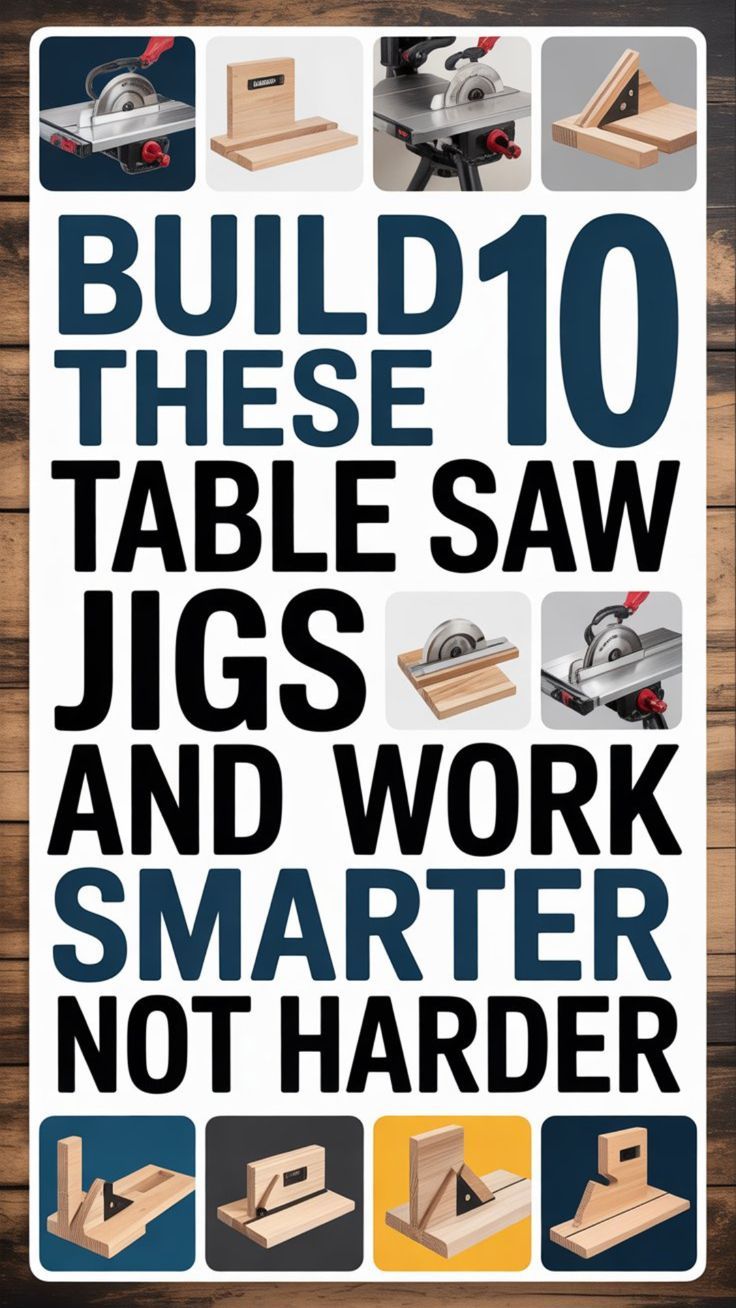
There’s nothing more frustrating than spending hours on a woodworking project only to have one imprecise cut ruin everything. You measure twice, cut once, and somehow the piece still comes out crooked. Sound familiar? Here’s the good news: you don’t need expensive equipment or years of experience to make perfect cuts every single time. The secret weapon that separates amateur woodworkers from the pros isn’t talent—it’s table saw jigs.
Jigs are simple guides and fixtures that help you make accurate, repeatable cuts with your table saw. Think of them as training wheels that never come off because they make everything easier, safer, and more precise. The best part? You can build most of these essential jigs this weekend using scrap wood you probably already have lying around your shop.
In this guide, I’ll walk you through 10 game-changing table saw jigs that will transform your woodworking. Whether you’re a complete beginner or have been building for years, these jigs will save you time, reduce waste, and help you create professional-quality projects. Each one is beginner-friendly, practical, and proven to work.
Let’s dive in and upgrade your workshop.
Why Every Woodworker Needs Table Saw Jigs
Before we get into the specific jigs, let’s talk about why they’re so important.
Safety First: Jigs keep your hands far away from the spinning blade. Instead of nervously guiding small pieces past a sharp carbide blade, you’ll use jigs to hold and move your workpieces safely. This alone makes building jigs worth the investment.
Accuracy and Consistency: Need to cut ten identical pieces? A jig ensures piece number ten is exactly the same as piece number one. No more measuring and marking each cut individually. Set it once, and you’re done.
Unlock Complex Cuts: Want to cut perfect circles, tapered furniture legs, or intricate box joints? Without jigs, these cuts range from difficult to nearly impossible. With the right jig, they become routine.
Save Money: Commercial jigs can cost $50 to $200 or more. Building your own from scrap plywood costs just a few dollars and works just as well—often better because you customize them for your specific needs.
Total Customization: Store-bought jigs force you to work within their limitations. When you build your own, you can adjust sizes, add features, and modify them as your skills grow.
Ready to build? Let’s get started with the ten jigs every table saw owner needs.
The 10 Essential Table Saw Jigs
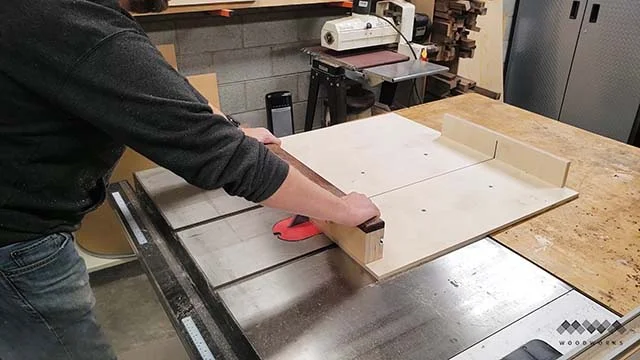
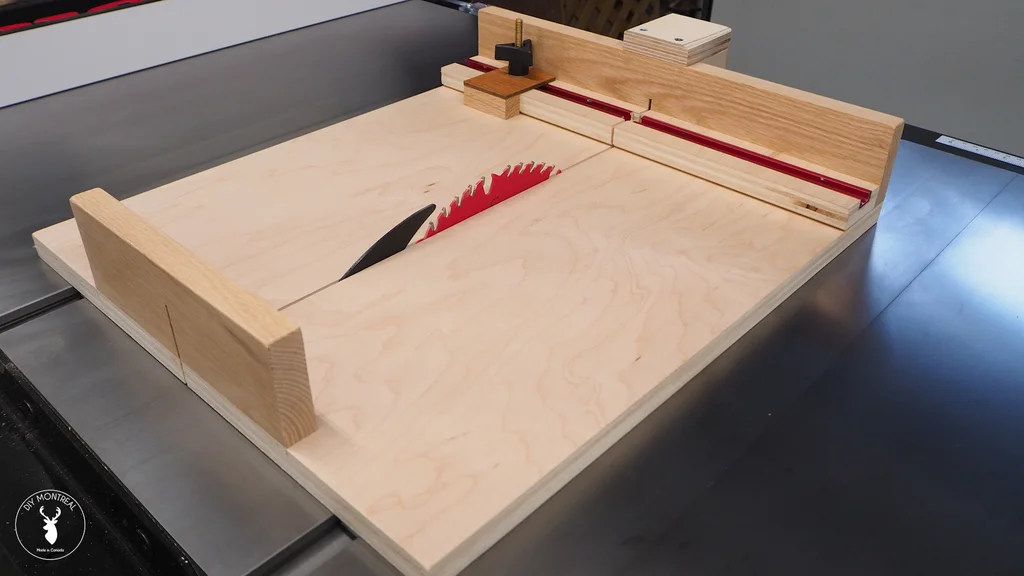
Jig #1: Crosscut Sled
Credit : Instructables
What it does: A crosscut sled is like a supercharged miter gauge that gives you perfect 90-degree crosscuts on boards of any width.
Why you need it: Your standard miter gauge wobbles, creates tearout on the back edge, and can’t handle wide panels. A crosscut sled eliminates all these problems while keeping your hands completely safe. Once you build one, your miter gauge will collect dust.
Materials needed: A sheet of 3/4″ plywood for the base, two hardwood runners sized to fit your table saw’s miter slots, wood glue, and screws. That’s it.
Quick build tip: Use the “5-cut method” to dial in perfect squareness. This technique involves making five successive cuts on a test board and measuring the result—it guarantees your fence is exactly perpendicular to the blade.
Common uses: Cutting plywood panels to size, trimming boards to length, making picture frames, and creating perfectly square shelves. This jig handles about 80% of your crosscutting needs.
Jig #2: Miter Sled
Credit : Instructables
What it does: Cuts precise angles—typically 45 degrees for picture frames, but you can set it for any angle you need repeatedly.
Why you need it: Perfect miters are the difference between professional-looking frames and amateur projects with gaps at the corners. This jig takes the guesswork out of angled cuts.
Materials needed: Plywood base with runners, adjustable fences set at your desired angles, and a few screws to lock everything in place.
Quick build tip: Pre-cut angle blocks at common angles (22.5°, 30°, 45°, 60°) and attach them to your fences. This way you can swap between angles quickly without measuring each time.
Common uses: Picture frames, shadow boxes, decorative trim work, and any project requiring perfect miter joints.
Jig #3: Taper Jig
Credit : Instructables
What it does: Creates consistent tapered cuts, perfect for furniture legs that start thick at the top and narrow at the bottom.
Why you need it: Tapered legs look elegant and professional, but cutting four identical tapers freehand is nearly impossible. This jig ensures all four legs match perfectly.
Materials needed: A piece of plywood for the base, a couple of hinges, and an adjustable stop block that sets your taper angle.
Quick build tip: Add measurement markings along the adjustable portion so you can return to common taper angles quickly. Mark popular ratios like 1/8″ per foot or 1/4″ per foot.
Common uses: Dining table legs, coffee table legs, modern chair legs, and any furniture piece that benefits from tapered design elements.
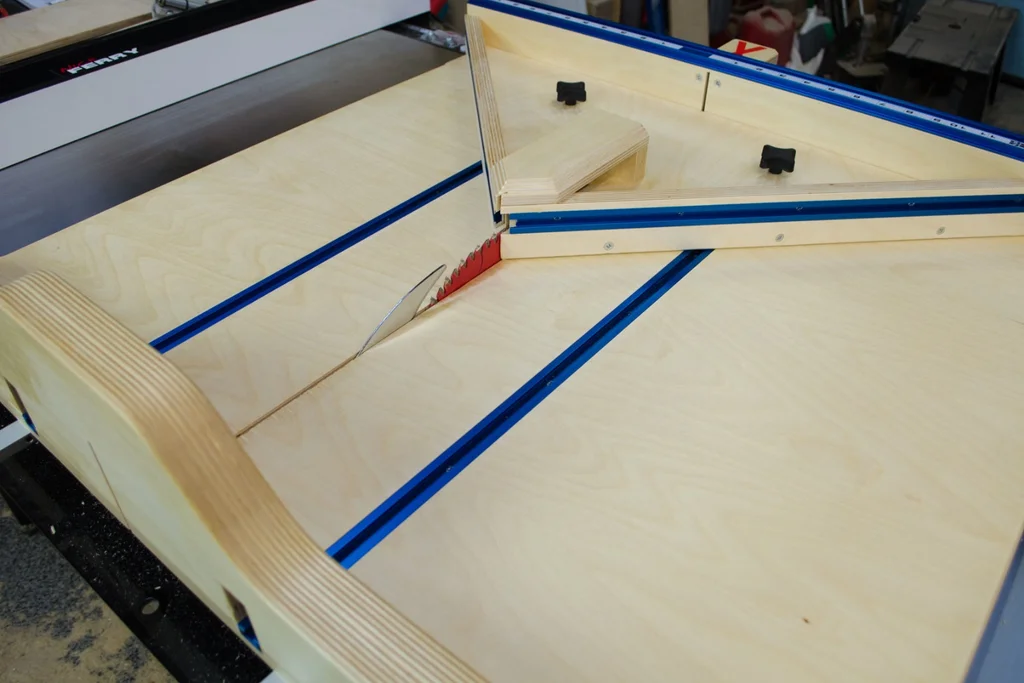
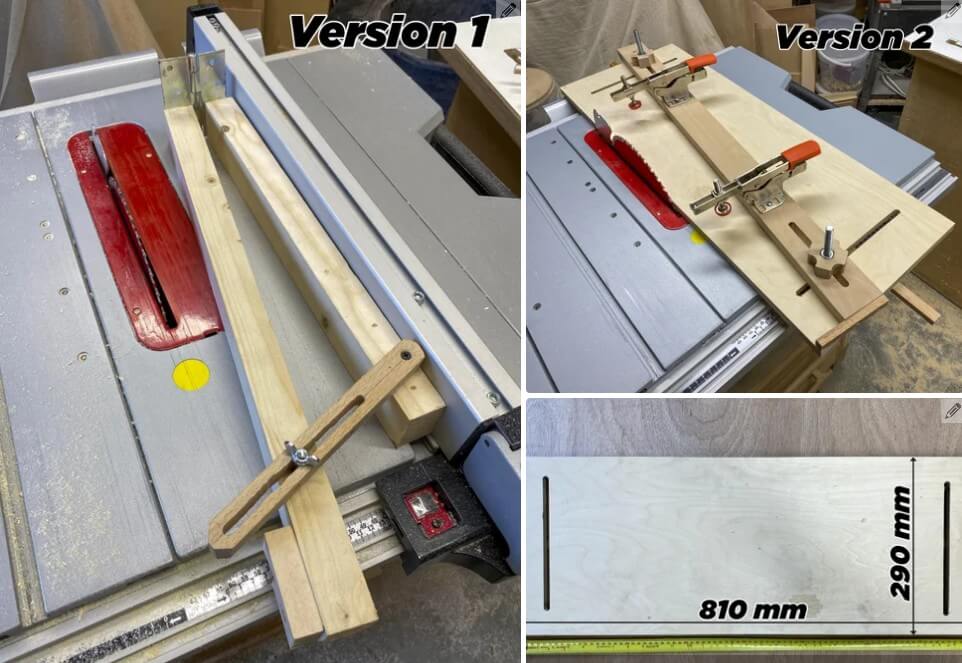
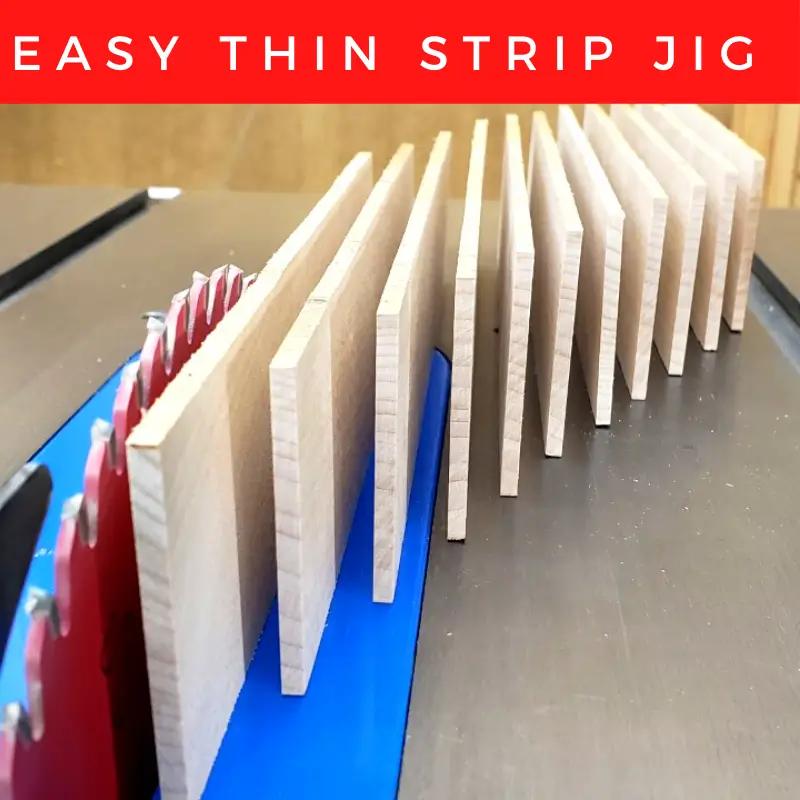
Jig #4: Thin Strip Rip Jig
Credit : Instructables
What it does: Safely cuts narrow strips of wood without the terrifying kickback risk that comes with ripping thin pieces on a table saw.
Why you need it: Cutting strips thinner than 1/2″ between the blade and fence is genuinely dangerous. This jig keeps your hands safe and produces consistent results.
Materials needed: A hardwood board slightly thicker than your desired strip width, a comfortable handle, and a push block on the end.
Quick build tip: Build several jigs in different widths for your most common strip sizes—1/4″, 3/8″, and 1/2″. Having them pre-made saves time and keeps you in the flow when building.
Common uses: Edging for plywood, decorative inlays, thin strips for shop-made molding, and any project requiring narrow stock.
Jig #5: Featherboard Holder
Credit : Instructables
What it does: Holds your workpiece firmly against the fence with just the right amount of pressure, preventing it from shifting during the cut.
Why you need it: Featherboards prevent kickback and ensure your cuts stay straight and true. They apply steady pressure that your hands alone can’t match.
Materials needed: A piece of hardwood, a saw to cut angled kerfs along one edge, and a clamp to attach it to your table or fence.
Quick build tip: Cut your kerfs at 30 degrees for optimal flexibility. Too steep and they’re too stiff; too shallow and they don’t provide enough pressure.
Common uses: Ripping operations where the board might drift away from the fence, cutting dados, and any cut where consistent pressure improves results.
Jig #6: Box Joint Jig
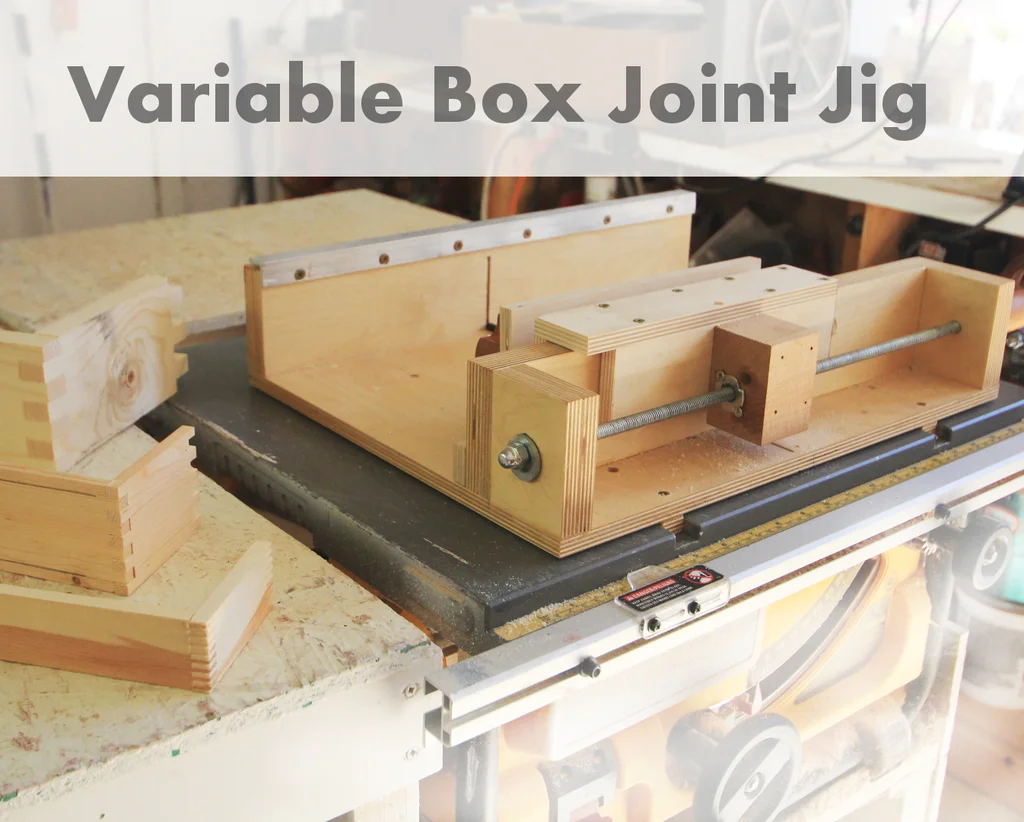
Credit : Instructables
What it does: Creates perfectly spaced, interlocking fingers for box joints (also called finger joints).
Why you need it: Box joints are incredibly strong and look professional, but spacing them evenly by hand is tedious and error-prone. This jig makes them foolproof.
Materials needed: A plywood backer board that slides in your miter slots, an indexing pin that matches your blade width, and a vertical fence.
Quick build tip: Use a brass rod for your indexing pin instead of wood. It slides smoother and lasts longer, giving you more consistent results.
Common uses: Drawer construction, decorative boxes, tool storage boxes, and anywhere you want strong, attractive corner joints.
Jig #7: Circle Cutting Jig

Credit : Instructables
What it does: Cuts perfect circles from plywood or solid wood, from small coasters to large tabletops.
Why you need it: You don’t need a band saw to cut circles. This simple jig pivots your workpiece around a center point, letting your table saw blade trace a perfect arc.
Materials needed: A long, narrow piece of plywood with a runner underneath and a pivot point (just a screw or nail) at the radius you want to cut.
Quick build tip: Drill multiple pivot holes at measured intervals so you can quickly switch between common diameters without recalculating each time.
Common uses: Round tabletops, lazy susans, circular shelf components, and decorative wheel-shaped elements.
Jig #8: Small Parts Sled
Credit : Instructables
What it does: Safely holds small workpieces that would otherwise be dangerous to cut, keeping your fingers far from the blade.
Why you need it: Small parts like toy components, small boxes, or craft pieces can’t be safely held by hand near a spinning blade. This jig clamps them securely.
Materials needed: A plywood base with runners, toggle clamps to hold the workpiece, and a backing board for support.
Quick build tip: Add T-track to your sled so you can reposition your toggle clamps easily for different sized workpieces. This versatility makes one sled work for hundreds of projects.
Common uses: Toy making, small decorative boxes, craft projects, and anytime you’re working with pieces smaller than your hand.
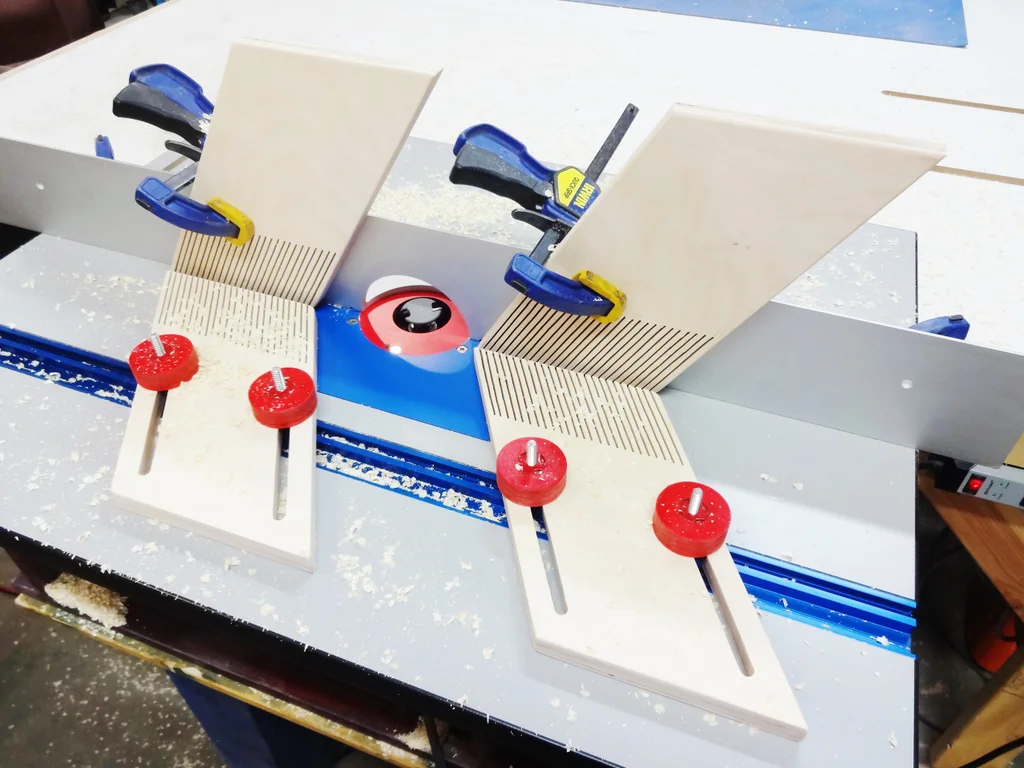
Jig #9: Spline Cutting Jig
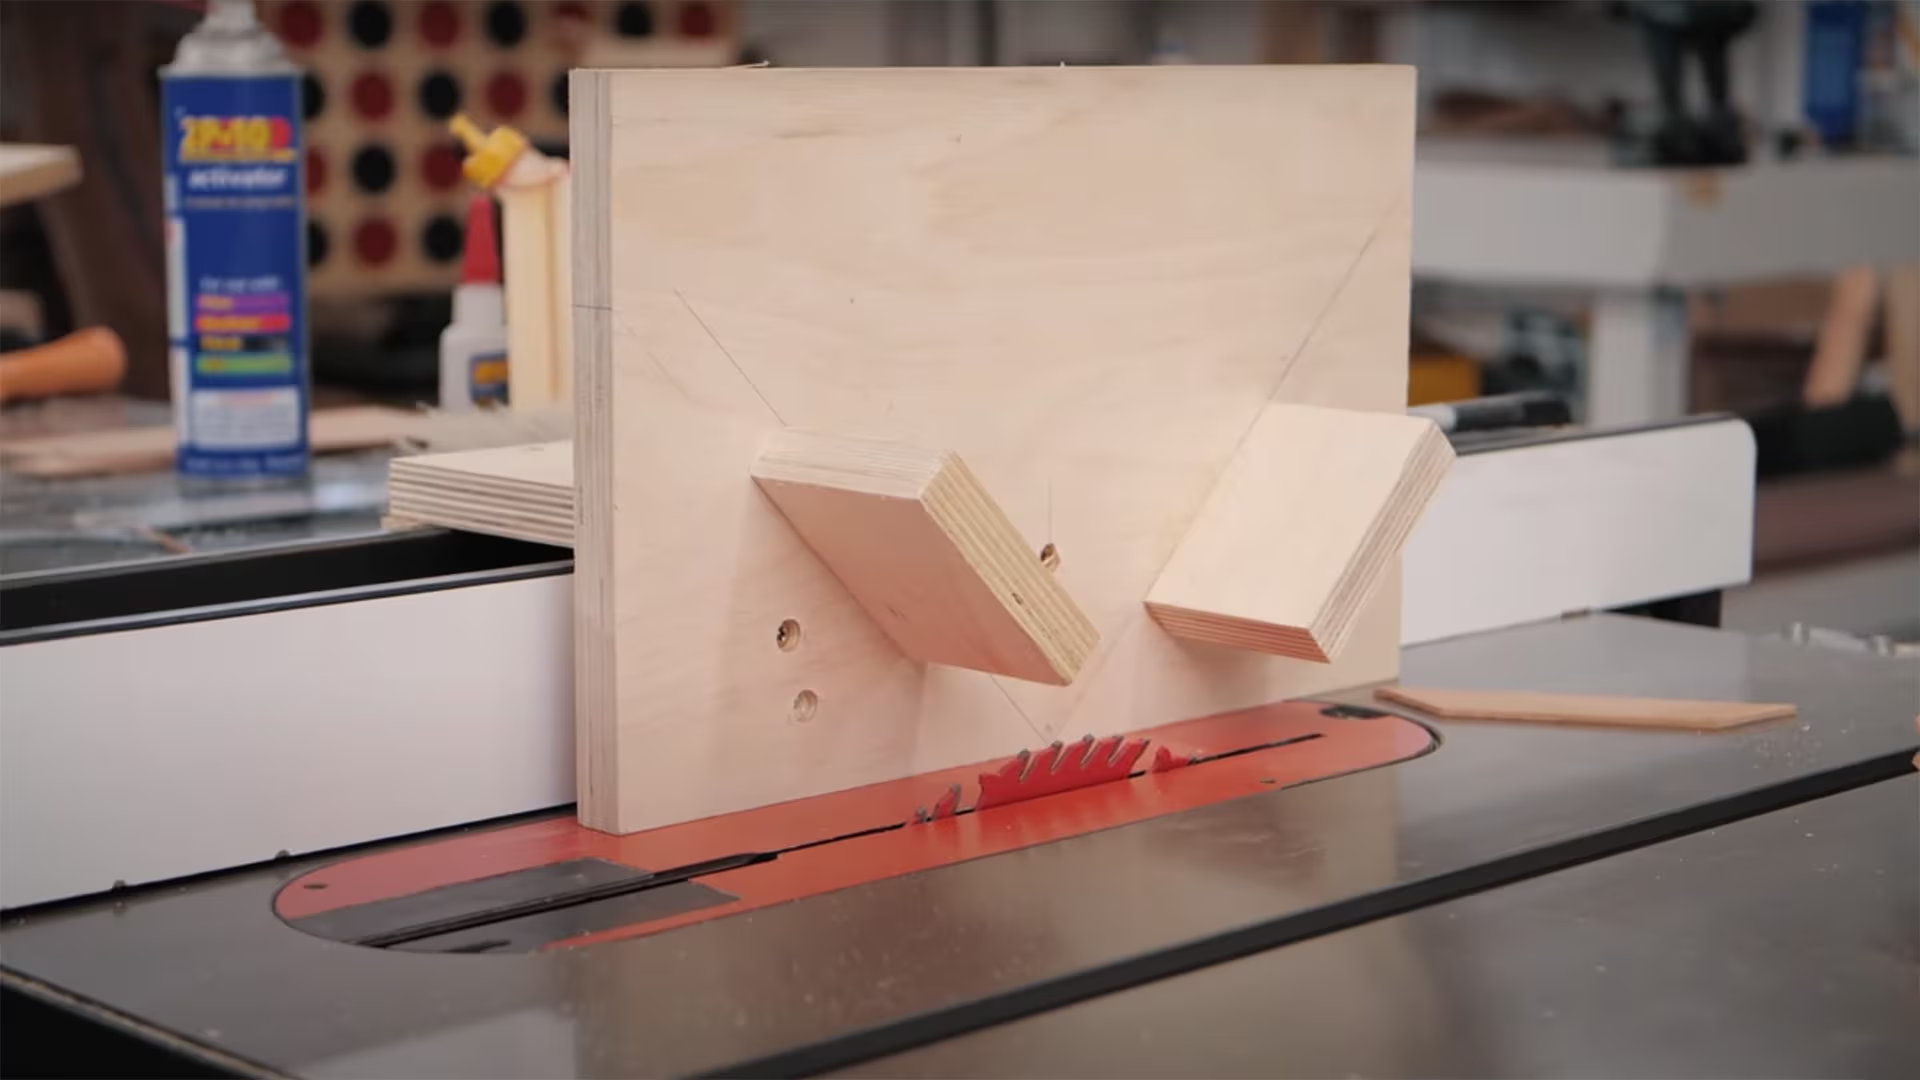
Credit : Kmtools
What it does: Cuts slots across mitered corners so you can add decorative or structural splines that strengthen the joint.
Why you need it: Miter joints look great but they’re weak if just glued. Adding splines transforms them into strong, lasting connections while adding visual interest.
Materials needed: A plywood base and an angled support block that holds your mitered corner at exactly 45 degrees to the blade.
Quick build tip: Build your support block at exactly 45 degrees using your crosscut sled. Accuracy here determines the accuracy of every spline you cut.
Common uses: Reinforcing picture frame corners, box corners, cabinet door frames, and anywhere mitered joints need extra strength.
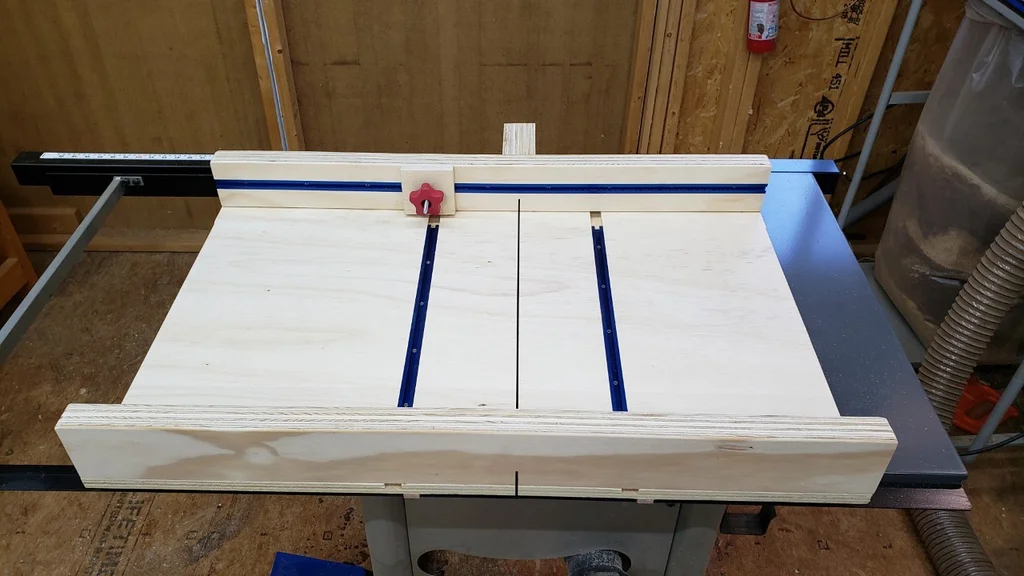
Jig #10: Dado Sled / Table Saw Crosscut Sled
Credit : Instructables
What it does: Cuts consistent dado grooves (those rectangular channels) across the grain of your workpiece, perfect for shelving and joinery.
Why you need it: Dado cuts need to be consistent and repeatable, especially when building shelving units where multiple dados must line up perfectly.
Materials needed: Plywood base with runners, adjustable stop blocks that position each dado cut, and a tall backing fence for support.
Quick build tip: Add flip stops—small blocks that swing out of the way—so you can quickly set multiple dado positions without removing your stop blocks between cuts.
Common uses: Bookcase shelving, drawer divider slots, cabinet shelf dados, and any project where boards nest into grooves.
Pro Tips for Building Your Table Saw Jigs

Now that you know which jigs to build, here are some tips to ensure they work perfectly:
Use quality materials: Spend a few extra dollars on Baltic birch plywood instead of construction grade. It’s flatter, more stable, and gives you better results. Your jigs are precision tools—treat them that way.
Perfect your runners: The hardwood runners that slide in your miter slots are critical. They should slide smoothly but without any side-to-side play. Take your time fitting them—it makes all the difference.
Reduce friction: Apply paste wax to all sliding surfaces. It makes your jigs glide effortlessly and helps prevent tearout by reducing friction.
Label everything: Use a label maker or permanent marker to note what each jig does and any important settings. Six months from now, you won’t remember that your taper jig is set for 1/4″ per foot.
Store them properly: Hang jigs vertically on your shop wall or store them flat in a cabinet. Proper storage prevents warping and keeps them accessible when you need them.
Test first: Always make test cuts on scrap wood before cutting your project pieces. This habit prevents costly mistakes and ensures your jig is dialed in correctly.
Safety never sleeps: Even though jigs make cuts safer, always wear safety glasses, keep your hands away from the blade path, and stay focused. A jig doesn’t replace good safety practices—it enhances them.
Taking Your Woodworking to the Next Level
You now have the knowledge to build ten essential jigs that will dramatically improve your table saw work. These jigs will help you make cleaner cuts, work more safely, and tackle projects you might have thought were beyond your skill level.
But here’s the thing about woodworking: building the jigs is just the beginning. Once you have these tools at your disposal, you’ll want projects that put them to use. You’ll find yourself thinking, “What should I build next?”
This is where many woodworkers hit a wall. You have the tools and skills, but you spend hours searching for plans online, only to find incomplete instructions, missing dimensions, or projects that don’t quite match what you’re looking for.
That’s exactly why serious woodworkers rely on comprehensive plan collections.
Ready to Put These Table Saw Jigs to Work on Amazing Projects?
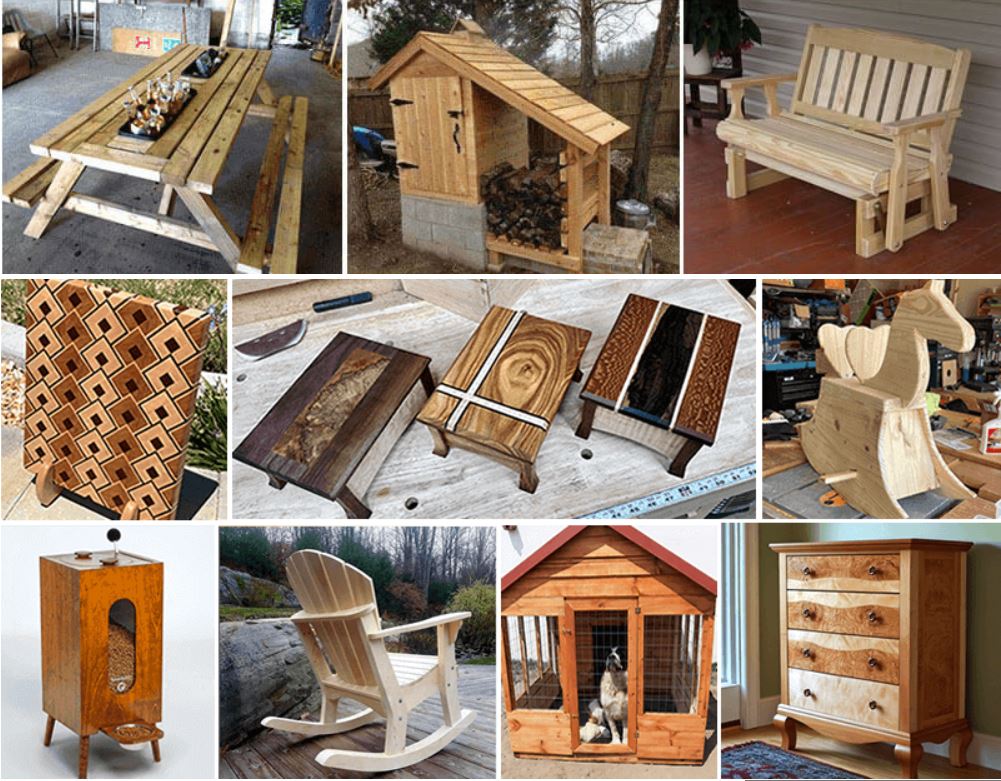
Imagine having instant access to over 16,000 professionally designed woodworking plans—everything from simple weekend projects to complex furniture builds. That’s exactly what Teds Woodworking Plans offers.
Here’s what makes it invaluable for woodworkers at any level:
- 16,000+ detailed woodworking plans covering every project category imaginable
- Step-by-step instructions with clear diagrams that guide you through every cut and assembly
- Projects for all skill levels from beginner to advanced
- Complete materials lists and cutting diagrams so you know exactly what to buy
- Includes jig plans and advanced techniques to expand your capabilities even further
Whether you’re building furniture for your home, outdoor projects for your garden, or handcrafted gifts for friends and family, Teds Woodworking gives you professional plans that guarantee success.
[Get Instant Access to 16,000+ Plans →]
Join thousands of woodworkers who’ve transformed their hobby with professional plans. Stop searching endlessly for free plans that leave out critical details. Get everything you need in one comprehensive resource.
Start Building This Weekend
You don’t need to build all ten jigs at once. Start with the crosscut sled—it’s the most versatile and immediately useful. Once you experience the difference it makes, you’ll be motivated to build the others.
These jigs are investments that pay dividends every time you enter your shop. They save time, reduce waste, improve safety, and open up new project possibilities. The hour or two you spend building each jig will save you dozens of hours over the life of your woodworking journey.
Remember, the best woodworkers aren’t necessarily the ones with the most expensive tools or the most experience. They’re the ones who work smarter by using jigs, fixtures, and proper planning.
Your table saw is waiting. Your scrap plywood is ready. This weekend is the perfect time to level up your woodworking game.
And when you’re ready for your next project? Teds Woodworking has plans for whatever you want to build.
Now get out there and start making sawdust!
Why Not Save This Pin For Later ?