You know that moment when you’re staring at a chunk of wood and suddenly you see a face hiding in there? Yeah, that’s the magic I’m talking about. There’s something almost mystical about coaxing a personality out of basswood—watching eyes emerge, a smile take shape, character lines deepen. It’s part meditation, part artistic expression, and honestly? It’s way more impressive at dinner parties than saying you binge-watched another Netflix series. 🙂
Here’s the thing: you don’t need to be Michelangelo to carve expressive faces in wood. I promise. If you can hold a knife and have the patience not to rush things (harder than it sounds, I know), you can absolutely do this. This guide walks you through everything—tools, techniques, proportions, and those sneaky mistakes that trip up every beginner (including yours truly).
Ready to turn some wood into art? Let’s get carving.
Understanding the Basics of Face Carving
Why Start with Faces?
Ever wonder why faces are everywhere in woodcarving? Simple: faces are universal. Everyone connects with them instantly. A perfectly carved bowl is nice, sure, but a face with actual expression? That stops people in their tracks.
Faces also teach you everything you need to know about anatomy and proportion. Get comfortable carving faces, and suddenly every other woodworking project feels easier. Plus, there’s this incredible satisfaction when someone looks at your carving and says, “Wow, it looks alive.”
Types of Face Carving
Before you grab your tools, let’s break down your options:
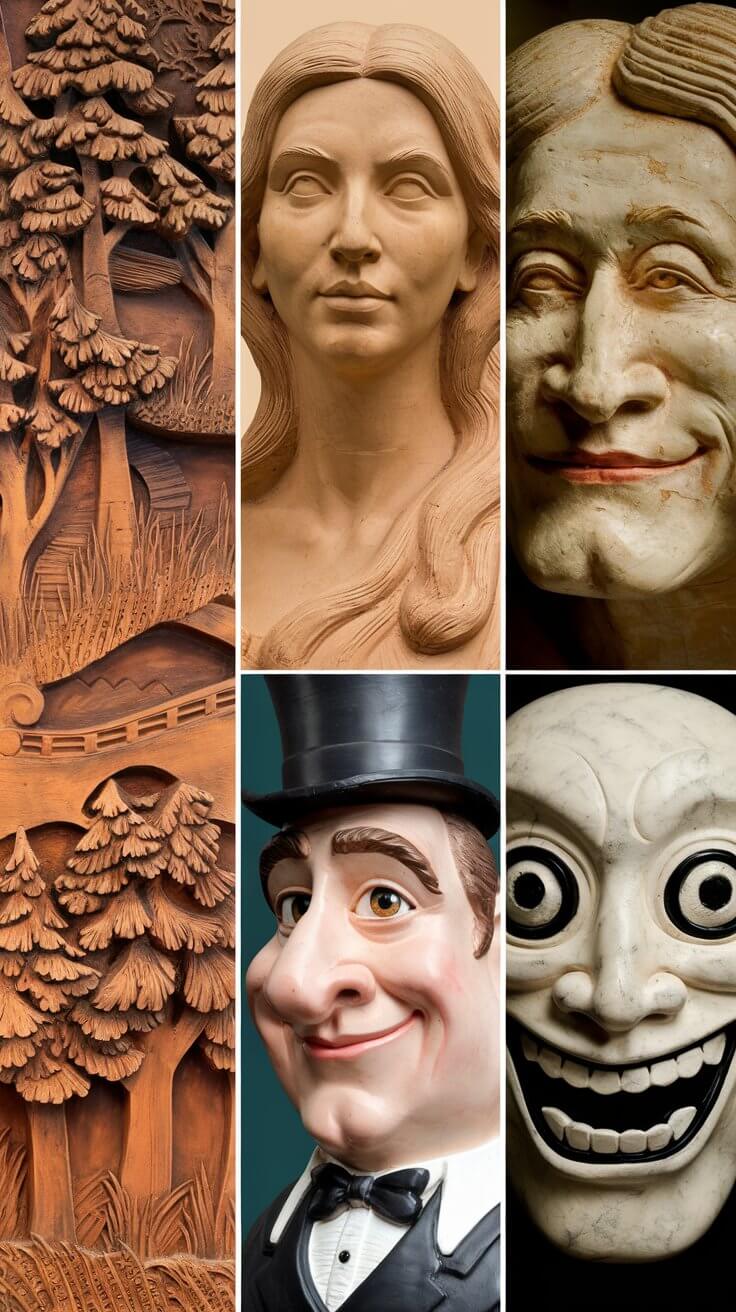
Relief carving means carving faces on flat surfaces—think decorative plaques or walking stick toppers. Full 3D carving is busts and sculptures you can walk around. Then there’s caricature carving (exaggerated, fun features) versus realistic faces (exactly what it sounds like). Oh, and spirit faces—those mystical, bark-dwelling characters that look like forest guardians.
My advice? Start with relief carving. It’s more forgiving, uses less wood, and you’ll see results faster. Win-win-win.
If you’re excited about face carving and want to explore more woodworking projects, I highly recommend checking out Teds Woodworking Plans. It’s a massive collection of over 16,000 woodworking plans with step-by-step instructions—including decorative carvings, furniture projects, and detailed carving patterns that complement your face carving skills beautifully.
Essential Tools to Carve Expressive Faces

Look, you could drop serious cash on tools. Or you could start smart. Let me save you some money and regret.
Must-Have Tools for Beginners
Here’s your starter lineup:
- Detail knife: Your MVP. Get a good one—it’ll do 80% of the work.
- Gouges: Think of these as curved chisels. Start with 3-5 different sizes (shallow, medium, deep curves).
- Basic chisel set: Flat chisels for clean cuts and shaping.
- Carving glove or mallet: Protect that thumb or tap those gouges—your choice.
- Sharpening tools: A strop and compound. Dull tools = frustration and danger.
Optional But Helpful Tools
Once you’re hooked (and you will be):
- Coping saw for roughing out shapes quickly
- Rasps and files for smoothing
- Sandpaper in various grits
- Wood burning tools for adding fine details
Safety Equipment
Real talk: cut-resistant gloves are non-negotiable. Add thumb guards, safety glasses, and a proper workspace, and you’re golden. Your future self will thank you when you still have all ten fingers.
Budget tip: Don’t blow $500 on tools day one. A basic beginner kit with 3-5 quality tools beats a drawer full of cheap junk you’ll never use.
As you build your tool collection, you’ll want to work on various projects to practice your skills. Teds Woodworking Plans includes detailed tool lists and material requirements for each project, helping you plan your purchases strategically and avoid buying tools you won’t use.
Choosing the Right Wood for Carving Expressive Faces
Not all wood plays nice with beginners. Some will fight you every cut.
Best Woods for Beginners
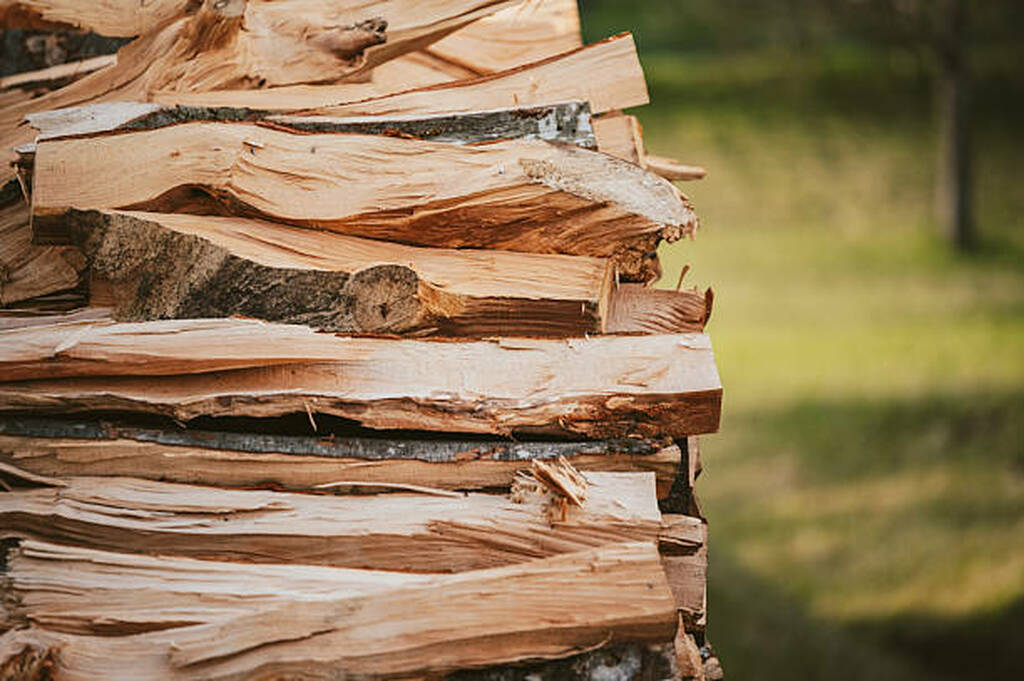
Basswood is the gold standard—and for good reason. It’s soft, carves like butter, has minimal grain, and forgives mistakes. It’s basically the training wheels of carving wood.
Butternut is another solid choice—slightly harder than basswood but still beginner-friendly with gorgeous grain patterns.
Pine? Cheap and available everywhere, but here’s the catch: it’s soft in some spots, hard in others, and the grain can be unpredictable. Use it for practice, not your masterpiece.
Woods to Avoid as a Beginner
Steer clear of oak, maple, or any dense hardwoods until you level up. They’re beautiful but require serious muscle and sharp tools. Woods with wild grain patterns will also make you want to throw your knife across the room (ask me how I know).
Wood Preparation
Make sure your wood is properly seasoned—too much moisture and it’ll crack as it dries. Pay attention to grain direction because carving against it feels like trying to write with your non-dominant hand. Blindfolded. In the rain.
For your first face, start with a block around 3x4x2 inches. Big enough to work with, small enough not to intimidate.
Understanding Facial Proportions
Here’s where beginners usually go wrong—they eyeball everything and wonder why their faces look like Picasso had a fever dream.
Basic Face Proportions Rule
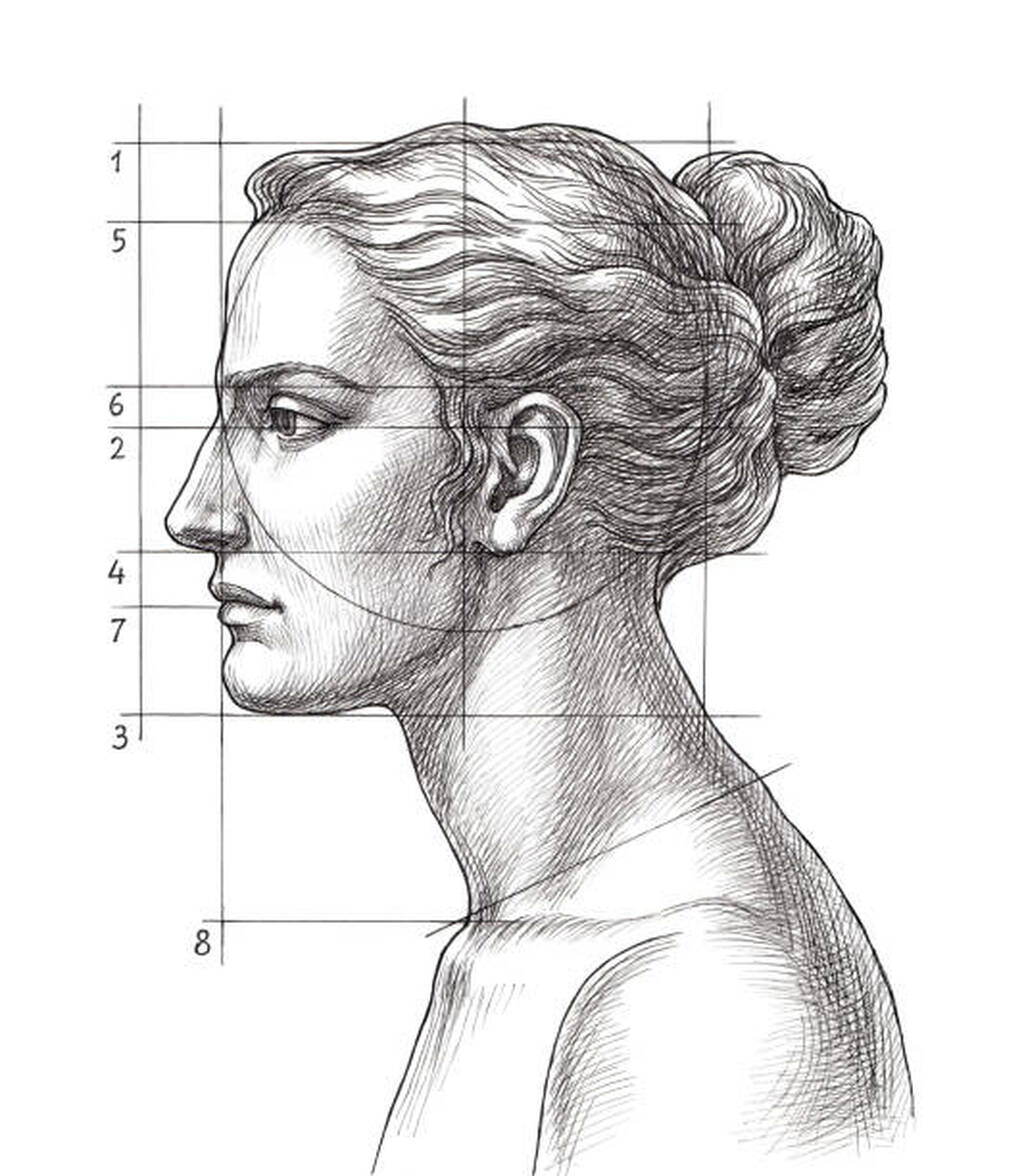
The “rule of thirds” is your new best friend:
- Eyes sit halfway down the head (not near the top like most beginners think)
- Nose length: halfway between eyes and chin
- Mouth placement: between nose and chin, about one-third up
- Ears: line up with the eyebrows at top, nose base at bottom
These aren’t suggestions—they’re the difference between “nice carving” and “what is that supposed to be?”
Simple Measurement Tricks
Use your knife as a measuring tool. Seriously. Mark reference lines before you start removing wood. You can always carve more away, but you can’t exactly glue it back on (trust me, I’ve tried).
Practice Exercise
Before touching wood, draw faces on paper. Sketch the proportions. Use reference photos. Look in a mirror and really study your own face. IMO, this step separates decent carvings from impressive ones.
Step-by-Step: To Carve Expressive Faces
Alright, let’s get to the good stuff.
Step 1: Design and Transfer
Sketch your design on paper—front and side views if you’re doing 3D. Use carbon paper to transfer it onto your wood block. This gives you a roadmap so you’re not just randomly hacking away.
Not confident in your drawing skills? No problem! Teds Woodworking Plans includes ready-to-use carving patterns and templates that you can print and transfer directly to your wood. This saves time and ensures accurate proportions from the start.
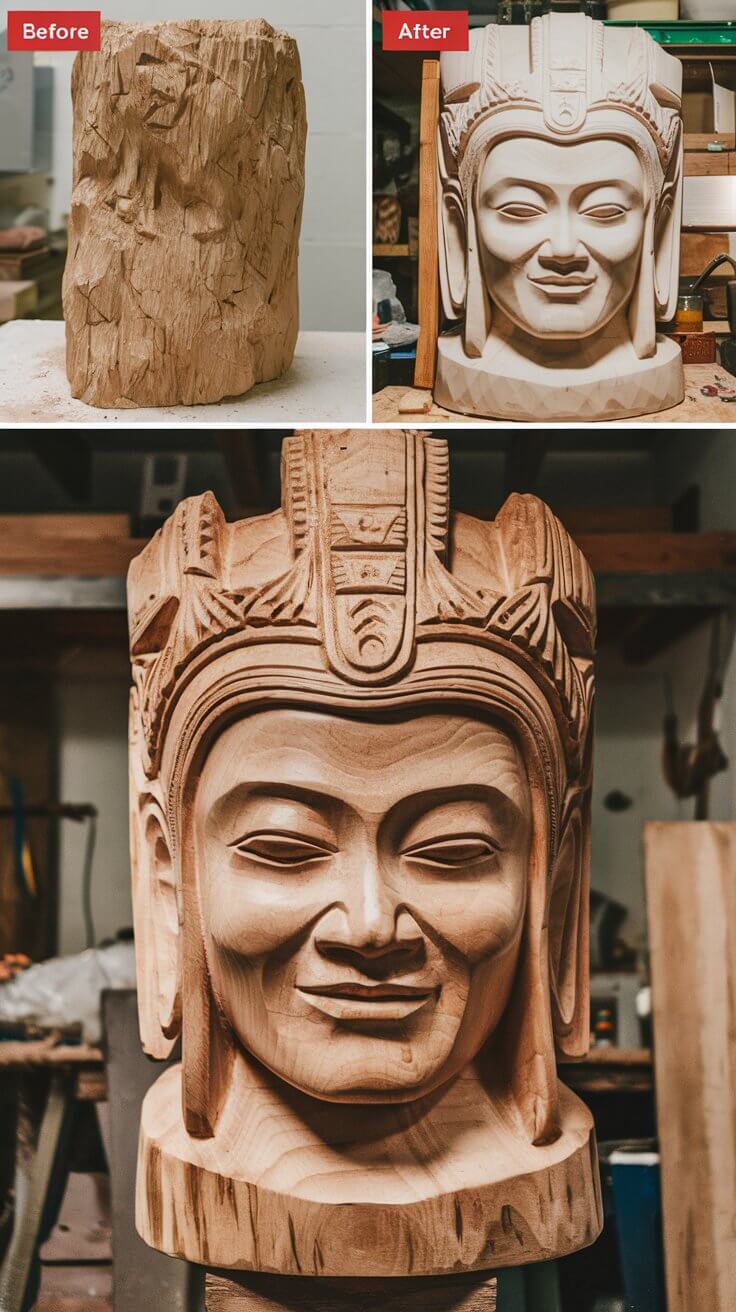
Step 2: Roughing Out the Basic Shape
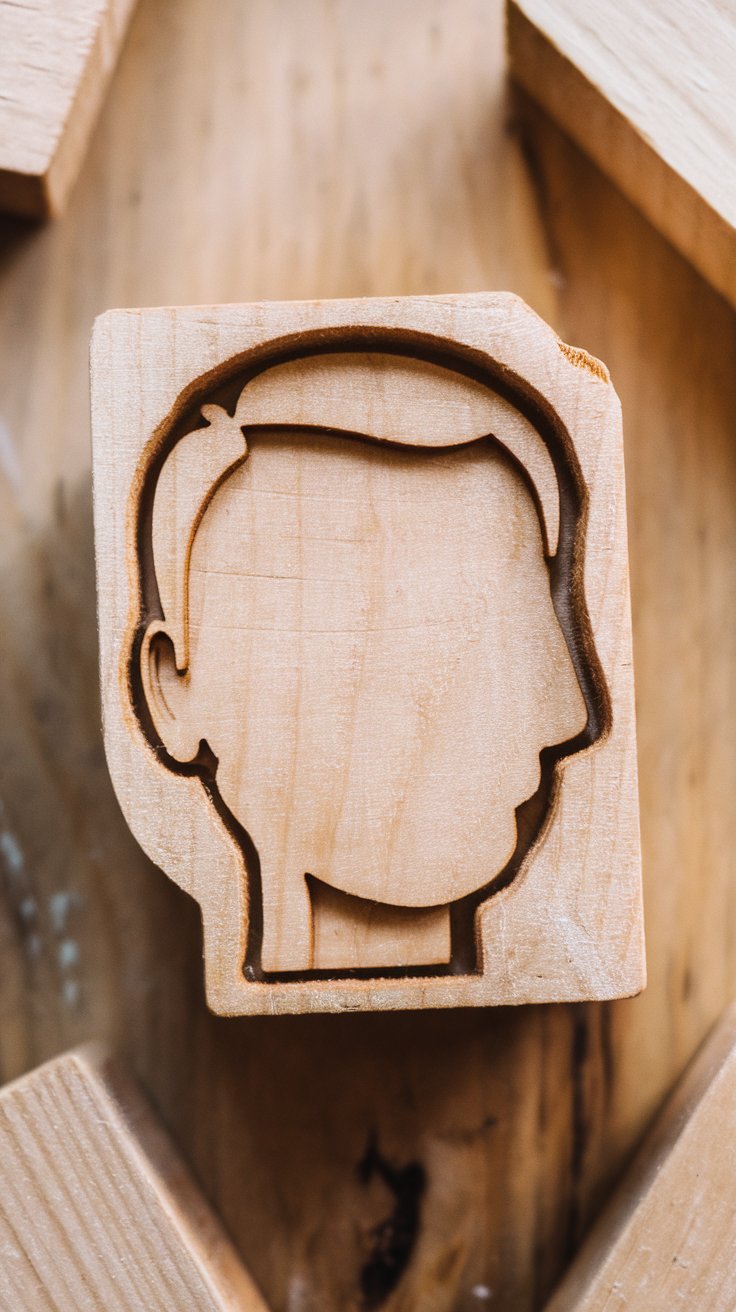
Remove the excess wood that’s definitely not part of the face. Establish the overall head shape—round, oval, square jaw, whatever you’re going for. Create the basic planes: front, sides, back. This is therapy with a knife, honestly.
Step 3: Blocking in Features
Note where the mouth, nose, and eyes will go. Carve out eye sockets, define the nasal bridge, and roughen the forehead and chin to begin adding depth. Don’t go into depth just yet. The terrain is being sculpted before the structures are added.
Step 4: Carving the Eyes
Eyes make or break a face. Here’s the secret: eye sockets need depth. Carve the upper eyelid overlapping the lower. Add the iris and pupil carefully—too deep and you’ve got zombie eyes, too shallow and they look painted on.
Common mistake? Making both eyes identical. Real faces have subtle differences. Embrace the asymmetry.
Step 5: Carving the Nose
The nose is simpler than you think: bridge, tip, nostrils. Start with the basic structure. Create dimension by carving away the sides. Keep checking proportions—a nose too big or too small throws everything off.
Remember: you can always remove more wood. Start conservatively.
Step 6: Carving the Mouth
Lips have shape and fullness. The line between lips isn’t just a slit—it curves, it has depth. Want your face to smile? Curve the corners up. Frown? Down. Neutral? Straight but slightly curved.
The mouth adds so much character. This is where personality really shows up.
Step 7: Adding Ears (if visible)
Ears are complicated, so simplify them. Think of the basic C-shape. Place them correctly (eyebrow to nose base), angle them slightly back. Don’t stress too much about internal details on your first few carvings.
Step 8: Refining and Detailing
Now the magic happens. Smooth surfaces with finer cuts. Add character lines—smile lines, crow’s feet, forehead wrinkles. Carve hair texture with small, controlled cuts. Refine those contours until the face looks alive.
Step back frequently. Seriously, like every five minutes. You need fresh eyes to catch what needs work.
Creating Expression and Emotion
A technically perfect face with zero emotion? Boring. Let’s add some life.
What Makes a Face Expressive?
Eyes are everything. Happy eyes crinkle at the corners. Sad eyes droop. Angry eyes narrow. The eyebrows do heavy lifting too—raise them for surprise, furrow them for concern, arch one for skepticism.
The mouth obviously contributes—but here’s the thing: a smile isn’t just curved lips. The whole face participates. Cheeks lift, eyes brighten, everything connects.
Tips for Adding Personality
Slight asymmetry makes faces more realistic. One eyebrow slightly higher, one corner of the mouth more pronounced. Think about the story behind the face—who is this person? What are they feeling? A wizened elder carries different lines than a laughing child.
Study reference photos of real expressions. Practice sketching different emotions before carving them. This isn’t overkill—this is what separates amateur work from art.
Common Expressions to Try
Start simple:
- Peaceful/serene: soft features, relaxed mouth, gentle eyes
- Joyful: curved smile, crinkled eyes, lifted cheeks
- Contemplative: slightly furrowed brow, neutral mouth, focused gaze
- Whimsical: asymmetrical smile, one raised eyebrow, playful eyes
Finishing Techniques
You’re almost done. Let’s make it beautiful.
Sanding (When and How Much)
Here’s a hot take: don’t over-sand. Light sanding smooths rough spots, but tool marks add character and show craftsmanship. If you sand everything smooth, it looks machine-made. Not the vibe.
If you do sand, progress through grits—150, 220, 320. Stop when it feels right, not when it’s glass-smooth.
Finishing Options
Natural oil finishes (like linseed or Danish oil) bring out wood grain beautifully. Wax finishes give a soft sheen. Stains can work but use them sparingly—you carved this face to show off the wood, not hide it.
Honestly? Sometimes leaving the natural wood color is the move.
Adding Final Details
Wood burning tools can add fine details like individual hairs or delicate wrinkles. Some people paint eyes or lips for pop—totally optional. Antiquing techniques (darker stain in crevices) add depth and age to your carving.
Common Beginner Mistakes and How to Fix Them
Let me save you from my mistakes:
Mistake 1: Eyes placed too high or too low
Fix: Measure carefully before carving deep. Remember—halfway down the head.
Mistake 2: Nose too large or out of proportion
Fix: Start smaller. You can always remove more wood. You cannot add it back.
Mistake 3: Flat, lifeless features
Fix: Create actual depth in eye sockets and around the nose. Dimension is everything.
Mistake 4: Carving too fast
Fix: Slow down. Make small cuts. Step back often. This isn’t a race.
Mistake 5: Not using reference images
Fix: Keep photos or a mirror nearby. Always.
Mistake 6: Dull tools making rough cuts
Fix: Keep tools sharp. It’s safer (sharp tools are more predictable) and easier. Sharpen regularly.
Practice Projects to Build Your Skills

Theory is great, but you need miles on the chisel.
Beginner-Friendly Projects
Try these to build confidence:
- Simple relief face on a pendant or plaque (small, manageable)
- Stylized “Green Man” face (forgiving, fun)
- Caricature walking stick topper (functional art!)
- Basic human face profile (good for understanding proportions)
Progressive Skill Building
Start with 2D relief before jumping to 3D. Practice individual features separately—carve ten noses, then ten sets of eyes. Master components before assembling the whole face. Gradually add more detail and realism as your confidence grows.
Ready to expand beyond face carving? Once you’ve mastered the basics, you’ll want more projects to challenge your growing skills. Teds Woodworking Plans offers an incredible library of 16,000+ woodworking projects—from simple carving patterns to complex furniture builds. Each plan comes with detailed diagrams, materials lists, and step-by-step instructions that make even advanced projects approachable.
Whether you want to carve decorative wall art, create wooden gifts, or build functional furniture, Teds has plans for every skill level. It’s like having a master woodworker guiding you through every project. Check out Teds Woodworking Plans here and take your woodworking journey to the next level.
Wrapping It Up
Look, wood carving faces is absolutely a learnable skill. It opens doors to endless creativity—and honestly, it’s incredibly satisfying. Your first face won’t be perfect. Mine looked like a potato with features. But that’s completely okay.
Every carver you admire started exactly where you are right now. The difference? They kept carving. Each face teaches you something new—a better way to shape eyes, how to create that perfect smile, where you need to slow down and pay attention.
Face carving is just the beginning of what you can create. It builds skills that transfer to every other woodworking project. The patience, the attention to detail, the understanding of form and proportion—all of it compounds.
As you continue developing your carving skills, having access to quality plans and inspiration is invaluable. I personally use Teds Woodworking Plans for project ideas and detailed instructions. With lifetime access and regular updates, it’s an investment that keeps giving back to your woodworking journey.
Start with one simple face project this week. Doesn’t have to be perfect. Just has to be started. Document your progress with photos—you’ll be amazed how fast you improve. Share your work, ask questions, join the community.
Practice is the key. Carve often, experiment freely, and enjoy the process. The magic isn’t just in the finished piece—it’s in those quiet hours with wood shavings at your feet, watching a face slowly emerge from nothing.
Now grab some wood and a knife. You’ve got faces to carve.
Resources & Next Steps
Recommended Learning Resources
YouTube channels have incredible face carving tutorials—search for specific techniques when you get stuck. Online woodworking communities (forums, Facebook groups, Reddit) are goldmines of advice and encouragement. Check for local woodcarving clubs—learning from experienced carvers in person accelerates your skills dramatically.
Take Your Woodworking Further
For comprehensive project plans and continuous inspiration: Teds Woodworking Plans – 16,000+ projects with lifetime access. FYI, this resource has seriously changed how I approach woodworking—having that many quality plans at your fingertips means you never run out of inspiration.
Keep Practicing
Set aside regular carving time—even 30 minutes a week adds up. Document your progress with photos—it’s motivating to see how far you’ve come. And seriously, don’t be afraid to make mistakes. They’re not failures—they’re lessons carved in wood.
Now get out there and carve something amazing.
Why Not Save This Pin For Later ?