So there I was, standing in my kitchen last spring, staring at cabinets that looked like they survived the 80s (barely), when the contractor hit me with a $28,000 quote for replacements. Twenty-eight thousand! For what essentially amounts to fancy wooden boxes with hinges.
That’s when I decided to get my hands dirty and figure out this whole DIY cabinet game myself. Best decision I ever made – well, after deciding to marry my wife and adopt our crazy dog 🙂
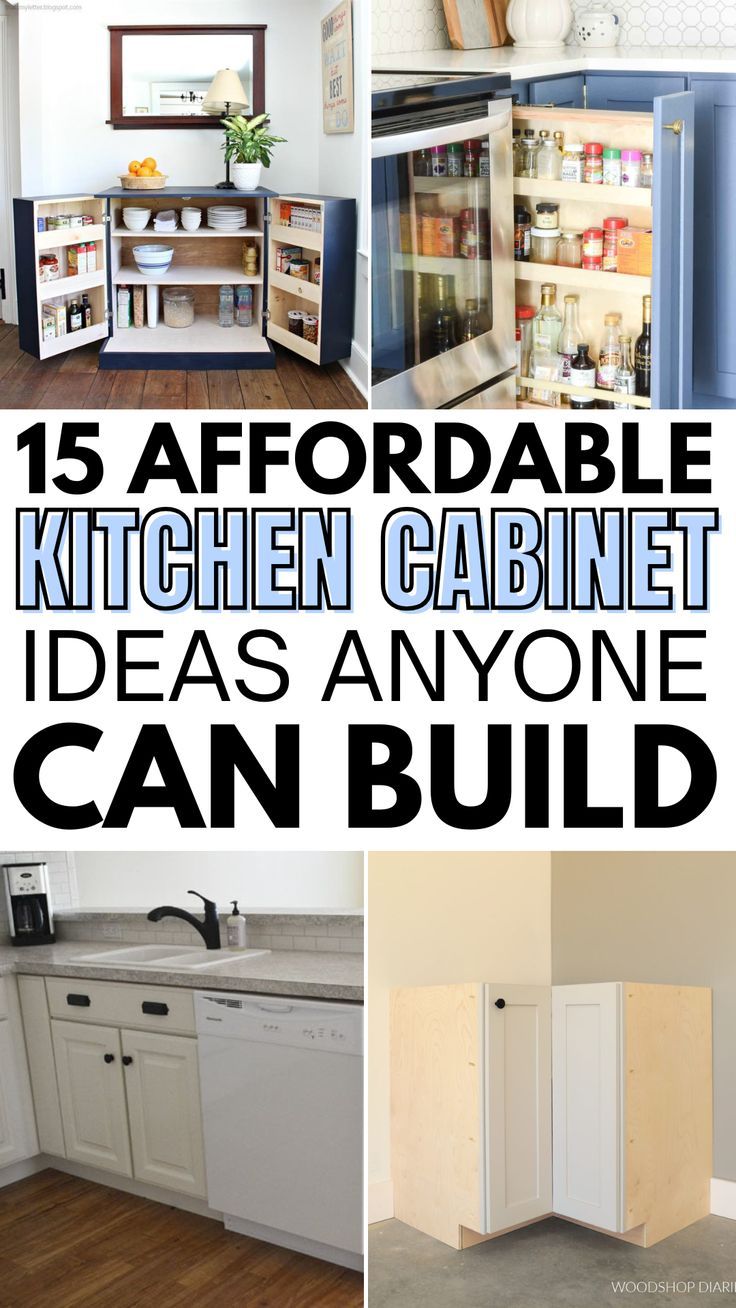
Here’s what I discovered: you can completely transform your kitchen with quality DIY cabinet plans for under $3,000. We’re talking everything from simple beginner-friendly shakers to fancy European-style soft-close units that’ll make your neighbors think you hired some expensive designer.
Whether you’ve never touched a power tool or you’re already comfortable building furniture, I’ve got 15 solid cabinet plans that’ll work for your skill level and budget. Ready to save some serious cash?
Why DIY Kitchen Cabinets Actually Make Financial Sense
Let me break down the numbers that made my wallet weep:
- Custom cabinets: $15,000 – $50,000+ (seriously, who has this kind of money?)
- Semi-custom options: $8,000 – $25,000 (still painful)
- Quality DIY build: $2,000 – $4,000 (now we’re talking sense!)
But honestly, the money savings aren’t even the best part. When you build your own kitchen cabinets, you get perfect customization for your exact space. Need a cabinet that’s precisely 23.75 inches wide because of that weird corner? No problem. Want soft-close drawers in every single base unit? You got it.
Plus, you control every aspect of quality. I’ve seen $15,000 “custom” installations with particle board sides that started sagging after two years. When you choose your own materials – solid plywood, quality hardware, proper finishes – you know exactly what you’re getting.
Ever wonder why cabinet shops charge so much? It’s not the materials (those are surprisingly affordable). You’re paying for their time, overhead, and profit margins that would make a loan shark blush.
Before You Start: Essential Planning That’ll Save Your Sanity
Measure everything twice, cut once – and I mean everything. I learned this lesson the expensive way when I mixed up my height and width measurements on a pantry cabinet. Not my finest moment :/
Critical Measurements You Need:
- Wall lengths (measure in three spots – walls lie)
- Ceiling heights throughout the kitchen
- All plumbing and electrical locations
- Distance between wall studs
Material Choices That Matter:
Plywood wins every time. Yeah, it costs more upfront than MDF, but it’s stronger, handles moisture better, and actually looks professional when you’re done. For cabinet boxes, ¾-inch plywood is your sweet spot.
MDF works fine for painted door panels and face frames, but keep it away from anything that might get wet. I watched a neighbor’s MDF cabinet door literally dissolve after a small plumbing leak. Not pretty.
Tool Requirements (Don’t Panic):
You don’t need a full cabinet shop. Here’s what actually matters:
- Circular saw or track saw for breaking down sheets
- Router with basic bits (game-changer for professional edges)
- Drill/driver combo (cordless makes life easier)
- Kreg pocket hole jig (seriously, get one of these)
- Clamps (buy more than you think you need)
Budget reality check: Add 20% to whatever you think you’ll spend. Materials always cost more than online calculators suggest, and you’ll need that one special bit that costs $18 but saves your entire project.
15 DIY Kitchen Cabinet Plans
#15 Ana White’s Frameless Base Cabinet Universal Template
Ana White : Check Instructions Here
Tools: Table saw or circular saw, Kreg pocket hole jig, drill, clamps, measuring tape.
Supplies: ¾” plywood ripped into 23¼” strips (for sides and shelves), ¼” plywood for back, pocket hole screws, wood glue, drawer slides, hinges.
This Ana White frameless base cabinet template is perfect for modern kitchens. The frameless design creates a sleek, contemporary look while maximizing storage space. The plans are incredibly detailed with step-by-step instructions and can accommodate cabinet widths up to 36 inches.
The universal template approach means you can easily adjust the dimensions to fit your specific kitchen layout. The final product looks professional and sturdy, with clean lines that work well in both modern and transitional kitchen designs. The frameless construction also makes the interior more accessible than traditional face-frame cabinets.
#14 Kreg Tool’s DIY Kitchen Pantry Cabinet
Kreg Tool : Check Instructions Here
Tools: Kreg pocket hole jig, circular saw, drill/driver, clamps, measuring tape, square.
Supplies: ¾” plywood, ¼” plywood backing, Kreg pocket hole screws, wood glue, cabinet hardware, drawer slides.
Kreg Tool offers comprehensive DIY kitchen cabinet plans with easy, step-by-step instructions designed for various skill levels. Their plans emphasize proper joinery techniques using pocket hole screws, which create strong, long-lasting connections.
The instructions are thorough and include detailed cut lists, assembly diagrams, and professional tips. The resulting cabinets have a clean, professional appearance that rivals expensive custom cabinetry. The plans also include guidance on finishing techniques to achieve a showroom-quality result.
#13 Ana White’s Wall Kitchen Cabinet Basic Carcass
Ana White : Check Instructions Here
Tools: Circular saw, drill, pocket hole jig, clamps, level, stud finder.
Supplies: ¾” plywood strips (11¾” wide), ¼” plywood back, pocket hole screws, wood glue, adjustable shelf pins, hinges.
This plan provides a basic wall cabinet carcass that can be customized to various widths and adjusted for different heights beyond the standard 30″ measurement. The design is simple yet effective for creating upper storage in any kitchen.
The modular approach allows you to build multiple cabinets to fit your specific wall layout. The basic carcass design can be dressed up with different door styles and hardware to match your kitchen’s aesthetic. The adjustable shelving makes these cabinets highly functional for storing dishes, glassware, and pantry items.
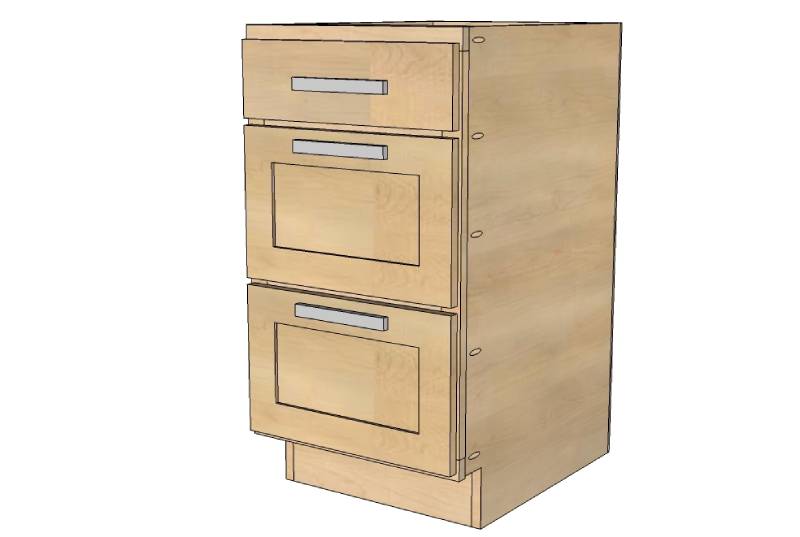
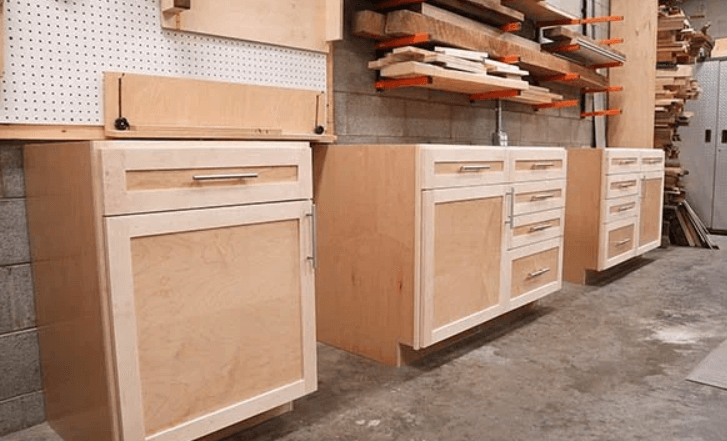
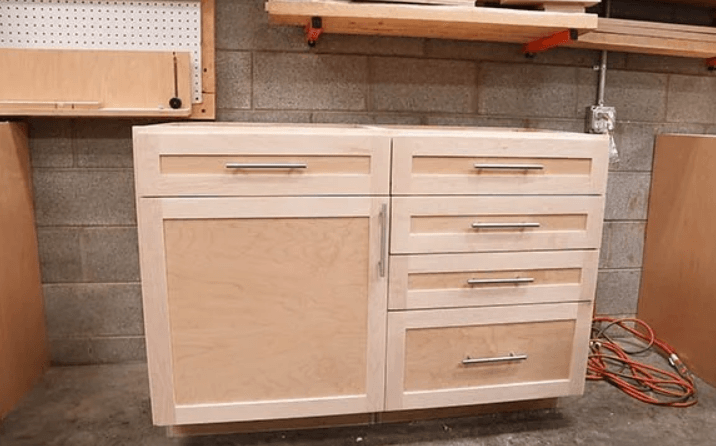
#12 MWA Woodworks Base Cabinet with Door/Drawer Combo
MWA Woodworks : Check Instructions Here
Tools: Table saw, drill, router, pocket hole jig, clamps, measuring tools .
Supplies: ¾” plywood, ½” plywood for drawer boxes, ¼” plywood backs, drawer slides, hinges, cabinet pulls.
This plan focuses on two practical base cabinet styles including a door/drawer combination that maximizes functionality while remaining approachable for DIY builders. The design balances storage efficiency with construction simplicity.
The door/drawer combo provides versatile storage options – drawers for frequently accessed items and cabinet space for larger pieces. The construction method emphasizes accuracy and proper joinery while keeping the process manageable for intermediate builders. The finished cabinets have a professional appearance that integrates seamlessly with any kitchen design.
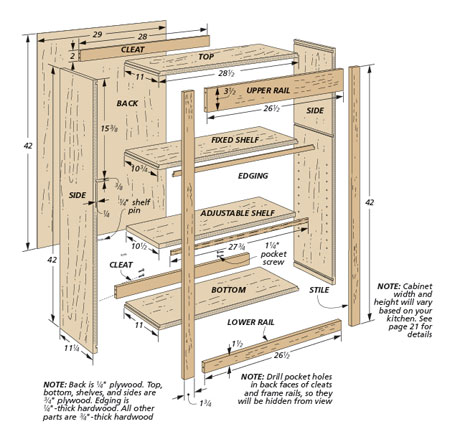
#11 Woodsmith Custom Kitchen Cabinet Plans
Woodsmith Plans : Check Instructions Here
Tools: Table saw, router, drill press, pocket hole jig, clamps, sanders.
Supplies: Hardwood lumber, plywood, drawer slides, hinges, cabinet pulls, wood finish.
These comprehensive plans include step-by-step instructions, exploded views, materials lists, and everything needed to build custom kitchen cabinets using professional-level joinery techniques. This is the ultimate woodworking challenge for skilled DIYers.
The plans cover base cabinets, upper cabinets, drawers, and doors with detailed construction methods. The emphasis on quality joinery and premium materials results in heirloom-quality cabinets that will last for decades. While more challenging than basic plans, the detailed instructions make success achievable for ambitious woodworkers.
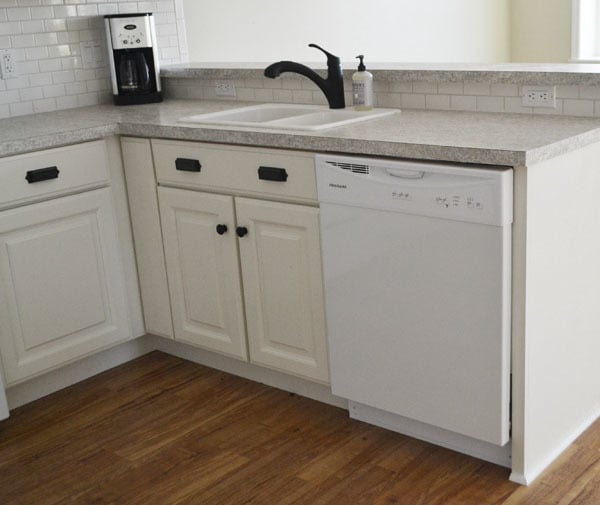
#10 Ana White’s 36″ Sink Base Kitchen Cabinet
Ana White : Check Instructions Here
Tools: Circular saw, drill, jigsaw, pocket hole jig, clamps.
Supplies: ¾” plywood strips, ¼” plywood back, pocket hole screws, wood glue, hinges, toe kicks.
This sink base cabinet plan includes detailed cutting lists and step-by-step video instructions for building a 36-inch wide base cabinet specifically designed to accommodate kitchen sinks. The design accounts for plumbing access and proper support.
The cabinet features a removable back panel for easy plumbing installation and maintenance. The construction is sturdy enough to support heavy sinks and countertops while providing accessible storage on both sides of the plumbing. The plans include tips for custom fitting around existing plumbing configurations.
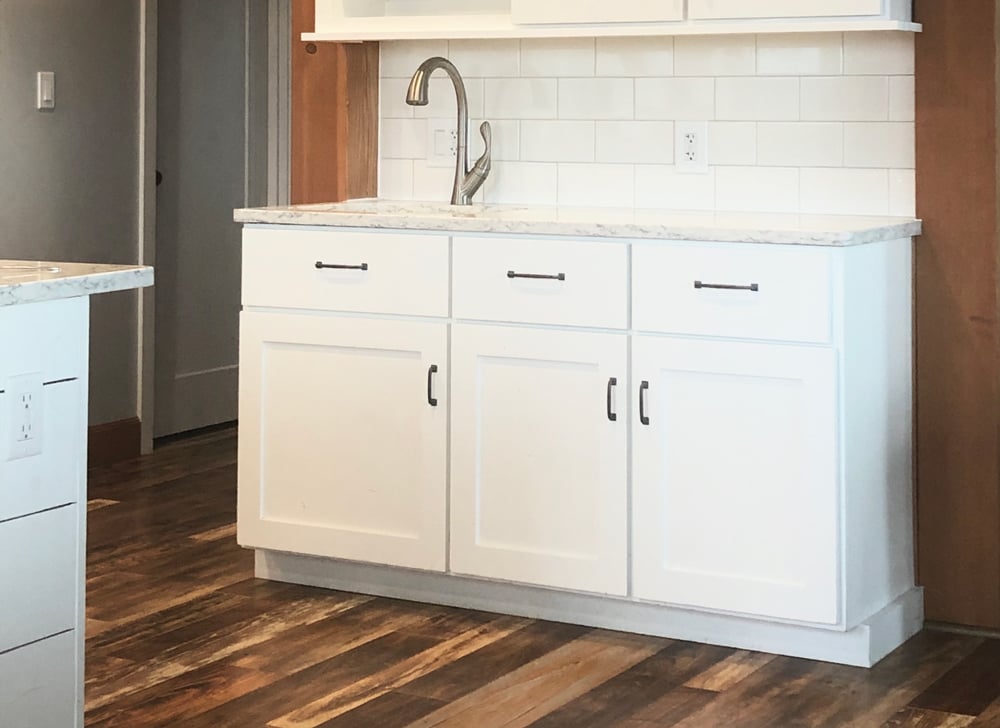
#9 Ana White’s Face Frame Kitchen Base Cabinet
Ana White : Check Instructions Here
Tools: Table saw, pocket hole jig, drill, clamps, router (optional).
Supplies: ¾” plywood, face frame lumber (1×2 or 1×3), drawer slides, hinges, drawer box materials.
This universal template approach allows for building face frame cabinets with specific drawer box construction details and proper pocket hole placement. The face frame design provides a traditional cabinet look with modern construction methods.
Face frame cabinets offer several advantages including easier installation alignment and the ability to hide minor measurement discrepancies. The plans provide detailed drawer construction guidelines including proper sizing for drawer slides and face frame openings. The traditional styling works well with both classic and contemporary kitchen designs.
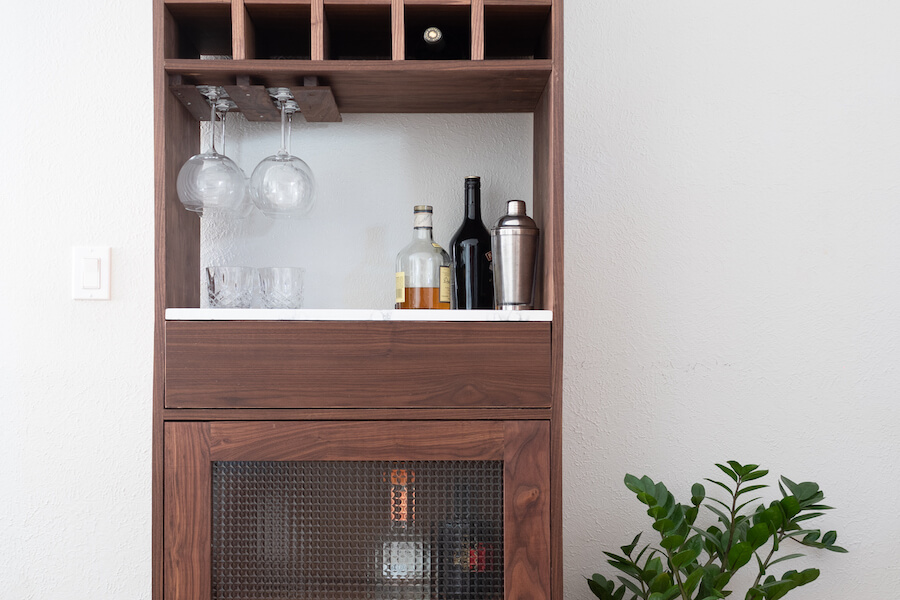
#8 Kreg Tool’s DIY Tall Bar Cabinet
Kreg Tool : Check Instructions Here
Tools: Kreg pocket hole jig, circular saw, drill, clamps, level.
Supplies: ¾” plywood, ¼” plywood backs, pocket hole screws, adjustable shelf pins, hinges, wall mounting hardware.
These wall cabinet plans from Kreg offer professional-quality results using their proven pocket hole joinery system. The plans include multiple size options and can be easily customized for specific kitchen layouts and storage needs.
The construction method ensures strong, durable joints that will support heavy dishes and glassware. The plans include detailed installation instructions for proper wall mounting and alignment with base cabinets. The modular design allows for building matching sets of cabinets for a cohesive kitchen appearance.
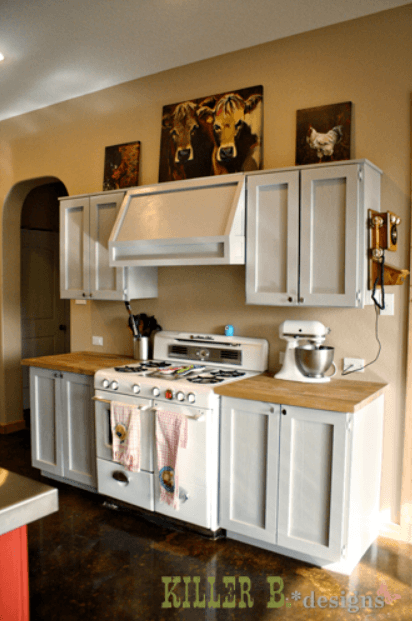
#7 Rustic DIY Cabinets
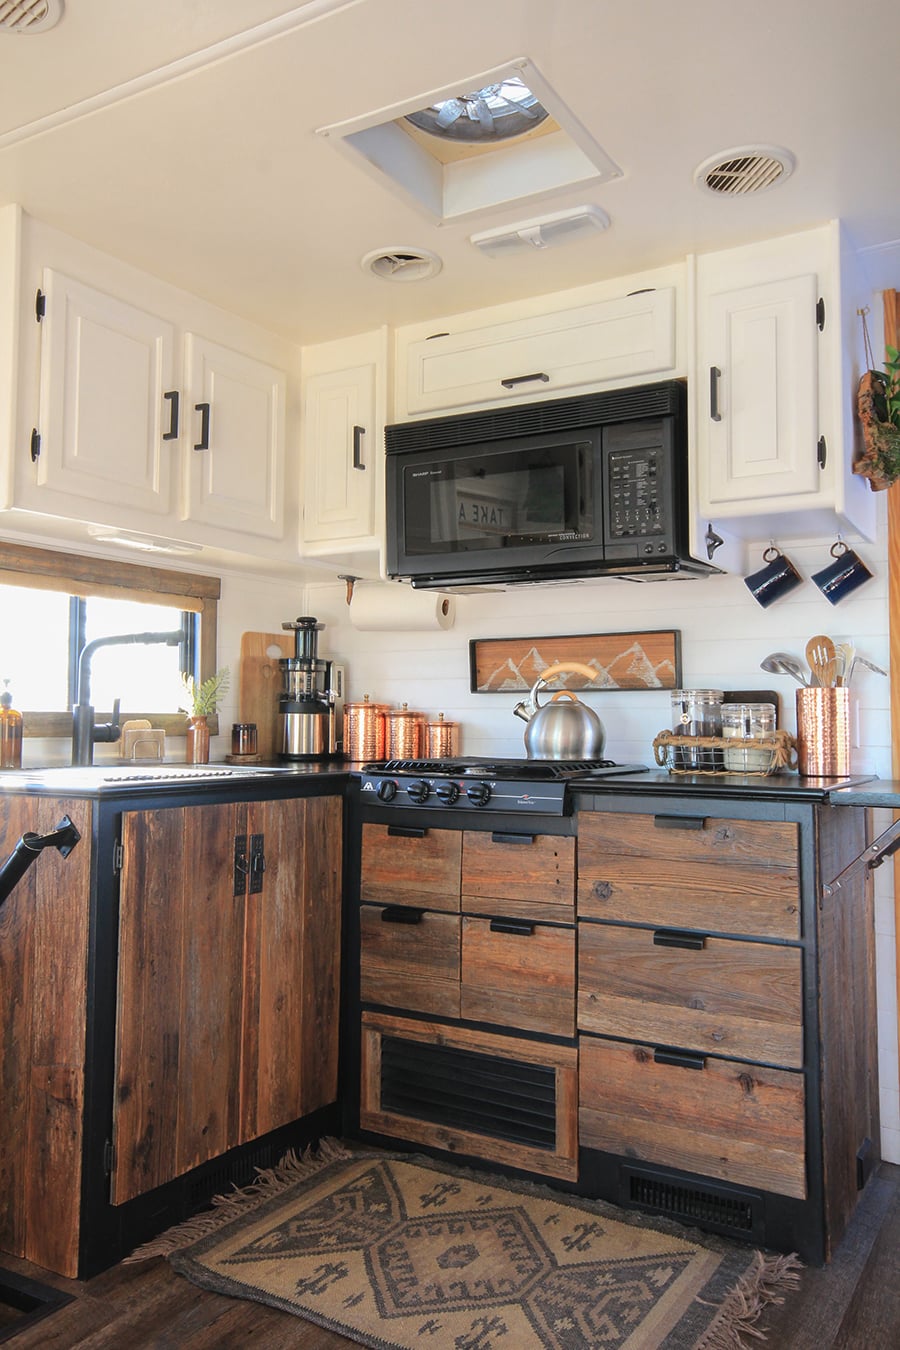
Rustic cabinets may be an excellent accent to a number of kitchens. These will look fantastic in cabins, vacation rentals, recreational vehicles, and other settings. They look particularly excellent in a two-toned style with plain white uppers and dark brown bottoms. These cabinets may be made with a peel-and-stick outside finish or with authentic salvaged wood planks. In either case, the effects are the same. The cabinets are stunning and can quickly change a room. With little ingenuity and planning, you can create your own rustic kitchen without needing to hire a designer.
#6 Corner Lazy Susan Cabinet Plans
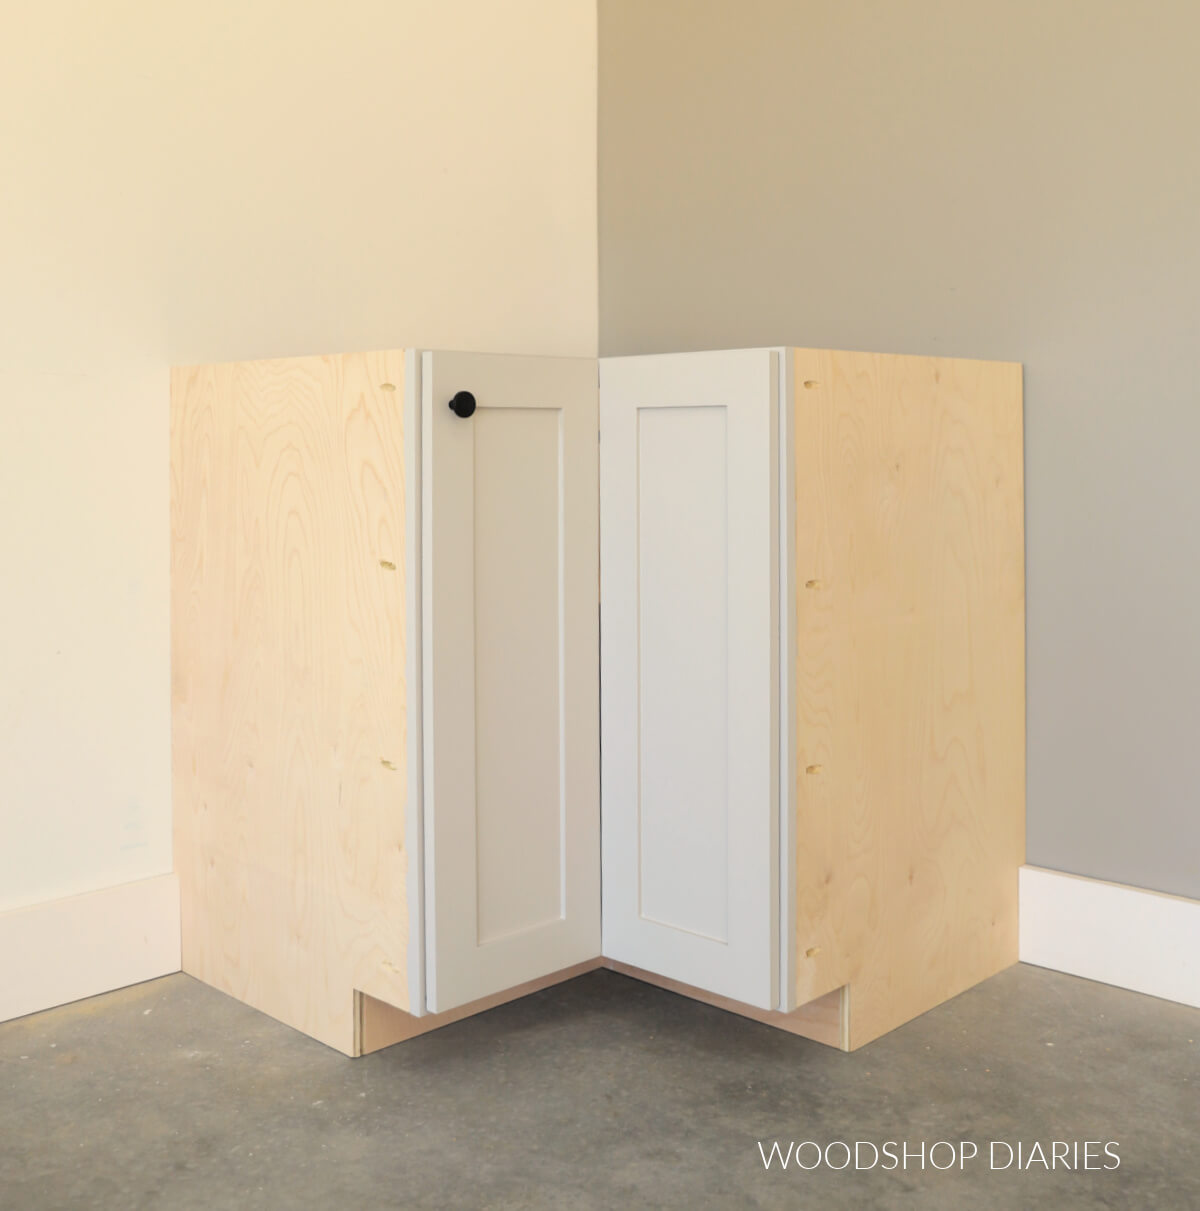
Woodshopdiaries : Check Instructions Here
Tools: Circular saw, jigsaw, drill, clamps, compass for curves.
Supplies: ¾” plywood, lazy susan hardware, special corner hinges, ¼” plywood back.
Corner cabinets often become dead space in kitchen layouts, but a lazy susan mechanism transforms them into highly functional storage. These plans show how to build the specialized cabinet box and install the rotating shelves.
The construction requires careful measurement and precise cuts to ensure proper fit and smooth rotation. The plans include guidance on selecting quality lazy susan hardware that will provide years of reliable service. The finished cabinet makes previously inaccessible corner space fully functional and easy to use.
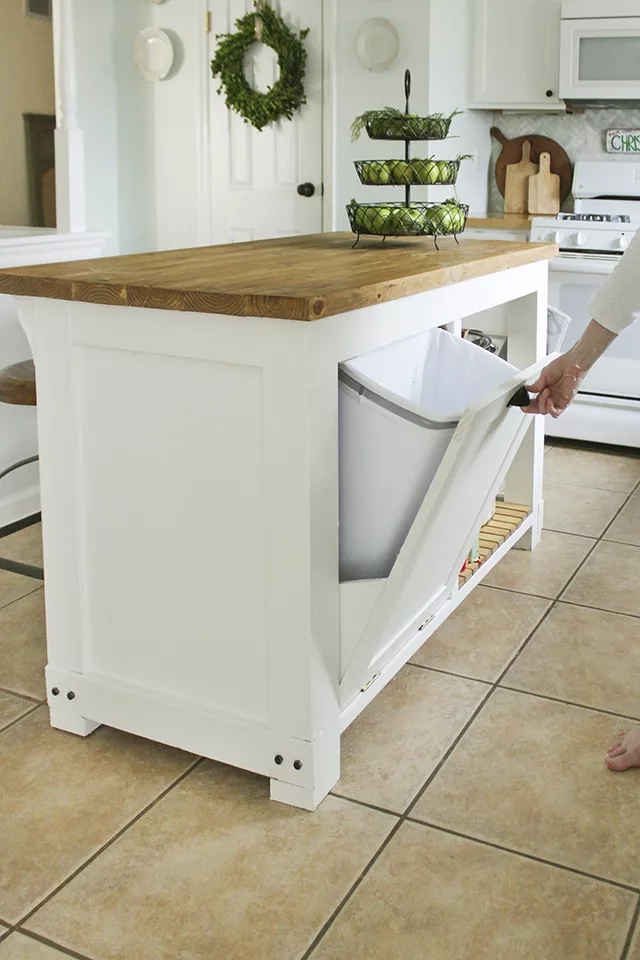
#5 DIY Kitchen Island with Storage
Tools: Table saw, drill, pocket hole jig, clamps, router, sanders.
Supplies: ¾” plywood, face frame lumber, drawer slides, hinges, countertop materials, electrical supplies.
A kitchen island with built-in storage combines workspace with cabinet functionality. These plans create a substantial piece that provides both prep space and organized storage for kitchen essentials.
Shades of Blue Interiors has created a stunning construction that will fulfill your functional kitchen island aspirations. This DIY kitchen island has open storage as well as a pullout bin for a garbage can. Aside from being handy indoors, this island would be ideal for use in an outdoor kitchen to keep a garbage can near the cooking area.
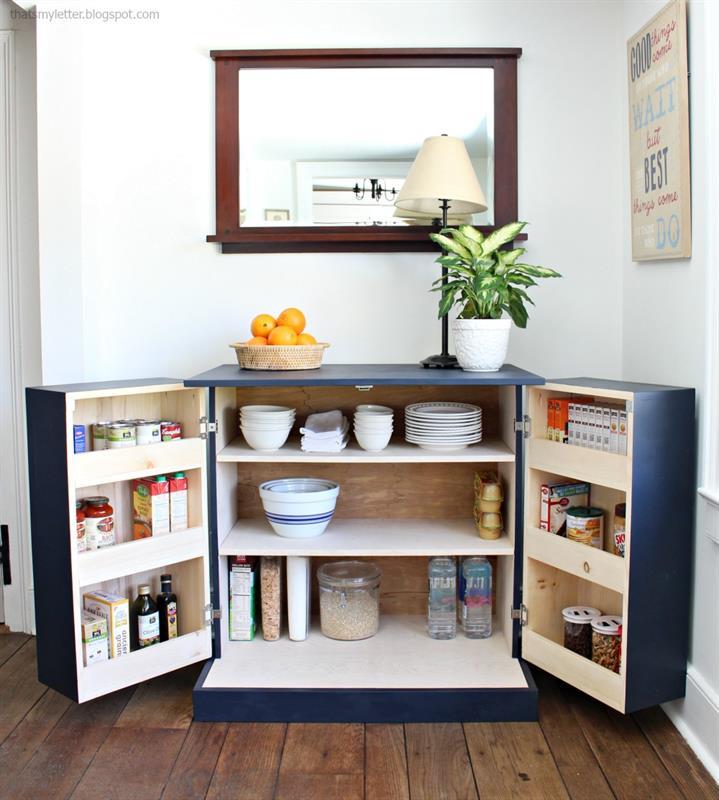
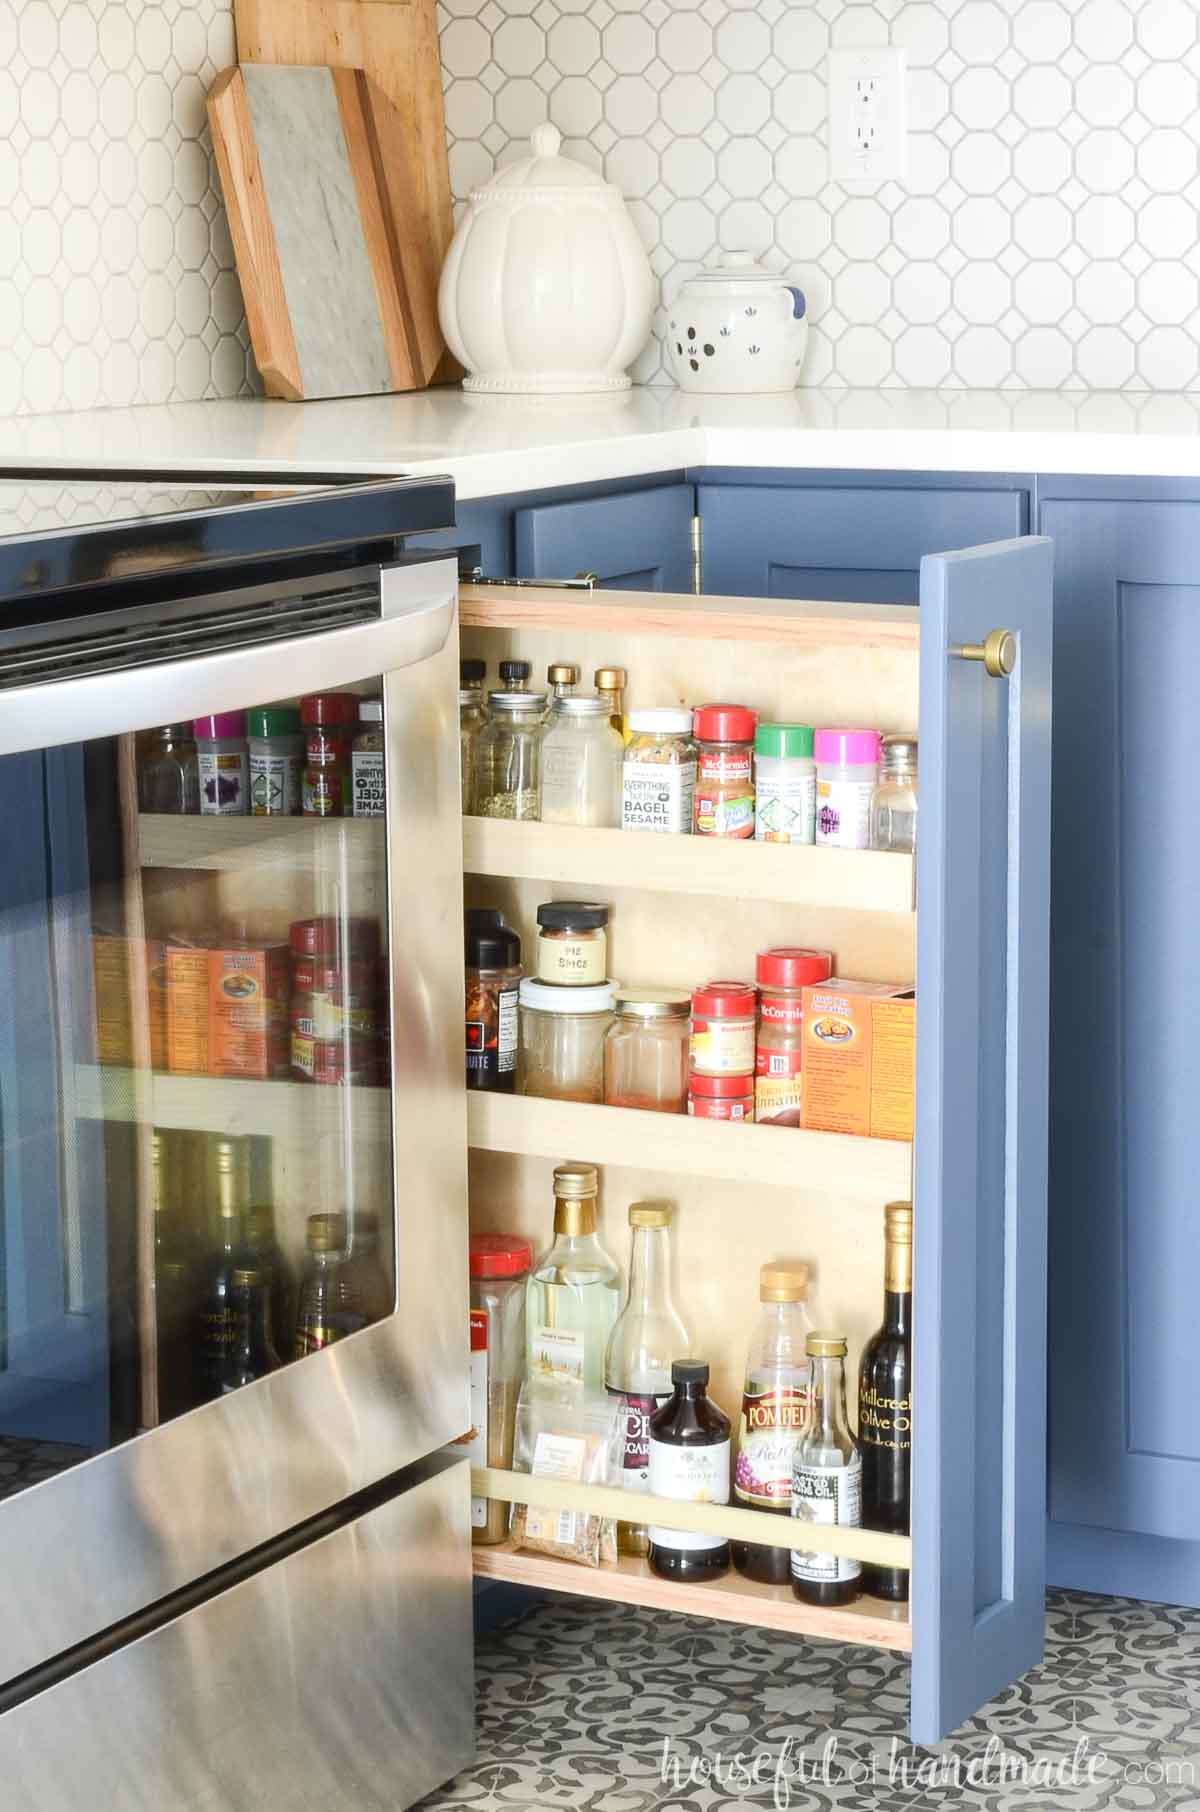
#4 DIY Spice Rack Cabinet Insert
Tools: Table saw, drill, pocket hole jig, measuring tools.
Supplies: ¾” plywood, narrow drawer slides, dividers, cabinet pulls.
Put all of your oils, spices, and other supplies in a single, compact do-it-yourself cabinet.
The pull-out spice rack cabinet is one of my favorite kitchen specialty cabinets.
It is a little cabinet that is just 8 to 10 inches wide, yet it is packed full with spices. Additionally, I have space to keep items like marinades, oils, vinegars, and honey.
I placed the spice cabinet near to the stove in both of my do-it-yourself kitchen makeovers so I could easily get the spices I needed for cooking.
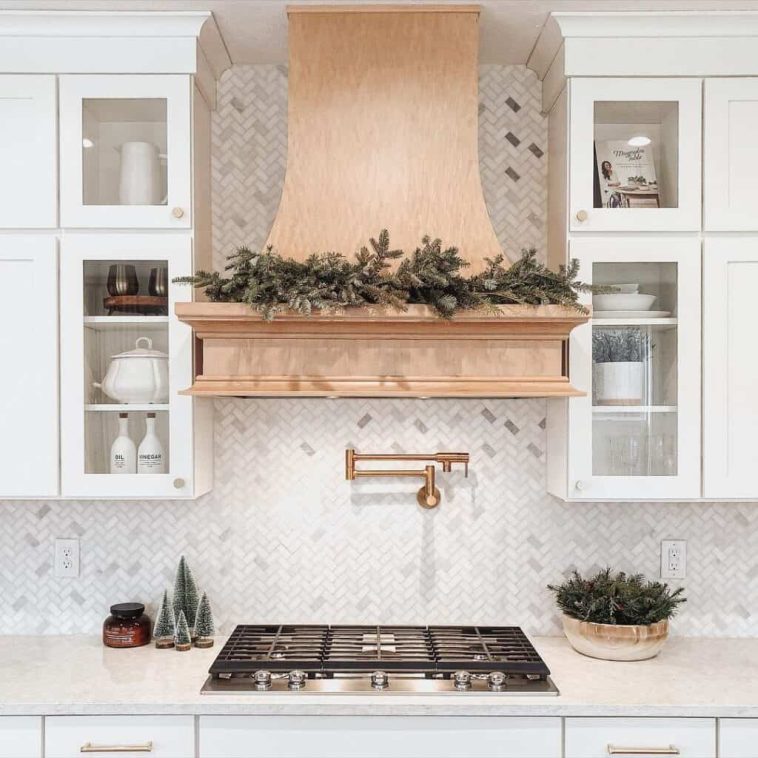
#3 DIY Upper Cabinet with Glass Doors

Tools: Router, table saw, drill, glass cutting tools, clamps.
Supplies: ¾” plywood, hardwood for door frames, tempered glass, glass clips, hinges, adjustable shelves.
Glass-front upper cabinets create visual interest while displaying attractive dishware and glassware. These plans detail both the cabinet construction and the specialized door building techniques required for glass installation.
A grey and white herringbone tiled wall highlights white upper kitchen cabinets with glass doors and metal hardware. A gray tabletop is covered with festive décor beneath a wooden stove hood draped in an evergreen garland.
#2 DIY Appliance Garage Cabinet
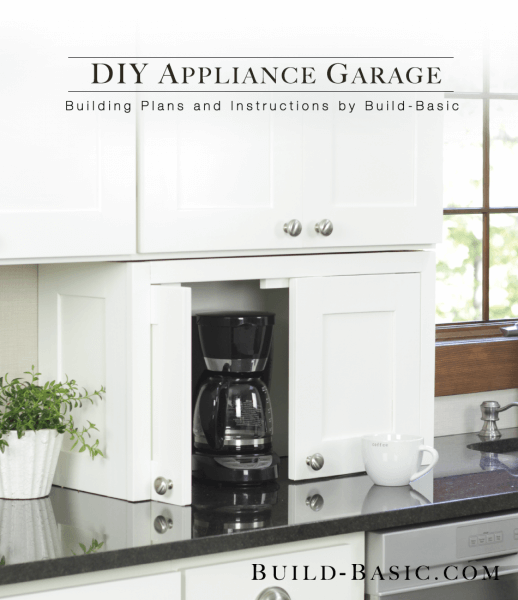
An appliance garage hides small appliances while keeping them easily accessible. These plans show how to build an upper cabinet with a tambour door that slides up to reveal stored appliances on a pull-out shelf.
The construction includes electrical planning for interior outlets and proper ventilation considerations. The tambour door mechanism requires precise routing for smooth operation. The pull-out shelf brings appliances forward for easy use without requiring removal from the cabinet.
#1 DIY Upper Cabinet Storage

Tools: Hammer, Straightedge and Power saw.
Supplies: 1⁄2 in (1.3 cm) plywood boards Pencil, Tape measure, Nails, Wood glue, Gloves, Goggles.
If you want to add extra DIY storage to your kitchen, you can always create higher cabinets to fit between your upper cabinets and the ceiling. These basic boxes are easy to install to your existing cabinets. With some little cabinet doors and knobs, you may add height, extra storage, and decorative elements. Depending on the height of your cabinets and the gap you have available, these DIY designs can provide ample storage. There are several methods to construct these top cabinet storage boxes, including those that are just ornamental. The choice is yours, but all options are included in the blueprints.
Money-Saving Strategies That Actually Work
Shop lumber yards, not big box stores. Yeah, Home Depot is convenient, but lumber yards often have better quality wood for less money. Plus, they’ll usually cut sheets to size, which saves you from wrestling 4×8 sheets into your Honda Civic.
Reuse what you can. If your existing cabinet boxes are solid, just build new doors and drawer fronts. You can save 50% or more this way, and nobody will know you took the shortcut.
Buy hardware in bulk. Those $8 hinges add up incredibly fast when you need 30 of them. Find a restaurant supply store or buy online in bulk – your budget will appreciate the savings.
Know when to hire help. FYI, electrical work and plumbing connections are usually worth paying professionals to handle. Everything else? You absolutely got this.
Avoid These Rookie Mistakes
Measurement errors will haunt your dreams. Seriously, measure everything three times and cut once. I cannot emphasize this enough – wood doesn’t grow back once you cut it too short.
Don’t pick projects above your skill level just because they look cool on Pinterest. Start simple and work your way up to the fancy stuff.
Rushing the finish work ruins everything you’ve worked for. Take your time with sanding and painting – it’s the difference between “I built this myself” and “I built this like a professional.”
Your Kitchen Transformation Starts Now
Look, you could spend $30,000 on cabinets and still not get exactly what you want. Or you could spend a few weekends, save over $15,000, and build something that’s perfectly suited to your space, style, and storage needs.
Start with something simple – maybe those shaker base cabinets or open shelving. Get comfortable with the process, build your confidence, then tackle the fancier projects. Before you know it, you’ll have a kitchen that looks like a million bucks without the heart-stopping price tag.
Ready to get started? IMO, the hardest part is just making the decision to begin. Everything else is just following plans, measuring carefully, and trying not to lose any fingers in the process. Your future self and your bank account will definitely thank you for taking this leap!
Why Not Save This Pin For Later ?