You know what’s funny? Everyone thinks woodworking requires a garage full of expensive machinery and decades of experience. Spoiler alert: it doesn’t. I started my woodworking journey with a hand saw I borrowed from my neighbor and a hammer that had seen better days. And guess what? My first woodworking project using basic tools actually turned out… decent.
Here’s the truth—woodworking is way more accessible than the Instagram pros want you to believe. You don’t need a $5,000 table saw or a workshop the size of a basketball court. What you need is basic tools, some patience, and the willingness to sand away your mistakes (literally).
Let me tackle those beginner concerns head-on. Cost? You can start with under $100 in tools. Space? A corner of your apartment works just fine. Experience? Zero is perfectly acceptable. I’m talking to you, person who’s never touched a piece of wood in their life.
So what counts as “basic tools” anyway? Think hammer, hand saw (or circular saw if you’re feeling fancy), drill, sandpaper, measuring tape, square, pencil, and wood glue. That’s it. You probably already own half of these.
What you’ll get from this post is a roadmap—15 actual woodworking projects you can build without selling a kidney for equipment. Each one builds your skills progressively, from “I hope this doesn’t fall apart” to “Hey, I actually made something cool.”
Getting Started – Your Basic Tool Kit
Let’s talk about what you actually need versus what the hardware store employee will try to sell you.
Essential Tools Every Beginner Needs
The non-negotiables:
- Measuring tape – Because eyeballing measurements is how you end up with wobbly tables
- Pencil – Preferably one that’s sharp (crazy concept, right?)
- Hand saw or circular saw – Your choice depends on arm strength and noise tolerance
- Hammer – The OG power tool
- Drill with basic bits – Cordless makes life easier, but corded works fine
- Sandpaper (various grits) – Start with 80, 120, and 220 grit
- Wood glue – The secret ingredient in literally everything
- Clamps (at least 4) – You’ll wish you had more, trust me
- Speed square or combination square – For when “looks straight” isn’t good enough
That’s your starter pack. IMO, you can build half the projects on this list with just these.
Optional But Helpful Tools
Once you’ve caught the woodworking bug (and you will), consider adding:
- Miter saw – Makes angled cuts stupid-easy
- Palm sander – Your forearms will thank you
- Level – Because “it looks level” is never actually level
- Chisels – For when you need to get fancy
Safety Tips for Beginners
Real talk—power tools don’t care about your feelings. Wear safety glasses every single time. I don’t care if you’re just making one cut. That’s exactly when sawdust decides to attack your eyeball.
Other non-negotiables:
Advertisement
- Keep your fingers away from blades (sounds obvious, but you’d be surprised)
- Secure your wood before cutting—loose boards are dangerous boards
- Unplug tools when changing bits or blades
- Work in a well-ventilated area when using stains or finishes
Where to Source Affordable Tools
FYI, you don’t need to drop hundreds at the fancy woodworking boutique.Harbor Freight, Craigslist, Facebook Marketplace, and estate sales are your friends. My drill? Twenty bucks at a yard sale. Still going strong three years later.
Home Depot and Lowe’s run sales constantly. Sign up for their email lists and wait for the 20% off coupons. Also, check out tool libraries if your city has one—it’s like Netflix for power tools.
The 15 Woodworking Projects Using Basic Tools
Alright, let’s get to the good stuff. Each project includes what you need to know upfront—no surprises, no “oh, and you’ll also need a lathe” moments.
Easy Woodworking Projects Using Basic Tools:
1. Wooden Coasters
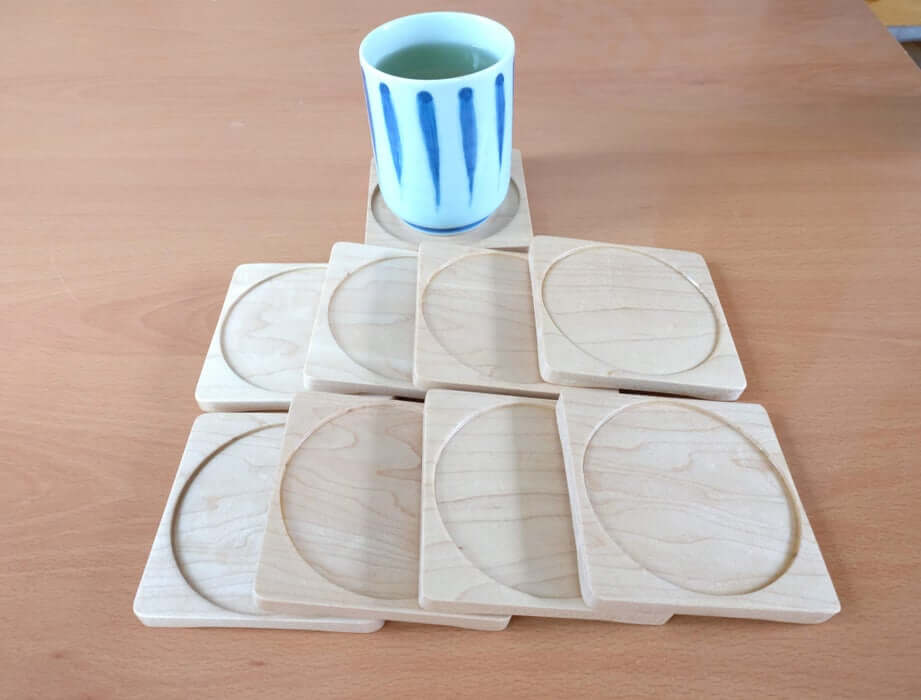
Credit : Instructables
Difficulty Level: Absolute beginner
Time Estimate: 1-2 hours
Materials Needed: Scrap wood, sandpaper, finish (optional)
Start here. Seriously. Cut squares from any hardwood scrap, sand until smooth, apply finish if you want. Boom—functional art that protects your furniture. These make great gifts when you inevitably make 47 of them because cutting squares is oddly satisfying.
2. Simple Picture Frame
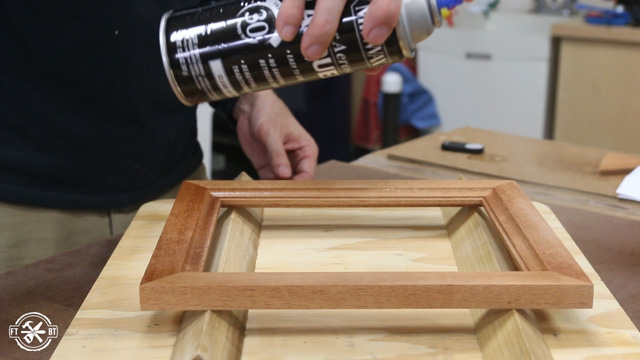
Credit : fix this build that
Difficulty Level: Easy
Time Estimate: 2-3 hours
Materials Needed: Four pieces of wood, miter saw or miter box, wood glue, clamps
Picture frames teach you the magic of 45-degree angles. Get those corners tight, and suddenly you look like you know what you’re doing. Pro tip: measure your photo first. Ask me how I know this matters.
3. Cutting Board
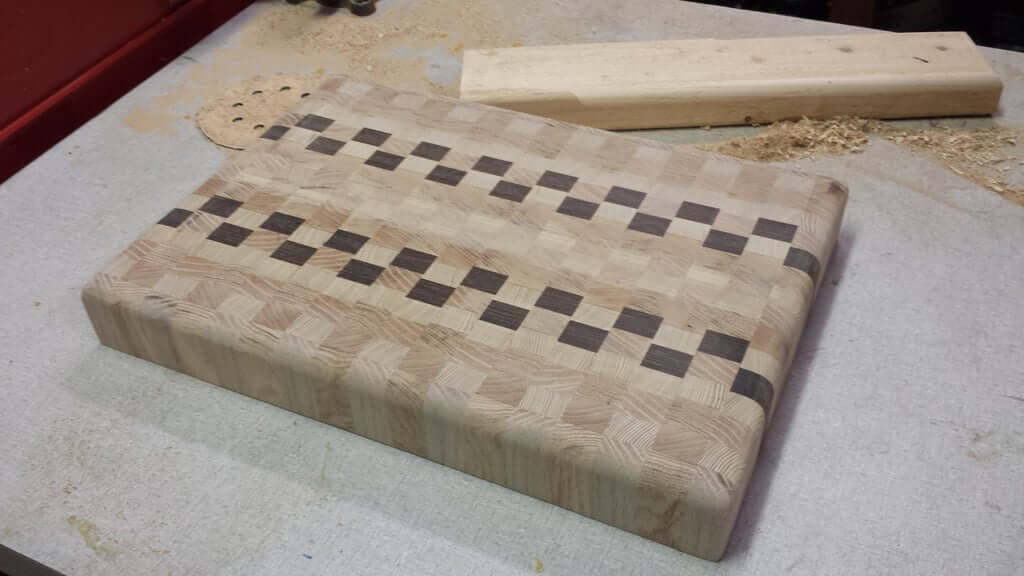
Credit : Instructables
Difficulty Level: Easy
Time Estimate: 3-4 hours (plus drying time)
Materials Needed: Hardwood boards (maple, walnut, cherry), wood glue, food-safe finish
Ever wanted to feel like a functional adult? Make a cutting board. Glue strips of hardwood together, clamp overnight, sand smooth, finish with mineral oil. Now you’re the person who gives handmade cutting boards as housewarming gifts.
4. Floating Shelf

Credit : rogue engineer
Difficulty Level: Easy-Moderate
Time Estimate: 2-3 hours
Materials Needed: Board for shelf, mounting brackets, screws, stud finder, level
These look way harder than they are. Find your wall studs (please, for the love of your drywall, find the studs), mount brackets, slide on your shelf. Instant home improvement credibility.
5. Plant Stand

Credit : a beautiful mess
Difficulty Level: Moderate
Time Estimate: 4-5 hours
Materials Needed: Dimensional lumber, screws, wood glue, stain or paint
Three or four legs, a platform on top—you’ve got yourself a plant stand. Your succulents will have never looked better, and your Instagram game just leveled up.
Intermediate Woodworking Projects Using Basic Tools
6. Coffee Table (Simple Design)
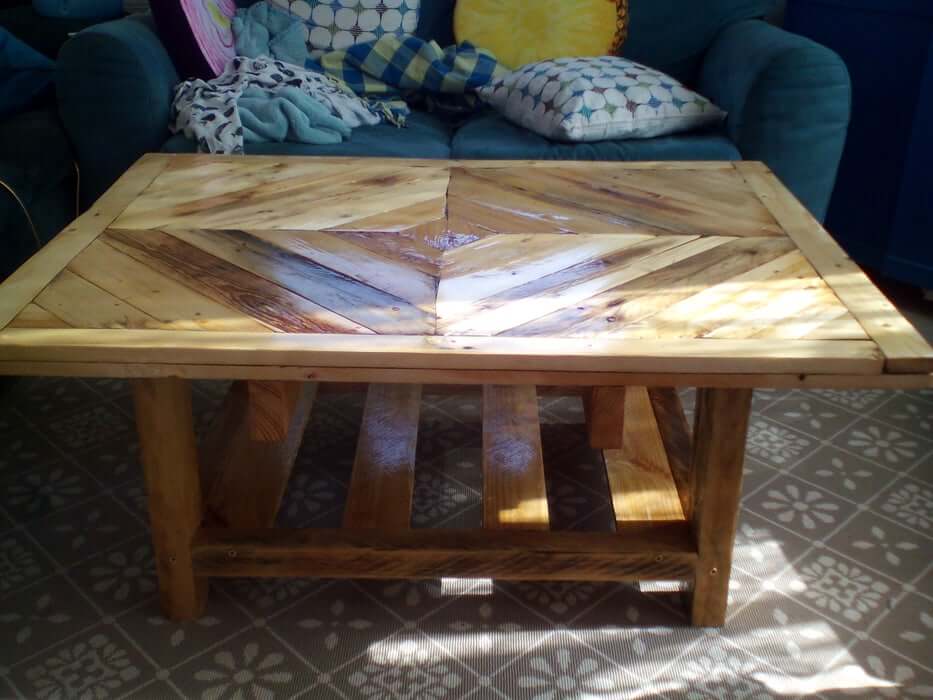
Credit : Instructable
Difficulty Level: Intermediate
Time Estimate: 6-8 hours
Materials Needed: 2x4s or 4x4s for legs, boards for tabletop, screws, wood glue, finish
Time to go big. A basic coffee table is just four legs and a flat top, but suddenly you’ve made furniture. Start with a simple design—you can always get fancy with project number 47.
7. Bookshelf
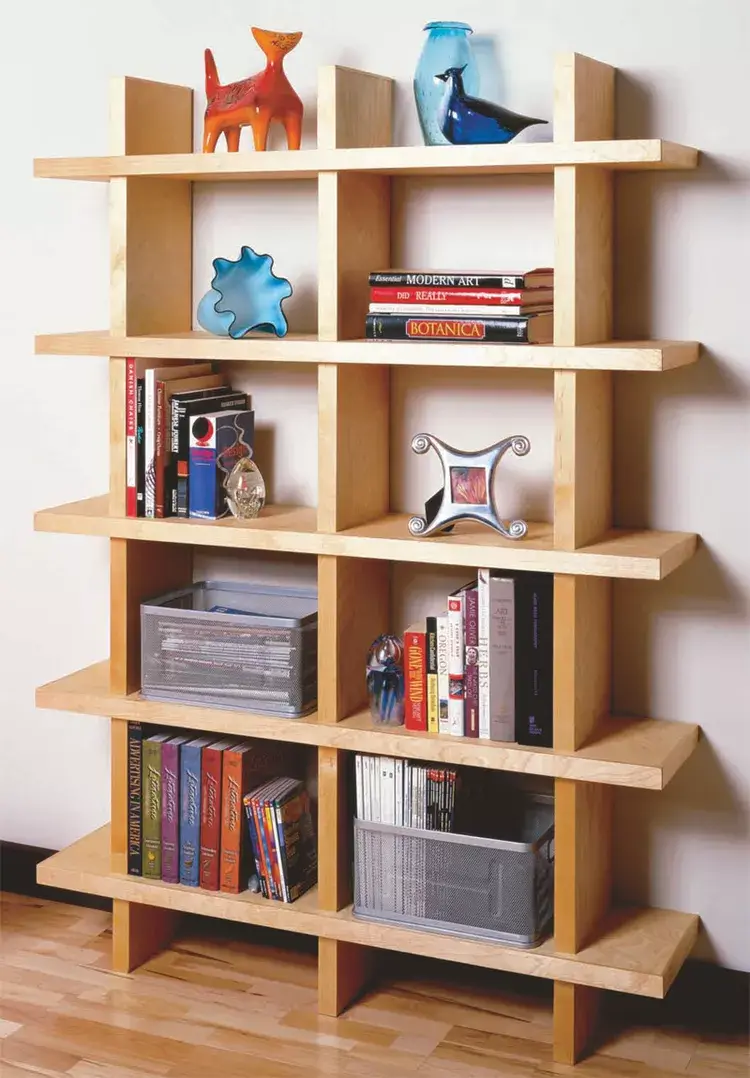
Credit : Popular Woodworking
Difficulty Level: Intermediate
Time Estimate: 5-7 hours
Materials Needed: Plywood or boards, screws, wood glue, L-brackets for stability
Think of it as stacked boxes. Vertical sides, horizontal shelves, everything secured. The hardest part is deciding how many shelves you need (spoiler: add two more than you think).
8. Tool Box/Caddy
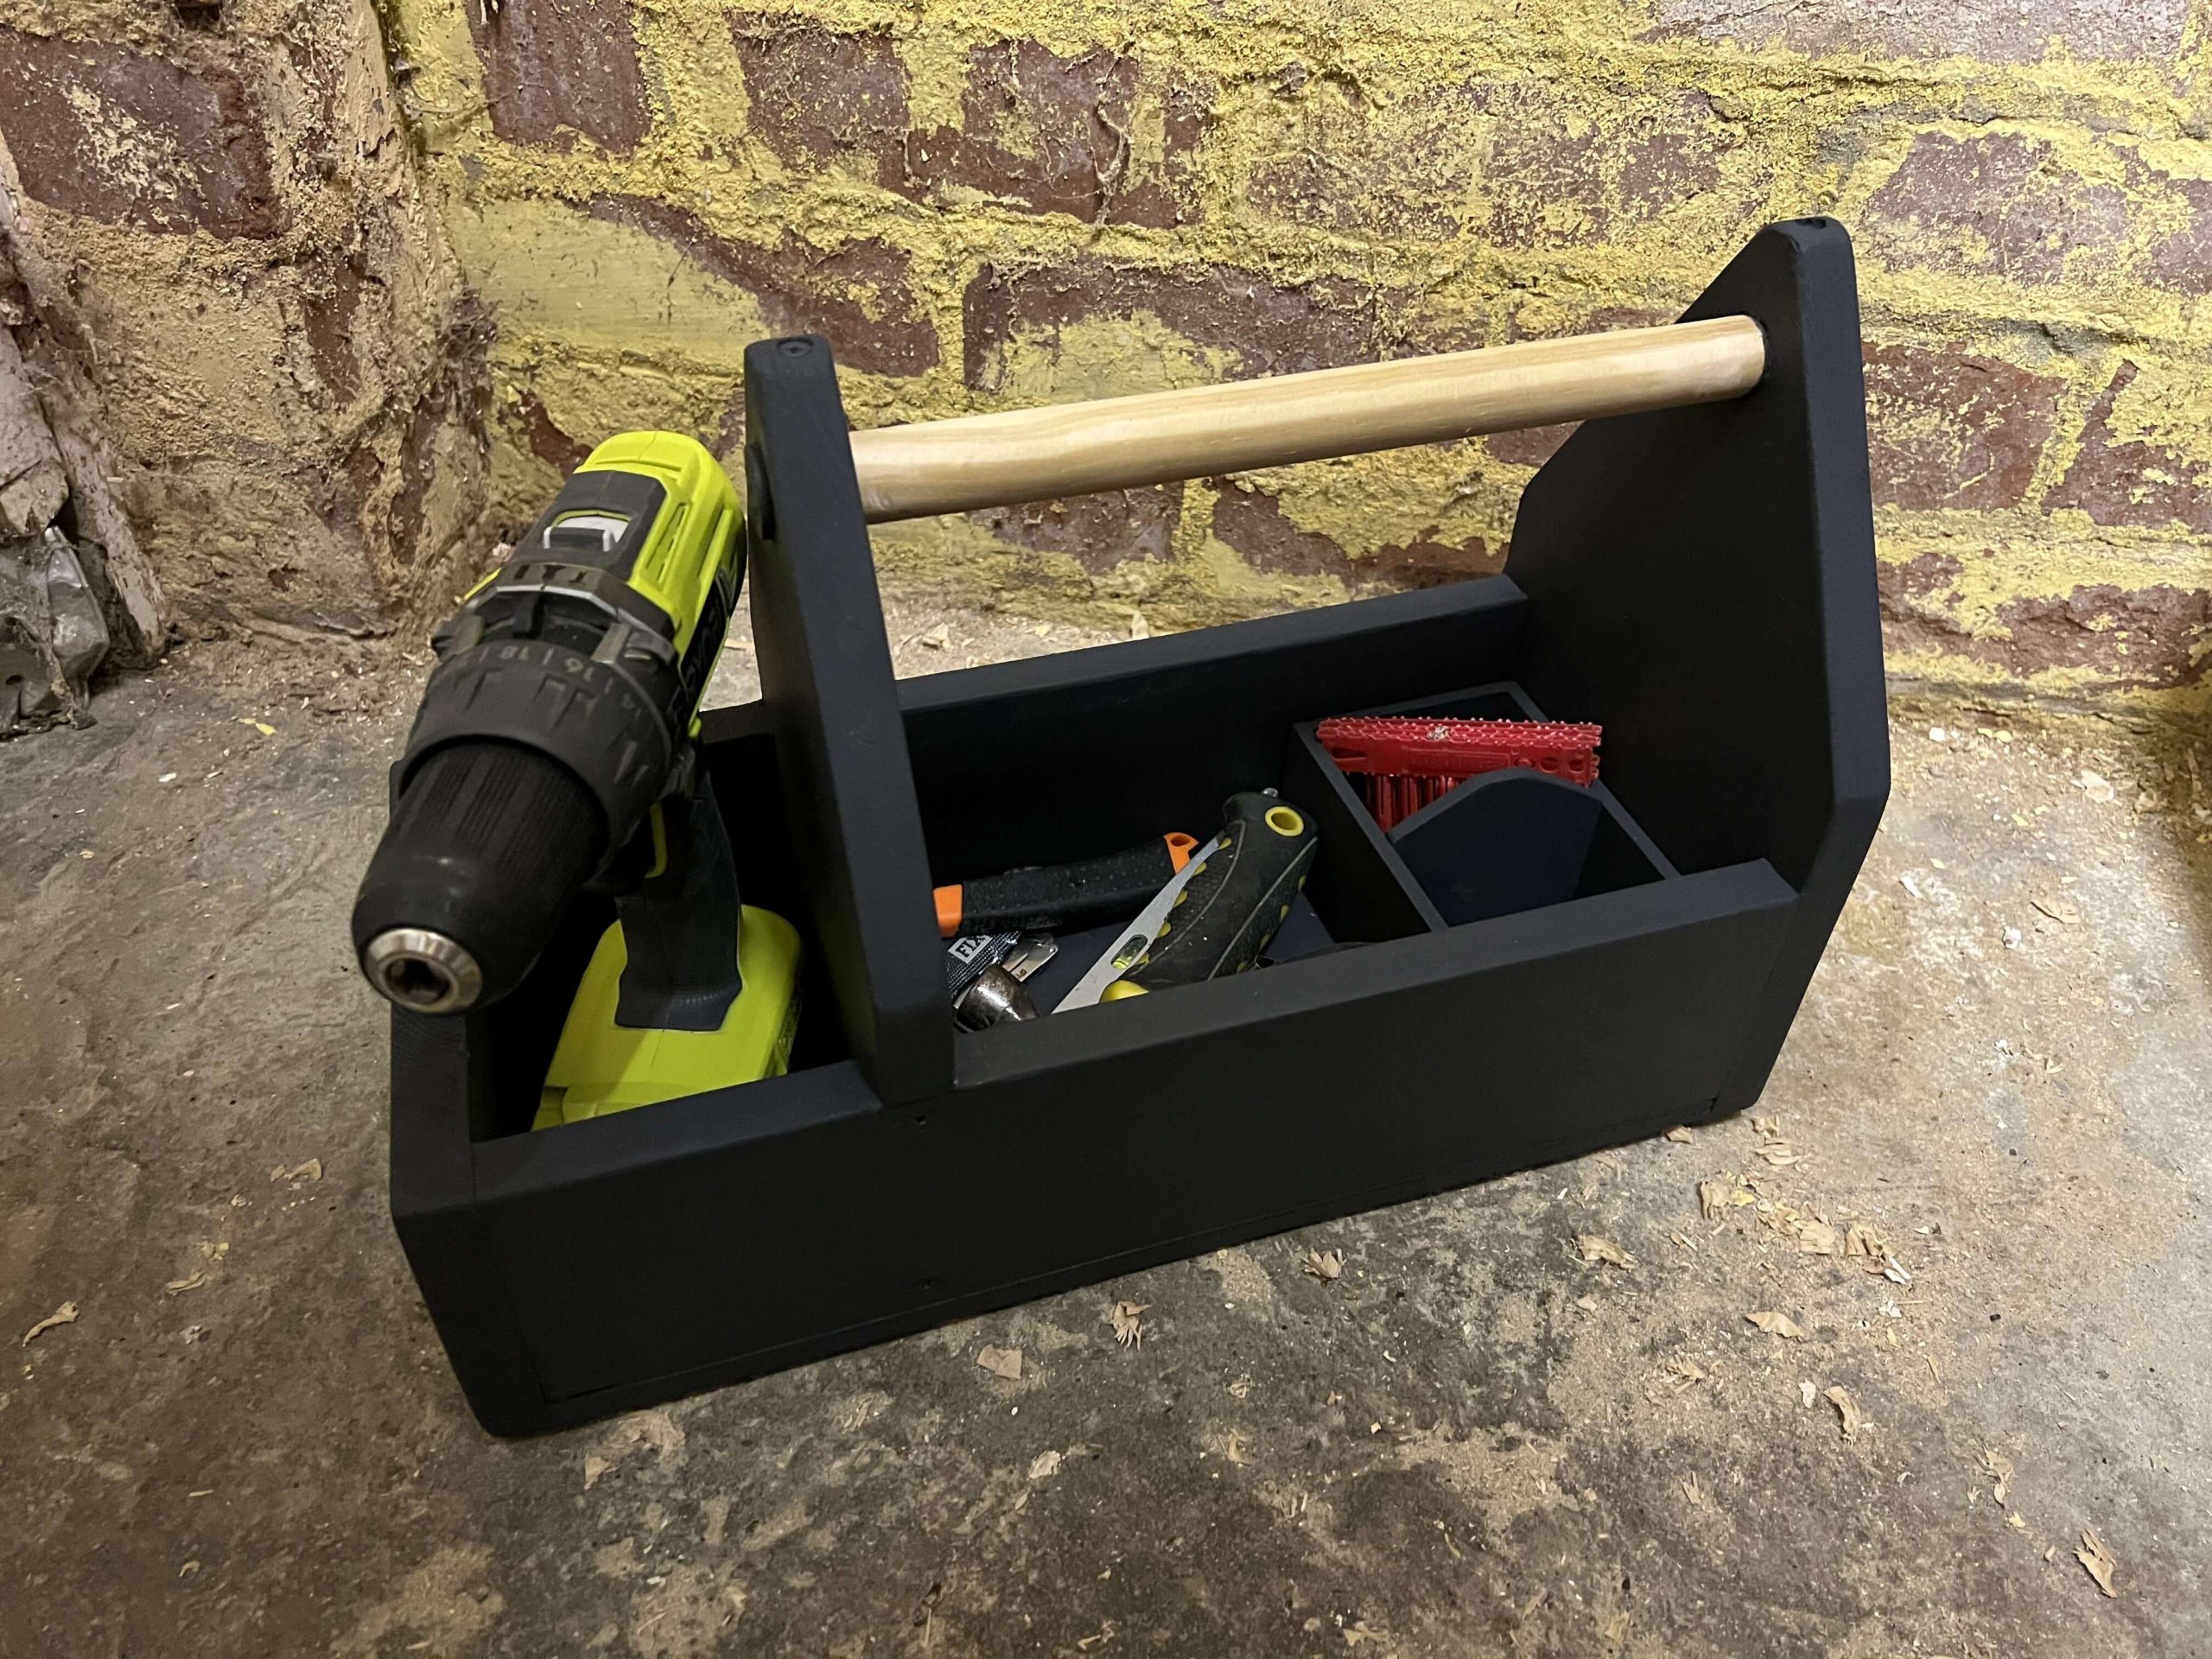
Credit : Instructables
Difficulty Level: Intermediate
Time Estimate: 4-6 hours
Materials Needed: Wood boards, handle, screws, wood glue
Is it meta to build a box to hold the tools you’re using to build the box? Absolutely. Do it anyway. You’ll use this thing constantly, and it’s oddly satisfying to carry around your creations.
9. Wooden Bench
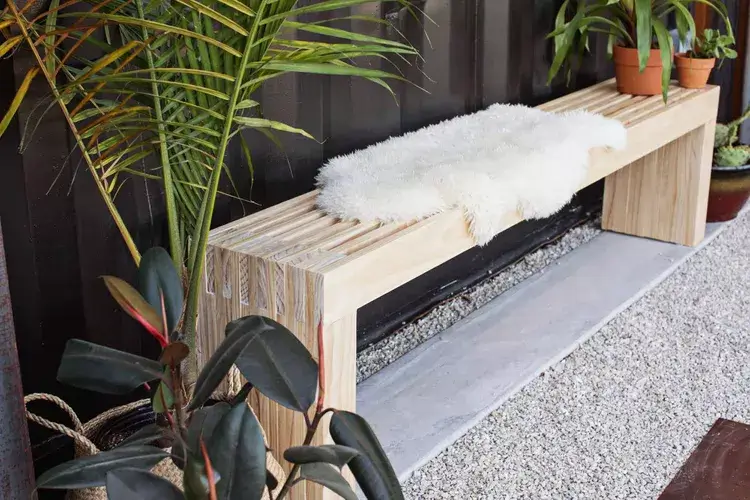
Credit : A Beautiful Mess
Difficulty Level: Intermediate
Time Estimate: 6-8 hours
Materials Needed: 2x4s, 2×10 or 2×12 for seat, screws, wood glue
Four legs, a seat, maybe a lower support beam. Nothing fancy, but you can actually sit on something you made. Test it thoroughly before inviting your in-laws over, though.
10. Side Table for $10
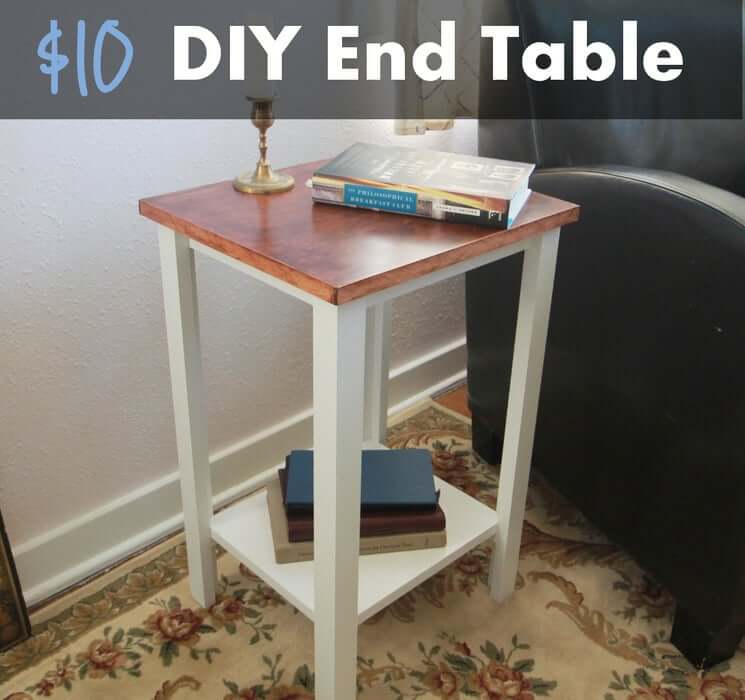
Credit : Instructables
Difficulty Level: Intermediate
Time Estimate: 5-7 hours
Materials Needed: Dimensional lumber, screws, wood glue, finish
Similar to the coffee table but smaller and usually taller. Perfect for practicing joinery without committing to a massive project. Plus, you can never have too many places to set your coffee.
Slightly Advanced Beginner Projects Using Basic Tools
11. DIY Headboard
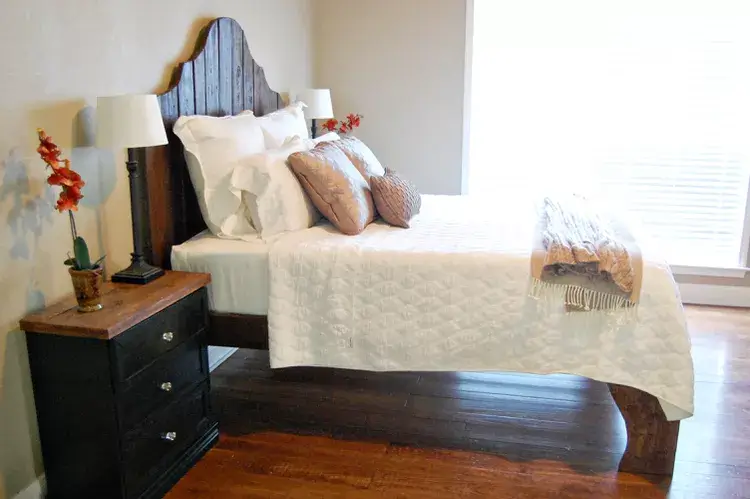
Credit : The Accent Piece
Difficulty Level: Moderate-Advanced Beginner
Time Estimate: 8-10 hours
Materials Needed: Boards or plywood, mounting hardware, stain or paint, decorative elements (optional)
Want to transform your bedroom without buying IKEA furniture? Headboards are surprisingly straightforward. Vertical or horizontal slats, a frame to hold them, mounting brackets for the wall. Done.
12. Wine Rack
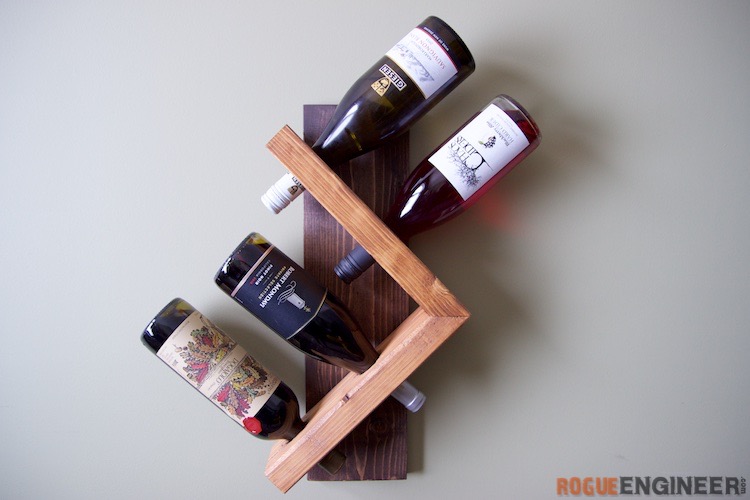
Credit : rogue engineer
Difficulty Level: Moderate-Advanced Beginner
Time Estimate: 6-8 hours
Materials Needed: Wood boards, dowels or notched design, screws, stain or finish
Whether you’re a wine enthusiast or just want somewhere to stash those bottles from Trader Joe’s, wine racks combine function with style. The angled design keeps corks moist (apparently that matters).
13. Outdoor Planter Box
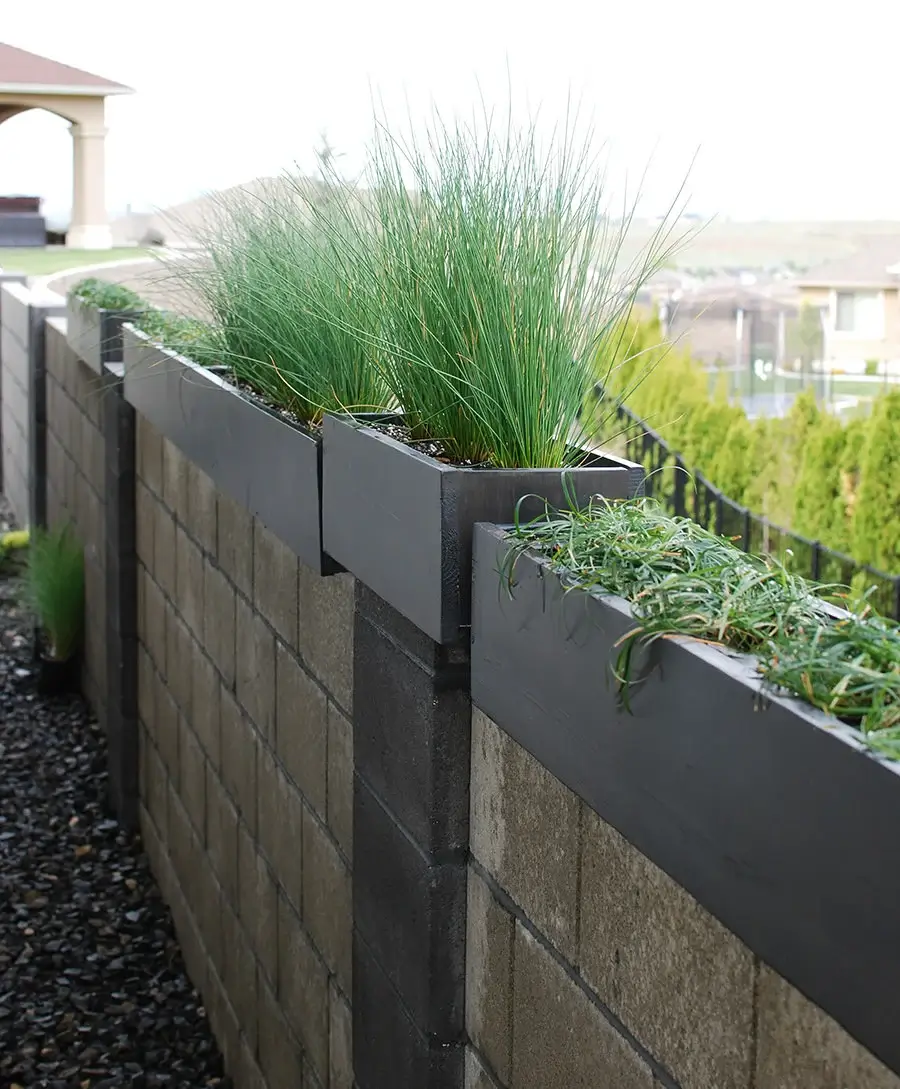
Credit : The Garden Glove
Difficulty Level: Moderate-Advanced Beginner
Time Estimate: 5-7 hours
Materials Needed: Cedar or weather-resistant wood, screws, waterproof liner, exterior stain or sealant
Five sides (no top needed—that’s where the plants go). Use cedar or treat your wood for outdoor use. Don’t skip the waterproofing step unless you want a mushy mess in three months.
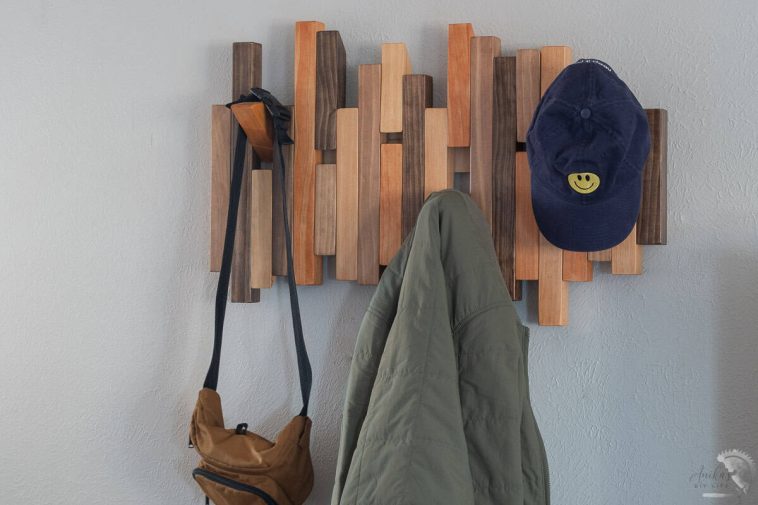
14. Coat Rack with Shelf

Credit : Anikas Diy Life
Difficulty Level: Moderate-Advanced Beginner
Time Estimate: 6-8 hours
Materials Needed: Board for back and shelf, coat hooks, screws, anchors, finish
A backing board, a shelf on top, hooks below. Mount it by the door and suddenly your entryway looks intentional instead of chaotic. It’s the small wins, people.
15. Small Storage Chest
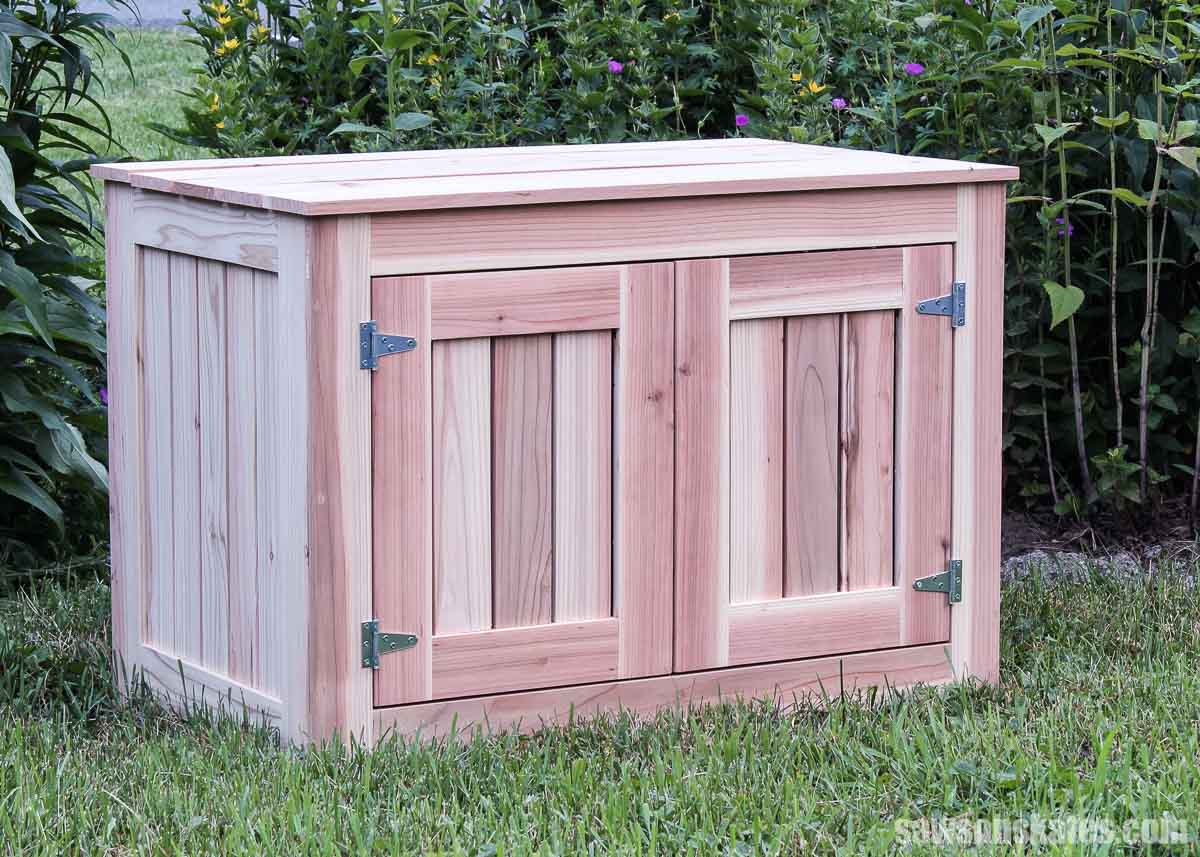
Credit : Saws On Skates
Difficulty Level: Advanced Beginner
Time Estimate: 10-12 hours
Materials Needed: Plywood or boards, hinges, latch or lock, screws, wood glue, finish
This is your graduation project. Four sides, a bottom, a lid with hinges. You’re basically a carpenter now. Use it for blankets, tools, or hiding evidence of your less successful projects (we all have them).
Tips for Success
Let me save you from the mistakes I made so you can make your own unique ones instead.
Start with Smaller Projects First
I know you want to build that dining table. I get it. But trust me—master coasters before attempting furniture your family will eat on. Skills build progressively. Walk before you run, cut before you carve, all that wisdom.
Measure Twice, Cut Once
This isn’t just a cute saying. It’s a survival strategy. Wood is expensive. Your time is valuable. That board you just cut three inches too short? Yeah, you need to buy another one now. Ask me how I know.
Seriously, measure, then measure again, then have your coffee and measure one more time.
Don’t Be Afraid to Make Mistakes
Here’s the secret no one tells you: every woodworker has a “mistakes pile” somewhere in their shop. That wonky shelf? Turn it into a plant stand. Those uneven coasters? They’re “rustic” now. Call it “character.”
Mistakes teach you more than successes. My best projects came after my worst failures because I learned what not to do.
How to Finish Your Projects (Sanding, Staining, Sealing)
The finish makes or breaks your project. You can build something perfectly and ruin it with a rushed finish.
Sanding progression: Start with coarser grits (80-100) to remove roughness, move to medium (120-150) to smooth, finish with fine (220+) for that buttery feel. Sand with the grain, not against it.
Staining: Apply with a brush or towel, then wipe off any excess. Allow to dry fully. Multiple thin coatings outperform one thick coat every time.
Sealing: Polyurethane for durability, wipe-on poly for ease, paste wax for that hand-rubbed look. Pick your battles based on where the piece lives and how much abuse it’ll take.
Where to Find Free Woodworking Plans
The internet is drowning in free plans. Ana White, Instructables, YouTube, and Pinterest have thousands. Many lumber stores offer free project plans too—just ask.
Start with plans until you understand how projects go together. Then you can start winging it with confidence (or at least educated guessing).
Need More Than 15 Woodworking Projects? I’ve Got You Covered
Here’s the thing—these 15 projects are fantastic for getting started, but once you catch the woodworking bug (and trust me, you will), you’re going to want more. Like, way more.
I stumbled across Ted’s Woodworking Plans a while back, and honestly? It’s been a game-changer. We’re talking about 16,000+ woodworking plans with step-by-step instructions, detailed diagrams, and material lists. Yeah, you read that right—sixteen thousand.
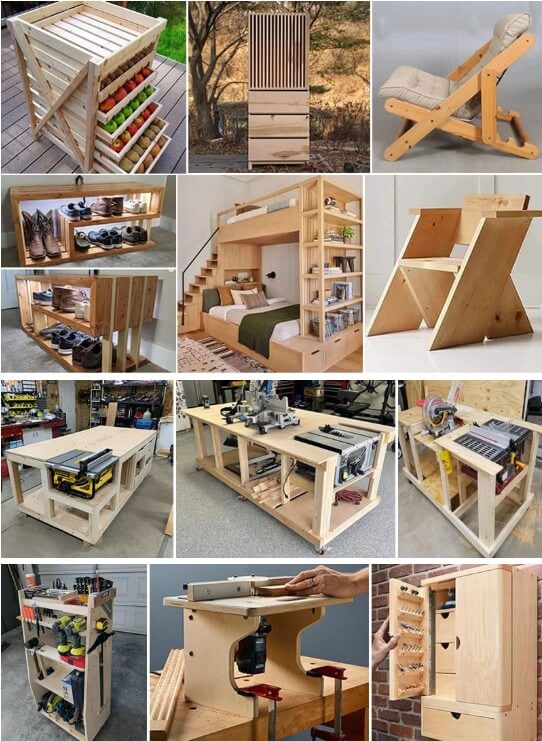
Whether you want to build a treehouse for the kids, a Murphy bed to save space, outdoor furniture, or even smaller projects like jewelry boxes and birdhouses, it’s all in there. The plans are beginner-friendly too, so you’re not stuck deciphering complicated blueprints that look like they need an engineering degree.
What I really like about Ted’s Woodworking:
- Clear, detailed instructions that don’t assume you already know everything
- Material lists and cutting diagrams so you’re not guessing at the hardware store
- Projects for every skill level—from “I just learned what a saw is” to advanced builds
- Lifetime access, so you can build at your own pace without subscription fees breathing down your neck
IMO, if you’re serious about this hobby and want to move beyond basic projects, having a massive library of plans at your fingertips beats endlessly Googling “easy woodworking projects” at 2 AM. Just saying.
You can check out Ted’s Woodworking Plans and see what I’m talking about. It’s worth browsing through even if you’re just getting ideas for your next build.
Let’s Wrap This Up
Look, woodworking isn’t some mystical craft reserved for bearded artisans with workshops full of antique tools. It’s sawing, sanding, and gluing stuff together. Sometimes it works beautifully. Sometimes you create firewood with extra steps.
Every expert started exactly where you are right now—staring at a pile of wood, wondering if they could actually pull this off. They could. You can too.
Here’s your mission: pick one project from this list. Just one. This weekend. Grab your basic tools, some wood from the hardware store, and make something. It doesn’t have to be perfect. It doesn’t even have to be good. It just has to be done.
Then take a picture, show someone, and feel that weird pride that comes from making something with your hands. That’s the drug that turns casual DIYers into full-blown woodworking addicts.
Now stop reading and go build something. Those coasters won’t make themselves.
Why Not Save This Pin For Later ?