
You walked into a home improvement store, spotted a patio sofa, and nearly choked on your coffee when you saw the price tag. $400. For wood and screws. Maybe some thin foam cushions if you’re lucky. And let’s be honest — half of those store-bought sets start wobbling after one winter like they’re auditioning for a slapstick comedy. Here’s what I want you to know: you can build a better outdoor couch for $30, in a single weekend, with zero woodworking experience. I know because I did it — and my neighbor spent the next three weeks convinced I’d dropped serious money on mine. The smug satisfaction alone was worth every minute.
If you’ve already built a raised garden bed with us, you already know the drill — literally. The same beginner-friendly approach applies here. New to building things entirely? No problem. We’ll walk through every step together.
Why Build Instead of Buy?
Let’s settle this debate quickly, because it’s not even close.
Store-bought patio furniture is, IMO, one of the worst purchases you can make. You’re paying for branding, shipping, packaging, and the retail markup — not the actual quality of the furniture. Most of it uses thin lumber, weak joints, and hardware that rusts after one rainy season. Two years later, you’re back at the store buying another one.
A DIY outdoor couch built from standard 2×4 lumber outlasts most store-bought sets by years. The wood is thicker, the joints are sturdier, and you sealed it yourself with a finish you chose. On top of that, you control every dimension — the height, the depth, the width. No more “close enough.” You build it to fit your space, your body, and your style.
And then there’s the “I built that” factor. Genuinely priceless.
What Makes This Build Different
This isn’t one of those DIY projects that requires a garage full of specialty tools and a weekend woodworking course. Here’s why this build works for complete beginners:
- Standard construction lumber — 2×4s and 2×6s are available at every hardware store on the planet
- Basic tools only — if you own a drill, you’re most of the way there
- Modular design — build one couch unit now, add a matching coffee table or armchair later without starting from scratch
Speaking of coffee tables, keep an eye out for our DIY Outdoor Coffee Table guide coming soon — it uses the exact same lumber and the exact same build approach.
Materials and Tools — The Actual $30 Breakdown
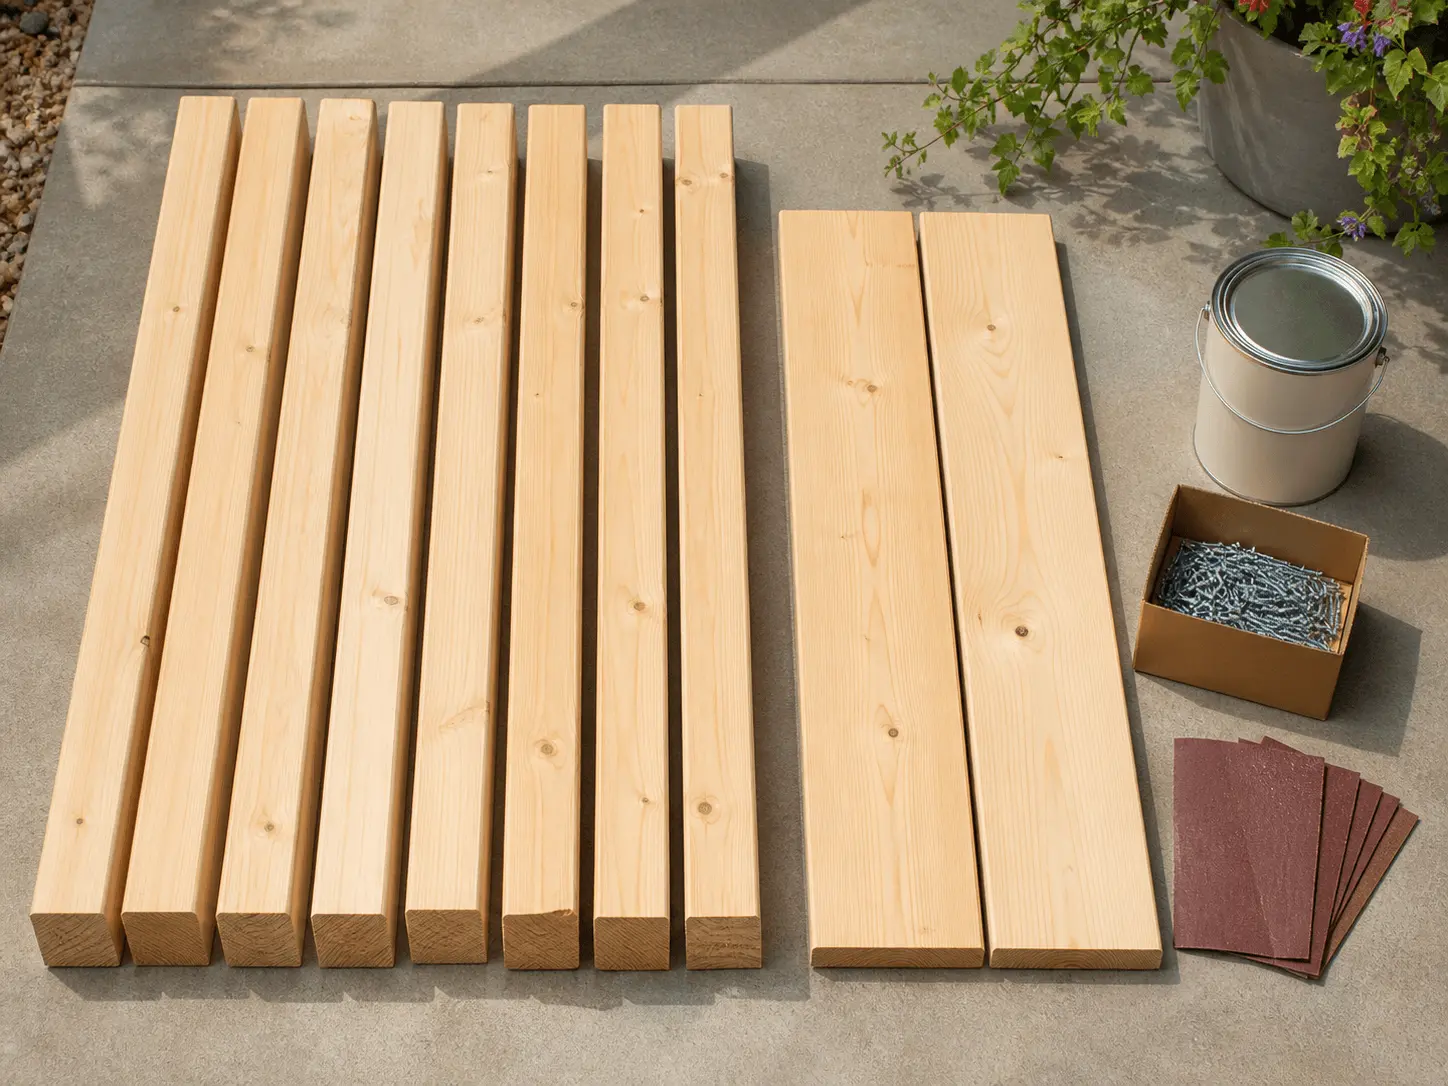
Here’s what makes people skeptical about the $30 claim — so let’s put it right on the table.
Advertisement
| Item | Approx. Cost |
| 2×4 studs (8-ft lengths) × 8 | ~$16 |
| 2×6 boards × 2 (for seat slats) | ~$8 |
| 3-inch galvanized deck screws (1 box) | ~$6 |
| Total | ~$30 |
That’s it. That’s the whole frame. Now, you’ll likely want to add a few things to make it look like the $500 version — but those are optional:
- Outdoor cushions — thrift stores, IKEA, or Amazon all have affordable options
- Exterior wood stain or paint — budget $10–$15 for a quality finish
- Sandpaper — a couple bucks and absolutely worth it
Tools You’ll Need
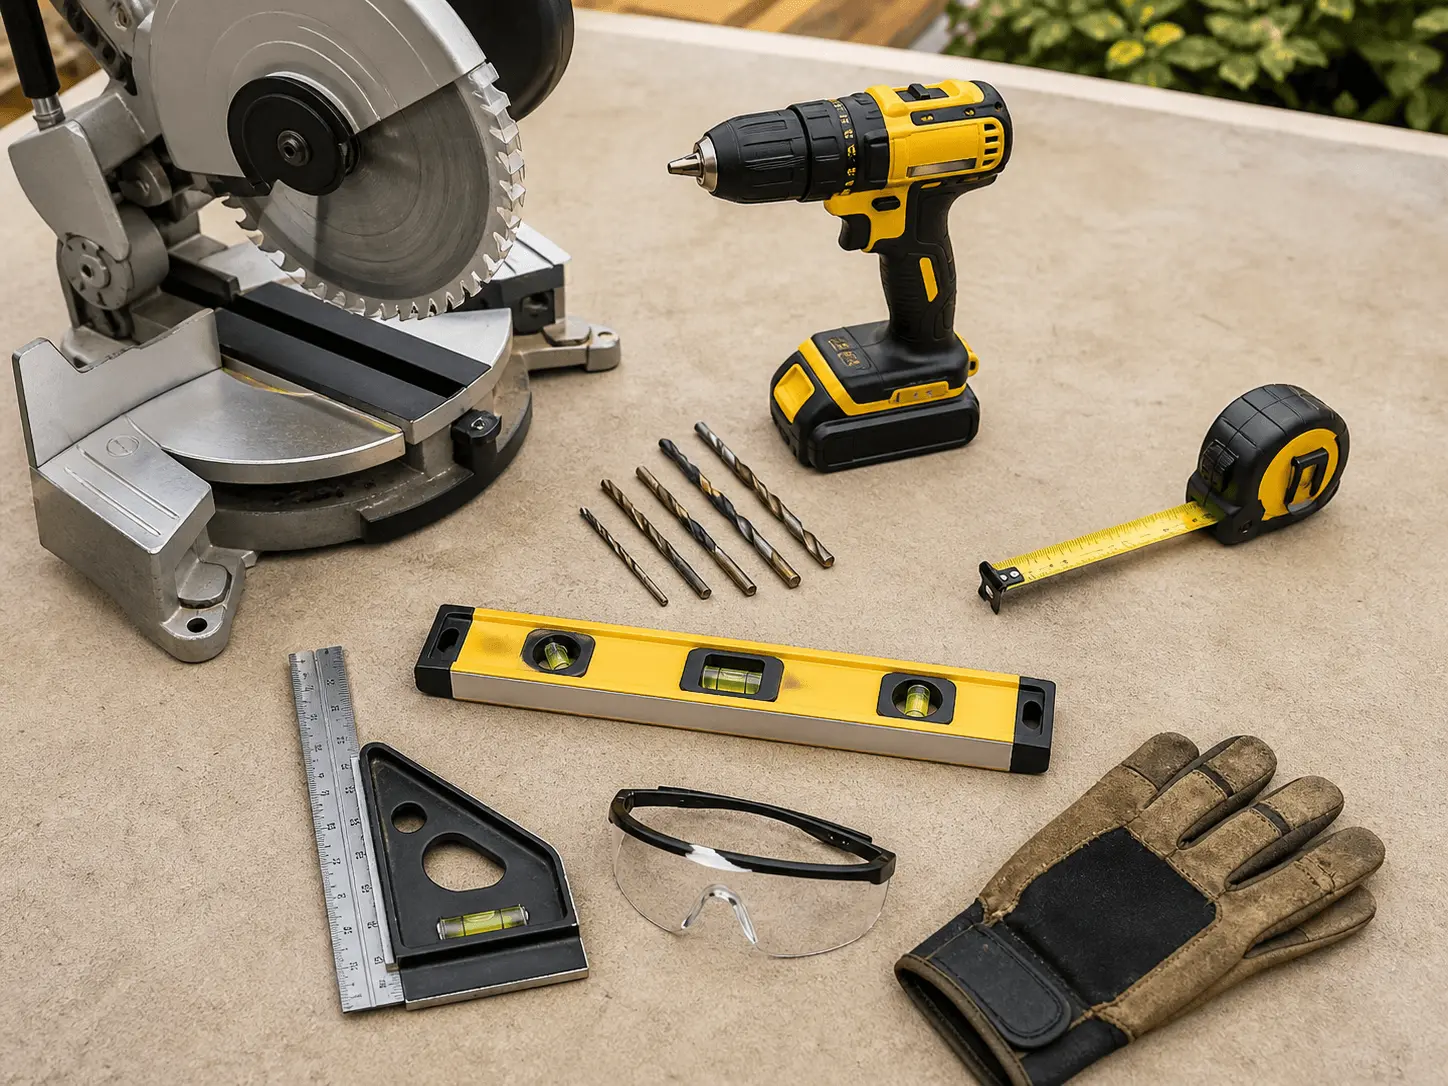
- Circular saw or miter saw
- Drill and drill bits
- Tape measure and carpenter’s square
- Level
- Safety glasses and gloves
💡 Beginner tip: Don’t own a saw? Most hardware stores will cut lumber for you free or for a small fee. Hand them your cut list and walk out with everything pre-cut. You won’t even need a saw at home.
Not sure which tools to invest in first? Our Beginner’s Woodworking Tool Guide breaks it all down by budget — from a starter $50 kit to a proper setup.
Choosing Your Style and Dimensions
Before you cut a single board, decide what you’re building. Three styles work well for beginners:
- The Simple Slab — straight back, flat seat, ultra-minimal. The easiest build and the cleanest look.
- The Angled Lounger — the backrest tilts back slightly (around 100°) for a more relaxed, reclined feel
- The L-Shape Sectional — build two identical units and join them at a corner for a full sectional sofa
For a single couch unit, stick to these dimensions:
- Width: 60 inches — comfortably fits 2 to 3 people
- Depth: 30 inches — the standard sofa depth; go shallower and it feels like a park bench
- Seat height: 18 inches from the ground
- Total back height: 30 inches
📐 Scale tip: Keep your dimensions in multiples of your lumber lengths to minimize cuts and reduce waste. Your wallet will thank you.
Free Beginner Plan — The Classic $30 Outdoor Couch
Alright, here’s the build. Follow these steps in order and you’ll have a finished frame by the end of the day.
Your Cut List
| Piece | Dimensions | Qty |
| Base long sides | 2×4 @ 60 inches | 2 |
| Base short sides | 2×4 @ 27 inches | 2 |
| Legs | 2×4 @ 18 inches | 4 |
| Center crossbar | 2×4 @ 27 inches | 1 |
| Seat slats | 2×6 @ 60 inches | 4 |
| Back frame top/bottom | 2×4 @ 60 inches | 2 |
| Back frame sides | 2×4 @ 12 inches | 2 |
| Back slats | 2×4 @ 60 inches | 3 |
Step-by-Step to Build a Classic $30 Outdoor Couch
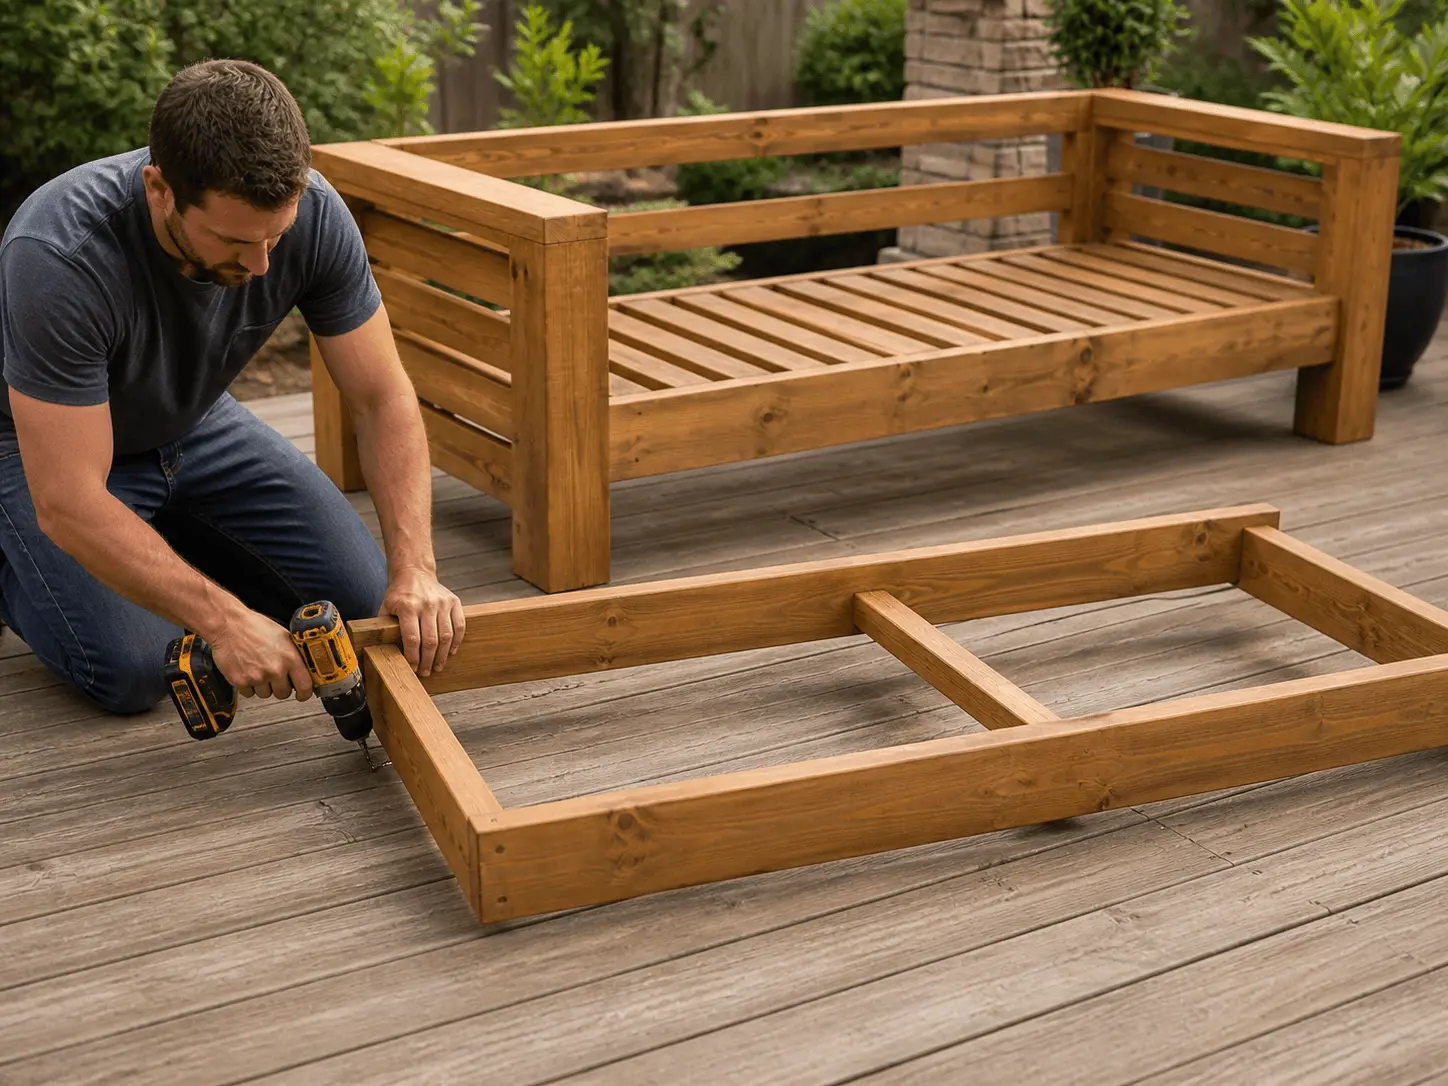
Step 1 — Build the base frame
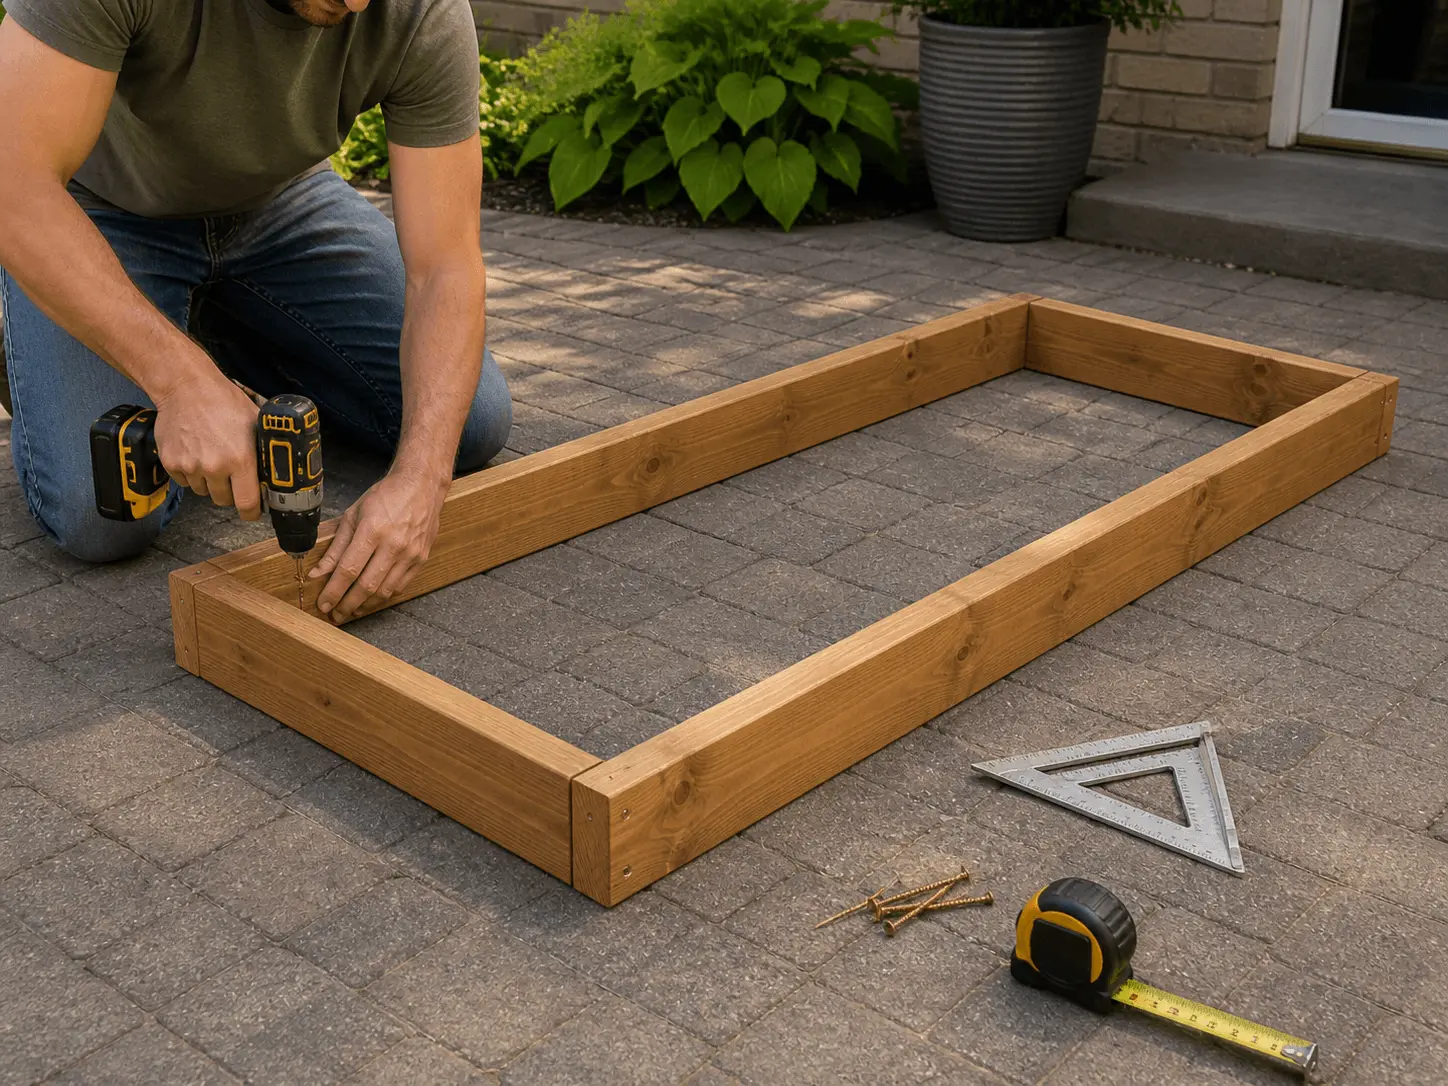
Assemble your two 60-inch boards and two 27-inch boards into a rectangle. This is the foundation everything else sits on. Square the corners by measuring diagonally — both measurements must match before you drive a single screw.
Step 2 — Add the legs
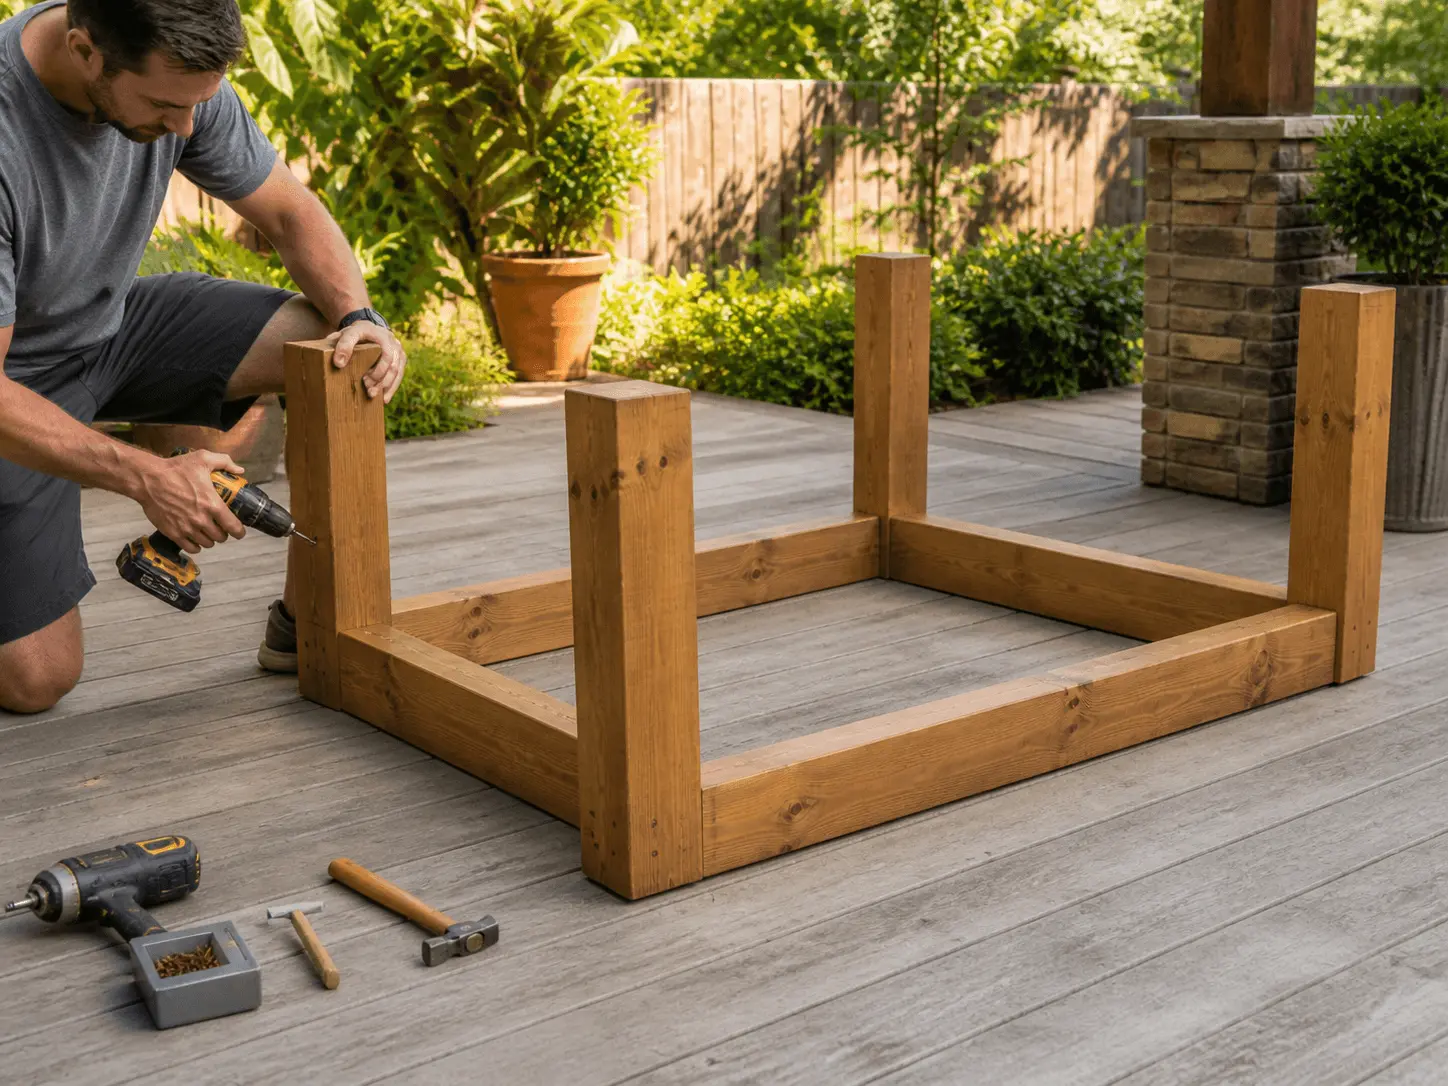
Cut four 2×4 legs at 18 inches each. Attach them to the inside corners of the base frame using two screws per leg. Pre-drill first — it takes 30 seconds and saves you from splitting wood at the very start of the build. :/
Step 3 — Reinforce the frame

Add a center crossbar running across the middle of the base, parallel to the short sides. This single piece prevents your seat from sagging under weight over time. Do not skip this step. I’ve seen builds without it last about six months before the middle starts dipping like a hammock.
Step 4 — Attach the seat slats

Lay your four 2×6 boards across the top of the base frame. Leave a ¼-inch gap between each slat — this lets rainwater drain instead of pooling on the surface. Secure each slat with two screws at each end.
Step 5 — Build the back frame
Assemble a second rectangular frame using your 60-inch and 12-inch 2×4 pieces. This becomes the skeleton of your backrest.
Step 6 — Attach the back frame to the seat

Stand the back frame up at the rear of the seat and secure it. For an upright seat, go 90 degrees. For a more relaxed, lounger feel, tilt it back to roughly 100 degrees and add a brace at the angle point. The angled version takes an extra 15 minutes and makes a noticeable comfort difference.
Step 7 — Add the back slats
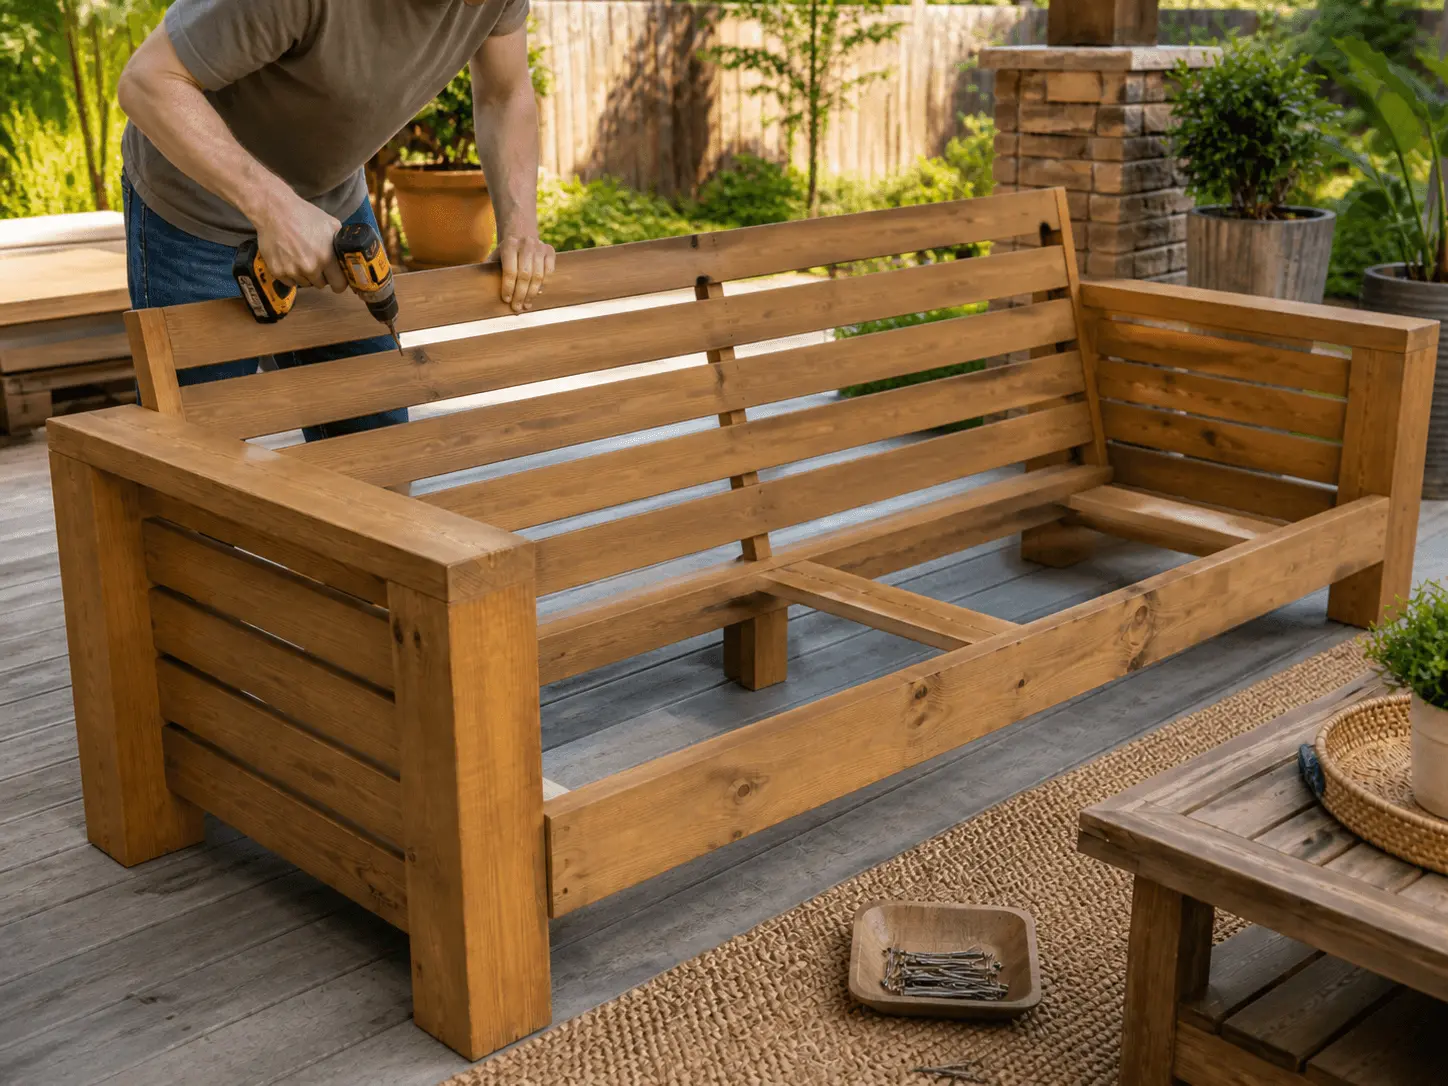
Attach your three back slats horizontally (or vertically if you prefer the look) across the back frame. Even spacing is key here — measure twice, drill once.
Step 8 — Sand everything
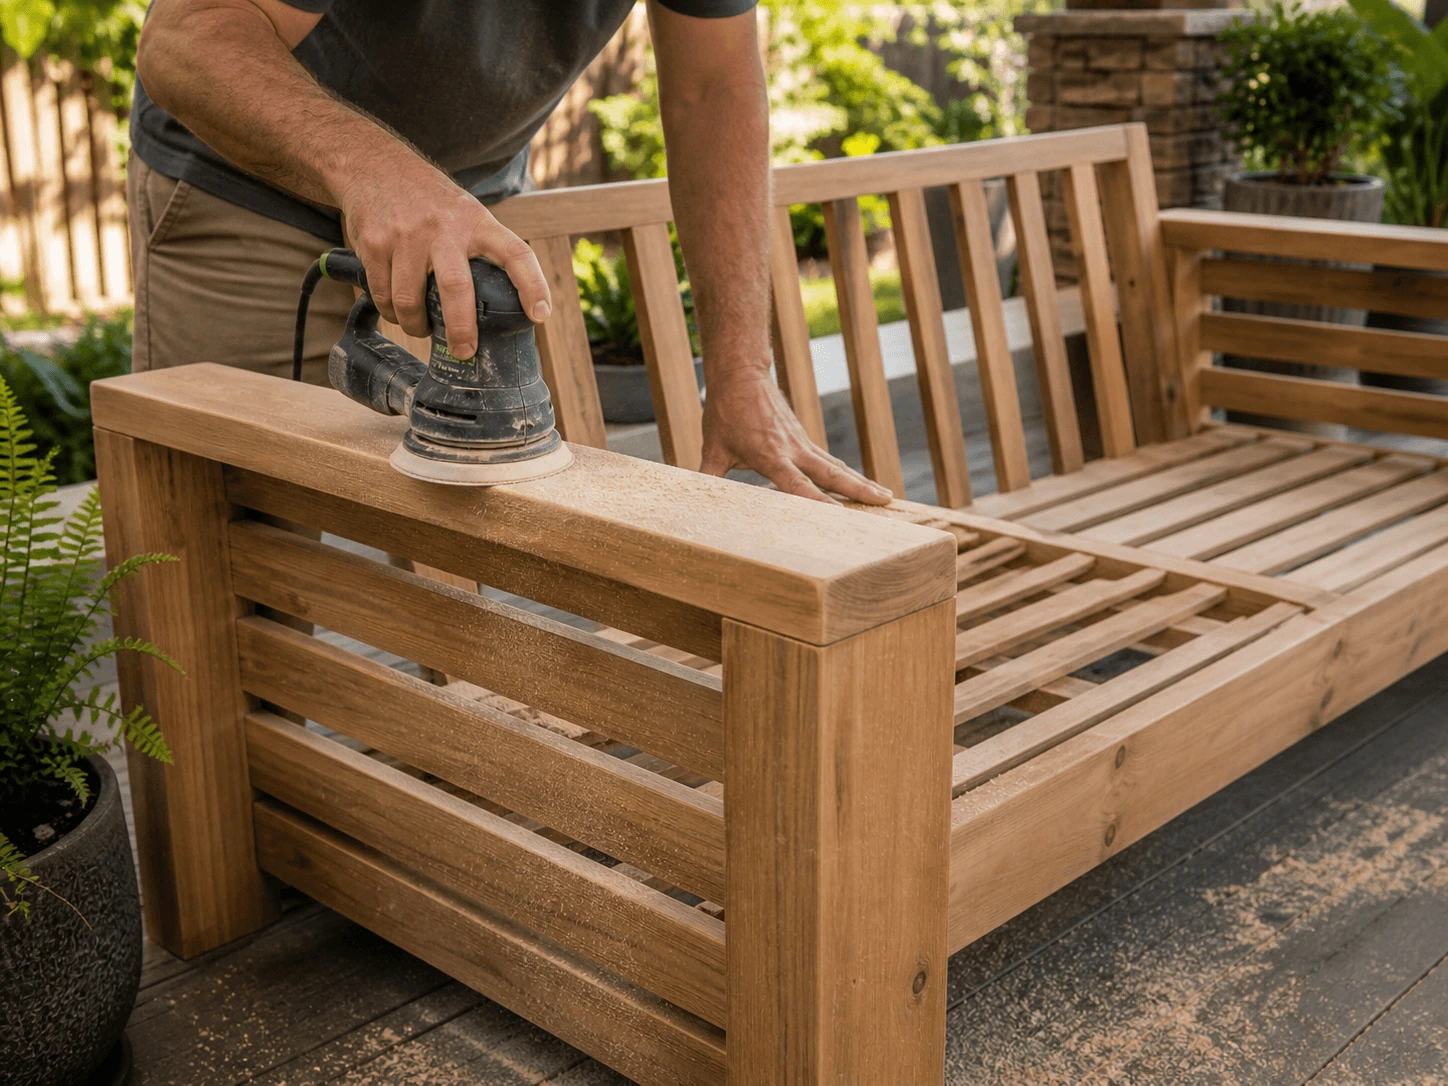
Take 30 minutes and sand the entire frame, paying extra attention to edges and corners. This step is what separates a rustic lumber pile from actual furniture. Use 80-grit to knock down rough spots, then finish with 120-grit for a smooth feel. Run your hand across every surface — if it snags, sand it again.
Step 9 — Stain or paint (optional but recommended)

Apply an exterior-grade wood stain or paint. One coat is the minimum; two coats is the difference between protection that lasts a season and protection that lasts several years.
Step 10 — Add cushions and sit down. You built a couch. Go use it.
Making It Look Like a $500 Patio Set
The build gets you 70% of the way there. The finish work closes the other 30% — and this is where the magic happens.
Choose the Right Finish
The stain or paint you choose sets the entire personality of the piece:
- Dark walnut stain — modern, sophisticated, pairs with everything
- Charcoal grey paint — contemporary patio look, very on-trend right now
- Whitewash — coastal or farmhouse aesthetic, beautiful against greenery
- Natural sealant only — rustic and raw, great if you love the look of natural wood grain
Pick the Right Cushions
Cushion thickness matters more than most people realize. A 3-inch cushion looks like an afterthought. A 5-inch or 6-inch deep-seat cushion looks intentional, expensive, and incredibly comfortable.
Go for neutral colors — grey, beige, white, or natural linen tones. They photograph beautifully and match any outdoor styling. And always choose outdoor fabric. IKEA’s HÅLLÖ and FRÖSÖN lines are genuinely great value — weather-resistant, fade-resistant, and easy to wash.
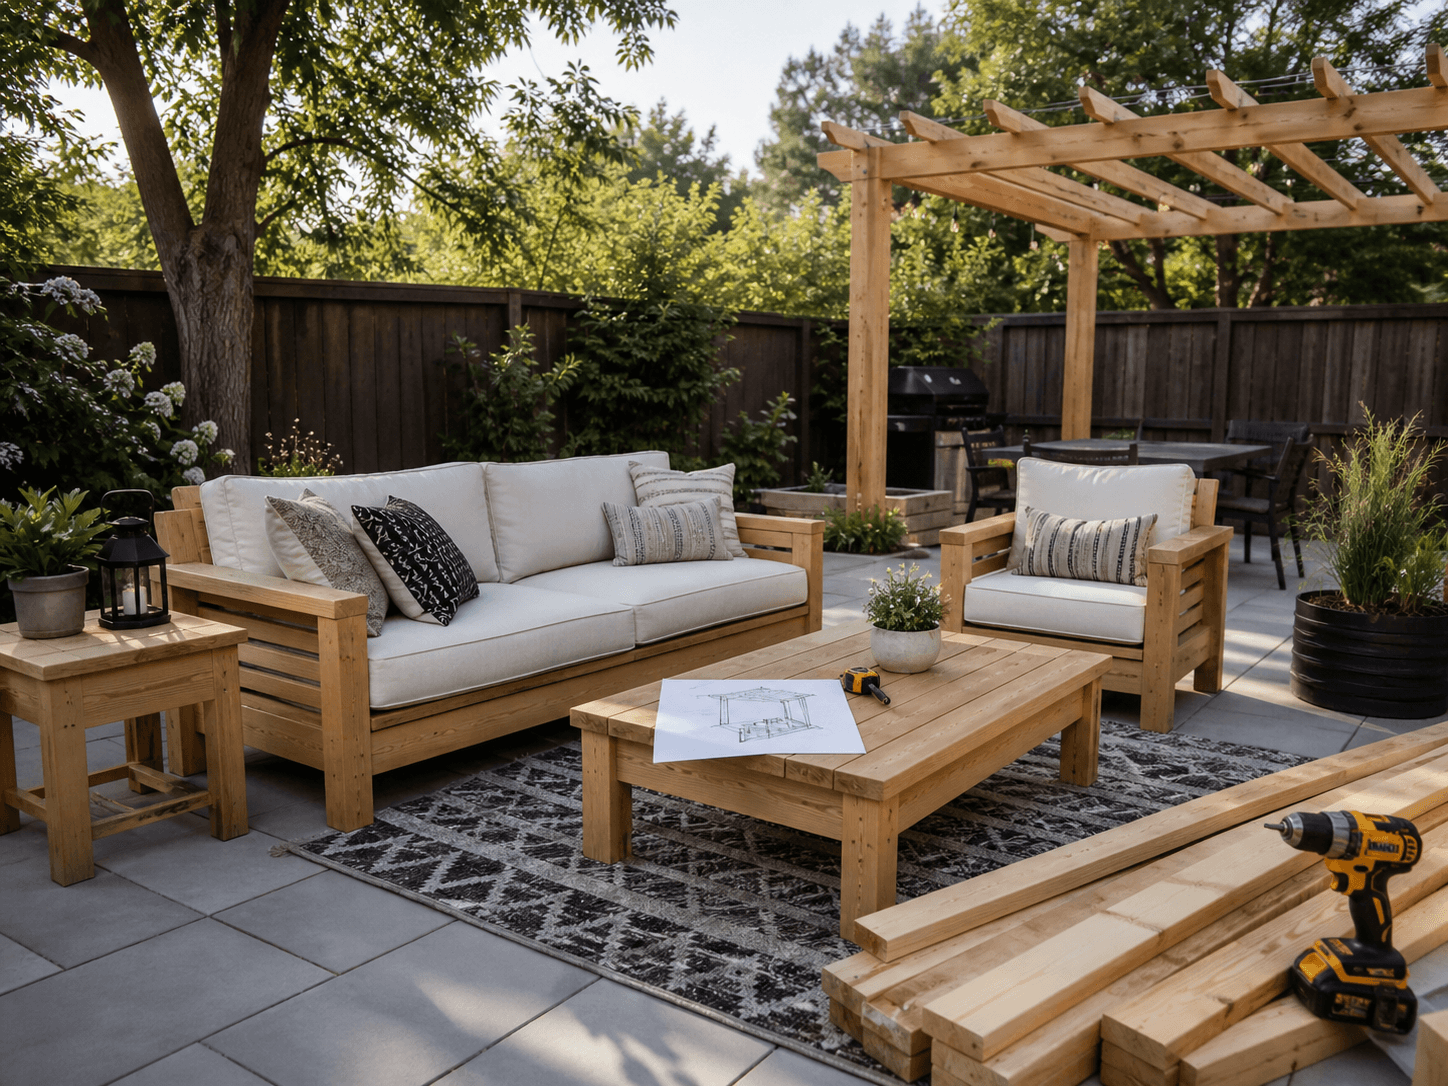
Style It Like a Pro
This is where you go from “cool DIY project” to “wait, you actually BUILT that?!”
- Add a matching coffee table in front using the same wood and same finish
- Lay an outdoor rug underneath to anchor the whole seating area
- Set a couple of potted plants on either side to frame the couch
And speaking of plants — we’ve already covered How to Build a Raised Garden Bed in detail. Those plants you’re growing make the perfect natural backdrop for your new outdoor living room. String some lights overhead and you’ve got a space that looks like it came out of an interior design magazine. Seriously.
Common Mistakes to Avoid
A few things will tank this build faster than anything else. Know them going in:
- Using indoor lumber without sealing it — untreated wood warps, cracks, and rots outdoors within one season. Seal everything before it goes outside.
- Skipping the center crossbar — your seat will sag. Add it. No exceptions.
- Building it too shallow — 30 inches is the minimum seat depth. Go shallower and it genuinely feels like sitting on a park bench.
- Forgetting the gaps between seat slats — without drainage gaps, water sits on the surface and accelerates rot from the inside out.
- Rushing the sanding — the difference between a rough build and a beautiful piece of outdoor furniture is often just 30 minutes of sanding. Take the time.
Upgrades and Matching Pieces — Build the Full Set
Here’s the thing nobody warns you about: you finish this couch and immediately start planning what comes next. Here’s your full wish list:
- Outdoor coffee table — same 2×4 construction, just shorter legs. Probably a 3-hour build.
- Side table / drink holder — a simple cube that sits right next to the armrest. Weekend-morning project.
- Matching armchair — scale the sofa frame down for a single-seat version. Use the exact same cut list logic.
- L-shape sectional — build a second couch unit and join them at a corner with a couple of connector boards.
- Storage ottoman — build a hinged box at seat height. Stores cushions, blankets, or garden tools and doubles as extra seating.
- Pergola overhead — this one’s the big one. Build a pergola above your new outdoor living room and you’ve created a fully covered outdoor space for a fraction of retail cost.
One Couch Is Never Just One Couch
Here’s what nobody tells you about DIY patio furniture: finishing your first piece is genuinely dangerous — for your weekend schedule. You set the drill down, step back, and look at what you just built for $30. Then you start sketching the matching coffee table. Then the armchair. Then the pergola. Then suddenly you’re pricing out lumber for a full outdoor kitchen and wondering exactly when that happened.
The build is addictive. And honestly, that’s a good thing.
But here’s where most people hit a wall: the plans. Free plans scattered across the internet are inconsistent — wrong measurements, missing steps, photos that skip the tricky parts entirely. You waste lumber, you waste time, and the frustration kills the momentum before the second project ever gets off the ground.
That’s exactly why Ted’s Woodworking is worth knowing about.
With over 16,000 step-by-step woodworking plans, Ted’s covers everything from weekend builds like this outdoor couch to full pergolas, potting benches, garden sheds, workshop storage, and beyond. Every single plan includes:
- ✅ Detailed diagrams — no guessing what goes where
- ✅ Precise cut lists — buy exactly what you need, nothing extra
- ✅ Beginner-friendly instructions — written for people still learning the craft
- ✅ Complete material lists — so you can cost out any project before buying a single board
No blurry Pinterest screenshots. No YouTube videos that cut away right before the hard part. No half-built projects collecting dust in your garage.
👉 [Explore Ted’s Woodworking Plans — 16,000+ Projects →]
Whether your next build is the matching coffee table, a garden shed, or the full backyard workshop of your dreams — the plan is already in there, waiting for you.
You’ve Got $30 and a Weekend. What’s Stopping You?
Let’s recap what you’re actually walking away with here: a custom outdoor couch, built to your exact dimensions, finished in your chosen style, for $30 in materials and one weekend of your time. Meanwhile, that $400 patio set at the store is still wobbling on the showroom floor.
This is genuinely one of the most satisfying builds a beginner can take on. The skills are minimal, the payoff is massive, and every single person who sits on it will ask you where you bought it. Take the compliment. You earned it.
New to building things entirely? Start with our How to Build a Raised Garden Bed guide — it uses the same tools, the same approach, and the same beginner-friendly logic that makes this couch build so approachable.
Now tell me — what are you building to go with it? A coffee table? A matching armchair? Or are you going straight for the pergola? Drop it in the comments. I genuinely want to know.