
Let me guess — you walked into a garden center, spotted a raised bed kit, flipped over the price tag, and immediately put it back. $150 for four flimsy boards held together with optimism? No thanks. Here’s the thing: you can build a better one yourself in a single weekend, for a fraction of the cost, even if you’ve never picked up a drill in your life. I built my first raised bed on a Saturday afternoon with zero woodworking experience, a borrowed drill, and a vague sense of determination. By Sunday evening, I was planting tomatoes. This guide walks you through everything — free plans included.
Why a Raised Garden Bed Is Worth Every Minute
Before we get into the how, let’s talk about the why — because once you understand what a raised bed actually does for you, you’ll want to build three of them.
You’re in Control of Everything
Drainage, soil quality, pH levels — all of it. In-ground gardening means fighting whatever your yard throws at you: clay-heavy soil, poor drainage, rock-solid ground that laughs at your trowel. With a raised bed, you fill it with exactly the right soil mix. Your plants grow faster, stronger, and happier. It’s almost unfair.
Your Back Will Thank You
Bending over a ground-level garden bed for an hour is a one-way ticket to a sore back. Raise that bed up 10 to 12 inches and suddenly you’re working at a comfortable height. Less strain, more enjoyment. That’s the deal.
Fewer Weeds, Fewer Pests, More Growing Season
Raised beds warm up faster in spring, which means you can start planting earlier than your neighbors. Weeds have a much harder time invading from below when you’ve got a solid soil mix and an optional weed barrier underneath. And pests? They’re not gone, but they’re significantly easier to manage in a contained space.
It Works Almost Anywhere
Patio. Lawn. Gravel driveway. Concrete backyard. A raised bed doesn’t care what’s underneath it — it brings its own party. You can even set one up on a rooftop if that’s your situation. IMO, that flexibility alone makes it the best garden option for most people.
What You’ll Need Before You Start
One of the biggest beginner mistakes is showing up at the hardware store without a list and wandering around for two hours. Don’t do that to yourself. Here’s exactly what to grab.
Materials for a Standard 4×8 ft Raised Bed
- 2×10 or 2×12 cedar or pine boards — cedar is the clear winner here
- Corner brackets or 4×4 corner posts — for joining the frame together
- 3-inch galvanized deck screws — galvanized means they won’t rust
- Landscape fabric (optional) — a weed barrier for the bottom
- Quality raised-bed soil mix — more on this later
💡 Beginner tip: Always choose cedar if your budget allows. It’s naturally rot-resistant and completely chemical-free, which matters when you’re growing food. Pine works but will break down faster, especially if your climate is wet.
Tools You’ll Need
- Circular saw or miter saw (or ask the hardware store to cut for you — most do this for free or a small fee)
- Drill and drill bits
- Tape measure and carpenter’s square
- Level
- Safety glasses and gloves
That’s it. No fancy workshop required. 🙂
Choosing the Right Size and Location
Size: Bigger Isn’t Always Better
The most popular size — and the one we’re building today — is 4 feet wide by 8 feet long. Why 4 feet wide? Because you can reach the center from either side without stepping into the bed. Step into your raised bed and you’ll compact the soil, which defeats the whole purpose.
Advertisement
Here’s a quick size guide:
- 4×4 ft — Great for small spaces or a first project
- 4×8 ft — The sweet spot for most gardeners
- 4×12 ft — For the ambitious among us
Location: This Part Actually Matters
Pick the wrong spot and you’ll grow very healthy weeds with absolutely zero vegetables. Your raised bed needs:
- At least 6 hours of direct sunlight per day — non-negotiable for most vegetables
- Flat or near-flat ground — slight slopes are workable, but keep it reasonable
- Away from large tree roots — they’ll compete with your plants for water and nutrients
- Good access to water — you’ll be out there with a hose or watering can regularly
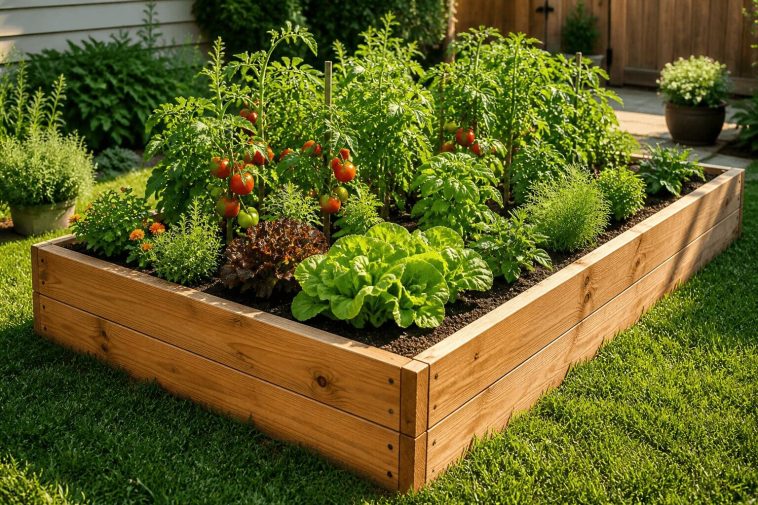
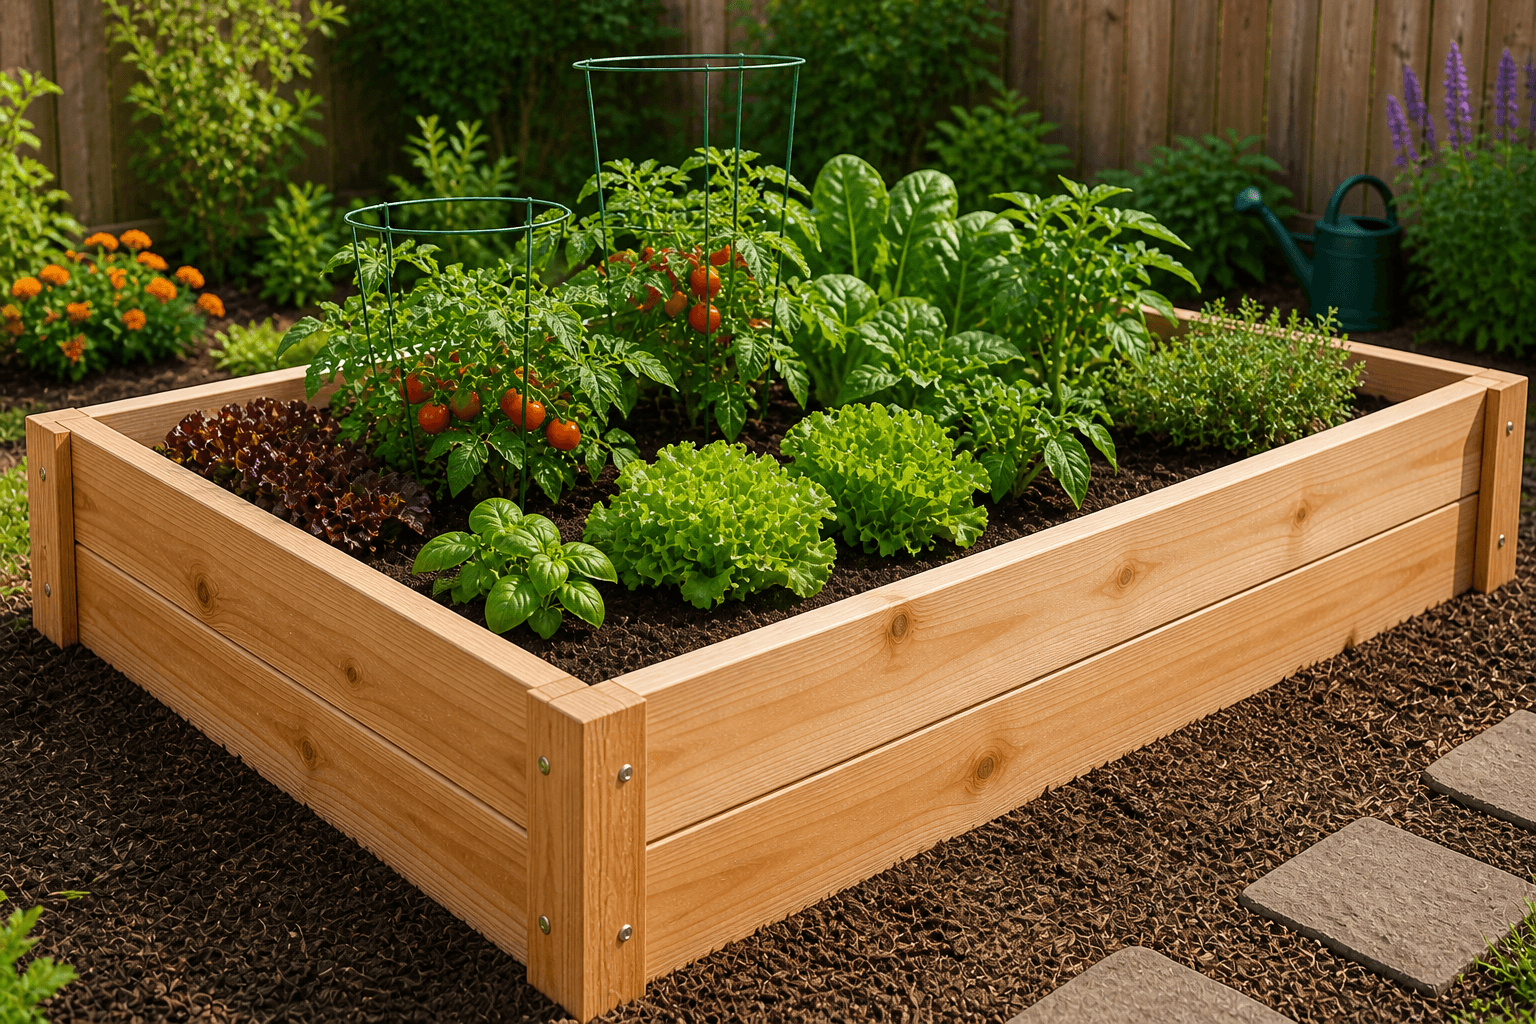
Free Beginner Plan: How to Build the Classic 4×8 Raised Bed
Alright, here’s the part you came for. This is a straightforward build — no complicated joinery, no advanced tools, no prior experience needed. Let’s go.
Your Cut List
Using 2×10 boards (which gives you about 9.25 inches of actual depth — plenty for most vegetables):
| Piece | Length | Quantity |
|---|---|---|
| Long sides | 96 inches (8 ft) | 2 |
| Short ends | 45 inches | 2 |
The short ends measure 45 inches rather than 48 because the long side boards overlap them at the corners. This is called a butt joint — the simplest and most beginner-friendly corner connection you can make.
Step-by-Step Build Walkthrough
Step 1 — Cut your boards
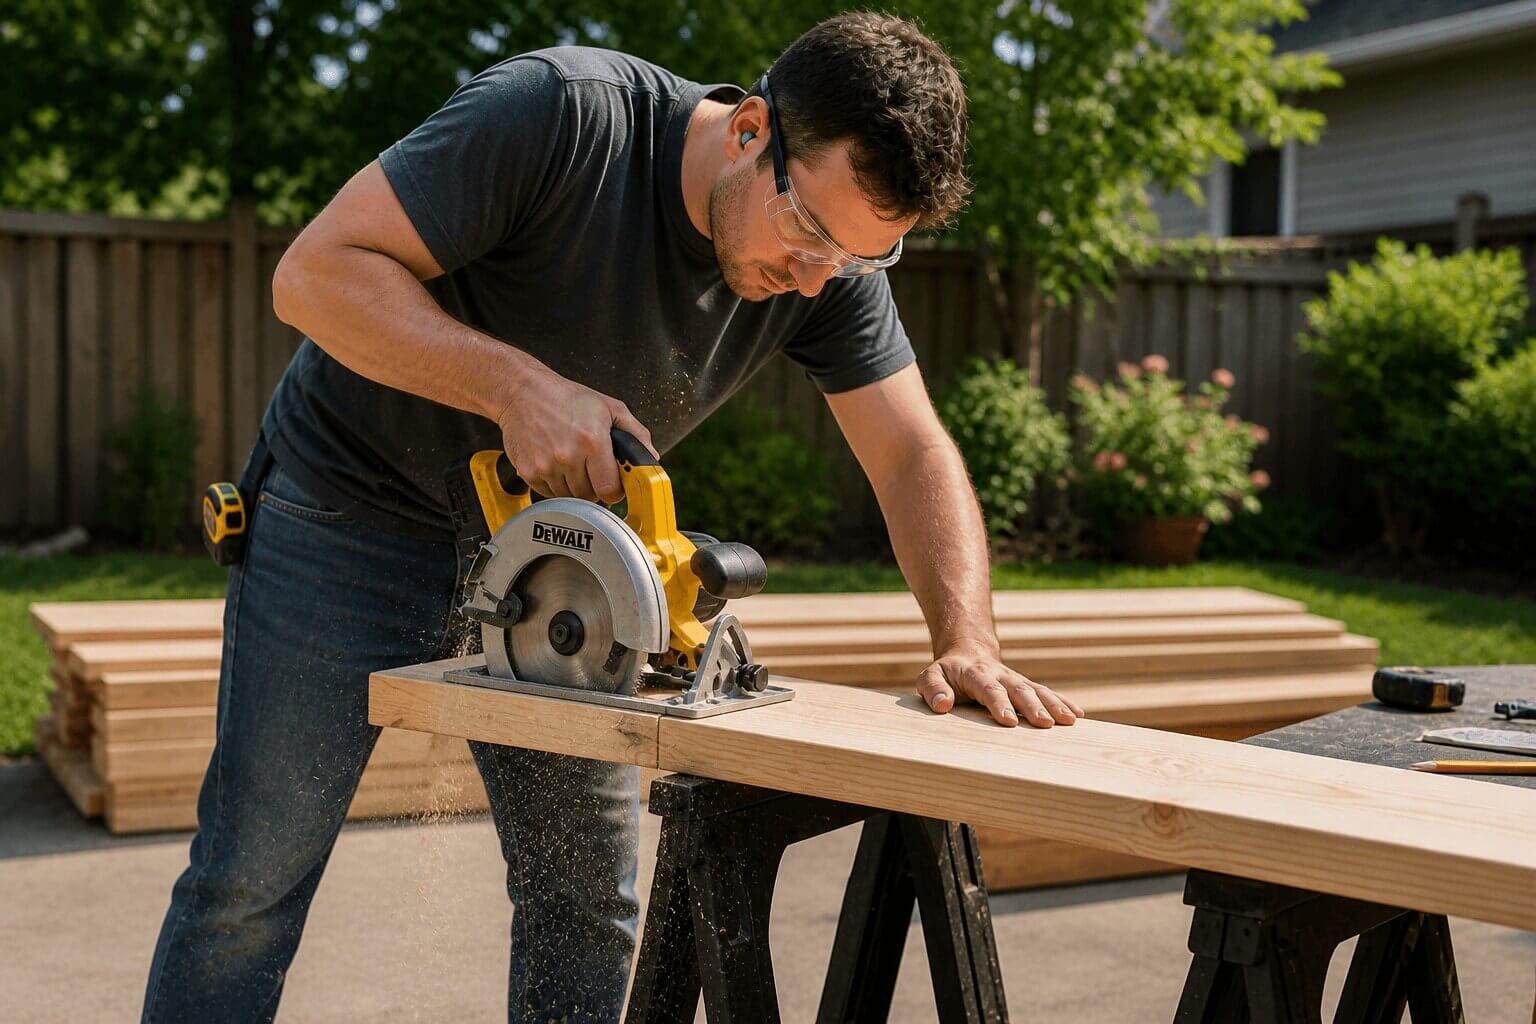
If you have a saw, cut to the dimensions above. If not, most hardware stores (Home Depot, Lowe’s, local lumber yards) will cut boards for you. Hand them your cut list and they’ll do the work.
Step 2 — Pre-drill your holes
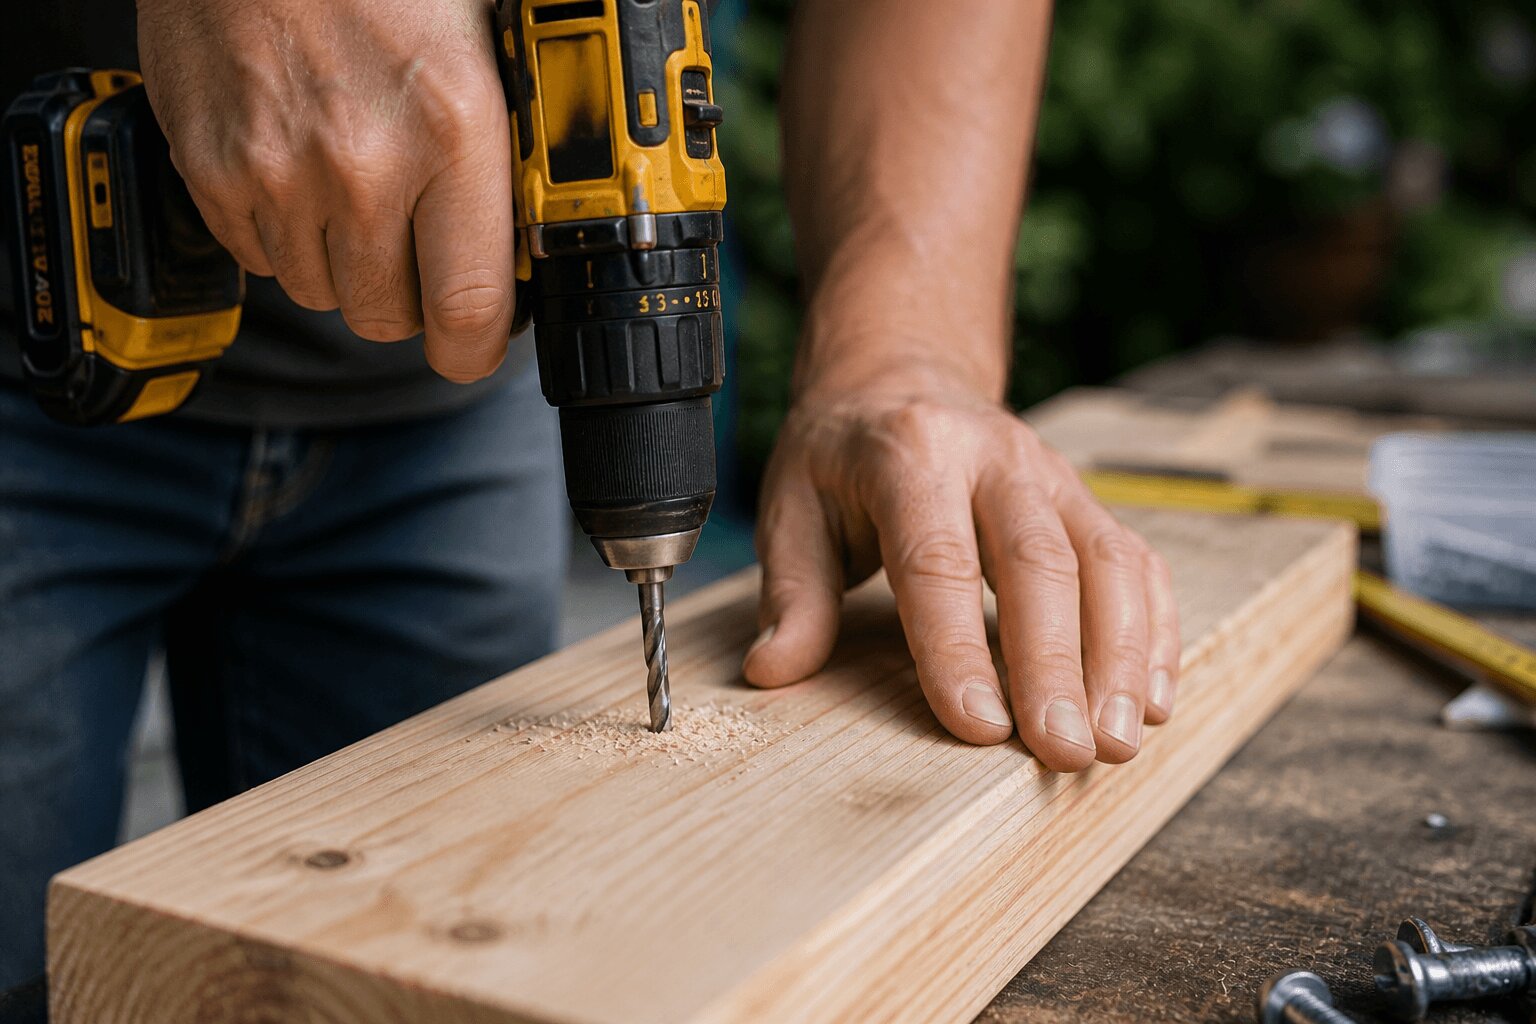
Before driving any screws near the end of a board, pre-drill a pilot hole slightly smaller than your screw. Skip this step and you’ll split the wood. Trust me on this one — I learned the hard way. :/
Step 3 — Assemble the frame
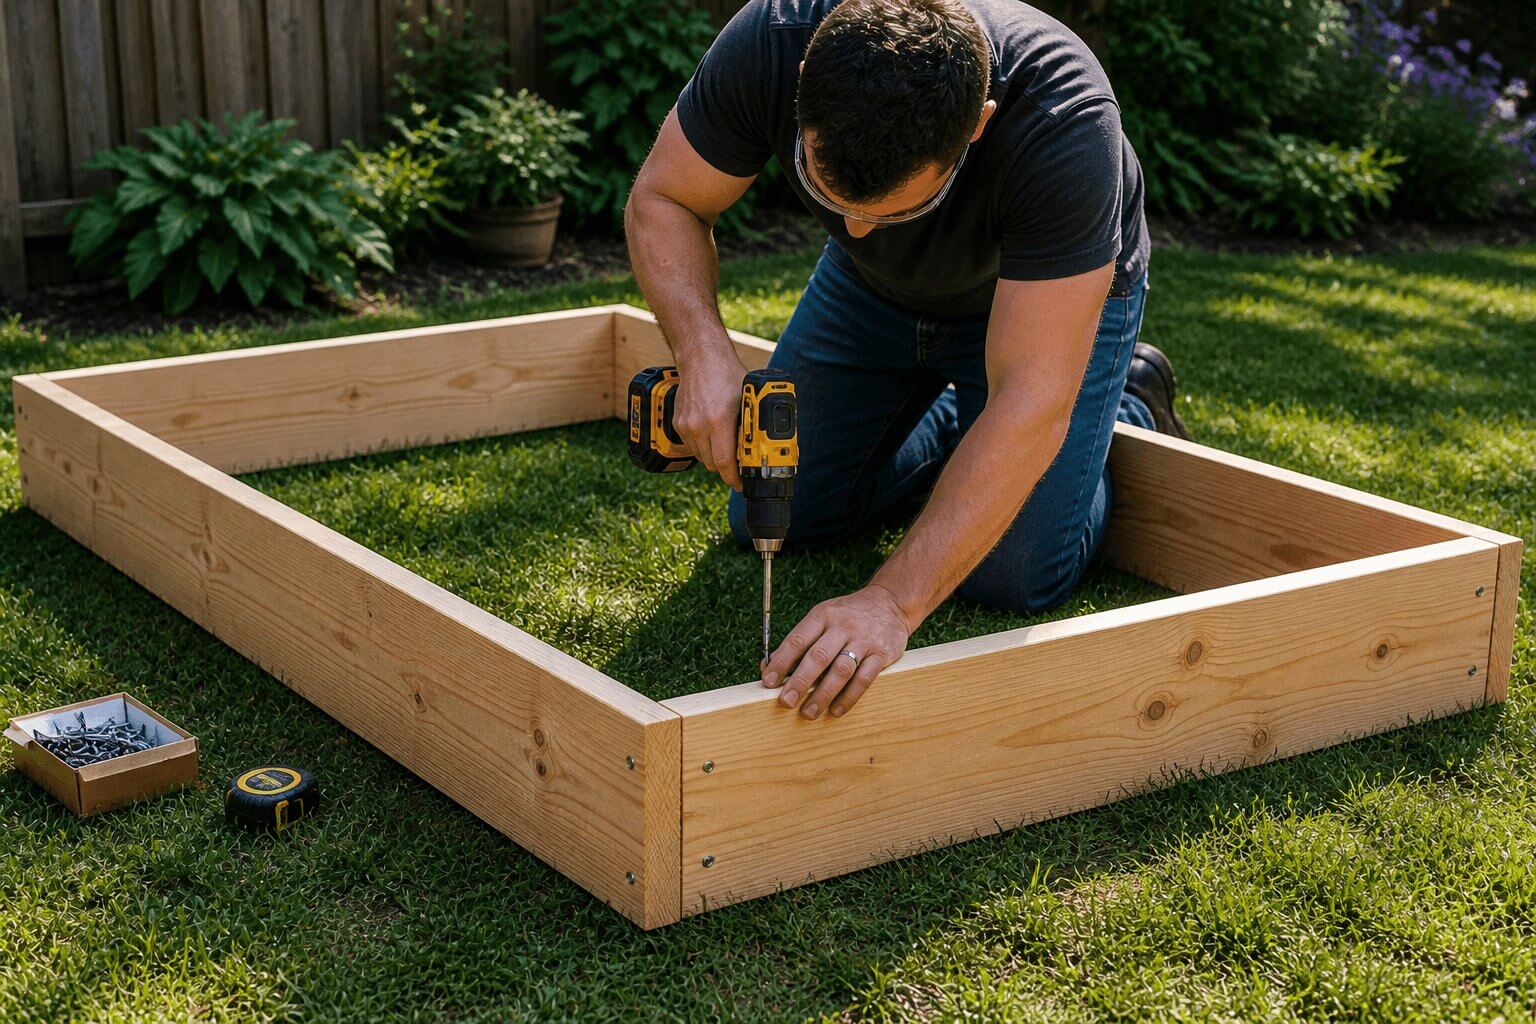
Stand your boards on edge and join the corners. Drive two or three screws through the long board into the end of the short board at each corner. If you’re using 4×4 corner posts, attach each board to the post instead — it’s even sturdier.
Step 4 — Square the corners
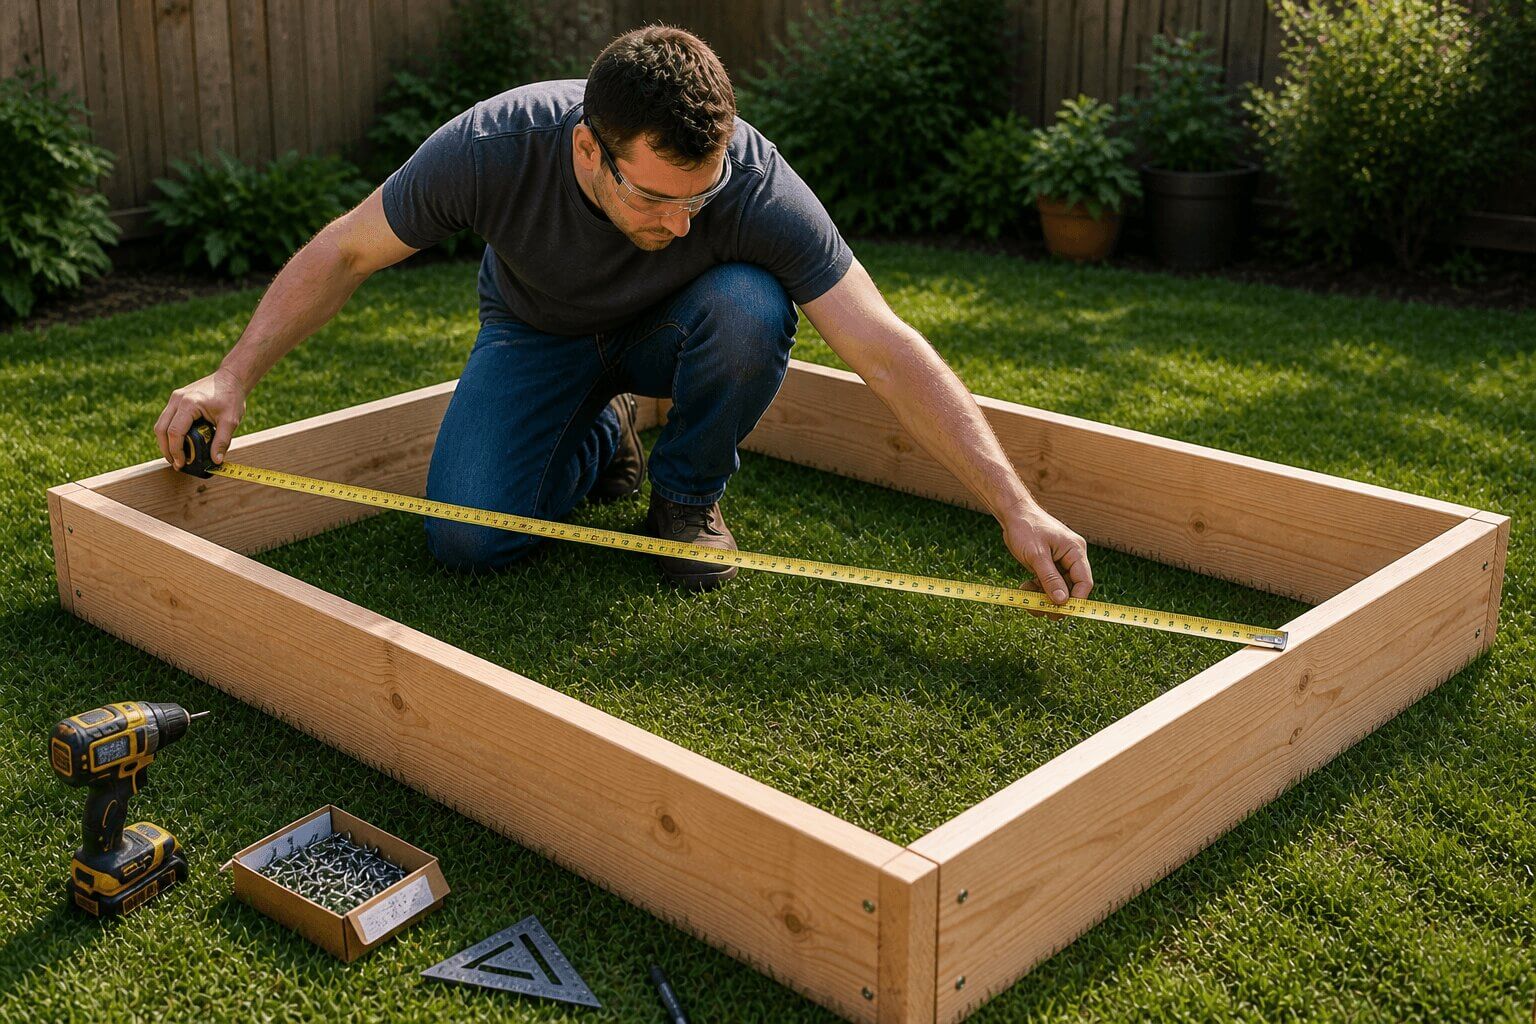
This step is where a lot of beginners zone out, and then they end up with a parallelogram. Measure diagonally from corner to corner — both measurements should be identical. If they’re not, nudge the frame gently until they match, then lock it in with your screws.
Step 5 — Set it in position
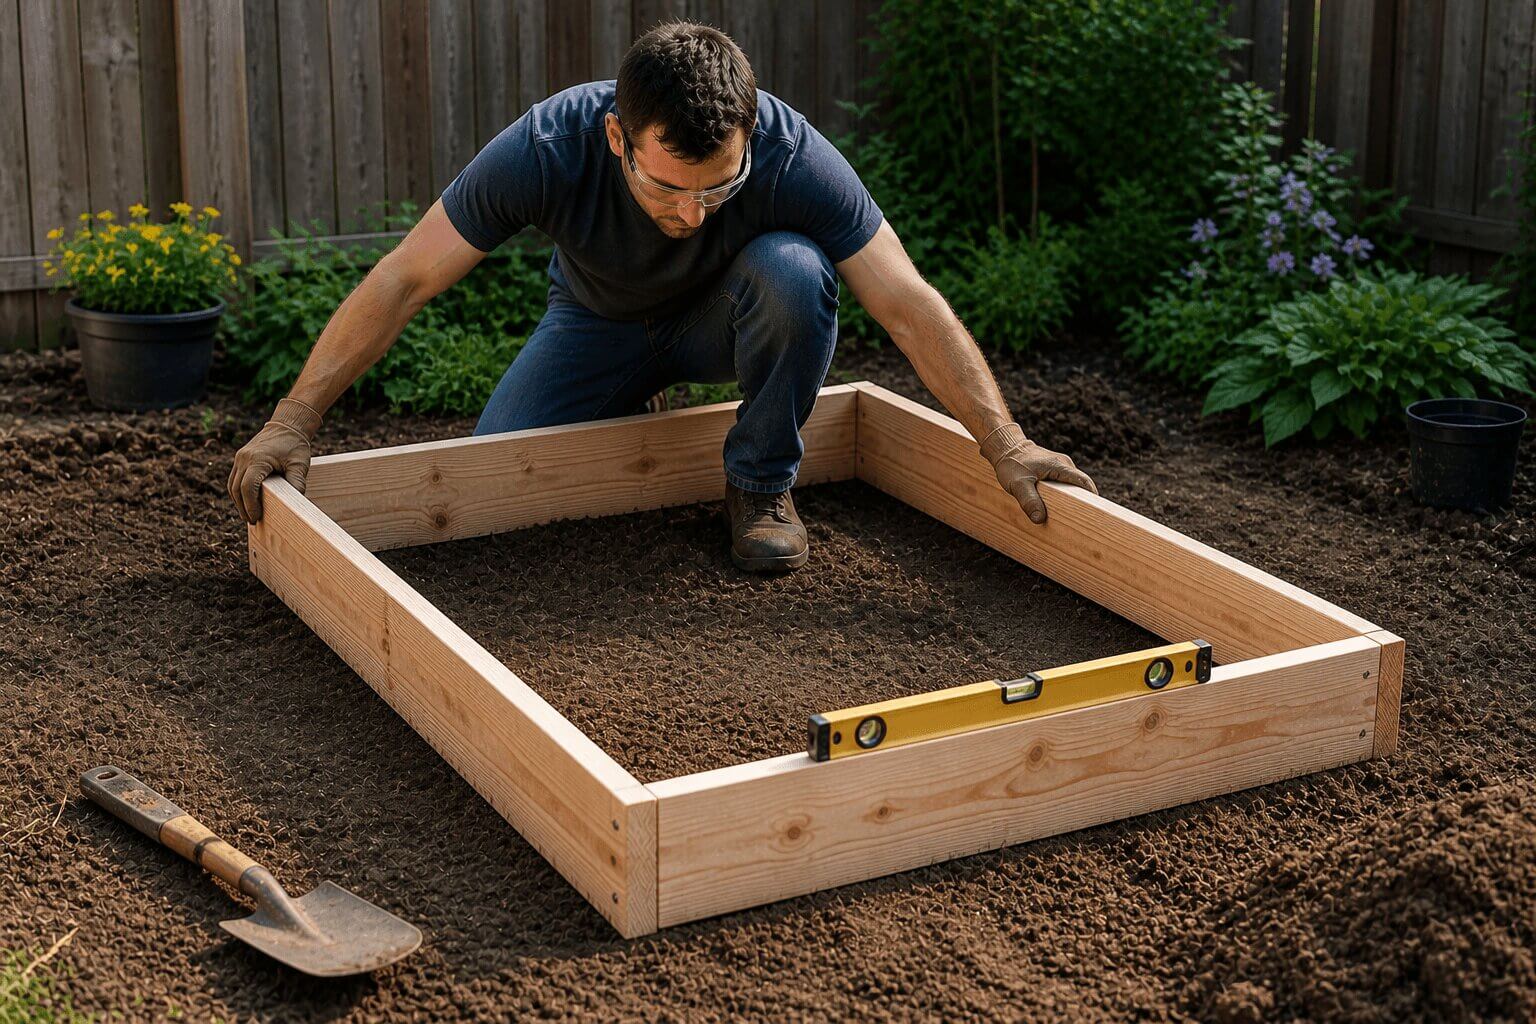
Move the frame to your chosen location. Mark the outline with spray paint or stakes. Remove any grass or weeds inside the outline, or plan to smother them with cardboard beneath your landscape fabric.
Step 6 — Add a weed barrier (optional but recommended)
Lay landscape fabric inside the bottom of the frame and staple it to the boards. This stops weeds from pushing up through the bottom without blocking drainage — water still passes through freely.
Step 7 — Fill with soil. This is where people often go wrong
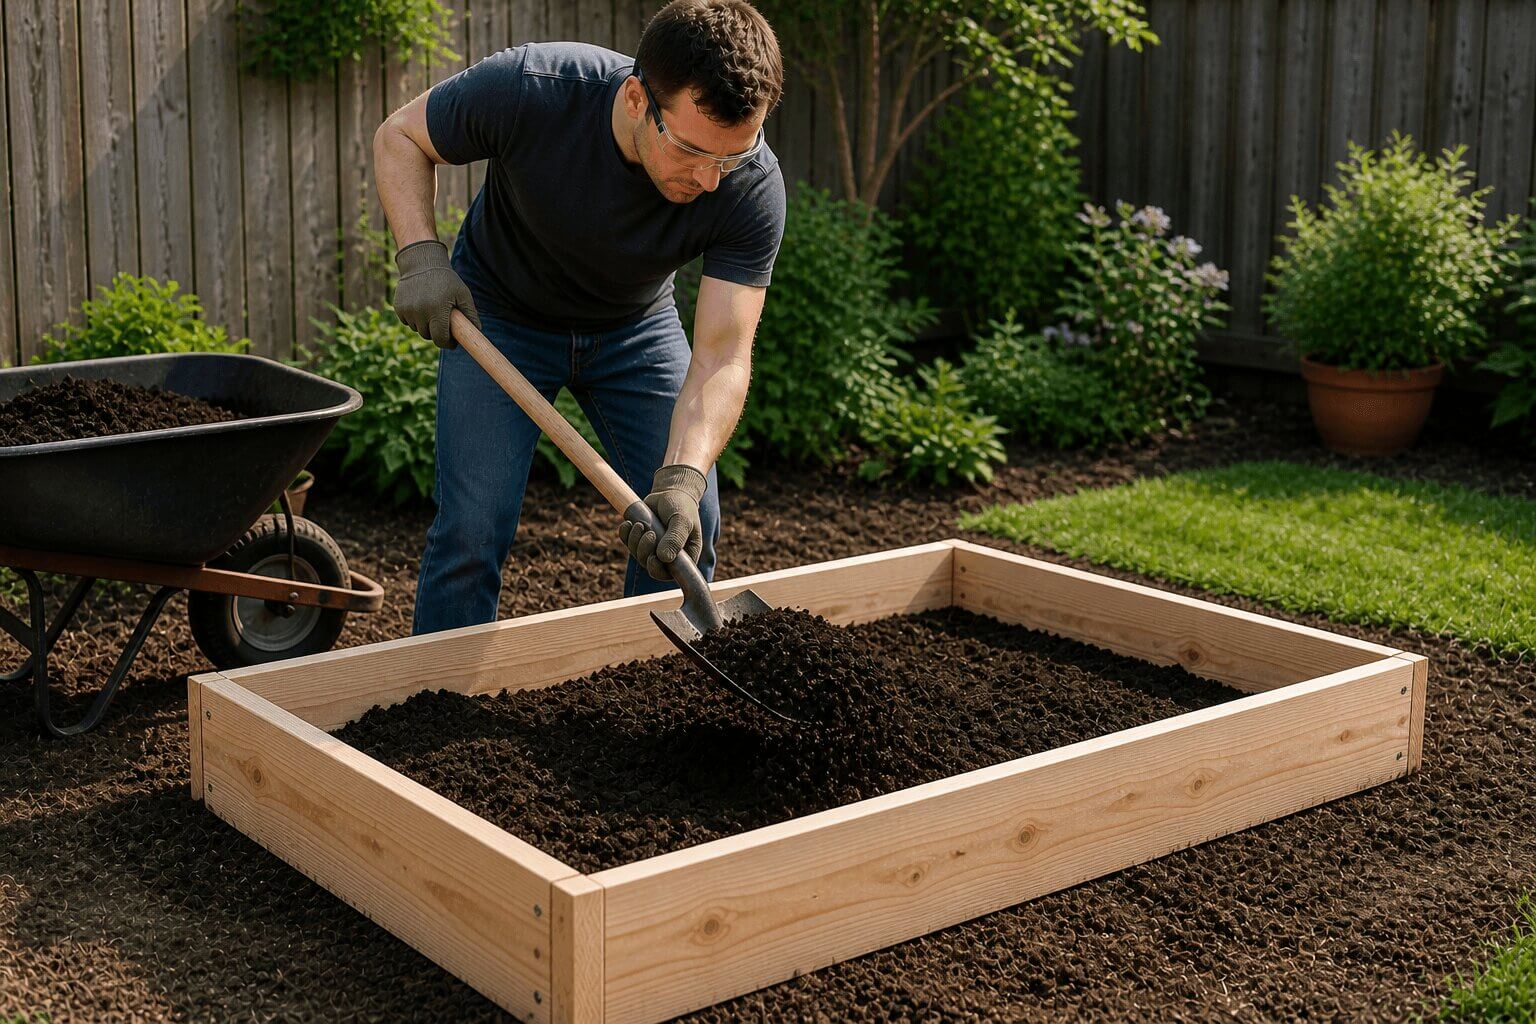
They fill the bed with plain garden dirt from the yard, and then wonder why nothing grows well. Garden soil is too dense and compacts badly in a raised bed. Instead, use a 60/40 mix of quality topsoil and compost. Some gardeners swear by the “Mel’s Mix” — one third compost, one third peat moss, one third coarse vermiculite. Either way works beautifully.
Step 8 — Plant and water in
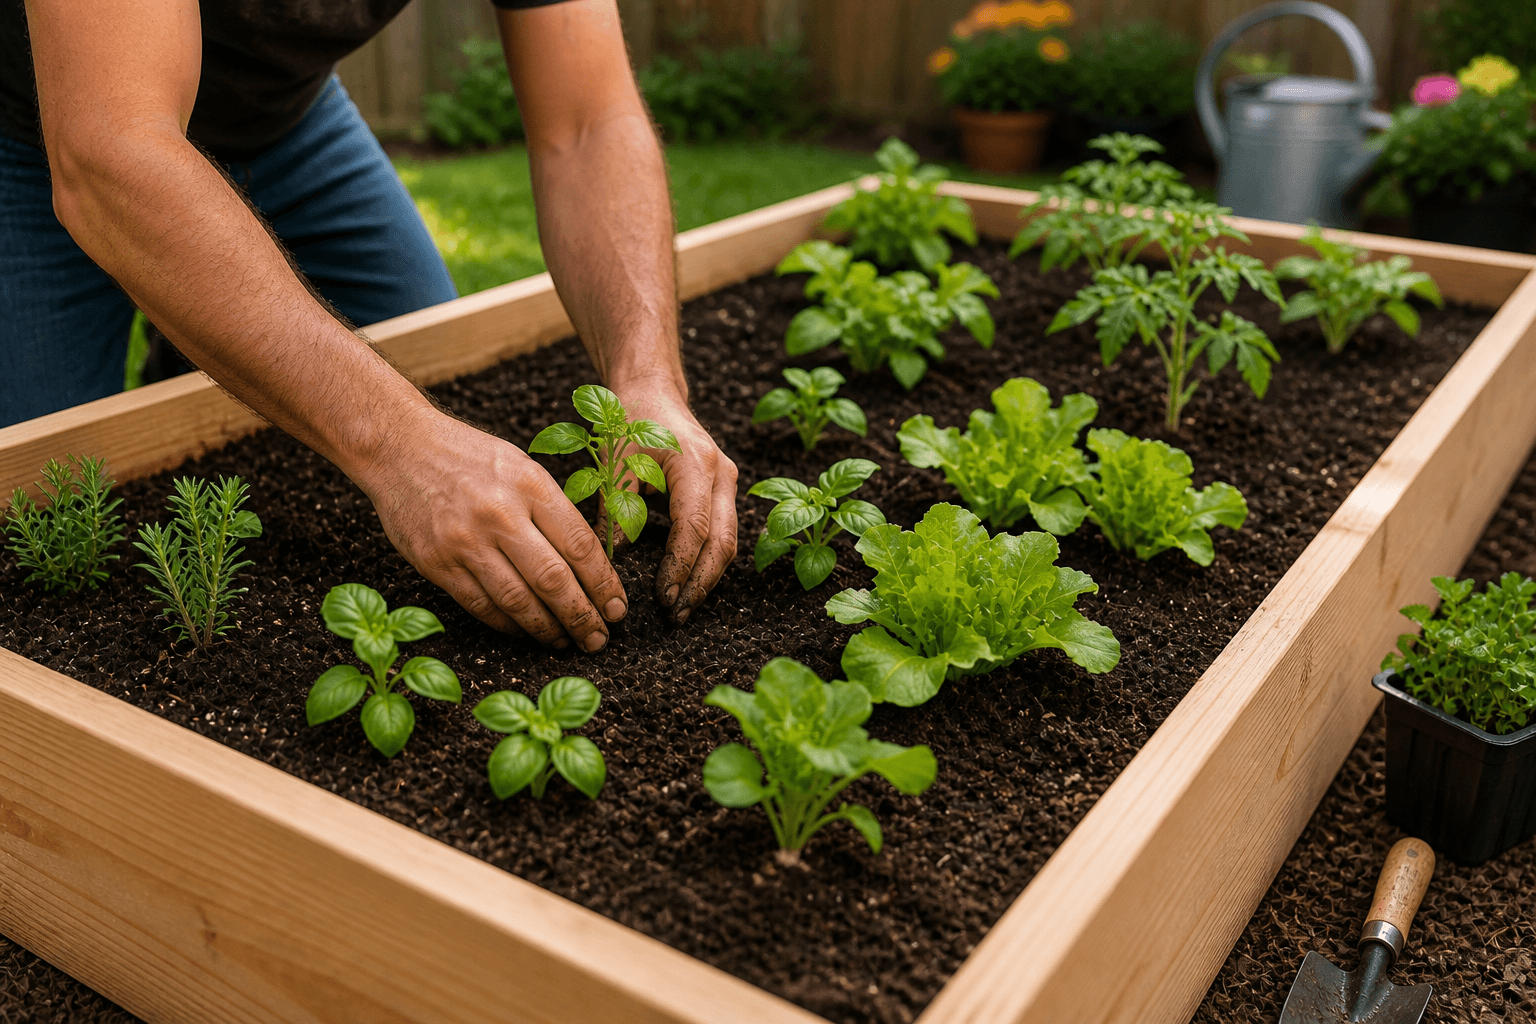
You’re done. Go put some plants in the ground. Or seeds. Or both. You built this thing — now use it.
Common Beginner Mistakes (So You Don’t Have to Make Them)
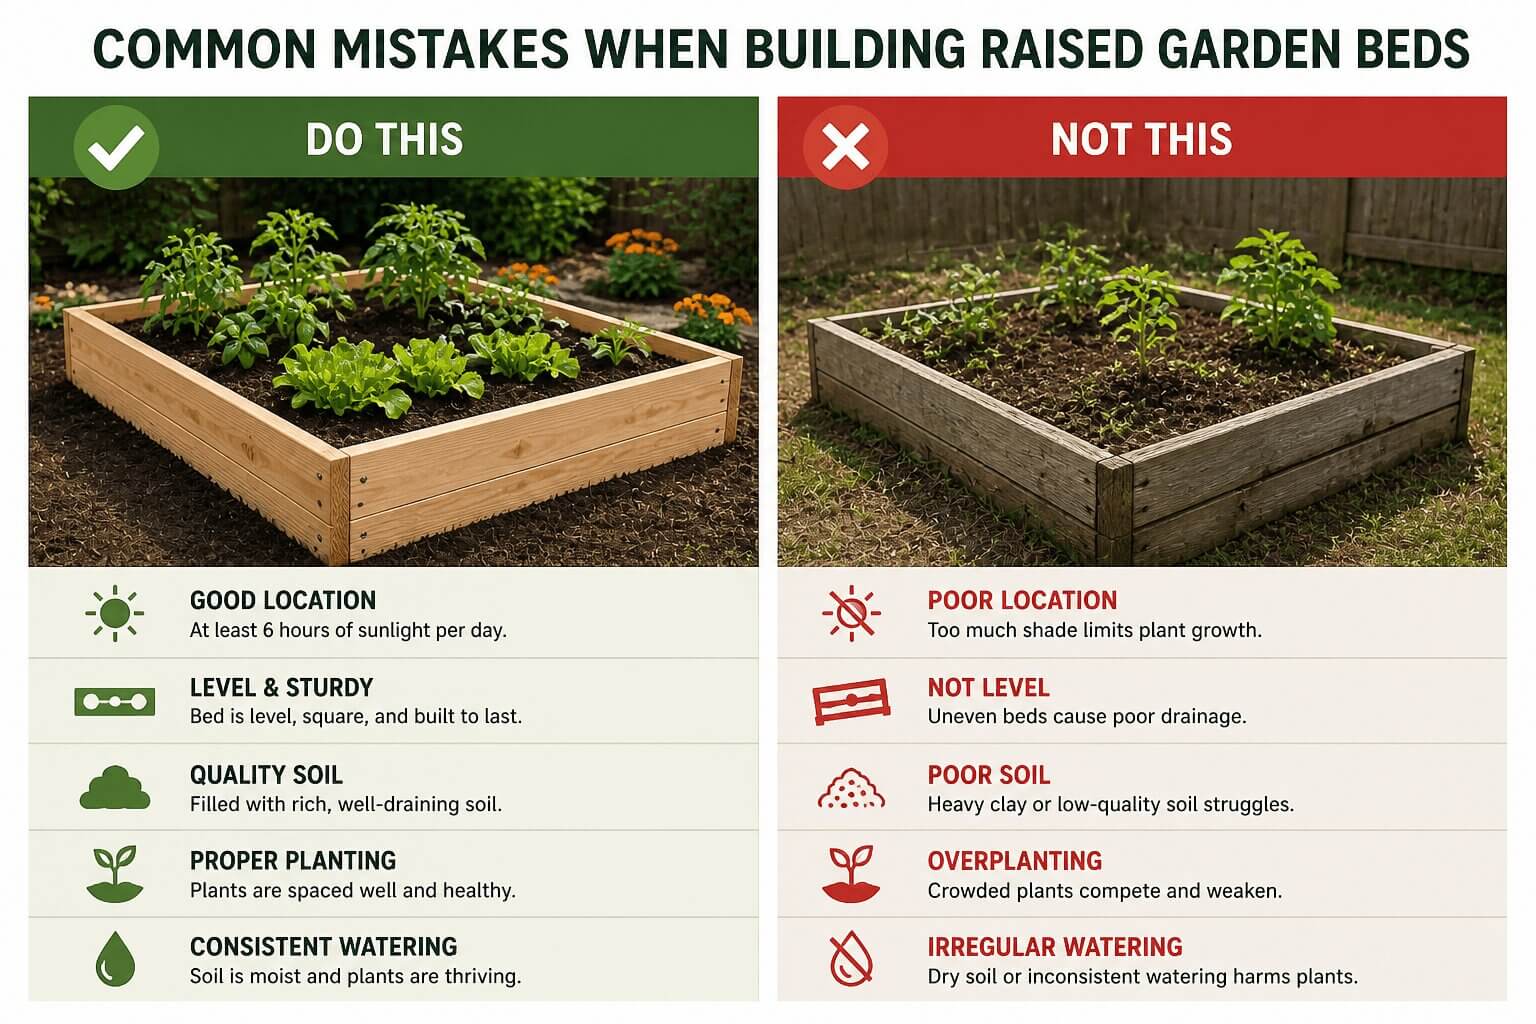
FYI, these are the errors I see most often — and most of them are completely avoidable with a little heads-up.
- Using pressure-treated lumber near food. Older treated wood contains chemicals you don’t want anywhere near vegetables. Stick to cedar, redwood, or untreated pine.
- Skipping the pre-drill. Boards split. Screws strip. Save yourself the frustration and drill those pilot holes.
- Placing the bed in partial shade. Six hours of sun is the minimum. Less than that and your vegetables will sulk.
- Not filling the bed deep enough. Aim for at least 10 to 12 inches of soil depth. Shallow beds stress plant roots and dry out way too fast.
- Using straight-from-the-yard dirt. It compacts, it drains poorly, and it brings weeds with it. Always use a proper raised-bed soil mix.
Upgrades and Variations — For When You’re Hooked
Here’s a little secret: nobody builds just one raised bed. Once you see how well it works, you’ll start planning the next one before the first one is even planted. Here are some popular upgrades to think about:
- Trellis wall — Attach a simple vertical frame to one end for climbing plants like beans, cucumbers, or peas
- Cold frame lid — Add a hinged polycarbonate lid and extend your growing season well into fall and winter
- Stacked frames — Build two identical frames and stack them for an extra-deep, tiered look that works great for root vegetables
- Multi-bed layout — Plan a series of beds with defined pathways between them using gravel, mulch, or stepping stones
- Drip irrigation — Run a simple drip line inside the bed and connect it to a timer. Set it, forget it, harvest things. Highly recommended.
Ready to Go Further? This Is Where Most Beginners Get Stuck
Building your first raised garden bed is a genuine confidence boost — and once it’s done, you’ll immediately start eyeing your next project. Maybe a second bed with a built-in trellis. Maybe a potting bench. A garden storage box. A pergola. A chicken coop.
Here’s the thing: the hardest part of any woodworking project isn’t the cutting or the drilling. It’s not having a clear, reliable plan in front of you before you touch a single board. That moment of staring at a pile of lumber with no idea what goes where — that’s where most people give up.
That’s where Ted’s Woodworking changes everything.
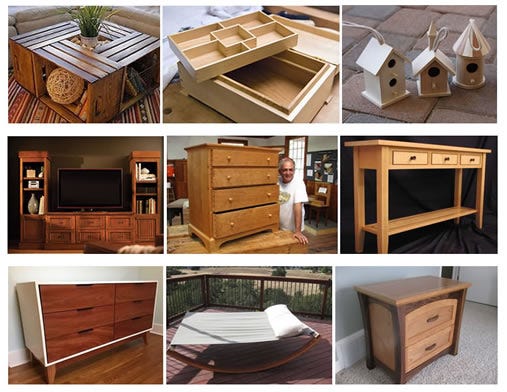
Ted’s Woodworking is the largest collection of step-by-step woodworking plans available — over 16,000 projects, all with detailed diagrams, precise cut lists, and instructions written for real beginners. Whether you want to build raised beds in every corner of your yard, a full outdoor kitchen surround, or a workshop full of tools and storage — the plans are already there, ready to go.
No guessing. No scaling measurements off a blurry Pinterest photo. No half-finished projects gathering dust.
👉 [Explore Ted’s Woodworking Plans Here →]
It’s the one resource I wish I’d had when I built my first raised bed — because once I had real plans in front of me, the projects didn’t stop.
Wrapping It Up
Let’s be honest — a raised garden bed is one of the most satisfying weekend builds you’ll ever do. You start Saturday morning with a stack of boards and end Sunday afternoon with a legitimate growing space that’ll feed you for years. No experience required. No expensive tools. No excuses.
The 4×8 plan in this article gives you everything you need to get started today. Cut the boards, drill the holes, square the corners, fill with the right soil, and plant something. That’s genuinely all there is to it.
And when you inevitably want to build more — a second bed, a potting bench, a trellis system — Ted’s Woodworking has 16,000 reasons to keep going.
Now tell me — what are you planning to grow? Drop it in the comments. I’m always curious what people put in their first raised bed. (Mine was tomatoes. Obviously.