Remember that time you scrolled through Pinterest at 2 AM and stumbled upon something so beautiful you just had to try it? That’s exactly how I fell down the wood burning rabbit hole. One gorgeous burned wooden spoon later, and I was hooked.
Wood burning—or pyrography if you want to get fancy—is having a serious moment right now. And honestly? I totally get why. You’re literally drawing with fire, creating permanent art on wood that looks way more expensive than it actually is. Plus, it’s ridiculously relaxing (once you get past the initial “please don’t burn the house down” nerves).
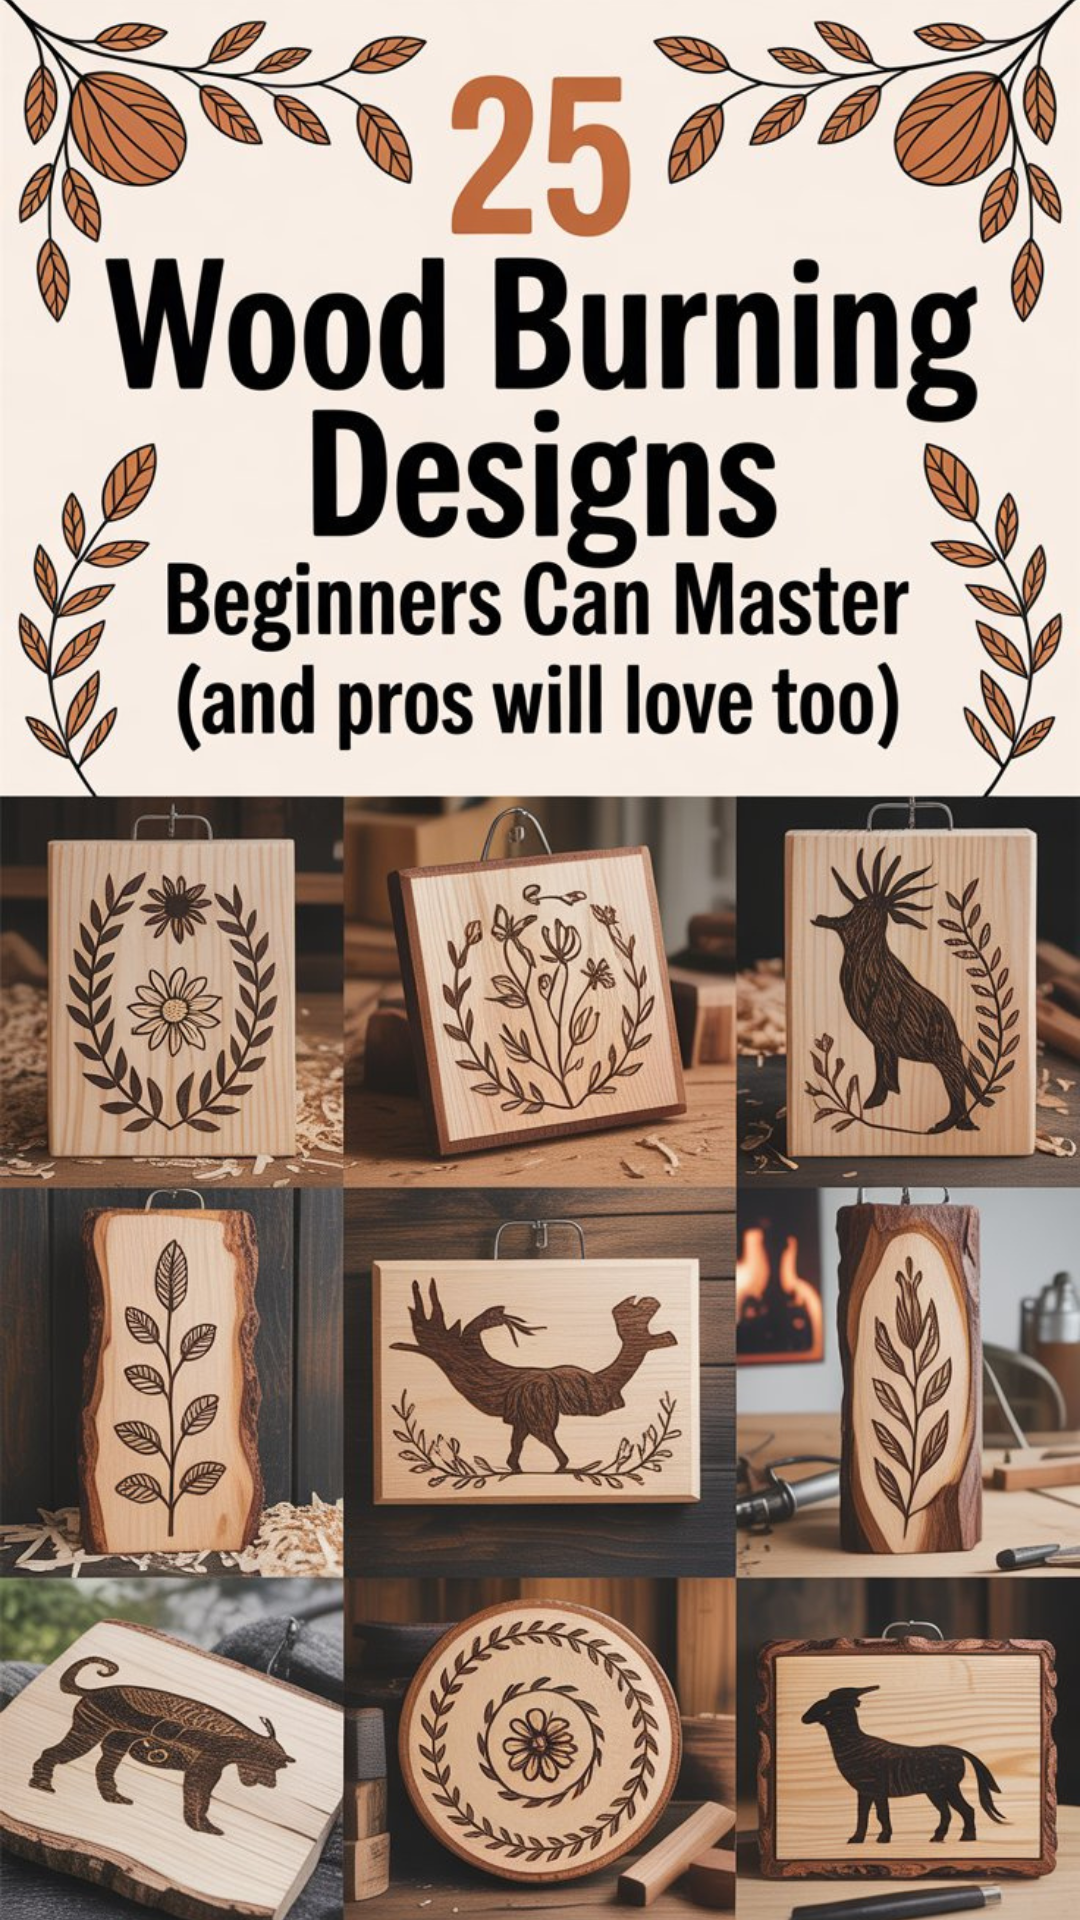
Here’s the best part: wood burning is cheap to start, makes incredible personalized gifts, and you can go from complete newbie to creating museum-worthy pieces. In this guide, I’m sharing 25 creative wood burning ideas that’ll take you from “what’s a wood burning pen?” to “yeah, I made that” territory. We’ll cover everything from simple beginner projects to advanced masterpieces that’ll make your friends say “wait, YOU made that?!”
All you need to start is a basic wood burning tool (around $20-30), some wood, and a willingness to embrace a few scorch marks along the way.
Getting Started with Wood Burning
Before we jump into the fun stuff, let’s talk tools. You don’t need to drop hundreds of dollars—a basic wood burning pen starter kit will do just fine. Think of it like a soldering iron that you use for art instead of electronics.
Wood choice matters more than you’d think. Basswood is your best friend as a beginner—it’s soft, burns evenly, and doesn’t have annoying grain patterns fighting you. Birch works great too and has a lovely light color. Pine? It’s cheap and accessible, but those resin pockets can be temperamental. Start with basswood, trust me on this one.
Safety stuff (I know, boring, but necessary): Work in a well-ventilated area because burning wood smells… well, like burning wood. Crack a window, use a fan, or work outside. Keep a heat-resistant surface under your work, and for the love of all things holy, don’t touch the hot tip. Yeah, I learned that one the hard way.
Basic techniques you’ll use:
- Outlining – Drawing lines and shapes (your starting point for everything)
- Shading – Creating depth and dimension by varying pressure and speed
- Stippling – Tiny dots that build up texture (surprisingly addictive once you start)
The learning curve isn’t steep—you’ll create something cool on your first try. Will it be perfect? Probably not. Will it be uniquely yours? Absolutely.
Beginner-Friendly Wood Burning Ideas
1. Wooden Spoons with Quotes
Let’s start with the project that started my obsession. Grab a plain wooden spoon from the dollar store and burn a favorite quote or saying onto the handle. “Stir Things Up” or “Made with Love” are classics, but get creative! These make fantastic housewarming gifts and take about 20-30 minutes. The narrow handle is perfect for practicing your lettering without committing to a huge project.
2. Personalized Cutting Boards
Want to look like a crafting genius with minimal effort? Burn someone’s name, a date, or a simple design onto a cutting board. This screams “I put thought into this gift!” even though it genuinely only takes an hour. Stick with simple fonts and maybe add a small decorative element in the corner. Pro tip: use boards labeled “decorative use” since heavily burned food-contact surfaces can be sketchy.
3. Wooden Bookmarks
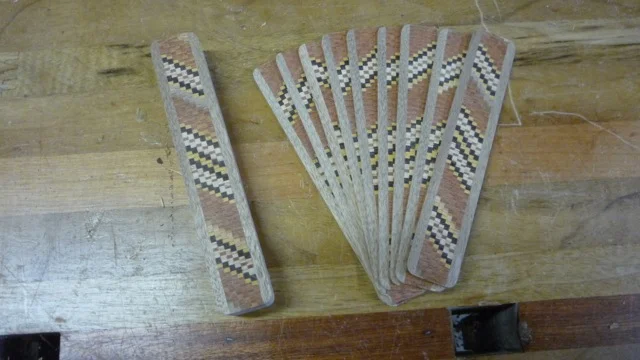
Perfect for practicing straight lines and geometric patterns without any pressure. Cut thin strips of basswood (or buy pre-cut bookmark blanks), add some triangles, dots, or a motivational quote, and boom—functional art. These are so quick you can make a dozen in one sitting. FYI, they also make great stocking stuffers.
4. Plant Markers for Gardens

If you’ve got a garden or know someone who does, these are pure gold. Burn herb names or vegetable labels onto wooden stakes or spoons. They’re practical, weatherproof (if you seal them), and look way cuter than plastic markers. Plus, you can practice your lettering on something that literally goes in the dirt—zero pressure!
5. Simple Coasters
Four-inch wood squares + simple design = instant home decor. Try burning initials, mandala-style circles, or geometric patterns. The small surface area means you can experiment without investing hours. Make a matching set of four and suddenly you’ve got a cohesive look going. These also taught me that symmetry is harder than it looks.
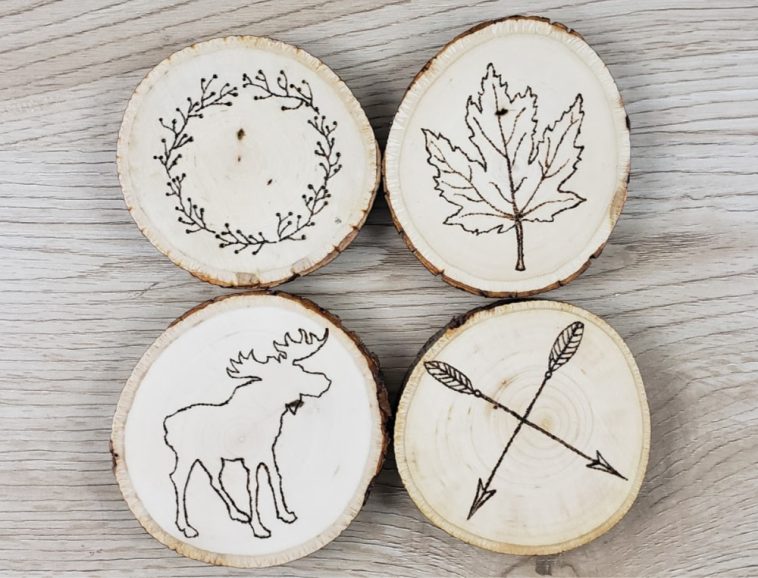
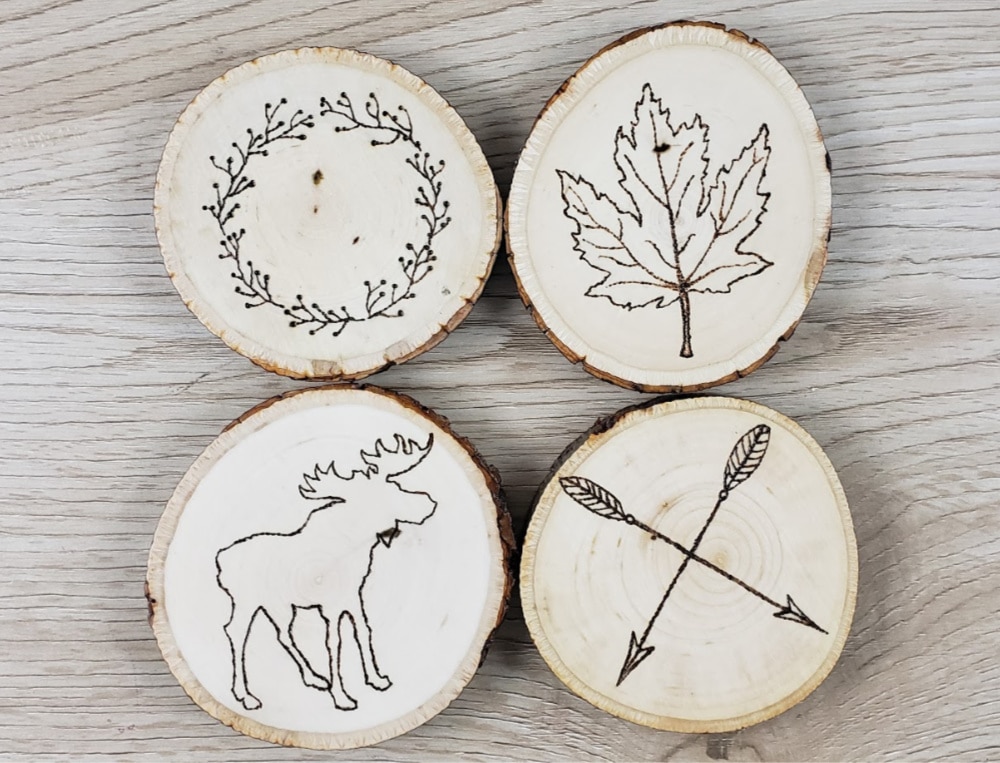
6. Wood Slice Ornaments
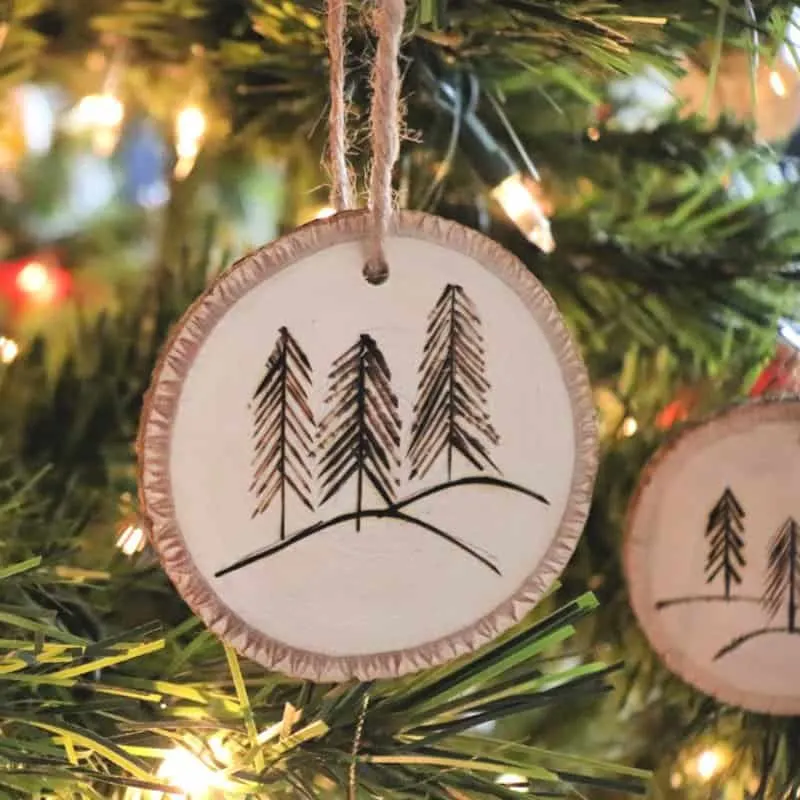
Grab those pre-cut wood slices (they’re everywhere during craft sales) and turn them into holiday ornaments. Snowflakes, simple trees, or even just the year burned in the center—these sell like hotcakes at craft fairs. Drill a small hole at the top, add twine, and you’ve got rustic charm for days. The natural bark edge does half the aesthetic work for you.
7. Key Chain
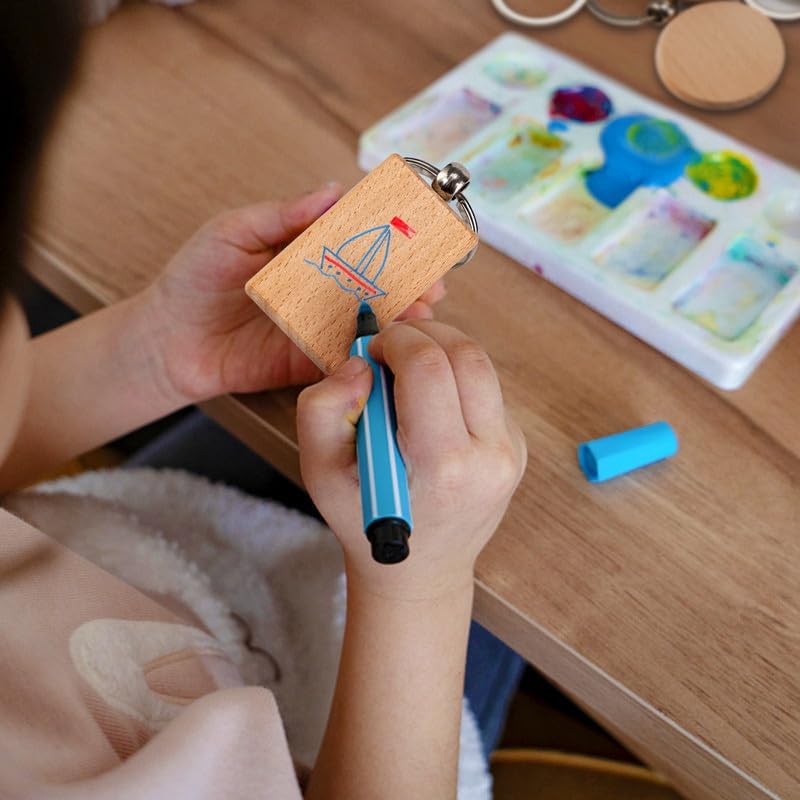
Tiny projects are your friend when you’re learning. Burn coordinates of a special place, initials, or small symbols onto 1-2 inch wooden tags. Attach a keyring and you’ve got a personalized accessory that people actually use. The small size means mistakes aren’t devastating, and you can knock out several in an afternoon.
8. Welcome Sign
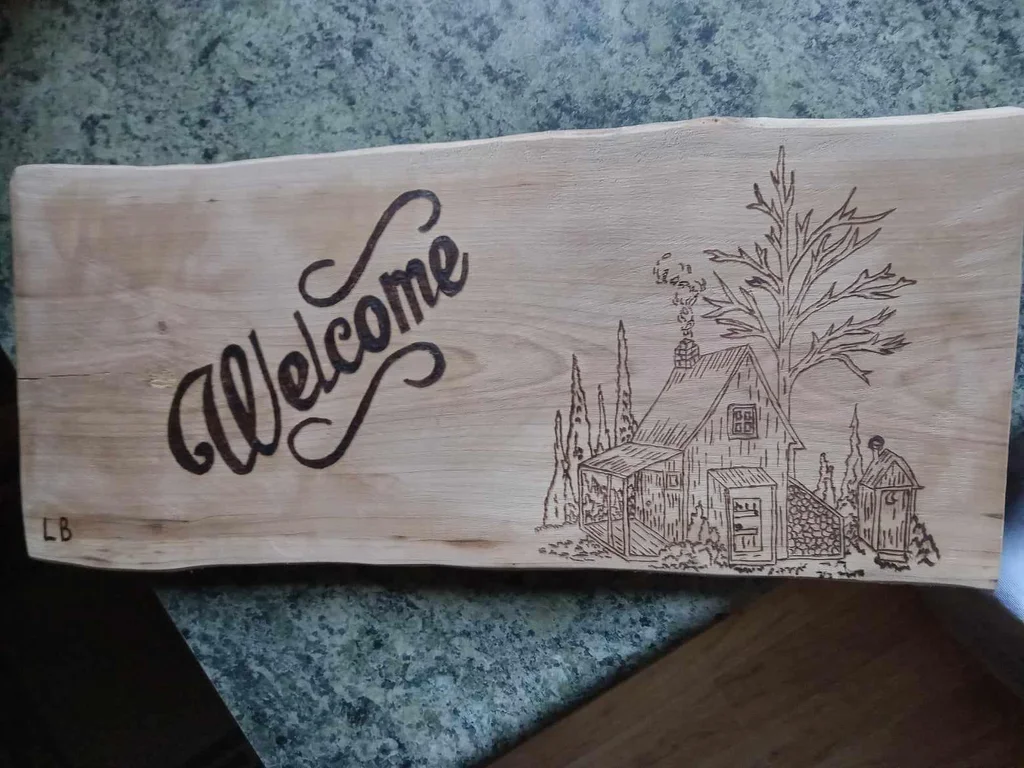
Everyone needs a porch sign, right? A simple wooden plank with “Welcome” or your family name is classic for a reason. You can keep it minimalist or add flourishes around the edges as you get more confident. This was my first “display in my actual home” project, and it still makes me proud every time I see it.
9. Picture Frames
Buy a plain wooden frame and customize the heck out of it. Burn decorative corners, borders, or a meaningful date along the edge. This transforms a $5 frame into something that looks custom and expensive. Plus, you can practice different pattern styles on each side of the frame.
10. Wooden Magnets
Cut small wood shapes (circles, squares, hearts) and burn tiny designs or doodles. Glue a magnet on the back and stick them on your fridge. These are perfect for using up wood scraps and testing out new techniques. I have about thirty of these because I can’t stop making them—they’re like potato chips, you can’t make just one!
Level Up Your Skills: Intermediate Wood Burning Ideas
11. Custom Recipe Boxes
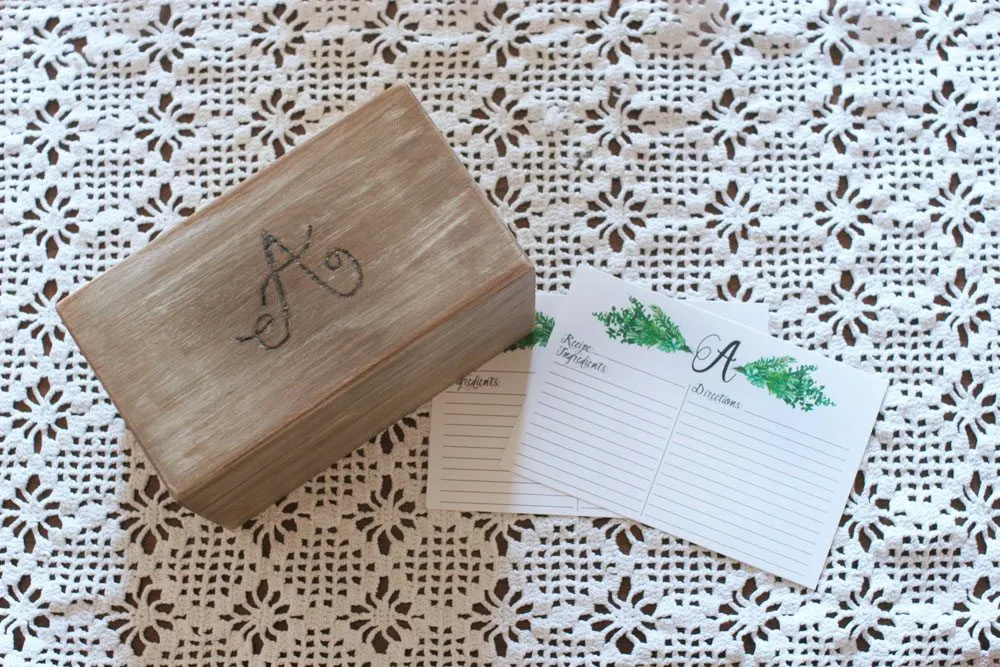
Ready for something with more surface area? Burn decorative lids on wooden recipe boxes with vintage-style lettering or botanical designs. You can create different patterns on each side, and it’s functional storage that looks gorgeous on a kitchen counter. This project taught me patience—rushing shows up immediately on larger surfaces.
12. Wooden Jewelry
Once you’ve mastered small details, try burning on thin wooden jewelry blanks. Nature motifs like leaves or minimalist geometric patterns work beautifully. Sand the pieces super smooth, seal them properly, and you’ve got wearable art. IMO, these make incredible gifts because they’re totally unique and surprisingly lightweight.
13. Personalized Serving Trays
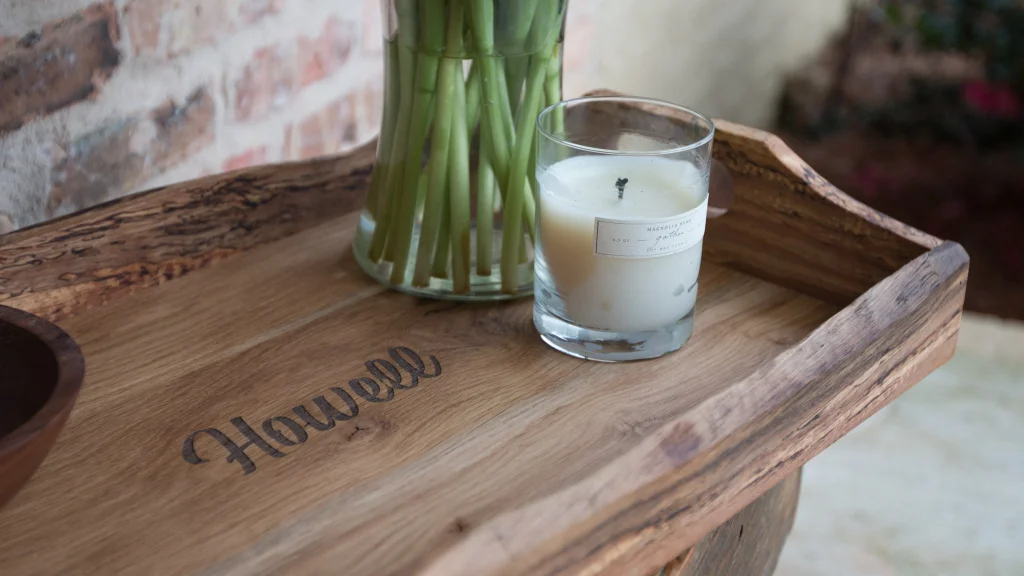
Take a plain wooden tray and transform it with intricate borders and monograms. This is where your shading skills really shine—you can create depth that makes simple designs look professional. The large flat surface lets you practice consistency in your line work. Warning: you’ll never want to use a regular boring tray again.
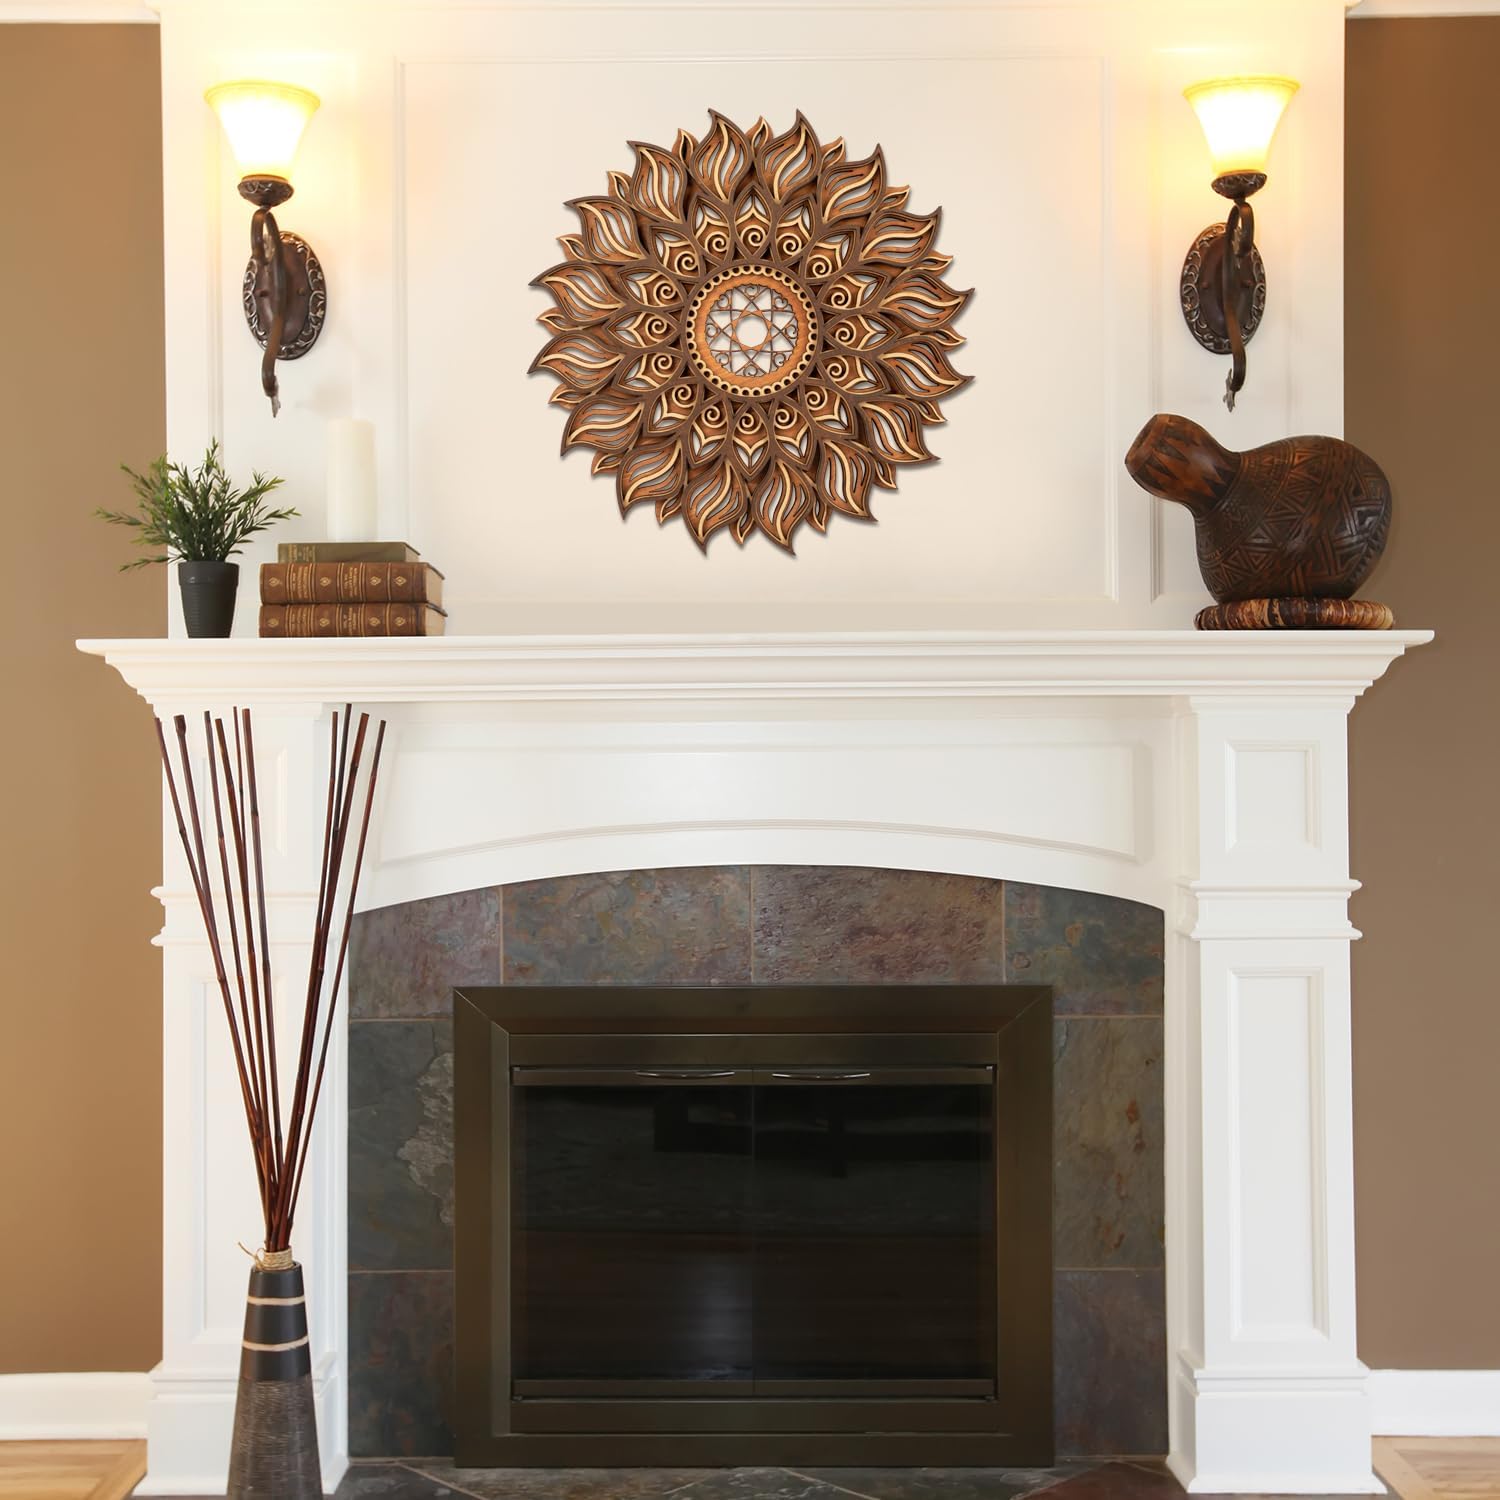
14. Wall Art Panels
Now we’re talking serious decor! Burn landscapes, inspirational quotes, or large mandala designs onto wooden panels. This is your chance to create statement pieces that people will actually frame and hang. I spent about 6 hours on my first mountain landscape, and it’s still my favorite thing I’ve ever made.
15. Wooden Phone Cases
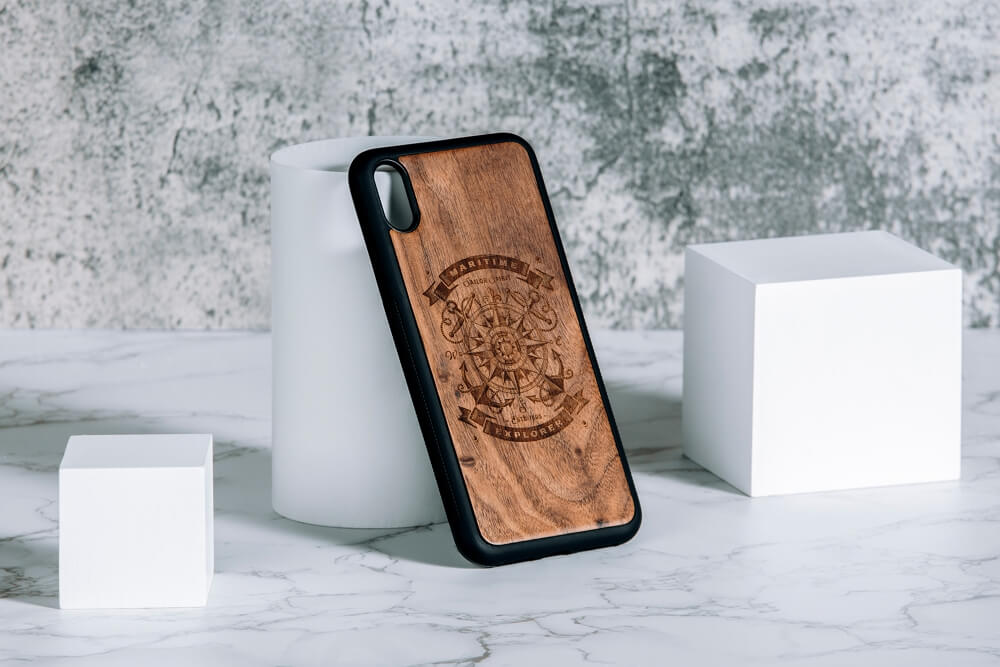
Yes, they make burnable wooden phone cases! Add custom designs, patterns, or meaningful symbols that make your phone actually yours. The curved surface takes some getting used to, but the result is so worth it. Just maybe practice the design on paper first—there’s no undo button here.
16. Kitchen Utensil Set
Create a matching set of spatulas, spoons, and cooking utensils with coordinating designs. Maybe a simple leaf pattern on each handle or geometric borders—consistency is key here. This is the project that made me feel like a real artist because suddenly I was thinking about collections and themes.
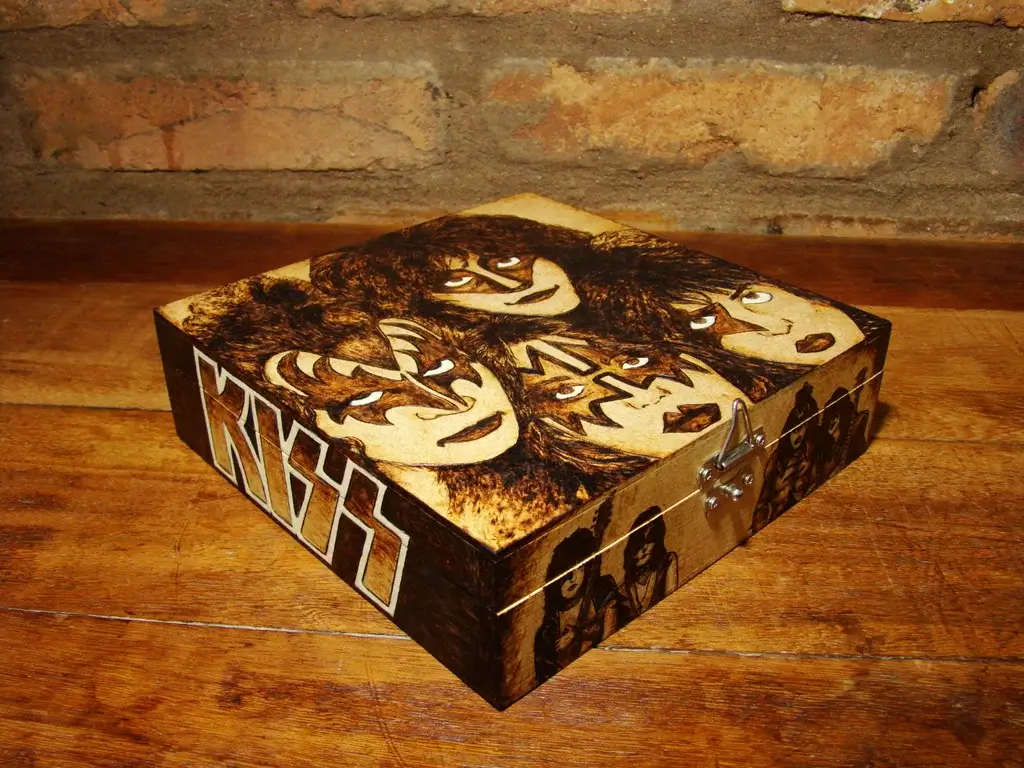
17. Memory Box
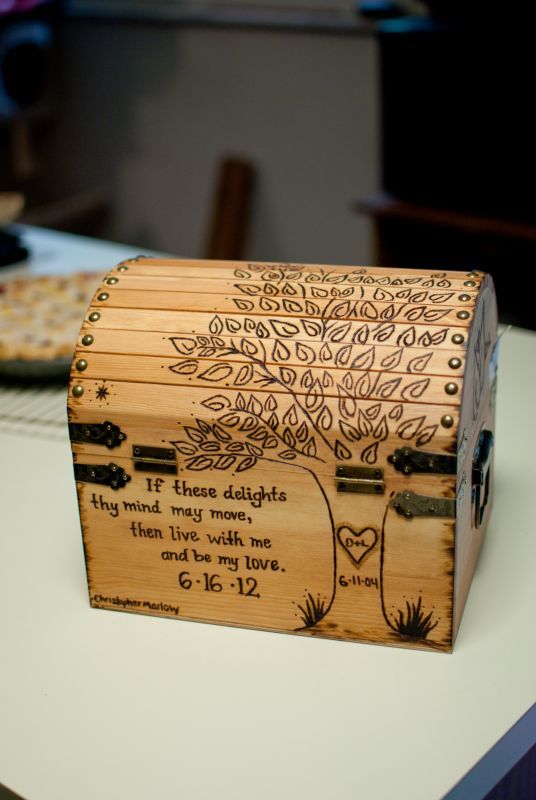
Wooden boxes are perfect for commemorating special occasions. Burn dates, names, meaningful quotes, or small scenes that tell a story. The multiple surfaces (lid, sides) let you practice different techniques on one project. These become instant family heirlooms.
18. House Number Signs
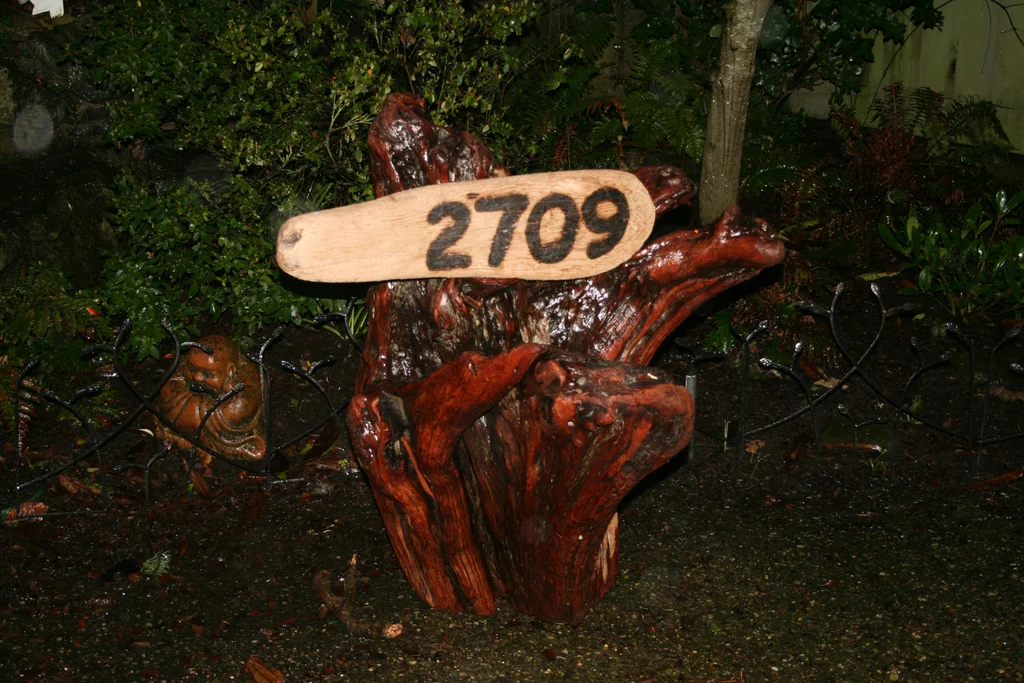
Way cooler than those generic metal numbers. Burn your address onto a wooden plaque with custom fonts and decorative elements. You can match your home’s style—rustic farmhouse, modern minimalist, whatever vibes you’re going for. This is where typography practice really pays off.
Challenge Yourself with Intricate Wood Burning Projects
19. Realistic Portrait Burning
Okay, real talk—this is not for the faint of heart. Burning realistic portraits (especially of beloved pets or family members) requires serious shading skills and patience. You’re looking at 10-20 hours minimum for a detailed portrait. But the results? Absolutely stunning. People will cry. I’ve made grown adults cry with pet portraits. Worth every minute.
20. Detailed Landscape Scenes
Mountains, forests, beaches—burning realistic landscapes means mastering perspective, depth, and intricate shading. You’ll use every technique you’ve learned: stippling for texture, line work for definition, and varied pressure for depth. My first forest scene took 15 hours, and I regret nothing. The meditative process alone is therapeutic.
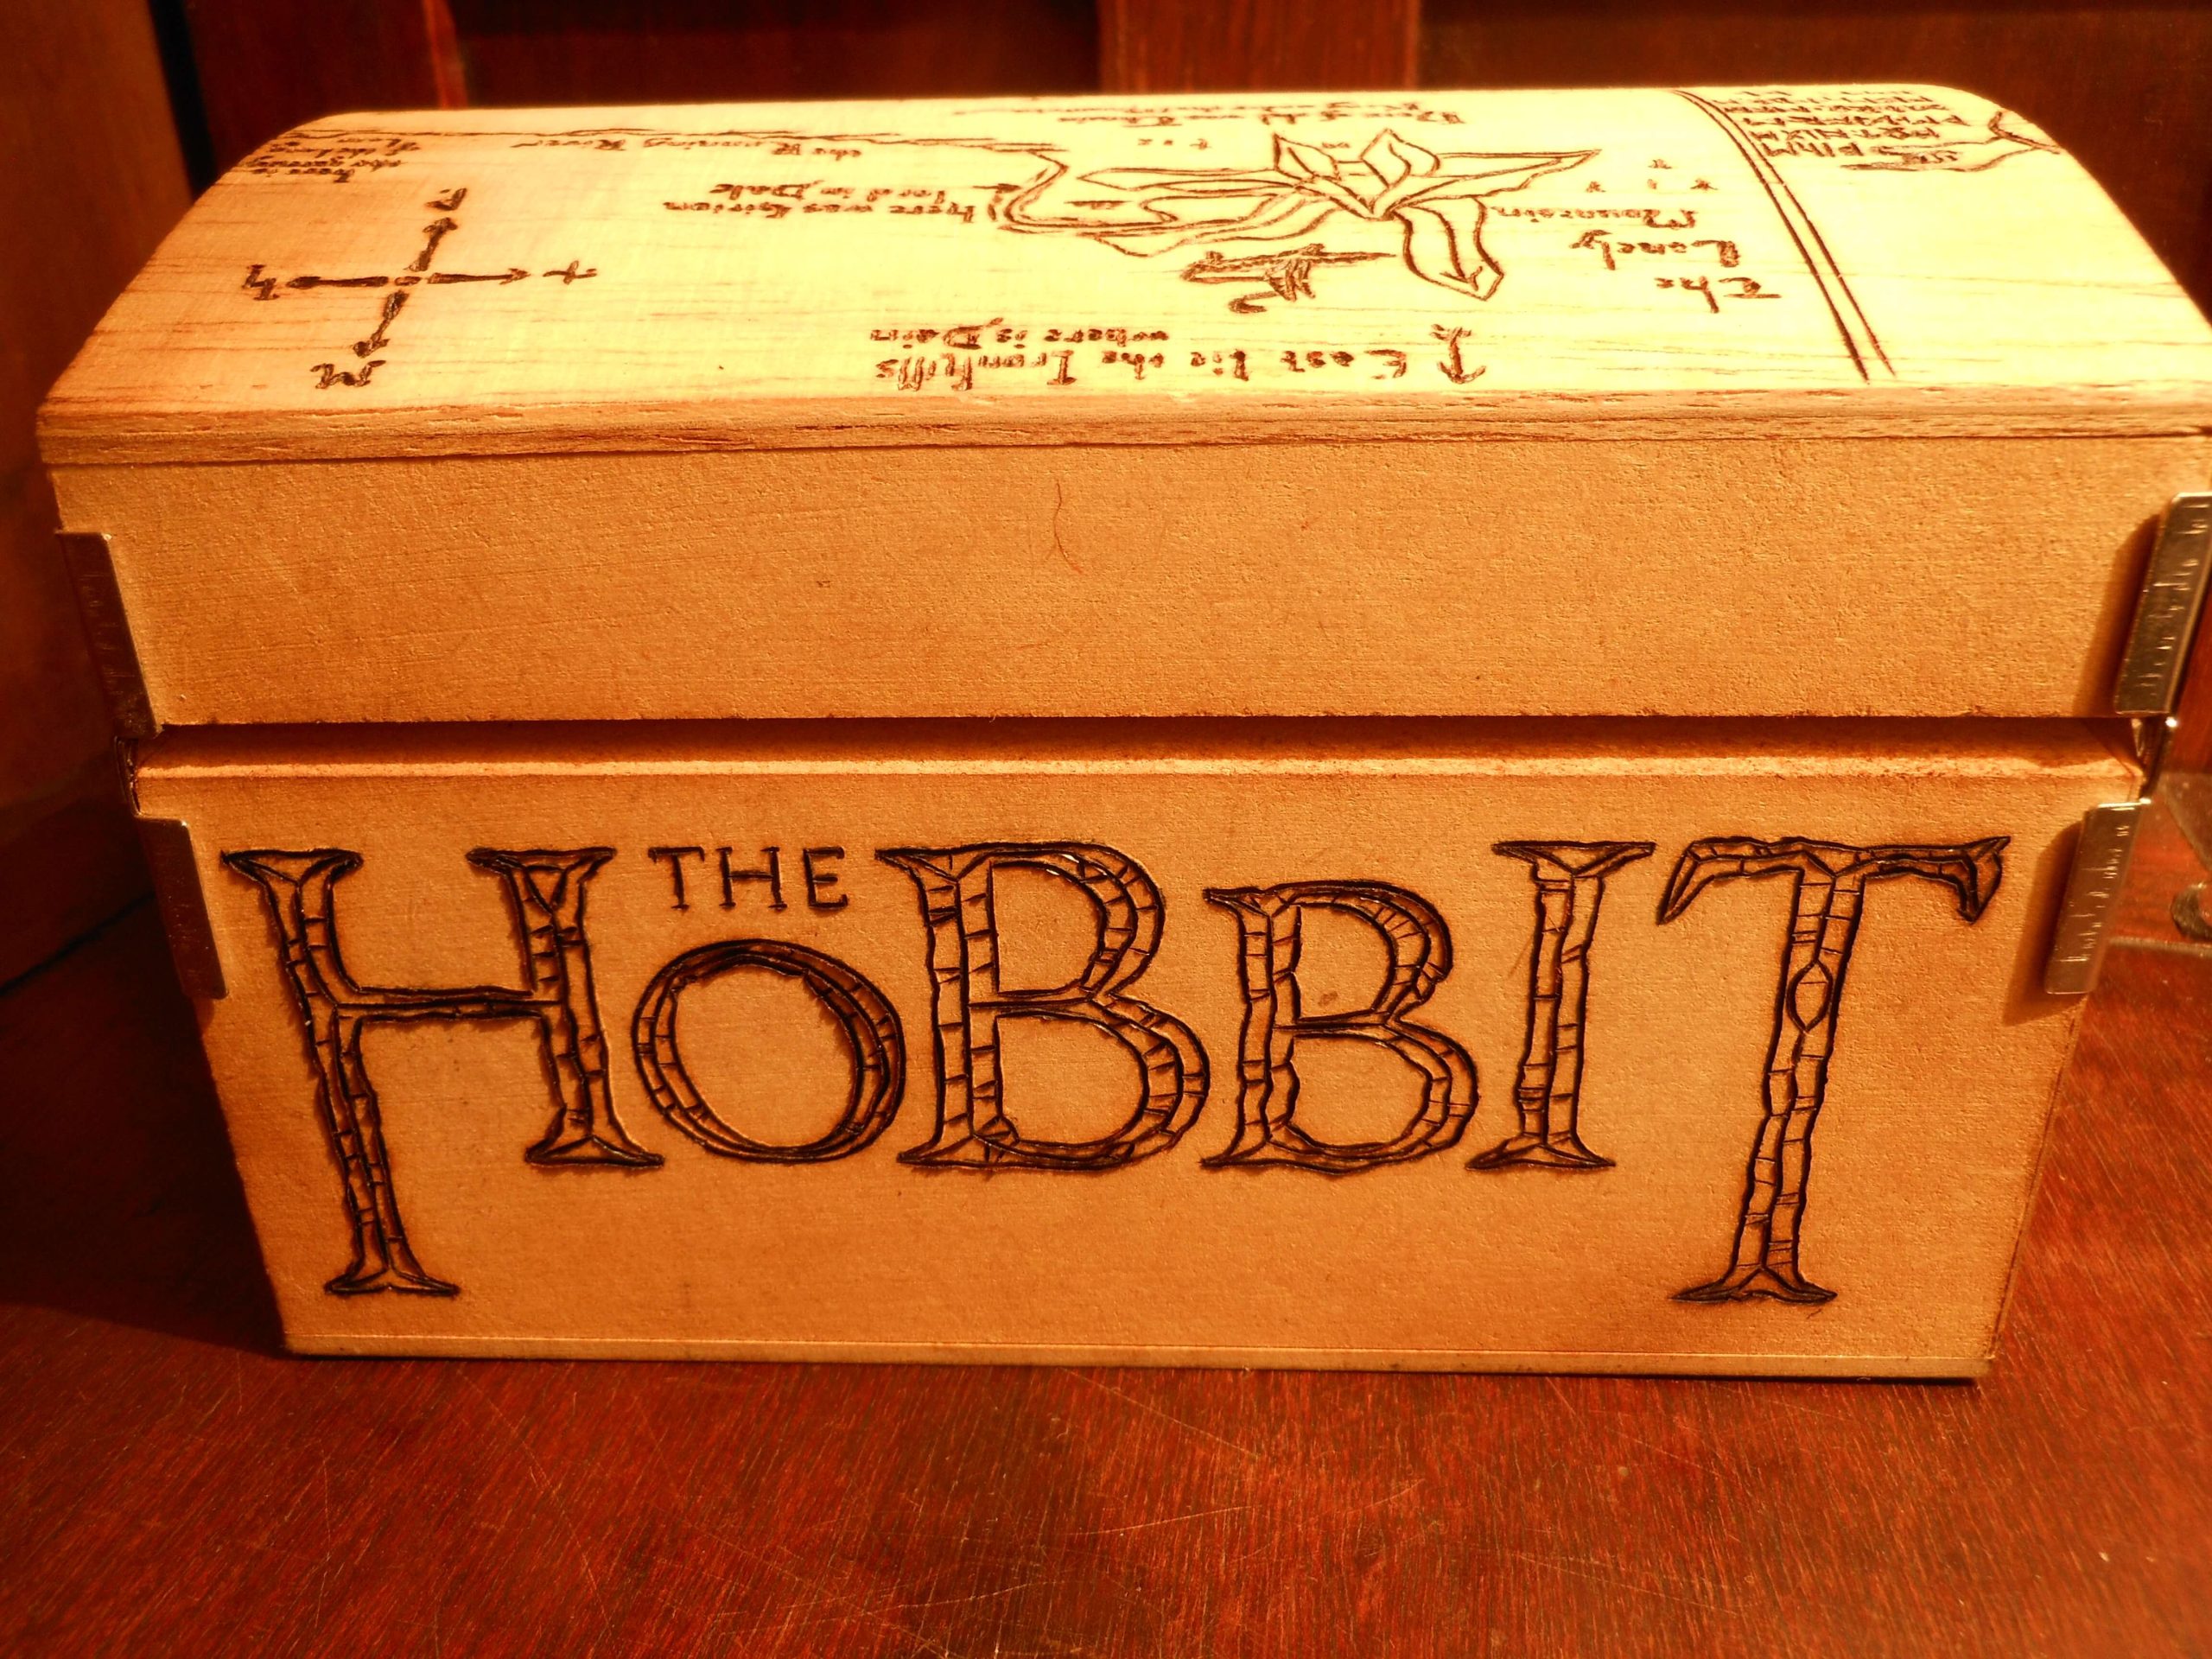
21. Large Wooden Map Art
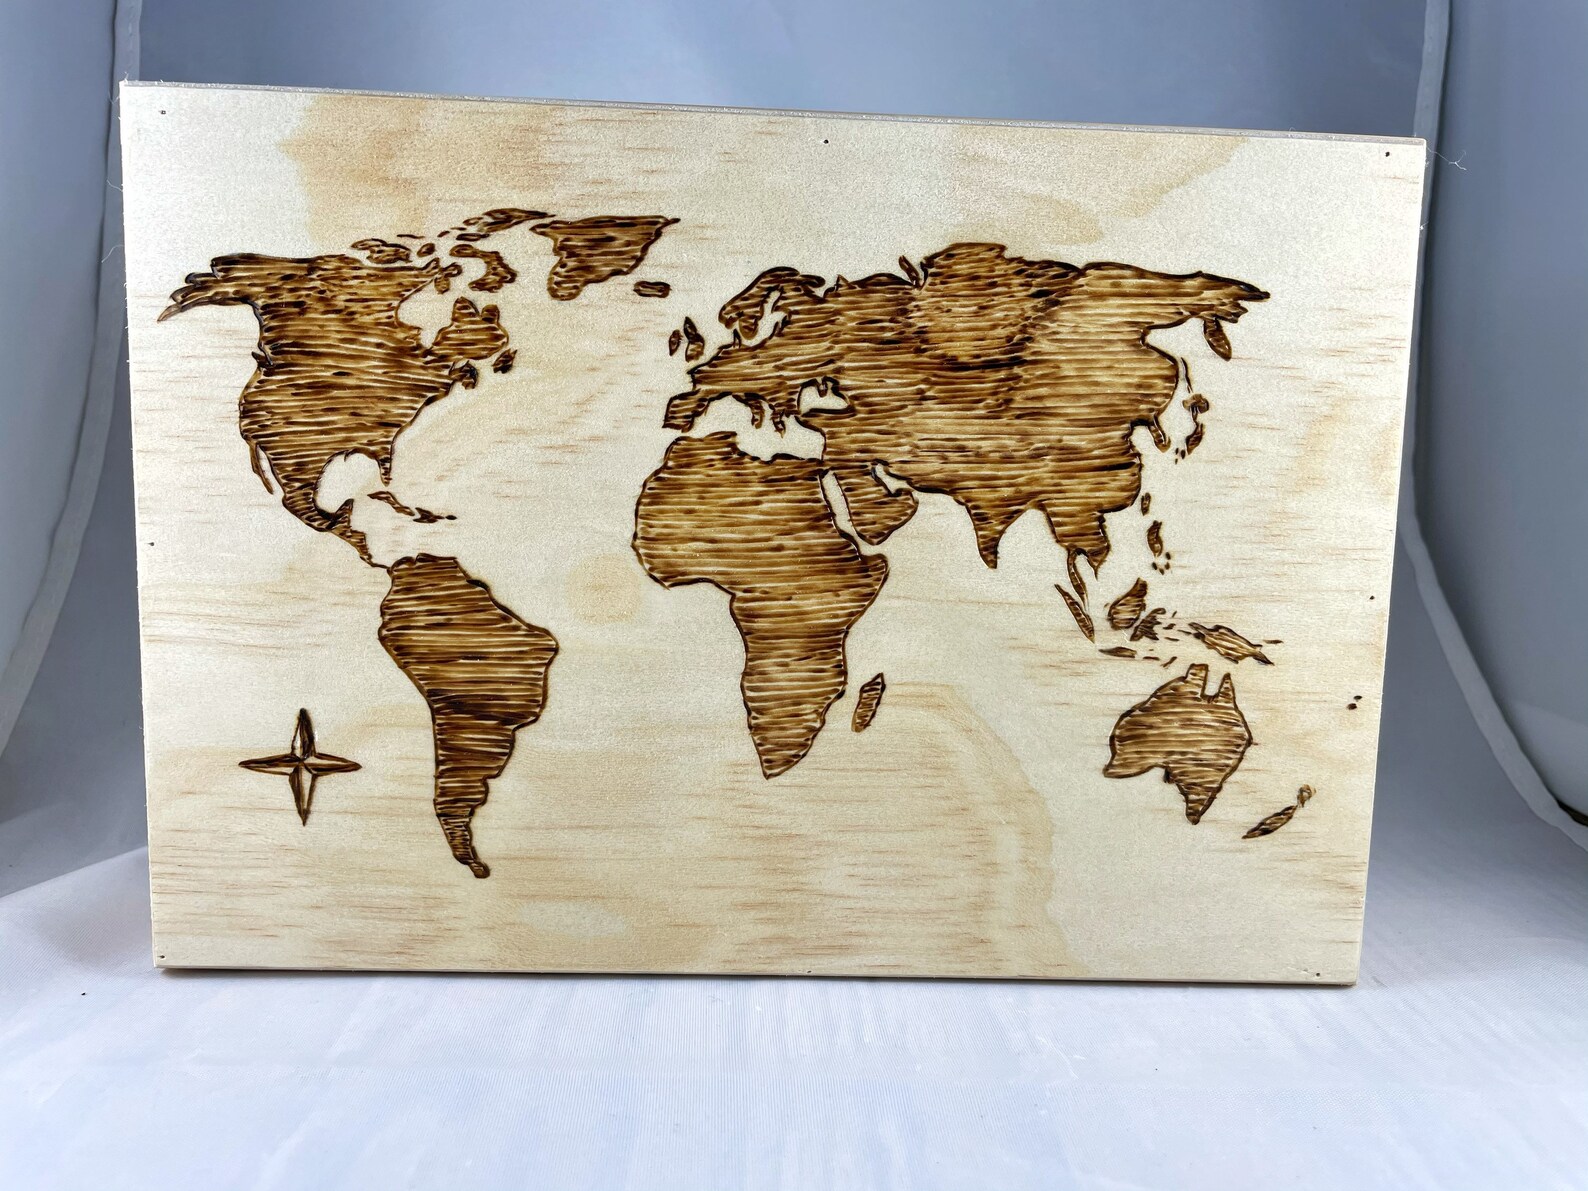
Burning world maps or state outlines with geographical details is incredibly impressive. Add cities, coordinates, or mark special locations with symbols. The precision required for accurate outlines will test your steady hand, but mounting this on your wall makes one heck of a conversation piece.
22. Mandala Wall Hangings
Large-scale mandalas are where mathematical precision meets artistic flow. The repetitive patterns are surprisingly meditative to burn, and the symmetry challenges you to maintain consistency across hours of work. Use a compass and ruler—freehand mandala burning is a recipe for frustration.
23. Custom Wooden Clock Faces
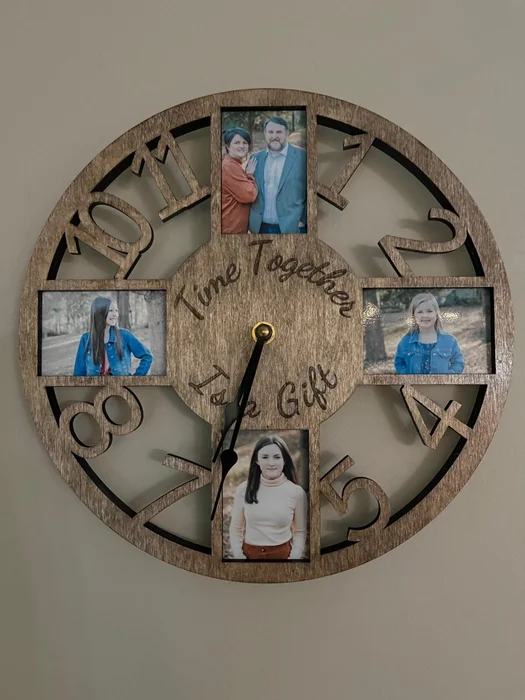
Take a clock mechanism and create a completely custom face around it. Roman numerals, decorative elements, or themed designs (celestial, botanical, geometric) make functional timepieces that are also art. The precision needed for spacing the numbers evenly is trickier than it looks!
24. Wooden Laptop Covers
Full-coverage designs on laptop wood skins are the ultimate flex. Nature themes, geometric patterns, or abstract designs turn your laptop into a mobile art gallery. The large surface area and need for consistent shading across the entire piece makes this legitimately challenging. But imagine pulling out your laptop in a coffee shop with YOUR burned design on it. Yeah.
25. 3D Wood Burning Projects
Layered pieces and shadow boxes take pyrography into the third dimension. Burn different elements on separate wood layers, then stack them for depth. These pieces require planning, precision, and advanced visualization skills. I’m still working up the courage to fully commit to one of these—but watching tutorials at 2 AM counts as progress, right? 🙂
Tips for Success
Let’s talk about the stuff that’ll save you from rookie mistakes (that I definitely didn’t make… multiple times).
Always practice on scrap wood first. I don’t care if you’re feeling confident—test your design, test your shading, test everything on a piece you don’t care about. Wood grain varies, and you need to know how your specific piece will react.
Start with light pressure and build up darkness gradually. You can always go darker, but you can’t go lighter. I burned way too dark on my first cutting board because I was impatient. It looked… aggressive. Learn from my mistakes.
Transfer patterns using graphite paper when you’re working on something important. Sketch on paper, trace it onto your wood, then burn along the lines. Your future self will thank you for not winging it on that gift for your mother-in-law.
Clean your tip regularly during long sessions. Carbon buildup affects heat transfer and can leave weird marks. A quick wipe on a damp sponge between sections keeps everything crisp.
Be patient—wood burning takes time. Rushing creates uneven lines, sloppy shading, and regret. Put on a podcast, get comfortable, and embrace the slowness. This isn’t a race.
Seal finished projects properly. Food-safe mineral oil for kitchen items, polyurethane or varnish for decorative pieces. Sealing protects your hard work and makes the burned areas pop beautifully against the natural wood.
Where to Find Inspiration
Stuck on what to create next? Here’s where I find endless ideas:
Pinterest boards are obviously the gold mine (that’s where this all started for me). Search “pyrography patterns” or “wood burning ideas” and prepare to lose three hours. Create boards for different project types so you’re always ready when inspiration strikes.
Instagram hashtags like #pyrography and #woodburning connect you with an incredibly talented community. Seeing what others create pushes your skills and introduces techniques you never knew existed. Fair warning: you might experience serious art envy.
Free pattern websites offer downloadable designs you can trace. Sites like Creative Fabrica and various craft blogs share patterns specifically designed for wood burning. Some are basic, some are incredibly detailed—there’s something for every skill level.
Nature and photography provide unlimited reference material. That hiking photo? Burn it. Your cat sleeping in a sunbeam? Burn it. The coffee cup on your desk? You guessed it—burn it. Real life offers better references than any clip art.
Create your own designs once you’re comfortable. Sketch ideas in a notebook, take photos of textures you love, combine elements from different sources. Original work feels different—there’s a special pride in burning something that came entirely from your brain.
Want Even More Woodworking Project Ideas?
If you’re loving the creative possibilities of wood burning, you might be ready to explore even more woodworking projects. I recently discovered Ted’s Woodworking Plans—a massive collection of over 16,000 woodworking plans that range from simple beginner projects to complex furniture builds.
Here’s why it pairs perfectly with wood burning: you can build custom wooden pieces specifically designed for pyrography. Imagine crafting your own serving trays, picture frames, or decorative boxes from scratch, then personalizing them with your wood burning skills. The combination creates truly unique pieces that nobody else will have.
The plans include step-by-step instructions, materials lists, and detailed diagrams—basically everything you need to build the perfect blank canvas for your next burning project. Whether you want to create custom wooden signs, build jewelry boxes to decorate, or make furniture pieces with burned accents, having quality plans makes the process so much smoother.
Check out Ted’s Woodworking Plans if you’re ready to take your wood crafting to the next level. Building your own pieces + burning custom designs = endless creative possibilities!
Final Thoughts
So there you have it—25 wood burning ideas that’ll take you from nervous beginner to confident pyrography artist. Start with those wooden spoons (seriously, they’re forgiving and fun), work your way through personalized cutting boards and bookmarks, then challenge yourself with portraits and 3D projects.
The beauty of wood burning is that every single piece you create is unique. Even if you follow the exact same pattern twice, the wood grain, your hand pressure, and a million tiny variables make each one one-of-a-kind. That’s pretty special in our mass-produced world.
My advice? Pick the simplest project that excites you and just start. Don’t wait for the perfect design or the perfect wood or the perfect moment. Grab your burning tool, find a scrap piece, and make something. It might be wonky. It might have uneven lines. It might not look exactly like you imagined.
Make it anyway.
Because somewhere between that first tentative line and your hundredth project, something magical happens—you stop thinking about whether you’re good enough and start enjoying the process. And that’s when your best work shows up.
Which project are you going to try first? Drop a comment below and let me know! And hey, if you found this helpful, pin it to your Pinterest board so you can find it again at 2 AM when inspiration strikes. Trust me, it will. 🙂
Happy burning!
Why Not Save This Pin For Later ?