

You know that pile of scrap wood sitting in the corner of your garage? The one you keep telling yourself you’ll “do something with eventually”? Well, eventually is today.
Scrap wood organizers are honestly one of the best things you can make as a woodworker — they cost almost nothing, they’re genuinely useful, and they make your space look like you actually have your life together. I’ve built a dozen of these myself, and every single one still gets used daily. Let’s get into it.
Why Scrap Wood Is Perfect for Organizers
Before the list, let me make a quick case for scrap-wood builds specifically.
Scrap wood is zero-pressure wood. You’re not cutting into a pristine $80 board of walnut — you’re using offcuts that would otherwise end up in the trash or the fire pit. That freedom makes it the perfect material for experimenting, trying new joinery, or just banging something together on a Saturday afternoon.
Most of the organizers below need nothing more than a few straight cuts, some wood glue, and a handful of screws. If you’ve got a circular saw and a drill, you’re in business.
25 DIY Scrap Wood Organizers (By Room & Category)
Workshop & Garage
1. Wall-Mounted Screwdriver Rack
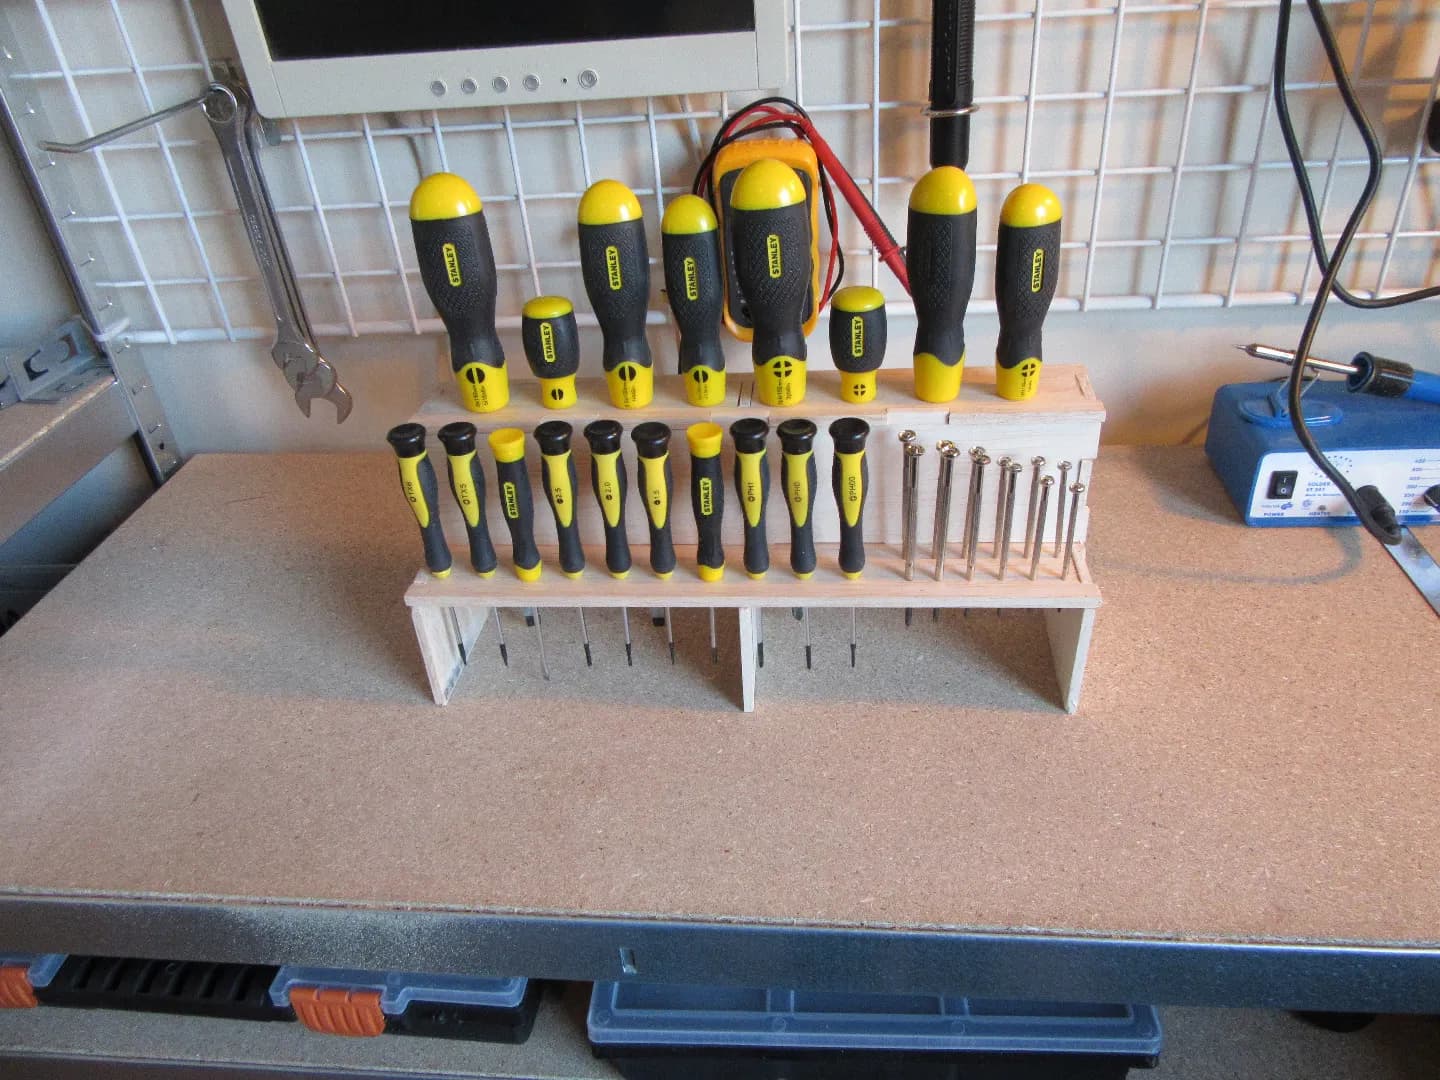
Source: Instructables
Stop fishing through cluttered drawers mid-project. This simple rack starts with a single 2×4 offcut — drill a row of angled holes sized to fit your screwdriver handles, mount it at eye level on the shop wall, and drop each driver in handle-down. Every tool is instantly visible, reachable in one move, and back in place just as fast. Takes about 20 minutes start to finish, costs nothing but a handful of screws, and earns its wall space the very first time you reach for a Phillips without thinking.
2. DIY Drill Bit Holder
Source: Instructables
A grid of progressively sized holes drilled into a scrap pine block — that’s the whole build. Mark out your layout, drill each hole to match a specific bit diameter, and mount it at drill-press height near your bench. The result is cleaner than any pegboard hook system and far more satisfying than rooting through a rattling case every time you need a 3/16″. Hardwood holds the bits more snugly than pine if you have an offcut, but pine works perfectly fine. Label each row by size with a wood-burning pen or permanent marker and you’ll never swap bits by mistake again.
3. Lumber Offcut Sorter
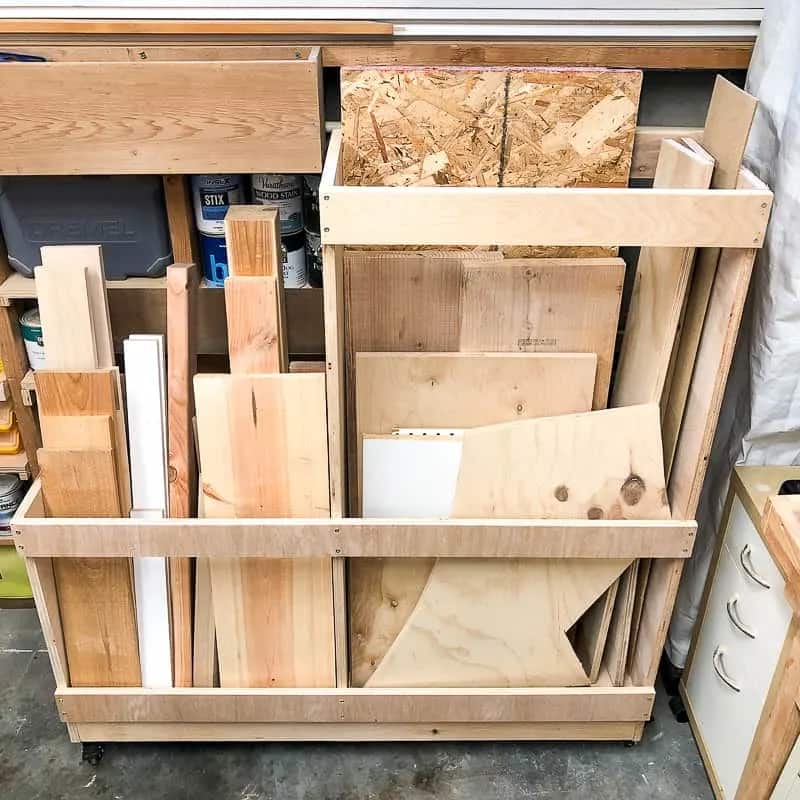
Source: The Handyman’s Daughter
Two upright boards, a handful of horizontal dividers, and suddenly your offcut pile has a home. Each slot holds a different length — shorts on one end, longer boards on the other — so you can grab exactly what you need without dismantling the whole pile. The wall-mounted version is especially worth building: it keeps everything off the floor, protects boards from warping in damp conditions, and turns that embarrassing lumber corner into the most organized spot in the garage. Build it from the scrap it’s going to hold and the whole thing costs essentially nothing.
4. Spray Can Shelf
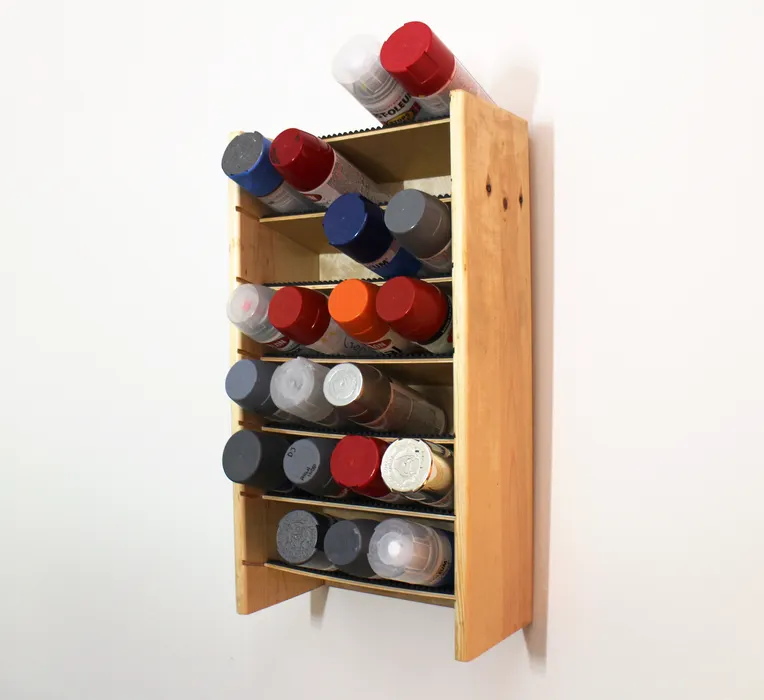
Source: Instructables
Two long boards as side rails, short crosspieces as rungs, leaned against the wall — that’s a spray can shelf. Cans store upright between the rungs so they can’t tip, roll, or bury themselves under other cans. The angled lean keeps everything accessible from the front and makes it easy to see what you’ve got at a glance. It gets those cans off the workbench where they always seem to migrate, frees up actual work surface, and takes maybe 30 minutes to build from the offcuts you probably already have in the corner.
5. Clamp Rack
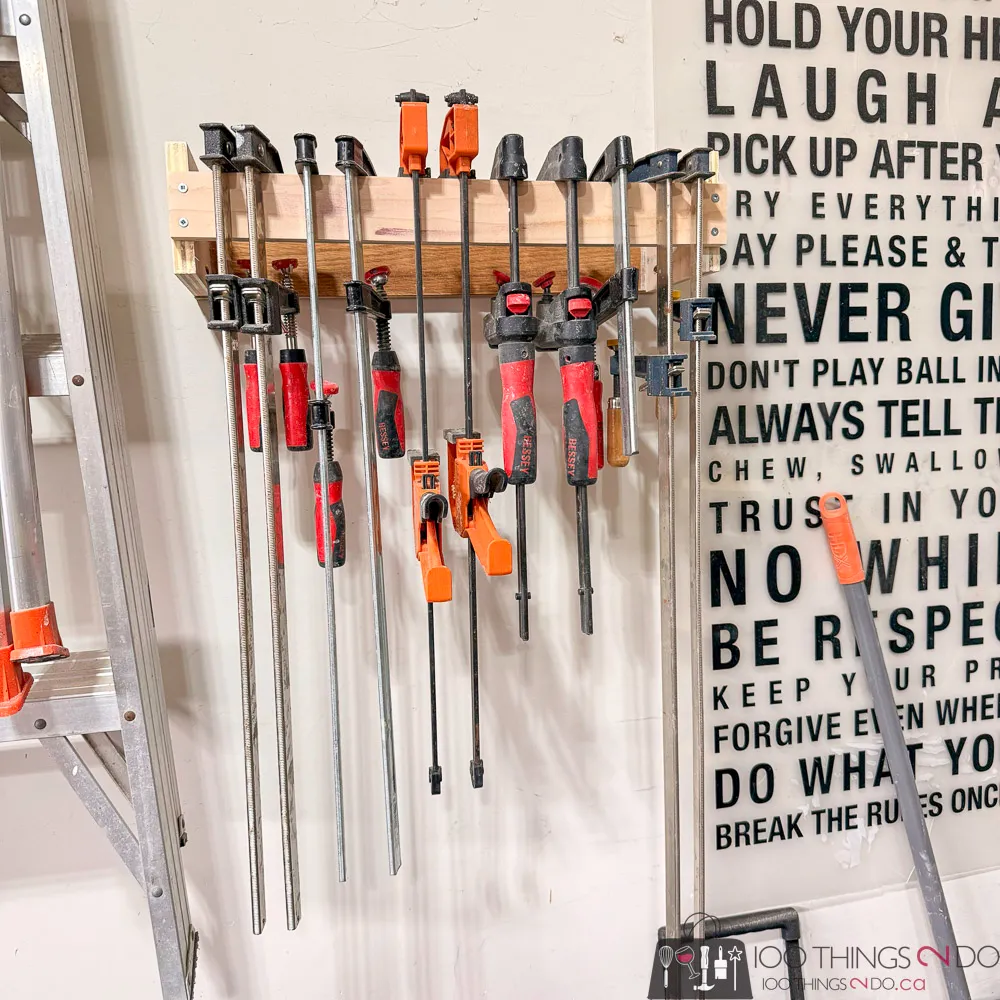
Source: Instructables
A single horizontal board with evenly spaced notches cut into the top edge — mount it at hip height and hang every bar clamp and F-clamp you own vertically in its own slot. No more clamps scattered across three benches, leaned against the wall, or piled in a bin. This might be the single most useful organizer you can build for a working woodshop. The notch spacing is easy to customize for your collection, and adding a second rail lower down handles longer pipe clamps with ease. Build it once, use it every single project.
6. Sandpaper Station
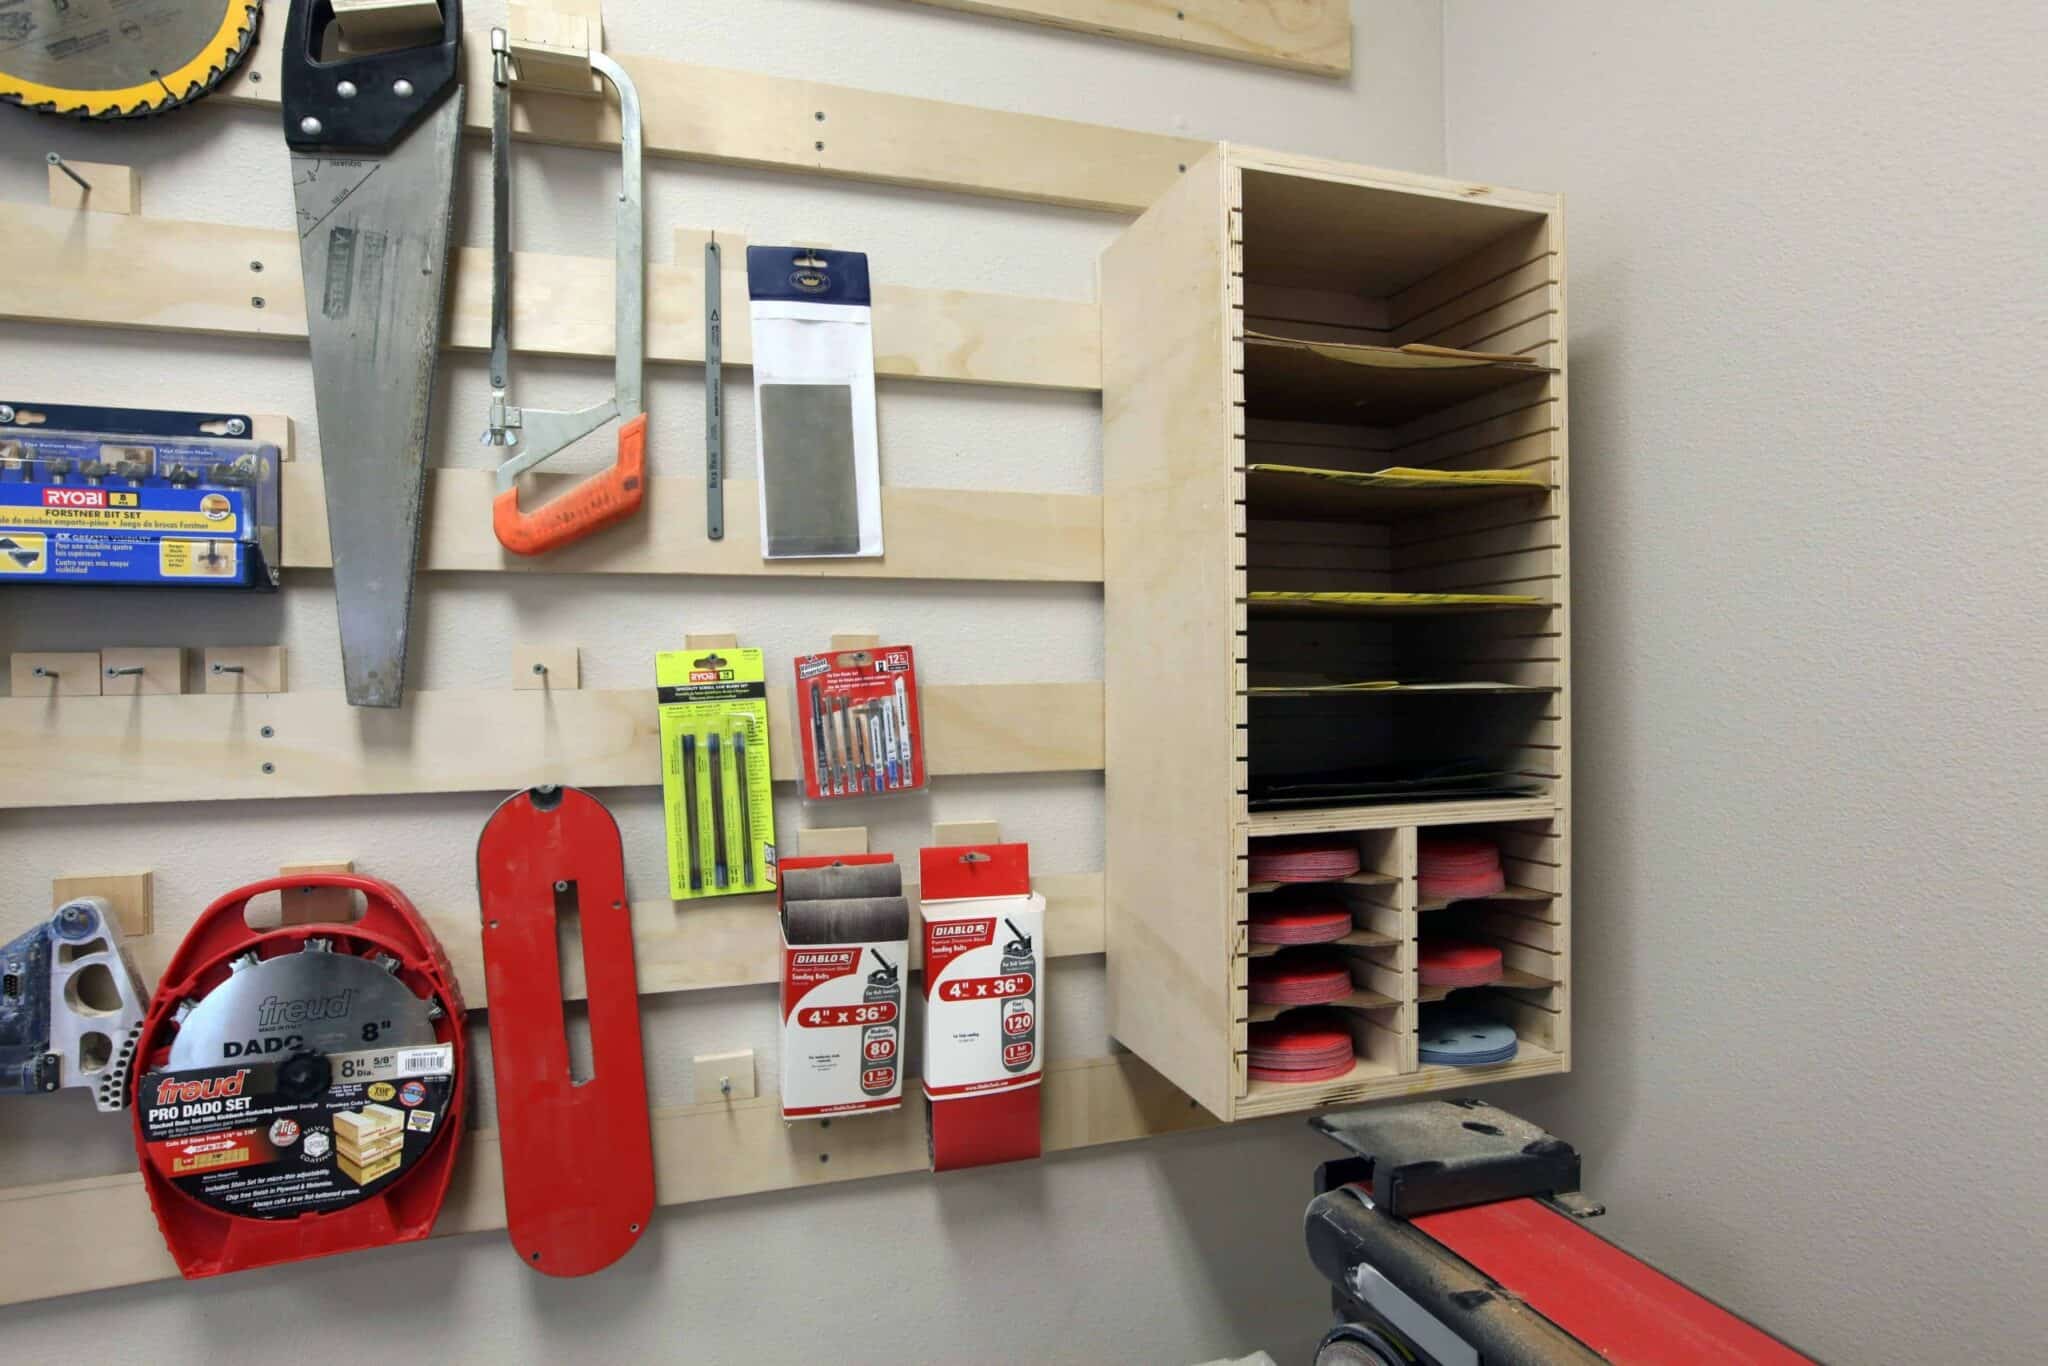
Source: The Geek Pub
A block of scrap wood with thin slots cut on the table saw — one per grit — keeps every sheet of sandpaper sorted, flat, and labeled. Burn or engrave the grit number on the front of each slot so you never sand with 80 when you meant 220. It’s a small build with an outsized impact on your workflow: no more shuffling through a pile, no more sheets folded and creased until they’re useless, no more mystery grits. Mount it beside your bench or on the wall near your sanding area and you’ll reach for the right sheet every time.
7. Router Bit Holder
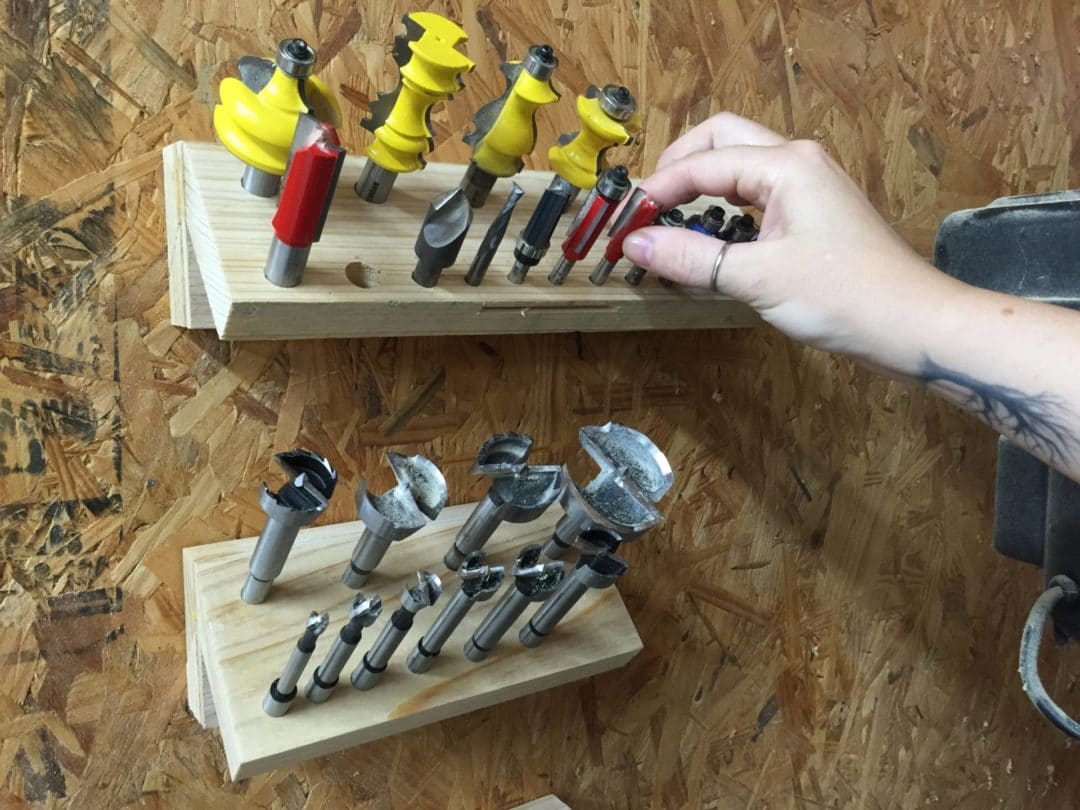
Source: Wilker Do’s
Dense scrap hardwood, a grid of shallow holes drilled to match your bit shanks, cutting edges stored safely downward — that’s the whole build. Hardwood is worth using here specifically because it grips the bit shanks without rattling, keeping each bit seated securely. Compare that to a drawer full of loose bits clanging around every time you open it — and chipping cutting edges in the process. Mount it beside the router table or inside a cabinet door, label the holes if you have a large collection, and your bits stay sharp, organized, and ready.
8. Extension Cord Reel Board
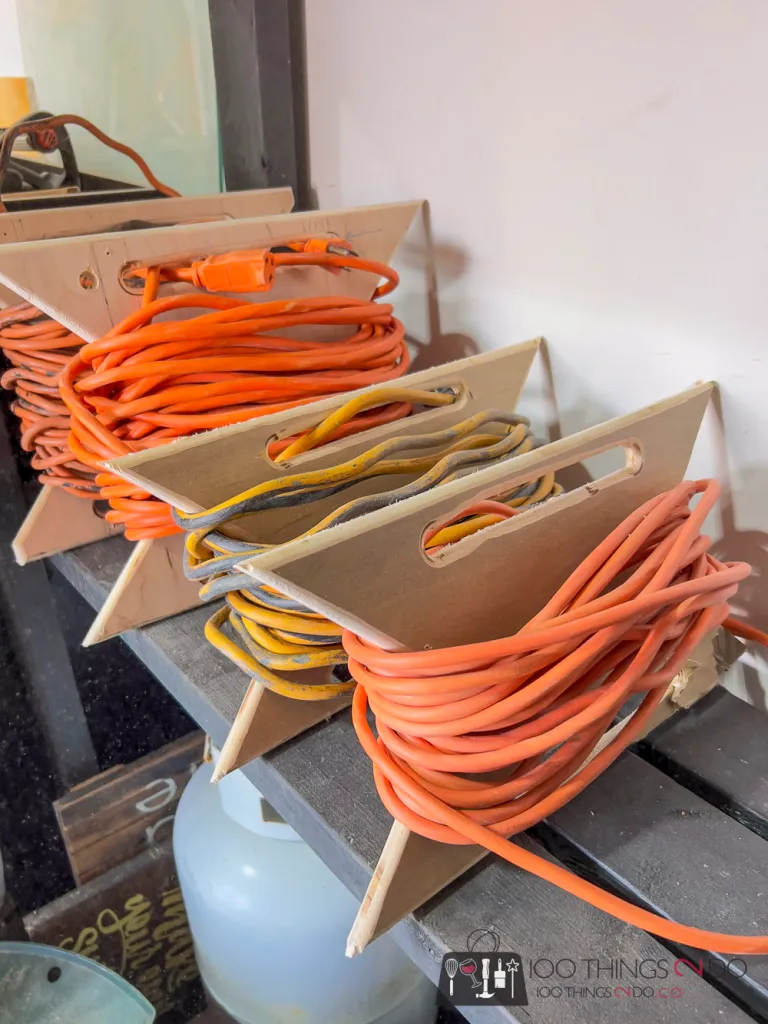
Source: 100 Things 2 Do
Mount a few wooden pegs or L-shaped brackets to a scrap board, hang it on the wall, and wrap each extension cord neatly around its own set of pegs. The improvement over the toss-and-untangle method is immediately obvious. Each cord gets its own dedicated spot, coils stay clean and tangle-free, and you can grab the right cord and go without the usual 10-minute knot-loosening ritual. Add a small label below each peg — 25 ft, 50 ft, outdoor, whatever you have — and cord selection becomes completely brainless.
For the Kitchen
9. Custom Knife Block
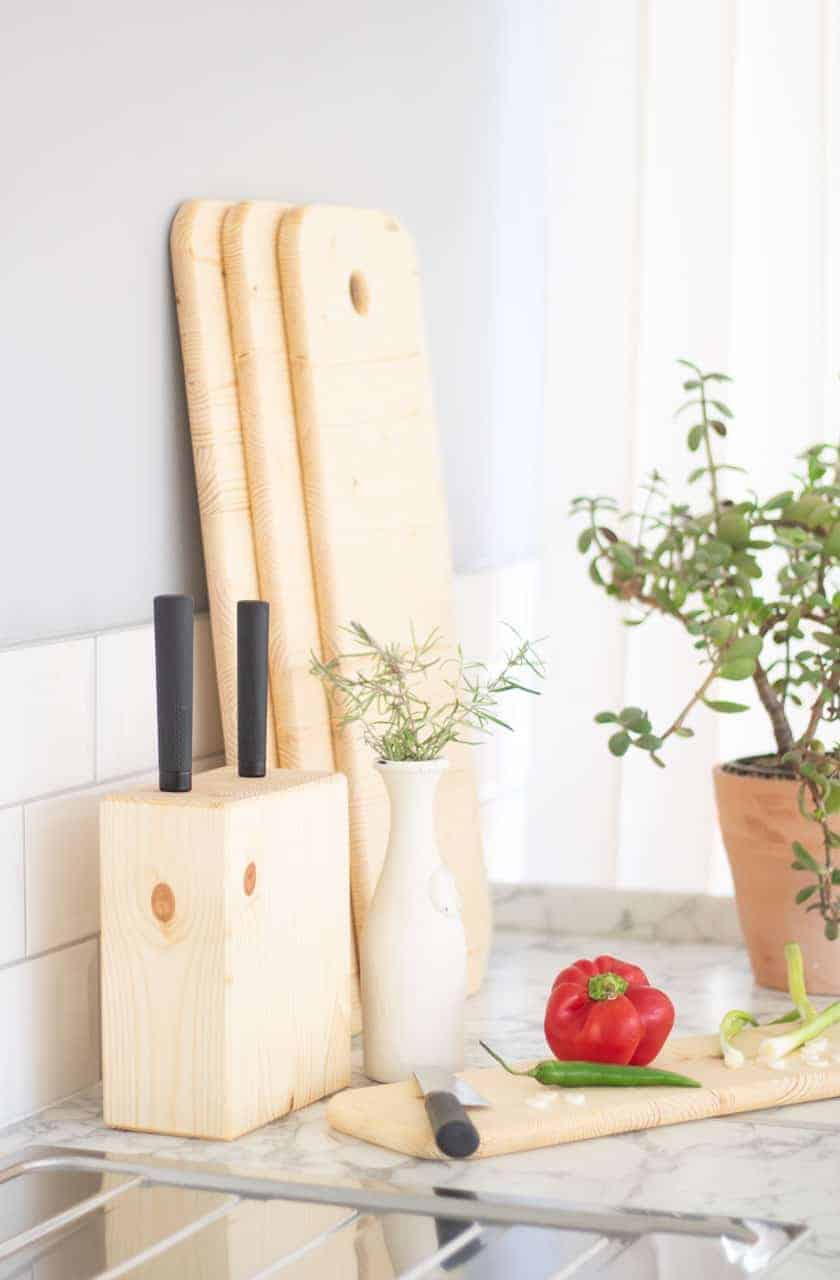
Source: The Carpenter’s Daughter
Stack several pieces of scrap hardwood to the same dimensions, glue them together with thin spacers between select layers — the spacers create the blade slots, no drilling or cutting required. You control the slot count, the slot width, and the overall height, which means it fits your actual knife collection instead of the generic five-slot version every kitchen store sells. Use a contrasting hardwood for the spacers if you want a bit of visual interest. Finish with food-safe oil and you’ve got a custom knife block that looks like it came from a boutique kitchen shop.
10. Spice Drawer Insert
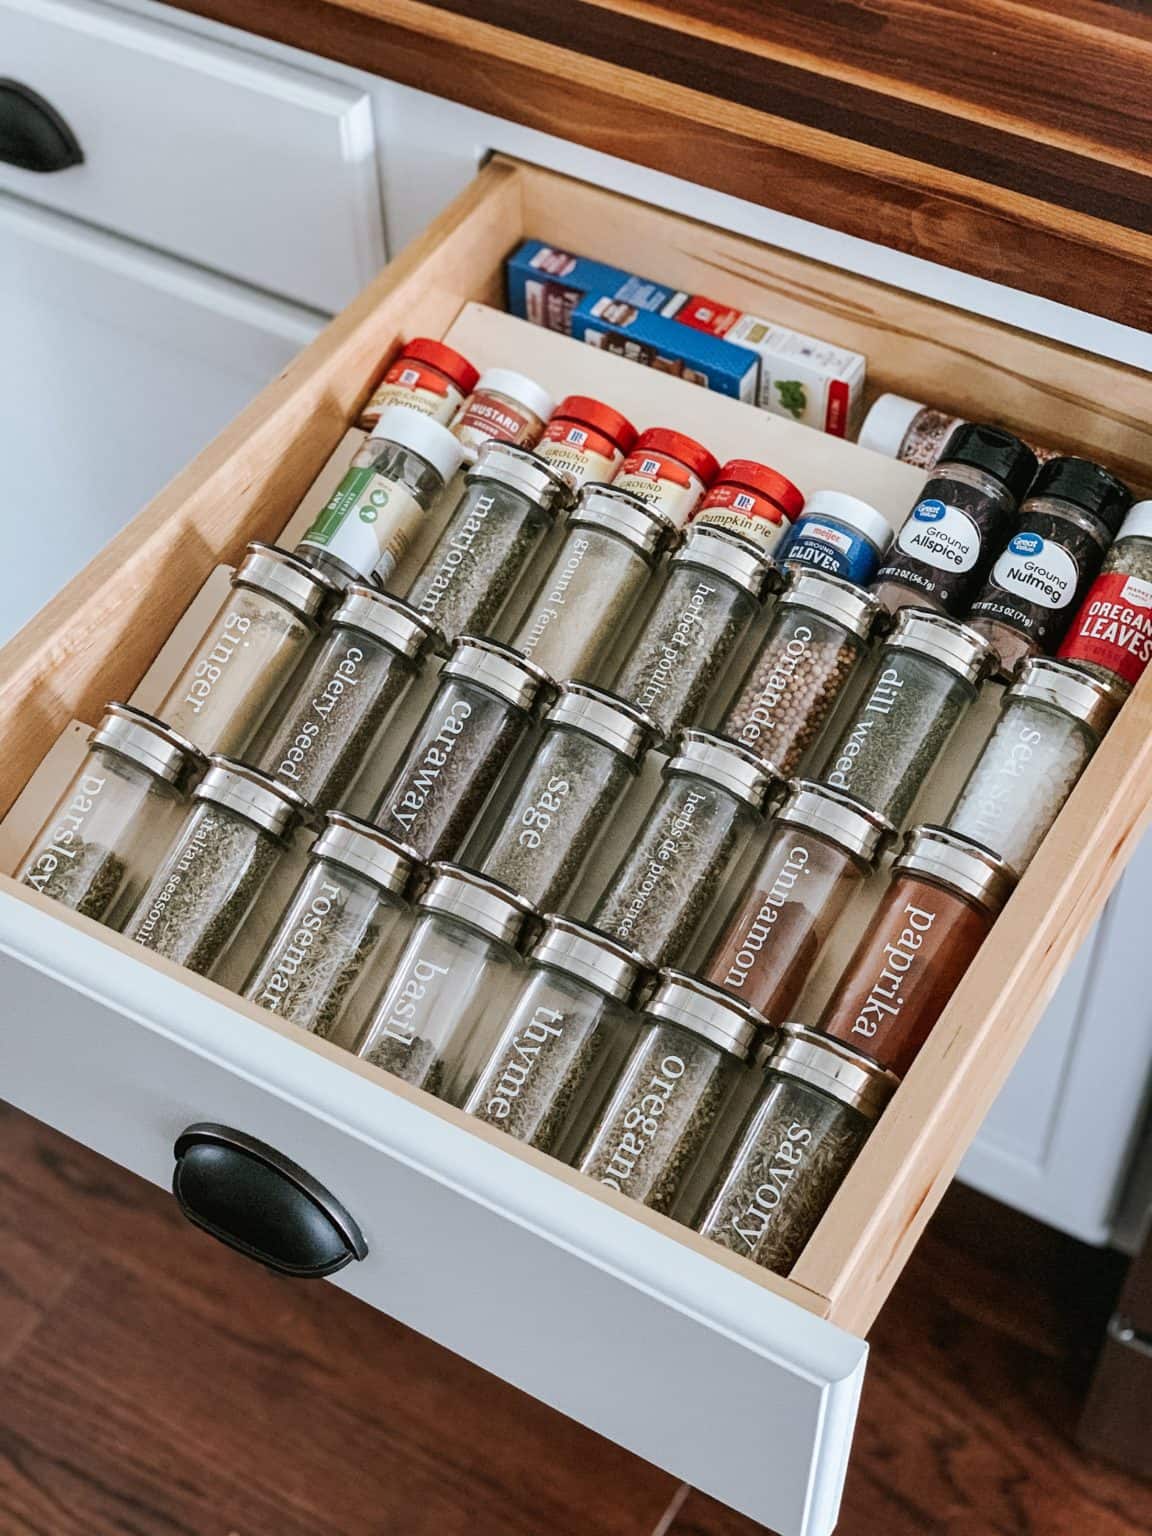
Source: Sammy on State
Cut a shallow tray from scrap plywood, sized to fit your specific kitchen drawer, add internal dividers, and suddenly every spice jar lies label-up and findable in under two seconds. No more pulling out six jars to find the cumin. No more duplicates because you bought something you already had. Cut the dividers to fit your actual jar sizes — short ones for the small tins, wider slots for the big jars. This is an hour’s work that transforms one of the most annoying storage problems in the kitchen, and it’s cut to fit perfectly because you built it yourself.
11. Under-Cabinet Mug Hooks
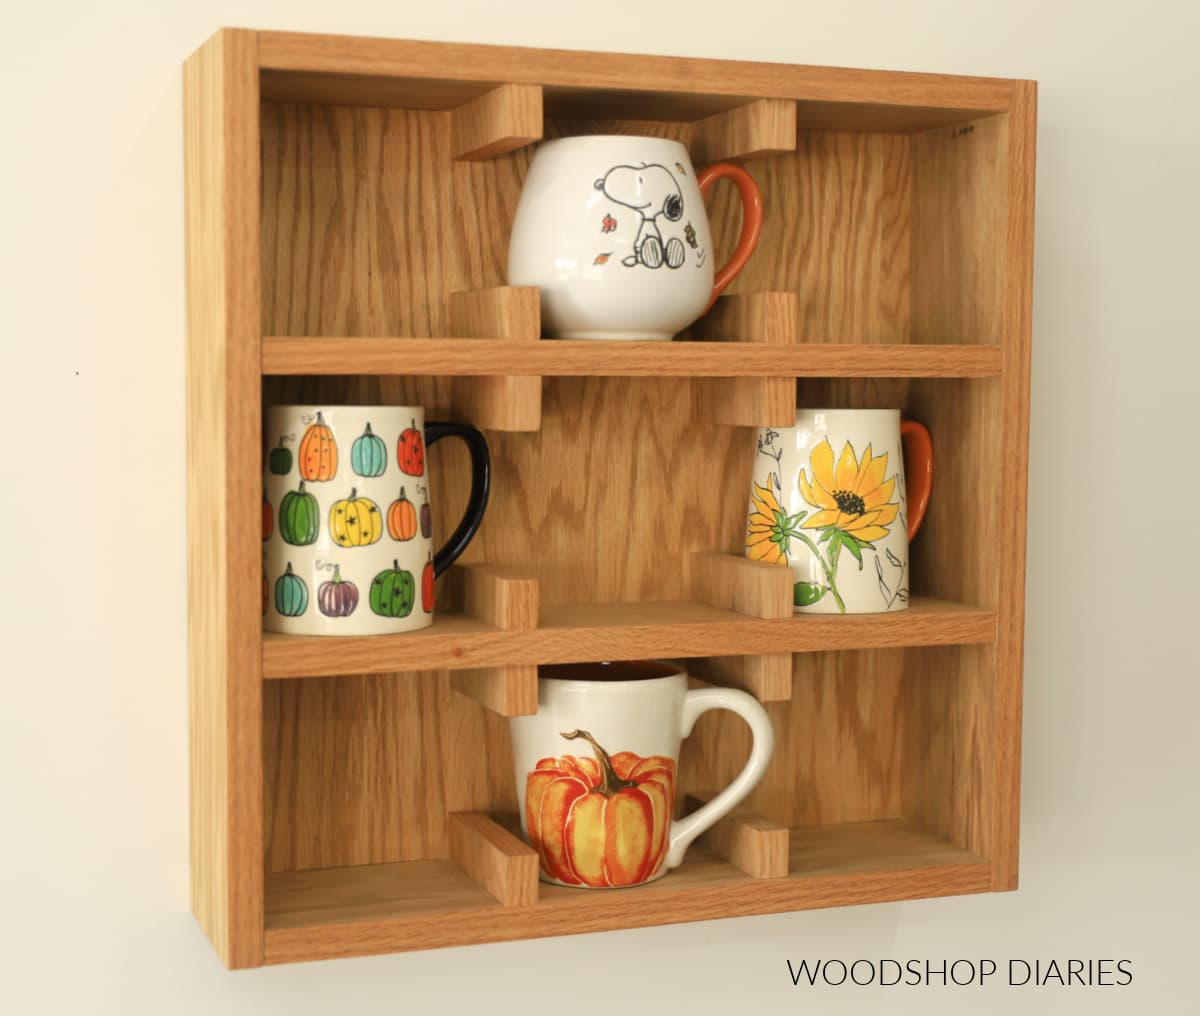
Source: Woodshop Diaries
Rip a thin strip of hardwood to length, drill evenly spaced holes through it, insert short dowels at a slight upward angle so mugs can’t slide off, and mount the whole strip to the underside of your upper cabinet. Every mug hangs neatly out of the way, your shelf space opens up, and the whole setup looks intentional rather than improvised. It’s one of those builds that guests notice and ask about. You can space the dowels for mugs only, or mix in some S-hooks for small pots or utensils depending on what you need.
12. Cookbook Stand
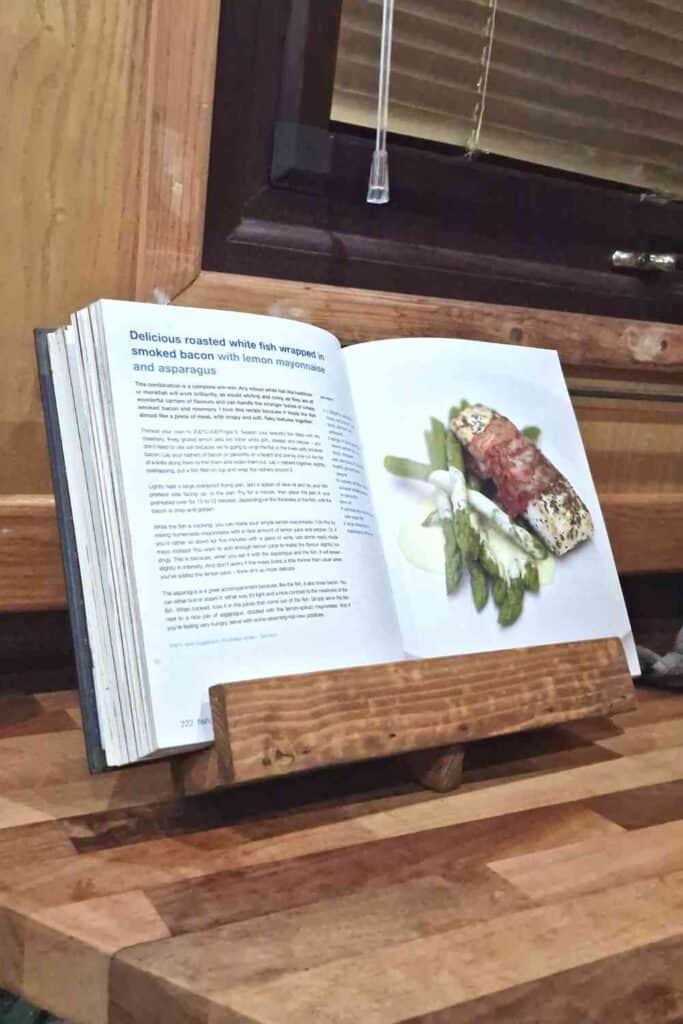
Source: The Carpenter’s Daughter
Two angled side pieces, a front ledge to hold the open book, a small lip at the base to stop it sliding — that’s the whole build, and it takes an afternoon. Use a nice hardwood offcut since this lives on the counter and you’ll look at it daily. The angled sides can be cut with a single bevel setting on the miter saw, and the ledge is just a short piece glued and screwed between them. Finish it with Danish oil or a light wax for a clean countertop-worthy look. Practical, good-looking, and way more personal than anything bought from a kitchen store.
13. Produce Bin Tower
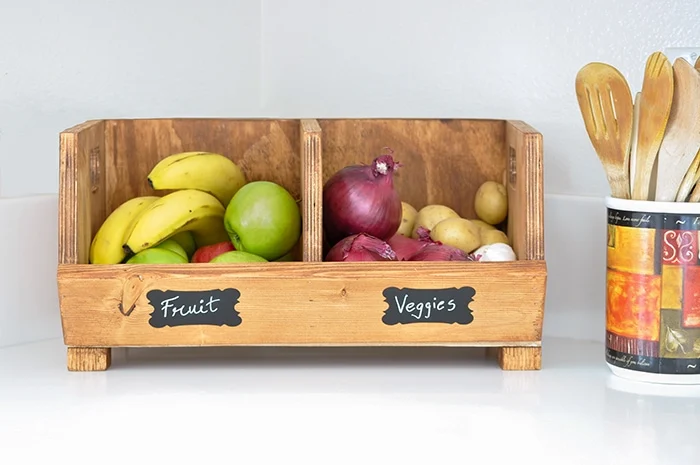
Source: Anika’s DIY Life
Stack two or three open-front boxes vertically with a slight backward tilt built into each crate — produce stays put, air circulates, and nothing goes unnoticed at the back. This is exactly the right storage for onions, garlic, and potatoes that need airflow and darkness but not a cabinet. The backward tilt angle is the detail that makes the whole thing work: gravity keeps everything in place while still letting you see and grab from the front. Drill a small hole in the back panel of each box to add cross-ventilation and extend the life of whatever’s inside.
Home Office & Desk
14. Desktop Cable Organizer
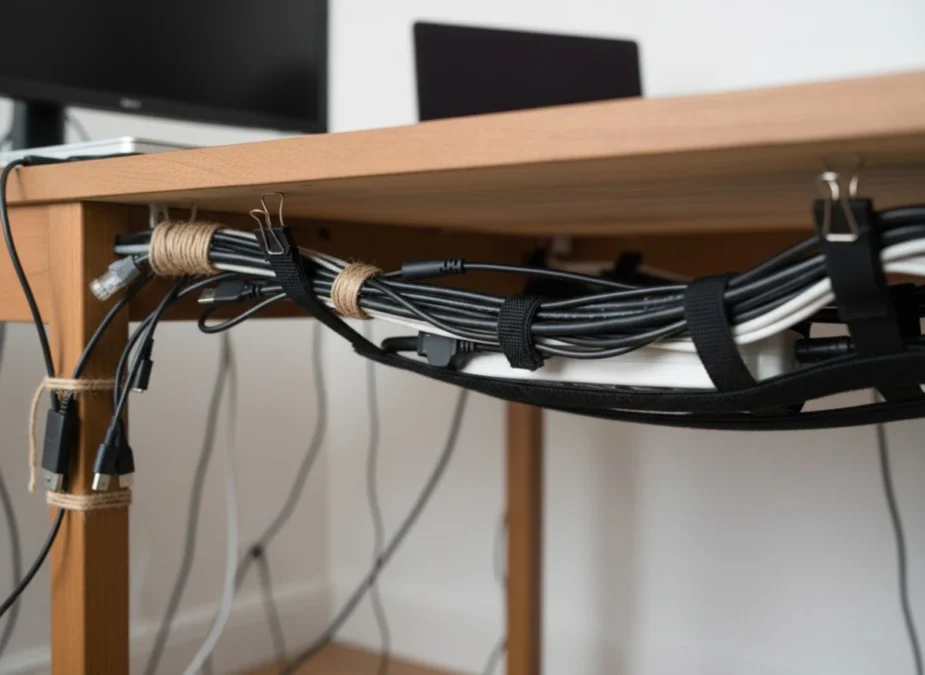
Source: Man Made DIY
A rectangular block of scrap wood with a series of holes drilled horizontally through it, mounted under your desk with double-sided tape or small screws — route each cable through a separate hole and the tangle disappears overnight. Power cord in one channel, monitor cable in another, USB hub cable in a third — each gets its own lane and can’t cross or bunch. It’s the kind of fix that only takes 20 minutes but changes the feel of the whole workspace. If you want to be extra tidy, route a groove along the underside of the block to hide the horizontal cable run completely.
15. Monitor Riser With Hidden Storage
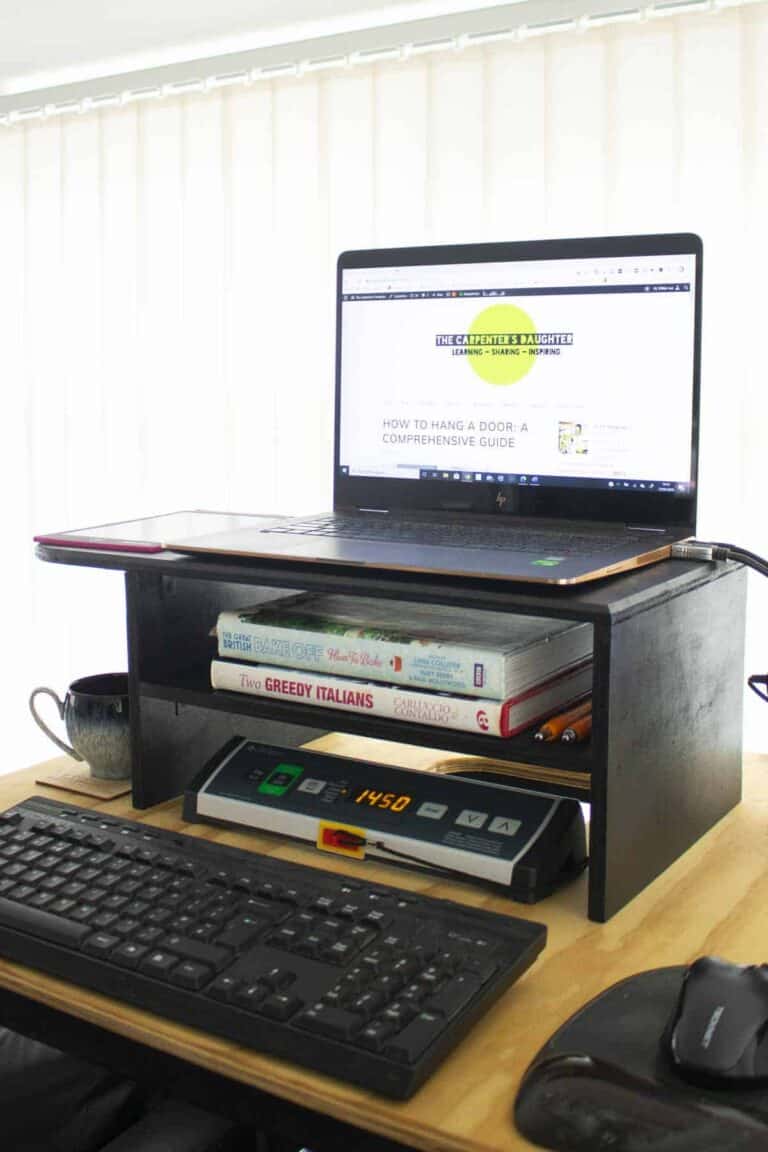
Source: The Carpenter’s Daughter
Two end supports plus a top surface, with a shelf or open cubby built underneath — the monitor goes up to a better ergonomic height and you get bonus storage for a keyboard when not in use, charging cables, or a stack of notebooks. The whole build is straightforward joinery: two end pieces, a top, optional shelf below. Make it the full width of your monitor or wider if you’ve got dual screens. Finish it to match your desk and it looks like it came with the desk, not like it was built from an offcut on a Saturday morning. Which, of course, it was.
16. Pen and Pencil Tray
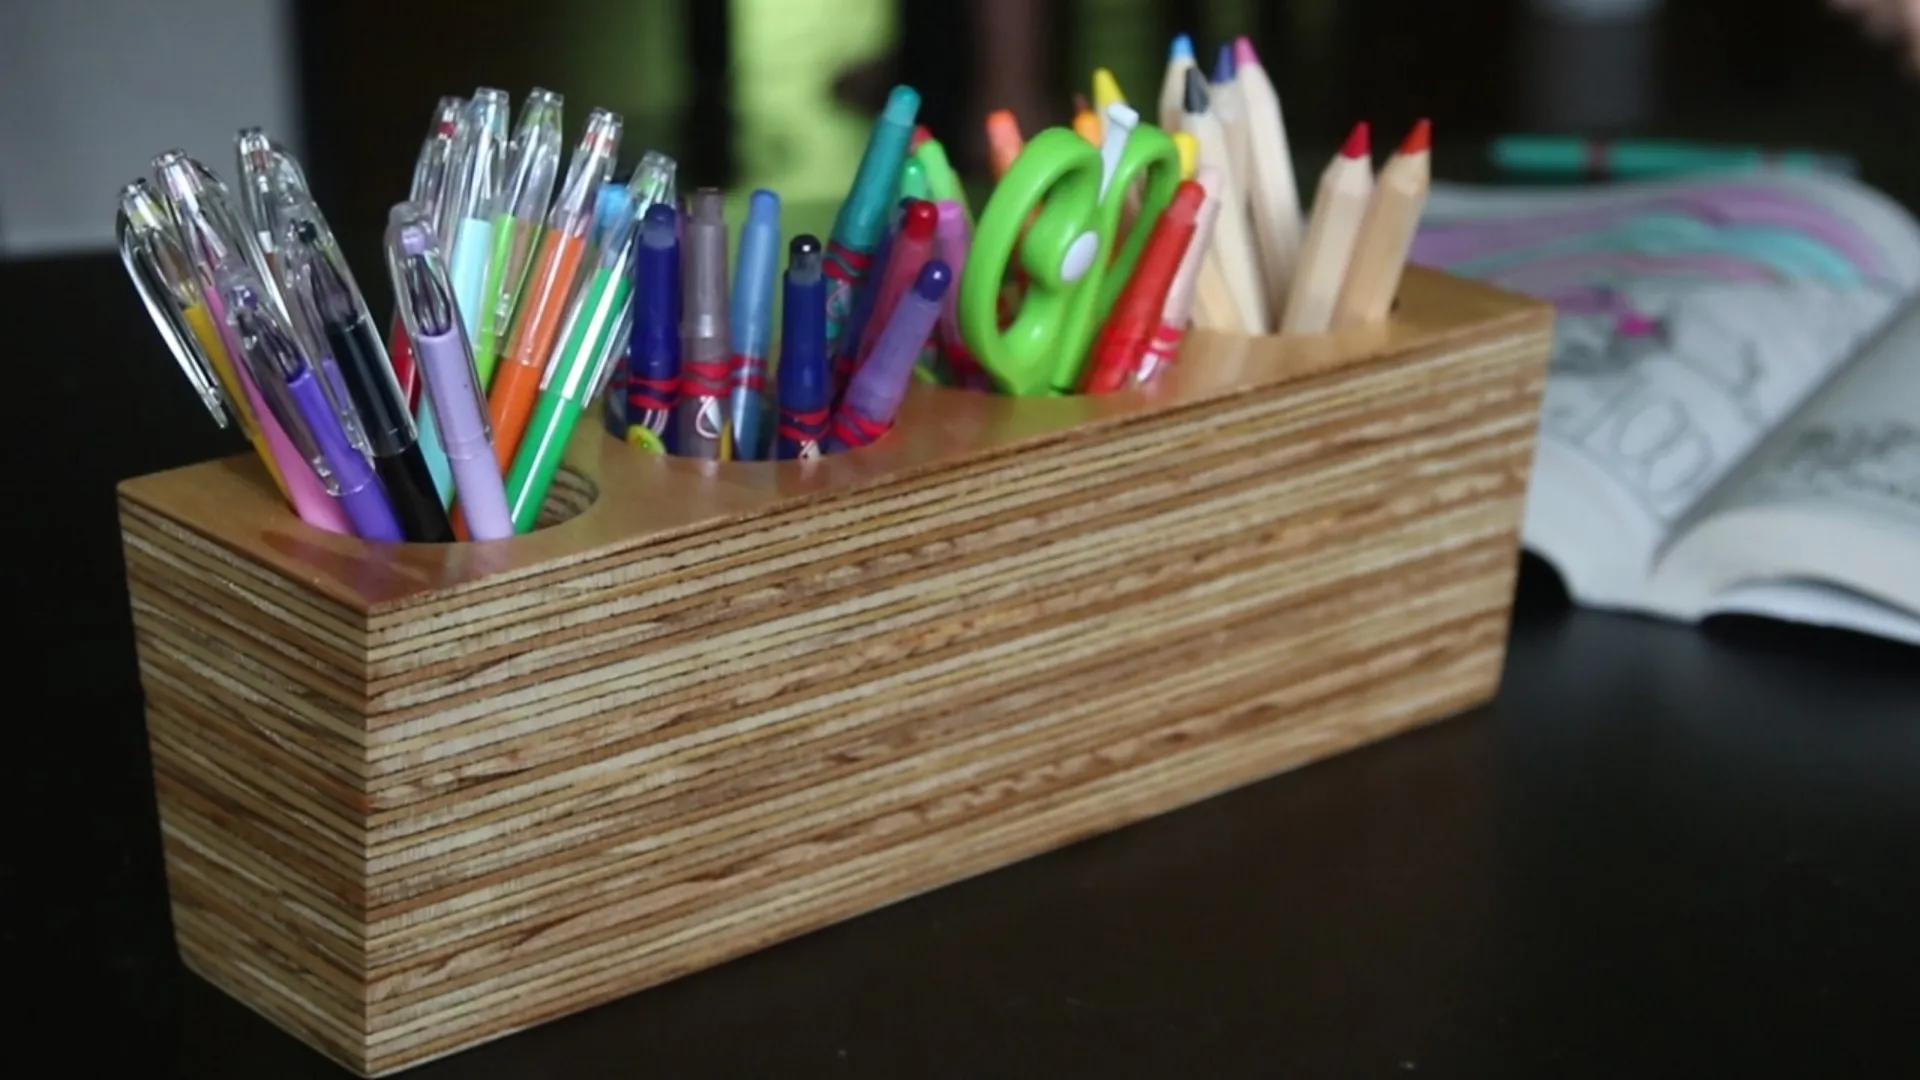
Source: Instructables
A shallow rectangular tray cut from scrap plywood with internal dividers for pens, pencils, scissors, and a stapler — the whole thing gets sanded smooth and finished with oil or paste wax. It’s not a complicated build, but it’s noticeably nicer than the plastic trays that come apart at the seams after six months. Customize the divider layout for exactly what you keep on your desk. Thinner slots for pens and pencils, a wider channel for the scissors, a short square section for the stapler. Everything has a home, the desk stays clear, and it actually looks good while doing its job.
17. Floating Shelf With Phone Charging Slot
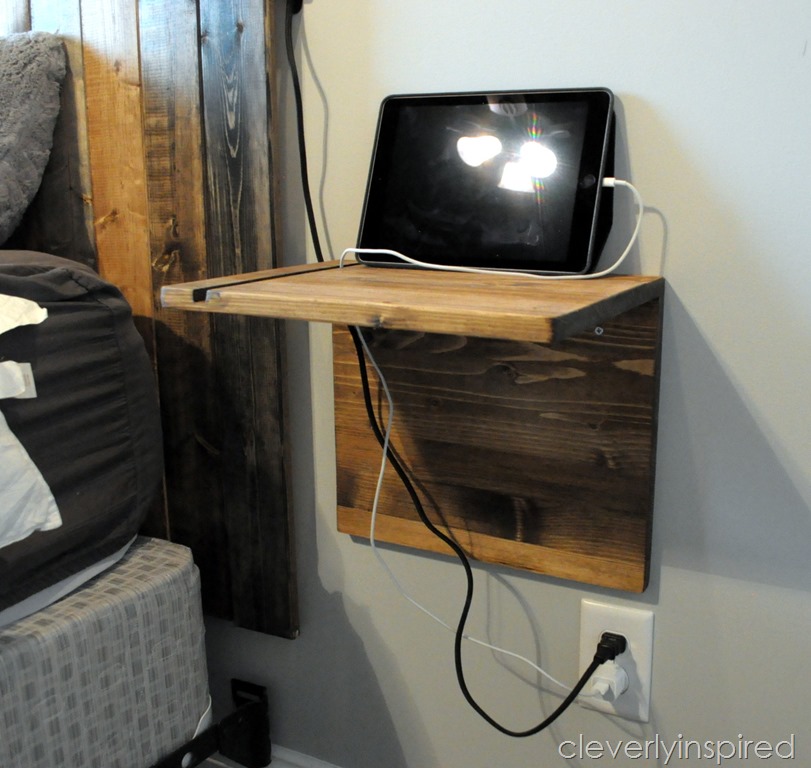
Source: Cleverly Inspired
A simple floating shelf with a vertical slot cut near one end — just wide enough to hold a phone upright while charging. Route a small channel along the underside of the shelf to hide the charging cable, and you’ve got a clean, wall-mounted charging station that looks intentional and takes up zero desk space. Mount it beside your desk for a proper home office setup, or next to the bed as a nightstand alternative. The phone-slot detail is the only tricky bit — a router or jigsaw handles it in minutes. Everything else is basic shelf construction.
Entryway & Mudroom
18. Key Hooks Board
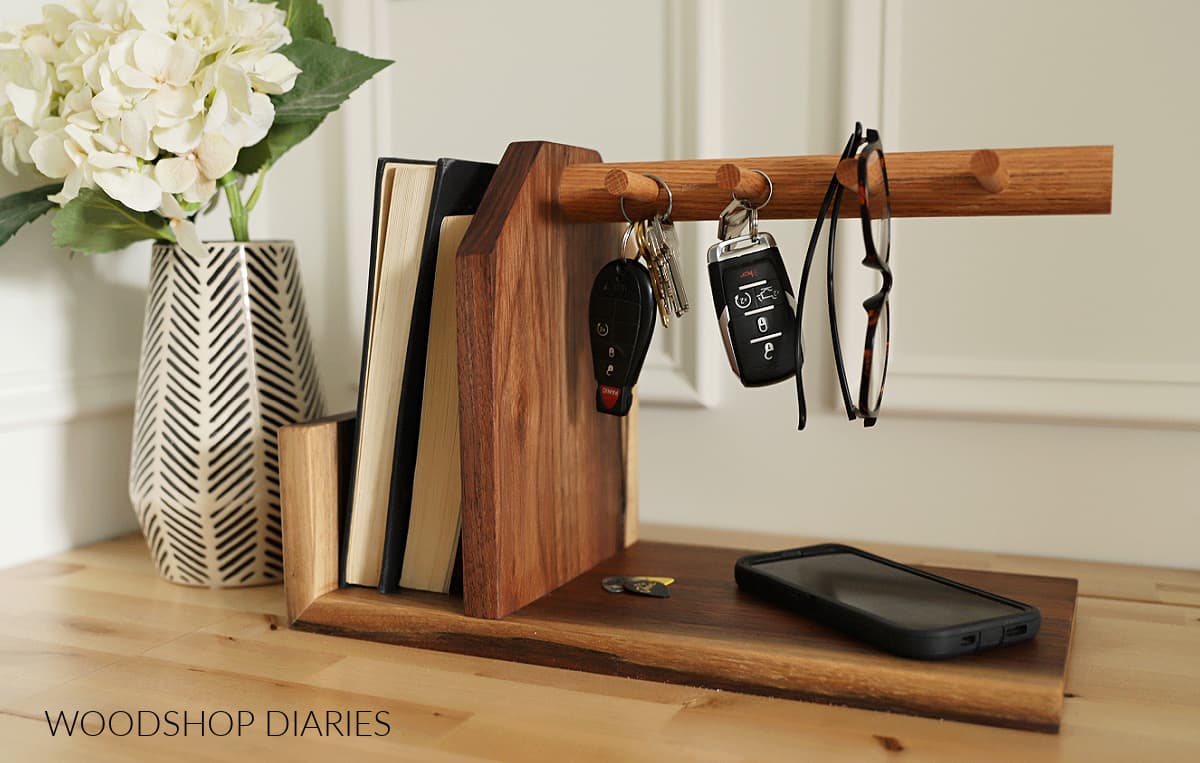
Source: Woodshop Diaries
A board cut to your preferred length with a row of short wooden pegs or cabinet hooks screwed in and mounted near the door — this is the oldest trick in home organization and it still works perfectly. You will not lose your keys again, at least not in the house. Use leftover cabinet knobs for a nicer look, or turn small wooden pegs on a lathe if you want a fully handmade version. Add a small shelf across the top for mail, sunglasses, or your wallet and you’ve turned a simple hook board into a complete entryway command center.
19. Modern Boot Tray
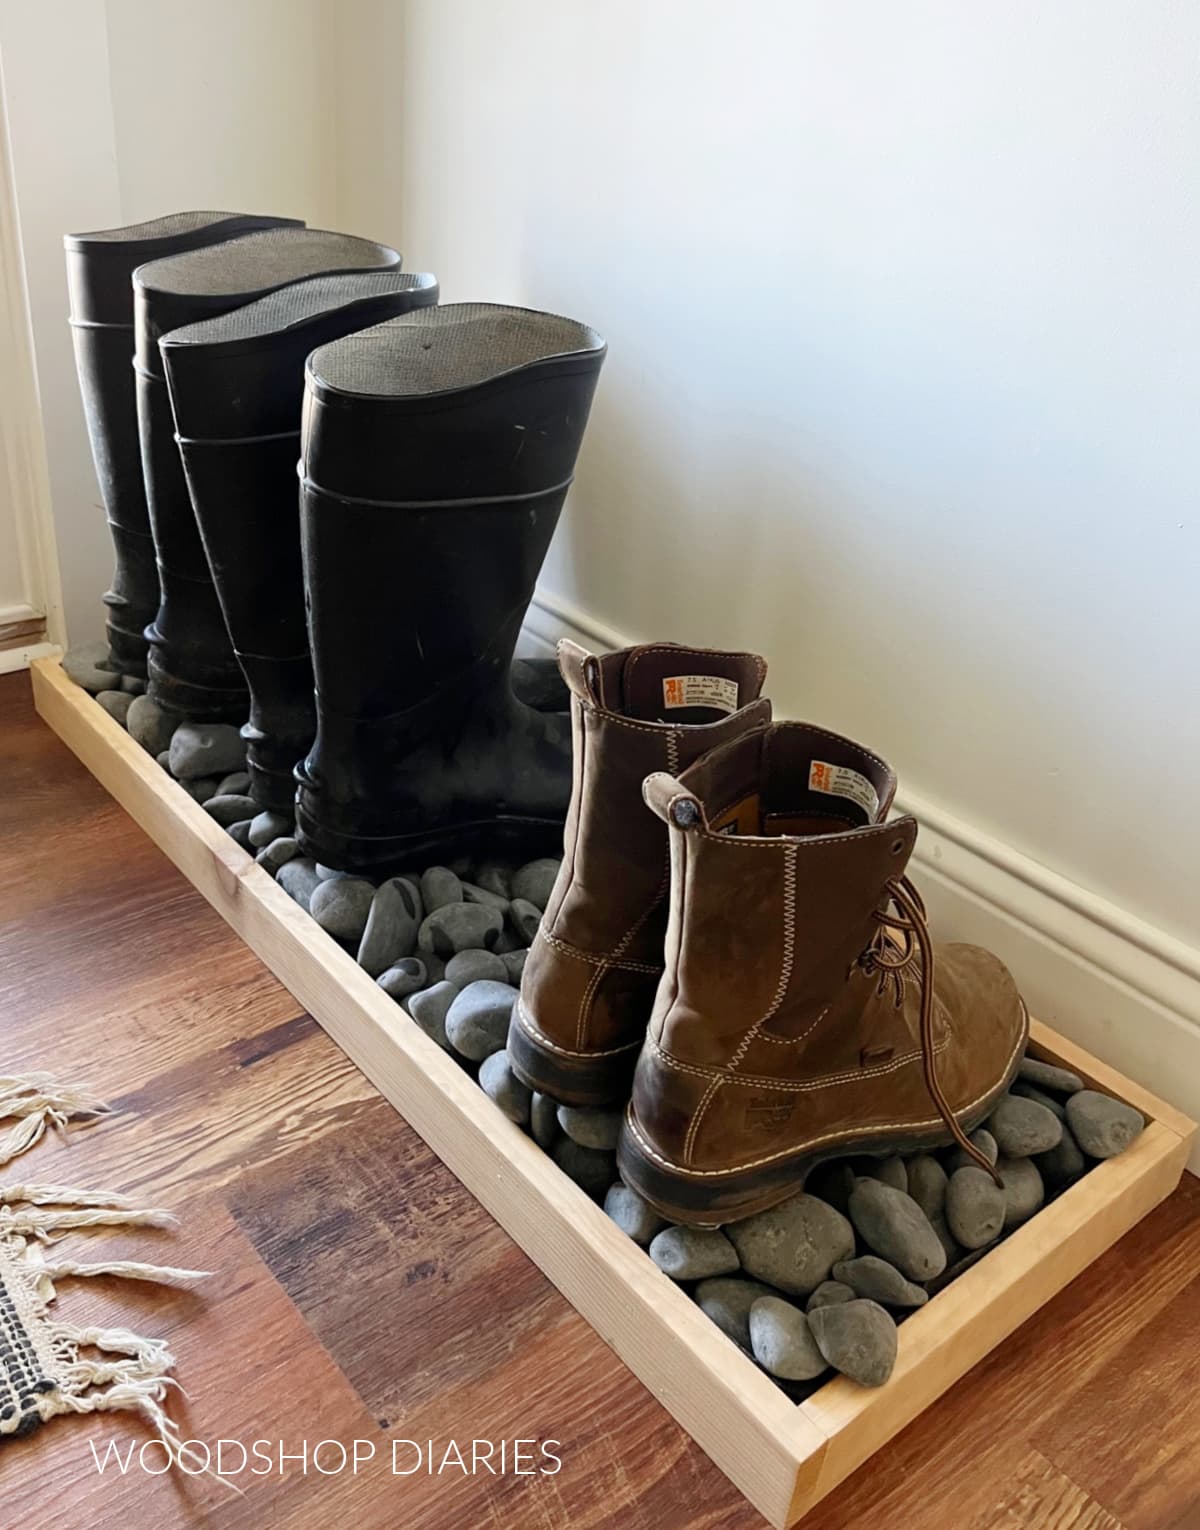
Source: Woodshop Diaries
Rip several thin slats from scrap wood and space them slightly apart on a simple frame — water and mud drain through the gaps instead of pooling into a soggy mess on the floor. It’s a cleaner, better-looking solution than a rubber tray and it actually works: boots dry faster with airflow from below, the floor underneath stays dry, and the whole thing looks like it belongs there rather than being borrowed from a garden center. Finish the slats with a water-resistant oil if you want longevity; leave them raw if you’re happy to replace them seasonally.
20. Grocery Bag Storage Holder
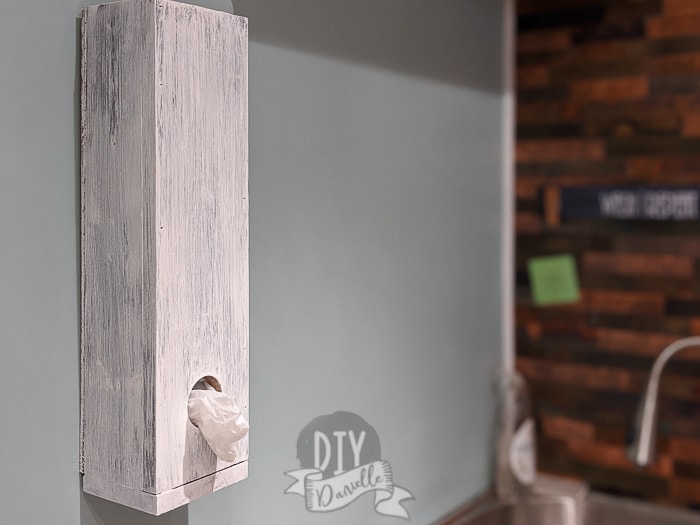
Source: DIY Danielle
A horizontal board with evenly spaced dowels at different heights handles backpacks, tote bags, and purses without everything collapsing into an unusable pile on a chair. The varying heights are key — lower pegs for bags you want accessible, higher ones for bags you use less often. Add a small shelf on top for hats, gloves, and sunglasses and you’ve got a one-board entryway organizer that solves the bag pile completely. Build it in an afternoon, screw it to studs or use appropriate wall anchors for the weight, and enjoy walking past a tidy entryway for the first time in years.
21. DIY Mail Organizer
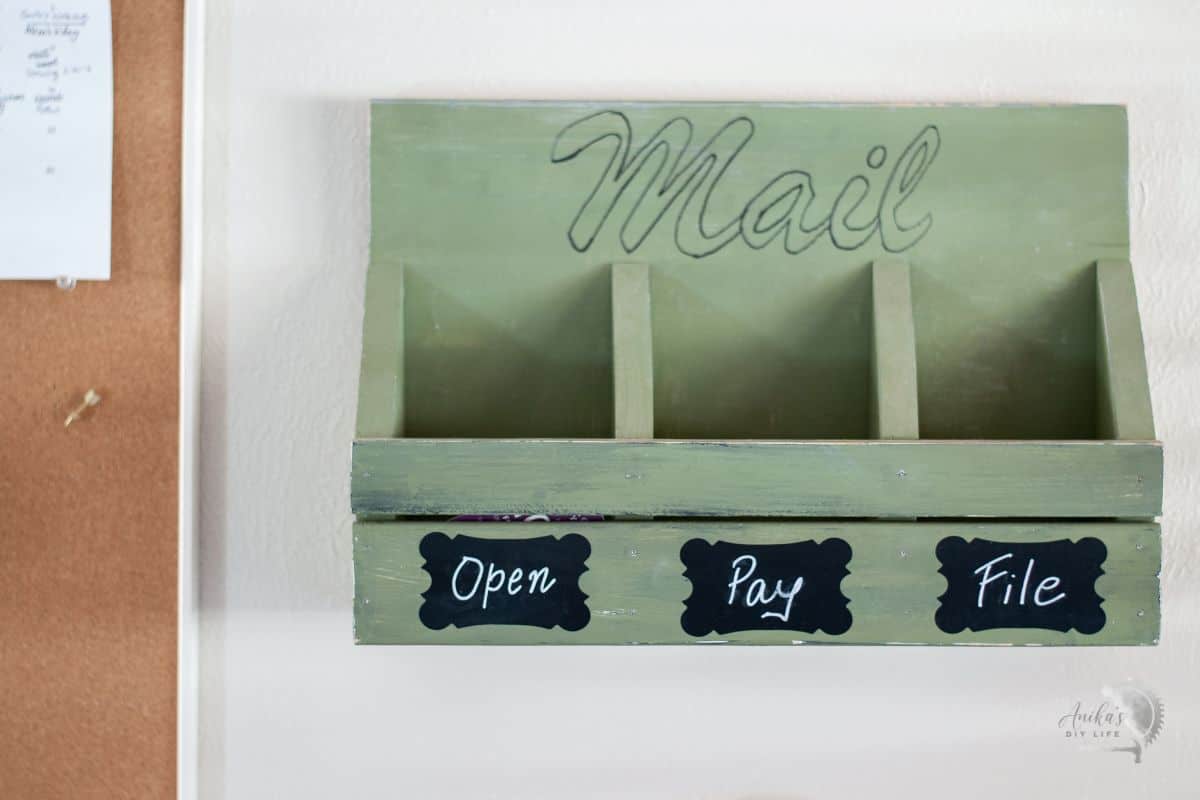
Source: Anika’s DIY Life
Three or four angled slots assembled from thin plywood strips into a standing unit — incoming mail goes in the first slot, bills in the second, outgoing in the third. It beats the counter pile by a significant margin, and it’s small enough to fit in any entryway or home office corner. The angled construction makes it easy to flip through each section without pulling everything out. Add a small label to the front of each slot with a wood-burning pen and the whole family knows the system. Cut the plywood from any leftover sheet you have — even 1/4″ works fine for this.
Bedroom & Closet
22. Nightstand Catchall Tray
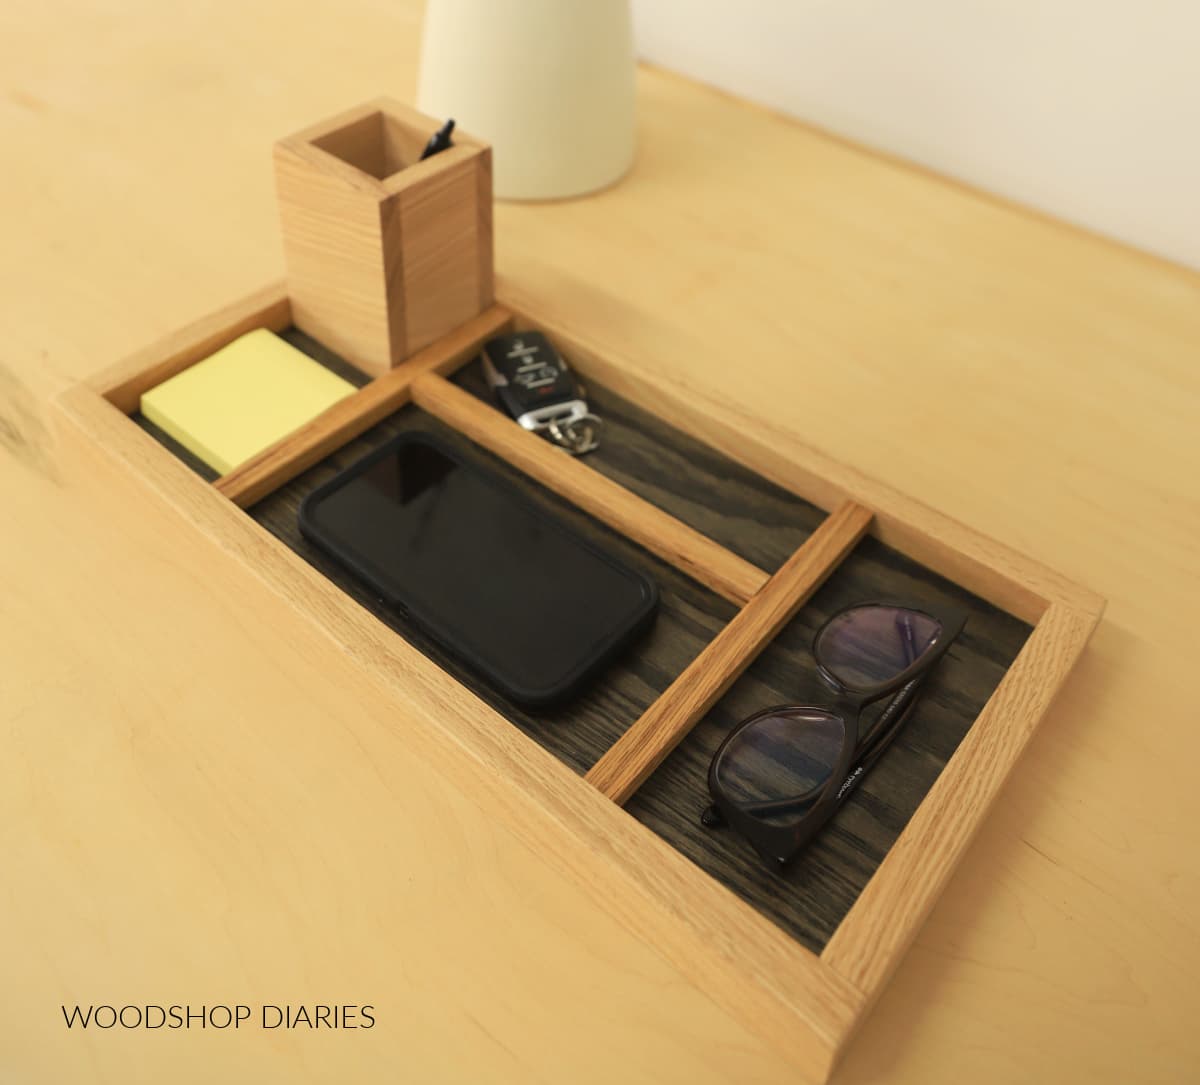
Source: Woodshop Diaries
A shallow tray with a few internal dividers — phone in one section, glasses in another, watch and wallet in the third. Cut it from a nice hardwood offcut and finish with paste wax for a surface that looks and feels premium. It’s an hour’s work that makes your nightstand look intentional rather than chaotic, and once you have it, you’ll wonder how you ever did without a dedicated landing spot for the stuff you empty from your pockets every night. The wax finish wipes clean easily, which matters more than you’d expect after about a week.
23. Belt Rack
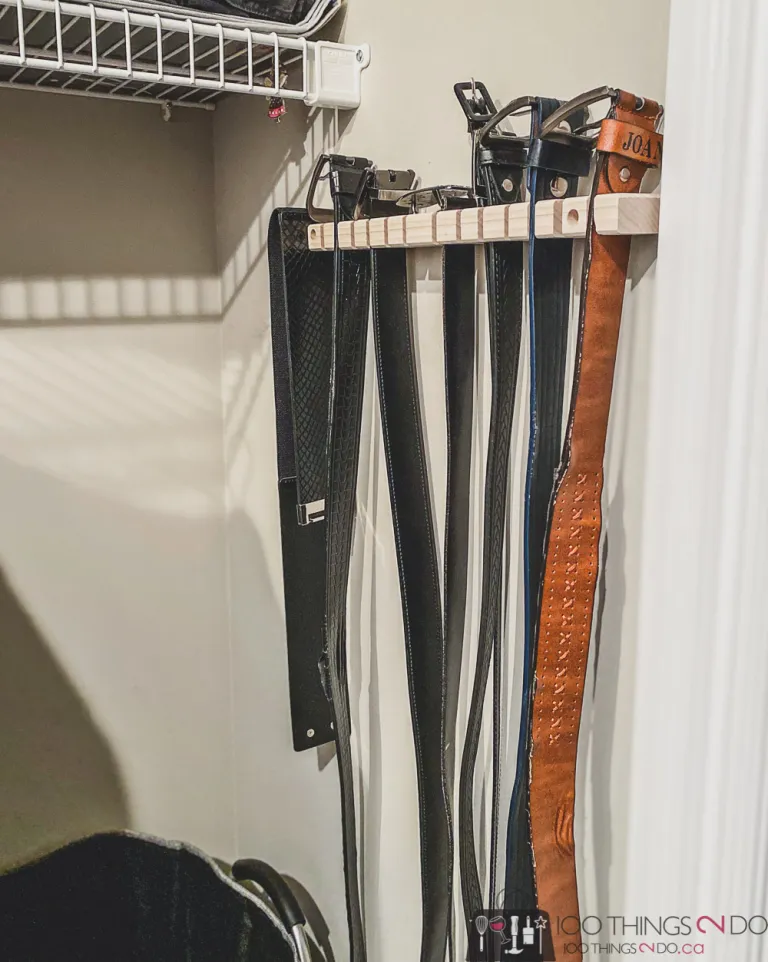
Source: 100 Things 2 Do
A board with short dowels or pegs angled slightly downward keeps belts and ties hanging without slipping off — mount it on the inside of a closet door and you’ve got hidden storage that doesn’t eat any floor or shelf space. No more stuffing belts in a drawer where they crease, tangle, and disappear. The downward angle is the design detail that actually matters here; it’s the difference between a peg that holds and a peg that doesn’t. Cut the board to fit your door, space the pegs for however many belts you have, and finish it to match the inside of your closet if you’re feeling thorough.
24. Custom-Fit Drawer Dividers
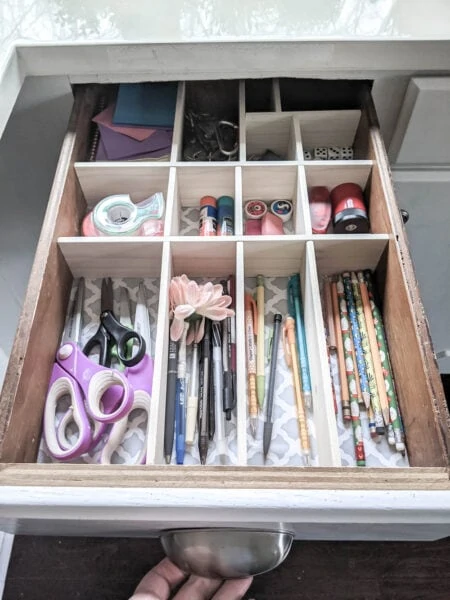
Source: Lovely Etc.
Rip thin strips from scrap plywood or hardwood, cut them to fit your exact drawer dimensions, and slot them together with half-lap joints — no glue, no screws, fully adjustable, completely removable if your storage needs change. Store-bought dividers never quite fit because they’re made for imaginary drawers; these fit perfectly because you measured your actual drawer. The half-lap joinery is beginner-friendly and takes about 30 minutes to cut with a table saw or even a handsaw. Stack two layers if you want to create smaller compartments for socks, ties, or accessories.
25. Under-Bed Storage Caddy
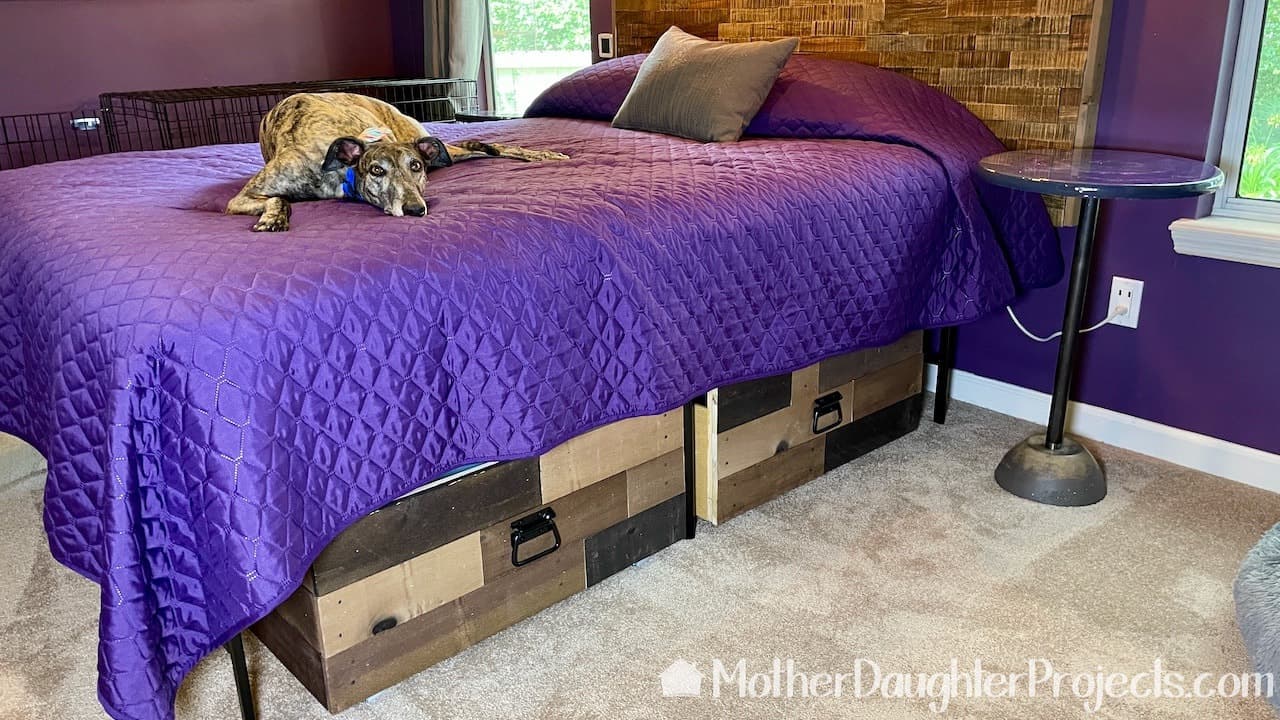
Source: Mother Daughter Projects
A flat, open-top box built to slide under your bed with just enough clearance — add a small handle on the pull-out end so you can retrieve it without lying on the floor. Great for seasonal clothing, extra bedding, spare pillows, or anything else you need a few times a year but not daily. The key measurement is the gap between your bed frame and the floor: measure it carefully, then build your box 1/4″ shorter. Use plywood for the base (it won’t sag under weight) and solid wood for the sides. Casters are optional but worth adding if the floor is smooth and you access it frequently.
Materials & Tools You’ll Need for Most of These Builds
Most of these organizers use the same basic materials list:
- Scrap wood — pine, plywood, and poplar are the most common and easiest to work with
- Wood glue — Titebond II for anything that needs a strong, lasting bond
- Wood screws — 1¼” and 2″ cover most situations
- Sandpaper — 120 grit for shaping, 220 for final smoothing
- Finish — Danish oil, tung oil, or a simple paste wax for a clean, protective coat
For tools, you really only need:
- Circular saw or miter saw
- Cordless drill and driver bits
- Tape measure and square
- Clamps (even 2–3 is enough to start)
If you want to level up any of these builds — add dados, cleaner joinery, or decorative touches — a router opens up a lot of possibilities. Not required, but worth learning. If you’re new to routers, check out our guide to using a router for beginners before tackling the more detailed builds on this list.
Common Mistakes to Avoid
Even simple organizer builds can go sideways if you skip a few basics:
- Not checking for square. A shelf that’s 2mm out of square looks fine in the shop and drives you crazy every time you look at it. Use a speed square on every assembly.
- Skipping the dry-fit. Always assemble without glue first. Check that everything fits, that your measurements are right, and that nothing is backward. Then glue.
- Using green or wet wood. Scrap wood that’s still drying will warp after you build with it. If the wood feels heavy and cool, leave it to dry for a few more weeks.
- Underestimating finishing. A quick sand and coat of oil takes 30 minutes and makes the difference between something that looks like scrap wood and something that looks like it belongs in your home.
- Mounting without studs. Wall-mounted organizers that carry weight — clamp racks, lumber sorters, pot racks — need to hit studs or use appropriate anchors. A screw into drywall alone won’t hold when you load it up.
Want Plans to Take These Further?
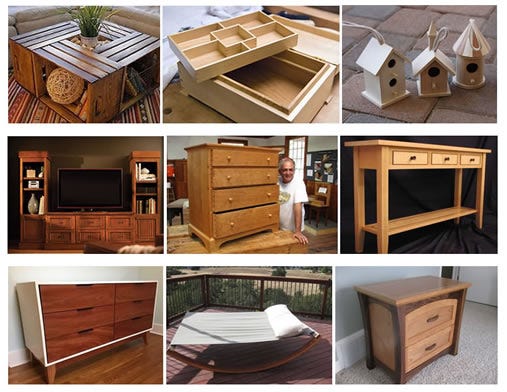
If you’re anything like me, you’ll knock out three or four of these organizers and immediately want to build more. The problem is that scaling up your projects — larger shelving units, workshop storage walls, full closet systems — gets complicated fast without solid plans to work from.
Ted’s Woodworking Plans is where I go when I want a full set of detailed, dimensioned plans I can actually follow without second-guessing measurements. The library covers thousands of projects at every skill level, including a ton of storage and organization builds. It’s genuinely one of the most useful resources I’ve found for project ideas with real plans behind them.
👉 Browse Ted’s Woodworking Plans here
More Scrap Wood Project Ideas
If you enjoyed this list and you’ve got more offcuts to burn through, there are plenty of directions to take things. You can build smaller decorative pieces, gifts, or even projects that you can sell at craft markets — scrap wood is perfectly suited for all of it.
For selling ideas, check out 25 Scrap Wood Projects That Sell (Low-Cost & Beginner-Friendly) — it covers beginner-friendly builds with real resale potential.
And if you want more general inspiration for using offcuts creatively around the house, our 10 Creative and Easy Scrap Wood Projects to Transform Your Home covers a great range of builds that go beyond pure utility.
Wrapping It Up
Twenty-five organizers, almost zero material cost, and a workshop full of scrap wood that’s finally being put to good use. That’s a pretty good deal.
The beauty of builds like these is that they don’t ask much of you — a few hours, basic tools, and a bit of patience with the sanding. And every single one of them makes your home or workshop a slightly better place to be. Start with whatever room bothers you most, grab the scraps, and just build. You’ll be surprised how fast one project turns into five.
Now go put that pile of offcuts to work. It’s been waiting long enough.