
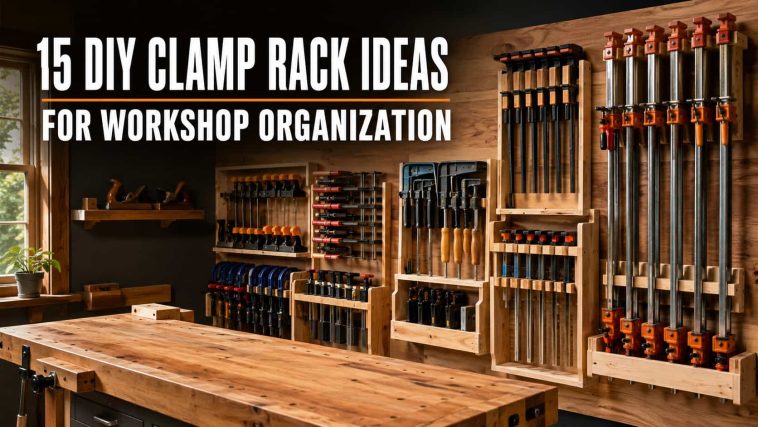
Clamps are wonderfully useful right up until they take over the workshop. Long parallel clamps lean in corners, pipe clamps roll under benches, quick clamps collect on every flat surface, and the exact size you need somehow ends up behind all the others.
A well-designed clamp rack keeps the collection visible, protects the clamps from damage, and puts them close to the assembly area. It can also reclaim a surprising amount of floor and workbench space. You do not need one universal rack, either. Many workshops work better with two or three small holders positioned where each clamp type is actually used.
Below are 15 DIY clamp rack ideas with links to the original free plan or detailed tutorial. The collection includes simple scrap-wood holders, compact wall racks, French-cleat solutions, and high-capacity mobile carts. Choose by clamp type, total weight, available wall space and how often the storage must move.
If your wall-storage system is still taking shape, begin with these 21 easy French cleat tool holders. For broader organization, combine the clamp rack with DIY garage shelving and a dedicated scrap-wood storage system.
Quick Comparison: Best Clamp Rack by Clamp Type
| Rack style | Best for | Space used | Difficulty |
|---|---|---|---|
| Slotted wall rack | Parallel and bar clamps | Moderate wall width | Easy–medium |
| Deep projecting rack | Many clamps in little wall width | More aisle depth | Medium |
| Pipe-clamp divider rack | Pipe clamps | Wall width | Easy |
| Small runner rack | Quick and F-style clamps | Minimal | Easy |
| French-cleat rack | Changing collections | Flexible wall space | Medium |
| Rolling clamp cart | Large mixed collections | Floor space | Medium |
Plan the Rack Around the Clamps You Own
Lay the collection on a clear surface and group it by type: parallel clamps, pipe clamps, F-style or bar clamps, quick clamps, spring clamps and specialty clamps. Measure head size, bar or pipe diameter, overall length and the space needed to lift each clamp out. A slot that fits one brand may be too tight or too loose for another.
Also consider weight. A short rack of quick clamps and a rack holding twenty heavy parallel clamps are very different structural projects. Wall-mounted storage must connect to suitable framing with hardware appropriate to the wall and total load. If the collection is large, two smaller racks spread across multiple studs may be more practical than one overloaded unit.
Workshop safety: Follow the original plan and tool manufacturer instructions. Wear appropriate protection, secure workpieces before cutting or drilling, and seek qualified adult or professional help for unfamiliar operations or structural mounting. Load-test a new rack gradually, keep long clamp bars out of walkways, and never rely on drywall alone for a heavy clamp collection.
15 DIY Clamp Rack Ideas for Workshop Organization
1. VersaGrip Clamp Rack
Credit : Kregtool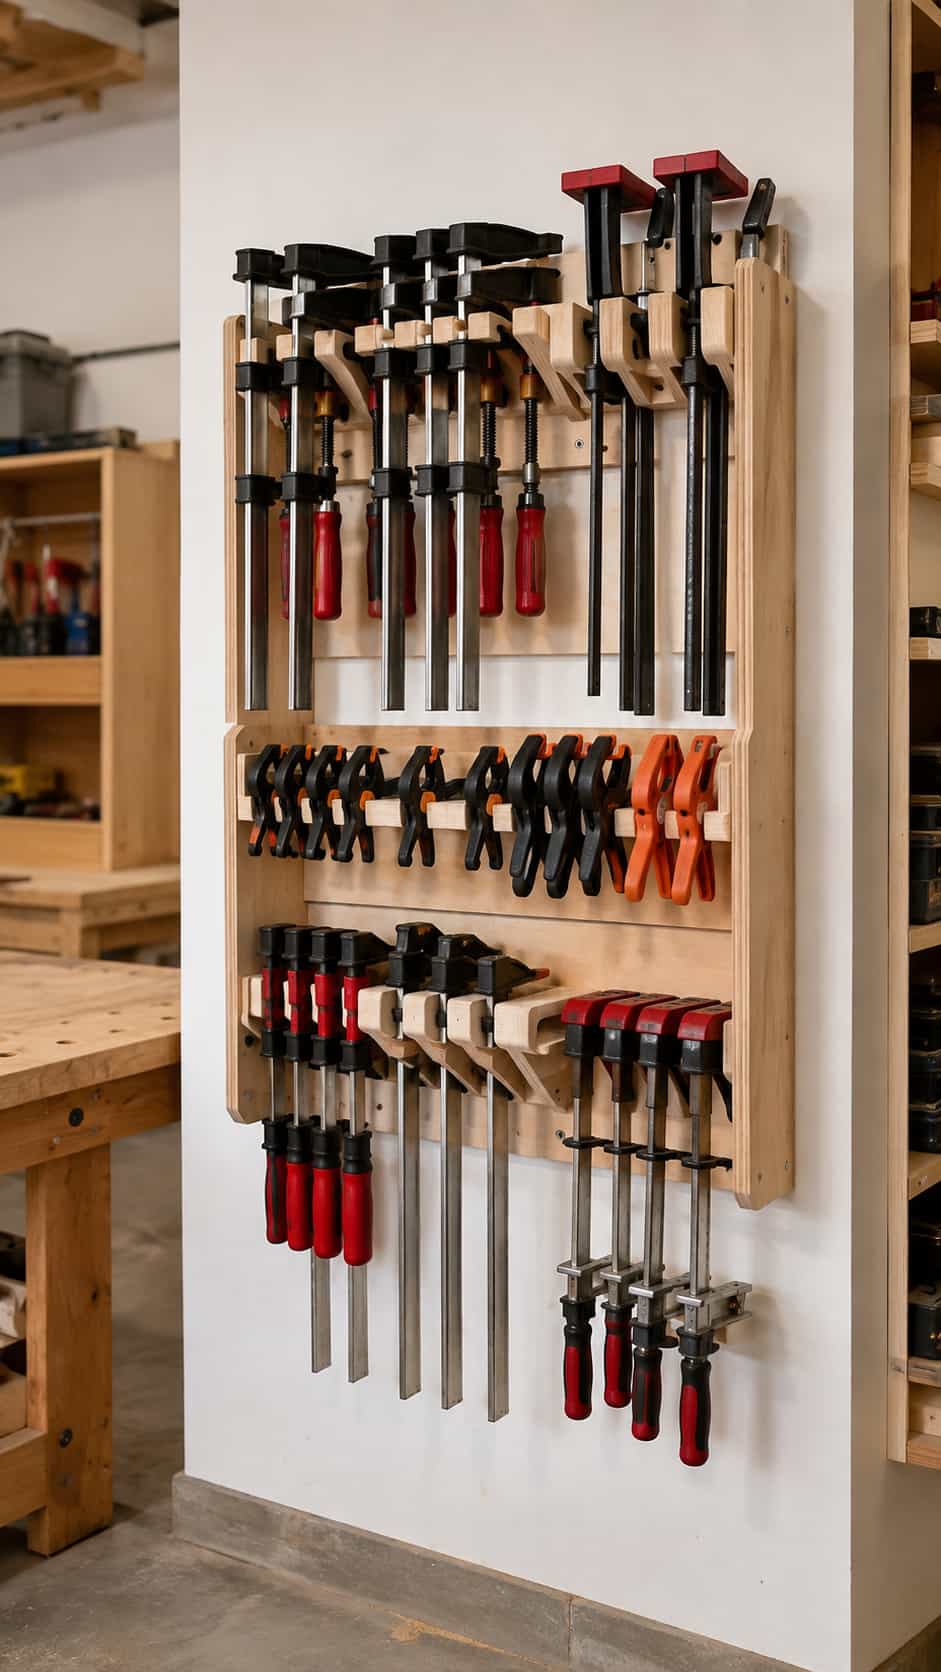
Kreg’s free VersaGrip rack uses a tall plywood frame with shaped shelves and slots for several clamp lengths. It can hang on a wall or attach to the side or back of a rolling workbench, which makes it useful when open wall space is limited.
The plan is designed around one clamp family, so measure your own clamp heads and bars before copying the slot dimensions for another brand. The vertical layout keeps several sizes together while using relatively little width. It is especially convenient beside a clamping table or assembly bench.
Best for: Kreg VersaGrip or similarly sized clamps
Difficulty: Easy
Important check: Slot and head clearance
Open Kreg’s free VersaGrip clamp rack plan
2. Space-Saving Workshop Clamp Rack
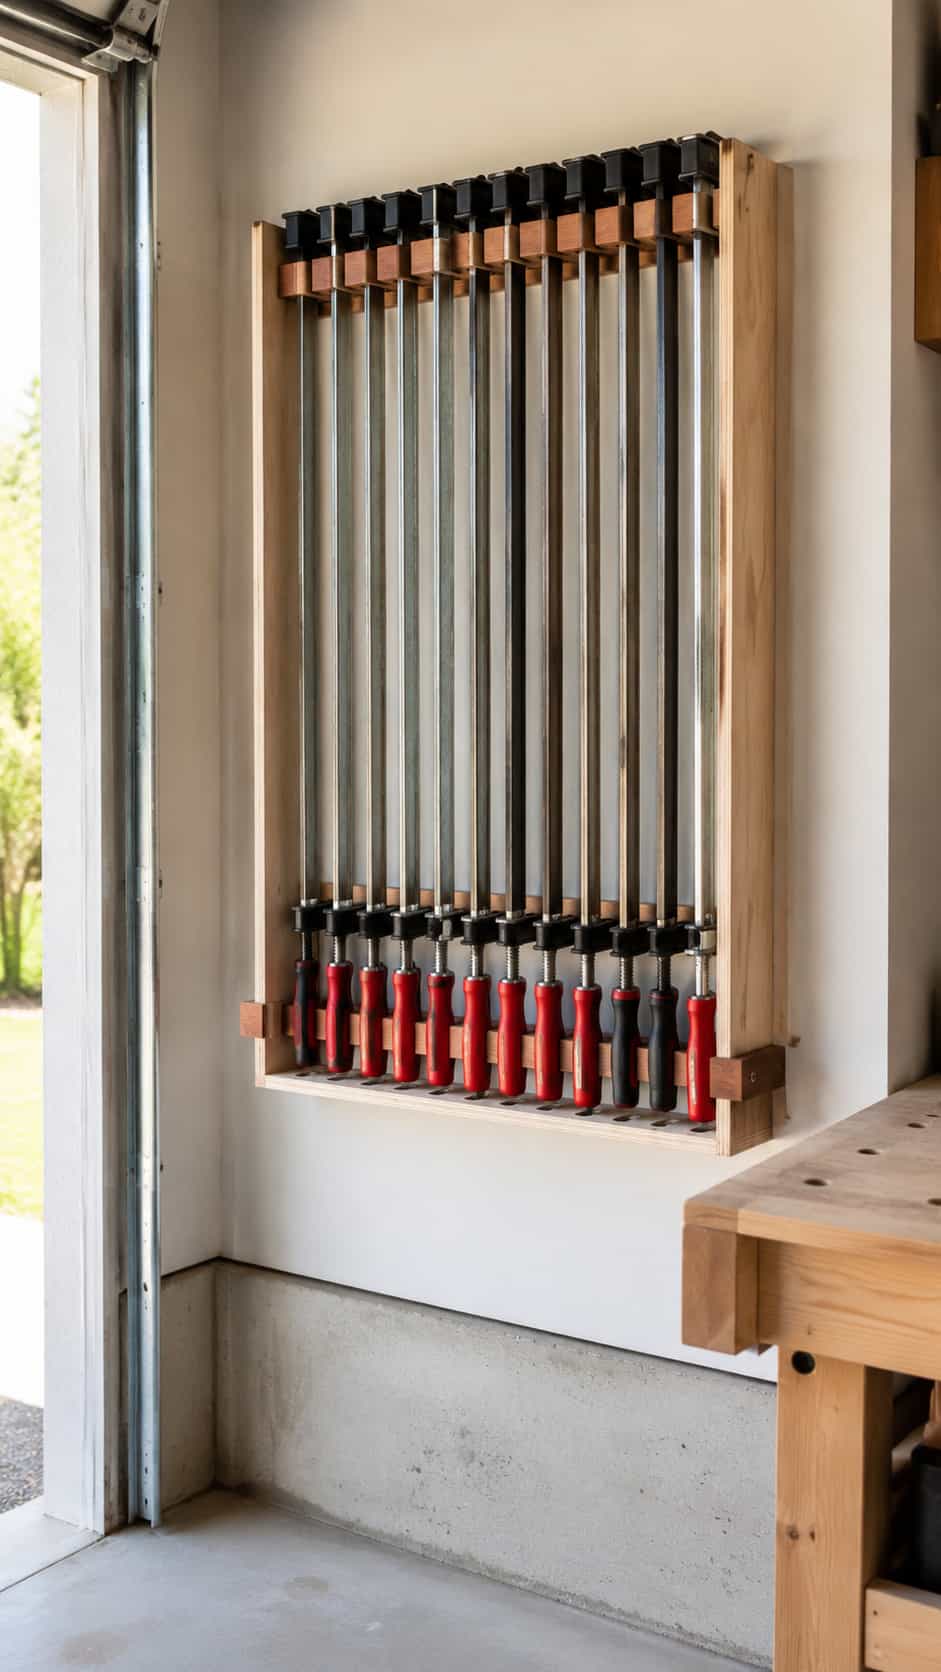
Credit : Kregtool
This Kreg design stores clamps one behind another on projecting supports, allowing a large number to fit within a narrower section of wall. It is a good choice when the wall is crowded with cabinets or tool holders but the aisle has enough depth.
Projecting racks trade wall width for reach into the room. Mark the full depth on the floor before building so long bars and clamp heads do not create a shoulder-height obstacle. Position frequently used sizes at the front and leave enough clearance to lift the rear clamps without unloading everything.
Best for: Narrow wall sections
Difficulty: Moderate
Important check: Aisle clearance in front of the rack
View the free space-saving clamp rack plan
3. Simple Wall-Mounted Clamp Rack
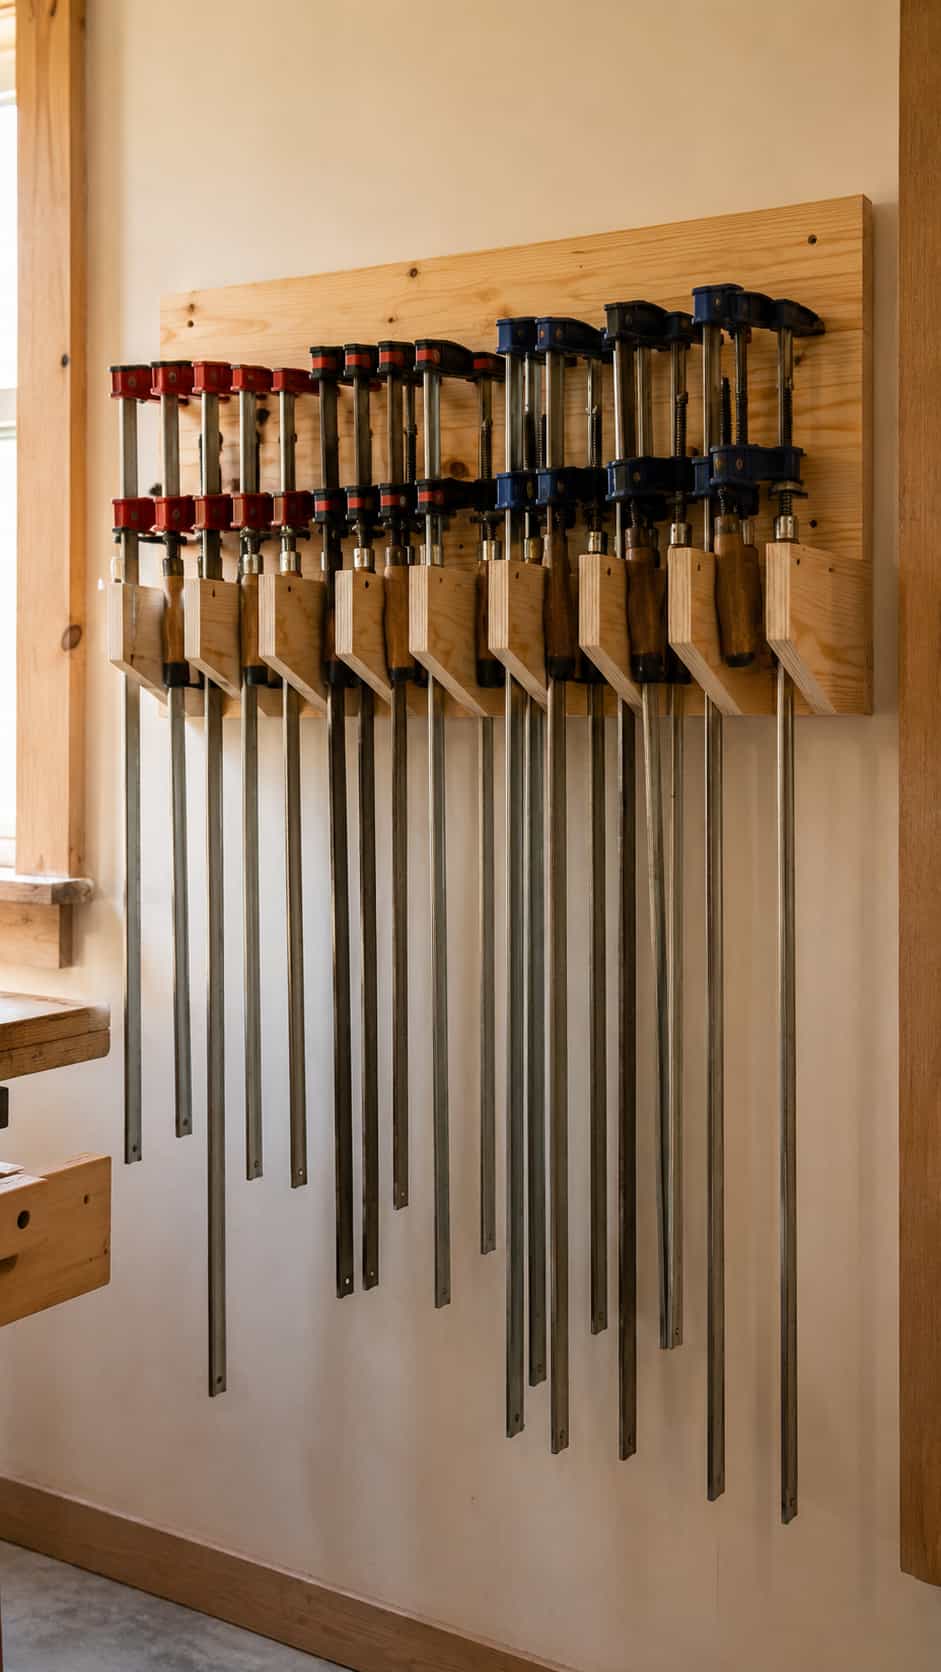
Credit : Kregtool
Kreg’s simple rack is a straightforward first workshop-organizer project. A back panel and shaped supports create open bays for common bar or F-style clamps without requiring a large cabinet or mobile base.
The simple form is easy to resize: shorten it for a small starter collection or repeat the module as more clamps are added. Keep the supports consistent with a spacer and test the first opening with the actual clamp before assembling the complete rack.
Best for: A small mixed clamp collection
Difficulty: Easy
Important check: Support spacing and wall anchoring
Get Kreg’s free simple clamp rack plan
4. Dedicated Kreg Clamp Rack
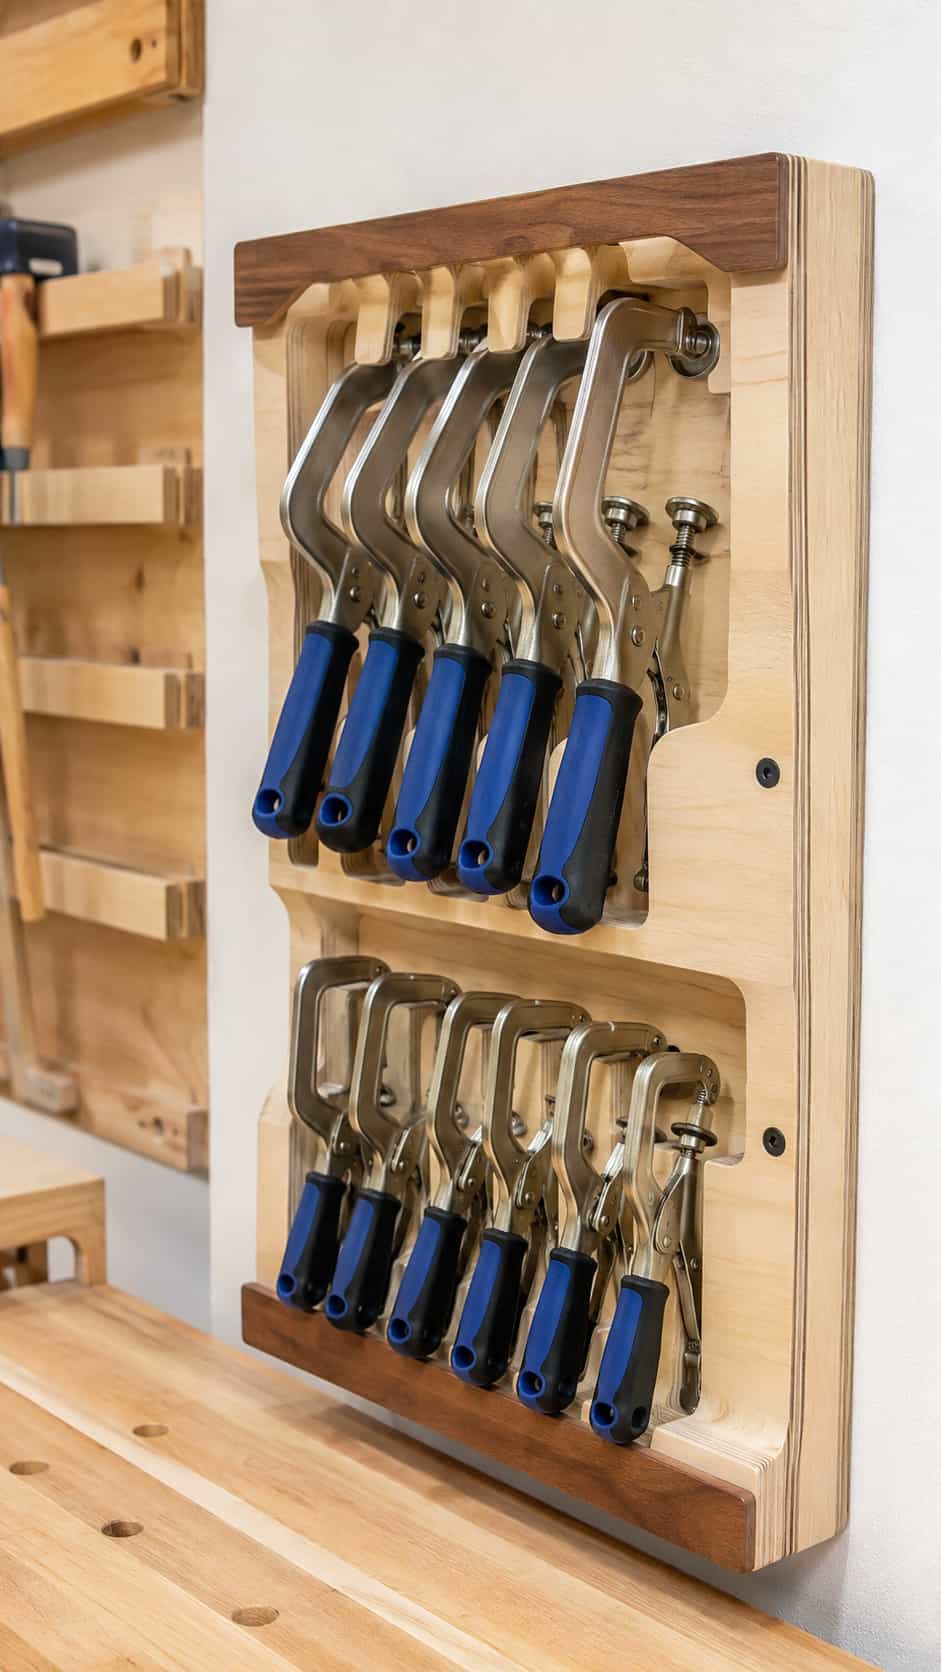
This free plan creates a compact holder for Kreg-style project and bench clamps. Instead of mixing specialty clamps with long parallel or pipe clamps, it gives smaller clamping tools a defined location near the workbench.
Dedicated storage often works better than forcing every clamp onto one giant rack. Mount the holder where the clamps are used, but keep it outside the cutting and assembly surface. If you own only a few specialty clamps, reduce the length rather than reserving empty wall space indefinitely.
Best for: Specialty and project clamps
Difficulty: Easy
Important check: Actual handle and pad dimensions
See the free DIY Kreg clamp rack plan
5. Small-Shop High-Capacity Clamp Rack
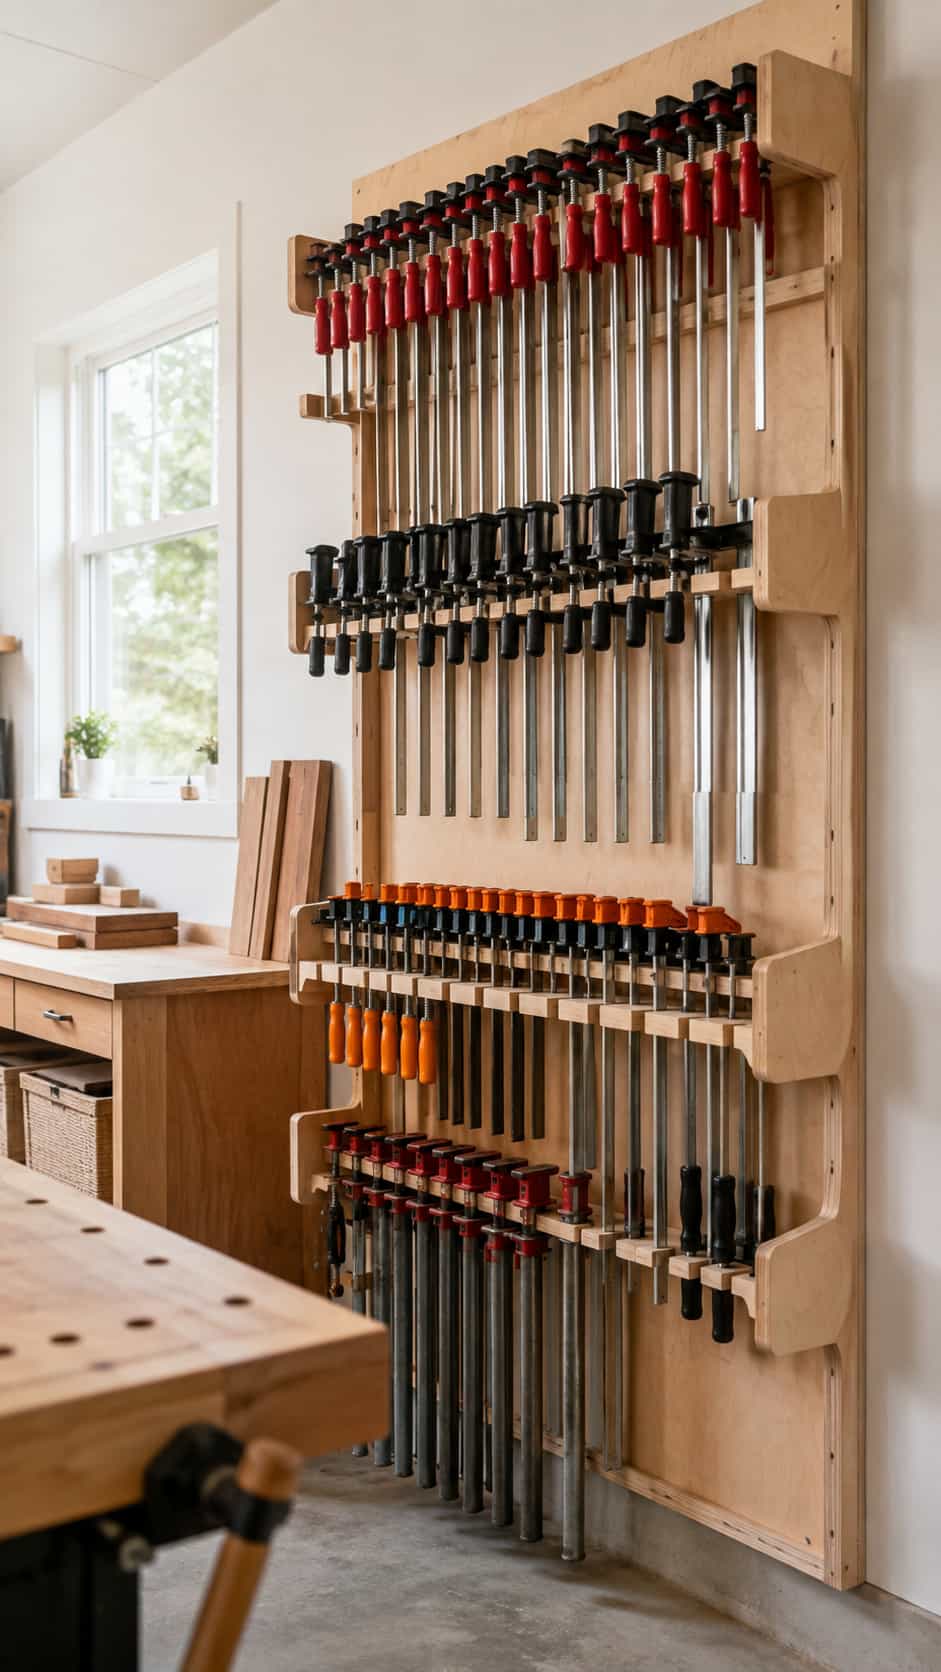
Kreg’s advanced small-shop plan is intended to hold more clamps within a compact footprint. It groups long clamps vertically and uses the storage volume efficiently rather than spreading every tool across a broad wall.
High capacity increases weight and makes precise support spacing more important. Do not treat the rack as automatically suitable for every wall. Review the plan’s construction, calculate the expected load, and distribute that load into the building structure. Leave growth room without creating an excuse to overload one section.
Best for: Larger collections in small rooms
Difficulty: Advanced
Important check: Total loaded weight and structure
Open the small-shop clamp rack plan
6. Customizable Clamp Rack
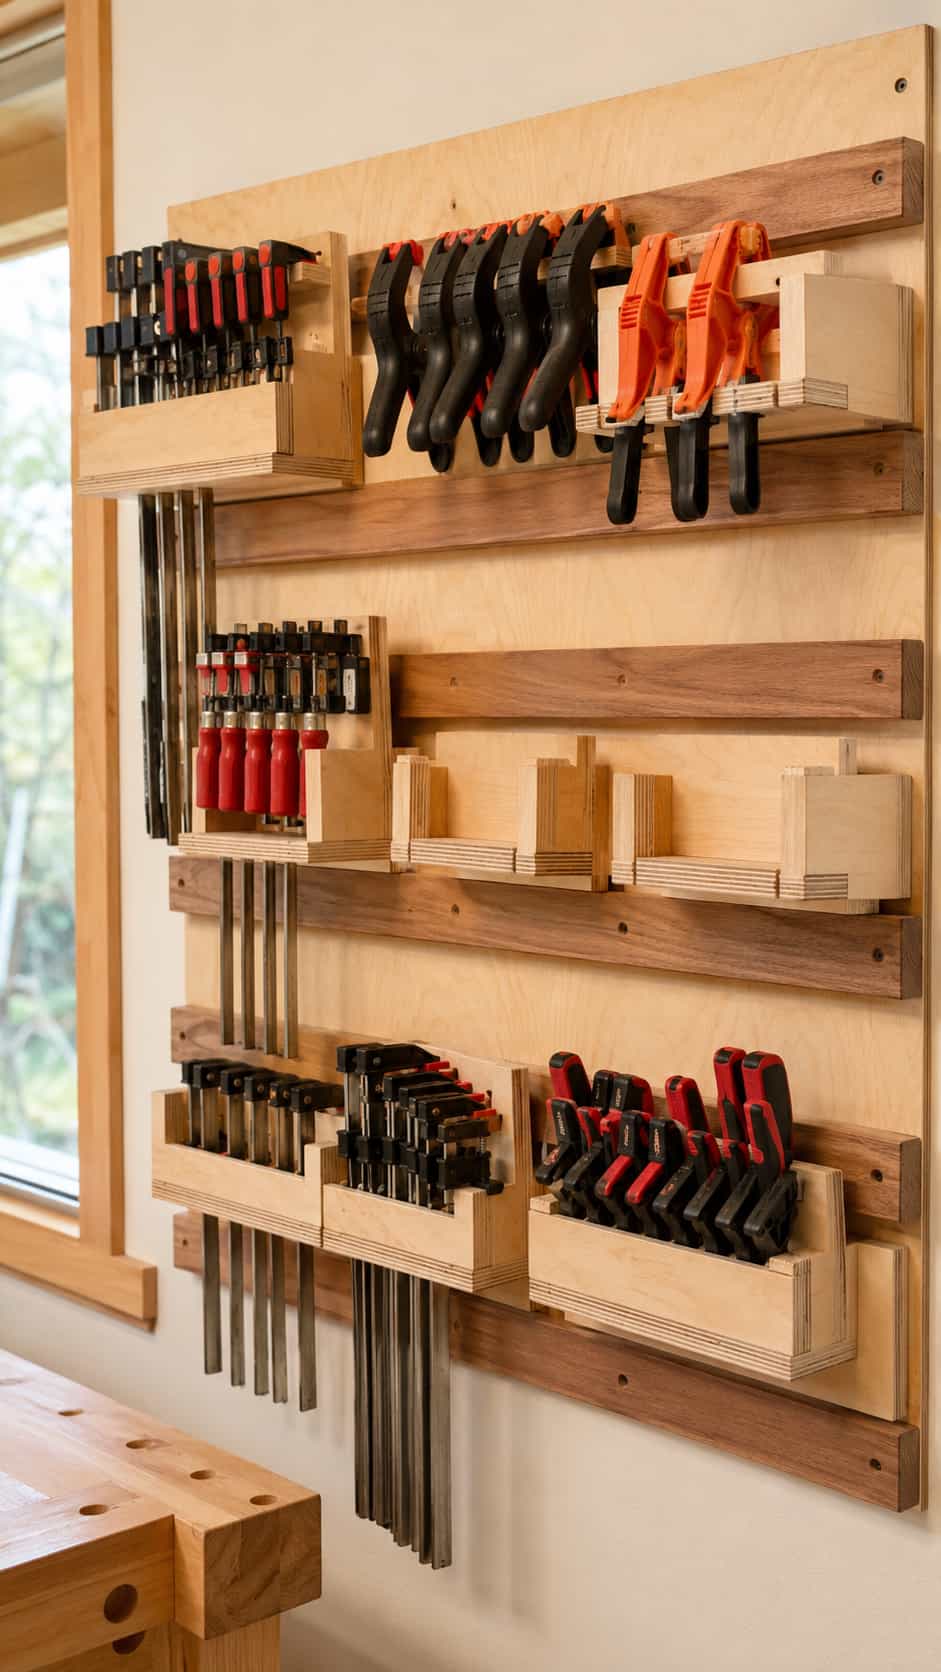
This Kreg plan is built around adjustable sizing rather than one fixed collection. The supports can be arranged to match the clamp types and quantities already in your shop, which reduces wasted openings.
Customization works best when you measure first. Arrange clamps in the desired order, note head and handle clearance, and create a full-scale spacing test on scrap material. Keep similar clamps together so it is obvious when one is missing at the end of a project.
Best for: Mixed brands and changing collections
Difficulty: Easy
Important check: Full-scale layout before assembly
Use Kreg’s free customizable clamp rack plan
7. Space-Saving Parallel Clamp Rack
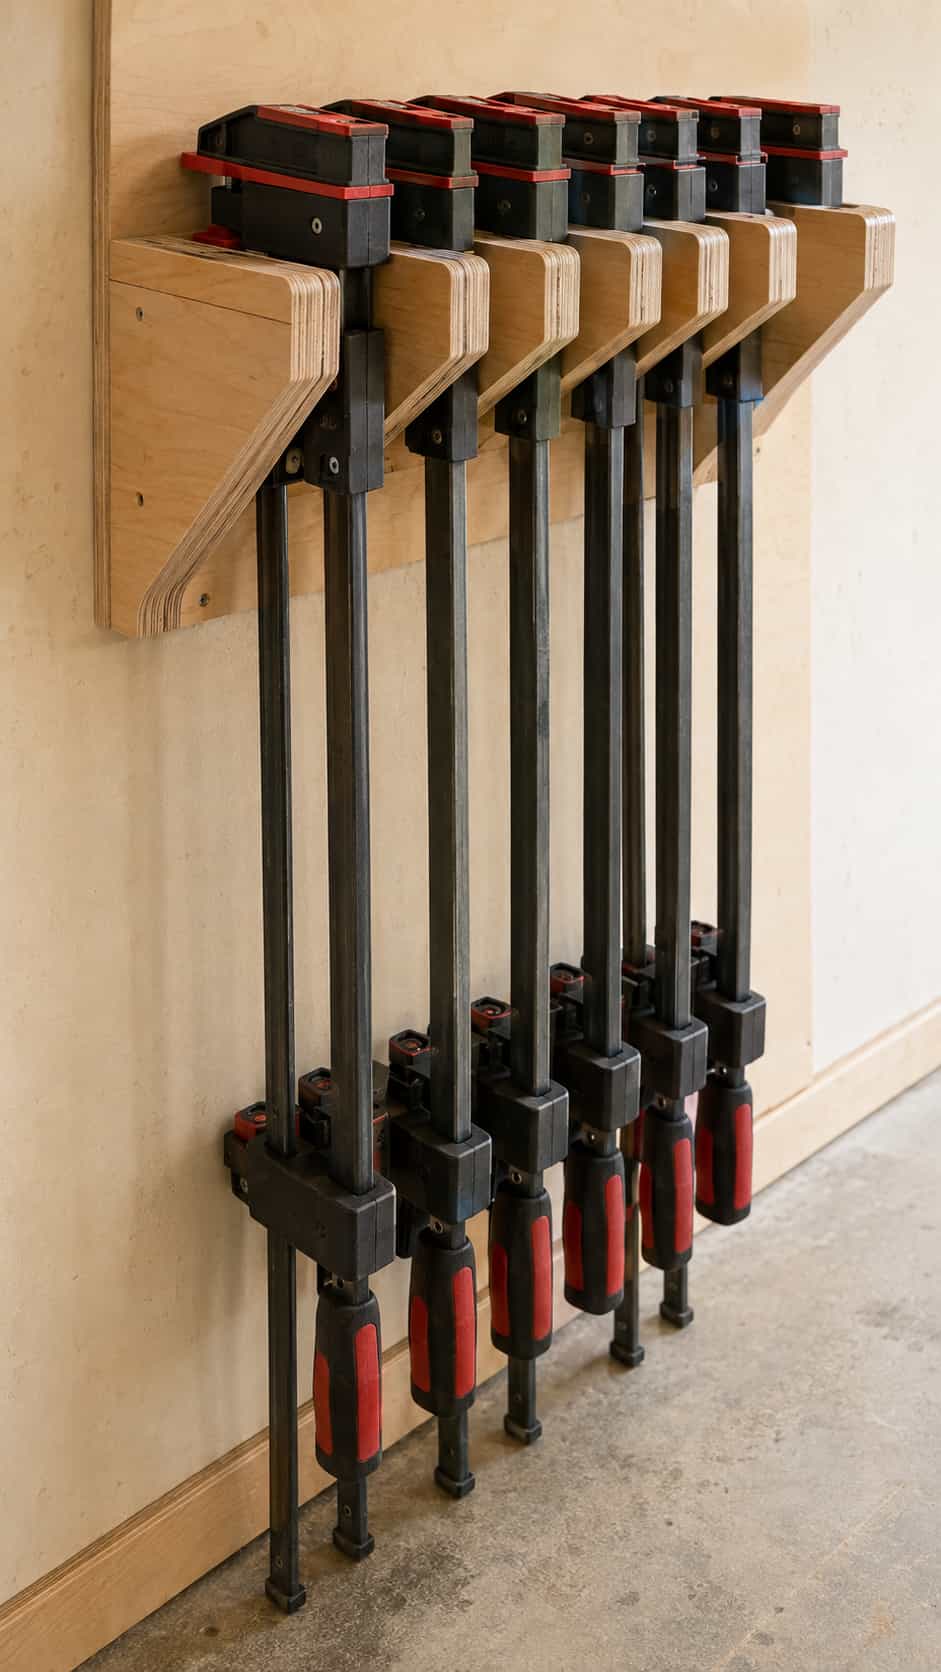
Fix This Build That’s plywood rack stores bar and parallel clamps in two depths, making better use of vertical wall space. Angled or gusseted supports carry the clamps while a top shelf adds room for light accessories.
This is a strong option for a collection dominated by heavy parallel clamps. The plan explains the support layout and spacing, but builders should still verify their own clamp bars and heads. Mount the finished rack into appropriate framing and add the clamps gradually while watching for movement or deflection.
Best for: Parallel and bar clamps
Difficulty: Intermediate
Important check: Support alignment and loaded wall attachment
Follow the parallel clamp rack plan and tutorial
8. Scrap-Wood Pipe Clamp Rack
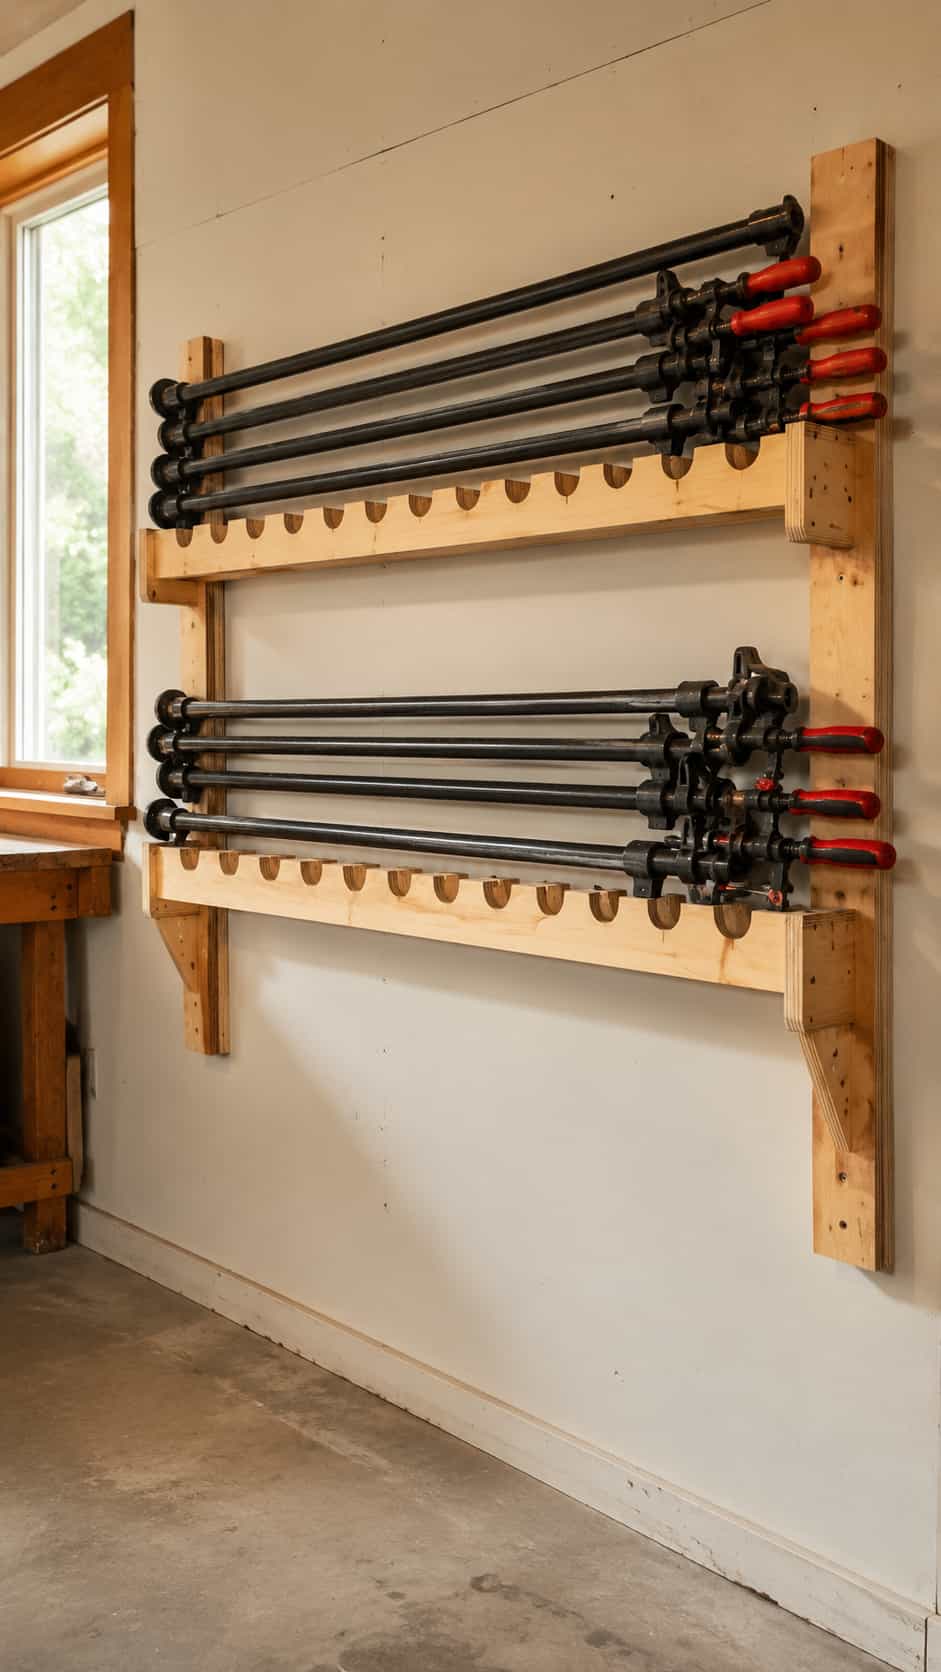
Woodshop Diaries’ pipe-clamp holder uses a back board and repeated divider blocks to create one slot for each pipe. The tutorial even provides a simple sizing formula based on the number of clamps, making it easy to build only the capacity you need.
Pipe clamps are long and heavy, so locate this rack where the bars can hang without crossing a doorway, outlet, bench or walkway. Multiple mounting points into framing help distribute the load. A second small rack is usually better than extending one unit beyond the supported wall area.
Best for: Pipe clamps
Difficulty: Easy
Important check: Bar length, stud position and total weight
Read the DIY pipe clamp rack tutorial
9. Five-Minute Small Clamp Rack
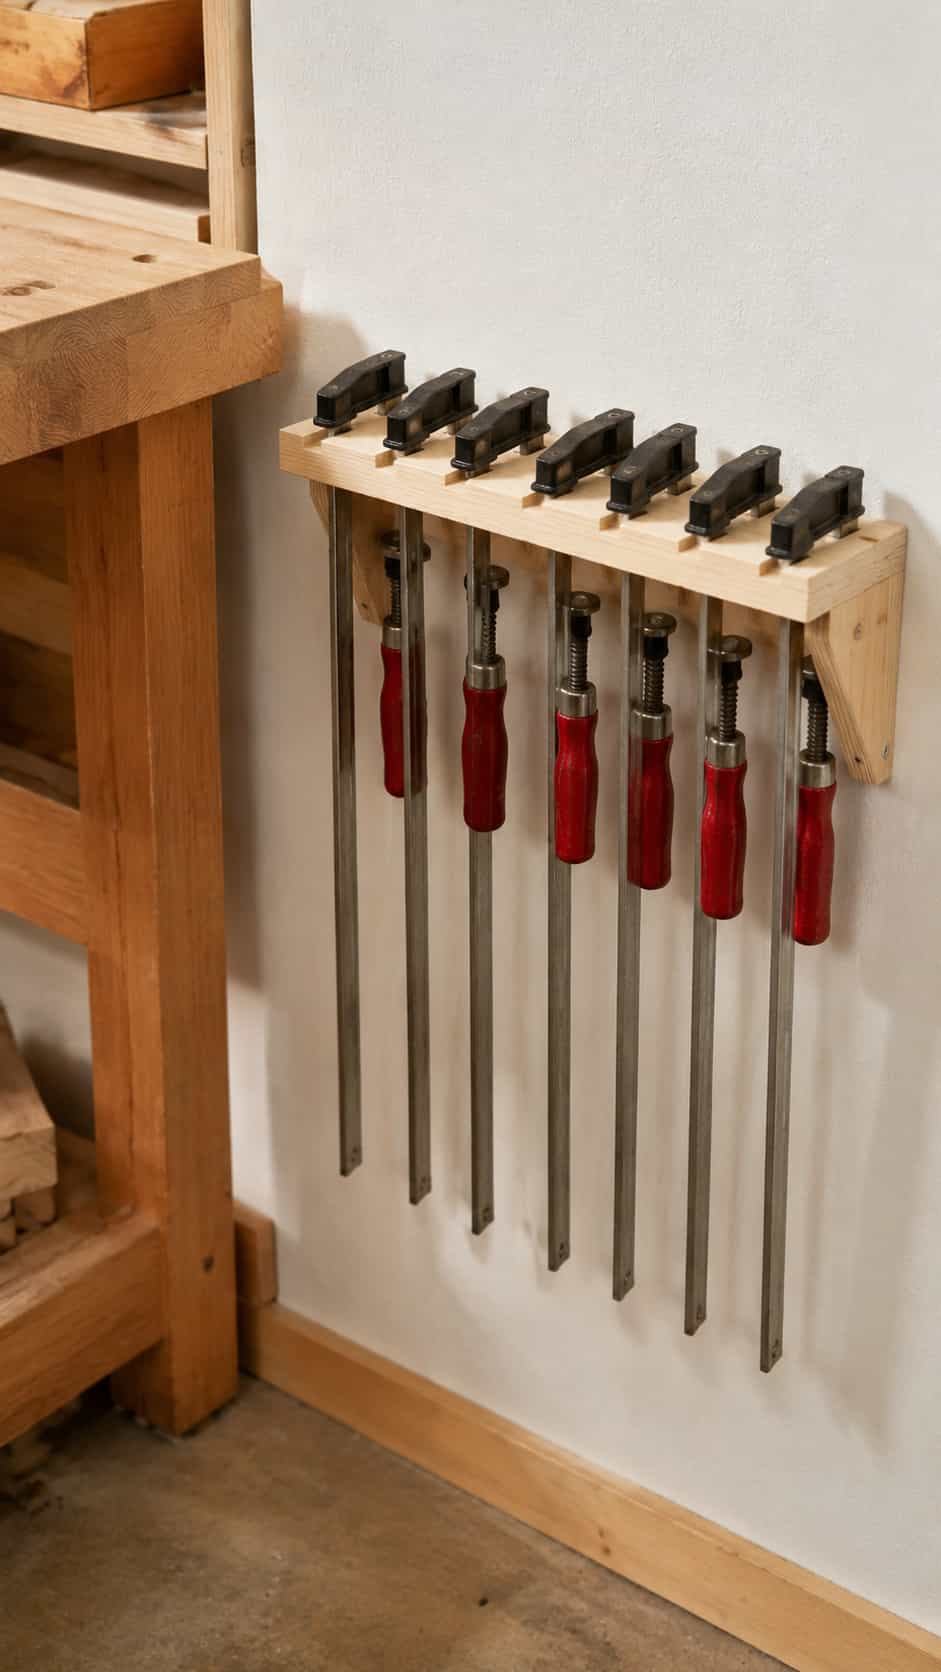
Another Woodshop Diaries design uses a back piece, short sides and a front runner to hold smaller clamps. It is intentionally simple and works well for quick clamps, light F-style clamps and other compact tools.
This is a good scrap-wood project because dimensions can follow the material on hand and the clamp heads you own. Build several short modules instead of one very long rack if you want to separate sizes or mount holders near different benches.
Best for: Quick clamps and small F-style clamps
Difficulty: Easy
Important check: Runner depth and clamp-head fit
See the simple scrap-wood clamp rack tutorial
10. Scrap-Plywood Parallel Clamp Rack
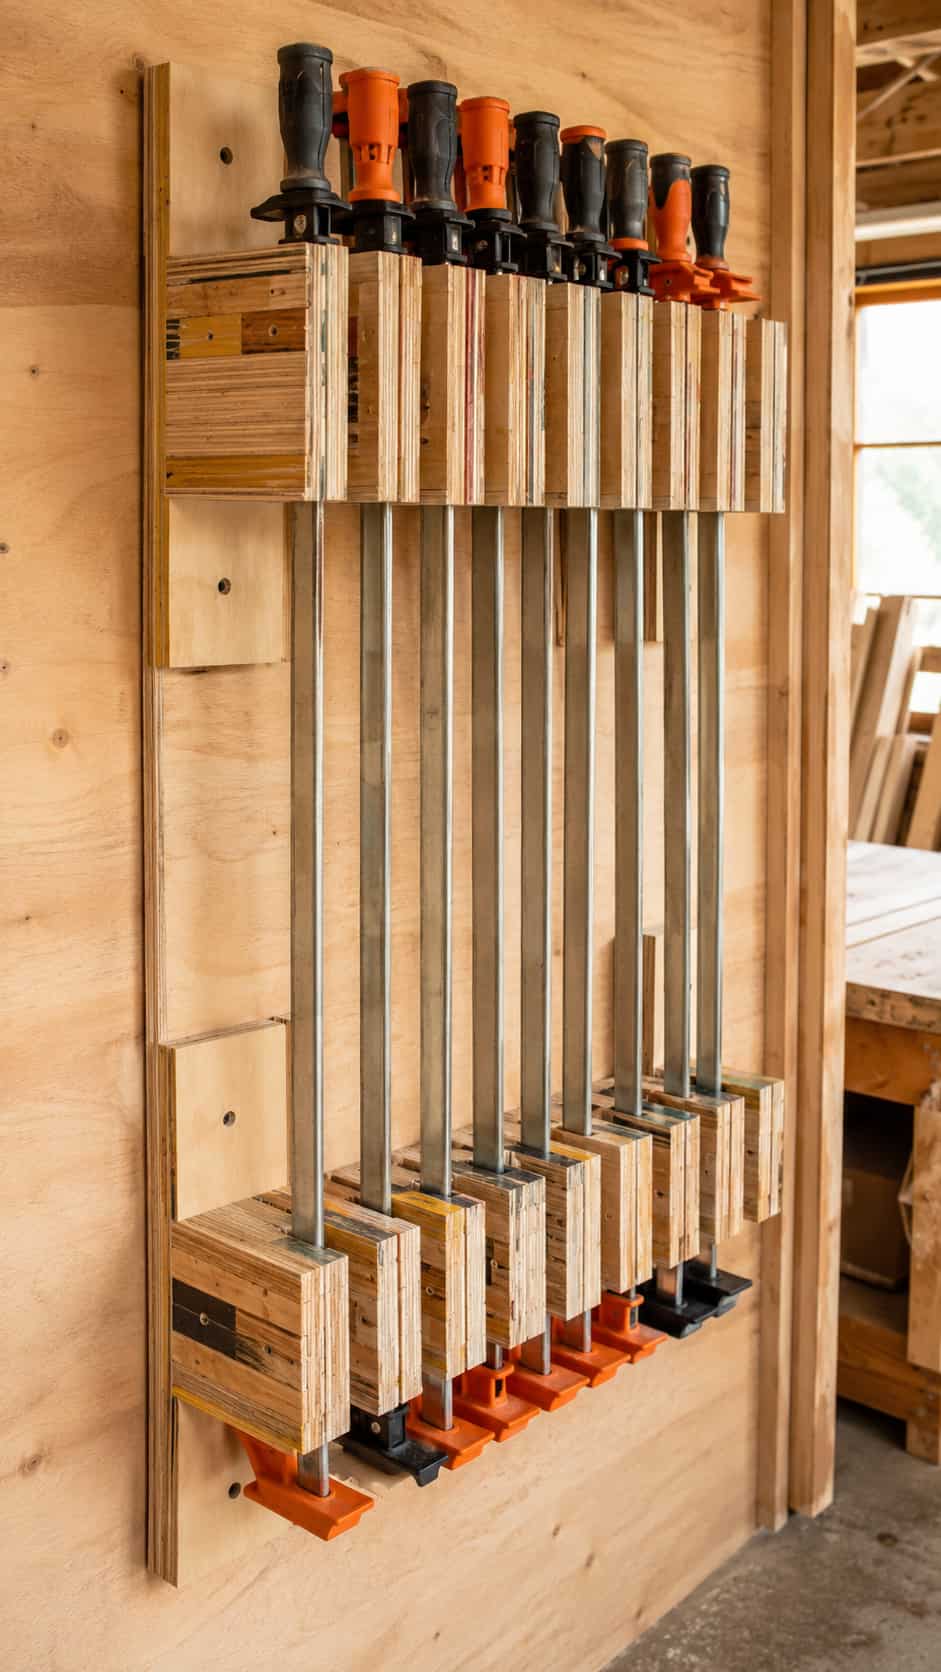
Jen Woodhouse’s rack uses a plywood backer with repeated triangular wedges to support roughly twenty parallel clamps. The open layout keeps every bar visible and makes good use of leftover plywood.
The design is easy to tailor by laying out the real clamps before fixing the wedges. Heavy parallel clamps create a meaningful wall load, so the finished rack must be installed into suitable framing. Keep the lowest handles above the floor but not so high that removing a long clamp becomes awkward.
Best for: A medium-to-large parallel clamp collection
Difficulty: Easy to intermediate
Important check: Wedge spacing and wall structure
Follow Jen Woodhouse’s parallel clamp rack tutorial
11. Rolling Clamp Rack
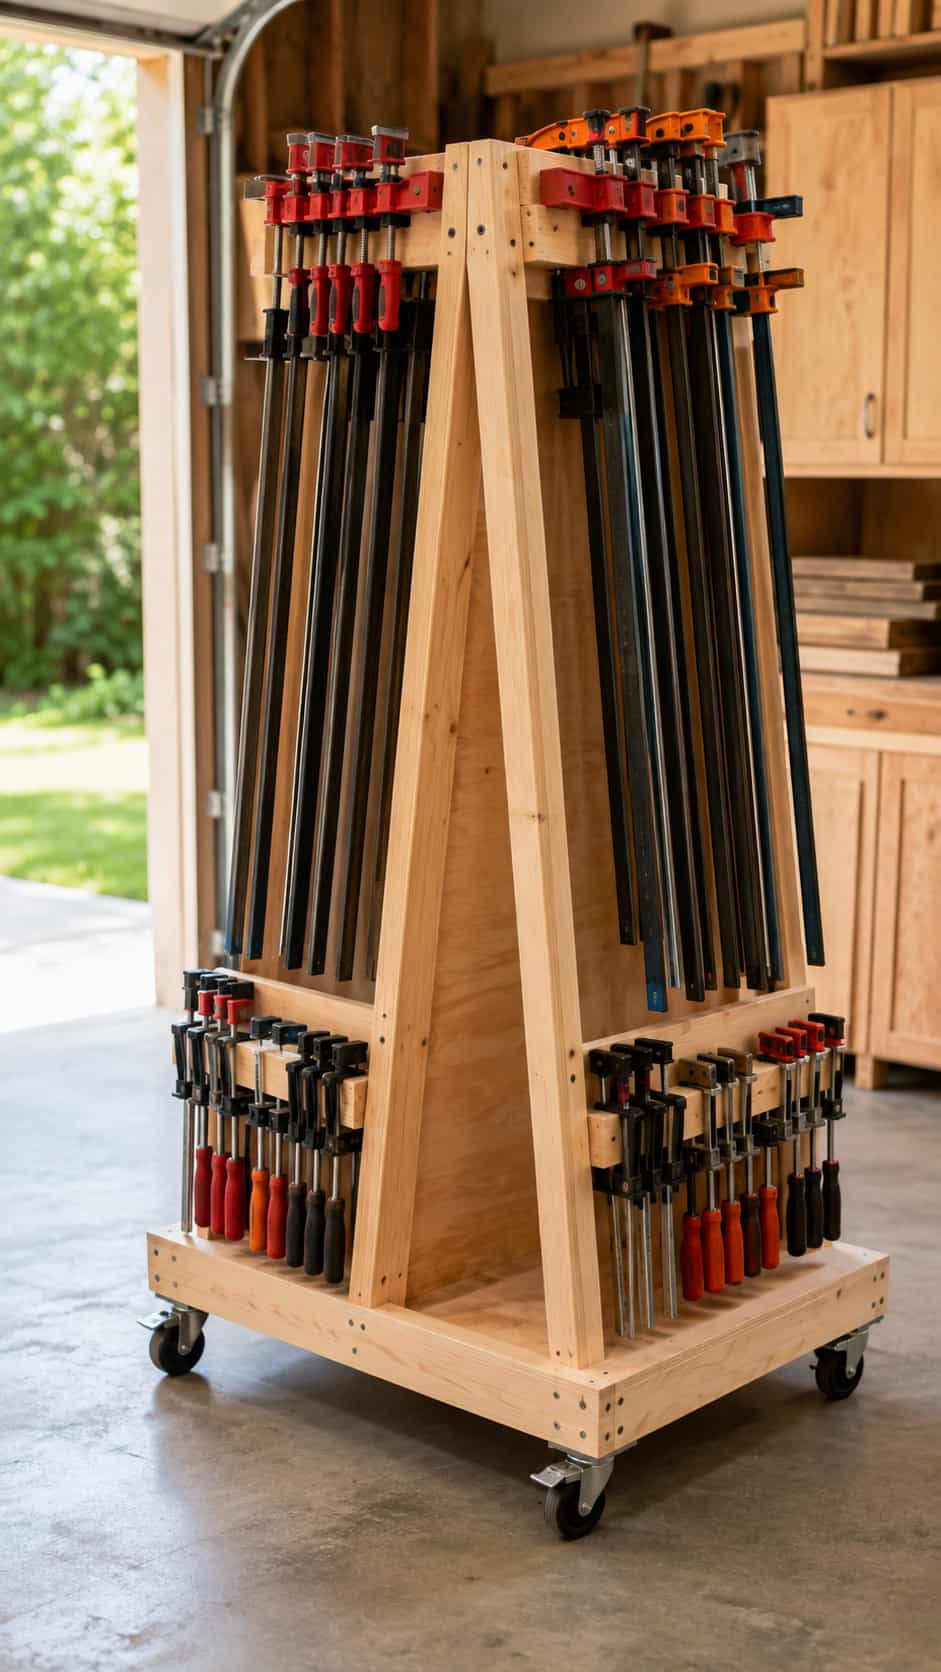
Popular Woodworking’s mobile rack stores about fifty clamps on an angled freestanding frame. It brings the entire collection to the assembly area and then rolls out of the way, making it practical for a larger shop with limited usable wall space.
A rolling rack needs more than wheels: the base must remain stable when clamps are removed from one side, and the casters must support the frame plus the full tool load. Load the rack evenly, lock the wheels during use, and keep handles and bars inside its footprint.
Best for: Large mixed collections
Difficulty: Intermediate
Important check: Stability, balance and caster rating
View the rolling clamp rack project
12. French Cleat Clamp Rack and Tool Wall
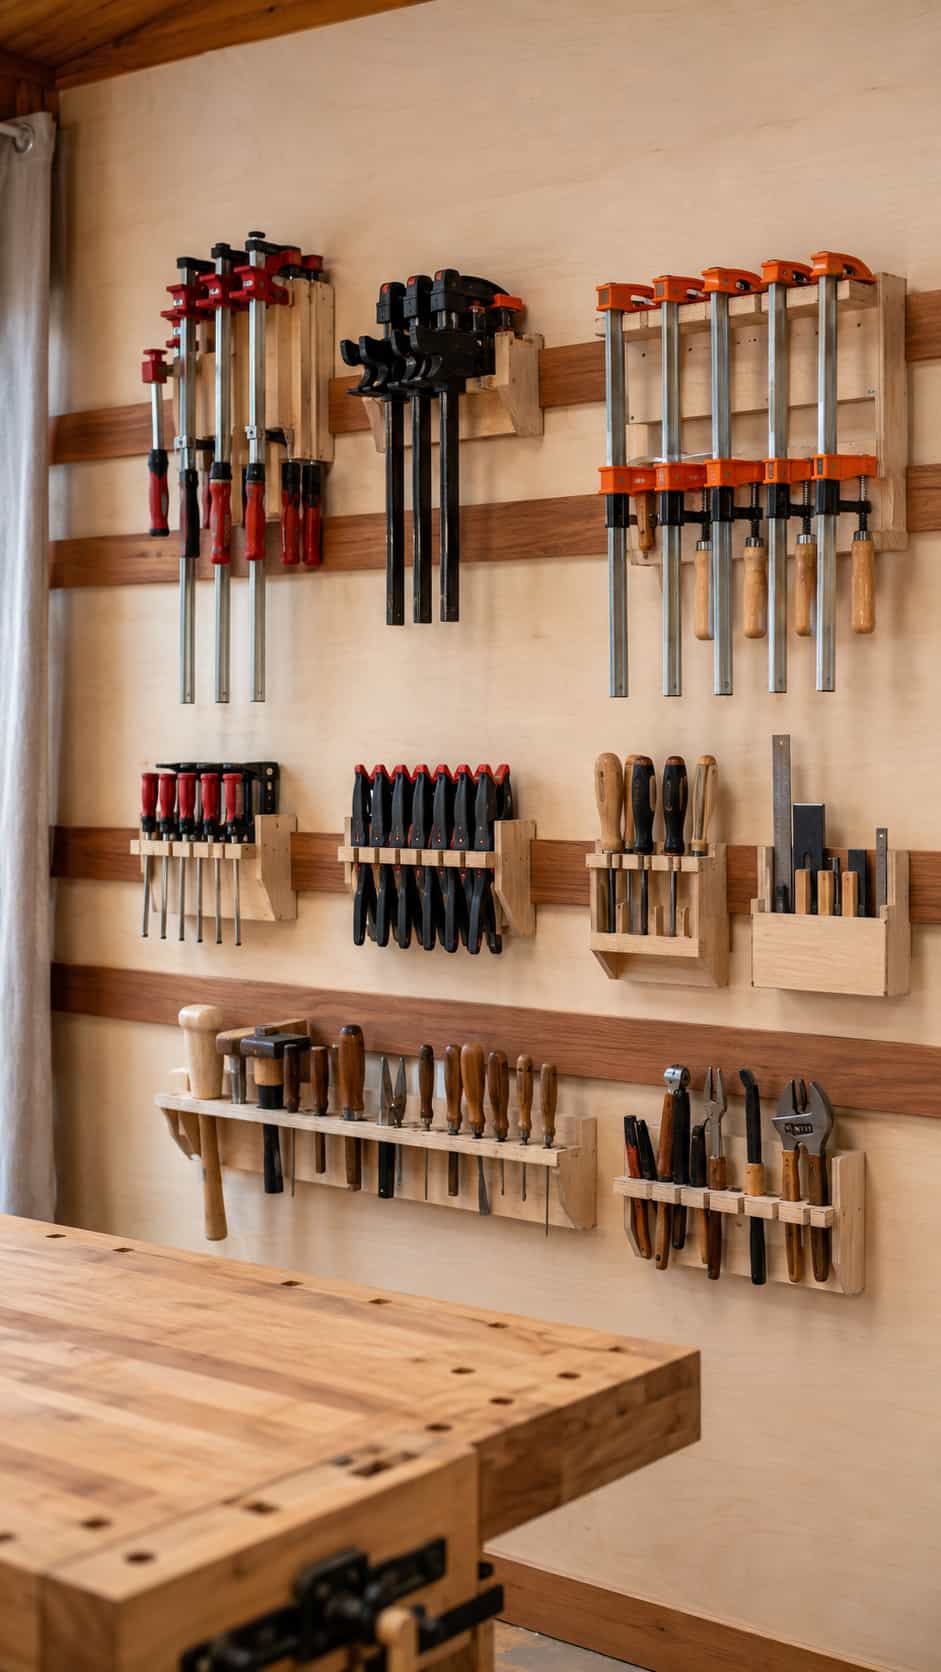
This Instructables project combines a French cleat wall with a dedicated clamp holder. The rack can be repositioned as the wall system changes, which is useful for workshops that are still developing.
A cleat system adds flexibility, but each removable holder must still be designed for the actual clamp load. Verify that the wall cleats are properly secured and that the mating cleat cannot lift accidentally as a clamp is removed. Use the surrounding wall for lighter holders rather than crowding more heavy clamps into one module.
Best for: Flexible workshop walls
Difficulty: Intermediate
Important check: Cleat engagement and wall fastening
Read the French cleat clamp rack tutorial
13. Mobile Clamp Wall
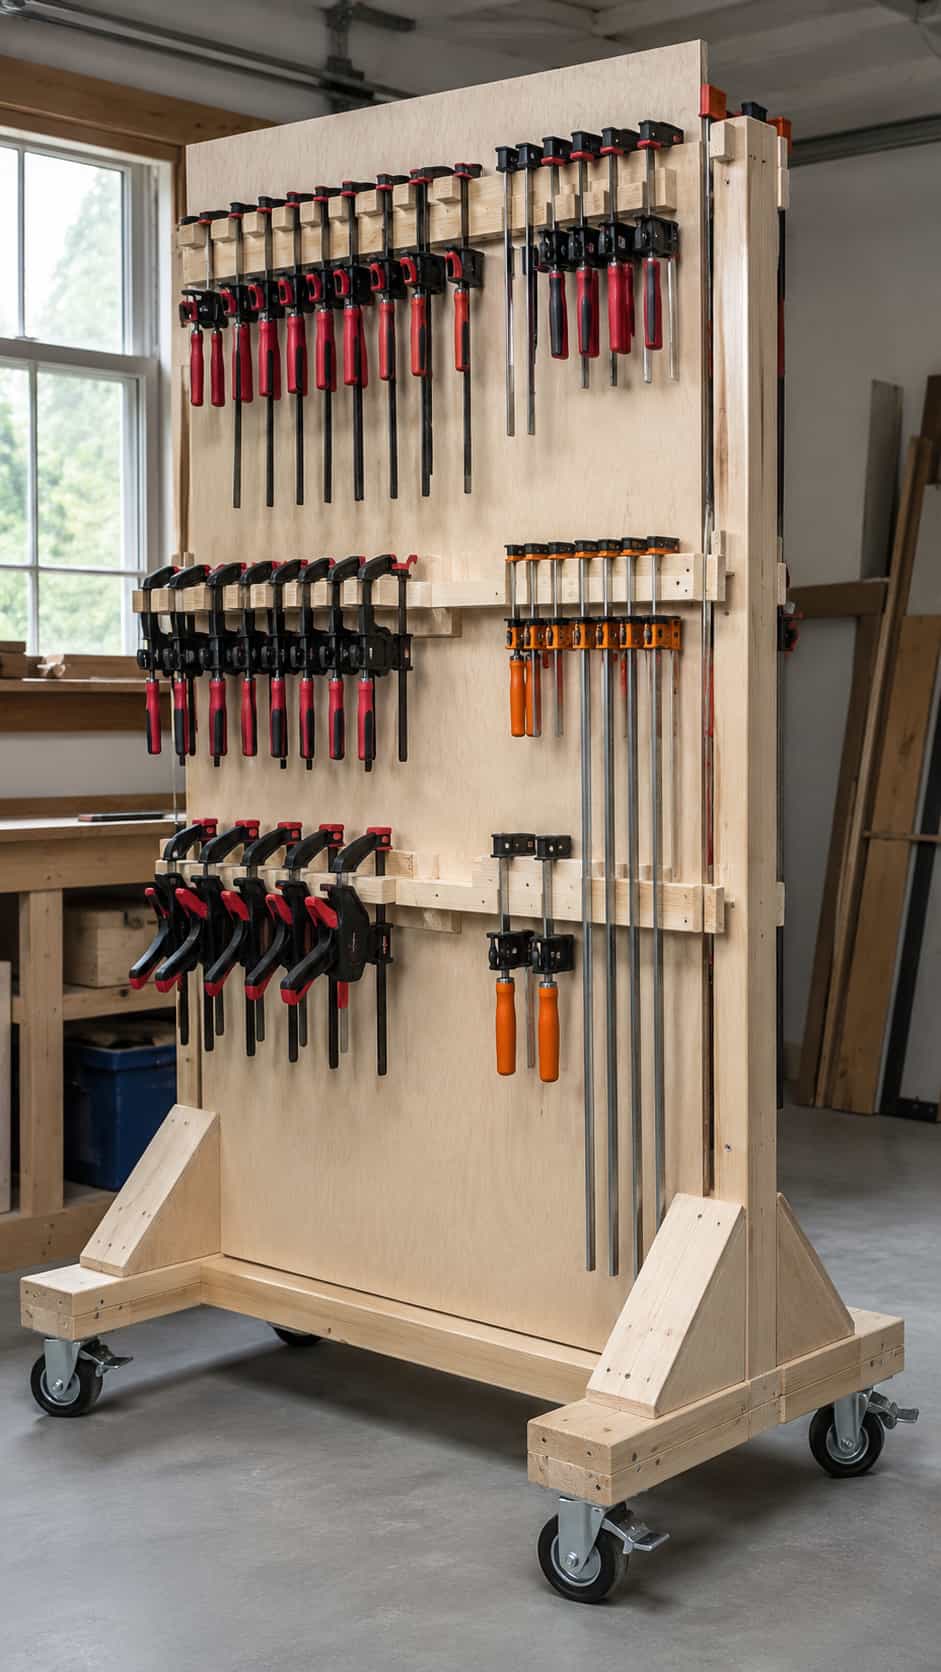
The Wood Whisperer’s mobile wall is a high-capacity solution with storage for parallel, F-style, pipe and bar clamps, plus pegboard on the sides. Instead of a narrow cart, it creates a movable storage panel that can serve two faces.
This suits a substantial workshop and collection. Its advantage is access and expansion; its drawback is mass and floor area. Measure the parked and operating footprint, use appropriately rated locking casters, and keep the heaviest clamps low and evenly distributed.
Best for: Very large mixed collections
Difficulty: Intermediate to advanced
Important check: Floor capacity, turning room and balance
See the mobile clamp wall project
14. Minimal Small Bar-Clamp Rack
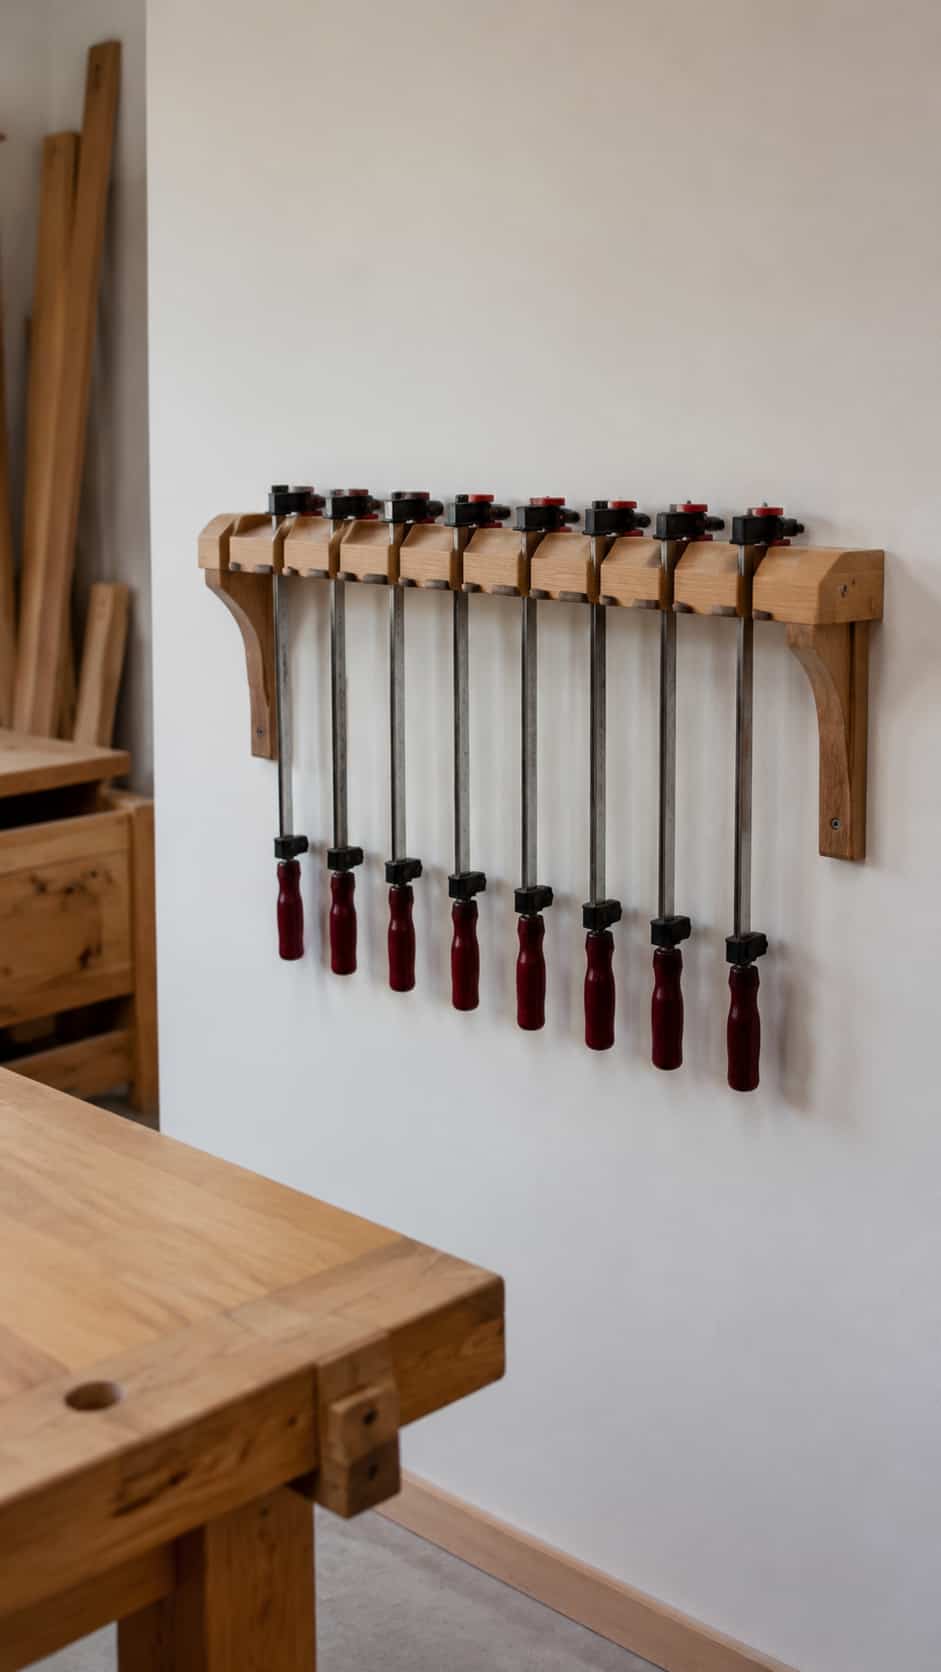
Rockler demonstrates how a compact rack can be little more than a slotted board, mounting back and end pieces. This minimalist approach is ideal for a row of light bar clamps that does not justify a large cabinet or cart.
The lesson is to match the solution to the collection. A precise, short holder near the bench may be more useful than a high-capacity rack across the room. Size each slot for the bar, leave clearance for the head, and secure the back to suitable structure.
Best for: Small bar and F-style clamps
Difficulty: Easy
Important check: Slot width and easy lift-out
See Rockler’s small clamp-storage examples
15. Compact F-Style Clamp Rack with Free Plan
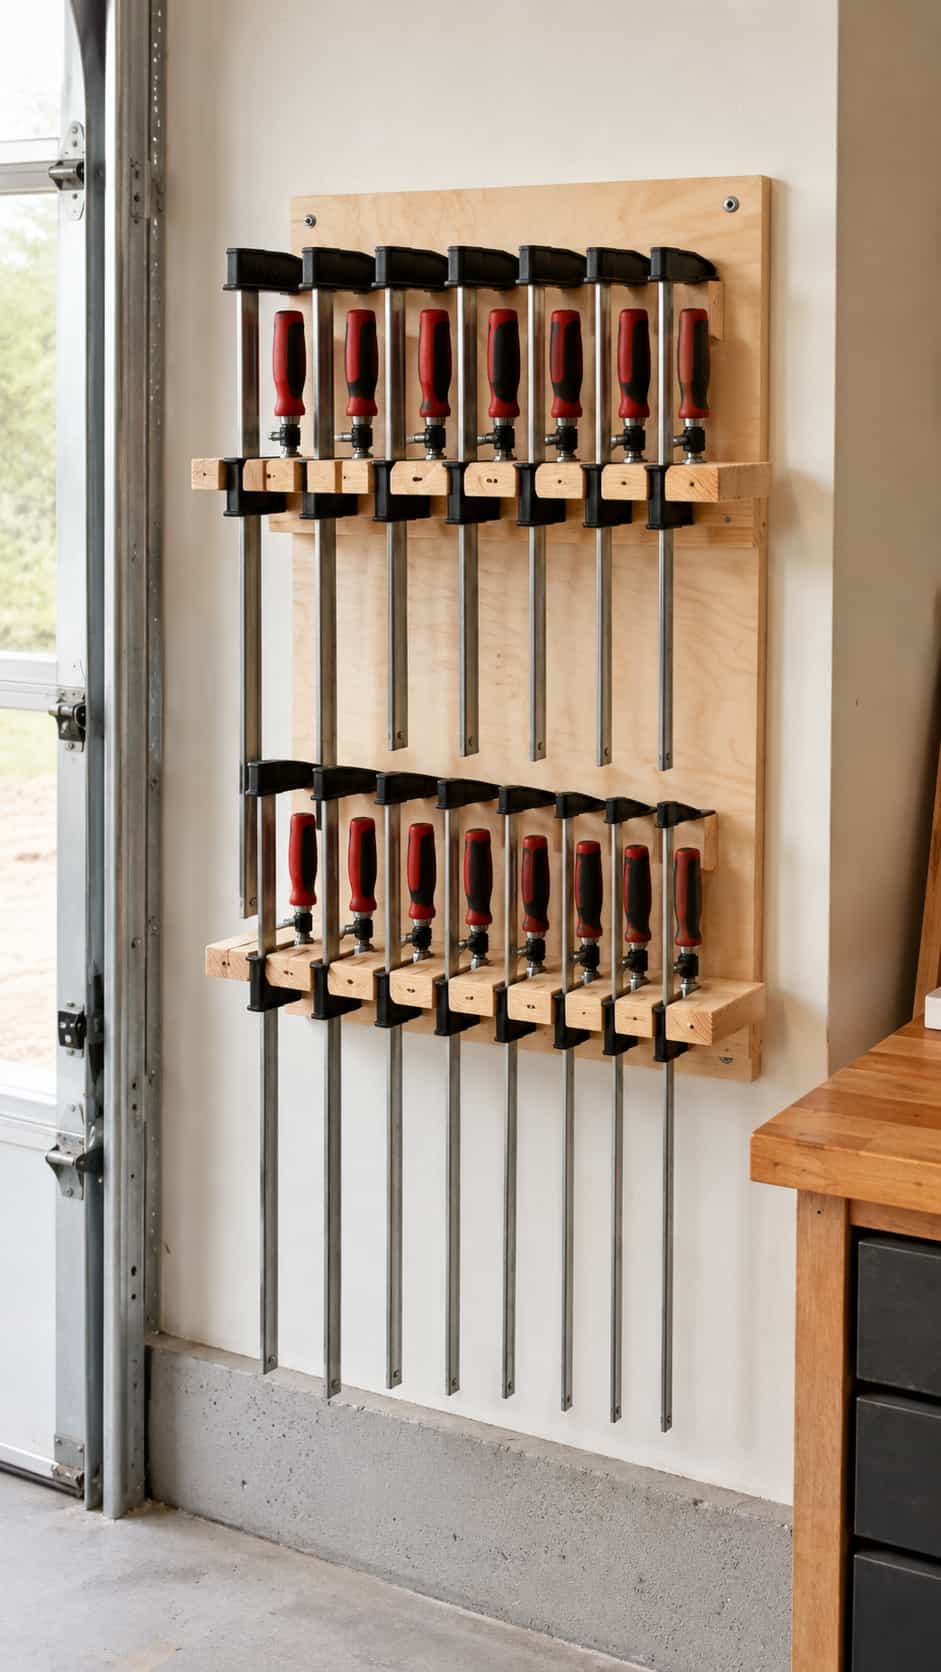
Making Manzanita’s free rack is designed for F-style clamps and can mount on a wall or attach to workshop furniture. The vertical plywood form organizes multiple clamp lengths in a relatively narrow space.
This is useful when the wall is already occupied by shelves or a tool system. Mounting the holder to the back or side of a sturdy bench can turn unused space into organized storage, provided the added clamp weight does not make the furniture unstable.
Best for: F-style clamps and limited wall space
Difficulty: Easy
Important check: Furniture stability or wall attachment
Get the free F-style clamp rack plan
Want a Workshop Layout That Works Beyond Clamp Storage?
Disclosure: This section contains an affiliate link. If you purchase through it, we may earn a commission at no additional cost to you.
A clamp rack clears the bench, but it is only one part of an efficient workshop. The rack should sit near the assembly area without blocking lumber movement. Your workbench, saws, material storage, dust collection, lighting and open walking route all need to cooperate.
That is where Ultimate Small Shop may be useful. It is a workshop-planning resource for woodworkers arranging a practical shop in a garage, basement, shed or other limited area. It focuses on the larger system—tool placement, storage, workflow and budget—rather than treating every organizer as a separate decision.
If a few clamps are the only issue, one free rack above should be enough. If your entire garage is being reorganized, planning the complete layout first can prevent you from mounting clamp storage where future lumber, machines or an assembly table need to go.
Learn more about Ultimate Small Shop
For related shop upgrades, explore these table saw workbench plans and time-saving woodworking jigs.
Where Should a Clamp Rack Go?
Put the most-used clamps close to the assembly or glue-up area, but outside the surface needed for project parts. Long clamp bars should not cross doorways, electrical panels, stairs or primary walking routes. Avoid damp areas where metal bars may rust and dusty corners where mechanisms collect debris.
If one wall is far from every work surface, consider a rolling cart or split the collection. Quick clamps may belong beside the workbench, pipe clamps near a larger assembly area, and specialty clamps beside the jig or machine they support.
Common Clamp-Storage Mistakes
Building before measuring the clamp heads
Bar width alone does not determine fit. Handles, pads and sliding heads need room to enter and leave the rack. Test one full-size opening first.
Mounting a heavy rack only to drywall
A loaded parallel- or pipe-clamp rack can be very heavy. Connect it to appropriate framing and use mounting hardware suited to the structure and load.
Blocking the walkway with long bars
A rack can clear the floor while still creating a head- or shoulder-height obstacle. Mark the projected depth and bar position before installation.
Storing every clamp on one overloaded holder
Divide a large collection by type or work zone. Several properly supported modules are easier to expand and safer to load than one oversized rack.
Leaving no space for growth
A little extra capacity is useful, but a huge empty rack wastes workshop space. Leave one or two openings in each useful category and add another module only when it is genuinely needed.
Frequently Asked Questions
How deep should a clamp rack be?
The correct depth depends on clamp-head dimensions and how many clamps sit one behind another. A shallow slotted rack uses more wall width; a deeper projecting rack saves width but requires more aisle clearance. Follow the original plan and test your clamps.
Can I build a clamp rack from scrap wood?
Yes, many small holders use plywood or solid-wood scraps. Use sound material without cracks, hidden fasteners or serious damage. Heavy clamp collections still require strong supports and reliable mounting.
What is the best rack for parallel clamps?
A gusseted wall rack or slotted plywood design works well because parallel clamps are heavy and have large heads. Keep supports aligned, mount into framing and distribute the load.
What is the best way to store pipe clamps?
A wall-mounted divider rack gives each pipe an individual slot and prevents bars from becoming a tangled stack. Locate it where the full pipe length stays clear of walkways.
Are rolling clamp racks worth the floor space?
They are useful for large collections or shops with little open wall space. A mobile rack can move beside an assembly table, but it needs a stable base, locking casters and a defined parking location.
Final Thoughts
The best DIY clamp rack matches the clamps you own and the work you actually do. A simple runner made from scrap wood may completely solve a small quick-clamp problem. A parallel-clamp collection may need a gusseted wall rack, while a large mixed collection can justify a mobile cart.
Measure every clamp type, choose one original plan, and test the first slot before building the full rack. Mount heavy storage into appropriate structure, keep long bars outside the walkway, and split oversized collections into sensible zones. Once clamps have a clear home near the assembly area, the workbench stays open and the right tool becomes much easier to find