
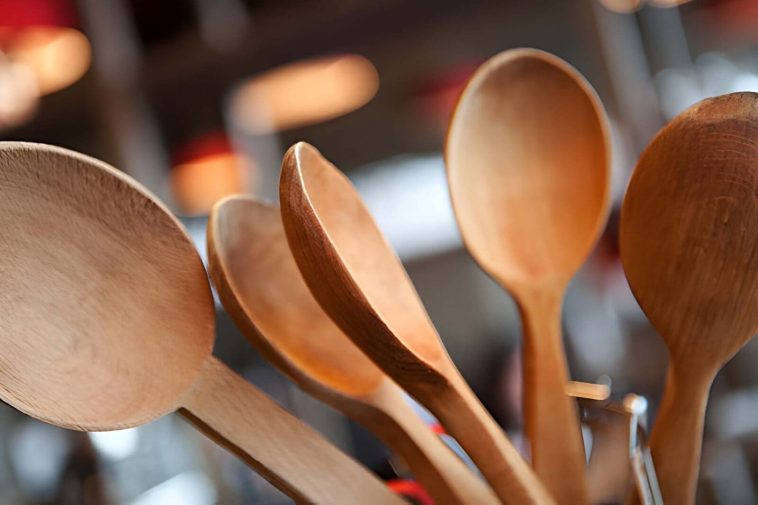
There is something quietly satisfying about eating soup with a spoon you carved yourself. Not just made — carved, by hand, from a block of wood.
If you’ve been looking for a beginner woodworking project that actually teaches you something useful, spoon carving is it. In this guide, you’ll learn exactly how to carve a wooden spoon by hand — from choosing the right wood and tools to finishing it safely for food use. No workshop required. No expensive equipment. Just a knife, a piece of wood, and a couple of free hours.
Expect to spend 2–4 hours on your first spoon — maybe a little longer. That’s a perfectly manageable weekend afternoon, and the result is something you’ll actually use.
1. Why Wooden Spoon Carving Is Perfect for Beginners
Let’s be honest — a lot of beginner woodworking projects sound fun until you realize they need a table saw, a router, and seventeen clamps. Spoon carving is the antidote to all of that.
You only need 2–3 tools to get started. You can carve at your kitchen table (put down a mat). The project is small enough to hold in your hand, and the feedback is immediate — every cut shows you exactly what the wood wants to do.
Compare that to chip carving or relief carving, which require more precise technique and a steeper learning curve. A spoon is forgiving. If the handle ends up slightly thinner on one side? Rustic. If the bowl is a little deeper than planned? Quirky and charming. The first spoon won’t be perfect — and that’s genuinely fine. IMO, the imperfections are half the point.
Spoon carving is also one of the oldest forms of folk woodworking. It connects you to a long tradition of makers who carved their own kitchen tools by firelight. There’s something grounding about that — and you don’t need to romanticize it too much to feel it.
| 💡 Cost check: A basswood blank + a basic carving knife can be under $30. That’s it for your first spoon. |
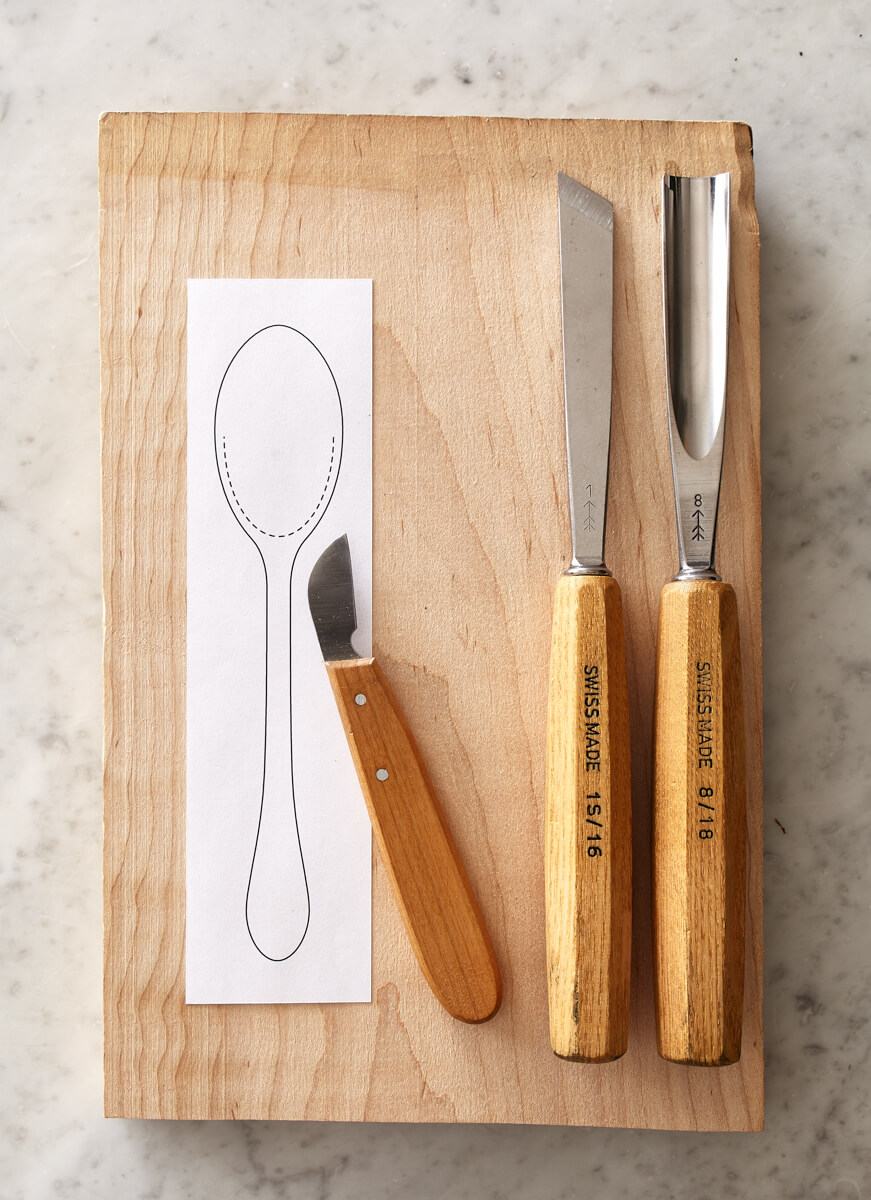
2. Tools You Need to Carve a Wooden Spoon
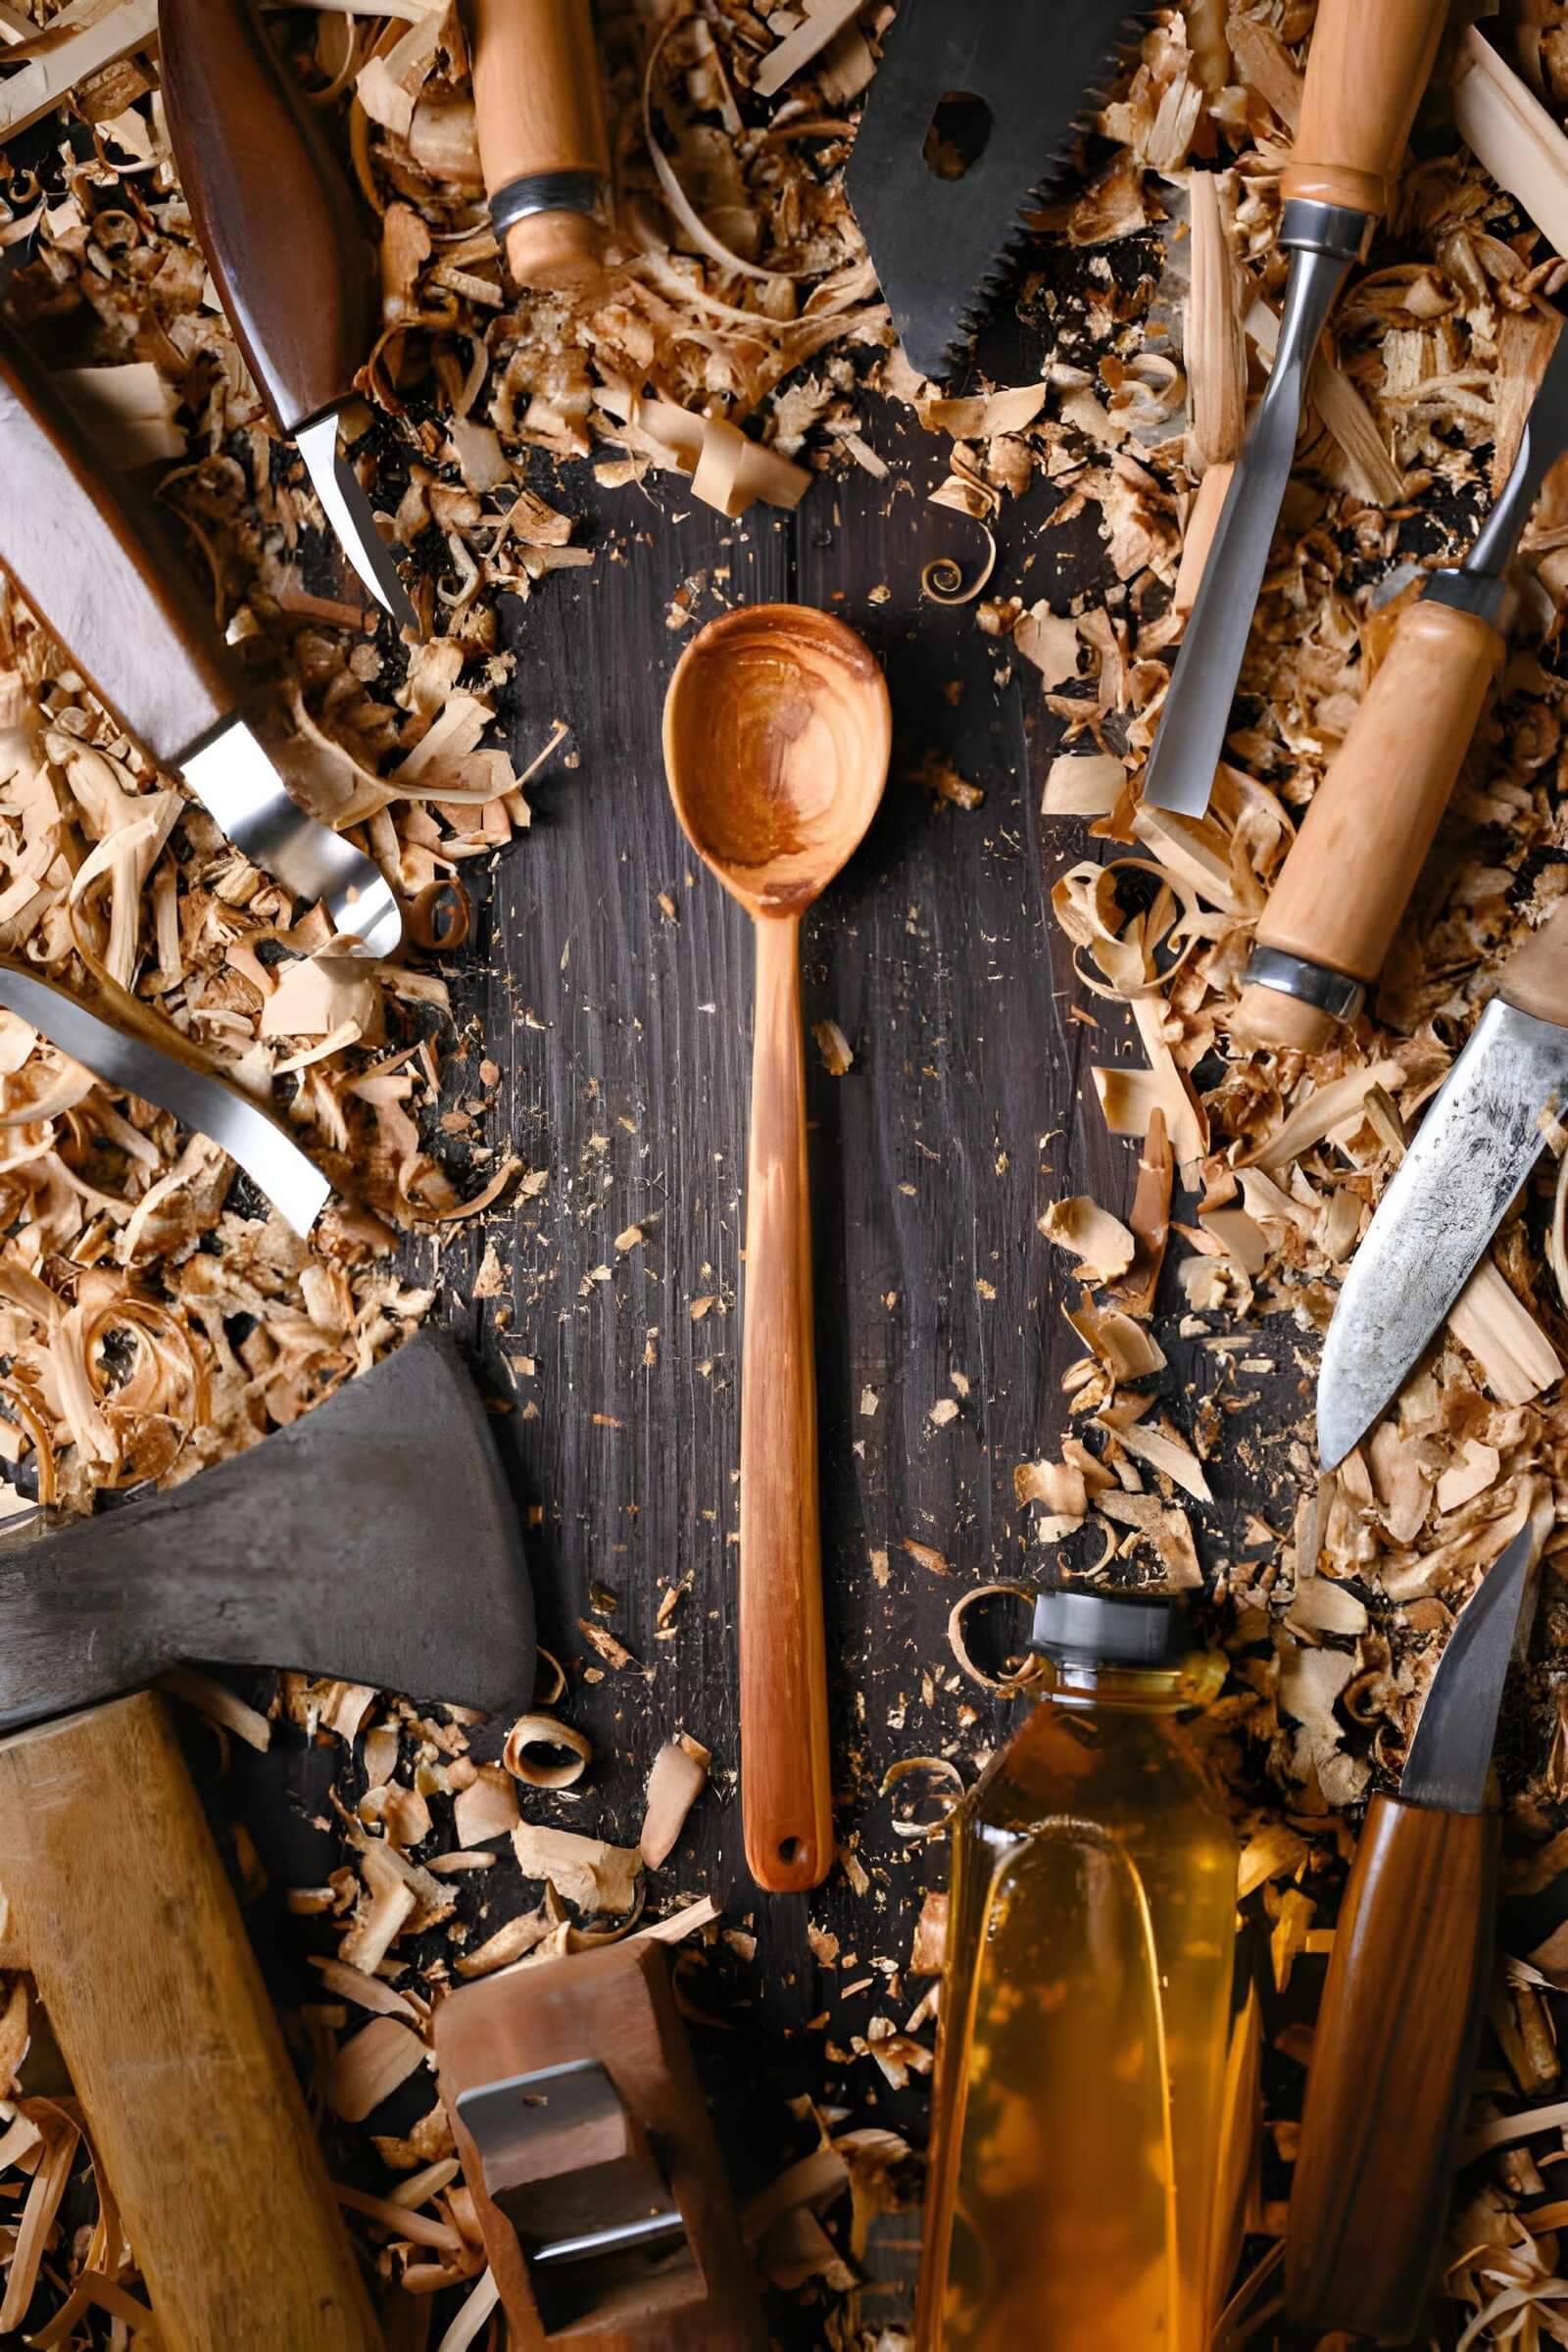
Good news: the tool list is short. Bad news: tool quality actually matters here — more than in a lot of other crafts. A dull knife doesn’t just slow you down, it’s actively more dangerous because you have to force it. So let’s talk about what you actually need.
The Essential Tools
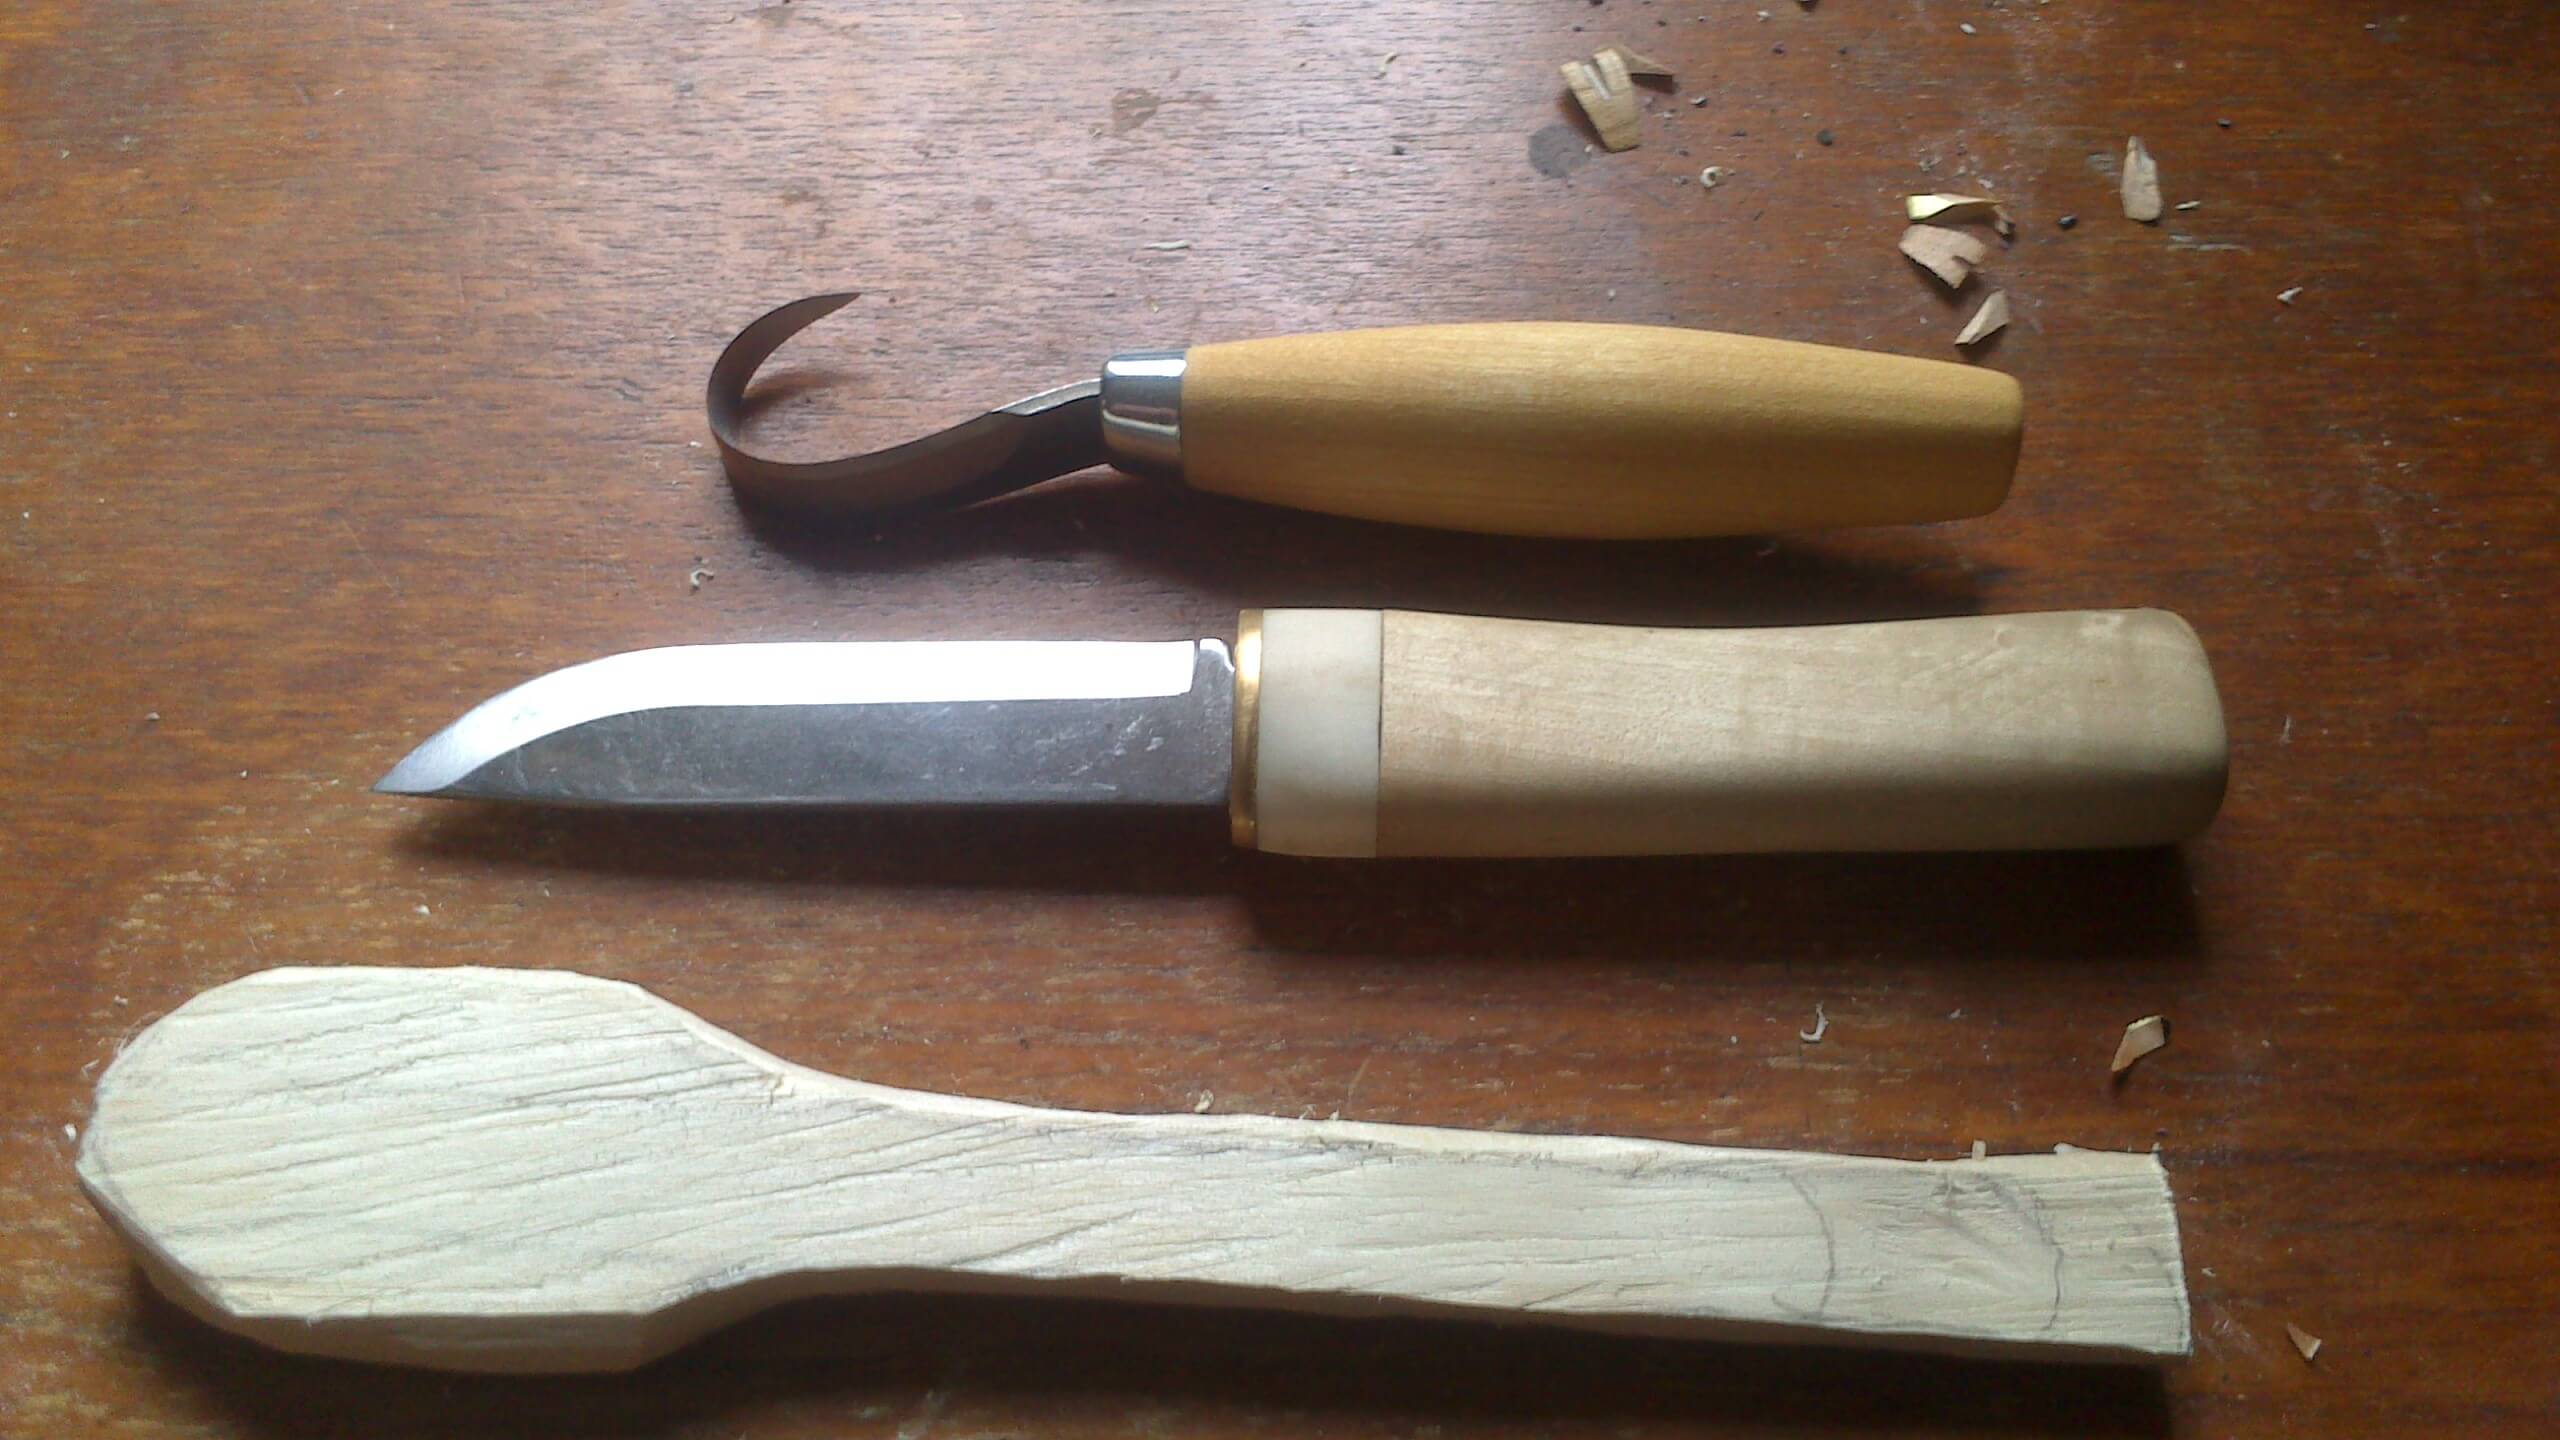
Carving Knife — Your primary tool for shaping the outside of the spoon. Look for a blade around 2–3 inches with a flat bevel grind. Brands like Mora or BeaverCraft are excellent entry-level options that won’t break the bank.
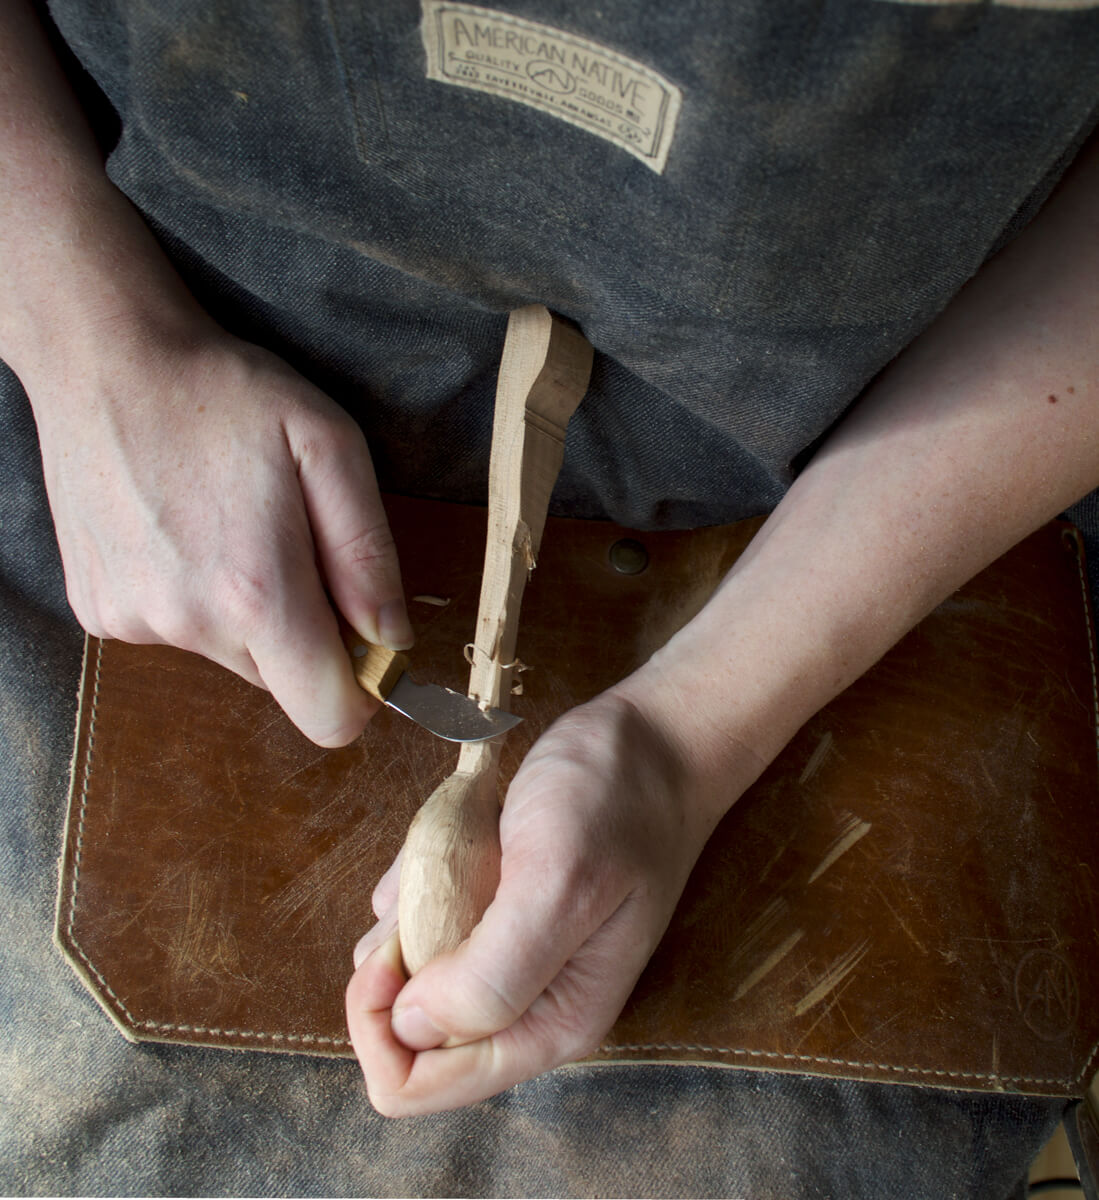
Hook Knife (Spoon Knife) — This curved blade is specifically for hollowing out the bowl of the spoon. You can’t really do that step efficiently without one. A right- or left-handed version is available — get the right one for your dominant hand.
Bench Hook or Wood Vise — Beginners often skip this, then spend the whole session fighting to hold the blank still. A simple bench hook costs almost nothing and makes every cut safer and more controlled.
Sandpaper — Grits 80, 120, and 220 will cover you from rough tool marks all the way to a smooth food-ready finish. Don’t skip this step.
Optional but Genuinely Helpful
- Wood carving gouge — speeds up roughing the bowl before the hook knife takes over
- Saw or hatchet — useful if you’re working from a log rather than a pre-cut blank
- Cut-resistant gloves — strongly recommended for beginners; one slip on a hook knife is enough
- Leather strop + honing compound — keeps your edges sharp between uses; a game-changer once you start caring about tool maintenance
Quick Tool Comparison
| Tool | Purpose | Est. Cost | Skill Level |
| Carving Knife | Shaping the handle & body | ~$20–$50 | Beginner |
| Hook Knife | Hollowing the spoon bowl | ~$15–$40 | Beginner |
| Bench Hook / Vise | Securing the blank safely | ~$10–$30 | Beginner |
| Sandpaper (80–220) | Smoothing tool marks | ~$5 | Beginner |
| Carving Gouge | Faster bowl roughing | ~$20–$60 | Optional |
| Leather Strop | Keeping edges razor-sharp | ~$10–$25 | Recommended |
| Cut-Resistant Gloves | Protecting your hand | ~$15–$30 | Strongly Recommended |
FYI: You don’t need everything on day one. Start with a carving knife, a hook knife, and some sandpaper. Add the rest as your skills and interest grow. If you want a full breakdown of starter gear, our guide to woodworking tools for beginners covers everything in detail.
3. Best Wood Types for Spoon Carving
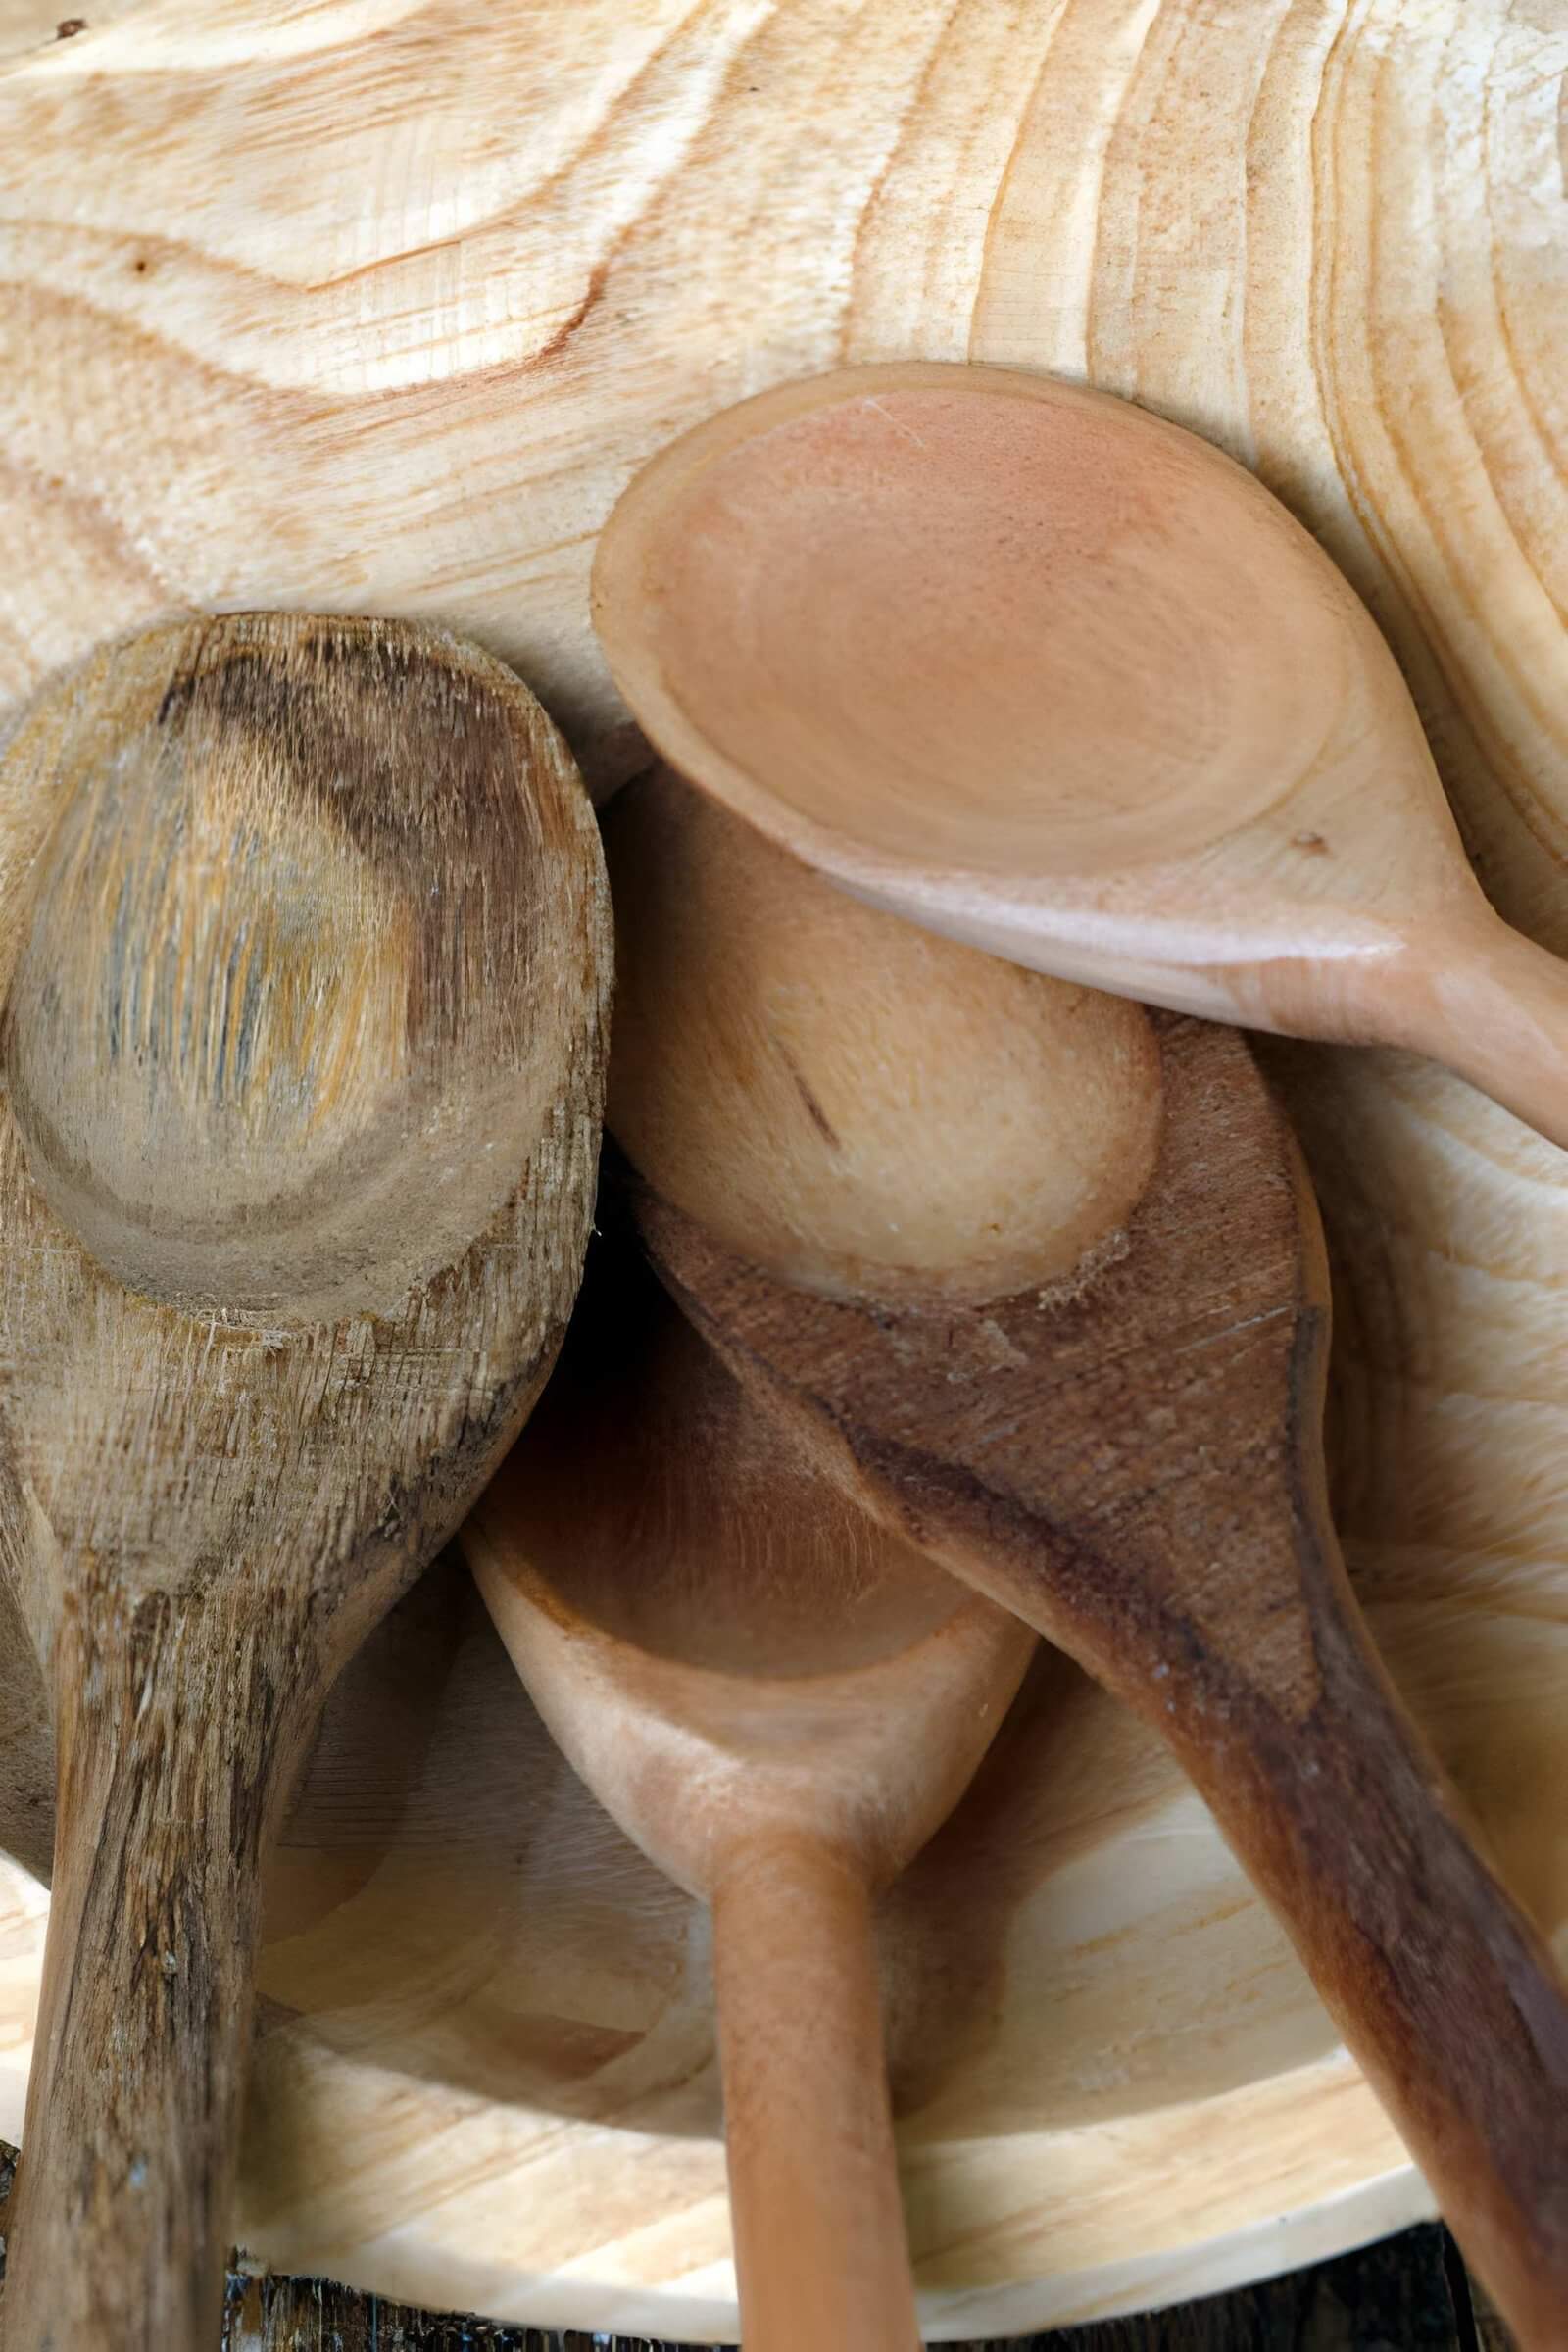
Wood choice is where beginners make their most common early mistake — grabbing whatever scrap is lying around without thinking about hardness or grain direction. Some woods are a dream to carve. Others will have you sweating through a simple cut.
Recommended Woods, Ranked for Beginners
- Basswood — The gold standard for beginners. Soft, consistent, easy to carve in any direction. Available as pre-cut blanks from most craft suppliers.
- Birch — Slightly harder than basswood, but carves cleanly and holds fine detail well. A step up once you’re comfortable.
- Cherry — Beautiful grain, develops a rich reddish-brown patina over time. It hardens as it dries, so carve it while it’s still relatively fresh.
- Maple — Very durable and food-safe, but hard. Better suited to intermediate carvers.
- Walnut — Rich, dark, stunning. Dense and heavy to carve by hand — save it for when your skills are solid.
Green Wood vs. Dry Wood — Which Is Better?
This debate comes up in every carving community. Here’s the short version:
- Green wood (freshly cut) is softer and easier to carve — it slices like butter compared to dried wood. Traditional carvers love it.
- Dry wood is more stable, widely available as blanks, and less likely to crack during or after carving.
For your first spoon, start with a dried basswood blank. It’s predictable, consistent, and forgiving — exactly what you want when you’re still figuring out how your knife responds to the grain.
What to Look For When Buying Wood
- Straight, even grain — knots cause your knife to catch and can split the wood unexpectedly
- No visible cracks or checks — these will worsen as you carve and may ruin the piece
- Pre-cut blanks from a carving supplier — the easiest option; they’re already the right thickness
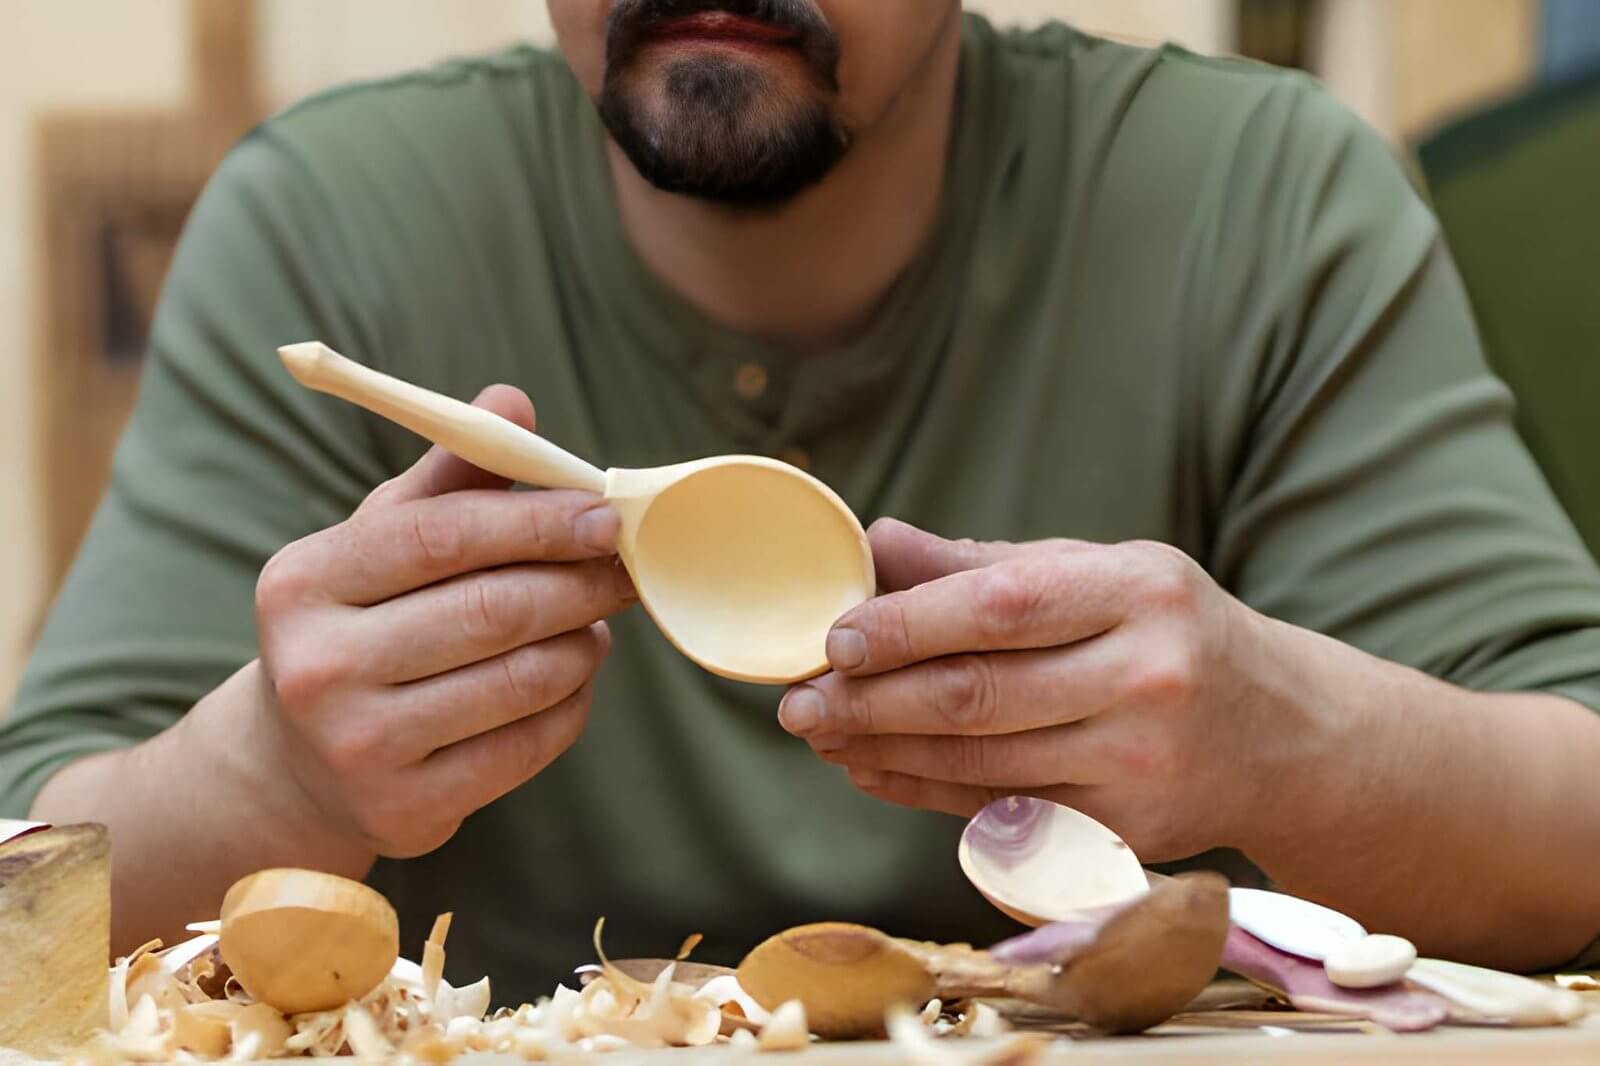
4. Step-by-Step: How to Carve a Wooden Spoon by Hand
Alright, here’s where we actually do the thing. Work through these steps in order and resist the urge to rush. Slow and deliberate is always faster than undoing a mistake.
Before You Begin
- Set up a non-slip mat or bench hook to secure your blank
- Put on your cut-resistant gloves — especially important for hook knife work
- Check that all blades are sharp; make a few test strokes on scrap wood first
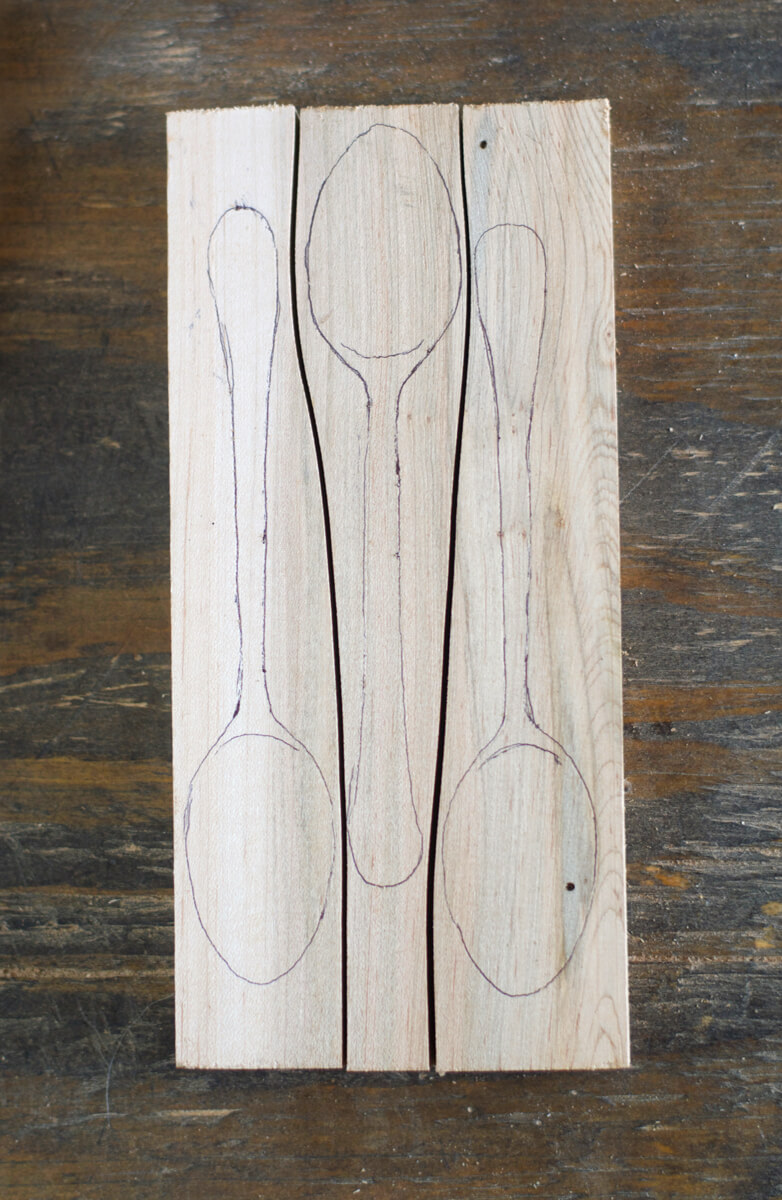
Step 1: Draw the Spoon Shape
Credit : Man Made Diy
Use a pencil to sketch your spoon profile directly on the wood blank — both a top-down view and a side profile. Keep it simple: an oval bowl that transitions into a tapered handle. You can find free printable templates online if you’re not confident sketching freehand.
Step 2: Cut the Rough Shape
Credit : Man Made Diy
Remove the bulk of the waste wood first. A saw or band saw makes quick work of the side profile. If you’re working with just a knife, make stop cuts across the grain, then pare the waste away in sections. Work in thin layers — never try to remove too much material in one cut.
Step 3: Carve the Spoon Bowl
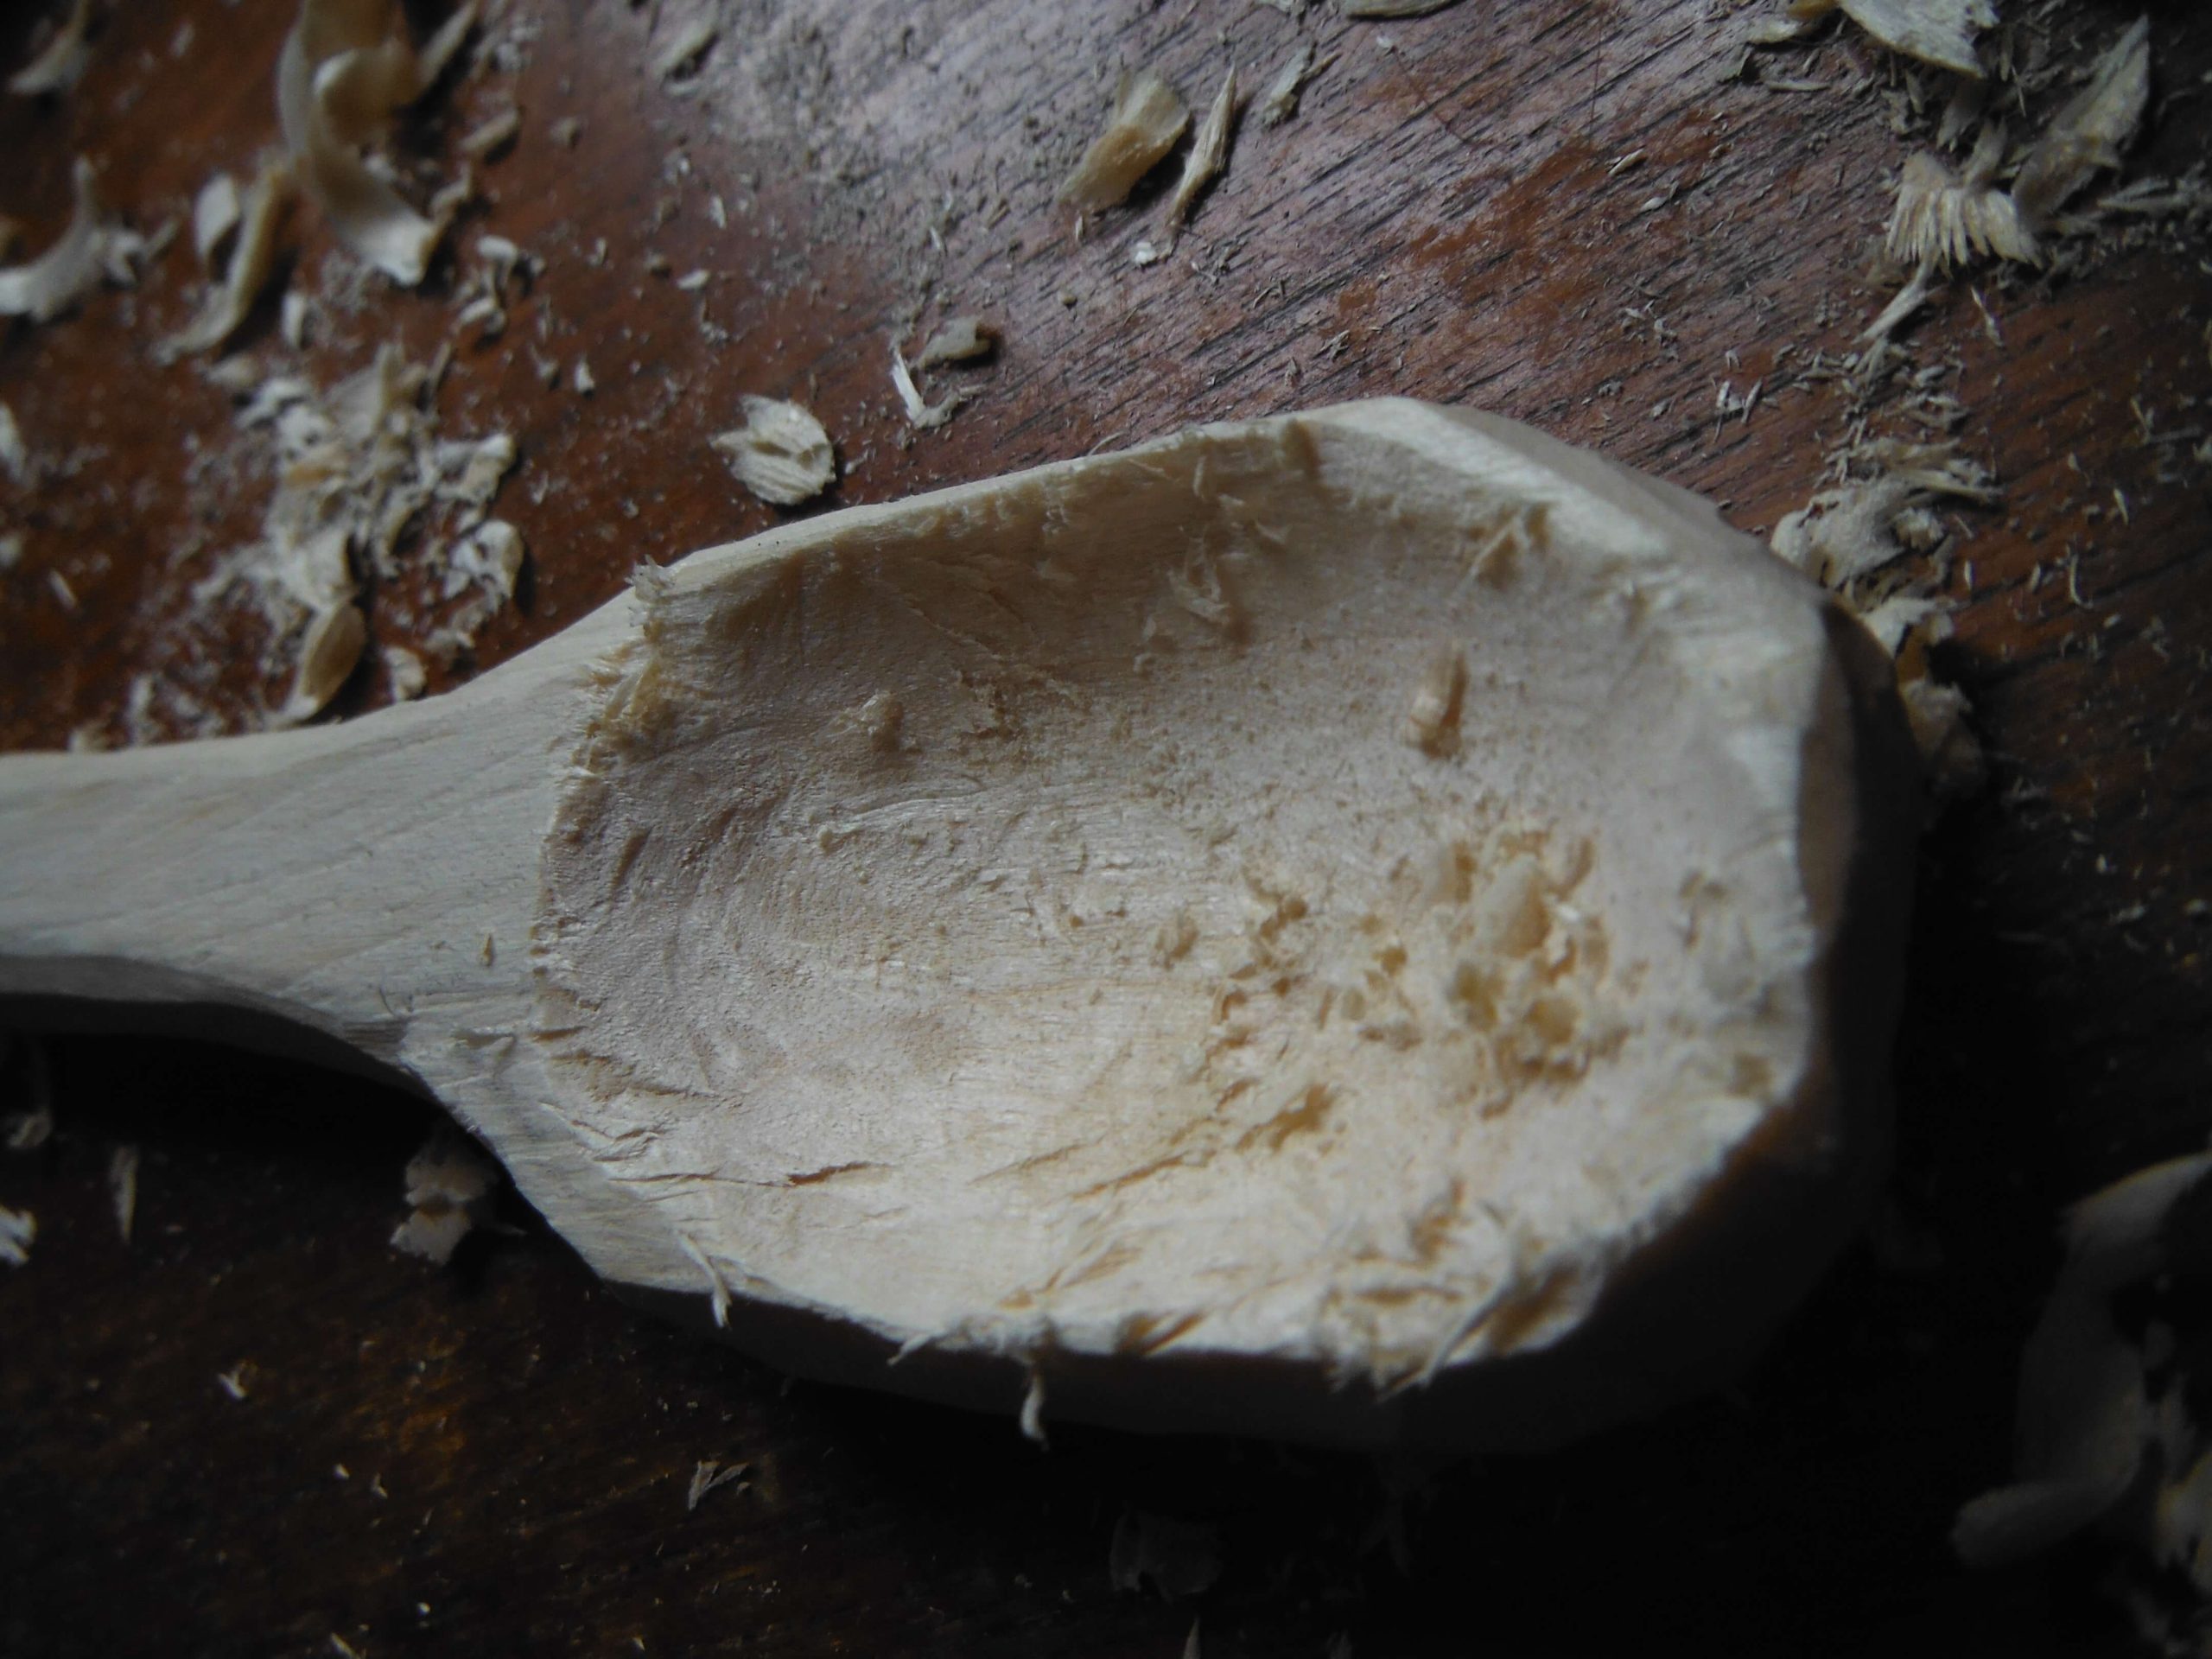
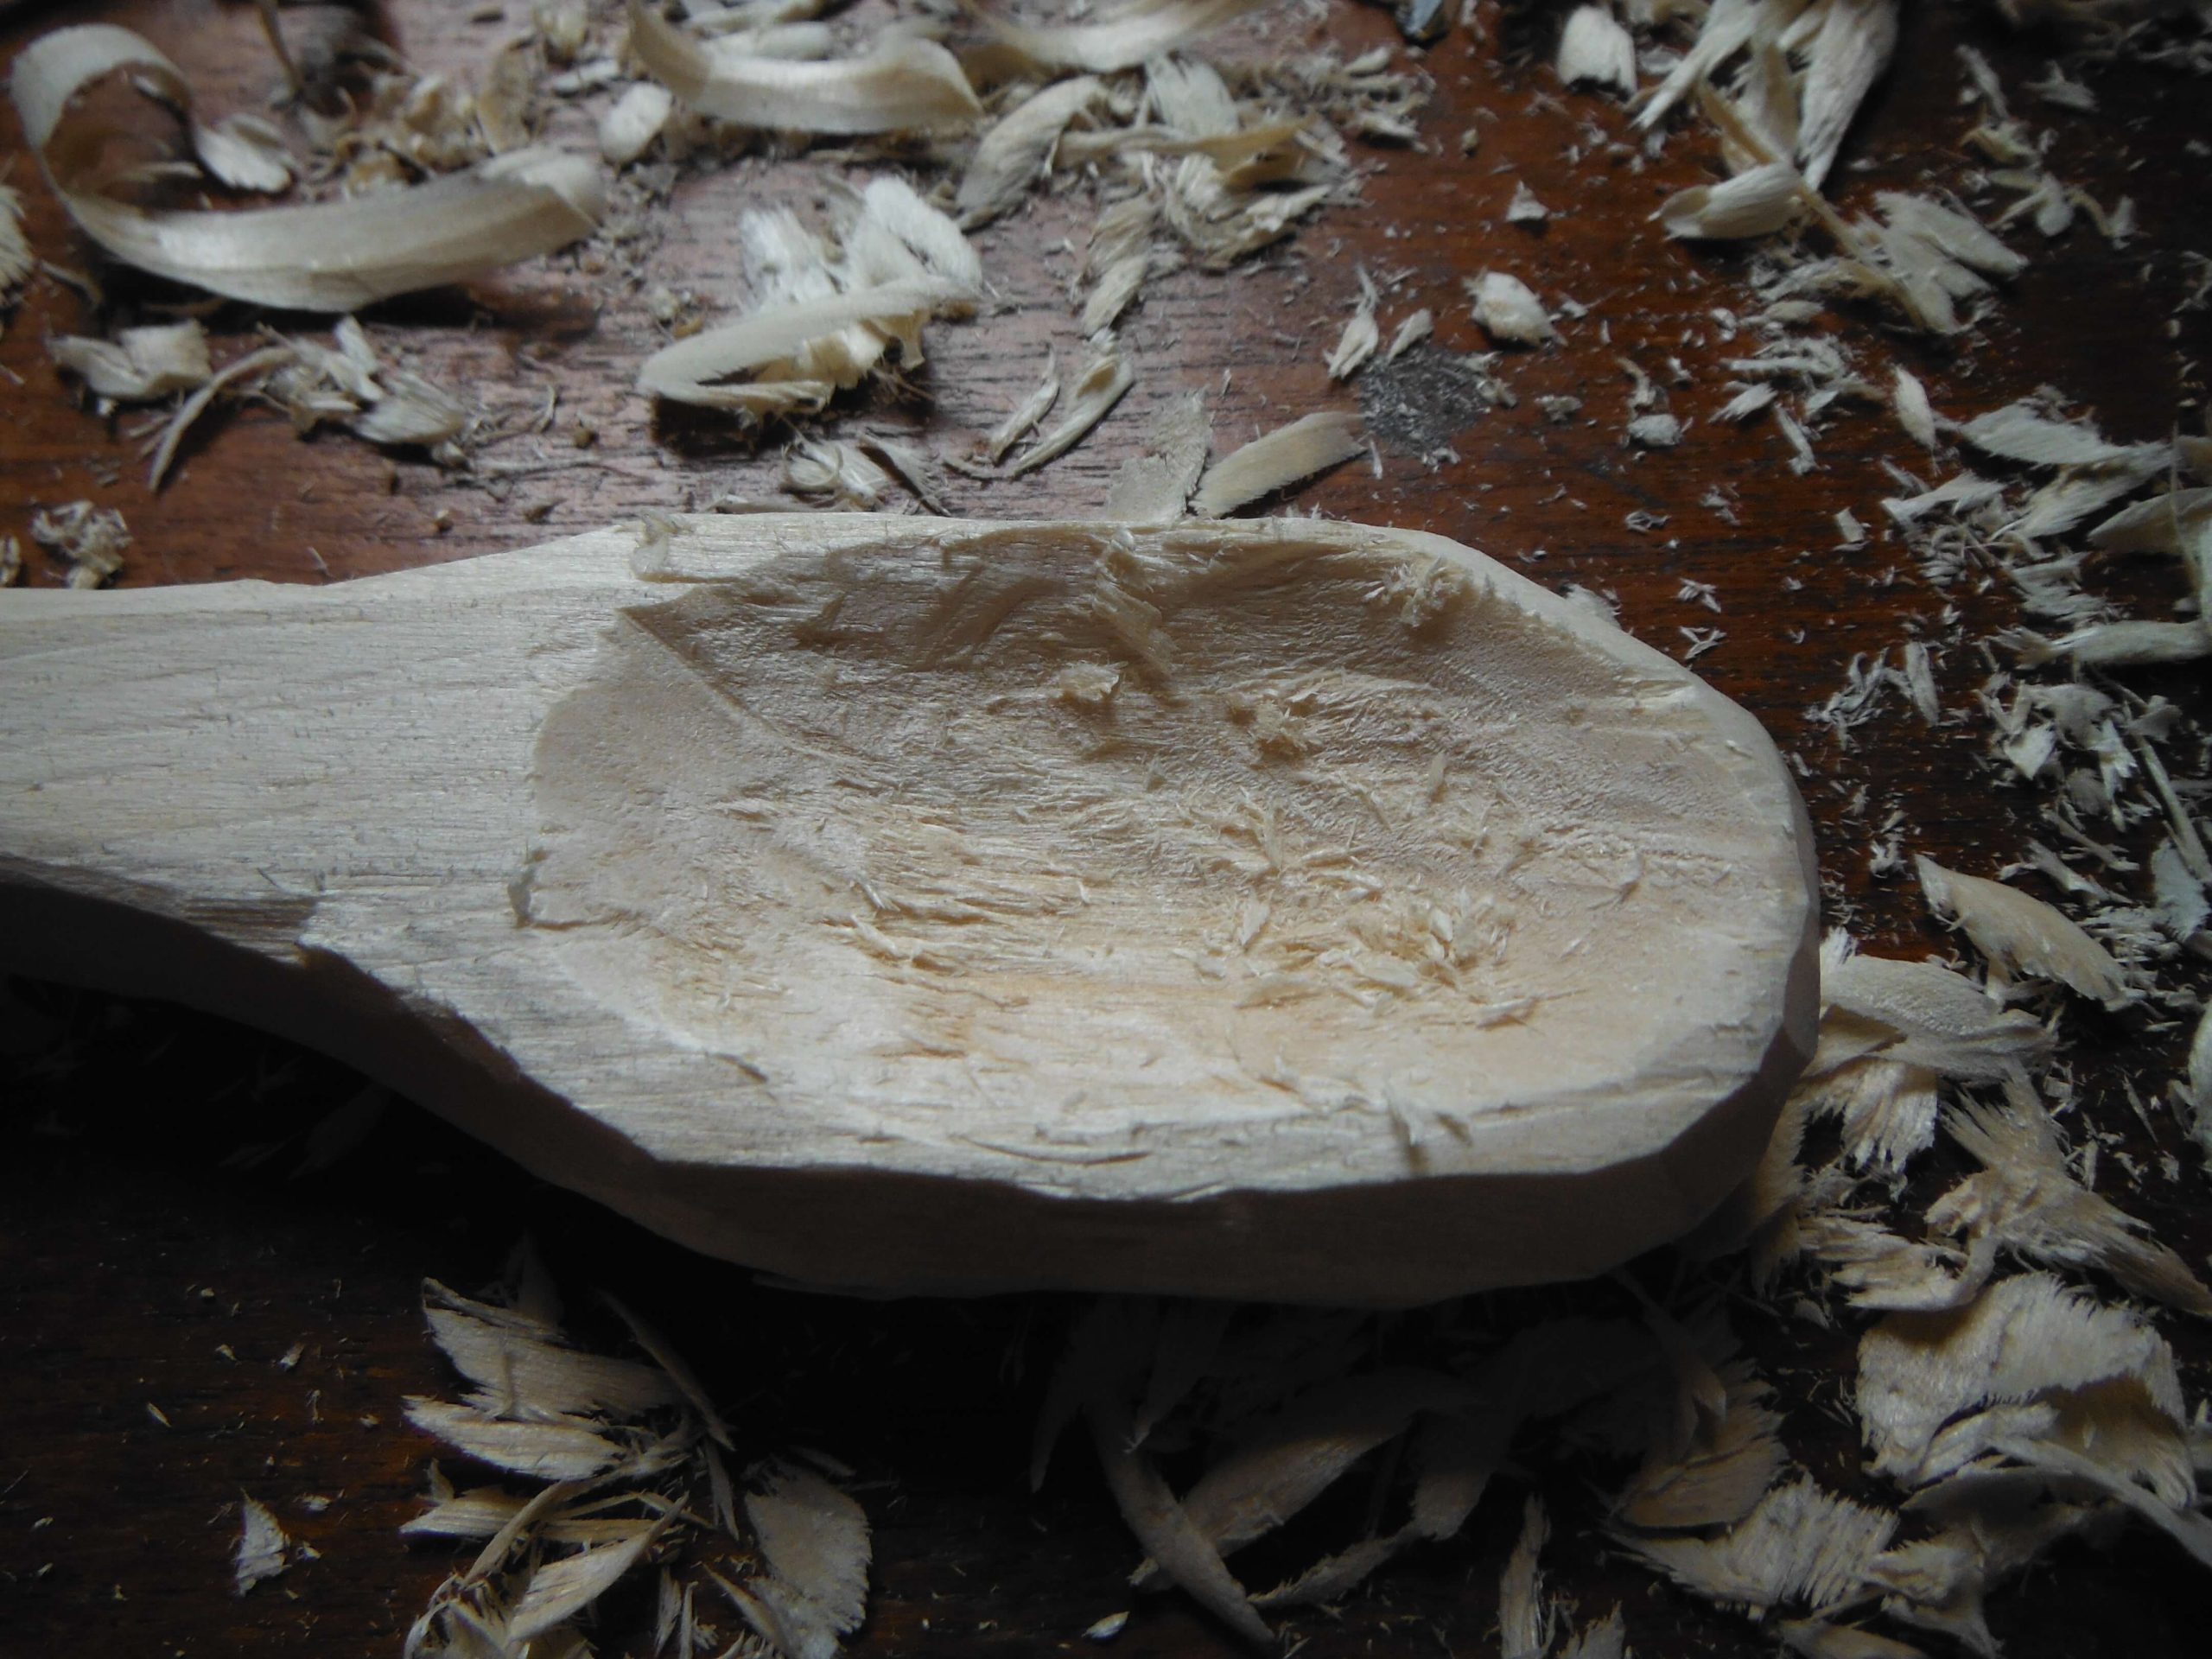
This is the trickiest step, but also the most satisfying when it clicks. Secure the blank bowl-side up.
- Use your hook knife with a controlled, rotating scooping motion
- Always carve from the center outward — never against the grain
- Aim for consistent wall thickness of 4–6mm — too thin and it may crack or flex in use
- Check your progress often by running a thumb around the inside of the bowl
Step 4: Shape the Handle

Switch back to your carving knife. Taper the handle from the neck (where it meets the bowl) down toward the tip. Use controlled push cuts or pull cuts — whichever feels more natural with the grain direction. Round off any flat spots and refine the profile.
Step 5: Refine the Overall Shape
Take your time here. Sight down the handle to check for straightness. Look at the spoon from all angles. Use light, paring cuts to clean up any lumps or asymmetry. This step is where the spoon goes from rough to refined.
Step 6: Sand the Spoon
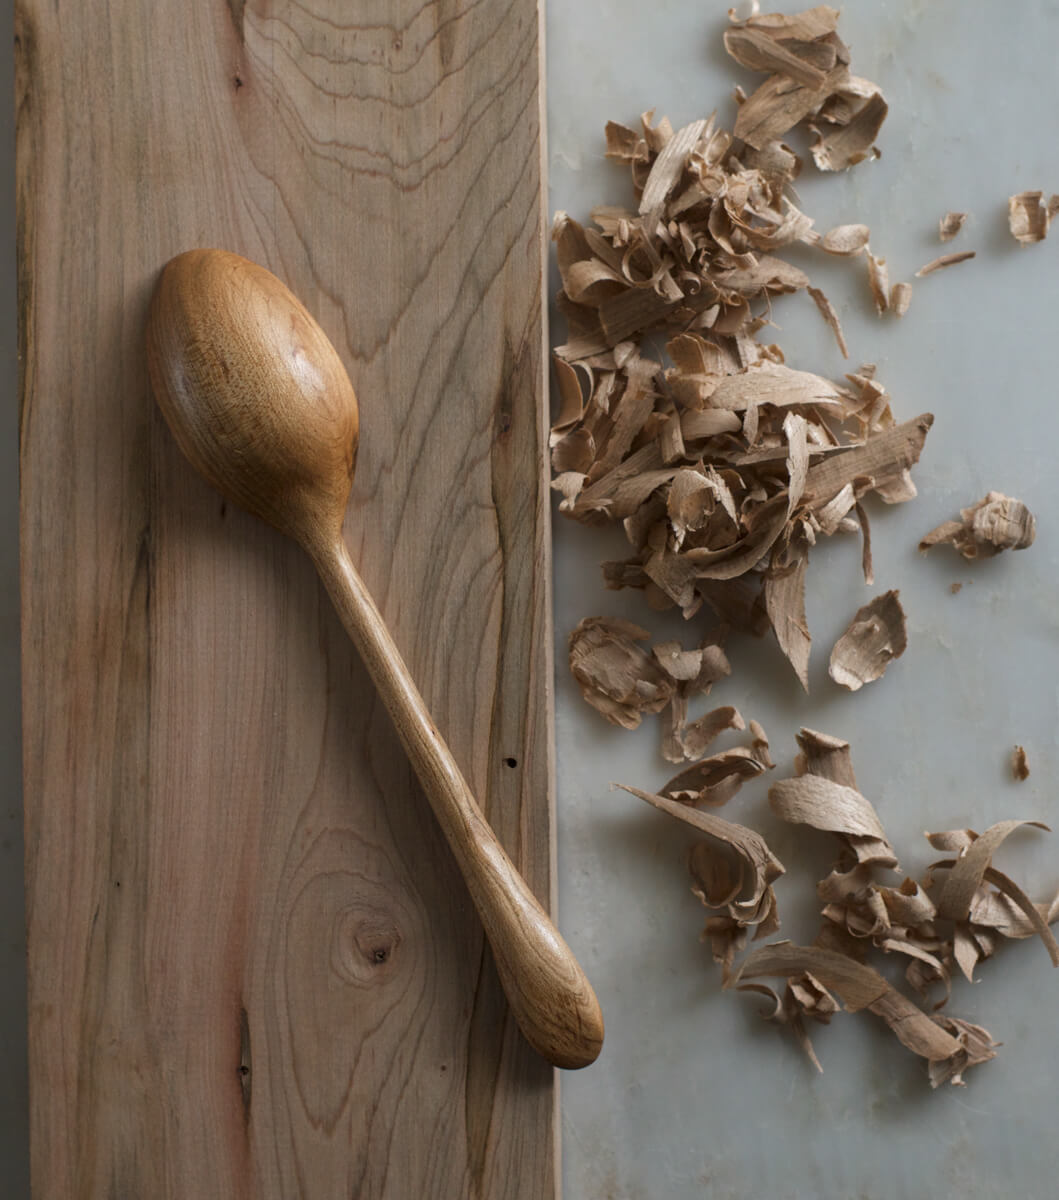
Start with 80-grit to remove tool marks, then work up through 120 and finish at 220. Always sand with the grain. Wipe away dust between grits with a dry cloth.
Optional: skip the finer grits if you want a rustic, hand-carved texture. Some of the most beautiful spoons keep the tool marks visible — it’s a legitimate aesthetic choice, not laziness 😄
5. How to Finish a Wooden Spoon Safely
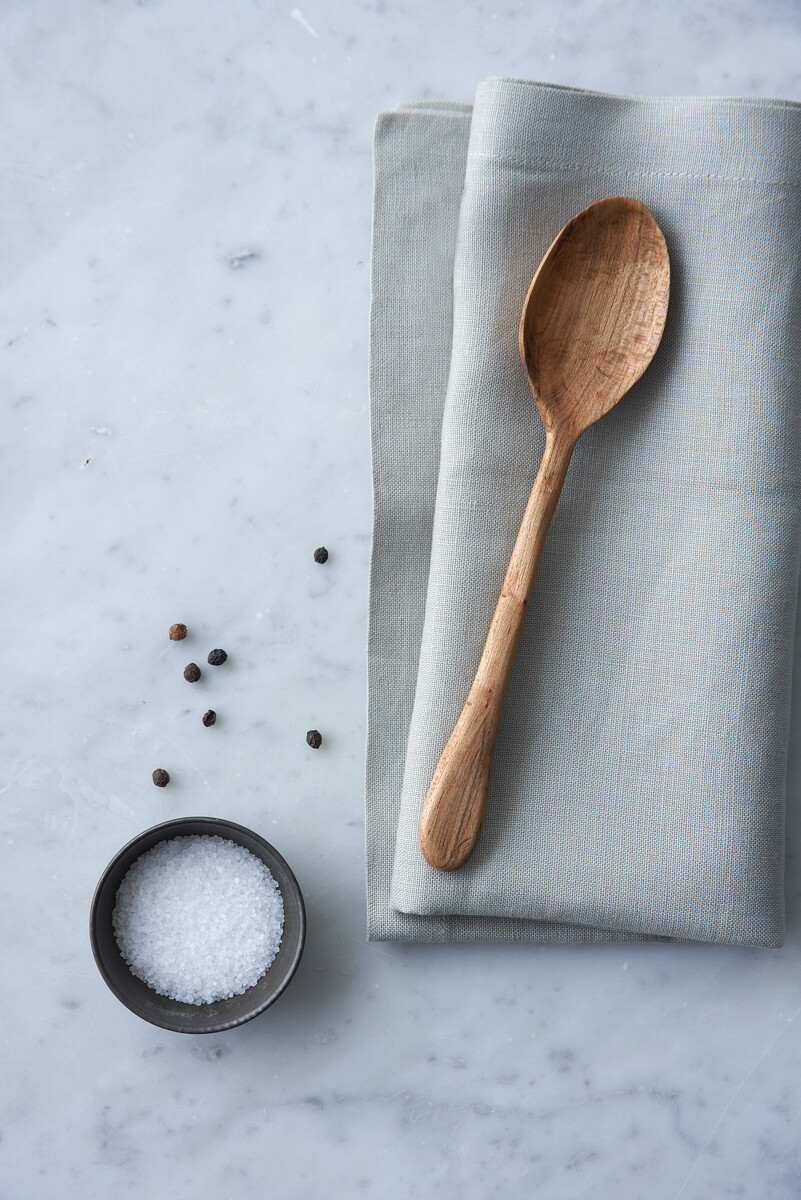
An unfinished wooden spoon will warp, absorb bacteria from food, and generally have a bad time. Finishing is not optional — but it’s also very straightforward.
Why the Finish Matters
Raw wood is porous. It absorbs moisture and everything that comes with it — oils, bacteria, food residue. A good finish seals the wood, repels moisture, and makes the spoon far easier to clean.
The Best Food-Safe Finishes
- Food-grade mineral oil — the easiest choice. Odorless, tasteless, affordable (pharmacy-grade works fine). Hard to go wrong with this one.
- Beeswax + mineral oil blend — adds a bit more water resistance and a smooth, natural feel. Many woodworkers make their own.
- Walnut oil — penetrating, dries completely to a polymerized film. Beautiful finish. Note: check for nut allergies before gifting.
What to avoid: Coconut oil goes rancid quickly and will make your spoon smell terrible within weeks. Linseed oil and tung oil can be toxic before they’re fully cured — don’t use them on anything touching food.
How to Apply Mineral Oil
- Wipe on a generous coat with a lint-free cloth, covering all surfaces
- Let it soak for 2–4 hours — overnight gives even better penetration
- Wipe off any excess; let the spoon dry completely before use
- Reapply monthly, or whenever the wood starts to look dry or dull
6. Beginner Spoon Carving Tips
A few things that will save you time, frustration, and possibly a fingertip:
- Carve with the grain, always. Cutting against it causes tear-out and rough, splintered surfaces that are hard to fix.
- Sharp tools are safer tools. It feels counterintuitive, but a dull blade requires far more force — and force leads to slips.
- Use short, controlled cuts rather than long sweeping strokes
- Rotate the spoon constantly to check proportions and symmetry from all angles
- Take breaks. Carving tired is when mistakes happen. Step away, rest your hands, come back fresh.
- Practice tricky cuts on a scrap piece first
- Work in good light — reading the grain and catching your progress depends on it
7. Common Spoon Carving Mistakes to Avoid
These are the mistakes that trip up almost every beginner. Consider this your shortcut to skipping the hard lessons:
- Using dull tools — the #1 mistake. Invest in a leather strop; five strokes before each session makes a huge difference.
- Carving against the grain — always check grain direction before each cut, especially when switching between sections of the spoon.
- Making the bowl too thin — aim for 4–6mm of wall thickness. Thinner than that and it may crack or flex when used with hot liquids.
- Skipping sanding — tool marks become very visible after oiling. They’re also harder to fix after finishing.
- Choosing the wrong wood — avoid dense hardwoods like oak for hand carving. Basswood exists for a reason.
- Rushing — slow, deliberate cuts are always more accurate than fast ones. You’re not being timed.
- Skipping the finish — an unfinished spoon will warp, stain, and absorb odors. Ten minutes with mineral oil solves all of that.
8. Easy Spoon Design Ideas to Try
Once you’ve got the basics down, start experimenting with form. These designs are all beginner-friendly and give you different skills to practice:
- Classic cooking spoon — long handle, oval bowl; the default starting point and a kitchen workhorse
- Coffee scoop spoon — small, deep bowl; great for practicing controlled hook knife technique
- Serving spoon — wide, shallow bowl; ideal for salads and side dishes, and easier to carve than it looks
- Rustic hand-carved spoon — intentionally textured, tool marks left visible; celebrates the handmade aesthetic
- Decorative handle spoon — add simple chip carving or geometric notch patterns to the handle once the base spoon is done
- Mini tasting spoon — small, quick to carve, perfect for a fast confidence-boosting project
These are also some of the most popular wood carving projects for people looking to sell handmade goods — hand-carved spoons do very well at craft markets and on Etsy. Which leads to an interesting thought: if you get good enough, your weekend hobby might pay for itself.
Curious what else is worth making? Our roundup of small wood projects that sell has plenty of ideas to keep your knife busy.
Wrapping Up: Go Make Your First Spoon
Now that you know how to carve a wooden spoon by hand — from wood selection to food-safe finishing — there’s really only one thing left to do: start.
Grab a piece of basswood, a decent carving knife, and a hook knife. Clear an afternoon. Your first spoon might be a little lopsided and thicker than ideal. That’s not a failure — that’s your first lesson in wood, grain, and your own hands. The second spoon will be better. The tenth will surprise you.
From there, try a butter spreader, a small spatula, or a chip-carved box. Each project builds on the last. The knife control you develop carving spoons transfers to everything else in woodworking.
If you’re exploring what else you can make as a beginner, start with our list of beginner woodworking projects — there’s plenty to keep you busy long after the spoon drawer is full.
Now go make something. The soup will taste better. I promise.