Every weekend woodworker’s dream — and it starts with that beat-up pile of old boards in your garage.
That Pile of Old Wood Is Literally Money Sitting There
Okay, real talk. You’ve got a stack of old pallets, some weathered fence boards, and maybe a few mystery planks from that deck you tore down two summers ago. They’ve been sitting in your garage long enough that you’ve started using them as a shelf for paint cans. Sound familiar? 🙂
Here’s the thing: that pile of beat-up wood is an absolute goldmine. Reclaimed wood is having a serious moment right now — and for good reason. It’s free (or close to it), it has a character that no brand-new board from the hardware store can ever replicate, and working with it is genuinely forgiving for beginners.
Eco-friendly? Check. Budget-friendly? Absolutely. Weekend-friendly? That’s literally what this article is about.
Over the next few sections, I’ll walk you through 25 categorized reclaimed wood project ideas — each with a difficulty level, time estimate, and materials list — plus tips on sourcing wood, the tools you’ll actually need, and where to find detailed plans if you want step-by-step guidance. Before we get to the good stuff, let’s quickly cover what reclaimed wood actually is and why it makes such a great building material.
If you’re brand new to the craft, you might also want to check out these easy woodworking projects for beginners before tackling the larger builds on this list.
What Is Reclaimed Wood, Exactly?

Reclaimed wood is salvaged timber from old barns, factories, demolished buildings, pallets, discarded furniture, and construction sites — cleaned up and given a second life in new projects. Unlike fresh lumber, it carries years (sometimes decades) of character in its grain, knots, nail holes, and natural weathering. That’s not a flaw. That’s the whole point.
Why is it so popular right now? A few reasons:
- Rustic and farmhouse aesthetics are trending hard in home decor
- Sustainability — people want to build without adding to landfill waste
- Cost — reclaimed wood is often free or dramatically cheaper than new lumber
The most common types you’ll encounter: pallet wood (easiest to find), old fence boards, barn wood, salvaged hardwood flooring, and construction site offcuts. Each has its own character, and honestly, the variety is part of the fun.
Before You Start: Tips for Working With Reclaimed Wood
I know — you want to jump straight to the projects. But spending 20 minutes on prep will save you hours of headaches later. Trust me on this one.
1. Inspect and Sort First
Not every board is worth using. Check for signs of rot, mold, active pest damage, or excessive warping. Structurally compromised boards might still work for decorative pieces, but don’t use them anywhere that needs to hold weight.
2. Remove All Hardware — Seriously, All of It
Hidden nails, screws, and staples will destroy saw blades. Use a strong magnet or a basic metal detector to scan every board before cutting. A cat’s paw nail puller or dedicated nail-pulling pliers makes this quick work.
3. Clean the Wood Thoroughly
Brush off loose dirt, then wipe down with a damp cloth. For really grimy boards, a stiff brush with soapy water works great. Let everything dry completely before you start cutting or sanding — wet wood doesn’t cut cleanly.
4. Sand in Stages
Start with 60–80 grit to remove rough surfaces and old paint. Work up to 120 grit, then 150 or 220 if you want a smooth finish. Sanding also reveals the natural color and grain hiding beneath all that surface grime — it’s genuinely satisfying.
5. Let Indoor Wood Acclimatize
Bring reclaimed wood inside for a few days before using it on indoor projects. Wood expands and contracts with humidity, so giving it time to adjust reduces warping after you’ve finished your build.
6. Use the Right Finish for the Job
Outdoor projects need exterior-grade sealant. Kitchen items that touch food need food-safe finishes like mineral oil or beeswax. Indoor decorative pieces? A light wax or oil coat enhances the natural look without hiding the wood’s character. Match the finish to the use — this is one of the most common beginner mistakes.
If you’re setting up a workspace from scratch, this guide on how to set up a small woodworking shop will help you get started on the right foot.
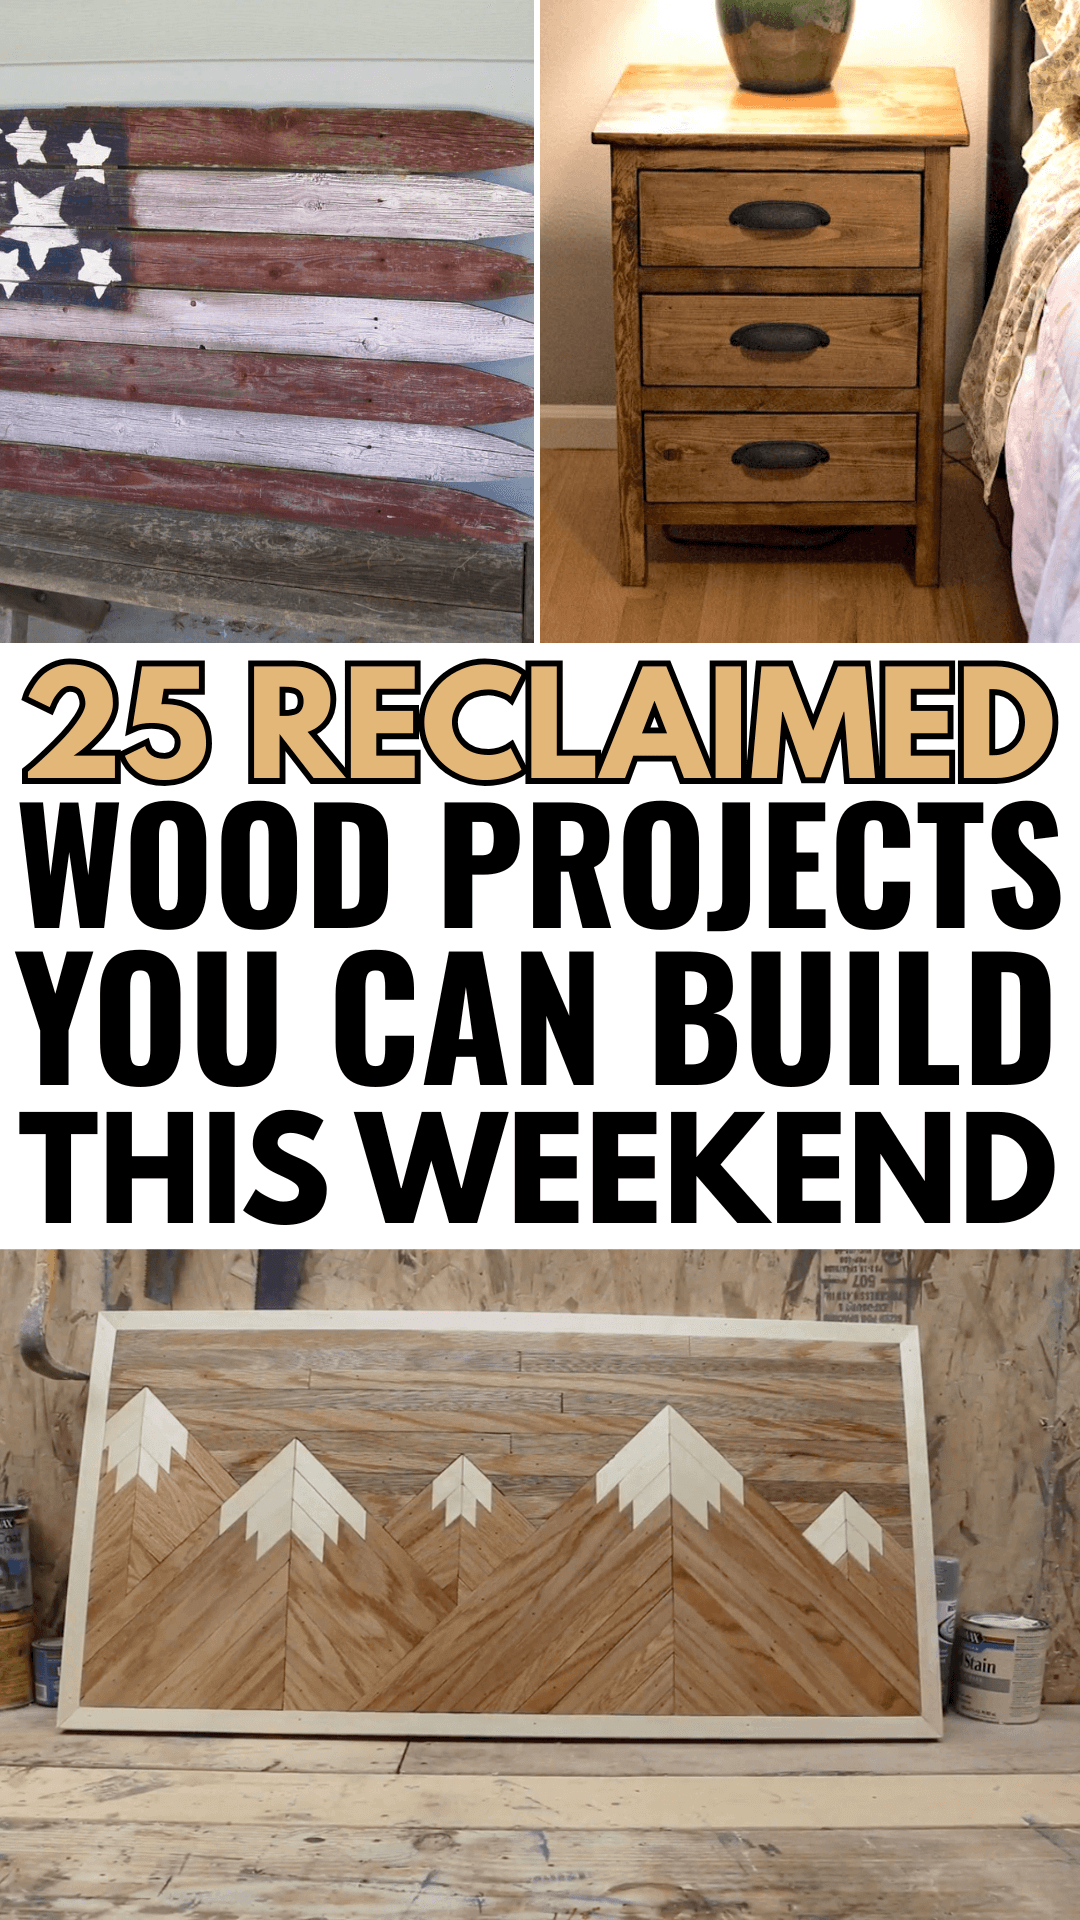
25 Reclaimed Wood Projects You Can Build This Weekend
Alright, here we go. I’ve organized these into five categories so you can jump straight to whatever fits your skill level, time, and space. Let’s get into it.
Reclaimed Wood Home Decor Projects
Reclaimed wood is practically made for home decor. The natural weathering and texture add instant character that brand-new smooth lumber simply can’t fake. These five projects are a great starting point.
1. Reclaimed Wood Mirror Frame ⭐ Beginner ⏱ 2–3 hours
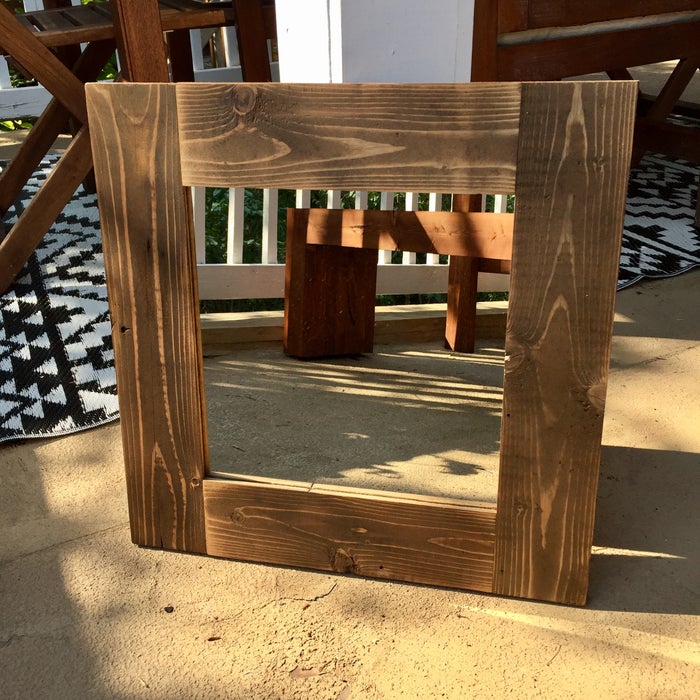
Credit : Instructables
A salvaged pallet board mirror frame is one of those projects that looks way more impressive than the effort it takes. Cut boards to size, arrange them around a basic mirror insert (IKEA and dollar stores are goldmines for these), and secure with wood glue and L-brackets. A common starter size is 18×24 inches. Staining is completely optional — raw wood with a little wax often looks better anyway.
2. Rustic Wooden Wall Art ⭐ Beginner ⏱ 1–2 hours
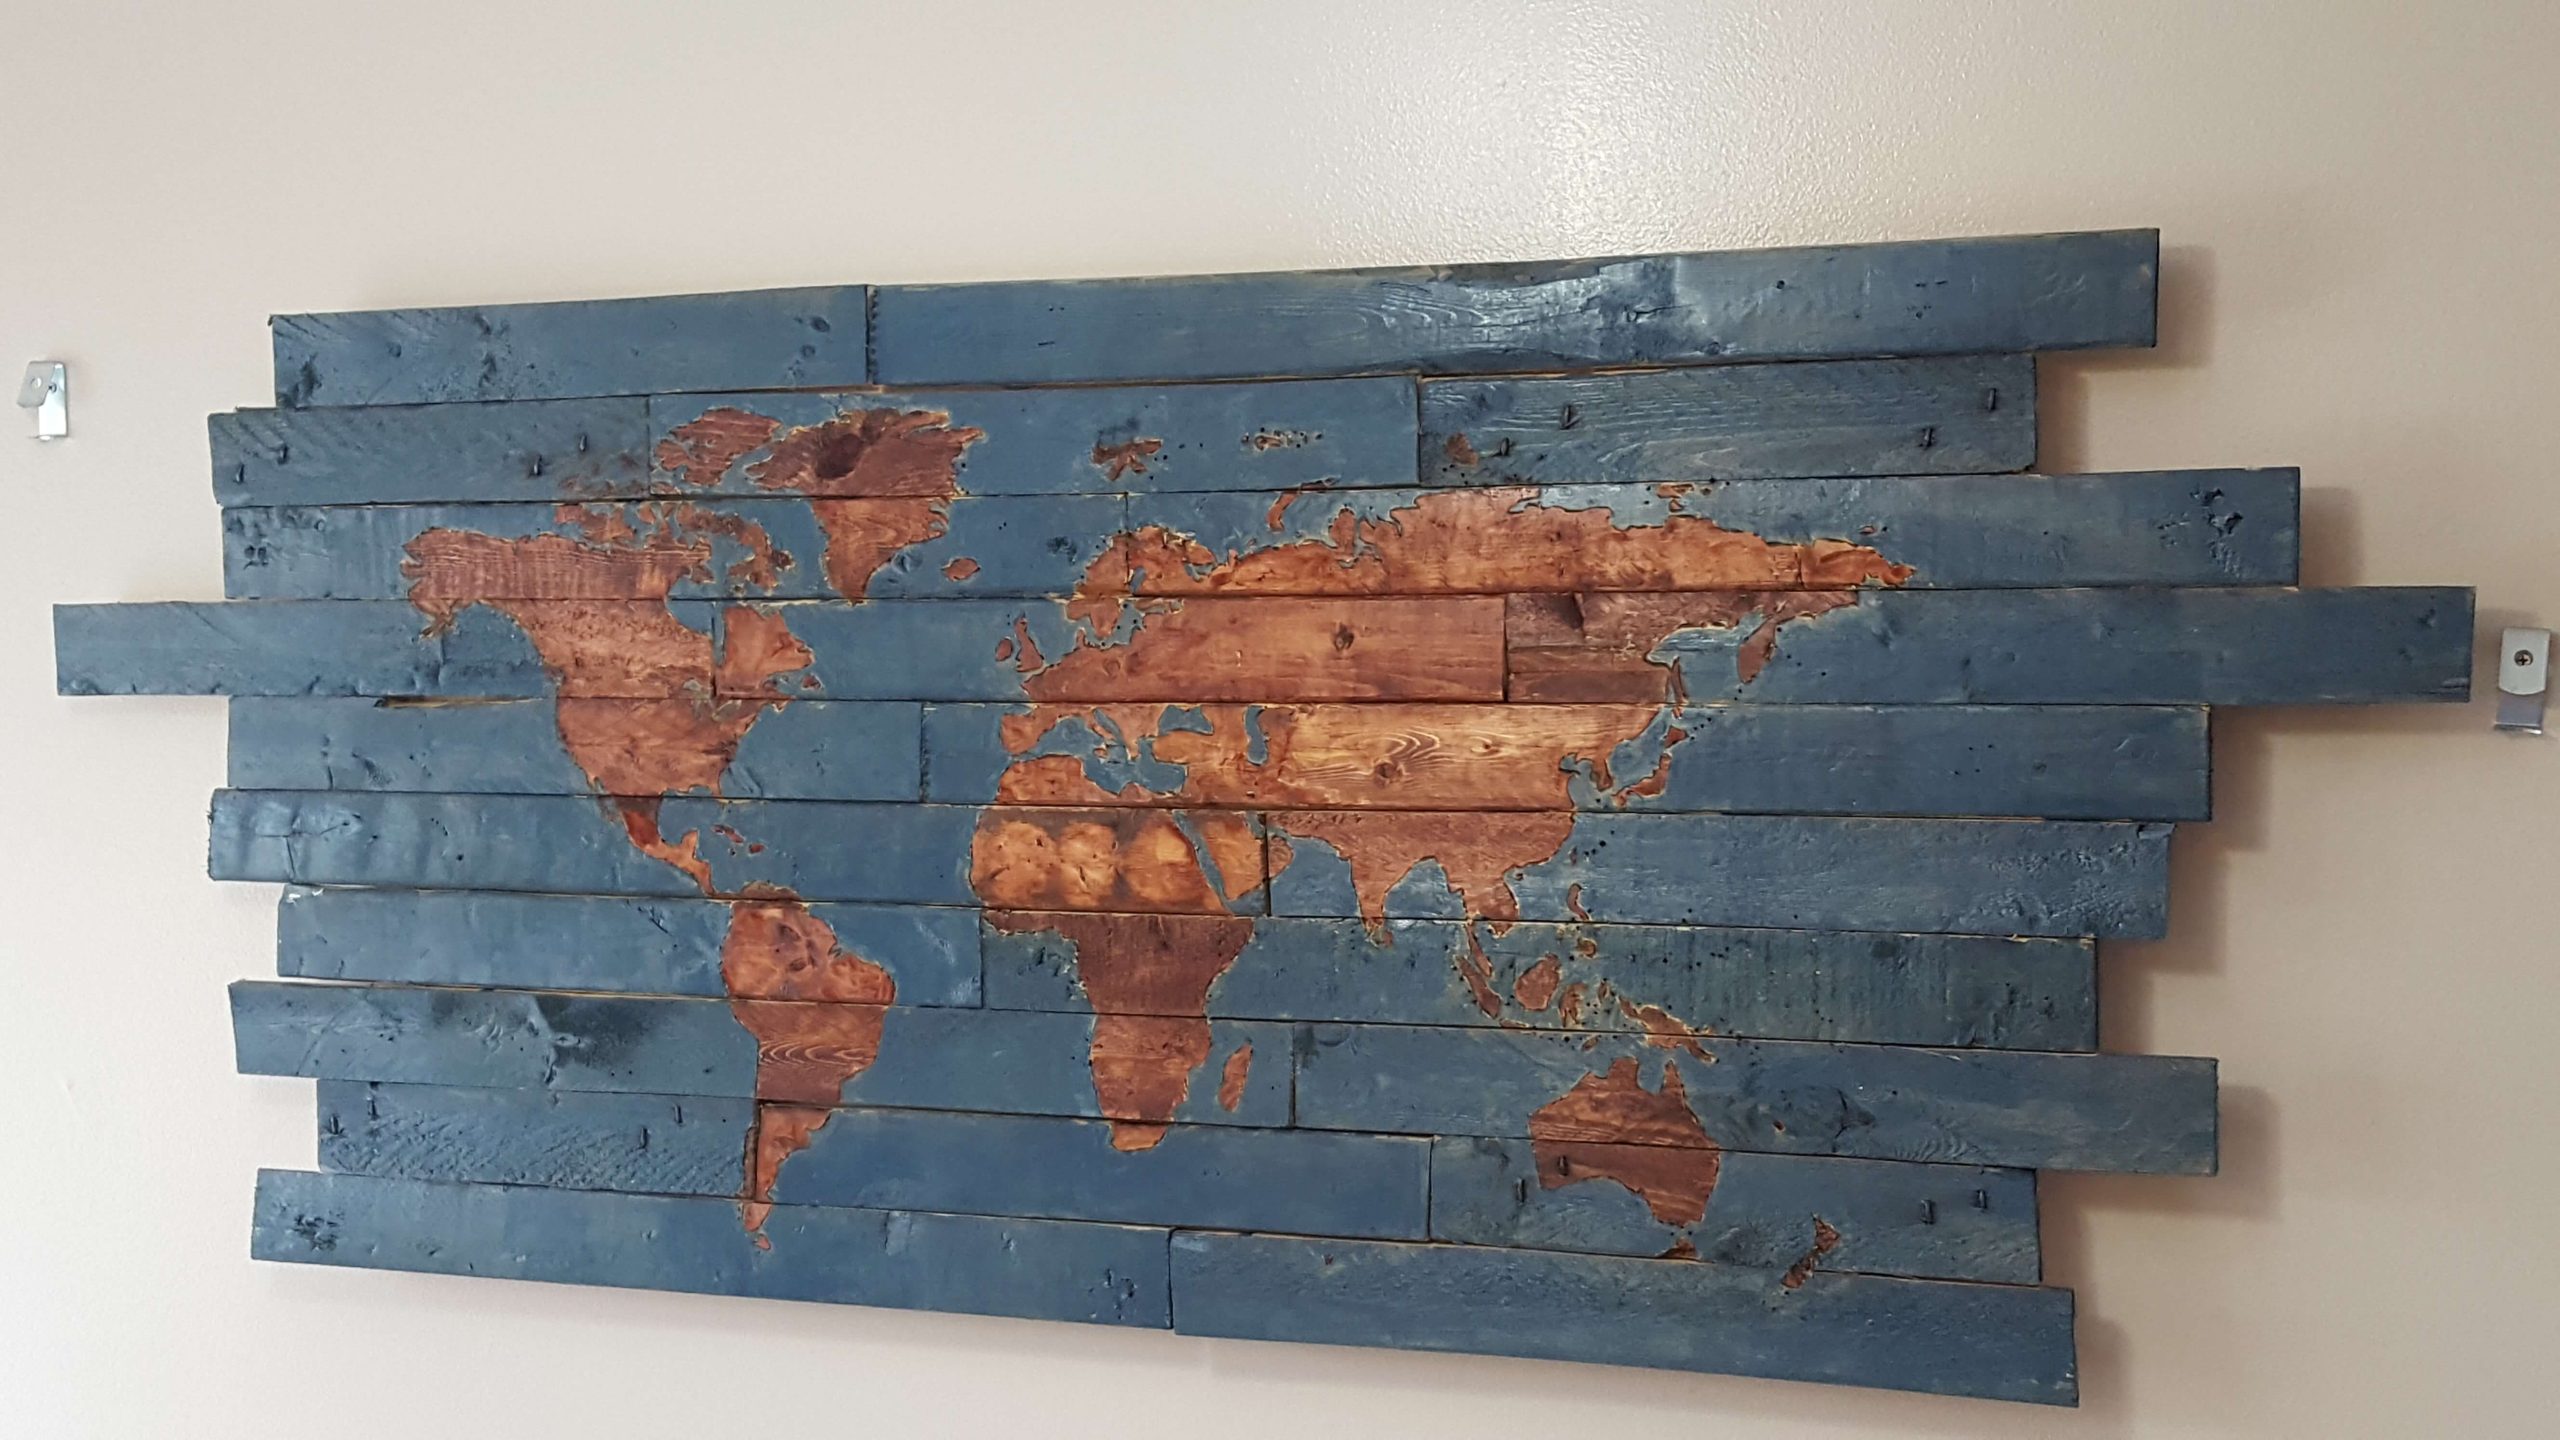
Credit : Instructables
This is the most creatively open project on the list — there are zero rules, which is both freeing and slightly terrifying. Arrange old scrap pieces into geometric patterns: chevron, abstract mosaic, or a simple grid. Mix wood tones, stain some boards, leave others raw. Hang with a French cleat for clean wall mounting on heavier pieces.
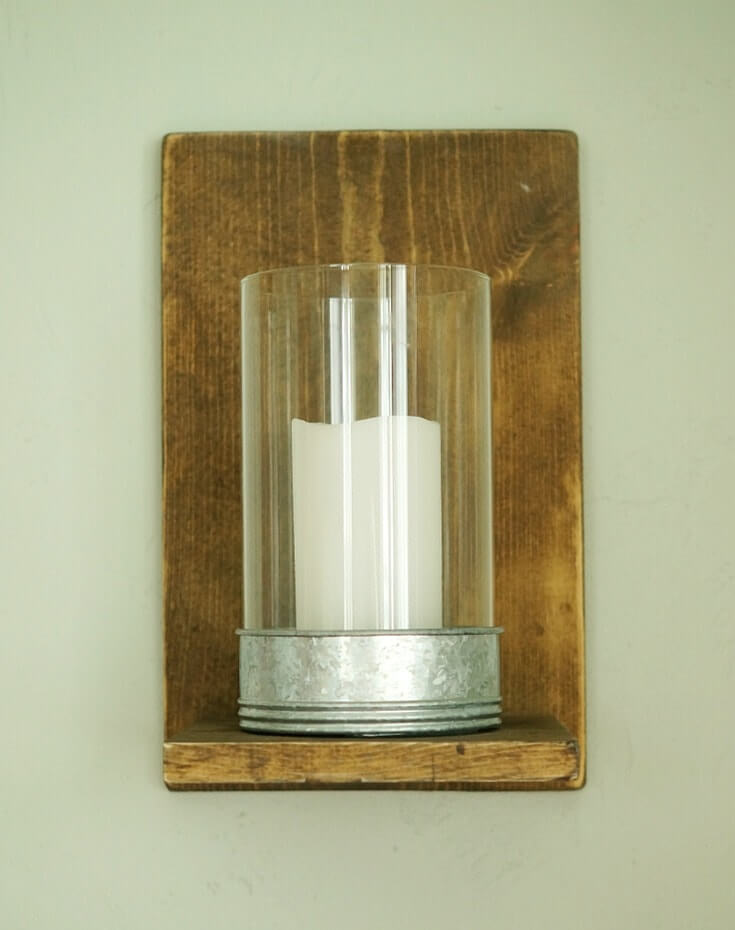
3. Wooden Wall Sconces ⭐ Beginner ⏱ 2–3 hours
Credit : kenarry
A simple bracket design cut from reclaimed boards can hold candle holders, fairy lights, or small Edison bulbs. The warm glow against rough-hewn wood creates a farmhouse atmosphere that honestly looks like it belongs in a design magazine. FYI — if you’re using real candles, keep the wood well away from direct flame. Battery-operated candles give the same vibe with zero fire risk.
4. Wooden Mountain Art ⭐ Beginner: 3-4 hours
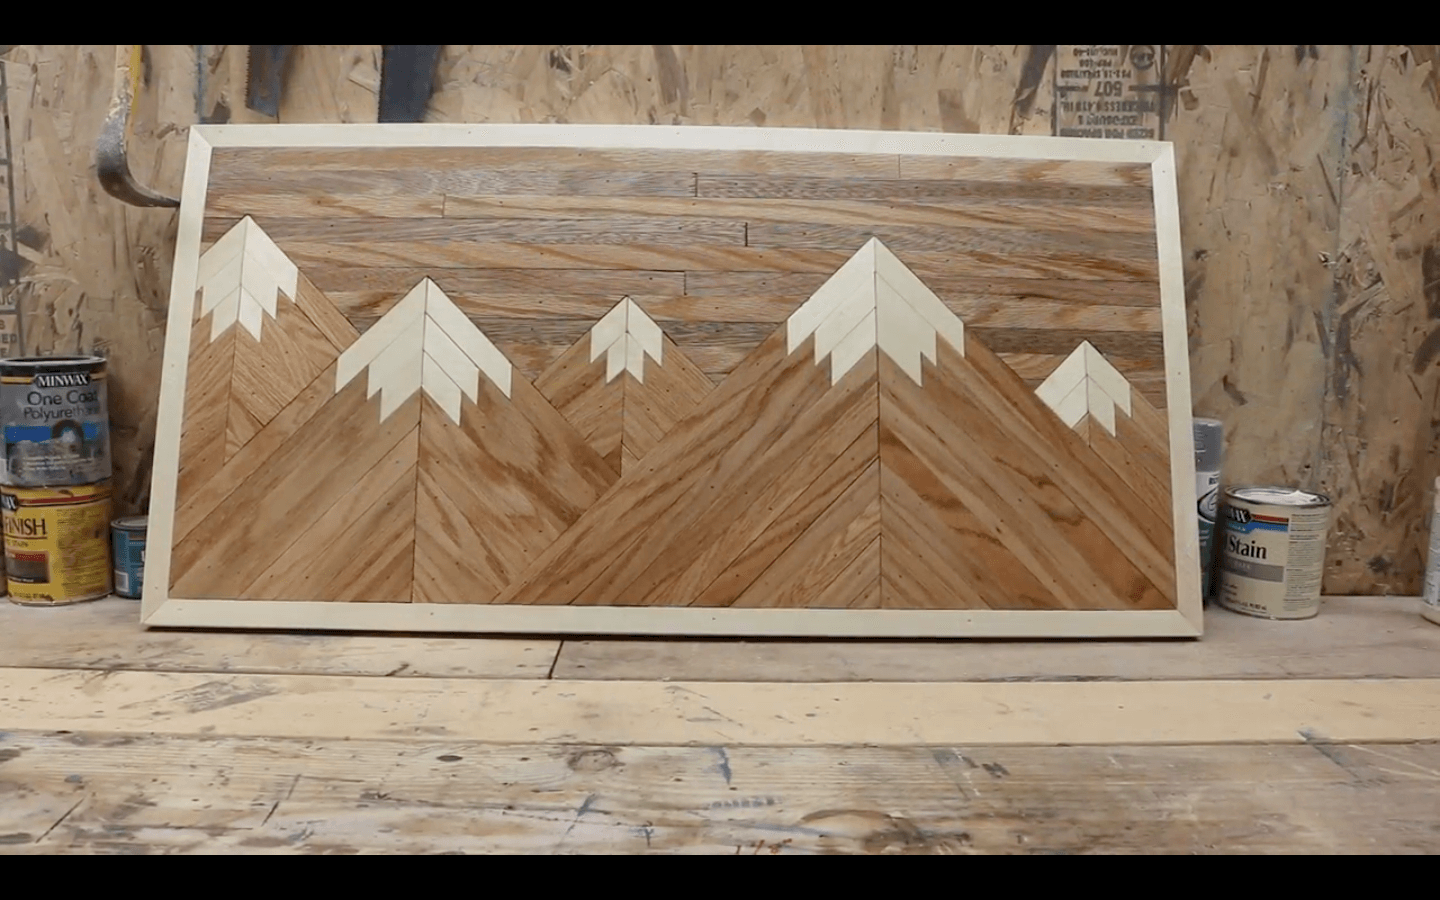
Credit : Instructables
This wall design idea combines triangular wood pieces in varying tints to form a mountain silhouette. It appears to need great expertise; it is largely about patience and straight cuts at various angles. Using naturally varied wood tones — some dark, some light, some weathered gray — eliminates the need for any staining. Sketch a simple template first to visualize the layout before cutting.
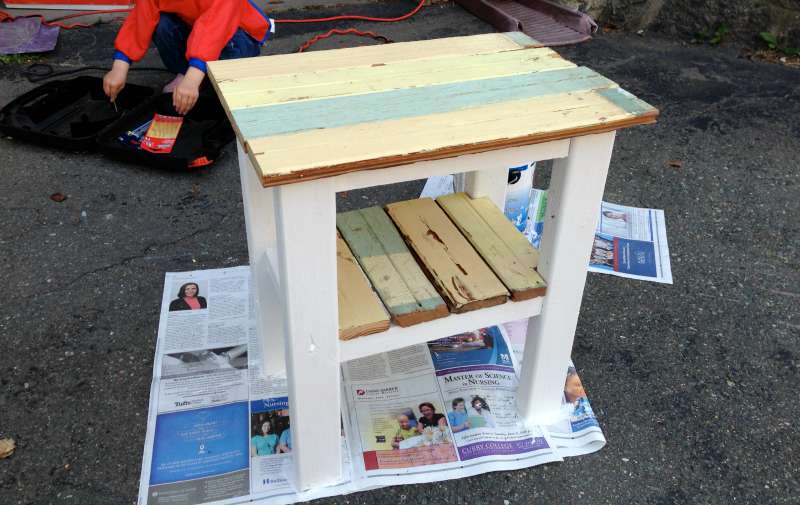
5. Wooden Flag Wall Decor ⭐ Beginner–Intermediate ⏱ 3–5 hours
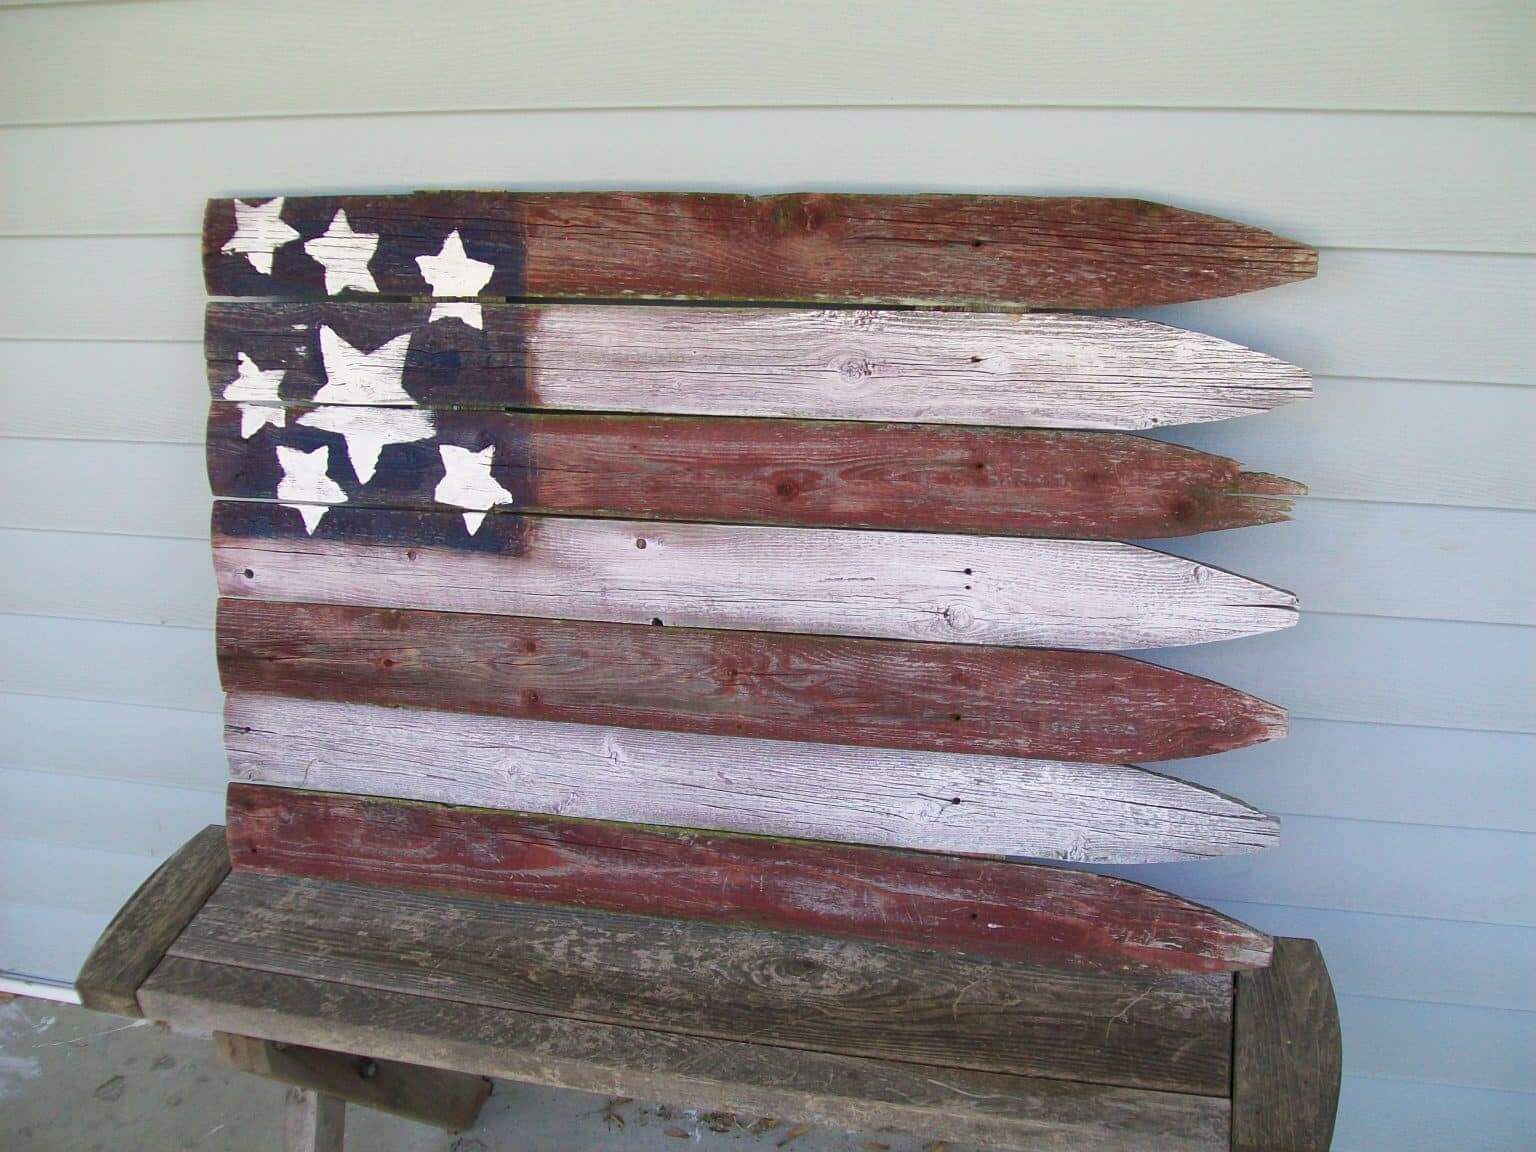
Credit : my Repurposed Life
Old fence boards or pallet planks in alternating stained and natural stripes make a striking flag-style wall display. This one works great as a gift — swap the stars for initials or a family name and suddenly you’ve got a personalized piece that people will actually want to hang up. Flag templates are available for free on most woodworking sites.
Reclaimed Kitchen Wood Projects
Important note before this category: anything that contacts food needs a food-safe finish. Mineral oil and cutting board wax are your best friends here. Also, stick to true hardwoods — oak, maple, walnut — for cutting boards and serving surfaces. Softwoods like pine scar easily and harbor bacteria. Don’t say I didn’t warn you. :/
6. Reclaimed Wood Serving Tray ⭐ Beginner ⏱ 2–3 hours
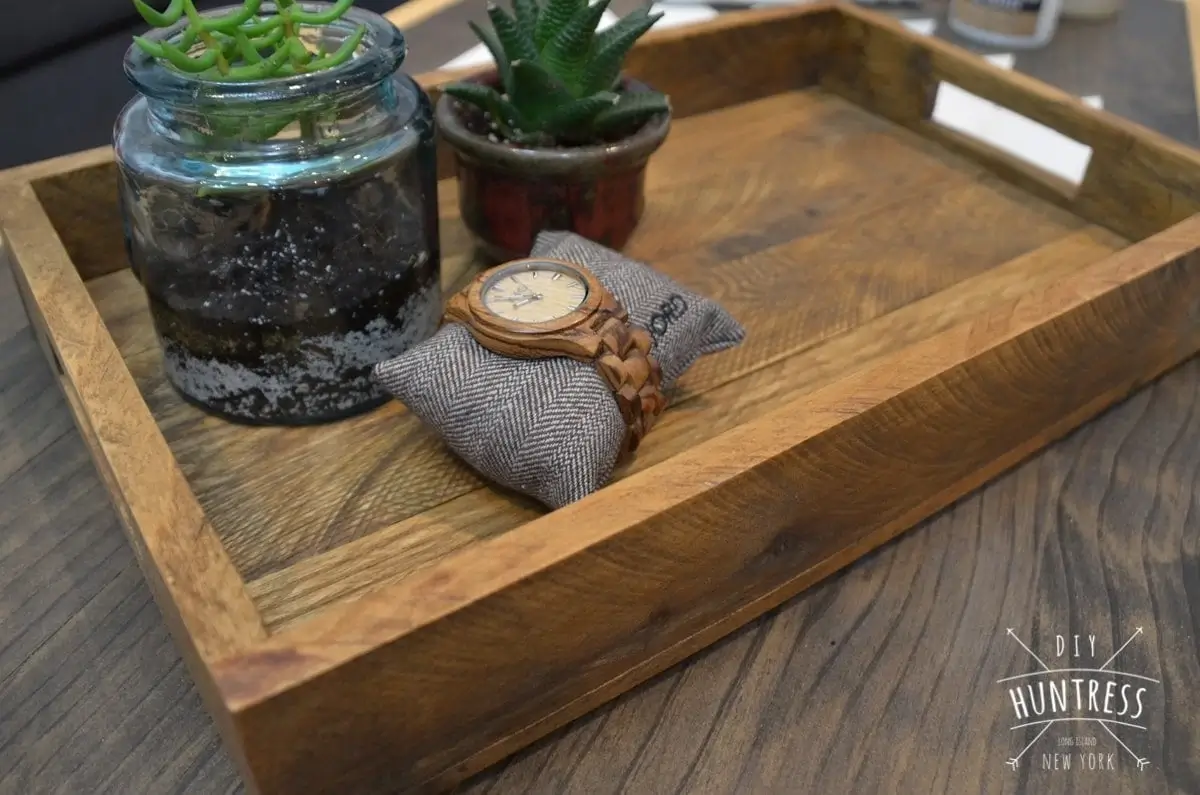
Credit : Diy Huntress
Two or three reclaimed boards glued together, sanded smooth, fitted with simple handles, and finished with food-safe oil gives you a serving tray that doubles as a coffee table centerpiece. Standard size is around 14×10 inches. Mineral oil or cutting board oil are both excellent choices for finish.
7. Spice Rack on the Oven Top ⭐ Beginner ⏱ 1-2 hours
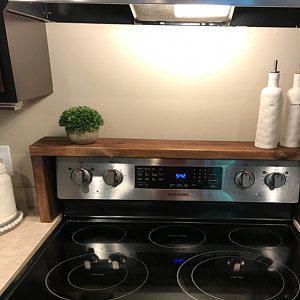
Etsy
Your most often used spices are kept handy over the stove by a single long board with tiny dowel rails screwed to the front.Quick build, genuinely useful, and it frees up cabinet space. Check for wall studs before mounting, especially if you’re using heavy glass jars.
8. Hanging Spice Rack ⭐ Beginner–Intermediate ⏱ 2–4 hours
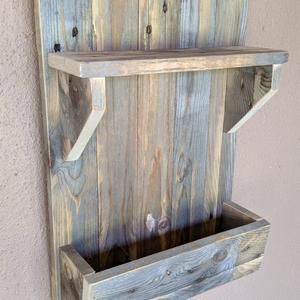
A slightly more involved version with multiple small shelves frees up both cabinet and counter space. Pallet wood creates a charming farmhouse-style organizer. One tip: make your shelves deep enough for standard spice jars (usually about 3 inches). Adding small chalkboard paint labels on each jar is a nice finishing touch.
9. Wooden Magnetic Knife Holder ⭐ Intermediate ⏱ 2–3 hours
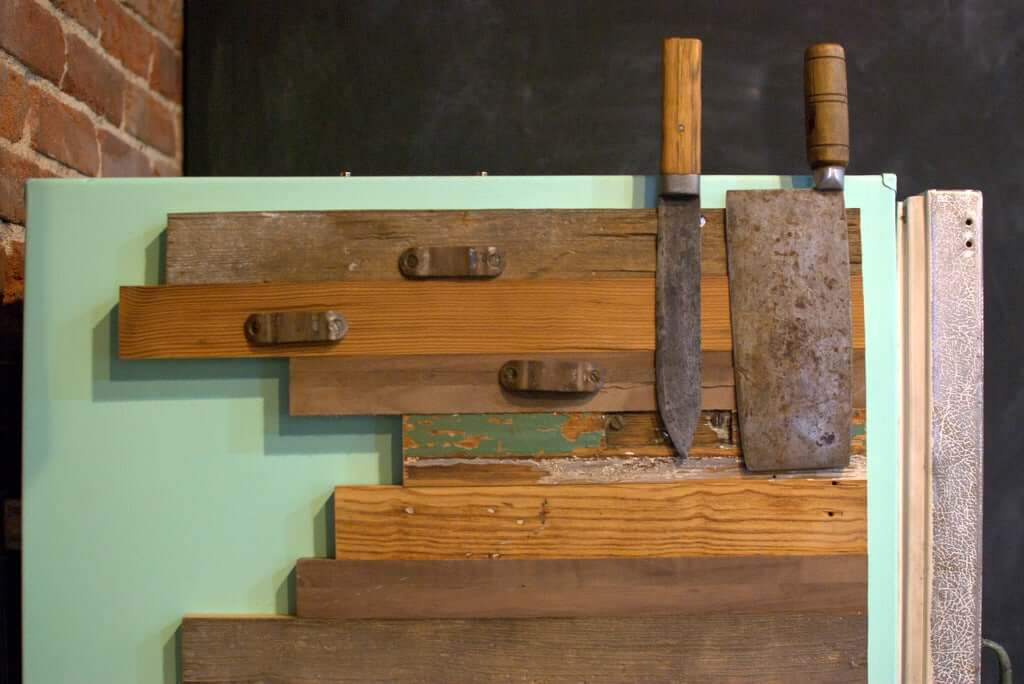
Credit : Instructables
Two reclaimed hardwood blocks mounted to the wall with a gap between them can hold knives either magnetically (embed strong magnets flush with the wood surface) or with simple grooves cut at the right spacing. Looks great, keeps blades sharp, and frees up drawer space. Stick to hardwoods here — softwoods can dull blade edges.
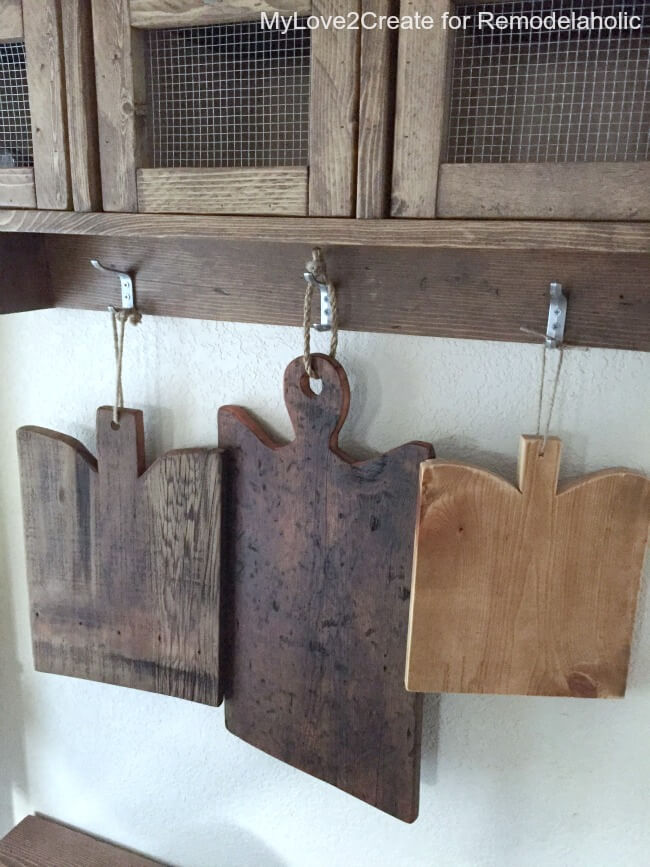
10. Rustic Cutting Boards ⭐ Beginner–Intermediate ⏱ 2–4 hours

Credit : Remodel Aholic
Old oak, maple, or walnut boards transform into beautiful cutting boards after thorough sanding and a few coats of mineral oil. Even a simple flat edge-grain design looks stunning. These also make excellent gifts — people love handmade kitchen items. Maintenance tip: re-oil every few months to keep the wood from drying out.
Reclaimed Organization Wood Projects
These small builds are perfect for absolute first-timers. They need minimal wood, basic tools, and most can be finished in an afternoon. They also happen to make excellent handmade gifts — just saying.
11. Reclaimed Wood Key Holder ⭐ Beginner ⏱ 30–60 minutes
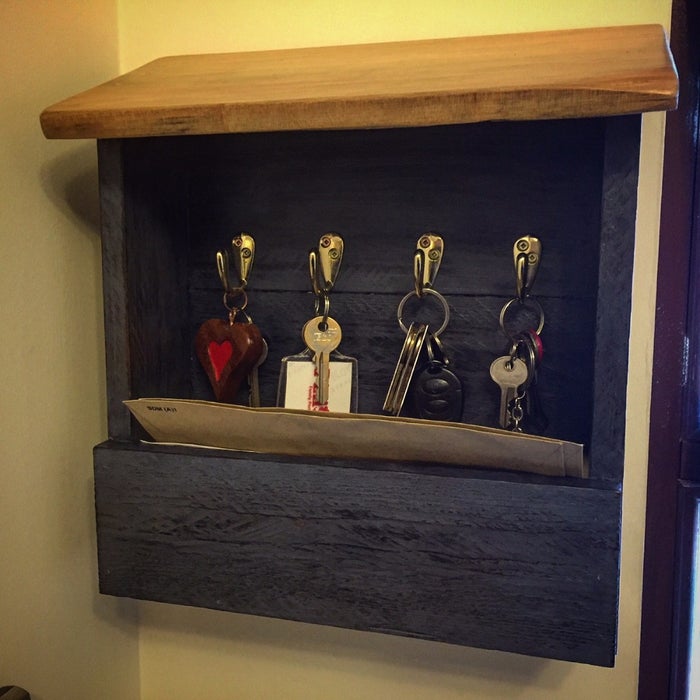
Credit: Instuctables
One board, a few decorative hooks from the hardware store, and you’ve solved the ‘where are my keys’ problem forever. Space hooks evenly with a tape measure. No cutting required if you buy a pre-sized board — this is genuinely the most beginner-friendly project on the whole list. Stencil a phrase or carve initials to personalize it.
12. Rustic Coat Rack ⭐ Beginner ⏱ 1–2 hours
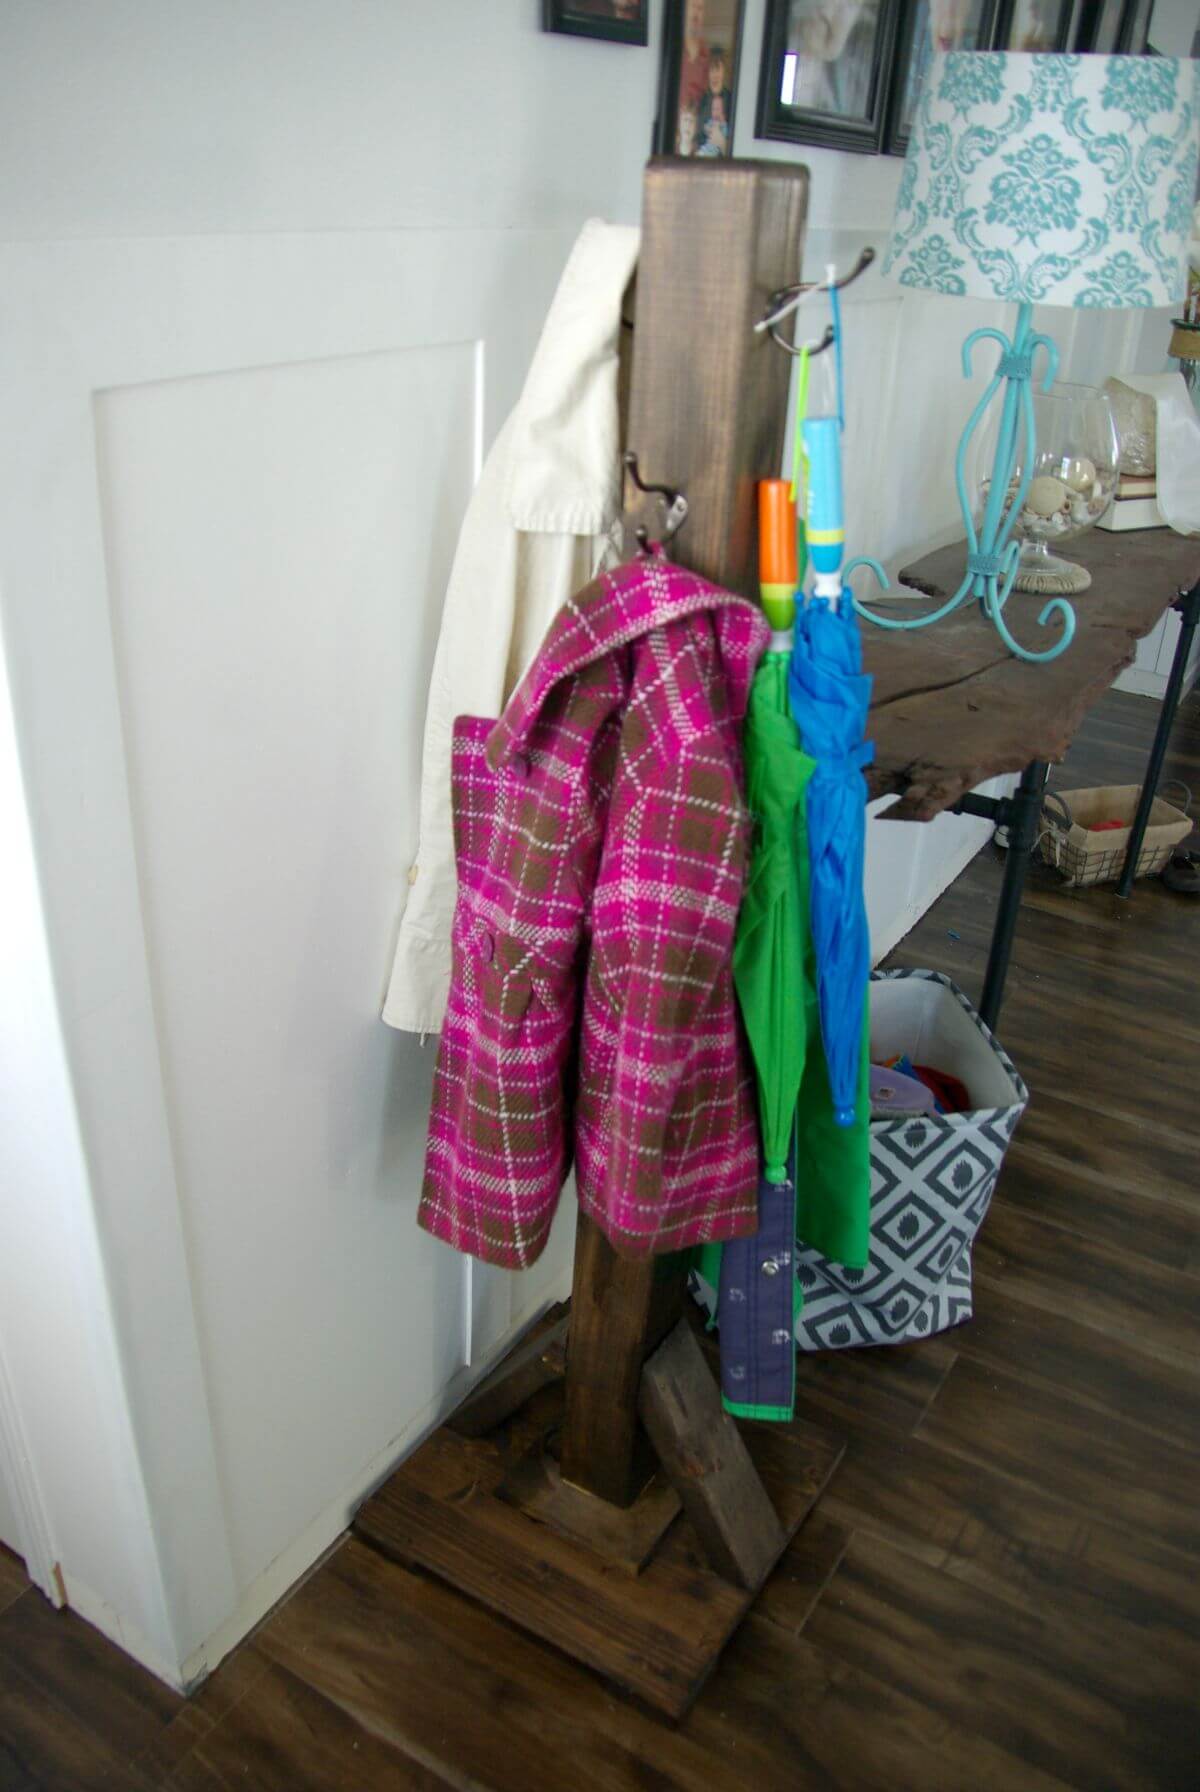
Credit : homedit
Same concept as the key holder, scaled up. A wider board with heavy-duty hooks handles coats, bags, and hats in an entryway. Barn wood with natural distressing looks especially good here. Mount at 60–68 inches from the floor for adults, and consider adding lower hooks at kid height. Find the wall studs — a loaded coat rack is heavier than you’d think.
13. Wooden Towel Rack ⭐ Beginner ⏱ 1–2 hours
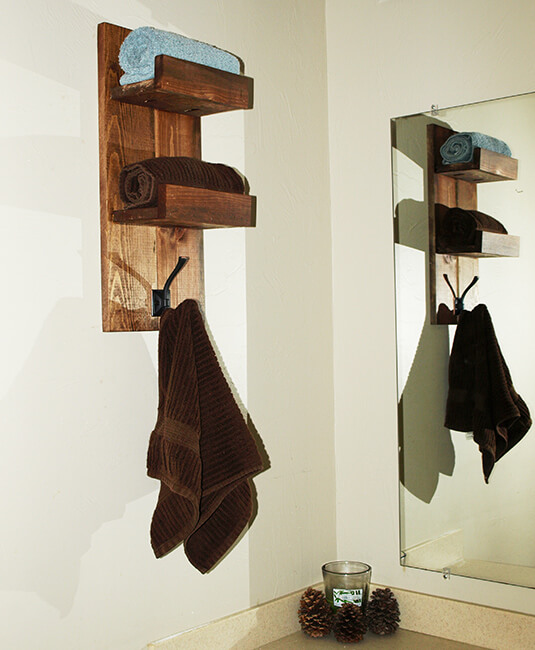
Credit: Diy pete
Two upright bracket pieces supporting a horizontal rod or — even better — an actual driftwood branch creates a towel rack that looks like it came from an expensive home goods store. Bathroom projects need moisture-resistant sealing though; a polyurethane coat or bathroom-safe wax will protect against steam and humidity.
14. Jewelry Organizer ⭐ Intermediate ⏱ 3–4 hours
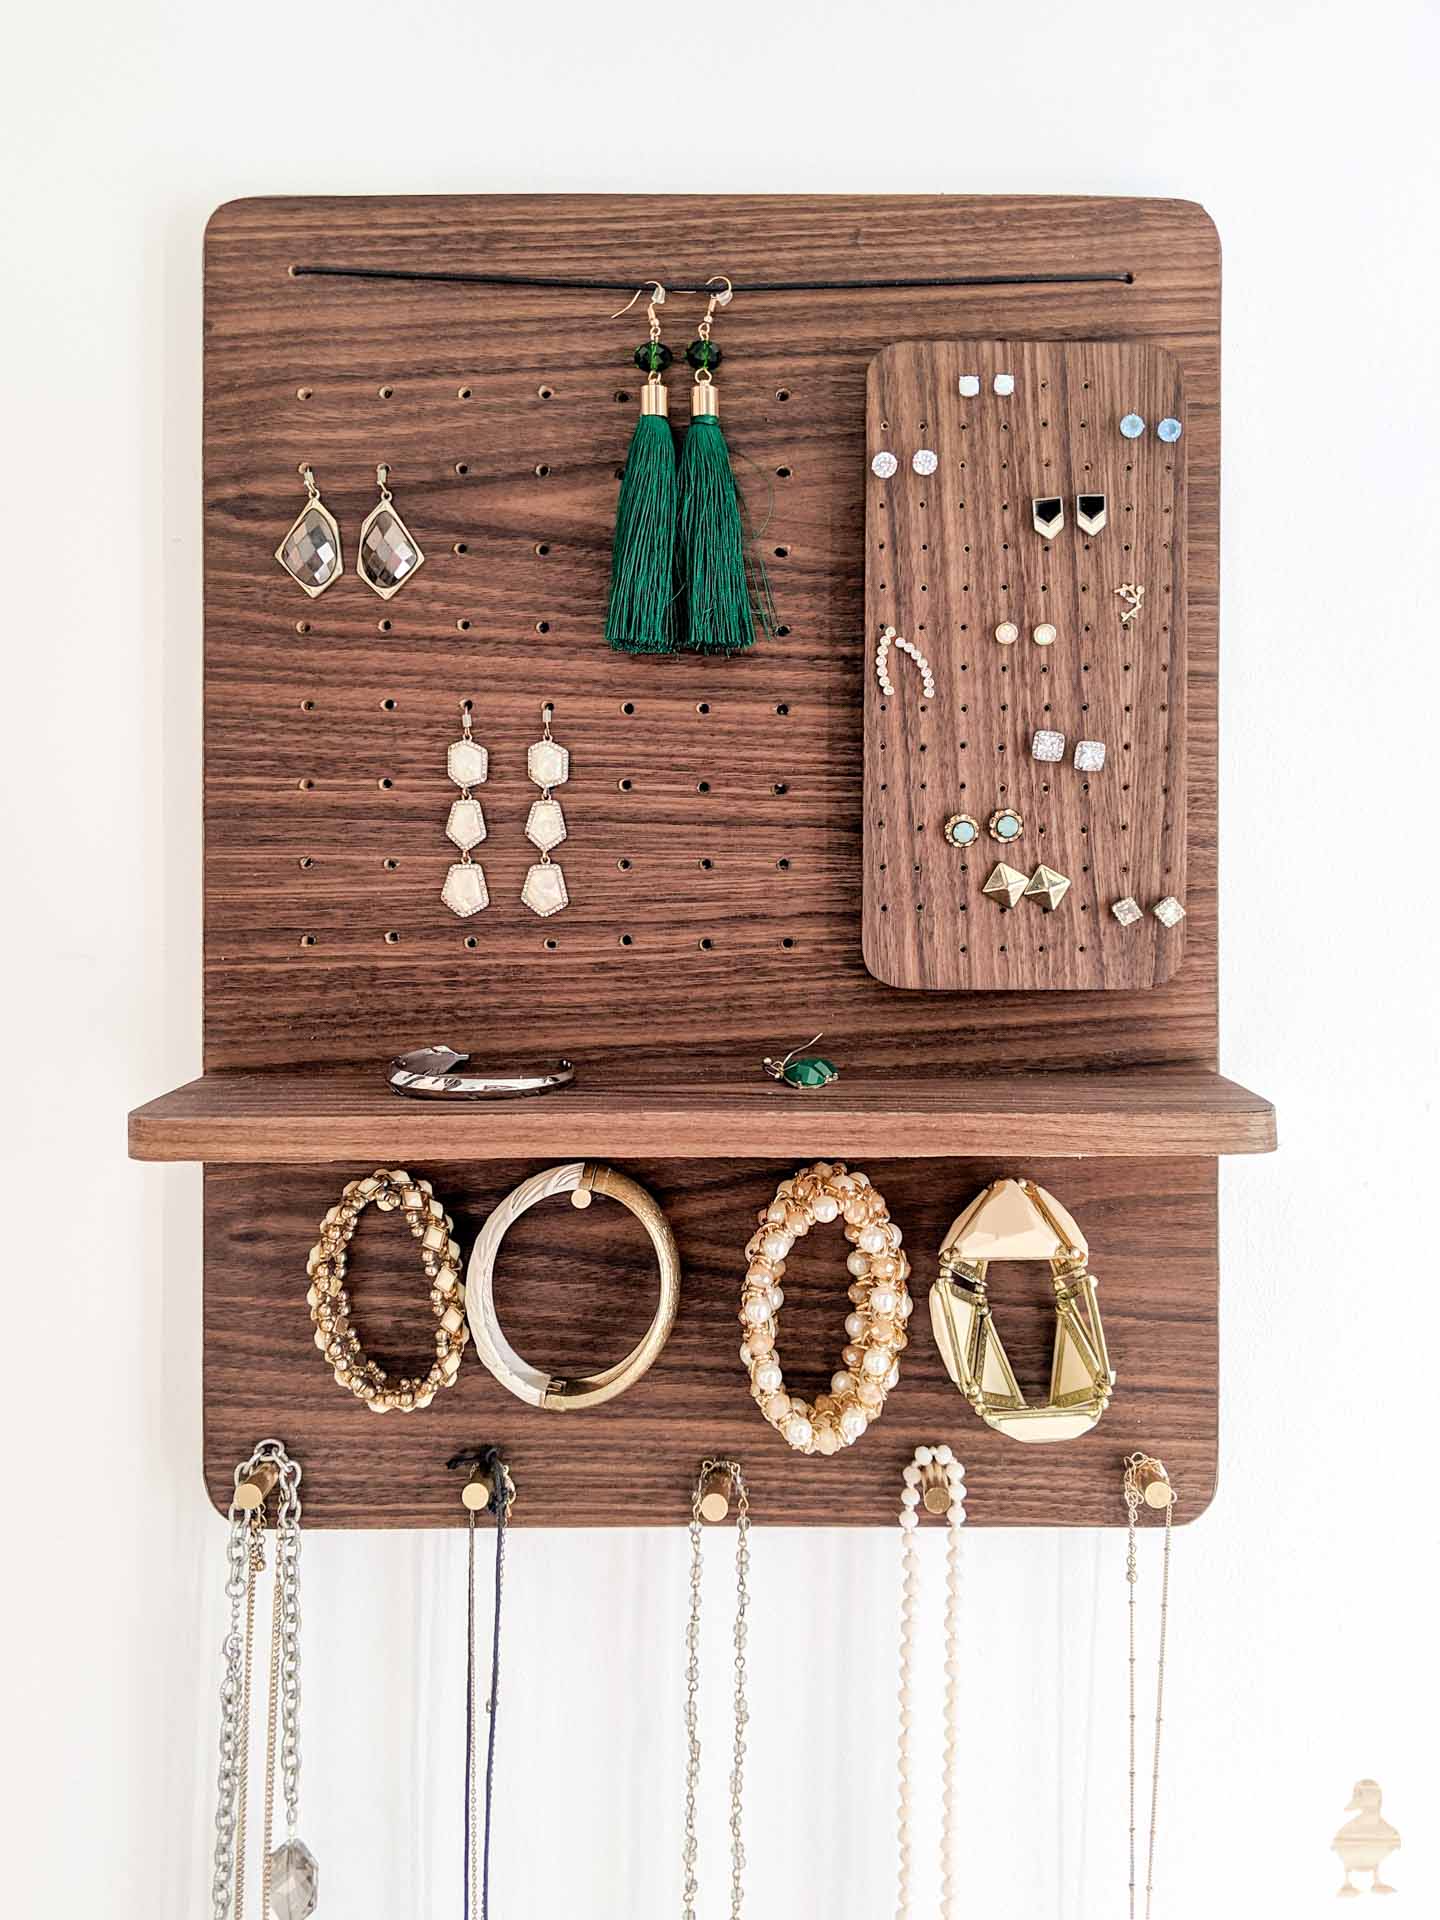
Credit : ugly duckling house
A reclaimed wood panel with small cup hooks for necklaces, thin dowels for bracelets, and small shelves or compartments for rings and earrings keeps a dresser clutter-free. IMO the best upgrade is adding a small mirror to the design — suddenly it’s a full vanity station, not just an organizer.
15. Wooden Tool Tote ⭐ Beginner ⏱ 2–3 hours
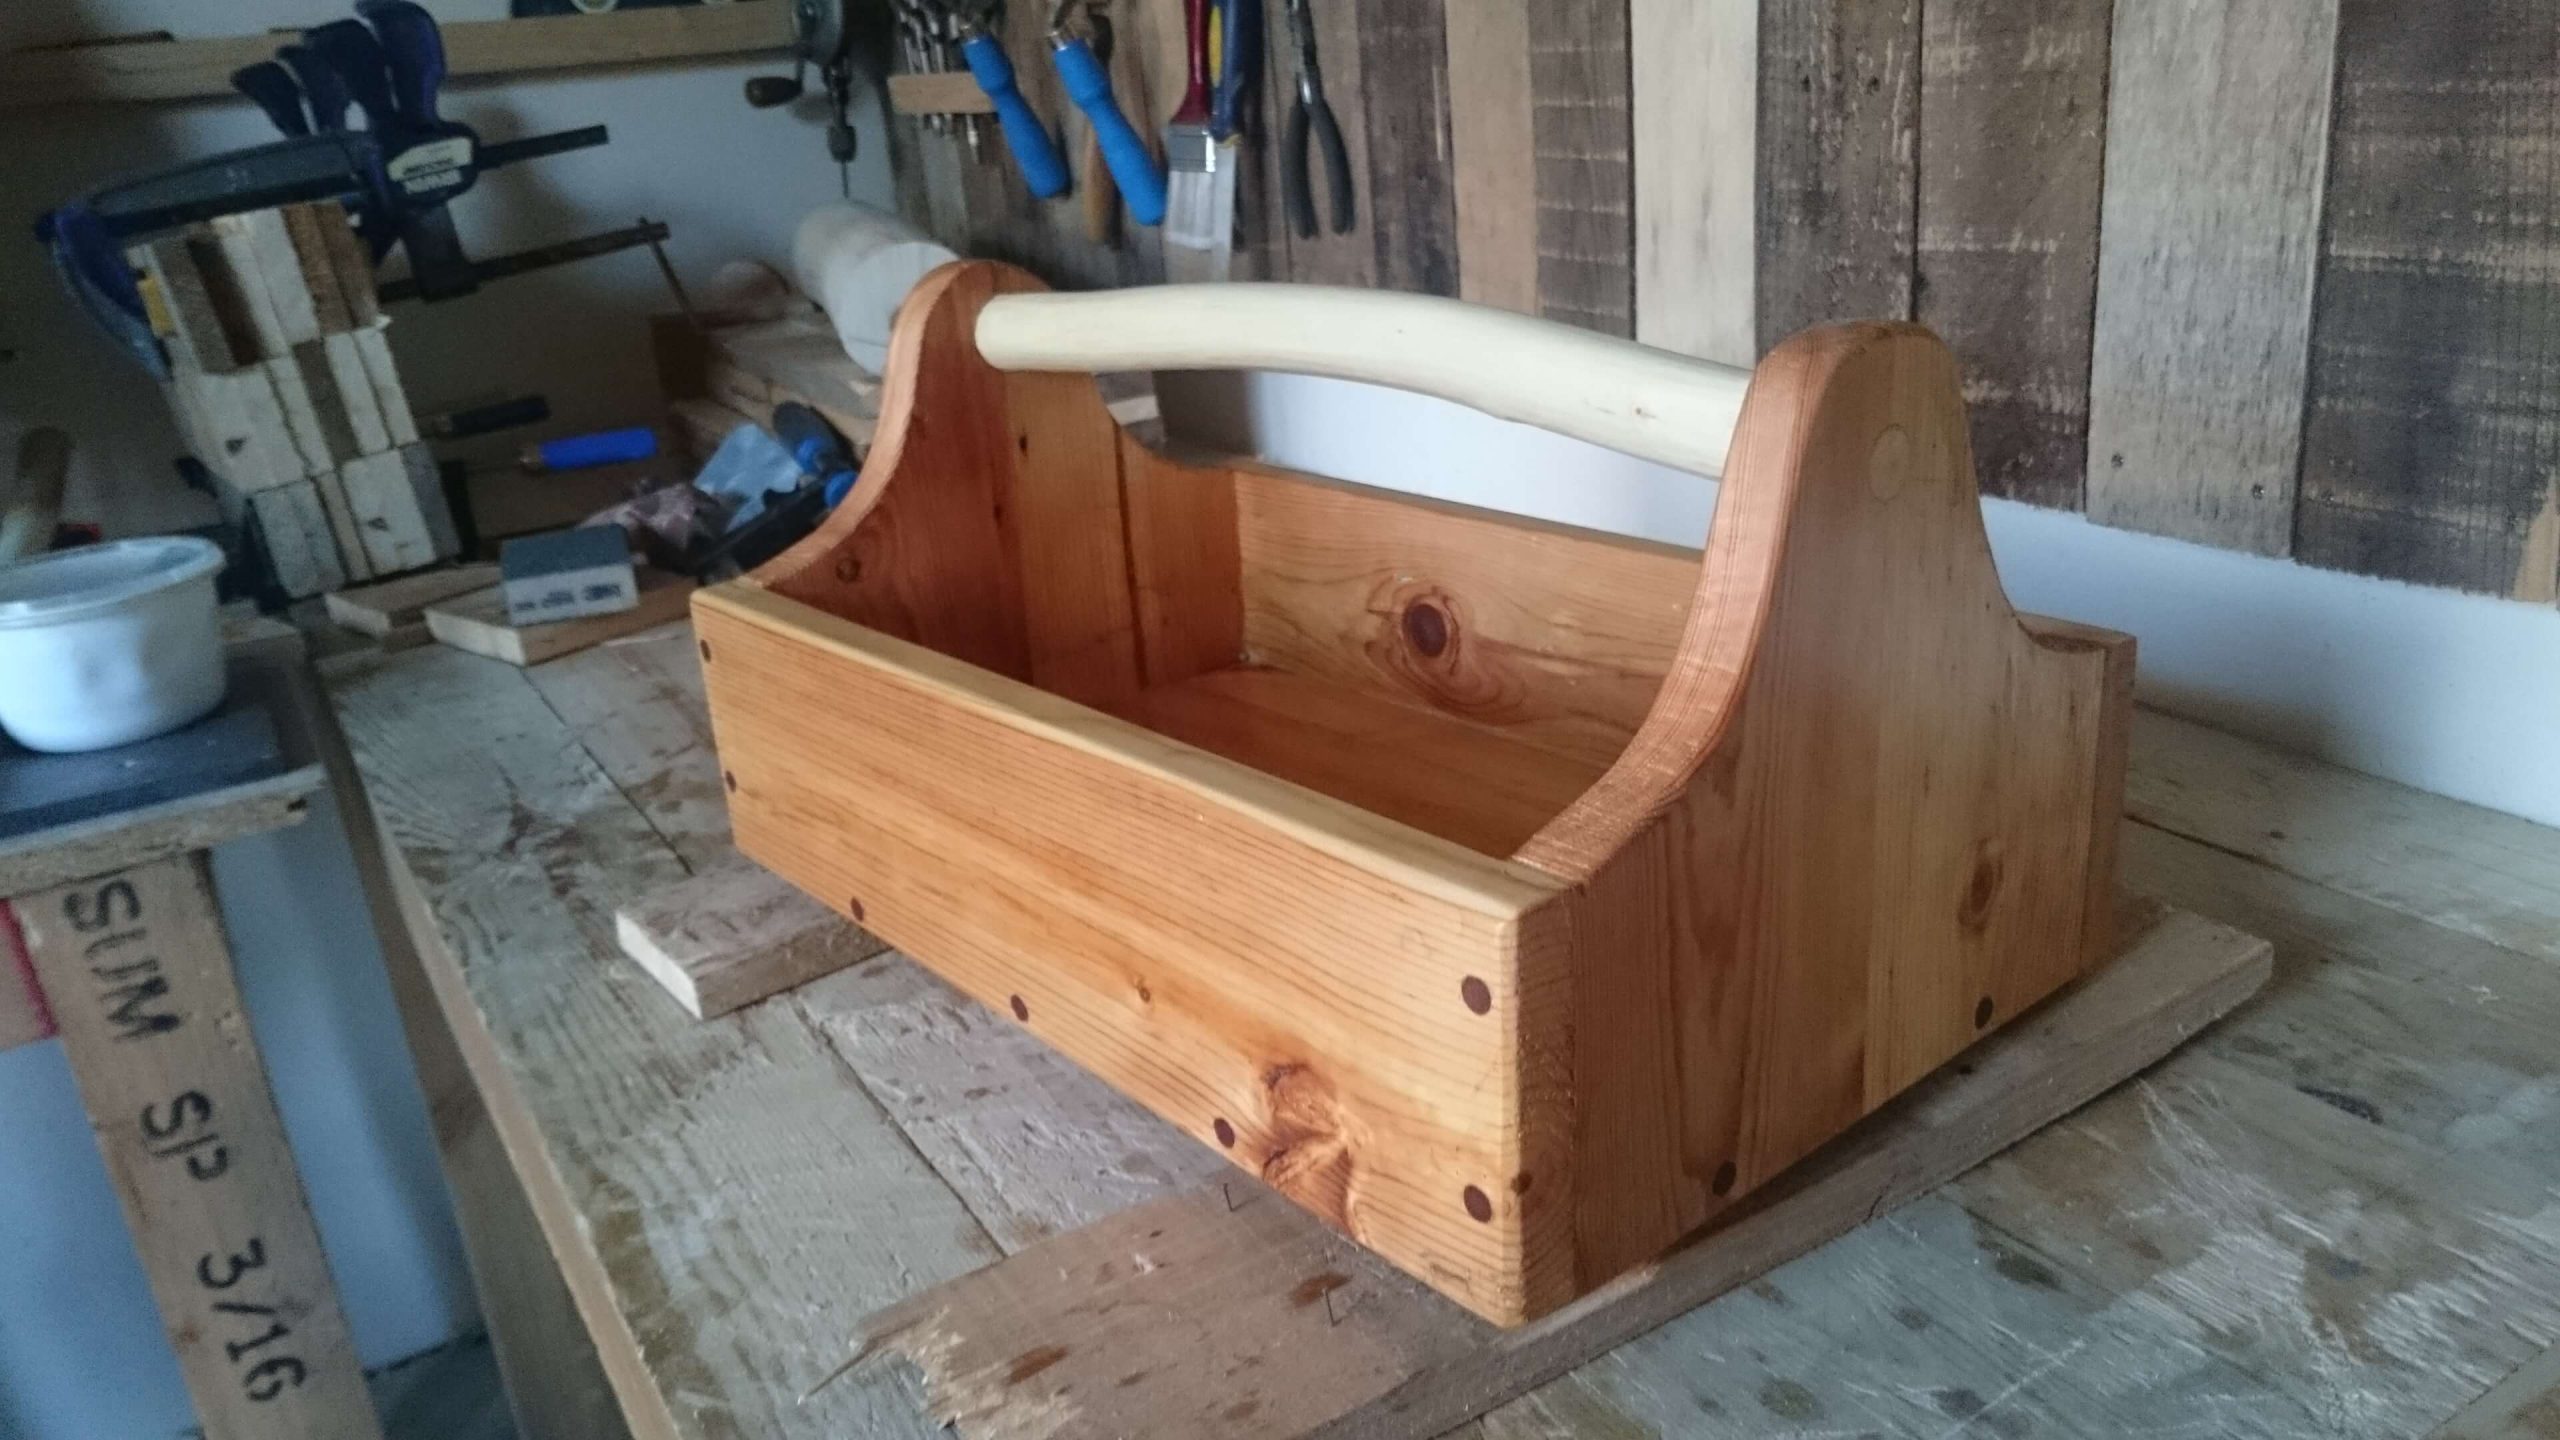
Credit: Instructables
A rectangular box with a central dowel handle keeps small hand tools organized and portable around the shop. Reclaimed pallet wood is perfect here since the tote will inevitably get dropped and banged around. Standard dimensions are roughly 18x8x8 inches. A coat of linseed oil helps the wood resist workshop grease and moisture.
Reclaimed Furniture Wood Projects
Heads up: these may take a full weekend for beginners — both days. But the results are genuinely impressive and will last for years. Furniture builds are where reclaimed wood really shines, because the aged character elevates pieces that would look ordinary if made from fresh lumber.
16. Reclaimed Wood Coffee Table ⭐ Intermediate ⏱ 4–6 hours

Credit : mylove2create
Three or four wide planks laid side by side as a tabletop, fixed to hairpin legs, creates a coffee table that immediately transforms a living room. Hairpin legs are a beginner’s best friend here — they eliminate the most complex part of furniture joinery and cost about $30–50 for a set. Standard height is 16–18 inches from the floor.
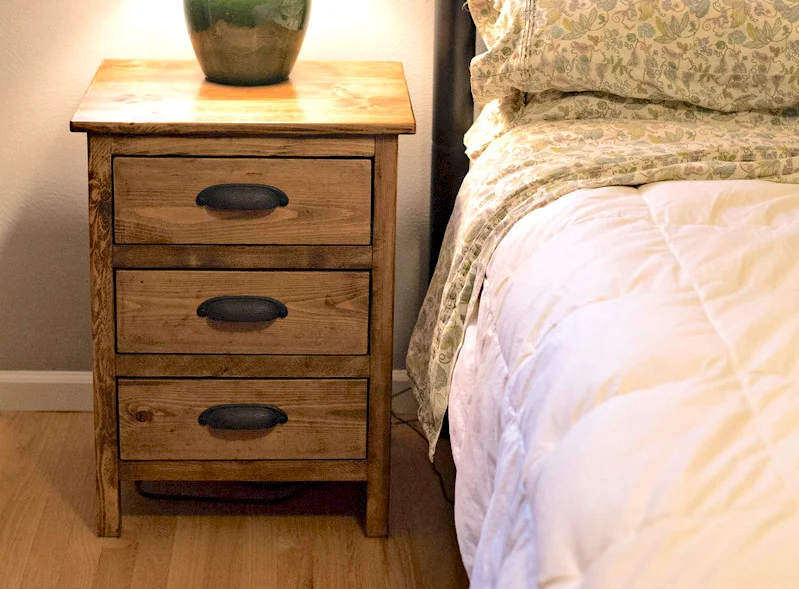
17. Rustic End Table ⭐ Beginner–Intermediate ⏱ 3–5 hours
An end table is small enough to finish in an afternoon but looks like a proper piece of furniture when done. Simple box construction with four legs and a lower shelf is the standard design. Consider making two matching ones from the same batch of reclaimed wood for a cohesive look. Pocket hole joinery (via a Kreg jig) makes the connections strong and beginner-friendly.
18. Simple Wooden Bench ⭐ Intermediate ⏱ 4–6 hours
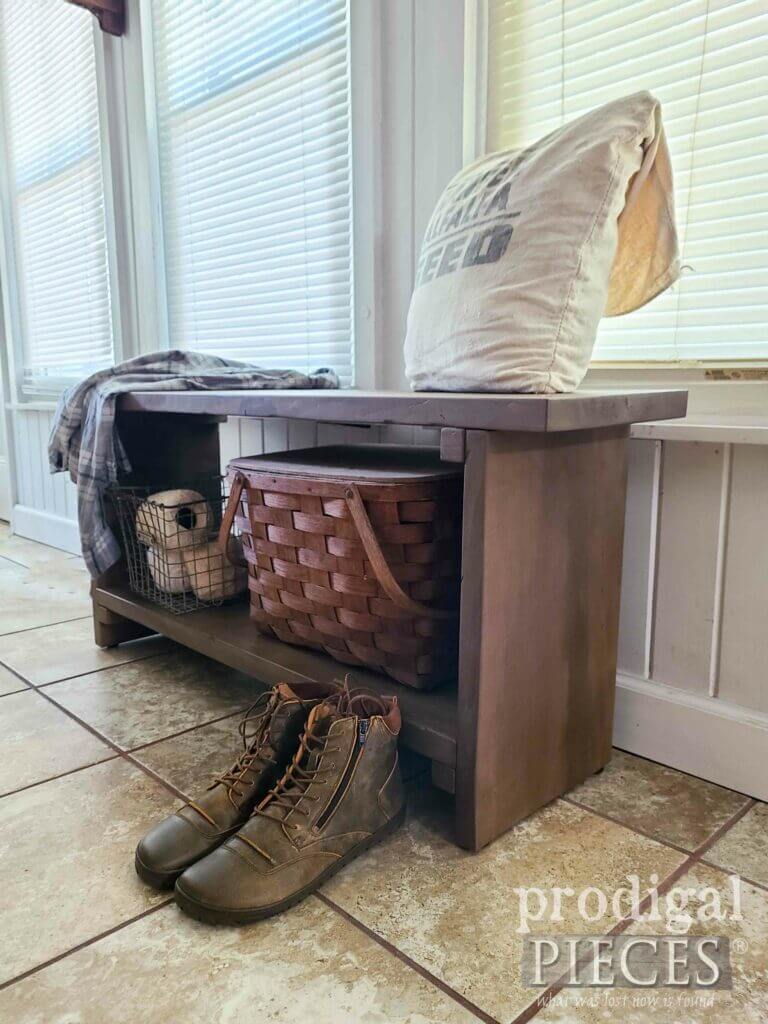
Credit: Prodigal Pieces
A thick plank seat supported by two trestle-style legs with a shelf below — this bench works in an entryway, at the foot of a bed, on a patio, or in a garden. Standard dimensions are 42–48 inches long, 18 inches high, 12–15 inches deep. For outdoor use, choose weather-resistant wood and use exterior-grade fasteners throughout.
19. Balcony Table ⭐ Intermediate ⏱ 3–5 hours
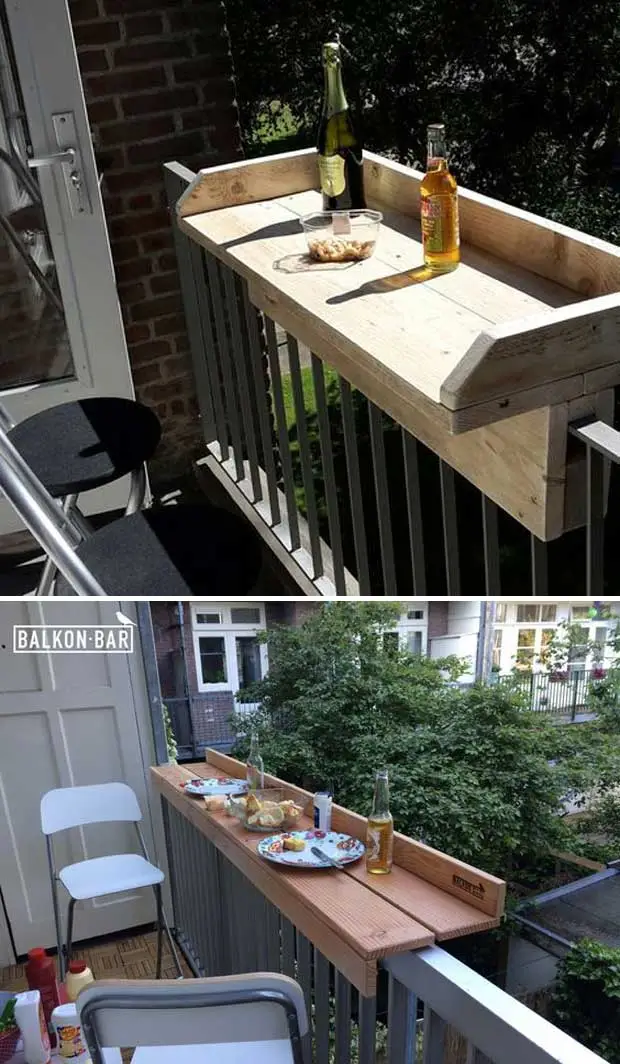
Credit : decorlovin
This fold-down table clamps to a balcony railing and folds flat against the railing when not in use. It’s the smartest solution I’ve seen for small apartment outdoor spaces — you get a real table without sacrificing any floor space. Keep the build lightweight, check your railing’s weight limits, and add a support leg or chain for stability when in use.
20. Bedside Shelf with Light ⭐ Intermediate ⏱ 3–4 hours
Credit : Ana-White
A single reclaimed board mounted at mattress height as a floating shelf replaces a nightstand in tight spaces. Route a channel along the back edge for an LED strip or add a small clip light, and you have built-in reading light. Use a floating shelf bracket design for a clean minimal look, and route a cable management channel so cords stay hidden.
Reclaimed Outdoor Wood Projects
Quick rule for all outdoor builds: use exterior-grade sealant or weatherproof paint on everything. Full stop. Pressure-treated lumber scraps work especially well for anything that contacts the ground, like planter boxes.
21. Birdhouse ⭐ Beginner ⏱ 2–3 hours
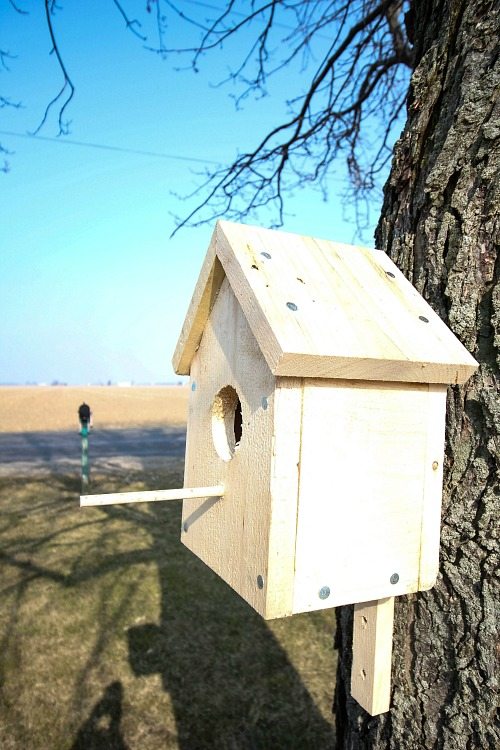
Credit : creeklinehouse
Six pieces of wood — four walls, a floor, a roof — and you have a birdhouse. This classic beginner build is quick, charming, and actually useful to local wildlife. Customizing the entry hole diameter for a specific bird species adds a nice educational element. Cedar or untreated pine are best; avoid chemical paints inside or near the entry hole.
22. Planter Box ⭐ Beginner ⏱ 2–3 hours
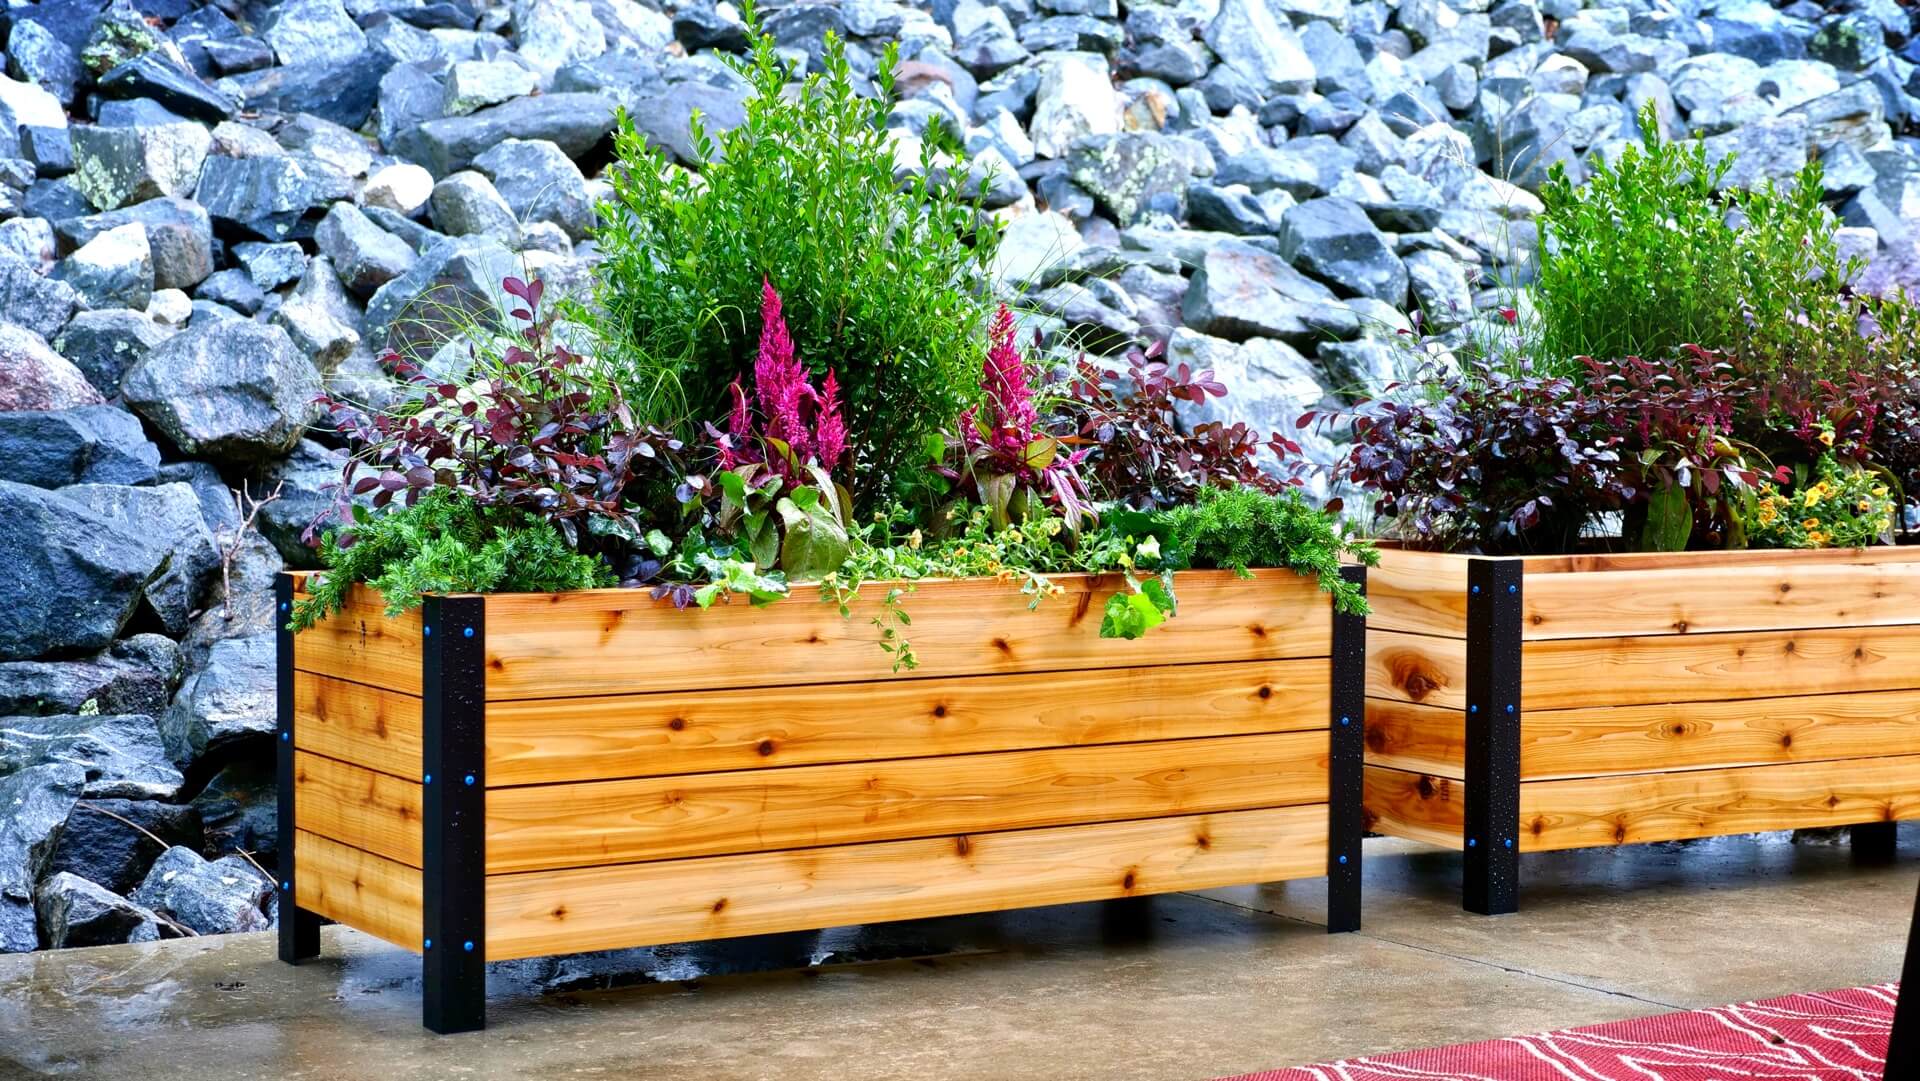
Credit : Instructables
Pallet boards + a free afternoon = a planter box that genuinely looks like you spent money on it. The box itself is four sides and a base — nothing fancy. Staple some landscape fabric on the interior walls to slow moisture from soaking into the wood, and punch a few holes through the bottom so water doesn’t pool around the roots. Want to go bigger? The exact same build scales up to a full raised garden bed without changing a single technique.
23. Garden Bench ⭐ Intermediate ⏱ 5–8 hours
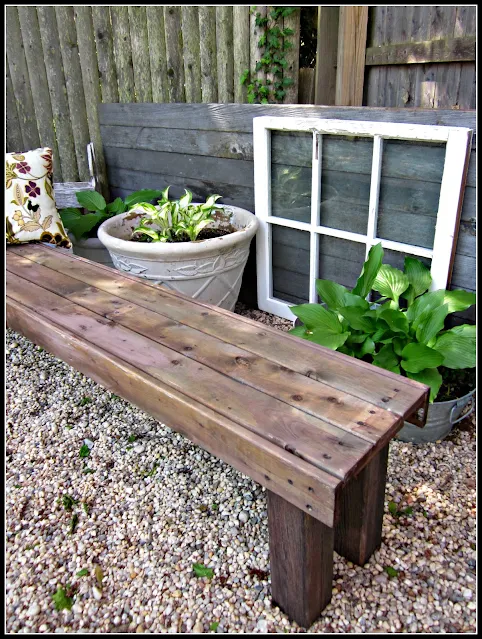
Credit : homeroad
Picture this: a solid wood bench tucked under your favourite tree, built entirely from boards you salvaged for free. That’s exactly what this project delivers. The joinery is the same as an indoor bench — the big difference is that every fastener needs to be exterior-grade stainless or galvanized, and the finished wood needs a serious coat of waterproof protection. Teak oil works brilliantly and you just brush on a fresh coat every spring
24. Rabbit Hutch ⭐ Intermediate–Advanced ⏱ Full weekend

Credit : Instructables
The most ambitious project on this list — but reclaimed wood makes it significantly cheaper than buying a commercial hutch. A raised sleeping compartment with a solid floor, a wire mesh run below, and a waterproofed roof is the standard design. Use non-toxic finishes, check for exposed nail heads, and add adequate ventilation. Plan interior dimensions for your rabbits before cutting anything.
25. Rustic Wine Holder ⭐ Beginner–Intermediate ⏱ 2–4 hours
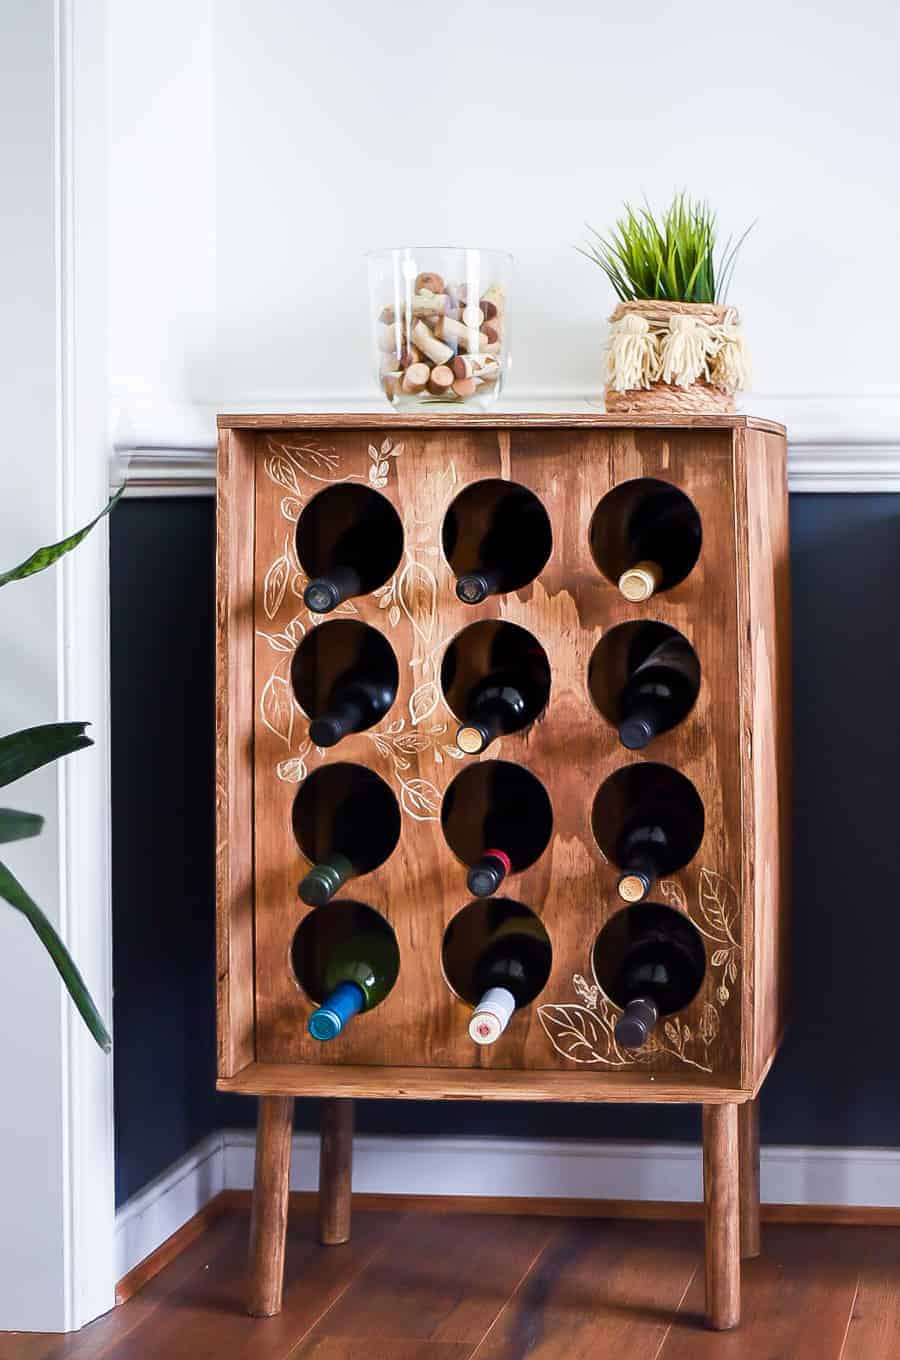
Credit : place of my taste
Take a thick reclaimed board, drill a series of angled holes through it, hang it on the wall, and suddenly you’ve got a wine rack that people will actually comment on. Wine bottles run about 3 inches across, so grab a 3-inch spade bit and you’re set. Want to get fancier? Cut individual cradles out of smaller pallet sections and arrange them in a staggered pattern — it looks like a piece you’d see in a boutique hotel. Mount a small shelf underneath for stemware and the whole thing becomes a proper home bar station.
Where to Find Reclaimed Wood
This is the most common question I receive from people who want to get started but don’t know where to find materials. Good news: if you start looking, you can find salvaged wood everywhere.
Free Sources
- Facebook Marketplace and Craigslist free sections: Search ‘free pallets,’ ‘free wood,’ or ‘free lumber.’ Act fast — good posts disappear within hours.
- Local construction sites: Ask the foreman about offcuts at the end of the day. Always get permission, but many sites are happy to have someone haul away wood they’d otherwise dump.
- Demolition and renovation projects: Old barns, decks, and farmhouses being torn down are treasure troves. Check local community boards and neighborhood groups.
- Retail store pallets: Call ahead to ask — many garden centers, hardware stores, and big-box retailers set aside pallets for pickup.
Low-Cost Sources
- Salvage yards and architectural salvage stores
- Habitat for Humanity ReStores — discounted building materials with proceeds going to a great cause
- Estate sales and property cleanouts
- Thrift store wooden furniture (disassemble for usable boards)
Paid Sources
- Barn wood suppliers and reclaimed lumber dealers
- Etsy — sellers offer pre-sorted, pre-cleaned reclaimed wood bundles
- Local sawmills sometimes sell offcuts and slabs cheaply
Pallet safety reminder: Always check the IPPC stamp. HT (heat treated) = safe. DB (debarked) = safe. MB (methyl bromide) = avoid entirely.
Tools You’ll Actually Need
The tools list isn’t a wishlist; it’s exactly what you need to get started. Not every project need all of them. Begin with the basics and progressively add more.
Essential Starter Tools
- Tape measure and pencil (sounds obvious, but measure twice)
- Sandpaper — 60, 120, and 220 grit, or an orbital sander for larger builds
- Hammer and nail puller
- Drill and a basic bit set
- Assorted wood screws
- Clamps — at least 2 to 4
Cutting Tools
- Circular saw — the most versatile option for beginners, handles most straight cuts
- Miter saw — ideal for clean angled cuts; worth renting if you don’t own one
- Jigsaw — needed for curved cuts (mountain art, birdhouse roofs)
Finishing Tools
- Wood stain and brushes
- Food-safe mineral oil or finishing wax (for kitchen projects)
- Exterior-grade sealant (for outdoor projects)
Optional but Worth Having
- Pocket hole jig (Kreg): makes furniture joinery strong and beginner-friendly
- Router: for decorative edges and cable management grooves
- Metal detector or strong magnet: saves your saw blades from hidden hardware
Not sure which tools to actually buy first? I put together a full guide on the essential woodworking tools for beginners that breaks down exactly what’s worth spending money on, what you can skip early on, and what to look for when you’re buying on a budget. It’ll save you from the classic mistake of blowing your whole budget on tools you won’t use for months.
Where to Find Detailed Woodworking Plans
Let’s be honest about something: the hardest part of starting a new woodworking project isn’t motivation — it’s staring at a pile of wood and not quite knowing what measurements to use, which order to assemble things in, or how to adapt the design when your boards aren’t the exact size the tutorial assumed.
Having a complete plan changes everything. Exact measurements, cut lists, materials quantities, step-by-step diagrams — it dramatically reduces mistakes and wasted wood, especially when you’re working with reclaimed pieces that are often irregular.
One resource a lot of DIY woodworkers rely on is Ted’s Woodworking — a collection of over 16,000 woodworking plans covering beginner weekend builds all the way up to large furniture pieces. Plans include exact measurements and cut lists, step-by-step illustrated instructions, materials and tools lists, and they cover everything from home decor to outdoor structures. Worth checking out if you want to build with more confidence and fewer ruined boards.
👉 Explore Ted’s Woodworking plans and find your next build →
(Disclosure: this may be an affiliate link — meaning I may earn a small commission if you purchase. I only recommend resources I’d genuinely point a friend toward.)
Common Mistakes to Avoid With Reclaimed Wood Projects
Consider this the ‘learn from other people’s painful experiences’ section. These are mistakes that are entirely avoidable — and surprisingly common.
Skipping the Metal Check
This is the number one cause of damaged saw blades and ruined cuts. A $5 magnet scan before every cut is all it takes to avoid a $40 blade replacement.
Using Damaged Wood
Boards with active rot, deep cracks, or pest damage will compromise a project structurally. It’s tempting to ‘make it work,’ but it’s not worth it for anything load-bearing.
Skipping Sanding Prep
Old wood has rough edges, raised grain, and old finishes that make glue and paint adhesion unpredictable. Sand before finishing, not as an afterthought after assembly.
Not Letting Wood Acclimatize
Cold, damp wood brought directly into a warm room and immediately built into a project will warp or split as it adjusts. Give it a few days indoors first.
Poor Measurements
Reclaimed wood comes in irregular lengths — never assume two boards are the same size without measuring. ‘Measure twice, cut once’ is a cliché for a reason.
Wrong Finish for the Application
Indoor finish on an outdoor project. Non-food-safe finish on a cutting board. These are easy mistakes that ruin otherwise solid builds. Match the finish to the project’s actual use.
Go Build One of These Reclaimed Wood Projects This Weekend
Here’s the bottom line: reclaimed wood projects are accessible in a way that most hobbies simply aren’t. The materials are often free. The tools list is minimal. And the results — a coffee table, a mirror frame, a garden bench — are genuinely impressive pieces that carry the story of the wood they were made from.
Skills compound too. A key holder teaches you measurement, drilling, and finishing. That coffee table teaches joinery and surface prep. Before long, you’re tackling builds you wouldn’t have dreamed of attempting when you started.
Pick one project from this list. Just one. Gather whatever reclaimed wood you can find this week. Start small if you’re nervous — the key holder takes less than an hour and requires zero cutting. Then see how it feels.
If you want step-by-step guidance to make your first build as smooth as possible, detailed woodworking plans can save hours of guesswork and wasted materials — especially when you’re still building your confidence.
Now go find some scrap wood. Your next project is waiting.
Frequently Asked Questions
What is reclaimed wood used for?
Reclaimed wood works across a huge range of DIY projects — furniture like coffee tables and benches, home decor like mirrors and wall art, kitchen items like cutting boards and serving trays, outdoor builds like planters and birdhouses, and organization projects like coat racks and key holders. Its aged texture makes it especially well suited to rustic and farmhouse-style interiors.
Where can I find reclaimed wood for free?
Free reclaimed wood is available on Facebook Marketplace and Craigslist free sections, from local construction sites (with permission), at demolition projects, and from retail stores that give away unwanted pallets. Always check pallet markings — look for HT (heat treated) and avoid MB (methyl bromide) treated pallets.
Is reclaimed wood safe for furniture and kitchen use?
Yes, with proper preparation. Remove all hardware, sand thoroughly, and apply the appropriate finish. For kitchen projects like cutting boards and serving trays, always use a food-safe finish such as mineral oil or beeswax. Avoid wood with signs of rot, mold, or unknown chemical treatment.
Do reclaimed wood projects require special tools?
Most beginner projects require only a tape measure, sandpaper, a drill, clamps, and wood screws. A circular saw is useful for cutting boards to length. More advanced projects may benefit from a miter saw or jigsaw, but neither is essential to get started.
Are reclaimed wood projects beginner friendly?
Many are ideal for beginners. Projects like key holders, wall art, serving trays, and picture frames require minimal cuts and basic assembly. The forgiving nature of reclaimed wood — where imperfections are part of the aesthetic — makes it especially well suited to first-time DIYers.
How do I identify safe pallets for DIY projects?
Check the IPPC stamp on the pallet. HT (heat treated) and DB (debarked) are safe for home use. Avoid any pallet marked MB (methyl bromide) — this is a chemical fumigant that penetrates the wood and cannot be removed by sanding. When in doubt, don’t use it indoors.
How long do reclaimed wood projects last?
With proper preparation and finishing, reclaimed wood projects can last for decades. Indoor pieces sealed with wax or oil need occasional reapplication but are very durable. Outdoor projects should be sealed with exterior-grade finish and refreshed annually to protect against moisture, UV, and weathering.
Why Not Save This Pin for Later ?