
I was tired of it. Tired of assembling flat-pack dressers that wobble on day one and fall apart by year two. Tired of paying $300 for something made of glorified cardboard. Tired of drawers that stick, handles that strip, and that one drawer that never — ever — closes properly. Sound familiar? 🙂
So I did what any reasonable person with a table saw and a stubborn streak does: I built my own. And honestly? It was one of the best decisions I’ve ever made in the workshop. In this guide, I’m going to walk you through exactly how to build a solid wooden dresser from scratch — full plans included. Whether you’re an experienced woodworker or you’ve just caught the bug, stick around. This one’s worth your time.
And hey — if this gets you inspired to take on more builds, check out our woodworking projects for a ton of ideas to keep your workshop busy.
Why Build a Dresser Instead of Buying One?

Let’s be real for a second. You could drive to a furniture store right now and walk out with a dresser today. But should you? IMO, not if you care about quality, value, or — you know — furniture that actually lasts.
The Cost Math Makes Sense
A decent solid wood dresser at a furniture store will run you anywhere from $600 to $1,500+. A flat-pack version might cost $200–$400, but you already know how that story ends. Building your own solid wood dresser? You’re looking at roughly $150–$300 in materials, depending on the wood species you choose. That’s a real dresser, with real wood, for half the price of the cheapest store option.
The Quality Gap Is Enormous
Here’s what most furniture stores won’t tell you: that “wood dresser” is probably particleboard wrapped in a wood veneer. It looks great in the showroom, but particleboard swells with humidity, strips out screws, and doesn’t survive a move. When you build your own, you control every single material that goes into it — real lumber, real plywood, real joinery.
You Get Exactly What You Want
Need a dresser that’s 40″ wide instead of 36″? Done. Want deep bottom drawers for sweaters and shallow top ones for socks? Easy. Want walnut with black hardware? Go for it. Full customization is one of the biggest wins of building your own furniture, and once you experience it, you’ll never go back to off-the-shelf.
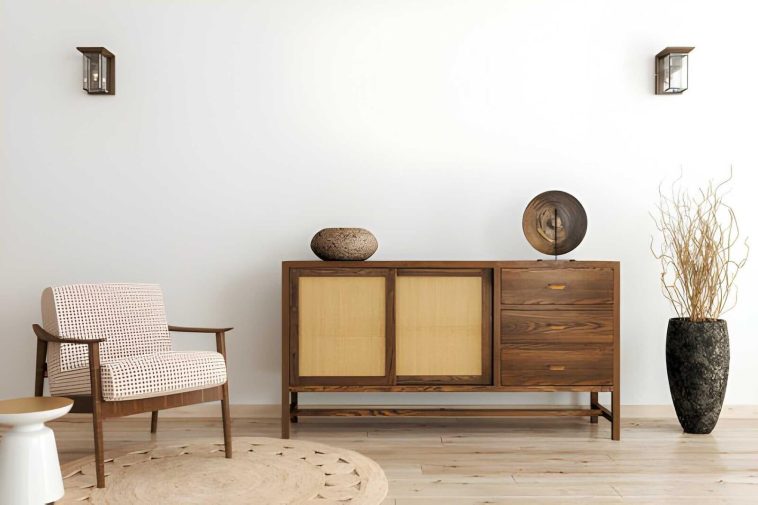
The Dresser Trend Is Back — And It’s Personal
There’s a reason dressers are having a major comeback right now. People are tired of sterile, minimalist bedrooms that feel like hotel rooms. They want warmth, character, and pieces that mean something. A handmade wooden dresser delivers all of that — and then some. The one you build today could still be in your family 50 years from now. Try saying that about a flat-pack.
What You’ll Need — Tools & Materials
Advertisement
Before you cut a single board, let’s make sure you’re set up for success. Nothing kills momentum like getting halfway through a build and realizing you’re missing something.
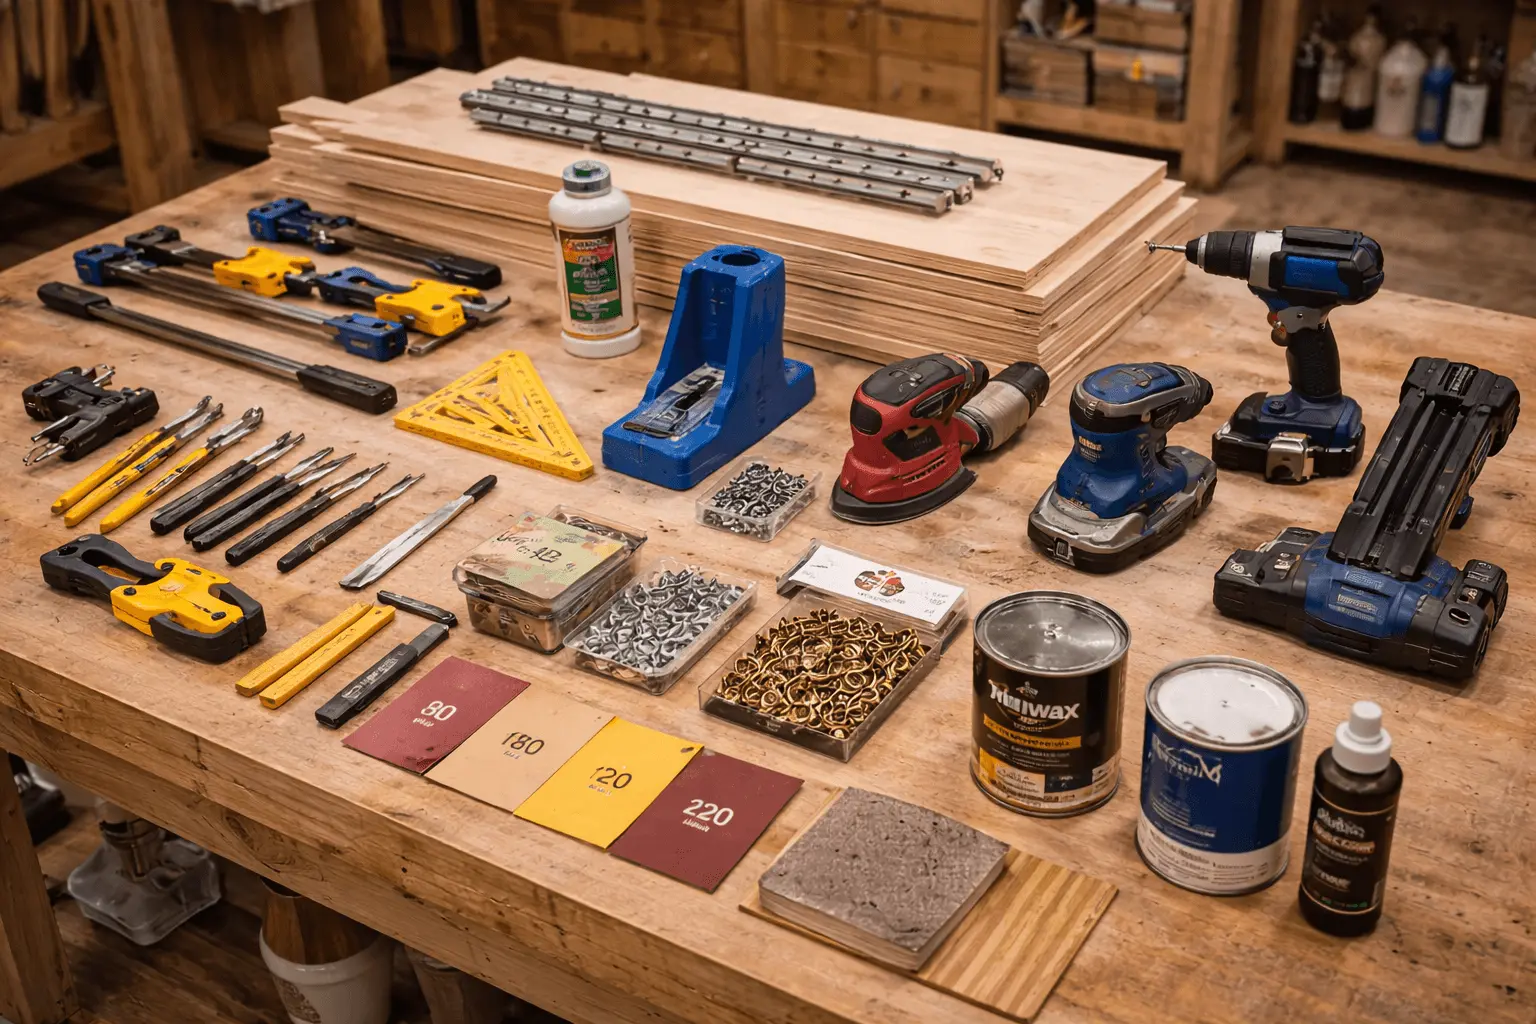
Tools You’ll Need
- Table saw — for ripping panels to width
- Miter saw — for crosscuts and getting clean, square ends
- Router — for cutting drawer grooves and edge profiles
- Pocket hole jig (Kreg Jig is the gold standard) — for fast, strong joinery
- Drill + bits — you’ll use this constantly
- Clamps — get more than you think you need. Seriously.
- Orbital sander + detail sander — both will earn their keep
- Tape measure, combination square, pencil — the holy trinity of layout
Make sure you have the right tools before you start — head over to our woodworking tools guide if you’re building out your shop or need recommendations on what to buy first.
Materials List
- Lumber — poplar for painted finishes, walnut or oak for natural finishes
- Plywood — 3/4″ for the carcass, 1/4″ for drawer bottoms
- Wood glue — Titebond II or III works great
- Pocket screws — 1-1/4″ for 3/4″ stock
- Full-extension drawer slides — don’t cheap out here
- Drawer pulls or knobs — your call on style
- Wood filler — for nail holes and small gaps
- Sandpaper — 80, 120, 180, and 220 grit
- Your finish of choice — paint, stain + poly, or oil
Choosing the Right Wood for Your Dresser
This decision matters more than most people realize. The wood you choose affects the look, the workability, the cost, and the finish. Let’s break it down.
Poplar
Poplar is my go-to for painted dressers. It’s affordable, machines cleanly, takes paint beautifully, and won’t give you grief at the table saw. If you’re planning to paint your dresser, poplar is the smart choice.
Pine
Pine is the budget option, and there’s nothing wrong with that. It has a warm, rustic character that works great for farmhouse or cottage-style builds. Just know that pine dents easily and needs a pre-stain conditioner if you’re staining it — otherwise, it blotches like crazy.
Oak
Oak is a workhorse. Strong, durable, with a beautiful open grain that looks stunning under a natural finish. It’s a bit harder to work with than poplar or pine, but the results speak for themselves. Great choice if you want a dresser that looks like heirloom furniture.
Walnut
The premium pick. Walnut’s deep, rich chocolate tones are absolutely gorgeous, and it’s trending hard in 2026 for a reason. If budget allows, walnut makes a dresser that stops people in their tracks. It’s also a joy to work with — it cuts clean and finishes beautifully with just an oil.
Plywood
Use 3/4″ birch or maple plywood for your carcass panels and 1/4″ plywood for drawer bottoms. Plywood is dimensionally stable — it won’t expand, contract, or warp like solid wood. That makes it ideal for the big flat panels of a dresser.
One hard rule: avoid MDF for drawers. MDF doesn’t hold screws well under repeated stress, and drawer boxes take a beating every single day.
If you’re brand new to woodworking and still figuring out materials, tools, and techniques, check out how to start woodworking for beginners — it’ll give you a solid foundation before tackling a build like this.
The Full Dresser Plans
Alright, let’s get into the good stuff. Here are the full dimensions for a standard 6-drawer dresser — a versatile size that fits most bedrooms without eating the whole room.
Dresser Dimensions
| Part | Dimensions |
| Overall Height | 54″ |
| Overall Width | 36″ |
| Overall Depth | 18″ |
| Side Panels (x2) | 54″ x 18″ |
| Top Panel | 36″ x 18″ |
| Bottom Panel | 36″ x 18″ |
| Drawer Dividers (x2) | 34.5″ x 18″ |
| Back Panel (plywood) | 36″ x 54″ |
| Drawers (x6) | 32.5″ x 8″ x 16″ |
The whole point of creating your own is to be able to modify things to fit your unique environment. Additionally, to account for errors, poor cuts, or grain problems, always add 10% more lumber to your shopping list. You’ll thank yourself later, I promise.
Step-by-Step Dresser Build Instructions
This is where it all comes together. Follow these steps in order, take your time, and don’t skip the dry-fit stages.
Step 1 — Cut Your Lumber
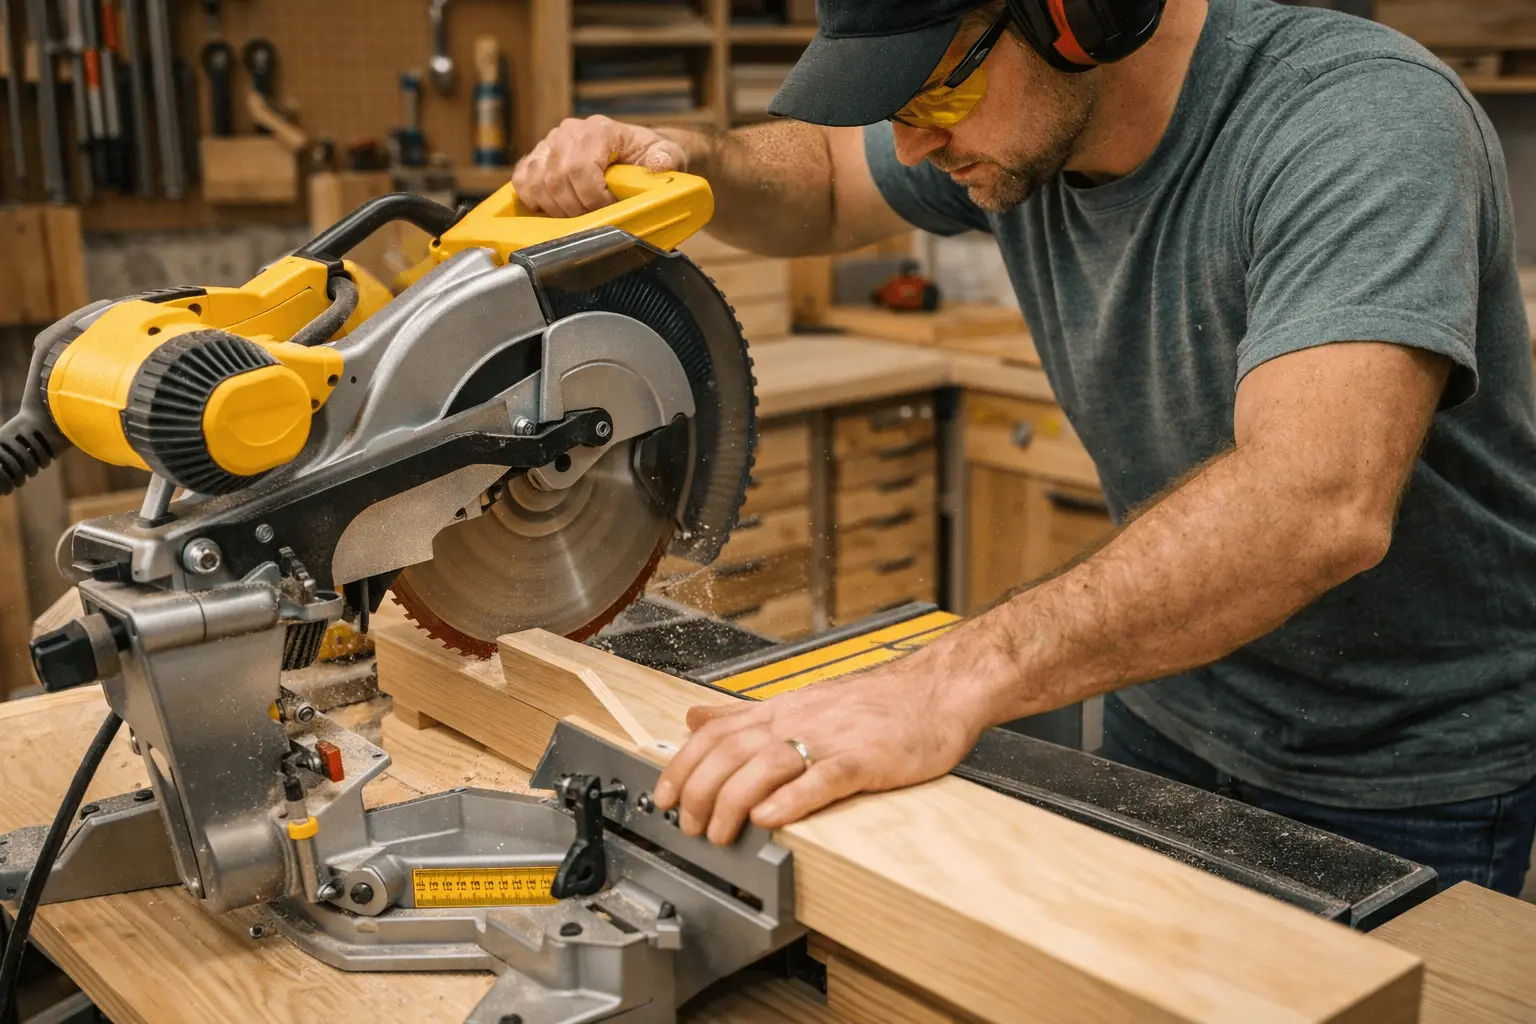
Start by printing or pulling up your cut list and going through it systematically. Cut all your pieces before you assemble anything. Work from largest to smallest to get the most out of your boards.
Use a table saw for ripping panels to width and a miter saw for squaring up ends. As you cut each piece, label it immediately with a pencil on the face that won’t show — it sounds obvious, but it saves a lot of confusion later. Check each piece against the cut list before moving on.
Step 2 — Build the Carcass
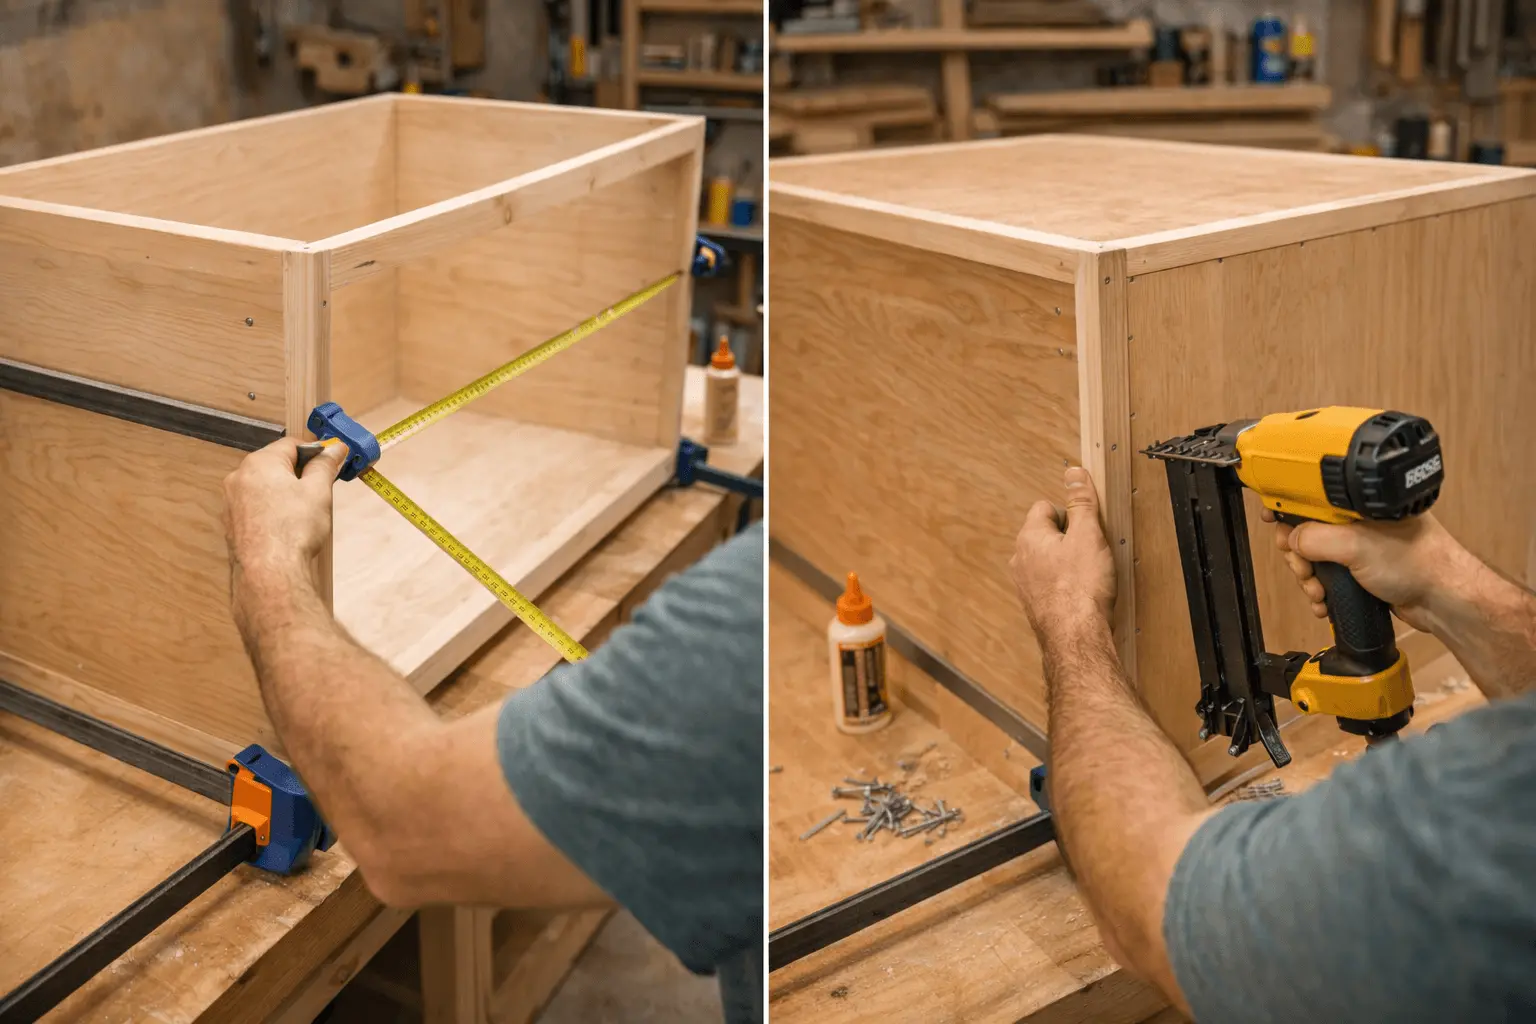
The carcass is the main box of your dresser — the two side panels, the top, and the bottom. This is the foundation of your entire build, so getting it right matters.
Use pocket holes and glue to join the top and bottom panels to the sides. Once assembled, check for square by measuring diagonally corner to corner — both measurements should match. If they don’t, clamp across the longer diagonal until they do, then let the glue fully cure before touching it.
Attach the back panel using glue and nails or staples. The back panel does more than close off the dresser — it locks everything square permanently.
Step 3 — Install the Drawer Dividers
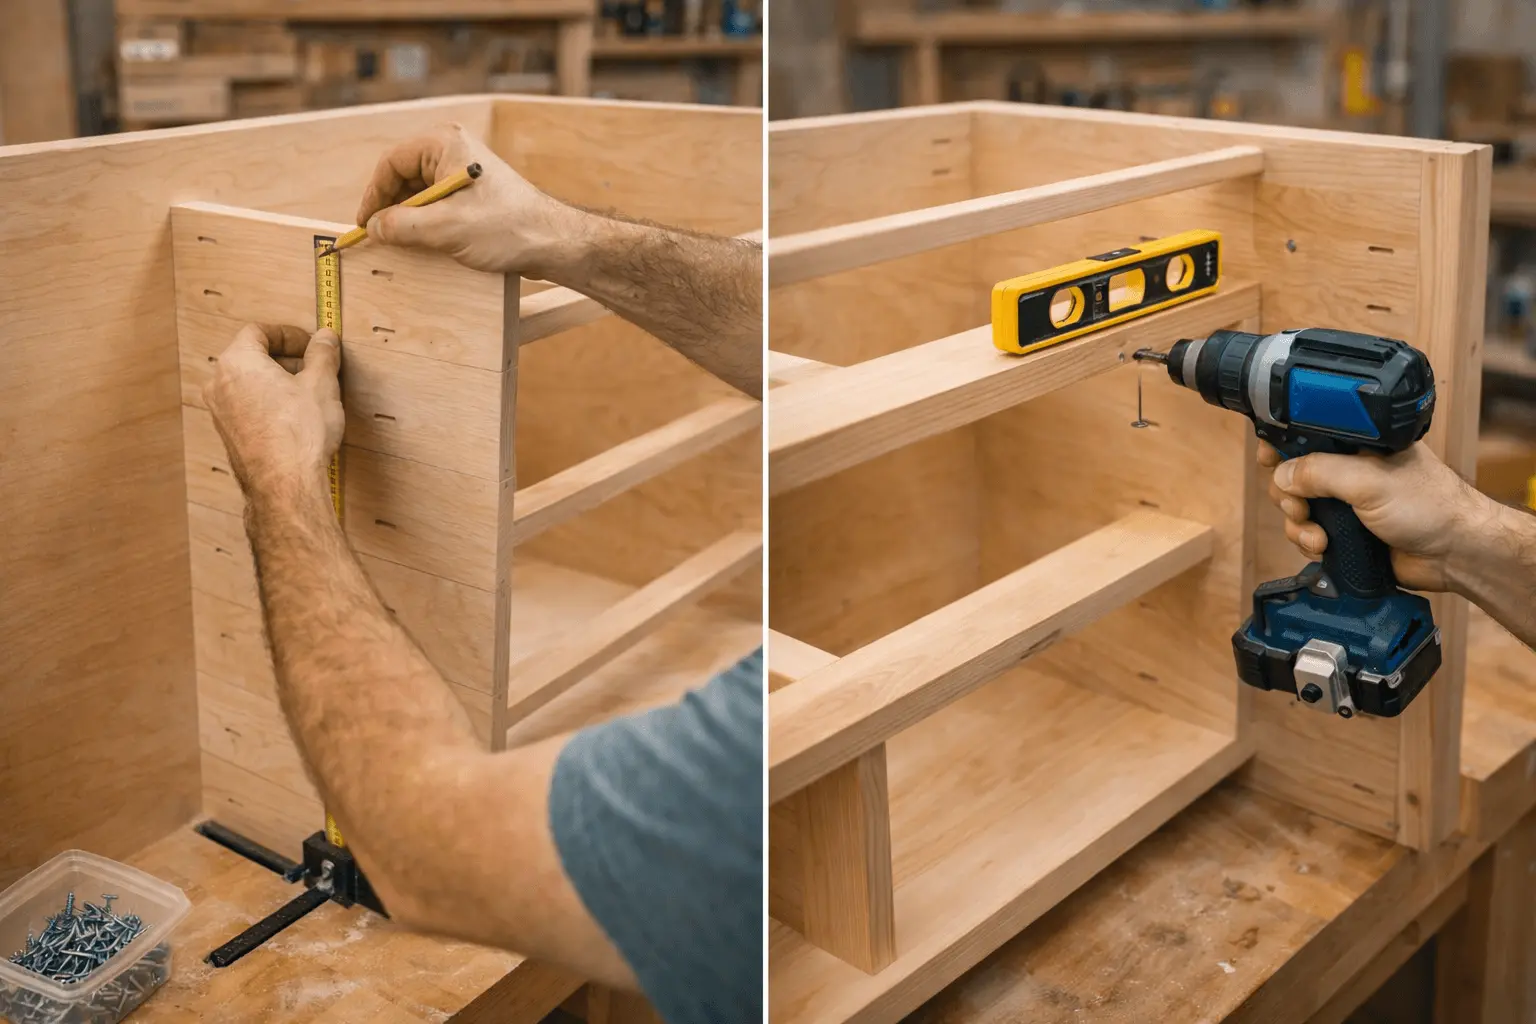
Measure the interior height of your carcass and divide it equally for your six drawers. Mark your divider locations clearly on both side panels.
Pocket holes work well here, but if you want maximum strength, cut dadoes (grooves) in the side panels for the dividers to sit in — it’s a stronger mechanical joint. Check for level at every divider before committing to glue. An unlevel divider means crooked drawers forever.
Step 4 — Build the Drawers
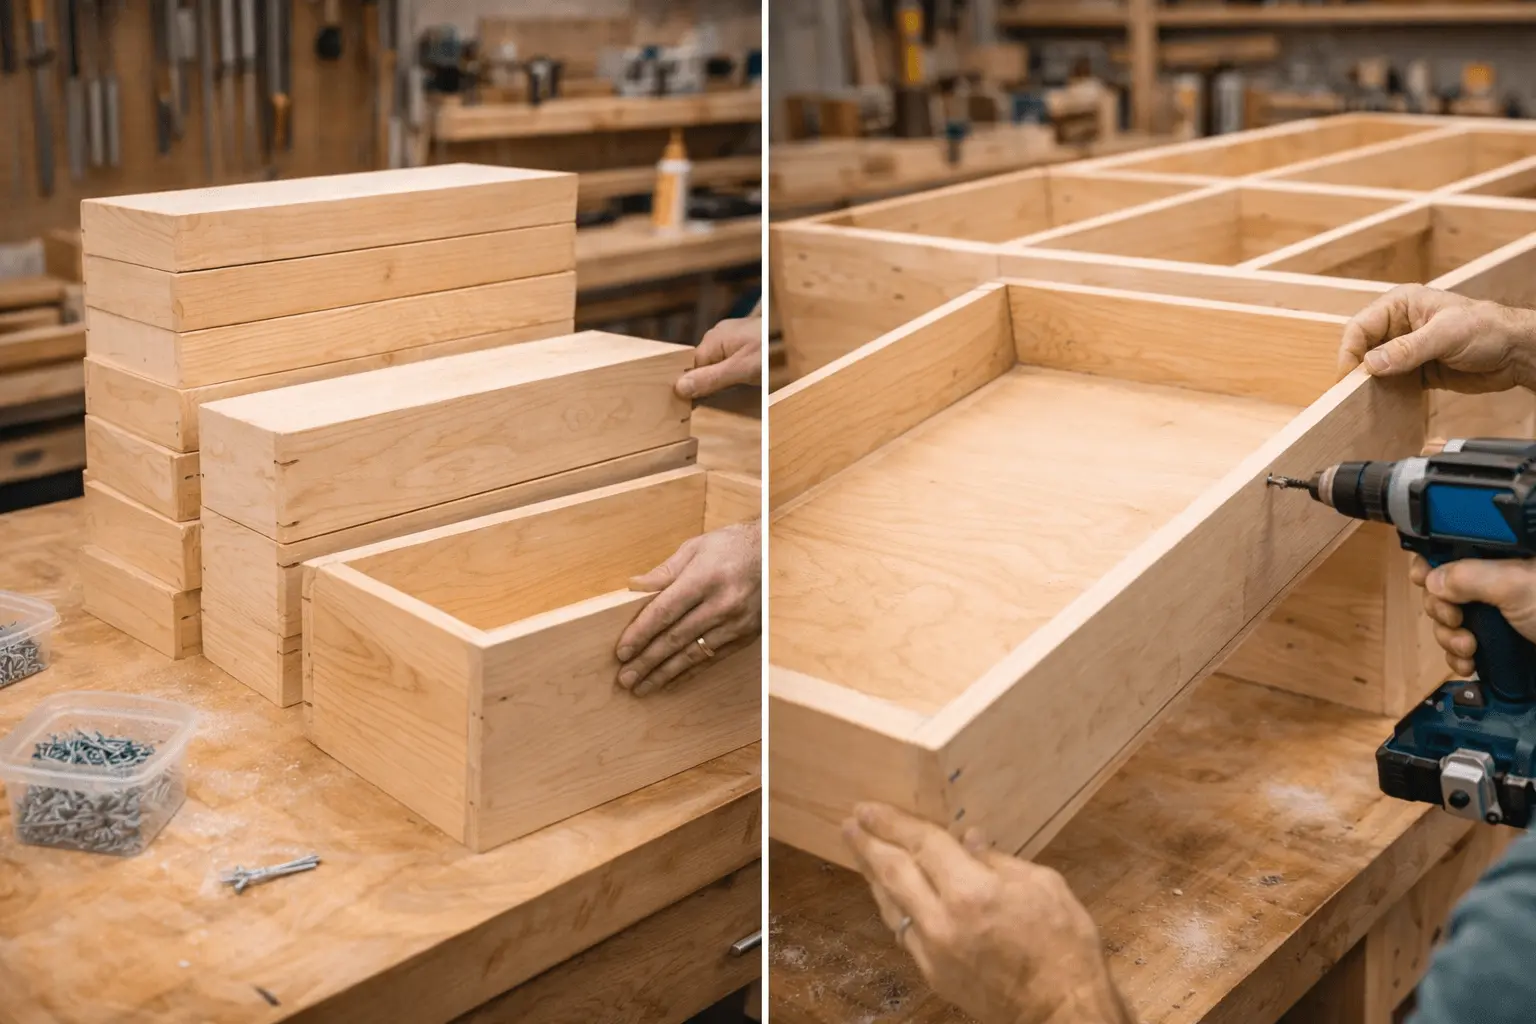
Each drawer box is a simple rectangle: two sides, a front, a back, and a plywood bottom. Cut all six sets of drawer parts at once for consistency.
Assemble with pocket holes and glue. Then nail or staple the 1/4″ plywood bottom into a rabbet (groove) around the lower inside edge of the box. Pro tip: make each drawer box exactly 1″ narrower than its opening. This gives you clearance for the drawer slides and ensures smooth operation.
Step 5 — Install Drawer Slides
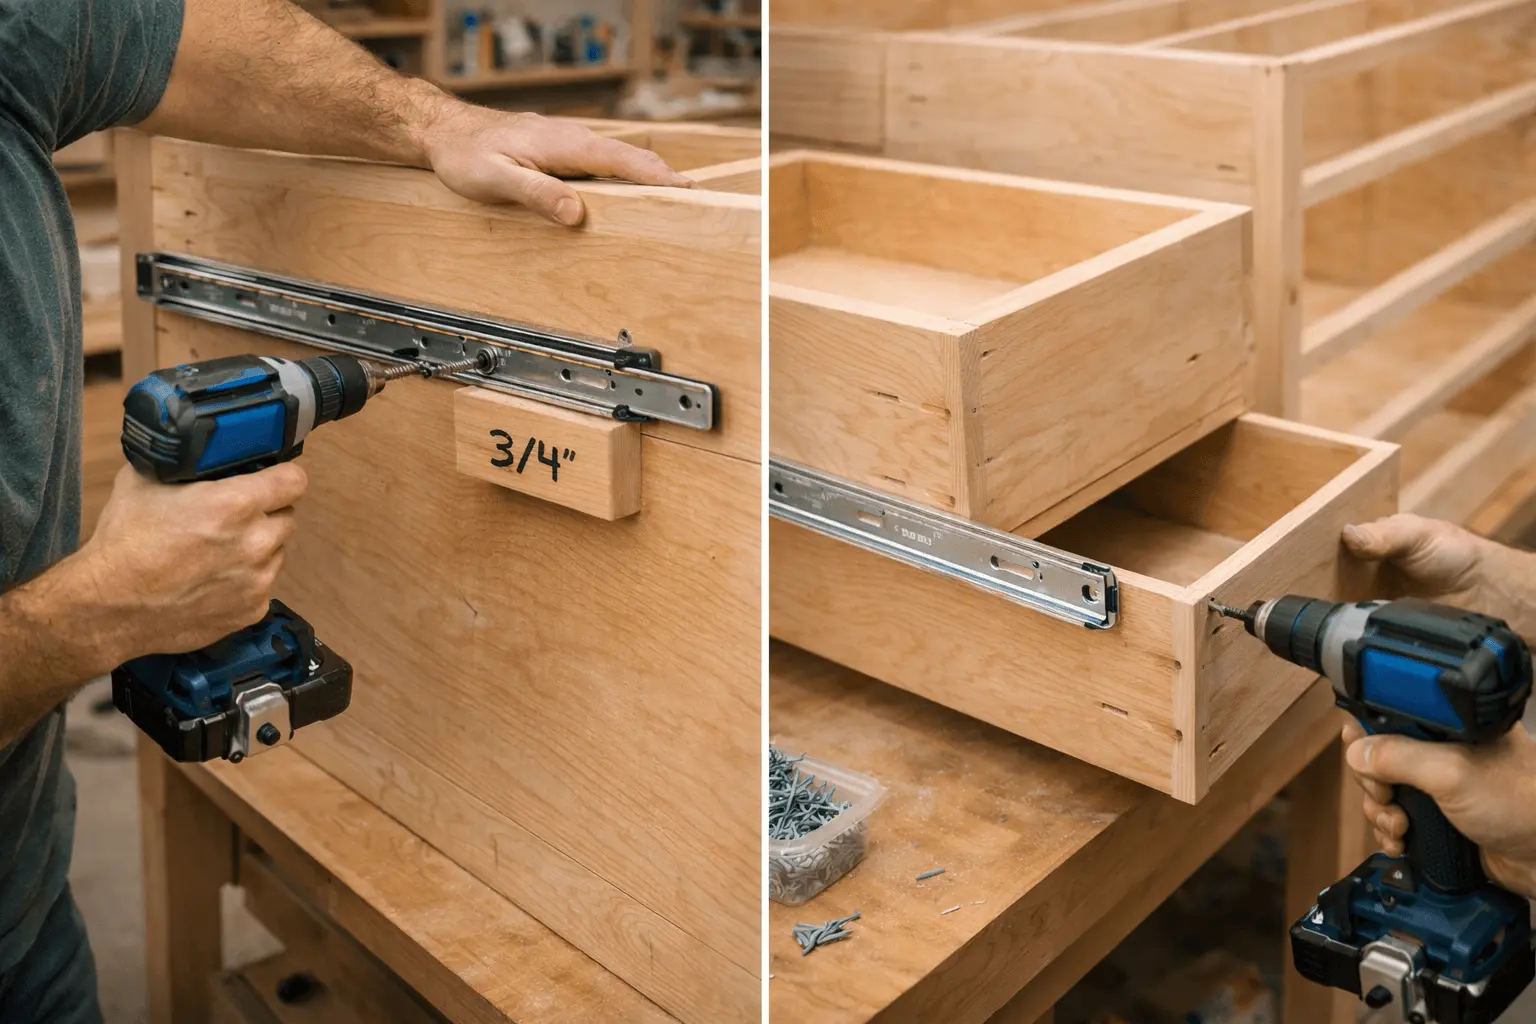
Full-extension ball-bearing slides are the way to go — they let you access the full depth of the drawer, and they glide smoothly for years. Side-mount slides are the easiest for beginners; undermount slides look cleaner but require more precise installation.
Attach the cabinet member to the inside of the carcass, then the drawer member to the drawer box. The most common mistake here is not checking that both slides are perfectly level with each other. Use a spacer block to set a consistent height on every slide, and test-fit each drawer before moving to the next.
Step 6 — Sand Everything
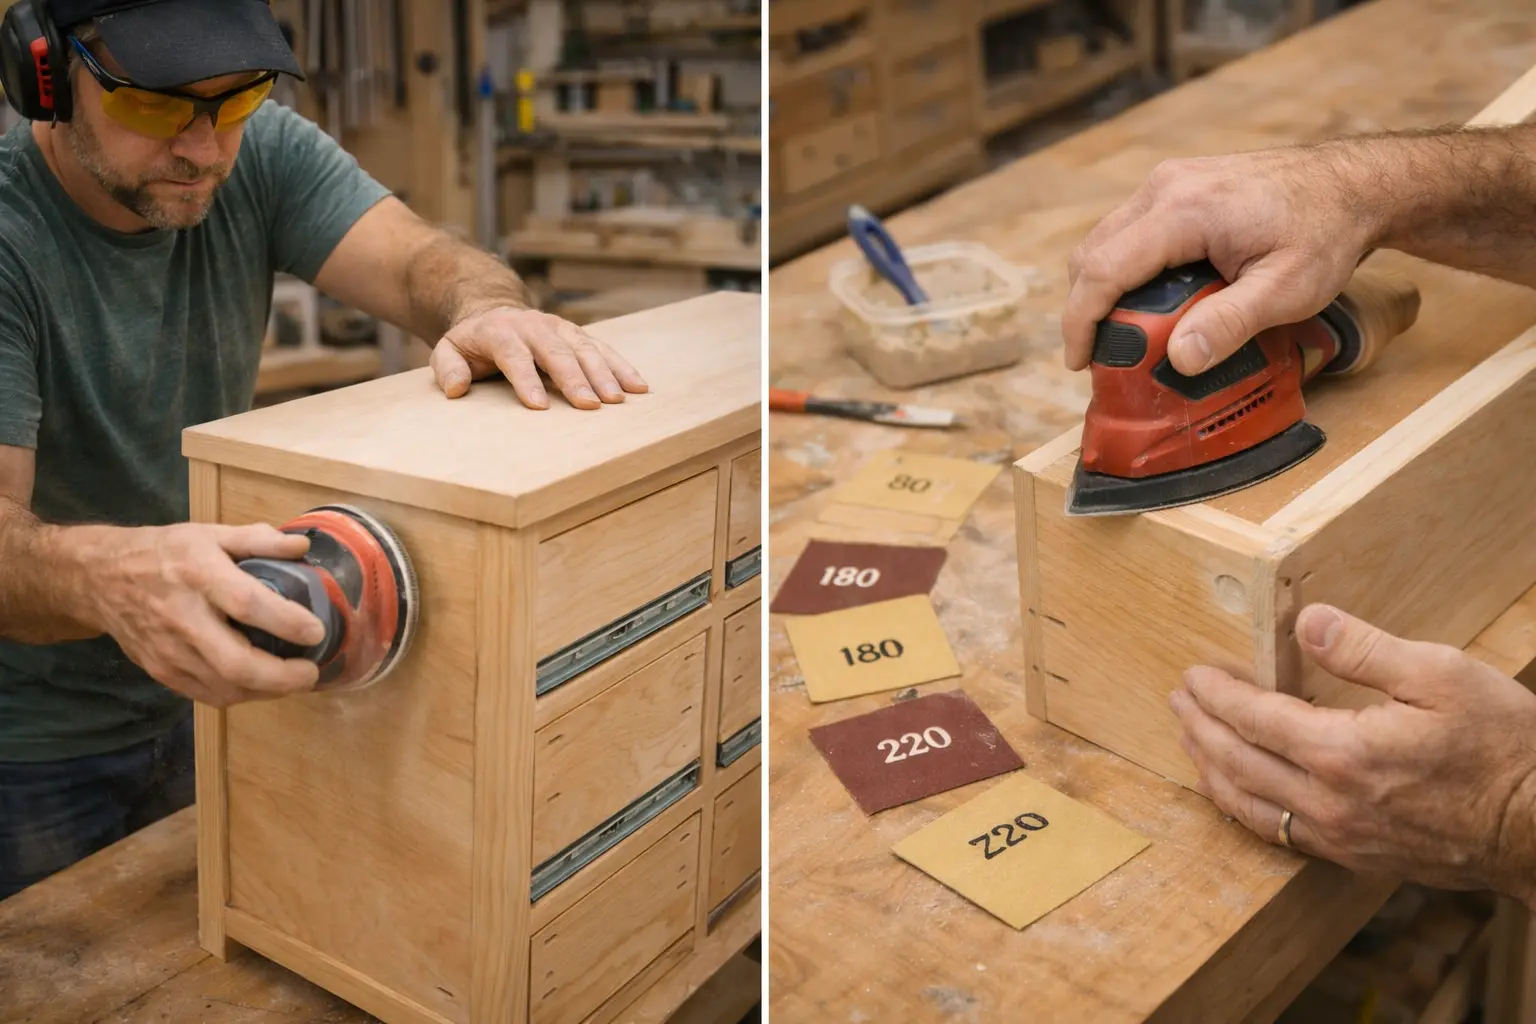
Sanding is the step people rush — and it always shows in the final result. Start at 80 grit to remove any mill marks or rough spots, then work your way through 120, 180, and finish at 220 grit.
Pay extra attention to end grain — it absorbs finish differently than face grain and needs more sanding passes to get smooth. Fill any nail holes or small gaps with wood filler, let it dry completely, then do a final pass at 220 before finishing.
Step 7 — Apply Your Finish
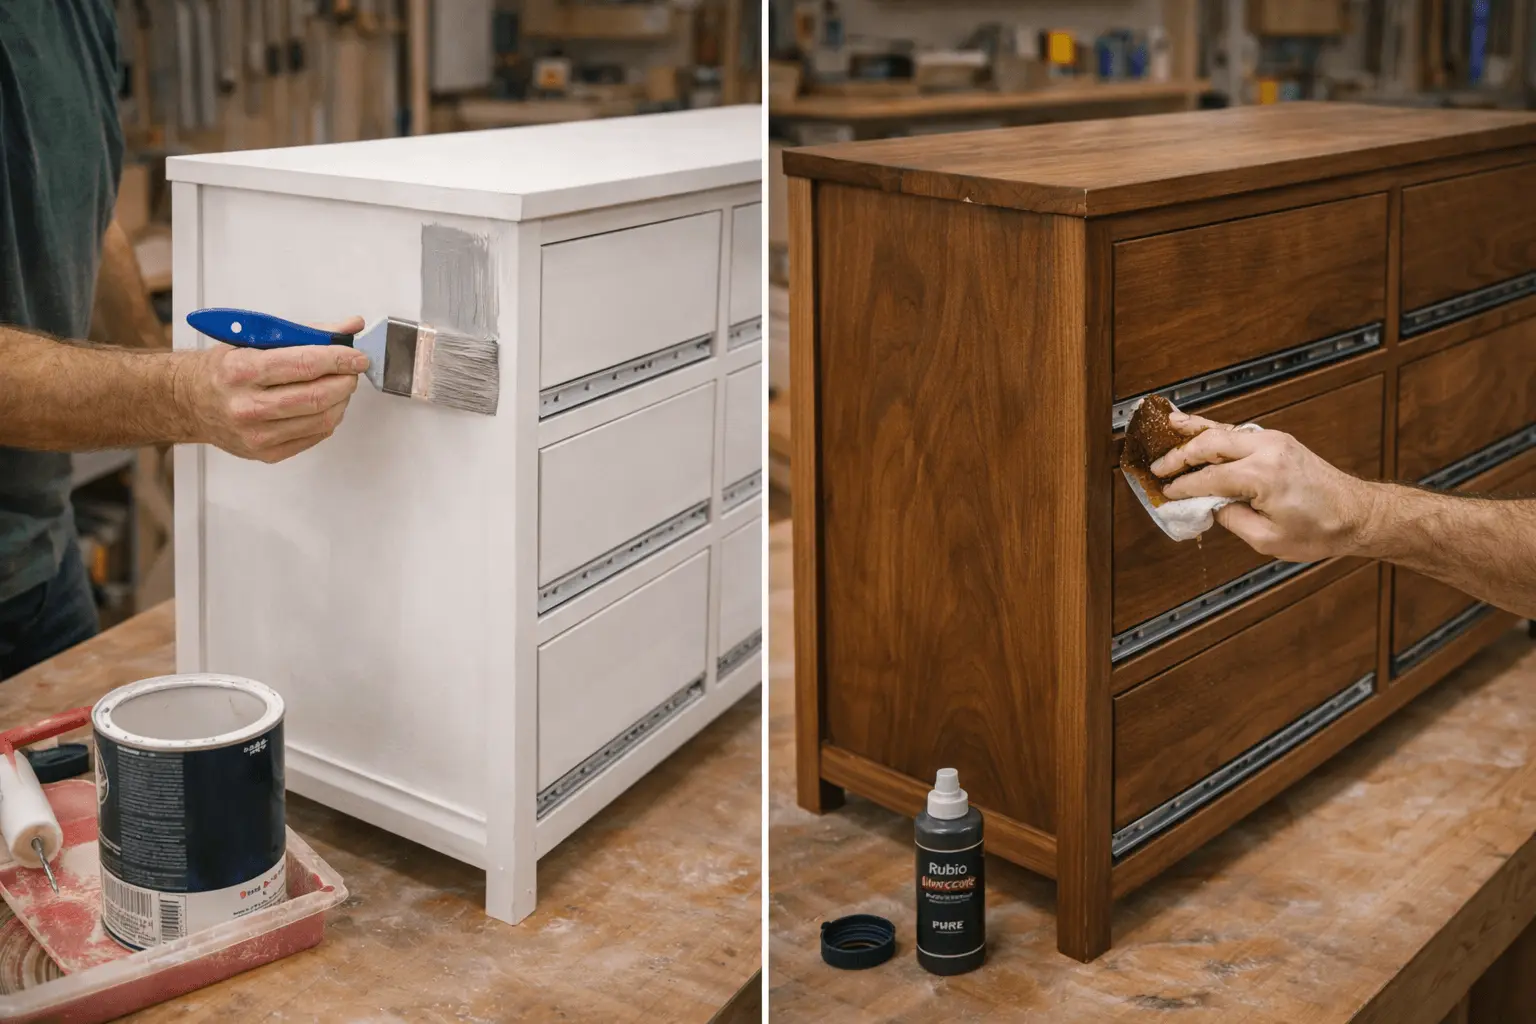
This is where your dresser goes from “workshop project” to “furniture.” Choose your finish based on your wood and your desired look:
- Painted finish: Apply a coat of primer, let it dry, sand lightly at 220, then apply two coats of paint. Light sanding between coats gives you a buttery-smooth result.
- Stained finish: Use a pre-stain wood conditioner first (essential for pine, good practice for any wood), then apply your stain, wipe off the excess, and follow with 2–3 coats of polyurethane. Sand lightly between poly coats with 320 grit.
- Oil finish (for walnut or oak): Danish oil or a hardwax oil like Rubio Monocoat brings out the natural beauty of the wood with a matte, tactile finish. This is IMO the most beautiful option if you’ve used a premium wood.
Step 8 — Attach Drawer Fronts & Hardware
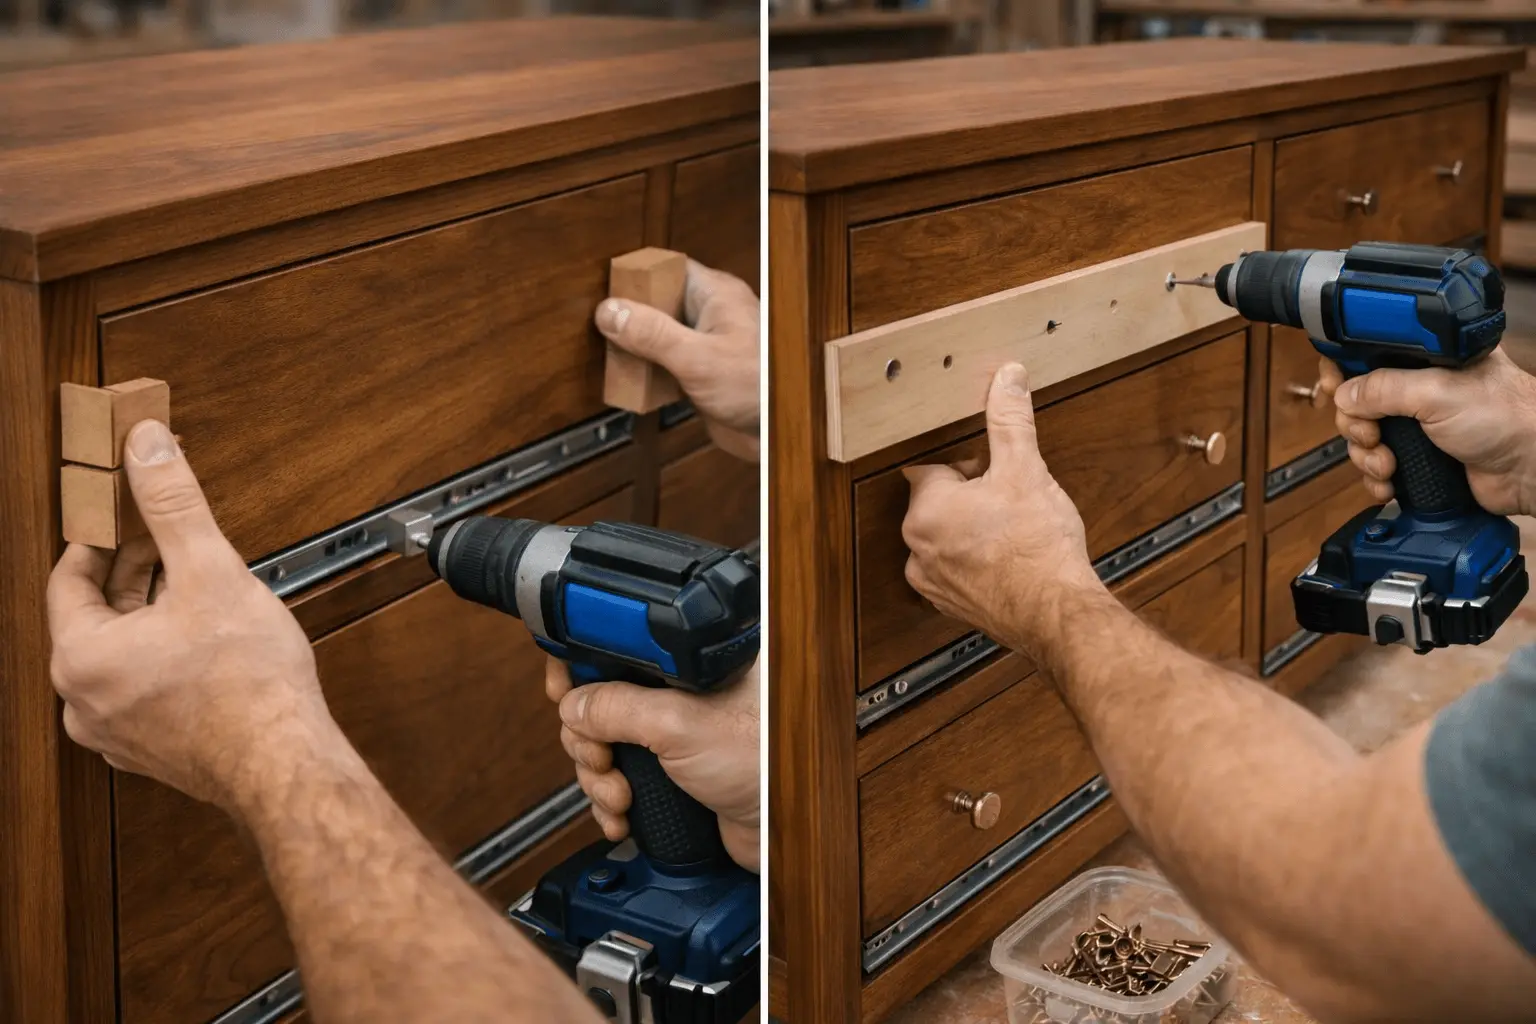
The false drawer fronts are the face of your dresser, so alignment here is everything. Here’s the trick: cut small cardboard spacers the thickness of your desired gap (usually about 1/8″), set them in place, then press the drawer front against them from the outside while a helper drives screws from inside the drawer box.
Once all fronts are on and aligned, mark and drill your hardware holes. A simple drilling template keeps all your pulls at the exact same height on every drawer. Stand back, admire the result, and feel very good about yourself. You earned it. 🙂
Tips & Tricks for a Professional Result
A few things I’ve learned the hard way so you don’t have to:
- Always dry-fit before gluing. Every single time. No exceptions.
- A pocket hole jig is worth every penny — it makes joinery fast, strong, and beginner-friendly.
- Full-extension drawer slides are non-negotiable. The cheap ones sag within a year.
- Don’t rush the finishing stage. A sloppy finish on a well-built dresser is a crime.
- Photograph every step of your build. Your Pinterest audience will love the process shots, and you’ll have a great record of how it all went together.
Common Mistakes to Avoid
Even experienced builders make these — so keep this list somewhere visible:
- Not squaring the carcass before the glue dries. Once it’s set, it’s set.
- Cutting drawers too wide. They’ll bind and drive you crazy every single morning.
- Skipping pre-stain conditioner on pine. Blotchy stain is really hard to fix after the fact.
- Not sanding between finish coats. It’s what separates a smooth, professional result from a rough, streaky one.
- Using cheap drawer slides. They sag, they stick, and they make the whole dresser feel cheap. Spend the extra $20 and get the good ones.
Ready to Build?
There you go — a complete, no-nonsense guide to building a wooden dresser from scratch. From choosing your lumber to applying the final coat of finish, you now have everything you need to make it happen.
Building your own furniture is one of those things that genuinely changes how you look at your home. Every time you open one of those drawers, you’ll know you made that. That’s something no flat-pack will ever give you.
Save this post, share your build when you’re done, and tag us on Pinterest — we genuinely love seeing what you create. And when you’re ready to tackle your next project, browse our favorite woodworking projects for your next great build.
Now go make some sawdust.