

You’re doing your usual Pinterest scroll — totally normal, definitely not at midnight — and you stumble on the most gorgeous wooden pendant necklace you’ve ever seen. Natural wood grain, perfectly sealed, hanging on a delicate gold chain. It looks like something a Copenhagen designer spent weeks perfecting. You click the Etsy link. $74. Plus shipping.
You close the tab.
Here’s what that Etsy seller doesn’t want you to know: that necklace probably cost $4 to make. And you can make the exact same thing — this weekend — for less than a coffee. These wooden jewelry projects are the budget crafter’s best-kept secret, and today I’m handing them all over to you.
Whether you’ve never touched a piece of sandpaper or you’re already dabbling in DIY, these 12 wooden jewelry projects are beginner-friendly, shockingly affordable, and genuinely beautiful. No fancy equipment. No woodworking degree. Just wood, a few basic supplies, and a Saturday afternoon. Let’s get into it.
Why Wooden Jewelry Is Taking Over Pinterest Right Now
Have you noticed that natural, earthy aesthetics are absolutely everywhere right now? Wooden jewelry fits that trend perfectly — and then some.
There’s something about wood as a material that feels simultaneously rustic and luxurious. The grain patterns are unique on every single piece, which means every item you make is genuinely one-of-a-kind. No two wood burned earrings will ever look identical. That’s the kind of thing boutique shoppers pay serious money for.
Beyond aesthetics, wooden jewelry ticks a lot of boxes that modern buyers care about. It’s lightweight and comfortable to wear — a game-changer if you’ve ever had earrings giving you sore earlobes by noon. It’s eco-friendly and sustainable, which matters more and more to conscious shoppers. And it pairs beautifully with everything from boho festival outfits to minimalist everyday looks.
The crafting world has caught on, and now wooden jewelry is one of the hottest DIY categories on Pinterest — and one of the most profitable on Etsy. More on that later. 👀
What You’ll Need Before You Start
Good news: your materials list is short, cheap, and mostly available at your local craft store.
Basic tools:
- Small hand saw or jigsaw — for cutting wood shapes
- Sandpaper — 80 grit for shaping, 220 grit for that silky finish
- Drill with small bits — for adding holes for jump rings and hooks
- Wood burning pen — optional, but opens up a whole world of designs
- Sealant, varnish, or beeswax — non-negotiable for a polished, protective finish
Materials you’ll need:
- Wooden beads, thin wood sheets, or small wood slices
- Jump rings, earring hooks, necklace chains, and elastic cord (all available at craft stores for next to nothing)
- Wood stain, paint, or a wood burning design to personalize each piece
Where to find supplies without breaking the bank:
- Craft stores like Michaels or Hobby Lobby (check the sale section — it’s always stacked)
- Amazon for bulk wooden beads and jewelry findings
- Dollar stores for basic chain and cord
- Scrap wood pieces from any hardware store offcut bin
One quick safety note: always work in a ventilated space, especially when sanding or using a wood burning pen. Sawdust and fumes are not the accessories you want. 😷
Advertisement
Not sure which tools are actually worth buying as a complete beginner? Don’t spend a dollar until you’ve read this: 👉 16 Best Woodworking Tools for Beginners — it cuts through the noise and tells you exactly what you need to get started.
12 Wooden Jewelry Projects That’ll Make People Stop and Ask “Where Did You Get That?”
Here we go. Twelve projects, all beginner-friendly, all costing under $15 to make. Let’s build something beautiful.
#12 Wood Slice Pendant Necklace

Credit : Instructables
Type: Necklace | Difficulty: ⭐ Easy | Est. Cost: $3–$6
This is the one that started my wooden jewelry obsession — and I’m willing to bet it’ll do the same to you. Slice a thin round from a small branch or dowel, sand it until it’s glass-smooth, drill a tiny hole at the top, and thread through a jump ring and chain. Seal it with beeswax for a natural, luminous finish. The wood grain does all the work — every slice looks different, which makes every necklace feel genuinely unique. Dress it up or down; it works either way.
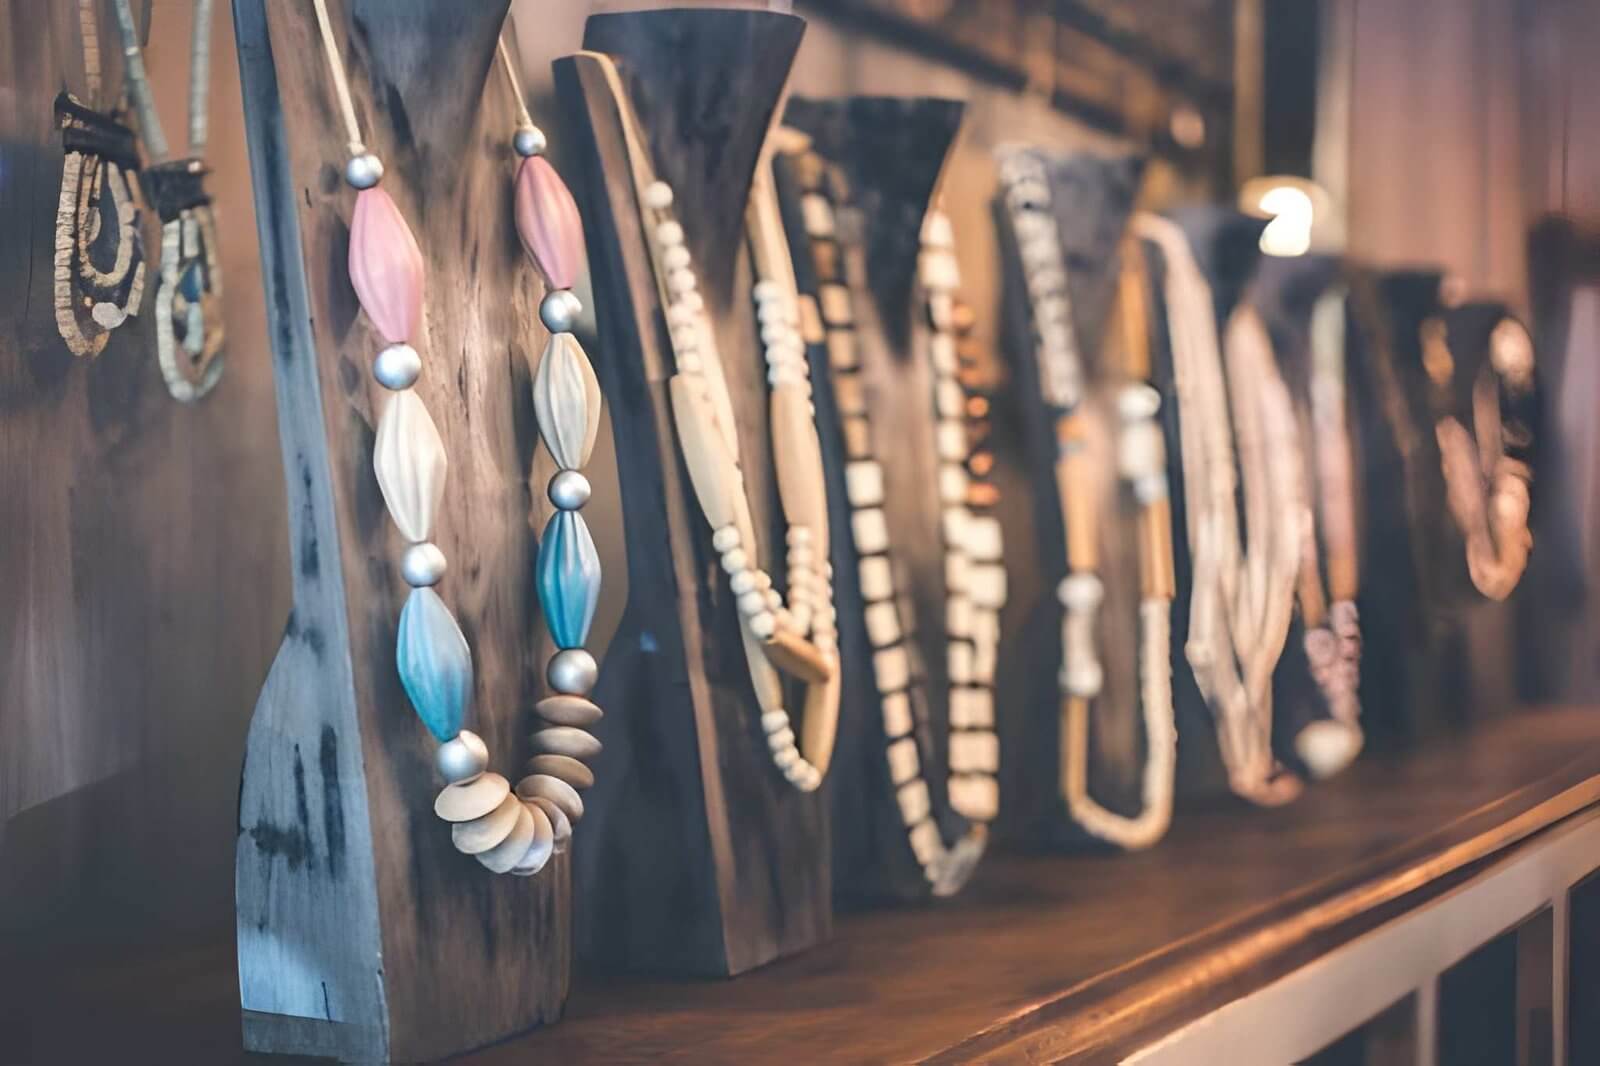
#11 Wooden Bead Statement Necklace

Credit : bombshellbling
Type: Necklace | Difficulty: ⭐ Easy | Est. Cost: $4–$8
If you want maximum visual impact for minimum effort, this is your project. Thread oversized wooden beads onto a thick cord or leather string, alternating between stained and natural beads for depth. The contrast between dark and light beads creates a layered, expensive look without any cutting or drilling required. This is genuinely a beginner’s first project — and it looks like something you’d find in an anthropologie window display.
#10 Wood Burned Earrings
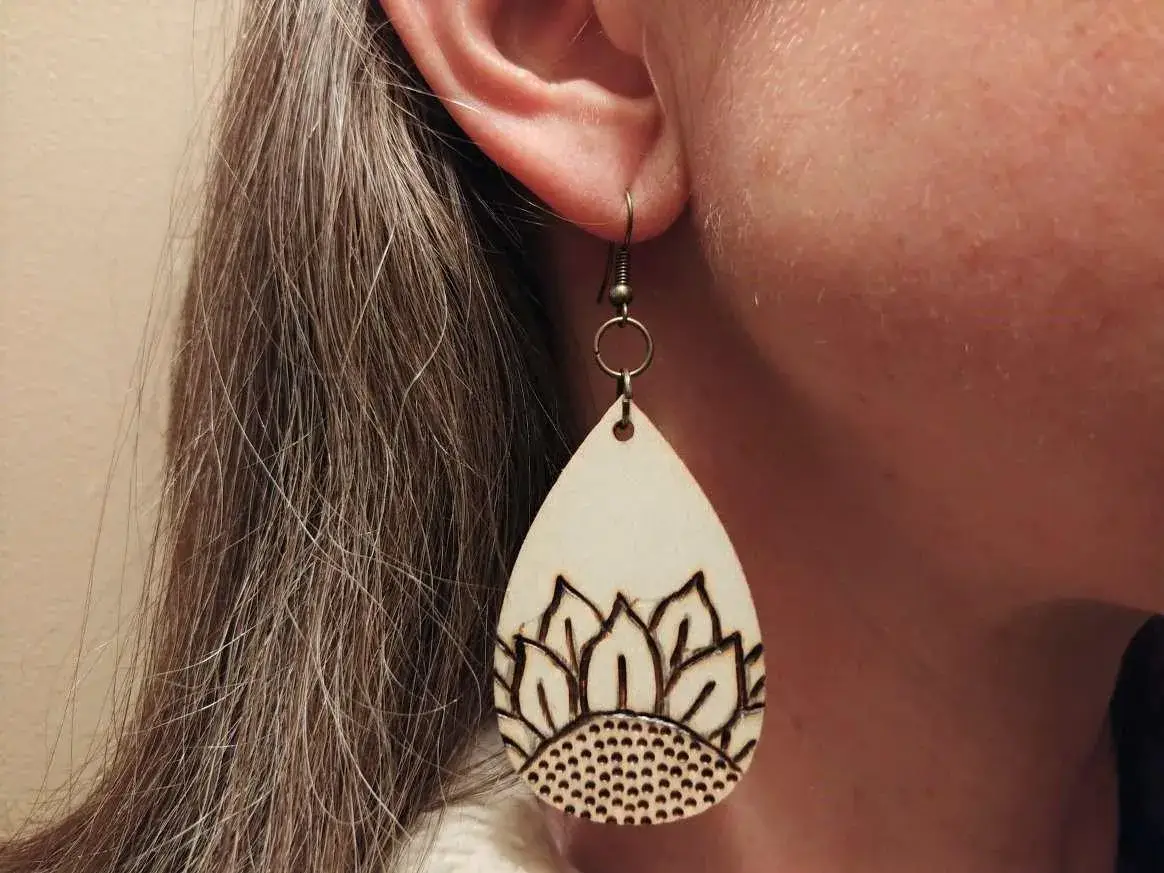
Credit : Instructables
Type: Earrings | Difficulty: ⭐ Easy | Est. Cost: $4–$8
Wood burned earrings are probably the most popular wooden jewelry item on Etsy right now — and for good reason. Cut small circles, teardrops, or rectangles from thin wood sheet, sand smooth, then use a wood burning pen to draw a simple design. Florals, geometric lines, mandalas, initials — anything works. Add earring hooks through a small drilled hole and you’re done. The burnt wood smell while you work is oddly satisfying, FYI. These also sell incredibly well if you ever want to make a few extra dollars from your hobby.
#9 Geometric Wood Drop Earrings
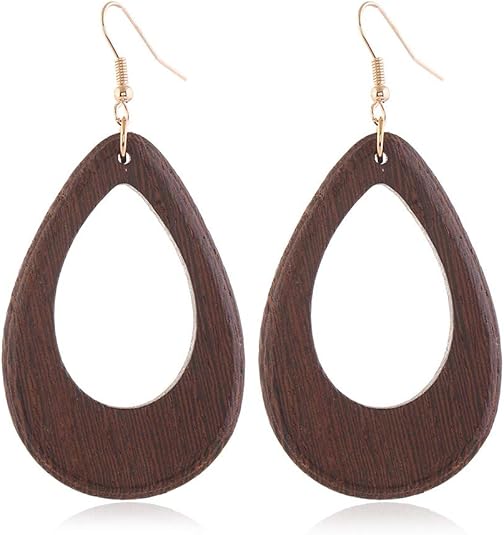
Credit : Amazon
Type: Earrings | Difficulty: ⭐⭐ Medium | Est. Cost: $5–$10
Cut precise geometric shapes — hexagons, triangles, half-moons, diamonds — from thin balsa or craft wood. Sand the edges until they’re perfectly sharp and smooth (this is what makes them look professional rather than homemade). Stain in a single rich color — ebony or walnut stain instantly reads as designer — seal, drill, and attach earring hooks. These are the kind of earrings that get compliments at dinner parties.
#8 Layered & Leather Bracelet
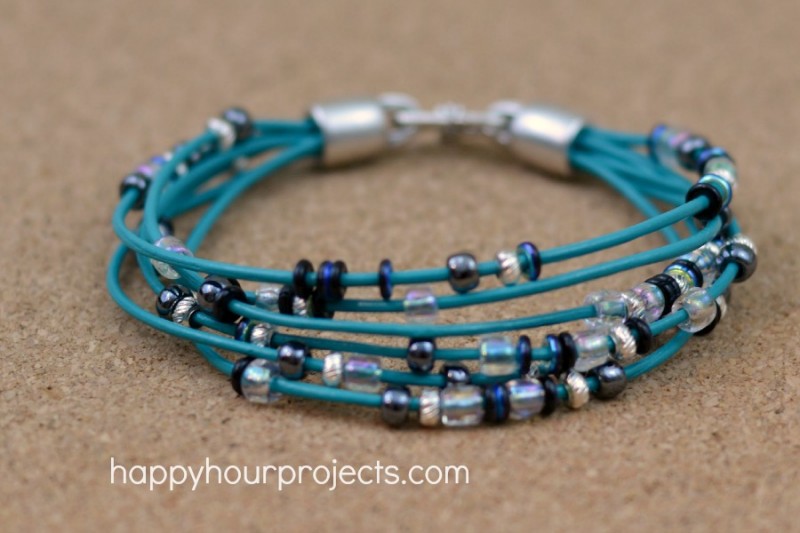
Credit : happyhourprojects
Type: Bracelet | Difficulty: ⭐ Easy | Est. Cost: $3–$7
Cut a thin strip of wood to wrist length, sand it smooth, and stain it. Then layer it alongside a thin leather cord or strap and wear them together as a stack. L leather textures is what makes this look high-end — the contrast does all the heavy lifting. Add a simple clasp or tie the leather ends in a knot for a casual boho finish. Stack two or three for maximum effect.
#7 Wooden Bead Stretch Bracelet
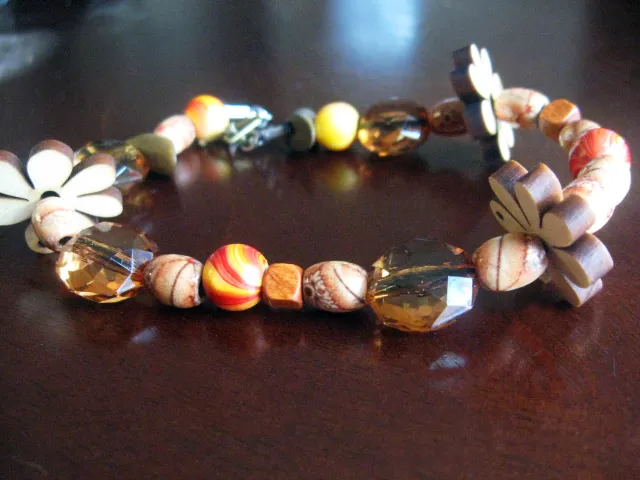
Credit : makesomethingmondays
Type: Bracelet | Difficulty: ⭐ Easy | Est. Cost: $2–$5
This might be the easiest project on the entire list — and the result is genuinely charming. Thread wooden beads onto elastic cord, tie a secure knot, and hide it inside one of the beads. Mix bead sizes and stain shades for a more intentional, curated look. Stain half the beads in walnut, leave the other half natural, and the result looks deliberately styled rather than randomly strung together.
#6 Wood Slice Ring
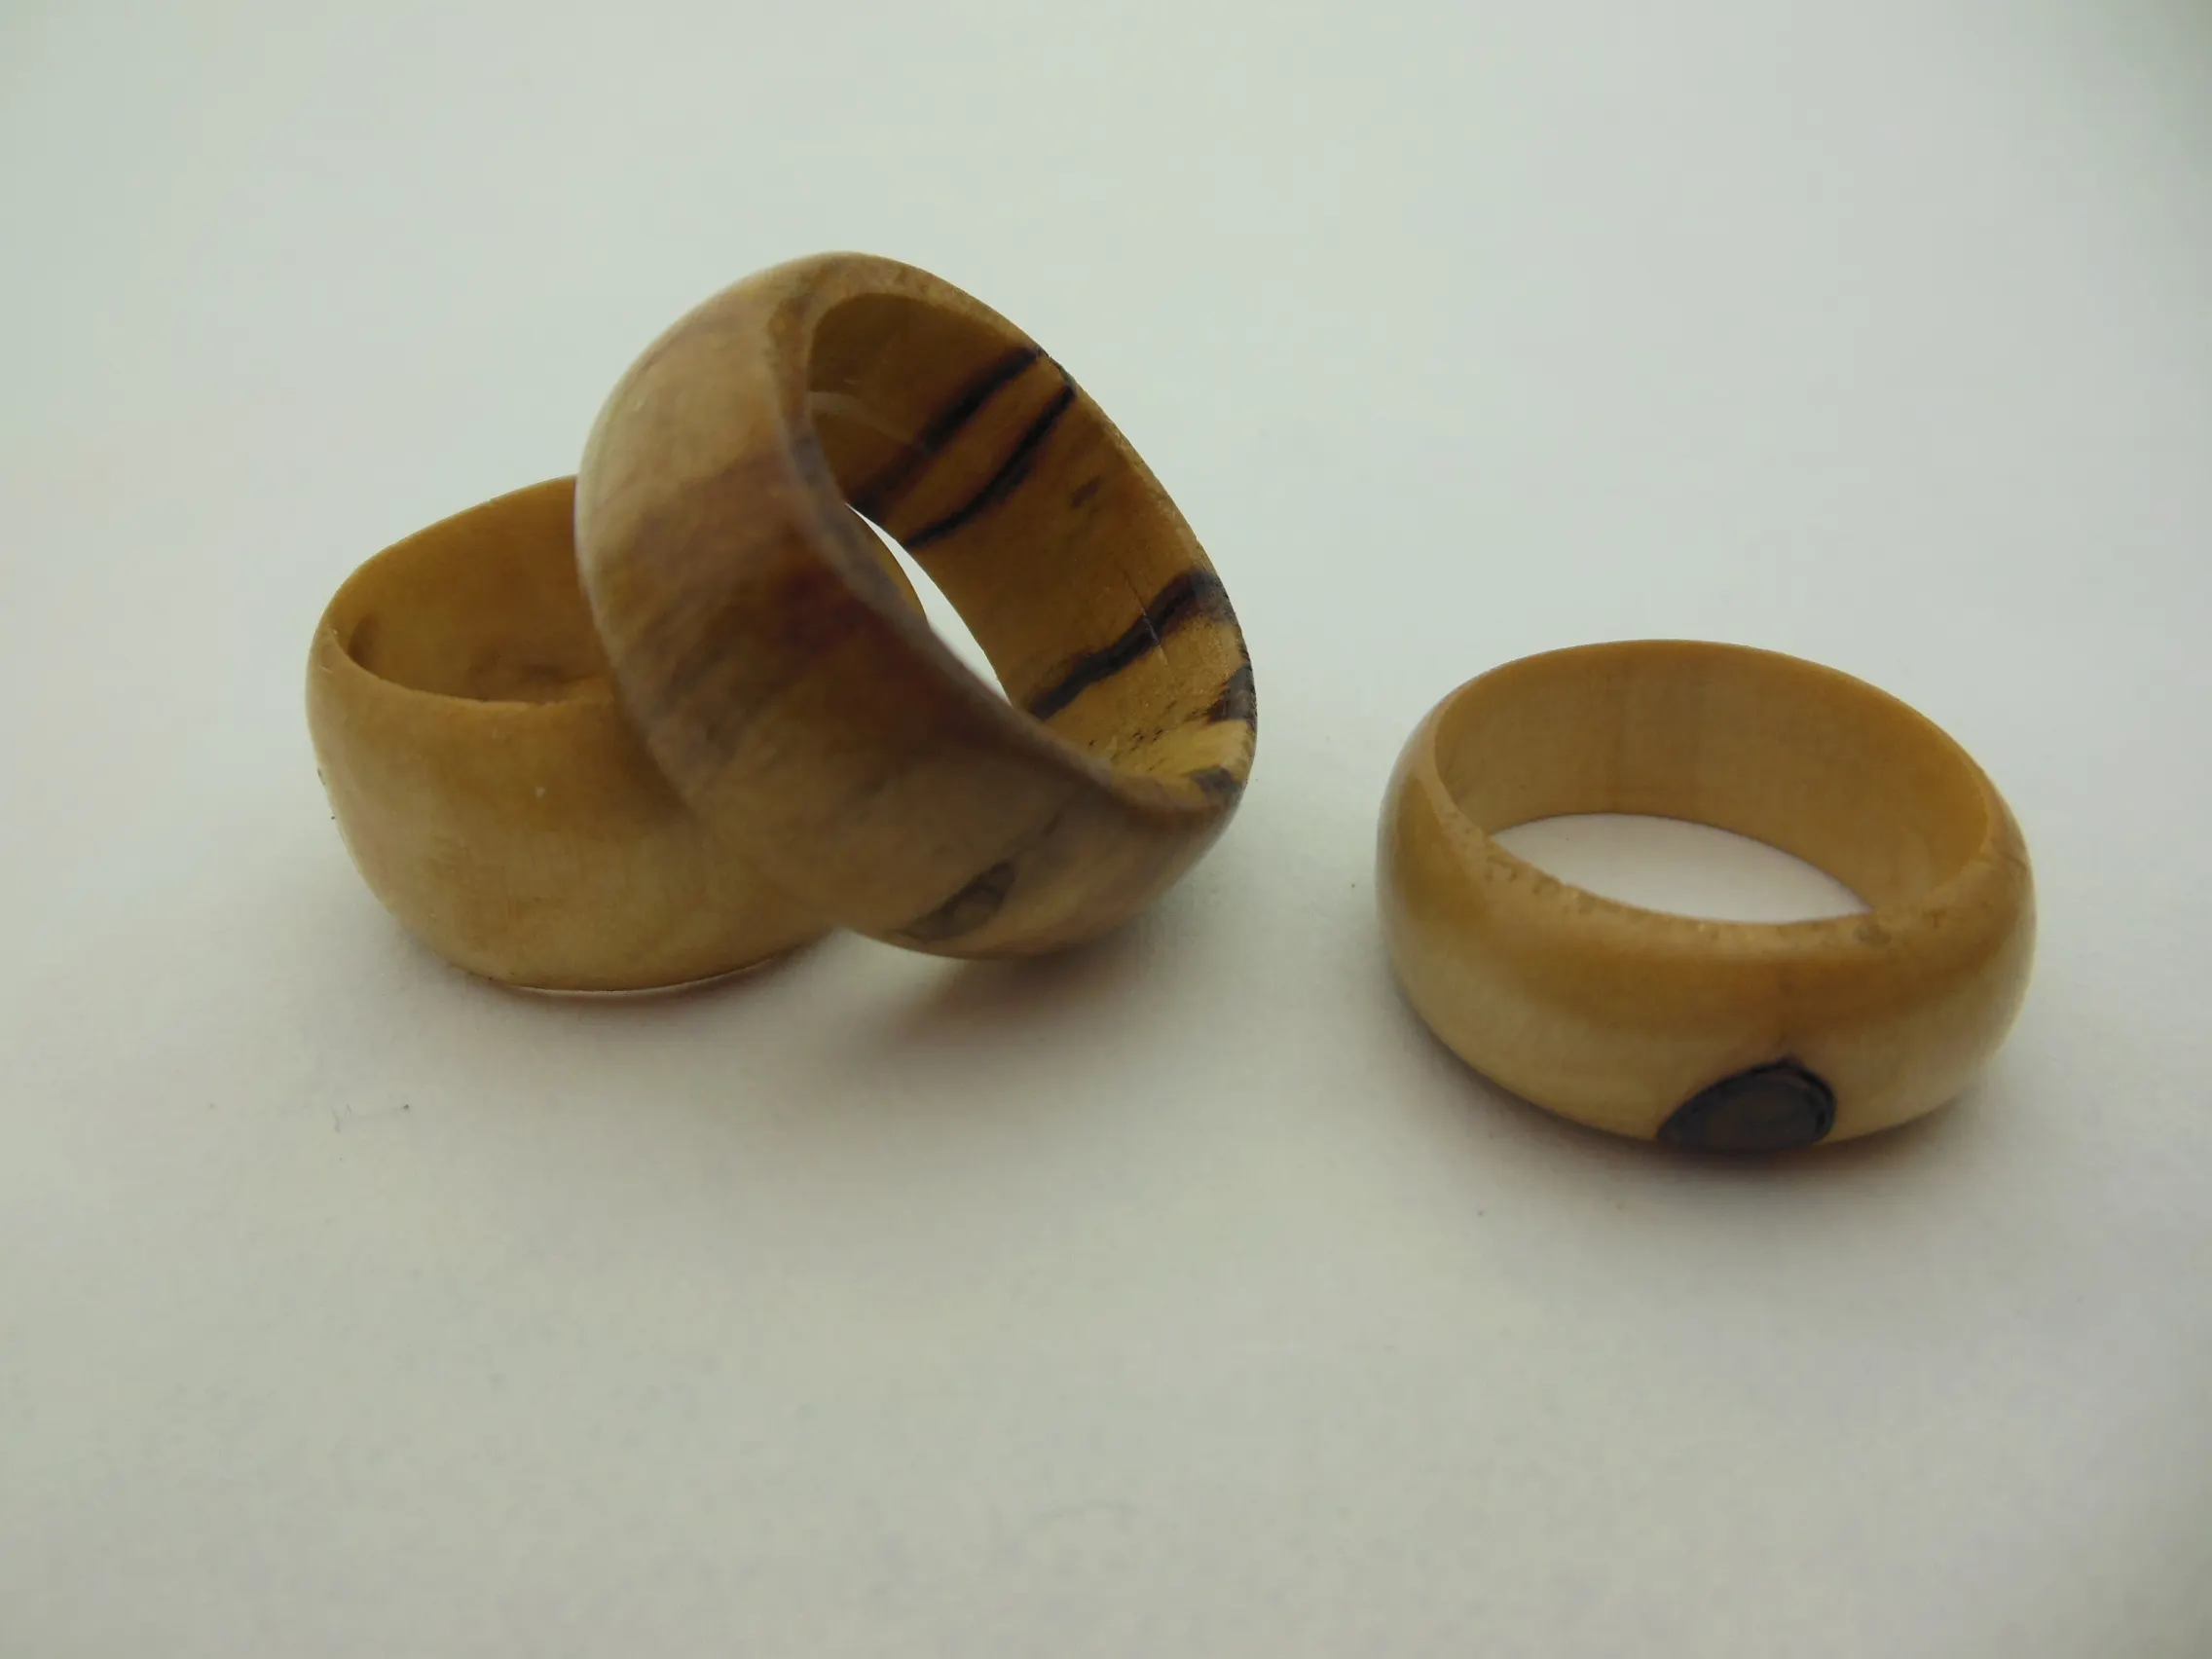
Credit : Instructables
Type: Ring | Difficulty: ⭐⭐ Medium | Est. Cost: $2–$5
Cut an ultra-thin slice of dowel or branch — we’re talking 3–4mm thick — sand the face silky smooth, and glue it onto a flat ring blank (available from any craft store for pennies). Paint or wood burn a tiny design on the face for a personalized touch. The finished ring looks like something a Brooklyn jewelry designer would sell for $45. It costs about $2 to make. The math is excellent.
#5 Engraved Wood Cuff Bracelet
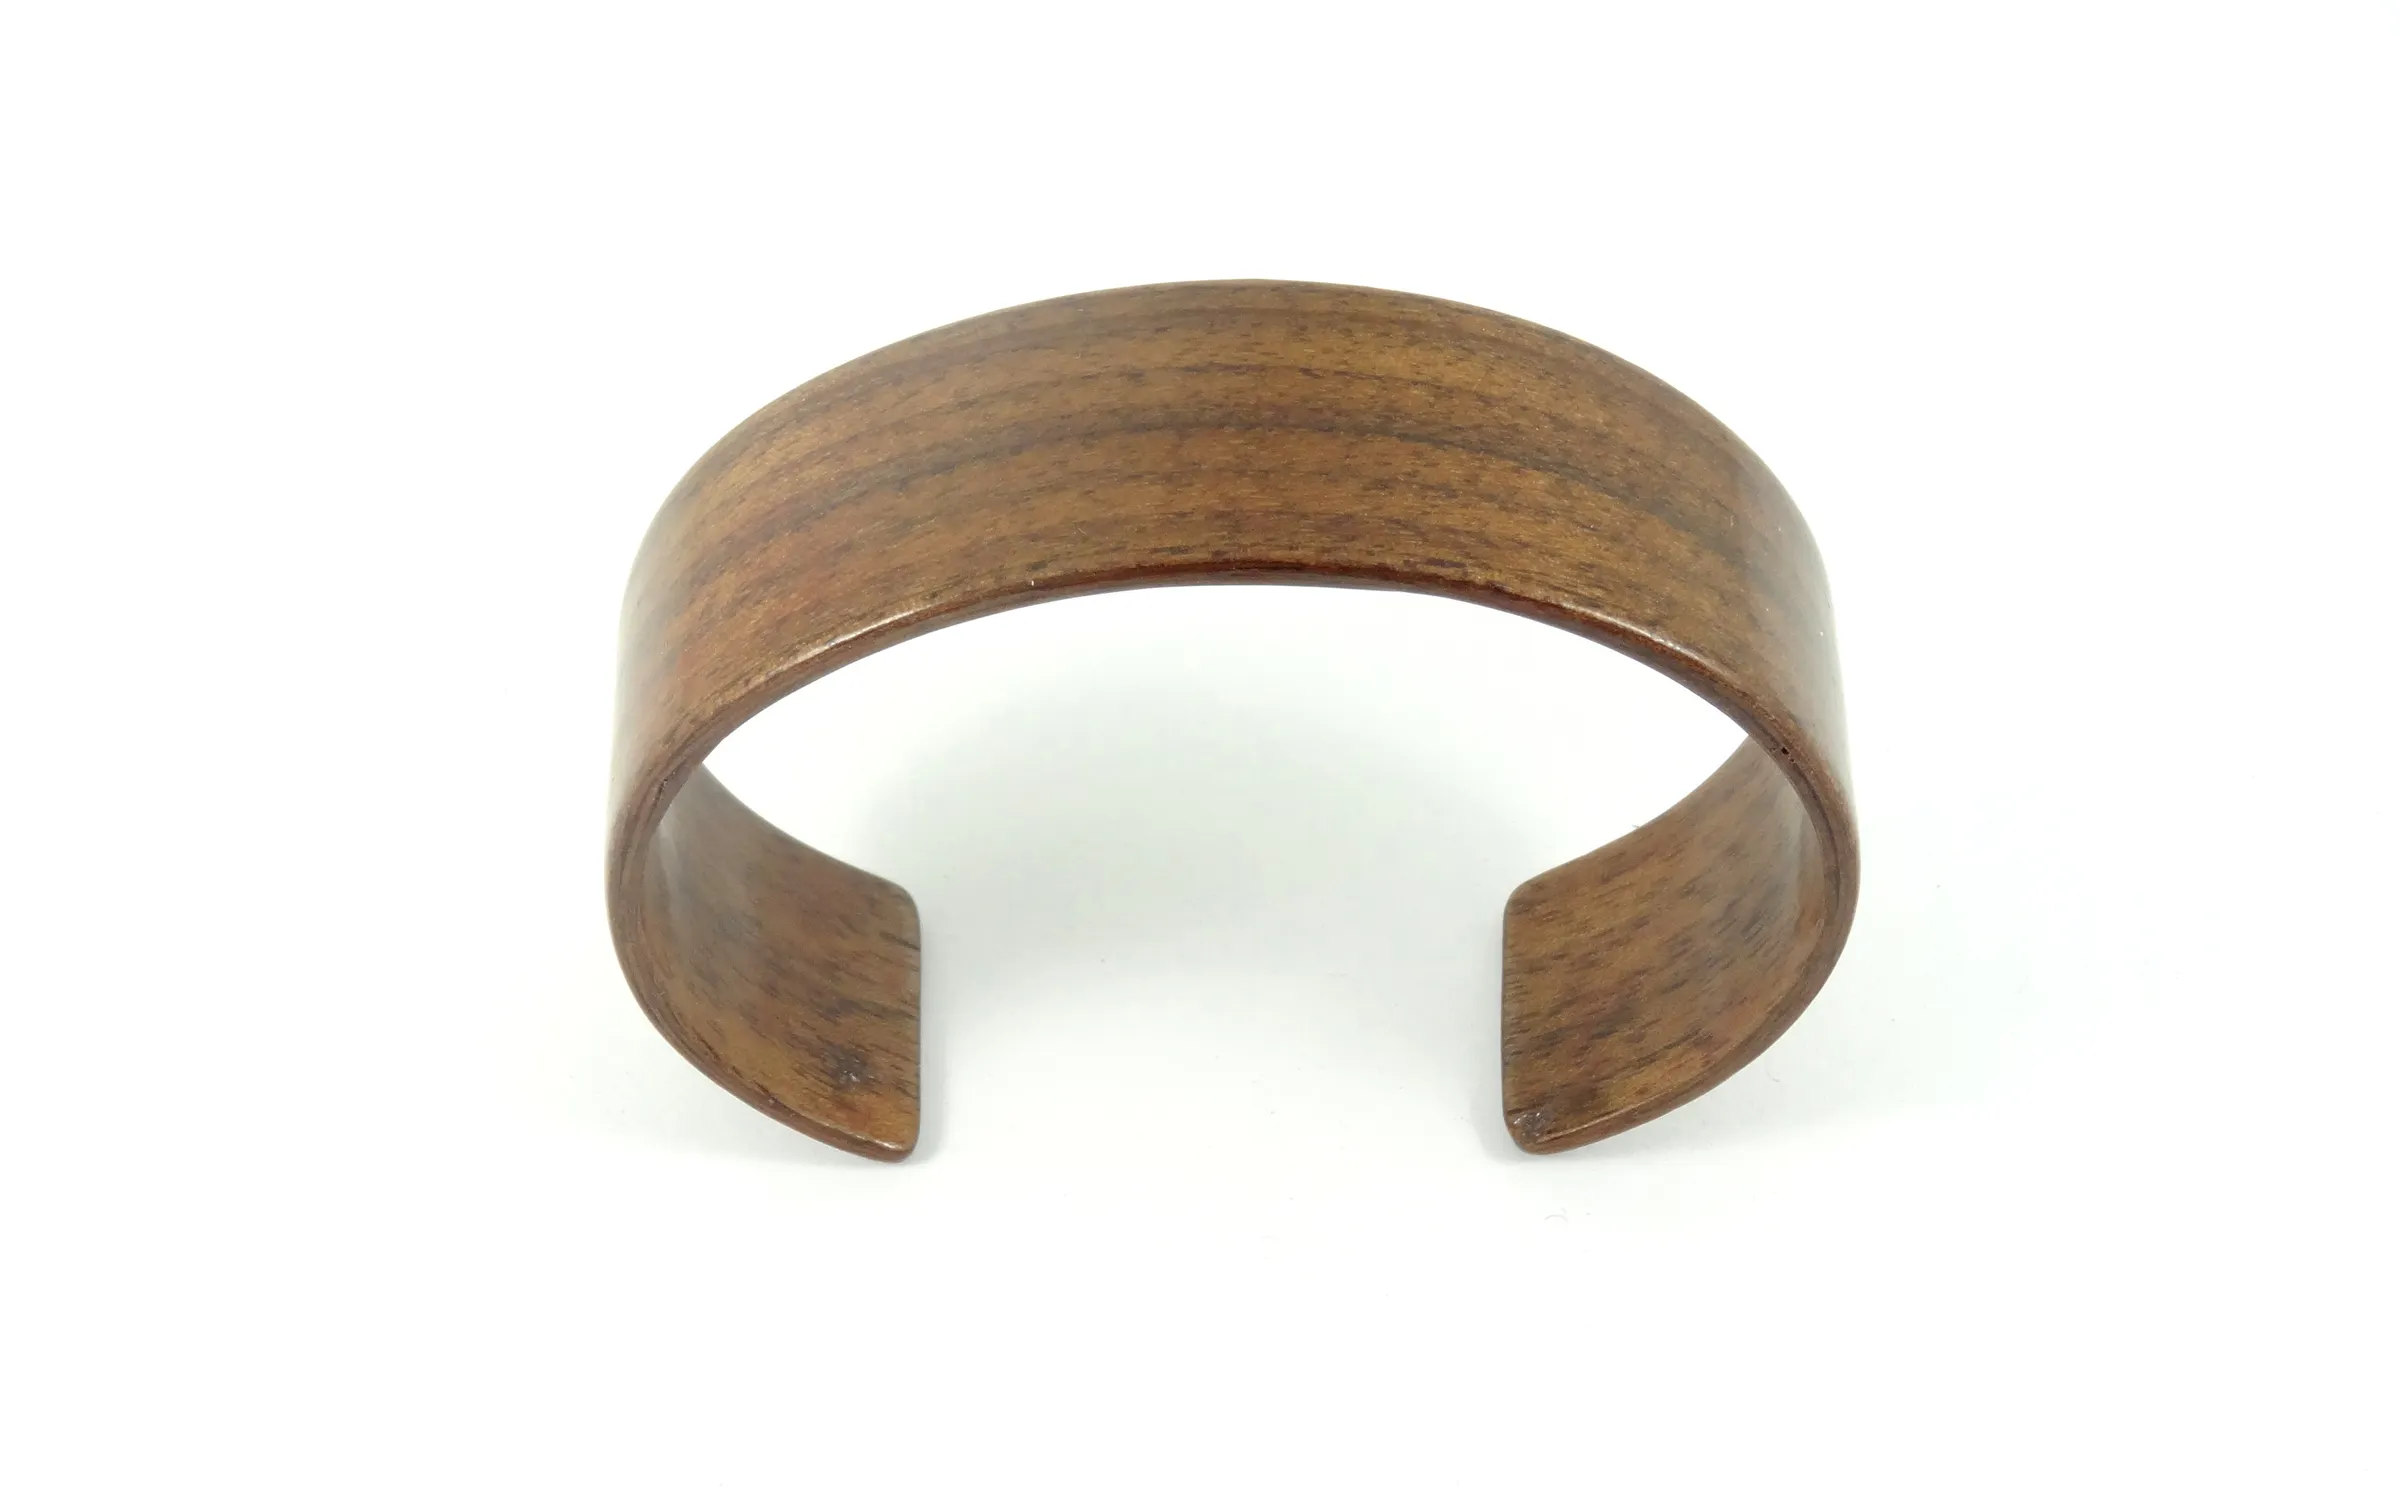
Credit : Instructables
Type: Bracelet | Difficulty: ⭐⭐ Medium | Est. Cost: $6–$12
Cut a strip of thin, flexible wood veneer to cuff width, soak it briefly in warm water to make it pliable, then curve it gently around a jar or bottle to dry in shape. Once dry, use a wood burning pen or small carving tool to engrave a meaningful word, a simple pattern, or a geometric border. Seal with a light varnish to lock in the design. The result is a statement piece that genuinely looks like artisan-crafted jewelry.
#4 Boho Wooden Tassel Earrings

Credit : amazon
Type: Earrings | Difficulty: ⭐ Easy | Est. Cost: $4–$8
Cut a small rectangular or oval piece of wood, sand smooth, and use a wood burning pen to add a simple design — a moon, a leaf, a tiny mandala. Then attach several strands of thin cord or embroidery thread to the bottom edge, knotting them through small drilled holes to create a tassel effect. The mix of wood and soft fiber is a texture combination that always looks intentional and on-trend. Lightweight, boho, and endlessly wearable.
#3 Secret Wood & Resin Ring
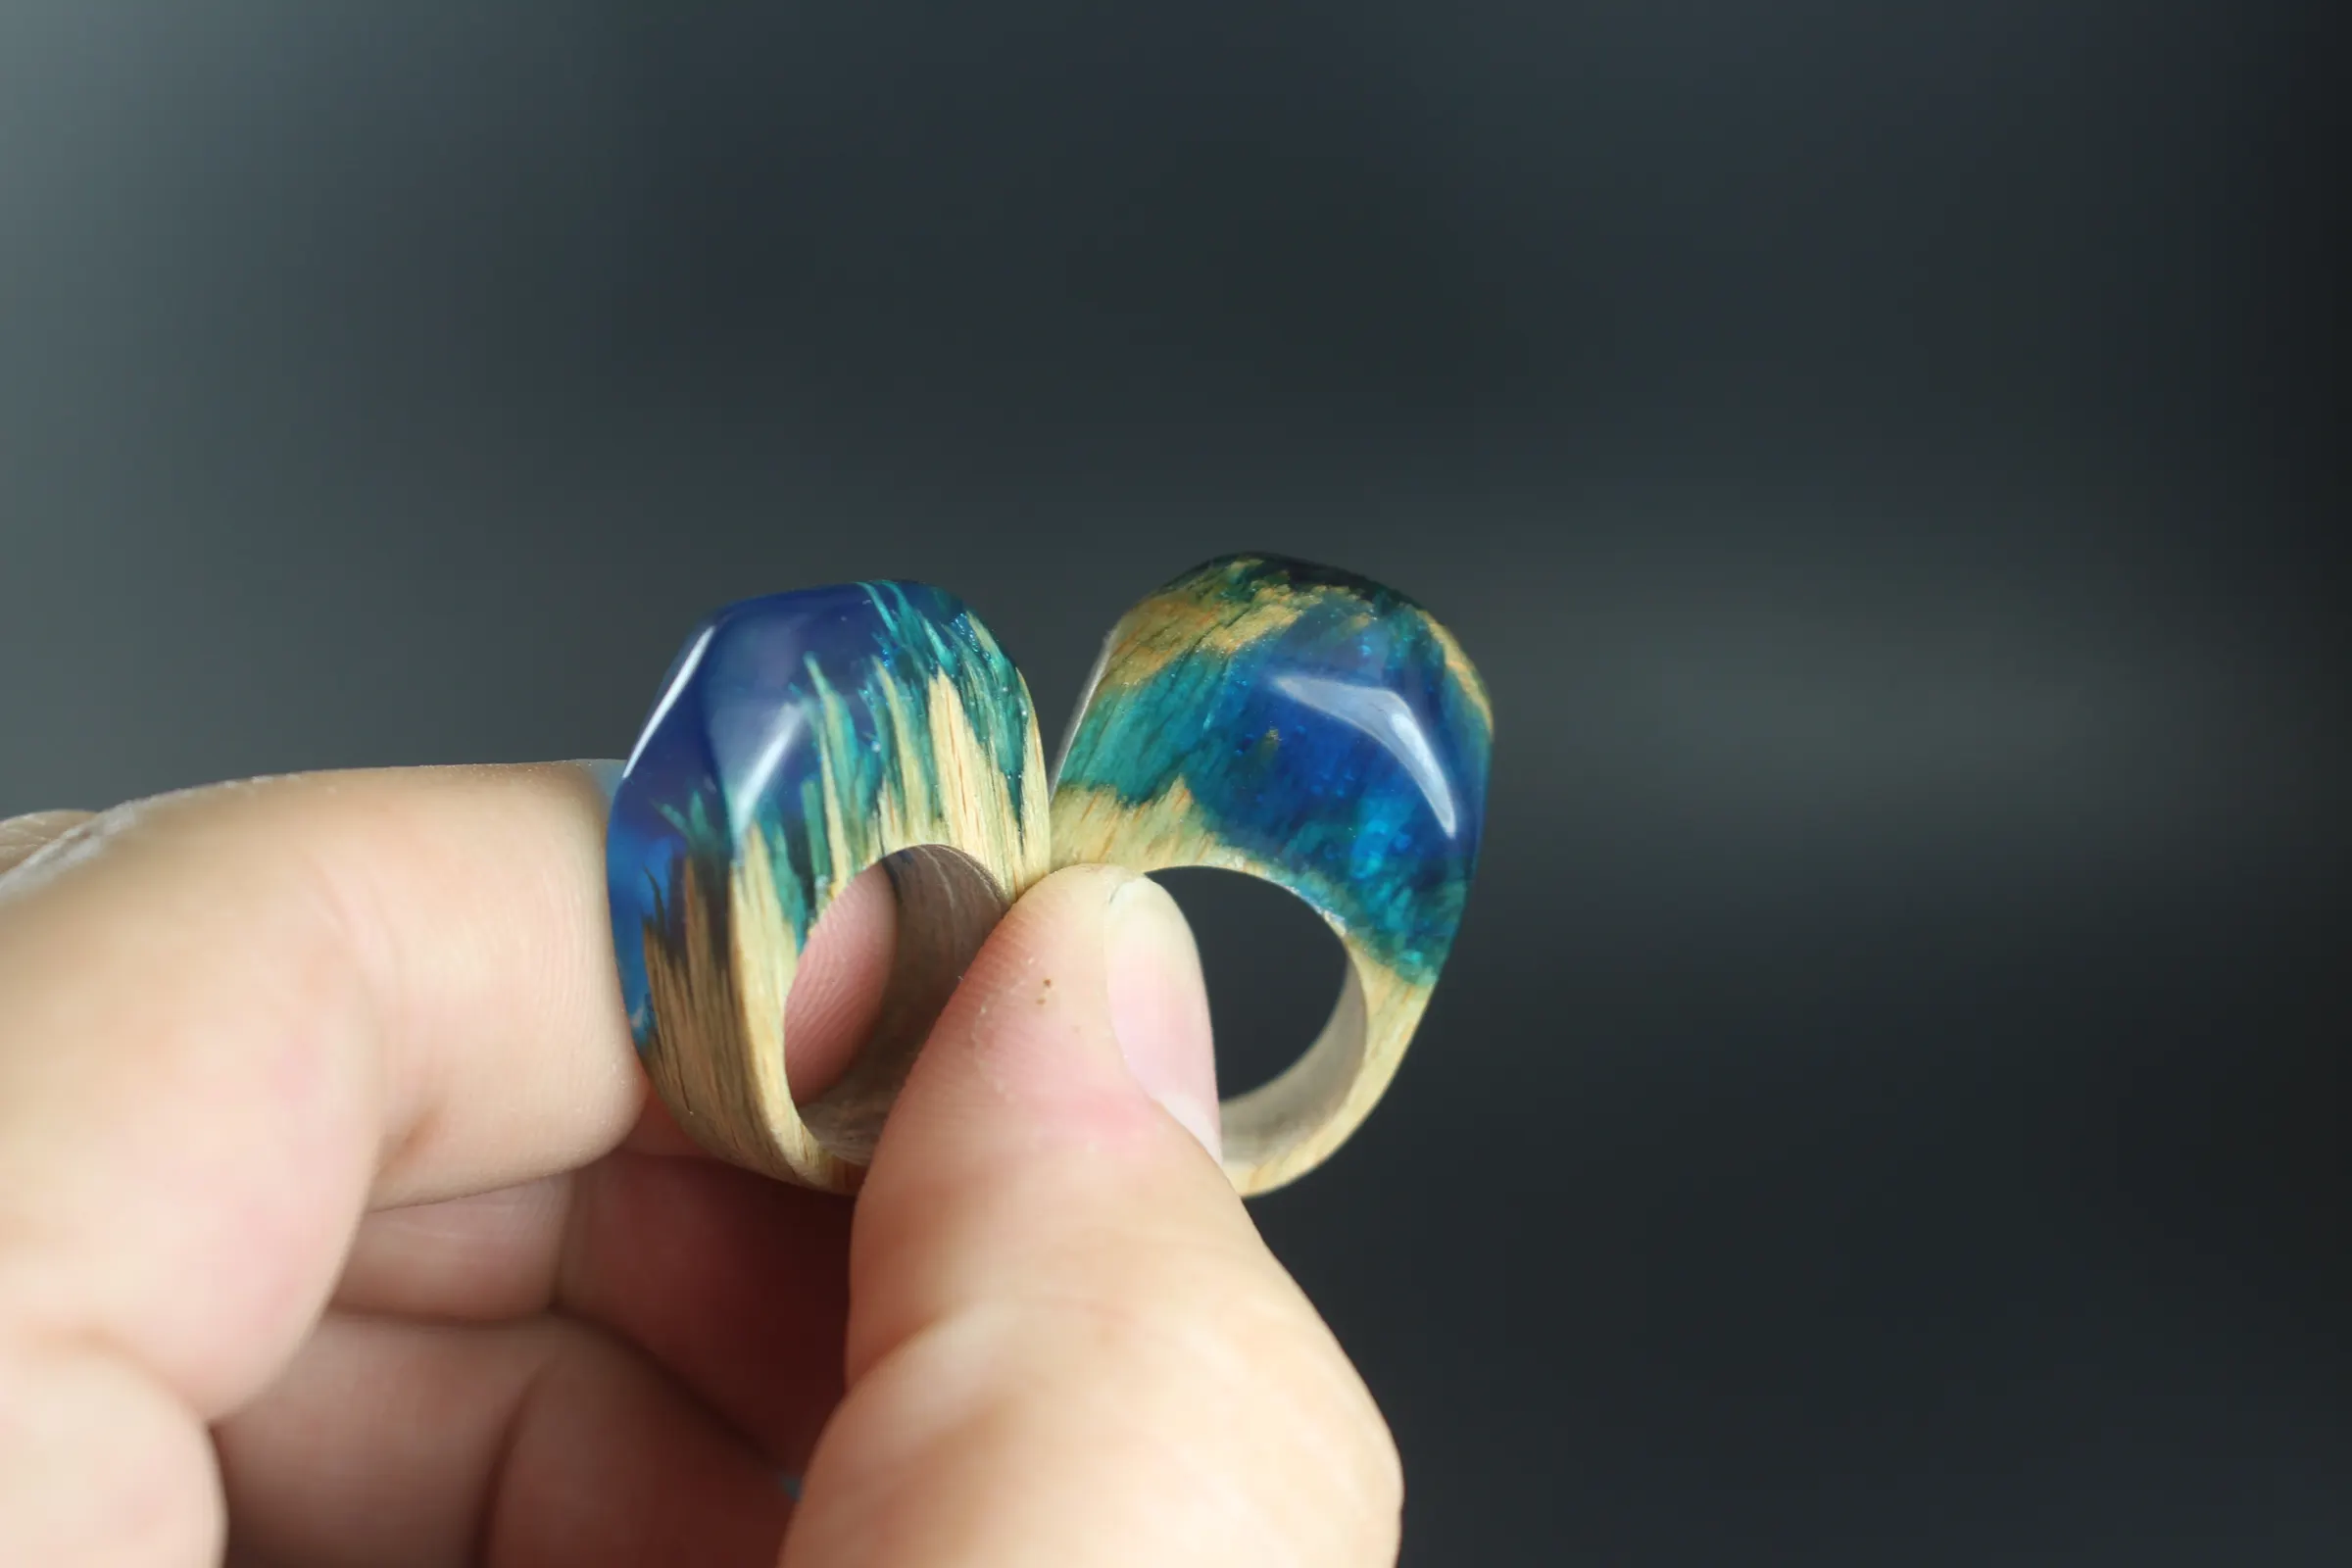
Type: Ring | Difficulty: ⭐⭐⭐ Advanced | Est. Cost: $10–$18
This is the one that stops people mid-scroll every single time — and yes, you can actually make it yourself. The concept is genius: you snap a small piece of wood in half, fill the gap with clear epoxy or UV resin, let it cure, then sand and shape the whole thing into a wearable ring. The result is a ring that looks like a tiny frozen landscape trapped in glass — the kind of piece people genuinely cannot believe is handmade.
The key to that jaw-dropping finish? Sand through every grit from 240 all the way up to 1200, then seal with a coat of resin or buff with polishing compound for a crystal-clear, glassy surface. Once fully cured, soak the ring in mineral oil or coconut oil to protect the wood from moisture. It takes a little more patience than the other projects on this list — but when you hold the finished piece in your hand, you’ll understand exactly why this wooden jewelry project has taken Pinterest completely by storm.
14. Wood & Copper Cuff Bracelet
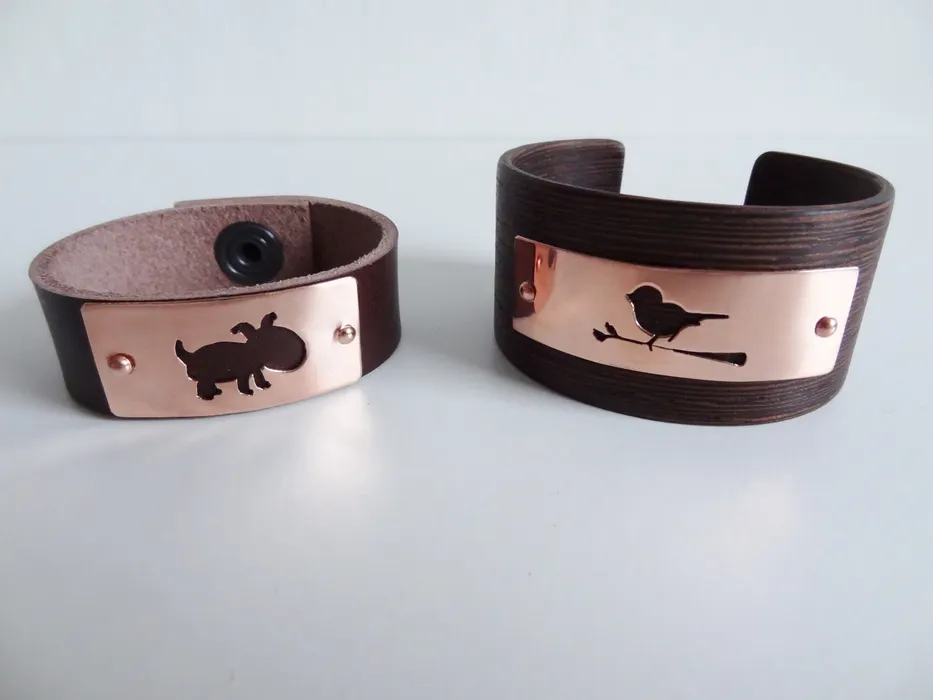
Credit : Instructables
Type: Bracelet | Difficulty: ⭐⭐⭐ Advanced | Est. Cost: $12–$20
If you’ve ever looked at a piece of wooden jewelry and thought “good, but it needs something more” — meet your new favorite project. Thin wood veneer gets bent into a cuff shape, then a hand-shaped copper plate gets riveted right on top for a mixed-material statement piece that looks like it came straight out of an artisan boutique. The contrast between warm wood and cool copper is what makes this one stop people mid-conversation. After each wear, just wipe it down with a soft cloth to keep that copper shine looking fresh.
15. Primitive Handmade Wooden Beads
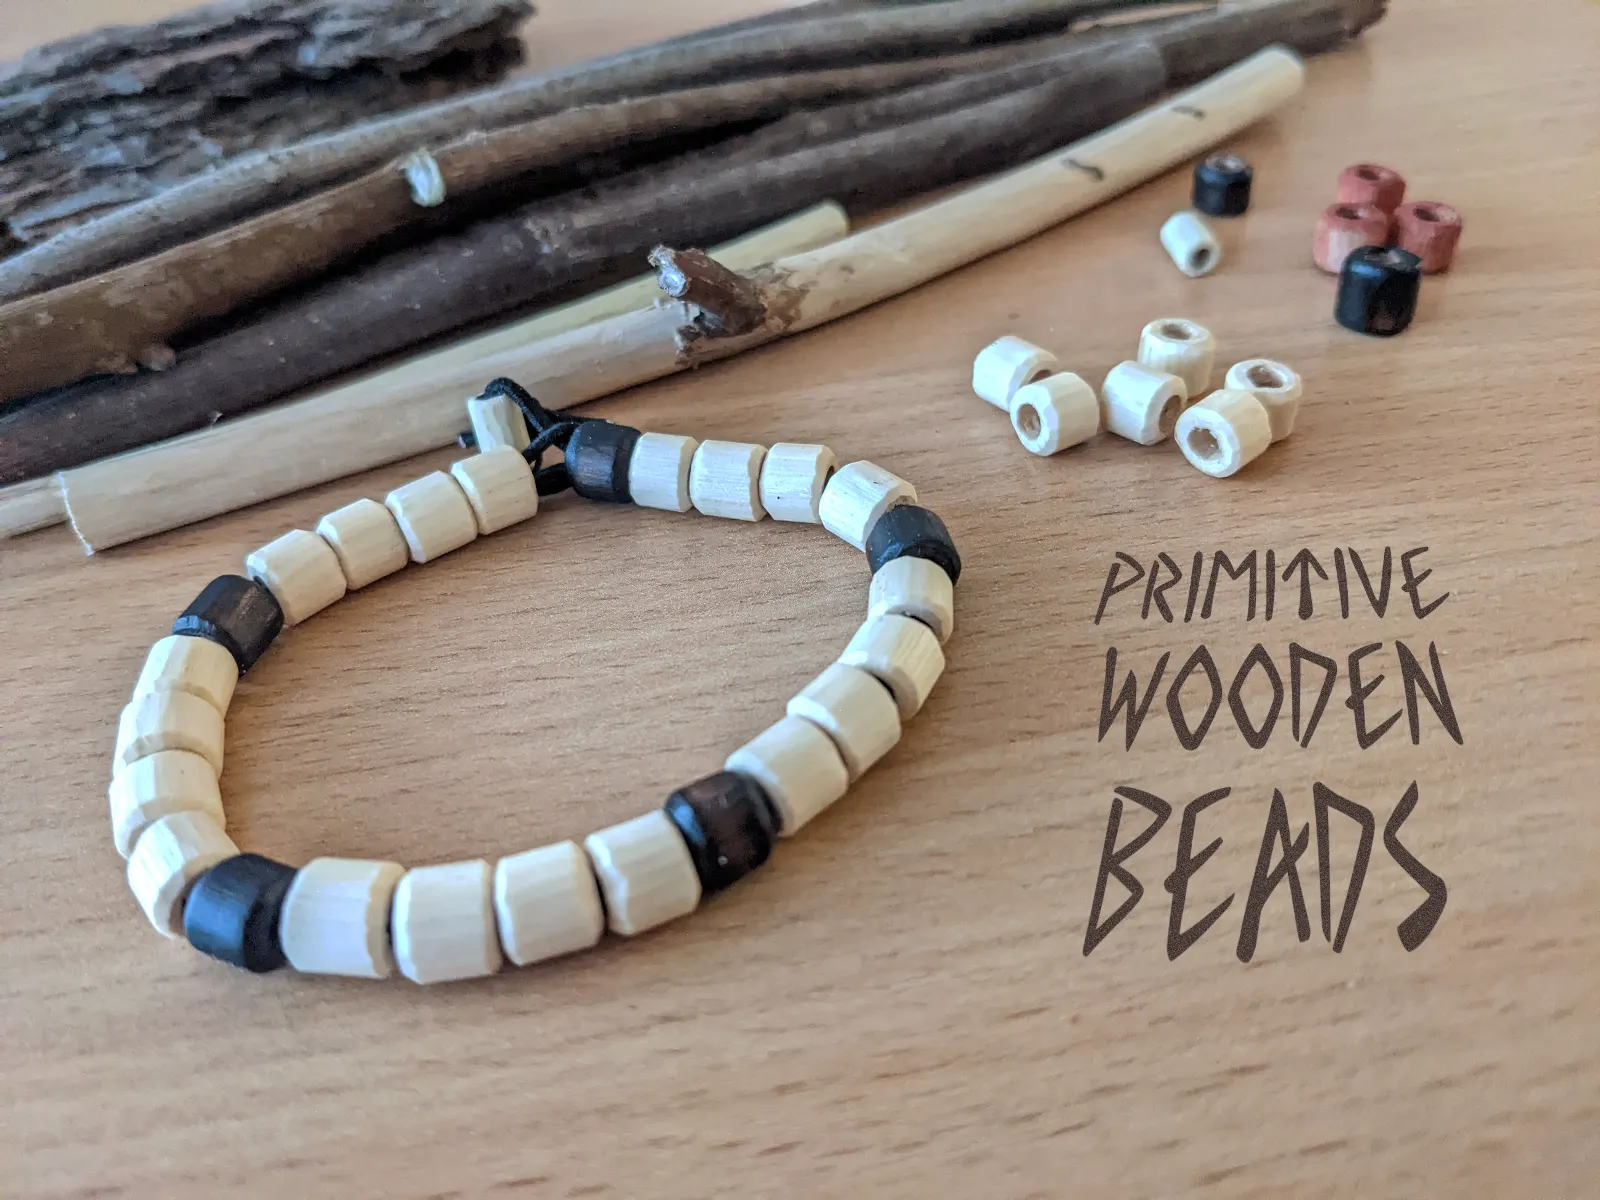
Credit : Instructables
Type: Necklace / Bracelet | Difficulty: ⭐⭐ Medium | Est. Cost: $0–$5
This one is for the crafters who look at a fallen tree branch and think “I could make jewelry out of that” — and you’d be absolutely right. The idea is beautifully simple: cut a fresh branch into small sections, drill a hole through the center of each piece, then sand and shape them into rustic, one-of-a-kind beads. No two beads come out identical, which is exactly what makes this wooden jewelry so special. String them onto jute twine or leather cord for a necklace or bracelet that looks entirely handcrafted — because it genuinely is, right down to the raw material.
Tips to Make Your Wooden Jewelry Look High-End
Here’s the part that makes the difference between “cute DIY attempt” and “wait, did you seriously make that yourself?” It’s all in the finishing.
- Sand obsessively: In jewelry, smoothness is everything. Rough edges on a necklace pendant feel homemade. Glass-smooth edges feel boutique. Start with 80 grit, finish with 220 grit, and don’t skip this step
- Seal every single piece: Unsealed wood absorbs moisture, stains from skin contact, and loses its finish quickly. A thin coat of beeswax, varnish, or resin protects the piece and adds a beautiful sheen
- Choose a consistent color palette: Stick to two or three stain shades across your pieces if you’re making a collection. Cohesion makes everything look more intentional and professional
- Mix materials deliberately: Wood plus leather, wood plus macramé, wood plus metal findings — these texture combinations are what designers charge a premium for. Use them freely
- Keep shapes clean and simple: The most expensive-looking wooden jewelry tends to be the most geometric and minimal. Resist the urge to overdo it — restraint is a design skill
- Photograph on neutral backgrounds: White marble contact paper, a linen cloth, or a natural wood surface makes wooden jewelry pop in photos. Lighting matters more than anything else if you plan to sell
Can You Actually Sell Your Wooden Jewelry?
Short answer: absolutely yes — and it moves faster than you’d think.
Wooden jewelry is one of the strongest-performing categories on Etsy right now. Wood burned earrings, geometric pendants, and bead necklaces consistently appear in bestseller lists. And the math is genuinely exciting — when your materials cost $4 and you sell the finished piece for $28, those margins add up quickly.
Craft fairs and local markets are another goldmine. Wooden jewelry photographs beautifully for an Instagram shop, too, if you want to build a following around your craft.
If you’re thinking about turning this hobby into actual income, start here: 👉 25 Small Wood Projects You Can Sell as a Beginner — real, sellable ideas with realistic income potential for complete beginners.
Ready to think even bigger? 👉 32 Profitable Woodworking Projects to Build & Sell from Your Home Workshop — for when you’re serious about building a woodworking income stream from home.
Take Your Wooden Jewelry Skills Even Further
Here’s what happens with wooden jewelry — IMO, it’s the gateway craft. You make one pair of earrings. Then a necklace. Then you’re eyeing that corner of your garage wondering if it could become a little workshop. Sound familiar? 🙂
The skills you build making wooden jewelry — precise cutting, smooth sanding, clean finishing — translate directly into bigger, more ambitious woodworking projects. And the creative confidence you build? That carries everywhere.
When you’re ready to expand beyond jewelry: 👉 20 Simple Woodworking Projects For Beginners — the perfect natural progression once you’ve nailed these 12 pieces.
And if you want to bring that same budget-friendly, high-impact magic into your home décor: 👉 15 Little Wood Projects That Look Expensive But Cost Almost Nothing — same energy, bigger scale.
🌟 The Resource That Took My Wooden Jewelry — and Everything Else — to a Whole New Level
Let me tell you about the moment my woodworking hobby stopped being a casual weekend thing and became something I genuinely couldn’t stop thinking about.
I’d made a few jewelry pieces. People loved them. I wanted more ideas, more plans, more detailed instructions — but every time I searched online, I got half-finished tutorials with vague measurements, missing steps, and zero materials lists. It was maddening.
That’s when I found Ted’s Woodworking Plans — and genuinely, I wish I’d found it on day one.
Ted’s is a library of over 16,000 step-by-step woodworking plans covering everything from tiny jewelry projects to full furniture builds. Every single plan comes with:
- ✅ A complete materials list — know exactly what to buy before you start, no surprises
- ✅ Step-by-step instructions written for real beginners, not experienced carpenters
- ✅ Detailed diagrams and precise measurements — zero guesswork, zero wasted wood
- ✅ Tool tips and finishing advice built into every plan
- ✅ Plans organized by skill level — start simple, grow at your own pace
Whether you want to keep making wooden jewelry, expand into home décor projects, or eventually build and sell from a home workshop — Ted’s has a plan for every single stage of that journey.
No more vague YouTube tutorials. No more estimating measurements. No more wasted materials because the instructions skipped three steps. Just clear, reliable plans that actually work.
If these wooden jewelry projects have sparked something real in you — and I have a feeling they have — then Ted’s Woodworking Plans is the most valuable next step you can take.
👉 Click here to explore Ted’s Woodworking Plans and see what you could build next →
Disclosure: This post contains affiliate links. If you purchase through my link, I may earn a small commission at no extra cost to you. I only ever recommend things I genuinely use and love.
Pick One Wooden Jewelry Project and Start This Weekend
Here’s the truth about wooden jewelry: the hardest part is starting. Once you make your first piece — even a simple bead bracelet — something clicks. You sand it smooth, seal it, hold it in your hand, and think: I made that. And then you immediately want to make five more.
Pick ONE project from this list and commit to it this weekend. My personal recommendation for absolute beginners? The Wooden Bead Statement Necklace. No cutting, no drilling, no burning — just beads, cord, and your own eye for color. You’ll have a finished piece in under an hour and wonder why you waited so long to start.
Big style. Tiny budget. A whole lot of satisfaction. That’s what wooden jewelry is all about. 🪵✨
📌 Save this post to your Pinterest board so you never lose it! 💬 Drop a comment below — which wooden jewelry project are you making first? 📧 Subscribe for weekly DIY and woodworking ideas straight to your inbox!