
If you’ve ever stared at two pieces of wood and thought, “How on earth do I hold these together?”—welcome to the club. Wood joints are the backbone of every project you’ll ever build, and picking the wrong one can turn your dream shelf into a wobbly disaster. Trust me, I’ve been there.
The good news? Once you understand the basics, choosing the right joint becomes second nature. Let’s break it all down so you can stop guessing and start building with confidence.
Why Wood Joints Actually Matter
Before we get into the which, let’s talk about the why. Wood joints aren’t just about holding two pieces together—they determine how strong, how clean, and how long-lasting your project will be. A poorly chosen joint is like wearing flip-flops to a marathon: technically possible, but you’re going to regret it.
Different joints serve different purposes:
- Structural strength — Can it handle weight and stress?
- Aesthetic appeal — Will it show or stay hidden?
- Ease of assembly — Do you need a PhD in carpentry to pull it off?
- Wood movement — Does it allow for seasonal expansion and contraction?
Matching the right joint to the right situation is what separates a solid, professional build from something that falls apart in six months. And if you’re just getting started with your tool setup, check out our guide to the 16 Best Woodworking Tools for Beginners—because having the right tools makes every joint easier to cut.
The Most Common Wood Joints (And When to Use Them)
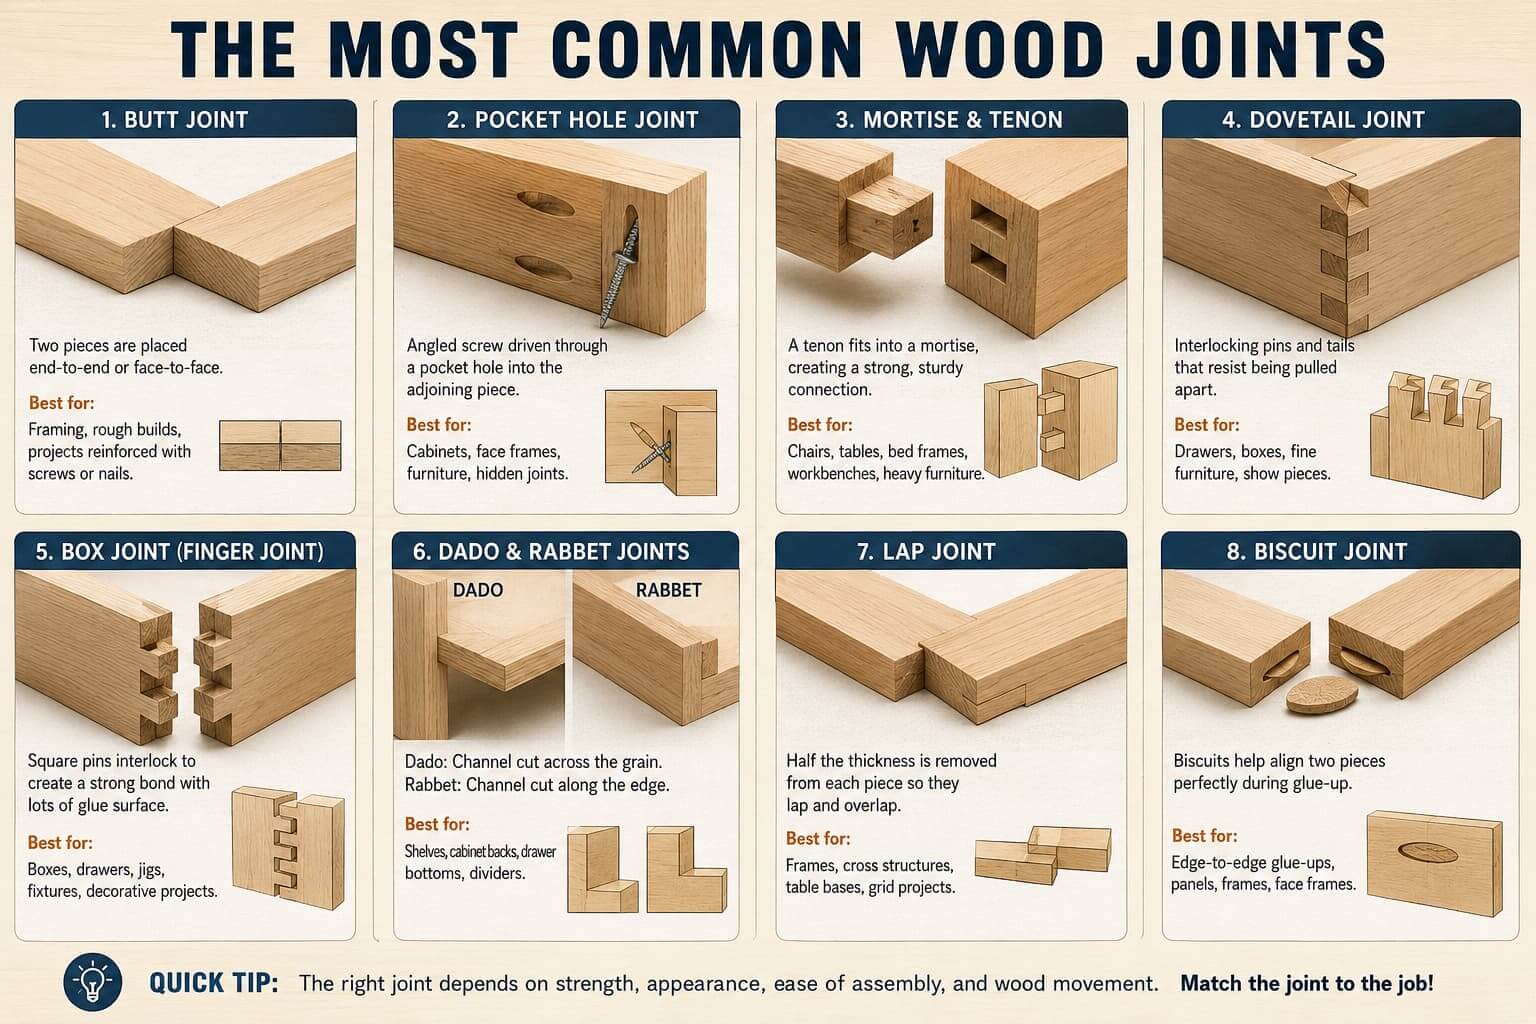
1. Butt Joint — The Simplest One of All
The butt joint is exactly what it sounds like: you butt two pieces of wood together end-to-end or end-to-face. Simple? Absolutely. Strong? Not particularly—at least not on its own.
When to use it:
- Rough framing where strength comes from fasteners, not the joint itself
- Temporary structures or quick builds
- Projects that get reinforced with screws, nails, or pocket-hole joinery
IMO, butt joints are great for beginners because they require zero specialized cuts. Add a bit of glue and some screws, and you’ve got yourself a joint that’ll hold up for light-duty work. Just don’t try to build a dining table with it and call it a day .
2. Pocket Hole Joint — The Modern Beginner’s Best Friend
If you haven’t discovered pocket hole joinery yet, prepare to have your mind blown. Using a pocket hole jig (Kreg is the gold standard here), you drill an angled hole into one piece of wood and drive a special screw through it into the adjoining piece.
Advertisement
Why woodworkers love it:
- Fast and easy — You can join two boards in under two minutes
- Surprisingly strong — Especially for face frames, cabinet boxes, and furniture
- No clamps needed in many situations
- Beginner-friendly with minimal tool investment
The pocket hole joint is perfect for furniture builds, face frames, and any project where the joint will be hidden. It’s not the sexiest joint in the woodworking world, but it gets the job done—reliably and quickly. Pair it with some well-designed plans, and you’ll be cranking out projects at a pace that’ll impress even your most skeptical friends.
3. Mortise and Tenon — The Classic King of Joints
Few joints command as much respect as the mortise and tenon. This is the joint that’s held furniture together for thousands of years—literally. Ancient Egyptians used it. And if it was good enough for them, it’s probably good enough for your workbench.
The concept is straightforward: a tenon (a projecting tongue) fits snugly into a mortise (a rectangular hole). The result is a joint that’s incredibly strong, resistant to racking, and almost impossible to pull apart once properly glued.
Best applications:
- Chair legs and rails
- Bed frames
- Workbenches and heavy furniture
- Anything that needs to withstand significant stress
The downside? Cutting a tight mortise and tenon takes skill and patience. You’ll want sharp chisels, a reliable marking gauge, and a good dose of focus. But once you nail it (pun intended), it’s deeply satisfying work.
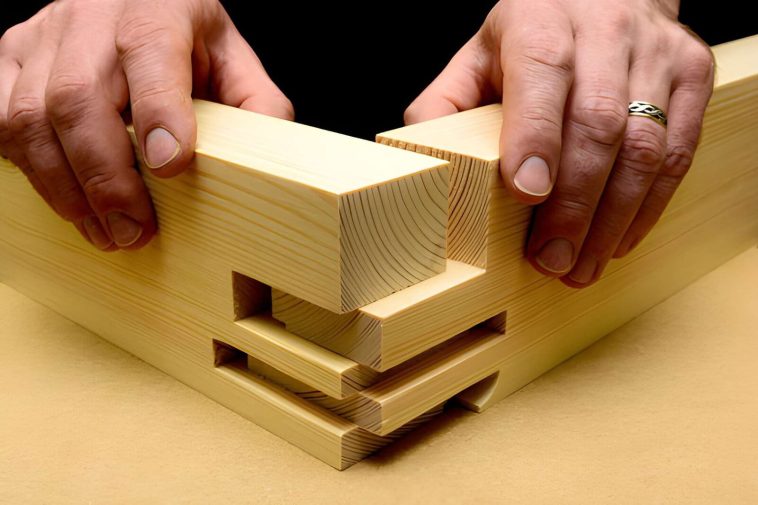
4. Dovetail Joint — The One Everyone Wants to Master
Ask any woodworker which joint they’re most proud of cutting by hand, and nine times out of ten they’ll say dovetails. The interlocking angled pins and tails create a mechanical bond so strong it laughs at tensile stress.
Dovetails aren’t just strong—they’re beautiful. A well-cut dovetail joint on a drawer front or a jewelry box is a genuine work of art. It signals craftsmanship, skill, and patience.
Types of dovetails:
- Through dovetail — Visible from both sides; great for the back of drawers
- Half-blind dovetail — Hidden from the front; used on drawer fronts
- Full-blind dovetail — Completely hidden; rare and very impressive
Hand-cutting dovetails is a rite of passage in woodworking. But if you want to speed things up, a dovetail jig and a router make the process much more accessible—speaking of which, we’ll cover routers in depth in our companion article on How to Use a Wood Router for Beginners.
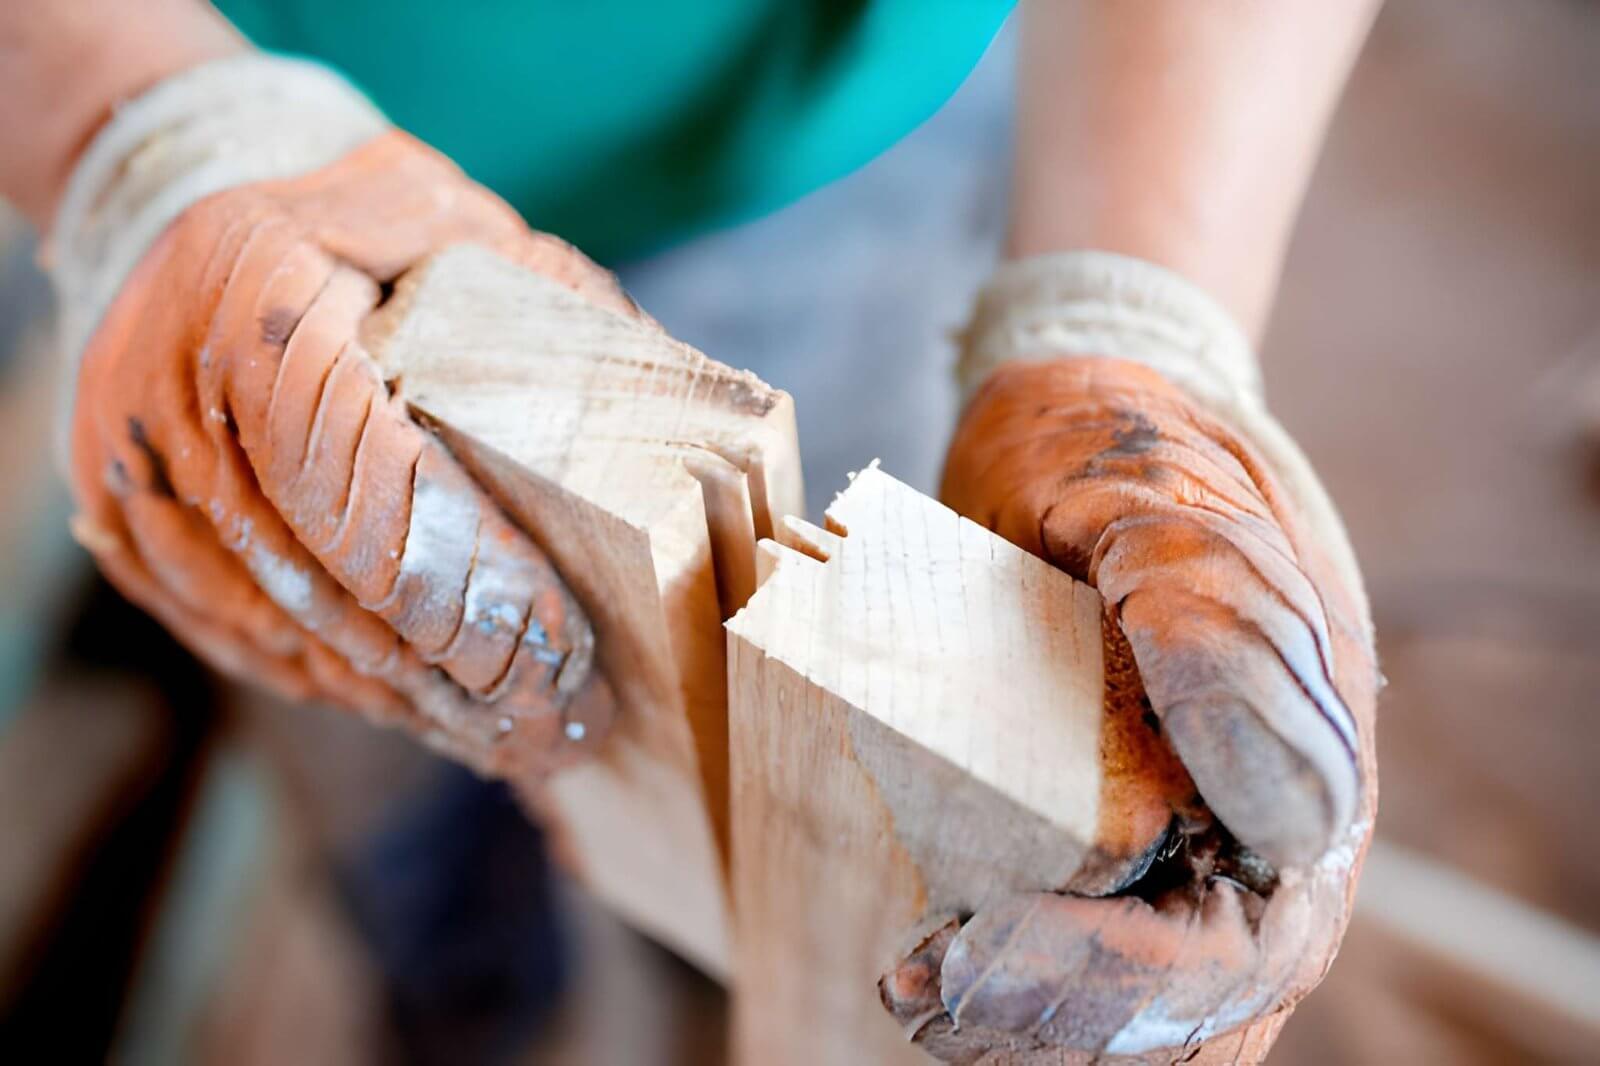
5. Box Joint (Finger Joint) — Dovetail’s Practical Cousin
Box joints look like a set of interlocking fingers—equal rectangular pins that mesh together. They don’t have the mechanical lock of a dovetail, but they offer massive glue surface area, which makes them incredibly strong when properly glued up.
When box joints shine:
- Boxes and drawers (hence the name)
- Shop jigs and fixtures
- Decorative applications where you want a clean, geometric look
The best part? You can cut box joints consistently and quickly using a simple jig on your table saw. Our guide to 10 Essential Table Saw Jigs You Can Build This Weekend includes a box joint jig that makes this process almost foolproof.
6. Dado and Rabbet Joints — The Shelf Builders’ Go-To
If you’ve ever built a bookshelf or a cabinet, you’ve probably used these joints—whether you realized it or not.
A dado is a channel cut across the grain of a board. A rabbet is a channel cut along the edge or end. Both joints are workhorses in furniture construction because they provide strong mechanical registration between parts.
Common uses:
- Shelves sitting in dado cuts in cabinet sides
- Drawer bottoms fit into rabbets
- Back panels on cabinets
- Dividers in storage units
Dado and rabbet joints are easy to cut with a router or table saw, and they provide far more strength than simply butting boards together. They’re also great for keeping everything square during assembly—a hidden benefit that saves you a ton of headache.
7. Lap Joint — Dead Simple, Surprisingly Useful
A lap joint is formed by removing half the thickness from each mating piece and overlapping them. The result is a flush, flat surface where two boards cross or meet.
Types of lap joints:
- Full lap — One piece sits entirely on top of another
- Half lap — Material is removed from both pieces for a flush fit
- Cross lap — Two boards cross in the middle (great for frames)
- End lap — Used at corners where two boards meet at 90 degrees
Lap joints are particularly useful in frame construction and woodworking projects that involve grid-like or crossed structures. They’re not going to win any awards for elegance, but they’re solid, quick to cut, and they work.
8. Biscuit Joint — The Alignment Helper
Biscuit joints use small, football-shaped pieces of compressed beech wood (biscuits) inserted into matching slots cut by a biscuit joiner. They don’t add a ton of strength on their own, but they align boards perfectly during glue-up—which is honestly their main superpower.
Best uses:
- Edge-to-edge glue-ups for tabletops and panels
- Aligning frame pieces during assembly
- Face frame construction
FYI, biscuit joints have somewhat fallen out of favor since the rise of pocket screws and dowel joinery, but they’re still a great tool in your arsenal when you need perfect alignment without a lot of fuss.
Choosing the Right Joint: A Quick Decision Guide
Feeling overwhelmed? Here’s a quick cheat sheet to make the decision easier:
| Project Type | Recommended Joint |
| Furniture frames | Mortise & Tenon or Pocket Hole |
| Drawers | Dovetail or Box Joint |
| Shelving/Cabinets | Dado or Rabbet |
| Outdoor structures | Lap Joint or Mortise & Tenon |
| Quick builds | Pocket Hole or Butt Joint |
| Show pieces | Dovetail or Through Tenon |
The trick is to think about three things: the stress the joint will face, whether aesthetics matter, and how much time you have. A weekend project for a rough shop shelf? Pocket holes all day. An heirloom blanket chest for your kid? Break out the dovetail chisels.
Making Your Joints Better With Jigs
Here’s a pro tip that’ll immediately level up your joinery game: use jigs. Jigs turn complicated, time-consuming cuts into repeatable, consistent operations that even beginners can nail on the first try.
Our article on 11 Woodworking Jigs That Will Save You Time and Effort covers some absolute essentials—including dovetail jigs, mortising jigs, and tenoning jigs that take the guesswork out of hand-fitting joints.
A good jig is worth its weight in sawdust. Seriously.
Want to Skip the Guesswork Entirely? There’s a Resource for That
Here’s something I wish I had when I was starting out: a massive library of plans that already show you exactly which joints to use, how to cut them, and in what order to assemble everything.
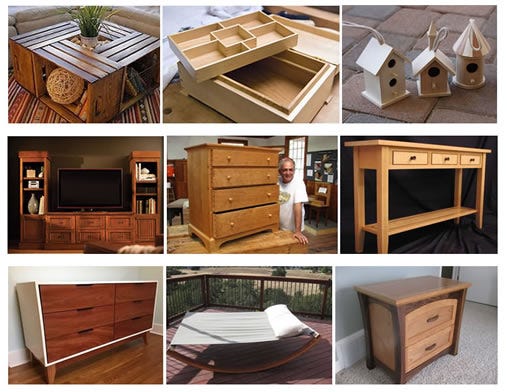
That’s what Ted’s Woodworking Plans delivers. With over 16,000 projects—from simple boxes to full bedroom sets—each plan comes with step-by-step instructions, cut lists, diagrams, and material lists. The joinery decisions are already made for you, which means you can focus on actually building instead of second-guessing yourself.
If you’ve been wanting to try more ambitious projects but keep hesitating because you’re not sure how to join everything together properly, Ted’s plans are genuinely the shortcut you’ve been looking for. It’s one of the most comprehensive woodworking resources available, and it covers projects at every skill level.
The Bottom Line on Wood Joints
Wood joints aren’t just a technical detail—they’re the foundation of everything you build. Choose the wrong joint and your project suffers. Choose the right one and your build will last a lifetime.
Here’s the core takeaway:
- Start simple — Pocket holes and butt joints are perfectly fine for most beginner projects
- Level up gradually — Work toward dado, rabbet, and lap joints as your skills grow
- Master the mortise and tenon — It opens the door to serious furniture making
- Learn dovetails — When you’re ready, nothing beats them for strength and beauty
Don’t let joint selection paralyze you. Pick something appropriate, practice it, and build the thing. That’s how every great woodworker got good. Now go make some sawdust.