
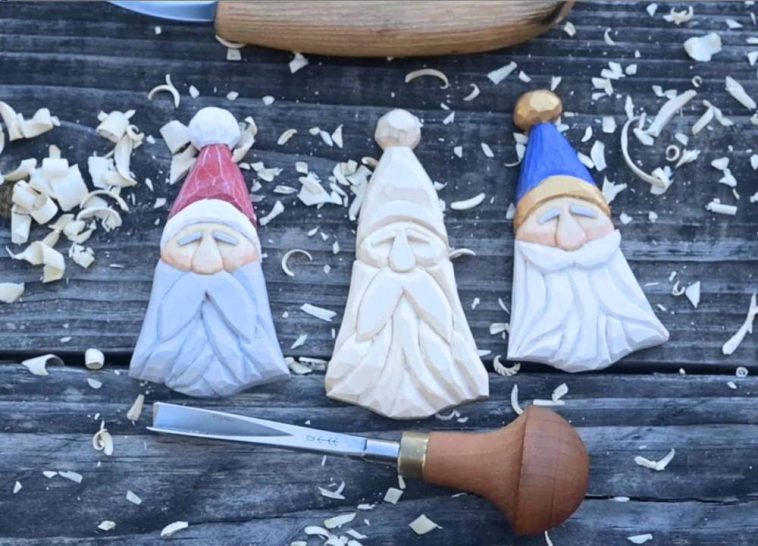
A little wooden Santa, a snowy tree or a smiling snowman can make a Christmas gift feel personal before you even wrap it. These Christmas wood carving ideas for beginners bring together 15 real projects from established carving creators, with original project photos and links to their patterns or tutorials.
You will find simple knife carvings, a flat ornament, a V-tool snowflake and a few projects to try once your basic cuts feel comfortable. Start with a design you like, check the tool list, and make one practice piece before planning a whole tree full.
Affiliate disclosure: This article includes an affiliate link to Ted’s Woodworking. If you purchase through it, we may earn a commission at no additional cost to you.
How the links work: The full instructions belong to the credited creators. Some pages provide downloadable patterns, others show measured layouts or videos. The Scandinavian Santa stencil is sold separately; its tutorial is free. Use the access notes below to choose the resource that suits you.
Which Christmas Carving Should You Try First?
Our suggested difficulty labels help you compare the projects; they are not completion-time promises. A small face can take longer than a larger tree, especially when you are learning to read the grain.
| Your goal | Try this project | Why choose it? |
|---|---|---|
| A first character carving | Classic Santa | Drawings and a full illustrated sequence |
| Something without a face | Rounded Christmas tree | Repeated branch shapes |
| A lightweight ornament | Flat Scandinavian Santa | Thin stock and shallow details |
| Practice with a V-tool | Geometric snowflake | A flat surface and line work |
| A winter bird | Red cardinal | A clear silhouette and bright finish |
| A next-step challenge | Pocket angel | Wings and smaller facial details |
For more practice before attempting the finer details, browse our small wood carving projects for beginners.
What You Need Before You Start
Most of these projects begin with basswood and a sharp carving knife. Buy clean carving blanks rather than using mystery offcuts with nails, treatment, knots or cracks. Choose the blank size from the original instructions: the body, hat and projecting details all need enough material.
- Carving knife and strop: Use tools designed for controlled carving and learn the sharpening method appropriate to your blade.
- Project-specific tools: A V-tool, small gouge or saw is needed for some designs. Check before buying a pattern or blank.
- Pencil, ruler and graphite paper: Useful for laying out the pattern and restoring lines during shaping.
- Holding and hand protection: Keep your supporting hand out of the cutting path. A cut-resistant carving glove helps but is not cut-proof. Secure flat work with a clamp or bench hook.
- Paint and brushes: A few acrylic colors are enough for many of these ornaments. Test your chosen paint and finish on scrap.
Use small, controlled cuts. If the wood tears or the blade needs excessive force, stop and check the grain, edge and cutting direction. Keep these small decorations away from young children; projecting parts and hanging hardware are not toy components.
1. A Classic Long-Bearded Santa Ornament
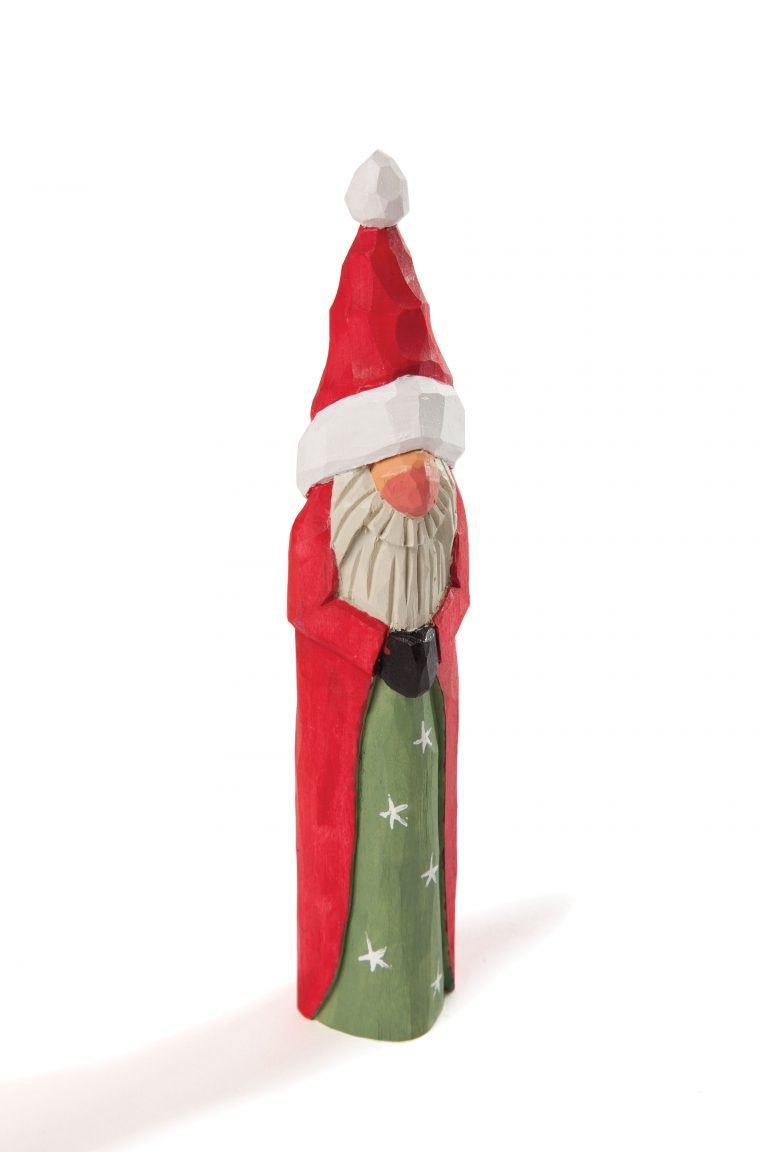
Red robes, a tall hat and a generous white beard make this a recognizable Christmas carving without realistic facial anatomy. Bob Kozakiewicz’s design is a useful starting point if you want to practice turning a square blank into a small character.
- Suggested level: Beginner.
- Tools and wood: 1 × 1 × 6-inch basswood; carving knife and small V-tool.
- Resource: Free illustrated tutorial and downloadable drawings.
The tutorial separates the hat trim, nose, beard and arms before adding texture. The 3 mm V-tool is used for the beard and mustache, so check your tool kit before choosing this one.
Before you carve: Keep the first beard fairly bold. A few clean grooves will read better than a crowded patch of shallow scratches. Try one ornament before preparing a whole gift batch.
See the simple santa ornament pattern or tutorial →
2. A Rounded Christmas Tree from a Basswood Egg
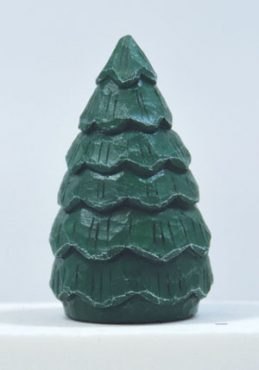
This little tree by Lori Dickie has a rounded silhouette and layered branches. It is a good alternative to character carving when you would rather work on repeated shapes than noses and cheeks.
- Suggested level: Beginner with a shaped blank.
- Tools and wood: Small turned basswood Santa egg, knife and micro V-tool; woodburner used in source.
- Resource: Free web instructions and a linked tree-pattern PDF.
The source starts with a turned Santa blank measuring approximately 1¾ × 3⅝ inches. It also explains how to begin with rectangular wood. The ready-shaped blank reduces the initial shaping, but it is an extra item to source.
Before you carve: Check the branch spacing before deepening the grooves. Leave enough wood between tiers to keep their edges strong. The original finish uses green paint with white highlights for a snowy effect.
See the quick and cute christmas tree pattern or tutorial →
3. A Stack of Three Smiling Snowmen
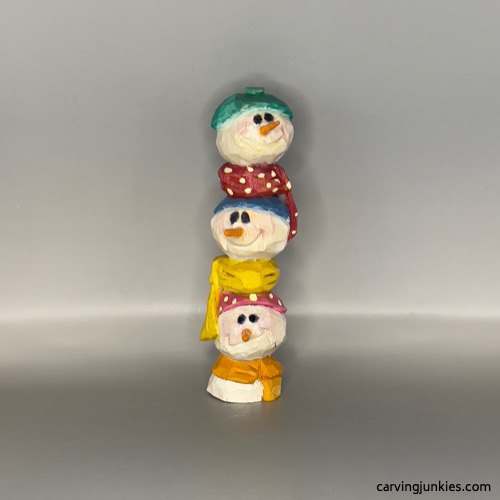
Three snowman faces stacked into one carving give you a small winter decoration with plenty of personality. Different hat and scarf colors help each face stand out without requiring three separate figures.
- Suggested level: Beginner.
- Tools and wood: 1 × 1 × 4-inch wood block, carving knife, pencil and acrylic paint.
- Resource: Free measured-layout photo tutorial and painting guide.
Carving Junkies shows the layout from several sides and follows it with progress photos. Small gouges are optional for details; the source offers painted noses as a simpler alternative to separate projecting noses.
Before you carve: For your first version, use painted noses and uncomplicated smiles. That lets you concentrate on separating the rounded faces and scarves. This one works nicely as a shelf decoration beside a larger Christmas display.
See the stacked snowman pattern or tutorial →
4. Flat Scandinavian-Inspired Santa Ornaments
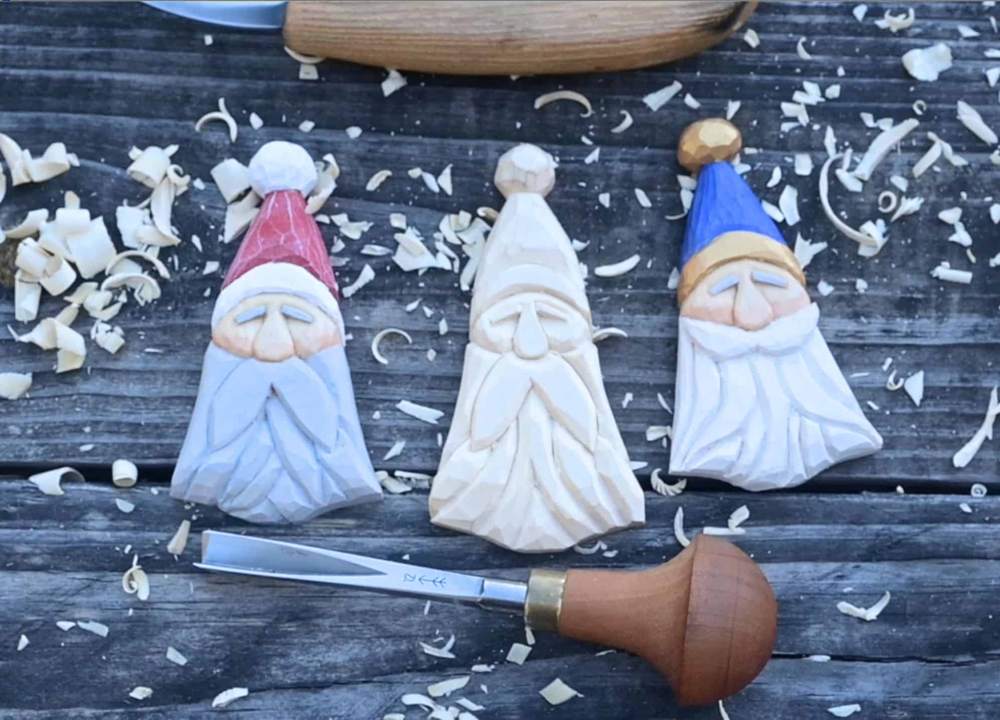
These flat Santas offer a different look from a full three-dimensional figure. The long beard, simple hat and shallow facial details make a lightweight ornament with a clear silhouette.
- Suggested level: Beginner; careful work on thin stock.
- Tools and wood: Thin basswood, carving knife, V-tool and optional coping saw.
- Resource: Free written and video tutorial; matching stencil set is sold separately.
The Artisan Life demonstrates versions on approximately ¼-inch-thick wood. Its tutorial is free to read and watch, but the linked stencil set is a separate paid product. You can review the process before deciding whether to buy it.
Before you carve: Support the thin blank while working and avoid squeezing the hat tip. For a coordinated set, repeat one outline and change the hat color. Let a few intentional knife facets remain rather than sanding away every sign of carving.
See the scandinavian santa pattern or tutorial →
5. A Trio of Mini Christmas Trees
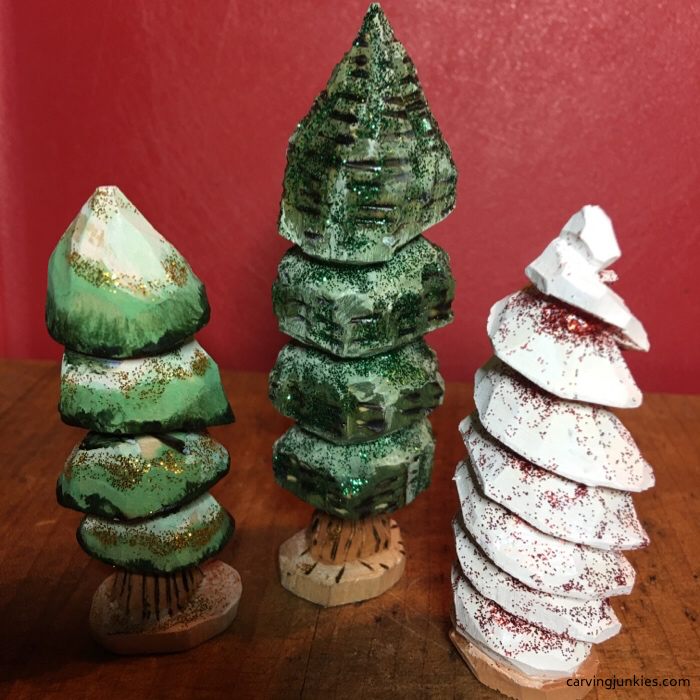
This source gives you three tree variations in one place: a spiral style, a textured tree and a mushroom-like layered tree. They make a small tabletop forest without repeating the same shape fifteen times.
- Suggested level: Beginner; textured version needs extra control.
- Tools and wood: 1-inch-square basswood blocks, 3 or 4 inches tall; knife; optional U-gouge.
- Resource: Free tutorials, three pattern images and painting guidance.
Carving Junkies supplies the individual layouts and shows the trees with built-in bases. A U-gouge is used for texture on one version, with a knife alternative discussed in the instructions.
Before you carve: Choose one design for the first session, then try the others with the same paint palette. Keep the base wide enough for a stable display. A small group looks especially good on a narrow shelf or beside wrapped gifts.
See the three mini christmas trees pattern or tutorial →
6. A Gnome Wearing a Christmas Tree Hat
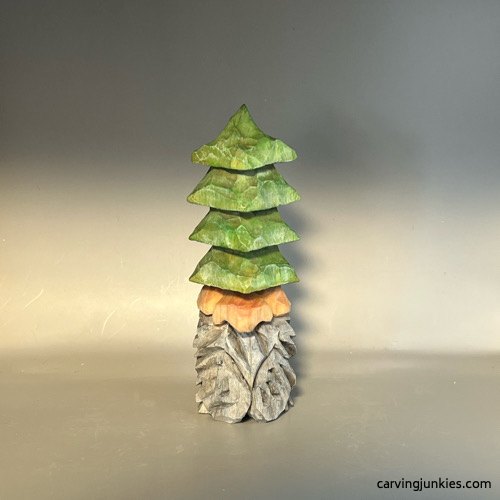
A tiered tree hat turns a familiar bearded gnome into a Christmas decoration. The oversized nose gives the carving a clear focal point, while the hat offers practice in repeating cuts around a block.
- Suggested level: Beginner with some nose-carving practice.
- Tools and wood: 1 × 1 × 4-inch basswood block and knife; optional small U-gouge.
- Resource: Free photo tutorial, pattern image and painting guide.
The source shows how to preserve wood for the nose before shaping the surrounding areas. It also explains alternatives if you do not have the gouge used for the nostrils.
Before you carve: Draw the hat tiers all the way around before starting. Check the profile often so the nose does not become too thin while you shape the beard. Keep the paint scheme simple: green hat, pale beard and a warm nose are enough.
See the tree-hat gnome pattern or tutorial →
7. Lora Irish’s “Oh So Easy” Santa
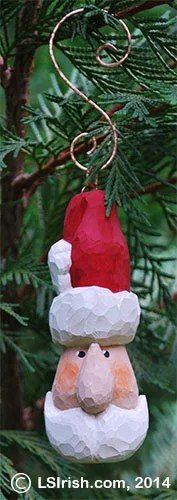
This compact Santa face makes a traditional hanging ornament. Its broad nose and simple white beard are appealing if you prefer a short character carving over a figure with separate arms and feet.
- Suggested level: Beginner.
- Tools and wood: 1 × 1 × 4-inch basswood, bench knife and V-gouge.
- Resource: Free pattern image and supplies guide; not a full photo walkthrough.
Lora S. Irish provides the pattern and a supplies list on the original page. This is primarily a pattern resource, so it suits someone who already understands basic shaping and stop cuts. Choose one of the detailed photo tutorials here if you need every stage demonstrated.
Before you carve: Use the pattern to plan the proportions before carving. Keep the nose chunky on your first attempt and compare the face from both sides. Add the hanger only where the finished piece has enough sound wood to support it.
See the oh so easy santa pattern or tutorial →
8. A Snowflake Carved into a Flat Wooden Surface
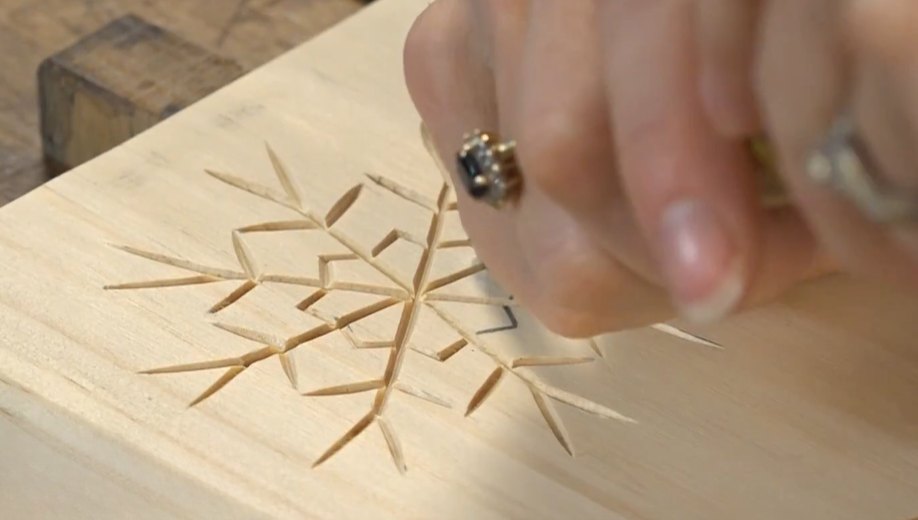
A geometric snowflake gives you a Christmas project without carving a whole figure. The design is made from grooves in a flat surface, which also makes it useful for a decorative plaque or box lid.
- Suggested level: Beginner with a V-tool.
- Tools and wood: Flat wood blank, V-tool, pencil and a secure holding setup.
- Resource: Free video tutorial linked from Schaaf Tools; no separate printable promised.
Schaaf Tools links a dedicated snowflake-carving video from its holiday project guide. This is a V-tool project rather than a knife-only whittle; follow the linked demonstration for the cut sequence.
Before you carve: Draw a large practice snowflake on scrap first. Keep the lines shallow and work toward consistent grooves before attempting a smaller ornament. If you use a round hanging blank, leave a clear border around the design and the hanger hole.
See the geometric snowflake pattern or tutorial →
9. A Corner-Block Santa with a Measured Layout
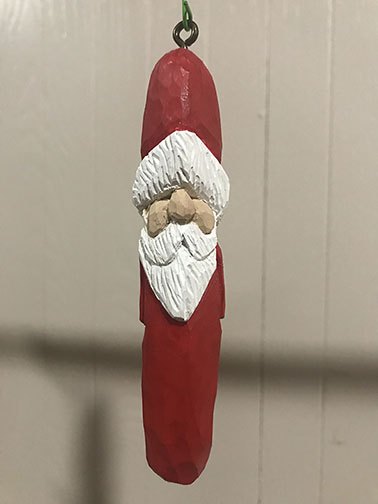
This Santa from Basswood Carving is useful if you like clear measurements before making the first cut. The face is positioned on a corner of the block, giving the nose room to project.
- Suggested level: Beginner.
- Tools and wood: 1 × 1 × 5-inch basswood blank, knife and painting supplies.
- Resource: Free measurements, downloadable pattern, progress photos and video link.
The source provides marked positions for the hat trim, nose and beard, plus a downloadable pattern and a video. It is a separate design from the longer Santa in idea #1, with its own proportions and cape details.
Before you carve: Carry the hat-band guidelines around the block before removing wood. Redraw them whenever they disappear during shaping. Focus on a balanced hat and a readable face first; beard texture can wait until the main shapes work together.
See the corner-block santa pattern or tutorial →
10. A Christmas Tree Character with an Oversized Nose
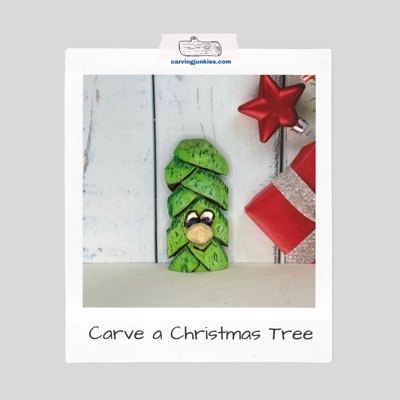
This tree has a face, and that small change makes it a fun alternative to ordinary miniature Christmas trees. The broad nose and layered green shape are deliberately playful.
- Suggested level: Beginner with basic stop cuts.
- Tools and wood: 1 × 1 × 3-inch basswood block and carving knife.
- Resource: Free photo tutorial, pattern image and painting guide.
Carving Junkies demonstrates the carving from a small basswood block. A woodburner is used to accent some details, but the instructions discuss paint as an alternative, so it does not have to be an extra purchase.
Before you carve: Reserve more wood for the nose than you think you need. You can reduce it later, while replacing a missing nose is much harder. Keep the first tree compact and give it a flat base if you want it to stand on a shelf.
See the nosy christmas tree pattern or tutorial →
11. Peppermint-Colored Christmas Carolers
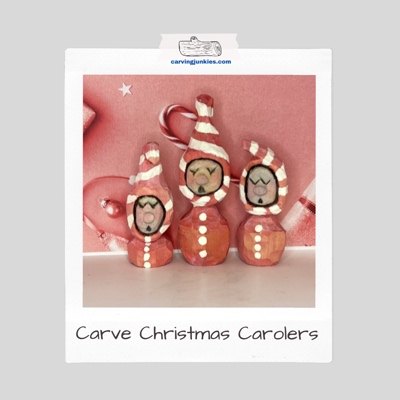
A little group of singing carolers brings a different subject to a holiday shelf. The open mouths and rounded hats make them recognizable, while the peppermint-inspired colors tie the group together.
- Suggested level: Beginner with some character-carving practice.
- Tools and wood: 1 × 1 × 4-inch basswood for the largest shown figure; knife and acrylics.
- Resource: Free measured-layout photo tutorial and painting guide.
The tutorial shows the construction from a block and includes several views of the developing figure. It uses woodburning to emphasize some lines, with dark paint suggested as another way to create contrast.
Before you carve: Start with one caroler at the tutorial’s size. Once you understand the face, vary the hat and height for a small group. Paint stripes after the base coat has dried, using pencil guides if keeping the spacing even feels difficult.
See the christmas caroler pattern or tutorial →
12. A Red Cardinal on a Branch
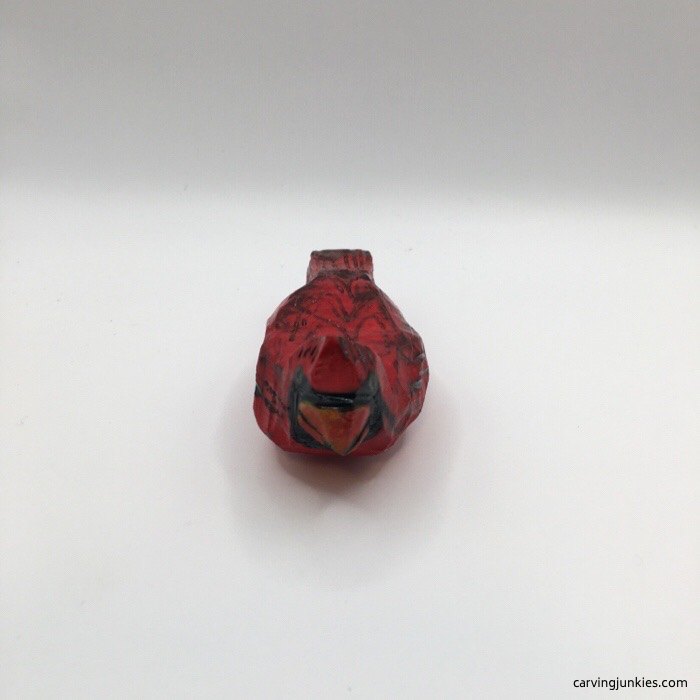
A red cardinal adds a nature-inspired piece to your Christmas decorations. It also gives you a break from carving beards and hats while keeping a strong winter color palette.
- Suggested level: Beginner; take care around the beak.
- Tools and wood: 1 × 1 × 3-inch basswood, knife and optional branch display base.
- Resource: Free pattern, photo tutorial and painting guide.
Carving Junkies provides a bird outline to trace onto the block and shows the shape from multiple angles. The finished bird is displayed on a real branch. Woodburning can add feather lines, but the basic form is carved with a knife.
Before you carve: Keep the beak short and supported while shaping the head. Concentrate on the back, chest and tail silhouette before adding feather marks. For a broader collection after Christmas, explore our beginner animal carving ideas.
See the red cardinal pattern or tutorial →
13. A Small Pocket Angel
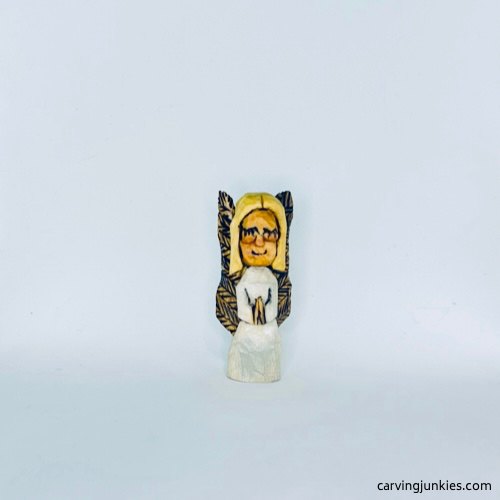
An angel with folded hands makes a thoughtful handmade keepsake. The dress keeps the body simple, while the wings and face offer a chance to develop finer control.
- Suggested level: Confident beginner; delicate wing work.
- Tools and wood: 1 × 1 × 3-inch basswood block, knife and optional detail tools.
- Resource: Free pattern, detailed photo tutorial and painting guide.
The creator labels this project as having some challenges. Separating the tops of the wings takes patience, and the source offers several ways to add feather details, including leaving the wings plain.
Before you carve: Keep this for after a tree or Santa if you are new to carving. Leave the wings thicker than the final appearance suggests until the surrounding shaping is finished. A plain wing and a simple painted face can still produce a lovely result.
See the pocket angel pattern or tutorial →
14. A Vintage-Style Snowman on Ice Skates
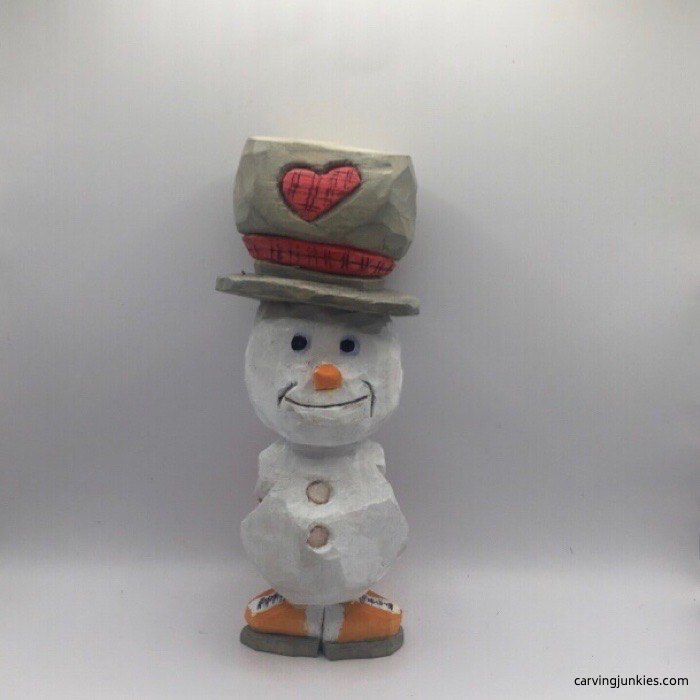
A tilted hat and old-fashioned skates give this snowman a nostalgic look. It is a more involved project than the stacked snowmen because the hat is carved separately and attached afterward.
- Suggested level: Confident beginner; multi-piece assembly.
- Tools and wood: Basswood for body and separate hat, knives, U-gouge and glue.
- Resource: Free illustrated tutorial, pattern image and painting guide.
The source includes extensive progress photos and an optional magnetic display feature. You can keep the first version as a stationary decoration instead of adding that feature.
Before you carve: Treat the skates and carrot nose as the delicate parts. Leave their final shaping until the broader body cuts are complete. Dry-fit the hat before painting so you can adjust its angle without damaging a finished surface. Follow the source for blank selection and assembly.
See the snowman on ice skates pattern or tutorial →
15. Santa Stuck Upside Down in a Chimney
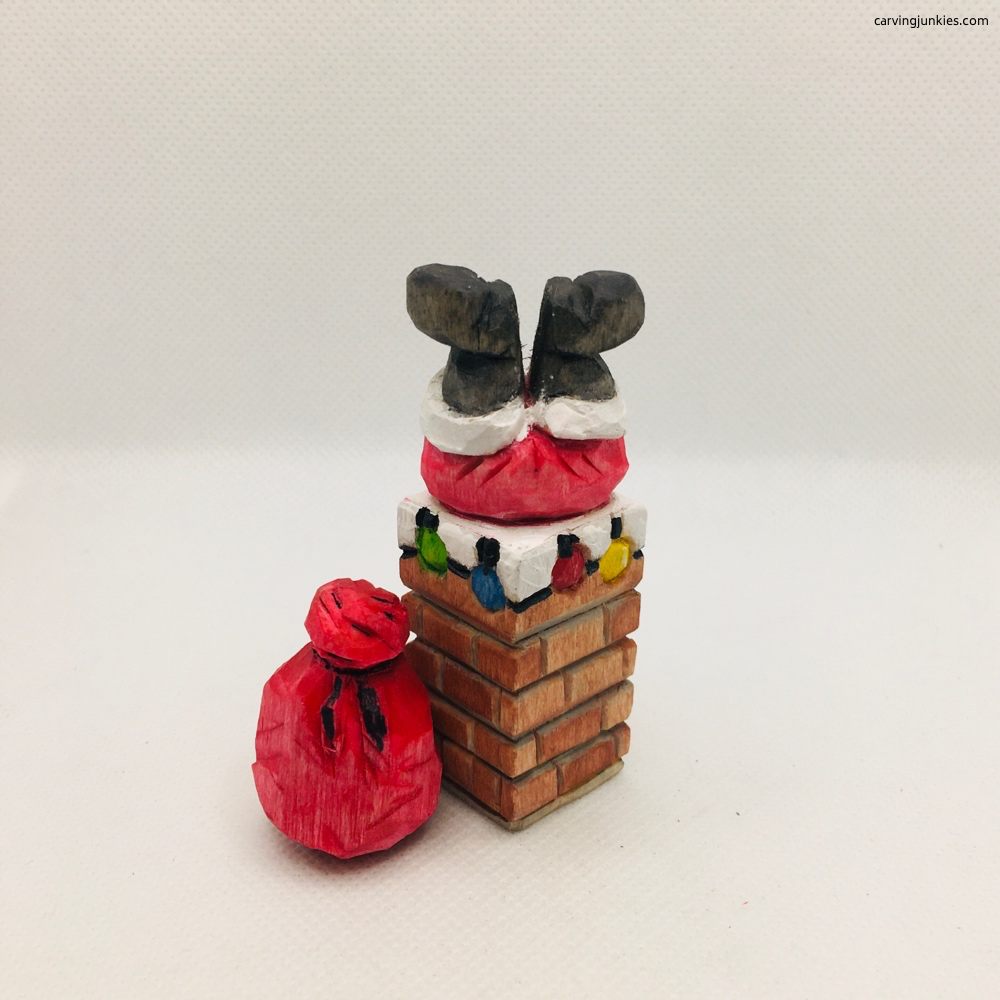
Santa’s boots sticking out of a chimney make a humorous final project for this list. The brickwork and tiny lights create interest without requiring a carved face.
- Suggested level: Confident beginner; detailed finish.
- Tools and wood: Approximately 1 × 1 × 3-inch basswood, knife and painting supplies.
- Resource: Free step-by-step photos and drawn layout; optional separate sack.
Carving Junkies marks this design as having some challenges. The repeated brick cuts and separation between the legs demand more control than a plain tree, making it a good project to attempt after a simpler ornament.
Before you carve: Keep the boot shapes sturdy while defining the chimney. Work gradually on the gap between the legs rather than forcing the blade. The optional gift sack is a separate addition; omit it on the first version if you want to concentrate on the main carving.
See the santa stuck in the chimney pattern or tutorial →
How to Use Christmas Wood Carving Patterns
Match the pattern to the blank
Download or view the pattern on the creator’s page. Check whether it specifies a print scale. If you resize a design, allow enough thickness for noses, wings and other projections; enlarging a front outline alone does not establish the correct depth.
Trace the outline with graphite paper, or draw the measured layout described in the tutorial. Add centerlines and carry height marks around the blank when instructed. Mark waste areas lightly so you can distinguish them from features you need to preserve.
Shape the outline before chasing tiny details
Follow the original project’s sequence. Recheck the front and side views as you remove wood, and redraw important guidelines before they disappear. Get the tree silhouette, Santa profile or bird shape working before investing time in texture.
Keep your first version close to the source dimensions. Reducing a design can make the cuts harder, especially around a face. If you need more ideas for using a template, see our beginner wood carving patterns.
Painting and Hanging Your Finished Carvings
Brush away chips and remove loose fibers before painting. Test a thin coat on scrap and check how it behaves in carved grooves. Let each color dry before adding adjacent details, and use a fine brush for eyes, buttons and narrow hat bands.
Paint can simplify a beginner project. A painted nose or feather line may give you the expression you want without carving a fragile projection. If your source demonstrates woodburning and you want to try it, read our wood burning beginner’s guide first and use it only on suitable unfinished wood.
Choose a finish compatible with the paint and the intended indoor display. Follow its ventilation, drying and curing instructions. Test a hanger on a practice piece: position the hardware in sound wood, use an appropriately sized pilot hole when needed, and avoid drilling into a thin hat tip.
Turn One Finished Carving into a Thoughtful Gift
A single carefully finished ornament can be enough. Add a ribbon and a small tag with the year, or group three trees in a simple gift box. For several recipients, repeat a design you have already finished successfully and vary the colors.
If you want to sell finished carvings, check each creator’s terms before using the pattern commercially. Free access does not automatically include resale rights or permission to redistribute the drawings. Keep the original pattern and photo credits with your project notes.
For gifts that combine carving with other woodworking skills, explore our useful wooden Christmas gifts and scrap wood Christmas projects.
Want to Explore More Woodworking After Christmas?
Small carvings are a satisfying place to begin. When you are ready to try projects such as shelves, boxes or furniture, a broader plan collection may help you explore what to build next.
Take a look at Ted’s Woodworking plans collection →
Review the current offer and sample information to decide whether it suits your tools and interests. The Christmas patterns linked above come from their credited creators; they are separate from this affiliate offer.
Christmas Wood Carving FAQs
What is a good first Christmas wood carving?
A simple tree is a useful choice if you want to avoid facial details. If you prefer a character, choose a Santa with a clear illustrated sequence, such as idea #1 or #9. Pick a design that matches the tools you already know how to use.
Do all these projects include free printable patterns?
No. Several provide free pattern images or linked PDFs; others teach through measured layouts, photos or a video. The resource note for each idea explains what is available. The Scandinavian Santa tutorial links to a paid stencil set.
Can I carve these Christmas decorations with one knife?
Several Carving Junkies projects demonstrate mainly knife work, sometimes with optional tools. Others specifically use a V-tool or gouge. The snowflake is a V-tool project. Read the source tool list rather than assuming one knife covers every idea.
How long should I allow for a beginner carving?
Give yourself more time than a creator’s estimate, especially for your first face or thin ornament. Work in comfortable sessions and allow additional time for painting, drying and finishing before you gift or hang the piece.
Choose one project, prepare the right blank and follow the original tutorial at your own pace. A finished carving with a few visible knife marks can have more charm than an ambitious design left unfinished.