
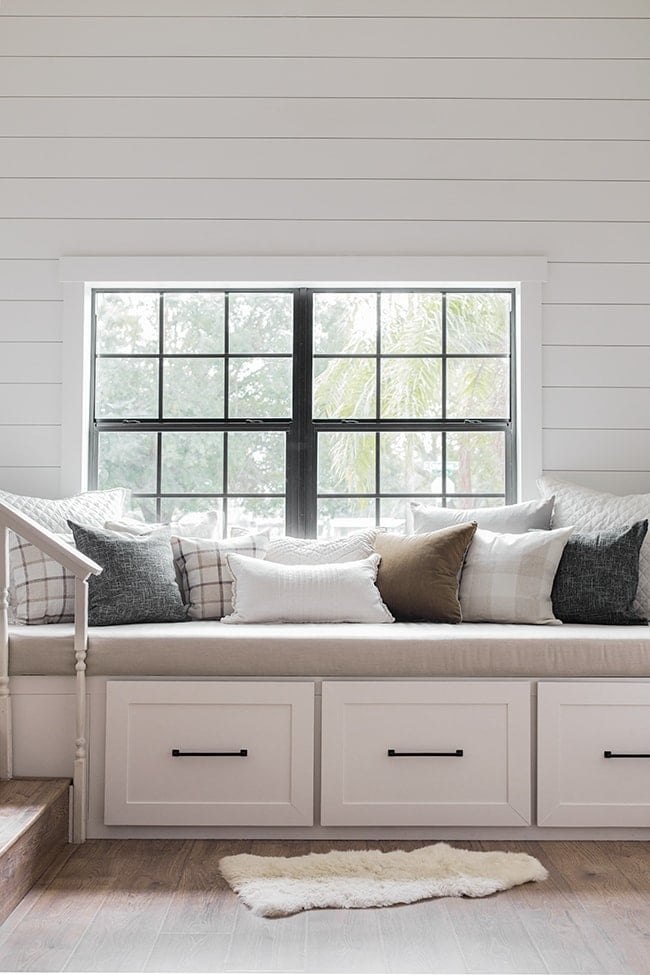
These DIY reading nook bench ideas turn an empty window wall, spare closet or quiet alcove into somewhere you will actually want to sit. Add a supportive cushion, a place for books and decent reading light, and even a small corner can become useful.
Below are 15 real woodworking projects with their original project photos and links to the creators’ plans or tutorials. Some were built specifically for reading; others are window seats or storage benches you can adapt for your own nook.
Affiliate disclosure: This article includes an affiliate link to Ted’s Woodworking. If you buy through it, we may earn a commission at no extra cost to you.
Which Reading Nook Bench Should You Build?
| Your space or priority | Projects to compare | Main decision |
|---|---|---|
| Open book storage | 1. Plywood cubbies, 6. Bookcase bench | Size shelves around your books or baskets |
| A bay window | 2. Angled bench | Measure the real corner angles |
| Hidden storage | 3. Lift-up compartments, 5. Wood flip top | Decide how often the cushion must move |
| A spare closet | 8. Framed closet seat, 9. Scrap-wood book nook | Check the opening and support structure |
| A movable seat | 10. Mini daybed, 13. Upholstered bench | Choose a size that fits the room and cushion |
| Drawers or a full library wall | 4, 11, 12, 15 | Allow room for drawers to open |
About the plans: Each entry identifies what is available: a free web tutorial, a downloadable plan or a paid printable option. Measurements describe the original builds, not a universal cut list. Skill levels are our editorial estimates. A bench carries people, so retain the source’s structural supports when adapting a design.
1. One-Sheet Plywood Window Bench with Book Cubbies
Best for: Open storage beneath a long window.
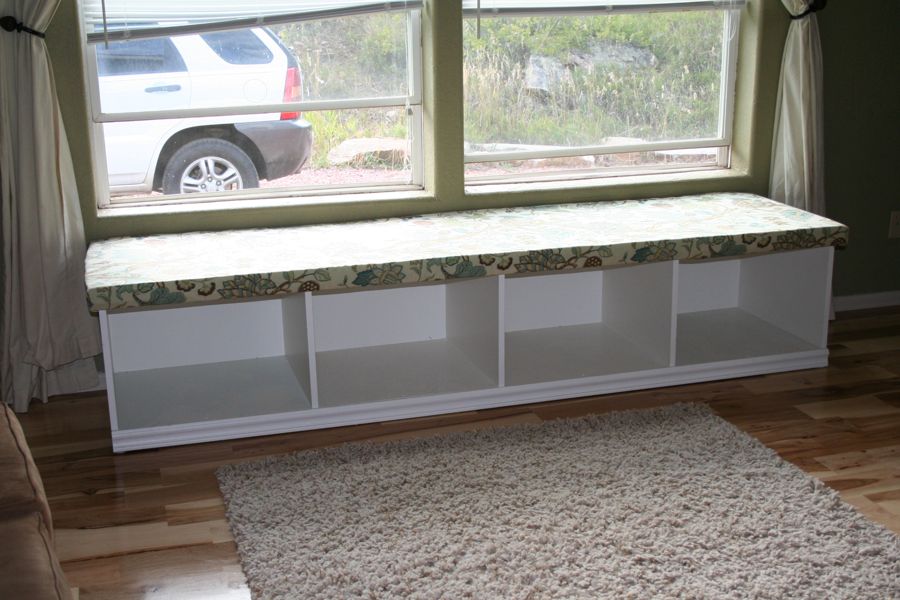
A row of open cubbies is a practical place to start a reading nook. Books stay visible, baskets can hold a throw, and there are no drawer slides or lid hinges to fit.
Ana White’s plan uses one main sheet of ¾-inch plywood for the carcass, plus a separate thin back panel and trim. Its top is 95¼ inches long and 15¾ inches deep, making this a relatively shallow seat. The photo shows a reader-built adaptation shared with the plan.
Choose this layout for upright reading or a narrow room. If you want to curl up sideways, compare the deeper designs below instead of simply widening the top without changing its supports.
Skill: Intermediate.
Main materials: ¾-inch plywood; thin back panel; 1×2 trim; molding; pocket-hole screws.
Plans and access: Free online plan, cut list and video; printable PDF offered by email.
See the original project and instructions at Ana White →
2. Angled Bench for a Bay Window
Best for: Making use of an angled window wall.
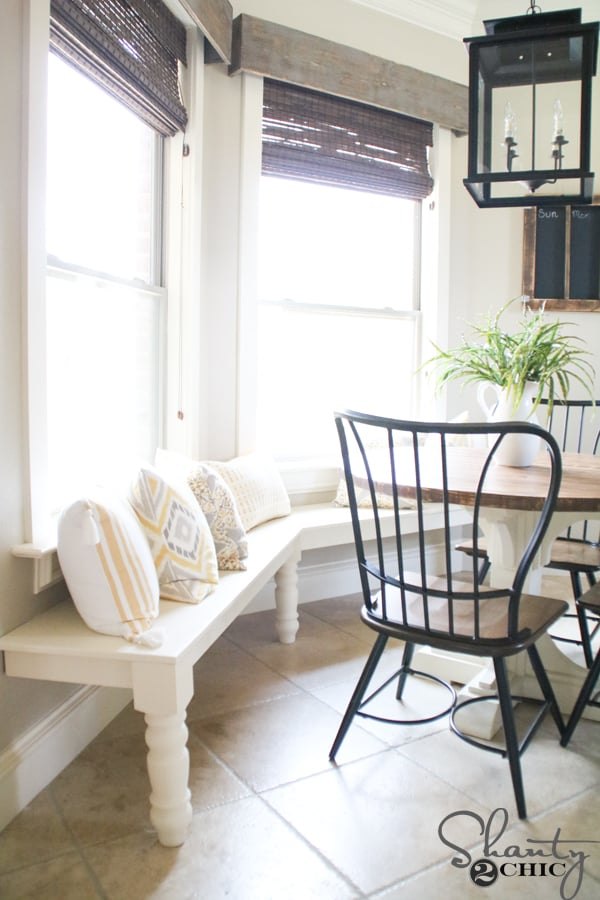
A bay window already feels like its own small room. This Shanty 2 Chic bench follows the angles, leaving the center of the space open and giving the seating a lighter appearance than a boxed-in base.
The original was built for a dining area, but the same wall-following layout can inspire a reading corner. It uses a plywood top, aprons and turned furniture legs, and the creator supplies a free printable plan alongside the photographs.
Measure your actual bay angles before choosing the cuts. Ashley’s window uses 45-degree corners; yours may differ. Plan assembly inside the room if the finished bench will be too large to fit through the door.
Skill: Intermediate.
Main materials: Plywood seat; apron boards; furniture legs; screws; paint.
Plans and access: Free illustrated tutorial and printable PDF.
See the original project and instructions at Shanty 2 Chic →
3. Long Window Bench with Lift-Up Compartments
Best for: Hidden storage along a wide window wall.
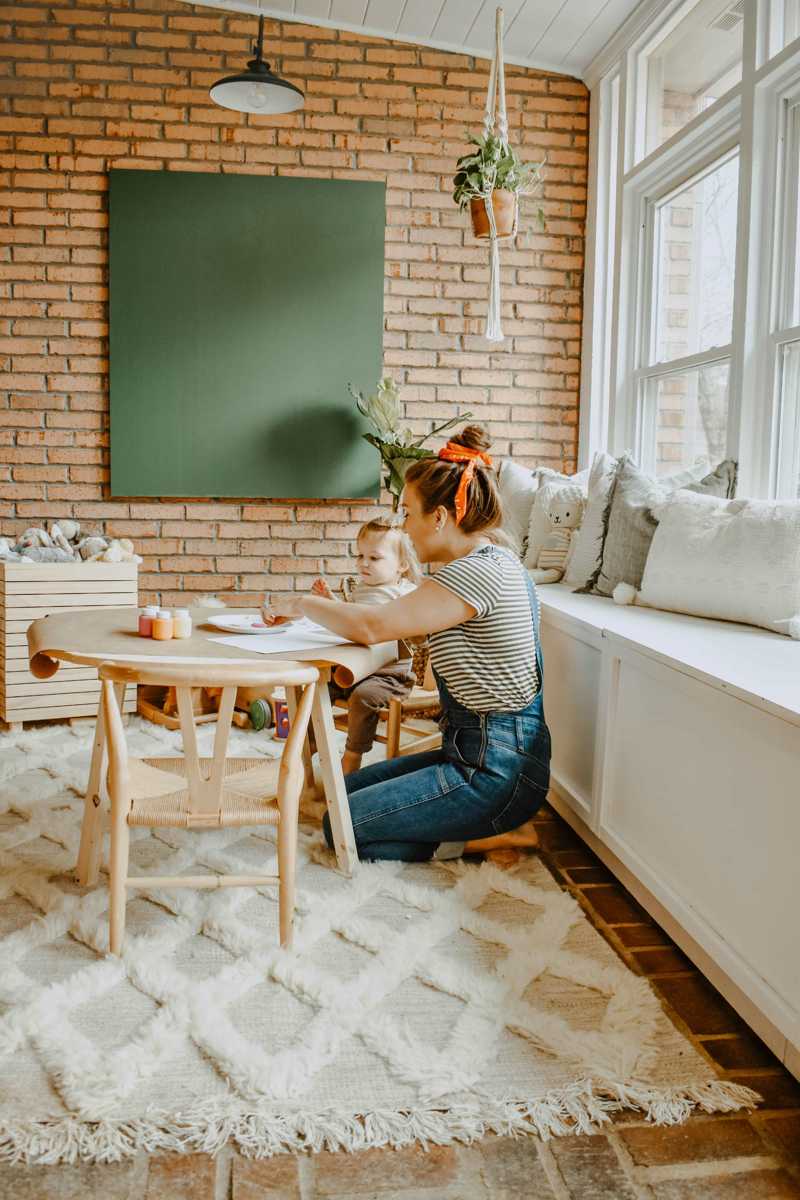
The drawer-style fronts on this House On Longwood Lane project hide a useful surprise: the storage opens from above. You get a tidy paneled face without installing a long row of drawer slides.
Kourtni built the bench for a sunroom play area and worked around a dog door. The tutorial and free PDF show the plywood shell, base, dividers, trim and hinged lids. That room-specific extension is optional inspiration rather than something every reading nook needs.
Pick this style for blankets or supplies you access occasionally. A large cushion needs to move before the lids open, so think about how often you will use the storage before choosing it over drawers.
Skill: Intermediate.
Main materials: ¾-inch plywood; 2×4 base; trim; hinges; pocket-hole screws.
Plans and access: Free illustrated tutorial and downloadable PDF.
See the original project and instructions at House On Longwood Lane →
4. Built-In Reading Bench with Three Deep Drawers
Best for: A complete window-seat transformation.
Jenna Sue Design’s window bench is the most complete reading-nook example in the group: generous seating, three large drawers and a finished wall treatment around the window.
The build uses a 2×4 frame, a poplar face frame and plywood drawers. The tutorial documents the construction and upholstery work, including the importance of square openings and accurately aligned slides. This was a multi-week project, not a quick afternoon bench.
It is a strong choice when you want the seat to look like part of the house. Allow space in front for the drawers to extend fully, and settle the cushion arrangement early so the woodwork and upholstery work together.
Skill: Advanced.
Main materials: 2×4 framing; plywood; poplar face frame; drawer slides; trim.
Plans and access: Free detailed photo tutorial and build video.
See the original project and instructions at Jenna Sue Design →
5. Simple Built-In Bench with a Wood Flip Top
Best for: A compact alcove with concealed storage.
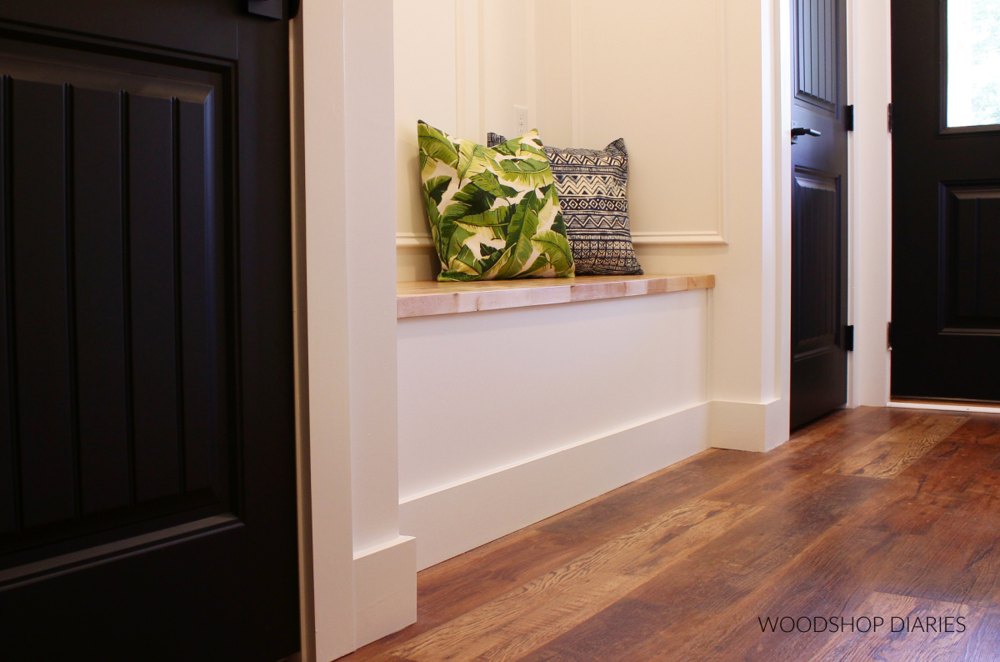
A warm wooden top keeps this painted bench from feeling like another cabinet. Woodshop Diaries builds the body as a plywood box, slides it into the alcove and adds a hinged seat for access to the storage.
The source’s bench box measures 70 inches long, 21 inches deep and 18½ inches tall before the seat top. That distinction matters: the top and any cushion raise the finished sitting height.
Choose it for a three-sided recess where a neat, simple front is enough. Shara explains measuring the opening at the front and back, which helps avoid the familiar problem of a square cabinet meeting walls that are not quite square.
Skill: Intermediate.
Main materials: ¾-inch plywood; butcher-block or built-up wood top; hinges; trim; screws.
Plans and access: Free step-by-step web tutorial and video.
See the original project and instructions at Woodshop Diaries →
6. Window Bench Between Bookcases with Basket Cubbies
Best for: A family library wall with easy-access storage.
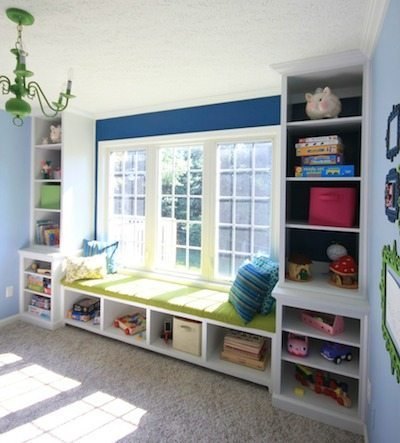
Bookshelves on both sides turn a bench into a destination. Sawdust Girl’s Robin Collection places an open-cubby window seat between bookcases, with baskets underneath for the things you would rather keep out of sight.
The bench plan is separate from the rest of the collection and includes plywood cutting diagrams, face-frame details and step-by-step assembly. The original installation also had to preserve airflow from a floor vent.
This is worth comparing with a fully enclosed storage chest if children will reach for books and toys throughout the day. Size the cubbies around the baskets you intend to use, and plan the bookcase anchoring as part of the overall installation.
Skill: Intermediate.
Main materials: ¾-inch plywood; thin backer; poplar face frame; glue; screws.
Plans and access: Free online plans with cutting diagrams and assembly steps.
See the original project and instructions at Sawdust Girl →
7. Floating Bench for an Alcove or Closet
Best for: Keeping the floor beneath the seat open.
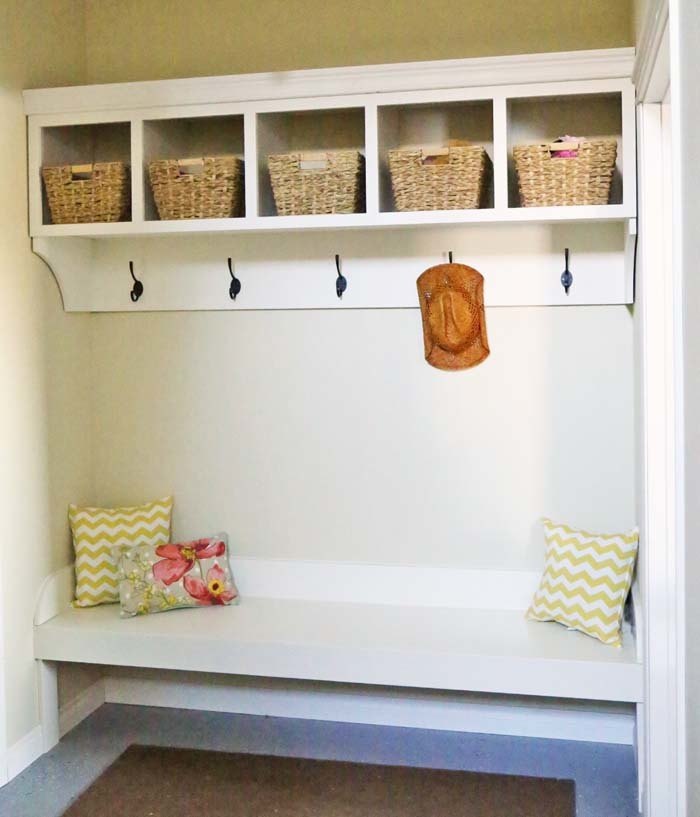
A floating bench gives a small recess a less crowded appearance. Ana White’s original is a mudroom build, but its wall-supported frame is an idea to adapt for a quiet alcove with a cushion and nearby books.
The tutorial begins with framing secured to the side and back walls, then adds the seat and front trim. It also discusses stronger framing for longer spans and additional support for deeper seats.
The hidden structure is the important part. Follow the support details for your span and wall construction; plasterboard alone cannot be treated as the load-bearing support. Where the framing is unsuitable, choose a floor-supported bench instead.
Skill: Intermediate; installation experience helpful.
Main materials: 2×3 or 2×4 framing; wood or plywood seat; 1×4 trim; suitable structural fasteners.
Plans and access: Free illustrated plan and reader-build examples.
See the original project and instructions at Ana White →
8. Closet Reading Nook with a Lower Storage Shelf
Best for: Turning an unused closet into a book corner.
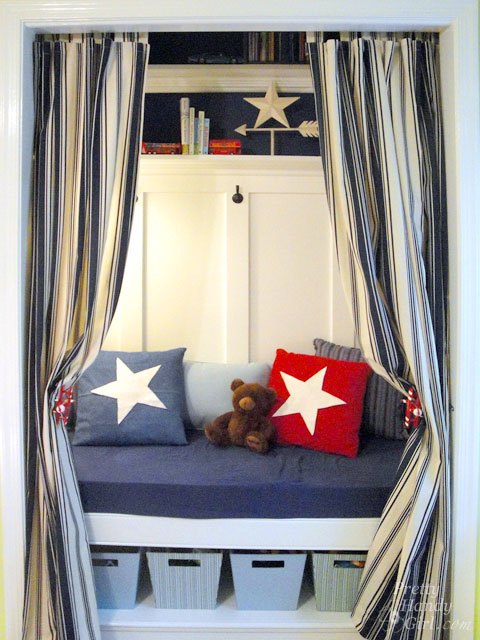
Curtains, a cushion and a shelf below the seat make this former closet feel like a little room. Pretty Handy Girl’s project is especially useful when the bedroom has spare closet space but no clear wall for a separate bench.
Brittany starts with a 2-by-6-foot closet and builds separate base and seat frames, then covers them with plywood. The tutorial also shows how to scribe the plywood around trim and finish the space.
Use it as a layout reference, then measure the actual opening and door jambs. Keep the low shelf accessible and avoid making the front edge so high that the intended reader cannot climb on and off comfortably.
Skill: Intermediate.
Main materials: 2×4 framing; ¾-inch finish-grade plywood; foam; paint; optional trim.
Plans and access: Free illustrated construction and cushion tutorial.
See the original project and instructions at Pretty Handy Girl →
9. Scrap-Wood Closet Book Nook
Best for: An enclosed nook with books close to hand.
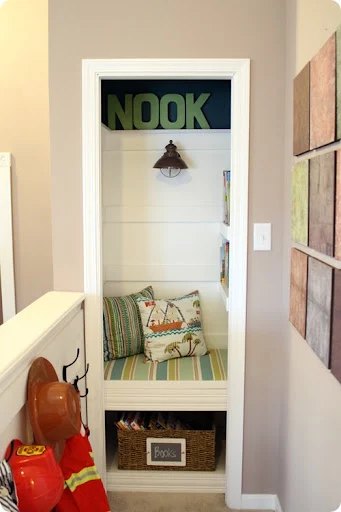
This Thrifty Decor Chick conversion gets much of its charm from working with a small, existing space. An upholstered bench, lower book storage and shelves above turn the closet into a dedicated reading spot.
The original uses reclaimed boards and scrap MDF, and the creator explains the extra supports added as the build progressed. It is a personal construction walkthrough rather than a dimensioned plan to copy unchanged.
Borrow the arrangement and the idea of reusing suitable material. For your own seat, use sound structural components and a support layout appropriate to the opening. Decorative trim and damaged offcuts should never substitute for the framing that carries the sitting load.
Skill: Intermediate; assess the support design carefully.
Main materials: Sound wood offcuts or plywood; framing material; brackets; screws; cushion.
Plans and access: Free project walkthrough; no standardized cut list.
See the original project and instructions at Thrifty Decor Chick →
10. Plywood Mini Daybed with Open Book Storage
Best for: A children’s reading corner with room to lounge.
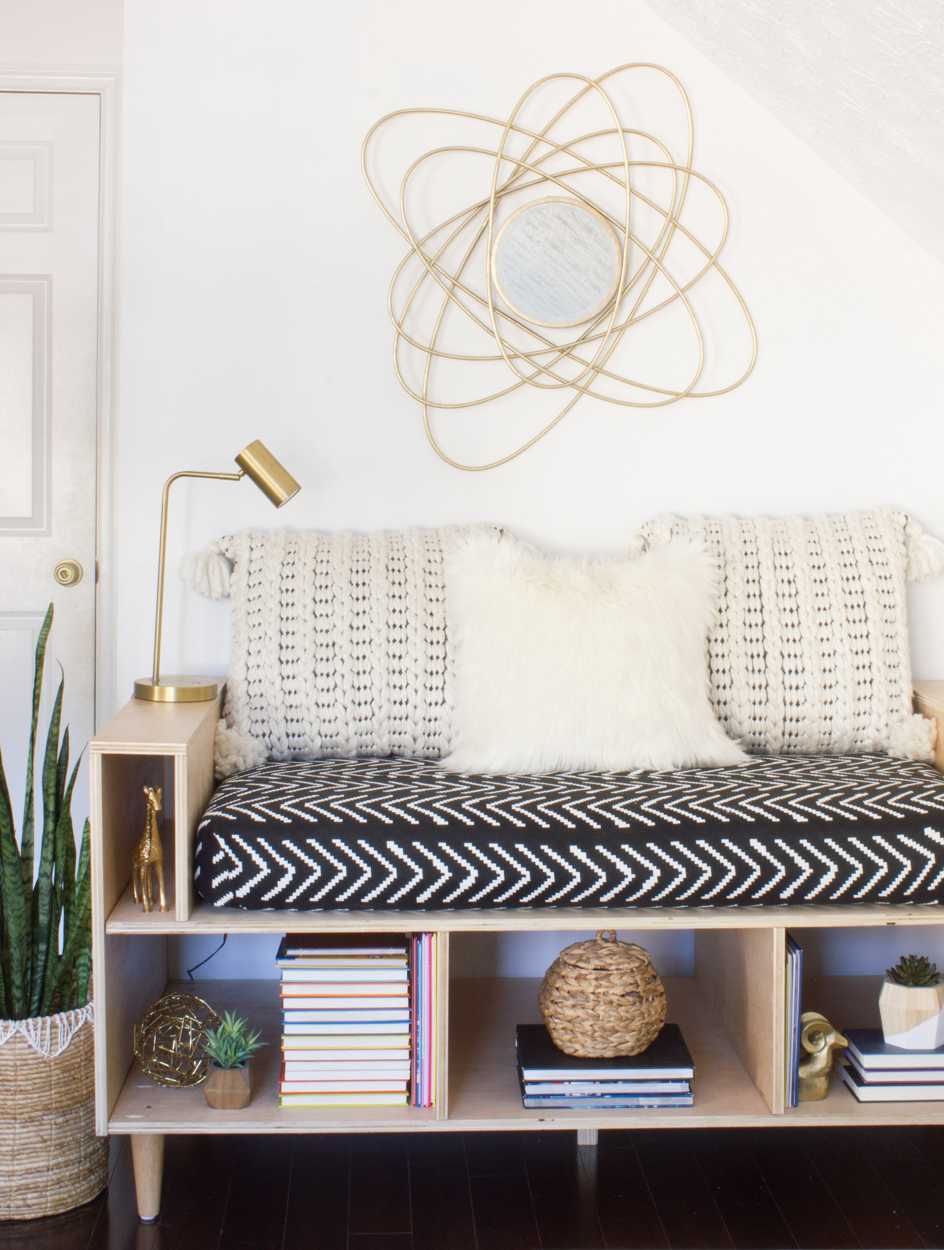
A little daybed can be a better fit than an upright bench when the reader likes to stretch out. Erin Spain’s plywood version includes open storage underneath and furniture feet that keep the base visually light.
The original was sized around a spare crib mattress for a children’s playroom reading corner. That is a lounge-seat project, not an infant sleep-space recommendation. The creator also notes that she would make the base narrower if building it again.
Measure your cushion or mattress first and sketch the panel layout before buying sheet goods. Keep the internal dividers and center support in the design rather than treating the long top as an unsupported shelf.
Skill: Intermediate.
Main materials: Furniture-grade plywood; wood support blocks; furniture feet; cushion or mattress.
Plans and access: Free photo tutorial with assembly details.
See the original project and instructions at Erin Spain →
11. Library Bench Framed by Arched Bookcases
Best for: A full wall of books, seating and closed storage.
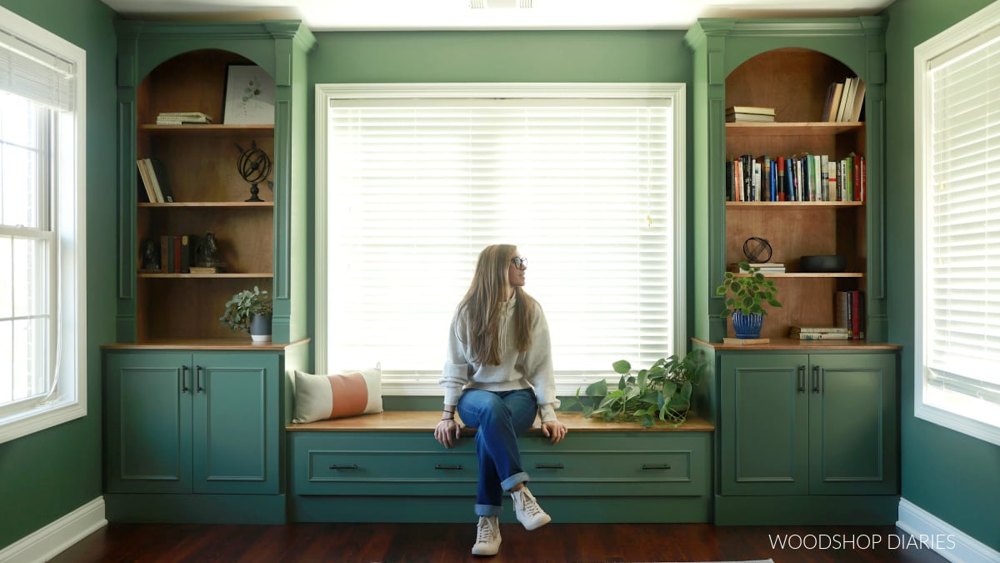
If you want the reading bench to anchor a whole room, Woodshop Diaries’ green built-ins offer a complete furniture composition. A drawer bench sits between base cabinets and arched bookcases, with stained wood accents breaking up the paint.
The source installation spans 141 inches, with a 72-inch bench between the cabinets. Shara installs the side units first, then builds the bench to suit the remaining opening. Her web tutorial explains the process; a detailed printable plan is sold separately.
This is the ambitious option for confident cabinet builders. Plan the whole wall together, including shelf depth, trim, outlets and the seated view, before ordering materials.
Skill: Advanced.
Main materials: Plywood; face-frame lumber; drawer slides; cabinet hinges; molding; finish.
Plans and access: Free web tutorial and video; detailed printable plans are paid.
See the original project and instructions at Woodshop Diaries →
12. White Window Bench with Paneled Drawer Fronts
Best for: A clean built-in seat with front-access storage.
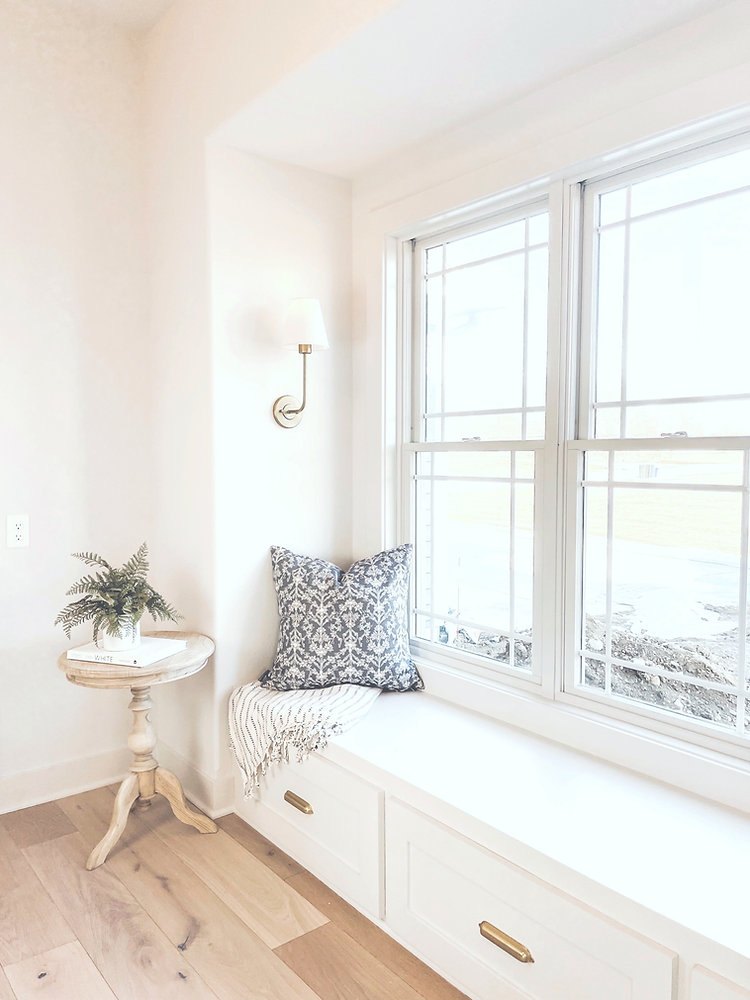
DIY With Dano shows how a plain stretch beneath playroom windows became a bright reading bench. The drawer fronts and small finishing details give the project a polished appearance without making the room feel busy.
The tutorial covers the frame, plywood top, three drawers, trim and painting. It also shares mistakes and adjustments from a first drawer build, making it useful for understanding the process. Measurements are intentionally tied to the creator’s space rather than offered as a universal cut list.
Compare this with Jenna Sue’s project if you want drawers but a simpler visual finish. Follow the clearance requirements supplied with your own slides instead of assuming every model needs the same gaps.
Skill: Advanced.
Main materials: 2×4 frame; plywood; drawer slides; MDF trim; pulls; paint.
Plans and access: Free step-by-step photo tutorial; dimensions depend on your room.
See the original project and instructions at DIY With Dano →
13. Freestanding Upholstered Storage Bench
Best for: Adding a movable seat without building wall to wall.
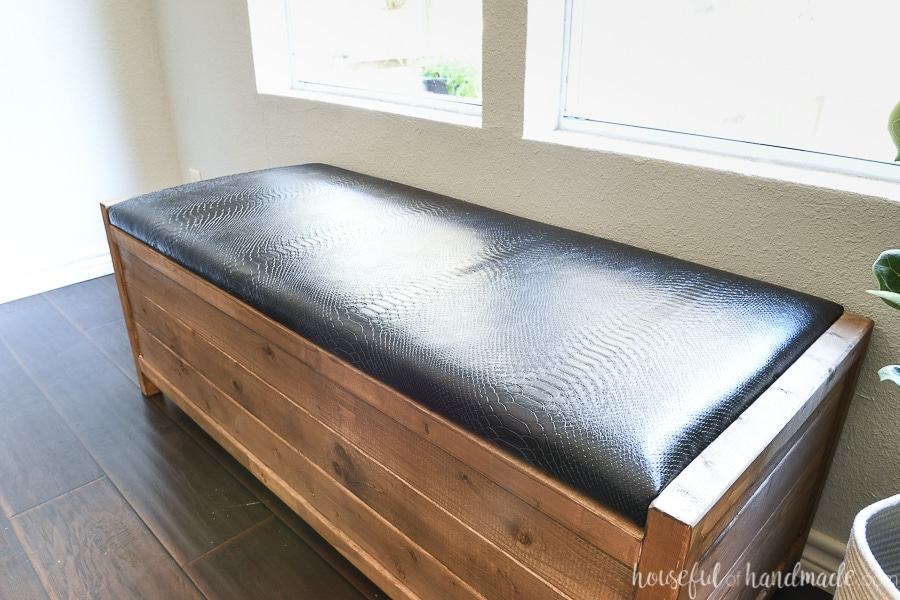
A freestanding bench is useful when you want a reading spot without committing to fitted cabinetry. Houseful of Handmade’s version pairs a wood base with an upholstered top and a large storage compartment.
The slightly raised ends give the bench a more furniture-like silhouette. The source uses 2×2 and 1×4 furring strips, with foam, batting and faux leather over the lid. Kati links to the full plan, now available on Kreg.
Place it beside a wall or below a suitable window and add back cushions for longer reading sessions. Keep the storage access in mind when choosing a throw or cushion arrangement that will sit over the lid.
Skill: Confident beginner to intermediate.
Main materials: 2×2s; 1×4s; plywood lid; upholstery foam; batting; fabric; hardware.
Plans and access: Free project overview; complete free plan on Kreg.
See the original project and instructions at Houseful of Handmade →
Open the free detailed plan on Kreg →
14. Long Upholstered Bench with Removable Storage Tops
Best for: A shared reading wall with concealed compartments.
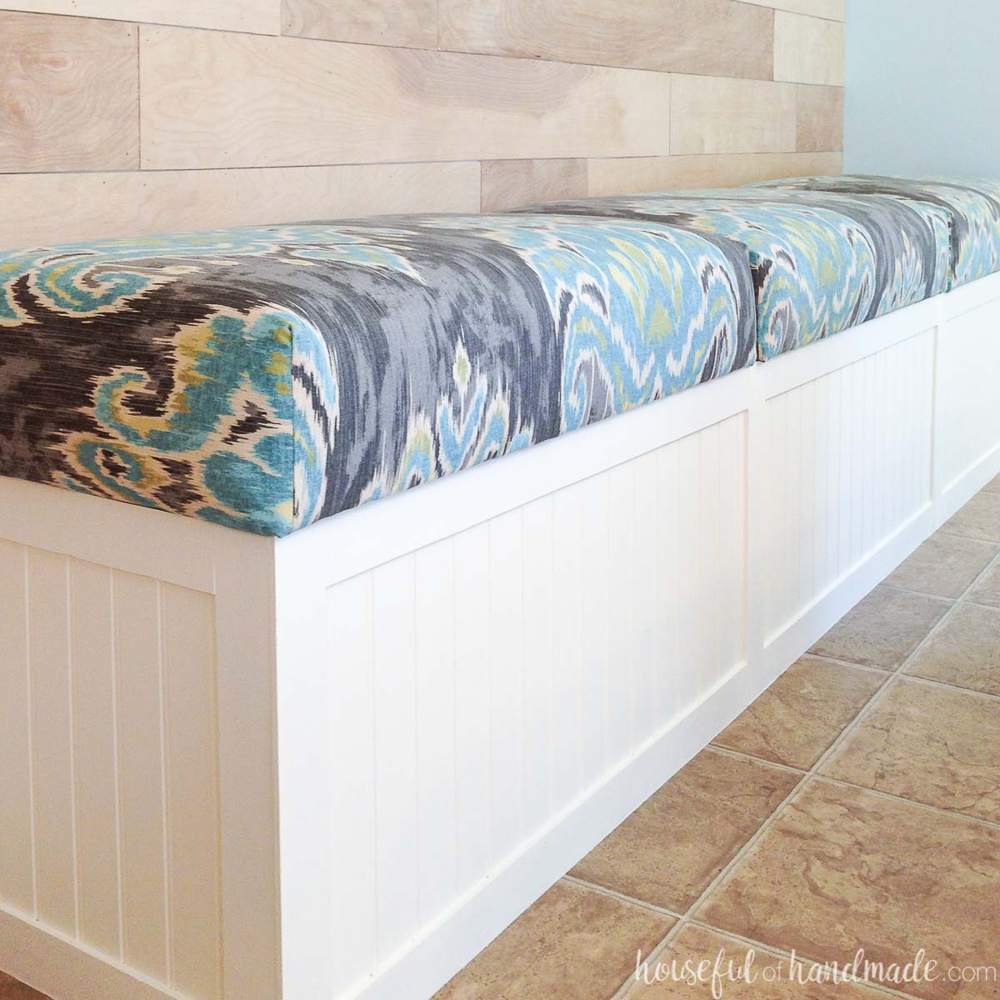
Removable upholstered tops give this long bench a different storage approach from a hinged chest. Each padded section lifts away, opening the compartment beneath without a visible row of doors or drawers.
Houseful of Handmade built the original for a dining room. It is 8 feet long, 18½ inches deep and 22 inches high including the cushion. That height may be too tall for your reading setup, so use the construction idea while planning a comfortable finished height of your own.
The free article explains the original build; updated printable plans are paid. This style suits occasional-access storage, since the upholstered panels must be lifted off to reach it.
Skill: Intermediate.
Main materials: 2×4 and 2×2 framing; plywood; beadboard; trim; upholstery supplies.
Plans and access: Free illustrated tutorial; updated printable PDF is paid.
See the original project and instructions at Houseful of Handmade →
15. Custom-Width Window Seat with Drawers
Best for: A specific opening that needs adjustable dimensions.
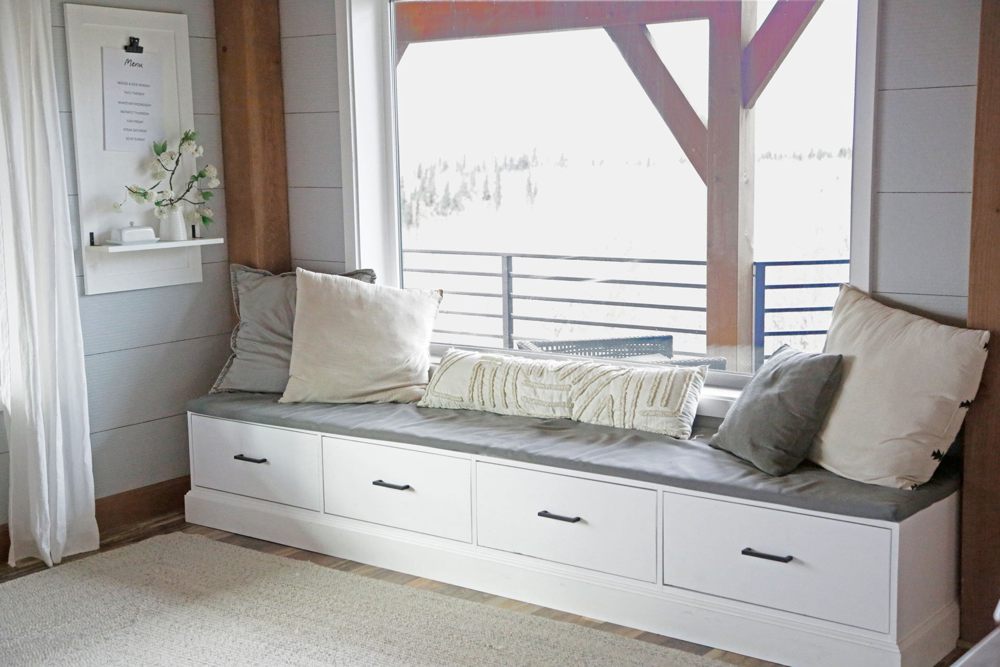
This Ana White design is useful when a fixed-length plan nearly fits your room but not quite. The plywood carcass is designed around a configurable width, with drawers underneath and a wood top above.
The example plan uses a 24-inch depth and a 17-inch carcass height, before your chosen top and cushion. The instructions limit the width of individual bays to support the top and explain drawer construction and slide installation.
Choose the layout before generating the cut list, and retain the dividers that support the seat. A wider window seat needs a revised structure, not simply a longer top panel. The configurator is a planning aid rather than a substitute for checking your measurements.
Skill: Intermediate to advanced.
Main materials: ¾-inch plywood; drawer lumber; thin drawer bottoms; slides; trim; screws.
Plans and access: Free online plan with a size configurator and video.
See the original project and instructions at Ana White →
Plan a Reading Bench That Fits Your Room
Start with how you want to sit
An upright seat needs less depth than a nook where you want to curl up with your feet beside you. Measure a chair or sofa you already find comfortable, then tape the proposed bench footprint onto the floor. Add temporary boxes or a mock-up to judge height and reach before cutting wood.
Include the seat top and cushion in your height calculation. A plan’s box height is not necessarily the finished sitting height, and a thick cushion can make a previously comfortable bench feel too tall. Back pillows also reduce the usable depth.
Measure the opening in several places
Check the width at the back and front, the floor level, baseboards and any window trim. Leave the fitting allowance specified by the chosen plan rather than forcing a tight box into an uneven recess. Make sure the assembled project can reach the room, or plan an assembly sequence inside it.
Keep heating and cooling outlets, electrical outlets, window operation and access routes clear. Plan any necessary changes before building around them. For a seat near an opening window, consider fall risks, especially in a child’s room; a window screen does not function as a safety barrier.
Choose storage you will actually use
Cubbies make books easy to see and reach. Drawers hide clutter without moving the seat cushion, but need accurate construction and open floor space in front. Lift-up lids suit spare blankets; removable tops work best for items you do not retrieve constantly.
For hinged lids, use hardware and lid supports suited to the lid’s weight and intended users, and plan against slamming and finger trapping. Check the chosen tutorial’s hardware details before buying. If the nook is mainly for children, our DIY toy storage organizer offers another way to keep books and toys nearby.
Keep the structure separate from the decoration
A face frame, beadboard panel or cushion does not replace the seat’s load-bearing frame. Follow the plan’s material thicknesses, dividers, spans, joinery and anchoring requirements. Floating seats need an appropriate connection to sound framing; heavy shelving needs secure anchoring too. If you change a span or cannot verify the support, have the design checked before using it.
A pocket-hole jig can simplify several of these builds, but a good joint still depends on correct stock thickness, screw selection and placement. Use the source plan for assembly details rather than building from a finished photograph alone.
Make the Nook Comfortable Without Crowding It
Start with a fitted seat cushion and one or two back pillows. Too many pillows can leave very little room for the person the bench was built for. Choose a cover you can clean easily and confirm that storage lids or drawers remain accessible.
A lamp beside the reader helps make the nook usable after dark. Keep cords out of walkways and arrange light so it falls on the page comfortably. A small table can hold a mug and the book you are reading; our DIY C-table plans provide compact options to compare.
For the wall behind the bench, a restrained painted panel or wood detail can define the corner. Browse our wood panel wall ideas for inspiration, and use our wood finishing tools guide to help prepare the bench surface. Let finishes cure fully before adding cushions.
DIY Reading Nook Bench FAQs
Which project is the simplest place to start?
Compare the open-cubby plywood bench and freestanding upholstered bench if you want to avoid drawers or a full wall of cabinets. Both still need careful measuring and sound assembly. A fitted alcove can introduce installation work even when the bench itself looks simple.
Can I build a nook without a window?
Yes. A spare closet, wall recess or freestanding bench against a suitable wall can work. Focus on a comfortable seat, accessible books and reading light. The closet and cabinet projects above show how a nook can feel defined without relying on a window view.
How much will a reading nook bench cost?
Price the actual materials and hardware in the selected plan. Include plywood, trim, finish, cushion supplies, drawer slides or lid supports, and any tools you do not own. A basic bench and a complete built-in library are very different projects, so one blanket price would be misleading.
Are all 15 printable plans free?
No. Most offer free online instructions, while some provide PDFs or email delivery. The Woodshop Diaries library system and Houseful of Handmade’s long built-in bench offer paid printable plans alongside their web tutorials. Check each project’s access note before choosing.
Choose One Corner and Start There
You do not need a whole library wall to create a useful reading spot. Choose a bench that suits the space, the person sitting on it and the storage you need. For smaller practice builds, explore our woodworking plans for beginners.
Enjoy planning your next build? You can also explore Ted’s Woodworking, a paid collection of woodworking plans. Check the samples and current offer to see whether it suits your tools and experience. The projects in this article link directly to their original creators; buying that collection is optional.