
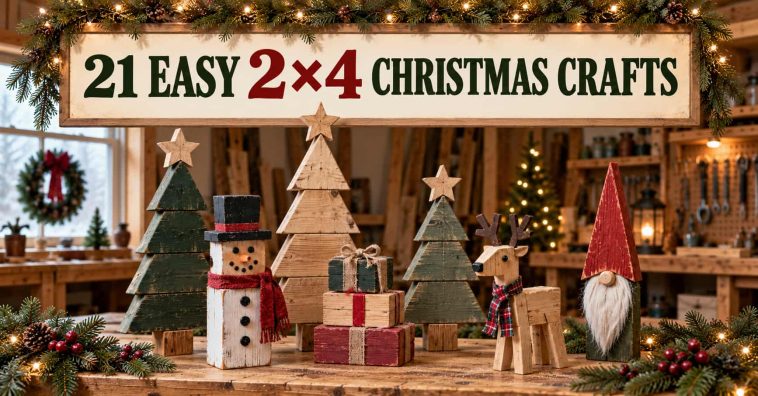
A single construction stud can become a surprising amount of Christmas décor. Cut it into blocks, add a little paint, and suddenly that ordinary 2×4 looks far more festive than anything sitting under fluorescent lights at the craft store.
These easy 2×4 Christmas crafts suit beginners, small workshops, and anyone who wants satisfying weekend projects without buying a cart full of expensive lumber. I’ve included quick build directions, suggested dimensions, finishing ideas, and honest notes about which projects require the most patience. Ready to make some sawdust before the fake snow starts falling?
Why 2×4 Christmas Crafts Make Perfect Weekend Projects
Standard 2×4 lumber stays affordable, easy to find, and forgiving to work with. Its chunky profile gives small decorations enough weight to stand on a shelf, mantel, or porch without complicated bases. You can also turn short offcuts into useful pieces instead of feeding the scrap bin forever.
Remember that a modern “2×4” actually measures about 1½ inches thick by 3½ inches wide. That difference matters when you plan a tree, stack blocks, or calculate the overall height. Measure your board before cutting because lumber apparently enjoys keeping beginners humble.
Most of the projects below need only straight or angled cuts. A miter saw makes batch work fast, but a circular saw and a securely clamped guide can handle many designs. Choose straight, dry boards with minimal twist, especially when you want the craft to sit flat.
Tools and Materials You’ll Need
You won’t need every item for every project. Gather the basics, read through your chosen design, and buy the decorative extras afterward. That approach prevents the classic “three bags of supplies, no actual plan” situation. We’ve all visited that neighborhood. 🙂
Basic tools
- Miter saw, circular saw, or handsaw with a miter box
- Tape measure, pencil, and combination square
- Drill/driver and assorted bits
- Random-orbit sander or sanding block
- Clamps
- Jigsaw for curved details, optional
- Brad nailer, optional
Useful materials
- Straight 2×4 lumber and clean offcuts
- Wood glue and suitable screws
- 80-, 120-, and 180-grit sandpaper
- Acrylic or exterior paint
- Wood stain or clear protective finish
- Painter’s tape, stencils, and small artist brushes
- Twine, ribbon, greenery, bells, hooks, and wooden beads
Safety first: Wear eye and hearing protection, control dust, clamp the work securely, and follow every tool manufacturer’s instructions. Keep your hands clear of blades and disconnect power before adjustments. Never cut a tiny block while holding it with your fingers; start with a longer board, make the cut, and move the offcut away after the blade stops.
1. Chunky 2×4 Christmas Trees
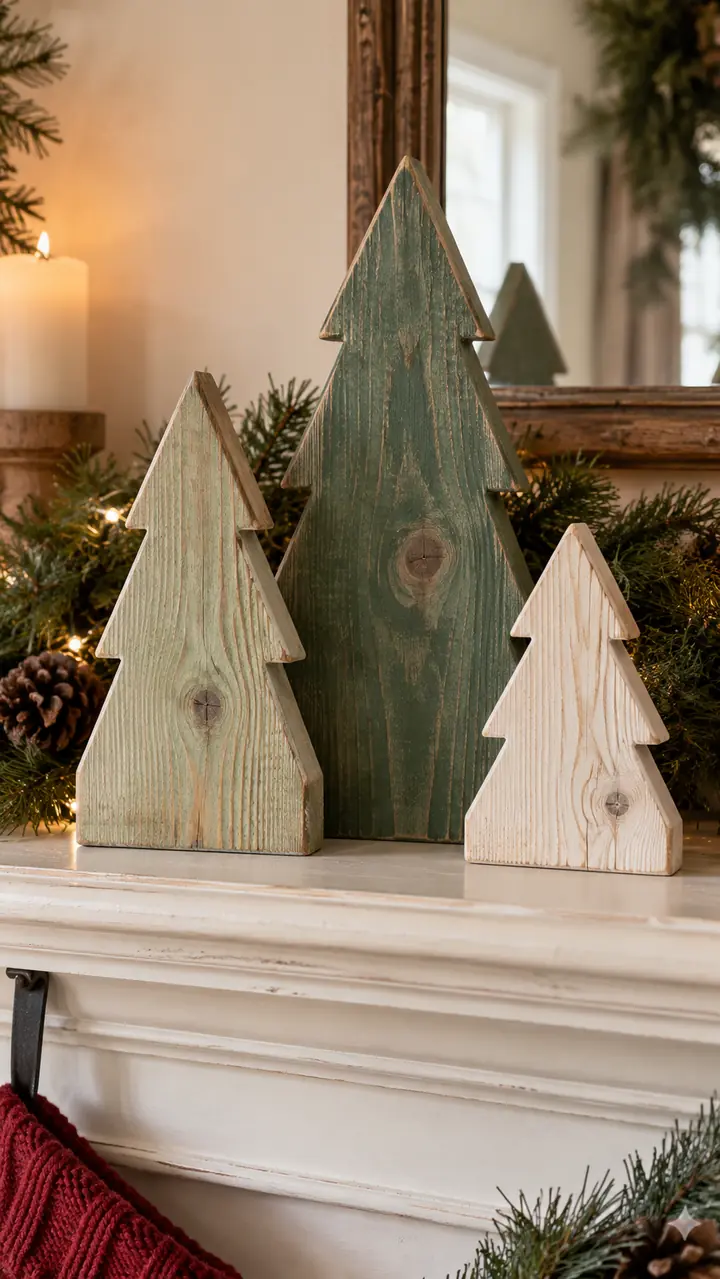
Start with the project that makes a plain stud look almost suspiciously stylish. Cut three pieces at roughly 6, 9, and 12 inches, then trim both upper corners of each piece at matching angles. Stand the trees alone or group the three heights into a small wooden forest.
Paint them forest green, sage, cream, or deep red. I prefer a thin stain or color wash because visible wood grain keeps the trees warm and handmade. Add short dowel trunks and block bases if you want a more traditional silhouette, but the chunky freestanding version takes less time and never wobbles.
2. Rustic Wood Block Snowmen
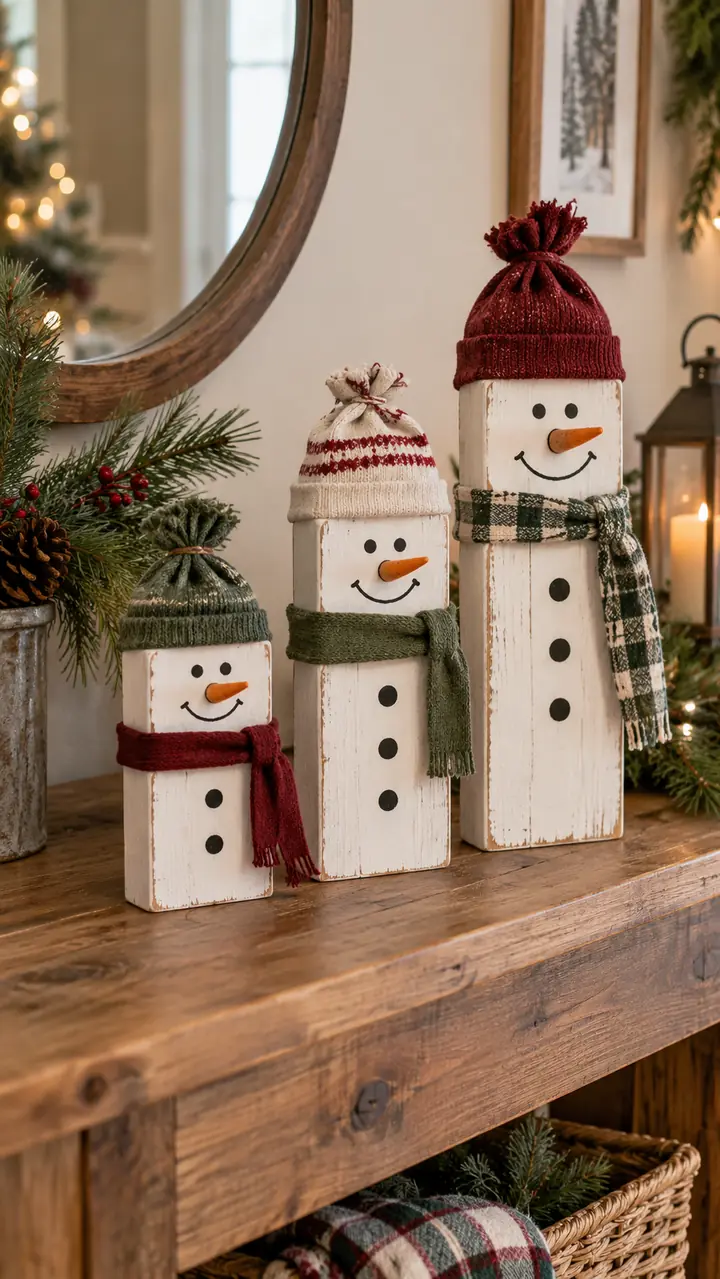
Cut 2×4 blocks at 6, 8, and 10 inches for a cheerful snowman family. Paint each block white, sand the edges lightly, and add simple faces with black and orange acrylic paint. A strip of fabric makes an instant scarf, while a small sock can become a hat.
Keep the faces simple. Two eyes, a carrot nose, and a crooked smile usually look better than a masterpiece that took four hours and caused an artistic crisis. For outdoor display, use exterior paint and seal every face, edge, and end grain.
3. Stacked Wooden Present Boxes
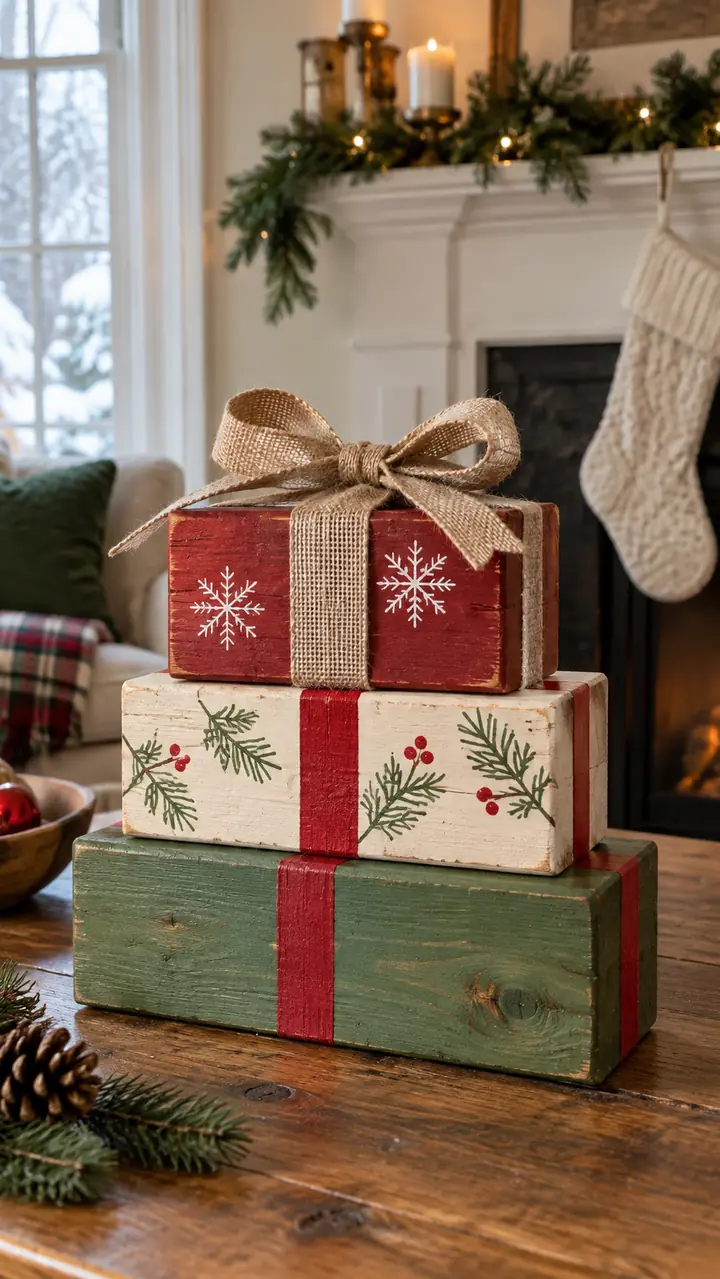
Cut three blocks in graduated lengths, such as 5, 7, and 9 inches. Paint each block like a wrapped gift, then stack and glue them with the longest piece at the bottom. Use painter’s tape to create crisp ribbon lines or wrap real ribbon around each block.
This 2×4 Christmas decoration works beautifully on a mantel, console table, or covered porch. Add a wooden tag with a family name for a personal touch. If you want to store the display easily, skip the glue and stack the blocks only during the holiday season.
4. Mini Christmas Village Houses
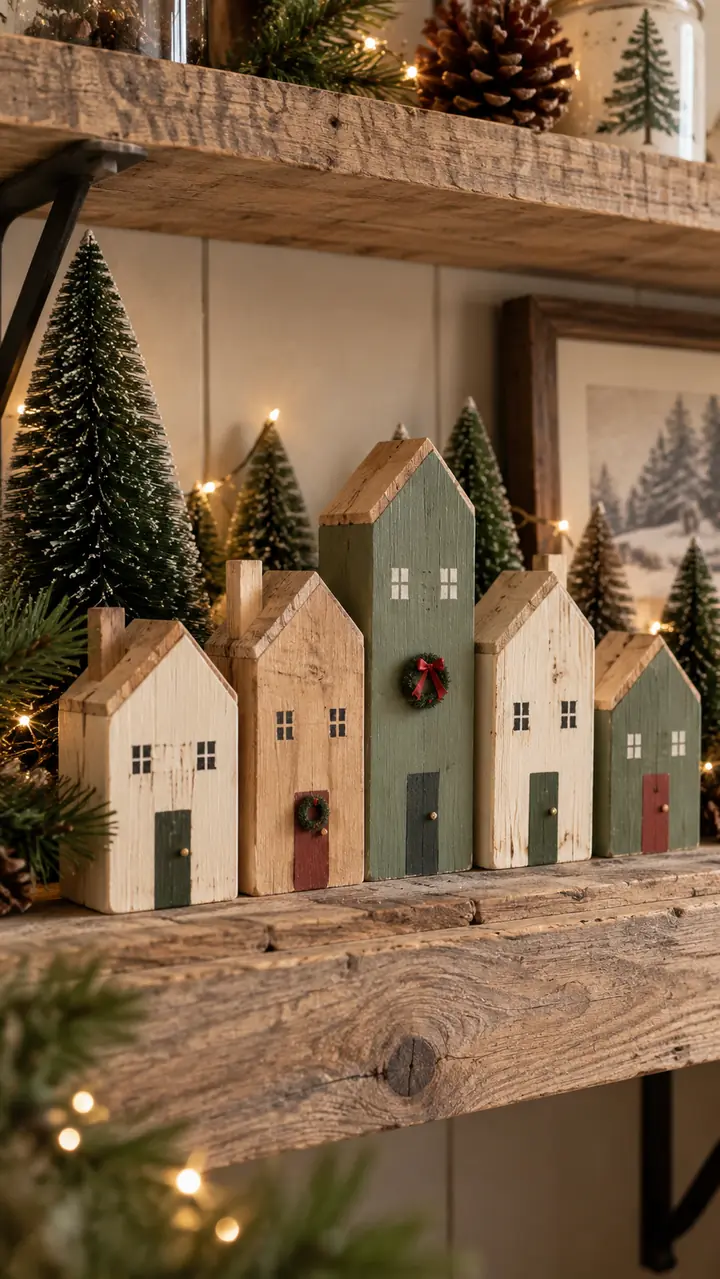
Cut several blocks at different heights, then angle the tops to form simple rooflines. Paint tiny doors and windows, or leave the houses natural and draw the details with a white paint marker. Cluster them with bottle-brush trees and battery-powered lights for an easy wooden Christmas village.
Why does this project look so polished? Repetition does the heavy lifting. Use three to seven houses, repeat the same limited color palette, and vary only the height and window patterns. Avoid open flames around wood, paint, greenery, or decorative snow; battery-operated lights give you the glow without the unnecessary drama.
5. 2×4 Wooden Reindeer
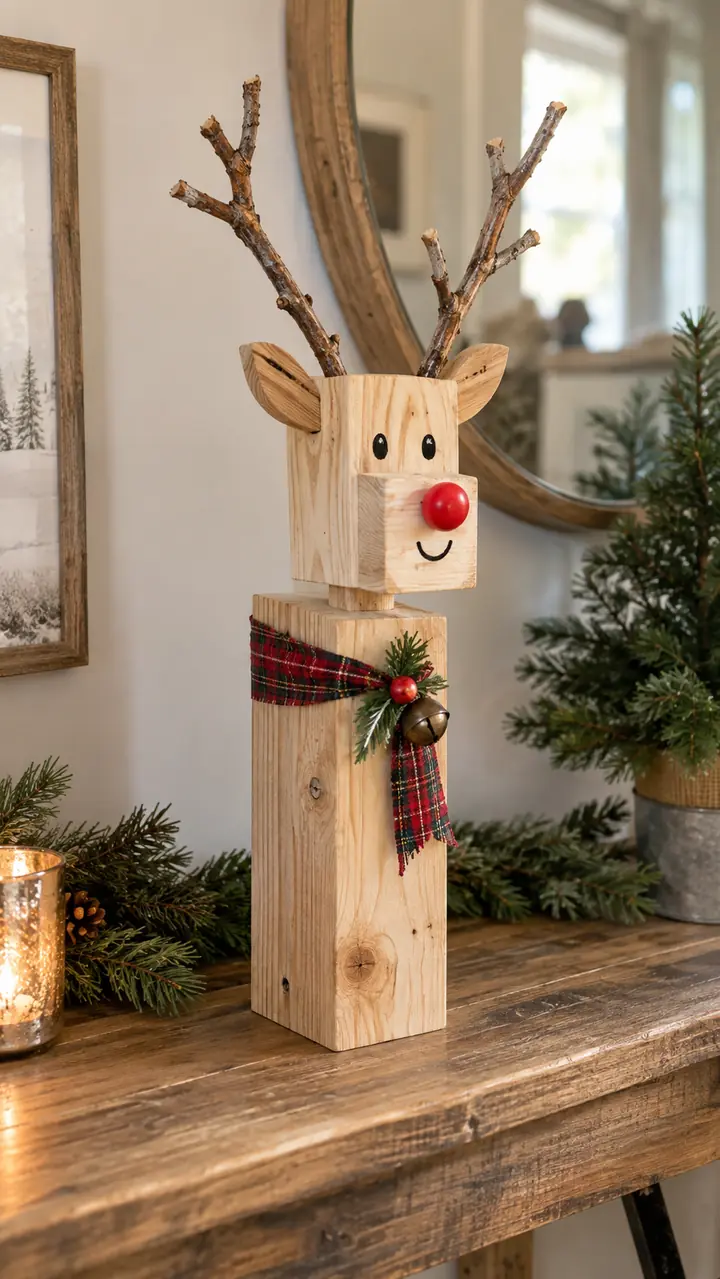
Use one upright block for the body and a shorter piece for the head. Connect them with a short dowel or a carefully screwed wood spacer. Add branch antlers, small wood ears, a painted face, and four dowel legs if you want a standing figure.
A simpler shelf version skips the legs and places the head directly on the body. Paint the nose red for Rudolph or keep everything natural for rustic décor. Pre-drill every small hole because dowels and narrow decorative parts can split when a screw barges in uninvited.
6. Oversized Wooden Candy Canes
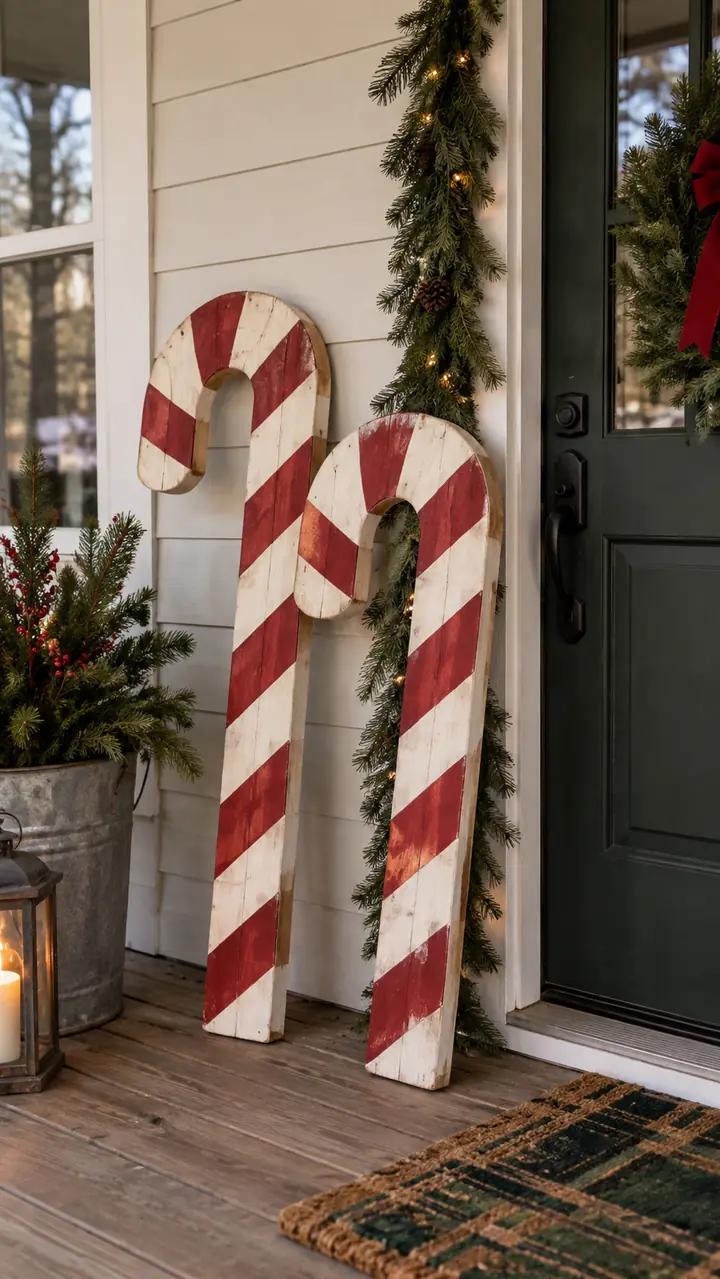
Cut a 2×4 to your preferred height, usually 18 to 30 inches, and round the top corners with a jigsaw. Paint the board white, then mark diagonal stripes with painter’s tape and add red paint. Remove the tape while the paint still feels slightly soft for cleaner edges.
Pair two candy canes beside the fireplace or lean a group against a covered porch wall. You can also attach a small cleat behind the curved top to strengthen the narrow section. These look bold from the street, and you don’t need advanced joinery to get there.
7. Scrap-Wood Christmas Stockings
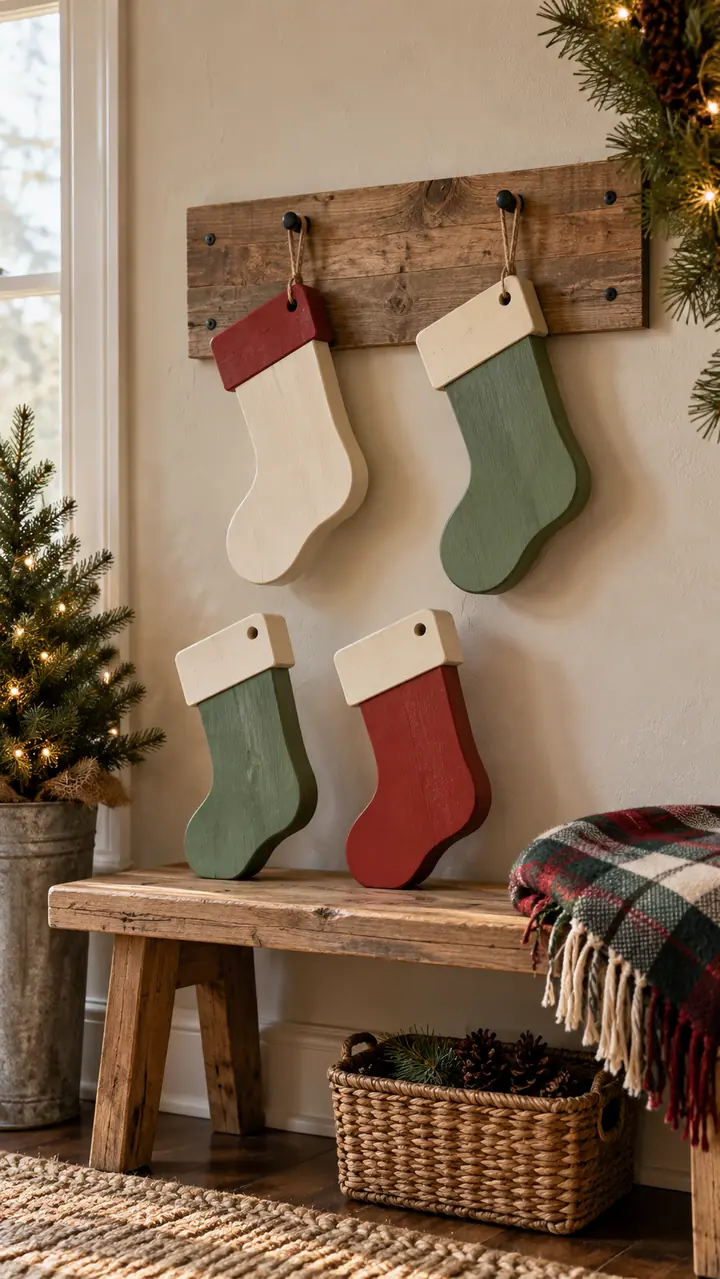
Draw a simple stocking profile on a wide face of the 2×4, then cut the outline with a jigsaw. Sand the curves, paint the cuff and body, and drill a small hanging hole near the top. Make several and add names for reusable gift tags or family ornaments.
The 1½-inch thickness creates a chunky shape that stands on its own if you flatten the bottom. Prefer a wall display? Screw the stockings to a backboard and add hooks underneath for keys, lightweight ornaments, or empty decorative stockings.
8. Wooden North Pole Sign
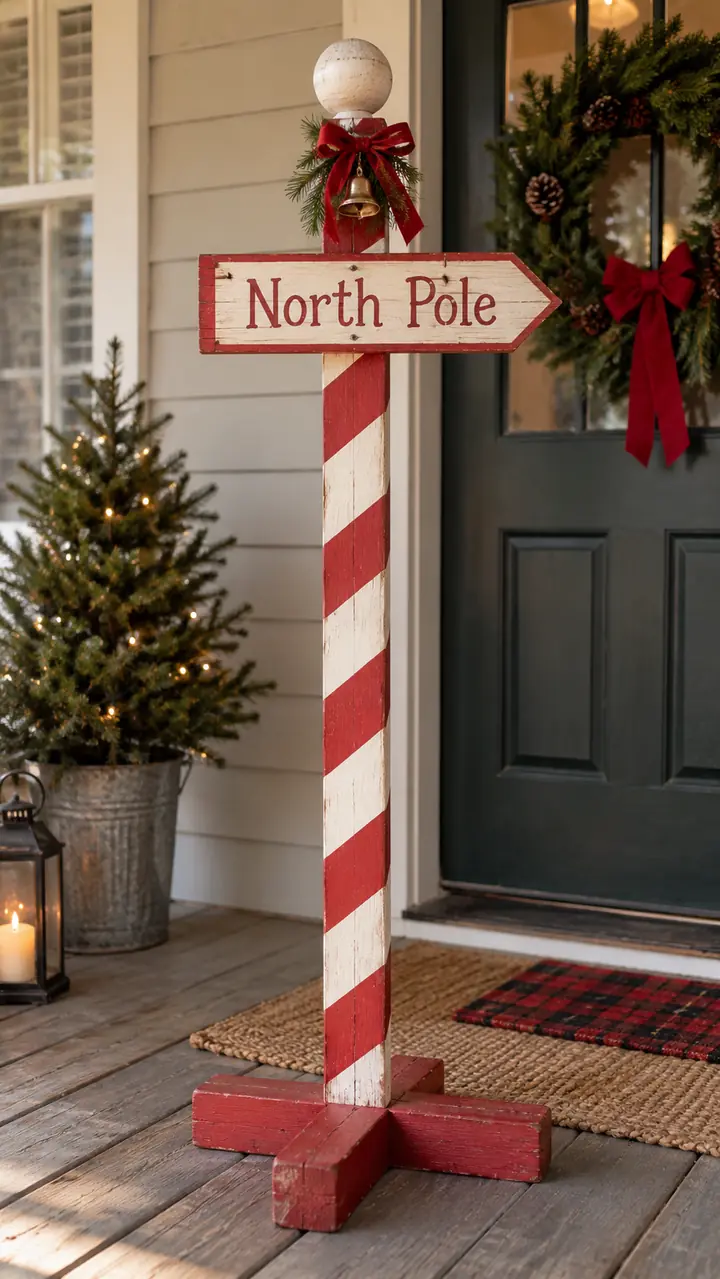
Cut one long 2×4 for the post and a short piece for the arrow. Shape one end of the arrow with two diagonal cuts, then paint “North Pole” across the face. Attach the arrow near the top and place the post in a wide cross-shaped base.
Add red-and-white stripes to the post, a wooden ball on top, and a small ribbon or bell. For outdoor use, anchor the base against wind and apply an exterior-rated finish. A tall sign catches attention, but physics still gets the final vote.
9. Minimalist Wood Nativity
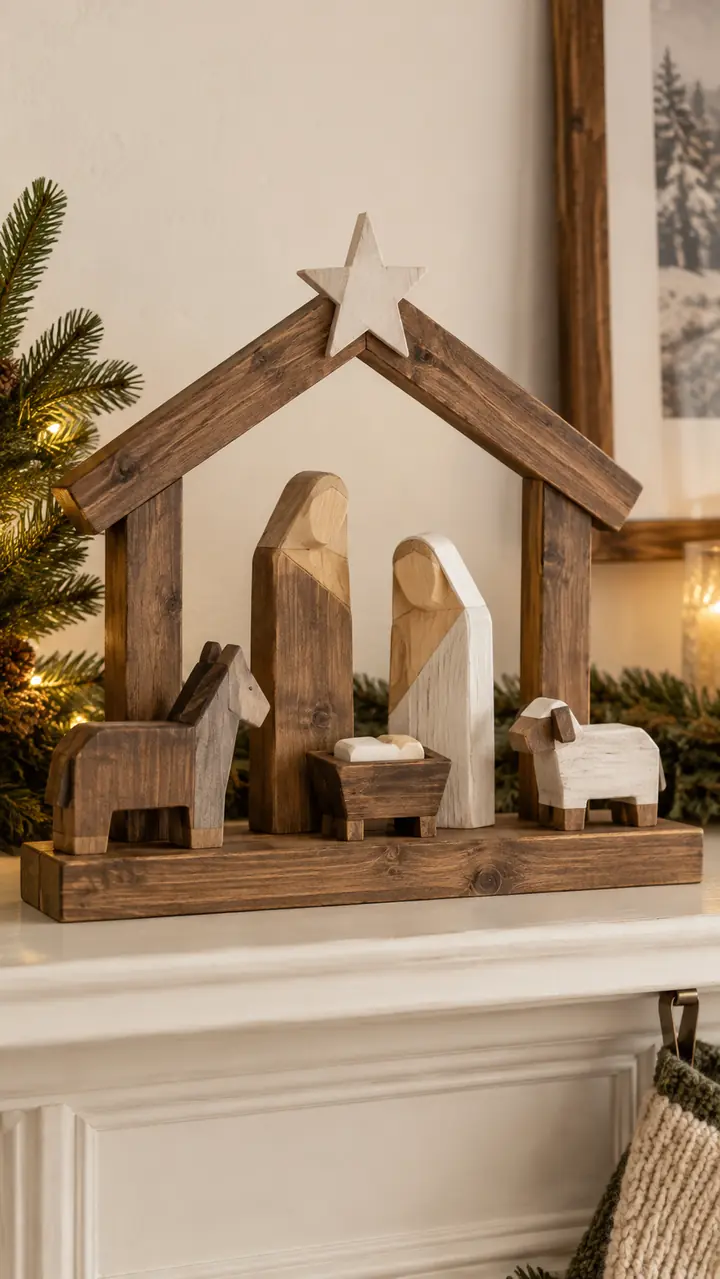
Cut simple geometric figures from short 2×4 sections: two taller blocks for Mary and Joseph, one tiny block for the manger, and optional smaller figures for animals or visitors. Angle or round the tops to suggest heads and shoulders without carving detailed faces.
Natural wood, walnut stain, and soft white paint give this nativity a calm, modern look. Arrange the figures beneath a basic stable made from three narrow boards. Keep the pieces large if young children may handle them, and avoid loose beads or tiny parts around toddlers.
10. Reversible Christmas and Winter Blocks
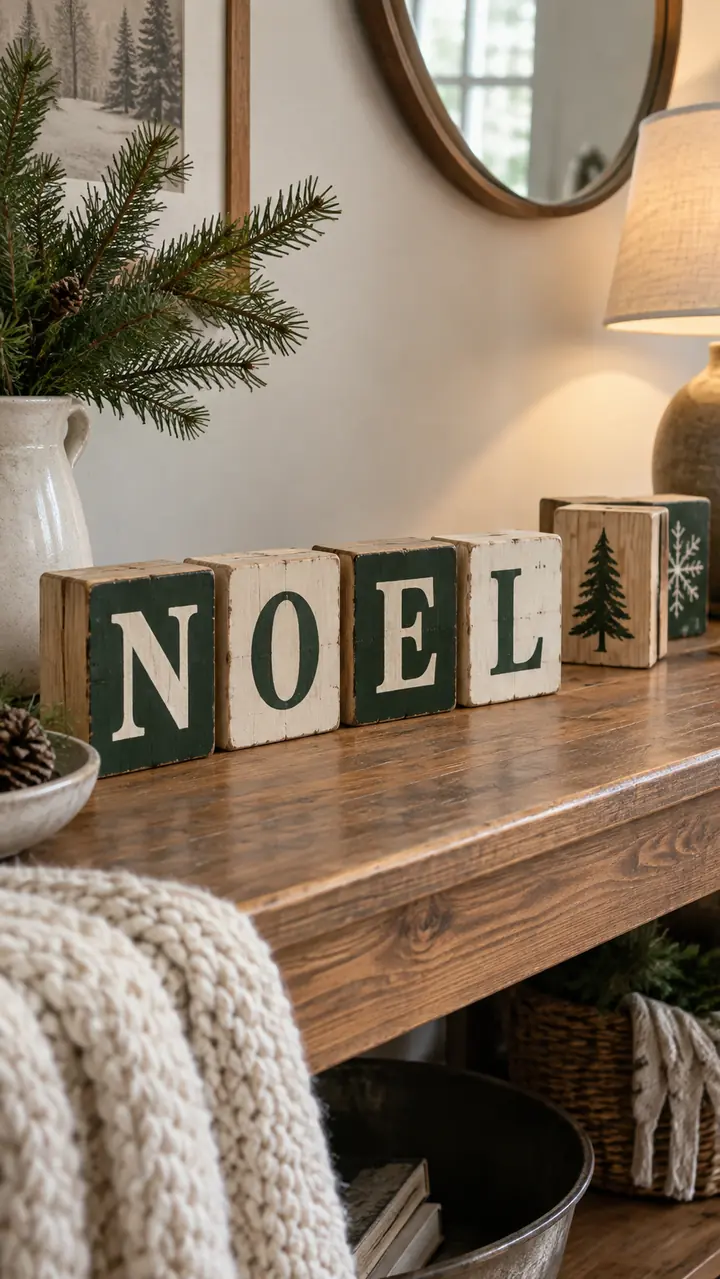
Paint one face of each block with letters that spell “NOEL,” “JOY,” or “XMAS.” Turn the blocks around and paint snowflakes, winter trees, or a neutral word such as “COZY” on the opposite faces. You’ll get two displays without storing two sets.
Cut all blocks with a stop block so their heights match. Sand every corner enough to remove splinters but keep the square profile. IMO, reversible décor earns bonus points because January always arrives before anyone feels like packing Christmas away.
11. 2×4 Christmas Candle Holders
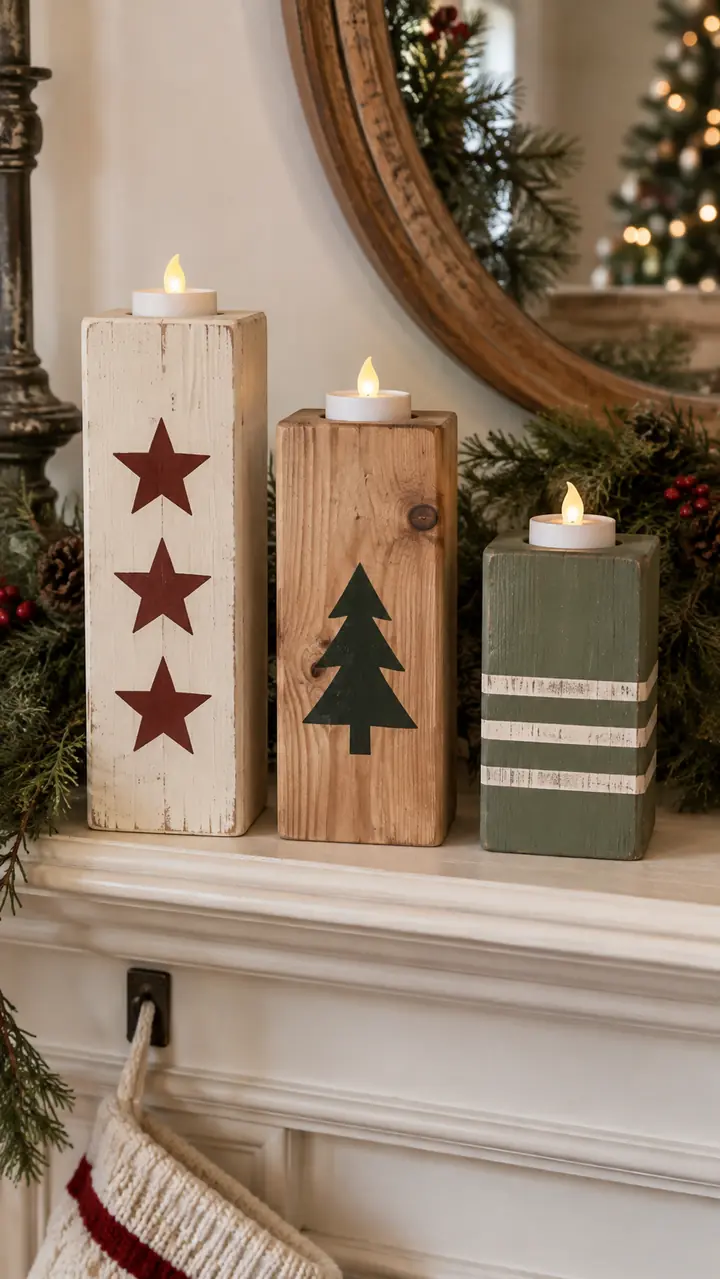
Cut blocks in three heights and drill shallow recesses for battery-powered tealights. Center each recess carefully and leave plenty of wood around the opening. Paint the blocks or stain them, then decorate the fronts with stars, trees, or simple horizontal stripes.
Use flameless lights only. Real flames and improvised wooden holders make a terrible holiday partnership. Battery tealights still create a cozy glow, and you can place the display near greenery without turning dinner into a fire-safety demonstration.
12. Wooden Christmas Book Stack
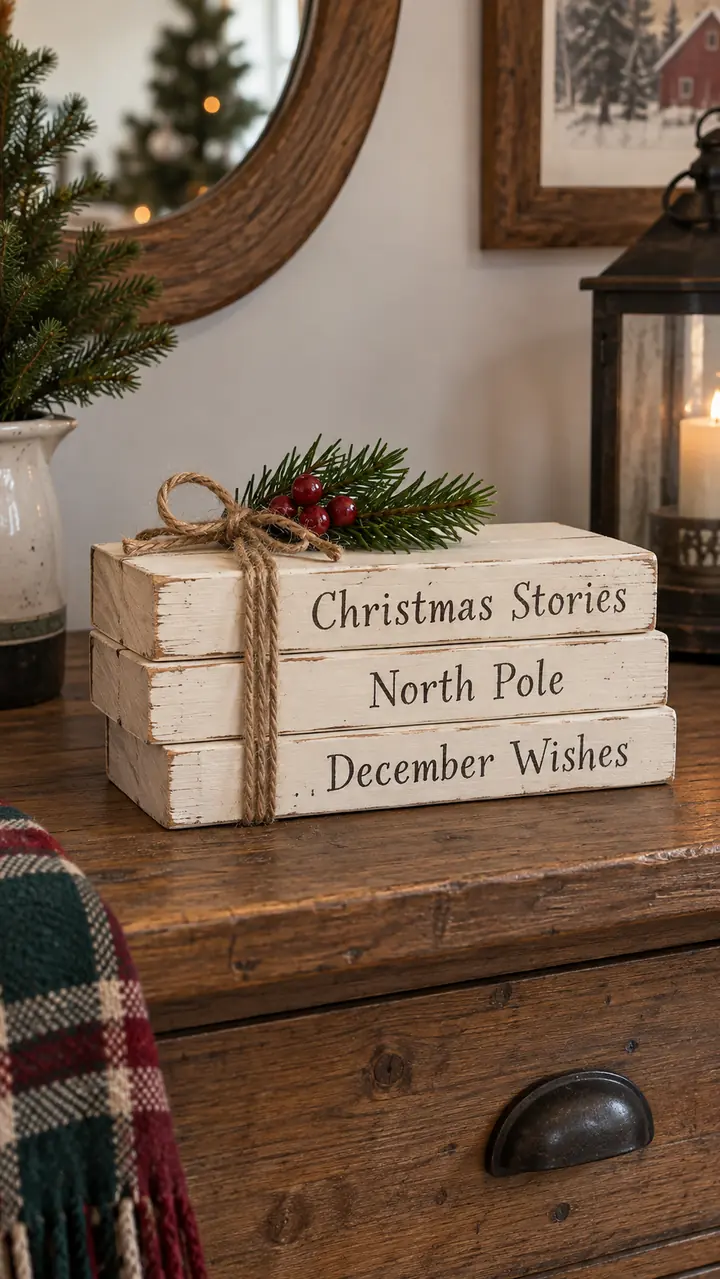
Cut three pieces between 7 and 10 inches long. Paint them cream, stack them on their wide faces, and add book-style titles such as “Christmas Stories,” “North Pole,” and “December Wishes.” Tie the stack with twine and tuck in a small sprig of faux greenery.
This project suits anyone who prefers farmhouse Christmas décor and easy straight cuts. Slightly offset each block to make the stack feel casual. You can distress the edges lightly, but stop before the new books look like they survived a century in an abandoned barn.
13. Chunky Wooden Stars
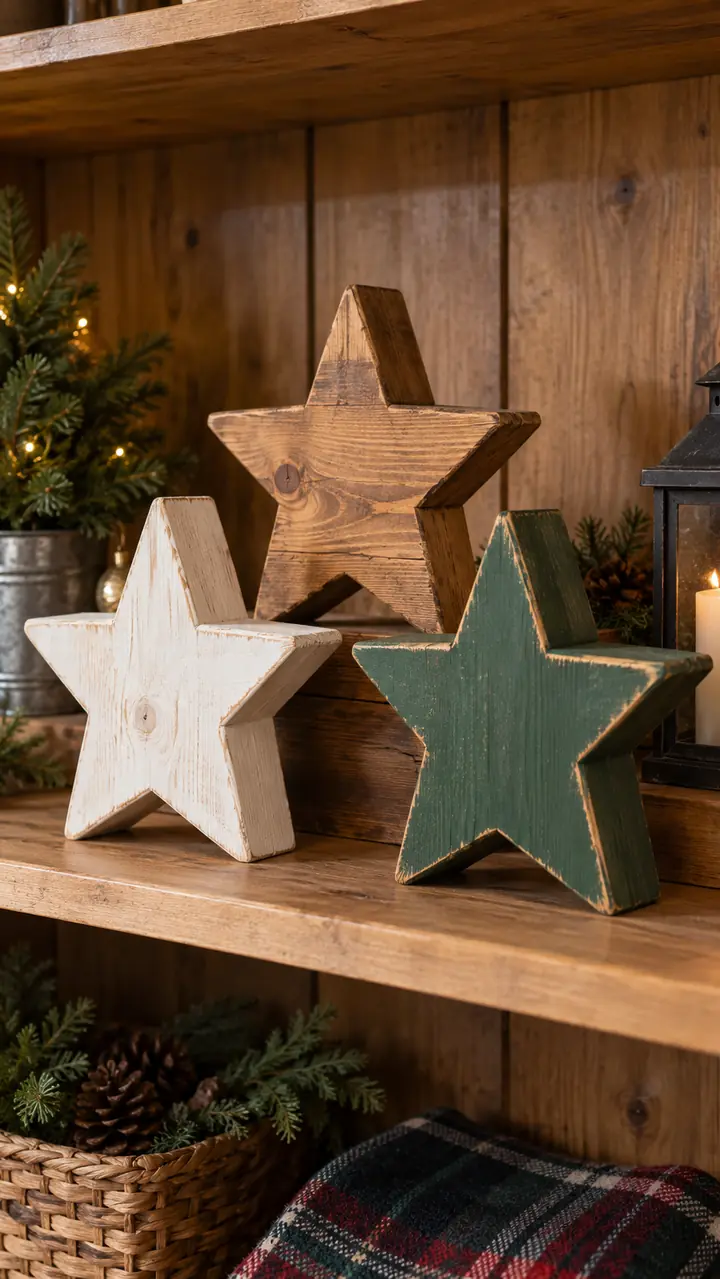
Trace a wide five-point star across the face of a short 2×4 section and cut it with a jigsaw or scroll saw. Keep the points broad so they resist breaking. Sand the inside corners by hand, then stain, paint, or whitewash the star.
One large star can top a small pallet tree, while several smaller stars can decorate shelves and place settings. Drill a hole before cutting if you plan to hang the star; the larger blank gives you more support during drilling. Gold wax or metallic paint along the edges adds a little shine without overwhelming the grain.
14. Christmas Tree Candle Village
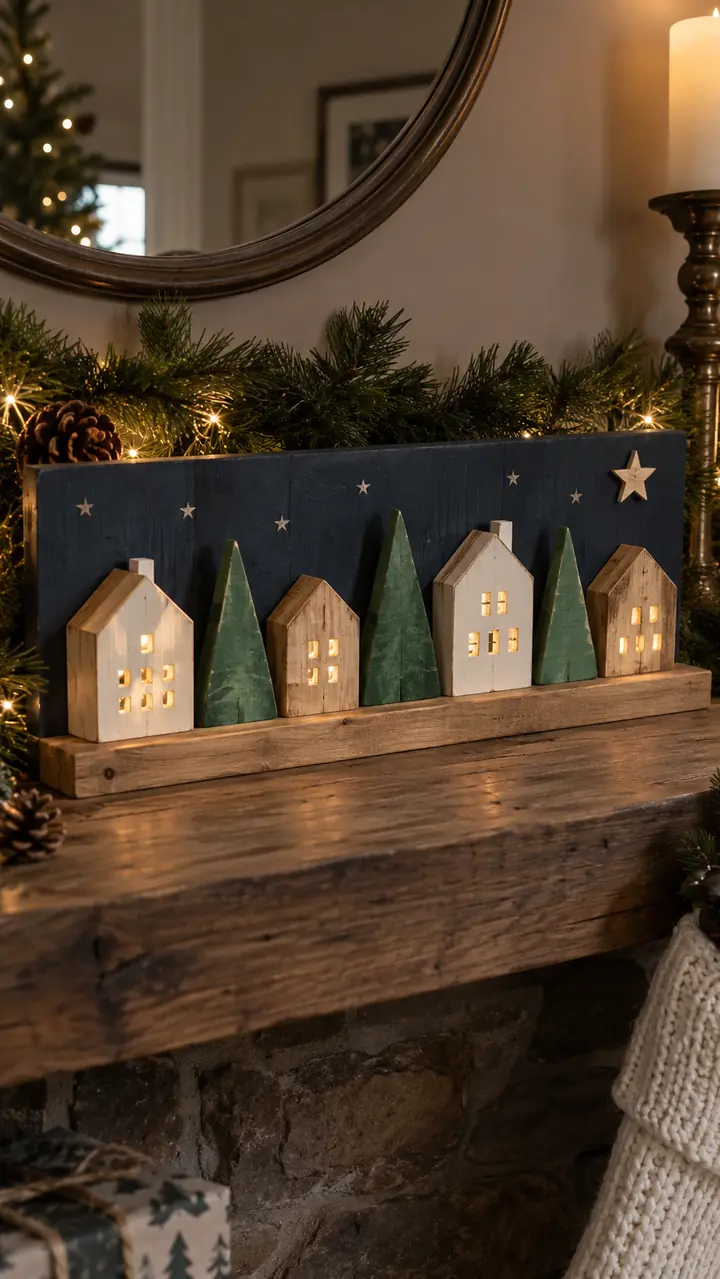
Combine simple block houses with triangular trees cut from leftover pieces. Arrange everything on a narrow wooden base and weave a strand of tiny battery lights behind the shapes. The result looks like a glowing winter village even though the construction relies on basic cuts.
Paint the backdrop dark green or midnight blue and keep the houses cream or natural. Drill small holes behind painted windows if you want the lights to shine through. Use low-heat battery LEDs and secure the battery pack where you can reach the switch.
15. Wooden Santa Blocks
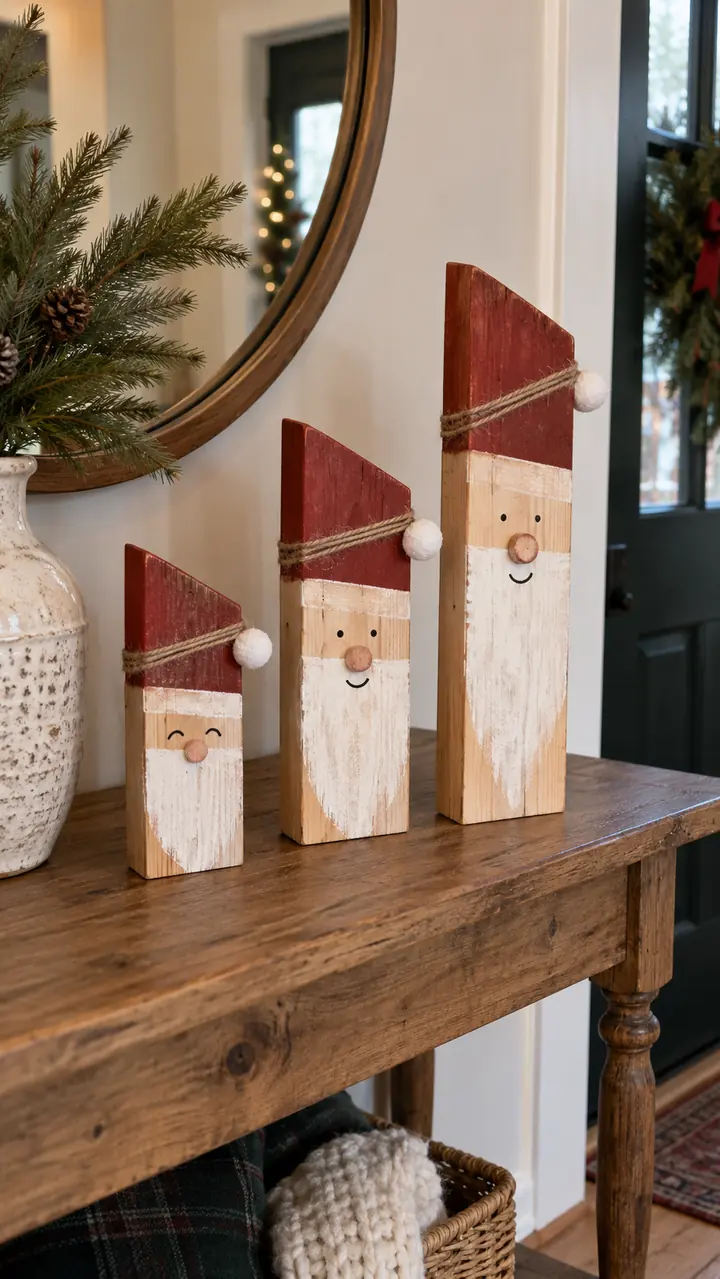
Cut upright blocks between 8 and 14 inches tall. Paint the upper section red, add a peach or brown face, and create a white beard with a dry brush or a simple wooden overlay. A diagonal top cut can suggest Santa’s hat without adding fabric.
Build a trio with slightly different heights and expressions. The small variations make the group feel handmade rather than factory-perfect. Want less painting? Use a red stain on the hat and leave the face natural.
16. 2×4 Holiday Lantern
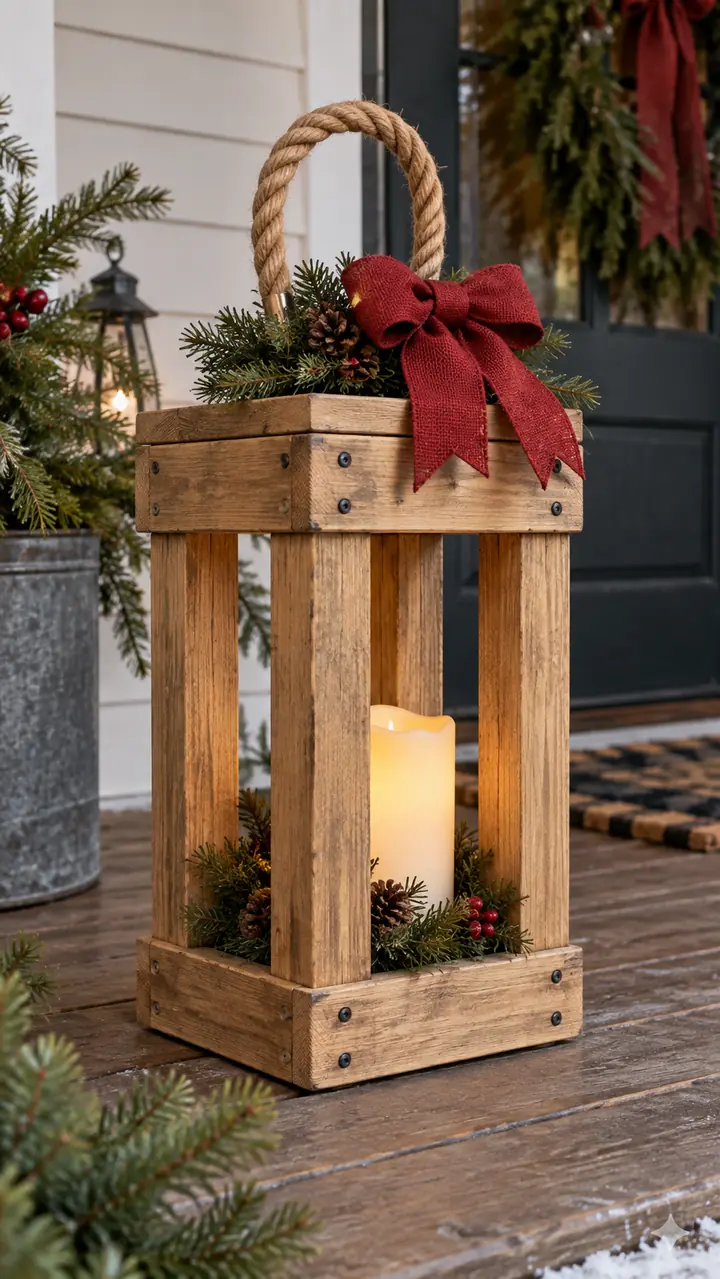
Build a square frame from short 2×4 pieces and add four upright corner posts. Cap the top with a second frame, then place a battery candle inside. You can leave the sides open or attach clear acrylic panels if you want a more finished lantern shape.
This design uses more lumber than the block crafts, but it creates a substantial porch display. Add a loop of thick rope, greenery, and a weather-resistant bow. Again, choose an LED candle—your wooden lantern doesn’t need method acting.
17. Wooden Snowflake Blocks
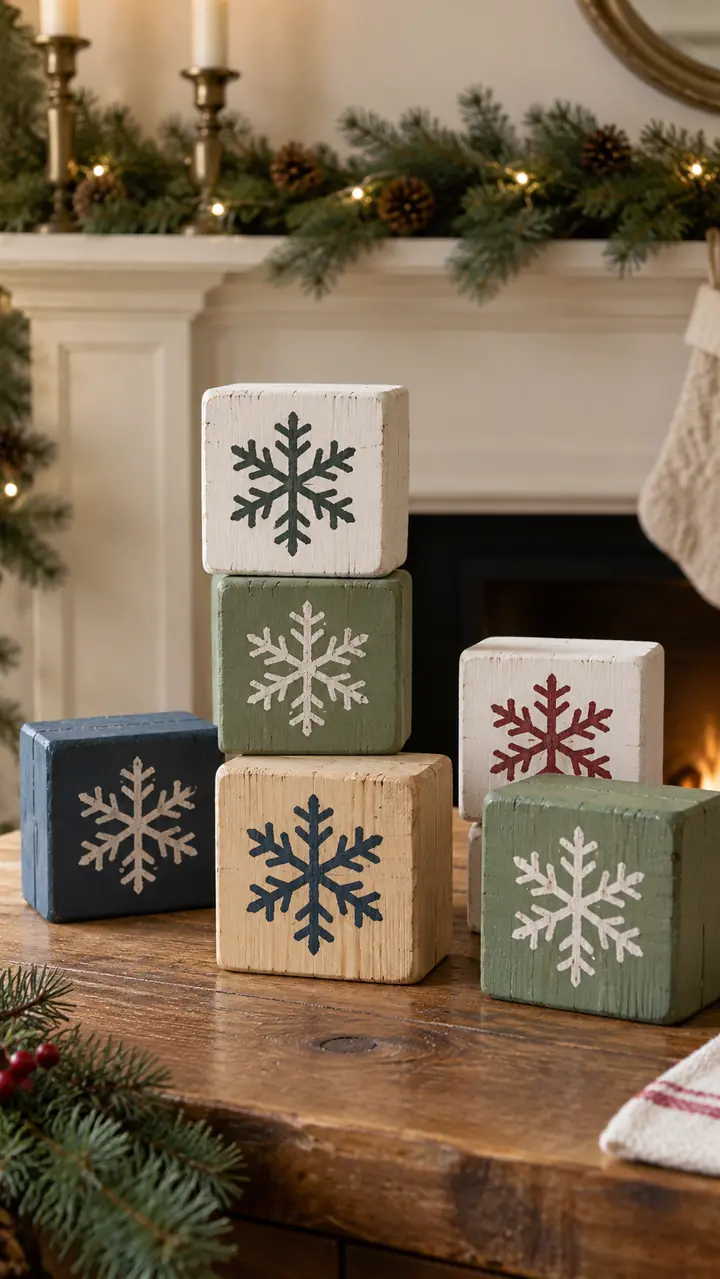
Cut square-ish blocks about 3½ inches long, paint them blue, white, or natural, and stencil a different snowflake on each face. Stack them vertically, scatter them across a mantel, or use them as chunky place markers. A paint pen helps you control the fine lines.
For a cleaner pattern, print a simple snowflake, transfer it with graphite paper, and trace the design. You can also burn the pattern into unfinished wood if you already know how to use a wood-burning tool safely. Practice on scrap first because pyrography offers no undo button.
18. Christmas Photo Holders
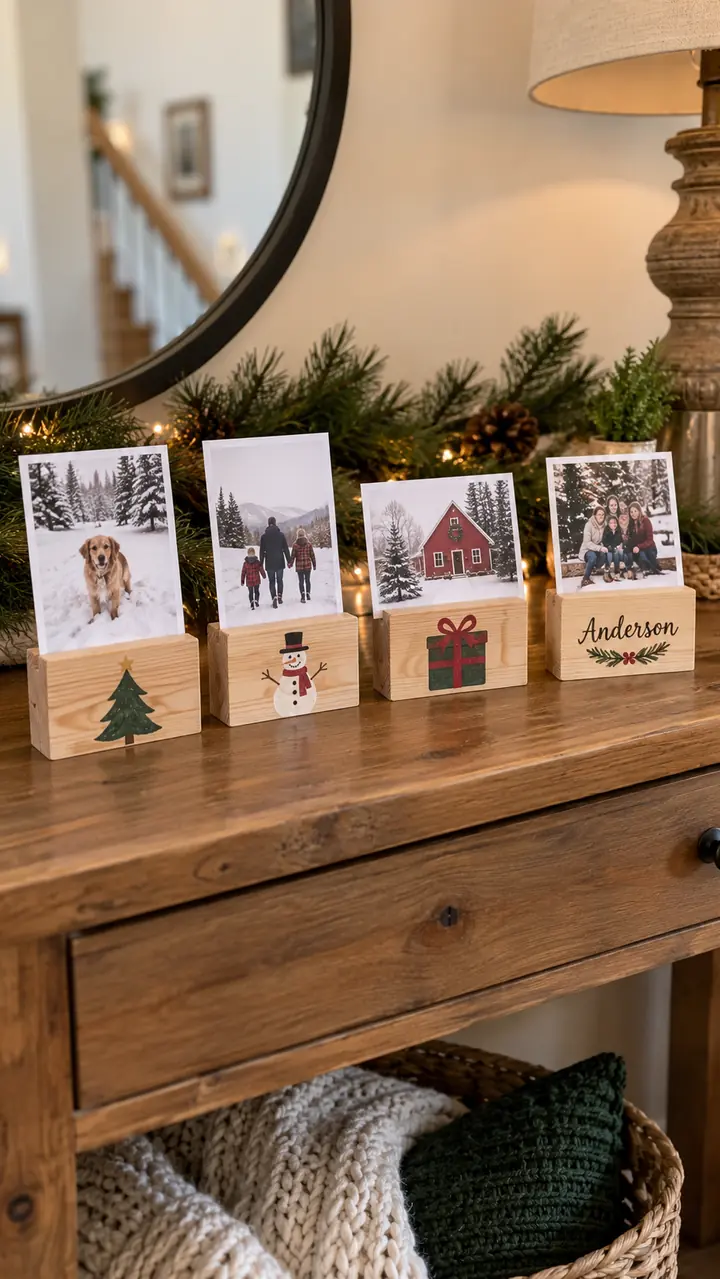
Cut short blocks, sand them smooth, and saw a shallow groove across the top to hold a printed photo or holiday card. Keep the groove narrow and angle it slightly backward. Paint each front with a tree, snowman, gift, or family name.
These holders make useful gifts because the recipient can swap the photo each year. FYI, test the groove with a scrap of cardstock before finishing all the blocks. A groove that pinches the card feels frustrating, while one that runs too wide makes every photo lean like it stayed up past midnight.
19. Wooden Christmas Train
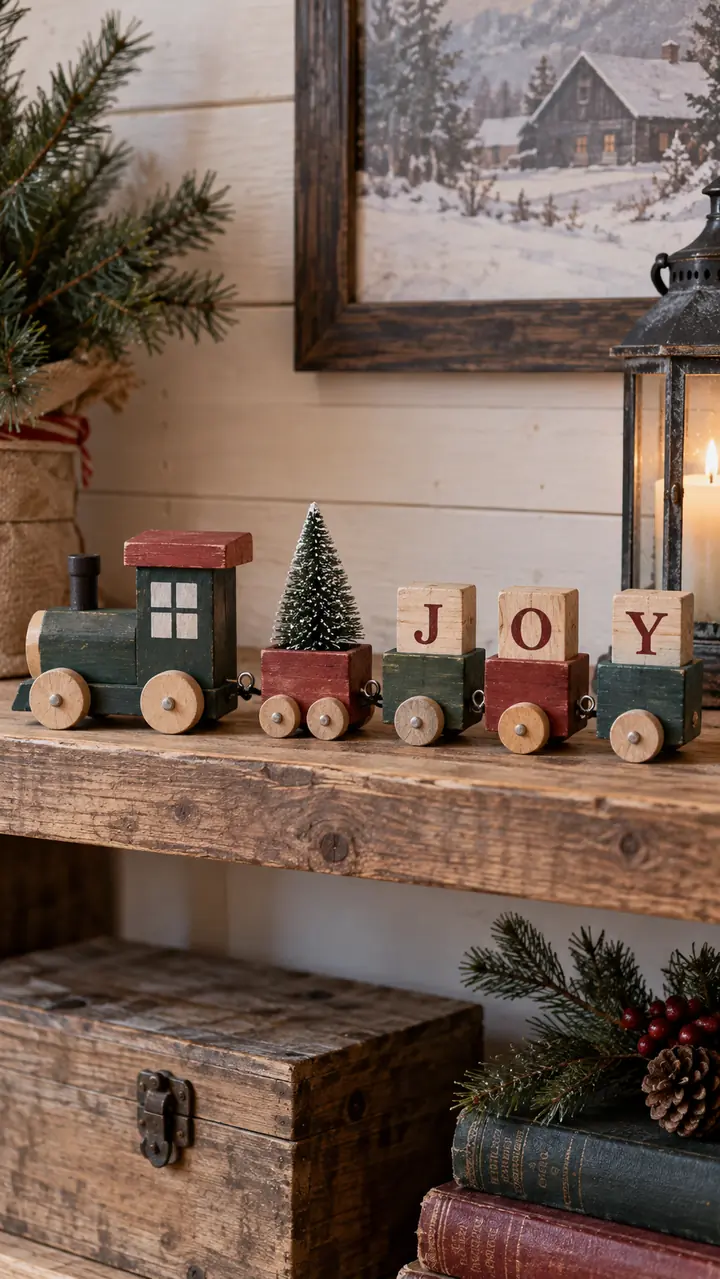
Use one longer block for the locomotive and shorter blocks for two or three cars. Add round wooden wheels, a dowel smokestack, and simple painted windows. Connect the cars with eye screws and short pieces of chain or cord.
Fill the cars with wrapped candy, miniature trees, or wooden letters that spell “JOY.” Keep the train decorative unless you redesign every connection and finish for child-safe play. Decorative hardware, small wheels, and loose accessories may create hazards for young children.
20. 2×4 Christmas Gnomes
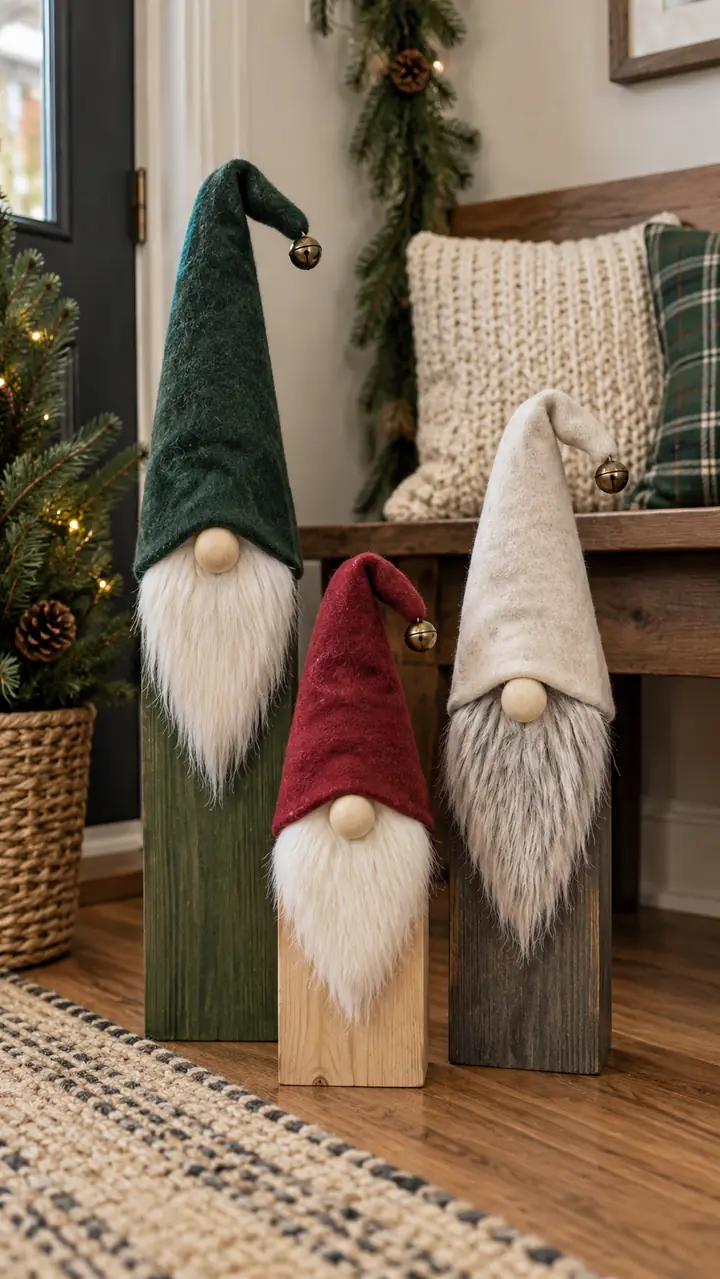
Cut blocks at different heights and angle the tops to support tall felt hats. Paint a round nose near the center, glue a faux-fur beard below it, and pull the hat low enough to hide the eyes. Apparently, anonymity counts as a personality trait when you’re a Christmas gnome.
Choose one restrained palette so the group looks cohesive. Cream, charcoal, muted red, and forest green work well with rustic interiors. If you dislike faux fur, cut a beard shape from thin plywood and paint it white.
21. Outdoor 2×4 Christmas Tree Forest
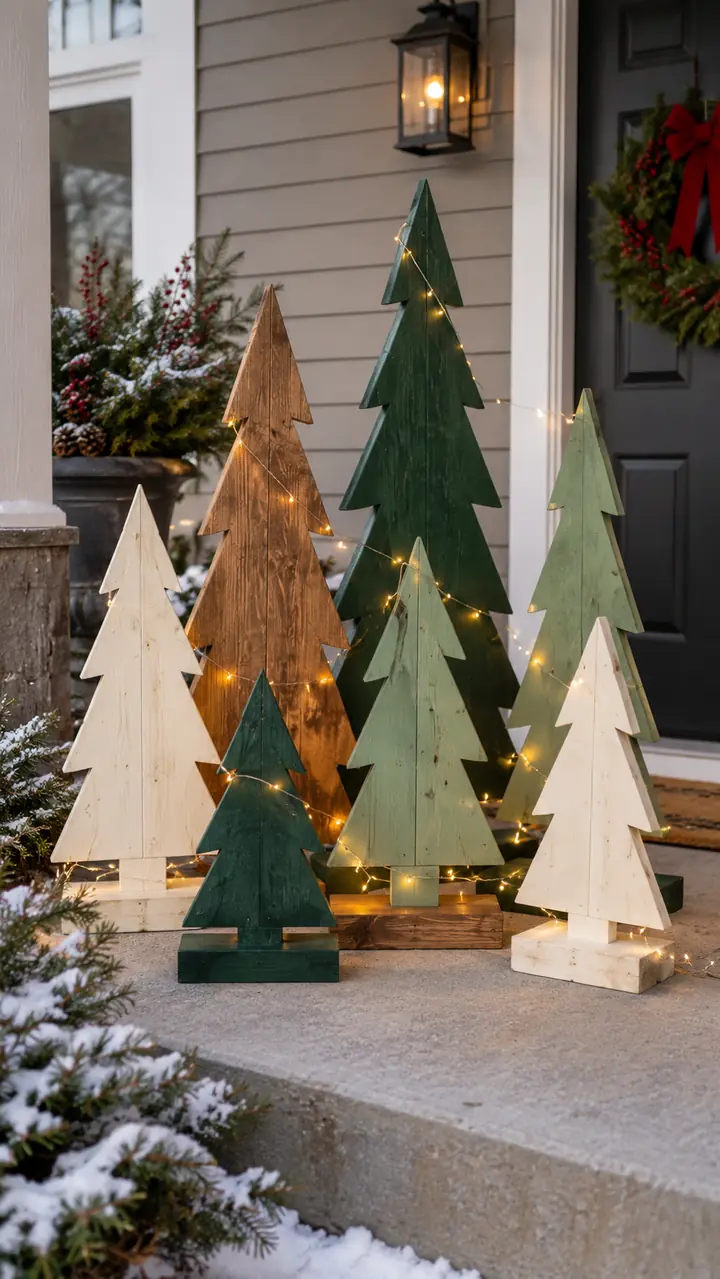
Finish with a larger version of the first idea. Cut several 2×4 boards at heights between 24 and 48 inches, trim angled tree silhouettes, and attach each one to a wide wooden base. Vary the height and shade of each tree to create depth.
Place the group beside a porch, fence, or front walkway. Use exterior primer, paint, screws, and sealer, and anchor the bases for local wind conditions. Add outdoor-rated lights only if the manufacturer approves them for that use.
If you want more exterior inspiration, browse these wooden Christmas yard decorations. The larger silhouettes pair especially well with reindeer, stars, and oversized gift boxes.
How to Make Basic 2×4 Crafts Look Professionally Finished
The design gets the attention, but preparation creates the polished result. Start by cutting past any split or damaged end grain. Sand rough lumber with 80 grit, smooth it with 120 grit, and finish with 180 grit before paint or stain.
Ease sharp corners with two or three light sanding passes. Don’t round everything into a potato unless the design calls for it. Remove dust with a vacuum and clean cloth before applying finish.
Use a stain-blocking primer under light paint when knots may bleed through. Apply two thin coats instead of one heroic, lumpy coat. Let each layer dry according to the product directions, then protect high-touch or outdoor pieces with a compatible clear finish.
How Much Lumber Should You Buy?
One 8-foot 2×4 can supply several block projects. For example, three trees, a snowman family, a book stack, and a handful of snowflake blocks may use only one or two boards, depending on your dimensions and cutting waste.
Sketch a cutting plan before you start. Group identical lengths, allow for the saw blade’s kerf, and cut the longest parts first. Save the short clean offcuts for noses, tags, bases, wheels, and village details.
If your workshop keeps producing useful leftovers, visit these small and scrap wood projects. Turning scraps into decorations feels much better than moving the same pile from one side of the shop to the other every month.
Choosing the Right Project for Your Skill Level
Beginners should start with block snowmen, present boxes, the book stack, reversible word blocks, or photo holders. These projects use straight cuts and let the paint carry most of the design. You can complete several in one relaxed afternoon.
Choose the village houses, chunky trees, stars, or Santa blocks when you feel comfortable making angled cuts. Save the reindeer, train, lantern, and outdoor forest for a longer session because they involve assembly, hardware, or extra stability.
Need a bigger holiday project after warming up? The DIY wooden Advent calendar plan includes measurements, a cut list, and 24 reusable drawers. It asks for more precision, but it also creates a piece your family can bring out every December.
Can You Make and Sell These Christmas Crafts?
Yes, several designs suit craft fairs and local marketplaces. Snowman families, gnome sets, personalized presents, reversible word blocks, and photo holders ship or display easily. Larger porch trees and North Pole signs may work better for local pickup because shipping chunky lumber quickly eats the profit.
Track the cost of lumber, paint, decorations, packaging, selling fees, and your time. Batch identical cuts and colors to speed production, but don’t promise personalization faster than you can deliver it. Holiday deadlines show absolutely no sympathy.
For more product ideas, see these Christmas wood crafts to make and sell. Use those ideas as inspiration, develop your own dimensions and details, and photograph the finished items clearly.
Frequently Asked Questions
Can I use 2×4 scraps for these projects?
Absolutely. Inspect every offcut for hidden screws, deep cracks, mold, heavy twist, or chemical contamination. Clean, dry construction-lumber scraps work well for blocks, houses, stars, ornaments, and small decorative details.
What paint works best on 2×4 Christmas crafts?
Acrylic craft paint works well for indoor decorations. Use exterior primer and exterior paint for porch or yard projects. Match every topcoat and sealer to the paint manufacturer’s recommendations so the layers bond properly.
How do I keep outdoor wooden decorations from tipping?
Use a wide base, exterior-rated fasteners, and anchors suited to the location and local weather. Keep tall displays away from walkways, vehicles, and power lines. Bring them inside when severe wind or weather threatens.
Can children help make these crafts?
Children can help with age-appropriate sanding, painting, and decorating under close adult supervision. Adults should operate power tools and handle finishes according to their labels. Check every project for small parts, sharp edges, and intended use before children handle it.
Which project takes the least time?
Wood block snowmen, snowflake blocks, and the Christmas book stack require the least construction time. Cut and sand the pieces in advance, then treat the remaining work like a painting session. Drying time will probably take longer than the actual building.
Final Thoughts
You don’t need exotic hardwood or a professional shop to make charming Christmas décor. A couple of straight 2×4 boards can become trees, snowmen, houses, reindeer, gifts, signs, lanterns, and an entire miniature village.
Pick one design that matches your tools, cut the parts safely, and give the finish enough time to dry. Once you see that first ordinary block turn into a Christmas decoration, you’ll start eyeing every offcut like it has holiday potential. Honestly, it probably does.