
A wooden fish can be a small carving you keep on your desk, a colorful pin for a fishing hat, or a sculpted piece that makes the grain of the wood part of the design. That variety is what makes fish wood carving such an enjoyable subject to explore. You can start with a simple silhouette, then move toward expressive faces, delicate fins, folk-art finishes, or relief work as your skills develop.
The images in this article are original illustrative examples created to visually match the style of each project. They are not photographs from the linked tutorials, and small details such as paint, fin shape, or surface texture may differ from the source pattern. Use the linked resource for the exact pattern, dimensions, and carving sequence.
These ten projects include printable templates, illustrated tutorials, and video demonstrations. Some suit a small knife-carving setup; others need a saw, gouges, or a rotary tool. Each entry explains what the linked resource provides and what the example image is showing so you can choose a project with the right amount of guidance.
If this is your first carving, start with a guided project rather than a template alone. A drawing shows you the destination; a tutorial helps you work out how to get there.
Before You Start: Wood, Tools, and a Safe Setup
Choose a suitable blank
Basswood is a practical starting choice for many small hand carvings. Look for a clean blank with straight grain and no cracks or loose knots. Follow the original project’s dimensions where supplied, including its thickness: a flat pin and a freestanding fish need very different blanks.
Print your chosen pattern before cutting the wood. Check the printer settings and any scale information, then make sure the complete outline fits. Leave enough room to hold or secure the work while shaping it. Making a design smaller does not automatically make it easier; tiny fins and eyes can be harder to control.
Gather tools for the project you choose
For knife-based projects, begin with a sharp carving knife, pencil, suitable hand protection, and your blank. A smaller detail knife can help with eyes and teeth, but it is not essential for every design. Sandpaper is optional when you prefer a smooth surface to visible knife facets.
Check the source before buying additional tools. The fish pin uses a saw to cut its outline, the decoy introduces gouges and separate fins, and the rustic 2×4 fish uses power-carving equipment. A short supply check now saves an unfinished project later.
Make safety part of the setup
Use shallow, controlled cuts and keep your holding hand and body outside the blade’s path. For hand whittling, use an appropriate cut-resistant carving glove on the holding hand; it reduces some risks but is not cut-proof or puncture-proof. Reposition the work whenever a cut would point toward your fingers.
Clamp relief boards and secure work used with power tools. Follow the equipment manufacturer’s guidance, including eye protection and dust control. Avoid loose gloves, clothing, or jewelry near rotating equipment. Hand-carving protection and power-tool protection are not interchangeable.
1. Simple Wooden Fish with a Printable Pattern
Resource: Free printable template in Letter and A4 formats.
Best fit: Carvers comfortable working from a drawing.
Main challenge: Turning a flat outline into a balanced three-dimensional shape.
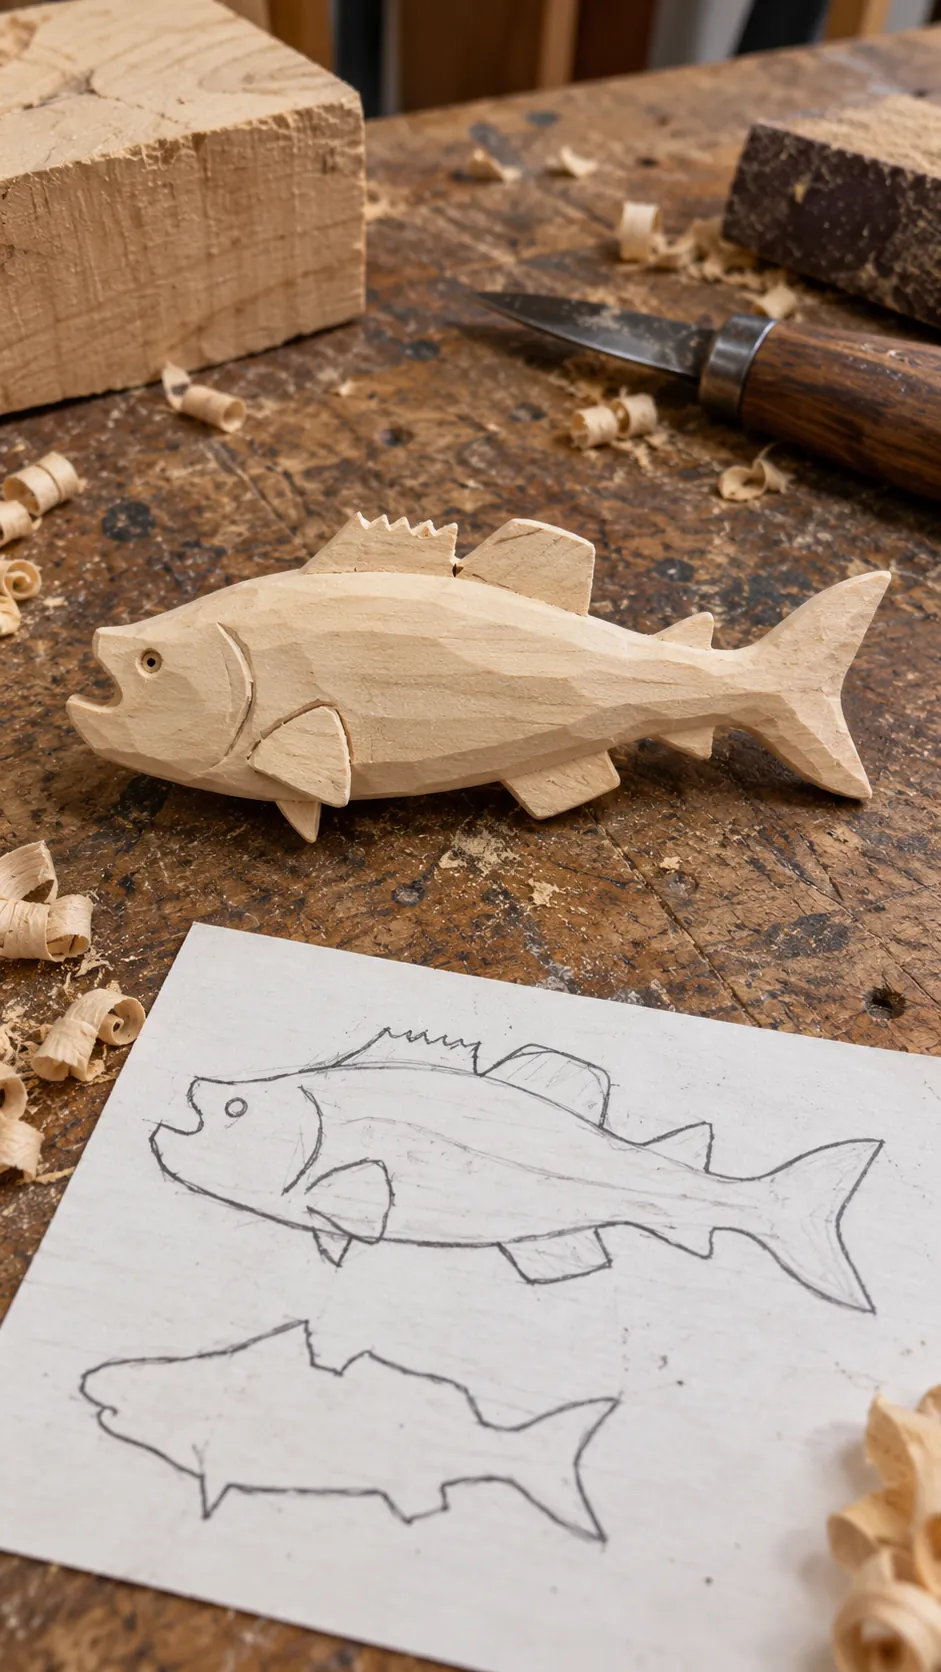
The example image shows a light-colored, unfinished fish carving resting on a worn workbench beside paper fish outlines and a carving knife. The body is intentionally simple, with visible knife facets, a rounded belly, a defined gill line, and sturdy fins. That makes it a useful visual reference for a first pattern-based fish rather than a highly detailed wildlife carving.
Carving Is Fun lists a fish template in its whittling collection. There is no accompanying fish walkthrough in that listing, so choose this option when you already understand basic shaping and want a design to work from.
Start by transferring the outline and roughing out the silhouette. Keep the tail and fins thicker than you think you need during the early stages. Once the body has a clear three-dimensional form, gradually refine the fins and head. The unfinished look shown in the image works well here: visible knife cuts and a small carved or painted eye are enough to make the fish readable without adding scales everywhere.
Find the fish template at Carving Is Fun — look under “Whittling Project Templates.”
2. Small Flat Fish Pin
Resource: Written carving instructions with project examples.
Tools and materials: ¼-inch basswood, coping or scroll saw, carving knife, sandpaper, pin backing.
Main challenge: Defining the fins without weakening a thin blank.
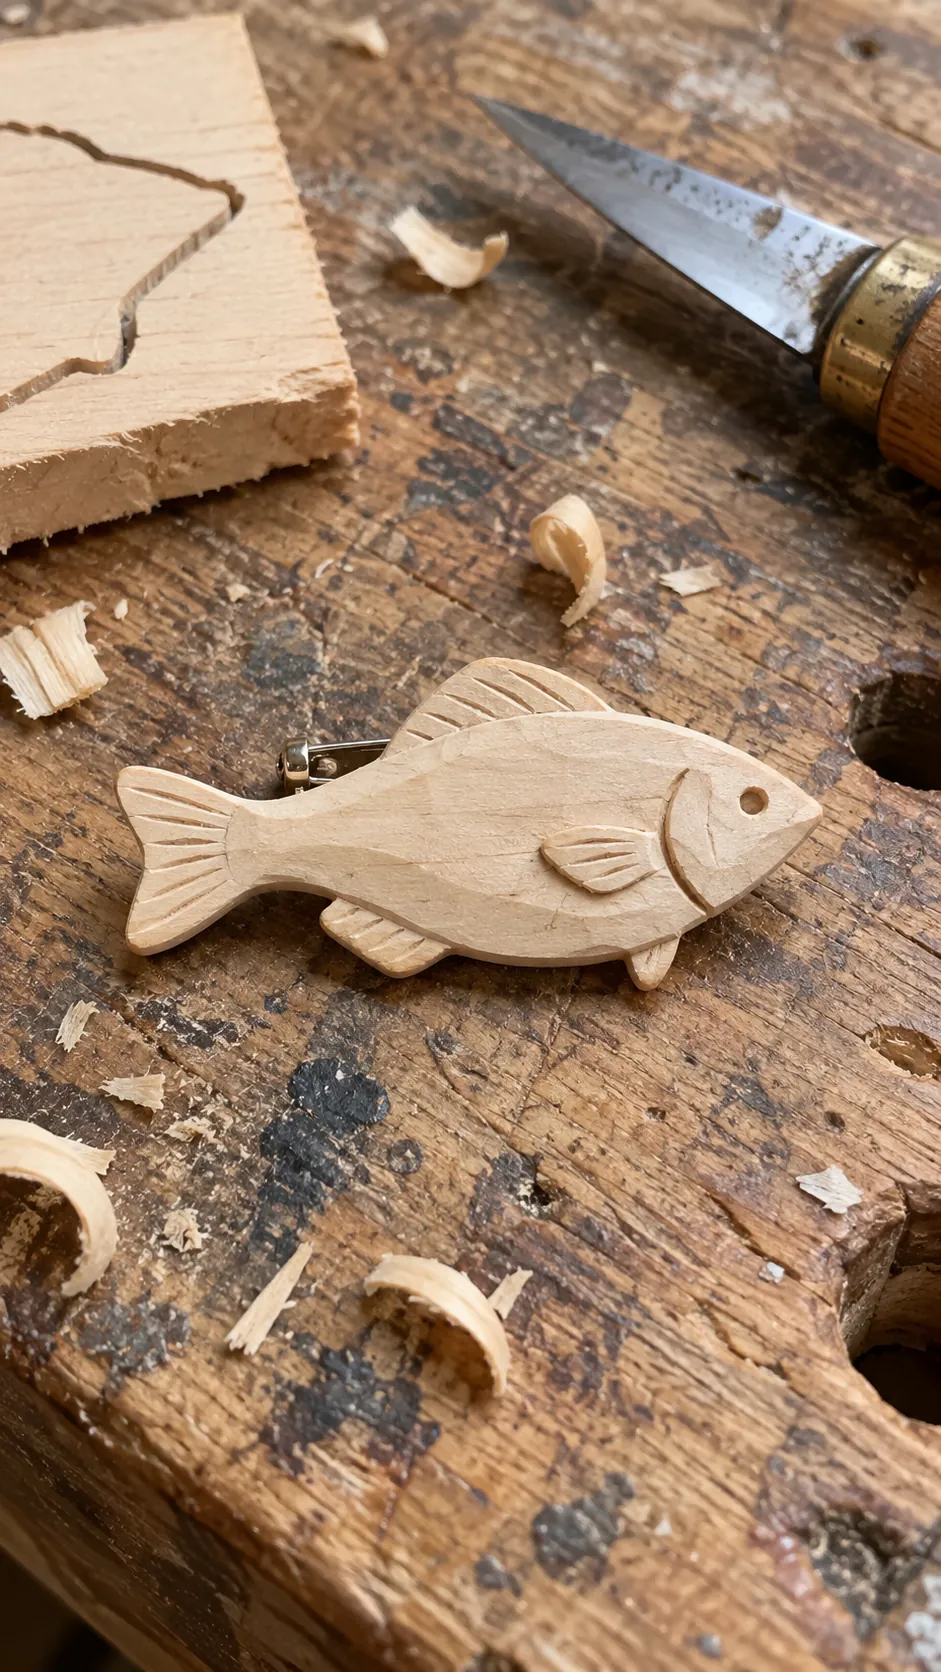
The image for this project shows exactly the kind of result that makes a fish pin appealing: a thin basswood profile, shallow carved details, a simple eye, and a metal pin back hidden behind the body. Because the carving stays relatively flat, the fins are suggested with stop cuts and shallow grooves rather than deep sculpting.
This project from Beginners Carving Corner turns a fish profile into a pin for a hat or jacket. The creator starts with an illustration resized to the desired size, transfers it to basswood, and cuts out the blank with a saw.
Round the back and belly only enough to soften the silhouette. Keep the dorsal, tail, and lower fins thin but supported. A few carved lines can give the fins texture without making them fragile. The eye can be impressed or drilled as a small circular detail.
Follow the fish pin tutorial at Beginners Carving Corner.
3. Goldfish Carved with a Knife
Resource: Video tutorial.
Tool focus: Knife carving, as described by the video creator.
Main challenge: Preserving a clear body-to-tail transition.
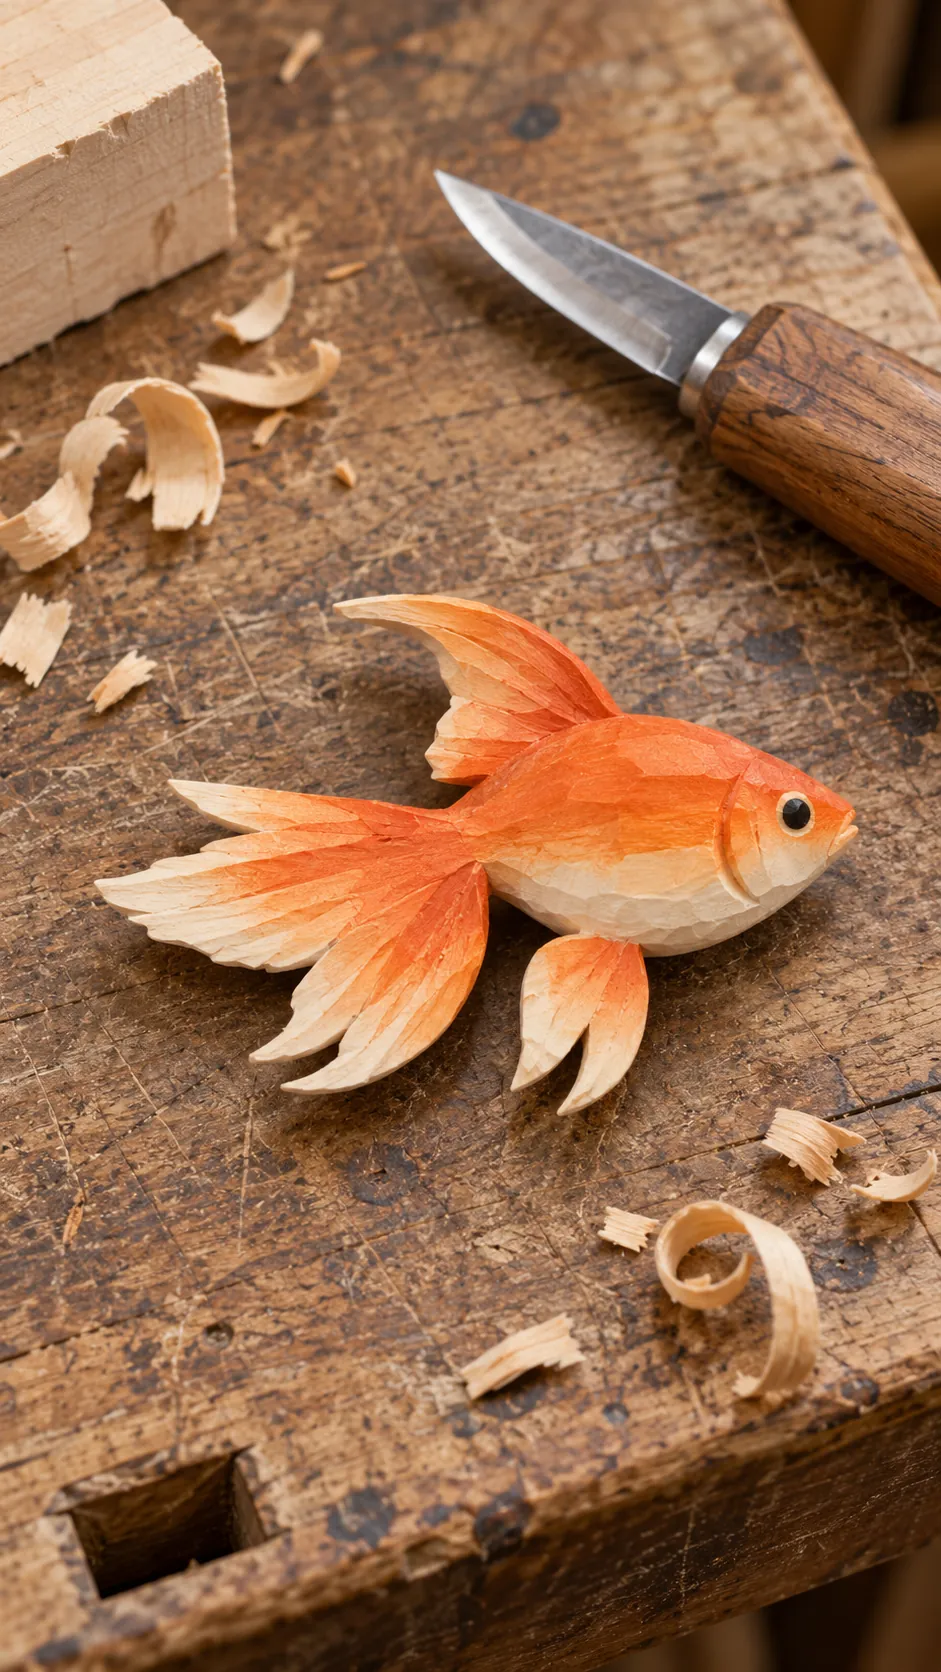
The example image shows a small orange goldfish with a rounded body and long flowing fins. The carving still has visible hand-cut texture, while the orange-to-cream paint makes the tail and belly easy to read. It is a useful way to visualize how a simple fish carving can become more recognizable through color without needing carved scales over the whole body.
This goldfish video offers another way to approach fish wood carving when you prefer visual instruction. The creator presents it as a simple project for beginners using a knife. Use the demonstration as your guide to the specific blank and sequence; a separate printable pattern is not confirmed here.
When shaping the fish, keep generous material around the tail and fins until the body is established. Then thin the projecting parts gradually. If you want a finish similar to the image, use a warm orange body, a lighter underside, and softer color toward the fin tips. Leave some carved texture visible so the piece still reads as hand-carved wood.
Watch the goldfish carving tutorial on YouTube.
4. One-Tool Angelfish
Resource: Publisher’s project page with a video and pattern link.
Tool focus: One-tool whittling, according to the publisher.
Main challenge: Keeping the projecting parts of the silhouette intact.
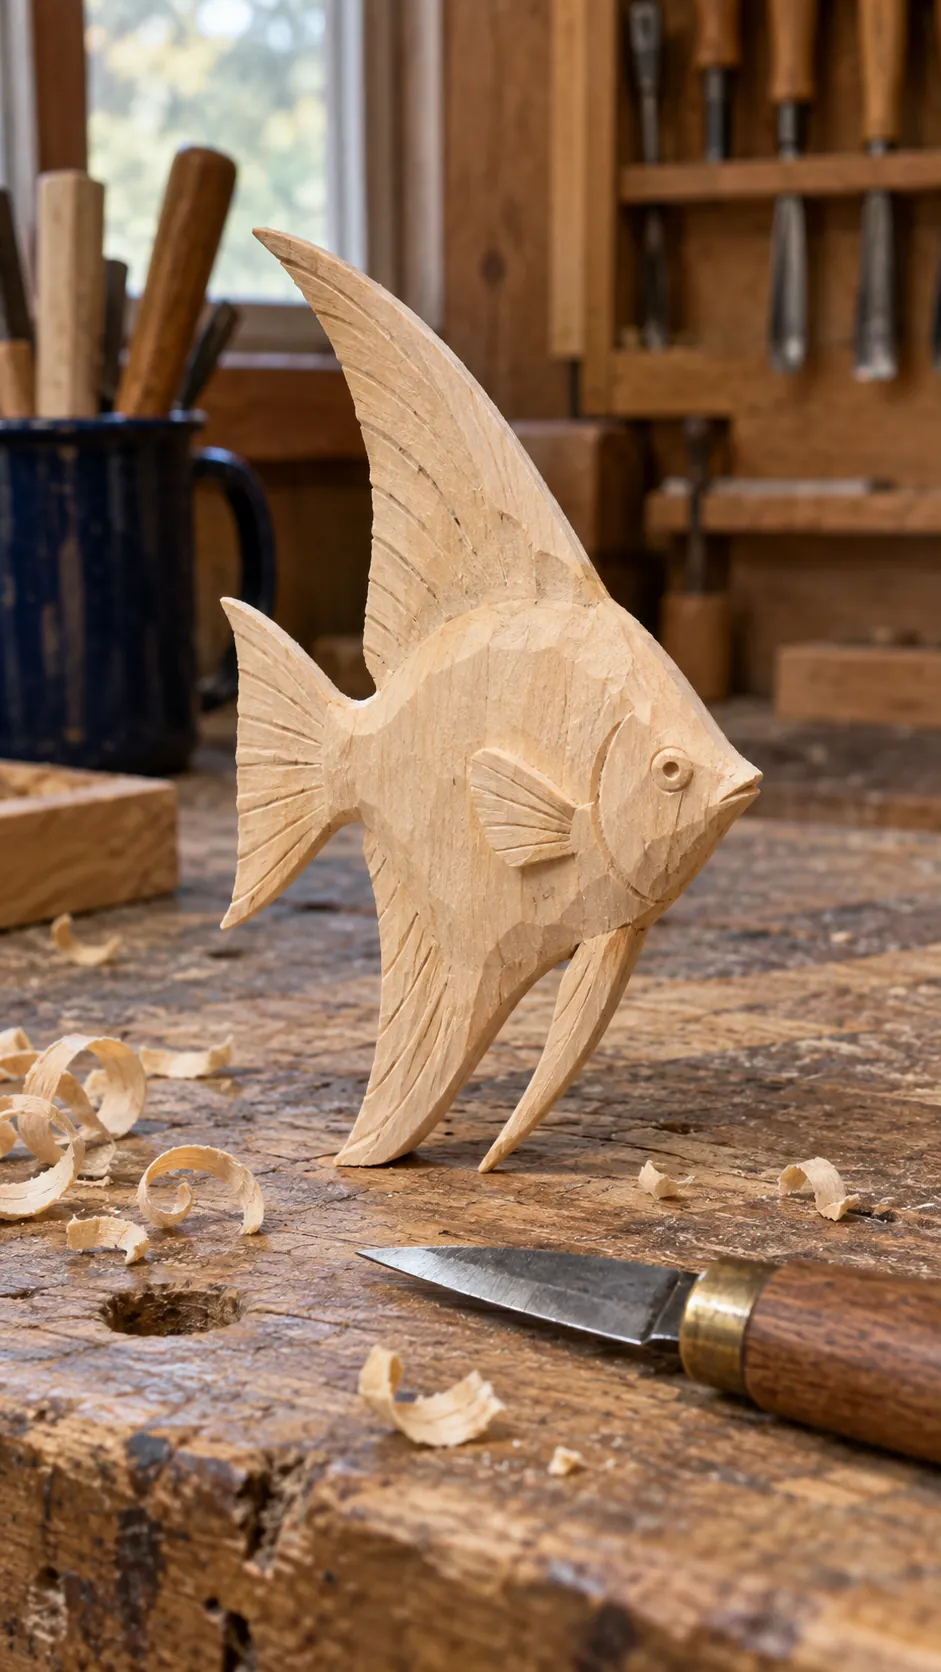
The example image uses an unfinished natural-wood angelfish with a tall dorsal fin, long lower fin, narrow tail, and simple carved eye. That restrained look suits the project well because the silhouette does most of the visual work.
Tom Hindes’s angelfish is a good project to consider when you want guided practice with a recognizable subject. Woodcarving Illustrated introduces it as beginner-friendly and says it can be completed with one tool.
Focus first on the diamond-like body and the long projecting fins. The fins do not need carved scales or complicated surface detail; clean proportions and crisp transitions are more important. If you like the look shown in the image, leave the basswood natural and preserve a few knife facets instead of sanding everything completely smooth.
See Tom Hindes’s angelfish project and linked pattern.
5. Flat Cartoon Fish with Clownfish-Inspired Colors
Resource: Illustrated tutorial, video overview, pattern, and painting guide.
Tools and materials: Basswood, roughout knife, smaller detail knife, pencil, optional sandpaper and paint.
Main challenge: Separating the eyes and mouth cleanly on a flat body.
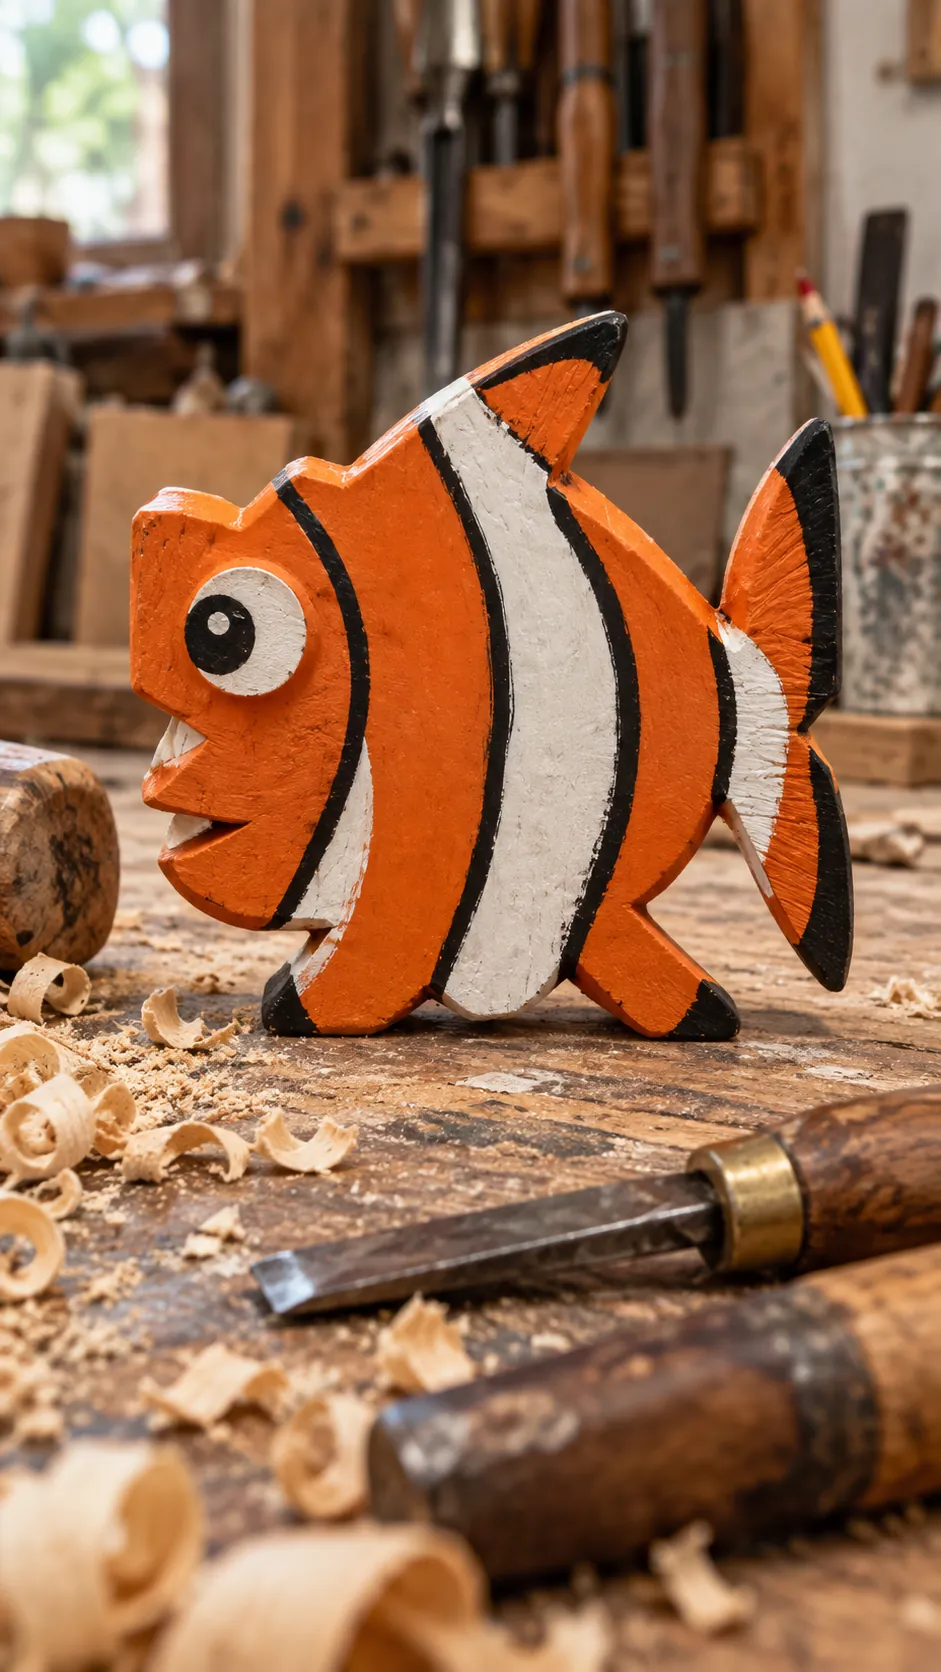
The image shows a deliberately simple flat cartoon fish painted in orange, white, and black clownfish-inspired bands. It has a chunky outline, a large circular eye, a small open mouth, and broad fins. The paint is intentionally bold because the carving itself remains shallow and graphic.
The original Carving Junkies project is a flat cartoon fish with prominent facial features. Clownfish coloring is an optional finish rather than a realistic clownfish pattern, so the image should be treated as a painted variation of that flat caricature style.
The example uses a blank approximately 3½ × 3½ × ¾ inches. Work through the outline, facial details, and mouth before painting. If you choose orange and white, sketch the bands first so they do not hide the eye or mouth. Keep the black outlines narrow and let some carved wood texture remain visible under the paint.
Get the flat fish tutorial and pattern at Carving Junkies.
6. Rounded Cartoon Fish with Oversized Eyes
Resource: Illustrated tutorial and free pattern.
Tools: Sturdy roughout knife and detail knife; the tutorial also mentions an optional gouge.
Main challenge: Shaping the face and split tail around a fuller body.
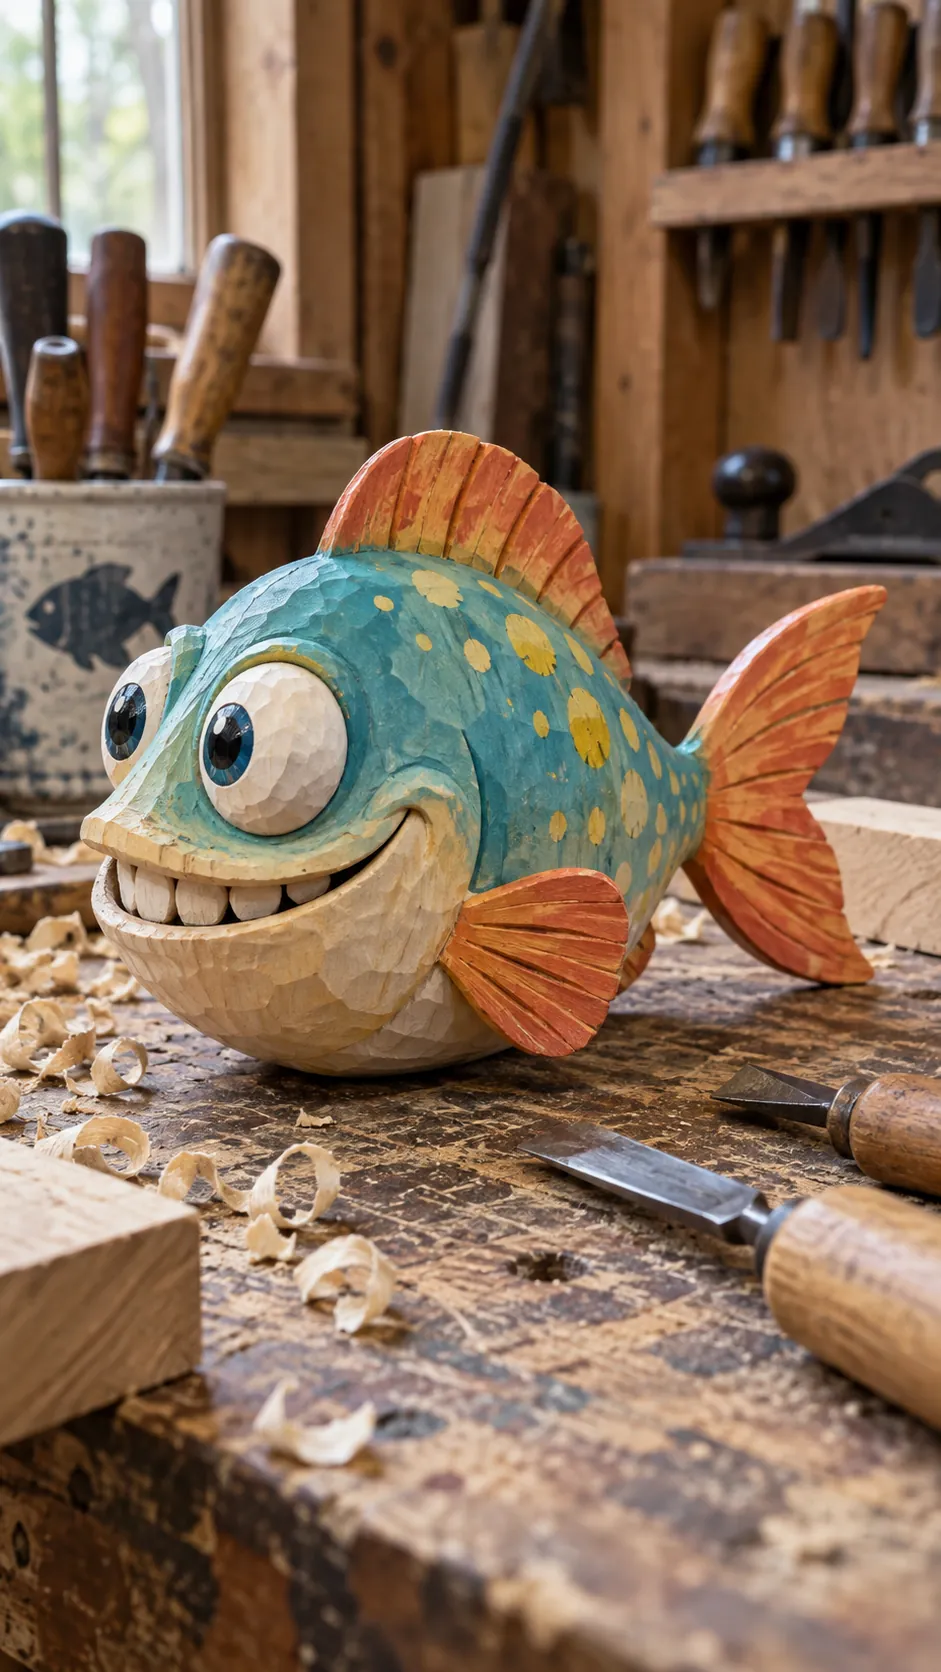
The example image shows a much fuller cartoon fish than the previous project: a rounded blue-green body, oversized white eyes, a wide toothy grin, orange fins, and scattered painted spots. The carving is intentionally playful, with the face doing most of the work.
This second Carving Junkies design has a rounder body, bulging eyes, a wide grin, and carved surface details. It is a useful comparison with the flatter fish above because the head, cheeks, eyes, and tail all need more three-dimensional shaping.
Rough out the body first and keep the face broad enough to support the eyes and mouth. Develop the tail and fins after the main volume feels balanced. For a finish like the example image, use a limited palette and let the carved facets remain visible beneath the paint rather than trying to make the surface look molded or plastic.
Follow the rounded cartoon fish tutorial at Carving Junkies.
7. Traditional Wooden Fish Decoy
Resource: Multi-page carving tutorial.
Tools and materials: Bench or chip-carving knife, gouges, basswood, sandpaper, glue, and separate fin material.
Main challenge: Combining the carved body with attached fins.
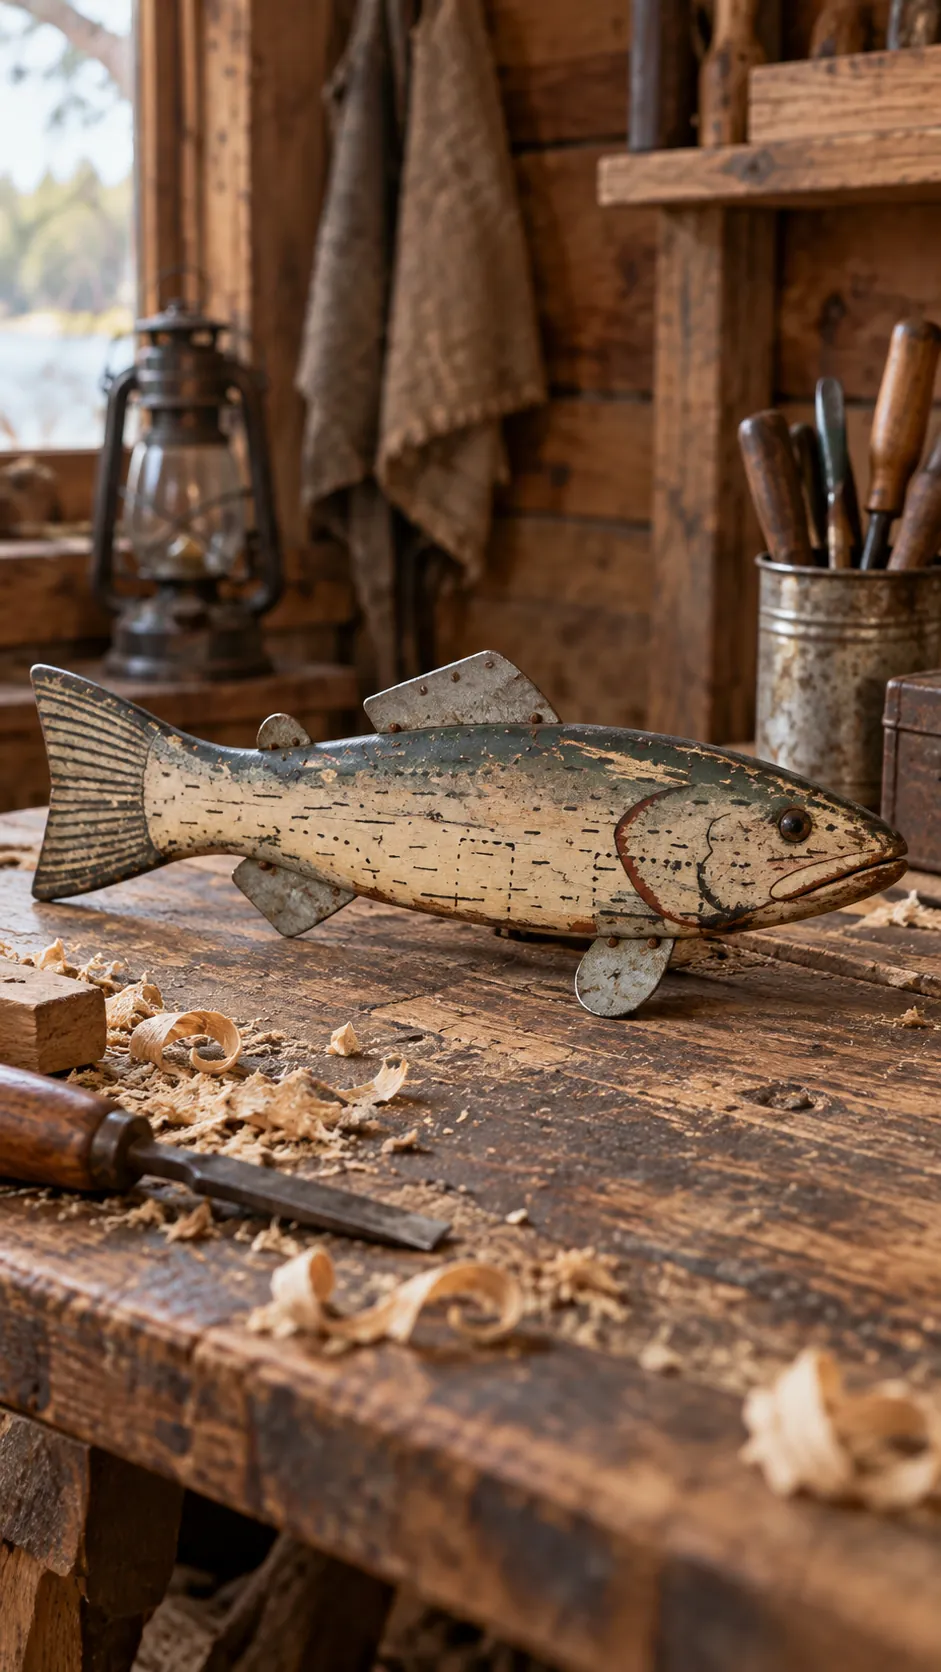
The example image shows a weathered folk-art fish decoy with a long carved wooden body, muted green and cream paint, and separate metal fins. The deliberately aged surface makes it look like an old working lure rather than a polished decorative sculpture.
Lora S. Irish’s fish decoy project uses a carved basswood body and separate fins made from thin metal. The introduction also discusses alternative fin materials, which makes this project different from the solid-wood carvings above.
Shape the body first, then fit the fins so they sit securely and symmetrically. If you want the rustic appearance shown in the image, use thin paint layers and allow some wood and wear to show through. The mouth, gill lines, and eye can remain simple because the silhouette and attached fins already give the piece plenty of character.
Read the fish decoy tutorial by Lora S. Irish.
8. Sculptural Fish Carving with a Pattern-Led Approach
Resource: Downloadable shark pattern and linked video by Charly Brunet Sculpture.
Best fit: A next-step project for carvers with shaping experience.
Main challenge: Maintaining the relationship between the body, fins, and tail.
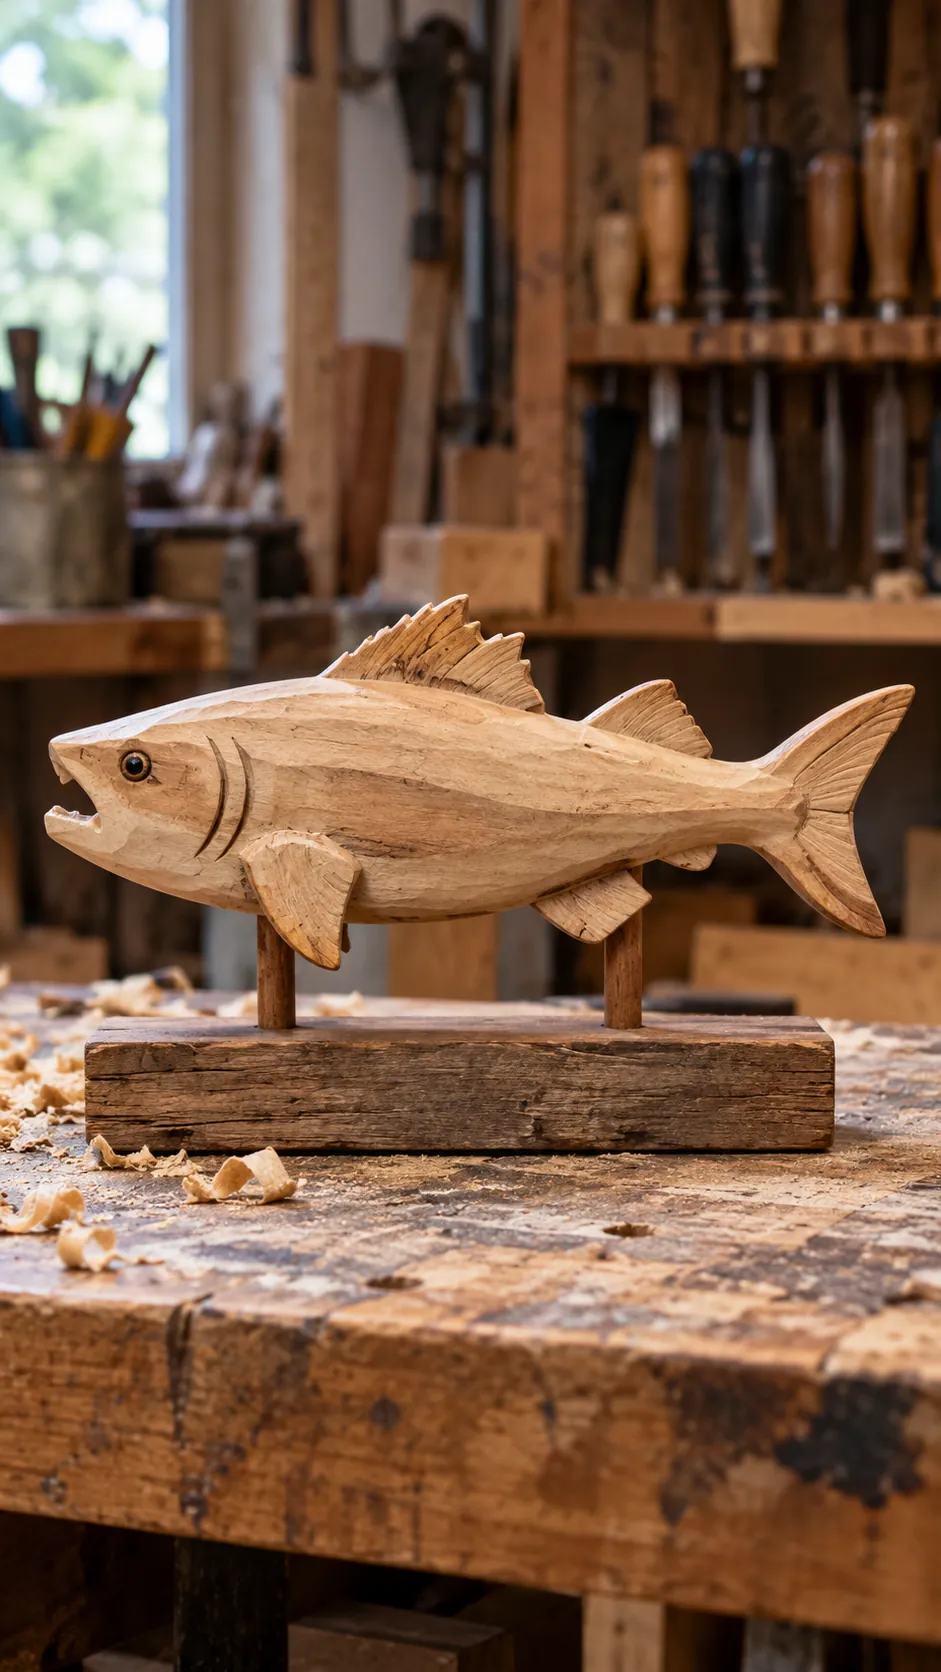
The image used in this article shows an elongated game-fish style carving rather than a literal shark. It is included to illustrate the same kind of three-dimensional planning needed for a longer fish body: a strong central mass, projecting fins, a narrow tail connection, and a clean overall silhouette.
The linked Carving Is Fun guest resource itself is specifically a shark pattern with a companion video. If you want to reproduce that source project, follow the shark template and video rather than copying the exact fish shown in the article image.
For either subject, work from the whole silhouette instead of finishing one fin at a time. Keep the fin roots thick while roughing out the body, check the balance from several angles, and only then refine the thinner projecting parts. A natural finish like the image keeps attention on the carving rather than on painted detail.
Find the shark pattern and video — look under “Charly Brunet Sculpture Templates.”
9. Fish Relief Carving on a Wooden Plaque
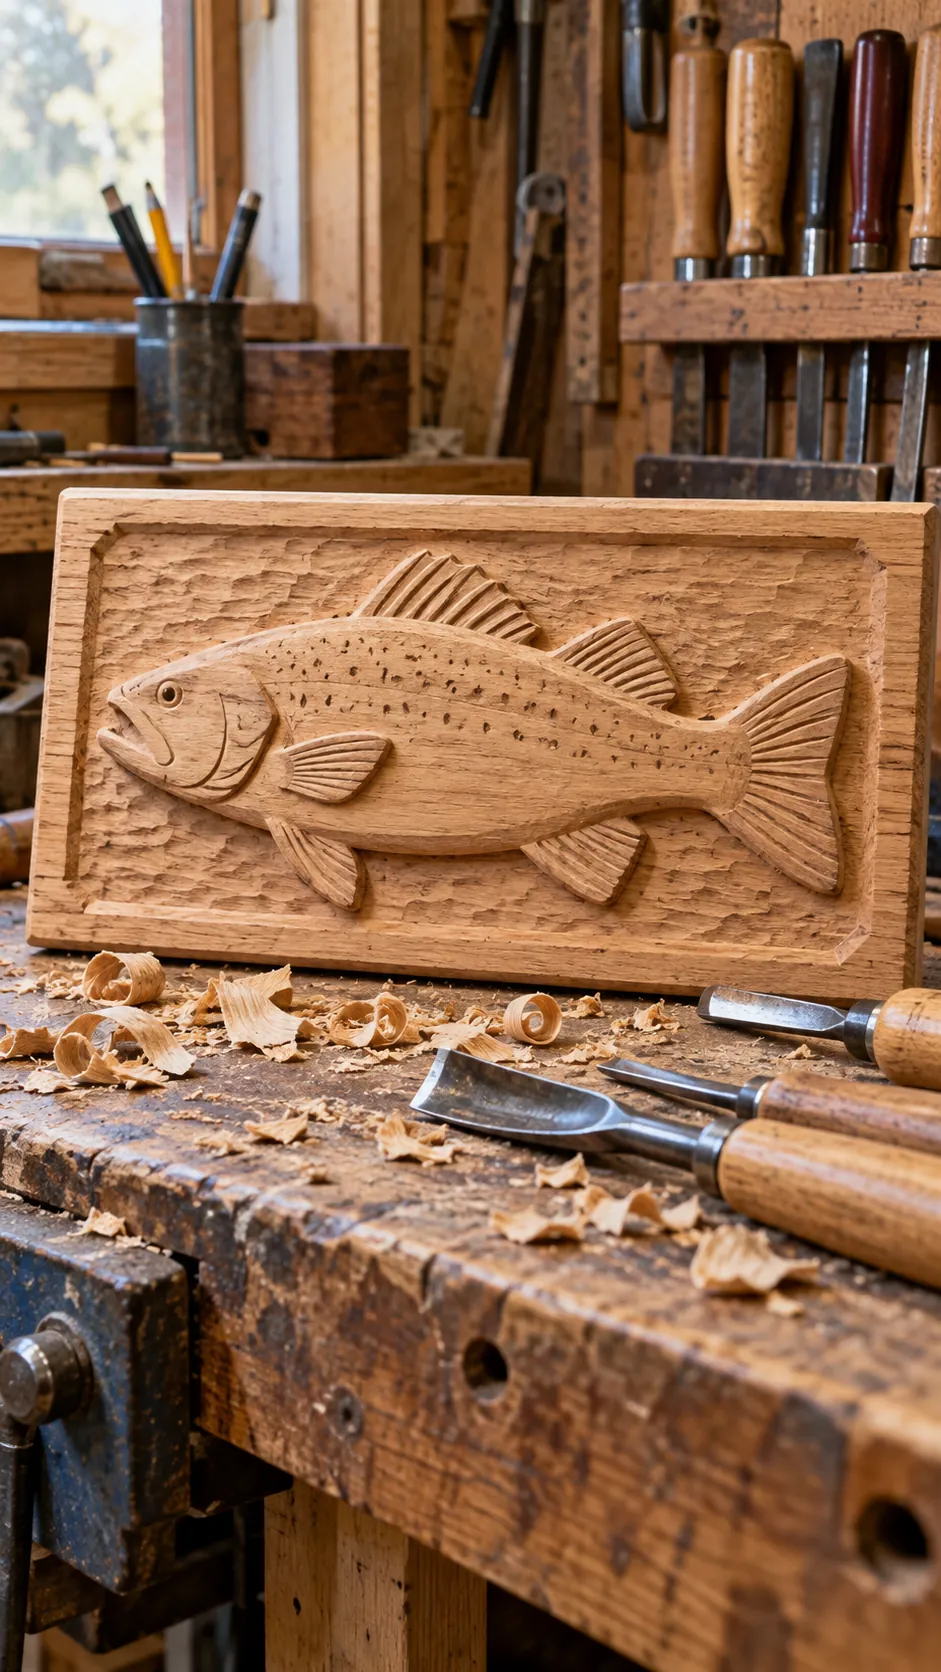
Resource: Printable relief template; no walkthrough is listed.
Suggested setup: A securely clamped board and suitable relief-carving tools.
Main challenge: Planning the background and the raised fish as separate levels.
The example image shows a rectangular wooden plaque with the fish raised prominently from a lowered, textured background. The fins are carved in shallow relief, the body carries simple spotted markings, and a border frames the whole composition. This is a more decorative interpretation of the relief idea than a plain transferred outline.
The fish relief template from Carving Is Fun gives you a starting design while keeping the fish attached to its background. Before cutting, identify the highest surfaces of the fish and decide how far the background will be lowered. Work gradually so the body stands forward without making the fins too thin.
If you want a look similar to the image, add a shallow frame around the panel and texture the background with controlled gouge marks. Keep the fish itself smoother so the contrast between subject and background stays clear. Because the source provides a design rather than a complete lesson, basic relief-carving experience is helpful.
Find the fish relief template — look under “Relief Carving Project Templates.”
10. Rustic Fish Carved from a 2×4
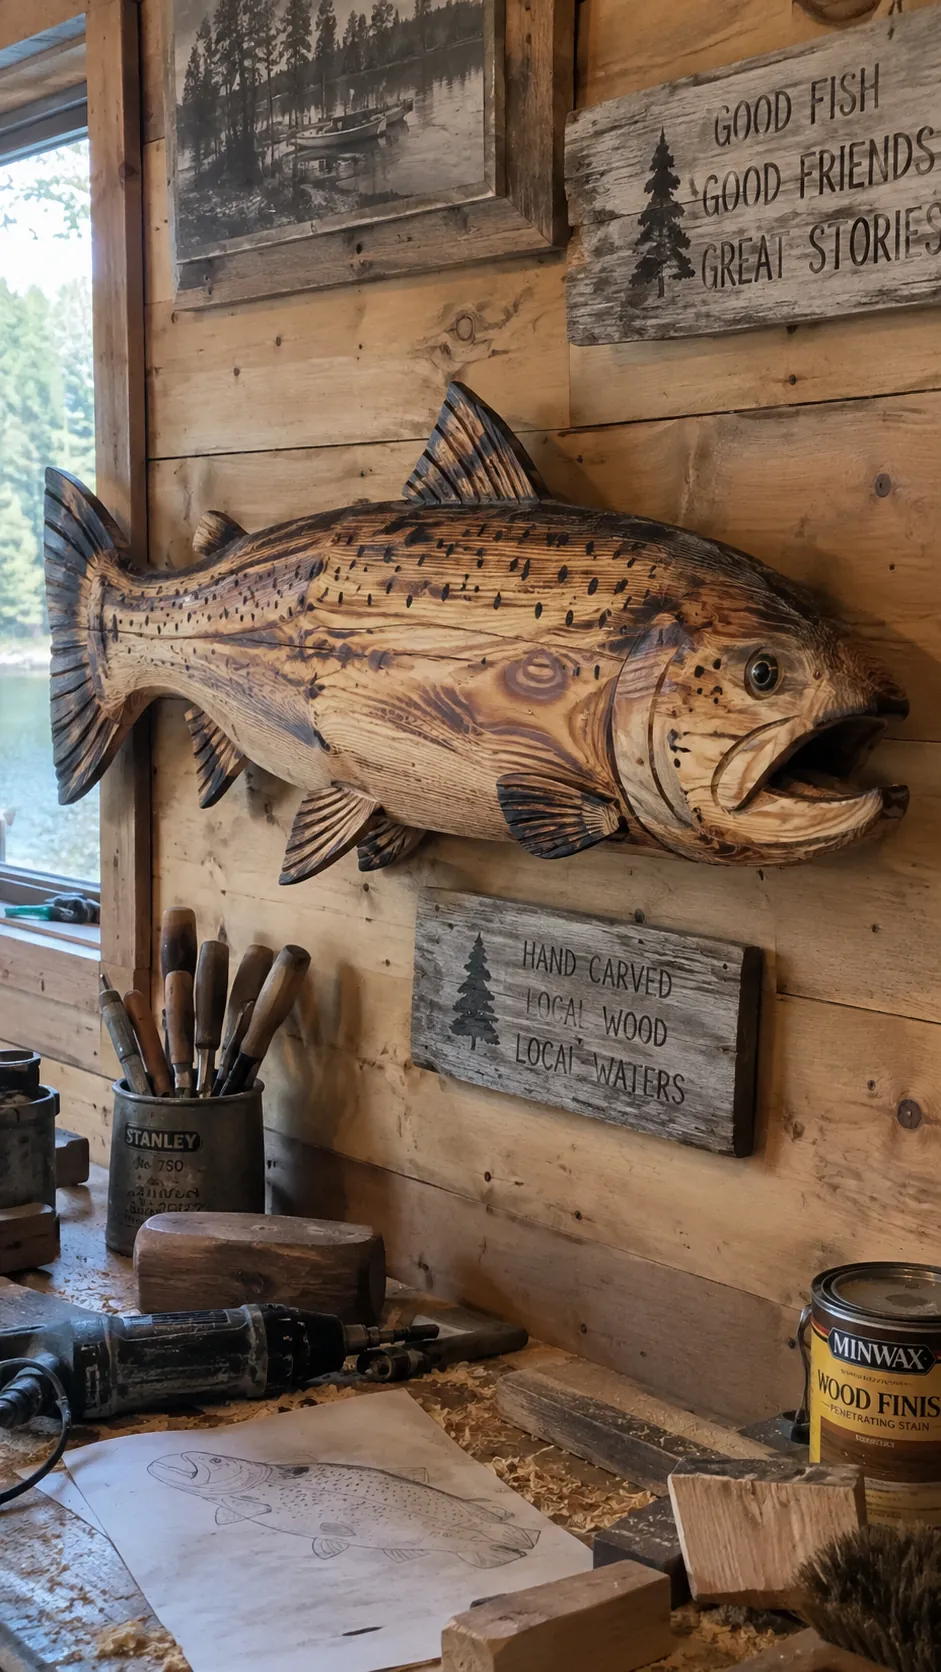
Resource: Illustrated tutorial with a downloadable pattern.
Tools: Saw, rotary carver or Dremel, carving and sanding attachments, and a woodburner.
Main challenge: Choosing and shaping the wood so the grain supports the design.
The example image shows a large rustic fish carved from strongly grained construction lumber. The body keeps the natural growth lines visible, while darker burned details emphasize the mouth, gill cover, fins, and scattered markings. A rotary carving tool and sanding accessories beside the piece reinforce that this is a power-carving project rather than a small knife whittle.
Robert Triplett’s project, published by Fox Chapel Publishing, makes ordinary construction lumber part of the visual effect. The tutorial lists a 2 × 4 × 14½-inch piece of construction lumber or another wood of choice and combines cutting, rotary carving, woodburning, and a translucent finish.
Choose a board with grain that can become part of the fish’s markings. After rough-shaping the body, use the rotary tool to blend the form and define the fins. Burn in selected lines rather than covering the whole surface, then use a translucent finish so the dramatic grain remains visible like it does in the image.
Get the rustic fish tutorial and pattern at Fox Chapel Publishing.
Which Fish Carving Should You Try First?
Choose according to the guidance you need, the tools you already own, and the look that appeals to you in the example images. The natural angelfish and simple pattern fish are good choices if you like visible knife facets and minimal finishing. The fish pin is compact and practical, while the orange goldfish adds color without requiring a complicated painted pattern.
For something more playful, compare the flat clownfish-inspired carving with the rounded cartoon fish. The decoy introduces separate metal fins and a weathered folk-art finish. The relief plaque requires more planning of depth, while the rustic 2×4 fish is better saved for a session when you are comfortable with a saw, rotary carving tools, and woodburning.
Remember that the images in this post are visual interpretations. Use the linked source when you need the exact pattern, dimensions, or sequence of cuts.
For more subjects to explore afterward, browse our free wood carving patterns for beginners and Wood Carving & Dremel Projects.
Finishing Your Wooden Fish
Decide what you want the surface to show
A natural-looking finish puts attention on the shape, grain, and knife facets. Paint can emphasize the eye, distinguish fins, or turn a stylized carving into a colorful character. Neither approach makes up for unfinished shaping, so inspect the unpainted fish from several angles first.
Try your finish on an offcut of the same wood. It will show how much the color changes and whether the finish emphasizes marks you would rather smooth out. Follow the product’s instructions for application, compatibility, ventilation, and curing.
Keep painted details readable
Plan the largest color areas before adding spots or stripes. Apply thin, controlled coats so paint does not collect in narrow carved grooves. Let adjacent colors dry sufficiently before adding their borders.
For cartoon fish, a small palette often works well: one body color, a contrasting fin color, and clearly defined eyes. For naturalistic markings, use a reference rather than guessing where every stripe belongs.
Match the display to the carving
Attach a pin backing according to its adhesive or hardware instructions. For hanging work, use an attachment point with adequate wood around it. A small display base can support a freestanding carving, but plan its fixing before drilling into the finished piece.
Treat delicate fish carvings as decorative objects. Thin fins, coatings, and small attached parts are not automatically suitable for children’s toys or aquarium use.
Frequently Asked Questions
What wood should I use for fish wood carving?
Basswood is a common starting choice for small hand-carved projects. The linked tutorial should guide your final choice, especially for thickness and blank dimensions. The rustic 2×4 project intentionally uses construction lumber for its visible grain.
Can I carve a wooden fish with just a knife?
Yes, some designs can be carved with one knife. The angelfish publisher specifically describes a one-tool project, and the Carving Junkies tutorials focus on knife carving. Check blank preparation as well: the fish pin uses a coping or scroll saw before the knife work begins.
Where can I find free fish carving patterns?
Carving Is Fun lists fish, shark, and relief templates. Carving Junkies includes patterns with its fish tutorials, and the Fox Chapel project provides a pattern link. Open the creator’s page to choose the correct resource and read its instructions before printing. The article images are there to help you visualize the finished style; the downloadable source pattern is what you should trace when accuracy matters.
How can I reduce the chance of breaking a fin or tail?
Leave supporting material while you establish the main form, avoid using thin projections as handholds, and reduce thickness gradually. Do not force a blade through resistant grain or pry away a stubborn chip. Reposition the work and take a smaller cut instead.
Do I need to carve individual scales?
No. A clear outline, well-positioned eye, and simple fin details can communicate the subject. Painted markings or the wood’s natural grain can add interest without covering the whole body in carved scales.
What is the difference between a pattern and a tutorial?
A pattern provides a design to transfer to wood. A tutorial explains the process through written steps, photographs, or video. If you need guidance on the sequence of cuts, choose a tutorial rather than a template-only project.
Pick One Fish and Start with the Shape
Choose a project that fits your tools, open the original instructions, and check the blank before making the first cut. Concentrate on a sturdy, recognizable form; the paint and finishing details can come later.
Whether you prefer a small angelfish, a cheerful cartoon carving, or a rustic wooden decoy, there is plenty to practice within this one subject. Which fish would you like to carve first?