
You walk outside, look at your bare patio, and think — I really need a chair out here. Then you check the price tag on patio furniture and immediately walk back inside. But here’s the thing — you don’t need to spend hundreds of dollars on outdoor seating you could build yourself in a single weekend. Grab some lumber, a drill, and a free Saturday, and you’re already halfway there.
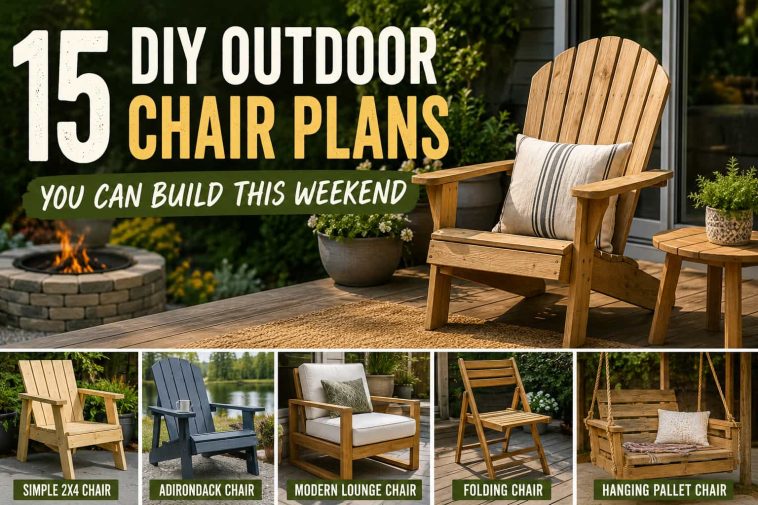
This guide covers 15 DIY outdoor chair plans that range from dead-simple beginner builds to more satisfying weekend projects. Each one includes approximate dimensions, a materials list, and a build tip so you actually know what you’re getting into before you start cutting.
Quick Comparison: Which Plan Fits You Best?
| Chair Plan | Difficulty | Best For | Estimated Cost |
|---|---|---|---|
| Simple 2×4 Outdoor Chair | Easy | Beginners | $25–$45 |
| Adirondack-Style Chair | Medium | Relaxing outdoors | $40–$80 |
| Modern Patio Lounge Chair | Medium | Stylish patios | $50–$100 |
| Folding Outdoor Chair | Medium | Small spaces | $35–$70 |
| Fire Pit Chair | Easy | Backyard fire pits | $30–$60 |
| Garden Reading Chair | Easy | Quiet garden corners | $25–$50 |
| Outdoor Dining Chair | Medium | Patio dining sets | $35–$75 |
| Rocking Patio Chair | Hard | Porches | $60–$120 |
| Wide Armrest Chair | Medium | Drinks & books | $45–$90 |
| Kids Outdoor Chair | Easy | Family patios | $15–$35 |
| Pallet Outdoor Chair | Easy | Budget builds | $10–$30 |
| Slatted Deck Chair | Medium | Decks and patios | $40–$85 |
| Outdoor Chair with Cushions | Medium | Comfort-first builds | $50–$100 |
| Outdoor Hanging Chair Out of Pallet | Medium | Porches & pergolas | $20–$60 |
| Curved Back Outdoor Chair | Hard | Advanced DIYers | $60–$120 |
Quick Picks
- Best beginner pick: Simple 2×4 Outdoor Chair
- Best comfort pick: Adirondack-Style Chair
- Best budget pick: Pallet Outdoor Chair
- Best patio pick: Modern Patio Lounge Chair
- Best advanced build: Curved Back Outdoor Chair
What You’ll Need Before You Start
Basic Tools
Before picking a plan, make sure you have the essentials:
- Circular saw or miter saw
- Drill and driver bits
- Measuring tape and speed square
- Sander or sanding block
- Clamps
- Safety glasses (non-negotiable)
Common Materials
Most of these DIY outdoor chair plans use the same short list of materials:
- 2×4 boards (the workhorse of backyard builds)
- 1×4 or 1×6 boards for slats
- Exterior-rated wood screws or deck screws
- Wood glue rated for outdoor use
- Outdoor stain, paint, or sealer
- Optional: outdoor cushions
Best Wood for Outdoor Chairs
Cedar and redwood are naturally weather-resistant and look gorgeous. Pressure-treated lumber is the budget pick that still holds up outdoors. Plain pine can work if you seal it properly, but it needs a little more maintenance over time. For most beginner builds, pressure-treated 2x4s are the sweet spot — affordable, durable, and easy to work with.
The 15 DIY Outdoor Chair Plans
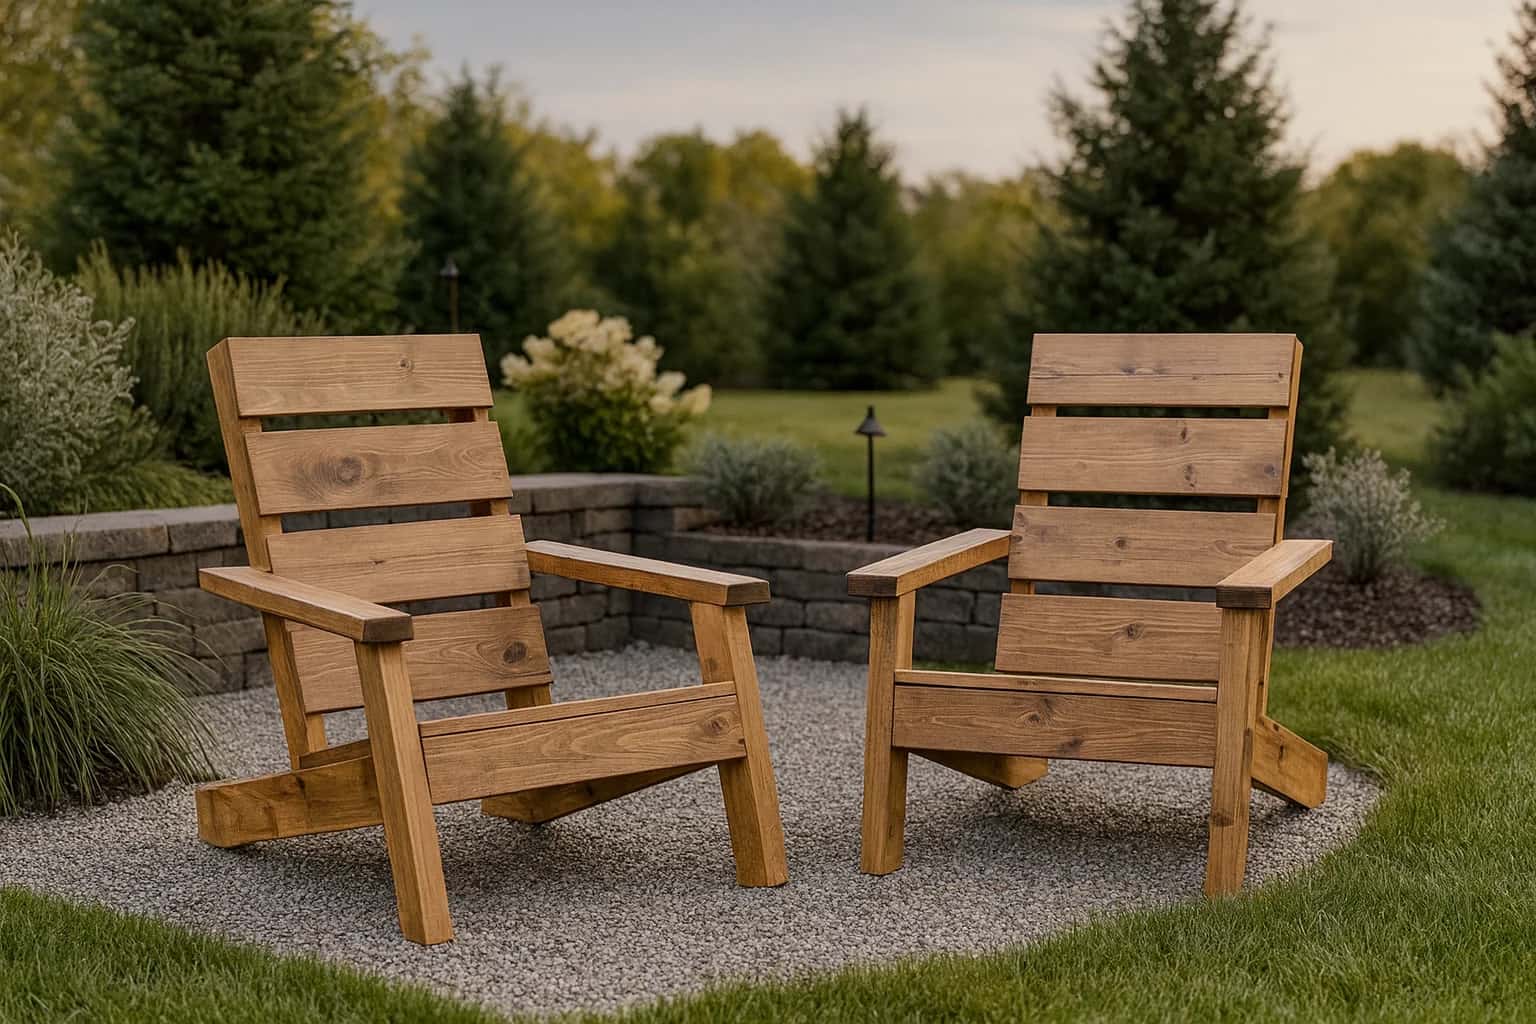
1. Simple 2×4 Outdoor Chair
Source : kregtool
Difficulty: Easy | Cost: $25–$45
This is the chair that everyone should build at least once. Two side frames, a few seat slats, a simple angled backrest — done. It’s strong, affordable, and looks way better than those plastic chairs you’ve been hauling out every summer.
Plan Snapshot
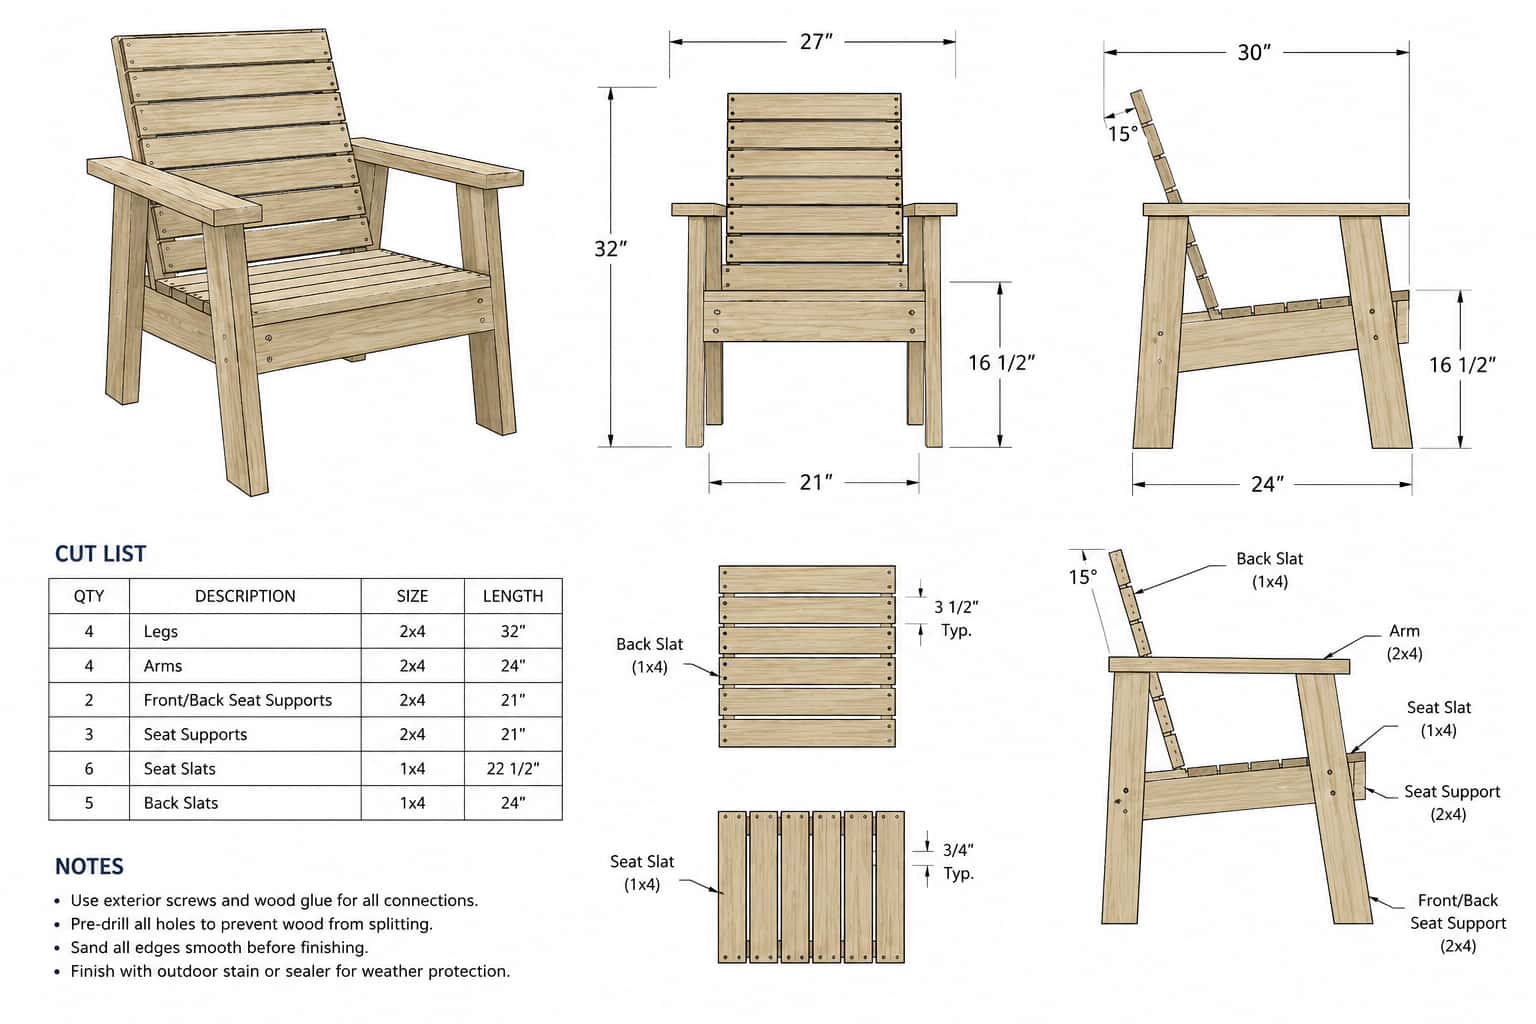
- Approx. Size: 24 in. wide × 34 in. tall
- Seat Height: 17–18 in.
- Best Wood: Pressure-treated 2×4 lumber or cedar
- Materials: 2x4s, 1×4 slats, exterior screws, wood glue, outdoor stain
- Best Finish: Exterior stain or paint
Build tip: Assemble the two side frames first, then connect them with your seat supports and back slats. Keep the angles consistent and you’ll end up with a surprisingly polished result.
Advertisement
This one works great as a fire pit chair, a garden seat, or just a simple place to sit and stare at your yard and do nothing — which is honestly underrated.
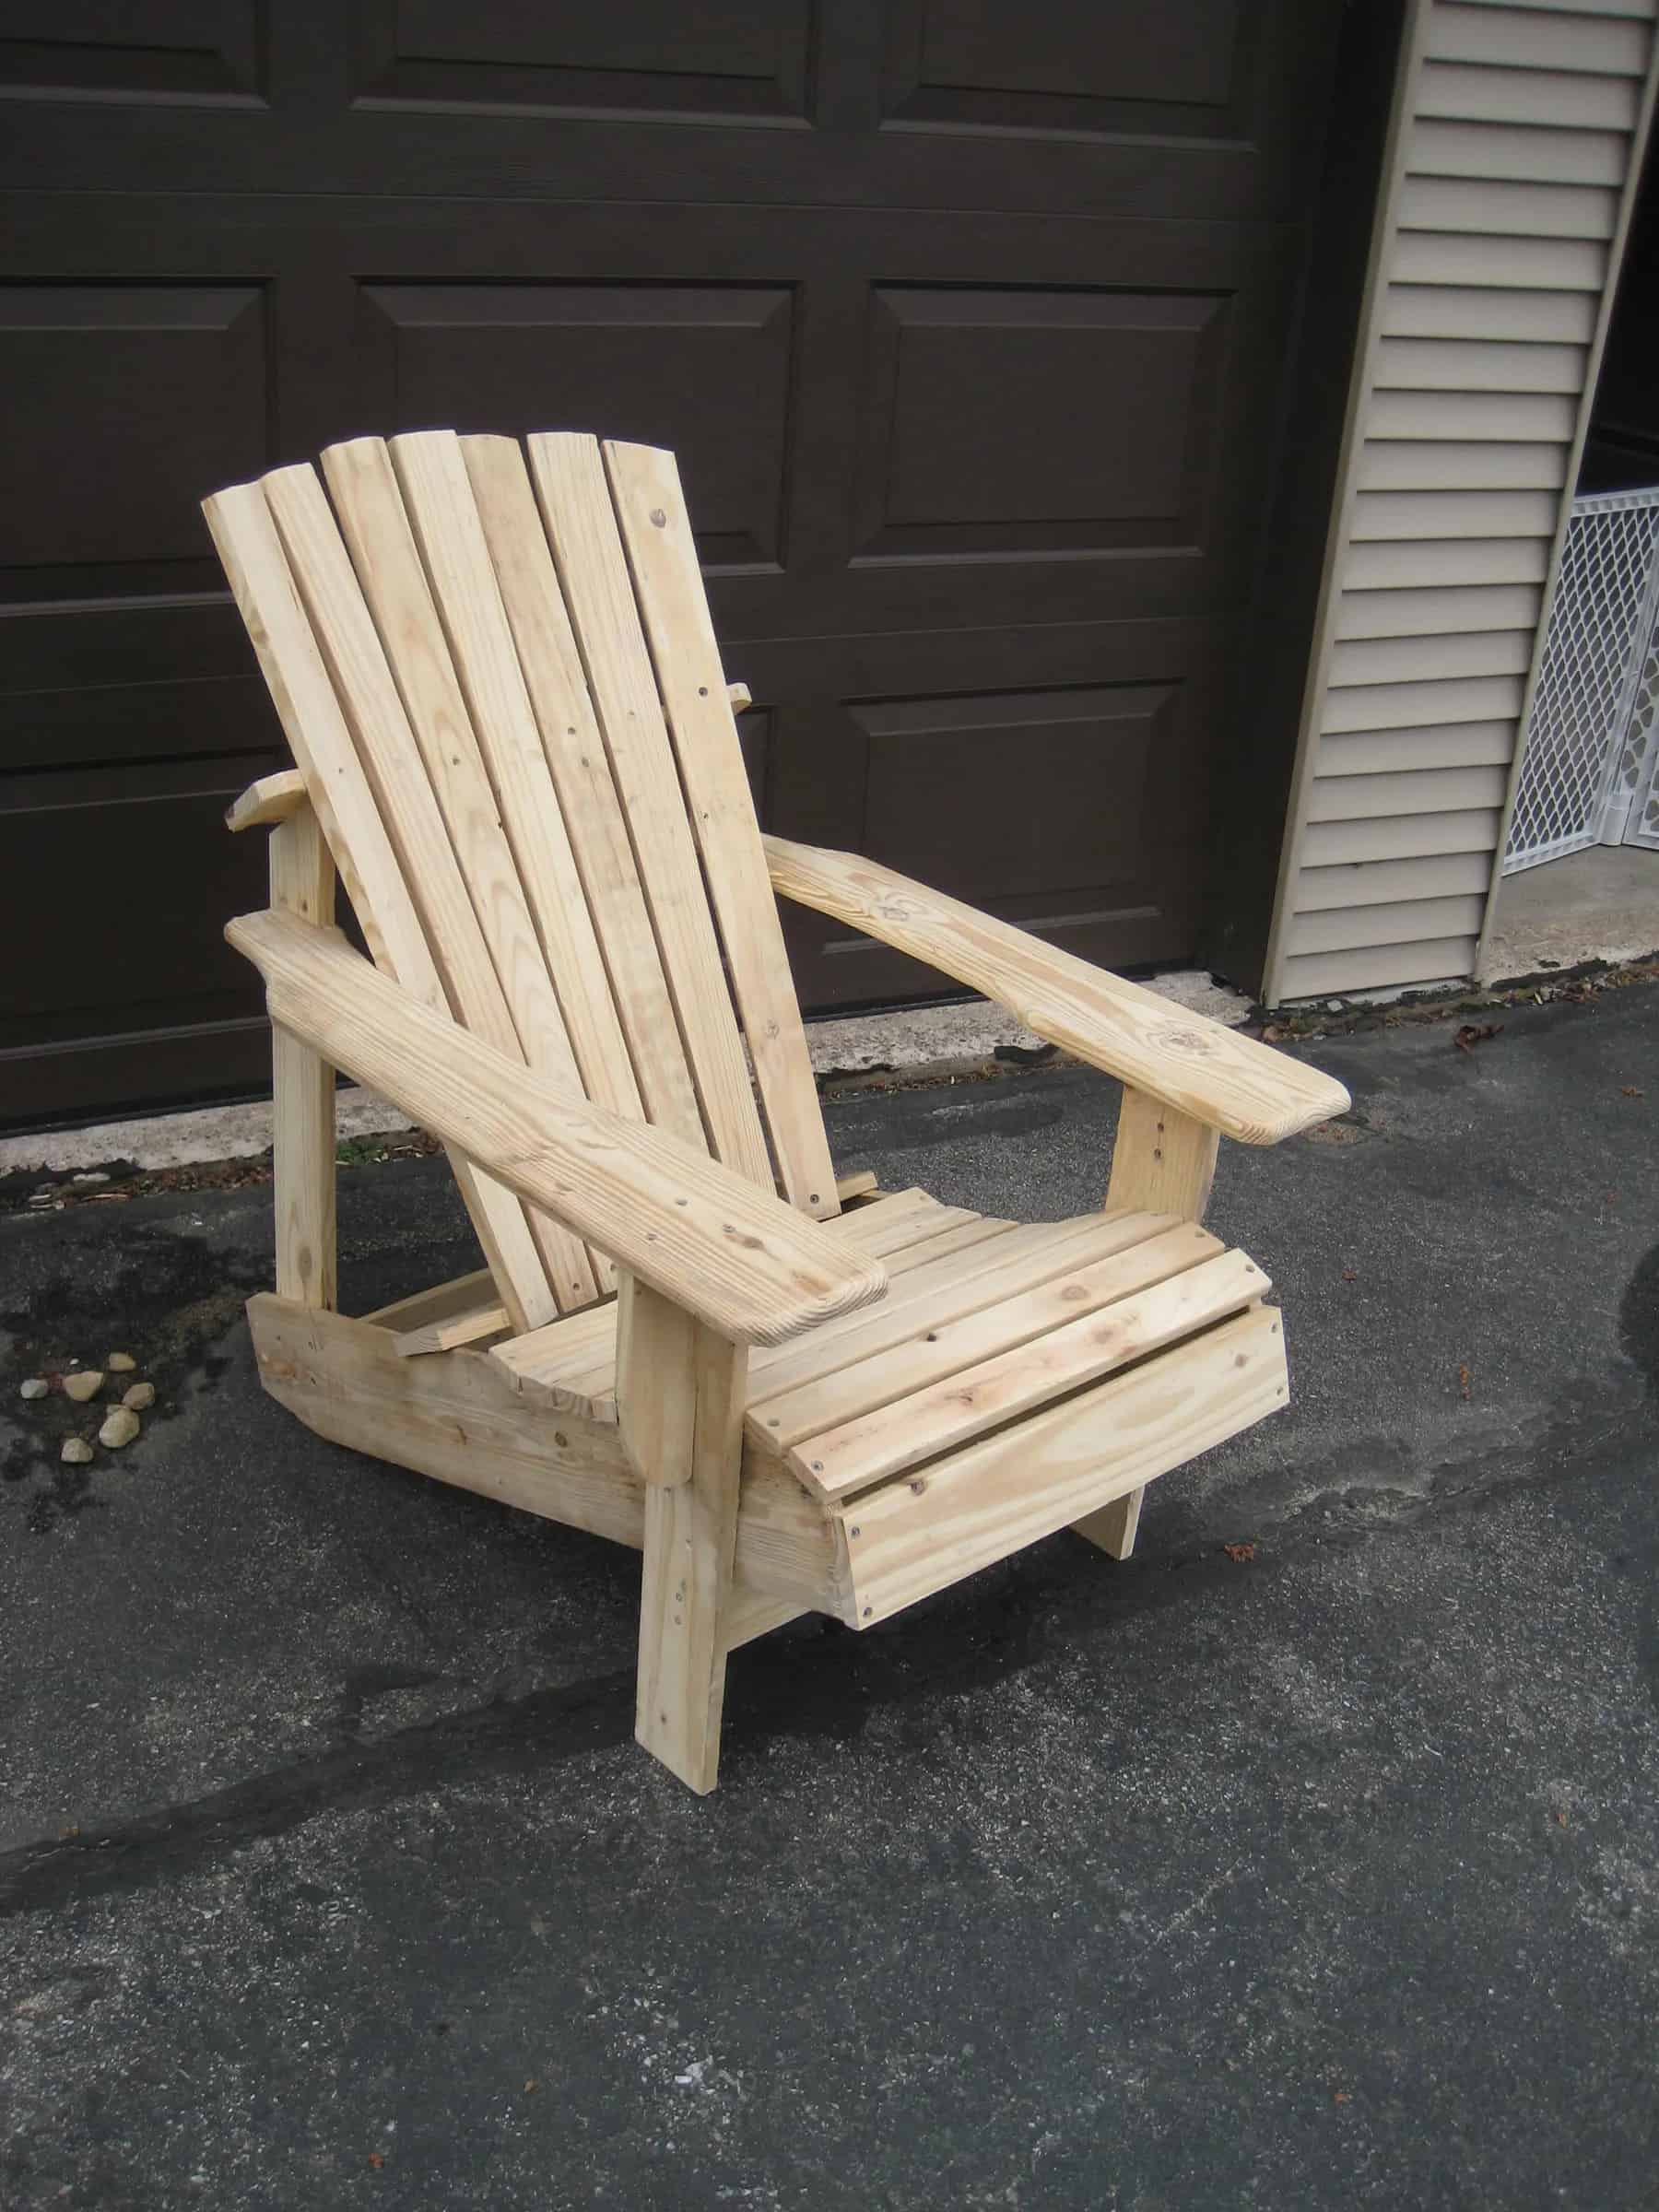
2. Adirondack-Style Outdoor Chair
Source : Ana-White
Difficulty: Medium | Cost: $40–$80
The Adirondack chair is basically the king of backyard seating. Wide armrests, a reclined back, and a low seat that makes you feel like you’ve earned the right to sit there. This is one of the most satisfying DIY outdoor furniture builds because the final chair looks expensive, feels comfortable, and works in almost any backyard.
It takes a little more measuring than the basic 2×4 version, but the final result looks like it cost triple what it actually did.
Plan Snapshot
- Approx. Size: 29 in. wide × 36 in. tall
- Seat Height: 14–16 in. (low, reclined seat)
- Best Wood: Cedar or pressure-treated pine
- Materials: 1x4s, 1x6s, 2×4 frame pieces, exterior screws, waterproof wood glue
- Best Finish: Exterior stain, paint, or teak oil
Build tip: The seat angle and back angle are what make this chair comfortable. Get those two details right and everything else falls into place.
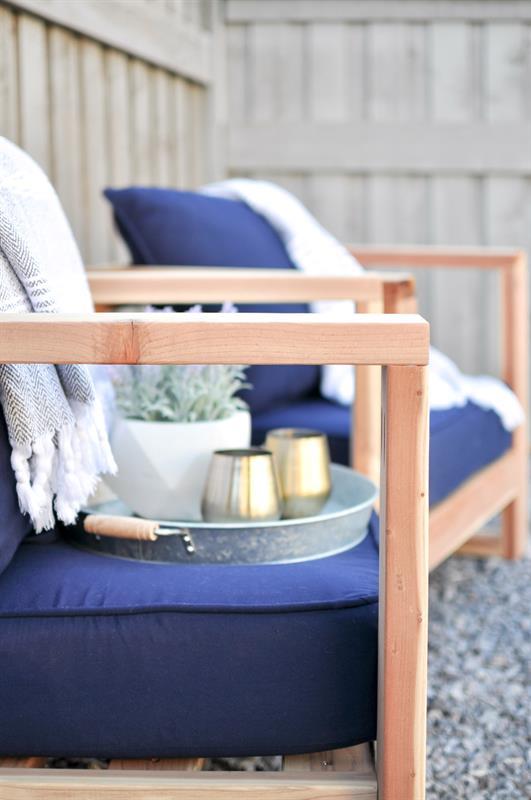
3. Modern Patio Lounge Chair
Source : realcedar
Difficulty: Medium | Cost: $50–$100
If your patio leans more “contemporary” than “rustic cabin,” this is the plan for you. Clean lines, evenly spaced slats, and a simple rectangular frame give it that furniture-store look without the furniture-store price.
Paint it black or charcoal for a sleek modern finish, or go with a warm wood stain if you want a natural look that still feels elevated.
Plan Snapshot
- Approx. Size: 26 in. wide × 32 in. tall
- Seat Height: 16–17 in.
- Best Wood: Cedar or smooth pine
- Materials: 2×4 frame, 1×4 slats, miter-cut legs, exterior screws
- Best Finish: Matte black paint or natural wood stain
Build tip: Use a spacer block between slats when attaching them. Consistent gaps are what make this design look intentional instead of slapped together.
4. Folding Outdoor Chair
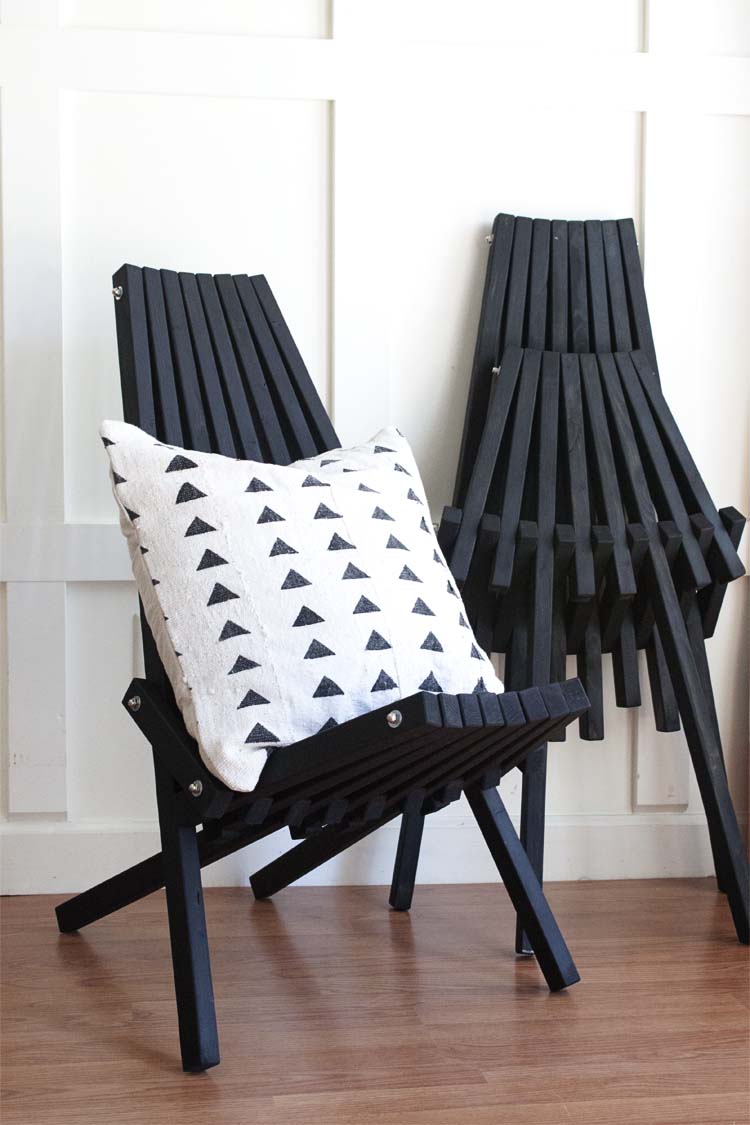
Source : southernrevivals
Difficulty: Medium | Cost: $35–$70
Small balcony? Weekend camping setup? Or maybe you just like the idea of furniture that disappears when guests leave? This folding outdoor chair plan is your answer.
The fold mechanism needs a little extra attention — moving parts have to line up correctly or the chair won’t fold smoothly. But once it works, it’s genuinely satisfying.
Plan Snapshot
- Approx. Size: 20 in. wide × 34 in. tall (open position)
- Seat Height: 17 in.
- Best Wood: Hardwood dowels + 1×3 slats or cedar strips
- Materials: Slats, pivot bolts, washers, exterior screws, sandpaper
- Best Finish: Outdoor oil or clear sealer
Build tip: Use bolts or heavy-duty hardware at the folding points, not regular screws. Screws will loosen over time and the whole thing gets wobbly fast.
5. Fire Pit Chair
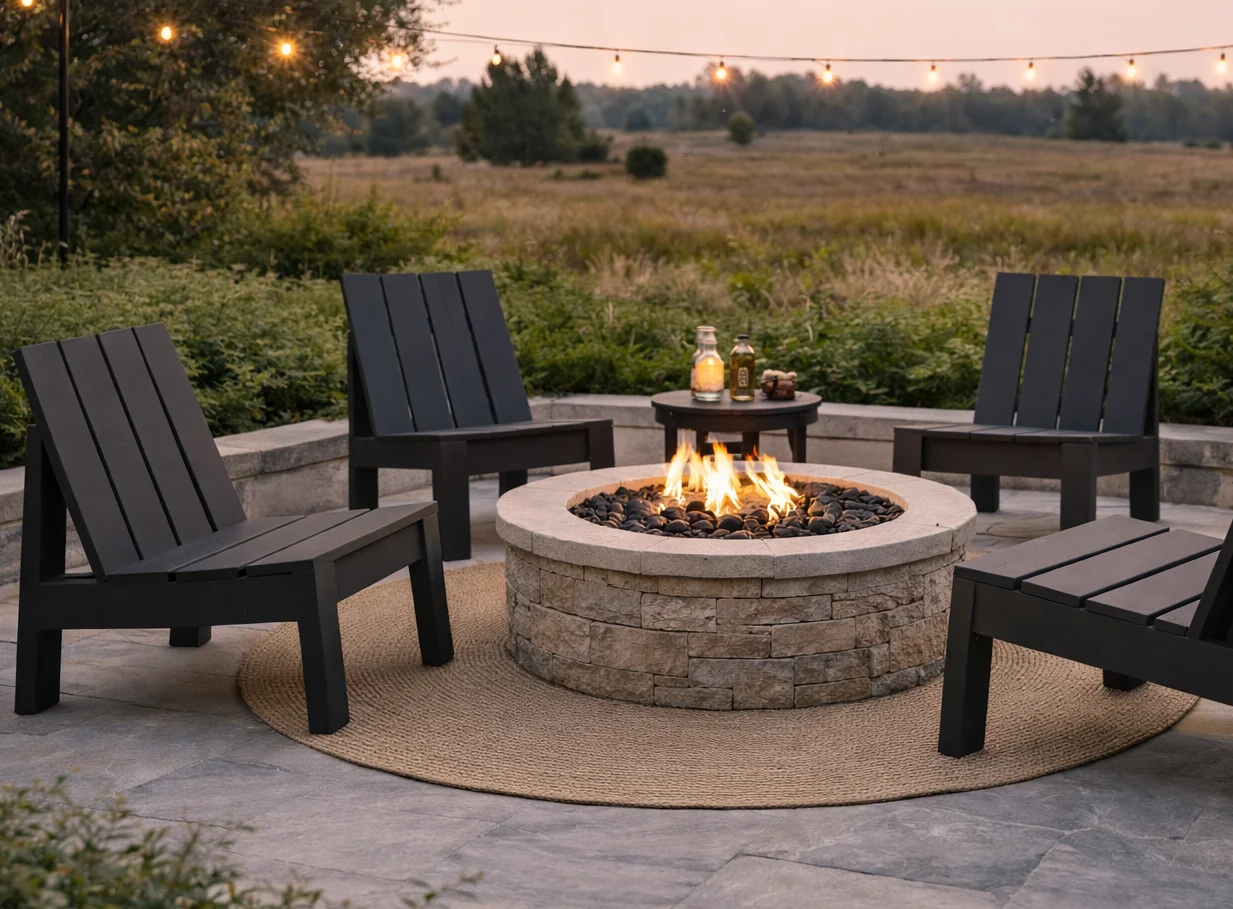
Source : Ana-White
Difficulty: Easy | Cost: $30–$60
A fire pit chair doesn’t need to be fancy. It needs to be sturdy, comfortable, and easy to build in multiples — because one chair around a fire pit is just sad. Build four or six of these and arrange them in a circle for a proper backyard hangout setup.
Keep the seat slightly wider than a standard dining chair and add a gentle back angle. If you’re thinking about building a full outdoor seating area, check out I Built This Outdoor Couch for $30 for a matching sofa build that uses the same basic techniques.
Plan Snapshot
- Approx. Size: 24 in. wide × 36 in. tall
- Seat Height: 17–18 in.
- Best Wood: Pressure-treated 2×4 lumber
- Materials: 2x4s, exterior screws, wood glue, stain or sealer
- Best Finish: Dark exterior stain
Build tip: Finish with a dark exterior stain so the chairs blend into the backyard atmosphere instead of looking like workshop leftovers.
6. Garden Reading Chair
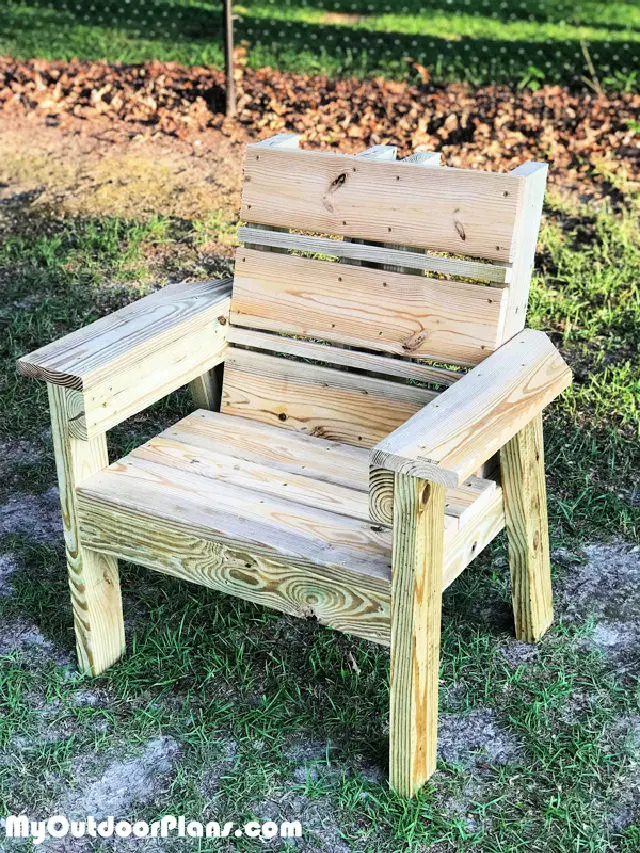
Source : myoutdoorplans
Difficulty: Easy | Cost: $25–$50
This is the chair you build for that one perfect corner of your yard — under a tree, beside a garden bed, anywhere that makes you want to sit down with a book and let the afternoon disappear. A slightly reclined back and a soft cushion are all you need to turn a simple wooden frame into your new favorite spot.
If you’re landscaping the space around it too, 15 Potting Bench Ideas That Double as Garden Decor has some great ideas for building matching garden furniture.
Plan Snapshot
- Approx. Size: 22 in. wide × 34 in. tall
- Seat Height: 17 in.
- Best Wood: Cedar or pine
- Materials: 2×4 frame, 1×4 back slats, outdoor cushion, exterior screws
- Best Finish: Natural wood stain or white paint
Build tip: Build a small matching side table later using scrap wood. A place to set your coffee or book transforms a chair into a full reading nook.
7. Outdoor Dining Chair
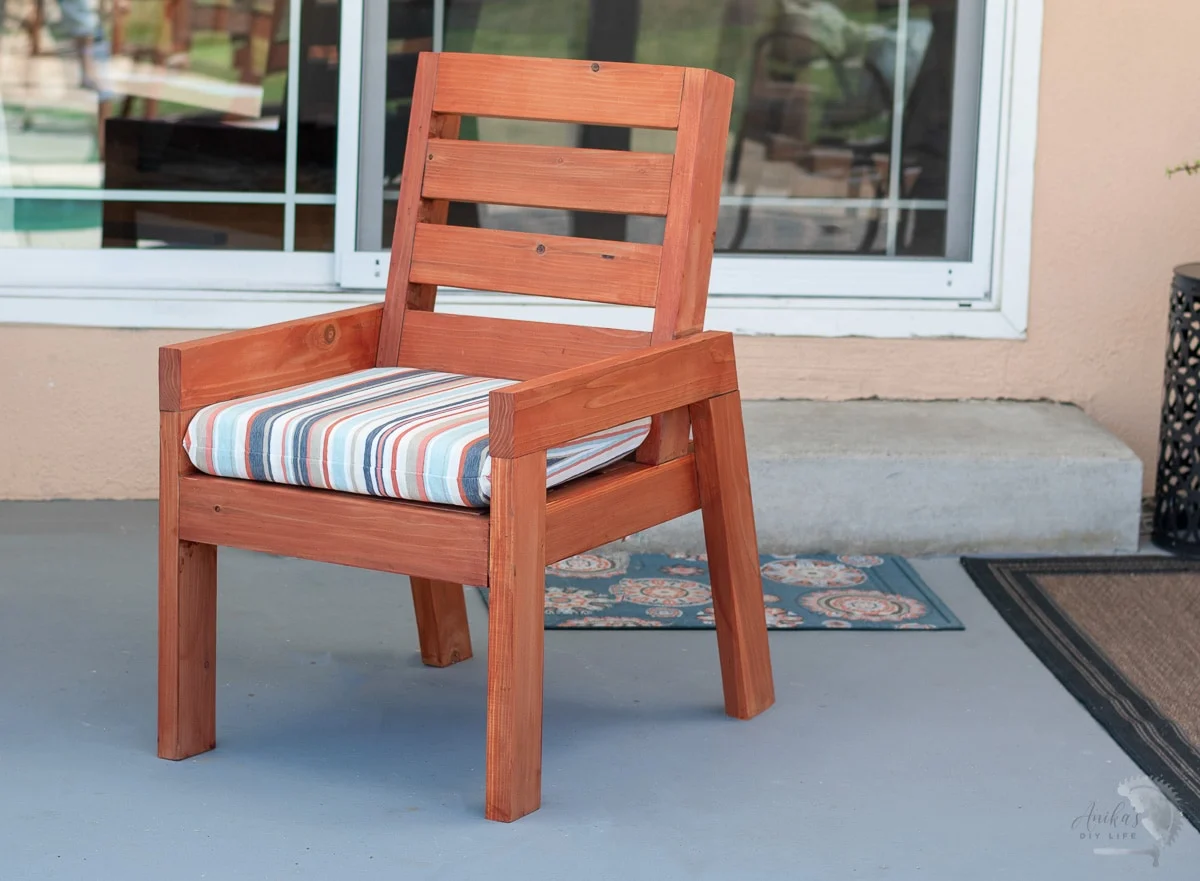
Source : anikasdiylife
Difficulty: Medium | Cost: $35–$75
Already have an outdoor table? Building your own matching patio dining chairs is one of the best ways to save money on outdoor furniture. Store-bought sets are expensive. A set of four DIY dining chairs made from cedar or treated lumber costs a fraction of a retail set and holds up just as well.
Keep the back upright rather than reclined — dining chairs need to work for eating, not just lounging.
Plan Snapshot
- Approx. Size: 18 in. wide × 36 in. tall
- Seat Height: 17–18 in.
- Best Wood: Cedar or pressure-treated pine
- Materials: 2×4 legs, 1×4 seat slats, 1×3 back slats, exterior screws
- Best Finish: Exterior paint or stain to match your table
Build tip: Standard dining seat height is around 17–18 inches. Match it to your existing table before cutting anything.
8. Rocking Patio Chair

Source : realcedar
Difficulty: Hard | Cost: $60–$120
A rocking chair on a covered porch is the kind of thing that says “I live well.” It’s also the most technically demanding build on this list, mostly because the curved rockers need to match perfectly on both sides.
This one is best for someone who’s already comfortable with a few woodworking projects and wants to level up.
Plan Snapshot
- Approx. Size: 26 in. wide × 42 in. tall
- Seat Height: 17 in. (at lowest point of rock)
- Best Wood: Oak, cedar, or hardwood
- Materials: 2×4 frame, curved rocker boards (1.5 in. thick), 1×4 slats, exterior hardware
- Best Finish: Exterior stain and protective topcoat
Build tip: Make a plywood or cardboard template for the rocker curve before cutting into your good lumber. Both rockers need to be identical or the chair will pull to one side.
9. Wide Armrest Outdoor Chair

Source : jayscustomcreations
Difficulty: Medium | Cost: $45–$90
You know what makes an outdoor chair instantly better? Wide armrests — wide enough to hold a drink, a phone, a book, a snack plate. It’s a simple upgrade to any standard chair frame and completely worth the extra effort.
Perfect for poolside, fire pit areas, or anywhere you plan to sit for a while.
Plan Snapshot
- Approx. Size: 28 in. wide × 36 in. tall
- Seat Height: 17–18 in.
- Armrest Width: 5–6 in.
- Best Wood: Cedar or pressure-treated 2x4s
- Materials: 2×4 frame, 2×6 armrests, 1×4 slats, exterior screws
- Best Finish: Exterior stain or paint
Build tip: Make the armrests wide but not so wide that the chair looks bulky. Around 5–6 inches usually hits the sweet spot.
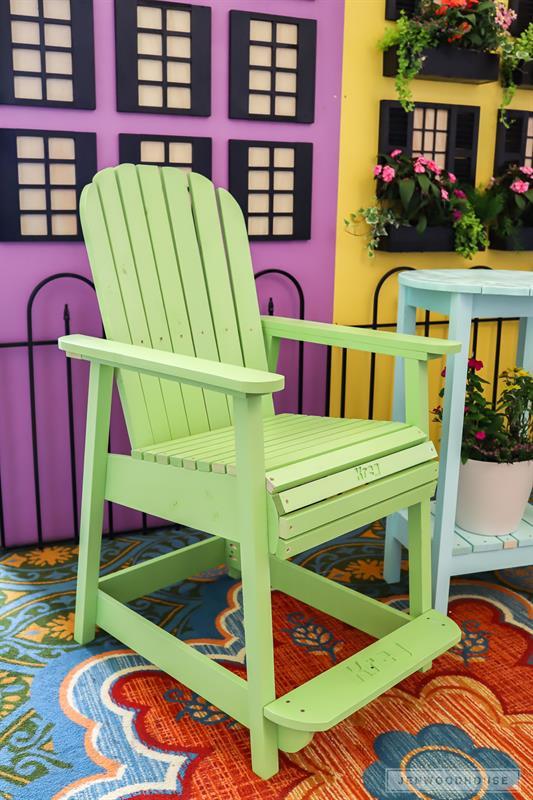
10. Kids Outdoor Chair
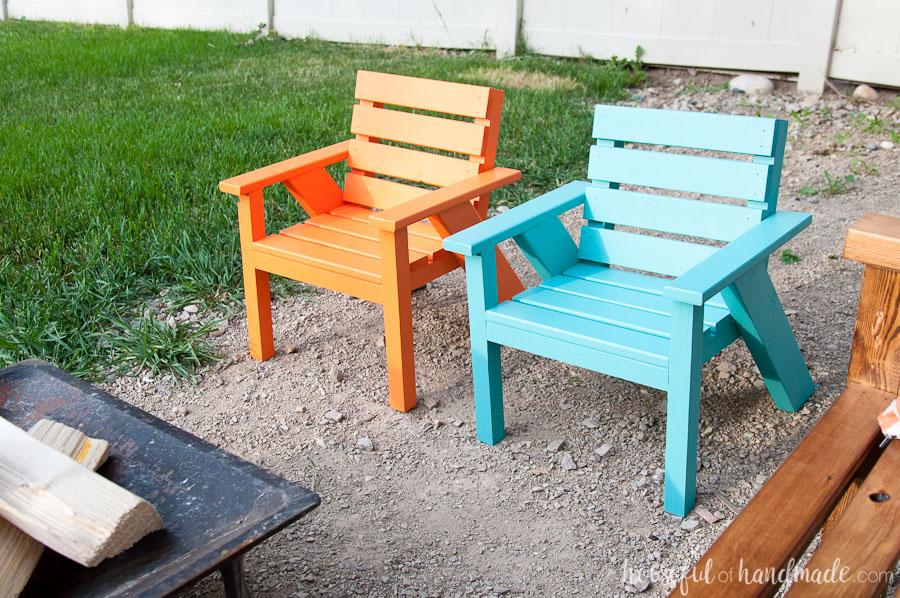
Source : kregtool
Difficulty: Easy | Cost: $15–$35
Scale down the classic 2×4 chair design, round off every edge carefully, and you’ve got a kids outdoor chair that can live in the backyard for years. Paint it a bright color or let the kids pick the finish — either way, it becomes a backyard staple pretty quickly.
Plan Snapshot
- Approx. Size: 14 in. wide × 24 in. tall
- Seat Height: 11–12 in.
- Best Wood: Pine or cedar
- Materials: 2x3s, 1×3 slats, exterior screws, sandpaper, paint or stain
- Best Finish: Bright exterior paint (non-toxic, child-safe)
Build tip: Sand everything twice. Then sand it again. Kids grab edges, corners, and undersides of chairs — smooth is non-negotiable here.
11. Pallet Outdoor Chair
Source : instructables
Difficulty: Easy | Cost: $10–$30
Pallet wood is nearly free, the rustic look works great outdoors, and there’s something satisfying about building furniture from material that would otherwise go to waste. Not all pallets are created equal though — avoid any marked MB (methyl bromide treated) and always sand thoroughly before use. For more ways to use scrap and reclaimed wood in your backyard, 10 DIY Trellis Ideas Made From Scrap Wood is worth a look.
Use the pallet boards for your seat and back slats, but reinforce the structural frame with cleaner dimensional lumber.
Plan Snapshot
- Approx. Size: 22 in. wide × 34 in. tall
- Seat Height: 17 in.
- Best Wood: Heat-treated (HT) pallet boards + 2×4 frame
- Materials: Pallet slats, 2×4 reinforcement frame, exterior screws, sandpaper, stain
- Best Finish: Rustic dark stain or clear outdoor sealer
Build tip: Look for HT-marked pallets and skip anything with stains, cracks, soft spots, or signs of chemical treatment.
12. Slatted Deck Chair
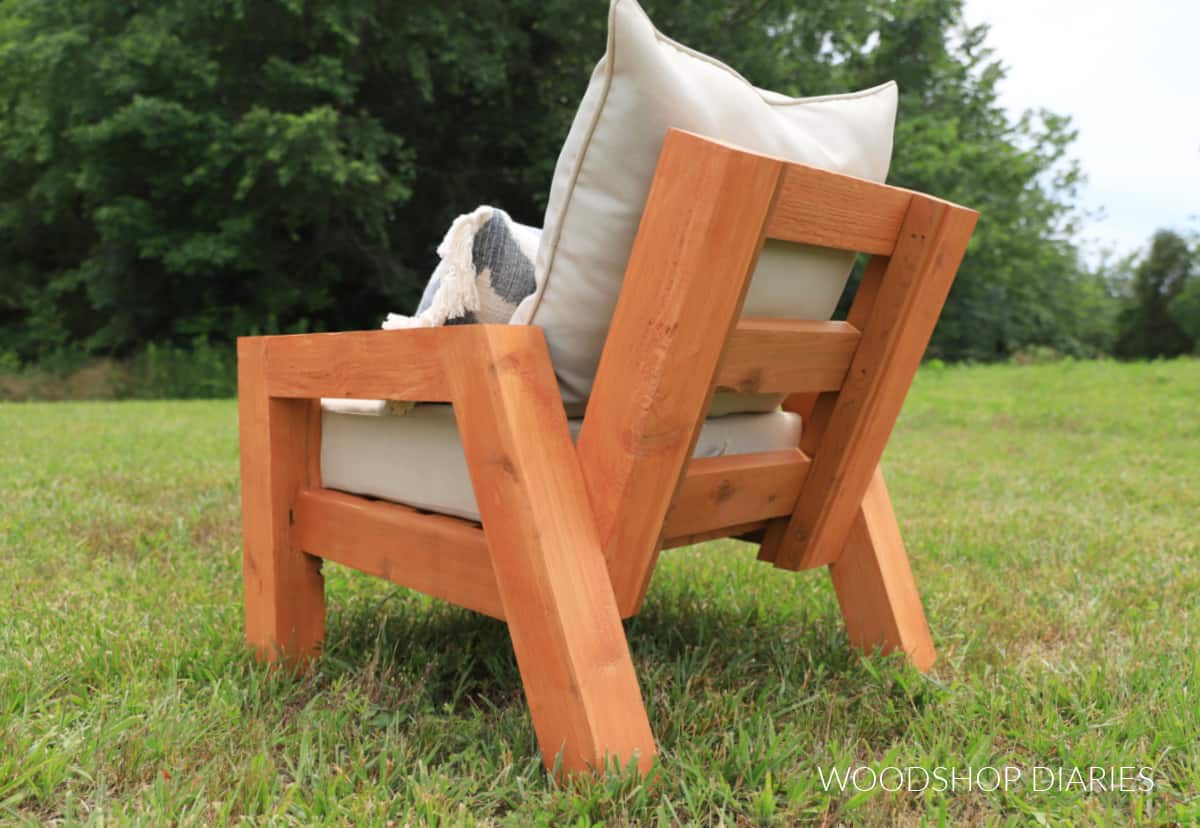
Source : Woodshopdiaries
Difficulty: Medium | Cost: $40–$85
A slatted deck chair has that timeless outdoor furniture look — clean, classic, and practical. The gaps between slats also let rainwater drain away instead of pooling on the seat, which is a real advantage for chairs that live outdoors year-round.
Even slat spacing is everything here. Uneven gaps make the whole chair look rushed, while consistent spacing makes it look like you knew exactly what you were doing.
Plan Snapshot
- Approx. Size: 22 in. wide × 36 in. tall
- Seat Height: 17–18 in.
- Slat Spacing: 0.5–0.75 in. gaps
- Best Wood: Cedar, teak, or pressure-treated pine
- Materials: 2×4 frame, 1×3 or 1×4 slats, exterior screws
- Best Finish: Exterior stain or clear UV sealer
Build tip: Cut a small scrap wood spacer block and use it between every slat as you attach them. Saves a lot of re-measuring and the result looks much cleaner.
13. Outdoor Chair with Cushions
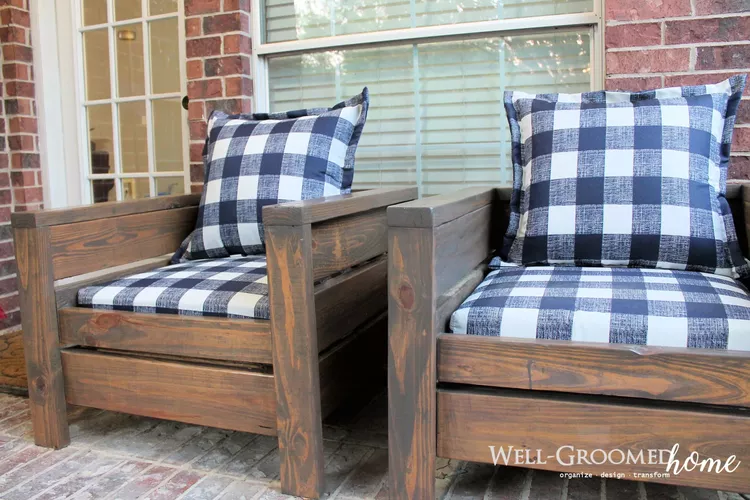
Source : wellgroomedhome
Difficulty: Medium | Cost: $50–$100
This is the comfort-first approach. Instead of building a chair and then hunting for cushions that fit, choose your outdoor cushions first and build the frame around them. The result looks like custom patio furniture and costs a fraction of what you’d pay in a store.
This works beautifully for covered patios and outdoor living spaces where you want maximum comfort.
Plan Snapshot
- Approx. Size: Depends on cushion — typically 24 in. wide × 34 in. tall
- Seat Height: 16–17 in.
- Best Wood: Cedar or pine
- Materials: 2×4 frame, 2×2 supports, exterior screws, outdoor cushions
- Best Finish: Paint or stain to complement cushion color
Build tip: Take your cushion measurements with you when buying lumber. Build the seat frame dimensions to match the cushion exactly — not guessing afterward.
14. DIY Outdoor Hanging Chair Out of Pallet
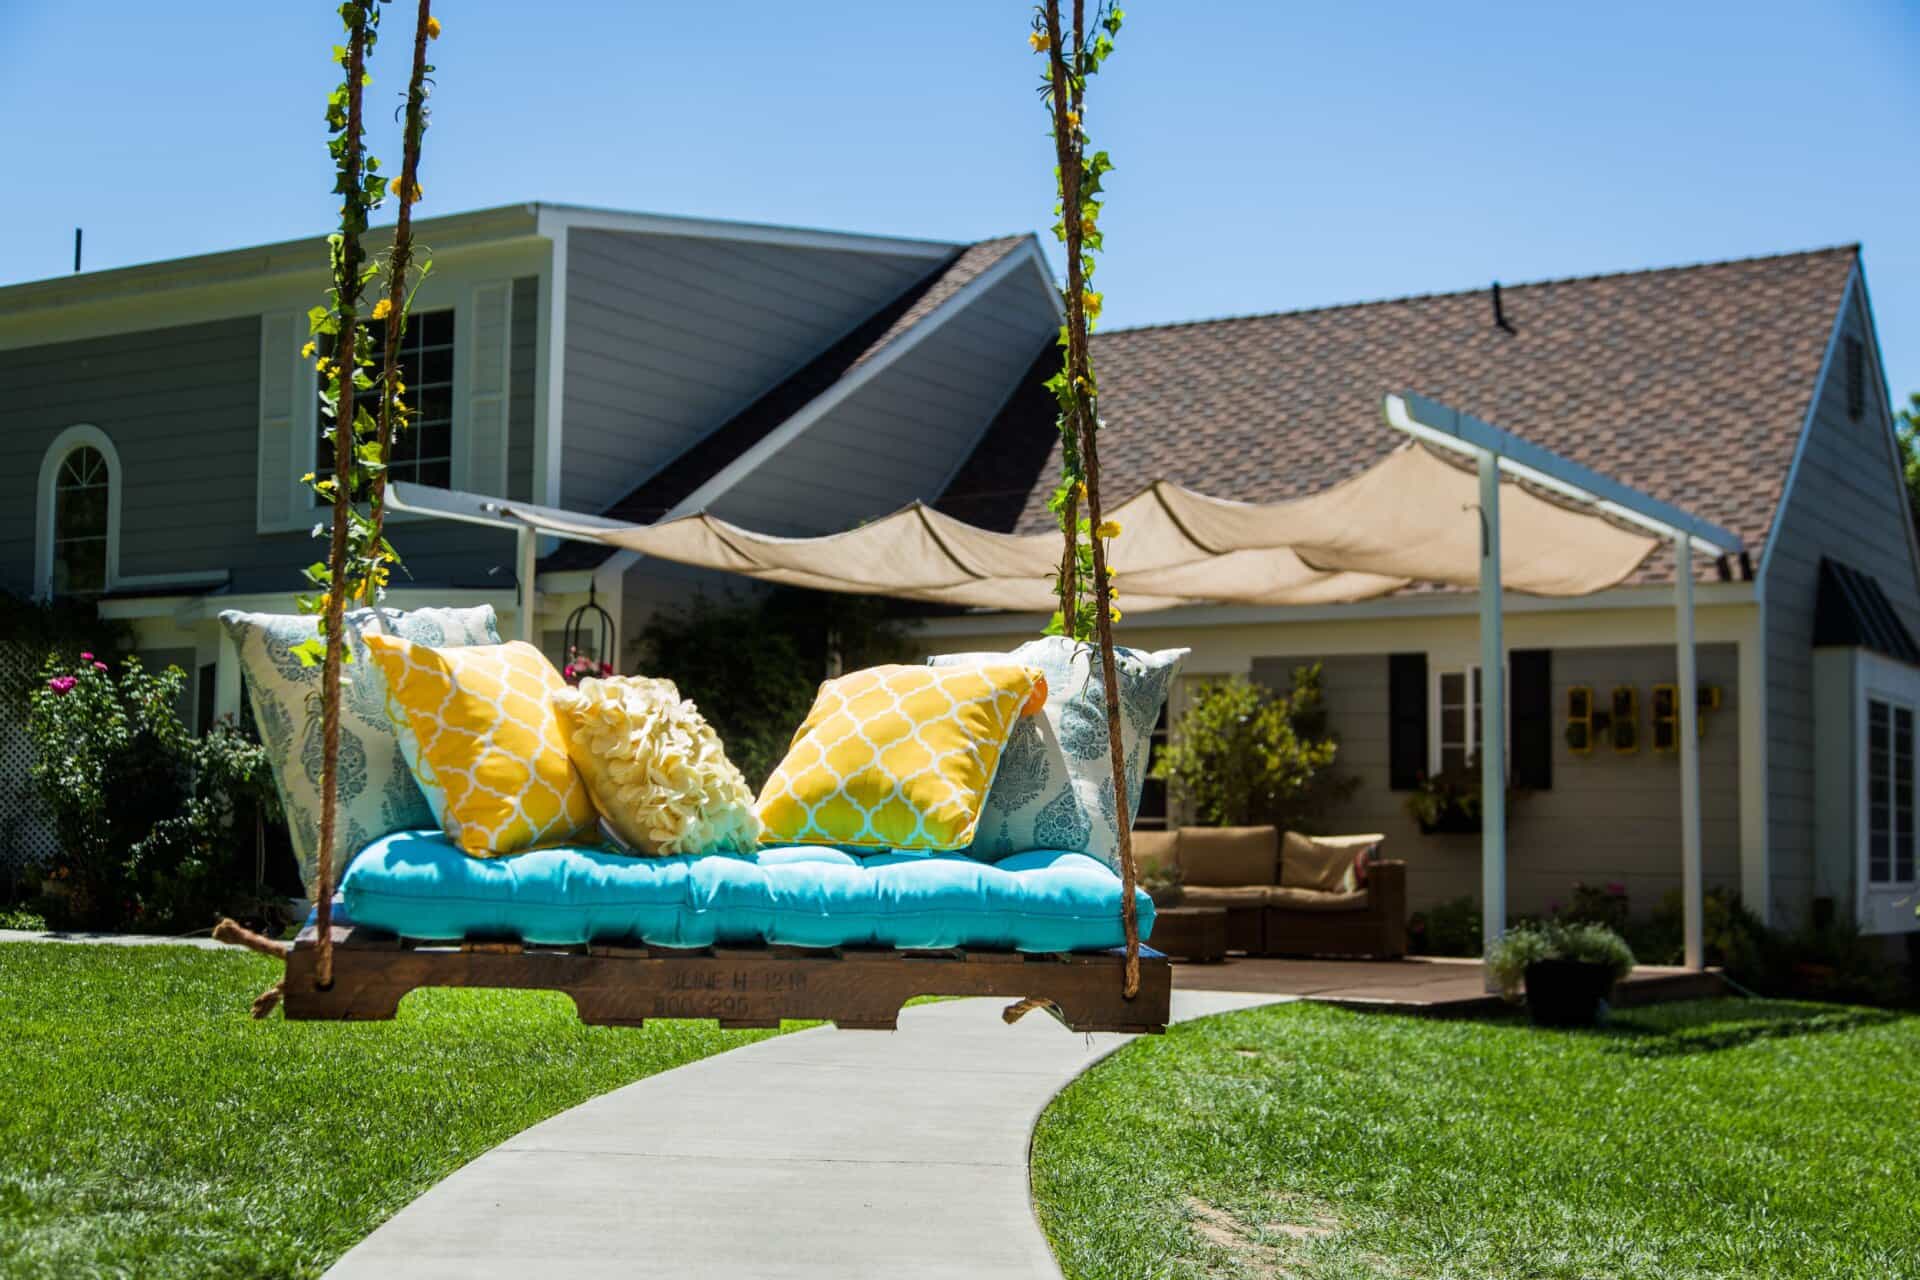
Difficulty: Medium | Cost: $20–$60
A DIY outdoor hanging chair made from pallet wood is a great way to turn a porch, pergola, or backyard corner into a cozy sitting spot. It has that relaxed swing-chair feel, but you can build it with simple pallet slats and a stronger wood frame underneath.
Use pallet boards for the seat and back, then reinforce the main structure with 2x4s or 2x3s so the chair feels sturdy and safe.
Plan Snapshot
- Approx. Size: 26–30 in. wide × 24–28 in. deep
- Back Height: 28–32 in.
- Seat Height: 16–18 in. from the ground once hung
- Best Wood: Heat-treated pallet boards + 2×4 reinforcement lumber
- Materials: Pallet slats, 2x4s, exterior screws, rope or chain, eye bolts, washers, outdoor,cushion, stain or sealer
- Best Finish: Rustic stain or clear outdoor sealer
Build tip: Attach the rope or chain to the reinforced frame, not just the pallet boards. Hang the chair from a solid porch beam, pergola beam, or rated hanging stand, and use outdoor-rated hardware for safety.
15. Curved Back Outdoor Chair
Source : Kregtool
Difficulty: Hard | Cost: $60–$120
The curved back outdoor chair is the most polished design on this list. Several narrow slats attach to curved supports to create a backrest that follows the natural shape of your spine — and the result feels much closer to store-bought furniture than most DIY builds. It takes more time and patience, but the final product is something you’ll actually be proud of.
Plan Snapshot
- Approx. Size: 24 in. wide × 36 in. tall
- Seat Height: 17–18 in.
- Back Curve Radius: Approx. 20–24 in.
- Best Wood: Oak, ash, or cedar
- Materials: 2×4 frame, curved support boards (cut from 2×6), 1×2 back slats, exterior hardware
- Best Finish: Exterior stain + polyurethane topcoat
Build tip: Make a full cardboard or plywood template for the curved supports before cutting any real wood. Both sides need to match exactly, and a solid template makes that repeatable.
Building Tips That Actually Matter
Sand Before You Finish
Outdoor chairs get touched constantly — seat edges, armrests, backrest corners. Sand everything smooth before applying any finish, including all edges and corners. Splinters are the enemy of a chair people actually want to sit in.
Use the Right Screws
Regular screws rust outdoors, and once rust sets in the wood around them stains and weakens. Use exterior-rated deck screws for anything that lives outside. It’s a small difference in cost and a big difference in how long the chair holds up.
Seal the Wood Properly
Even pressure-treated lumber benefits from a sealer or stain. Apply at least two coats of exterior-grade finish and let it cure fully before putting the chair outside. Touch up every year or two, especially on chairs that sit in full sun.
Get the Angles Right
A chair that looks good but feels uncomfortable is still a bad chair. A slight seat angle and a reclined backrest — even just a few degrees — make a surprisingly big difference in how long someone can comfortably sit.
Common Mistakes to Avoid
- Using indoor wood outdoors without sealing it properly
- Forgetting to sand sharp corners and edges
- Making the seat too narrow (aim for at least 18 inches wide)
- Using regular indoor screws or staples for outdoor builds
- Building without checking that the chair sits level
- Choosing cushions after building the frame — always measure cushions first
Want Plans With the Cut Lists Already Done?
Building your first outdoor chair from scratch is a great project. Figuring out cut lists, angles, and dimensions entirely on your own — that’s where a lot of beginners waste time or expensive lumber.
If you want printable woodworking plans with cut lists, diagrams, and step-by-step measurements, a woodworking plan bundle can save you a lot of time before you start cutting.
Ted’s Woodworking Plans is one of the most complete resources out there for this — covering outdoor chairs, benches, tables, garden furniture, storage builds, sheds, and hundreds of other projects. Instead of working out every measurement yourself, you follow a proven plan and spend your weekend building instead of troubleshooting.
👉 Browse Ted’s Woodworking Plans here
Wrapping It Up
You don’t need to spend hundreds of dollars on patio furniture to create a comfortable outdoor space. These 15 DIY outdoor chair plans cover every skill level, every budget, and every backyard style — from a simple $25 fire pit chair to a polished curved-back lounge chair you’d be proud to show anyone.
Start with one plan. Use weather-resistant materials. Seal the wood. Then actually sit in the thing you built — that part never gets old.