
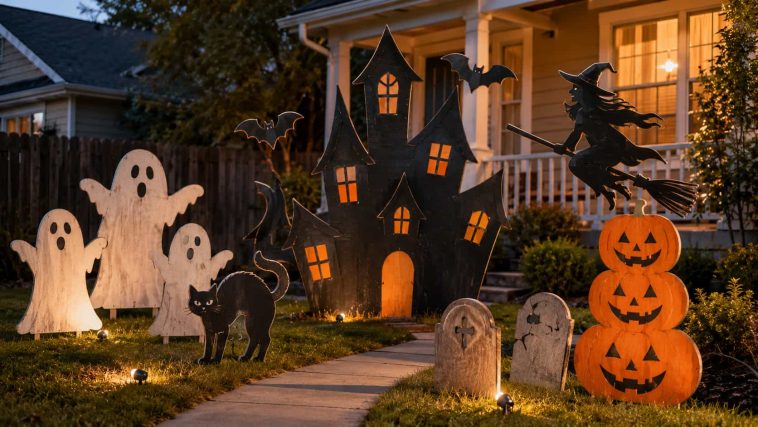
A blank sheet of plywood can turn into a whole Halloween scene before the neighbors finish untangling their plastic cobwebs. That sounds like a win, right?
These Halloween wood cutout patterns focus on bold silhouettes, simple shapes, and outdoor-friendly details. You can make one statement piece for the porch or build a full cast of ghosts, witches, cats, pumpkins, and monsters across the yard. Better yet, you can resize most of these ideas to fit scrap wood, a fence panel, or a full plywood sheet.
If you want decorations beyond plywood silhouettes, explore these easy Halloween wood projects for more spooky ideas.
You do not need museum-level painting skills or an elaborate workshop. A clear outline, sturdy exterior-grade material, safe cutting habits, and weather-resistant paint will carry most of the project. The trick lies in choosing a pattern that people can recognize from the street. Tiny details may look clever on paper, but darkness swallows them faster than Halloween candy disappears from an unattended bowl.
What Makes a Good Halloween Wood Cutout Pattern?
A strong outdoor cutout uses a simple, readable silhouette. Step back from your sketch and imagine the shape under weak porch lighting. Can you still identify it? If the answer sounds like “maybe, with an explanation,” simplify the outline.
Large curves and wide connecting areas help the wood survive outdoor use. Thicken narrow broom handles, tails, and other fragile parts before you cut anything. Plan the display method too: freestanding figures need broad bases, while yard-stake designs need solid wood near the bottom.
Materials and Tools to Plan Before You Start
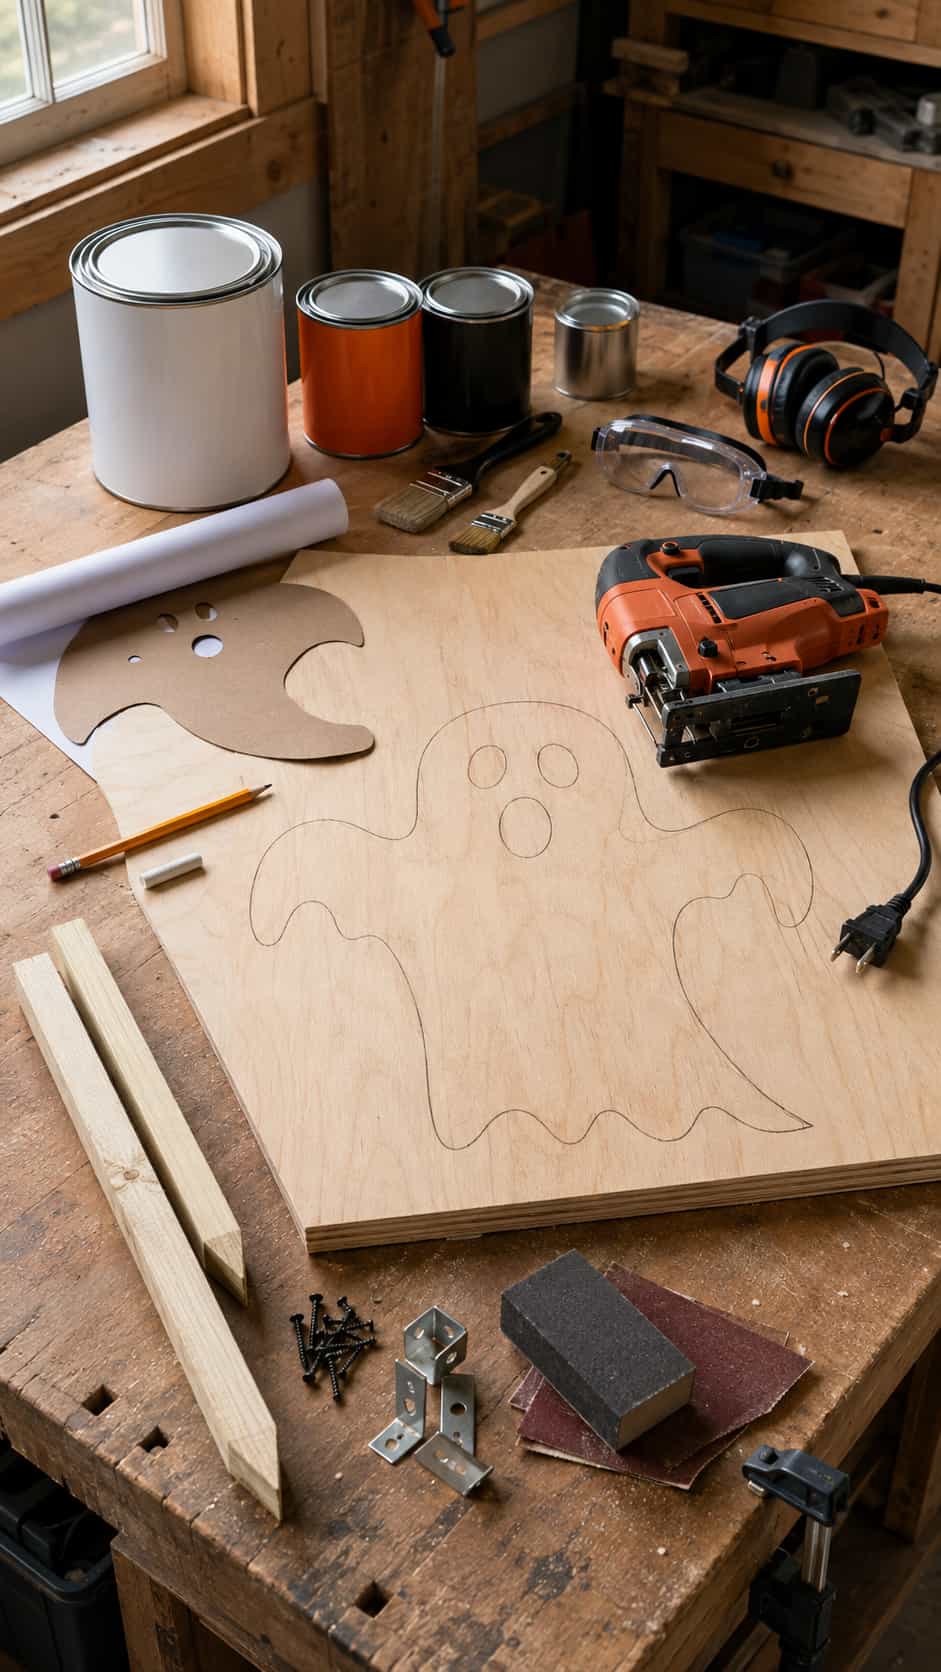
Choose material that matches the size and location of your DIY Halloween wood cutouts. Exterior plywood suits large yard figures, while solid boards work well for smaller porch signs. Avoid warped sheets; Halloween already brings enough chaos. 🙂
Gather these basics before you begin:
- Exterior plywood or suitable outdoor wood in a thickness that supports the chosen size
- Paper, cardboard, or a projector for enlarging the pattern
- Pencil, chalk, or removable marking material
- A suitable saw and blade for the outline
- Sandpaper or a sanding block for smoothing edges
- Exterior primer, outdoor paint, and a compatible clear topcoat
- Outdoor-rated screws, stakes, brackets, or hanging hardware
- Eye and hearing protection, clamps, and a stable work surface
Power tools demand care and training. Ask an experienced adult to supervise or handle any cutting that exceeds your experience, secure the workpiece, wear the protection that the tool manufacturer recommends, and follow the tool manual. A spooky yard should entertain people; it should not create an actual emergency.
Still assembling your workshop? Start with these essential woodworking tools for beginners before buying equipment you may rarely use.
Spooky Halloween Wood Cutout Patterns for Outdoor Decor
1. Friendly Ghost Trio
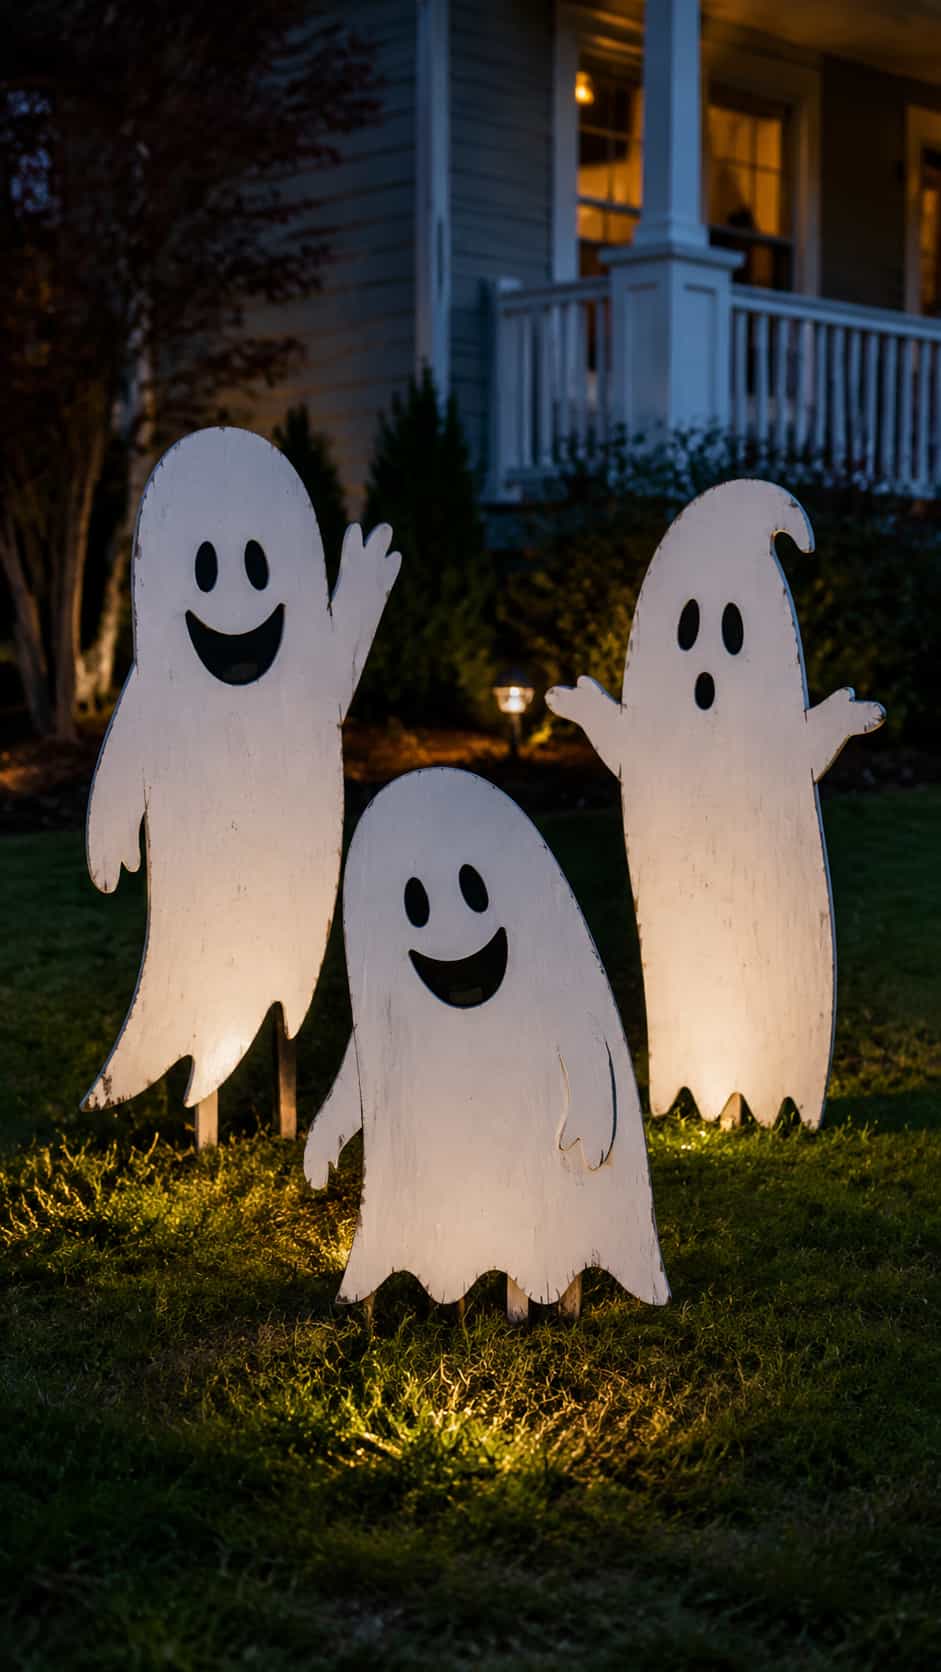
A group of three wooden ghosts gives you more movement than one lonely white blob in the grass. Draw each ghost with a different top curve, arm position, and lower edge. One can wave, one can lean forward, and one can look suspiciously confused by the entire situation.
Keep the eyes and mouths large so they show after sunset. Paint the faces black, or cut the openings only if your material, tools, and mounting method support that choice safely. Arrange the ghosts at three different heights to create depth.
This pattern works especially well for beginners because the flowing outer lines forgive small cutting imperfections. Use stakes behind the bodies, then add solar spotlights from the front for an easy wooden ghost yard decoration.
2. Black Cat With an Arched Back
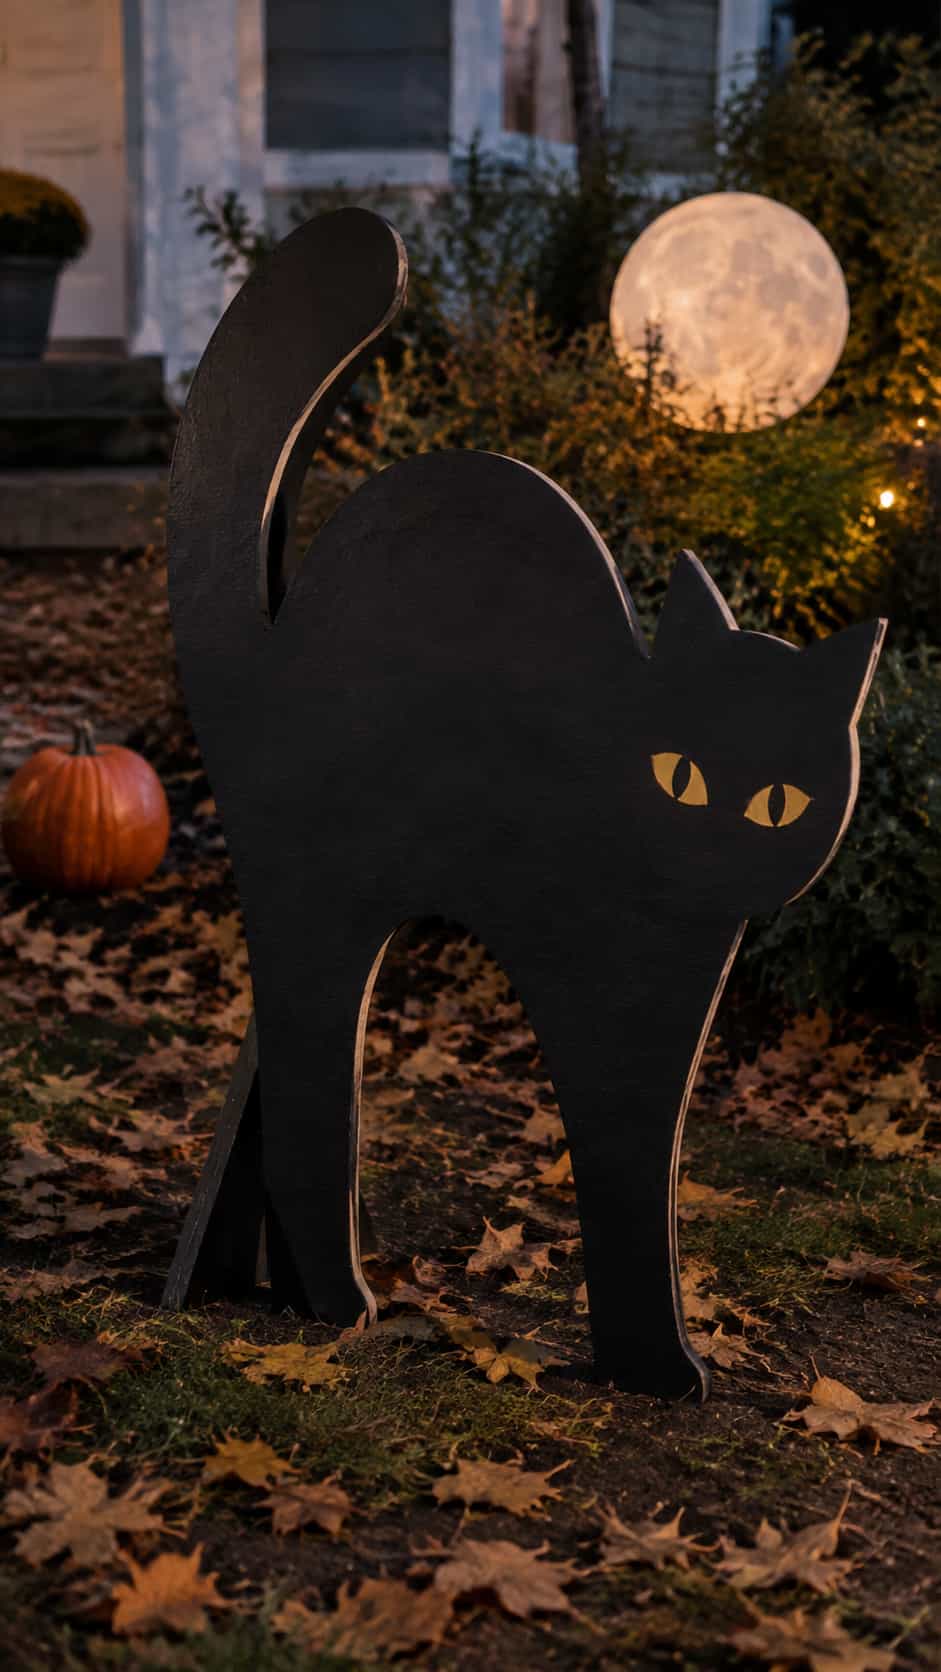
Nothing says Halloween quite like a black cat pretending that the entire yard belongs to it. Use a high arched back, pointed ears, a raised tail, and four sturdy legs. Make the tail thicker than a realistic tail so it survives cutting and storage.
Black exterior paint creates a crisp silhouette during the day. Add yellow or green eyes for a small flash of color, or keep the cat completely black for a cleaner look. A moon or pumpkin placed behind it can help the shape stand out at night.
3. Classic Witch on a Broom
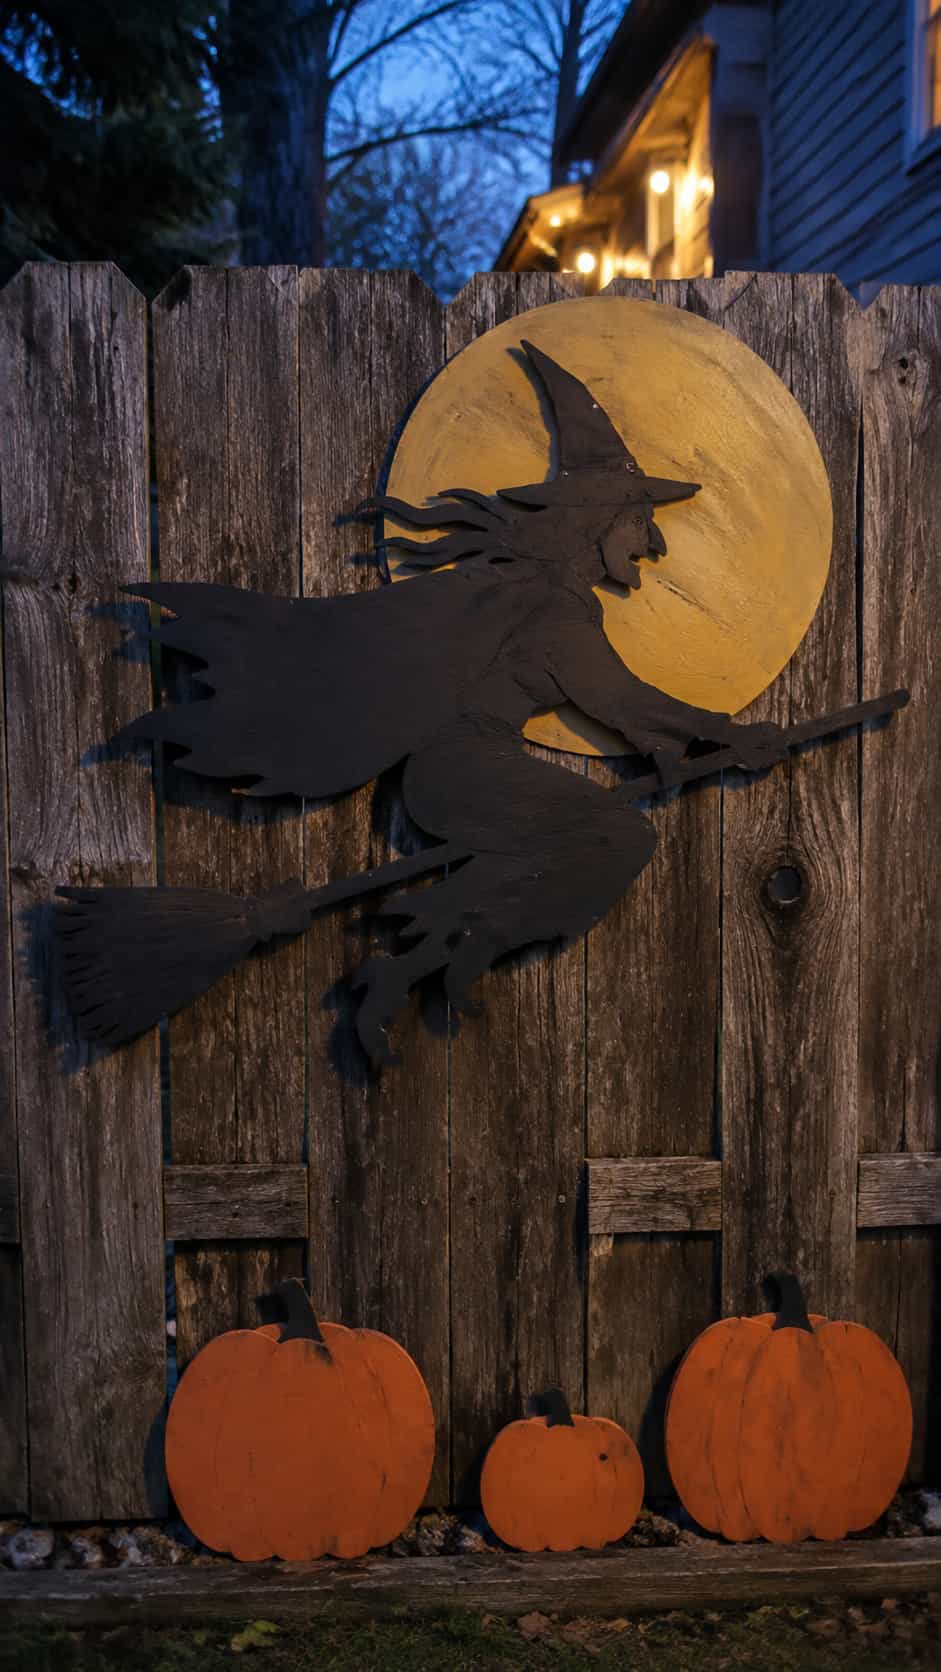
A flying witch creates one of the most recognizable Halloween silhouettes. Build the pattern around a pointed hat, curved nose, flowing cape, and long broom. Connect narrow sections wherever possible so the shape stays strong.
For example, let the cape touch the broom or body instead of leaving several fragile gaps. You can paint the whole cutout black and let the outline do the work. Add a golden moon behind the witch if you want a layered display with more color.
Mount this figure on a fence, shed wall, or porch panel where viewers can see the horizontal shape. The design looks especially effective above smaller pumpkin cutouts, as though the witch runs the neighborhood decorating committee.
4. Stacked Jack-o’-Lantern Totem
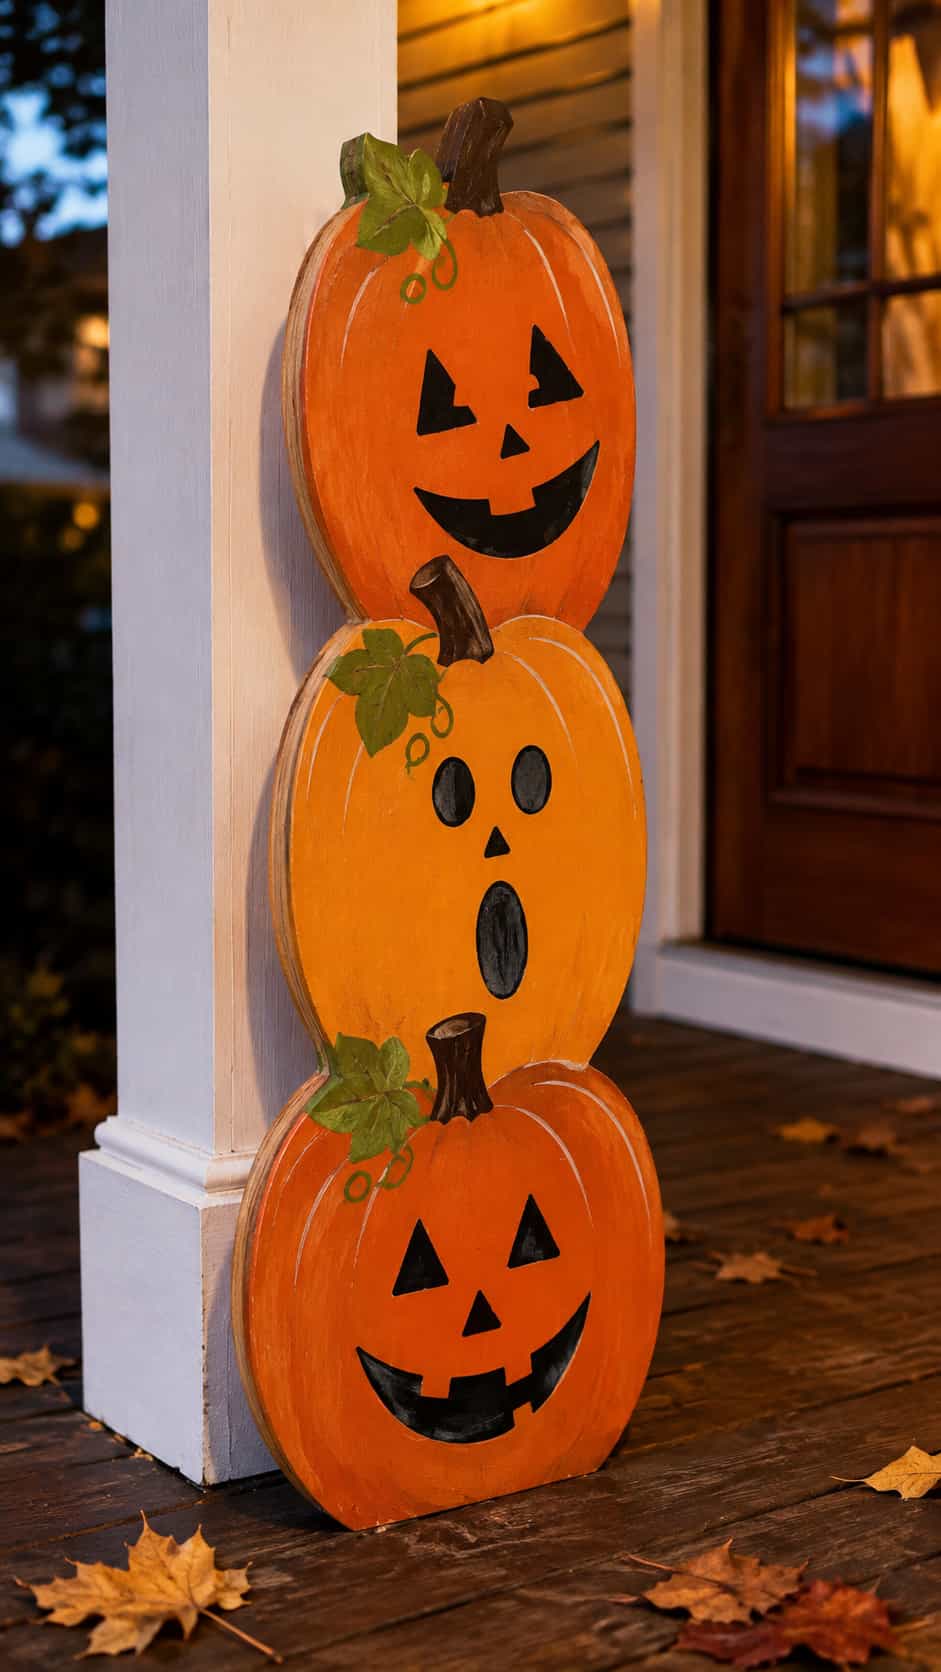
Stack three pumpkin shapes into one tall pattern, then give each pumpkin a different expression. Try a cheerful grin at the bottom, a surprised face in the middle, and a crooked smirk at the top. Wide facial features will remain visible from the sidewalk.
Paint the pumpkins in three shades of orange instead of one flat color. Add dark brown stems, green leaves, and black facial details. Thin highlights along one side can suggest rounded forms without turning the paint job into a three-day art exam.
This vertical cutout fills narrow spaces beside a door, mailbox, or porch column. The stacked design also creates one solid piece, which makes setup and storage easier than juggling three separate pumpkins.
For more porch and yard designs, check out these DIY wooden pumpkin ideas for fall and Halloween.
5. Peeking Fence Ghosts
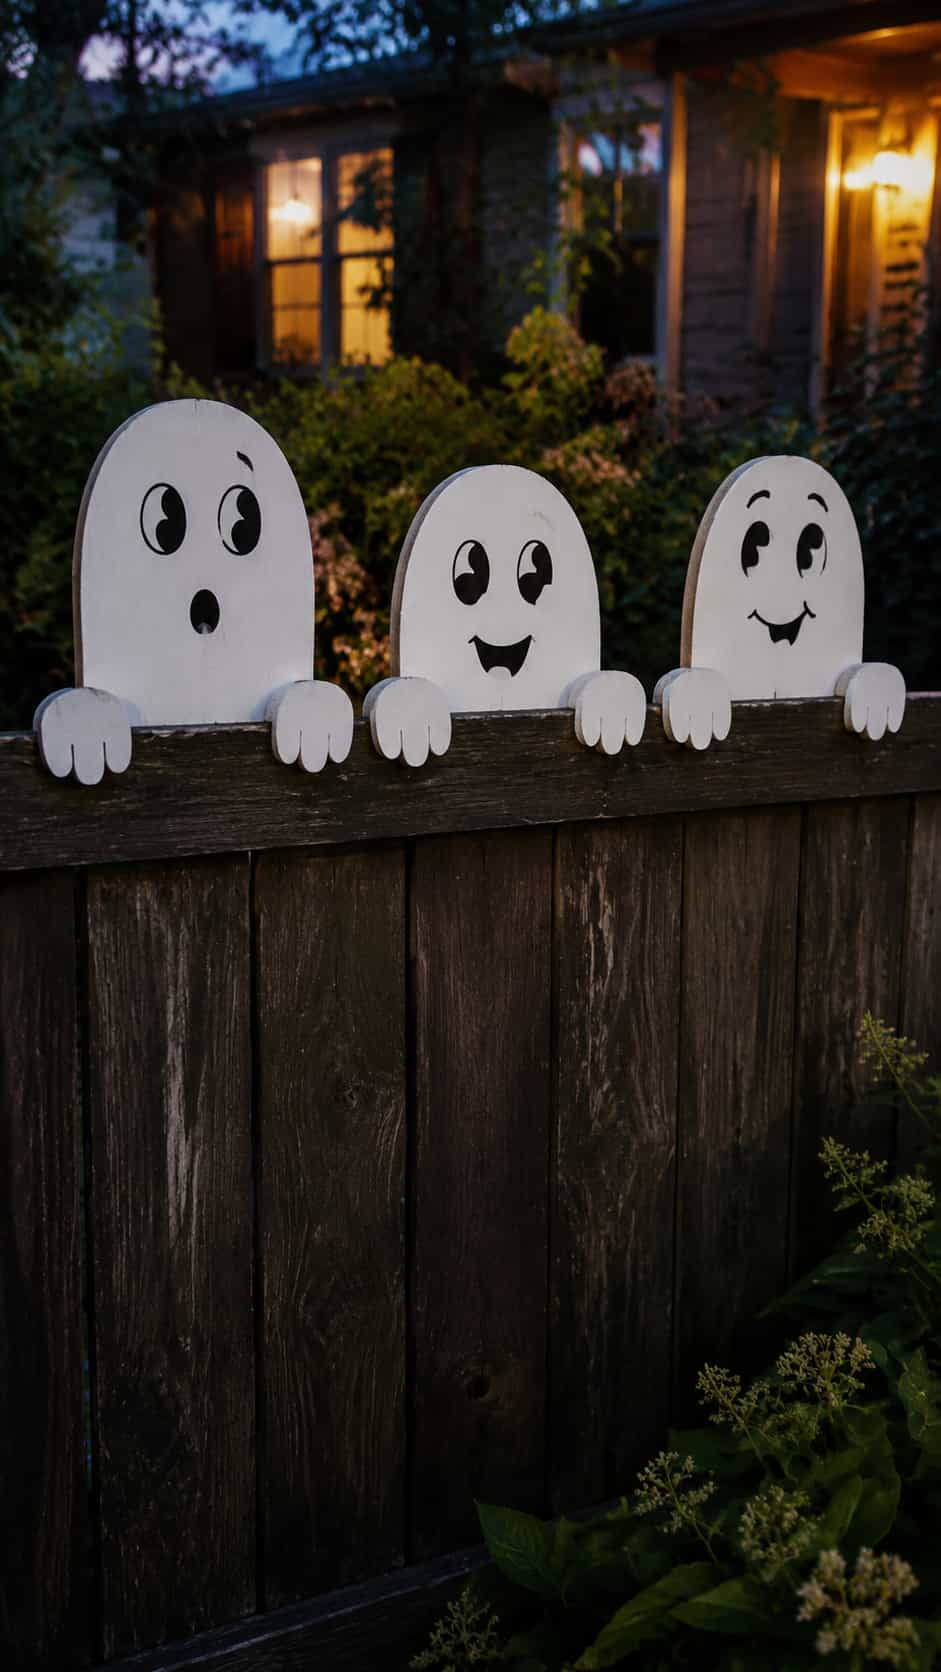
Create two or three half-ghost patterns that look as though they peek over a fence. Each shape only needs a rounded head, large hands, and a short upper body. Place the hands along the fence line so the figures appear to grip the top board.
Change the eye direction on every ghost. One can watch the street, another can stare at the front door, and the third can look at its companions with deep concern. That tiny change adds a surprising amount of character.
White paint provides the strongest contrast against dark fencing. FYI, this idea also works on balcony rails, porch railings, and garden walls when you choose secure outdoor mounting hardware.
6. Crooked Haunted House Silhouette
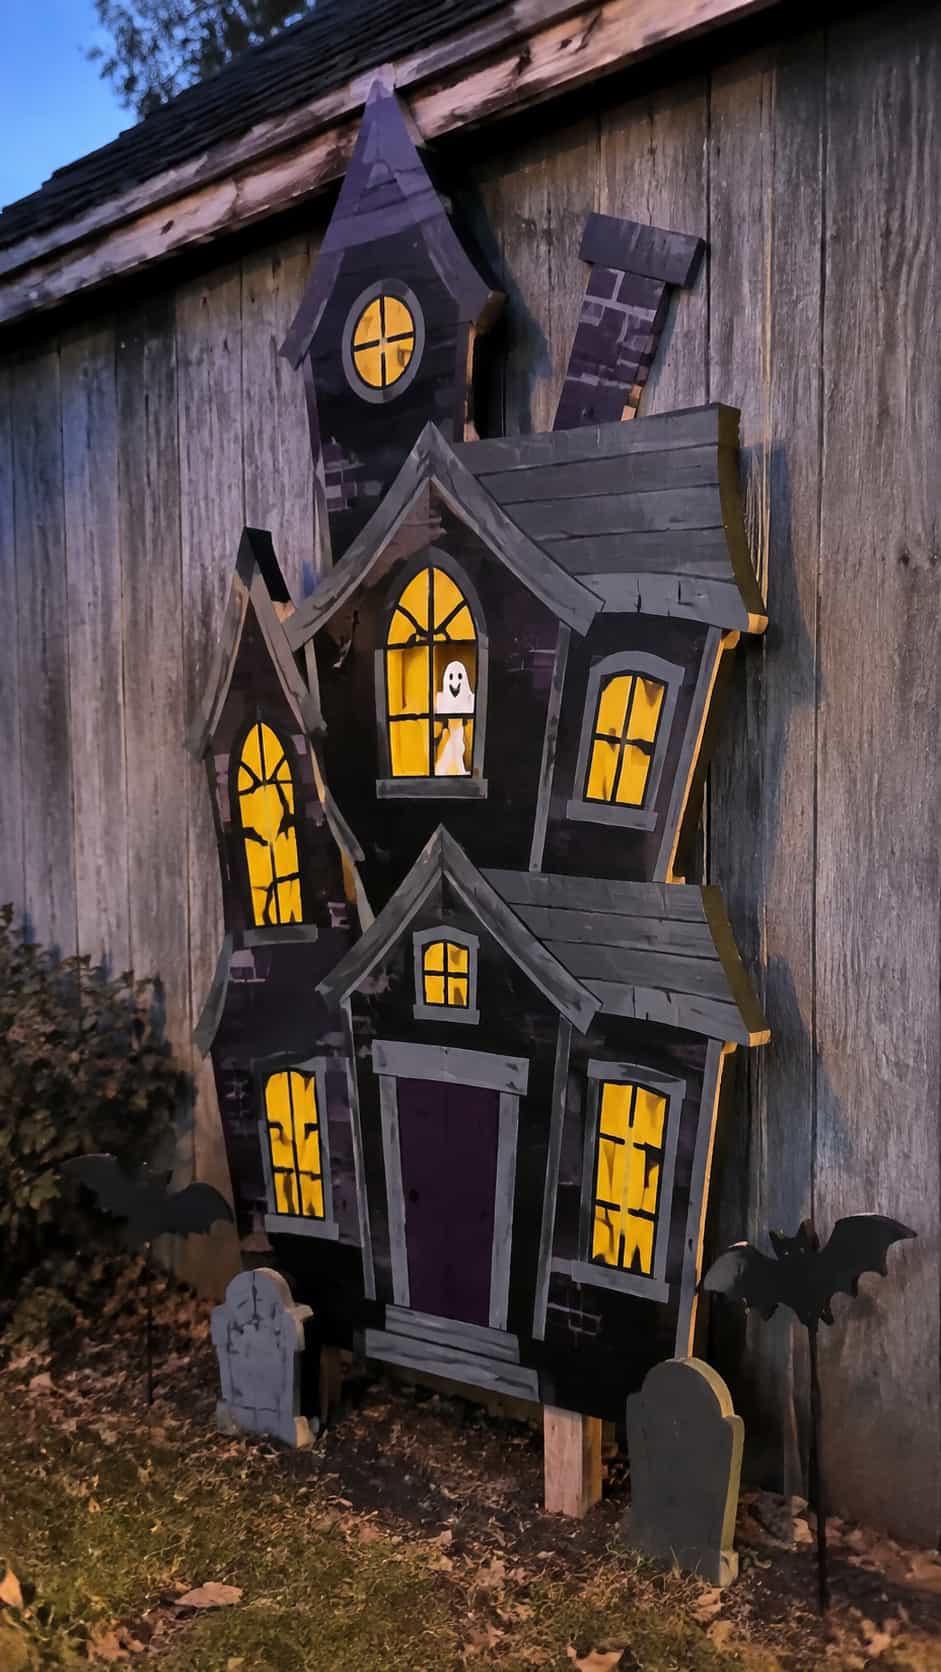
A haunted house cutout gives you a complete scene inside one pattern. Draw a leaning roof, uneven chimney, tall windows, and crooked tower. Keep the outer silhouette bold, then paint smaller details rather than cutting every window and roof shingle.
Use dark purple, charcoal, or black for the building. Bright yellow windows create instant nighttime contrast, while gray trim and painted cracks add age. A small ghost in one window can bring humor without making the design busy.
This pattern needs more planning than a simple ghost, but it also creates a stronger focal point. Place it against a fence or shed wall, then surround it with smaller tombstones and bats to build a complete wooden Halloween yard art display.
7. Row of Crooked Tombstones
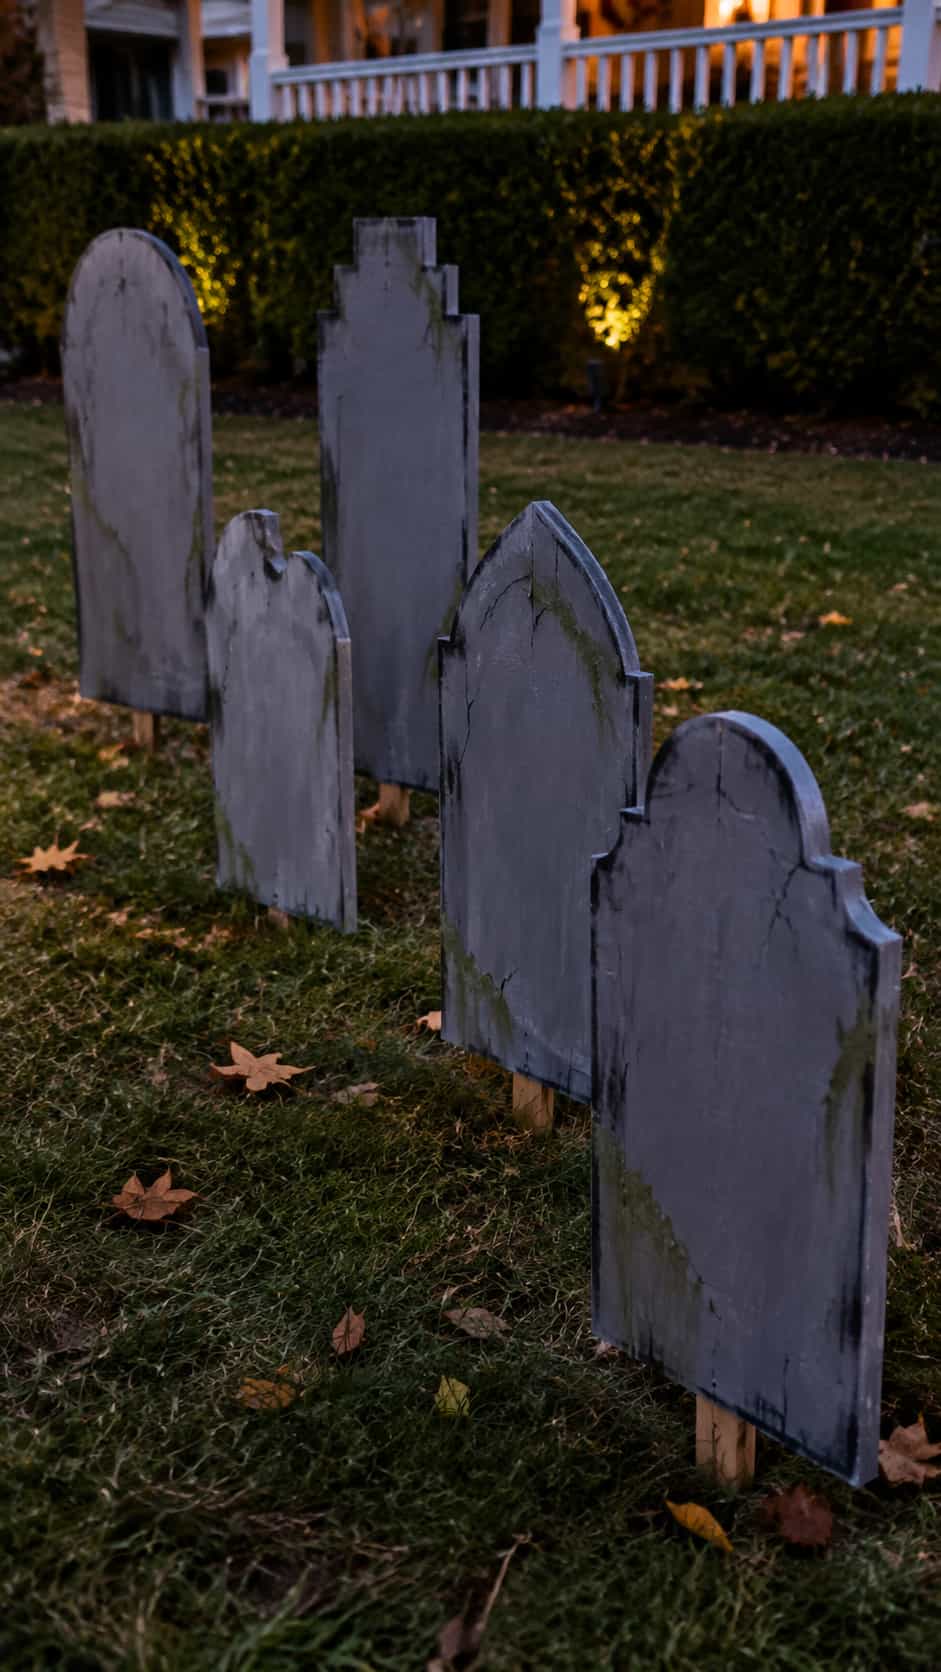
Tombstone patterns let you fill a large yard without using huge amounts of wood. Cut several different tops: rounded, pointed, broken, and stepped. Vary the heights so the row looks collected rather than copied.
Paint the surfaces gray, then add darker edges, simple cracks, and playful names or short phrases. Keep the wording family-friendly and large enough to read. A few moss-green brush marks can add outdoor age without requiring actual moss to conquer the lawn.
Connect each tombstone to a strong rear stake or support. Angle the pieces slightly across the yard instead of lining them up like obedient office chairs. The uneven placement creates depth and makes five cutouts look like a much larger graveyard scene.
8. Skeleton Hand Yard Stakes
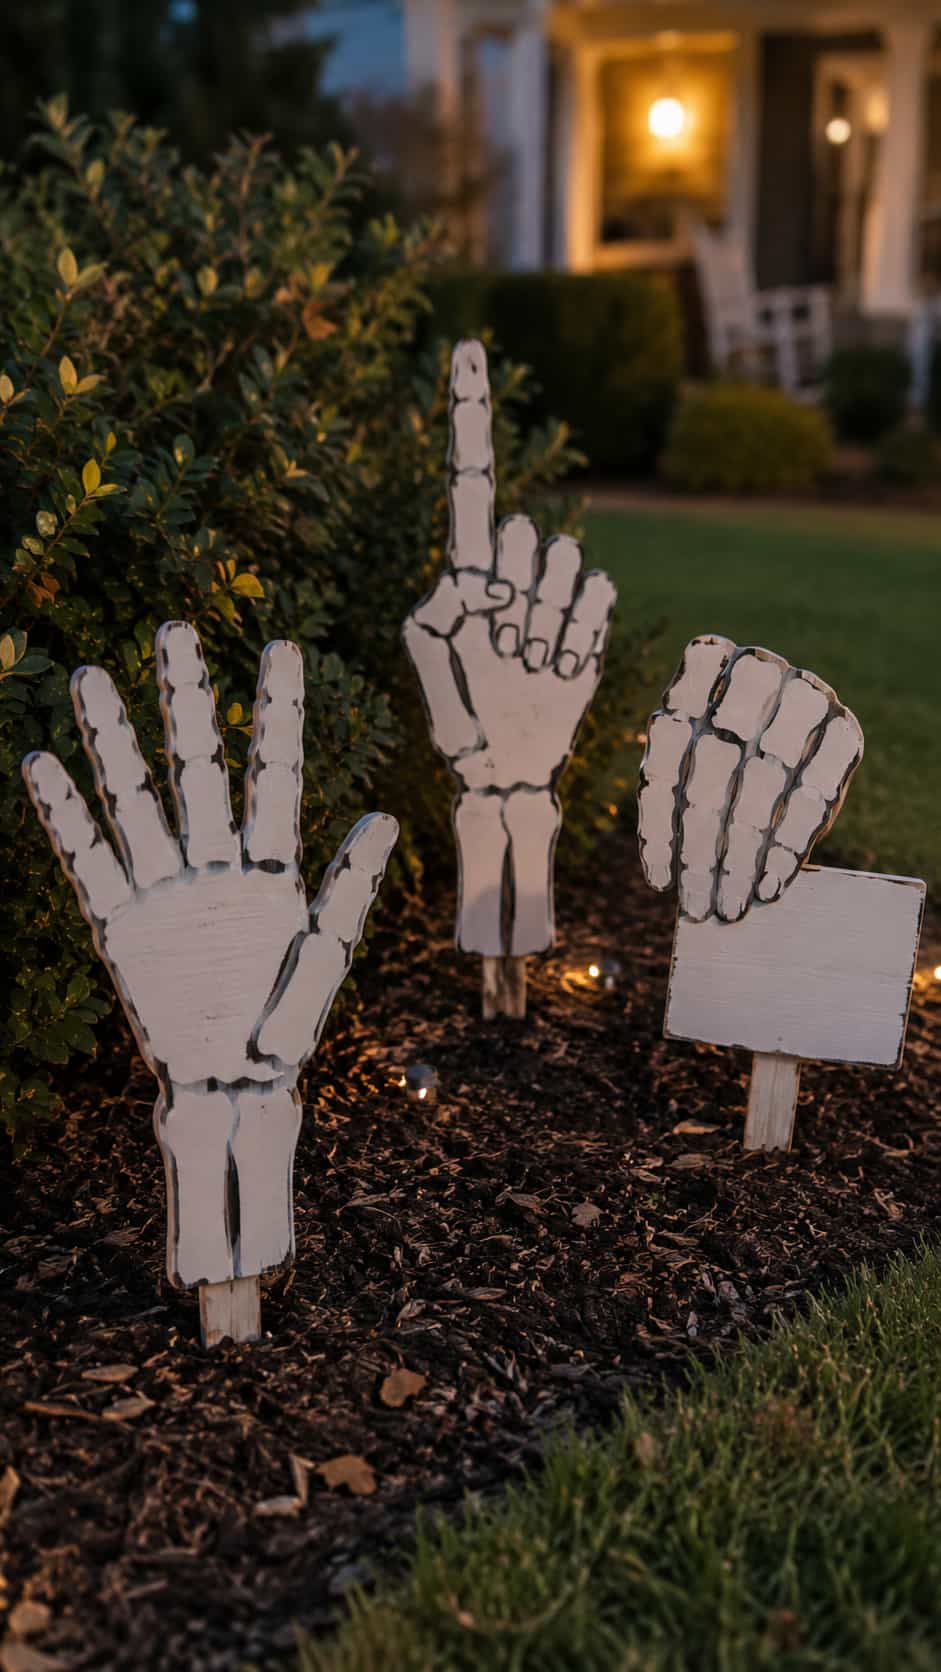
Large skeletal hand silhouettes can appear to reach from flower beds, gravel borders, or behind low shrubs. Simplify each hand into a palm shape with five thick finger sections. Avoid narrow joints and sharp interior corners, which weaken the wood.
Paint the hands warm white or pale gray, then add thin charcoal lines to suggest separate bones. You can create several hand positions, including an open palm, a pointing finger, and a hand that grips a small sign.
Use these cutouts as accents rather than the main display. Three hands scattered near larger figures create a playful surprise, especially when landscape lighting catches them after dark. Keep the imagery cartoon-like and fun rather than realistic or graphic.
9. Oversized Candy Corn Trio
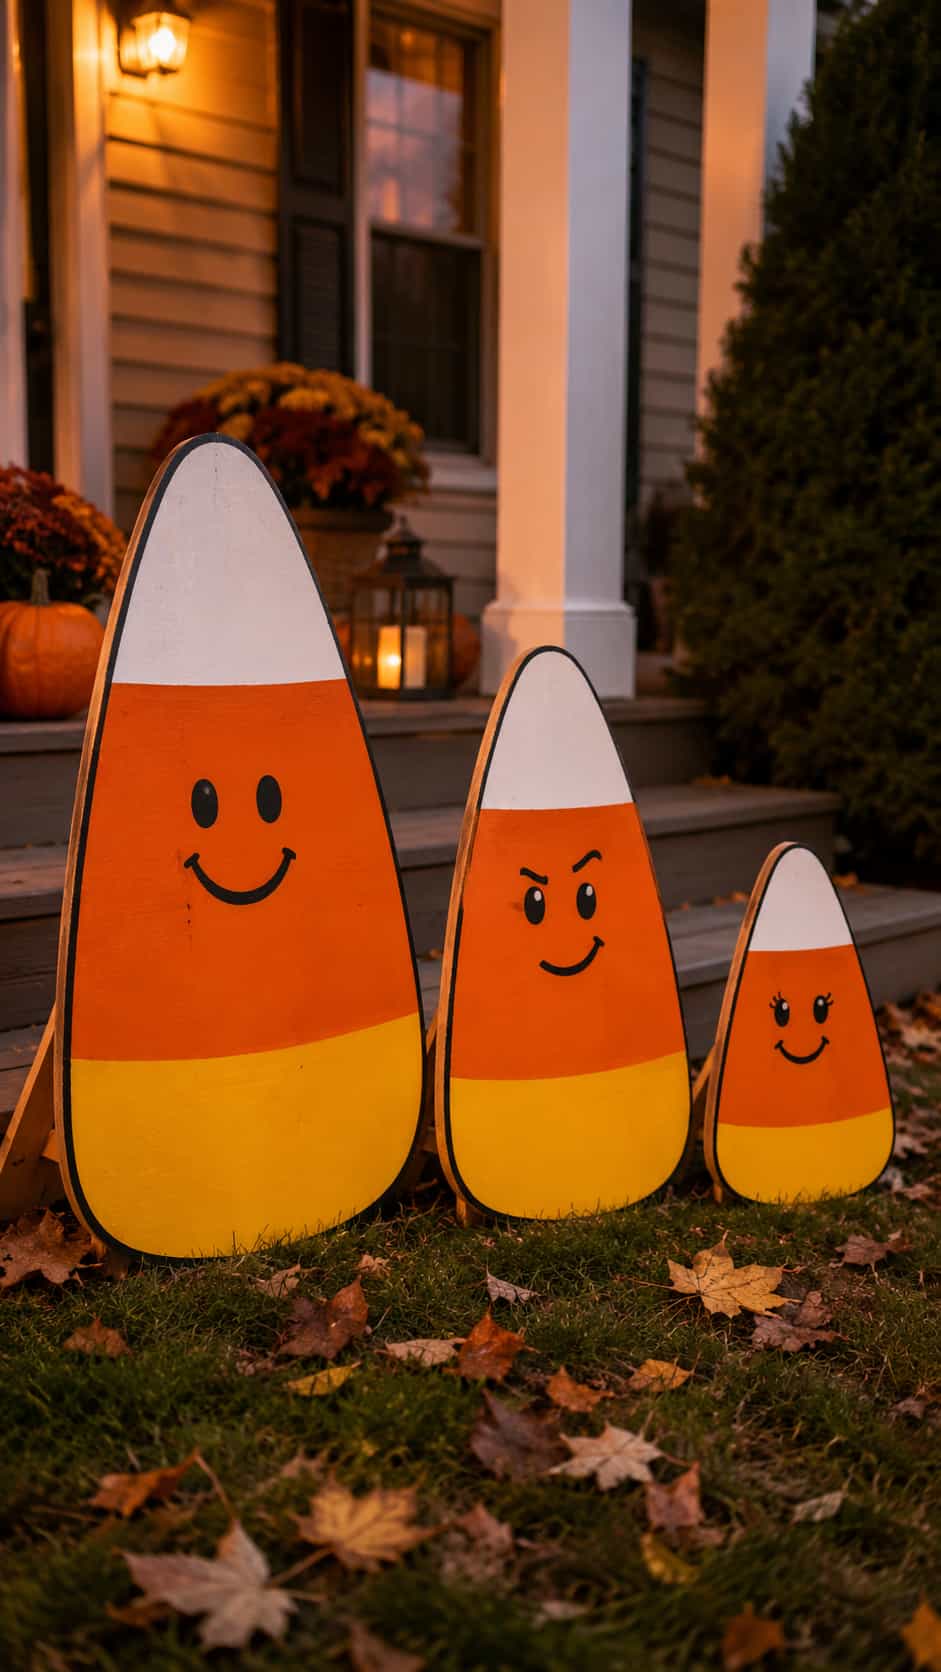
Candy corn cutouts bring bright color to a display that might otherwise turn into fifty shades of black and orange. Draw three rounded triangle shapes in different sizes. A slightly curved base will make each piece look softer and more cheerful.
Paint the familiar white, orange, and yellow bands, then outline them with a thin dark border. Add simple faces if you want a cute design for younger trick-or-treaters. One raised eyebrow can turn an ordinary candy into the most judgmental object in the yard.
10. Crescent Moon With Hanging Bats
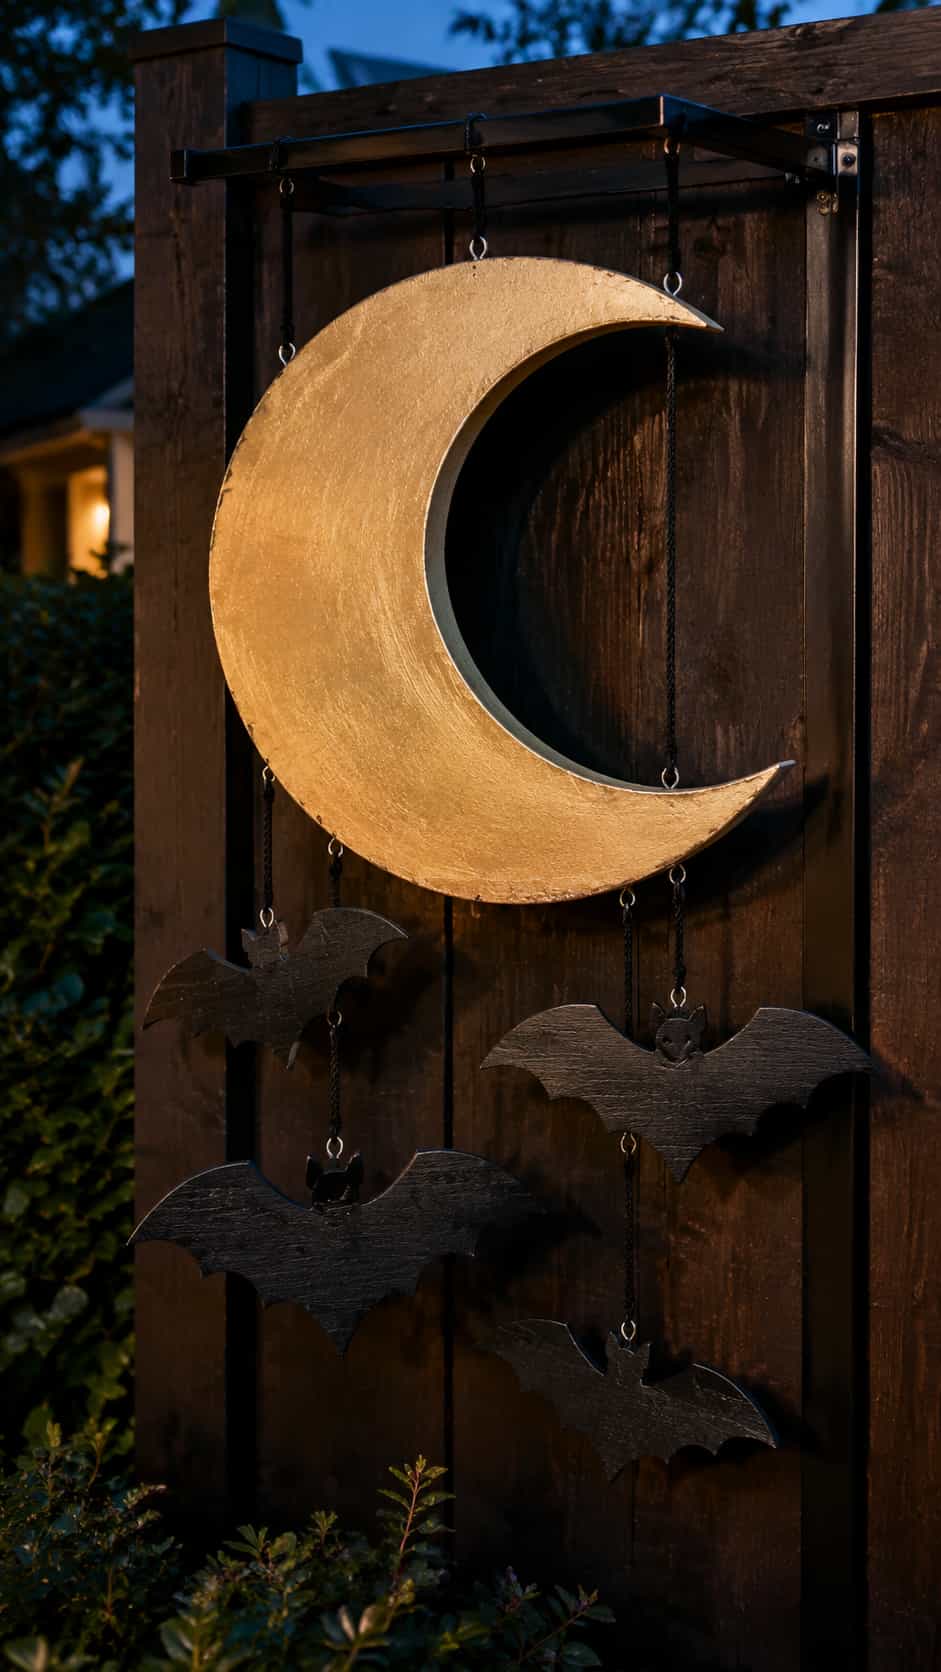
A large crescent moon gives small bat cutouts a strong visual anchor. Cut the moon as one wide curve with a thick lower point, then paint it gold, cream, or pale yellow. Keep the points substantial so they do not chip during storage.
Cut three to five bats in different sizes and wing positions. Mount them around the moon on a fence or display panel, or hang lightweight pieces from an outdoor-safe frame that can handle local weather. Secure every component so wind cannot turn the decorations into surprise projectiles.
Want to experiment with smaller wooden silhouettes? These free scroll saw patterns for beginners offer more shapes to practice.
11. Pumpkin-Head Scarecrow
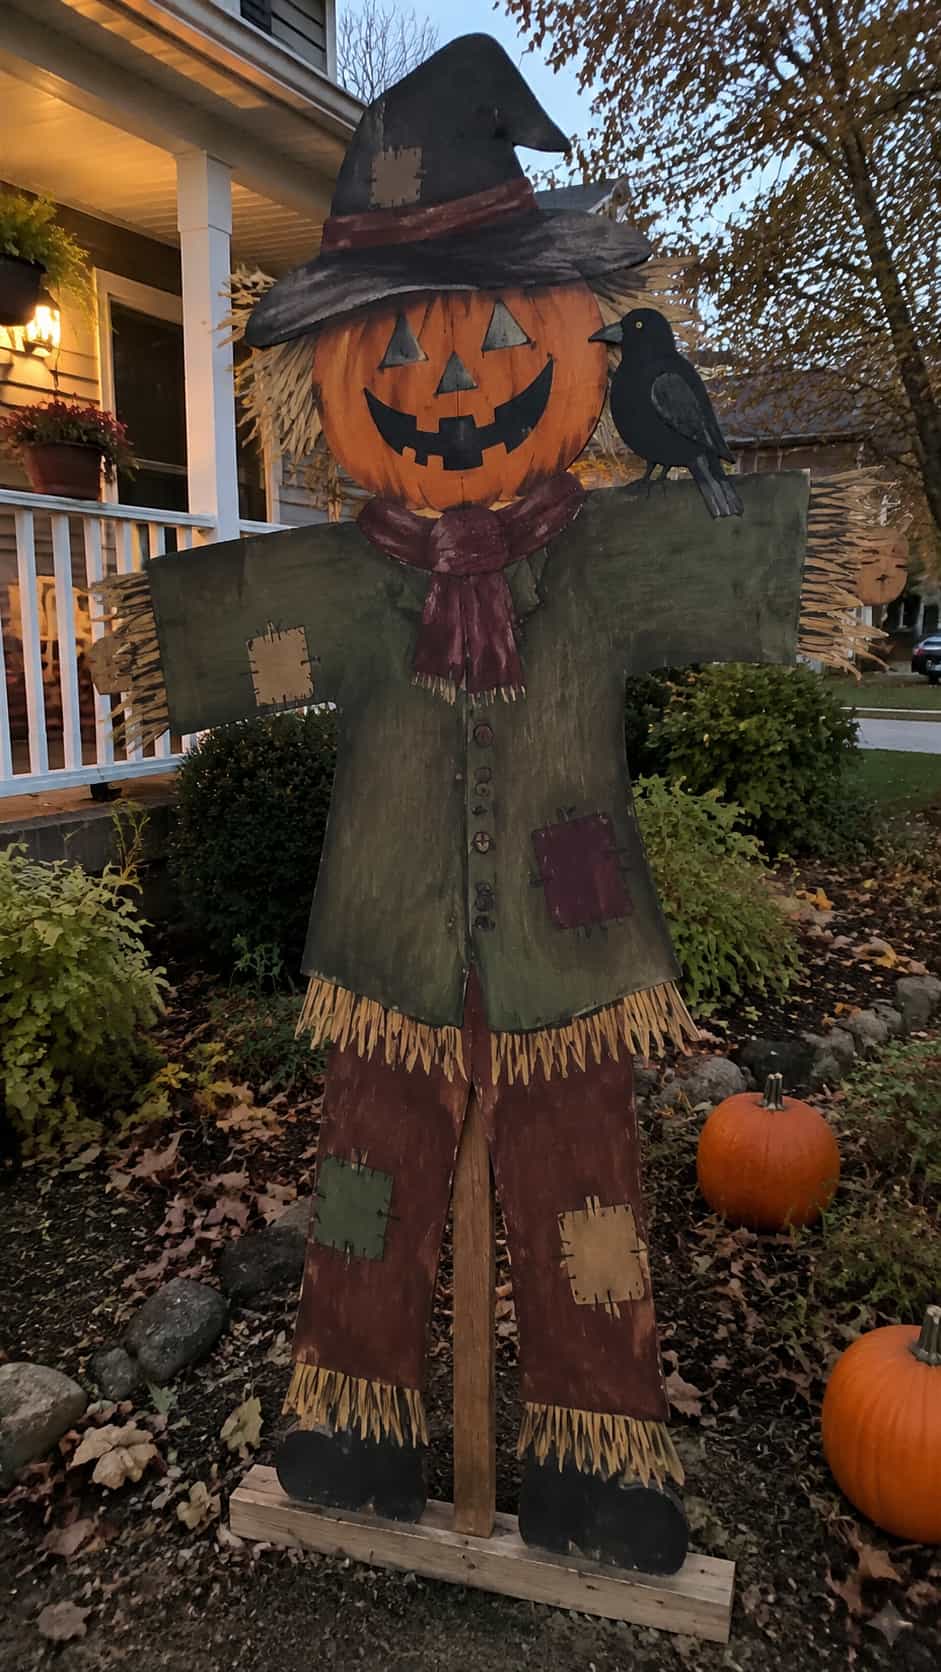
Combine a scarecrow body with a carved-pumpkin face for a tall yard character. Use a broad hat, simple coat, wide sleeves, and sturdy legs. Let the arms touch the torso or a cross support so the pattern keeps plenty of strength.
Paint patched clothing in muted green, brown, or burgundy, then use bright orange for the head. A crooked smile and triangle eyes will read clearly from far away. Add painted straw at the cuffs rather than cutting many thin strands.
Place the scarecrow near the garden, walkway, or porch corner. A height between child-size and adult-size creates a noticeable figure without demanding a full sheet of plywood. Want extra charm? Give it a small wooden crow on one shoulder.
12. Waving Mummy Character
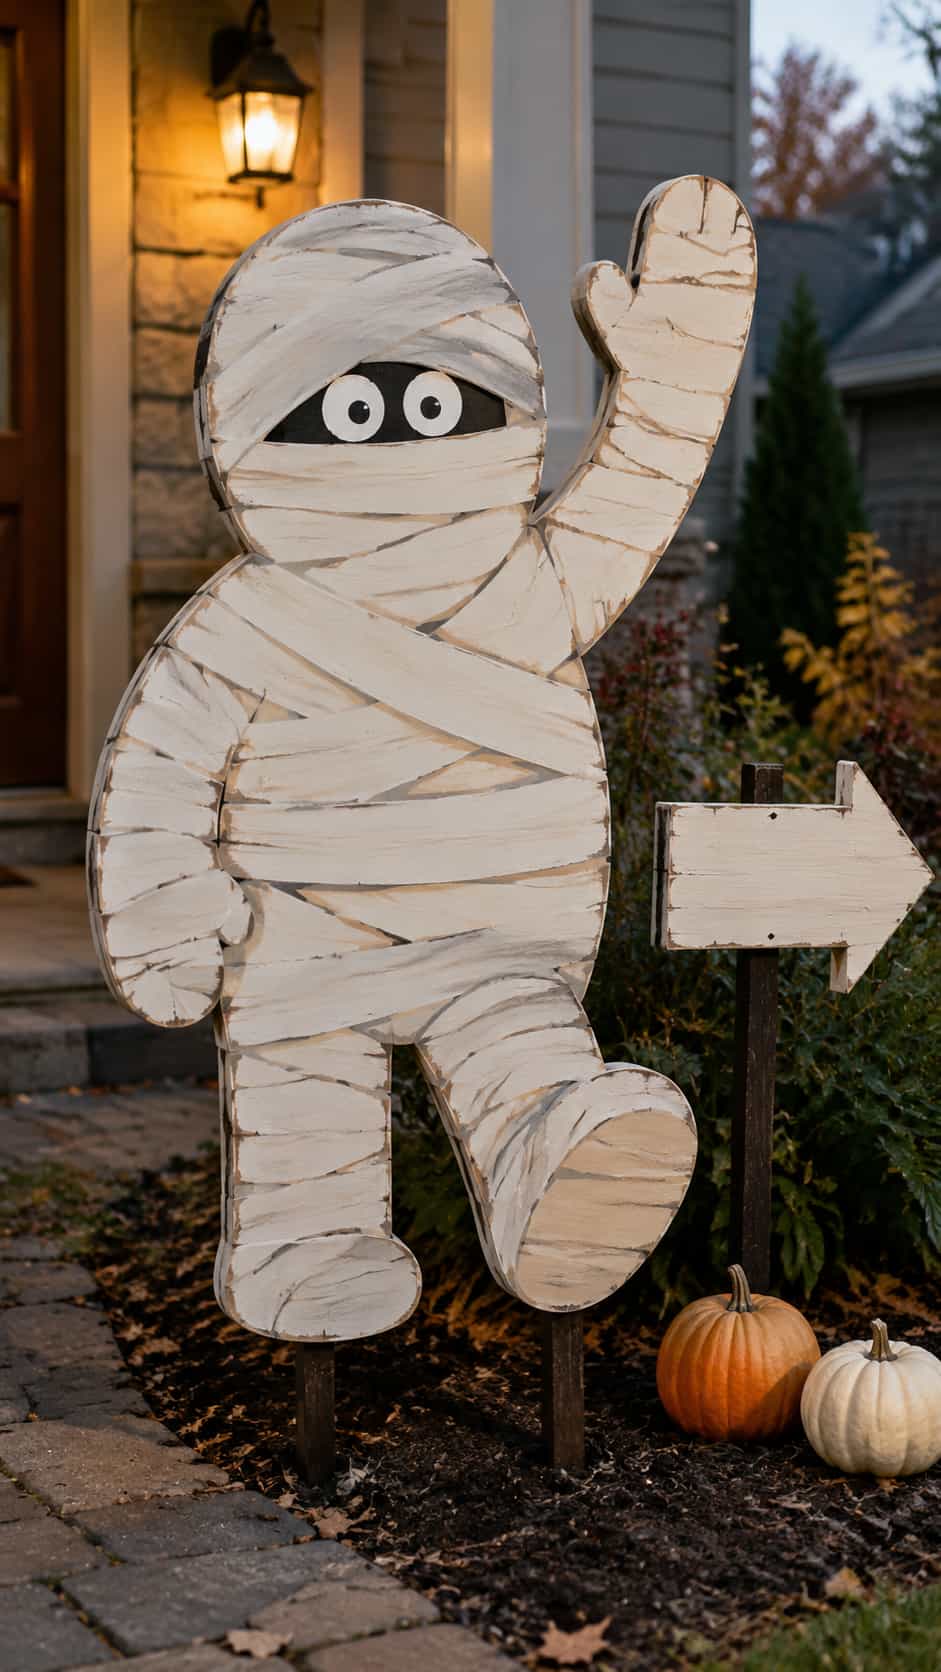
A mummy cutout can look funny, spooky, or somewhere delightfully in between. Draw a rounded body with one arm raised and one foot stepping forward. Keep the legs and arm thick enough for outdoor durability.
Paint the base warm white, then add overlapping gray or tan bandage lines across the body. Leave a dark face opening with two large eyes. The painted wrapping creates detail without forcing you to cut dozens of narrow strips, because nobody needs that kind of punishment.
This figure works near the front walk, where the raised hand can welcome visitors. Pair it with a small sign that reads “This Way” or “Treats Ahead” to turn the decoration into a useful guide.
13. Owl on a Twisted Branch
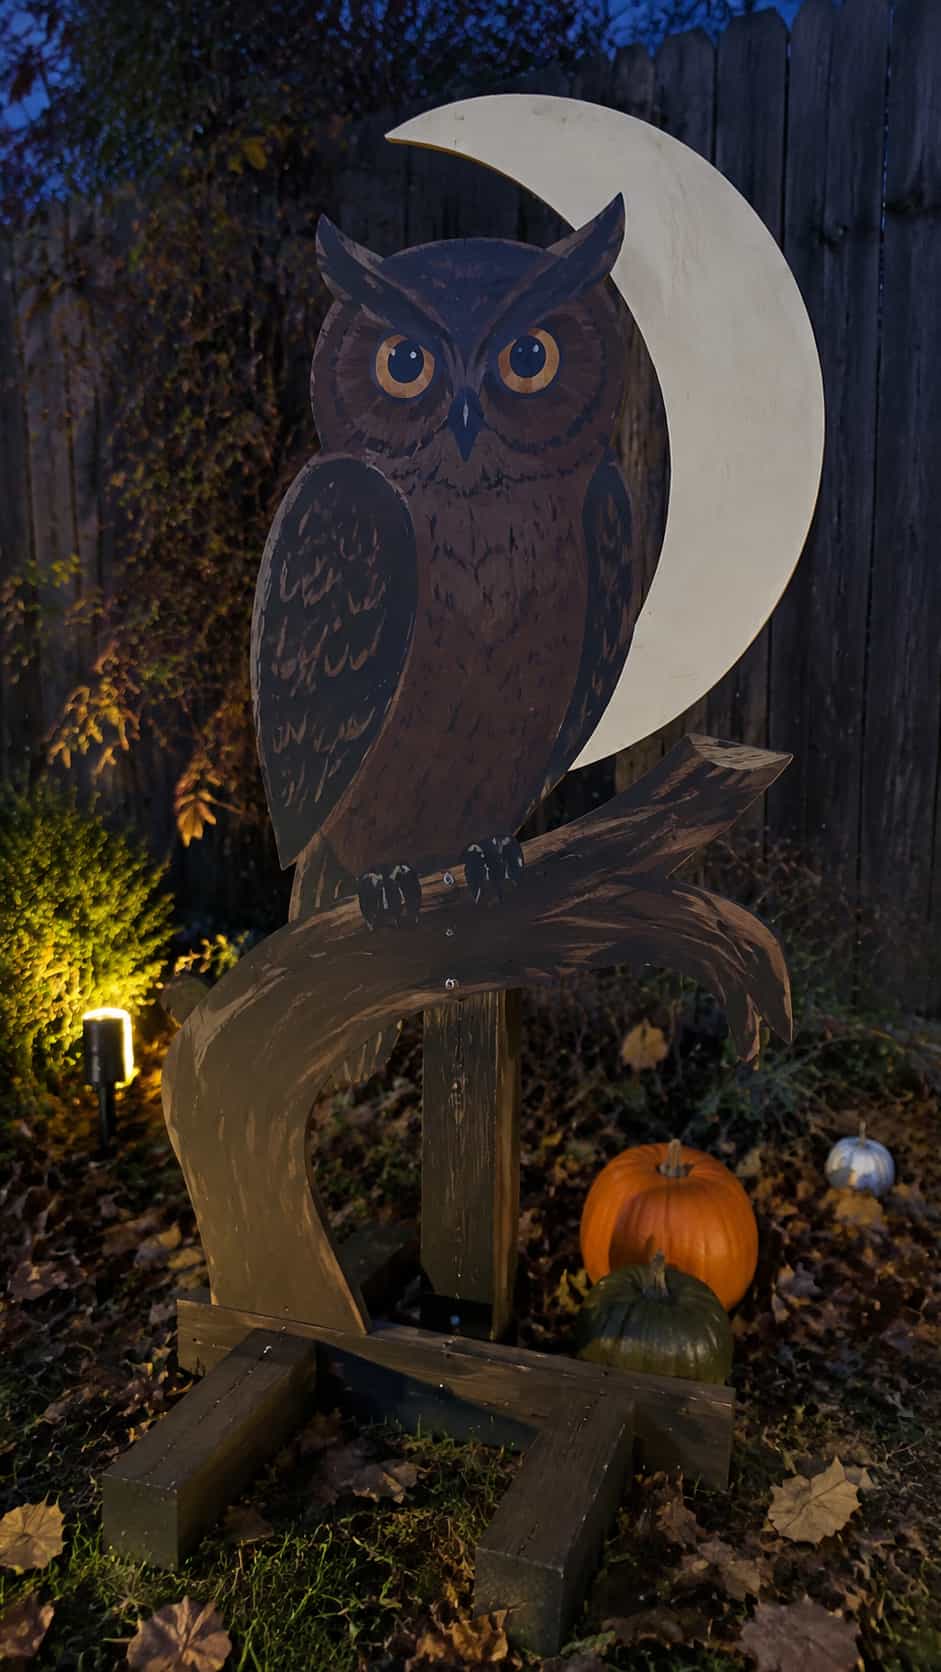
An owl brings a slightly mysterious woodland mood to your Halloween display. Shape the pattern around a broad body, pointed ear tufts, large eyes, and a thick branch. Join the feet firmly to the branch so you avoid fragile little toes.
Paint the owl black or dark brown, then add amber eyes and a few simple feather marks. A pale moon behind the bird will strengthen the silhouette and brighten the scene. You can also cut the moon and owl as one connected pattern.
Mount the piece on a tree-friendly support, fence, or freestanding panel. Never drive hardware into a living tree without checking a tree-safe mounting method. The owl looks especially good above pumpkins and fall leaves, so you can display it from early autumn through Halloween.
14. Monster Eyes Behind the Bushes
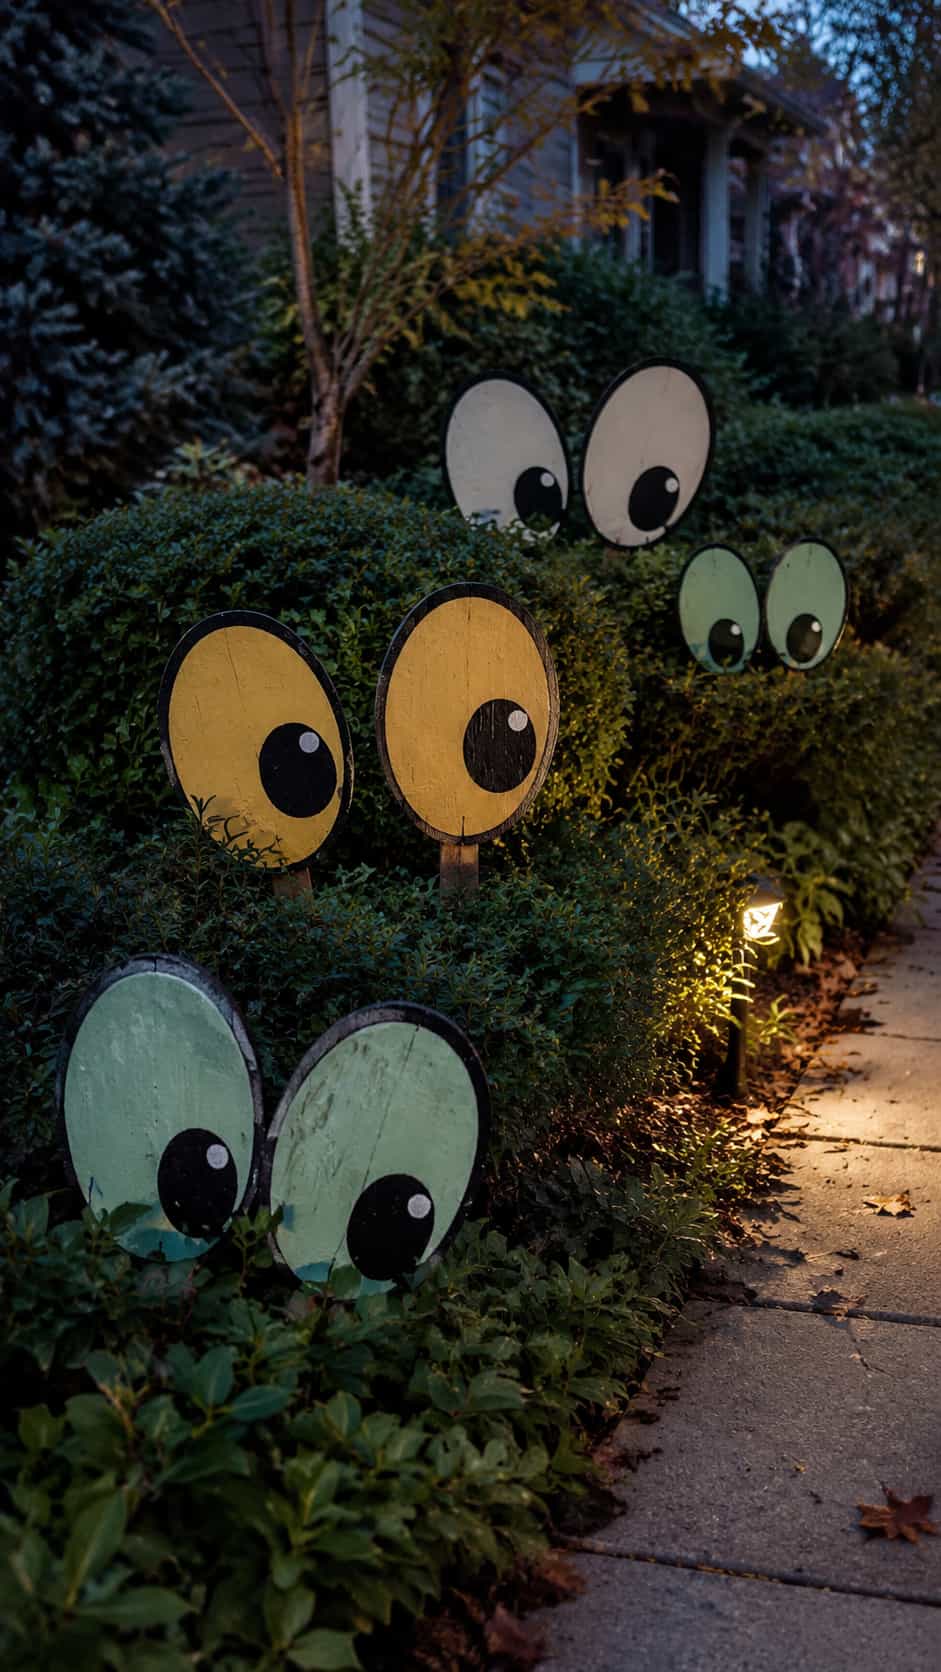
Sometimes two eyes create more suspense than a full monster. Cut several pairs of oversized eye shapes and mount them just above or inside dense shrubs. Use different pupil directions so the creatures seem to watch people cross the yard.
Paint the whites in pale green, yellow, or white, then outline them heavily in black. Reflective outdoor paint can improve visibility, but test the effect under your actual lighting before covering every piece.
15. Bat Swarm in Multiple Sizes
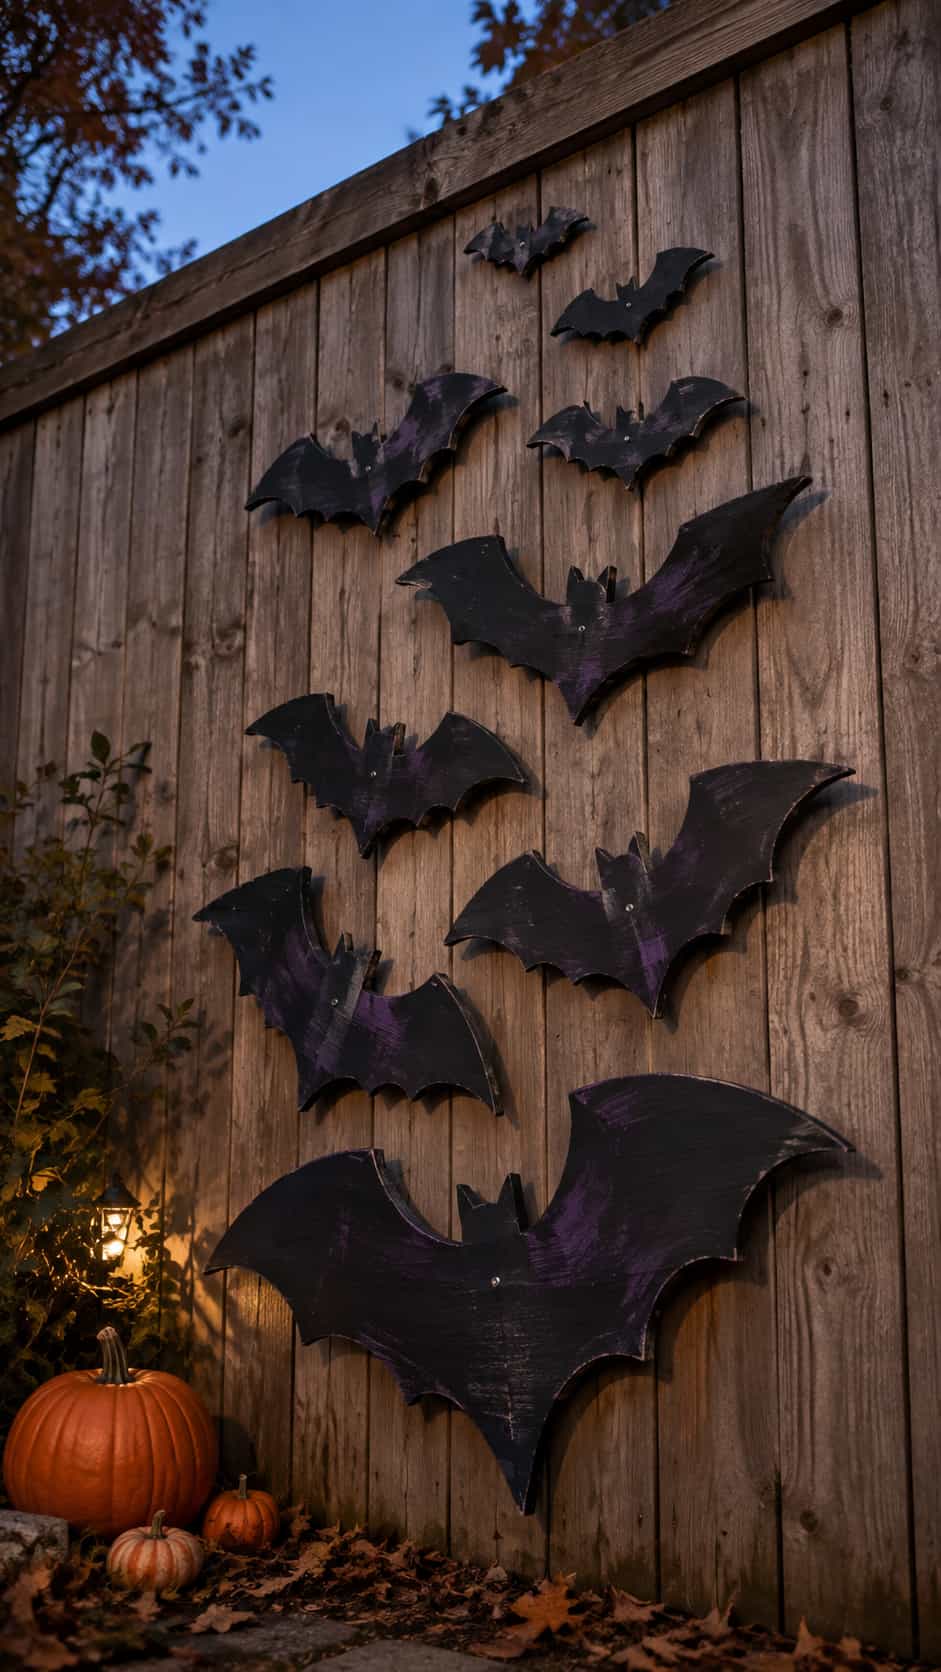
A bat swarm turns one easy pattern into a flexible wall or fence display. Draw a basic bat silhouette with a compact body, pointed ears, and wide wings. Create three sizes and reverse some patterns so the bats do not all fly in military formation.
Paint every bat black, or add dark purple highlights along the wings. Arrange the swarm from large pieces at the bottom to small pieces at the top. That gradual change suggests motion and makes a short fence feel taller.
You can cut the smallest bats from leftover plywood around larger designs. If you already plan a witch or haunted house, use the swarm to connect those separate pieces into one cohesive scene.
16. Grinning Pumpkin Archway Signs
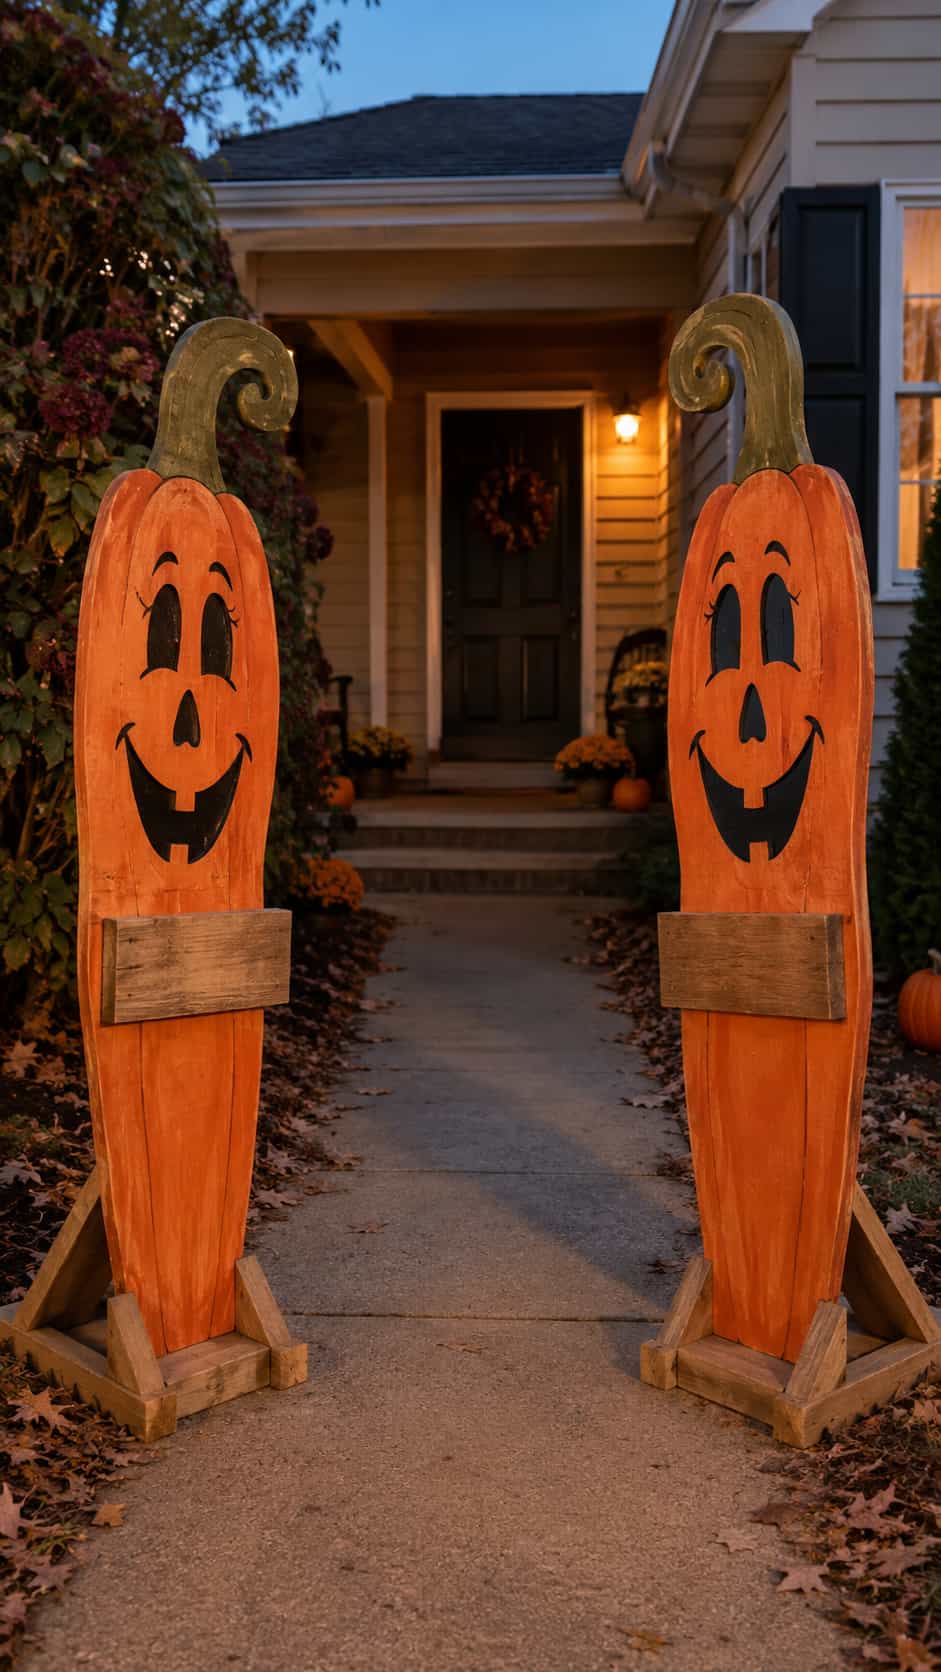
Create two tall pumpkin cutouts that frame a walkway or porch entrance. Give each pumpkin a broad base, a long curling stem, and a face that turns toward the path. The pair can look like quirky guards who accept payment exclusively in chocolate.
Add a small sign panel to each pattern. Use phrases such as “Enter If You Dare” and “Treats This Way,” or keep the message simple with “Happy Halloween.” Paint the letters in high-contrast colors and keep the font thick.
Support each sign with a wide base or strong rear stakes. Place both pieces far enough from the walking surface that costumes, bags, and excited feet cannot catch on them.
17. Ghost Dog With a Treat Bucket
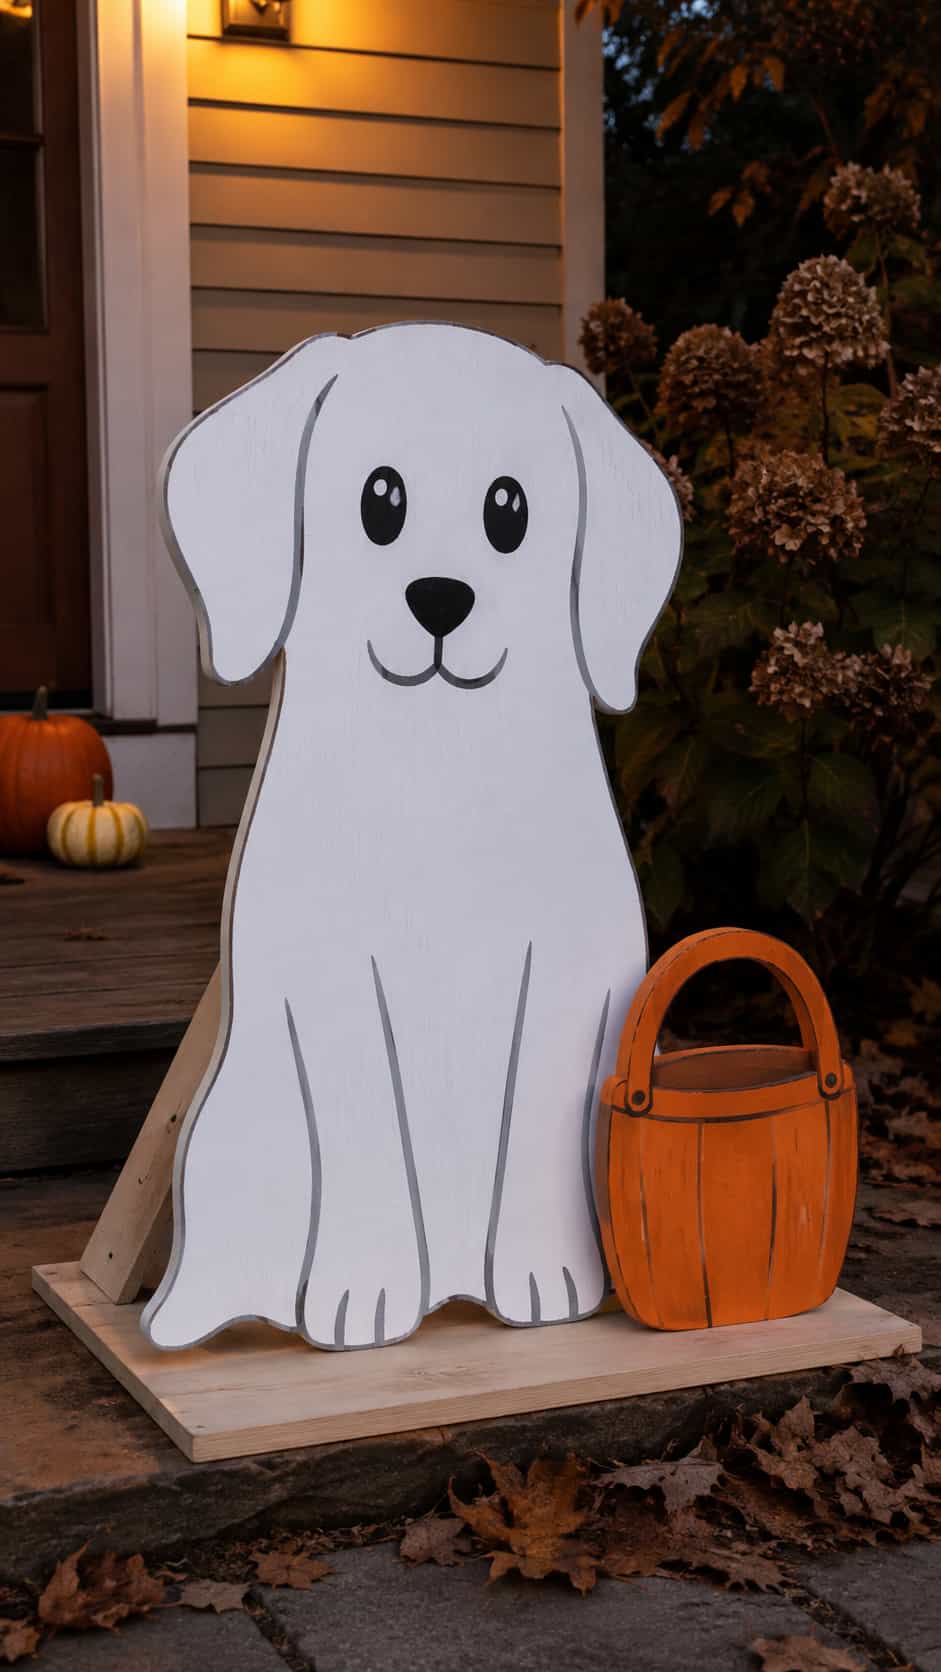
A ghost dog adds personality to the usual cast of human-shaped spirits. Start with a sitting dog silhouette, then add a sheet-like lower edge, floppy ears, and a small treat bucket beside one paw. Keep the features broad and cartoon-like.
Paint the body white and outline the ears, paws, and face in gray. Use orange for the bucket and black for the eyes. You can adapt the ear and head shape to suggest a favorite type of dog without chasing realistic detail.
18. Giant Spider and Web Corner
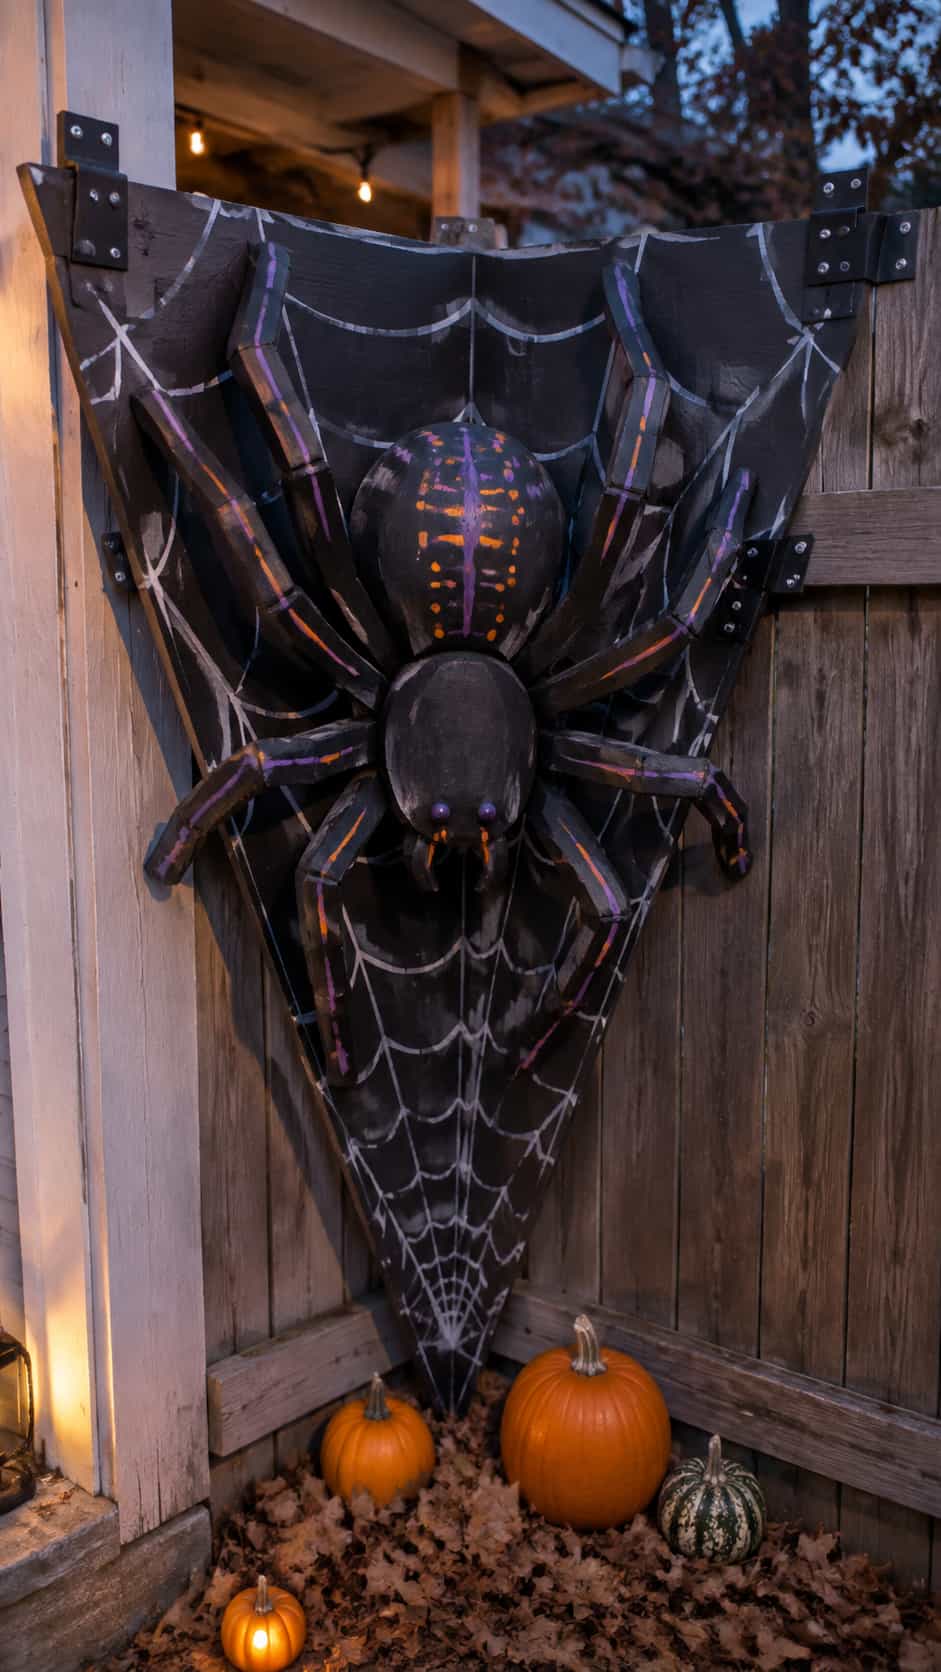
Cut a large spider with a round body and eight thick, bent legs. Connect some leg sections to a web corner or background panel so the shape stays durable. A completely separate thin leg may look elegant for six minutes, right before storage snaps it.
Paint the spider black with purple, orange, or green markings. Use white or light gray lines for the web. Instead of cutting every web opening, paint the web onto a triangular wood panel for a much stronger outdoor piece.
Mount the design in the corner of a fence, porch railing, or shed wall. The triangular format naturally fills empty corners and helps the spider look larger than the amount of wood suggests.
19. Vintage Pumpkin Truck
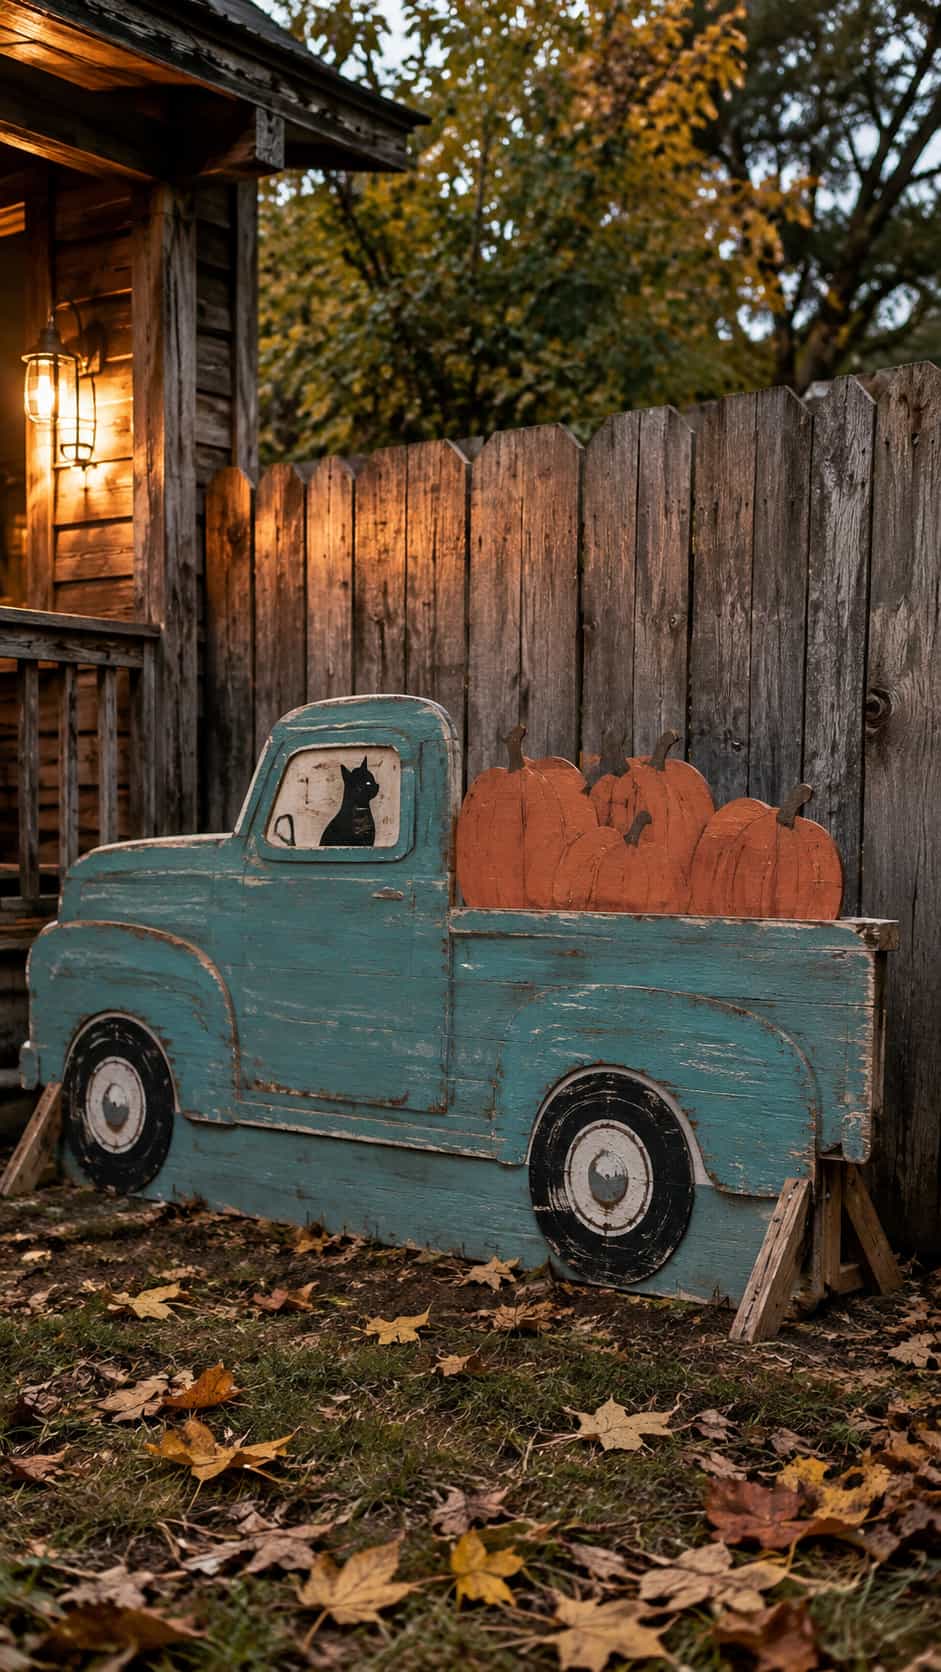
A side-view pickup truck carrying pumpkins creates a rustic Halloween pattern that also suits fall decor. Draw a simple cab, large round wheels, and an open truck bed piled with pumpkins. Keep the underside mostly solid so the wheels and body remain connected.
Paint the truck faded teal, red, or green, then use warm oranges for the pumpkins. Add a small door number, a “Pumpkin Patch” label, or a black cat in the driver’s window. Subtle sanding on the painted edges can create a worn look, but reseal the surface afterward for outdoor use.
Place this wider cutout against a fence or along the porch. It bridges seasonal decorating nicely, so you can display it before October and keep it out through Thanksgiving if you remove the spookier companions.
For decorations that can stay outside beyond Halloween, explore these easy fall wood projects.
20. Cauldron With Rising Bubbles
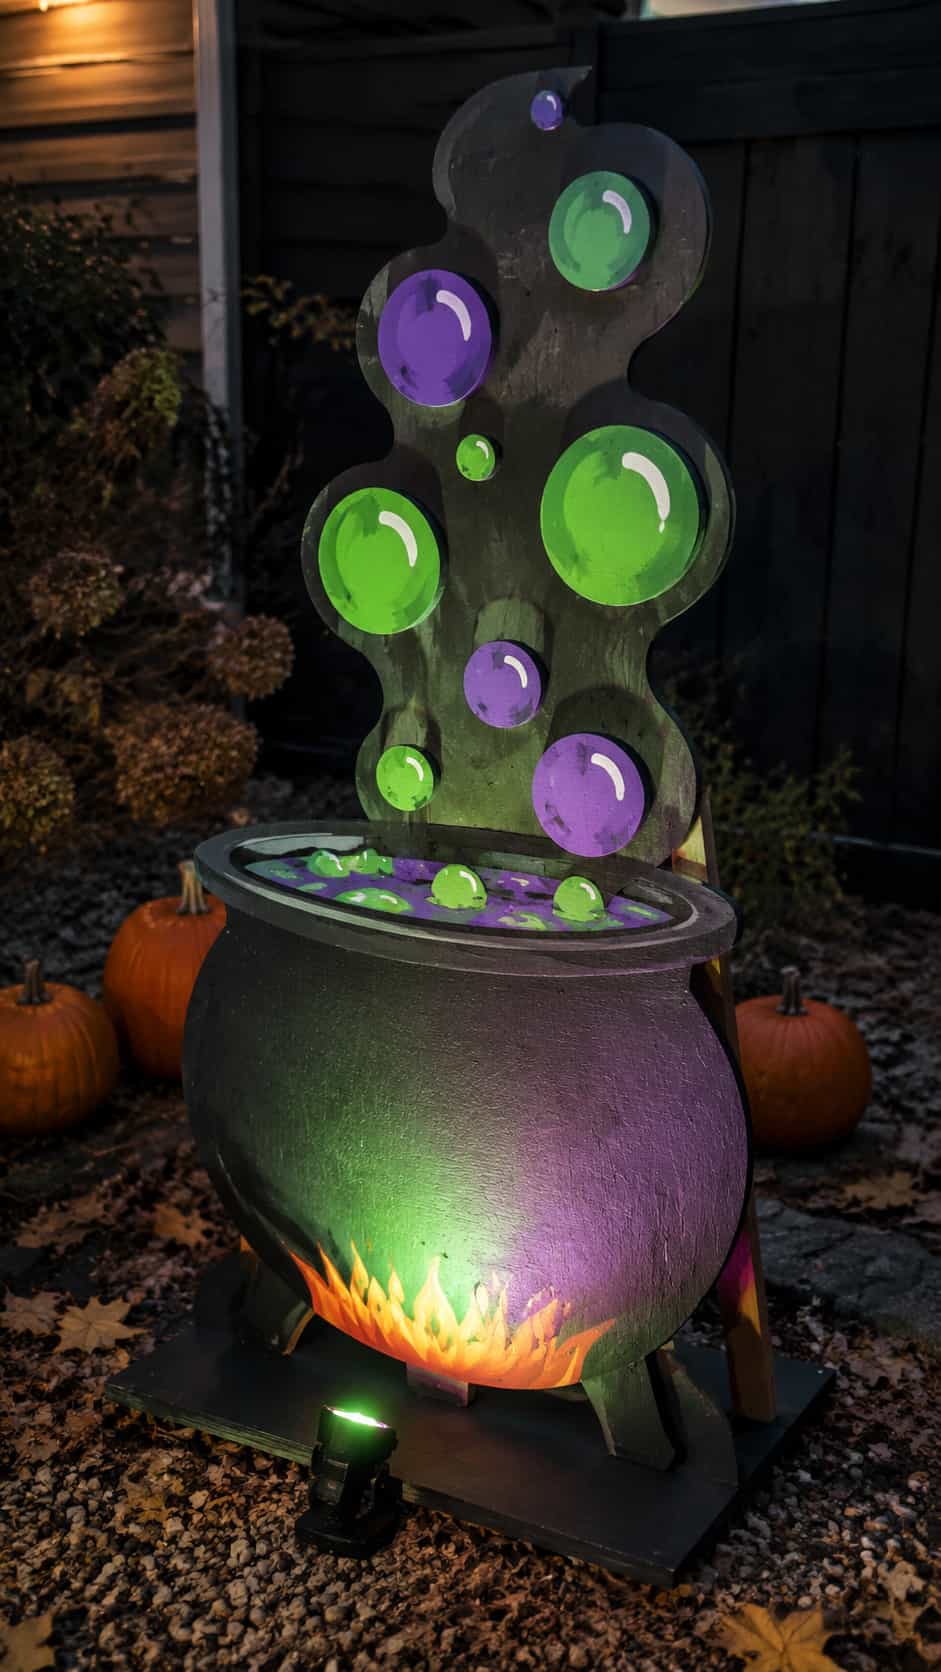
A bubbling cauldron pattern brings bright color and motion to a witch-themed scene. Draw a wide pot with three sturdy feet and a thick rim. Add several separate round bubble cutouts above it, or connect the bubbles with painted steam shapes on a background panel.
Use black for the pot and vivid green or purple for the potion. Paint highlights on the bubbles to make them look glossy. An orange glow around the bottom can suggest a fire without adding another fragile cutout layer.
Place the cauldron below a witch, beside a cat, or near a small sign with a playful message. Solar lighting aimed from below will make the bright paint stand out after sunset.
21. Full Halloween Character Parade
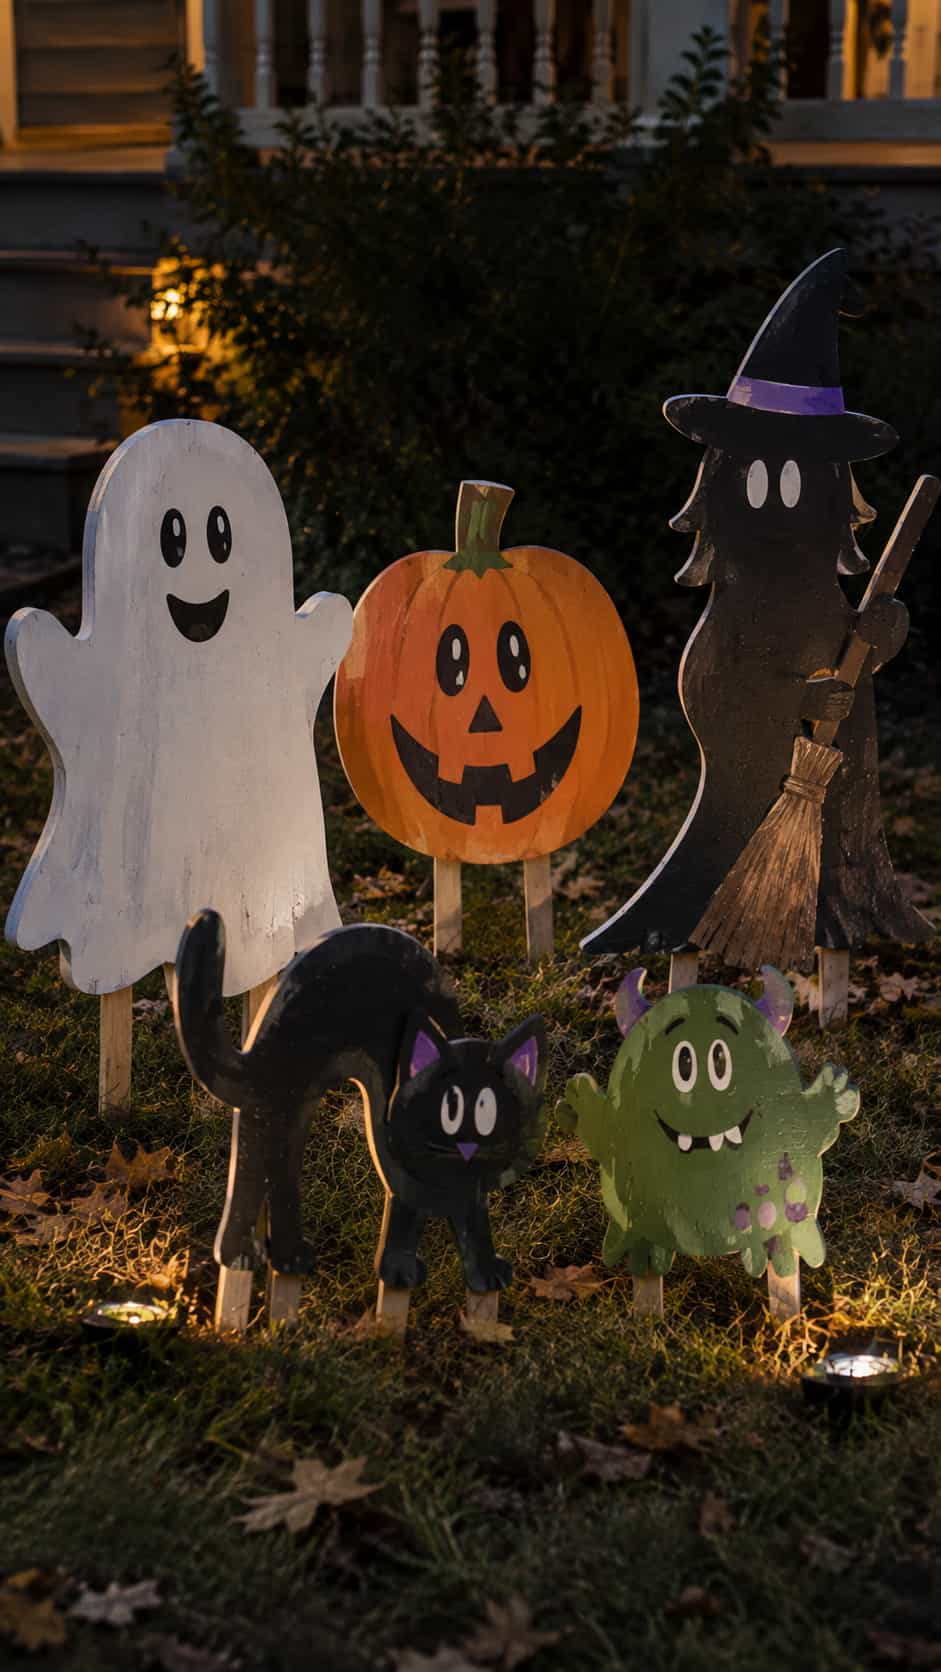
Why choose one character when the yard can host a whole parade? Create five connected or separate silhouettes: a ghost, pumpkin, cat, witch, and small monster. Repeat one visual feature, such as matching eyes or a shared color palette, to make the group feel intentional.
Keep each figure between roughly knee and waist height if you want a manageable display. Overlap some shapes when you arrange them, and vary the heights. The group will feel more animated than a straight row of evenly spaced pieces.
This final idea gives you an excellent way to use several Halloween wood cutout patterns without turning the lawn into visual clutter. Start with three characters this year, then add one or two each season. Your storage area may complain, but the yard will look fantastic.
How to Turn Any Idea Into a Usable Wood Pattern
You can create a clean pattern without advanced drawing skills. Start with a simple reference silhouette that you created, licensed, or found in the public domain. Avoid copying another maker’s protected pattern or artwork. Inspiration costs nothing; copyright trouble can cost rather more.
Use one of these methods to enlarge the design:
- Grid method: Draw a square grid over a small sketch, then copy each square onto a larger paper grid.
- Projector method: Project the outline onto the wood and trace it lightly.
- Tiled printing: Print the enlarged image across several pages, tape the pages together, and transfer the outline.
- Freehand method: Mark the total height and width first, then sketch the biggest curves before adding small details.
After you trace the outline, step back several feet and inspect it. Smooth awkward curves, widen weak connections, and remove details that will disappear outdoors. For a coordinated group, reuse the same eye style, line thickness, and color palette.
Paint and Protect Outdoor Halloween Wood Cutouts
Outdoor moisture attacks edges first, so treat those edges with care. Smooth rough areas, remove dust, and apply an exterior primer that suits the wood and paint system. Cover the front, back, sides, and especially the cut edges.
Use exterior paint for the main colors. BTW, strong contrast usually beats complicated shading on wooden Halloween yard decorations. Black against orange, white against charcoal, and yellow against purple all remain easy to see as daylight fades. Skipping the back may sound faster, but rain rarely respects shortcuts.
Add Details That Survive the Viewing Distance
Paint facial features, cracks, bandages, feathers, and lettering with thick lines. Test the design from the sidewalk after each major stage. If a detail disappears at that distance, enlarge it or remove it.
Choose a compatible exterior clear coat when your paint system benefits from one. Follow the coating manufacturer’s drying and recoating guidance. Seal hardware holes and damaged paint promptly, because small openings invite water into the wood.
Display Your Spooky Yard Decorations as One Scene
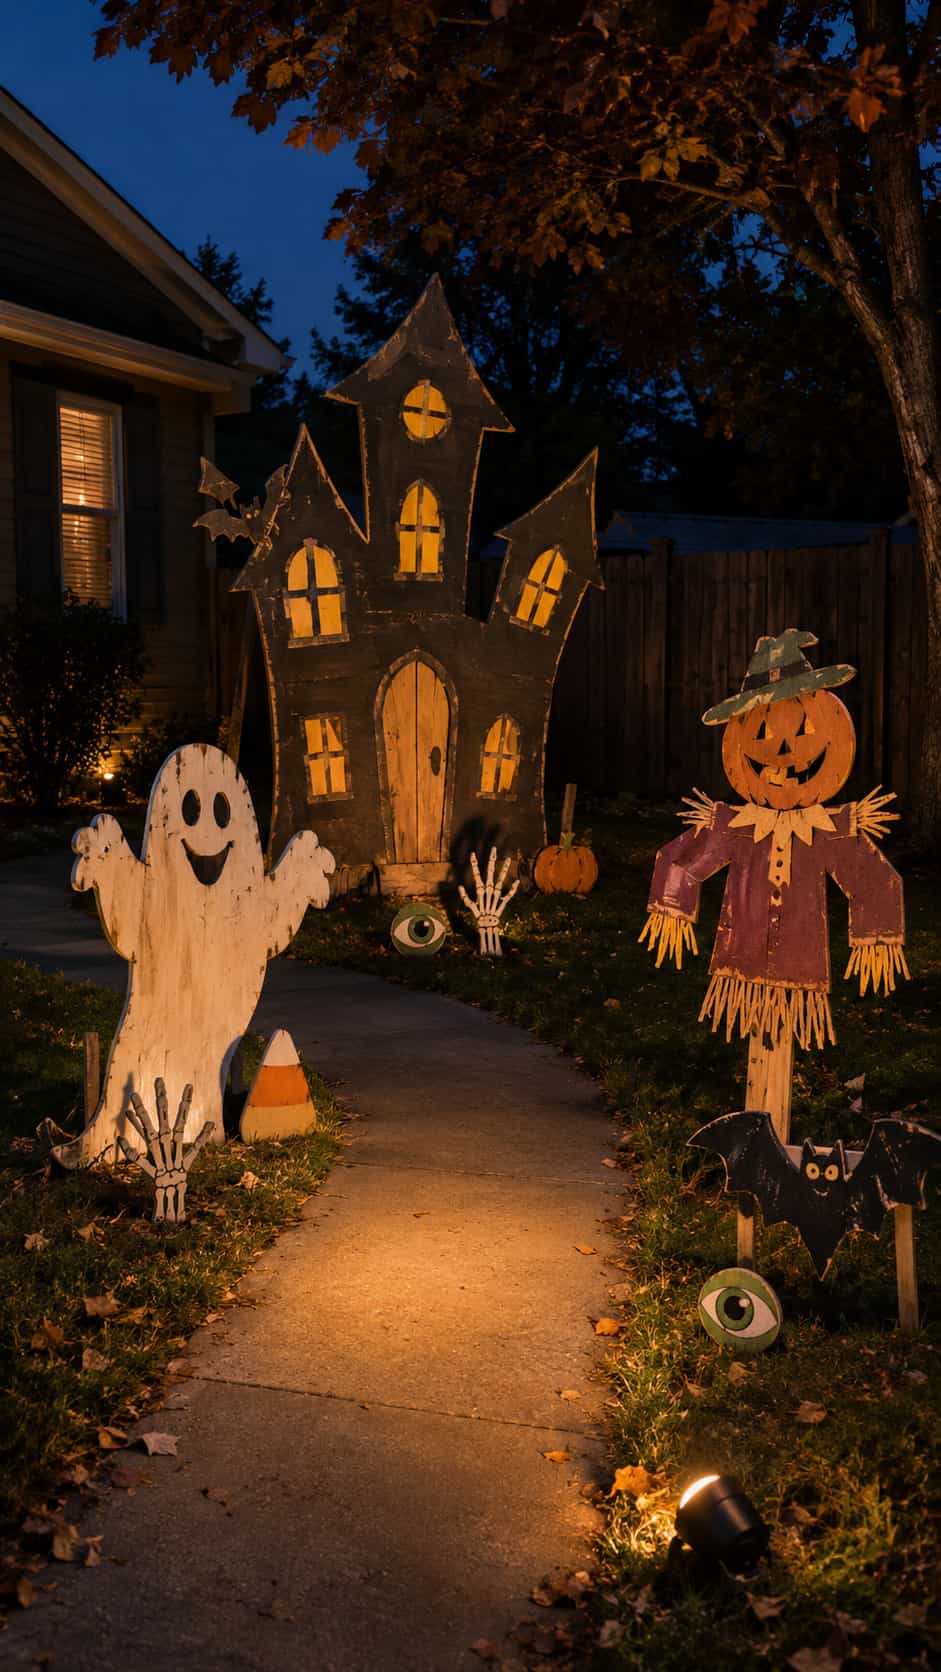
A good display needs a focal point, supporting characters, and open space. Choose one large piece, such as the haunted house, witch, truck, or scarecrow. Place medium figures nearby, then use bats, eyes, hands, or candy corn as small accents.
Lighting changes everything after dark. Use outdoor-rated lights and cords, keep them away from walking paths, and follow all manufacturer guidance. Aim light across the face of each cutout rather than straight down from above, which can hide the painted details.
Try this simple layout:
- Place the tallest cutout near the back or beside a strong background.
- Add two medium pieces at different distances from the viewer.
- Repeat one color across the scene to connect the designs.
- Keep the walkway clear and secure every figure against wind.
- Check the display during daylight and after dark.
Resist the urge to fill every patch of grass. Empty space helps each silhouette read clearly. Yes, Halloween encourages excess, but your yard still deserves a little visual breathing room.
Final Thoughts
The best combine simple outlines, sturdy shapes, bold paint, and secure outdoor mounting. Start with an easy ghost, cat, bat, or pumpkin if you want a quick first project. Choose the haunted house, witch, scarecrow, or full character parade when you want a larger centerpiece.
Pick one idea, sketch the silhouette, and test its size with cardboard. Once the outline looks clear from the sidewalk, you already solved the hardest design problem. Then you can build a spooky yard that looks planned, playful, and far more memorable than another bag of plastic cobwebs