
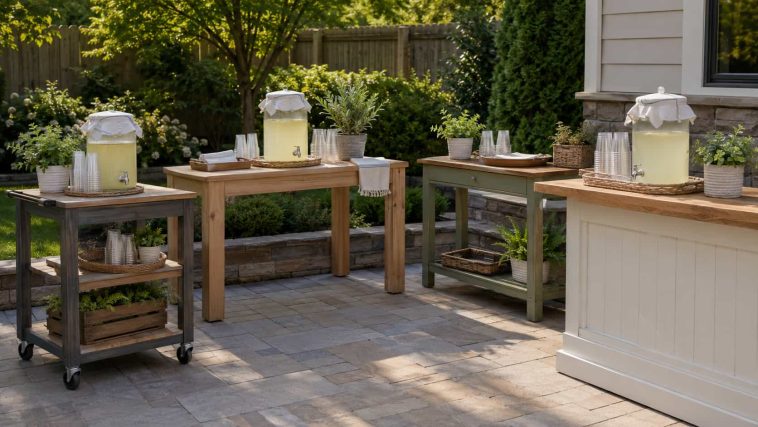
The 15 DIY outdoor bar ideas below range from compact carts to larger freestanding serving stations. You can use every design for alcohol-free drinks, snacks, plates, garden-party supplies and everyday patio storage. Choose the version that fits your space, then use a complete verified plan whenever stability, wall mounting, utilities or heavy countertops enter the picture.
Quick Comparison of DIY Outdoor Bar Ideas
|
Project |
Difficulty |
Estimated time |
Best use |
Suggested finished size |
|
Rolling beverage cart |
Easy |
2–4 hours |
Flexible patios |
36 H × 30 W × 18 D in |
|
Simple serving table |
Easy |
3–5 hours |
Everyday entertaining |
36 H × 48 W × 20 D in |
|
Narrow balcony station |
Easy |
2–4 hours |
Small spaces |
36 H × 30 W × 12–16 D in |
|
Farmhouse patio bar |
Medium |
4–7 hours |
Rustic patios |
42 H × 48 W × 22 D in |
|
Fold-down patio bar |
Medium |
3–5 hours |
Tiny patios |
30–36 W × 16–20 D in open |
|
Cooler serving cart |
Medium |
4–6 hours |
Family gatherings |
36 H × 40 W × 22 D in |
|
Console with open shelves |
Medium |
4–6 hours |
Organized serving |
36 H × 48 W × 18 D in |
|
Slatted outdoor bar |
Medium |
5–8 hours |
Modern backyards |
42 H × 60 W × 24 D in |
|
L-shaped serving station |
Medium–Advanced |
1–2 days |
Corner layouts |
About 60 × 60 in footprint |
|
Freestanding privacy bar |
Medium |
5–8 hours |
Patio zoning |
42 H × 48 W × 24 D in |
|
Planter-divider station |
Medium |
5–8 hours |
Garden patios |
40 H × 60 W × 20 D in |
|
Portable tray station |
Easy |
1–3 hours |
Occasional hosting |
32 H × 24 W × 16 D in |
|
Enclosed patio cabinet |
Advanced |
1–2 days |
Protected storage |
36 H × 48 W × 22 D in |
|
Modular serving units |
Advanced |
Several days |
Gradual expansion |
36 H × 36 W × 24 D per unit |
|
Curved-look serving bar |
Advanced |
1–2 days |
Statement patios |
42 H × 60 W × 24 D in |
The dimensions above help you compare scale; they do not replace verified construction drawings. Measure your patio, check the actual materials and confirm that your chosen plan suits the intended load before you build.
Plan Your Patio Serving Station First
An outdoor bar can look gorgeous on Pinterest and still block the door in real life. Start with the way you use the patio, not with the most dramatic photo. A compact serving cart often provides more value than a giant permanent counter that spends eleven months collecting leaves.
Decide What the Station Needs to Hold
List the items you want to place on the station. Lightweight cups, covered drink dispensers, serving trays and napkin bins need less support than a stone top or large cooler.
Keep grills, griddles and heat-producing appliances separate. If you want preparation space near outdoor cooking, read 15 DIY grill stations and BBQ prep tables and follow the exact appliance manual, required clearances and local rules.
Measure the Space and Walking Route
Mark the proposed footprint without creating a trip hazard. Check door swings, steps, paths and the route between the house and dining area. Leave enough room for people to carry trays comfortably.
On a small patio, shallower furniture usually works better than a shorter but deeper cabinet. FYI, a twelve-inch-deep console can still hold cups and a narrow drink dispenser without swallowing the entire balcony.
Choose Outdoor-Suitable Materials
Use clean lumber with a known history, exterior-rated fasteners and a finish intended for outdoor exposure. Seal exposed end grain and design open shelves so water can drain instead of sitting against the wood.
Place stored items in removable, washable bins. Bring paper products and anything moisture-sensitive indoors after use, because a decorative cabinet cannot negotiate with a summer storm.
Keep Utilities and Appliances Independent
A basic serving table needs no electricity, plumbing or built-in appliance. That simplicity keeps the project flexible and reduces the number of site-specific problems you must solve.
Ask a qualified professional to plan any fixed electrical connection, sink, drainage system, refrigerator or structural installation. Never improvise a utility connection or enclose an appliance inside an unverified wooden cabinet.
15 DIY Outdoor Bar Ideas for Your Patio
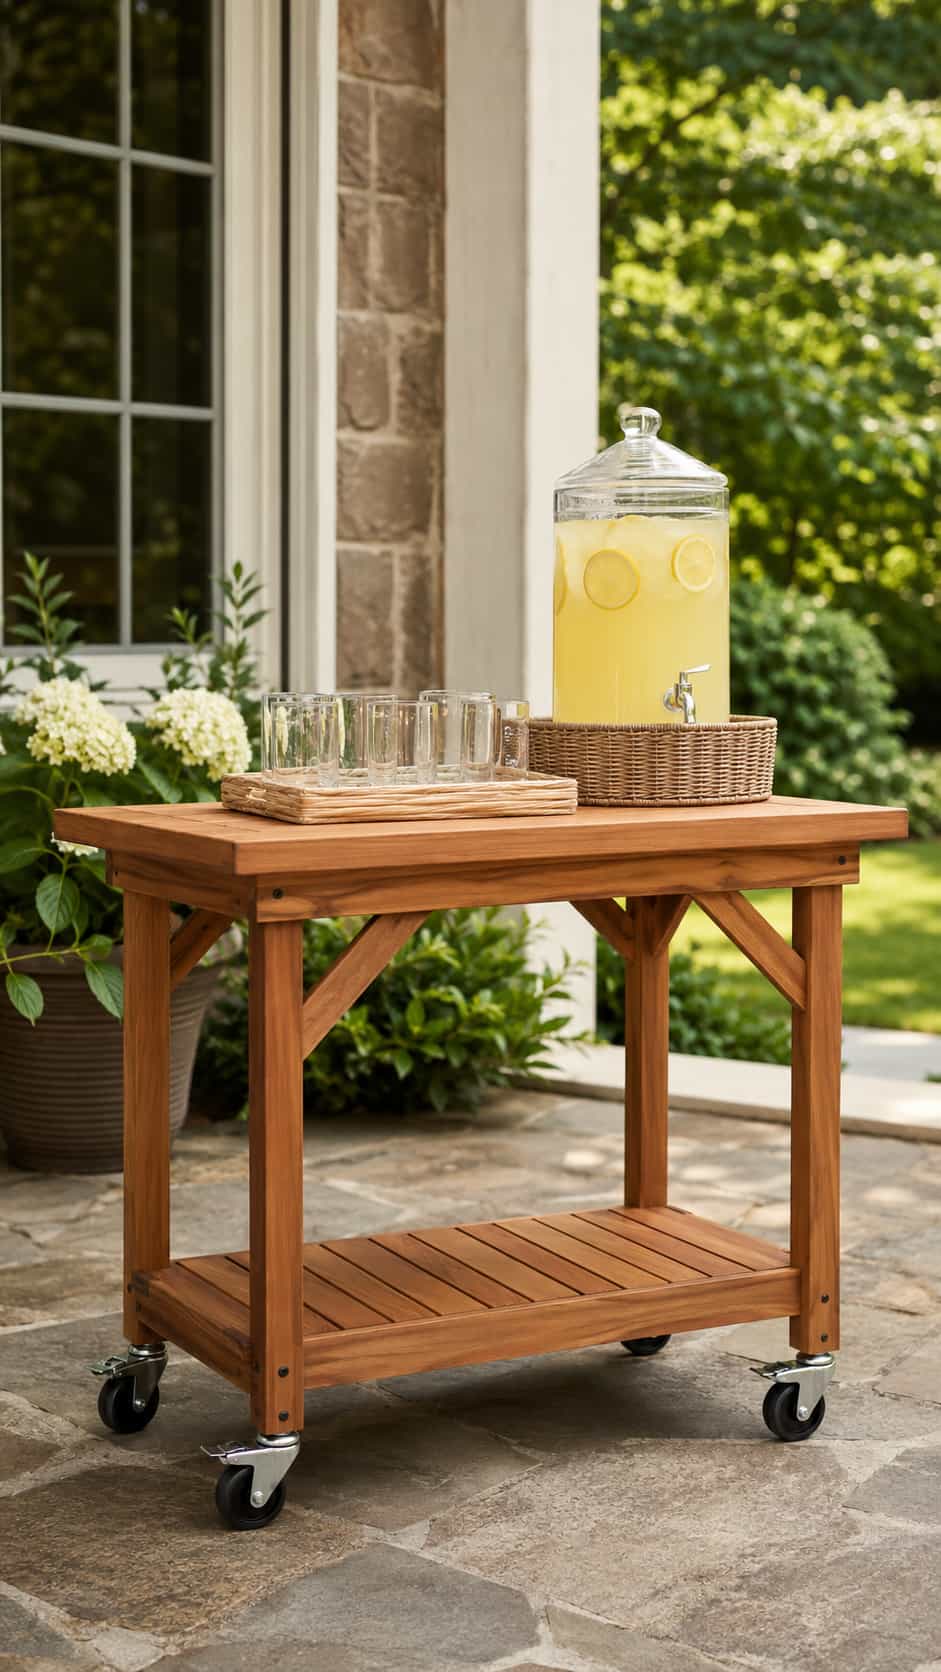
1. Rolling Outdoor Beverage Cart
Difficulty: Easy
Estimated time: 2–4 hours
Best use: Flexible patios and small gatherings
Suggested finished size: Approximately 36 inches high, 30 inches wide and 18 inches deep
A rolling outdoor bar cart gives you serving space where you need it, then moves aside when the patio returns to everyday life. Choose a design with a fully supported top, a lower shelf and four exterior-rated locking casters.
Use it for covered drink dispensers, cups, napkins and lightweight trays. Keep every wheel locked while the cart sits in use, and test the empty cart on a level surface before you add anything.
Customization idea: Add a removable towel rail and two small utensil hooks to one side.
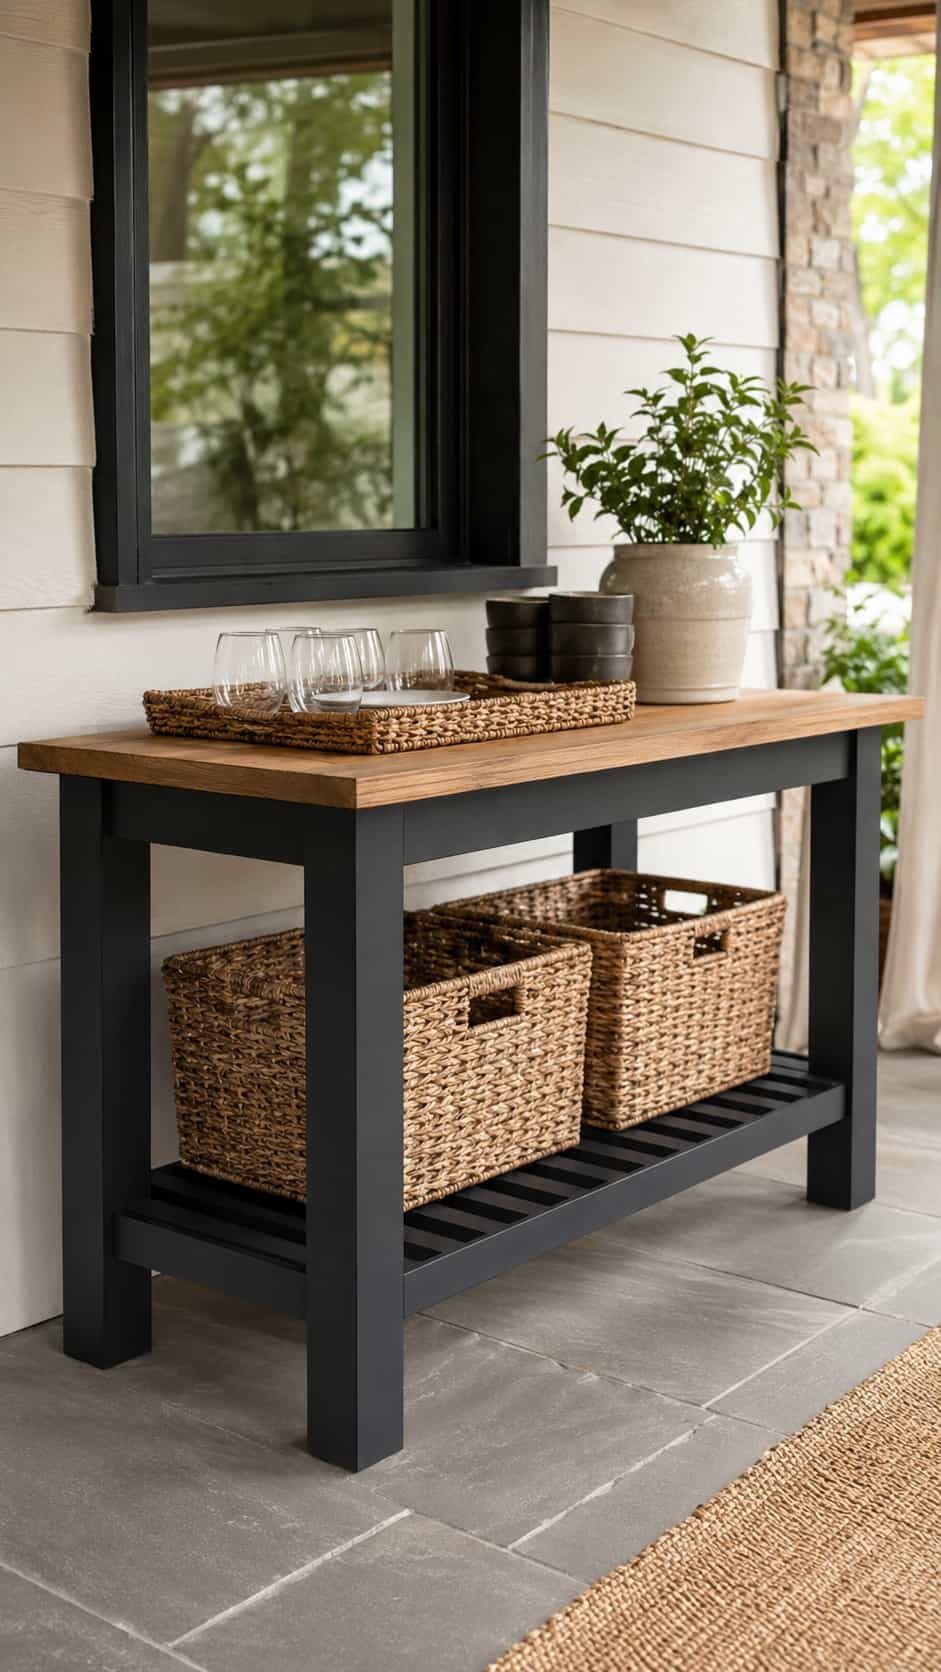
2. Simple Outdoor Serving Table
Difficulty: Easy
Estimated time: 3–5 hours
Best use: Everyday patio dining
Suggested finished size: Approximately 36 inches high, 48 inches wide and 20 inches deep
This straightforward table gives you one broad work surface and an optional lower shelf. It fits beside most seating areas because it does not wrap around a grill, refrigerator or other appliance.
Choose a complete frame that supports the top on every side. A slatted shelf adds useful storage while allowing rainwater and air to move through the station.
Customization idea: Paint the base charcoal or sage, then use a natural exterior wood finish on the top.
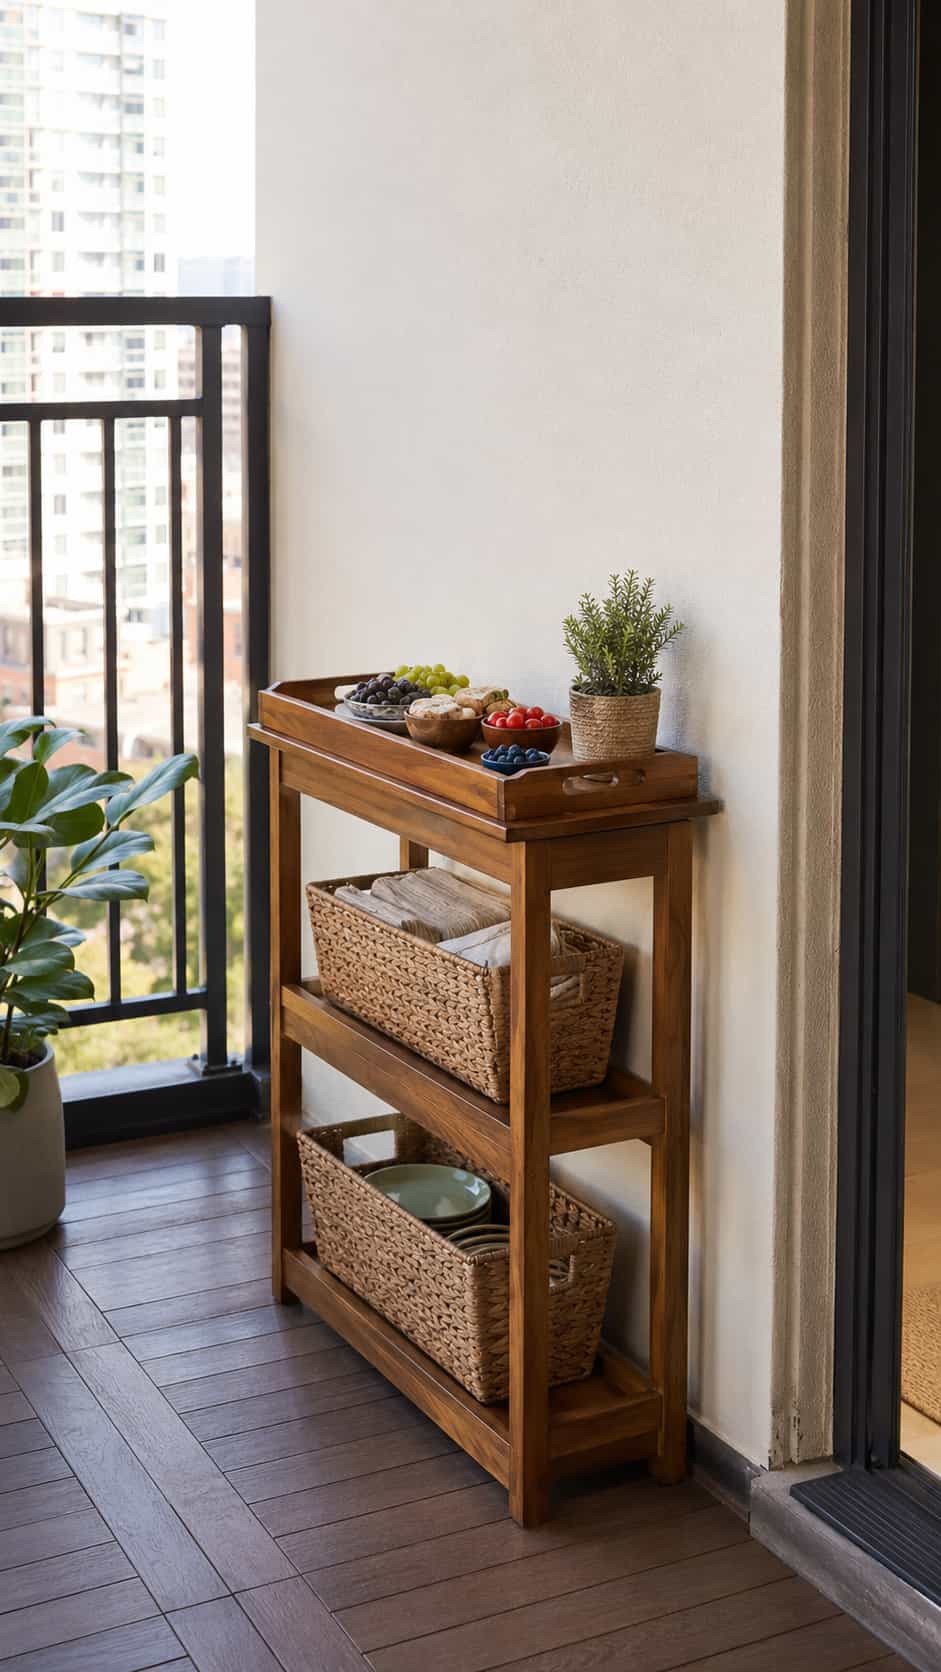
3. Narrow Balcony Serving Station
Difficulty: Easy
Estimated time: 2–4 hours
Best use: Balconies and narrow patios
Suggested finished size: Approximately 36 inches high, 30 inches wide and 12–16 inches deep
A shallow console can hold drinks and snacks without turning a narrow balcony into an obstacle course. Keep the design freestanding and stable, and avoid a tall top-heavy profile.
Use the lower area for one or two removable baskets rather than deep permanent storage. Check any balcony rules and keep the complete unit away from railings, exits and edges.
Customization idea: Add a removable serving tray that fits neatly on the top.
4. Farmhouse-Style Patio Bar
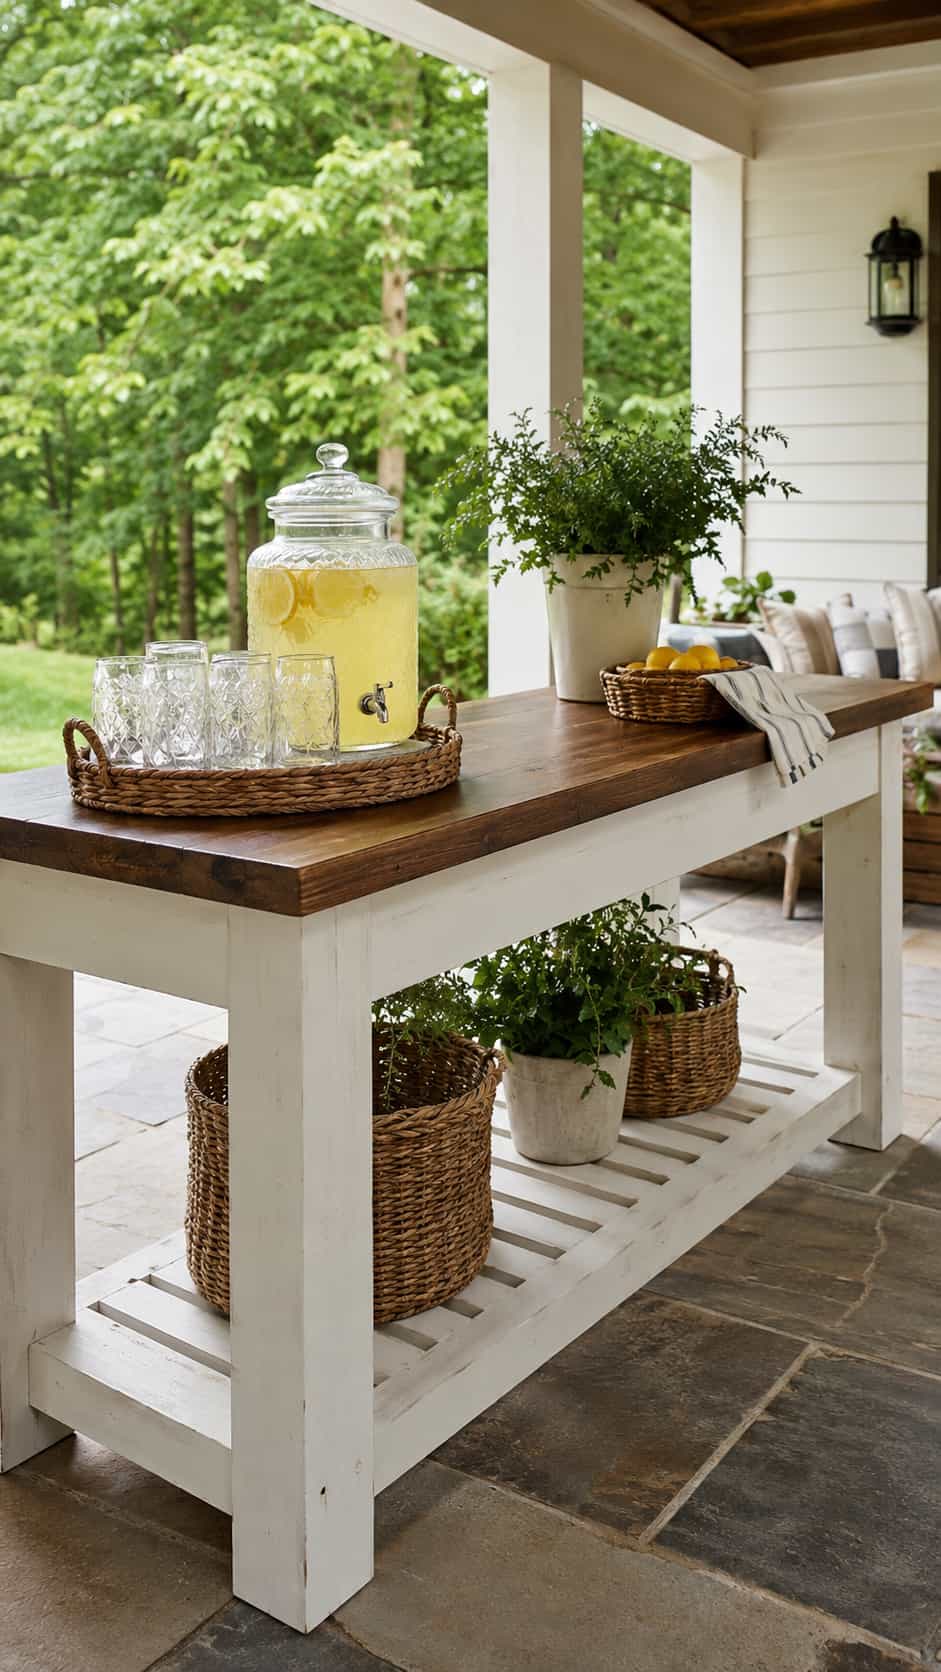
Difficulty: Medium
Estimated time: 4–7 hours
Best use: Rustic porches and covered dining areas
Suggested finished size: Approximately 42 inches high, 48 inches wide and 22 inches deep
Chunky legs, a complete apron frame and a slatted shelf give this patio serving station a relaxed farmhouse look. A slightly higher counter separates it visually from the nearby dining table.
Use a verified furniture plan that connects all four sides and prevents racking. IMO, a painted base and stained top look more intentional than covering every surface with the same dark stain.
Customization idea: Repeat the color from your planters or outdoor chairs on the base.
For related furniture inspiration, see these DIY 2×4 outdoor furniture projects.
5. Fold-Down Patio Bar
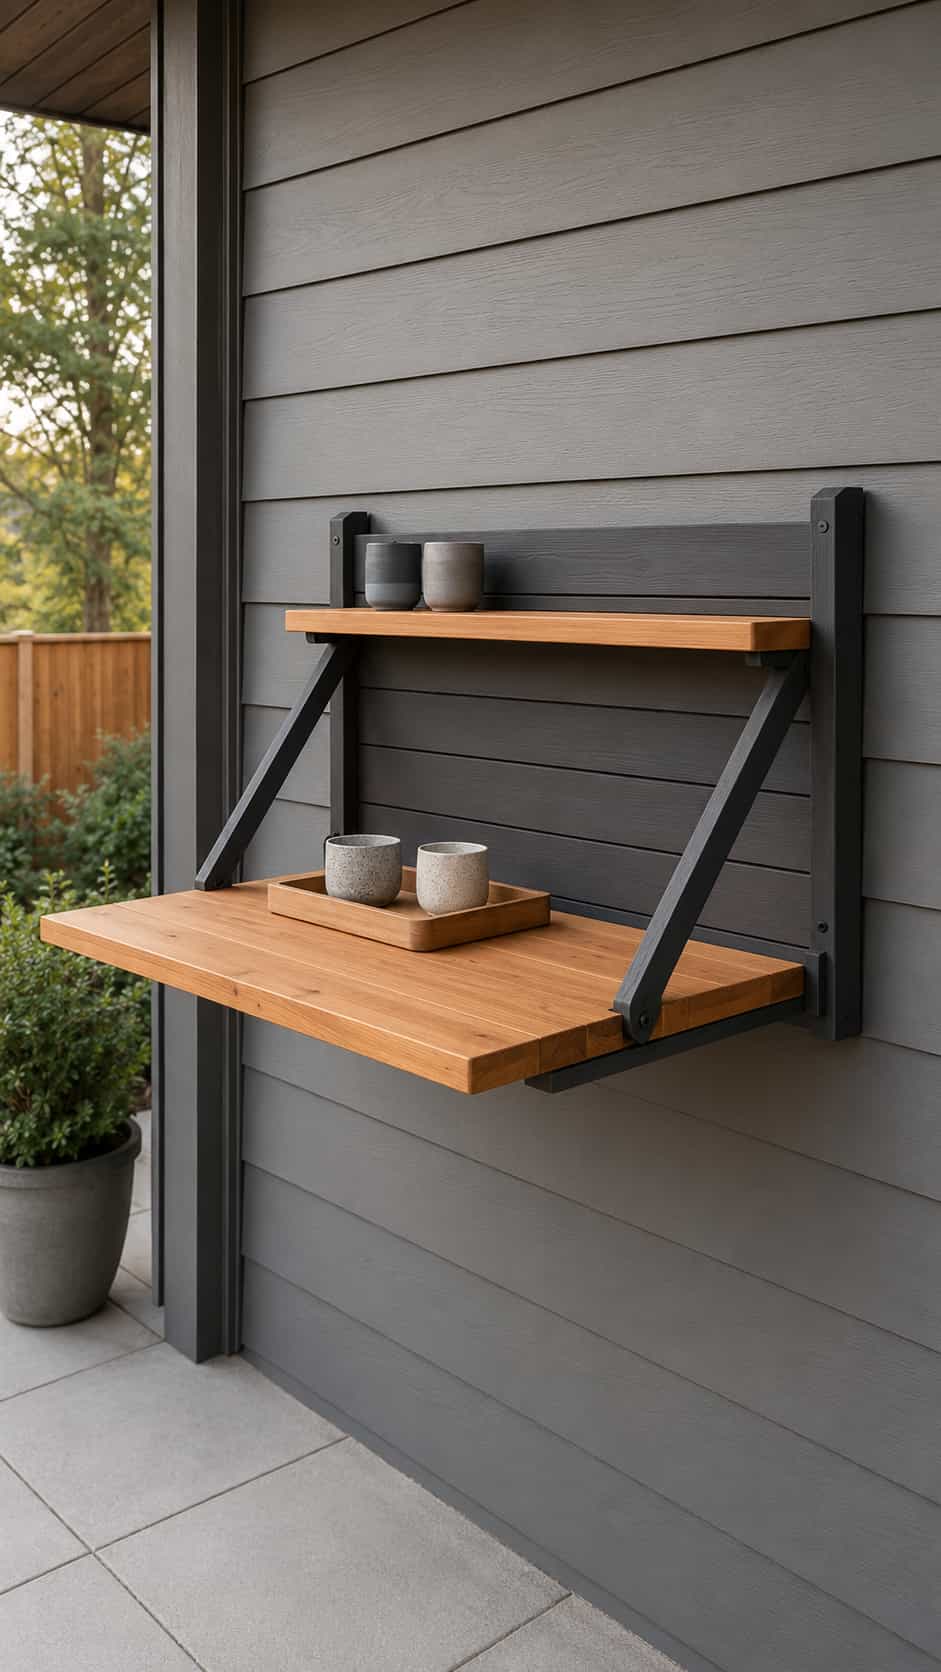
Difficulty: Medium
Estimated time: 3–5 hours
Best use: Tiny patios where floor space matters
Suggested finished size: Approximately 30–36 inches wide and 16–20 inches deep when open
A fold-down patio bar creates a temporary landing surface, then closes against the wall. It works well for cups, a small tray and lightweight serving items.
The wall, hardware and support method must suit the expected load. Ask an experienced adult or qualified professional to verify the mounting location, structure and hardware before use.
Customization idea: Paint the closed front as a simple geometric outdoor panel.
6. Cooler and Serving Cart
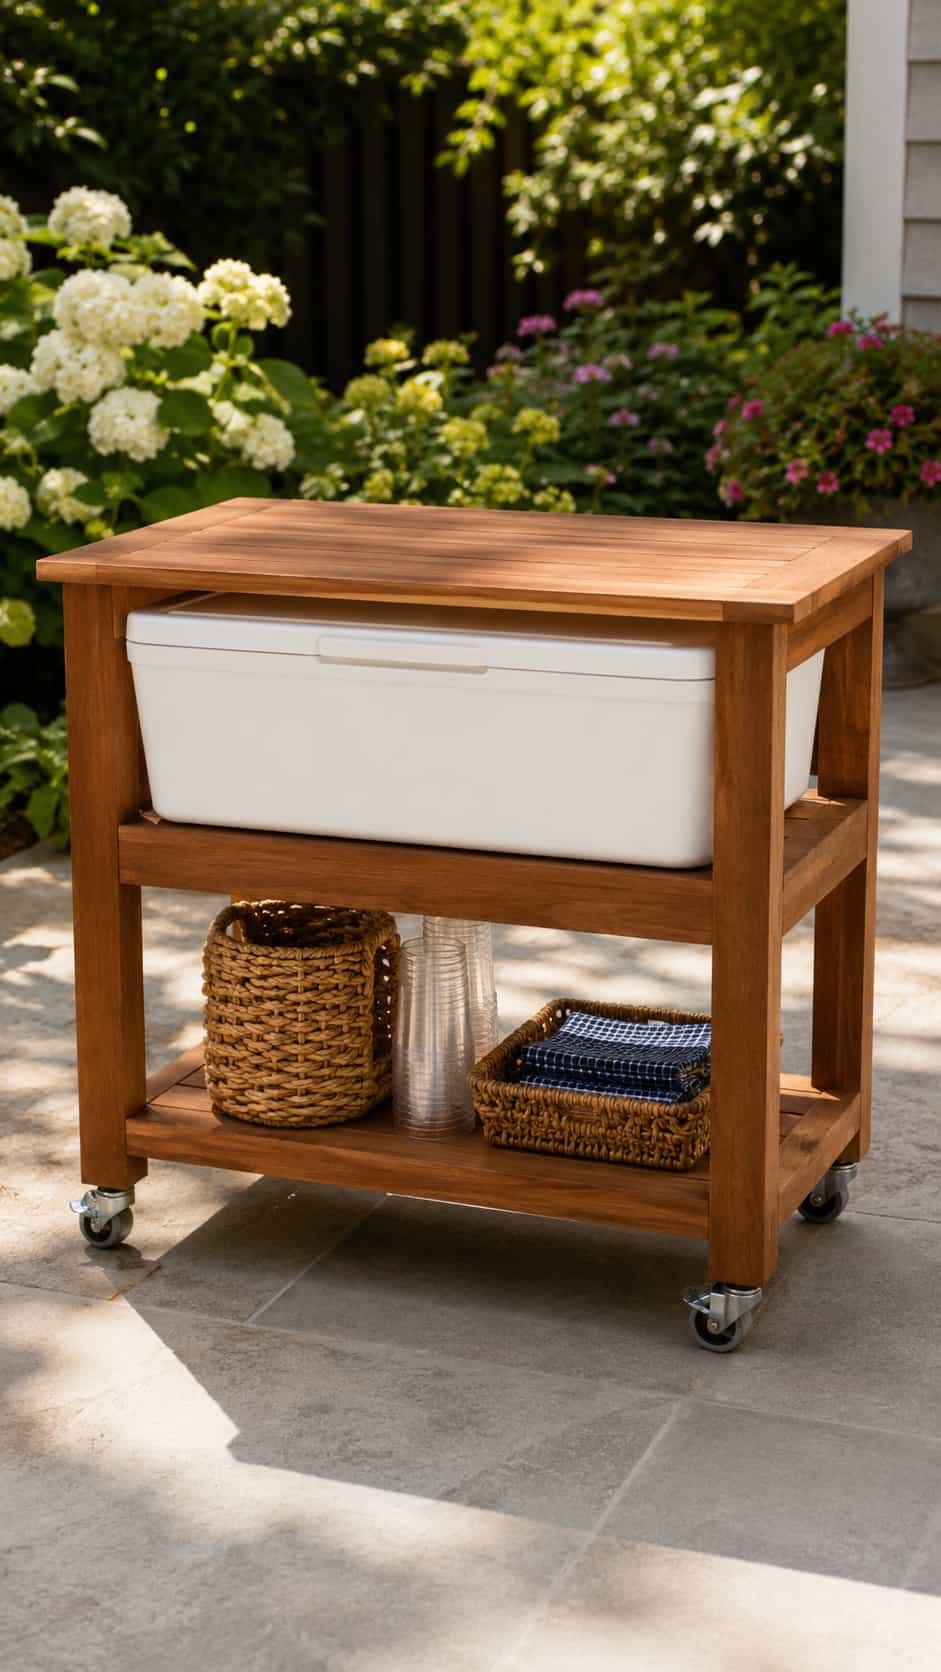
Difficulty: Medium
Estimated time: 4–6 hours
Best use: Family parties and cold drinks
Suggested finished size: Approximately 36 inches high, 40 inches wide and 22 inches deep
Pair a removable closed cooler with a stable outdoor cart to keep drinks cold and the serving area organized. Design the station so you can lift out the cooler for draining, cleaning and storage.
Do not build around an electric cooler or refrigerator unless a verified appliance-specific design supports it. A simple insulated container avoids wiring, ventilation and weatherproofing complications.
Customization idea: Add a separate removable bin for recyclable cans and bottles.
7. Patio Console With Open Shelves
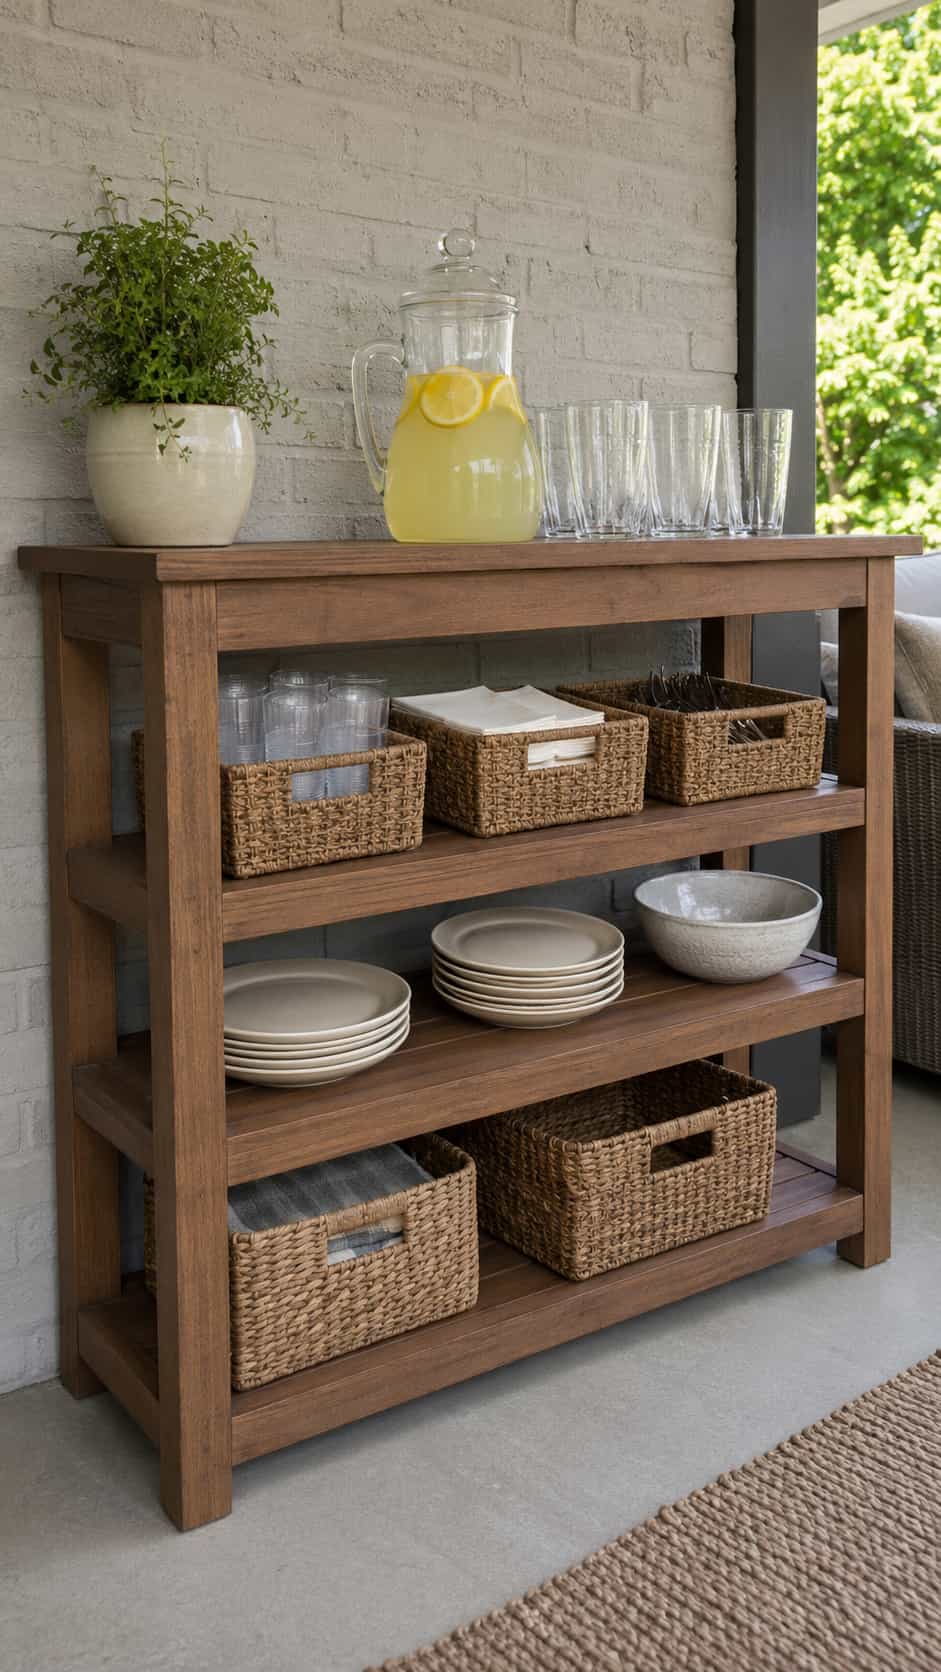
Difficulty: Medium
Estimated time: 4–6 hours
Best use: Organizing serving supplies
Suggested finished size: Approximately 36 inches high, 48 inches wide and 18 inches deep
Open shelves keep trays, baskets and washable outdoor supplies within easy reach. They also reveal clutter immediately, which may finally convince everyone that a random pile of plastic cups does not count as styling.
Use slatted shelves or another drainage-friendly design. Store lightweight items in removable bins and bring sensitive supplies indoors between gatherings.
Customization idea: Use matching labeled baskets for cups, napkins and serving utensils.
8. Modern Slatted Outdoor Bar
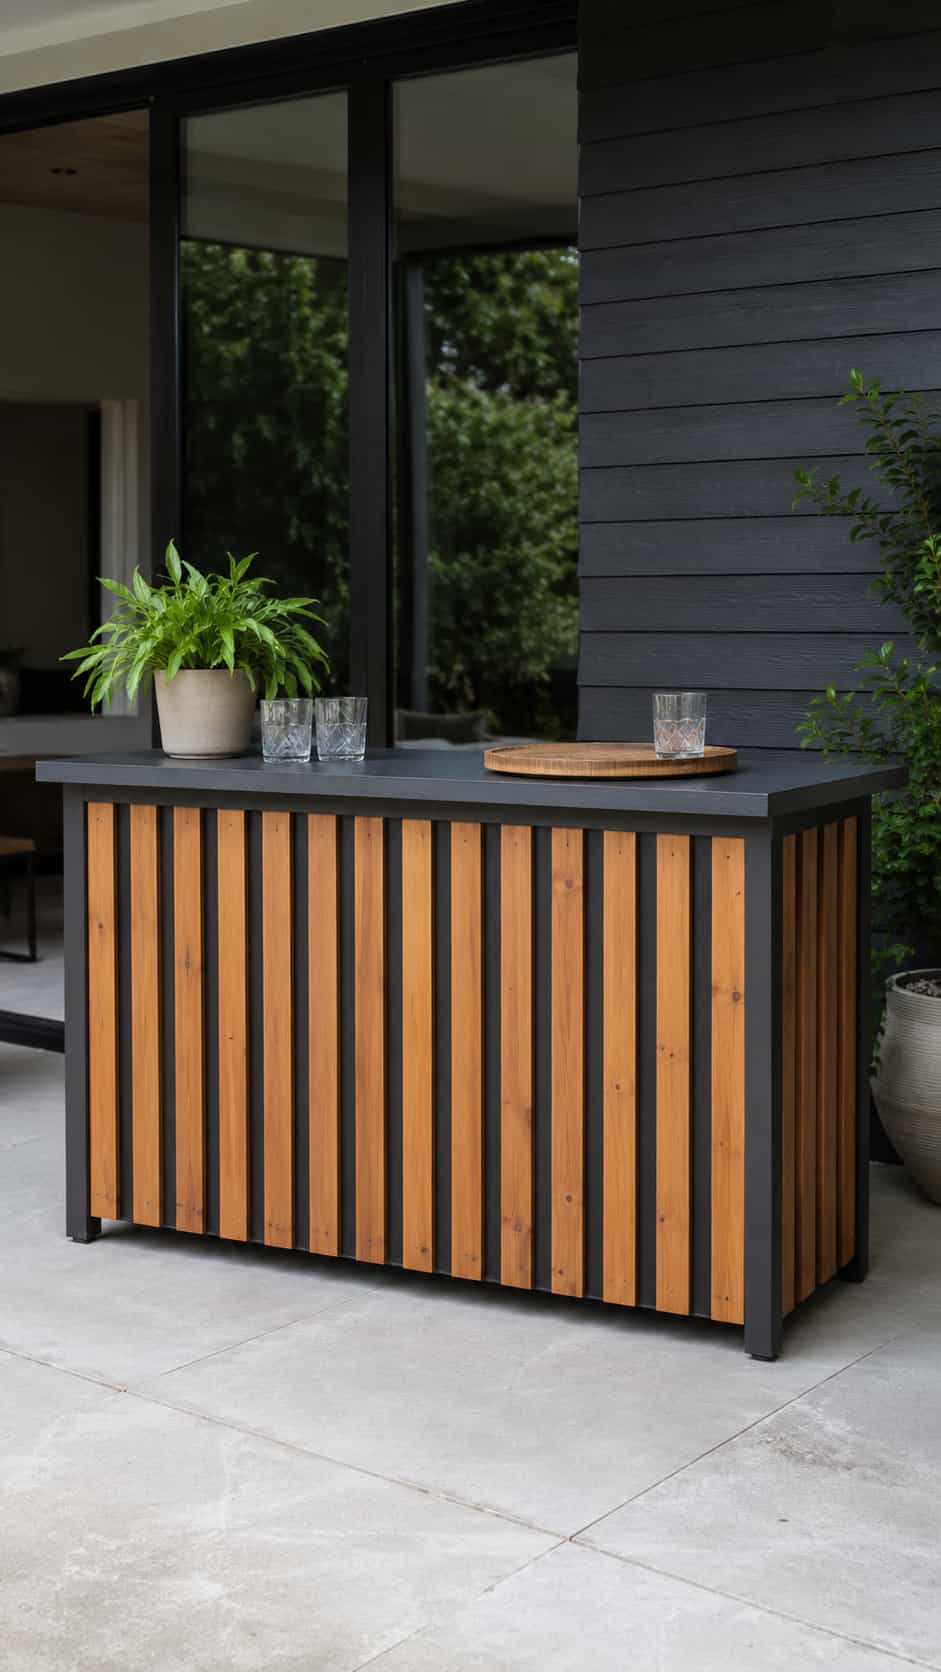
Difficulty: Medium
Estimated time: 5–8 hours
Best use: Contemporary patios
Suggested finished size: Approximately 42 inches high, 60 inches wide and 24 inches deep
Vertical wood slats can turn a simple rectangular station into a polished modern feature. Keep the decorative front independent from the complete supporting frame so style never replaces stability.
A broad counter provides space for trays and nonbreakable drinkware. Choose consistent slat spacing and a restrained finish to let the repetition create the visual impact.
Customization idea: Use charcoal behind natural cedar-toned slats to create extra depth.
9. L-Shaped Patio Serving Station
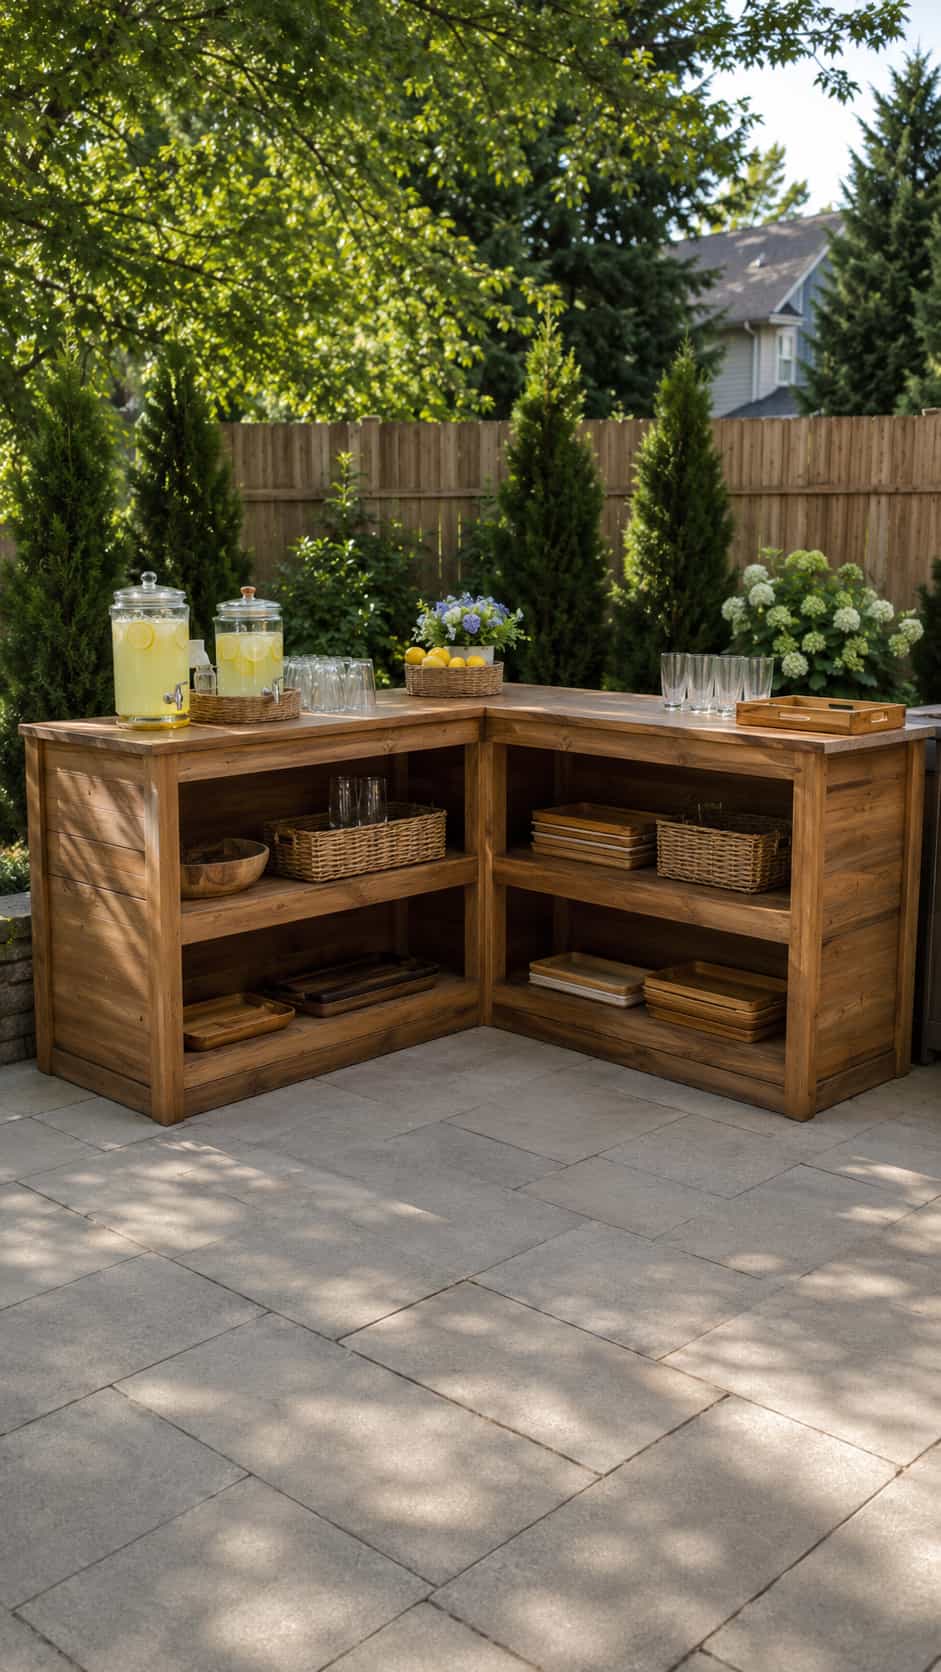
Difficulty: Medium–Advanced
Estimated time: 1–2 days
Best use: Patio corners and larger gatherings
Suggested finished size: Approximately 60 inches along each side with a 22–24-inch depth
An L-shaped layout separates serving from storage and creates a natural corner for arranging drinks and snacks. It also occupies significant space, so mark the entire footprint and test the walking route before you commit.
Use a complete verified plan that supports the corner joint and both countertop sections. Keep the station freestanding from cooking appliances, walls and utilities.
Customization idea: Give one side open shelves and keep the guest-facing side visually clean.
10. Freestanding Privacy Bar
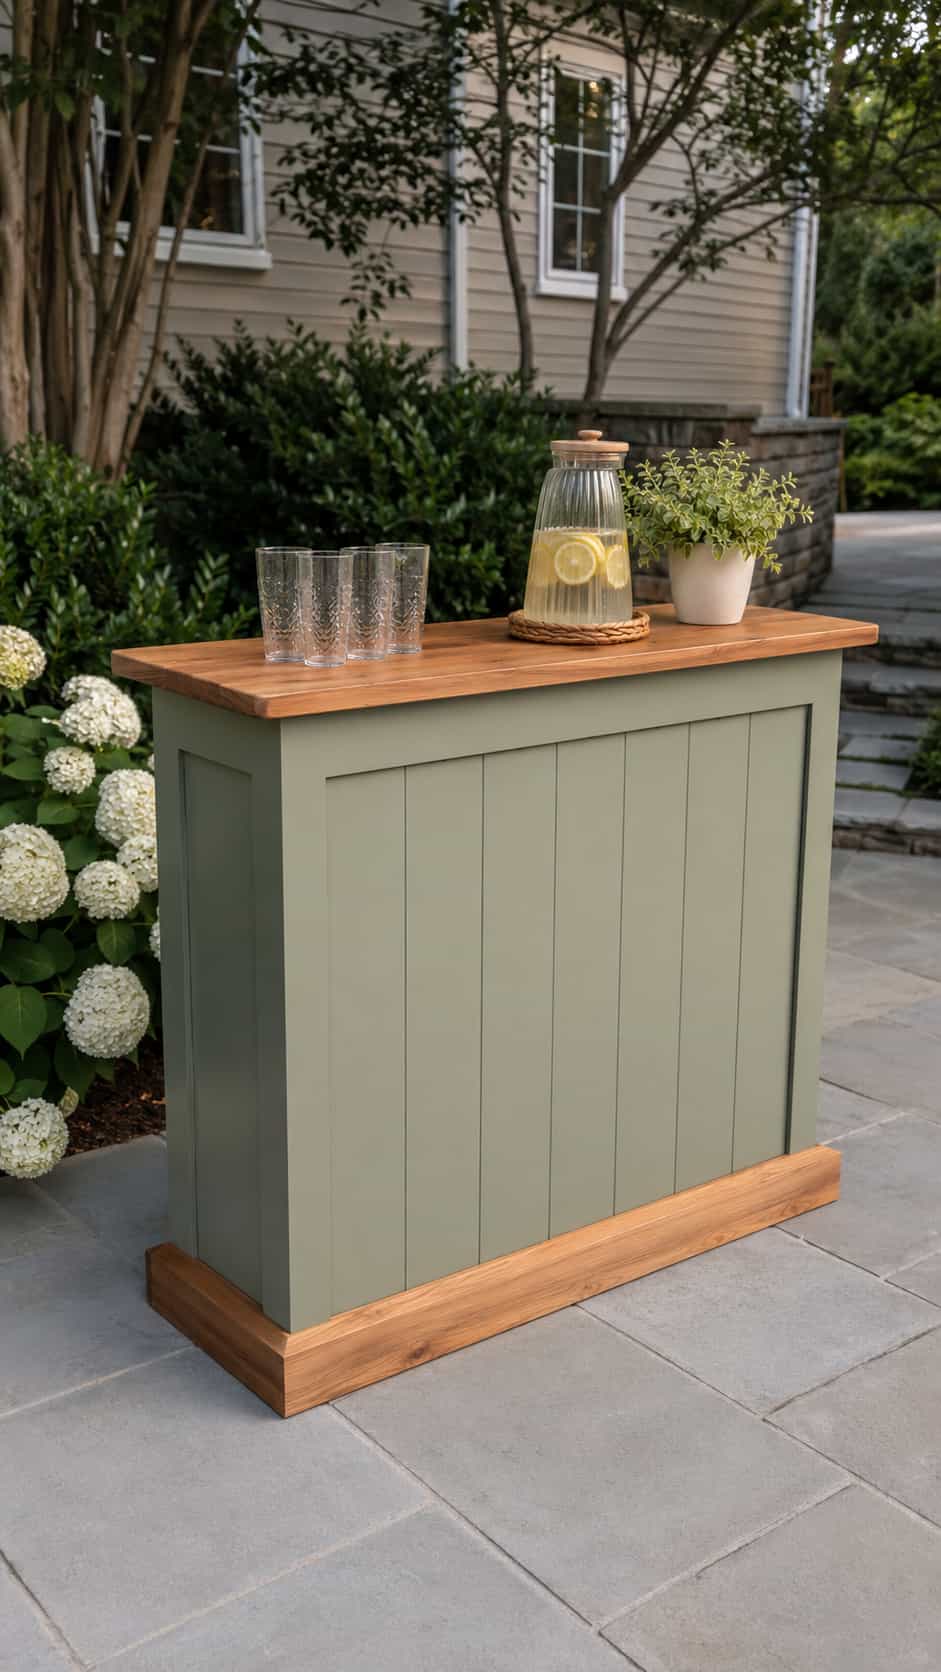
Difficulty: Medium
Estimated time: 5–8 hours
Best use: Dividing a dining area from a garden zone
Suggested finished size: Approximately 42 inches high, 48 inches wide and 24 inches deep
A solid guest-facing panel can make a serving station feel like a subtle patio divider. Keep the panel close to counter height rather than adding a tall sail-like wall that catches wind.
Check the unit on a level surface and use a verified design that suits outdoor exposure. Do not rely on decorative weight alone to stabilize a large freestanding structure.
Customization idea: Add a shallow decorative ledge on the guest side for small unbreakable cups.
11. Planter-Divider Serving Station
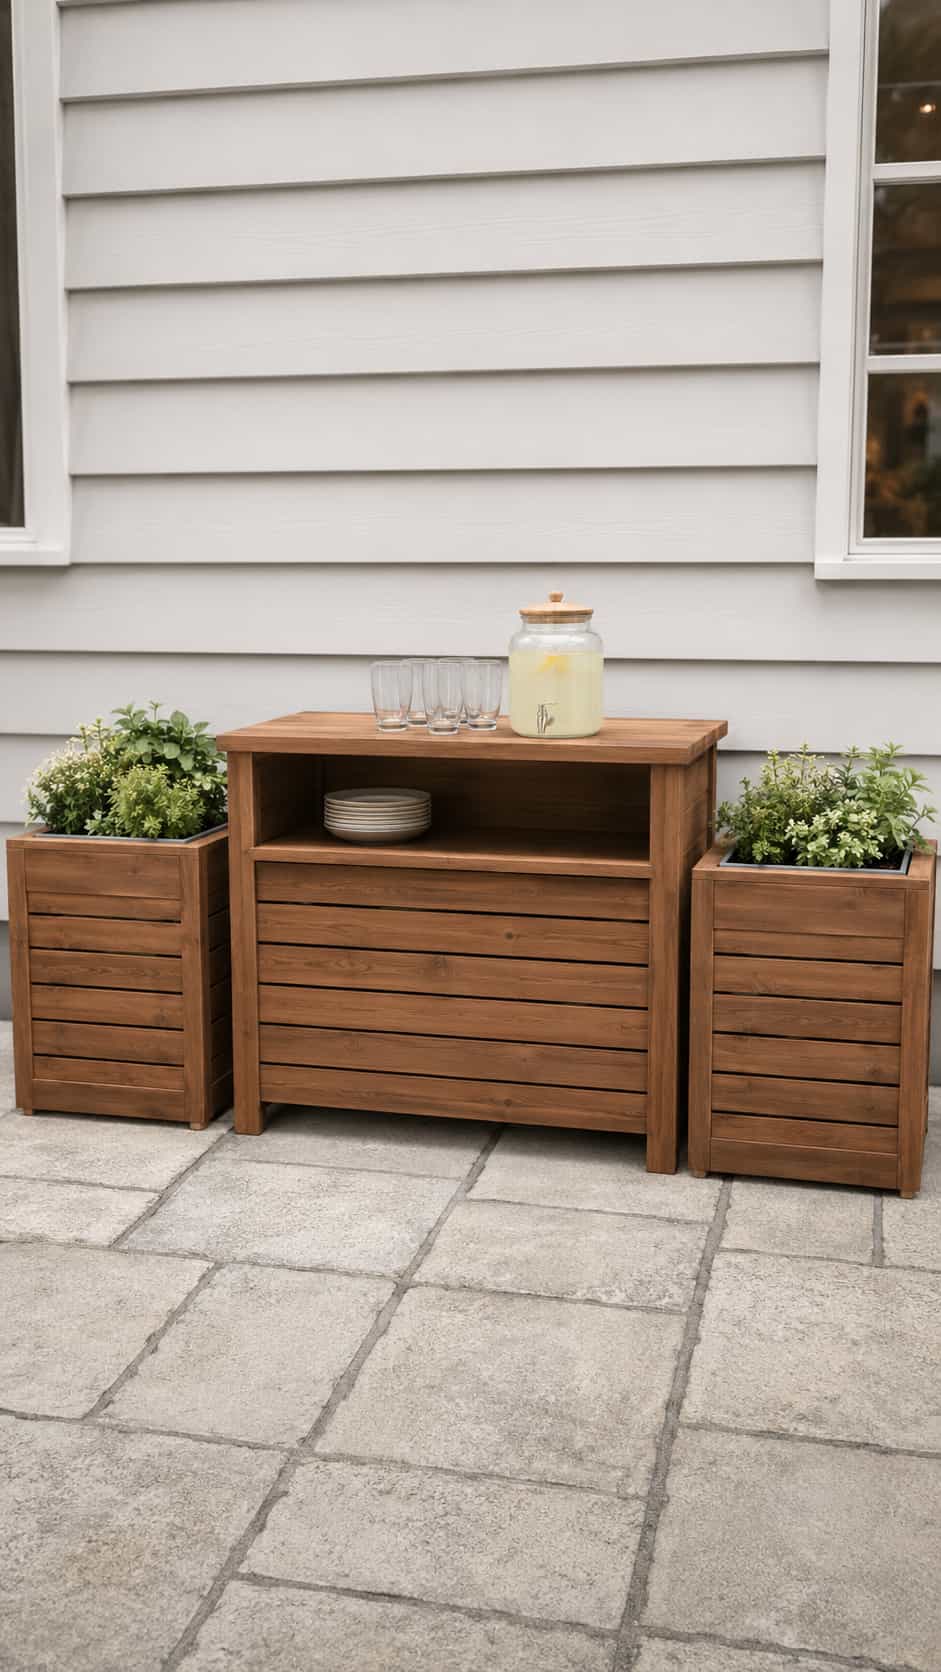
Difficulty: Medium
Estimated time: 5–8 hours
Best use: Garden patios and entertaining zones
Suggested finished size: Approximately 40 inches high, 60 inches wide and 20 inches deep
This idea pairs a serving console with separate planter boxes to soften the patio boundary. Keep every plant in a removable pot or lined planter so soil and standing water stay away from the serving surface.
Choose low, lightweight plants that will not make the unit top-heavy. You can also position independent planters beside the station instead of integrating them into the frame.
Customization idea: Match the planter finish to your planter-box plans for a coordinated garden area.
12. Portable Tray Serving Station
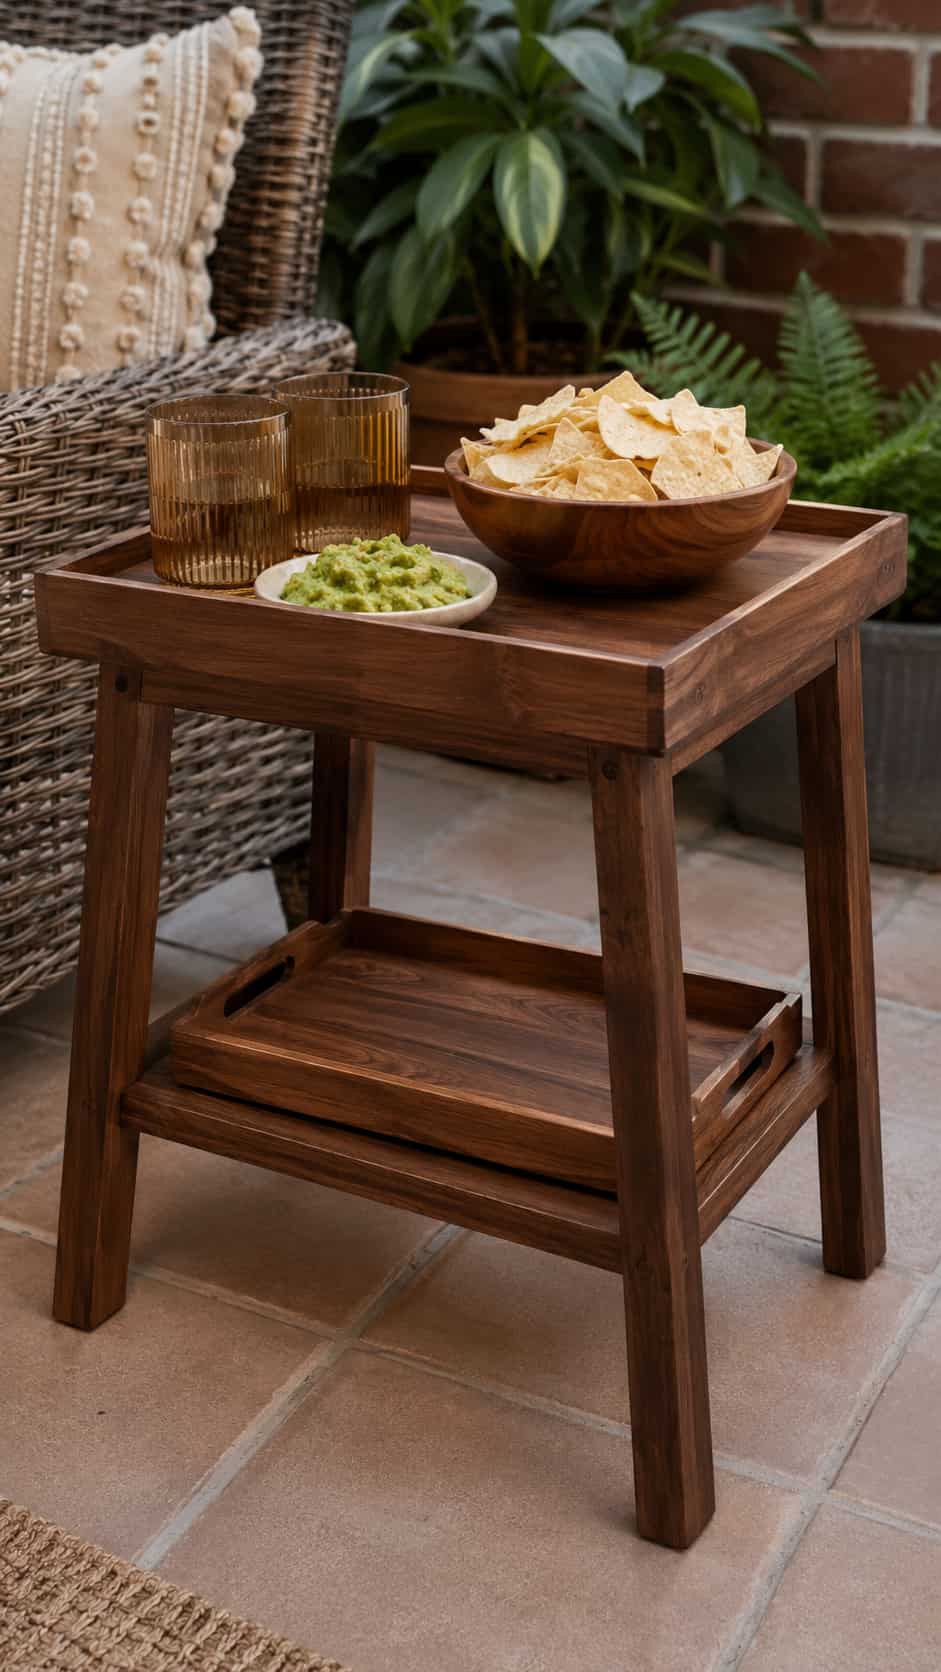
Difficulty: Easy
Estimated time: 1–3 hours
Best use: Occasional hosting and very small patios
Suggested finished size: Approximately 32 inches high, 24 inches wide and 16 inches deep
A compact stand with a removable tray offers the lightest, simplest option in this collection. Carry the tray separately, set it securely on the stand and return everything indoors when the gathering ends.
Keep the base broad enough to resist tipping and use the station only for lightweight items. This project delivers useful serving space without pretending that every backyard needs its own hospitality empire.
Customization idea: Make two coordinating trays so one can hold cups while the other carries snacks.
13. Enclosed Outdoor Serving Cabinet
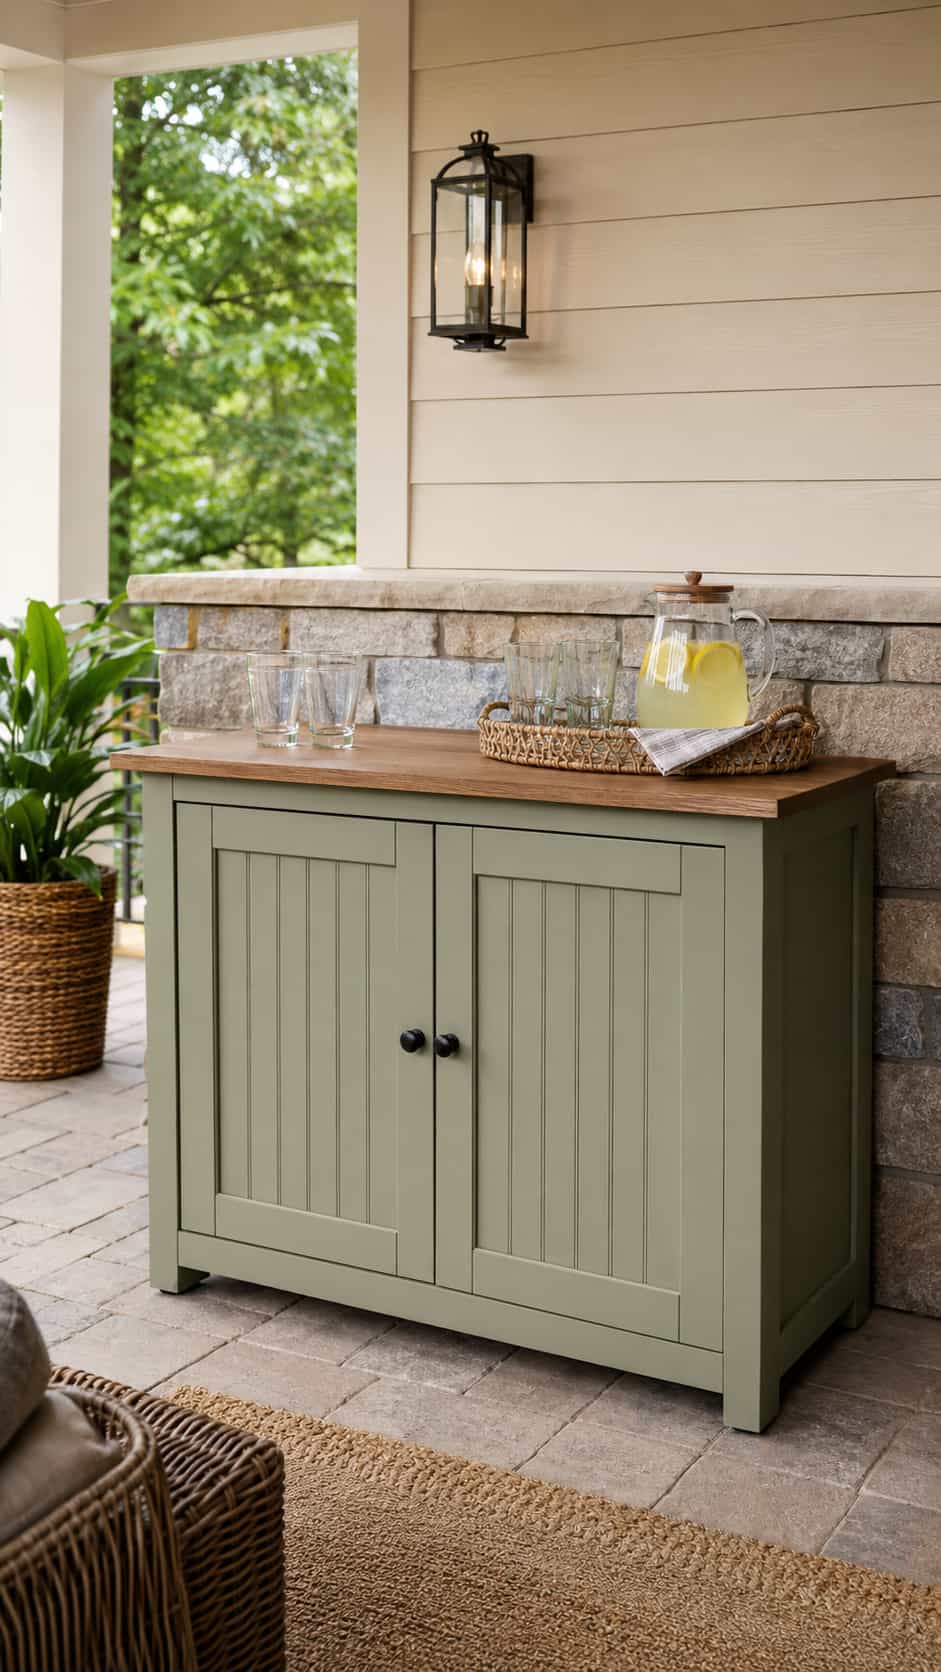
Difficulty: Advanced
Estimated time: 1–2 days
Best use: Covered patios that need tidy storage
Suggested finished size: Approximately 36 inches high, 48 inches wide and 22 inches deep
Doors hide washable serving pieces and make the station look more like finished furniture. Outdoor cabinets still need drainage, ventilation and weather-suitable materials; “closed” never means magically waterproof.
Use a verified cabinet plan and adjustable feet or another reliable leveling method. Store food, paper products and moisture-sensitive items indoors rather than leaving them in the cabinet.
Customization idea: Add removable interior bins instead of permanent dividers.
If hidden storage matters more than serving height, compare the design with this DIY outdoor storage bench.
14. Modular Patio Serving Units
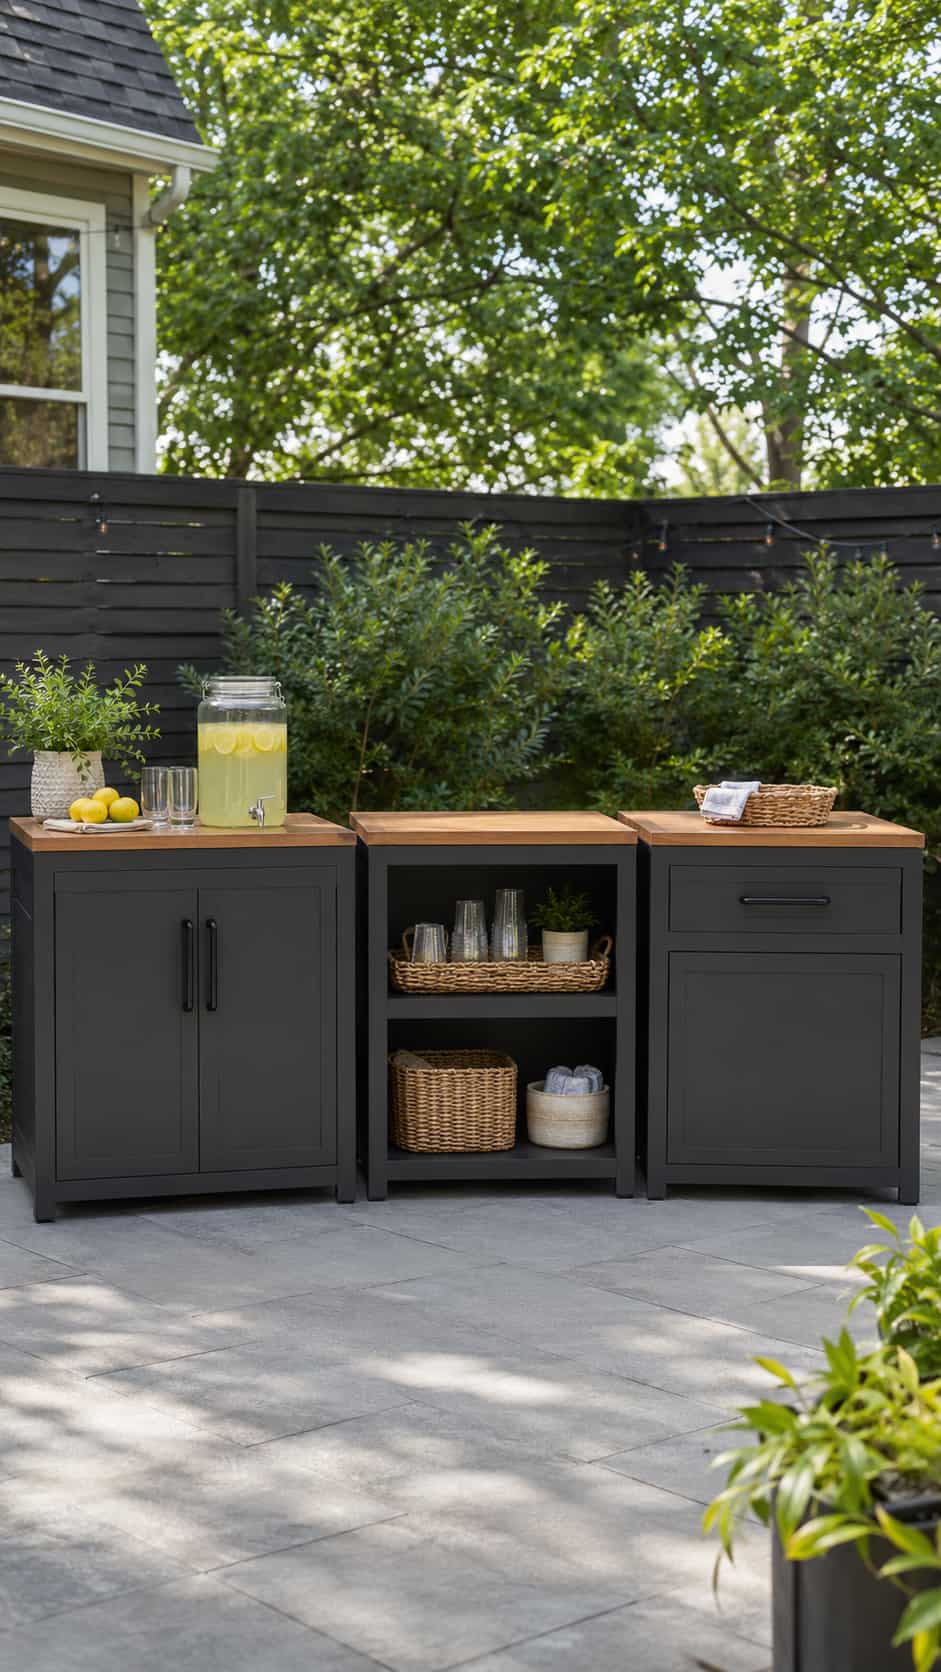
Difficulty: Advanced
Estimated time: Several days
Best use: Patios that may expand later
Suggested finished size: Approximately 36 inches high, 36 inches wide and 24 inches deep per module
Modular units let you begin with one preparation cabinet, then add a serving shelf or storage module later. Matching heights, depths and finishes make separate pieces look like one planned outdoor station.
Keep each first-stage module dedicated to ordinary storage and serving. Ask qualified professionals to plan any later plumbing, electrical work or appliance installation, and keep every grill separate unless a verified model-specific design says otherwise.
Customization idea: Repeat one countertop material and one handle style across every future unit.
15. Curved-Look Outdoor Serving Bar
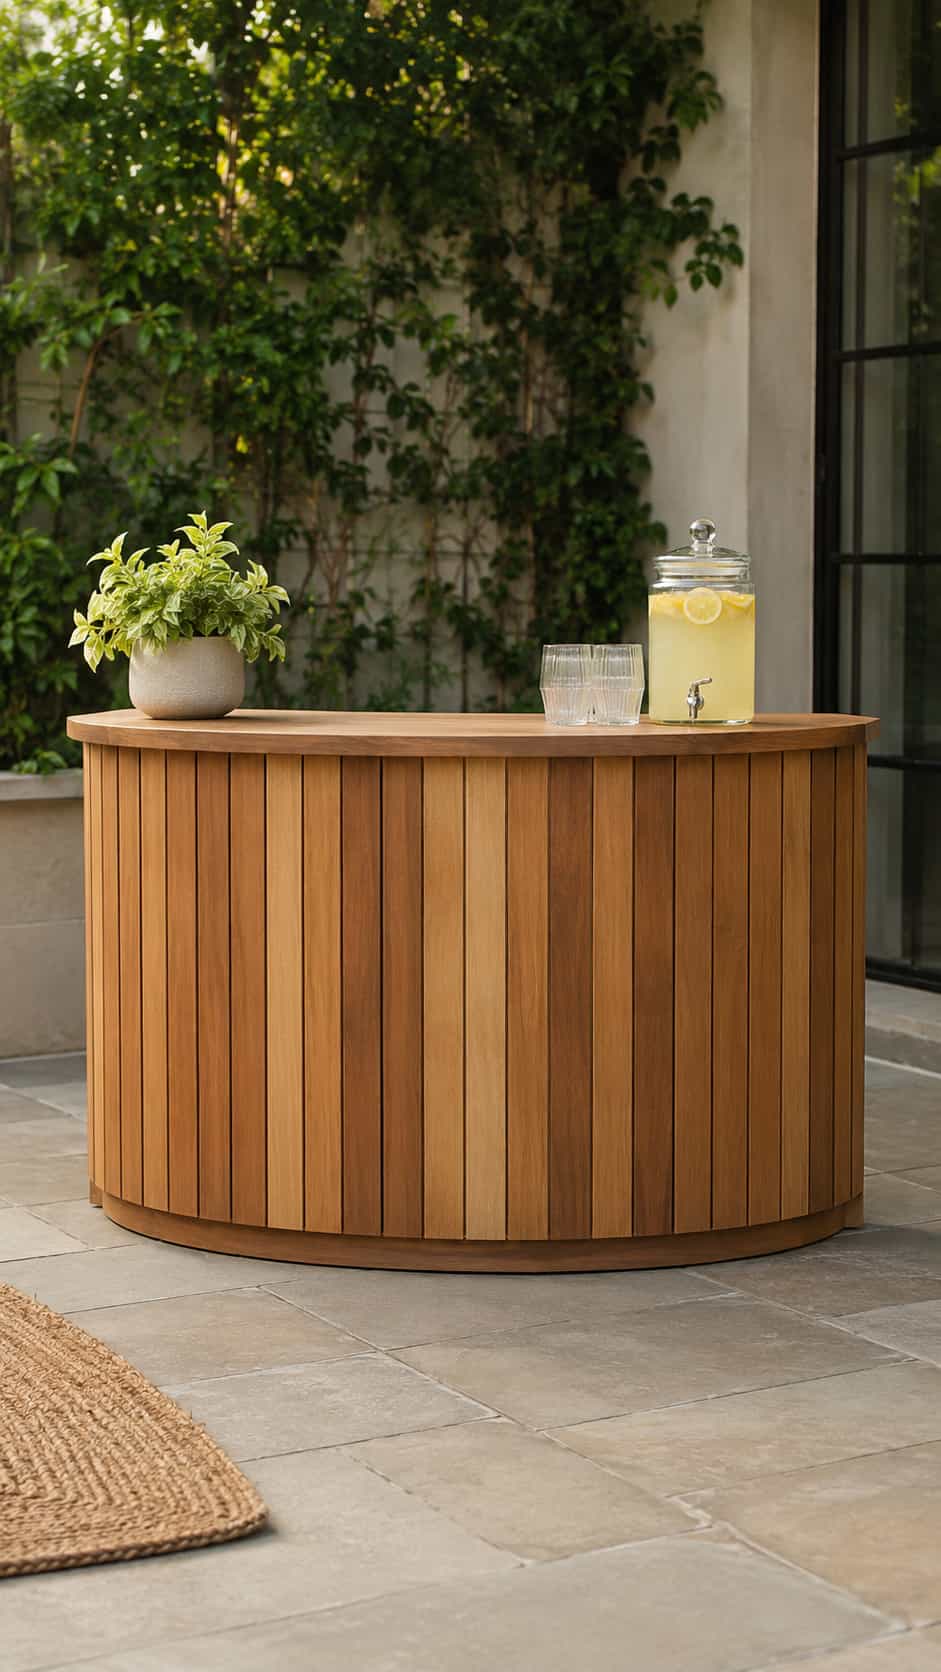
Difficulty: Advanced
Estimated time: 1–2 days
Best use: Statement patios and broad entertaining areas
Suggested finished size: Approximately 42 inches high, 60 inches wide and 24 inches deep
A curved appearance can come from narrow vertical slats arranged across a gently faceted front. The internal frame and countertop still need a complete verified design that handles the geometry and expected load.
Keep the curve decorative and avoid improvised structural shortcuts. A broad, level top and a stable footprint matter more than achieving a perfect showroom arc.
Customization idea: Use two related wood tones to emphasize the rhythm of the front slats.
Three Featured Patio Serving-Station Design Guides
The dimensions below provide visual references for planning and photography, not verified structural plans. Confirm every board, joint, fastener, support and load with a complete tested design before you build. Ask experienced adult or qualified professional help wherever mounting, heavy materials, utilities or outdoor installation affect safety.
Beginner Rolling Beverage Cart
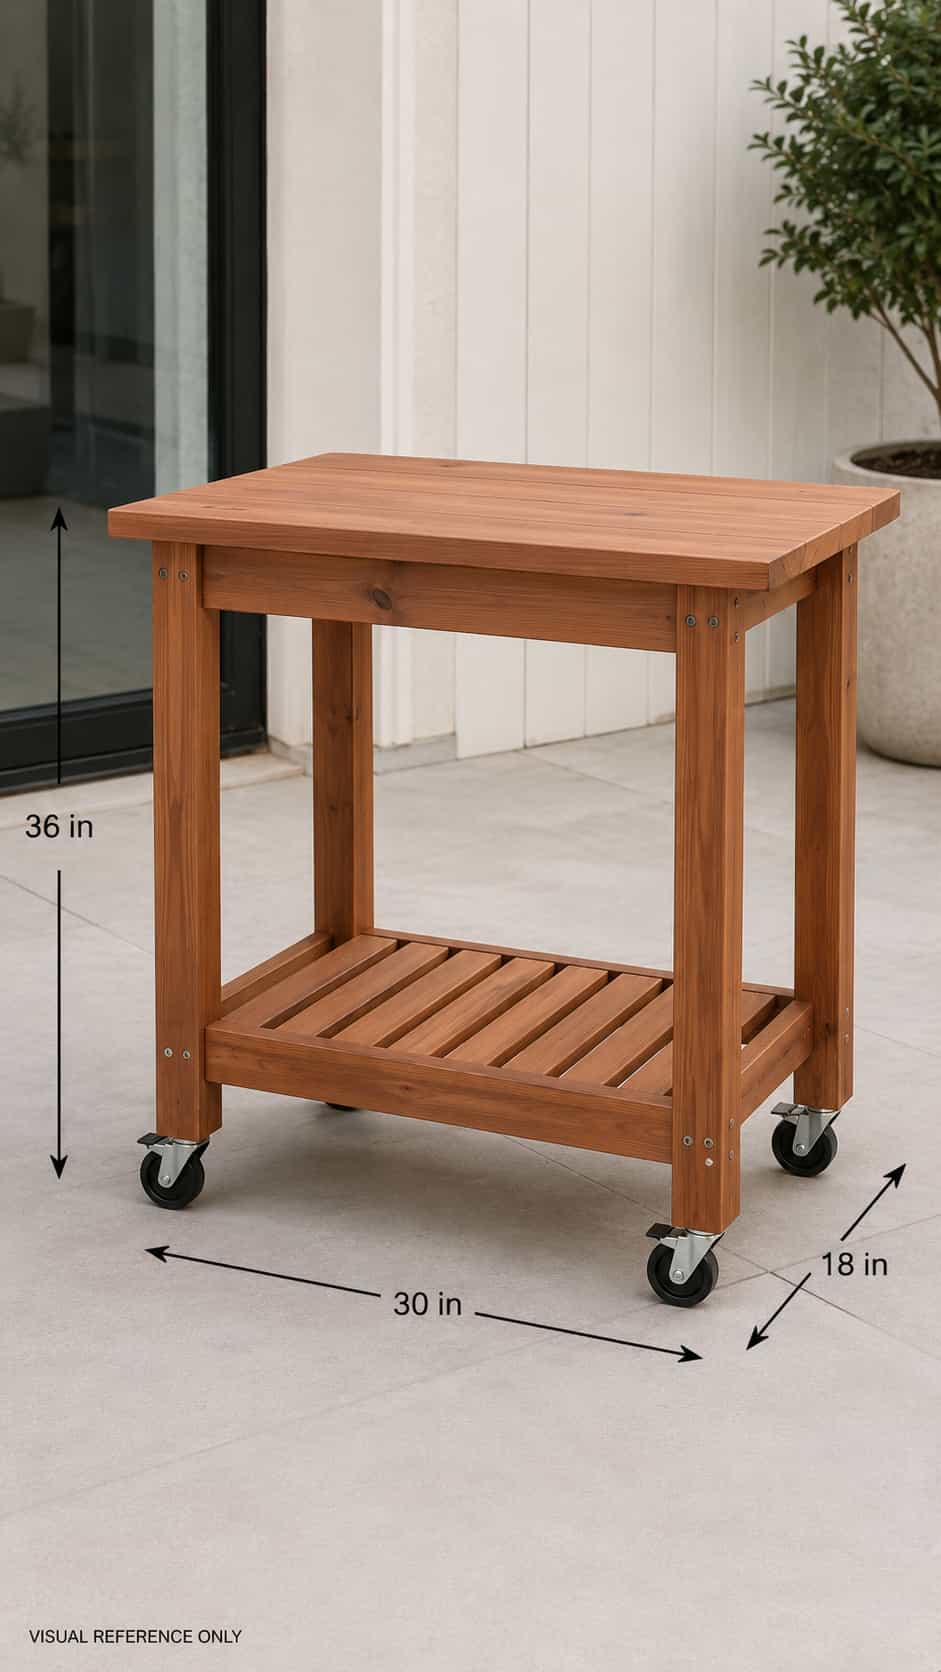
Picture a cart approximately 36 inches high, 30 inches wide and 18 inches deep. Use four sturdy legs, a complete upper support frame, a weather-resistant top, one slatted lower shelf and four exterior-rated locking casters.
Keep the top clear except for lightweight serving items, and place the shelf high enough to avoid wet ground. Select casters rated beyond the expected total load and lock every wheel during use.
Before loading the cart, place it on a level surface and check for rocking or frame movement. Correct any problem before you use it.
Farmhouse Patio Serving Table
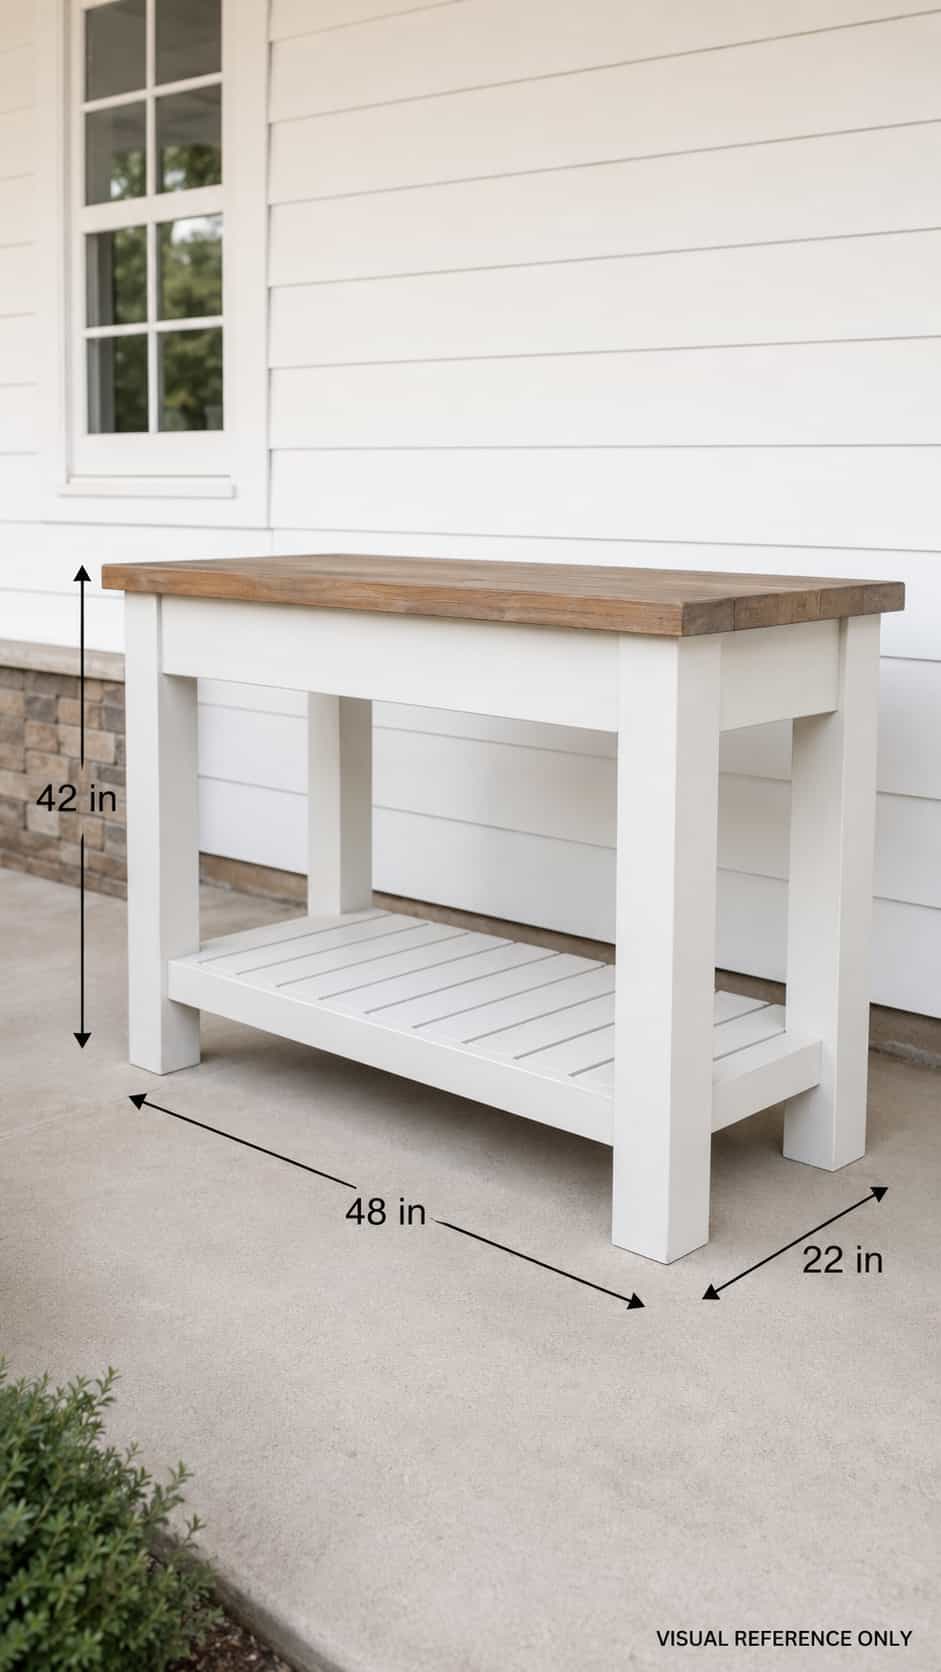
Use 42 inches high, 48 inches wide and 22 inches deep as a visual starting point. A strong-looking design includes four substantial legs, a complete four-sided apron frame, a broad top and a drainage-friendly slatted shelf.
The higher counter creates a casual serving zone, while the shelf holds lightweight baskets and trays. Keep the table independent from grills and all heat-producing equipment.
A painted base with a naturally finished top suits the farmhouse style. Choose an exterior finish and verify the whole design before construction.
Modular Patio Serving Unit
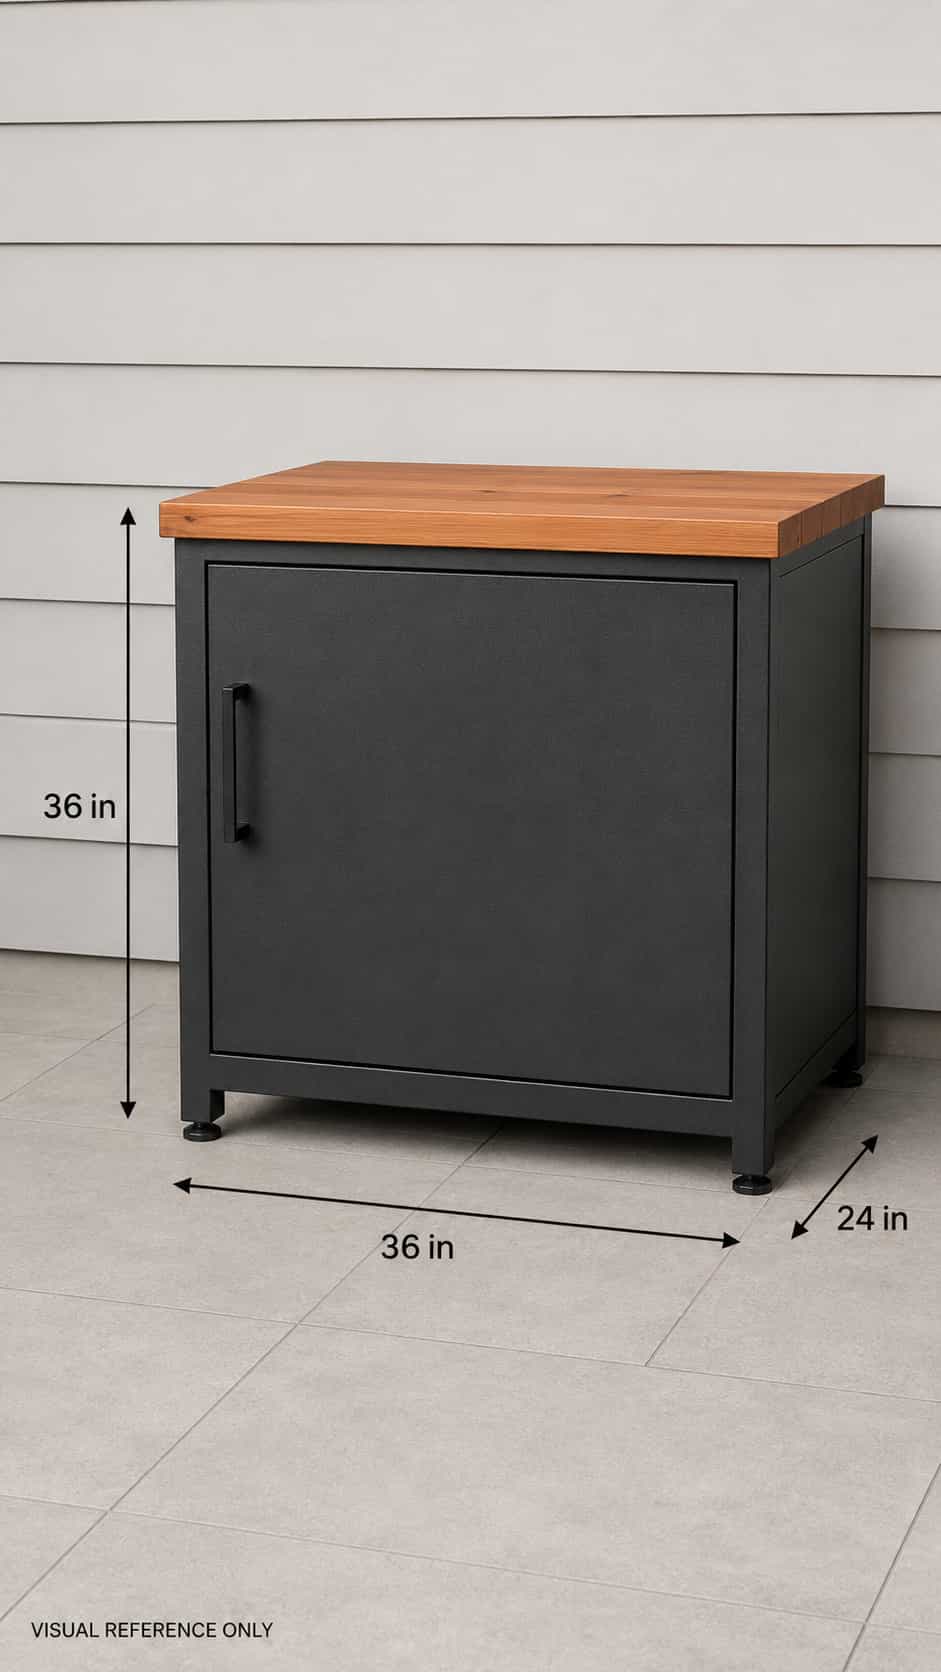
Imagine one unit at 36 inches high, 36 inches wide and 24 inches deep. Plan a stable exterior-rated cabinet frame, a suitable countertop, one storage compartment and a reliable leveling system.
Keep this first module focused on serving and ordinary storage. You can add a matching open-shelf unit later without modifying the first cabinet or surrounding an appliance.
Countertop weight affects the supporting frame, so select the complete verified plan after you choose the surface. Leave utilities and fixed appliance integration to qualified professionals.
More Patio Project Inspiration
You can build a coordinated outdoor area without making every piece match exactly. Repeat a finish, hardware color or slat detail across a few projects instead.
Explore 15 potting-bench ideas for garden workstations that can inspire shelf layouts.
Pair the serving station with one of these 21 DIY 2×4 outdoor furniture projects.
Add hidden cushion storage with a DIY outdoor storage bench.
Browse the shed and outdoor wood projects collection for more patio inspiration.
Want Complete Plans for Larger Outdoor Projects?
Disclosure: This section may contain affiliate links. If you purchase through one of these links, we may earn a commission at no additional cost to you.
A simple freestanding serving table can make a manageable project when you use verified dimensions and suitable help. Larger outdoor bars, mounted units and modular cabinets require more planning because structure, weather exposure and countertop weight must work together.
If you want a broader project library, Ted’s Woodworking Plans offers one optional collection to explore. Review each project’s dimensions, diagrams, cut list, difficulty and material requirements before starting. Confirm important measurements and safety requirements independently; a third-party plan does not automatically suit your patio, materials or experience.
Final Thoughts
The best DIY outdoor bar ideas make serving easier without complicating the patio. Start with a rolling cart, shallow console or simple table if you want a quick win. Choose a verified design and experienced help when you move into wall mounting, heavy countertops, enclosed cabinets or modular layouts.
Measure the space, protect the walking route and keep utilities and appliances independent. Then add your favorite finish, load the station with lemonade and snacks, and enjoy a backyard setup that finally gives every cup somewhere sensible to land.