
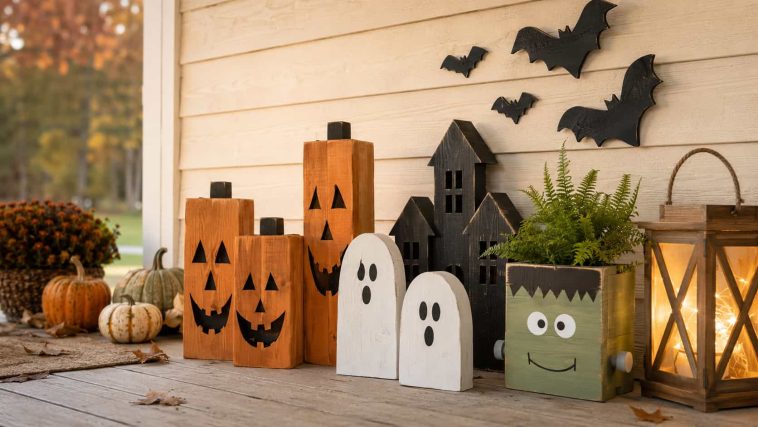
Treat the suggested measurements as design references rather than complete construction plans. Ask a responsible, experienced adult to handle cutting, drilling and other potentially dangerous workshop tasks, and follow every tool and finish manufacturer’s instructions.
Before You Start Making Halloween Wood Projects
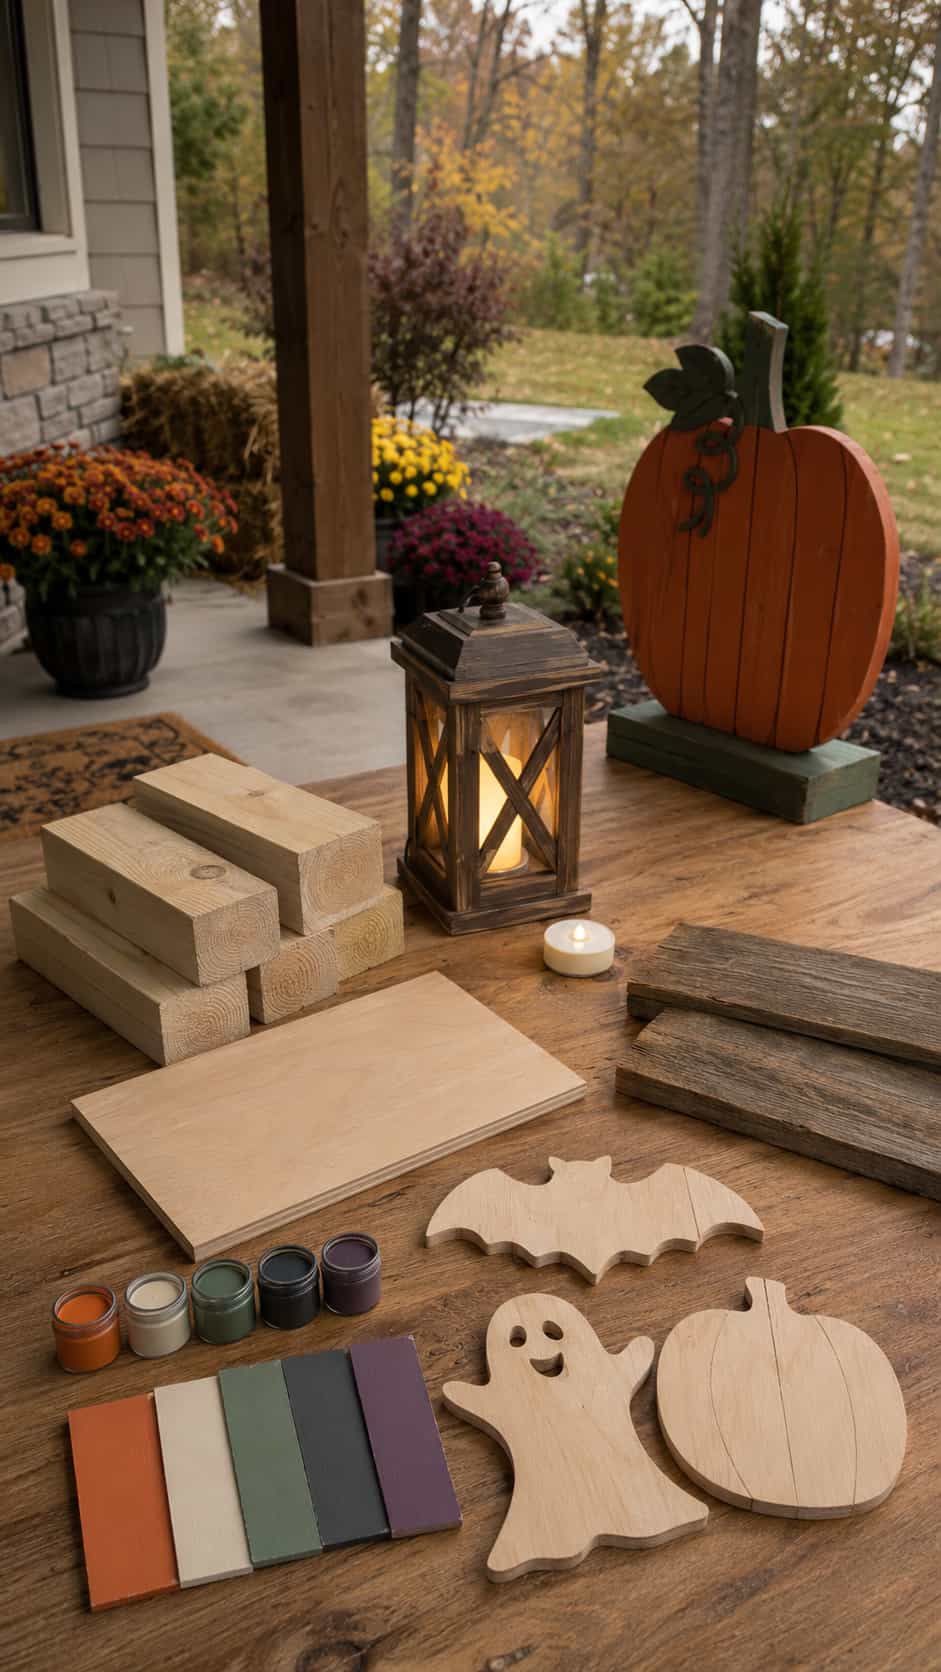
A little planning keeps a quick seasonal craft from becoming a wonky orange object that nobody can identify. Check your wood, decide where the decoration will live and settle on a limited color palette before any work begins.
Match the Wood to the Project
Short 4×4 offcuts work beautifully for chunky pumpkins, ghosts and shelf sitters. Flat plywood suits silhouettes, door hangers and wall art, while fence-board scraps make excellent porch signs.
Avoid badly split lumber and unidentified reclaimed wood. If you cannot confirm where a pallet or scrap came from, choose clean material with a known history instead.
Keep the Shapes Simple
Bold shapes usually look better than complicated details, especially from the street. A pumpkin needs a clear outline, a ghost needs a recognizable face and a bat needs wings that do not resemble two unfortunate triangles glued together.
Simple shapes also paint more easily. Use repeated curves, limited colors and one or two decorative accents to make separate pieces feel like a coordinated collection.
Use LED Lights Around Wood
Battery-powered LED lights create a warm Halloween glow without putting an open flame inside a wooden lantern or candleholder. Keep the light removable so you can replace the batteries and inspect the project.
Never place a candle, burner or homemade electrical system against wood. A seasonal decoration should provide atmosphere, not an unexpected fire-safety demonstration.
Prepare Outdoor Projects for Weather
Choose exterior-rated materials, fasteners and finishes for decorations that will face rain or strong sunlight. Seal exposed end grain and keep freestanding pieces away from areas where water collects.
Place yard decorations where they remain visible without obstructing steps, driveways, paths or lawn maintenance. Stable supports matter more than elaborate details when the wind arrives.
Halloween Wood Projects at a Glance
| Project | Difficulty | Estimated Time | Best For |
| Jack-o’-lantern blocks | Easy | 1–2 hours | 4×4 scraps |
| Wooden ghost family | Easy | 1–2 hours | Porch décor |
| Stacked pumpkin sign | Easy | About 2 hours | Entryways |
| Black cat silhouette | Easy–Medium | 2–3 hours | Walls or porches |
| Wooden bats | Easy | 1–2 hours | Group displays |
| Candy corn blocks | Easy | Under 1 hour | Beginners |
| Haunted house village | Medium | 2–4 hours | Shelf décor |
| “BOO” porch sign | Easy | 1–2 hours | Covered porches |
| Playful graveyard markers | Medium | 2–3 hours | Yard displays |
| Spiderweb wall art | Medium | 2–3 hours | Indoor décor |
| Pumpkin door hanger | Easy | 1–2 hours | Front doors |
| Wooden ghost garland | Easy | 1–2 hours | Mantels |
| LED Halloween lantern | Medium | 2–3 hours | Evening displays |
| Reversible seasonal sign | Easy | About 2 hours | Fall and Halloween |
| Monster-face planters | Easy | 1–2 hours | Porch plants |
| Witch-hat blocks | Easy | 1–2 hours | Shelf décor |
| Halloween shelf sitters | Easy | 1–2 hours | Tiny scraps |
| Trick-or-treat candy tray | Medium | 2–3 hours | Parties |
| Pumpkin-patch stakes | Easy | About 2 hours | Garden beds |
| Spooky tree wall art | Medium | 2–4 hours | Indoor displays |
| Halloween yard silhouettes | Medium | 3–5 hours | Outdoor decorating |
1. Wooden Jack-o’-Lantern Blocks
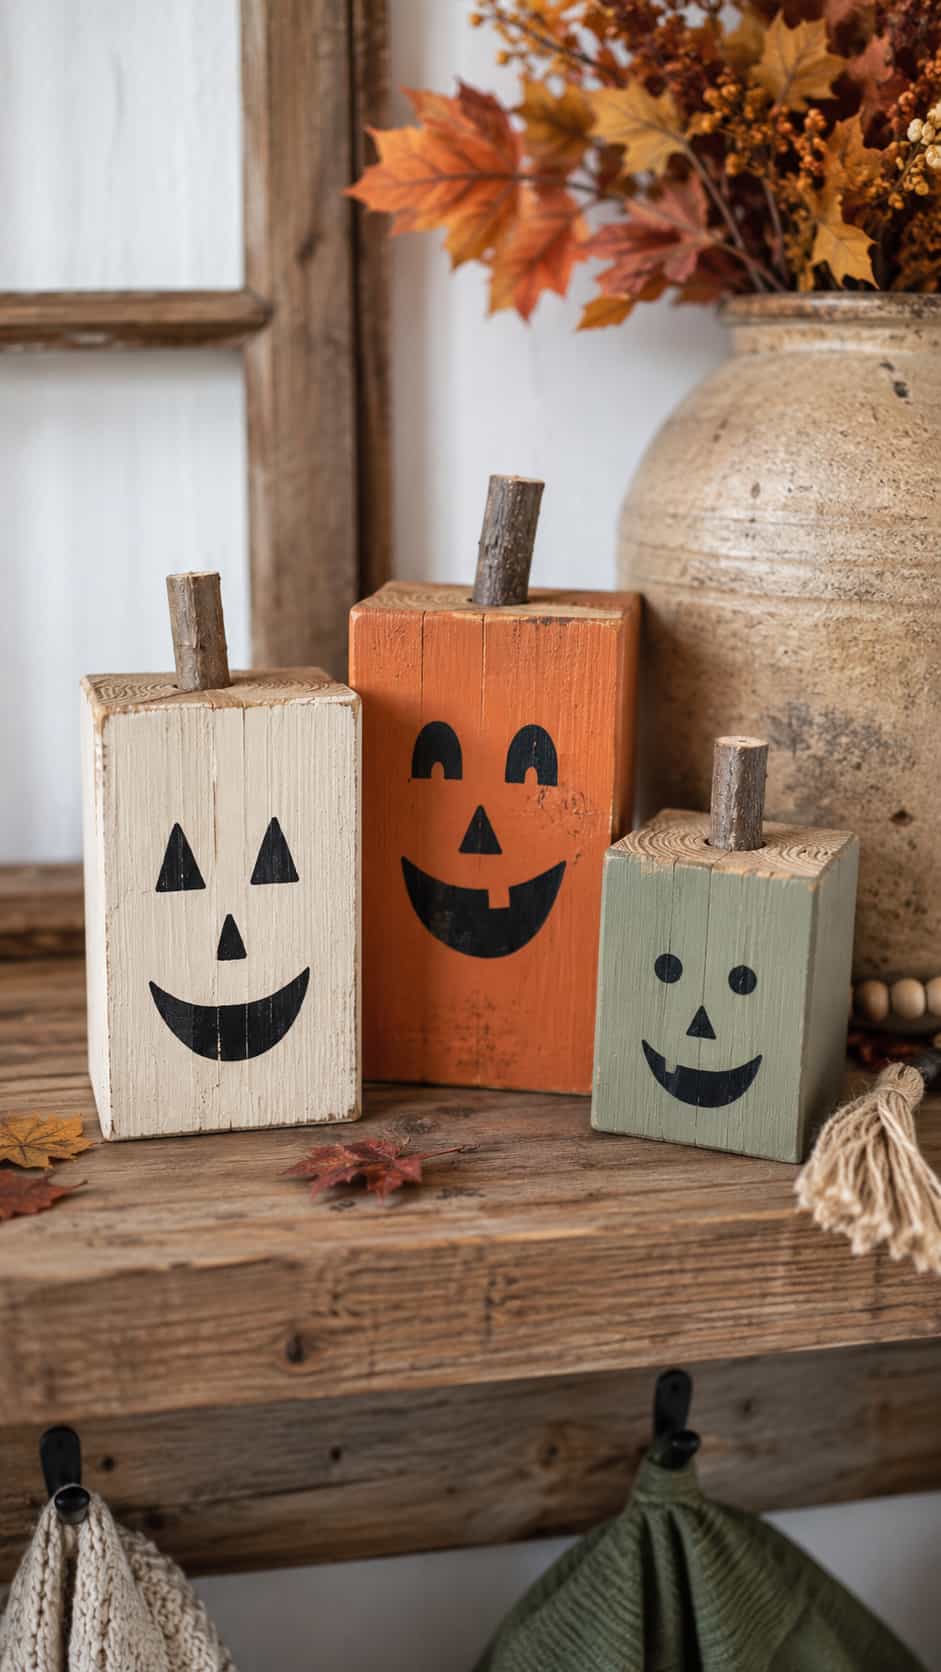
Turn several chunky blocks into reusable jack-o’-lanterns by giving each one a different height and expression. Orange paint creates the traditional look, while cream, sage green or natural wood produces a calmer farmhouse style.
Use a short twig or dowel as the stem and keep the faces large enough to read from across the room. A set of three usually looks more intentional than one lonely pumpkin judging everyone from the shelf.
Customization idea: Paint a different face on each side so you can change the display by rotating the blocks.
2. Friendly Wooden Ghost Family
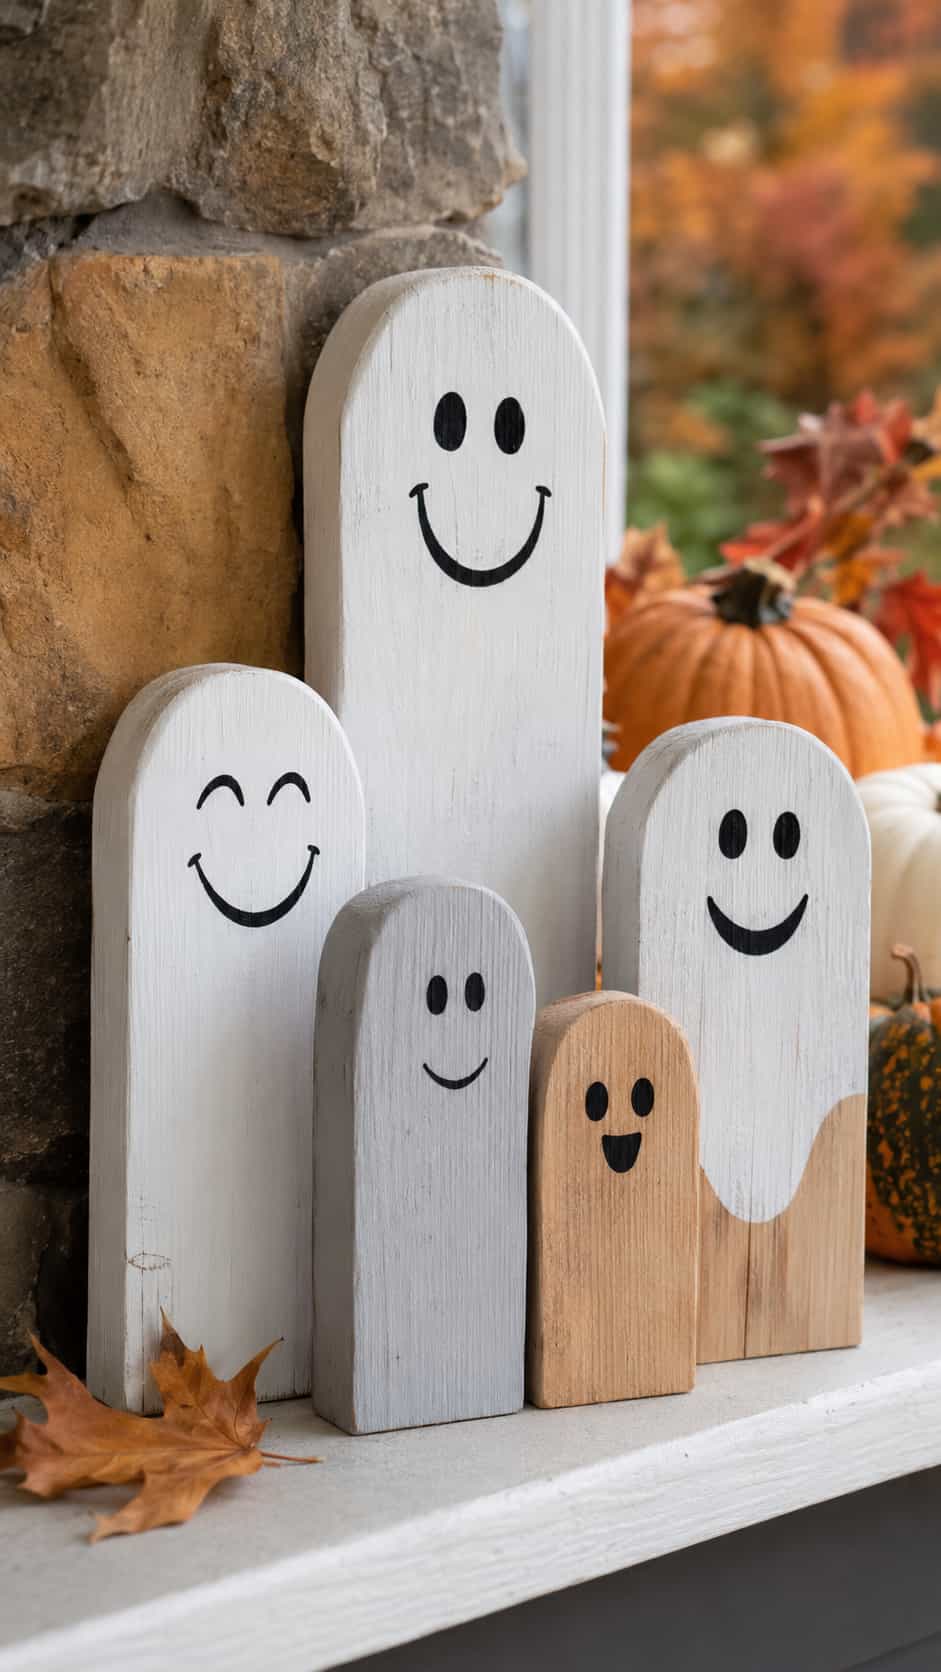
Upright wood blocks make an easy ghost family when you combine several heights. White paint and simple black faces create the design without complicated shaping.
Round the visual design with slightly different expressions rather than making every ghost identical. Keep outdoor pieces stable and use an exterior finish if they will face damp weather.
Customization idea: Combine white, pale gray and natural wood across the group.
3. Stacked Wooden Pumpkin Sign
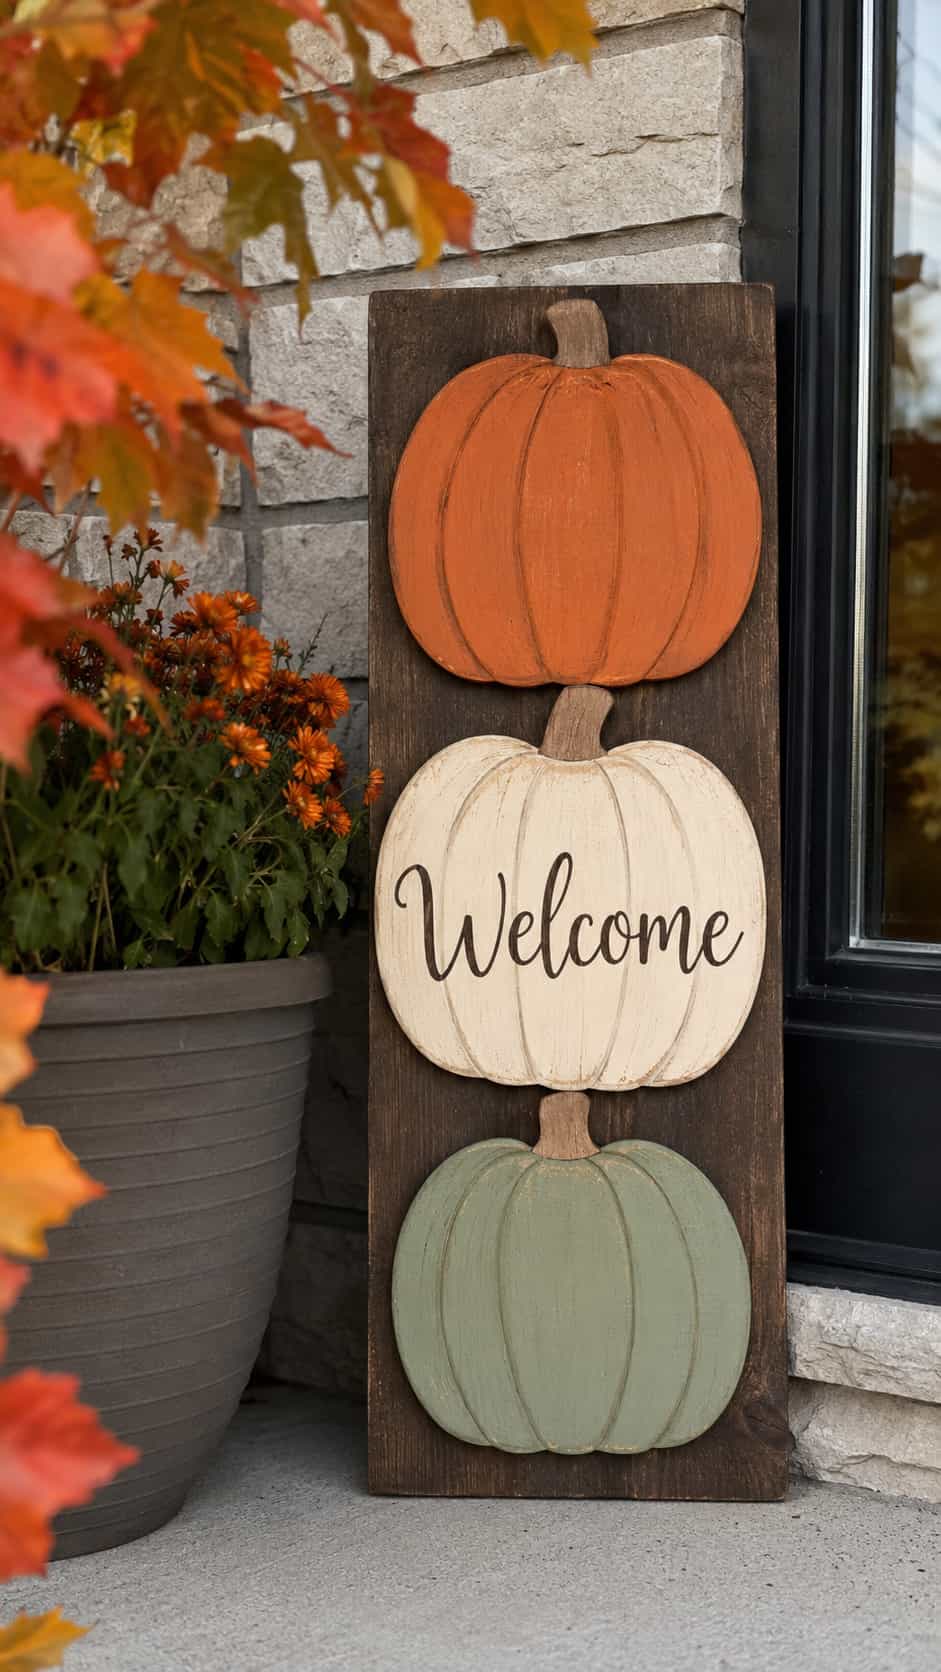
A vertical stack of three pumpkin shapes fills a narrow corner without taking over the entire porch. Mount the shapes to a stable backing and vary their colors slightly for more depth.
Use one large word or initial instead of crowding every pumpkin with lettering. The design should remain readable from several feet away.
Customization idea: Add “Welcome” to the center pumpkin and leave the other two decorative.
4. Black Cat Silhouette
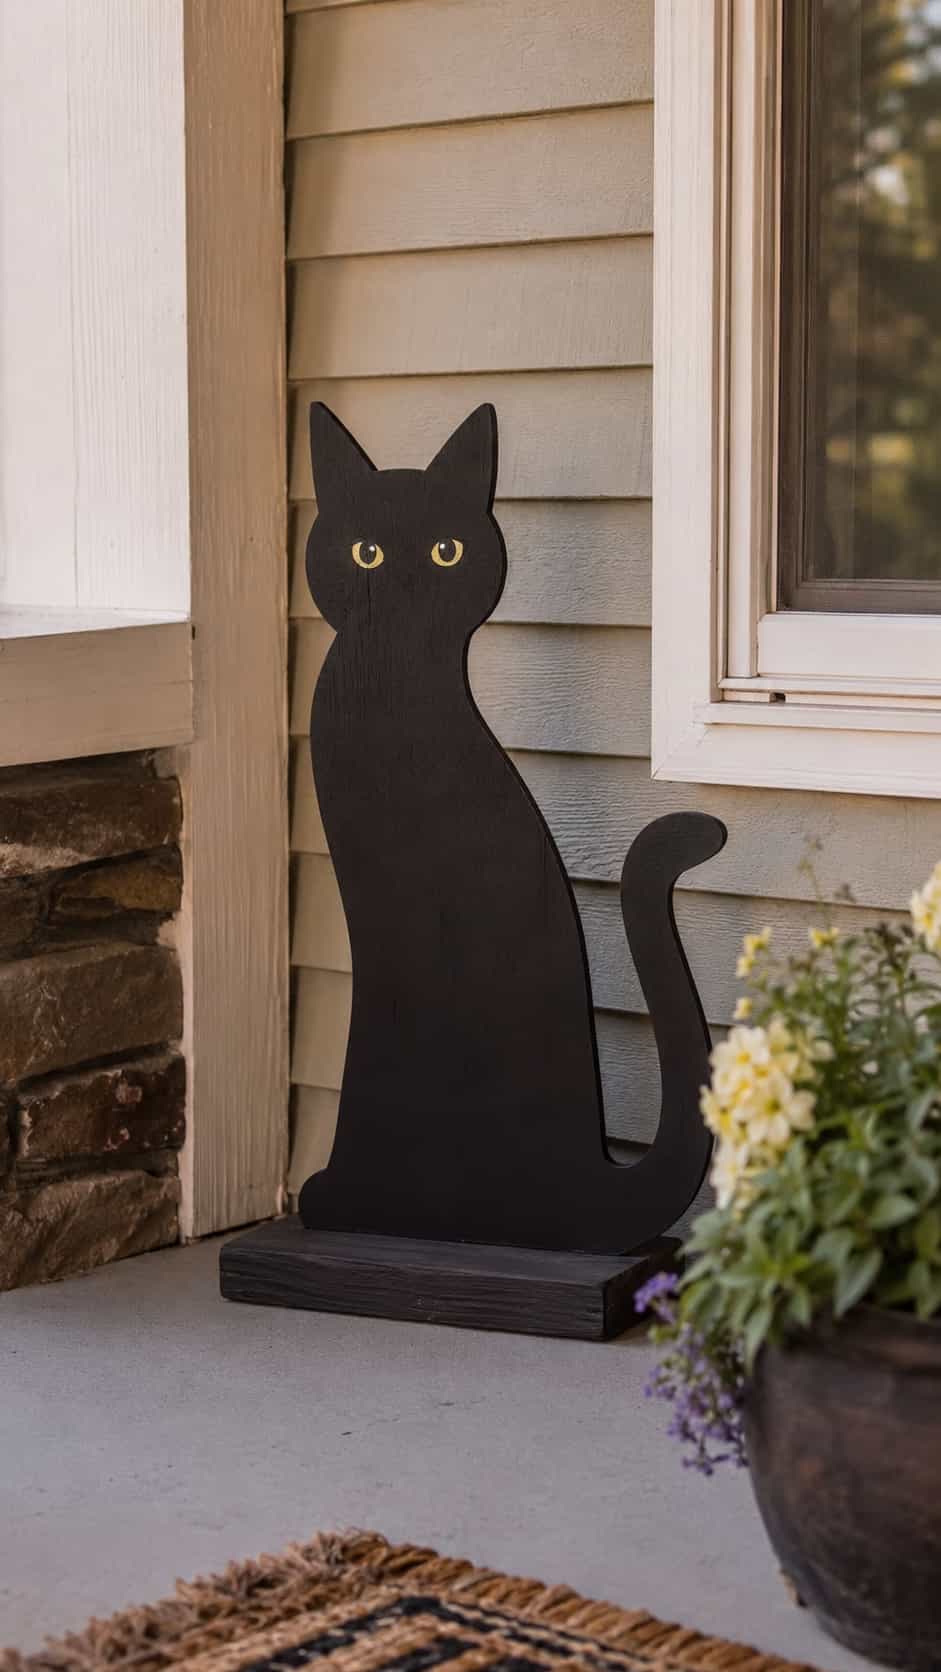
A simple sitting-cat silhouette creates a strong Halloween shape without looking too intense. Use a clear curved tail, pointed ears and a solid body outline so the cat remains recognizable in low light.
Flat silhouettes need a secure display method that suits their weight and location. Keep outdoor cats away from roads and dark walkways where the shape could surprise someone for all the wrong reasons.
Customization idea: Add reflective painted eyes instead of wiring lights into the decoration.
5. Wooden Bat Decorations
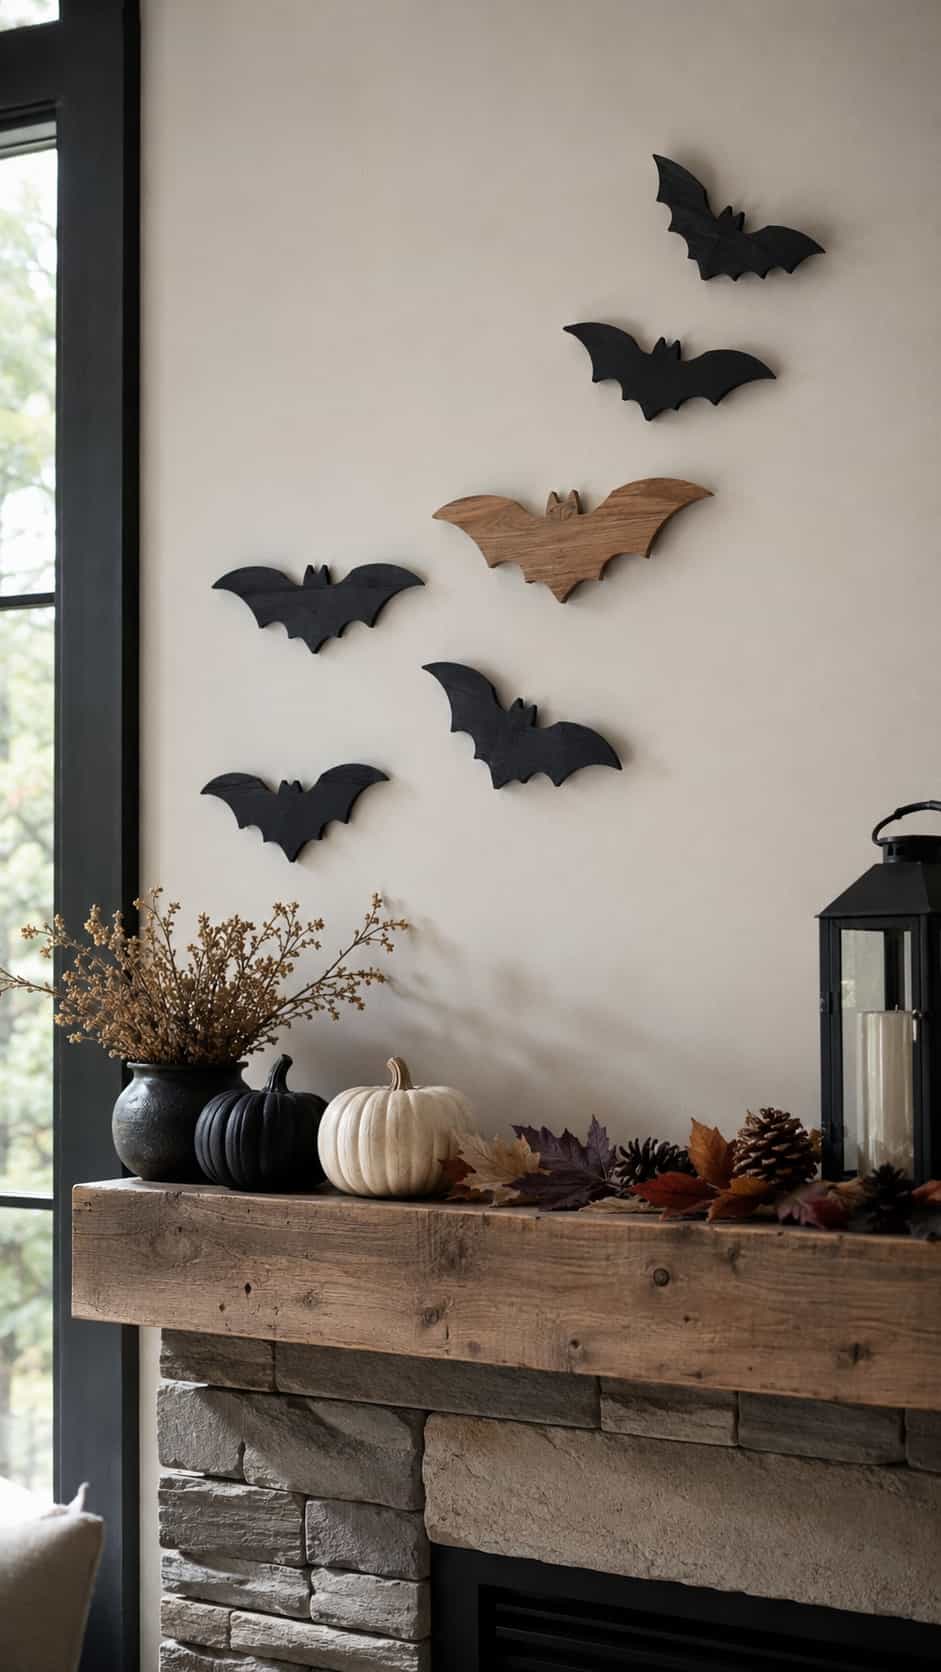
One wooden bat looks fine, but a group creates movement. Arrange several sizes in a rising curve across a wall or door, leaving enough space between them to keep each shape visible.
Lightweight pieces need secure mounting that will not damage the display surface. Indoor bats also store easily because you can stack them flat after Halloween.
Customization idea: Mix matte-black bats with one or two natural-wood pieces.
6. Candy Corn Wood Blocks
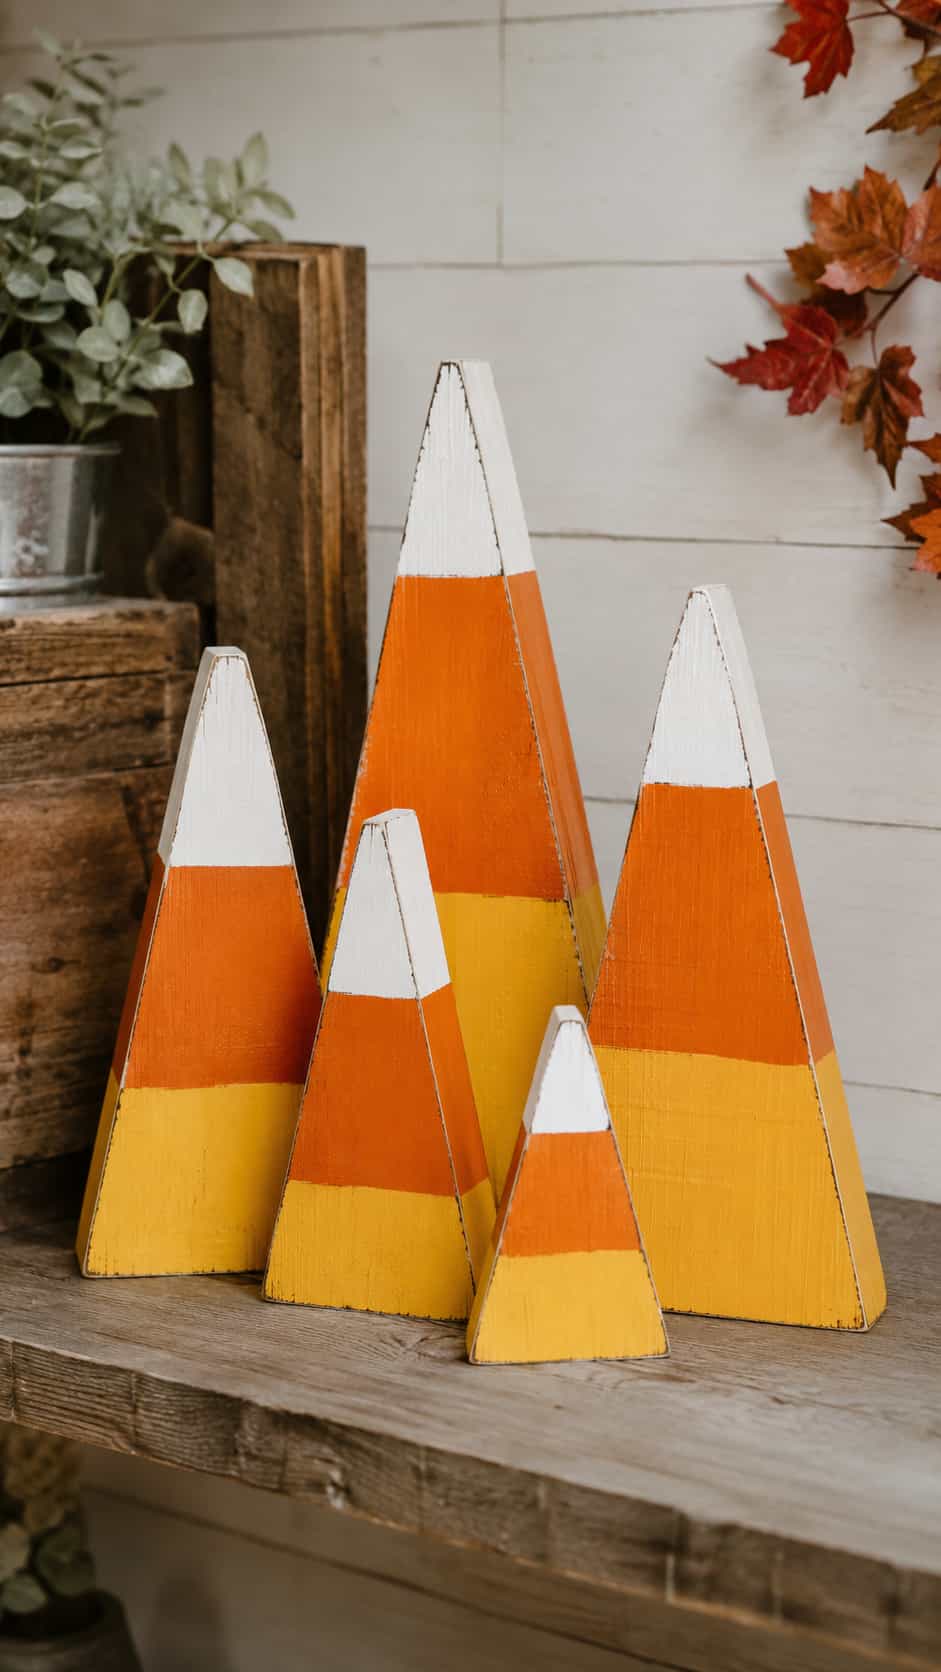
Candy corn blocks offer one of the quickest DIY Halloween wood crafts in this collection. Use triangular or gently tapered pieces and divide each one into yellow, orange and white sections.
Group several heights together and keep the painted bands slightly imperfect for a handmade appearance. FYI, the decoration may prove more popular than the actual candy.
Customization idea: Lightly distress the finish for a rustic effect.
7. Miniature Haunted House Village
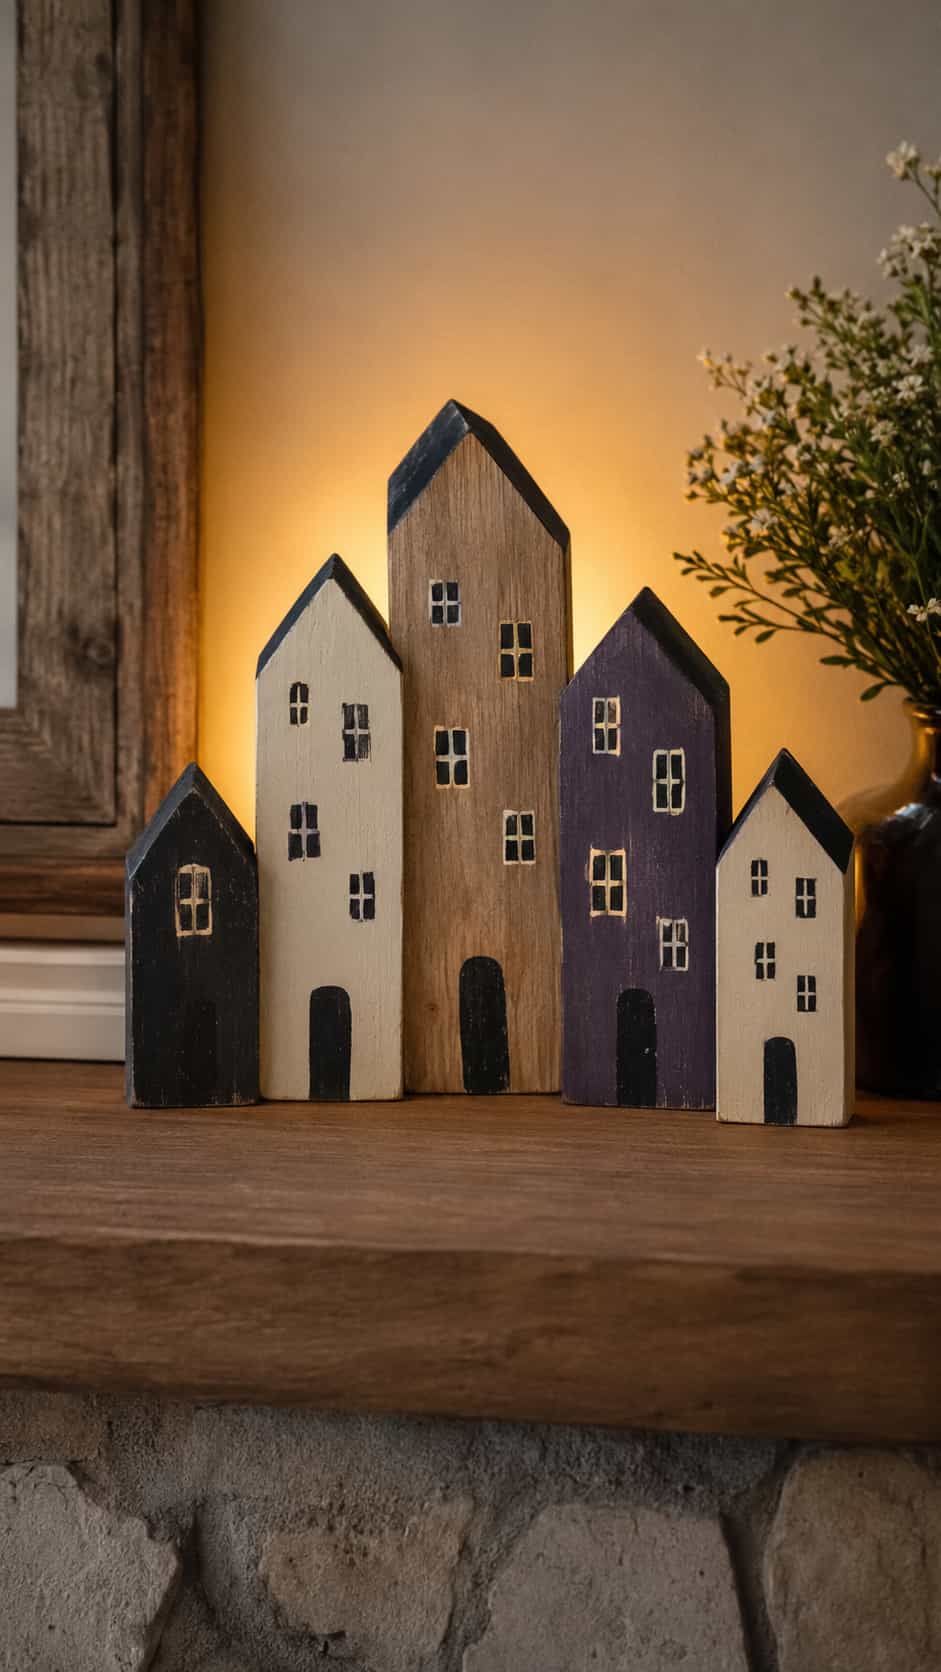
Turn upright scraps into a tiny neighborhood by adding painted rooflines, crooked windows and dark doors. Different heights make the village interesting even when every house begins as a simple block.
Use solid painted shapes instead of homemade wiring. A removable LED light placed behind the complete group can create atmosphere without becoming part of the wooden houses.
Customization idea: Combine charcoal, muted purple, cream and unfinished wood.
8. Vertical “BOO” Porch Sign
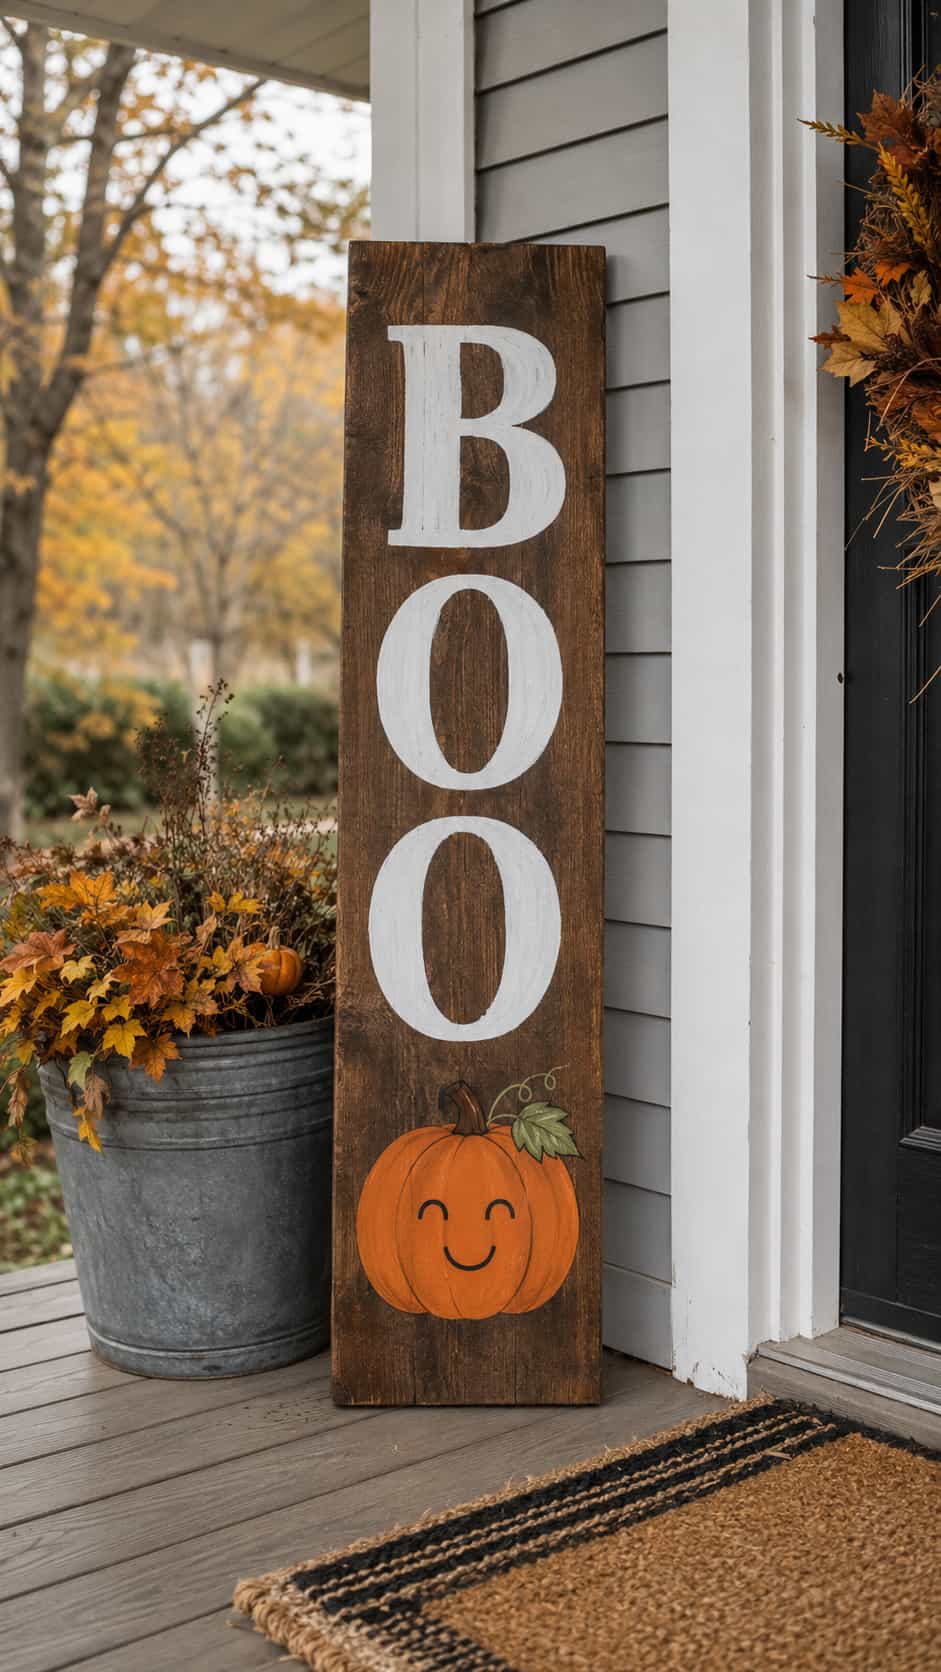
A vertical sign delivers plenty of visual impact without requiring a complicated design. Paint large letters on a wide board and add one small ghost, pumpkin or bat near the bottom.
Position the sign on a stable surface and secure it appropriately for the location. Avoid leaning a tall lightweight board where wind or foot traffic can knock it over.
Customization idea: Paint a general autumn message on the reverse side.
9. Playful Wooden Graveyard Markers
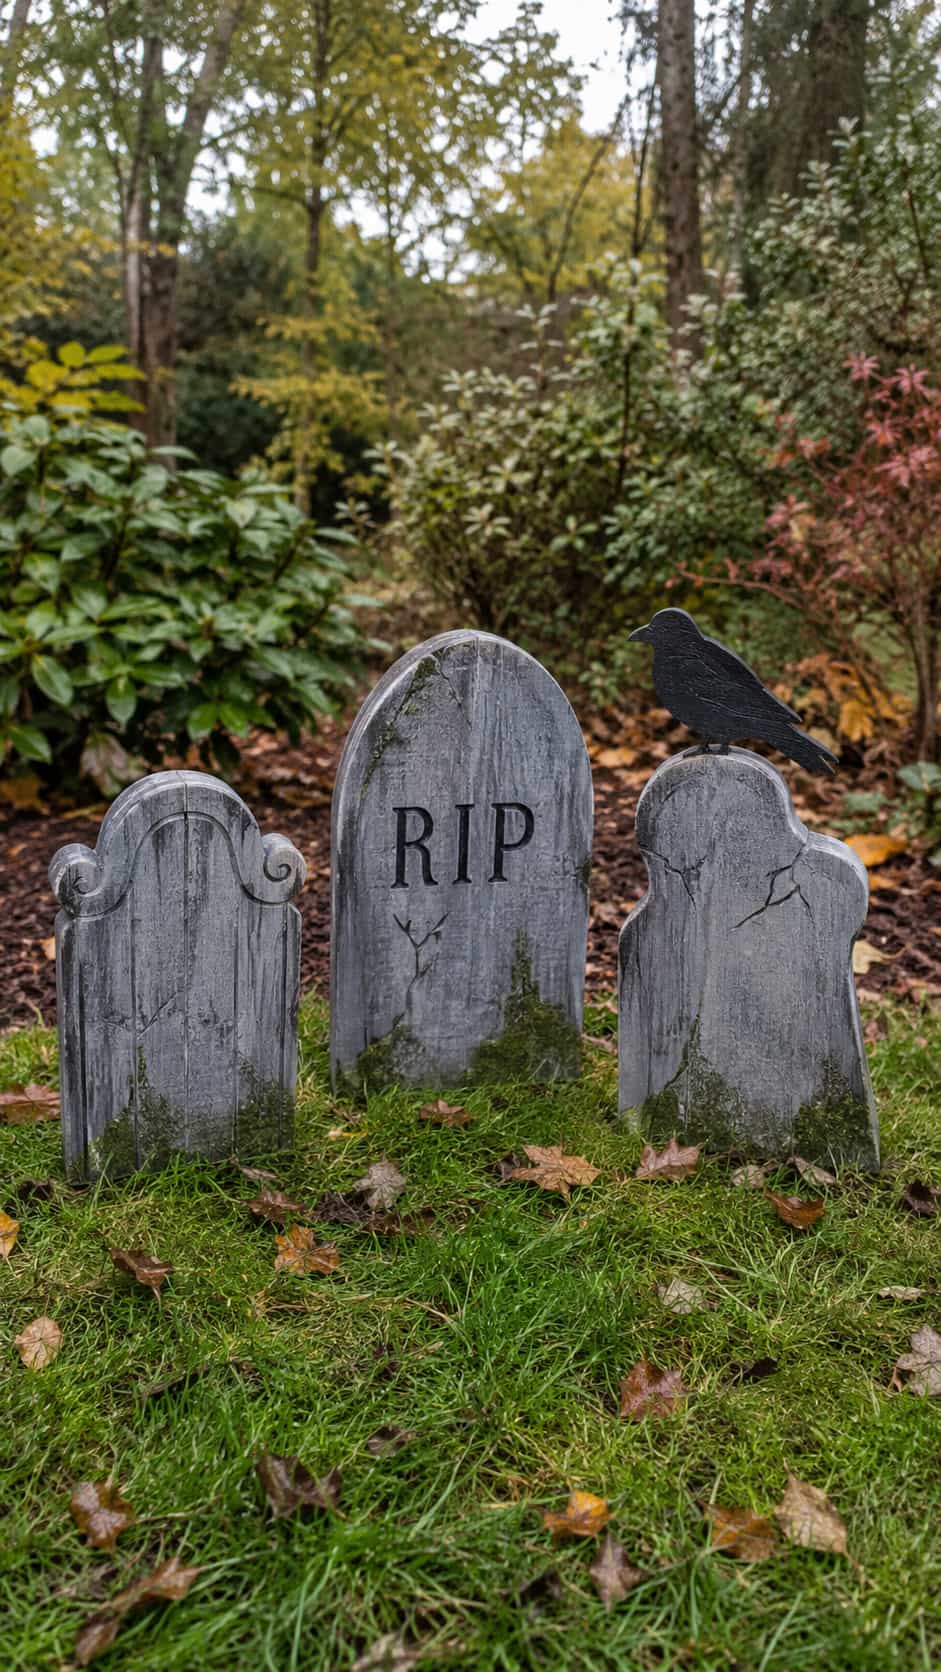
Cartoon-style graveyard markers add a classic Halloween element without graphic details. Choose rounded shapes, gray paint and harmless jokes or invented names.
Every marker needs a stable outdoor support that suits the soil and weather. Keep the display away from sidewalks, driveways and mowing routes.
Customization idea: Add painted cracks, mossy green accents or a small wooden crow silhouette.
10. Wooden Spiderweb Wall Art
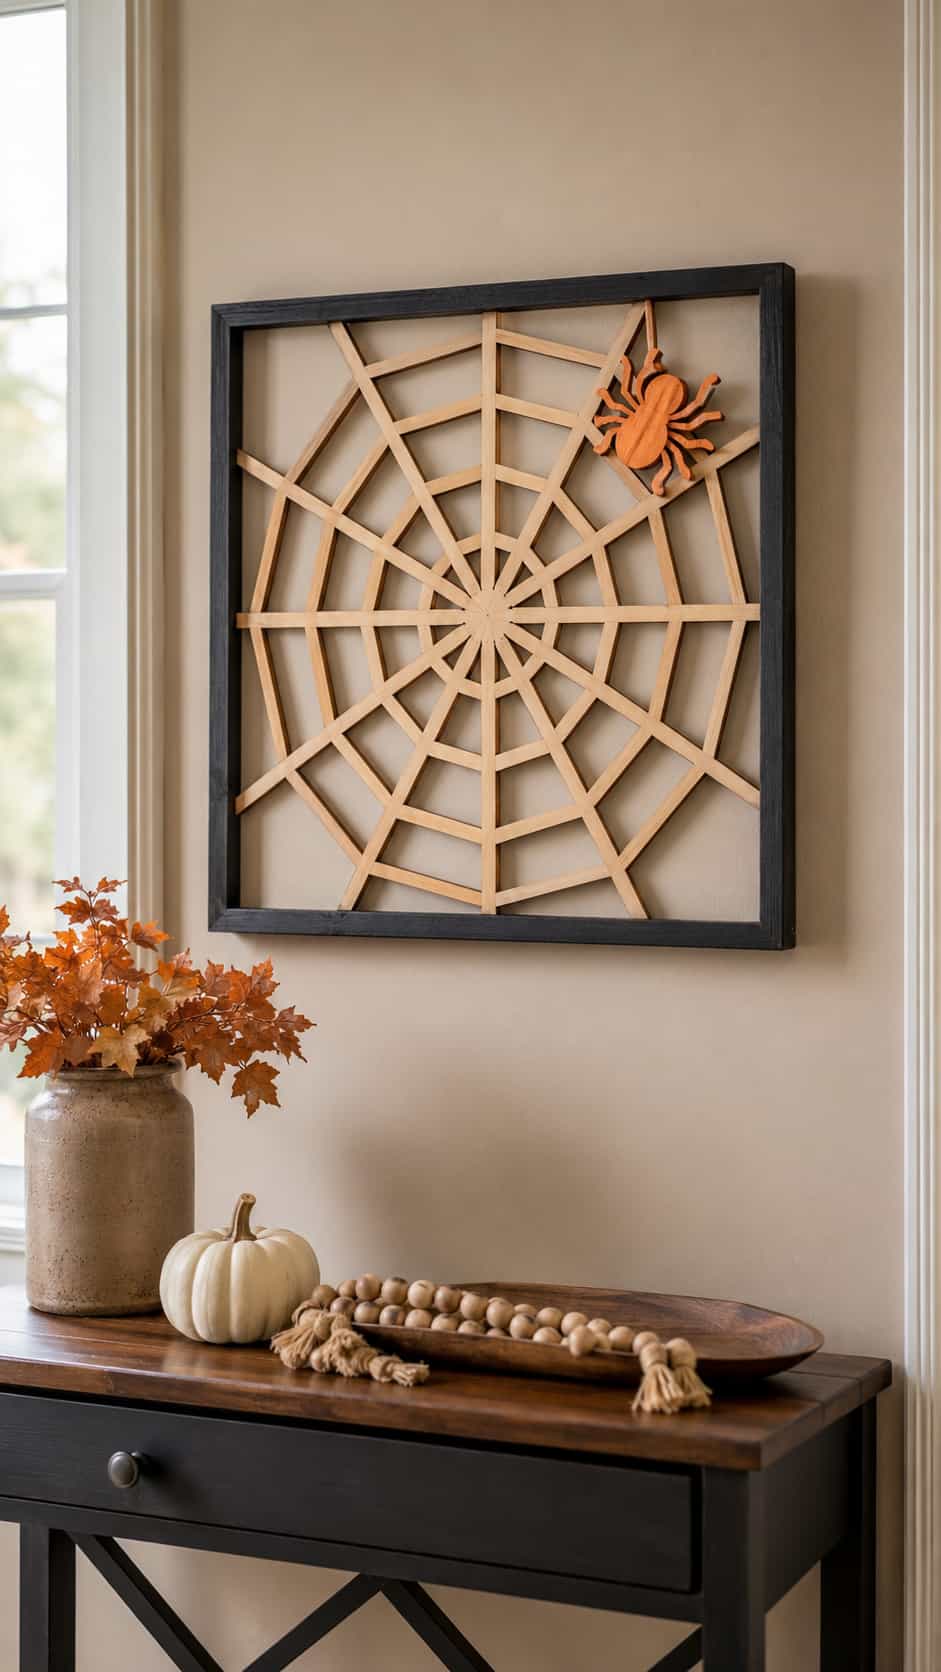
A geometric spiderweb inside a square frame creates Halloween wall art that still feels tidy and modern. Use repeated lines and even spacing so the web looks intentional.
Black paint on the frame will make a natural-wood web stand out. Keep the finished piece lightweight enough for the selected hanging hardware.
Customization idea: Add one small removable wooden spider in a contrasting color.
11. Wooden Pumpkin Door Hanger
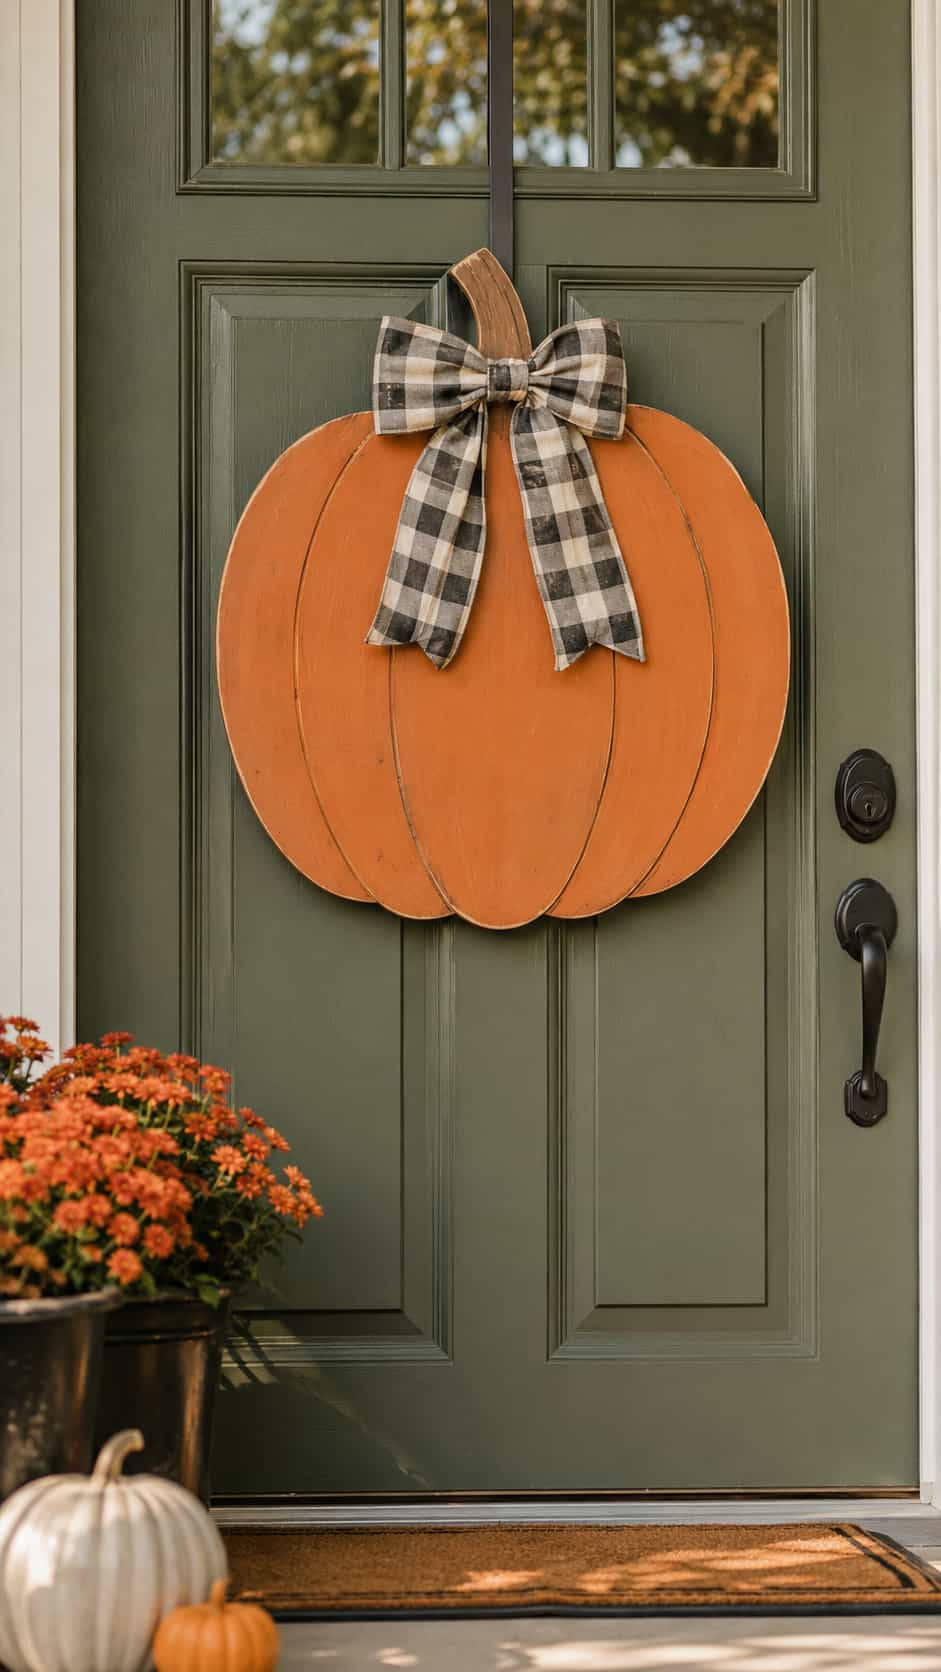
A lightweight pumpkin panel offers a softer alternative to a traditional wreath. Use a bold outline, a simple stem and a finish that coordinates with the door.
Choose hanging hardware that suits both the project’s weight and the door material. Make sure the decoration does not interfere with the handle, lock or safe operation of the door.
Customization idea: Add a removable bow that works for both fall and Halloween.
12. Wooden Ghost Garland
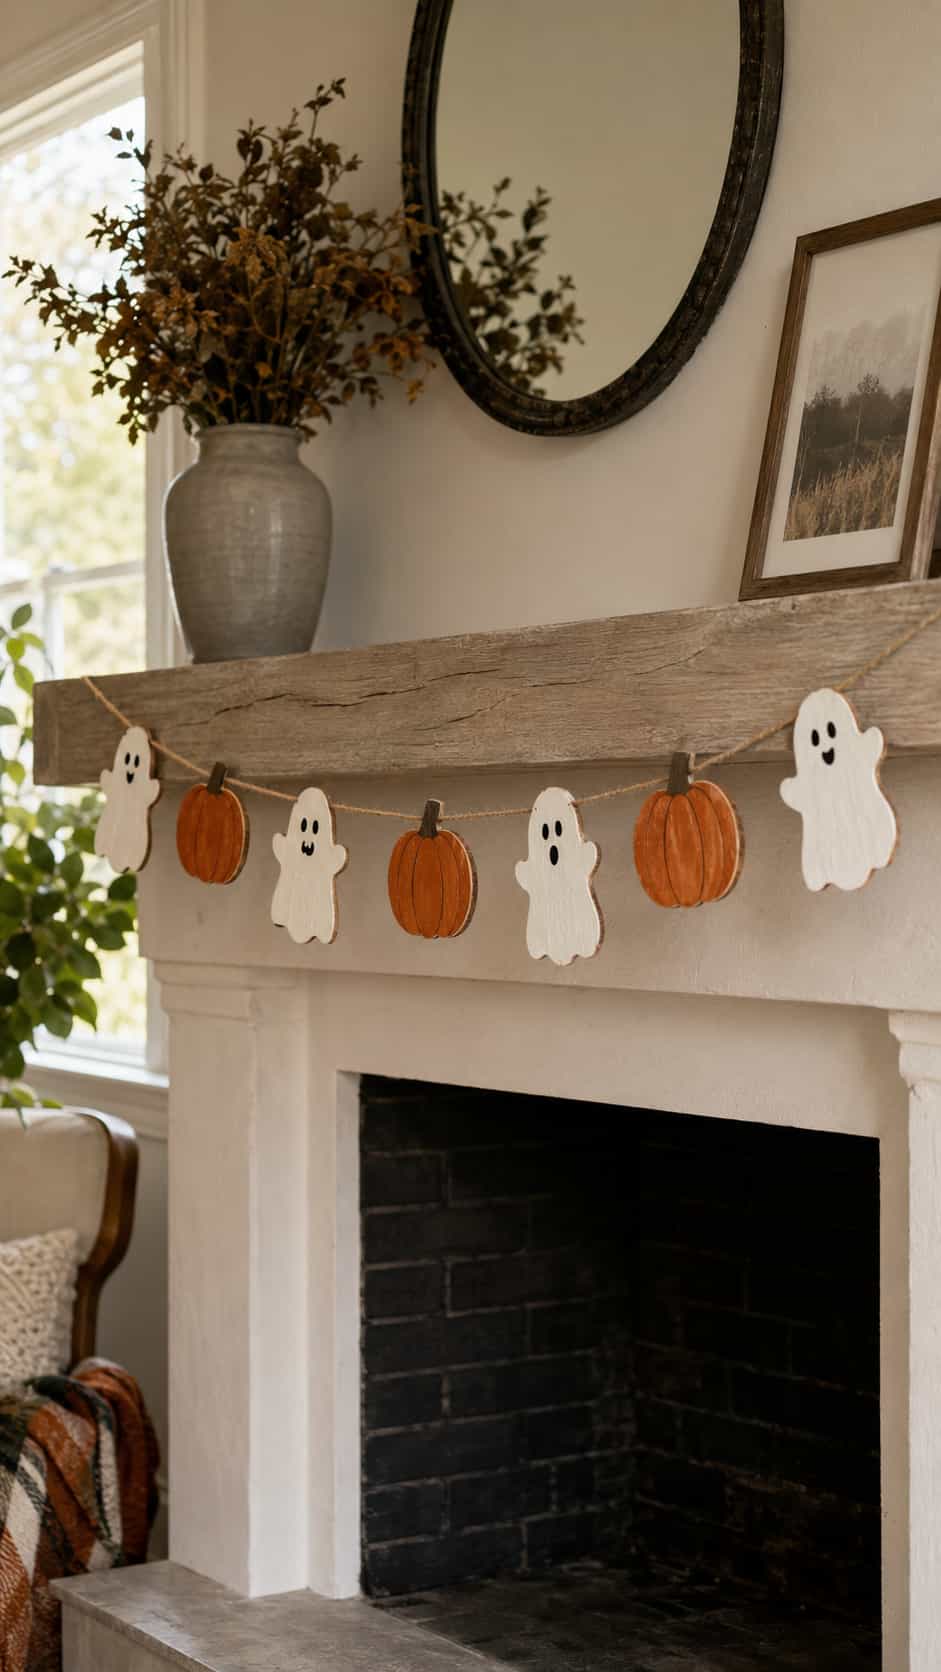
A row of small ghost shapes turns tiny scraps into a coordinated decoration. Use lightweight pieces and alternate two or three expressions across the garland.
Display it away from heaters, candles, cooking surfaces and any location where the cord could create a hazard. A garland should hang quietly, not begin an unexpected career as a tripwire.
Customization idea: Alternate ghosts with miniature pumpkins or stars.
13. Wooden Halloween Lantern With LED Light
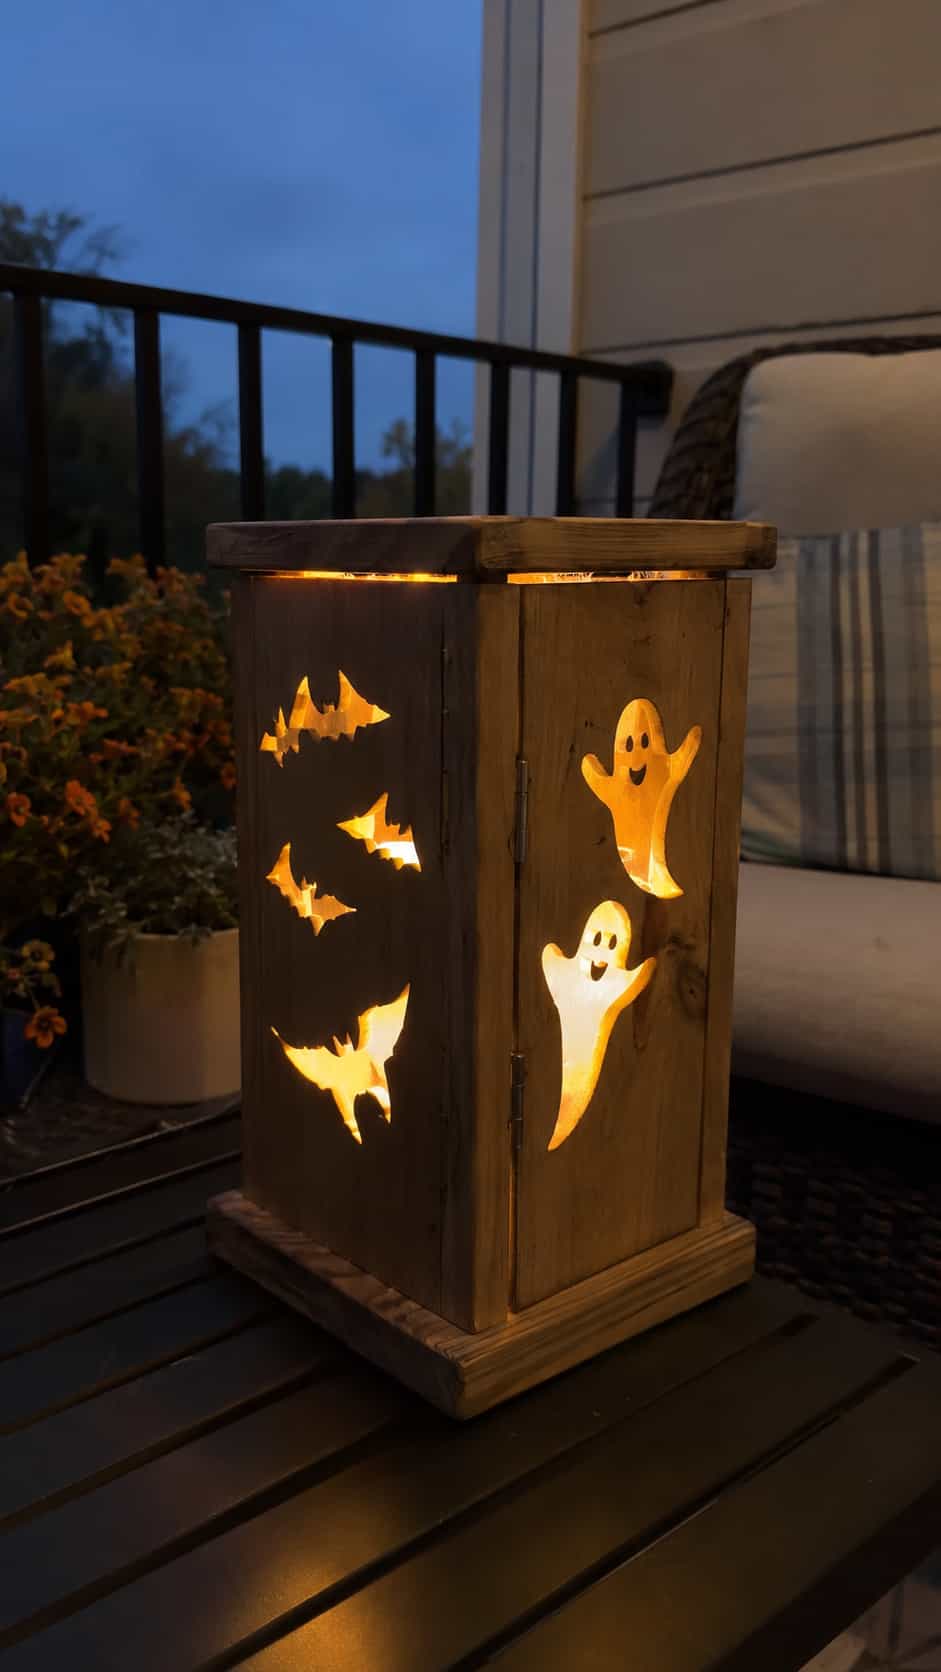
A decorative lantern box can cast pumpkin, bat or ghost shapes when you pair it with a removable battery-powered LED light. Keep the openings simple and leave easy access for the light.
Use LED lights only—never an open flame. Position the lantern on a stable surface and protect it with a suitable finish if it will sit outdoors.
Customization idea: Create interchangeable decorative panels for different seasons.
14. Reversible Fall and Halloween Sign
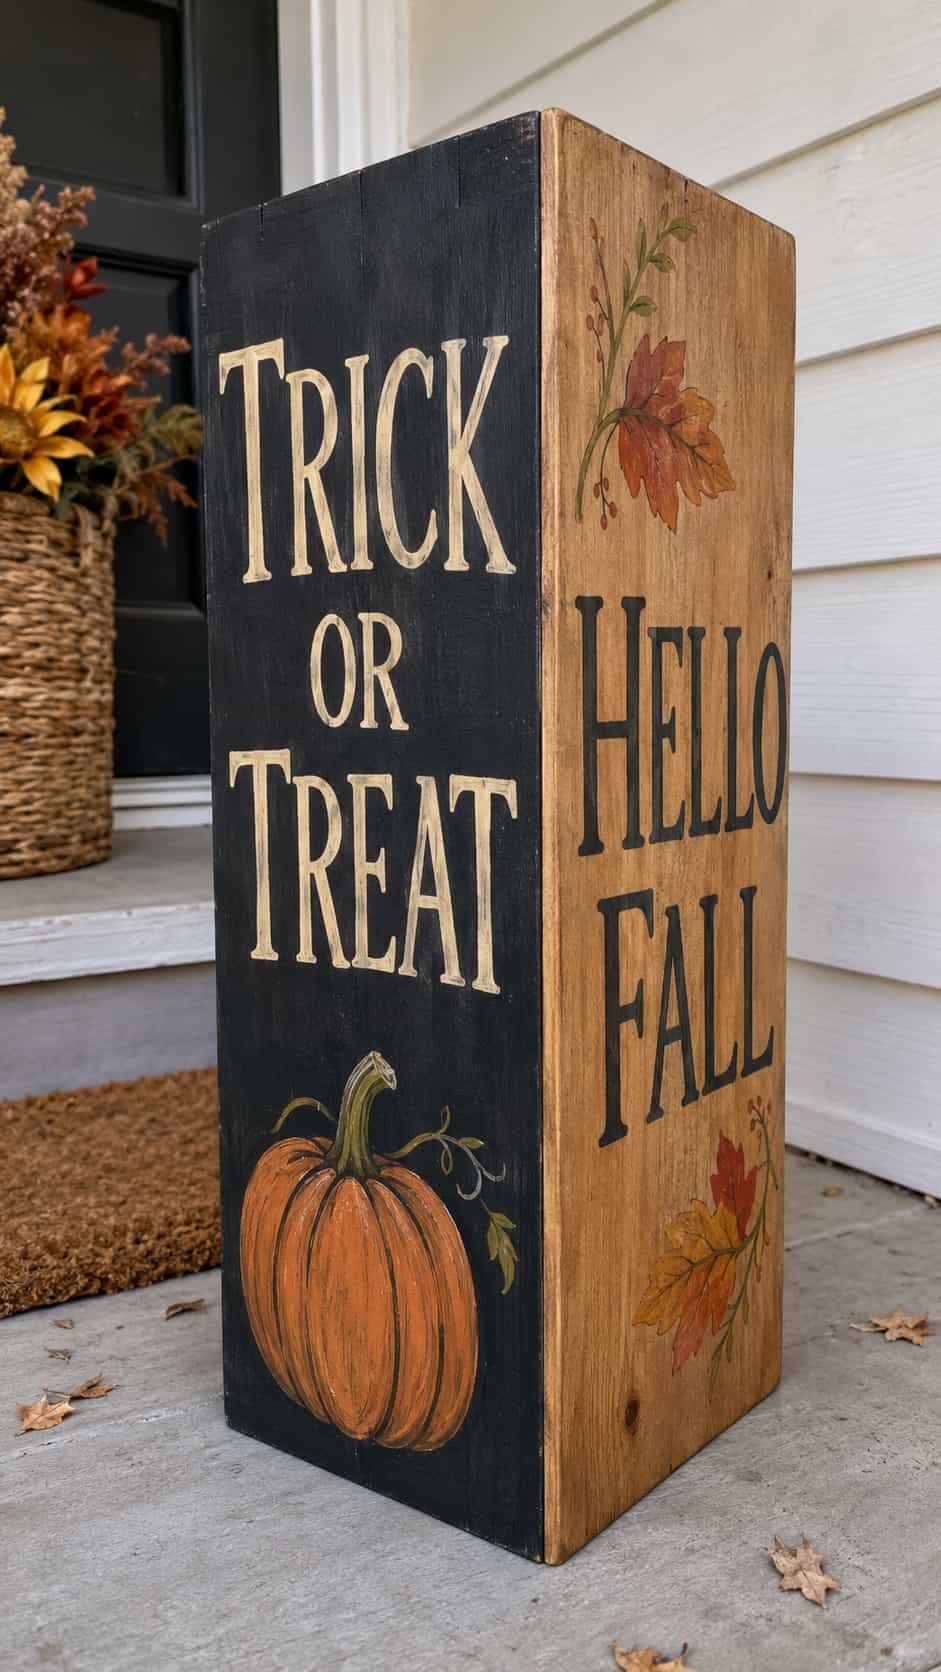
A reversible sign earns its storage space by working from early fall through Halloween. Paint a pumpkin, leaves or “Hello Fall” on one side and a Halloween message on the reverse.
Choose colors that coordinate across both designs so the edges still look finished. This project offers more value than a one-day decoration and requires only one place in the storage closet—always a win.
Customization idea: Pair “Hello Fall” with “Trick or Treat.”
15. Monster-Face Wooden Planters
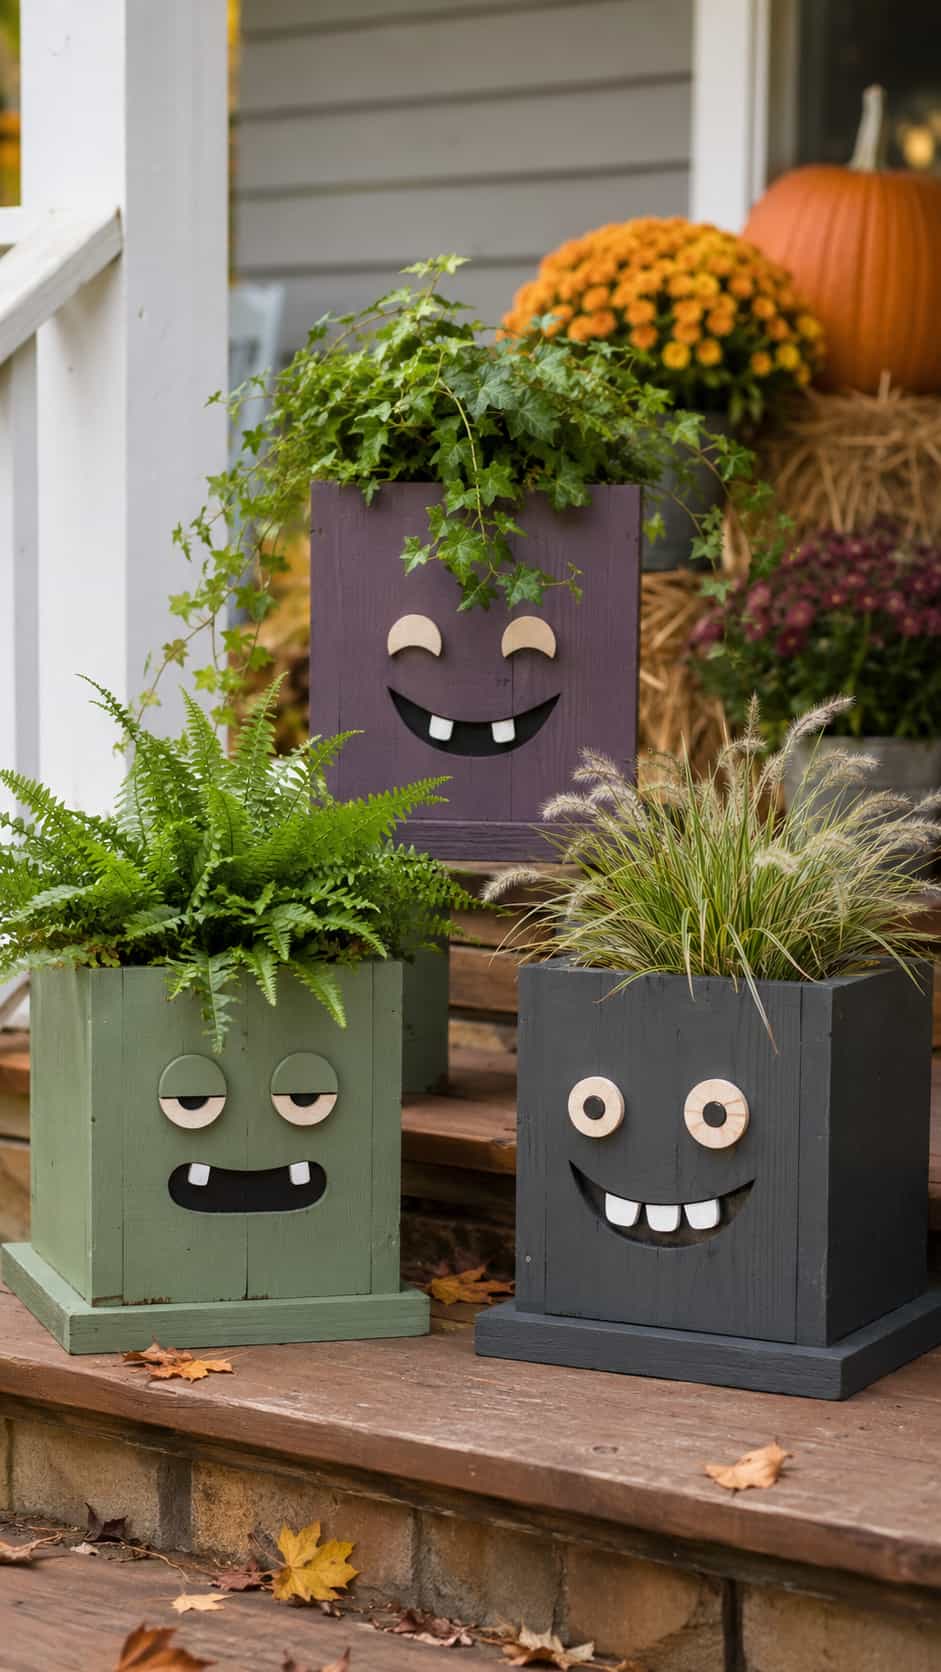
Give an existing wooden planter or removable planter sleeve a friendly monster face. Green, purple, orange and charcoal paint work well with leafy plants that resemble wild hair.
Keep soil and standing water away from untreated decorative wood. Use a separate plant pot or appropriate liner so you can remove the plant and clean the project.
Customization idea: Match each monster’s face to the color and shape of its plant.
For more outdoor container ideas, explore our 15 Stunning Planter Box Plans to Build This Weekend.
16. Wooden Witch-Hat Blocks
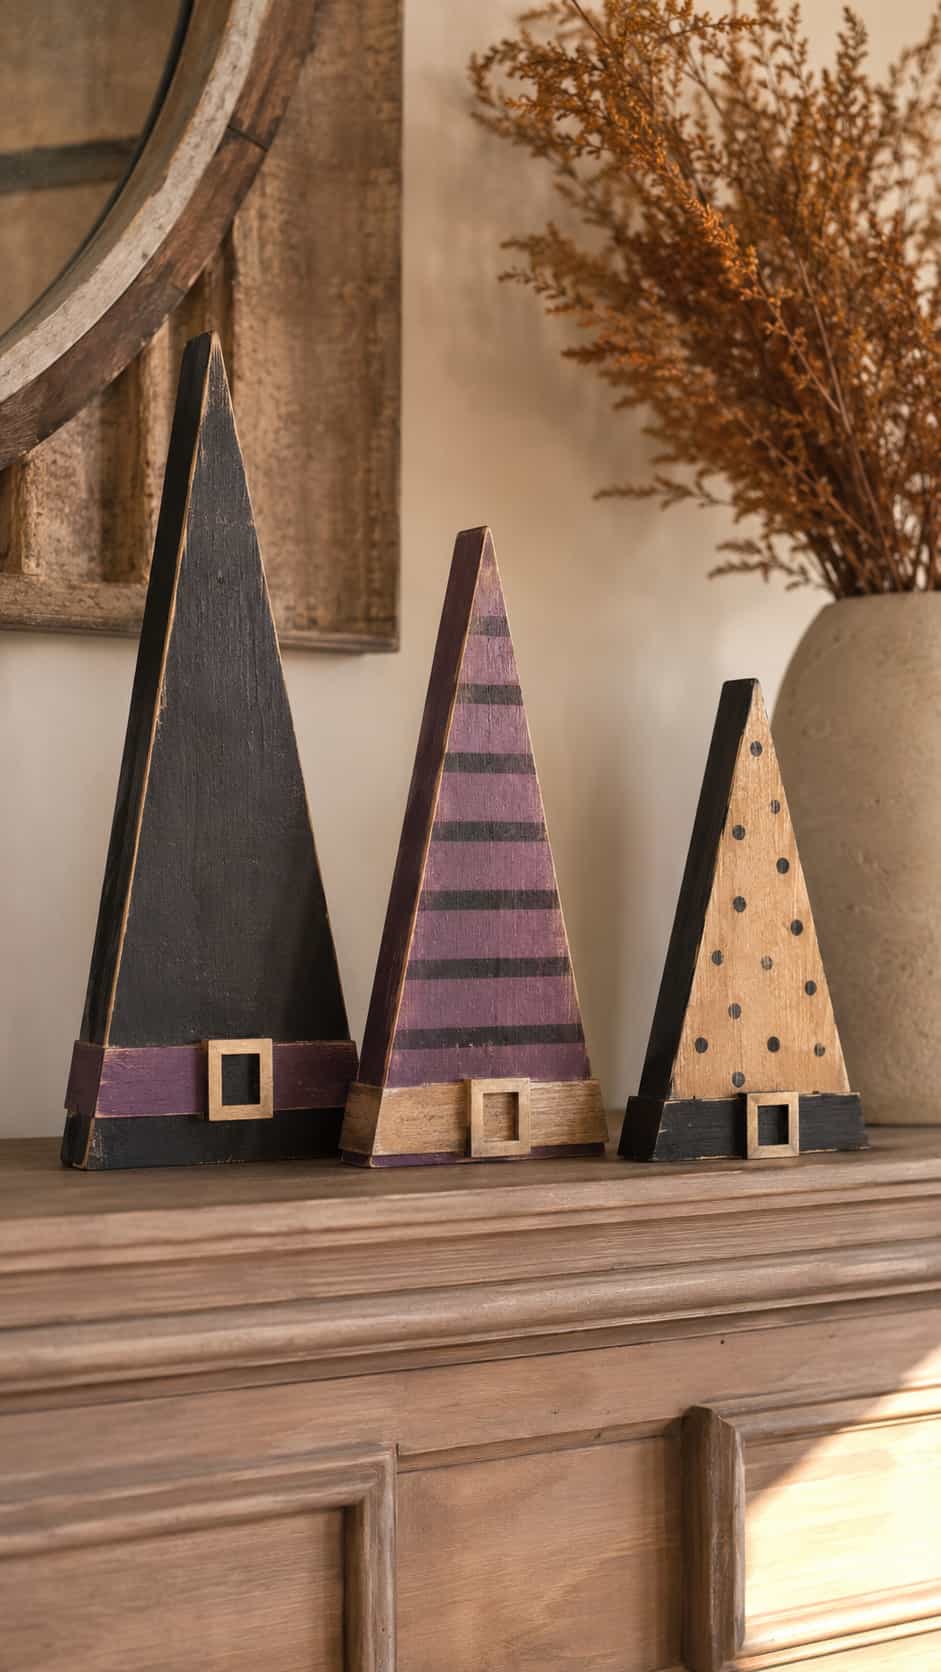
Triangular pieces or painted upright blocks can suggest witch hats without requiring complicated construction. A wide painted band and one small buckle shape make the design immediately recognizable.
Create two or three heights and repeat the same colors across the set. IMO, muted purple, black and natural wood look more polished than using every paint color that happens to live in the cupboard.
Customization idea: Add stripes, dots or a contrasting band to each hat.
17. Halloween Shelf-Sitter Set
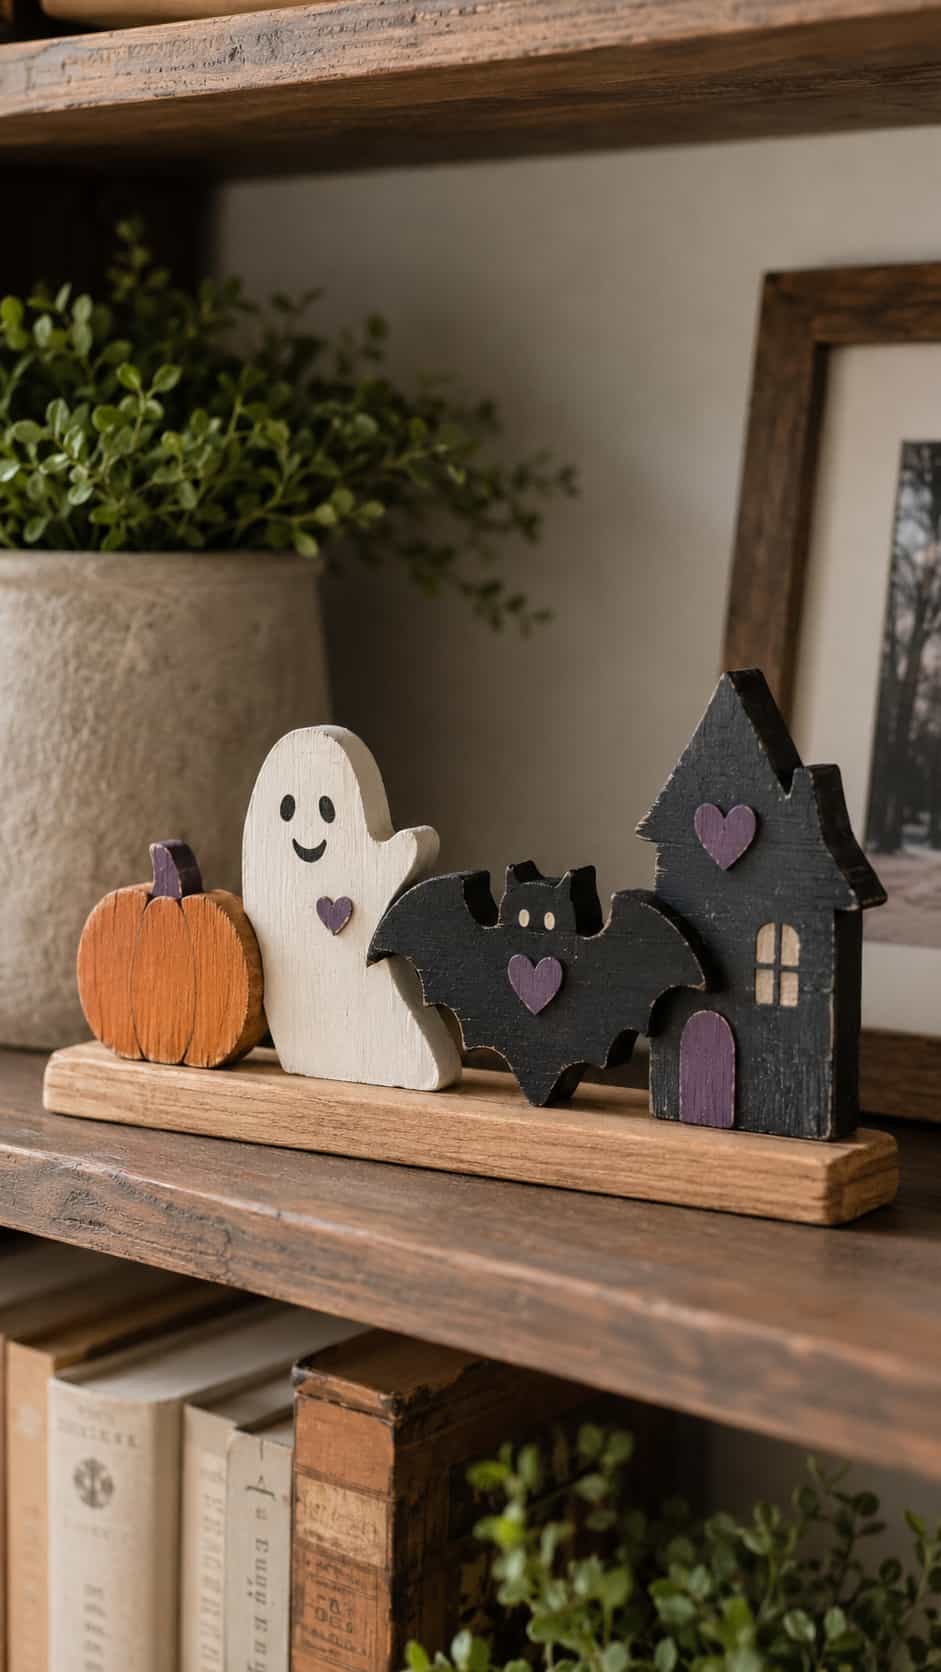
Combine a miniature pumpkin, ghost, bat and haunted house into one shelf-sitter collection. Matching thicknesses and a limited palette help the individual shapes look related.
Keep each piece broad enough to stand securely. If a shape feels unstable, display it on a small shared base rather than balancing it on a narrow edge.
Customization idea: Use one accent color across every piece.
18. Wooden Trick-or-Treat Candy Tray
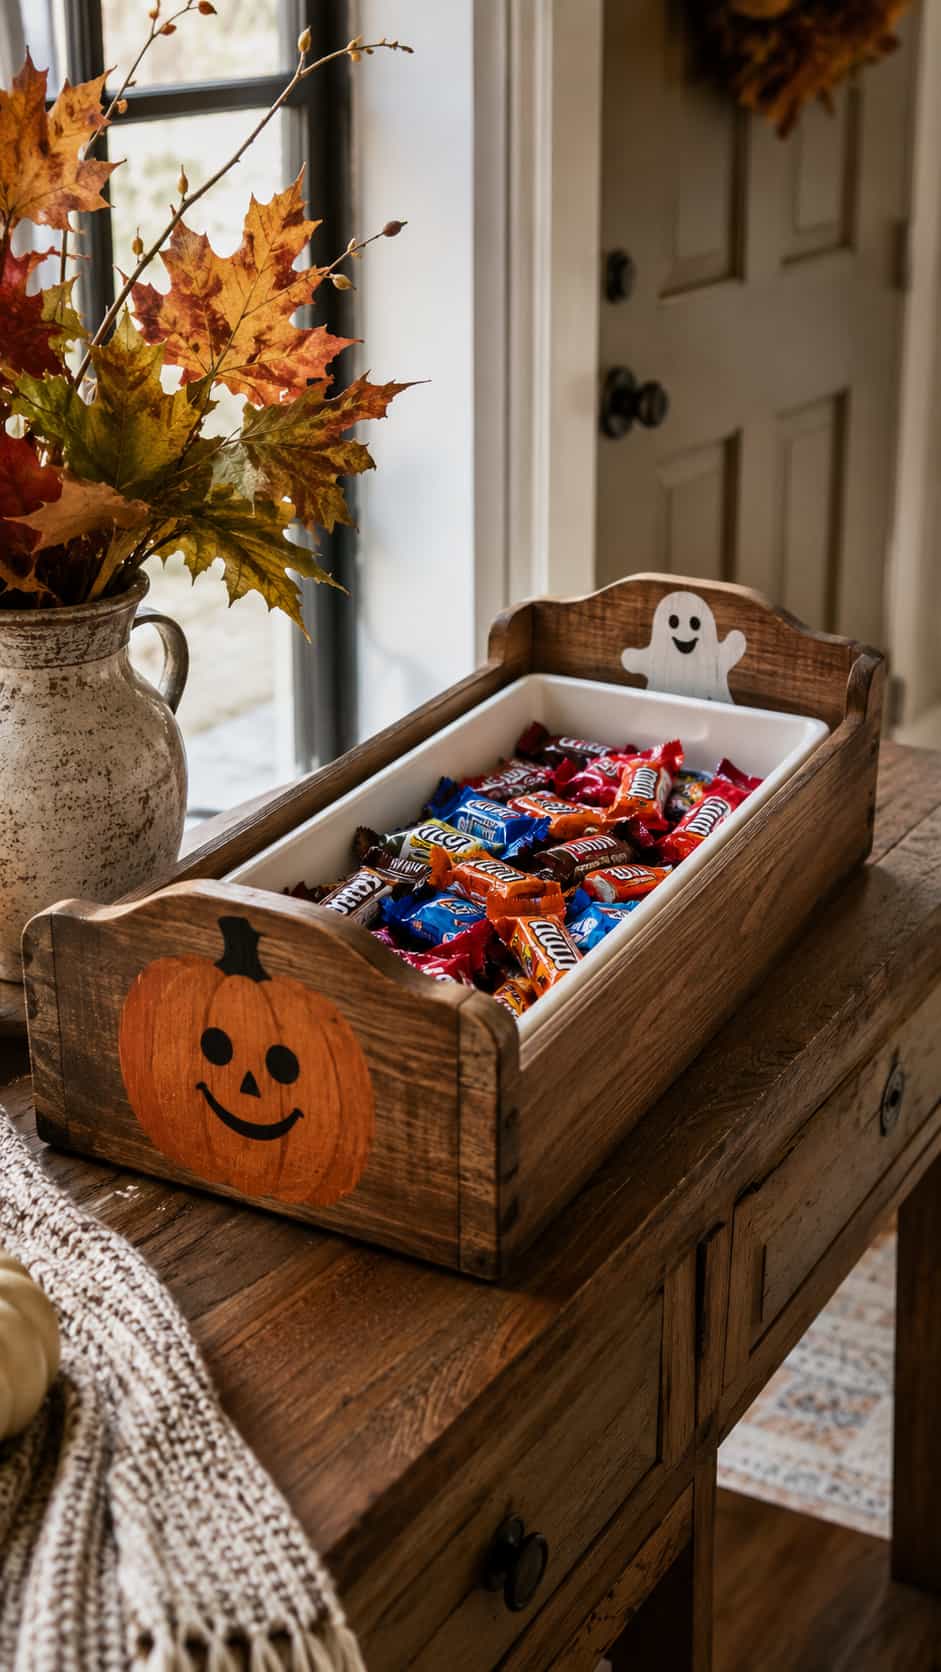
A shallow wooden tray with raised sides keeps wrapped candy and small party supplies together. Handles make the tray easier to move, while a removable liner protects the decorative finish.
Place wrapped treats in a washable food-safe container instead of directly on a painted craft surface. Keep the tray away from hot appliances and open flames.
Customization idea: Paint one end like a pumpkin and the other like a ghost.
19. Pumpkin-Patch Garden Stakes
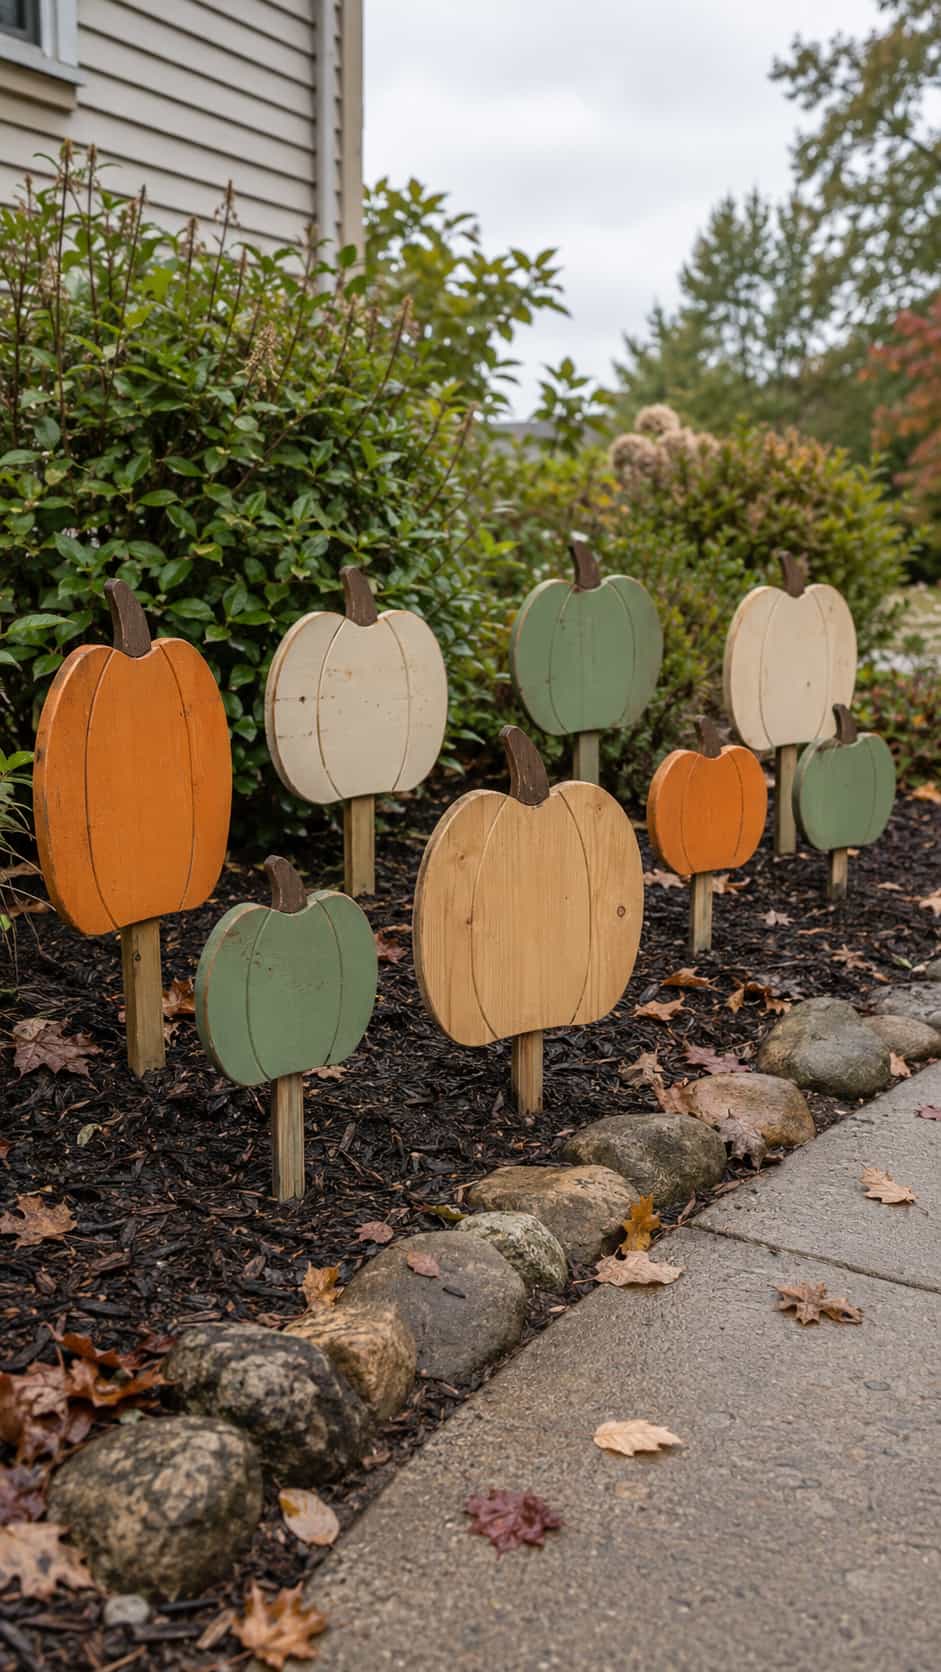
Paint several lightweight pumpkin shapes and attach them to suitable outdoor supports. Vary the size and color so the group resembles a small wooden pumpkin patch.
Place each stake where people can see it clearly without stepping around it. Keep decorations away from underground services, irrigation equipment and mowing paths.
Customization idea: Use orange, cream, sage and natural wood across the patch.
20. Spooky Tree Silhouette Wall Art
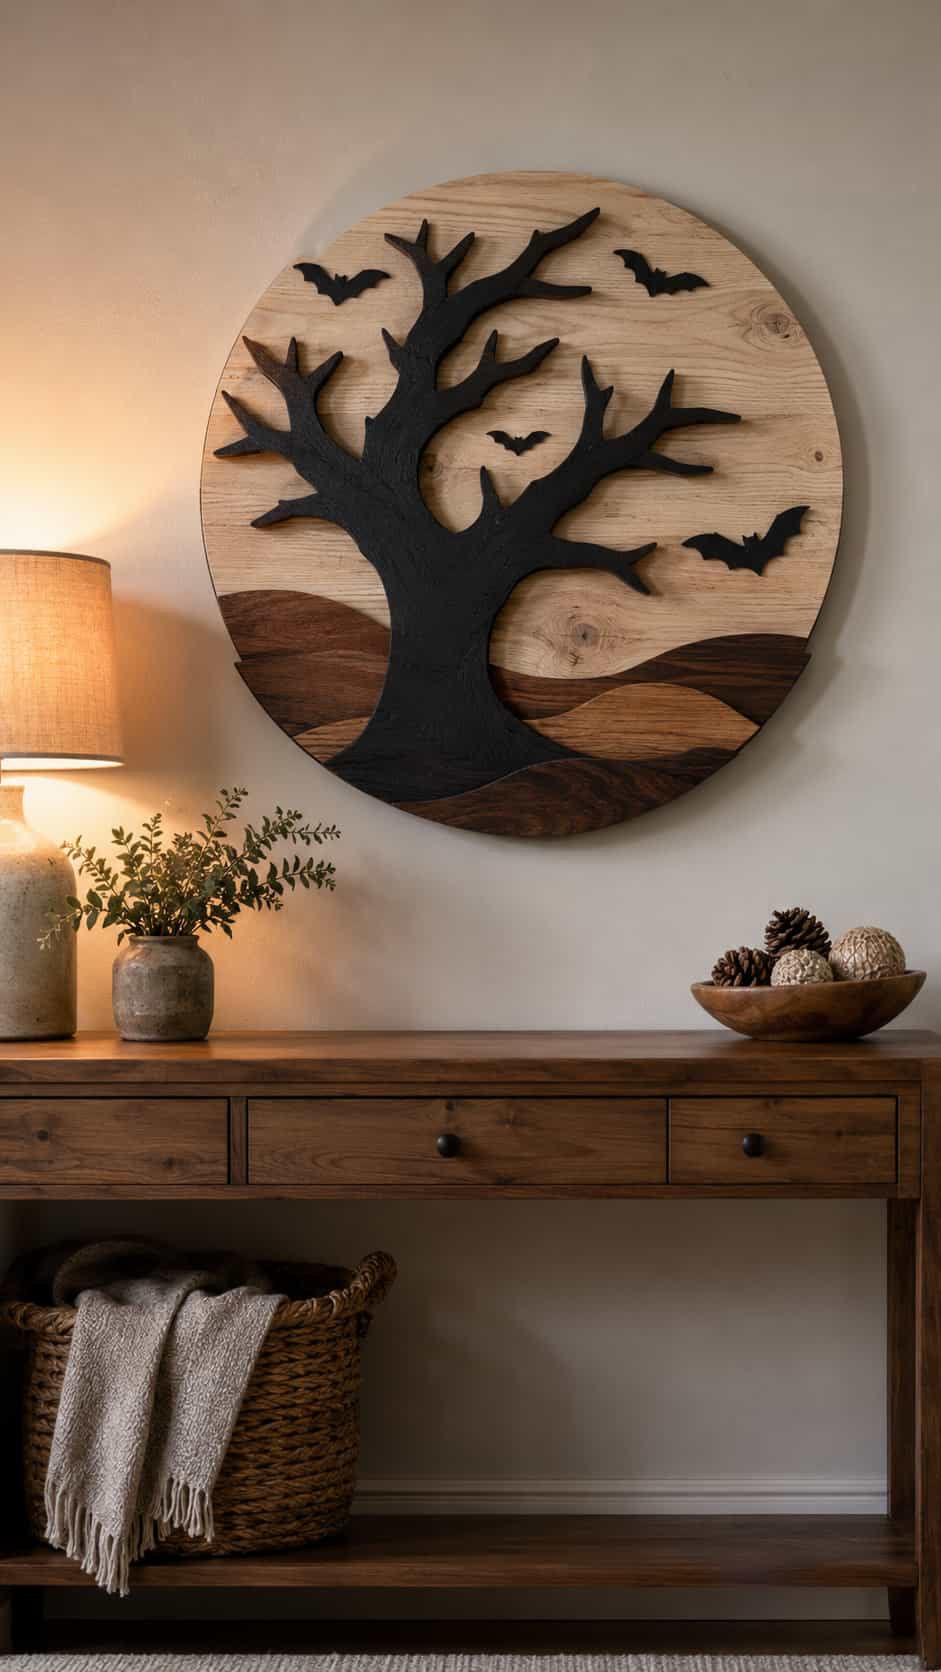
A bold tree silhouette creates a dramatic focal point without graphic imagery. Place the dark tree against a round moon or layered wood background, then add a few small bat shapes.
Limit the branches and details so the design stays clear. Too many thin elements can make the piece visually messy and more delicate to store.
Customization idea: Use layered natural wood tones instead of painting every section black.
21. Halloween Yard Silhouettes
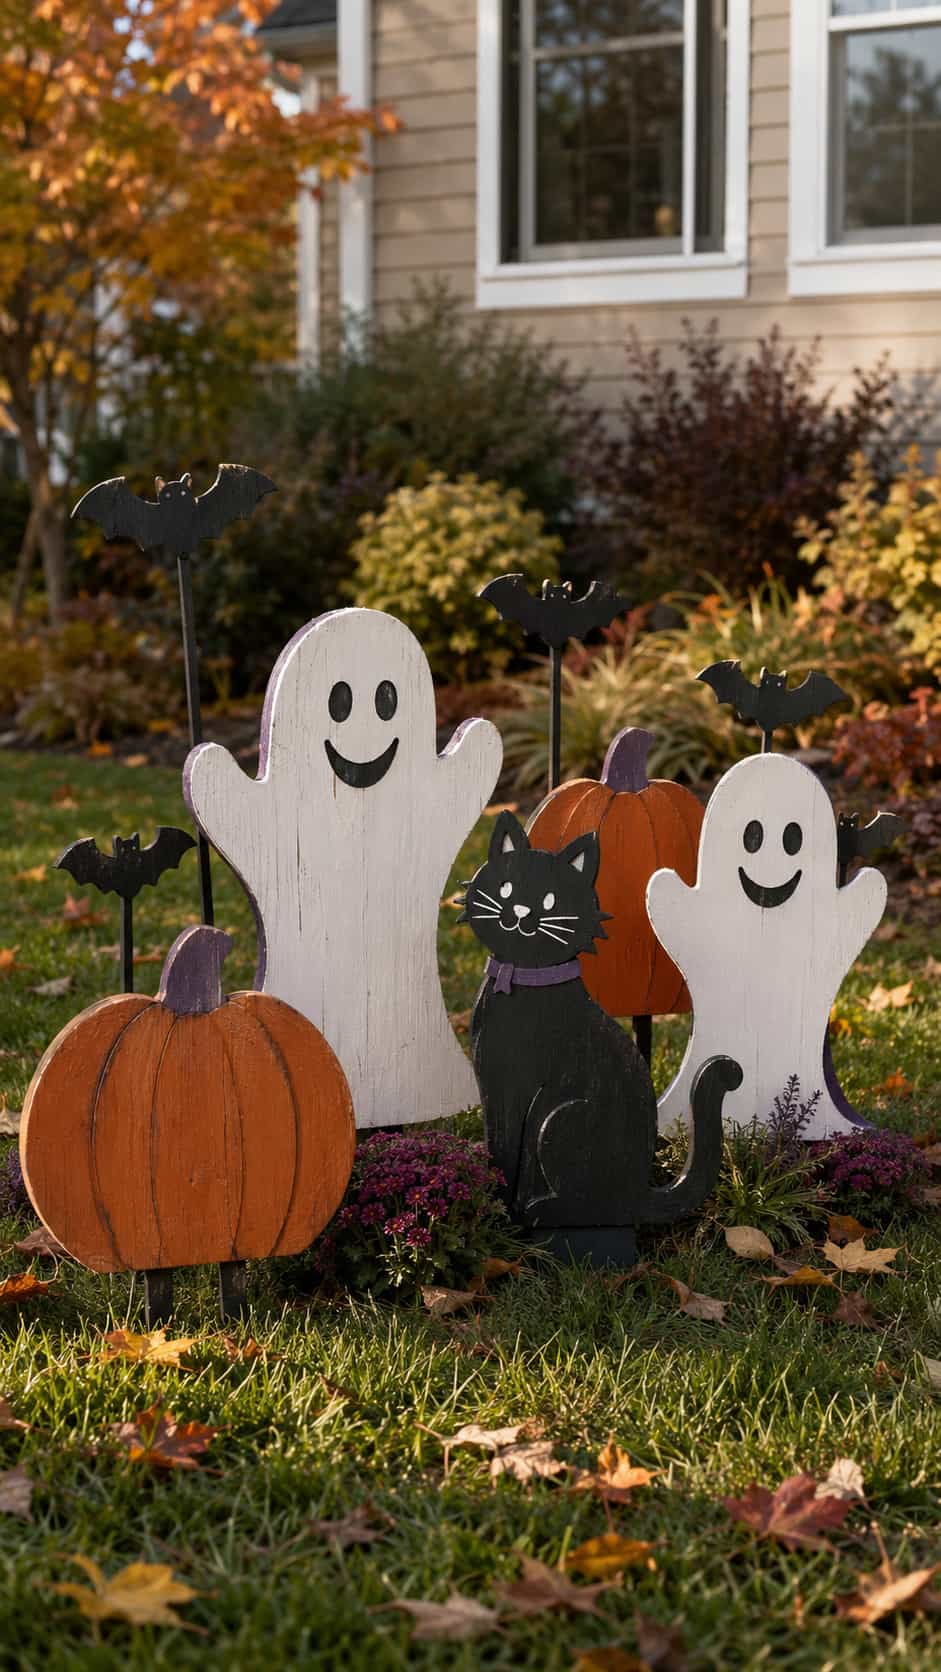
A coordinated group of pumpkins, cats, bats and friendly ghosts can transform an otherwise empty lawn. Repeat the same shapes in several sizes and use exterior-rated panels and finishes.
Stable supports and thoughtful placement matter more than extra decoration. Keep silhouettes away from roads, steps, paths and any area where they could obstruct visibility.
Customization idea: Use one repeated accent color to connect the complete scene.
Which Halloween Wood Project Should You Choose?
Choose block projects when you have short 2×4 or 4×4 scraps and want a quick beginner-friendly design. Pumpkins, ghosts, candy corn pieces and shelf sitters also store easily after the season.
Choose flat silhouettes when you want wall, door or yard decorations. Plywood and appropriate panel offcuts work well for bold shapes, but outdoor pieces need stable supports and exterior protection.
Choose wooden signs when you enjoy painting and lettering. Reversible signs provide the best seasonal value because they can work from early fall through Halloween.
Three Featured Halloween Wood Design Guides
The following ideas deserve a closer look because they offer clear design options without requiring a complicated structure. Use the suggested dimensions as visual references, then work from verified construction details that suit your materials and experience.
4×4 Jack-o’-Lantern Trio
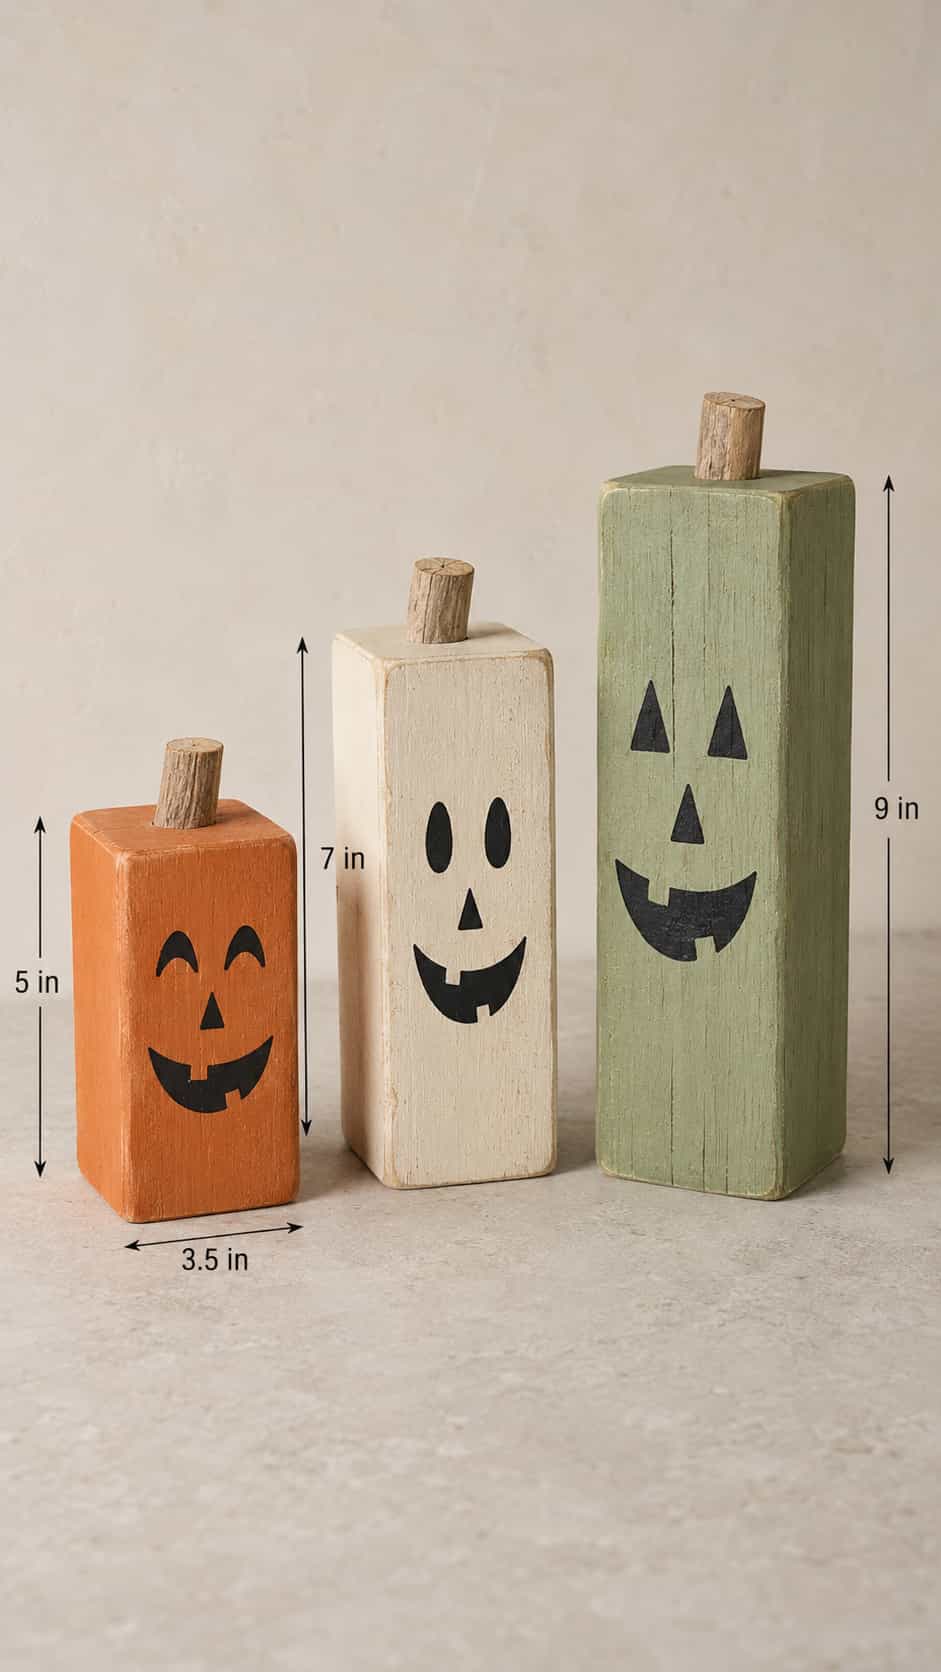
Plan a group of three blocks at approximately 5, 7 and 9 inches tall. Keep the natural 4×4 cross-section, vary the expressions and use short stems that suit the scale of each pumpkin.
Orange creates the classic look, while cream, sage and natural wood fit neutral fall décor. Display the trio indoors or on a protected porch and choose a finish appropriate for the location.
Reversible Fall and Halloween Porch Sign
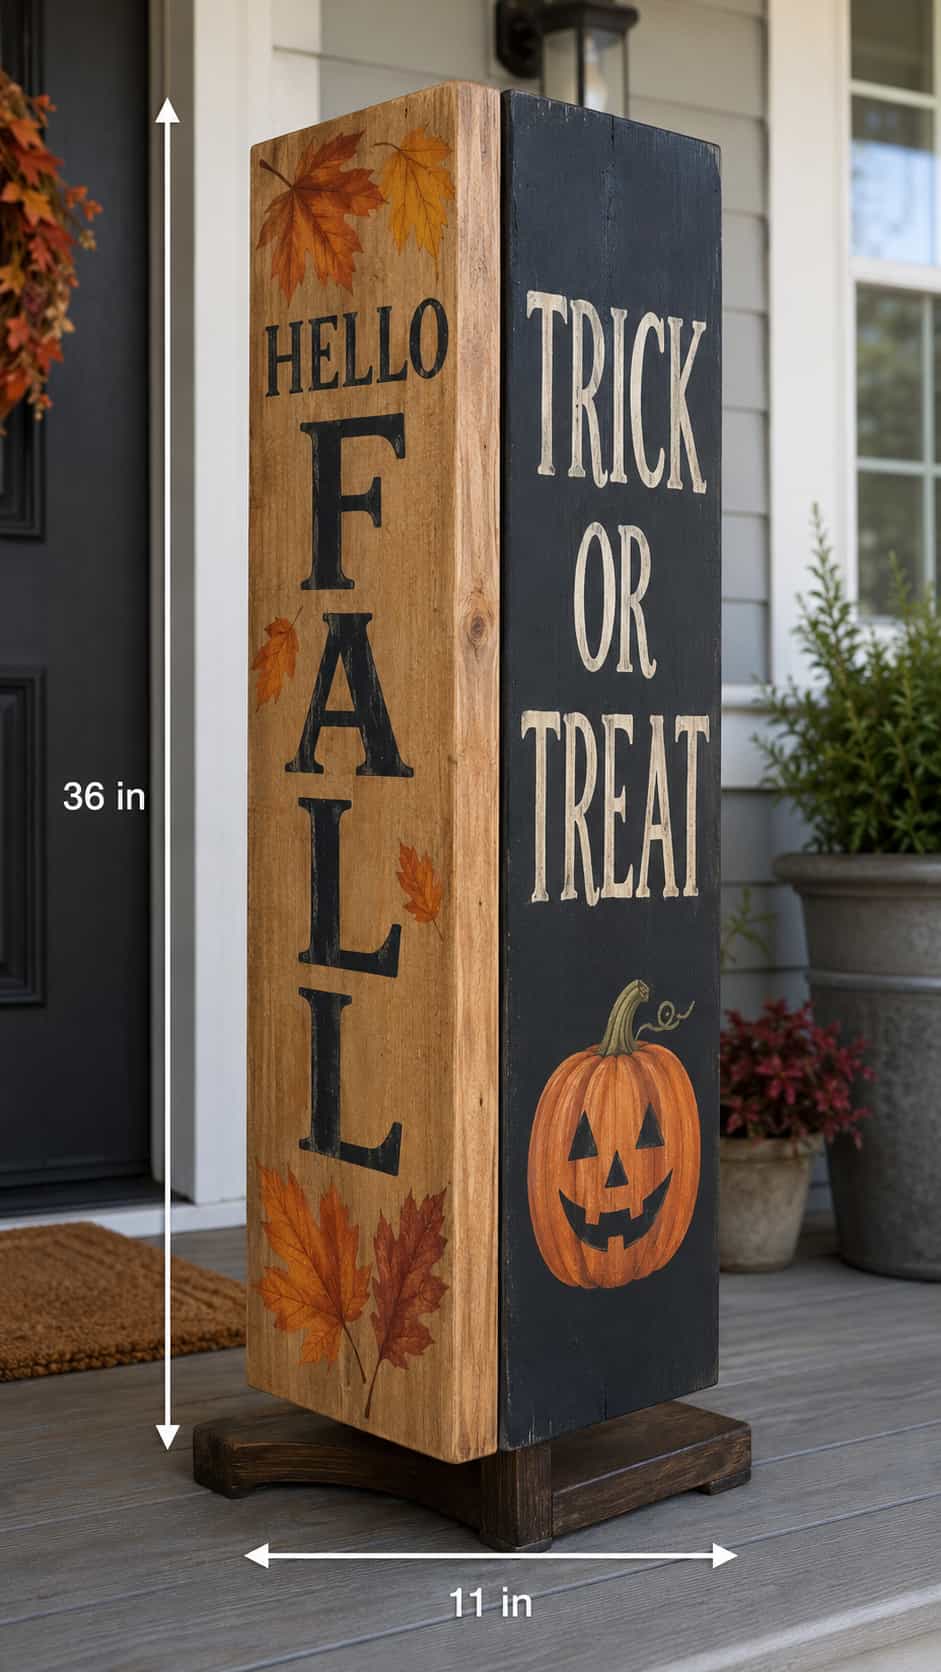
A sign around 36 inches tall and 10–12 inches wide provides room for large readable lettering. Use one side for a fall greeting and the reverse for a Halloween message.
Plan a stable display method that matches the location rather than simply leaning a lightweight board in a windy corner. Use exterior-rated finishes for porch exposure.
Miniature Haunted House Village
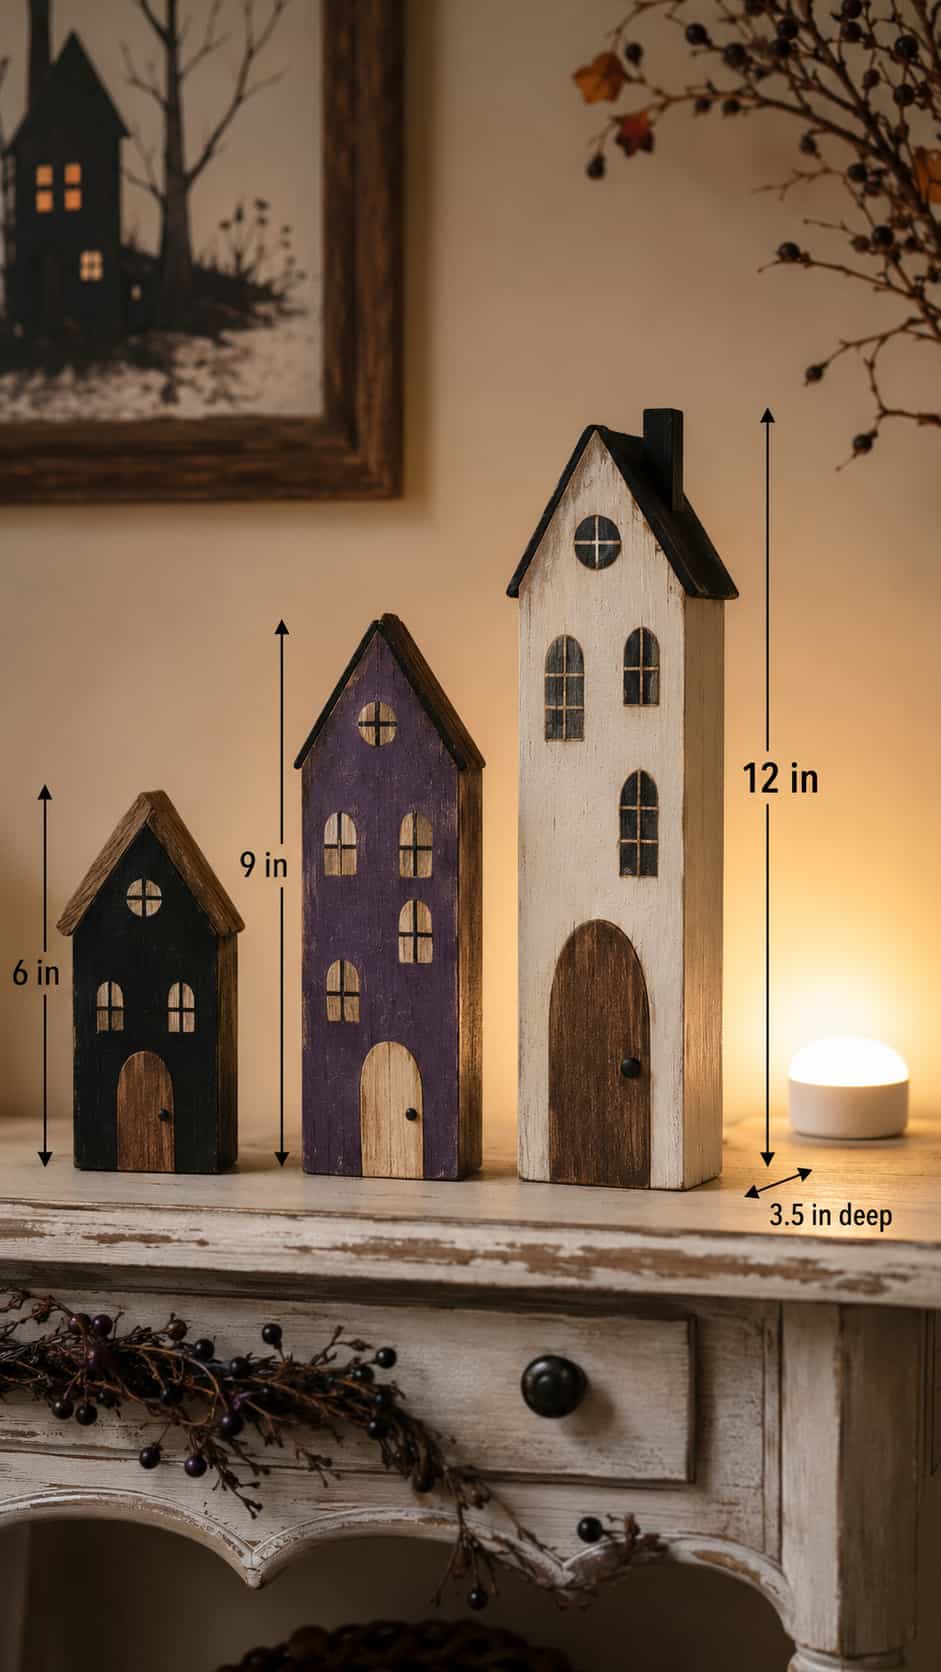
Create three block houses at approximately 6, 9 and 12 inches tall, using a consistent depth for a stable grouped display. Vary the rooflines, doors and window positions while repeating the same color palette.
Place a removable battery-powered LED light behind the village if you want a glow. Keep the light independent from the solid wooden houses.
Common Halloween Wood Project Mistakes
Using Open Flames
Wooden lanterns and candleholders should use removable battery-powered LED lights. Never place candles or burners directly inside a wooden decoration.
Making Outdoor Decorations Too Light
Wind can move tall signs and thin silhouettes. Use an appropriate stable base or installation method and inspect the support before every seasonal display.
Adding Too Many Details
Fine lines often disappear from a distance and create fragile pieces. Bold shapes photograph better, paint faster and survive storage more successfully.
Forgetting About Storage
Think about November before creating an enormous yard display. Flat silhouettes stack easily, while chunky block projects fit neatly into labeled bins.
Choosing the Wrong Finish
Indoor craft paint may fade or peel outdoors. Match the primer, paint and protective finish to the material and expected exposure.
Blocking Walkways
Keep signs, stakes and freestanding figures away from paths, steps and driveways. Decorations should guide attention, not redirect ankles.
How to Protect Outdoor Wooden Halloween Decorations
Outdoor projects last longer when water can drain and every exposed surface receives a suitable finish. Seal end grain, follow the finish manufacturer’s curing instructions and inspect supports before displaying the project.
Keep decorations away from standing water and store them in a dry location after Halloween. Clean off dirt before storage so moisture does not remain trapped against the finish.
For more guidance, read our articles about outdoor wood finishes, waterproofing outdoor wood and wood finishing for beginners.
Frequently Asked Questions
What wood works best for Halloween crafts?
Clean 2×4 and 4×4 scraps work well for block decorations. Fence boards suit signs, while appropriate plywood or exterior panels work better for flat silhouettes.
Can I use pallet wood?
Use pallet wood only when you can confirm its treatment and storage history. Avoid dirty, stained, chemically treated or unidentified pallets, especially around candy trays and indoor décor.
How can I illuminate wooden Halloween decorations safely?
Use removable battery-powered LED lights. Keep the light accessible, inspect it before use and never substitute an open flame or improvised electrical system.
Which Halloween wood projects suit beginners?
Start with jack-o’-lantern blocks, ghost blocks, candy corn pieces or a simple painted sign. These projects rely on basic shapes and allow plenty of room for creative finishes.
How do I prepare Halloween wood projects for outdoors?
Choose suitable exterior materials, apply an outdoor-rated finish and use stable supports. Keep each project away from standing water, traffic routes and hidden obstacles.
Can I sell Halloween wood projects?
Small signs, block sets and porch decorations may suit seasonal craft fairs or online marketplaces. Calculate the material cost, labor, packaging and selling fees before choosing a price.
If selling seasonal crafts interests you, read our guide to Woodworking Projects That Sell on Etsy.
Want More Complete Woodworking Plans?
Disclosure: This section may contain affiliate links. If you purchase through one of these links, we may earn a commission at no additional cost to you.
Seasonal block crafts and painted signs can work well as inspiration projects. Larger furniture, storage and outdoor builds need complete measurements, verified cut lists and clear assembly diagrams.
If you want a broader project library, Ted’s Woodworking Plans offers one optional collection to explore. Review each design’s dimensions, materials, diagrams and difficulty before starting. Confirm important measurements for yourself and choose projects that suit your available space, tools and experience.
Final Thoughts
Halloween wood projects offer a practical way to use clean scraps and create decorations that return every October. Start with one simple shape, choose two or three colors and match the finish to the display location.
By next weekend, your porch may look ready for Halloween—and your scrap pile may finally look slightly less judgmental.