
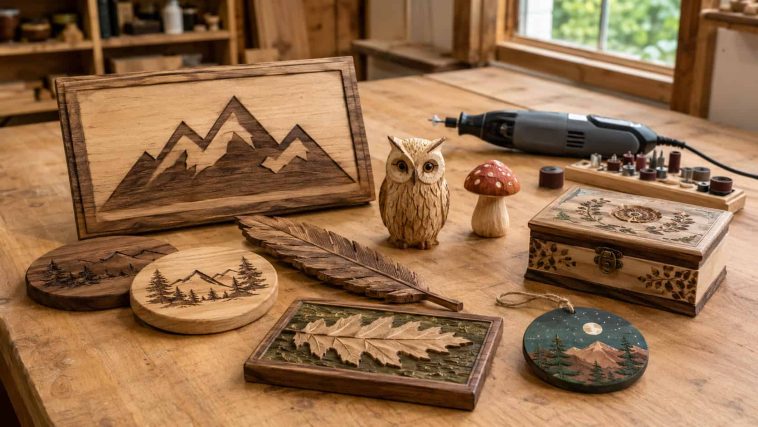
A Dremel may be one of the smallest power tools in your workshop, but it can handle an impressive range of woodworking jobs. With the right attachment, you can carve, engrave, shape, sand, polish, and add decorative details without setting up several full-size machines.
That makes Dremel tool projects especially appealing when you have limited space, a pile of scrap wood, or just one free weekend. Many of the ideas below require only a small wood blank and a few common rotary-tool attachments.
If you have never used a rotary tool on wood, begin with our complete guide on how to use a Dremel for wood carving. It explains the basic setup, bit selection, tool control, and beginner mistakes to avoid.
The projects in this collection range from simple engraved plant markers to decorative relief carvings. Start with an easy project that uses broad lines, then move toward smaller details as your control improves.
Quick Comparison: Best Dremel Tool Projects
| Project | Difficulty | Estimated time | Recommended attachment |
|---|---|---|---|
| Personalized wooden sign | Easy | 1–2 hours | Engraving cutter |
| Engraved coasters | Easy | 1–2 hours | Fine engraving bit |
| Decorative spoon handles | Easy | 1–2 hours | Engraving cutter |
| Wooden pendants | Easy | 1–2 hours | Small carving bit |
| Personalized keychains | Easy | 45–90 minutes | Engraving bit |
| Wooden plant markers | Easy | 30–60 minutes | Fine engraving bit |
| Decorated picture frame | Easy | 1–2 hours | Engraving cutter |
| Wooden bookmarks | Easy | 30–60 minutes | Fine engraving bit |
| Refrigerator magnets | Easy | 1–2 hours | Small carving bit |
| Holiday ornaments | Easy | 1–2 hours | Engraving cutter |
| Geometric wall art | Easy–Medium | 2–3 hours | Straight carving cutter |
| Leaf relief carving | Medium | 2–4 hours | Round carving bit |
| Wooden feather | Medium | 2–3 hours | Tapered carving bit |
| Miniature mushroom | Easy–Medium | 1–2 hours | Sanding drum |
| Small carved owl | Medium | 2–4 hours | Round and tapered bits |
| Wooden fish | Easy–Medium | 2–3 hours | Sanding drum |
| Simple carved face | Medium | 3–5 hours | Small ball-shaped cutter |
| Wooden stamp block | Medium | 1–2 hours | Fine engraving bit |
| Textured candle tray | Easy–Medium | 2–3 hours | Engraving cutter |
| Small jewelry dish | Medium | 3–5 hours | Shaping and sanding bits |
| Wooden ring cone | Easy–Medium | 1–2 hours | Sanding drum |
| Decorative drawer pulls | Medium | 2–3 hours | Shaping cutter |
| Personalized tool handles | Easy | 30–60 minutes | Engraving bit |
| Mini game pieces | Medium | 2–4 hours | Small carving bit |
| Decorated keepsake-box lid | Medium | 2–4 hours | Engraving cutter |
Dremel Bits and Attachments You May Need
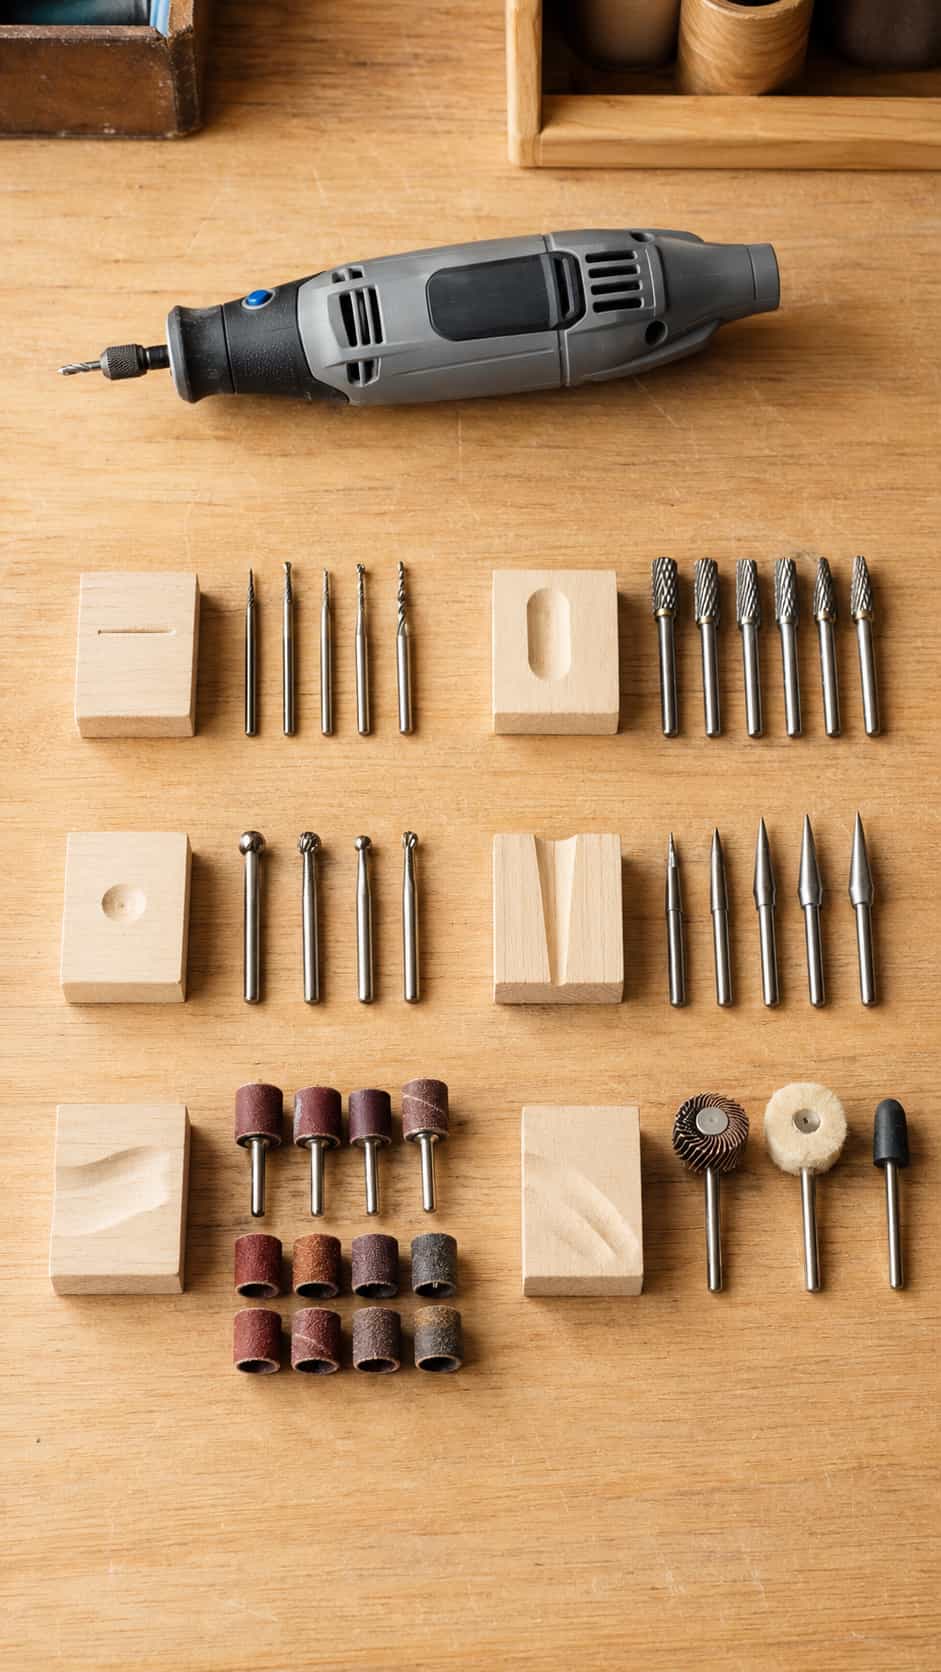
You do not need every accessory sold for your rotary tool. A small collection of useful bits can cover most of these projects.
Engraving cutters
Engraving cutters create lettering, outlines, decorative borders, and shallow patterns. They are ideal for signs, coasters, plant markers, bookmarks, and personalized gifts.
High-speed carving cutters
These remove more wood than fine engraving bits. Depending on their shape, they can establish recesses, round corners, hollow shallow areas, and form the basic shape of small carvings.
Ball-shaped cutters
A small round cutter is helpful for dimples, eyes, shallow recesses, backgrounds, and rounded textures. It is useful for relief carving and small animal projects.
Tapered and pointed cutters
These attachments help create narrow grooves, feather lines, fur texture, corners, and other controlled details. They should generally be used after the main shape has already been established.
Sanding drums and bands
Sanding drums smooth rough cuts, soften corners, and refine curved shapes. Keep more than one grit available so you can shape with a coarser band before switching to a finer one.
Abrasive finishing accessories
Flap wheels, abrasive buffs, and similar finishing attachments can help soften tool marks in detailed areas that are difficult to reach with regular sandpaper.
Always confirm that an attachment is intended for wood and compatible with your specific rotary-tool model. Follow the tool and accessory manufacturers’ directions for installation and operating speed.
Best Wood for Dremel Projects
Basswood is an excellent choice for detailed carving because it is soft, has a relatively even grain, and does not fight every change in direction. Pine and poplar are affordable alternatives for signs and larger decorative projects, although pine’s growth rings can sometimes cause uneven carving.
For small gifts and polished decorative pieces, maple, cherry, and walnut can produce beautiful results. However, these hardwoods take longer to shape and may be frustrating for a first project.
Our guide to the best wood for beginner carving provides a more detailed comparison.
Useful materials include:
- Basswood blanks
- Clean pine or poplar scraps
- Thin plywood for flat decorations
- Pencil and printable patterns
- Painter’s tape or transfer paper
- Sandpaper in several grits
- Clamps or a bench vise with protective jaws
- Paint, stain, wax, or an appropriate clear finish
- Small brushes
- Wood glue and project-specific hardware
Avoid salvaged wood with an unknown history. It may contain hidden metal, old coatings, dirt, or treatments that should not be disturbed with a rotary tool.
Important Dremel Safety Rules
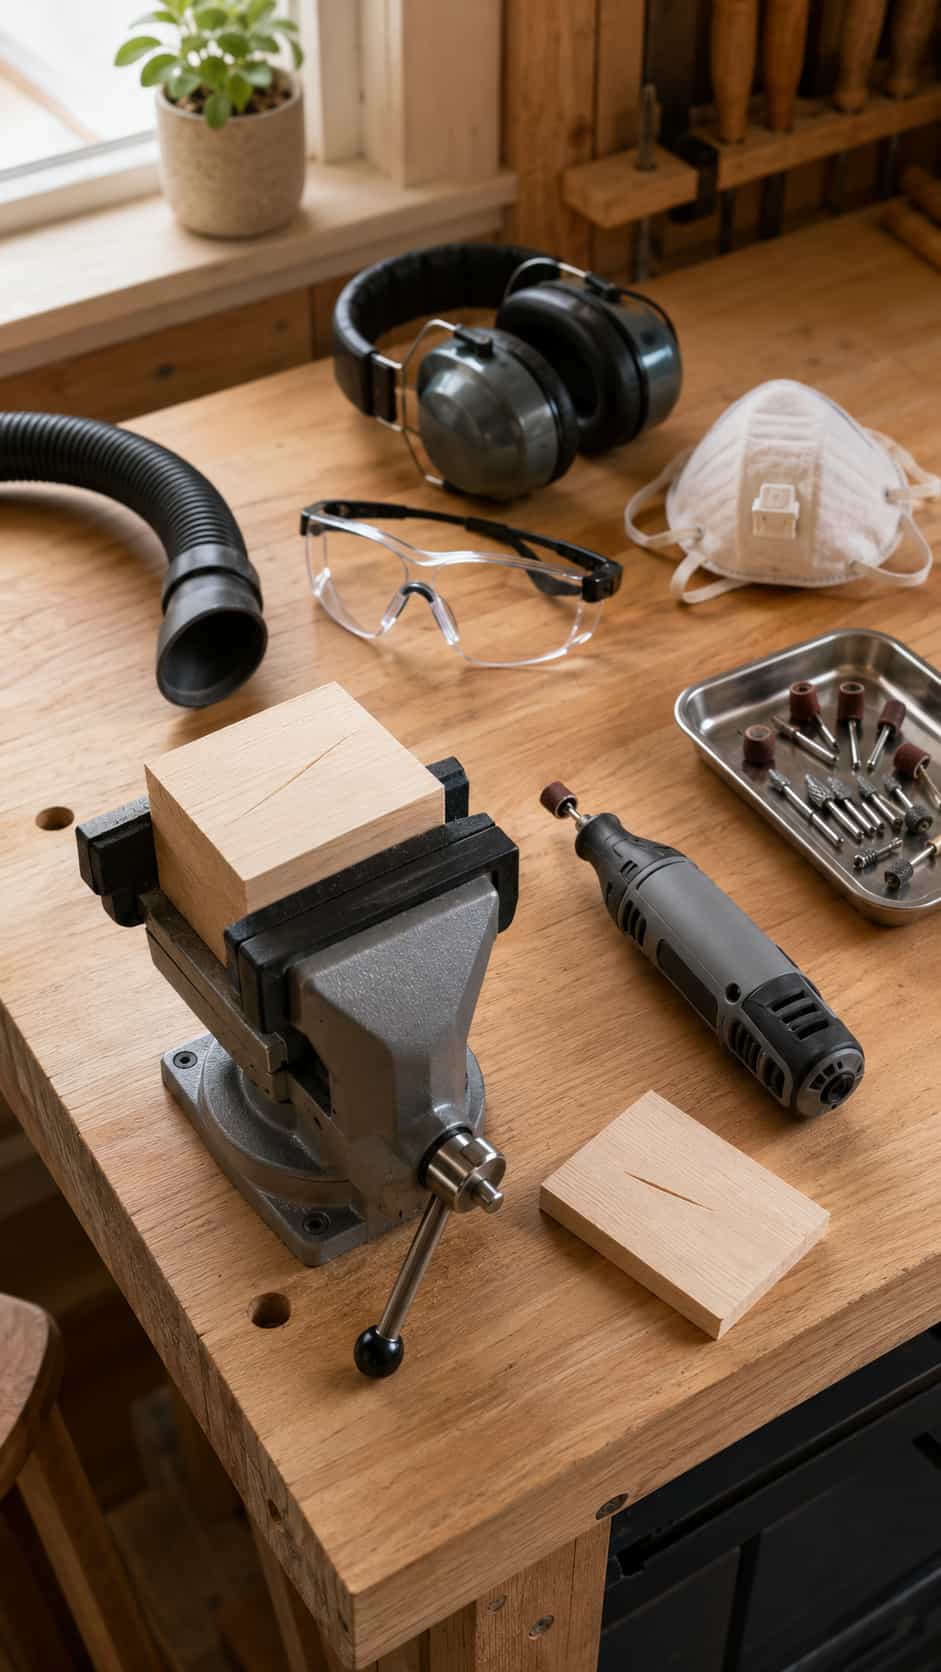
A rotary tool is compact, but it is still a fast-moving power tool. Treat it with the same attention you would give a larger workshop machine.
- Wear properly fitting eye protection.
- Secure the workpiece before turning on the tool.
- Never hold a tiny blank close to the spinning attachment.
- Keep fingers out of the bit’s path.
- Tie back long hair and avoid loose clothing or jewelry.
- Inspect bits and accessories before every session.
- Disconnect the tool before changing an attachment.
- Use dust extraction and work in a well-ventilated area.
- Wear suitable respiratory protection when the material or finish requires it.
- Do not carve painted, treated, pressure-treated, or mystery wood.
- Let the accessory do the work instead of forcing it through the material.
- Stop regularly to check the tool, accessory, and workpiece for excess heat.
- Children and teenagers should use rotary tools only with direct, knowledgeable adult supervision.
Test your setup on scrap wood before touching the actual project. Different woods respond differently, and a quick test can reveal whether an attachment is removing material faster than expected.
25 Dremel Tool Projects for Woodworkers
1. Personalized Wooden Sign

Difficulty: Easy
Estimated time: 1–2 hours
Recommended attachment: Engraving cutter
A small personalized sign is one of the easiest ways to learn how a Dremel responds to curves, straight lines, and changes in grain direction. Use a smooth pine, poplar, or basswood board and transfer a simple name, word, or house-number design onto the surface.
Secure the board and establish the letters with shallow passes. Trying to reach the final depth immediately usually creates uneven lines. Once the engraving is complete, lightly sand the surface and add paint inside the recessed letters if you want stronger contrast.
Start with a bold, uncomplicated font. Thin calligraphy and tightly spaced letters are much harder to control.
2. Engraved Wood Coasters
Difficulty: Easy
Estimated time: 1–2 hours
Recommended attachment: Fine engraving bit
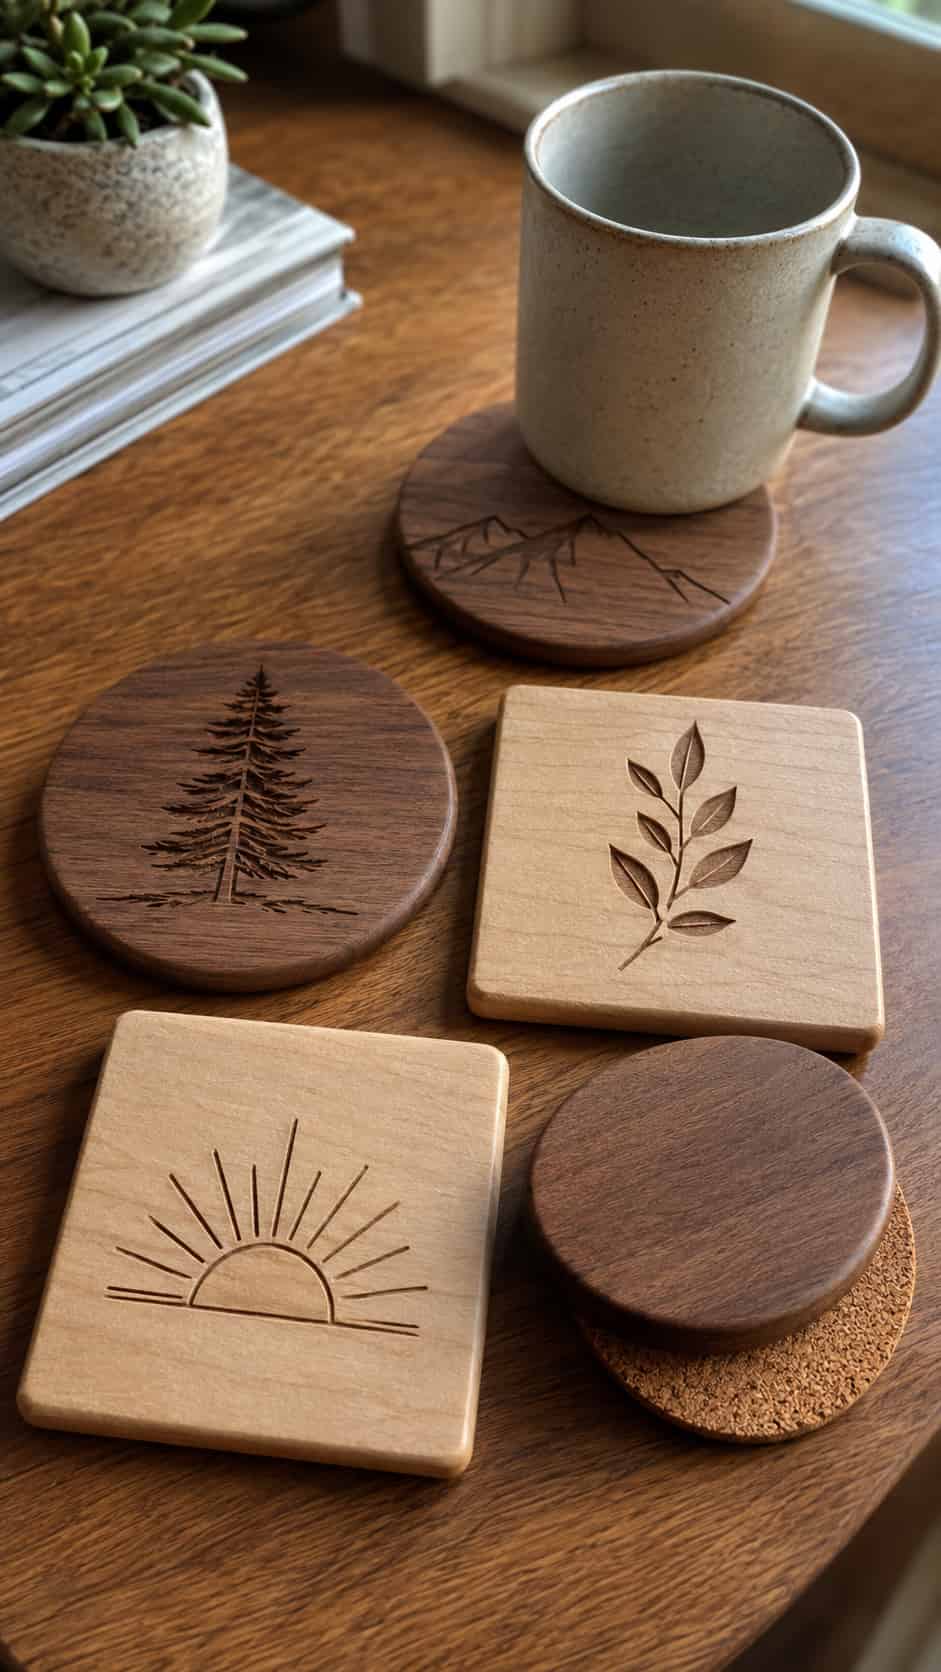
Turn square or round wood blanks into a coordinated coaster set by adding simple leaves, mountains, initials, or geometric patterns.
Create one master template so the designs share the same proportions. The patterns do not need to be perfectly identical; small differences make the set feel handmade. Keep the engraving relatively shallow so the surface remains practical for glasses and mugs.
After sanding away pencil marks, apply a moisture-resistant finish suitable for the coaster’s intended use. Add cork or felt to the bottom to protect furniture.
3. Decorative Wooden Spoon Handles
Difficulty: Easy
Estimated time: 1–2 hours
Recommended attachment: Engraving cutter
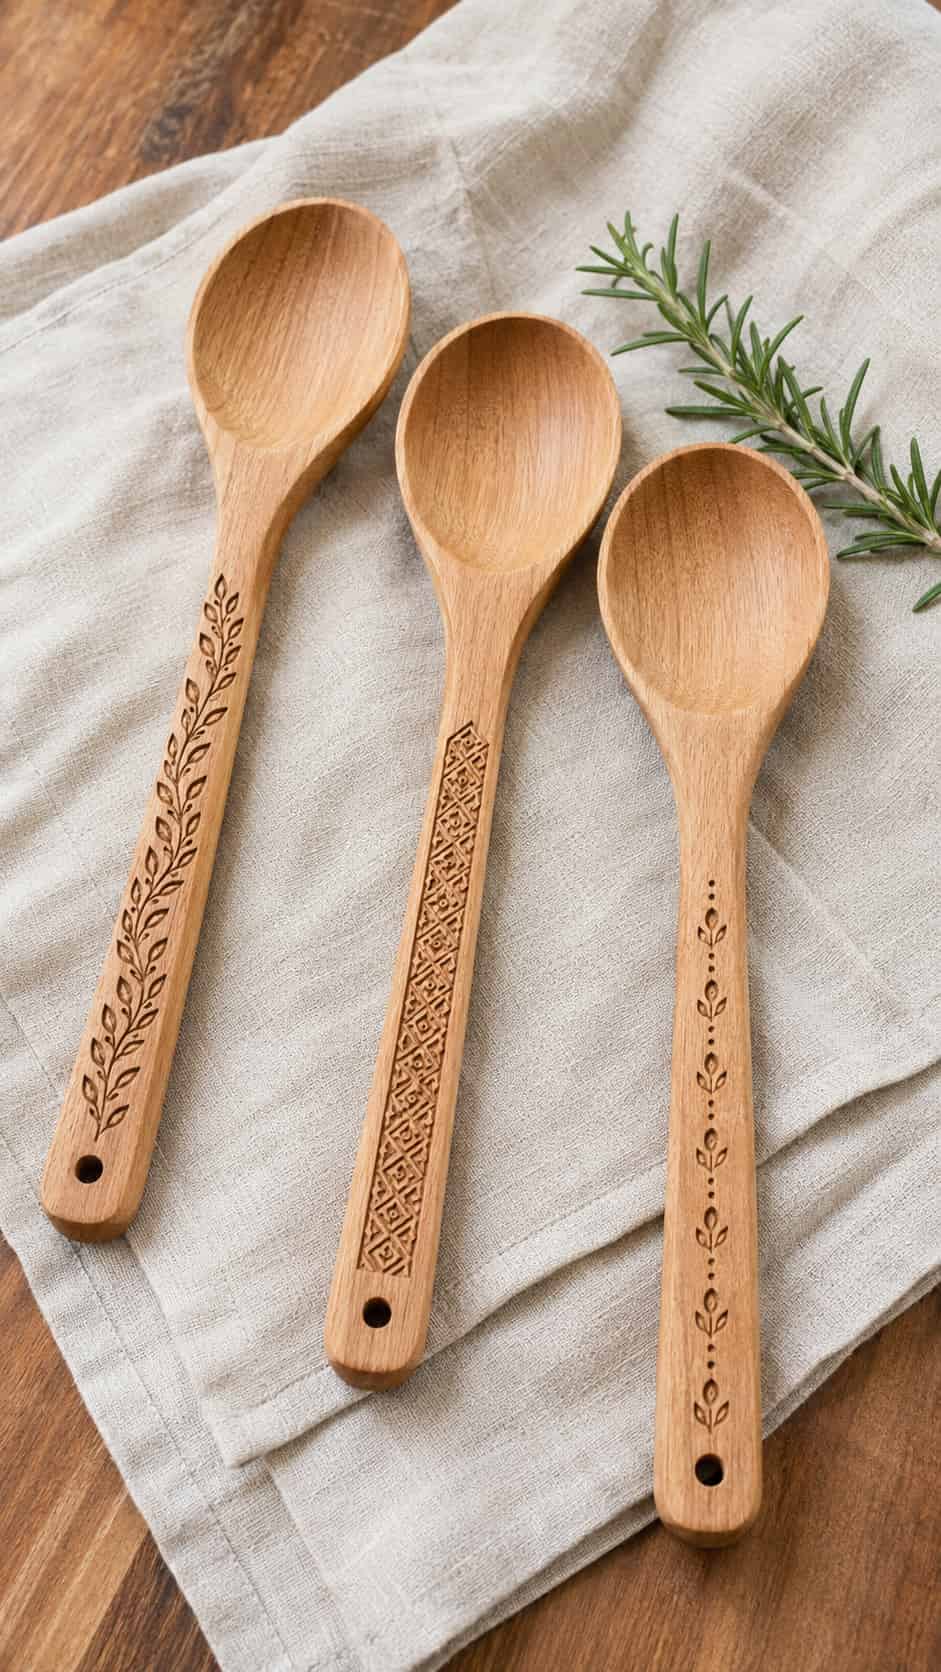
Plain wooden spoon handles offer a ready-made surface for practicing borders, names, vines, dots, and simple repeating patterns. Secure the spoon carefully without crushing it, then decorate only the handle.
Avoid deep carving that could weaken the handle. Do not carve the bowl or any area that will regularly contact food unless the materials, finish, and cleaning method are appropriate for that purpose.
If you eventually want to make the entire spoon rather than decorate one, read our guide on how to carve a wooden spoon by hand.
4. Wooden Pendants
Difficulty: Easy
Estimated time: 1–2 hours
Recommended attachment: Small carving bit
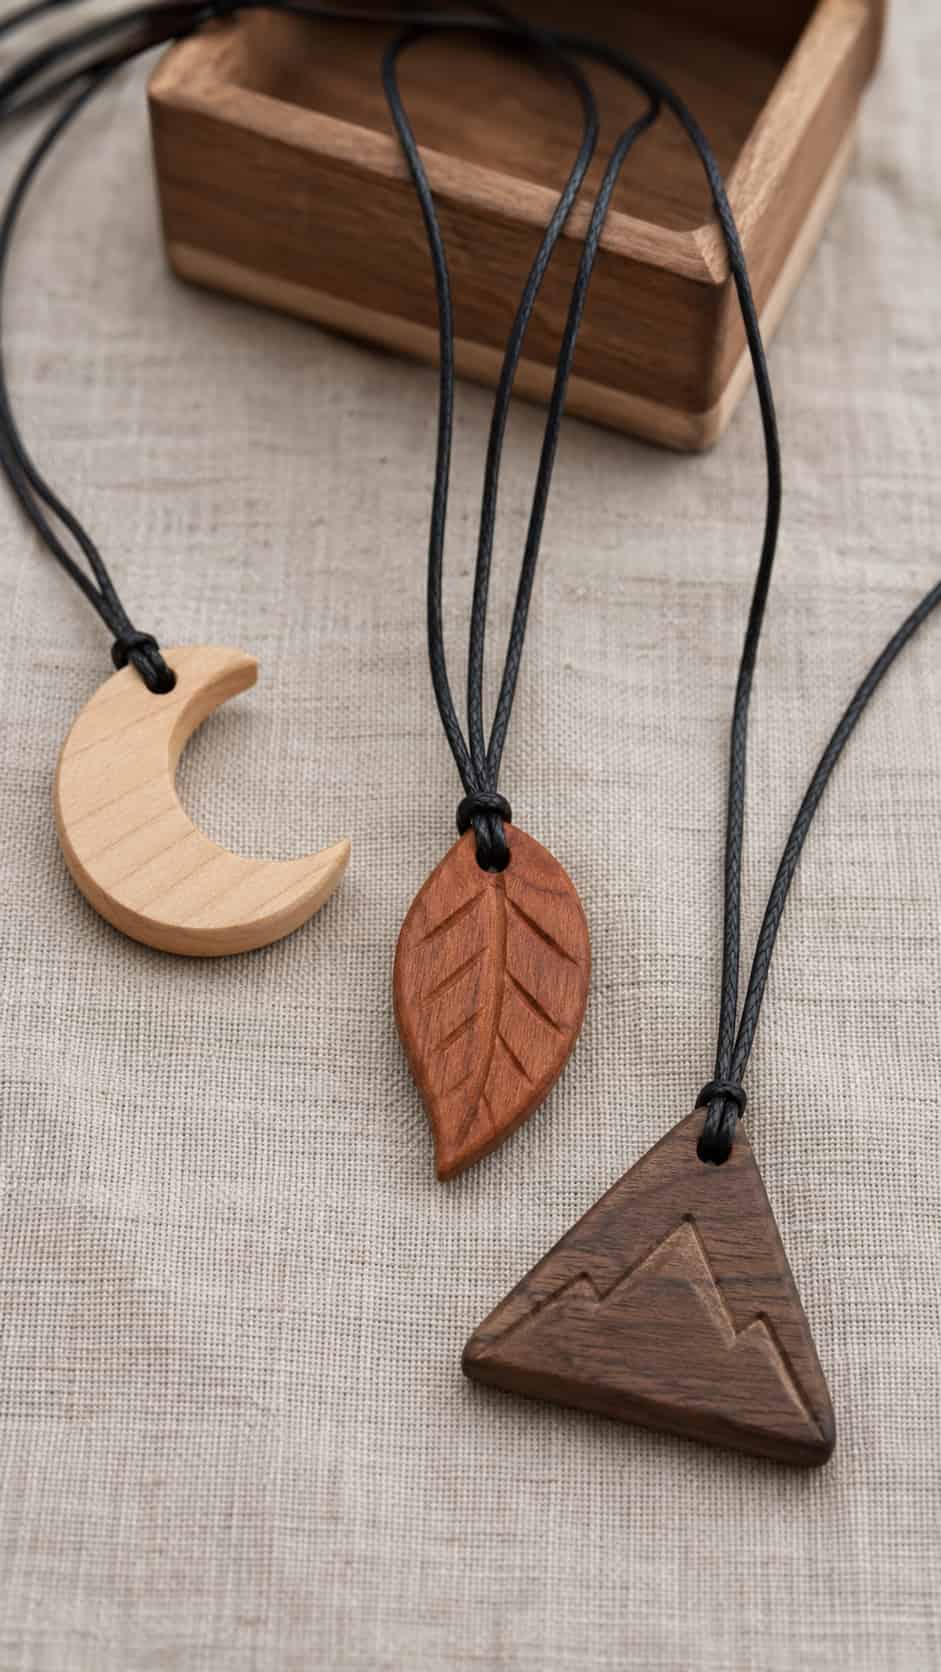
A thin basswood or hardwood blank can become a lightweight pendant with a carved moon, leaf, mountain, flower, or abstract design.
Draw the outer shape before beginning and have an experienced adult cut the blank safely with suitable equipment if needed. Use the Dremel for controlled shaping, shallow engraving, and smoothing rather than attempting to hold a tiny loose piece.
Round every edge and sand the finished pendant carefully. If adding a cord hole, place it far enough from the edge to reduce the chance of splitting.
5. Personalized Wooden Keychains
Difficulty: Easy
Estimated time: 45–90 minutes
Recommended attachment: Engraving bit
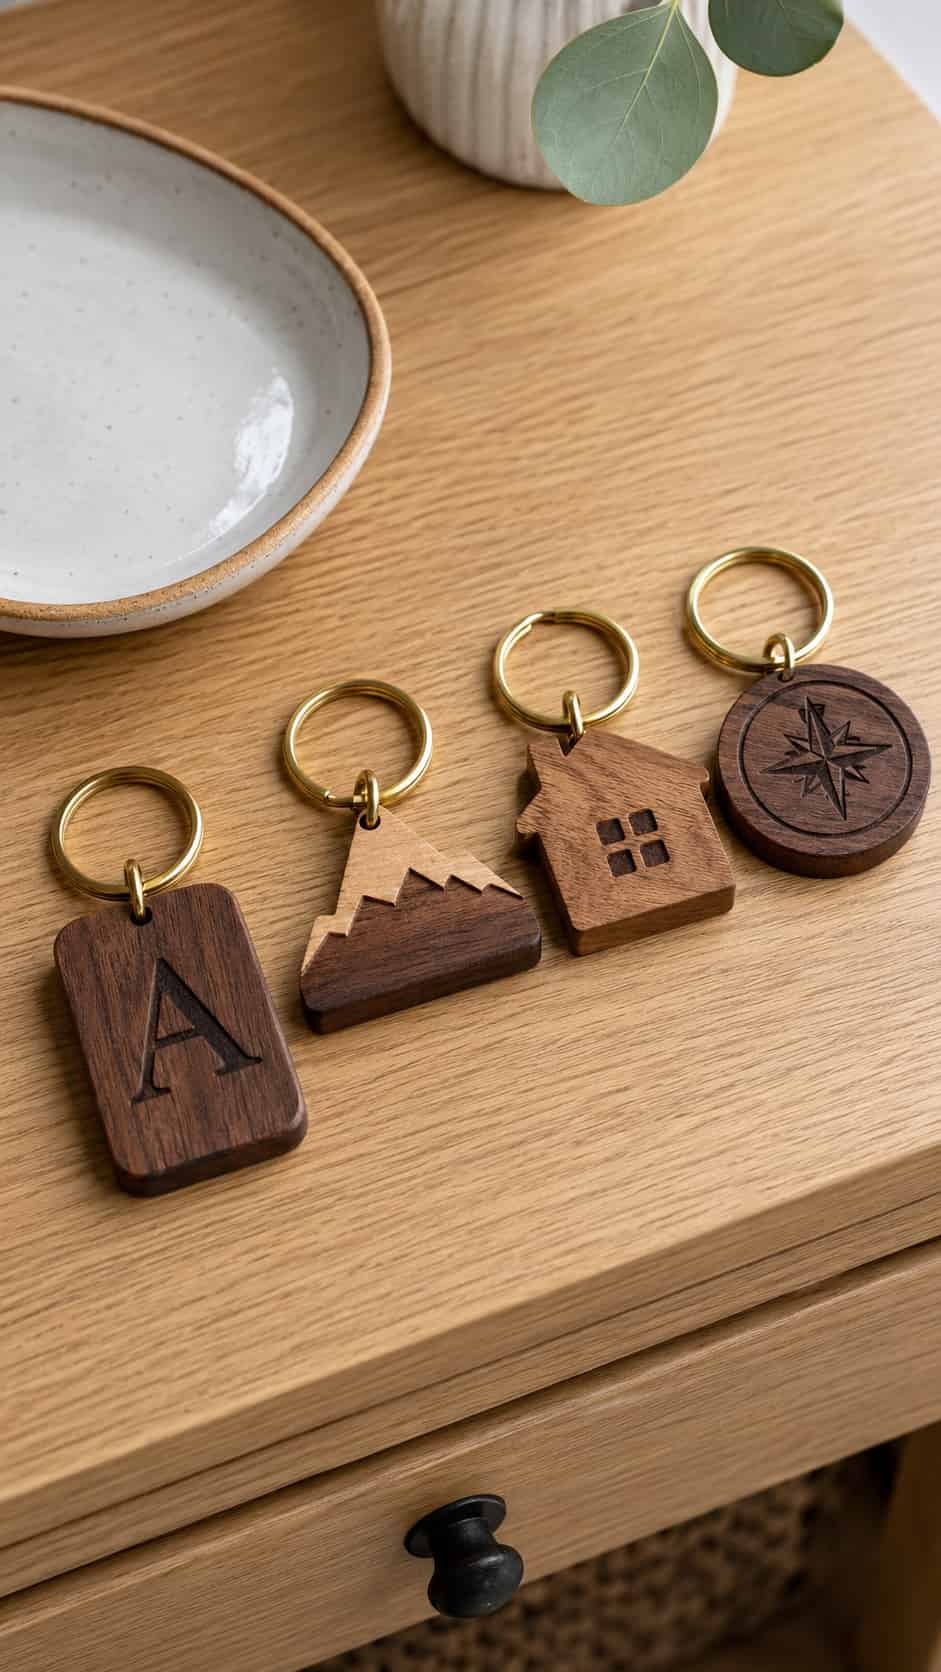
Keychains are excellent scrap-wood projects because each blank requires very little material. Try initials, coordinates, simple icons, or short words.
Clamp the blank to a larger sacrificial board so your fingers never need to hold it near the tool. Engrave the design, round the corners, sand thoroughly, and attach the hardware through a properly positioned hole.
Choose a dense, durable wood and keep narrow sections slightly chunky. A delicate keychain may look attractive but will not survive long in a pocket or bag.
6. Wooden Plant Markers

Difficulty: Easy
Estimated time: 30–60 minutes
Recommended attachment: Fine engraving bit
Engraved plant markers are quick, practical, and easy to make in batches. Cut or purchase a set of flat wooden labels, then engrave herb, vegetable, or flower names into each one.
Use large letters that can still be read once the marker is outdoors. Adding paint to the recessed lettering makes the names easier to see.
Choose outdoor-suitable wood and finish, but remember that even sealed wooden markers may weather over time. That natural aging can be part of their charm.
7. Decorated Picture Frame

Difficulty: Easy
Estimated time: 1–2 hours
Recommended attachment: Engraving cutter
A plain unfinished frame becomes much more interesting when you add a carved border, corner leaves, stars, initials, or a date.
Remove the glass and backing before beginning. Mark the design while the frame is flat, then clamp it securely without damaging the joints. Keep the pattern a comfortable distance from the inner and outer edges.
For more ways to use small offcuts in frames and décor, explore these easy scrap wood crafts.
8. Thin Wooden Bookmarks
Difficulty: Easy
Estimated time: 30–60 minutes
Recommended attachment: Fine engraving bit
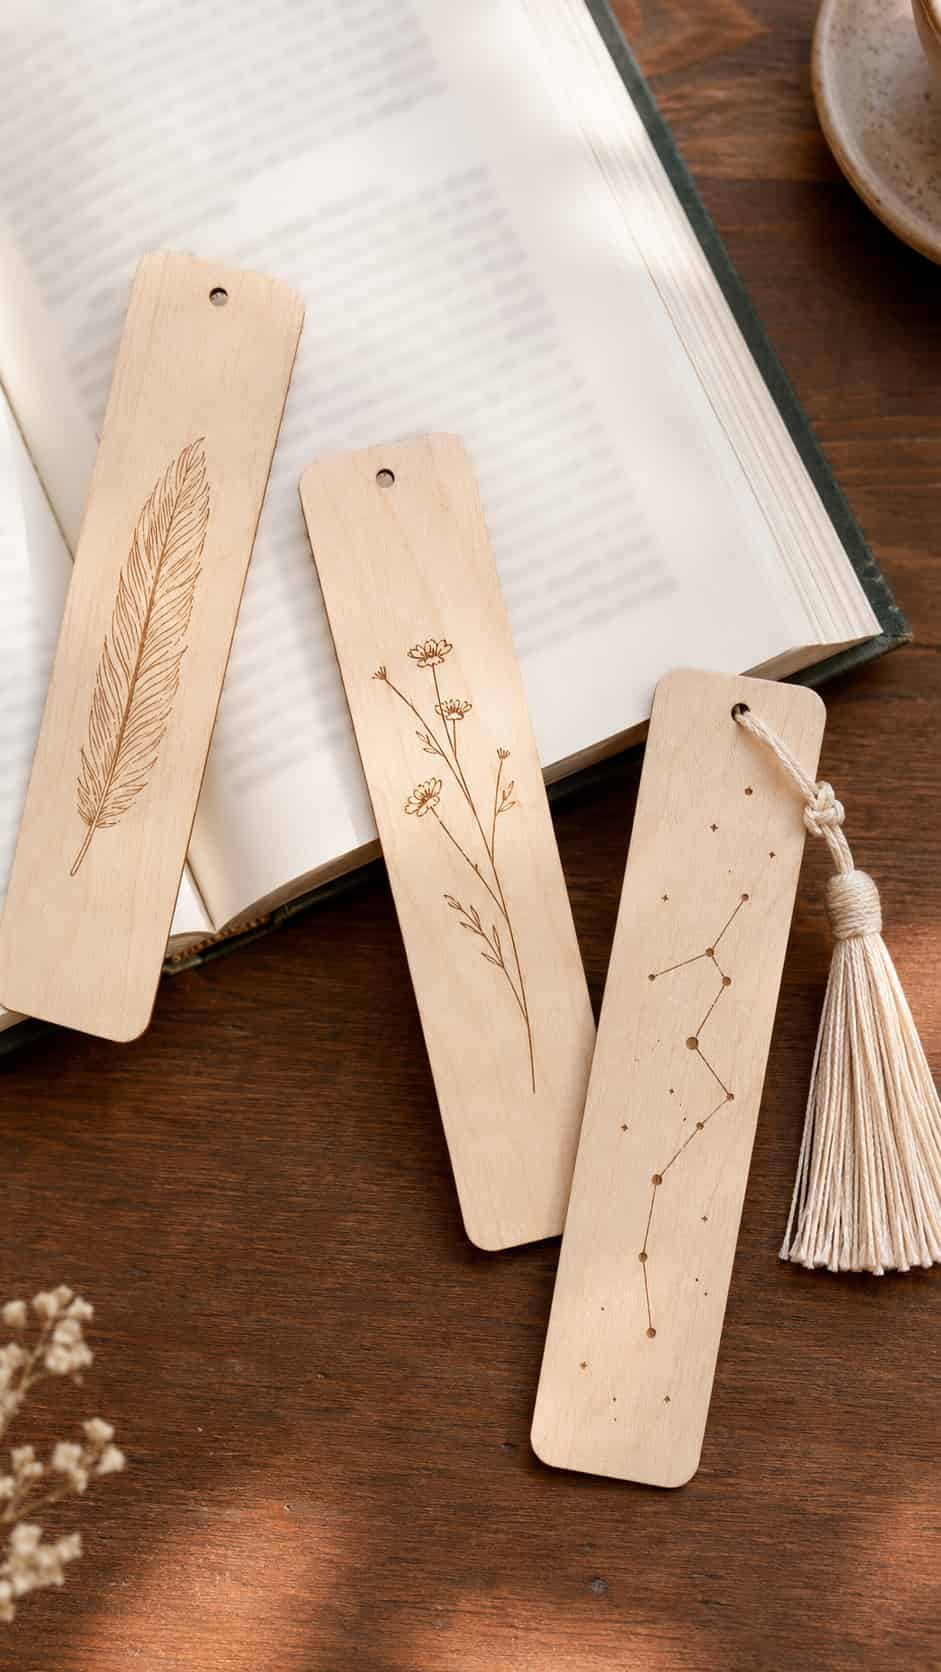
Use thin hardwood veneer or a prepared wood bookmark blank for this project. Engrave a feather, flower, constellation, initial, or small geometric border.
The main challenge is keeping the material from flexing. Support the entire bookmark on a flat sacrificial board and secure it with a method that will not damage the surface.
Keep the engraving shallow because thin wood can break or warp. Smooth every corner and edge so the bookmark cannot catch on a page.
9. Carved Refrigerator Magnets
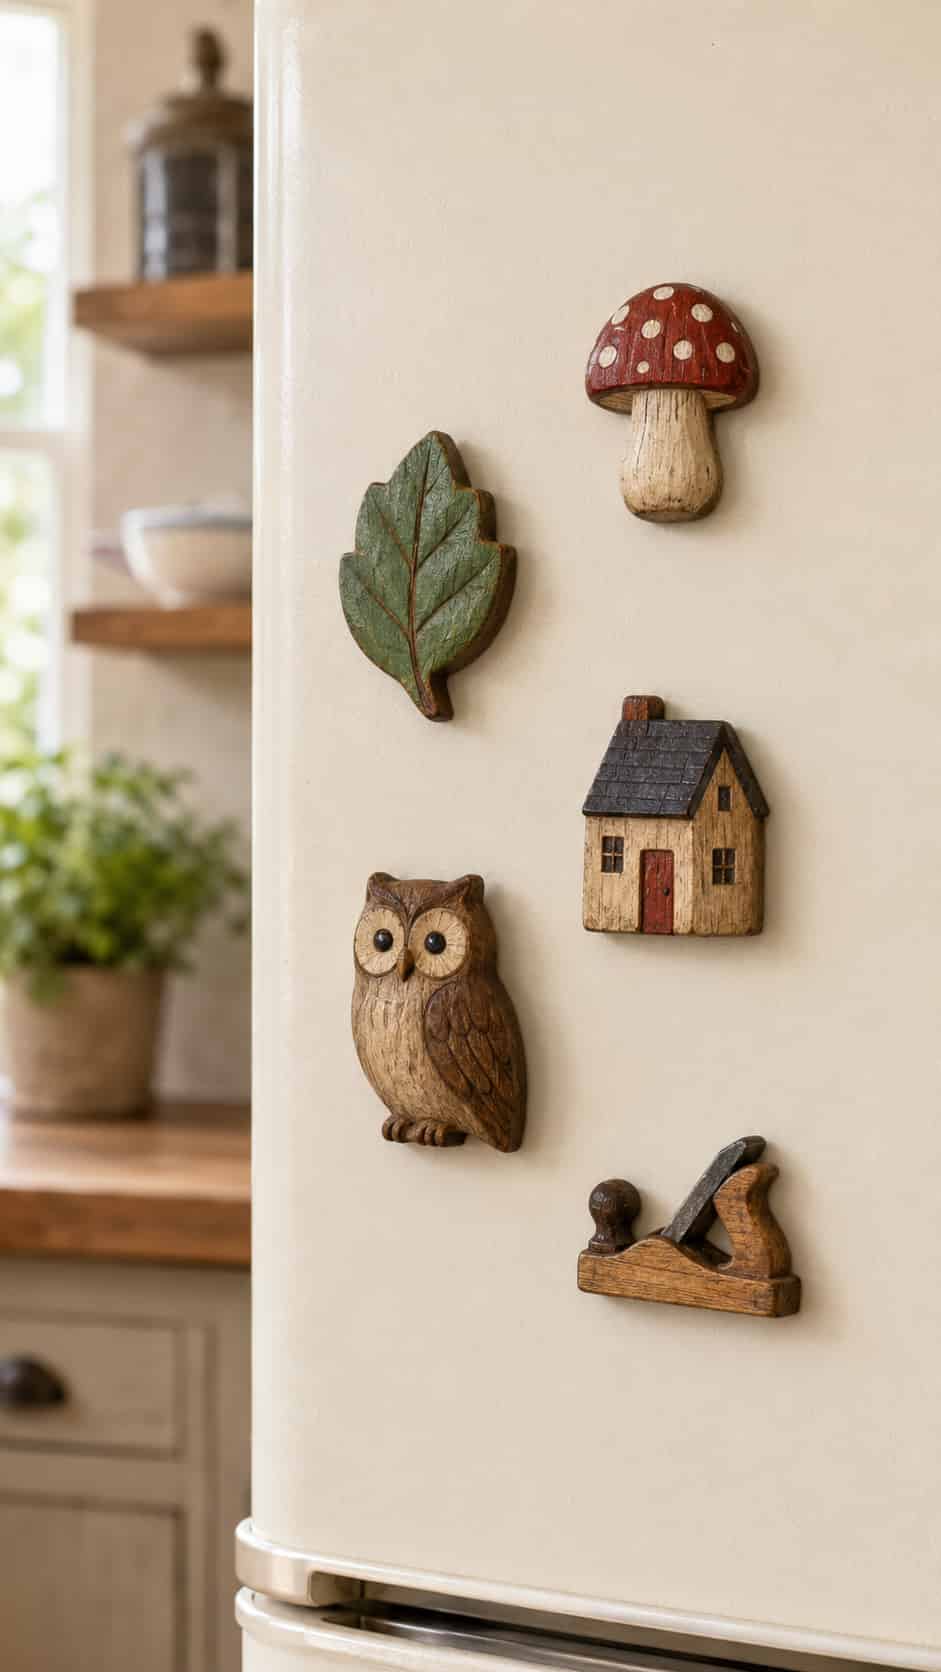
Difficulty: Easy
Estimated time: 1–2 hours
Recommended attachment: Small carving bit
Small mushrooms, leaves, houses, animals, or miniature tools can become useful refrigerator magnets.
Keep the shapes broad and sturdy. A thick silhouette is easier to carve and far less likely to break than a design with tiny legs, stems, or points. Flatten the back carefully so the magnet can sit securely.
Attach an appropriately sized magnet only after all carving, sanding, and finishing are complete. Follow the adhesive manufacturer’s directions, and keep small magnets away from young children.
10. Wooden Holiday Ornaments

Difficulty: Easy
Estimated time: 1–2 hours
Recommended attachment: Engraving cutter
Ornaments let you turn thin wood blanks into stars, trees, snowflakes, mittens, houses, or personalized family keepsakes.
Trace a simple outline, establish the broad shape using suitable supervised equipment, and use the rotary tool to refine edges and add surface decoration. A sanding drum can soften the perimeter, while an engraving cutter creates names and patterns.
Leave enough material around the hanging hole so the top does not split. For more seasonal inspiration, browse these scrap wood Christmas projects.
11. Geometric Wood Wall Art

Difficulty: Easy–Medium
Estimated time: 2–3 hours
Recommended attachment: Straight carving cutter
Geometric wall art can look impressive without requiring realistic carving skills. Draw a series of triangles, arches, rays, or overlapping lines on a flat panel.
Use a straightedge only for marking—never place it near a moving bit. Clamp the panel, remove the straightedge, and carve the marked grooves freehand with light, controlled passes.
Paint selected sections or fill the grooves with a contrasting color. The clean pattern will hide small variations better than highly detailed lettering.
12. Leaf Relief Carving
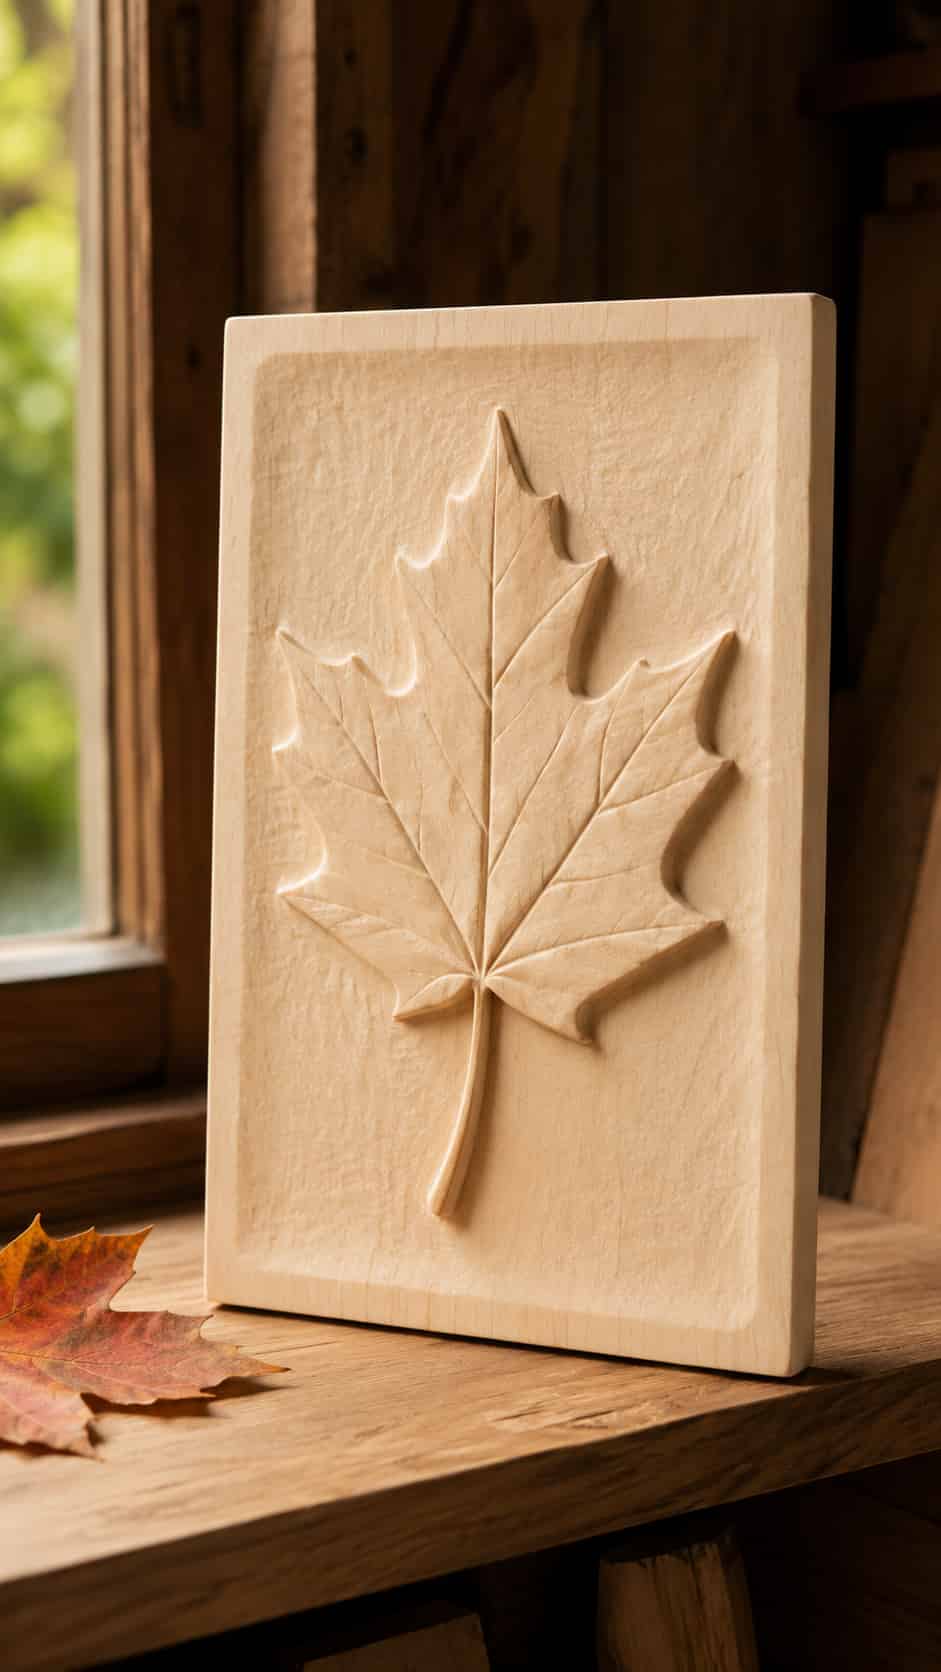
Difficulty: Medium
Estimated time: 2–4 hours
Recommended attachment: Round carving bit
A leaf relief teaches you how to create depth on a flat board. Transfer a clear leaf outline, define the central vein, and gradually lower the surrounding background so the leaf appears raised.
Work from larger areas toward smaller veins and edge details. Frequently brush or vacuum away dust so you can see the actual surface.
If drawing your own design feels intimidating, choose a template from these free wood carving patterns for beginners.
13. Carved Wooden Feather
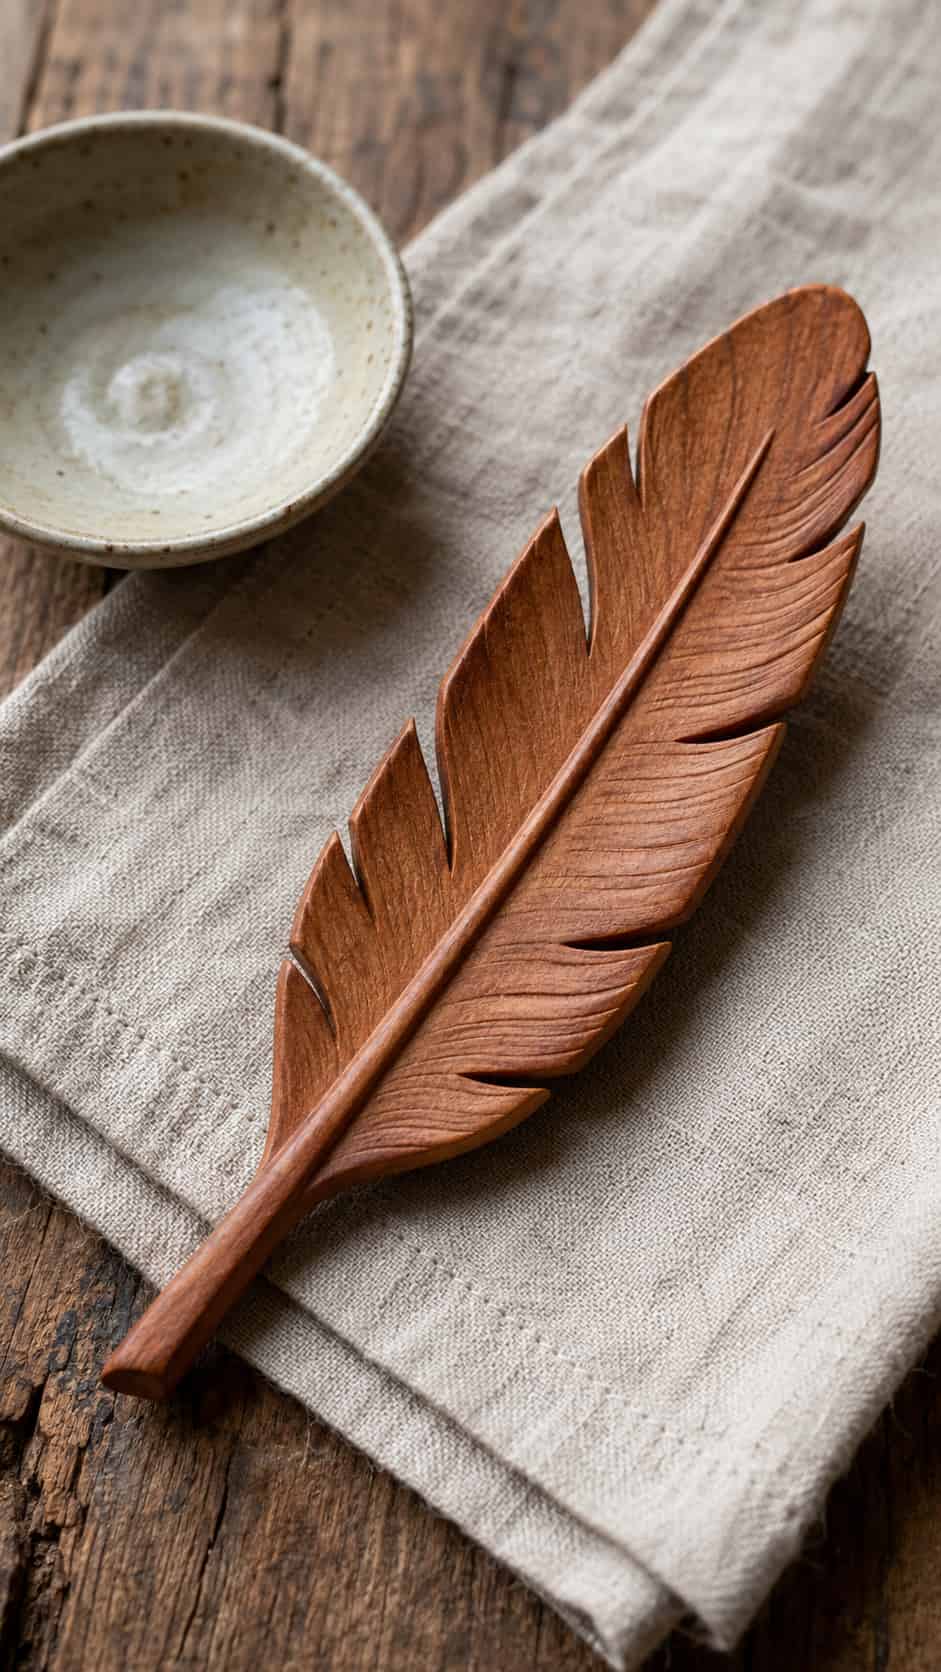
Difficulty: Medium
Estimated time: 2–3 hours
Recommended attachment: Tapered carving bit
A wooden feather is a manageable project for practicing flowing lines and repeated texture. Begin with a feather-shaped blank or carve the design as a shallow relief on a rectangular panel.
Establish the center shaft first. Add the angled barbs afterward, working in a consistent direction. Avoid making the outer edges extremely thin because they can chip.
Slight variations in the engraved lines make the feather appear more natural, so this project does not demand machine-perfect symmetry.
14. Miniature Wooden Mushroom

Difficulty: Easy–Medium
Estimated time: 1–2 hours
Recommended attachment: Sanding drum
A mushroom’s rounded cap and simple stem make it one of the most forgiving three-dimensional carving projects.
Begin with an oversized blank and establish the broad proportions before refining the transition between the cap and stem. Use a sanding drum or shaping attachment carefully while the wood remains securely supported.
Finish with hand sanding, then leave it natural or paint the cap. You can find additional small carvings in our collection of easy small wood carving projects.
15. Small Carved Owl

Difficulty: Medium
Estimated time: 2–4 hours
Recommended attachment: Round and tapered carving bits
Owls work well as compact carvings because their basic silhouette can remain solid and stable. Establish the head, body, and eye areas before adding feather texture.
Large circular eyes and a short beak create a recognizable owl without requiring realistic detail. Use shallow V-shaped or curved marks to suggest feathers rather than carving every individual one.
More birds, woodland creatures, and simplified shapes can be found in these animal wood carving ideas for beginners.
16. Simple Wooden Fish
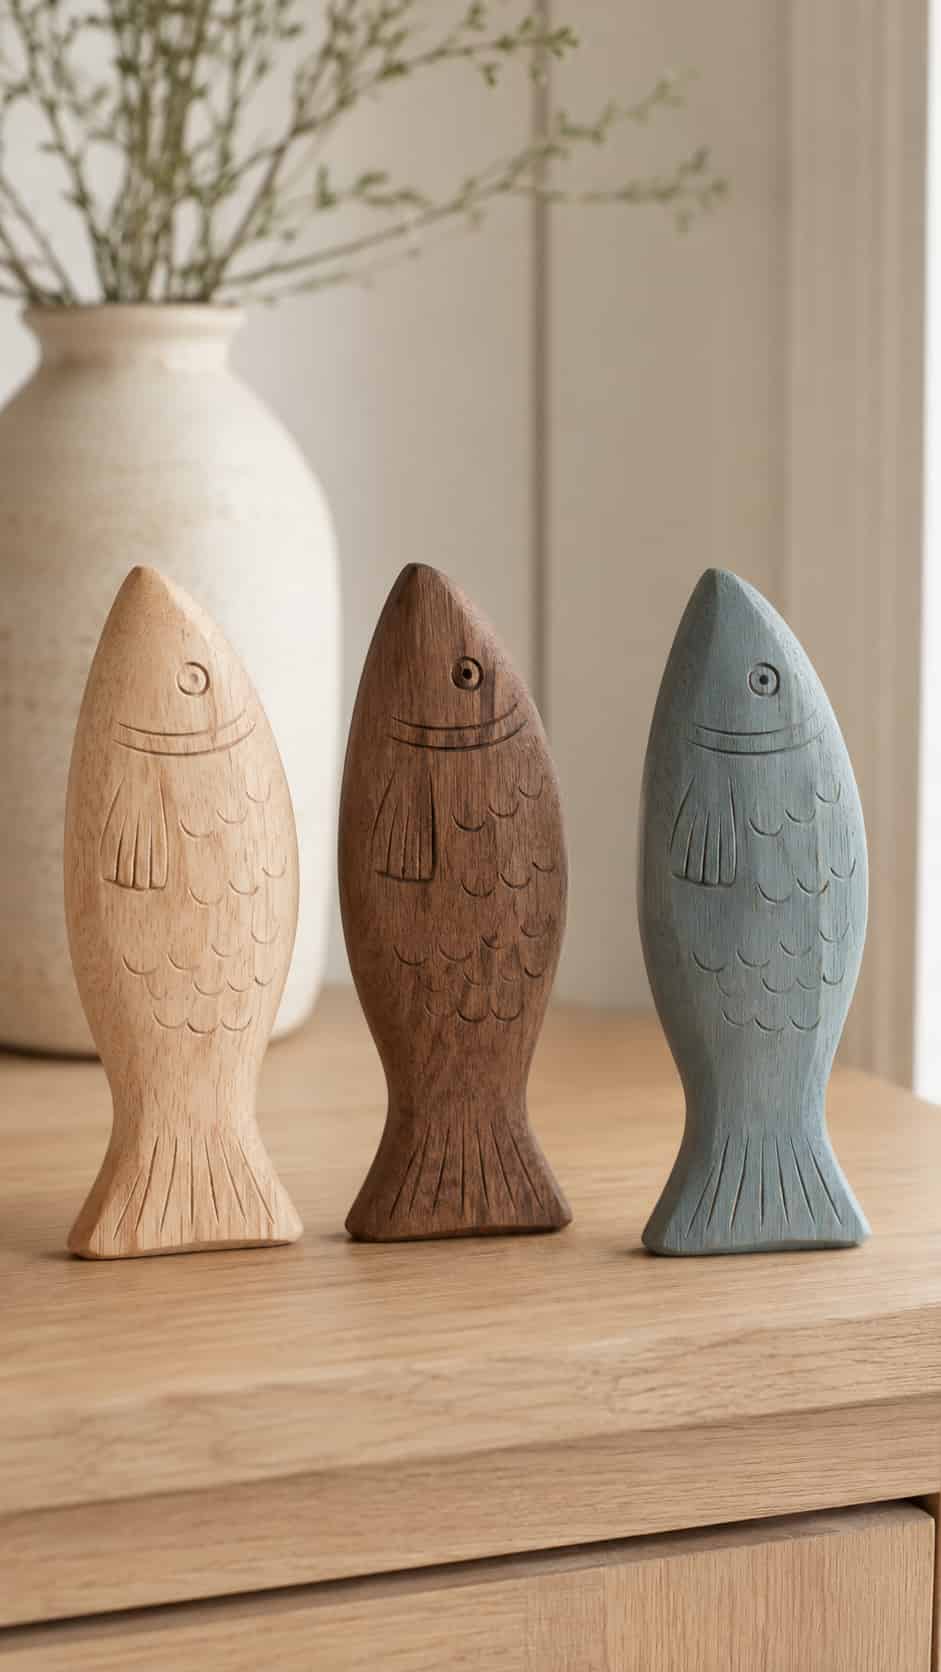
Difficulty: Easy–Medium
Estimated time: 2–3 hours
Recommended attachment: Sanding drum
A fish can be carved as a flat ornament, refrigerator magnet, wall decoration, or small freestanding figure.
Start with a broad body and sturdy tail. Round the body with a sanding attachment, then add the eye, gill, fin, and scale pattern using a smaller engraving cutter.
Do not chase perfect scale spacing. A few curved lines or dots can suggest texture while keeping the project relaxed and beginner-friendly.
17. Simple Wood-Spirit Face
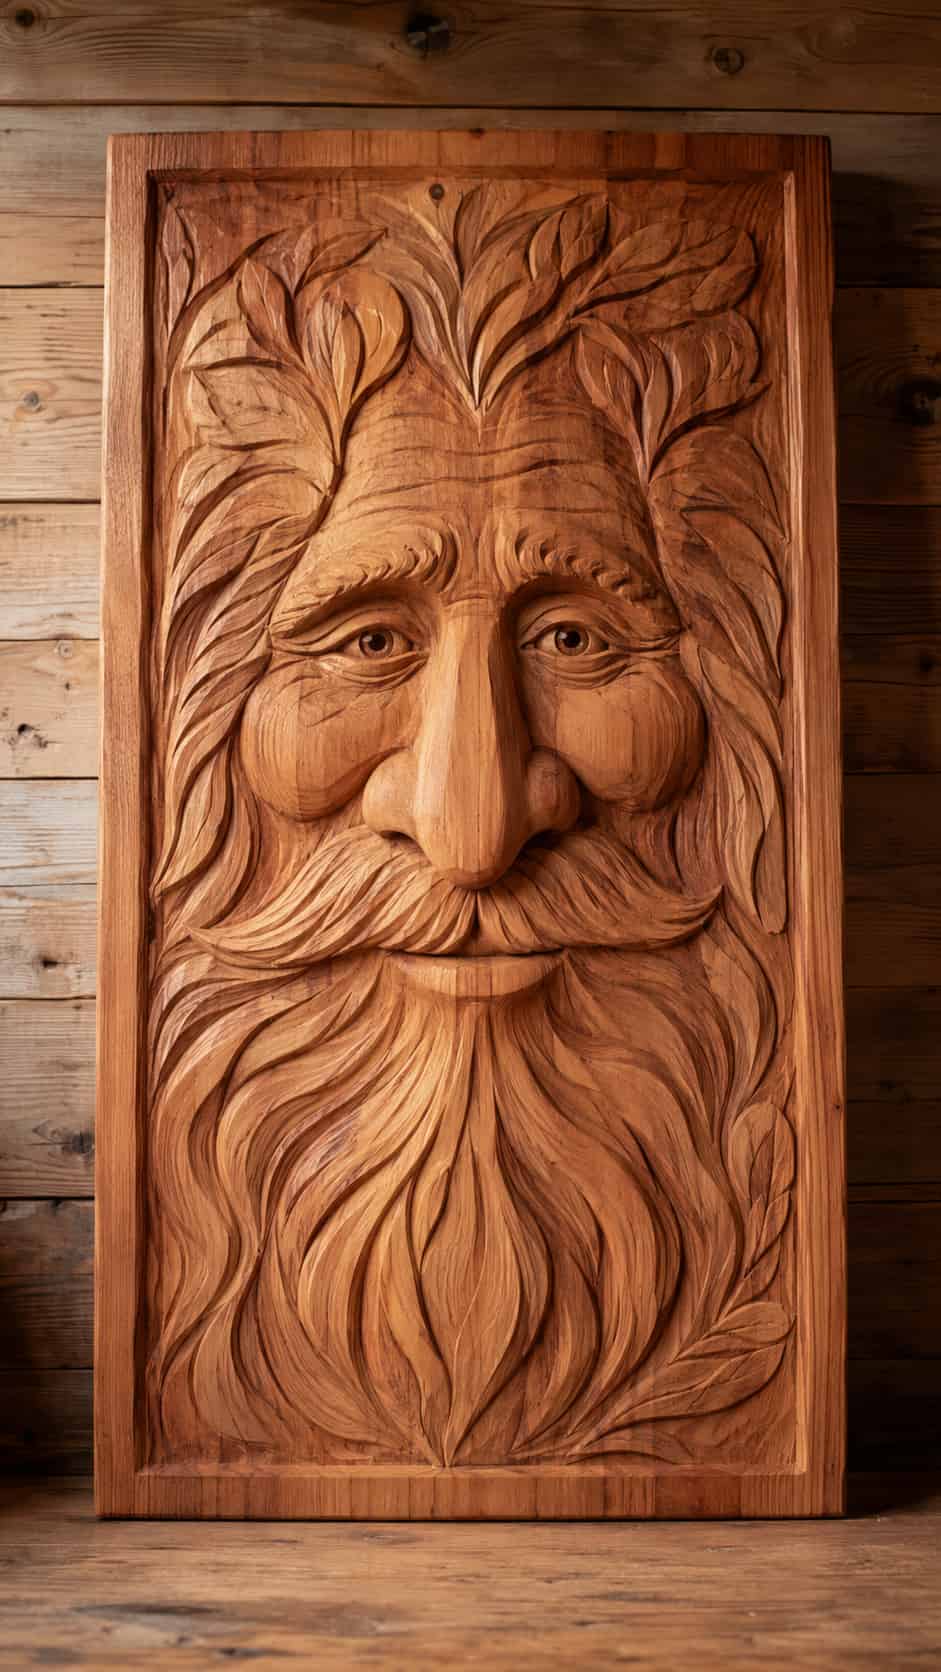
Difficulty: Medium
Estimated time: 3–5 hours
Recommended attachment: Small ball-shaped cutter
A simple wood-spirit face introduces facial features without requiring a realistic portrait. Begin with a long nose and deep brow line, then build the eyes, cheeks, moustache, and beard around those landmarks.
Make the main features bold. Tiny realistic details are difficult to control and often disappear once the project is sanded or finished.
Practice each feature on scrap wood first. You can also begin with one of these easy wood-carving face patterns before attempting a complete design.
18. Wooden Stamp Block
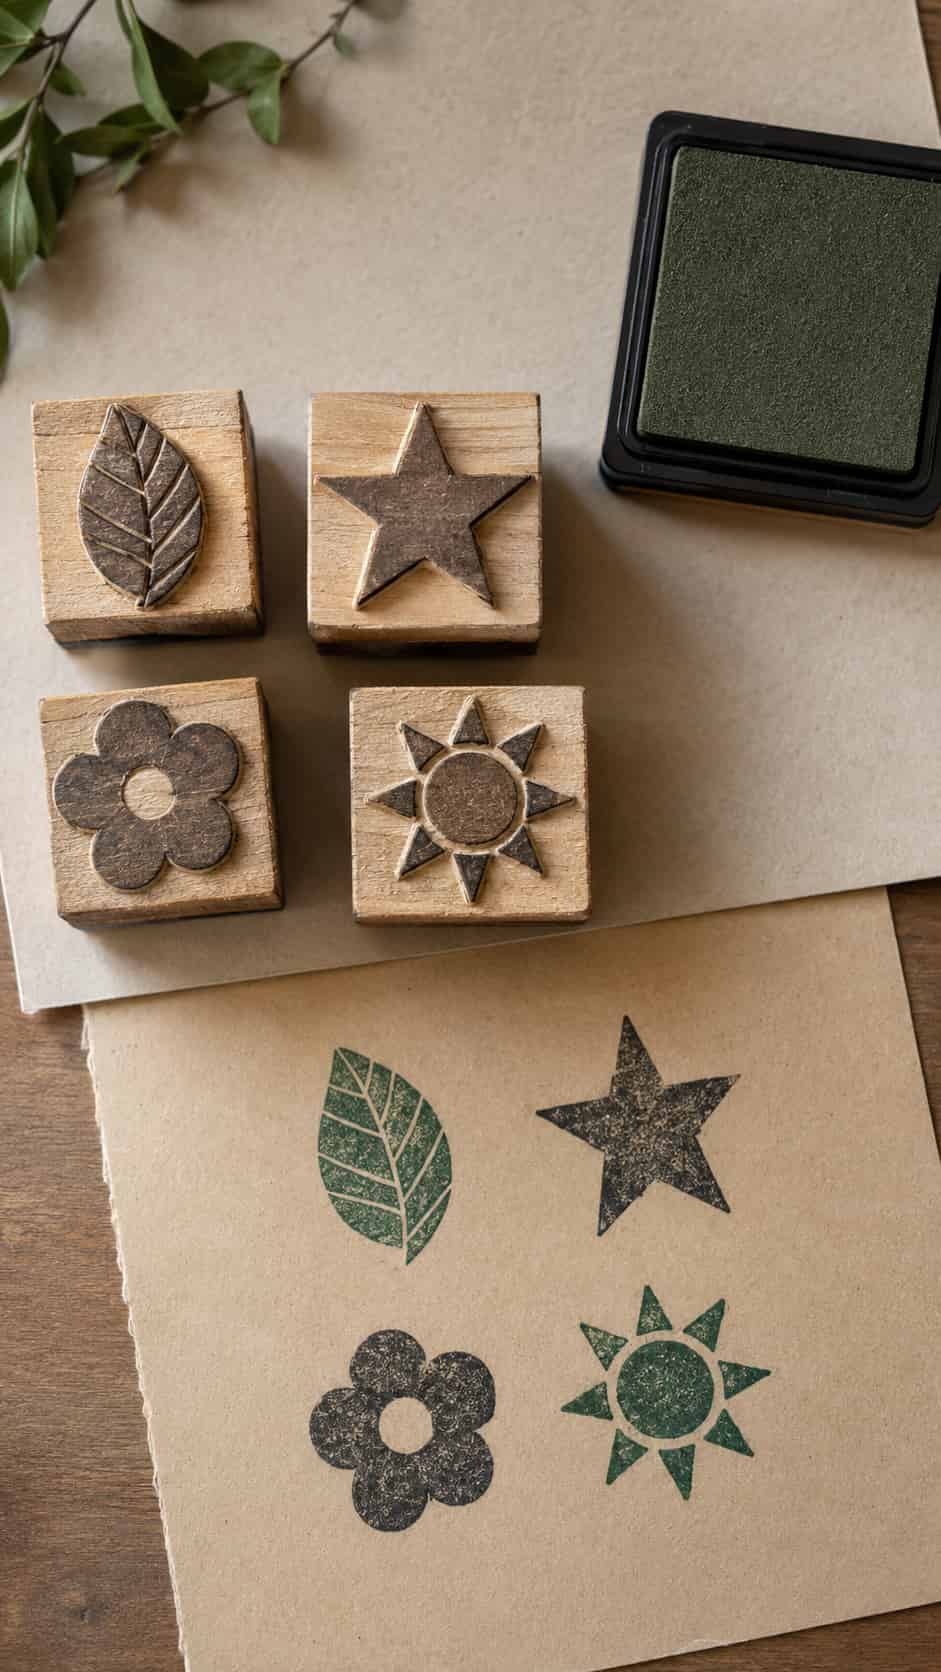
Difficulty: Medium
Estimated time: 1–2 hours
Recommended attachment: Fine engraving bit
Carve a simple raised design into a flat wood block to create a decorative stamp for paper crafts.
Remember that the printed design will appear reversed. Transfer letters and directional images as mirror images before carving. Remove the background gradually while leaving the design raised.
Test the stamp frequently on scrap paper. Simple leaves, stars, flowers, and geometric icons work better than thin letters or highly detailed pictures.
19. Textured Candle Tray
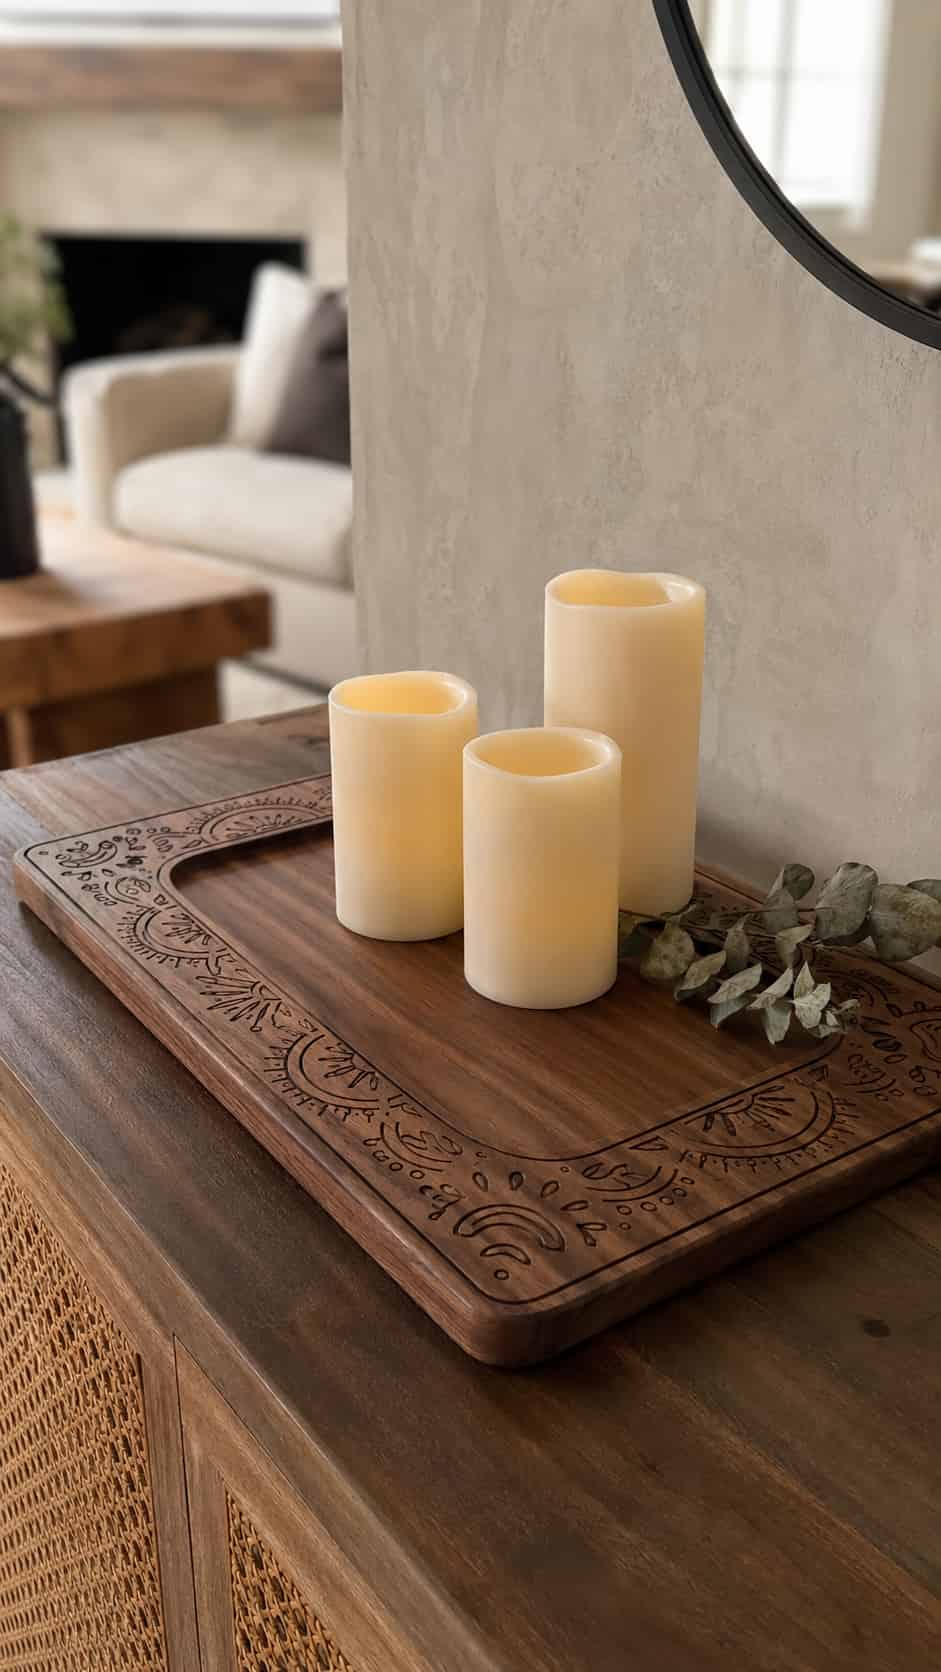
Difficulty: Easy–Medium
Estimated time: 2–3 hours
Recommended attachment: Engraving cutter
Turn a plain wood tray into a decorative centerpiece by engraving patterns around its border. Try sunbursts, arches, dots, leaves, or repeating lines.
Keep the center flat so objects sit securely, and use only LED candles rather than open flames near wooden décor. Smooth the engraved border before applying the finish.
A contrasting stain or dark paint wiped into the recessed lines can make a simple pattern appear much deeper and more defined.
20. Small Wooden Jewelry Dish
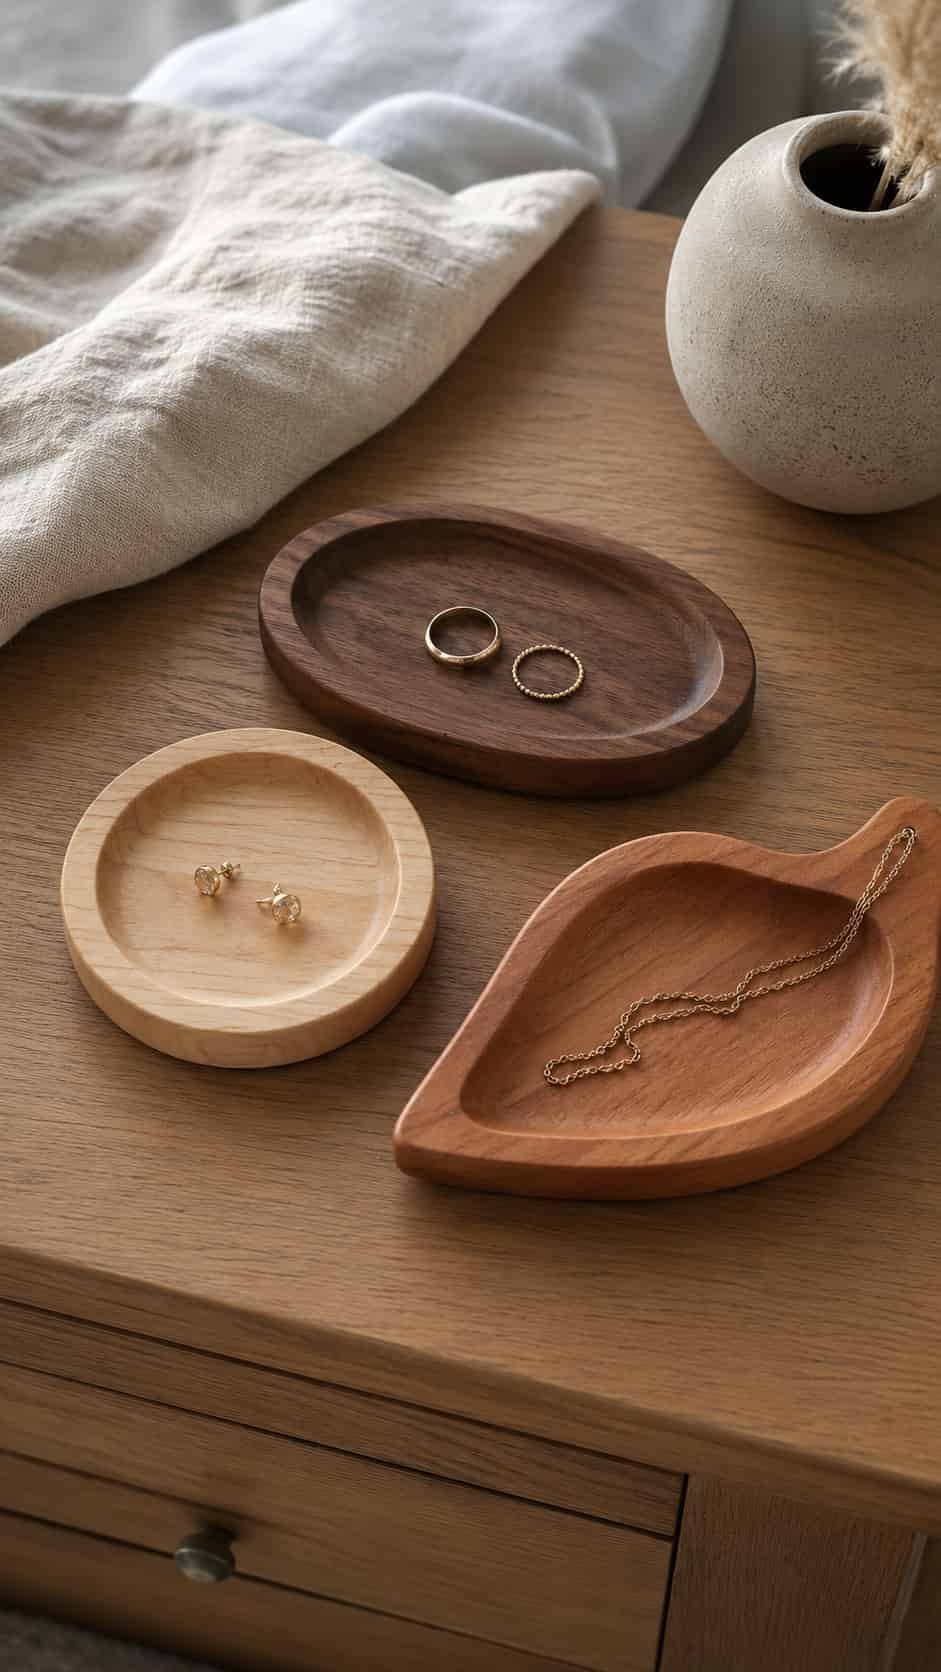
Difficulty: Medium
Estimated time: 3–5 hours
Recommended attachment: Shaping cutter and sanding accessories
A shallow jewelry dish is useful for holding rings, earrings, or keys. Draw the outer boundary and inner recess on a thick wood blank before removing material gradually from the center.
The dish does not need to be extremely deep. A shallow depression with a wide rim is easier to control and leaves more strength in the base.
Use a rounded cutter for the recess and finish with curved sanding accessories. Check the thickness frequently to avoid removing too much material.
21. Wooden Ring Cone
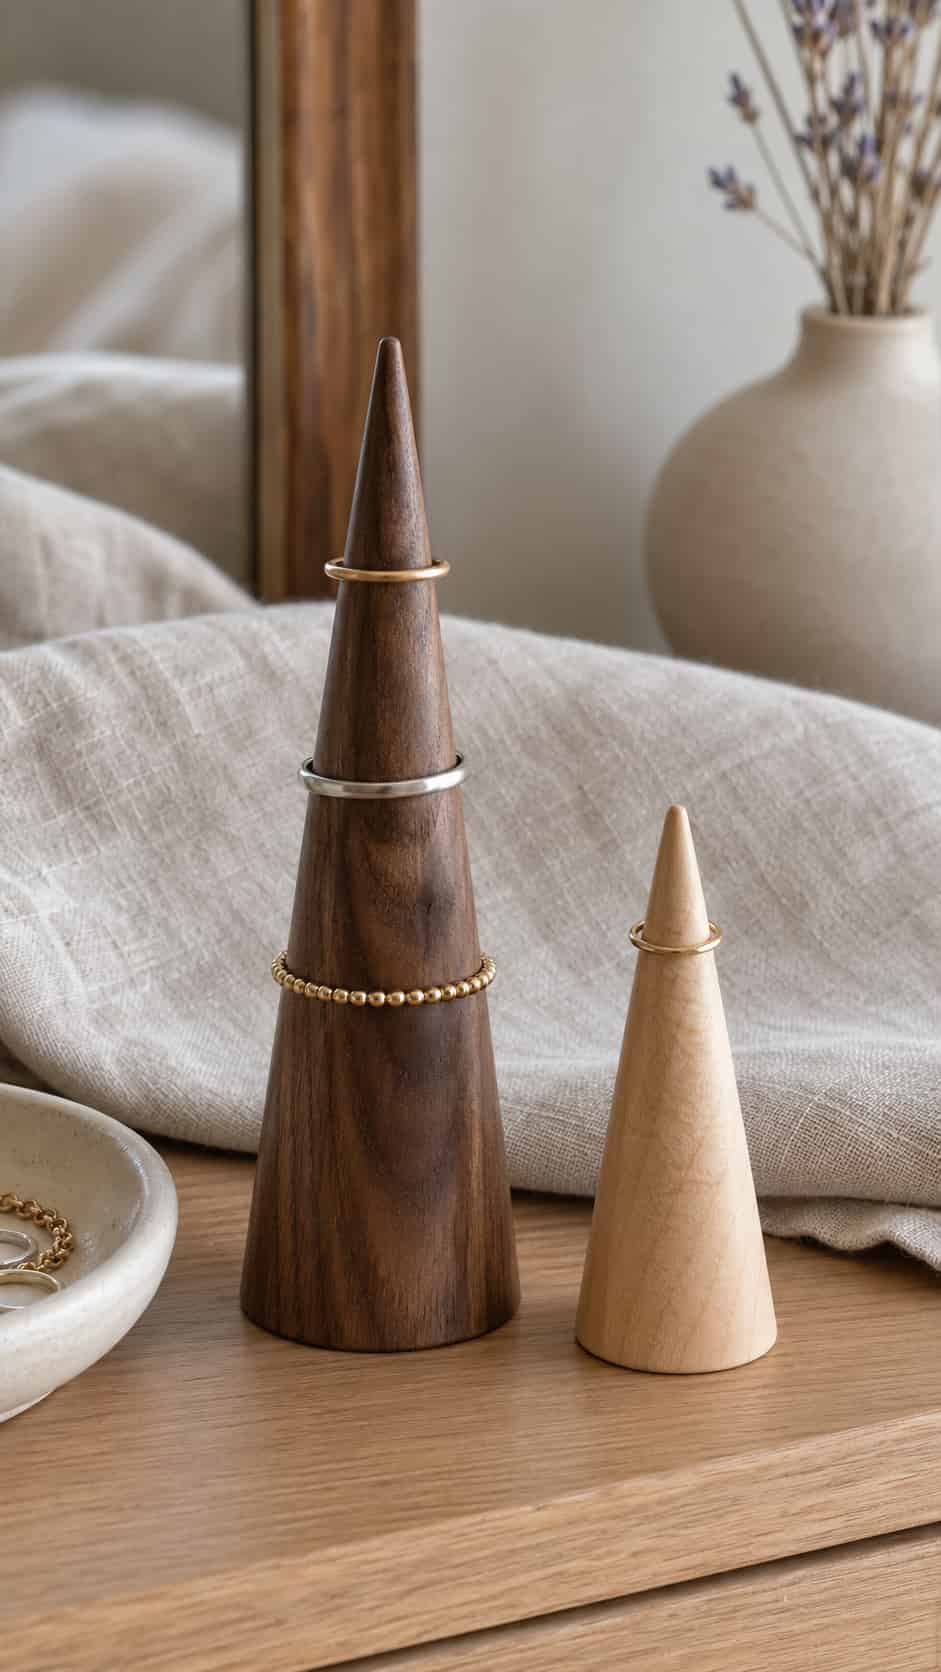
Difficulty: Easy–Medium
Estimated time: 1–2 hours
Recommended attachment: Sanding drum
Transform a thick scrap block into a small ring cone by gradually rounding and tapering the upper portion while preserving a wide, stable base.
Symmetry is the challenge. Mark several reference lines around the blank and inspect the cone from different directions as you shape it.
Do not hold the blank by hand. Secure it using an appropriate clamping setup that keeps the entire work area clear of fingers. Finish with increasingly fine sanding.
22. Decorative Drawer Pulls
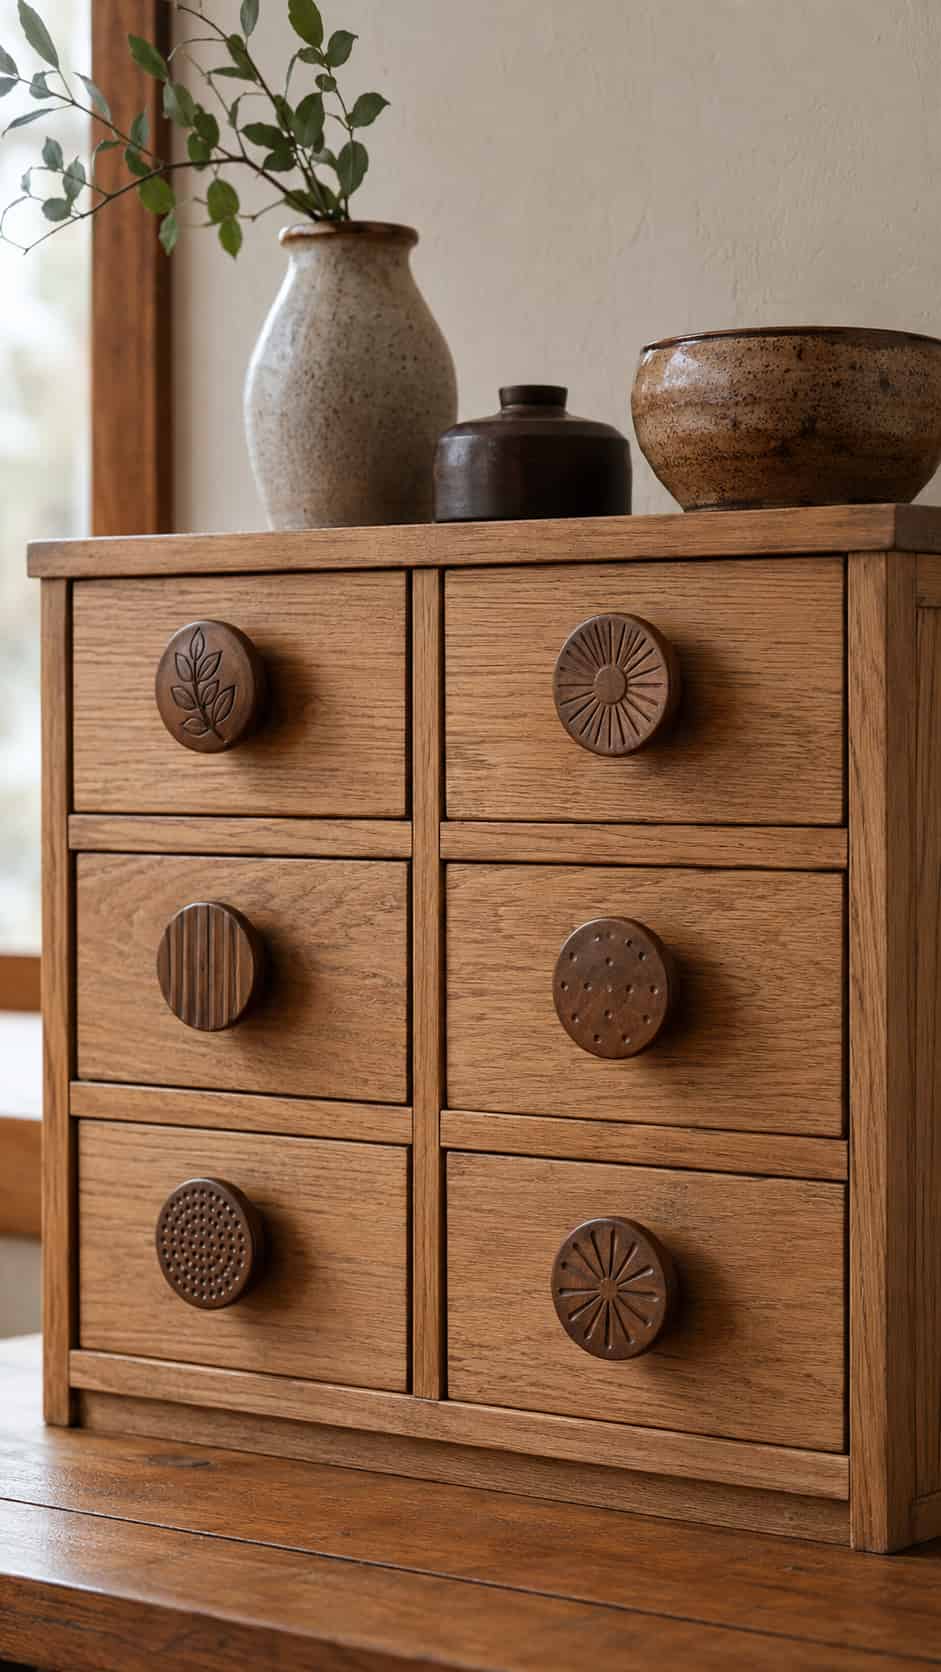
Difficulty: Medium
Estimated time: 2–3 hours
Recommended attachment: Shaping cutter
Plain wooden knobs can be customized with fluting, dots, leaf patterns, initials, or shallow geometric carvings.
Work on the decorative face while the knob is firmly secured using a safe jig or clamping method. Avoid removing material near the mounting point because that could weaken the hardware.
Make one sample before modifying an entire set. Use pencil reference marks and the same sequence of attachments to keep multiple pulls visually consistent.
23. Personalized Tool Handles
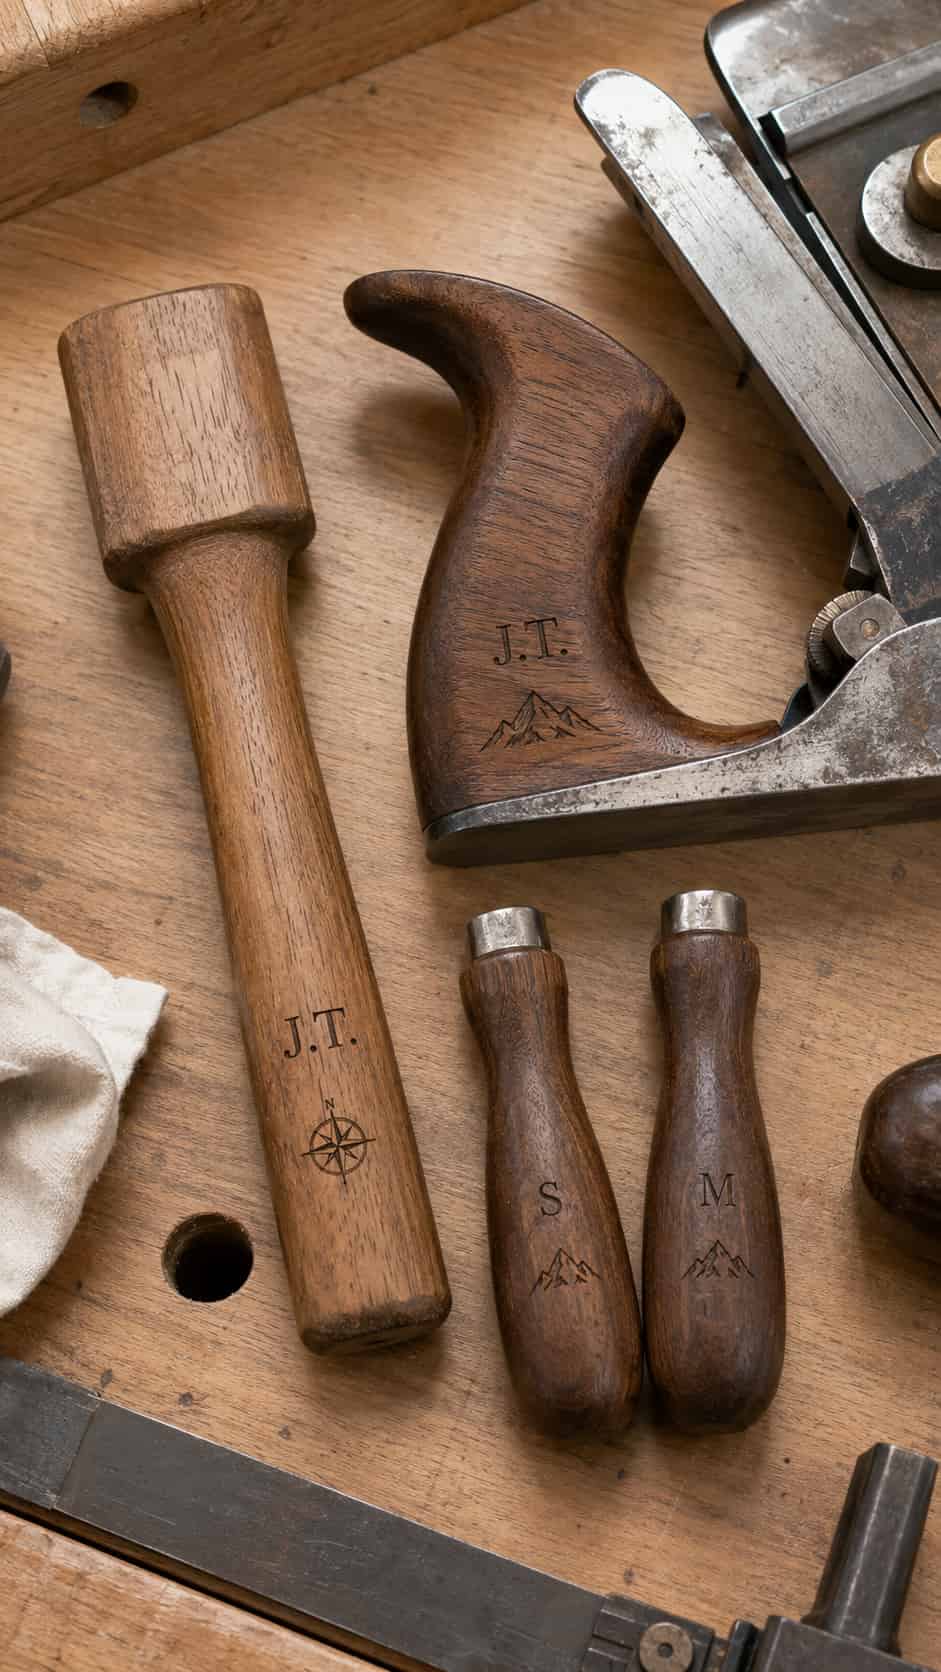
Difficulty: Easy
Estimated time: 30–60 minutes
Recommended attachment: Engraving bit
Add a name, initials, size marking, or simple symbol to unfinished wooden handles. Personalization can make frequently used hand tools easier to identify.
Remove detachable handles when the tool is designed for safe disassembly. Otherwise, secure the complete tool so no metal edge or working part creates a hazard.
Keep engravings shallow and away from thin or stressed sections of the handle. Do not alter insulated, safety-rated, cracked, or structurally questionable handles.
24. Mini Wooden Game Pieces
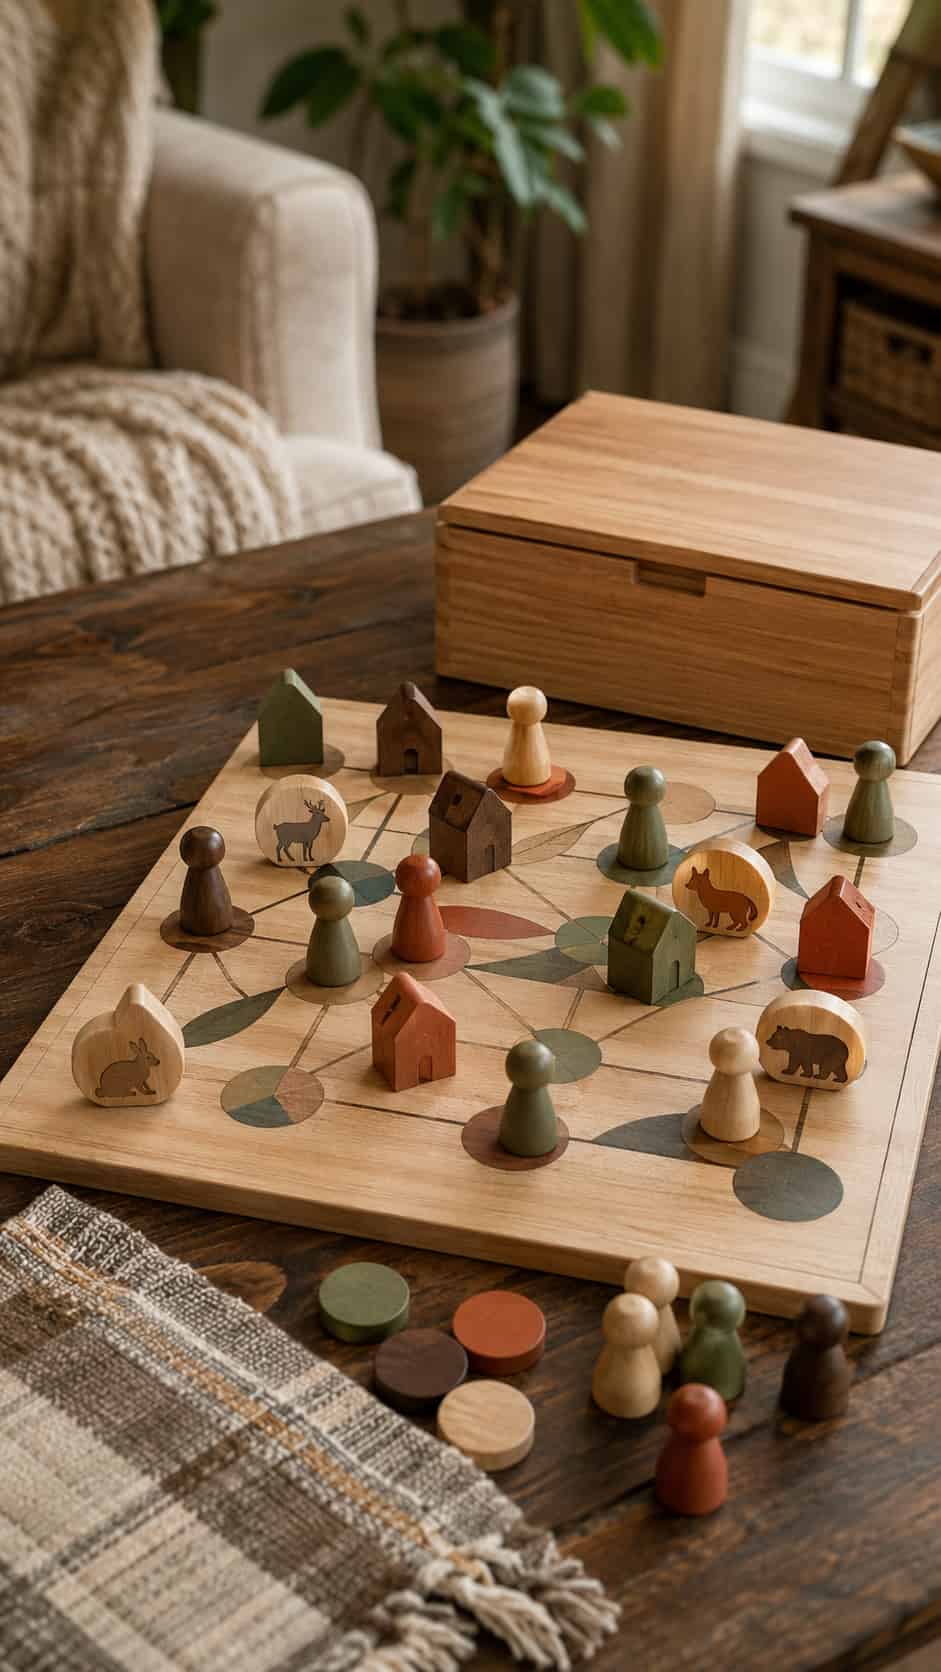
Difficulty: Medium
Estimated time: 2–4 hours
Recommended attachment: Small carving bit
Create simple pawns, houses, animals, or abstract markers for a homemade tabletop game.
Consistency matters more than detail. Make one sturdy master design, mark reference dimensions, and repeat the same shaping sequence for every piece. Sand the bases flat so the pieces stand without wobbling.
Avoid tiny detachable pieces if the project could be accessible to young children. Store all parts safely and design them for the intended user’s age.
25. Decorated Keepsake-Box Lid
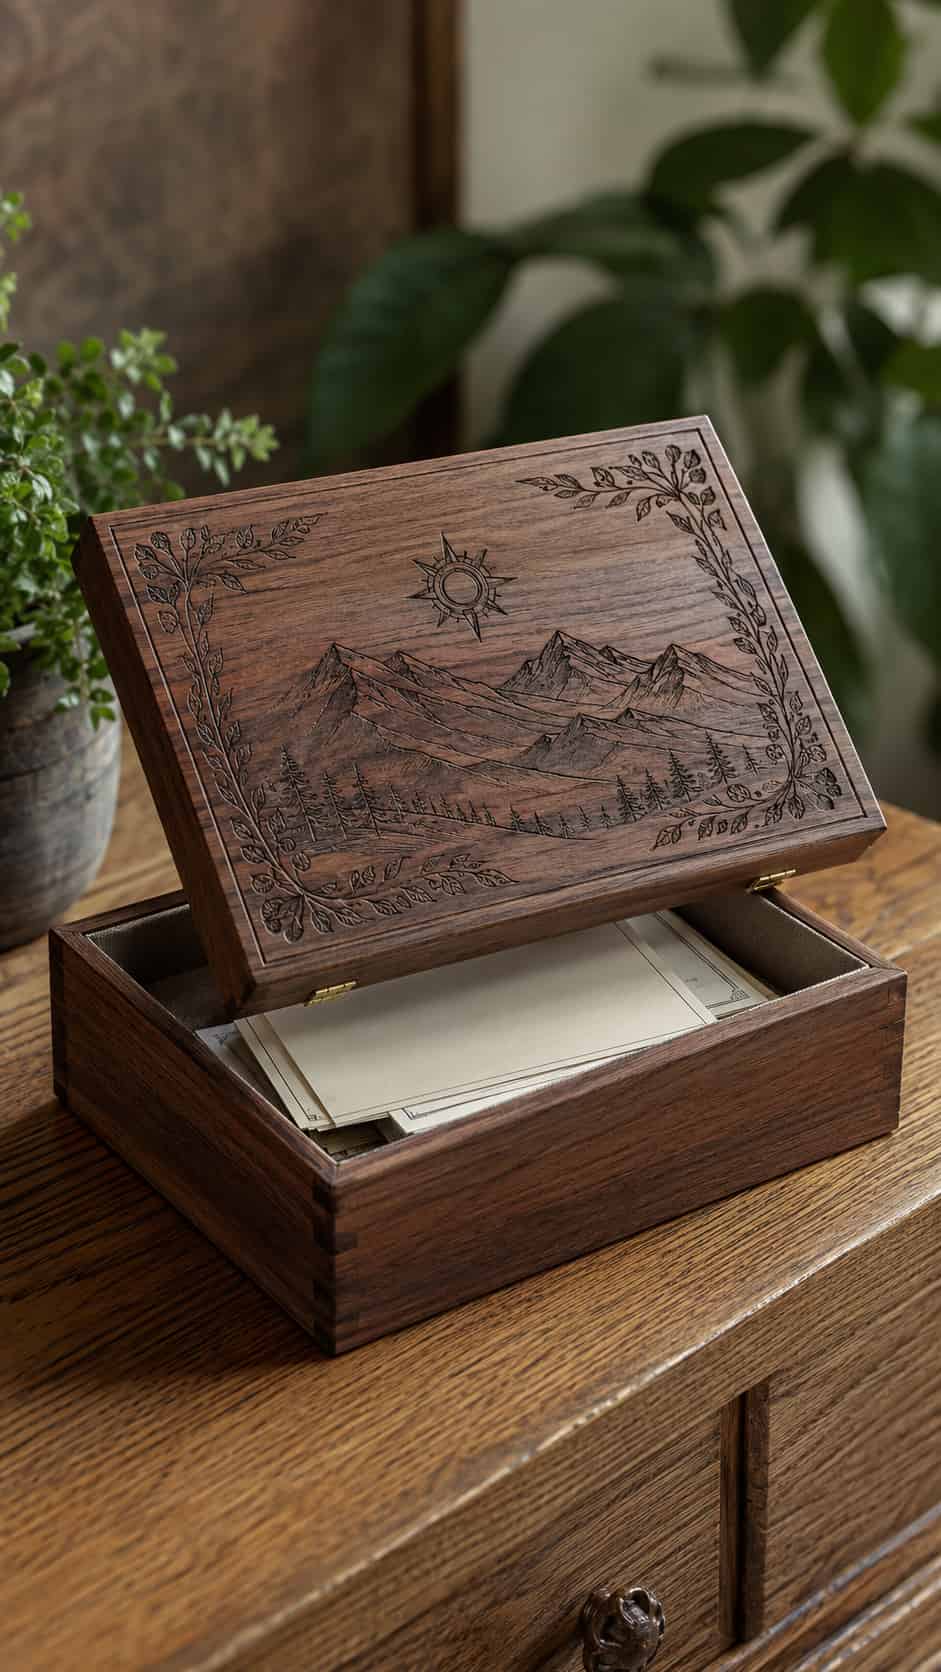
Difficulty: Medium
Estimated time: 2–4 hours
Recommended attachment: Engraving cutter
A plain wooden box can become a memorable gift with an engraved lid. Add a name, floral border, mountain scene, compass, geometric motif, or meaningful date.
Remove the lid if the box construction allows it, then support it on a flat board to reduce vibration. Keep the design away from hinges, fasteners, and thin edges.
Create the outline first, inspect the spacing, and deepen only the areas that need stronger contrast. A dark wax or painted recess can make the design stand out without requiring extremely deep carving.
How to Get Cleaner Results
The difference between a rough first attempt and a polished project often comes down to patience rather than expensive accessories.
Practice on matching scrap wood
Do not test the bit on a completely different material. A cutter that behaves smoothly in basswood may respond differently when it meets hard maple or coarse pine.
Build depth gradually
Several controlled passes usually produce cleaner lines than one aggressive pass. Shallow work also makes mistakes easier to correct.
Remove dust frequently
Dust hides scratches, uneven recesses, and pencil marks. Stop the tool before clearing the work area with a vacuum or brush.
Combine rotary-tool work with hand sanding
A Dremel can reach tight areas, but ordinary sandpaper often leaves the best final surface on flat sections and broad curves.
Know when to stop
Small details do not always improve a project. If the main shape reads clearly and the surface looks balanced, one more line may create clutter rather than refinement.
Finishing Your Dremel Projects
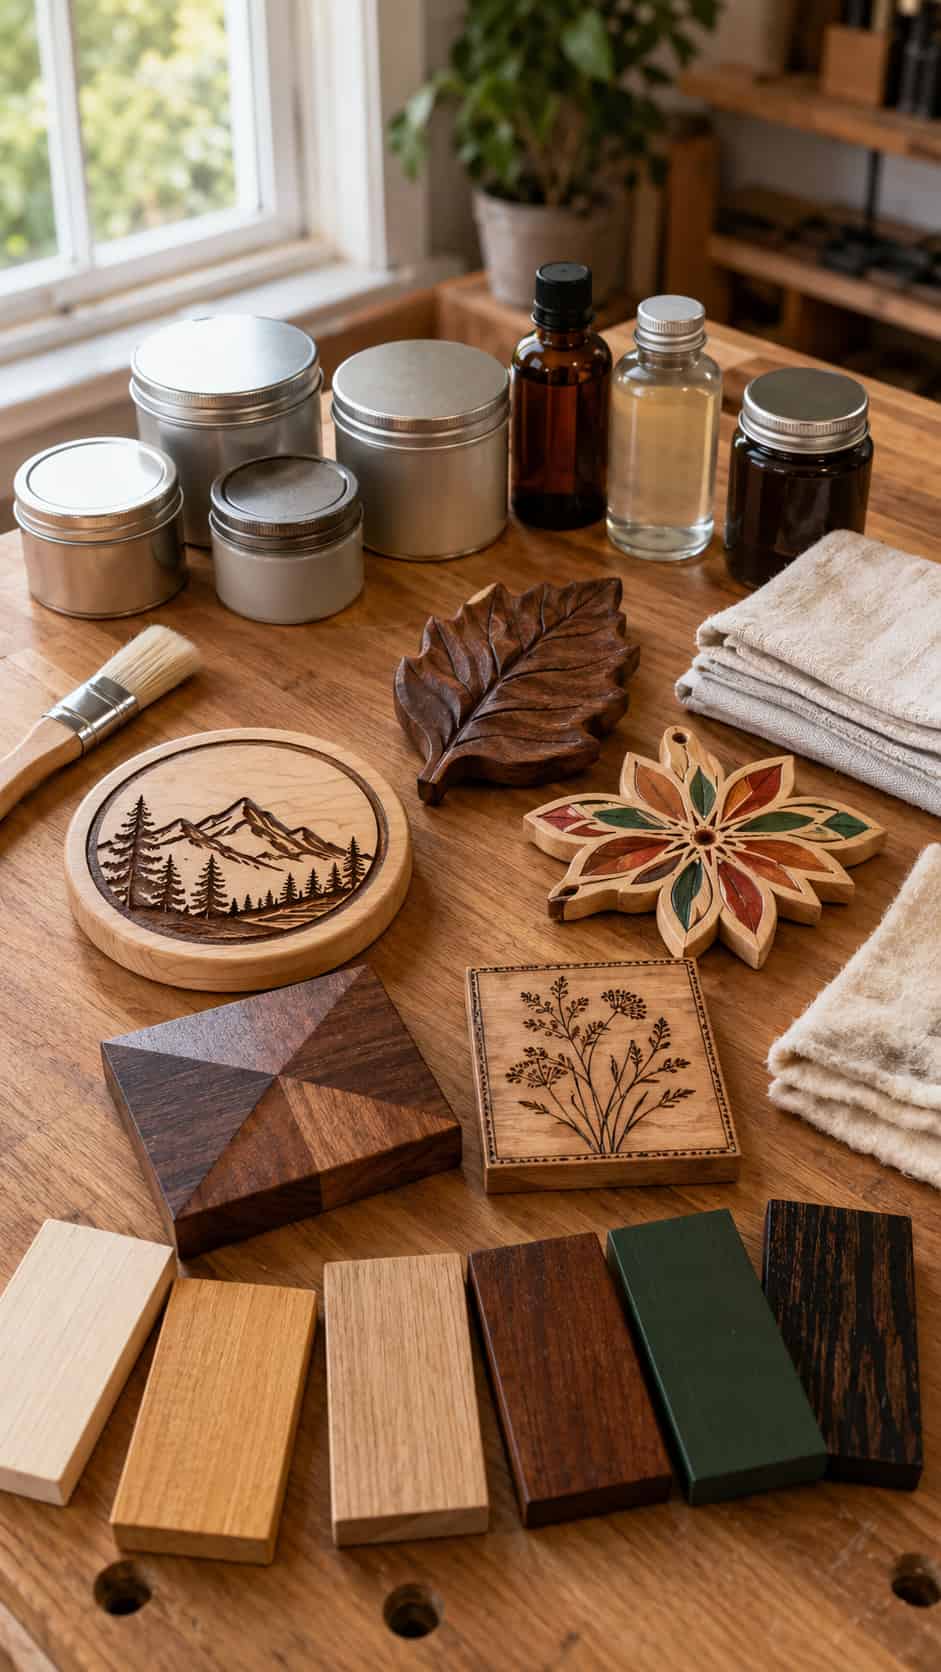
Remove loose dust before applying a finish. Pay special attention to engraved lines because dust often remains trapped inside them.
Your finishing options include:
- Clear wax for indoor decorative carvings
- Suitable drying oil for a natural appearance
- Water-based clear finish for added surface protection
- Acrylic paint for colorful details
- Stain for emphasizing grain
- Dark paint or wax inside engraving for contrast
Always select a finish appropriate for the project’s intended use and follow its safety, drying, ventilation, and curing directions. Items intended for children, food contact, outdoor use, or frequent handling require extra care when choosing materials.
You can also combine engraving with pyrography. For inspiration, see these creative wood-burning ideas and printable wood-burning patterns. Wood-burning tools require their own safety precautions and direct knowledgeable adult supervision for minors.
Frequently Asked Questions
What is the easiest Dremel project for a beginner?
Plant markers, simple signs, coasters, and picture-frame borders are excellent first projects. They use flat surfaces, broad designs, and shallow engraving rather than complicated three-dimensional shaping.
Which Dremel attachment is best for carving wood?
There is no single best attachment for every job. An engraving cutter works well for lines and lettering, a rounded cutter helps create recesses, and a sanding drum is useful for shaping curves. Match the attachment to the operation and confirm that it is approved for wood.
Can I use scrap wood for these projects?
Yes, provided the wood is clean, solid, untreated, and free of hidden nails or screws. Avoid wood with unknown paint, chemical treatments, heavy contamination, cracks, or embedded metal.
Why does my Dremel jump across the wood?
The workpiece may not be secure, the attachment may be removing material too aggressively, or you may be applying too much pressure. Stop, disconnect the tool, inspect the setup and attachment, and test again on scrap according to the manufacturer’s instructions.
How do I prevent burn marks?
Avoid forcing the accessory or leaving it in one place. Use a suitable attachment in good condition, follow the recommended operating guidance for your tool and material, and pause if excess heat develops.
Can a Dremel replace traditional carving tools?
It can handle many carving, engraving, shaping, and sanding jobs, but it does not fully replace knives, gouges, chisels, saws, or hand sanding. Many woodworkers combine rotary-tool work with traditional techniques.
Can young woodworkers use a Dremel?
Rotary tools should only be used by minors with direct supervision from a knowledgeable adult who controls the setup and confirms that the task, accessory, protective equipment, and workholding method are appropriate. A non-powered activity such as drawing patterns, sanding by hand, or painting a completed adult-prepared blank may be a safer starting point.
Final Thoughts
You do not need a large workshop or an expensive piece of lumber to enjoy these Dremel tool projects. A clean scrap of wood, one dependable rotary tool, and a few well-chosen attachments can produce signs, gifts, carvings, ornaments, and practical household pieces.
Begin with a flat engraving project, practice every unfamiliar attachment on scrap wood, and focus on clean shapes before tiny details. Once your control improves, relief carvings, animals, faces, and three-dimensional projects will feel much more approachable.
The goal is not to use every attachment in the box. It is to choose one manageable project, secure it properly, work safely, and turn an ordinary piece of wood into something worth keeping.