
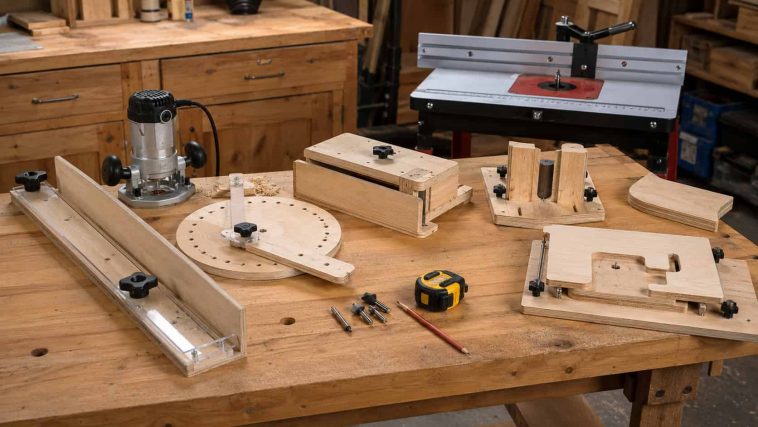
A router is one of the most versatile tools in your shop, but let’s be honest — freehand routing can go sideways fast. One wobble and that clean groove turns into something that looks like it was carved by a caffeinated squirrel. That’s where jigs come in.
I’ve been burned enough times by wandering cuts and mismatched circles to know that a good jig isn’t optional gear — it’s the difference between a project you’re proud of and one you hide in the garage. A simple jig guides either the router or the workpiece, and once you get the hang of it, your accuracy and repeatability jump way up.
Quick note: This article is a router jig idea roundup, not a full set of detailed plans. Because router bases, bits, guide bushings, and tables vary by model, always measure your own router before building a jig.
Common frustrations I hear (and have lived through) include:
- Uneven grooves that look fine until you run your hand over them
- Wandering straight cuts that drift no matter how steady your hand feels
- Mismatched circles when you’re trying to make a matching pair
- Inconsistent mortises that don’t line up with your hinges or joints
- Difficulty holding small workpieces without getting your fingers too close to the bit
- Repeating the same setup over and over because you didn’t build anything reusable
If you’re still getting comfortable with bits, depth adjustments, and feed direction, it’s worth backing up and reading our How to Use a Wood Router for Beginners: Everything You Need to Know guide first. Everything below builds on that foundation.
One more thing before we get into it: always follow your router manufacturer’s instructions, and if you’re new to power tools, ask an experienced adult to help out.There’s no shame in getting help when you’re learning. A clean project is never worth rushing or taking risks around a spinning bit.
What Is a Router Jig?
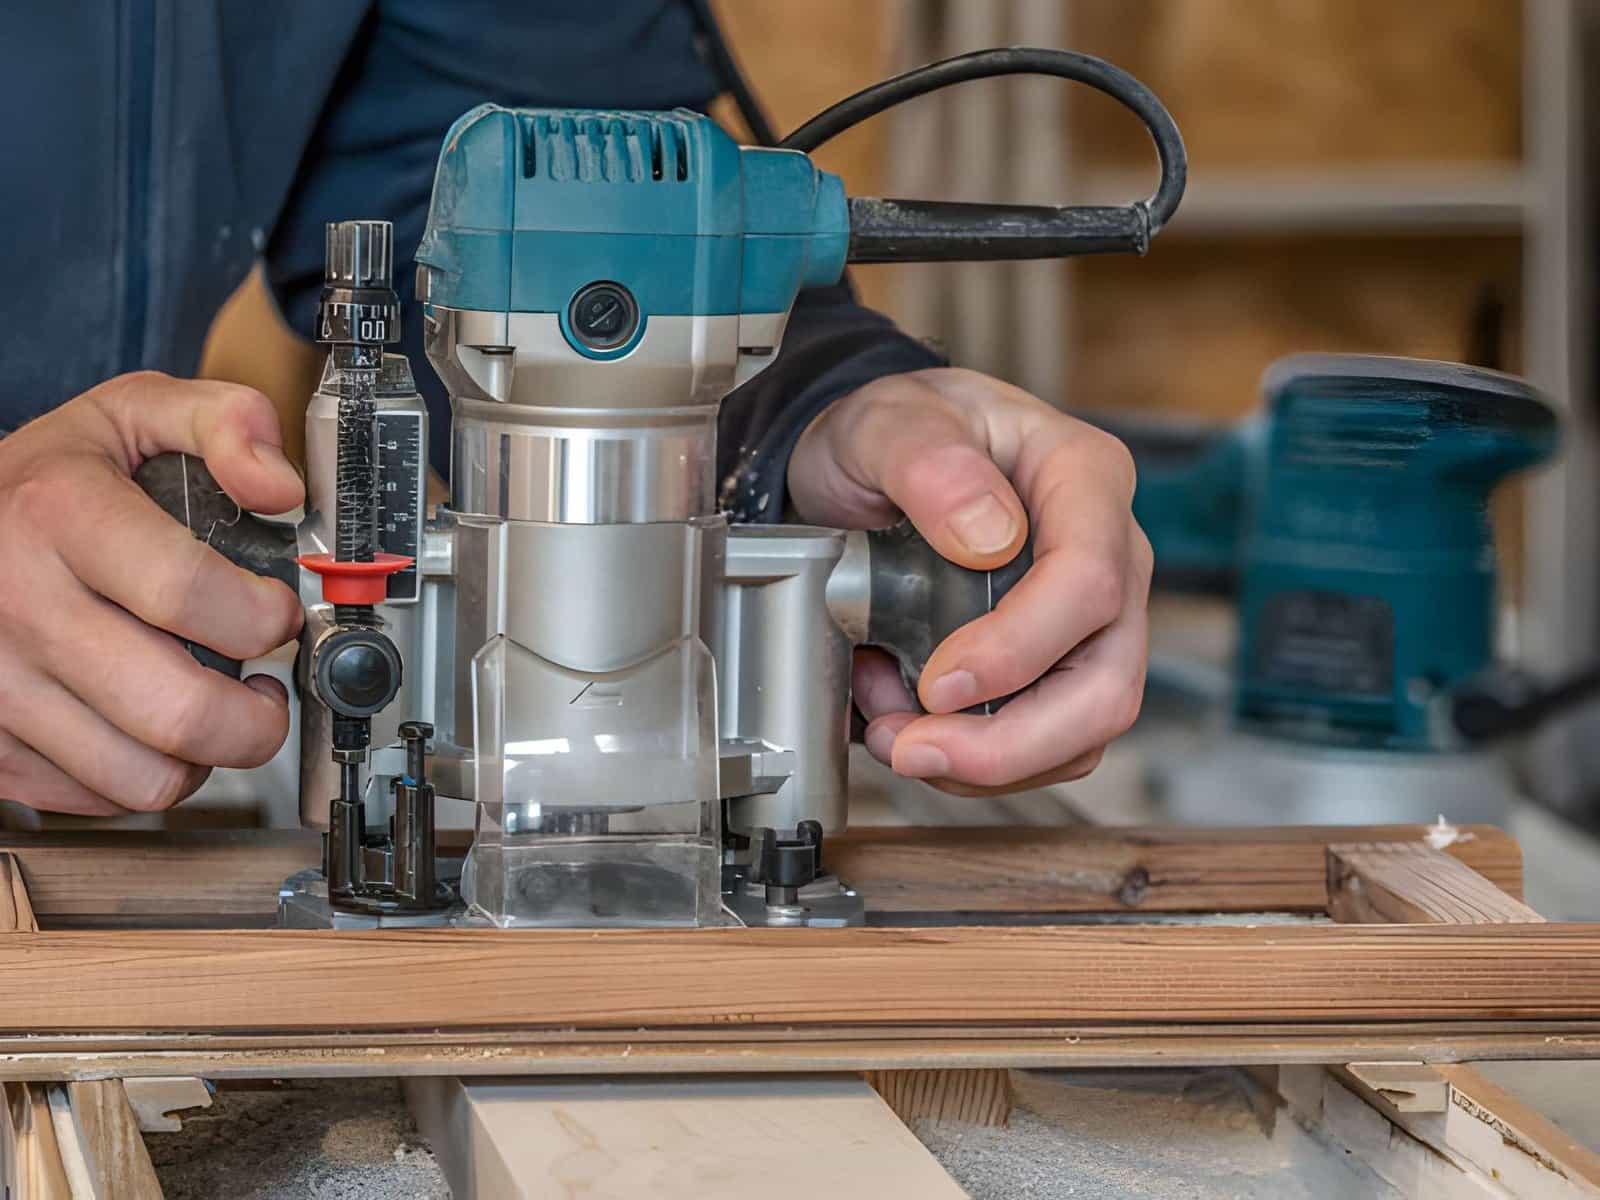
At its core, a router jig is anything that controls the path or position of the router, a template, or the workpiece itself. Think of it as training wheels that never come off — except instead of looking uncool, you look like you know exactly what you’re doing.
Here’s what a solid jig actually gets you:
- Straighter cuts, every single time
- Repeatable dimensions, so part two matches part one
- Better control, especially with tricky grain or awkward angles
- Faster project setup once the jig is built
- Less wasted material from blown-out or botched cuts
- Safer workpiece positioning, keeping your hands clear of the bit
Now, a quick distinction, because these terms get thrown around loosely: a jig guides the tool or workpiece through a cut, a template defines a specific shape a bearing-guided bit will follow, and a router-table accessory (like a fence or sled) is built into or attached to the table itself. They overlap a lot in practice, so don’t lose sleep over the terminology.
Router jigs are just one piece of an efficient shop setup. If you want more homemade problem-solvers, check out 11 Woodworking Jigs That Will Save You Time and Effort for a broader look.
Quick Router Jig Comparison Table
| Router Jig | Difficulty | Estimated Build Time | Best Use | Router Setup |
|---|---|---|---|---|
| Straight-edge guide | Easy | 30–60 minutes | Straight cuts | Handheld |
| Circle-cutting jig | Easy | 1–2 hours | Circles and arcs | Handheld |
| Adjustable dado jig | Medium | 2–3 hours | Dados and grooves | Handheld |
| Mortising jig | Medium | 2–4 hours | Repeated mortises | Handheld |
| Edge-jointing jig | Easy | 1–2 hours | Straightening board edges | Router table |
| Corner-radius jig | Easy | 1–2 hours | Matching rounded corners | Handheld |
| Hinge-mortise jig | Medium | 2–3 hours | Doors and boxes | Handheld |
| Template-routing jig | Medium | 2–3 hours | Repeated shapes | Handheld |
| Router flattening sled | Medium | 3–5 hours | Slabs and wide boards | Handheld |
| Adjustable router-table fence | Medium | 3–4 hours | Controlled table routing | Router table |
| Coping sled | Medium | 2–3 hours | Rail ends and cabinet parts | Router table |
| Box-joint jig | Medium | 3–4 hours | Repeated box joints | Router table |
| Small-parts holding jig | Easy | 1–2 hours | Controlling small pieces | Router table |
| Ellipse-routing jig | Medium | 2–4 hours | Ovals and decorative tops | Handheld |
| Router setup gauge | Easy | Under 1 hour | Repeatable depth settings | Either |
Keep in mind these times are ballpark figures. Your actual build time depends on your experience level and whatever scrap you’ve got lying around — And honestly, many “1-hour” jig builds turn into 2-hour builds once you start fine-tuning the setup.
Before You Build a Router Jig
Match the Jig to Your Router
Before you cut a single piece of scrap, check these details on your own router:
- Router-base shape
- Baseplate screw pattern
- Bit location relative to the base
- Plunge or fixed-base design
- Guide-bushing compatibility
- Router-table dimensions, if you’re using one
Whatever you do, don’t copy mounting-hole measurements from someone else’s router model. Every brand does it a little differently, and a jig built for the wrong base is just an expensive paperweight.
Choose Stable Materials
Good jigs start with good material. Here’s what tends to work well:
- Quality plywood for most jig bodies
- MDF for templates that’ll stay in a dry workshop
- Straight hardwood strips for fences and guides
- Clear acrylic when you want to see the cut line through the template
- Exterior-rated material only if the jig will actually see outdoor conditions
Warped scraps make warped jigs, and warped jigs make warped results. Skip the bin of sad, twisted offcuts for this one.
Gather the Basic Hardware
You’ll want to have these on hand before you start:
- Bolts, washers, and nuts
- Threaded knobs
- Toggle clamps
- T-track, where it makes sense
- Double-sided woodworking tape
- Guide bushings
- The right router bits for the job
- Reliable workbench clamps
Follow Essential Safety Practices
I’m not going to bury this one under a bunch of fluff:
- Read the router manual before you touch the trigger
- Disconnect power before changing bits or adjusting anything
- Secure the jig and the workpiece before every cut
- Keep your hands away from the bit’s path — always
- Wear eye and hearing protection
- Control dust appropriately
- Test every new jig on scrap wood first
- Ask an experienced adult to supervise if you’re new to power tools
Ever wonder why so many woodworking mishaps come down to skipping one of these steps? It’s rarely the tool’s fault. It’s almost always a shortcut.
Best Materials for Router Jigs
For most router jigs, plywood is usually the safest beginner choice because it is stable, affordable, and easy to work with. MDF works well for templates and flat shop-made guides, but it should stay in a dry workshop. Hardwood strips are useful for fences, stops, and runners because they hold edges better than soft, warped scraps.
Avoid badly twisted lumber, weak plywood, cracked offcuts, or anything that flexes under pressure. A jig only improves accuracy if the jig itself stays flat, square, and predictable.
15 Essential Router Jigs to Build
Each jig below follows the same rundown: difficulty, estimated time, what it’s best for, router setup, what the jig actually does, the basic design, key setup considerations, and a customization idea to make it your own.
1. Straight-Edge Router Guide
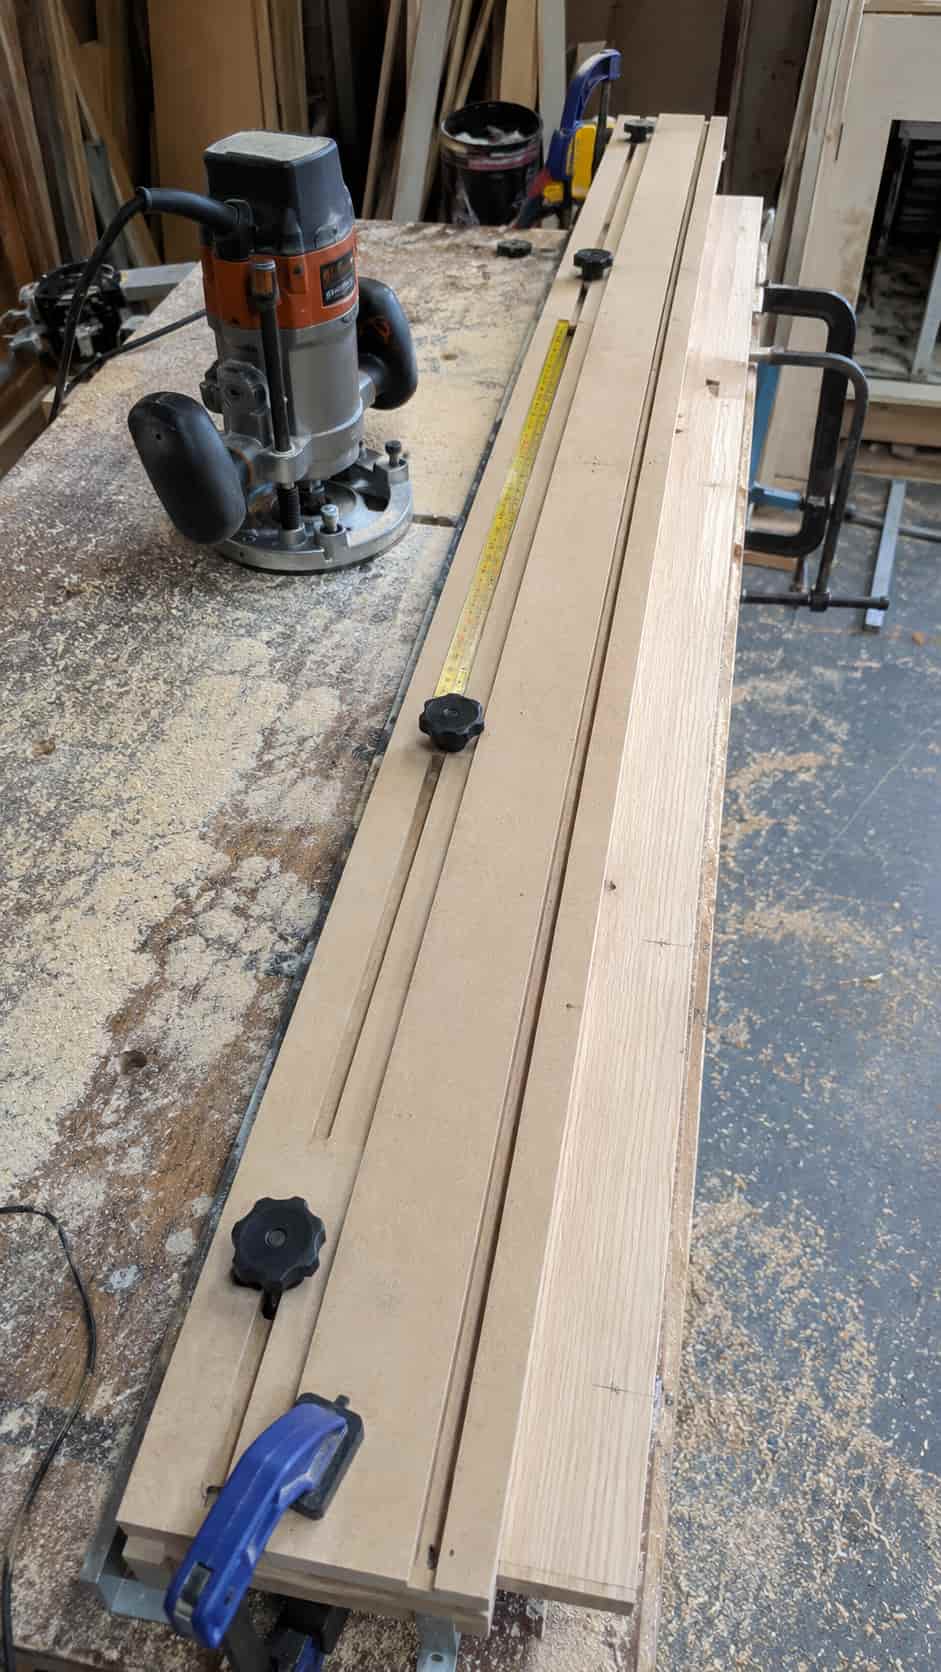
Difficulty: Easy Estimated time: 30–60 minutes Best for: Straight grooves, dados, and trimming Router setup: Handheld router
A straight fence clamped parallel to your cut line keeps the router from wandering, plain and simple. Build the guide around the exact distance between your bit and the edge of your router’s base — measure twice, because this offset is the whole point of the jig.
Customization idea: Add adjustable clamping slots so the same guide works across different board widths.
2. Circle-Cutting Router Jig
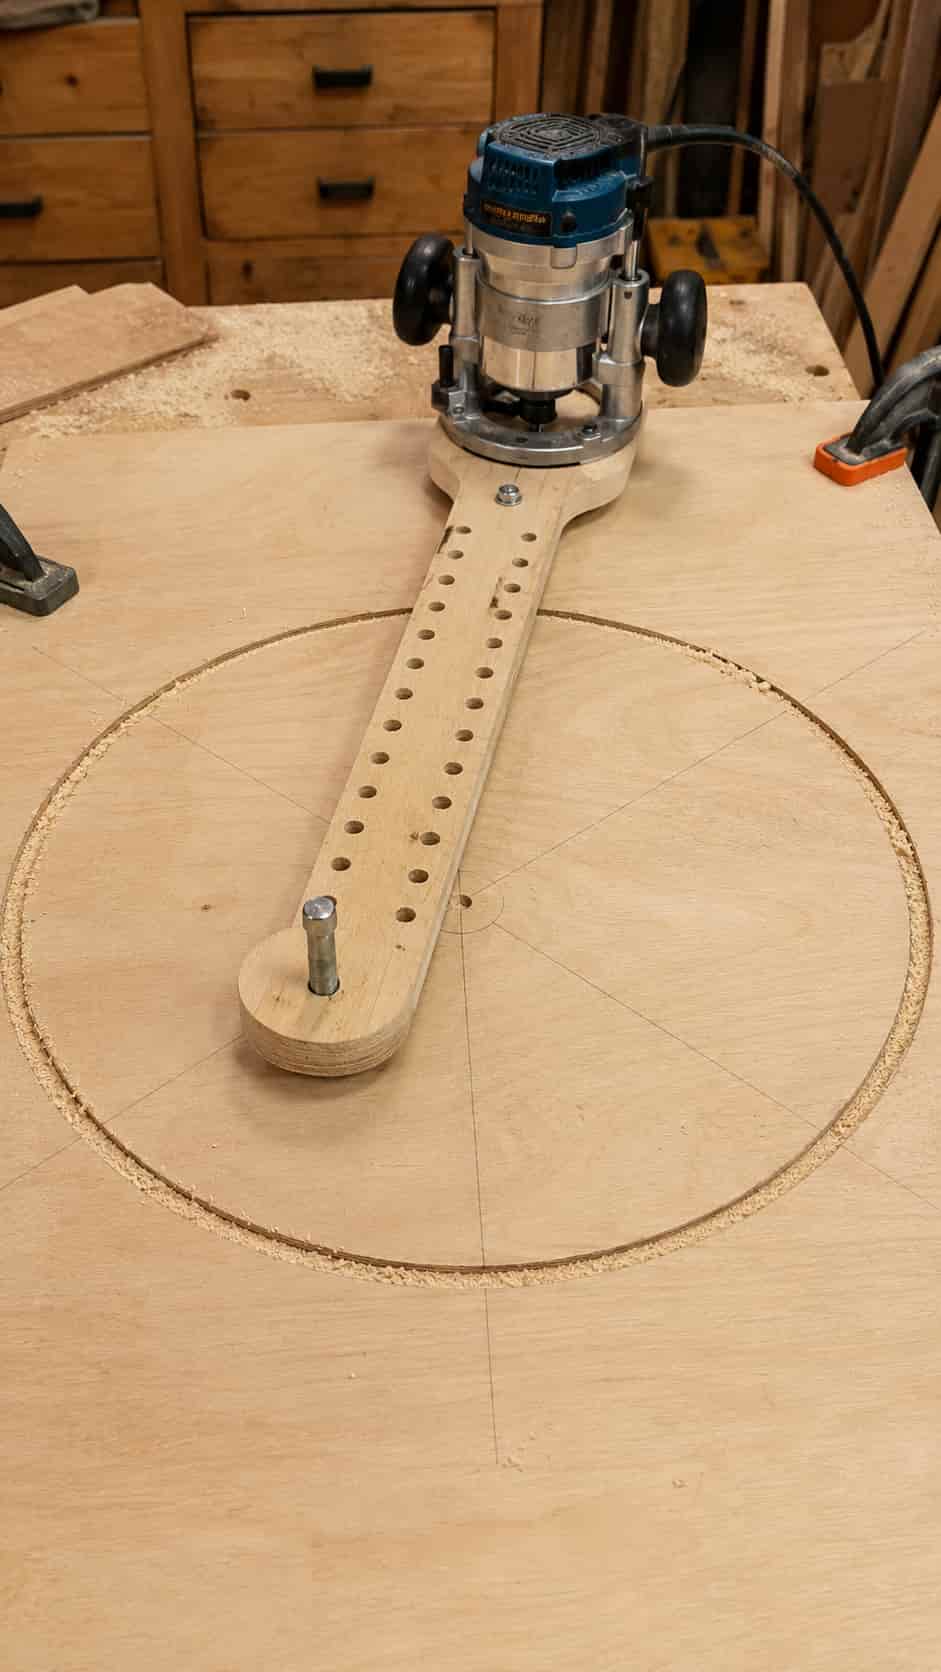
Difficulty: Easy Estimated time: 1–2 hours Best for: Tabletops, signs, trays, and decorative circles Router setup: Handheld router
This one uses a long baseplate with a series of pivot positions drilled along its length. The distance between the pivot point and the bit determines your circle’s radius, so more pivot holes mean more size options.
Customization idea: Swap the fixed holes for an adjustable sliding pivot — one jig, infinite radius options.
3. Adjustable Dado Jig
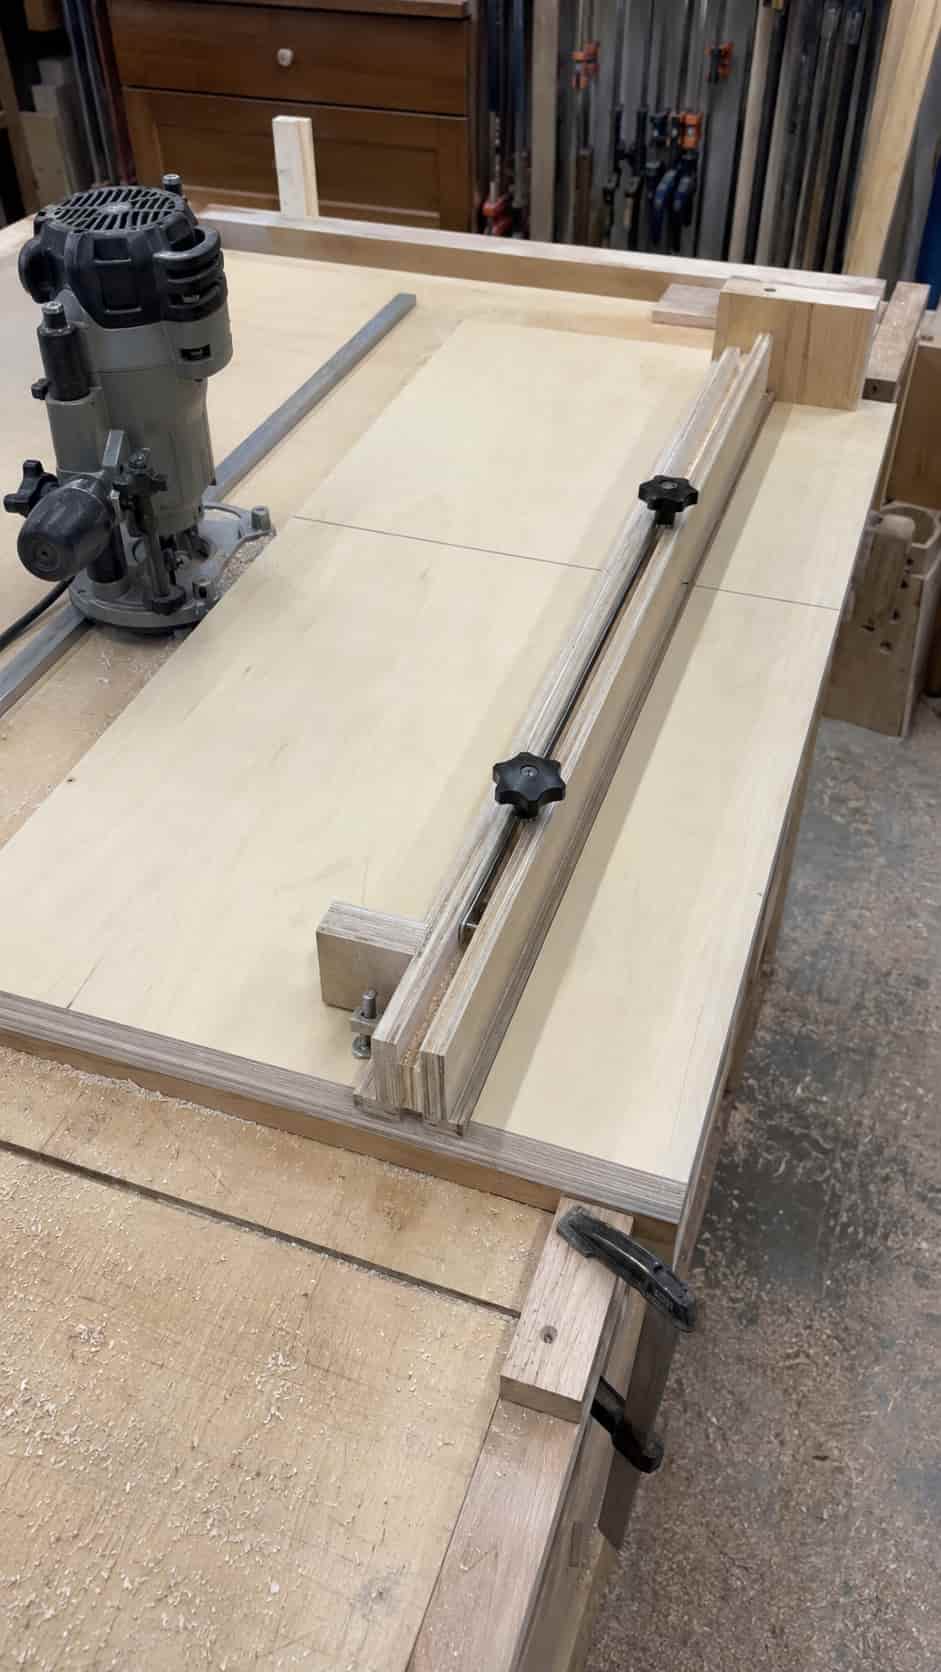
Difficulty: Medium Estimated time: 2–3 hours Best for: Shelves, cabinets, and storage projects Router setup: Handheld router
An adjustable guide lets you match the actual thickness of your plywood or shelf material, not the “nominal” thickness printed on the label (which, let’s be honest, is basically a suggestion at this point). This solves one of the most annoying mismatches in shop math.
Customization idea: Add stops for repeated stopped dados across multiple shelves.
4. Router Mortising Jig
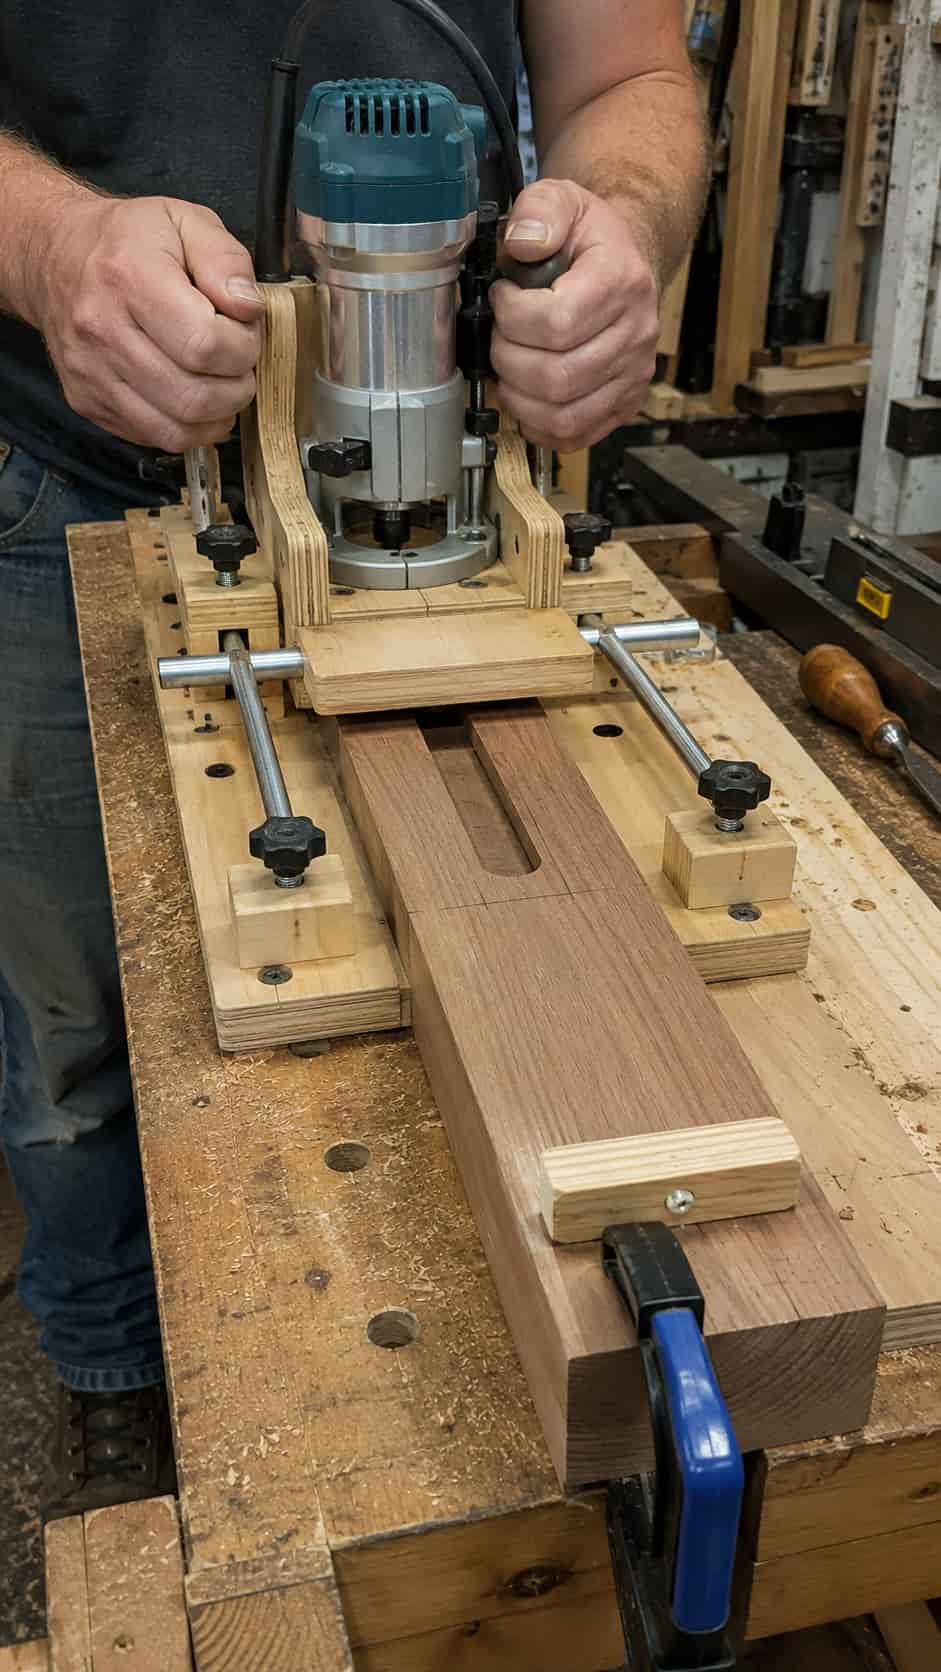
Difficulty: Medium Estimated time: 2–4 hours Best for: Furniture joints and repeated mortises Router setup: Plunge router
This jig centers your router and limits its travel between two adjustable stops, so every mortise comes out the same size in the same spot. Secure clamping matters more here than almost anywhere else — a shifted workpiece means a ruined joint.
Customization idea: Add removable spacers to dial in different mortise lengths without rebuilding the jig.
5. Router-Table Edge-Jointing Jig
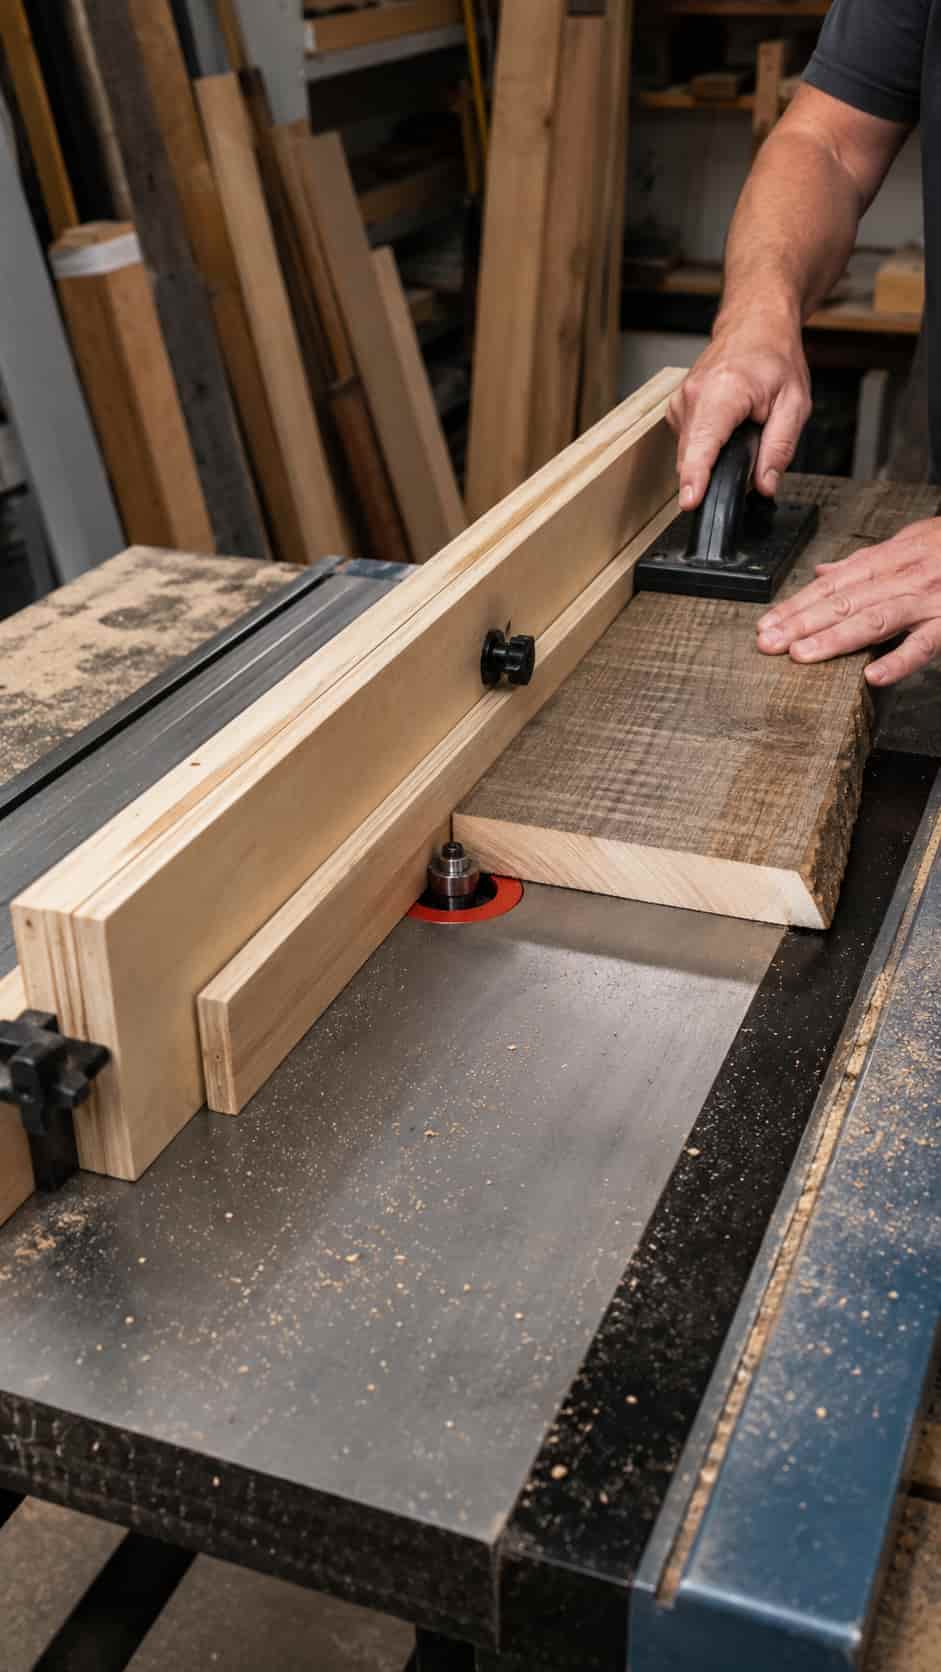
Difficulty: Easy Estimated time: 1–2 hours Best for: Straightening rough board edges Router setup: Router table
An offset fence supports the newly routed edge as the board passes the bit, essentially letting your router table pull double duty as a light jointer. Just don’t expect it to replace every jointer operation — this handles the light stuff well, not the seriously twisted board you’ve been avoiding.
Customization idea: Build a few removable offset strips for different cutting depths.
6. Corner-Radius Template Jig
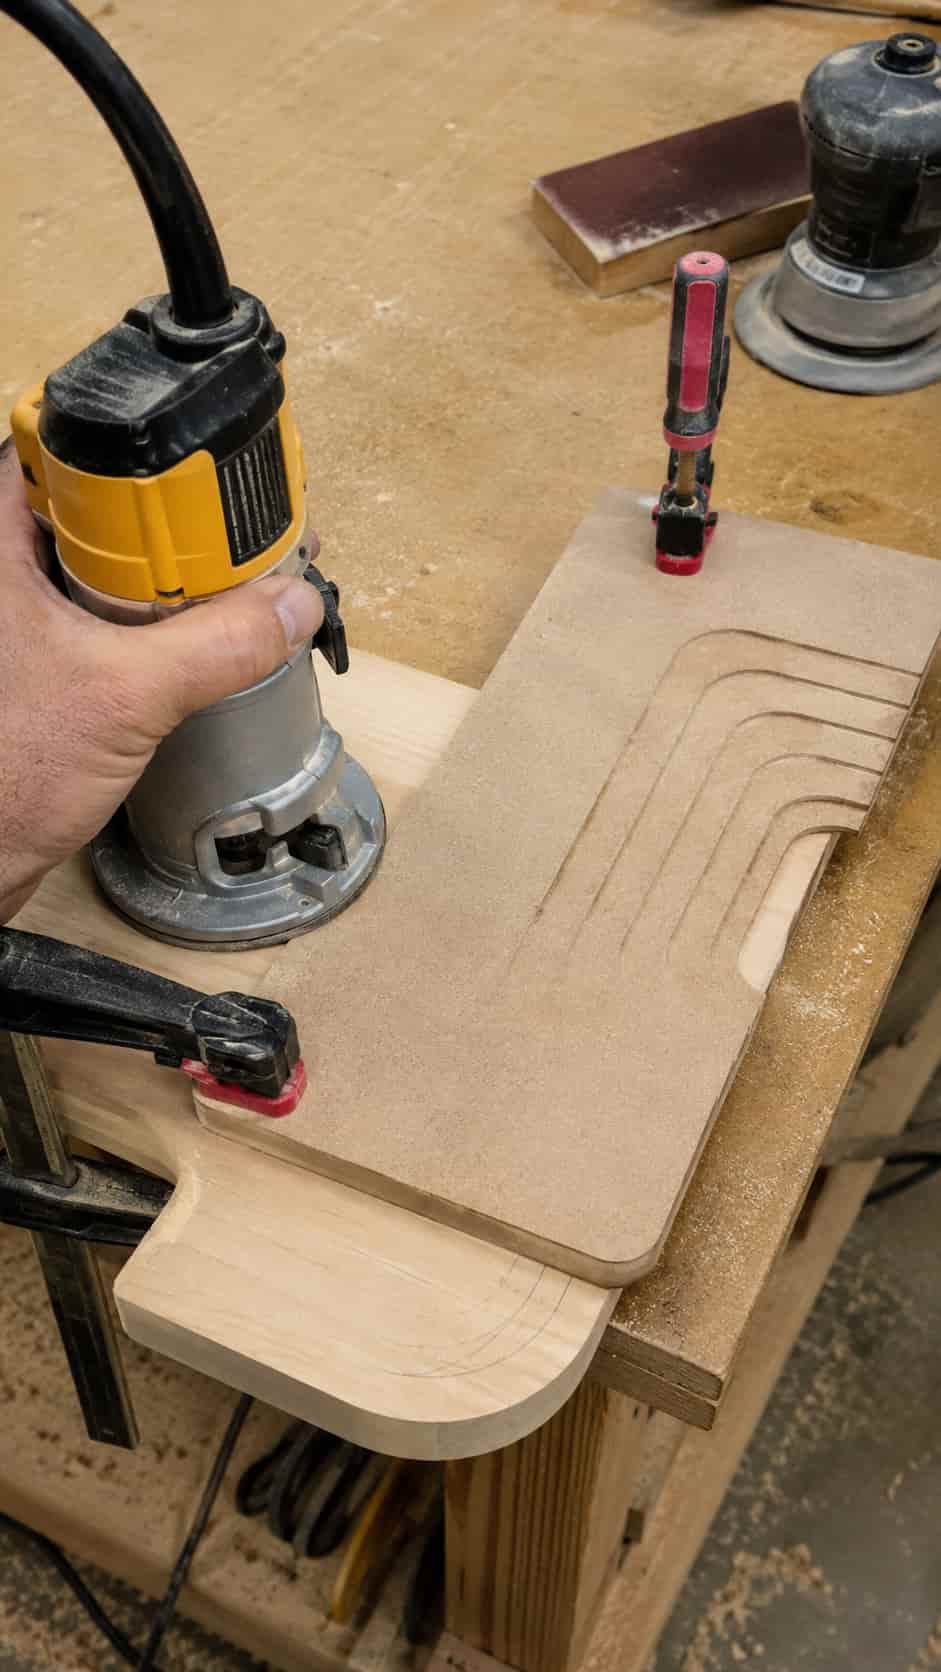
Difficulty: Easy Estimated time: 1–2 hours Best for: Shelves, tabletops, signs, and trays Router setup: Handheld router
A reusable template with a fixed radius gives you matching rounded corners across a whole project — no more eyeballing it and hoping nobody notices the mismatch.
Customization idea: Put several radius sizes on one template so you’re not building a new one for every project.
7. Hinge-Mortise Router Jig
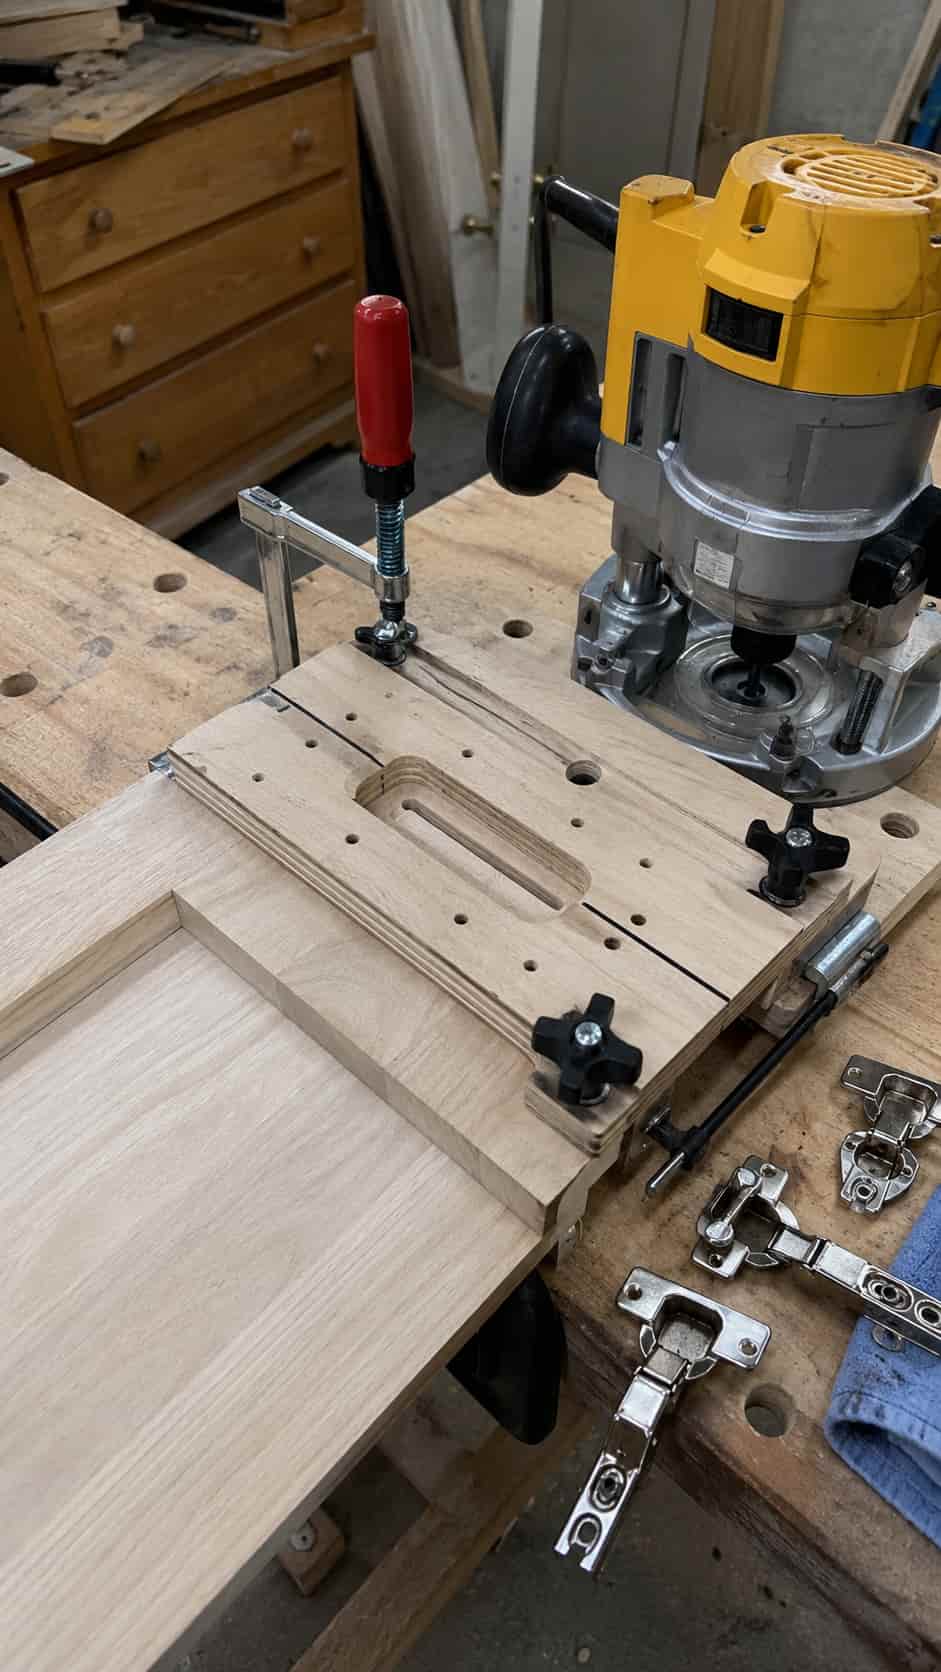
Difficulty: Medium Estimated time: 2–3 hours Best for: Doors, cabinets, boxes, and storage benches Router setup: Handheld router
This adjustable template positions the hinge recess consistently, which matters more than you’d think once you’ve hung a door with a mortise that’s a hair off. The template dimensions need to match your specific hinge, guide bushing, and bit — mix and match at your own risk.
Customization idea: Add alignment marks for the hinge sizes you use most often.
8. Reusable Template-Routing Jig
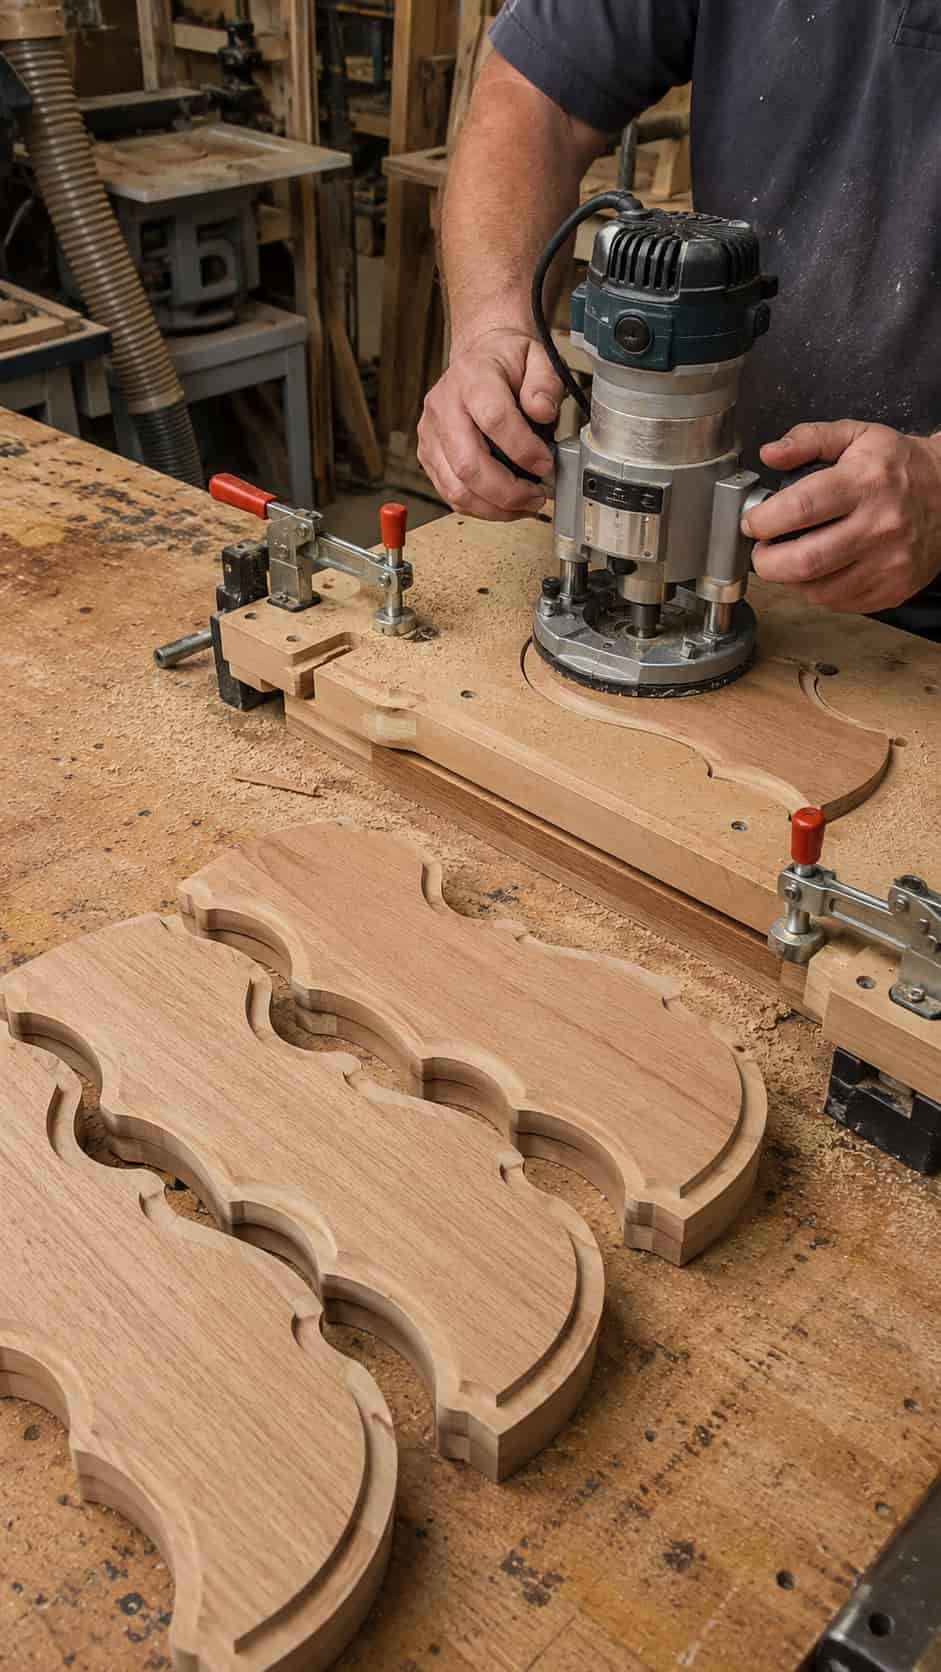
Difficulty: Medium Estimated time: 2–3 hours Best for: Repeated curves, signs, and furniture components Router setup: Handheld router
One accurate master template, paired with a bearing-guided bit, lets you crank out several matching components. The relationship between the template, the bearing, and the finished shape is basically the whole trick here — get the template right and the rest follows.
Customization idea: Build interchangeable inserts for related shapes so one base jig covers a whole family of parts.
9. Router Flattening Sled
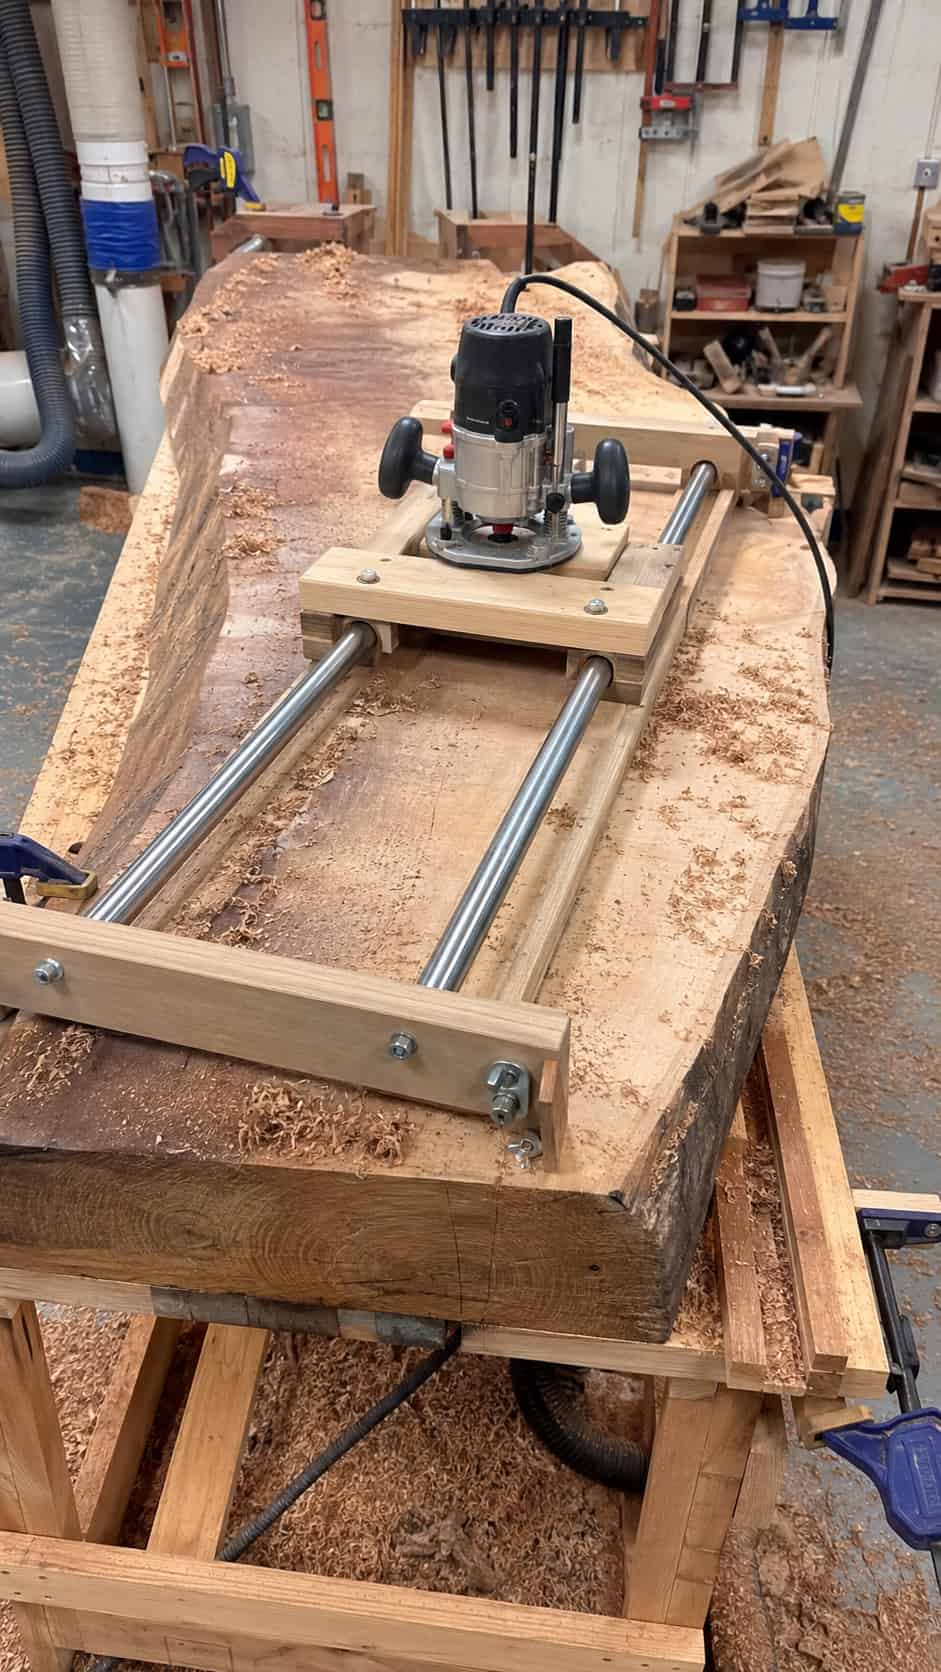
Difficulty: Medium Estimated time: 3–5 hours Best for: Wide boards, end-grain slabs, and workbench tops Router setup: Handheld router
Two parallel rails support a sliding carriage that holds the router, letting you flatten a slab that’s too wide for a planer. The rails have to stay level, straight, and well supported — any sag in the rails becomes a permanent dip in your slab. Use a verified design that fits your specific workpiece and router.
Customization idea: Build adjustable-height rails so the sled works across different material thicknesses.
10. Adjustable Router-Table Fence
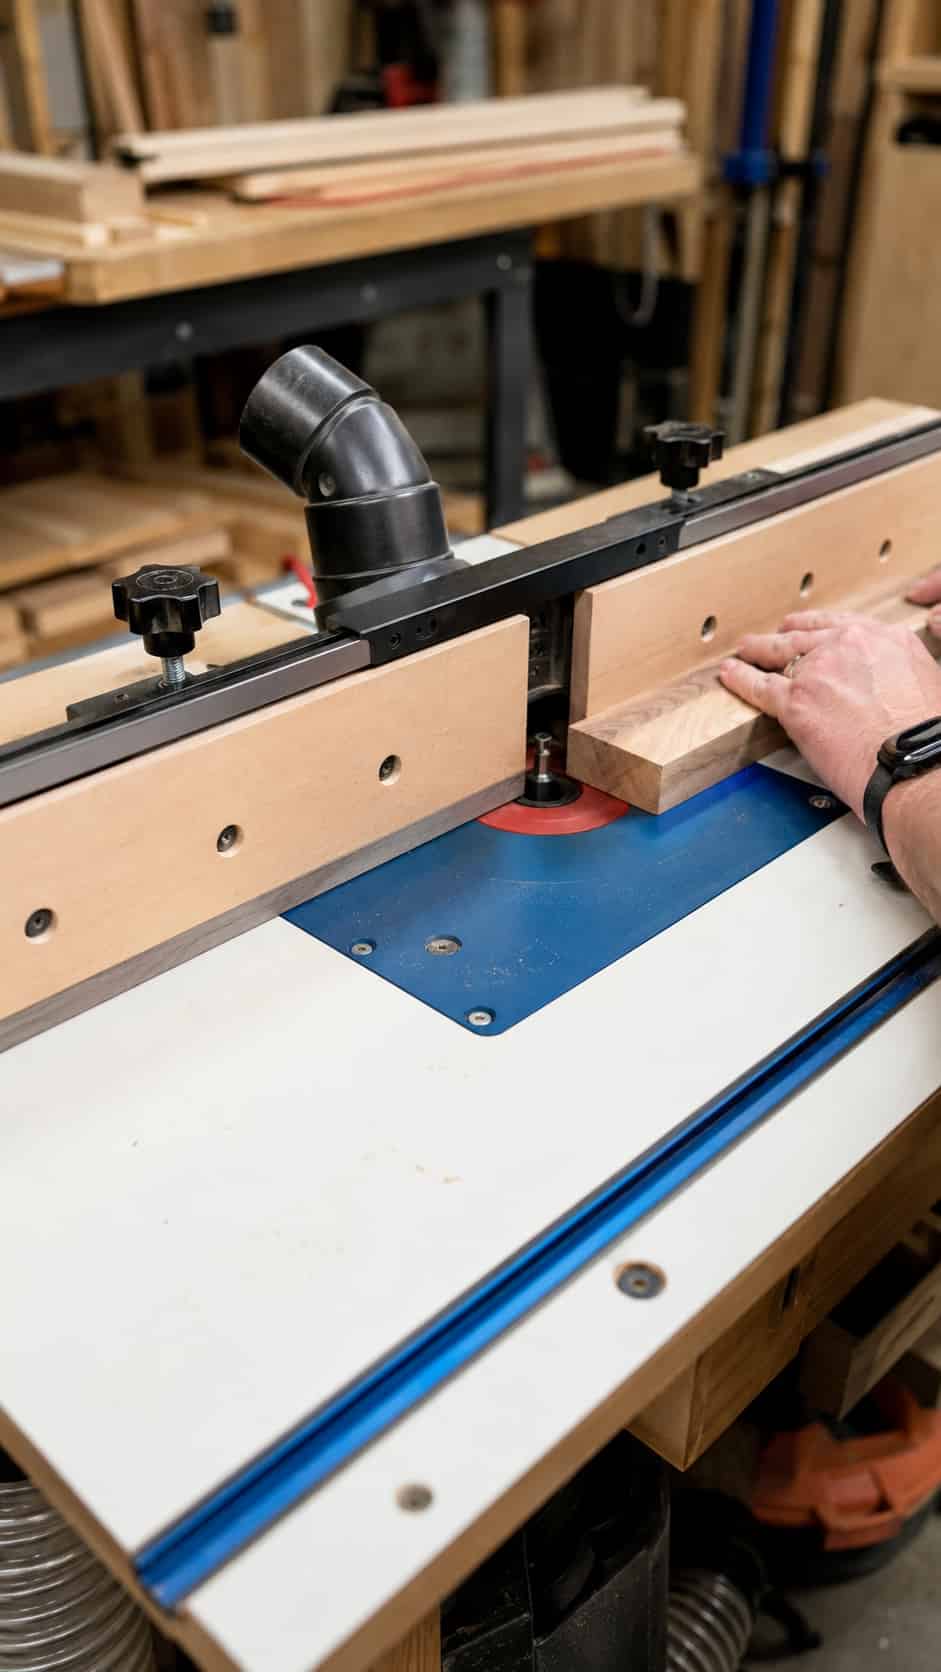
Difficulty: Medium Estimated time: 3–4 hours Best for: Edge profiles, grooves, and repeatable table routing Router setup: Router table
A straight, adjustable fence is honestly one of the biggest upgrades you can make to a basic router table. Think through dust collection, bit clearance, and how easily you can lock in an adjustment before you finalize the design.
Customization idea: Add replaceable fence faces and a built-in measurement scale.
11. Router-Table Coping Sled
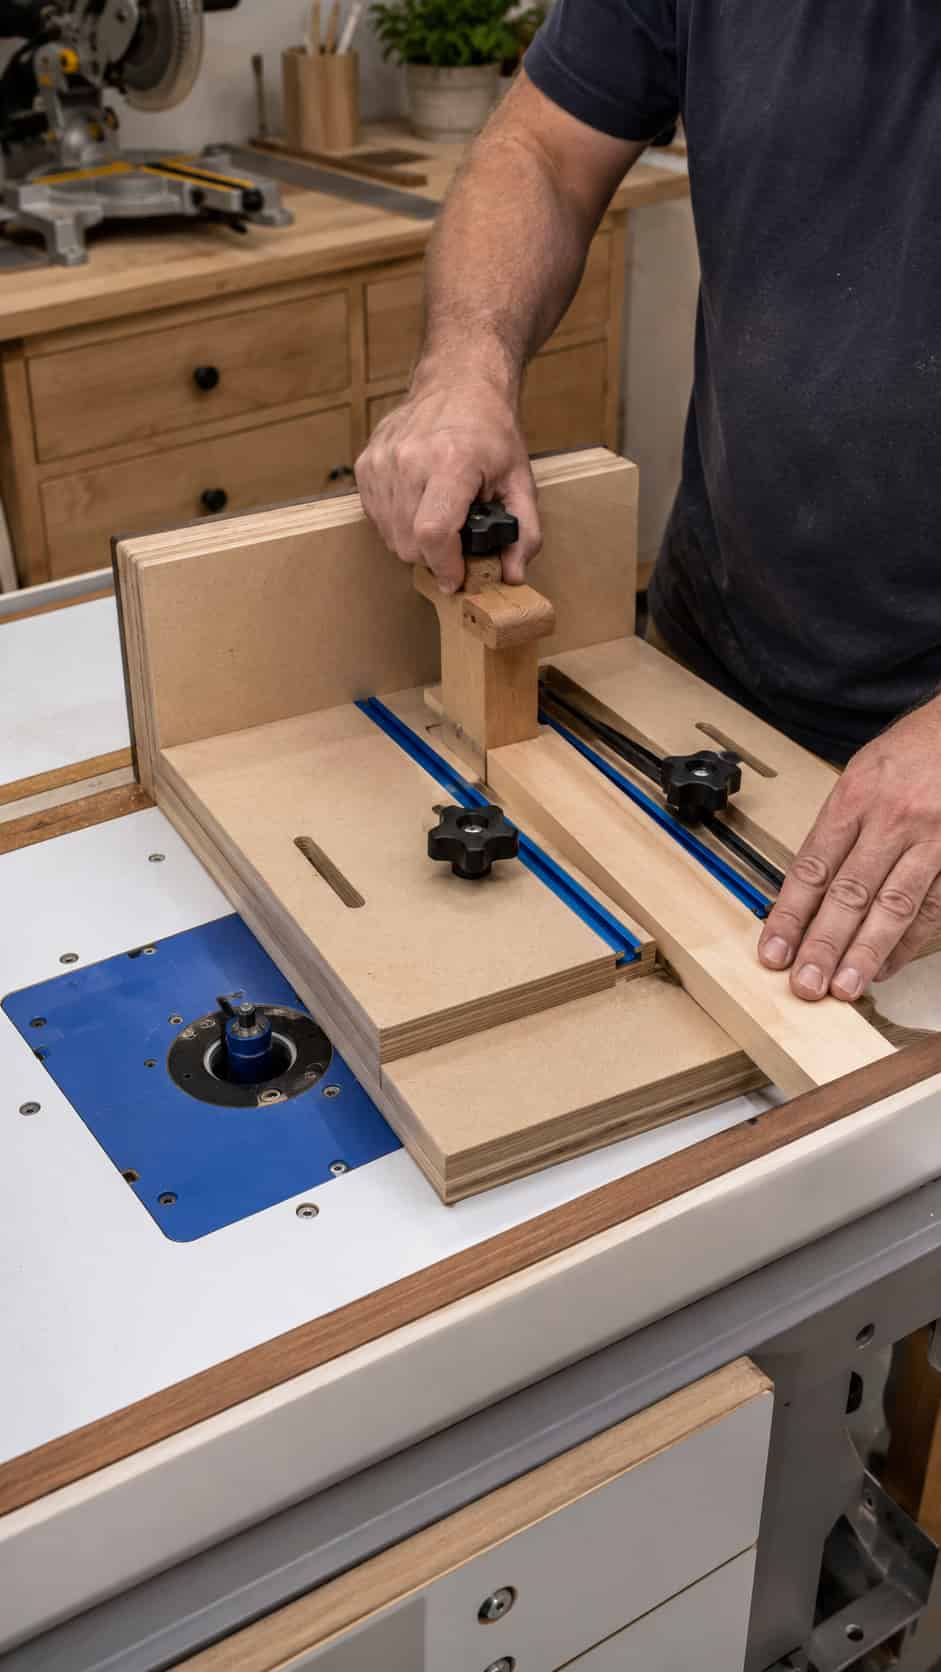
Difficulty: Medium Estimated time: 2–3 hours Best for: Cabinet rails and narrow board ends Router setup: Router table
This sled supports a workpiece as it moves squarely across the router-table fence, which matters a lot when you’re routing the end grain of a narrow rail (freehanding that is asking for trouble). A stable base, rear support, and a solid hold-down system are non-negotiable here.
Customization idea: Add an adjustable stop for repeated identical parts.
12. Router-Table Box-Joint Jig
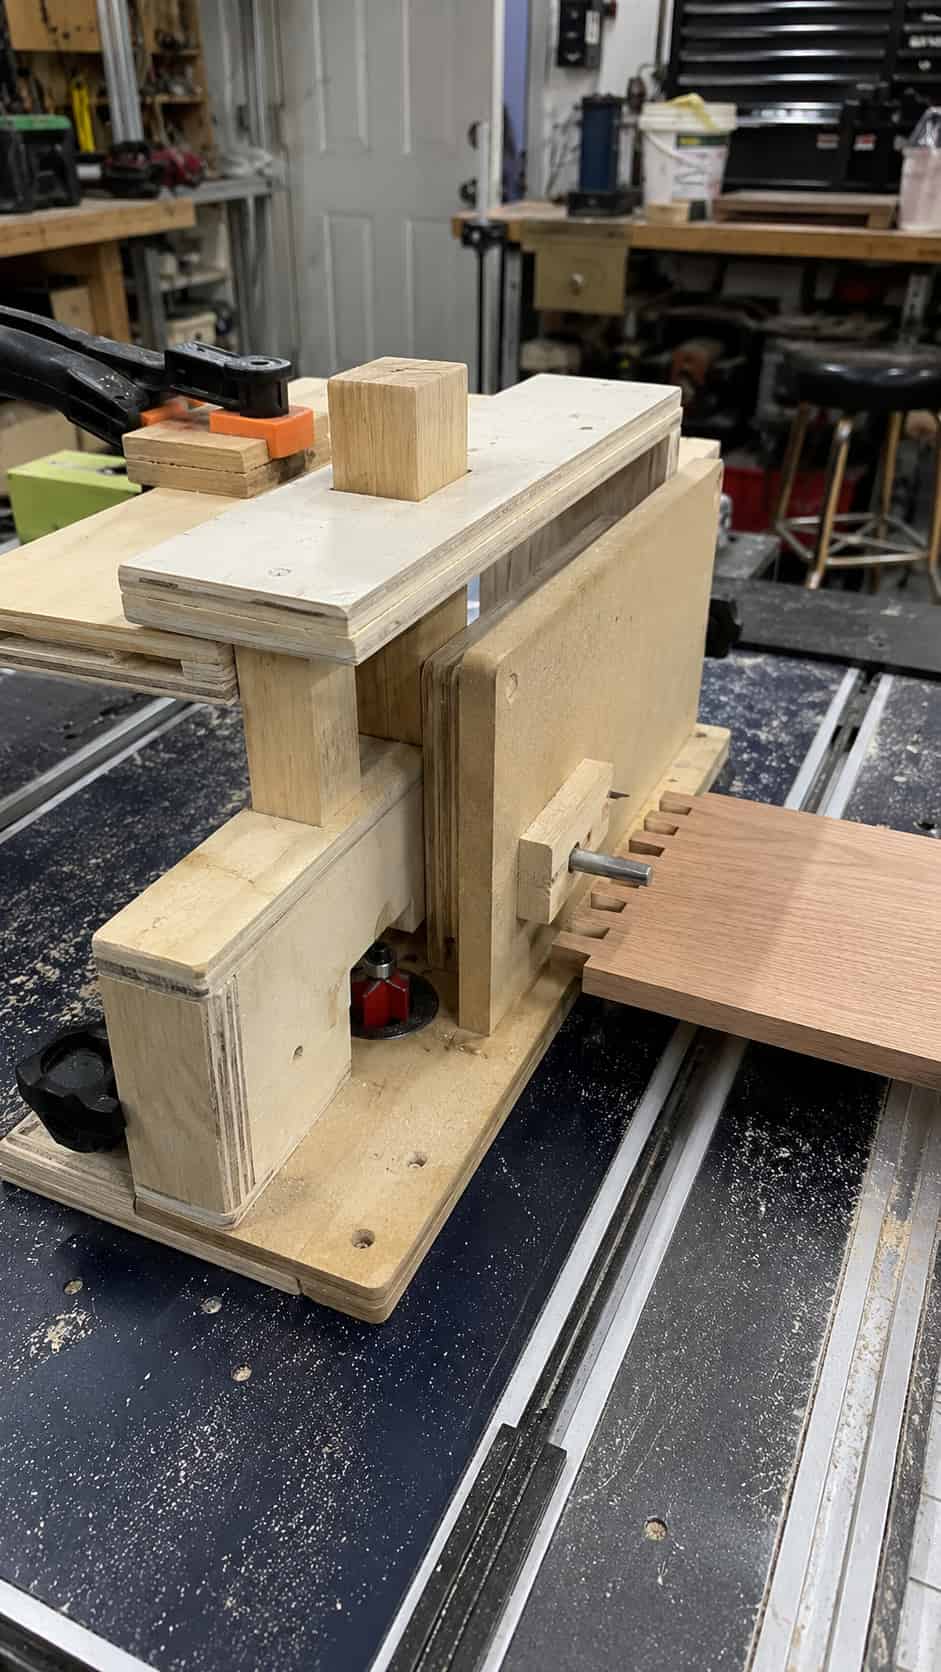
Difficulty: Medium Estimated time: 3–4 hours Best for: Boxes, drawers, and decorative joinery Router setup: Router table
An indexing key sets consistent spacing between cuts, which is exactly what makes box joints look intentional instead of improvised. Your bit width, indexing key, and spacing all need to work together precisely, or you’ll end up with gaps that no amount of glue can hide.
Customization idea: Build interchangeable indexing blocks for different joint sizes.
13. Small-Parts Holding Jig
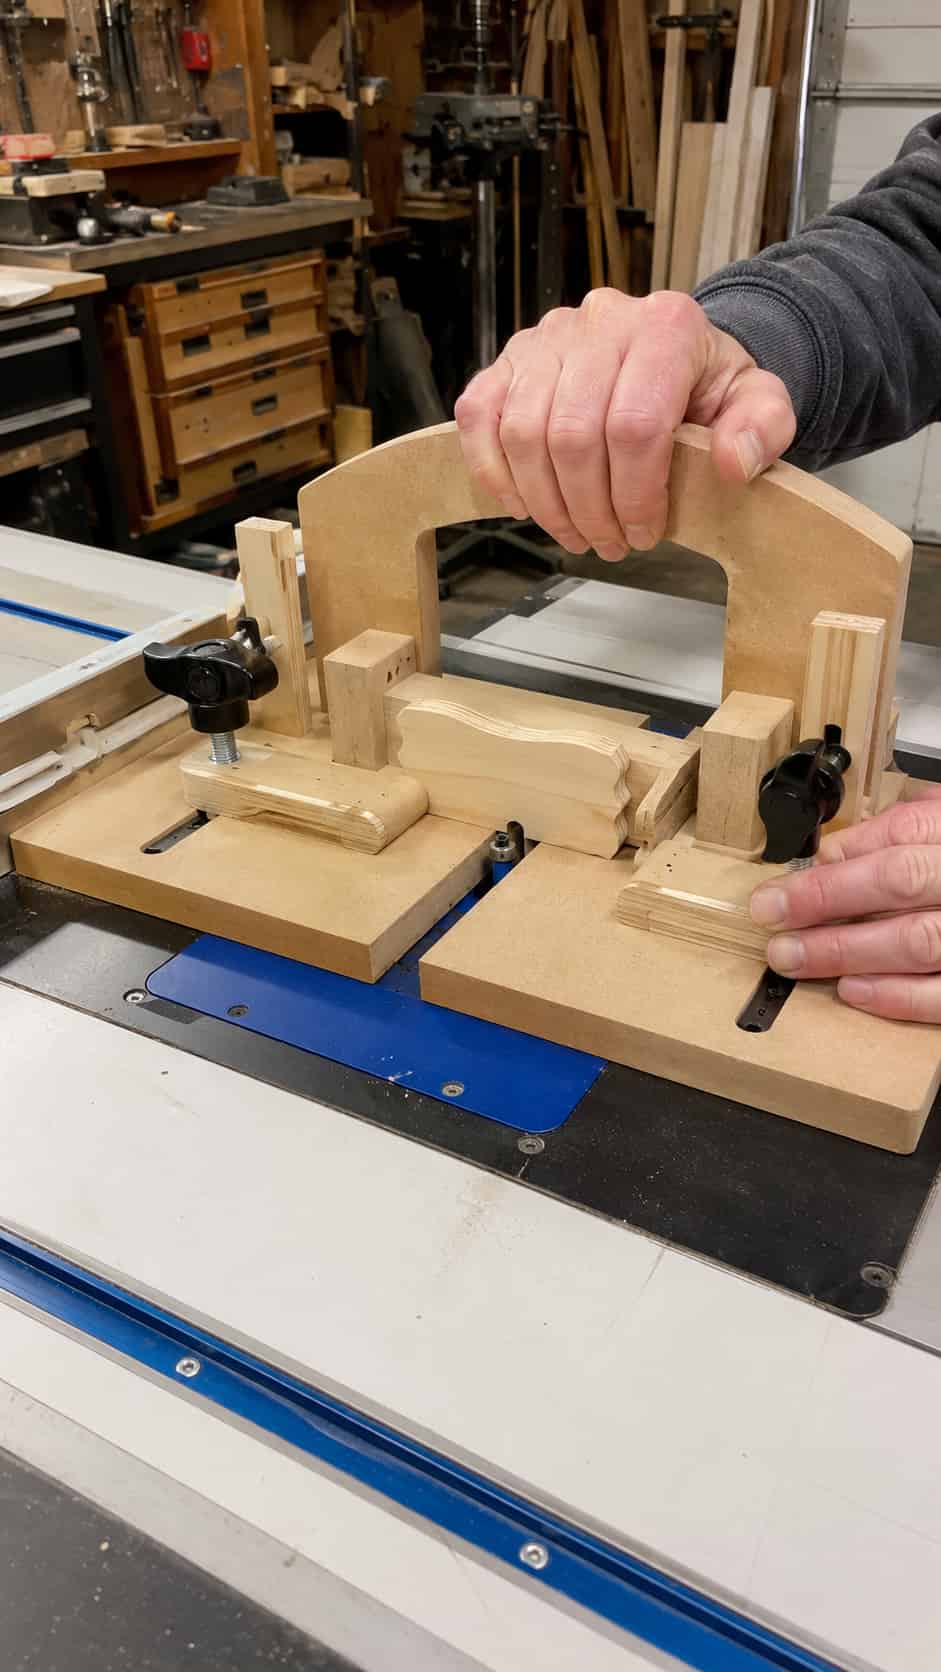
Difficulty: Easy Estimated time: 1–2 hours Best for: Small signs, blocks, and decorative components Router setup: Router table
A larger carrier piece lets you control a small workpiece without getting your fingers anywhere near the cutter. If you’ve ever tried routing a tiny block freehand, you already know why this jig exists.
Customization idea: Add adjustable stops and suitable hold-down clamps for different part sizes.
14. Ellipse-Routing Jig
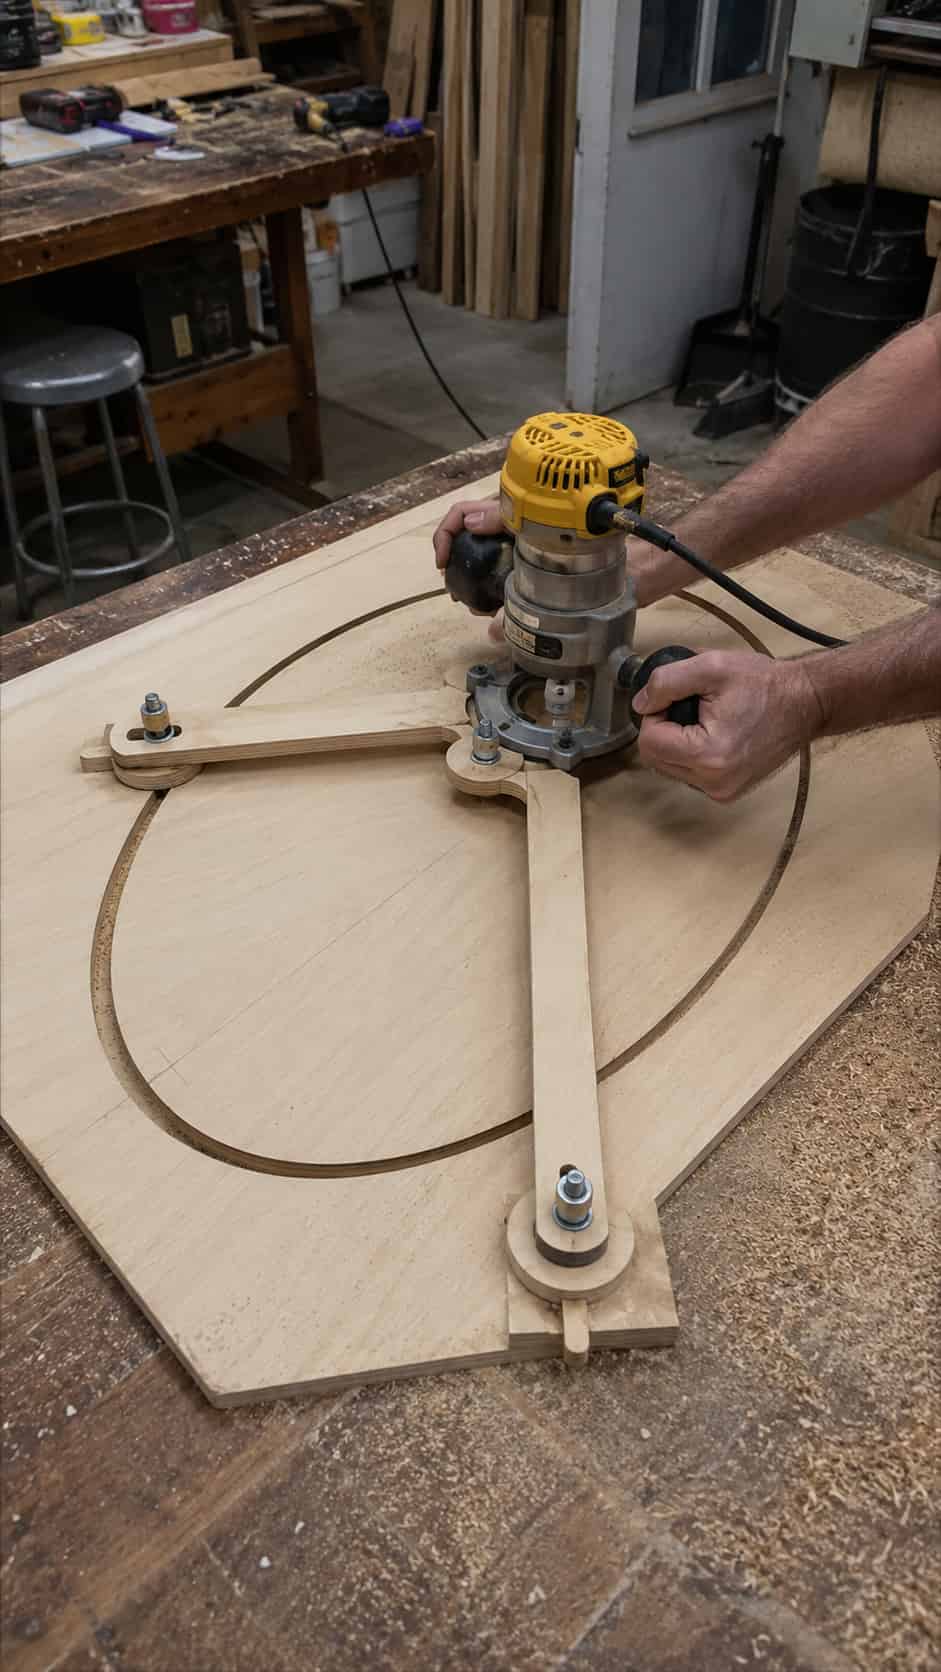
Difficulty: Medium Estimated time: 2–4 hours Best for: Oval tables, frames, trays, and decorative panels Router setup: Handheld router
Two sliding pivot points guide the router through an oval path — it’s a satisfying bit of mechanical trickery once you see it in action. Test the full setup with a pencil before you commit to routing actual wood; a dry run saves you from an ellipse that looks more like a potato.
Customization idea: Add multiple adjustment positions for different oval proportions.
15. Router Depth and Setup Gauge
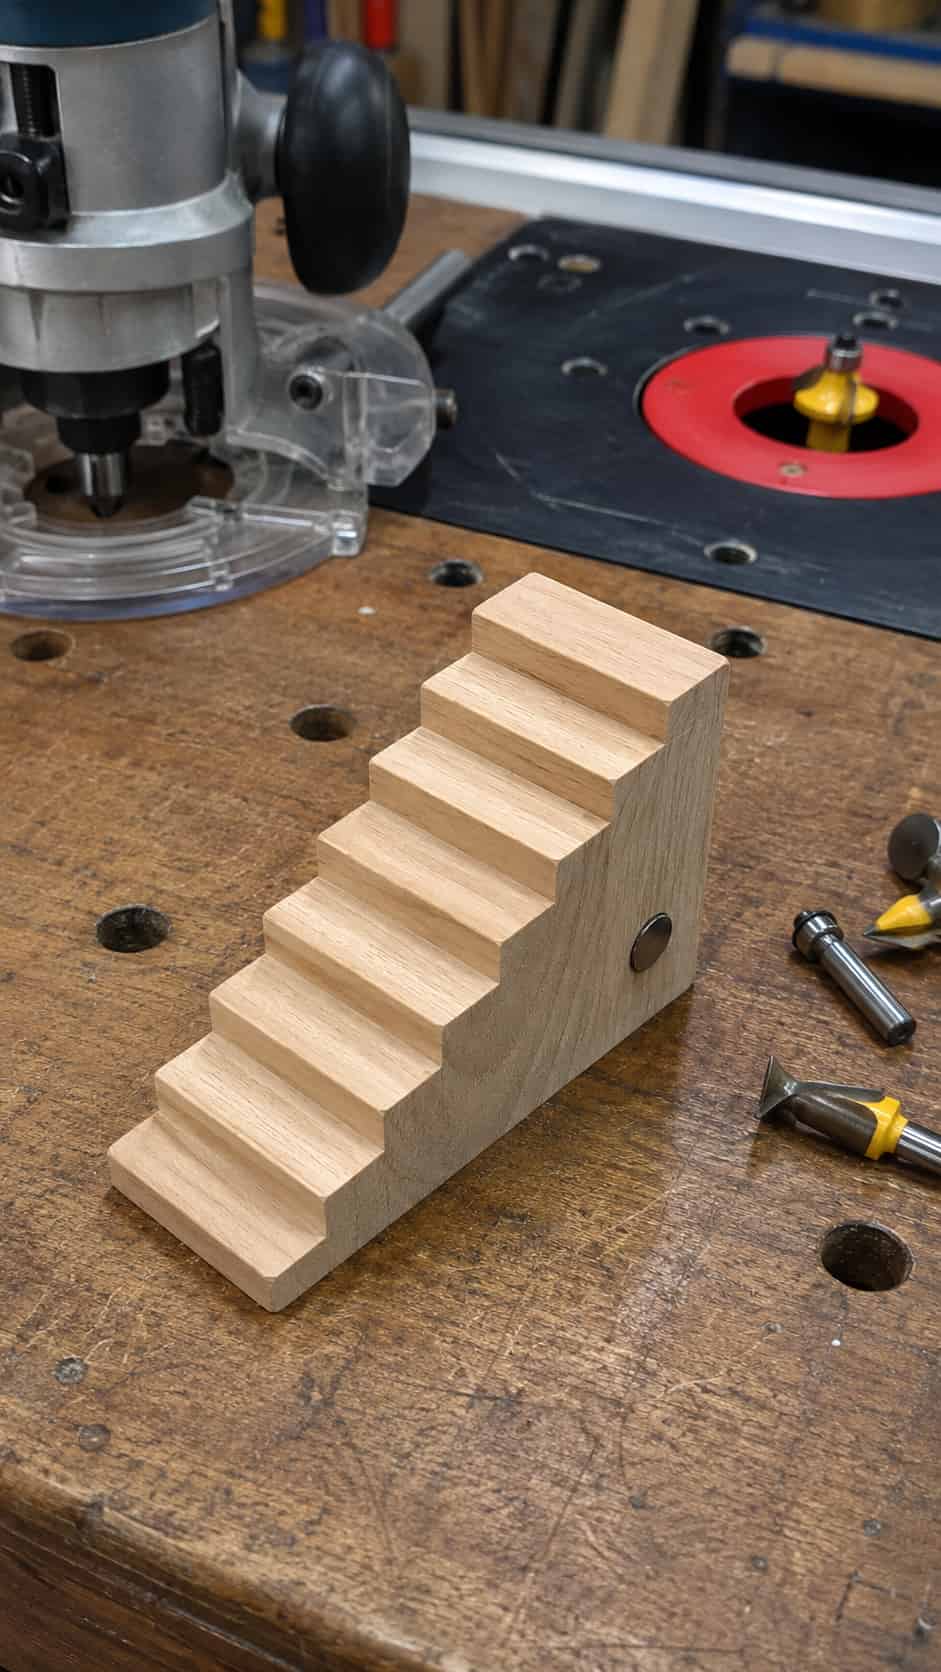
Difficulty: Easy Estimated time: Under 1 hour Best for: Repeating common bit-height and depth settings Router setup: Handheld or router table
A stepped wooden gauge labeled with your frequently used measurements takes the guesswork out of resetting your router for the tenth time this month. Always verify each reference measurement with your own tools before trusting it blindly — gauges drift, especially if they get bumped around the shop.
Customization idea: Build separate gauges for dado depths, round-over bits, and router-table settings.
Three Router Jigs That Deserve Complete Plans
A few of these projects are worth their own dedicated tutorials, with full measurements, cut lists, and diagrams. Here’s what each one should eventually cover:
Beginner Straight-Edge Guide
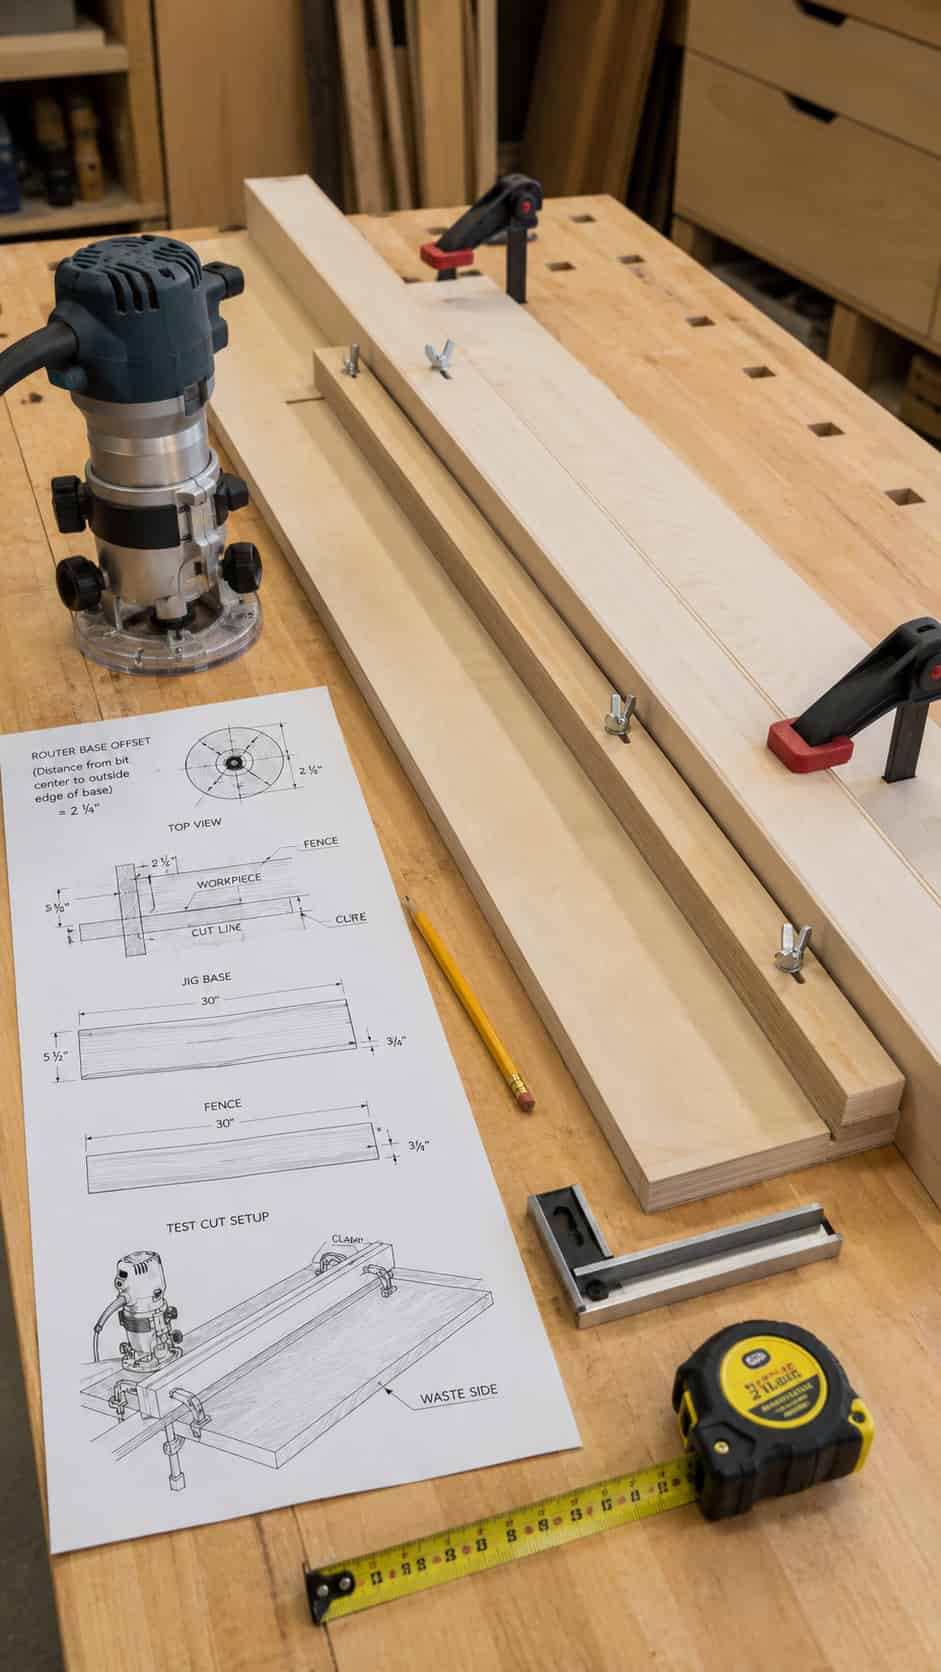
- Router-base offset calculation
- Base dimensions
- Fence alignment
- Clamp positions
- Test-cut procedure
- A diagram showing the finished cut line
Adjustable Circle-Cutting Jig
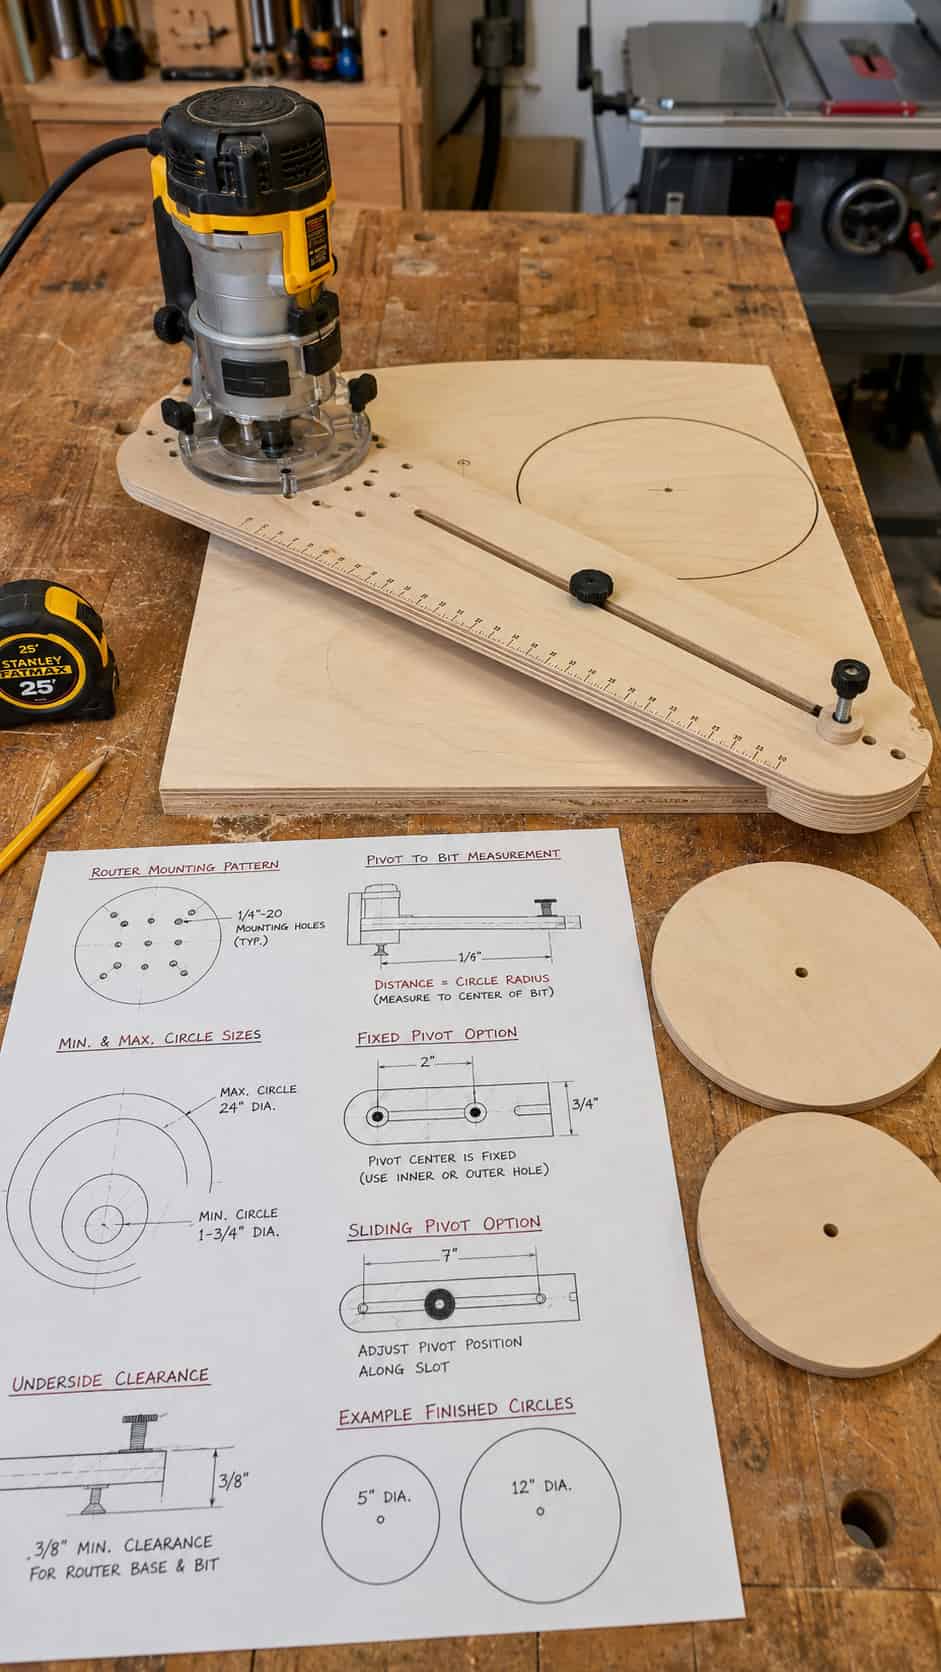
- Router mounting pattern
- Pivot-to-bit measurement
- Minimum and maximum circle sizes
- Fixed versus sliding pivot options
- Underside clearance
- Example finished circles
Adjustable Dado Jig
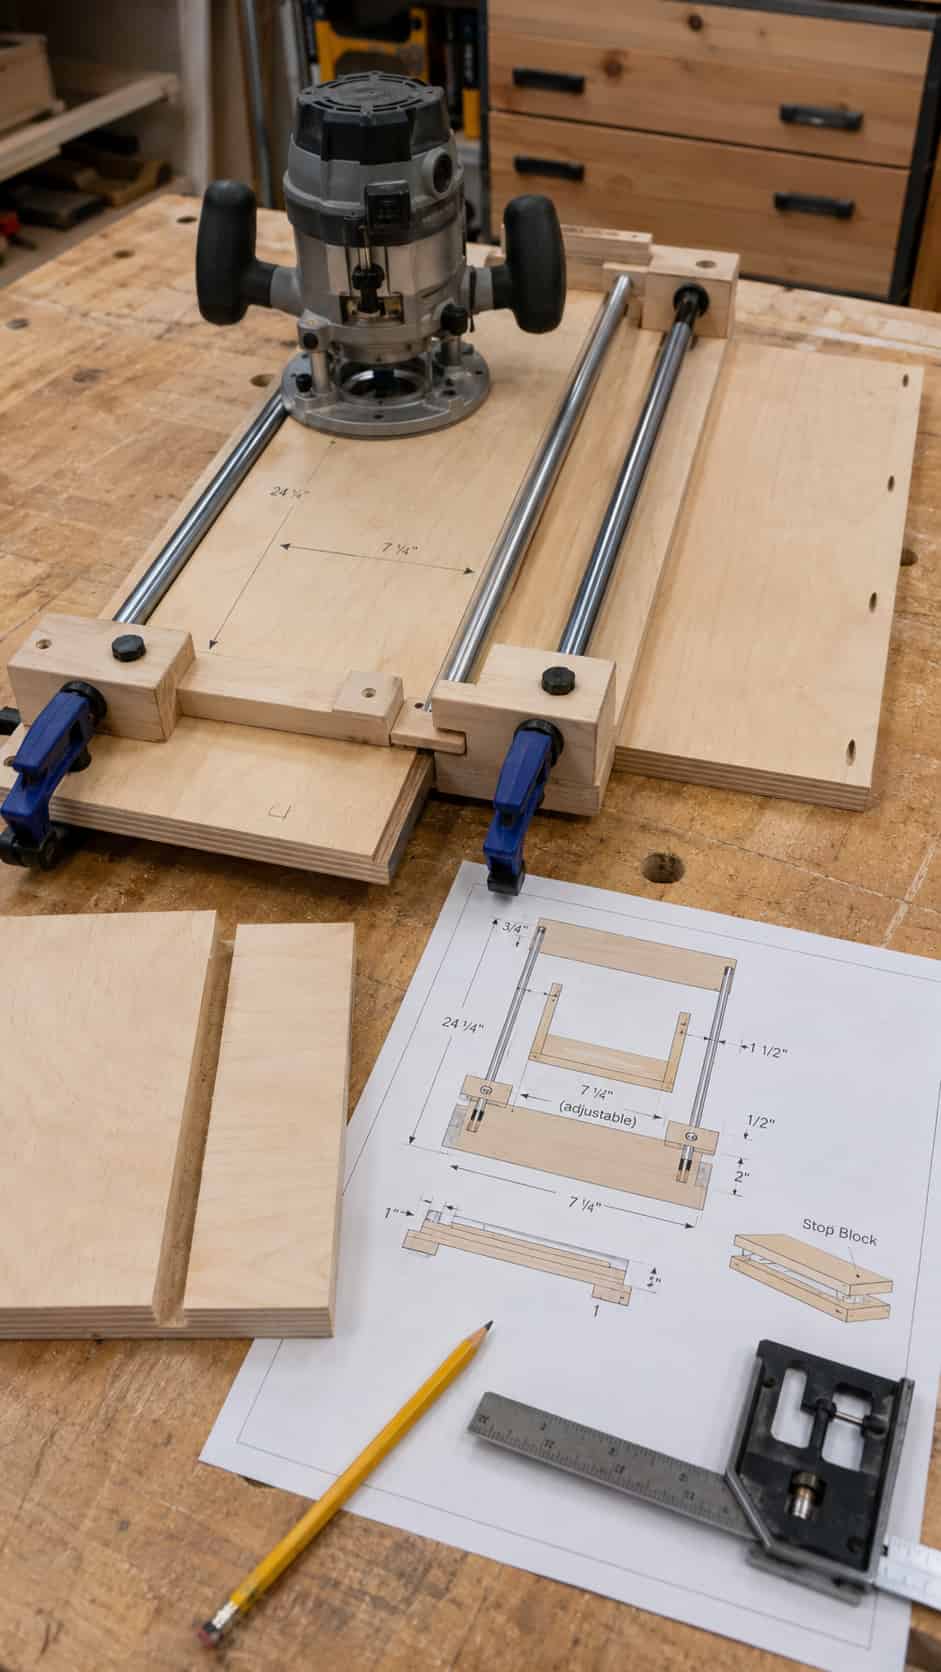
- Both guide rails
- Adjustment range
- Router-base offset
- Workpiece alignment
- Stops for repeated cuts
- A test cut using the actual shelf material
Worth noting: any preliminary measurements in a plan should serve as visual references until you build and verify the complete jig with your exact router, bit, and guide-bushing combination.
Which Router Jig Should You Build First?
Not sure where to start? Here’s how I’d point you based on what you’re actually working on:
- For complete beginners: Straight-edge guide
- For round projects: Circle-cutting jig
- For shelving and cabinets: Adjustable dado jig
- For furniture joinery: Mortising jig
- For slab projects: Flattening sled
- For router-table work: Fence or coping sled
- For repeated decorative pieces: Template-routing jig
Common Router-Jig Mistakes to Avoid
Using warped material. A crooked jig transfers its error to every single workpiece it touches. There’s no fixing that after the fact.
Forgetting the router-base offset. Always measure from the bit’s cutting edge to the guide surface — this is the number that makes or breaks a straight-edge or dado jig.
Copying another router’s mounting pattern. Different router models use different baseplates. What fits your buddy’s router might not fit yours at all.
Using weak clamping points. Clamp in stable positions outside the router’s path, not wherever happens to be convenient.
Skipping test cuts. Test every new setup on scrap material before you touch the actual project piece. This one step alone prevents most jig disasters.
Treating a jig as a substitute for safe technique. A jig improves guidance, but it doesn’t replace the router manual, proper workpiece support, or experienced supervision when you need it.
Want a More Organized Woodworking Shop?
Disclosure: This section contains an affiliate link. If you purchase through the link, we may earn a commission at no additional cost to you.
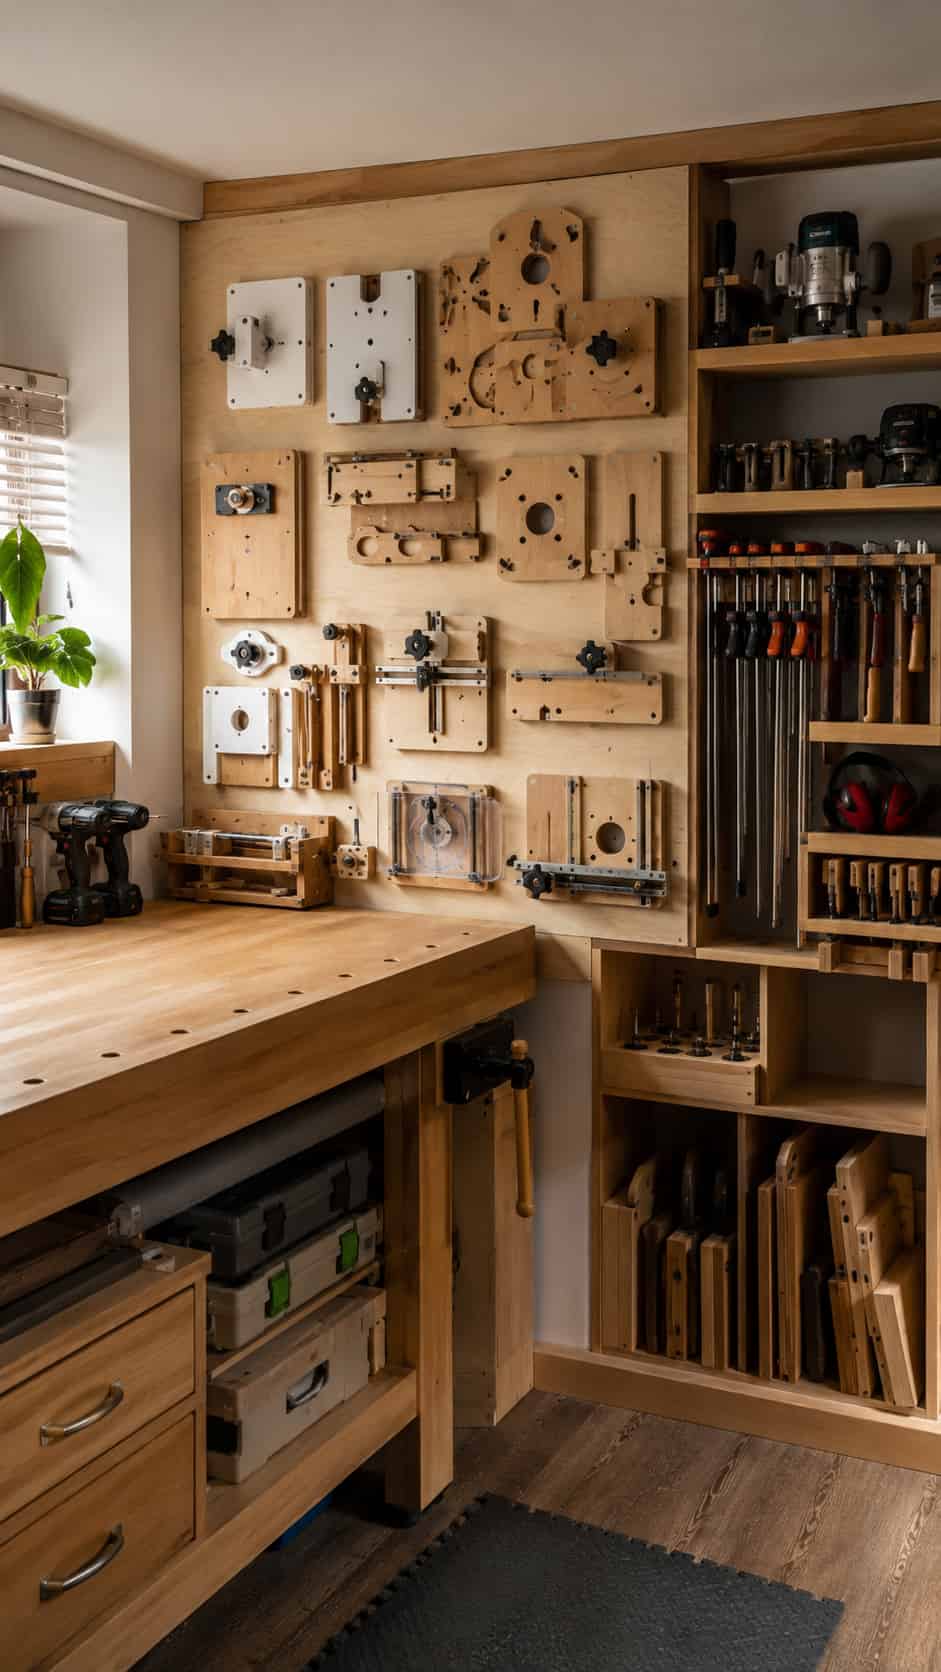
Homemade router jigs can seriously improve your accuracy, but they also need somewhere practical to live. When fences, templates, and sleds start leaning against every available wall, even a genuinely useful jig collection can create workshop clutter surprisingly fast.
If you’re looking for ideas on arranging tools, work surfaces, and storage in a limited space, Ultimate Small Shop offers an optional workshop-planning resource worth a look. Review the offer carefully and decide whether the approach fits your available space, budget, and woodworking goals.
See What Ultimate Small Shop Includes
Frequently Asked Questions
What is the easiest router jig to build?
The straight-edge guide or the corner-radius template are both great starting points — minimal materials, minimal time, maximum payoff.
Can I build router jigs from scrap wood?
Yes, as long as the scrap is flat and stable. Skip anything warped or damaged, since that flaw will show up in every cut the jig makes.
Which plywood works best for router jigs?
Stable, void-free plywood in a reasonable thickness works well for most jigs. There’s no single “correct” thickness — it depends on the size and stress of the jig you’re building.
Do I need a router table to use these jigs?
Not for all of them. Many jigs work fine with a handheld router, but coping sleds and box-joint jigs need a compatible router-table setup to function properly.
Can one jig fit every router?
No — mounting patterns, base diameters, and guide-bushing systems differ enough between router models that a jig built for one router often won’t fit another.
Should router jig plans include exact measurements?
Yes. A genuinely useful plan should include verified dimensions, hardware specs, router compatibility, and clear setup instructions — anything less leaves too much guesswork.
Final Thoughts
You don’t need all 15 of these jigs sitting in your shop by next weekend. Pick the one that solves whatever’s currently driving you nuts, build it carefully, and test it on scrap before it ever touches a real project.
Start with the straight-edge guide if you’re new to router jigs. Once you feel how much easier it makes a basic groove or trimming cut, you’ll understand exactly why homemade jigs tend to multiply around a workshop — mine sure did.