
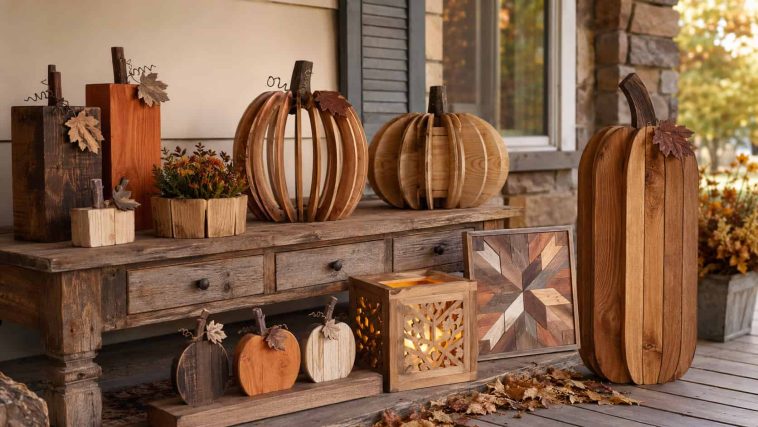
Wooden pumpkins solve a very specific autumn problem: real pumpkins eventually collapse into sad orange puddles, while lumber behaves itself. Build one good wooden pumpkin and you can bring it back every September without wondering what grew underneath it in storage. Charming, practical, and no surprise biology lesson—what more could fall décor need?
This collection includes 21 DIY wooden pumpkin ideas, from quick shelf accents to statement porch pieces. You will also find three measured mini plans, material guidance, finishing advice, and essential workshop safety notes.
For more seasonal inspiration, browse these easy fall wood projects and easy Halloween wood projects.
Quick Comparison of the 21 Wooden Pumpkin Ideas
| Project | Difficulty | Time | Approximate size | Best location |
|---|---|---|---|---|
| 4×4 pumpkin trio | Easy | 1–2 hours | 5–9 in. tall | Indoors/covered porch |
| 2×4 pumpkin family | Easy | 1–2 hours | 6–12 in. tall | Indoors/covered porch |
| Pallet-plank pumpkin | Easy | 2–3 hours | 18 × 16 in. | Indoors/covered porch |
| Stacked pumpkin topiary | Medium | 3–5 hours | 30–42 in. tall | Covered porch |
| Reversible pumpkin | Easy–Medium | 3–4 hours | 34 × 11 in. | Covered porch |
| Interlocking plywood pumpkin | Medium | 2–4 hours | 12 × 12 in. | Indoors |
| Curved-slat pumpkin | Medium | 3–5 hours | 16 × 14 in. | Indoors/covered porch |
| LED lantern box | Medium | 3–4 hours | 10 × 10 × 5 in. | Indoors/covered porch |
| Pumpkin planter box | Medium | 3–5 hours | 16 × 12 × 8 in. | Covered outdoors |
| Tall porch pumpkin | Easy–Medium | 2–4 hours | 36 × 14 in. | Covered porch |
| Fence-picket pumpkin set | Easy | 2–3 hours | 8–18 in. tall | Indoors/covered porch |
| Wood-slice ornaments | Easy | 1–2 hours | 3–5 in. | Indoors |
| Pumpkin coasters | Easy | 1–2 hours | 4–5 in. | Indoors |
| Pumpkin napkin holder | Medium | 2–3 hours | 7 × 6 × 3 in. | Indoors |
| Pumpkin shelf sitters | Easy | 1–2 hours | 4–8 in. tall | Indoors |
| Mini pumpkin village | Easy–Medium | 2–4 hours | 4–7 in. tall | Indoors |
| Pumpkin bookends | Medium | 3–5 hours | 7 × 6 in. each | Indoors |
| Wooden pumpkin wreath | Medium | 4–6 hours | 18–24 in. diameter | Indoors/covered porch |
| Engraved pumpkin plaque | Medium | 2–4 hours | 14 × 12 in. | Indoors |
| Scrap-wood mosaic pumpkin | Medium | 4–6 hours | 20 × 16 in. | Indoors |
| Tiered-tray pumpkin décor | Easy | 1–3 hours | 3–6 in. tall | Indoors |
Times exclude finish drying and curing. Outdoor suitability always depends on the wood, adhesive, finish, drainage, and level of exposure.
Tools and Materials You May Need
Most projects start with ordinary lumber and a modest collection of workshop basics. A capable adult should handle all cutting, drilling, routing, powered sanding, and machine setup.
Common supplies include:
- Pine, cedar, poplar, exterior plywood, or clean untreated offcuts
- Measuring tape, carpenter’s square, pencil, and paper templates
- Clamps and a stable work surface
- An appropriate saw, drill, and sanding equipment
- Wood glue rated for the project’s intended location
- Sandpaper in several grits
- Paintbrushes and clean cloths
- Primer, paint, stain, or clear finish
- Eye and hearing protection
- Suitable dust extraction
You can build many of these designs from short boards. These scrap wood crafts offer more ways to use leftover material, while these beginner woodworking plans can help new builders practice basic construction.
Workshop Safety Comes First
Wooden pumpkins look harmless. The machines that prepare them do not share that personality. Follow every tool manufacturer’s instructions and let a knowledgeable adult control the complete power-tool process.
- Wear properly fitting eye protection.
- Use hearing protection when the equipment requires it.
- Collect dust at its source and work with suitable ventilation.
- Secure each workpiece before cutting, drilling, carving, or sanding.
- Keep hands away from cutting paths and moving parts.
- Disconnect equipment before changing blades, bits, or accessories.
- Avoid painted, pressure-treated, contaminated, or mystery wood.
- Inspect lumber for nails, screws, cracks, and loose knots.
- Keep the floor and work area free from cords and offcuts.
- Allow finishes to cure fully in a ventilated area away from children.
Children and teenagers should use power tools only with direct supervision from a knowledgeable adult. Safer ways to participate include choosing colors, tracing templates, or decorating fully prepared pieces under adult guidance.
Choosing Wood and Finish
Pine offers an affordable option for indoor block pumpkins. It cuts and sands easily, although knots and soft grain can sometimes create uneven surfaces.
Poplar provides a smoother, more consistent surface for painted silhouettes. It costs more than basic construction lumber, but the cleaner grain can reduce preparation time.
Cedar suits covered porch decorations and adds attractive rustic texture. However, even cedar needs appropriate protection and regular inspection when exposed to moisture.
Furniture-grade plywood works well for flat shapes, mosaics, lantern boxes, and interlocking designs. Seal every exposed plywood edge if the project may encounter humidity.
For a more detailed comparison, read this guide to the best woods for beginner woodworking projects.
Choose a finish documented for the project’s location. Exterior decorations need an exterior-rated system, while indoor coasters require a finish that tolerates occasional moisture. Remember that dry to the touch does not mean fully cured.
21 DIY Wooden Pumpkin Ideas
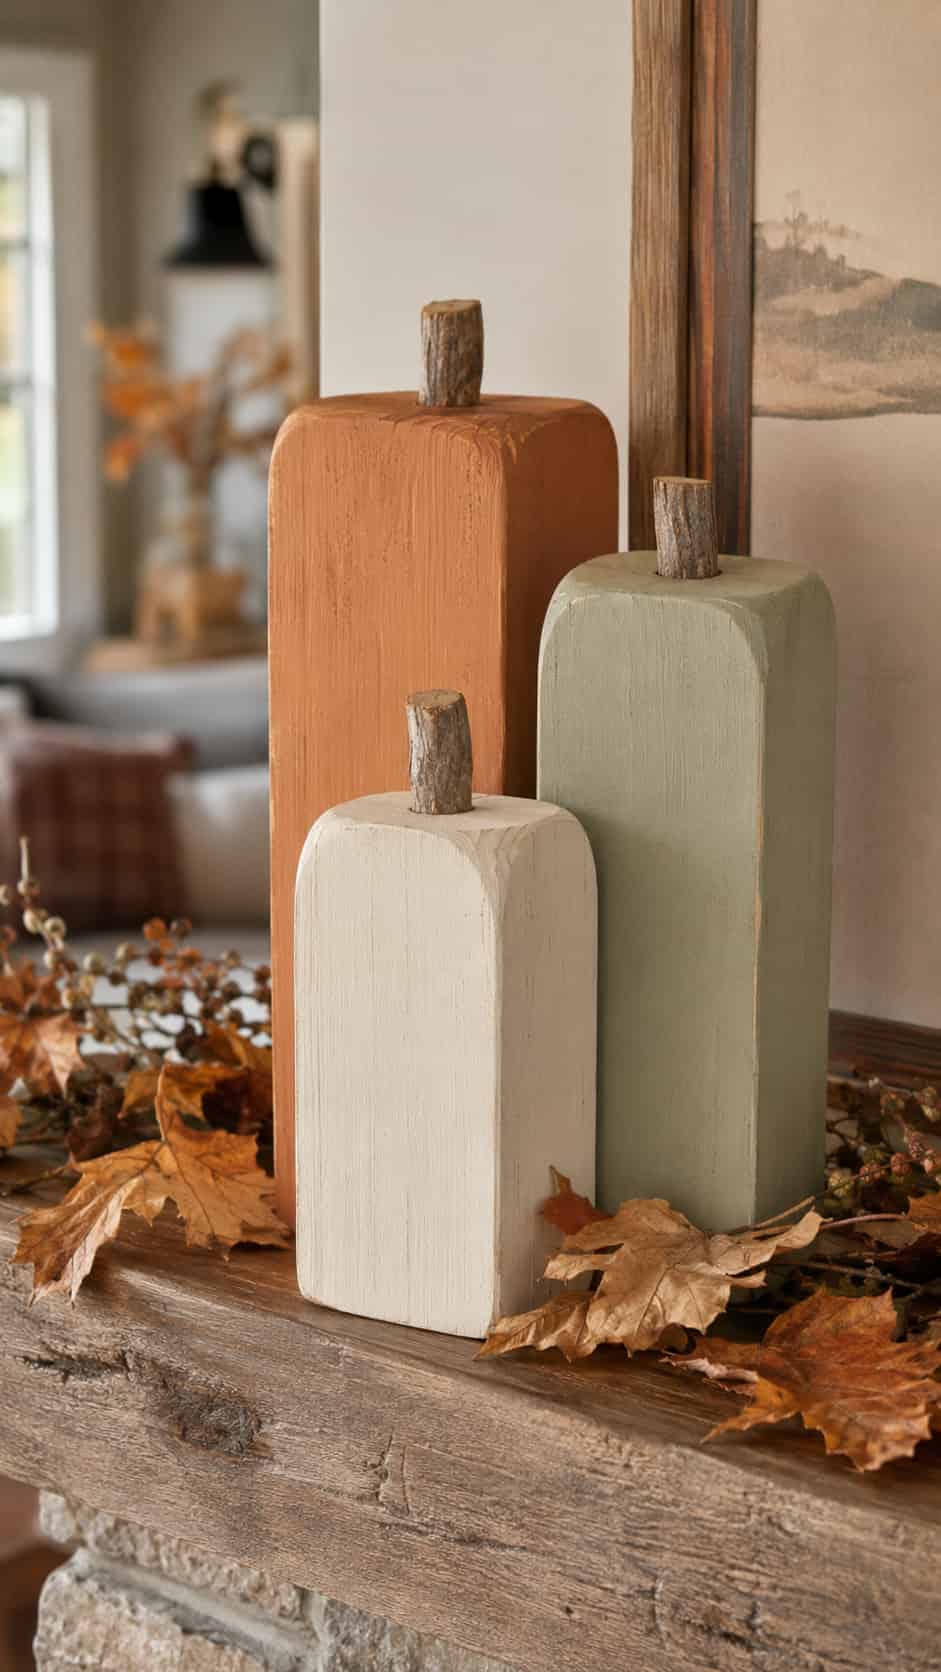
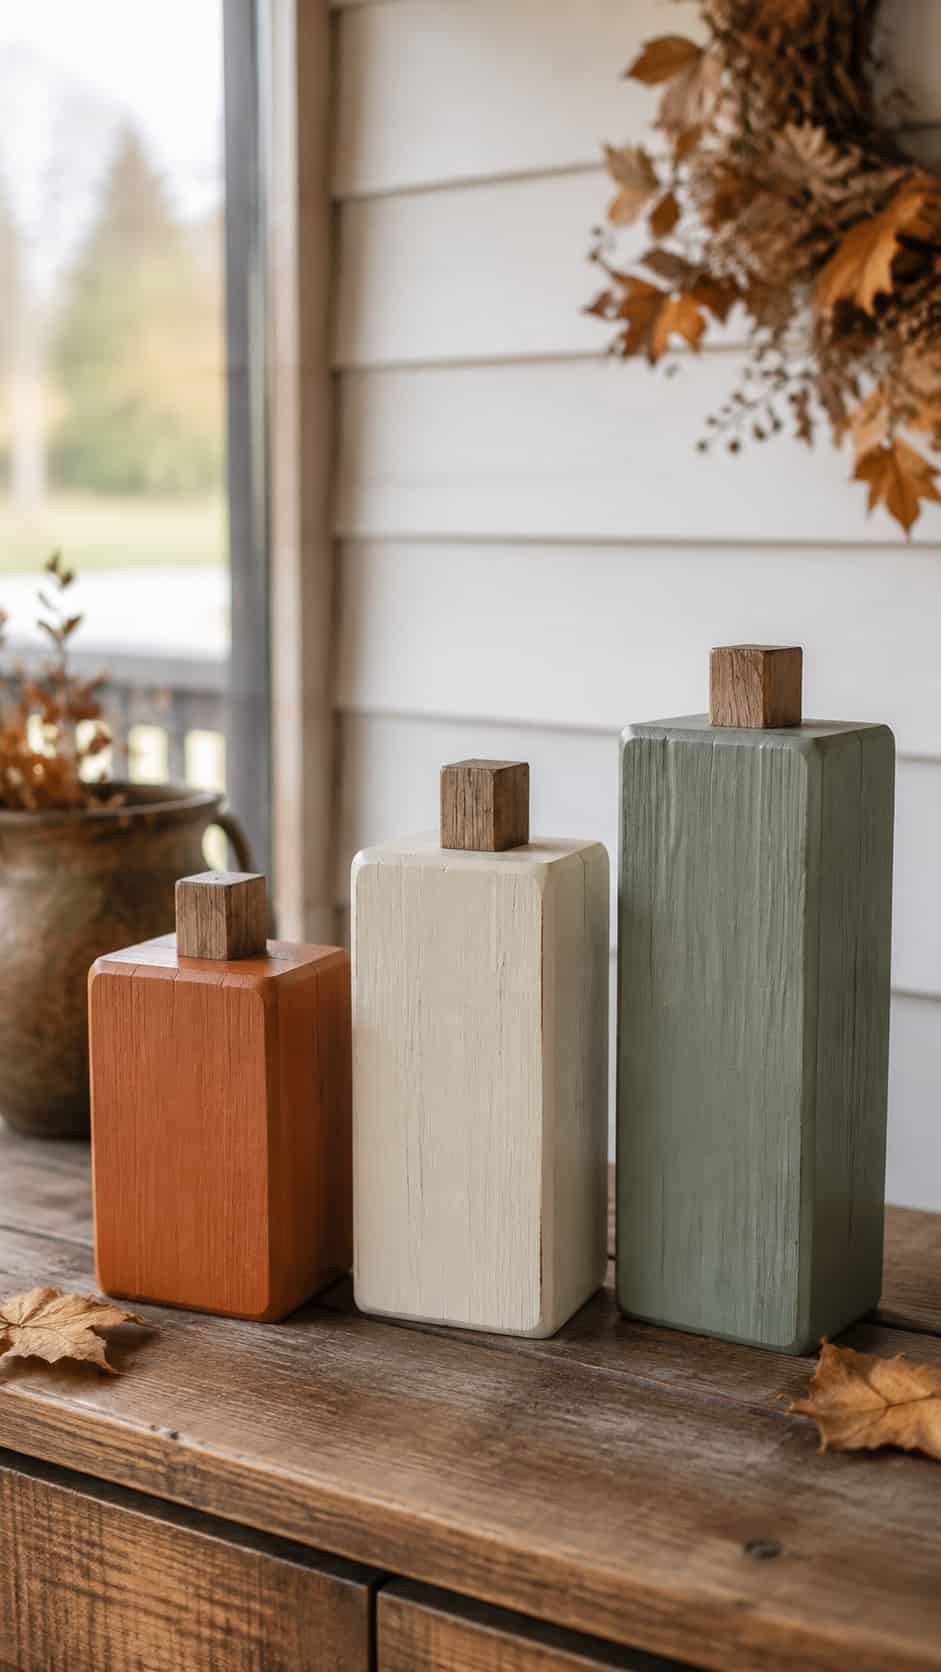
1. 4×4 Wooden Pumpkin Trio
Difficulty: Easy
Estimated time: 1–2 hours
Suggested material: Untreated 4×4 pine or cedar
Finished size: About 5, 7, and 9 inches tall
Suitability: Indoors or a covered porch
Three chunky blocks create a complete arrangement without complicated joinery. Vary their heights, soften the edges, and add broad wooden stems. Their heavy bases help them remain stable on a mantel, step, or console table.
Paint one pumpkin rust, one cream, and one muted green, or let attractive cedar grain provide the color. Shallow decorative grooves can suggest pumpkin ribs without substantially weakening the blocks.
A small leaf shape adds character, but keep every attached decoration broad and secure. Thin wire curls may look attractive, yet they can snag clothing or bend during storage.
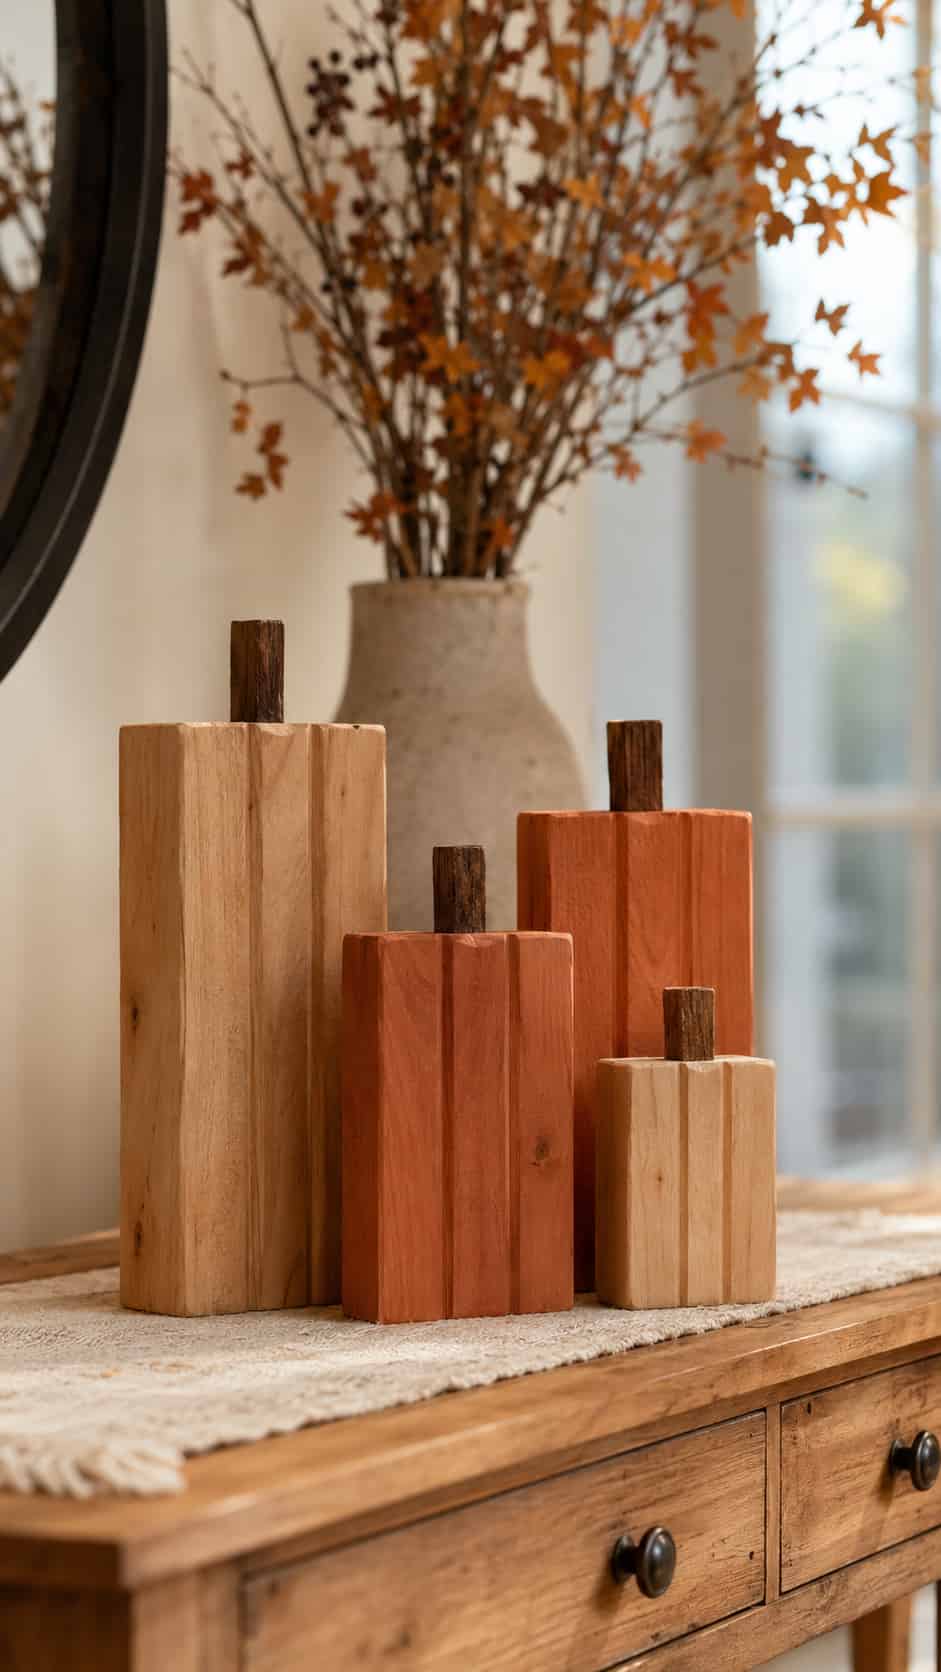
2. 2×4 Pumpkin Family
Difficulty: Easy
Estimated time: 1–2 hours
Suggested material: Clean 2×4 offcuts
Finished size: Approximately 6–12 inches tall
Suitability: Indoors or a covered porch
Stand short 2×4 sections on end to create a cheerful family of narrow pumpkins. This project works especially well when the scrap bin contains several mismatched lengths that feel too useful to discard and too awkward to store forever.
Round the upper corners and paint simple jack-o’-lantern faces for Halloween. For a general fall version, use layered stains and attach broad wooden leaves instead.
Give every pumpkin a flat base and arrange the finished group before attaching stems. Slightly different stem angles make the collection feel handmade.
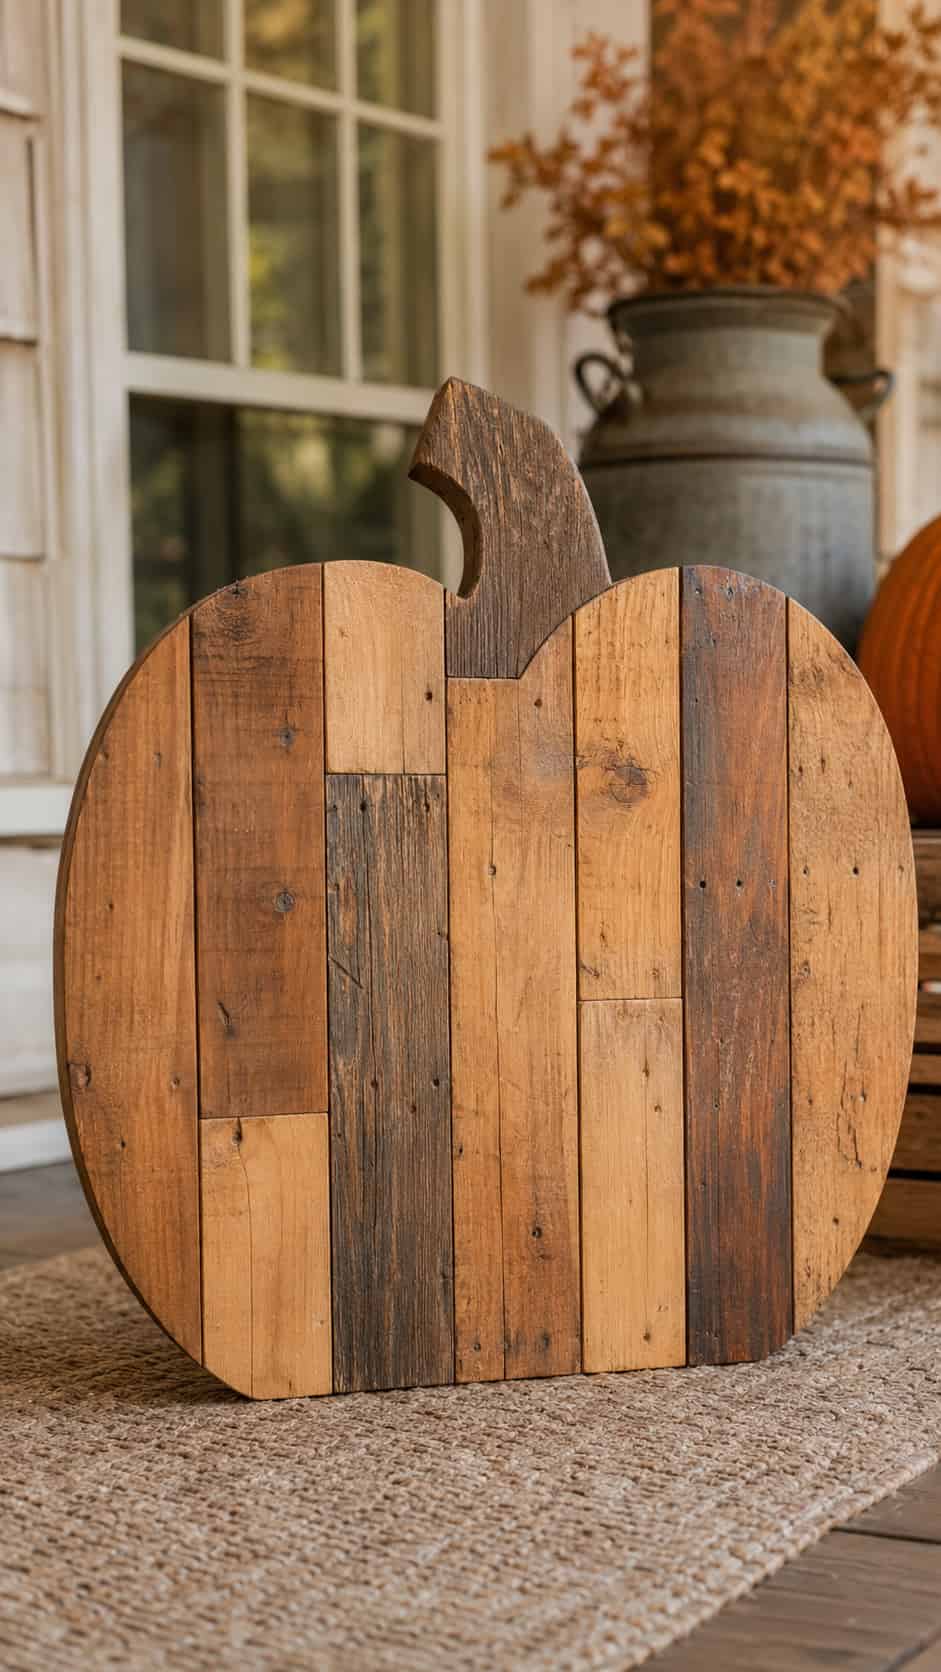
3. Pallet-Plank Pumpkin
Difficulty: Easy
Estimated time: 2–3 hours
Suggested material: Clean boards from a known source
Finished size: About 18 × 16 inches
Suitability: Indoors or a covered porch
Arrange narrow planks side by side and secure them to rear battens. Mark a generous pumpkin silhouette across the assembled face. The visible seams create instant farmhouse texture, so you can keep the finishing treatment fairly simple.
Avoid pallet wood with an unknown history. It may contain treatments, contamination, hidden fasteners, or coatings that should not be disturbed.
An orange color wash allows the grain to remain visible. White paint creates a modern farmhouse appearance, while natural wood looks especially good with a darker stem and border.
4. Stacked Pumpkin Topiary
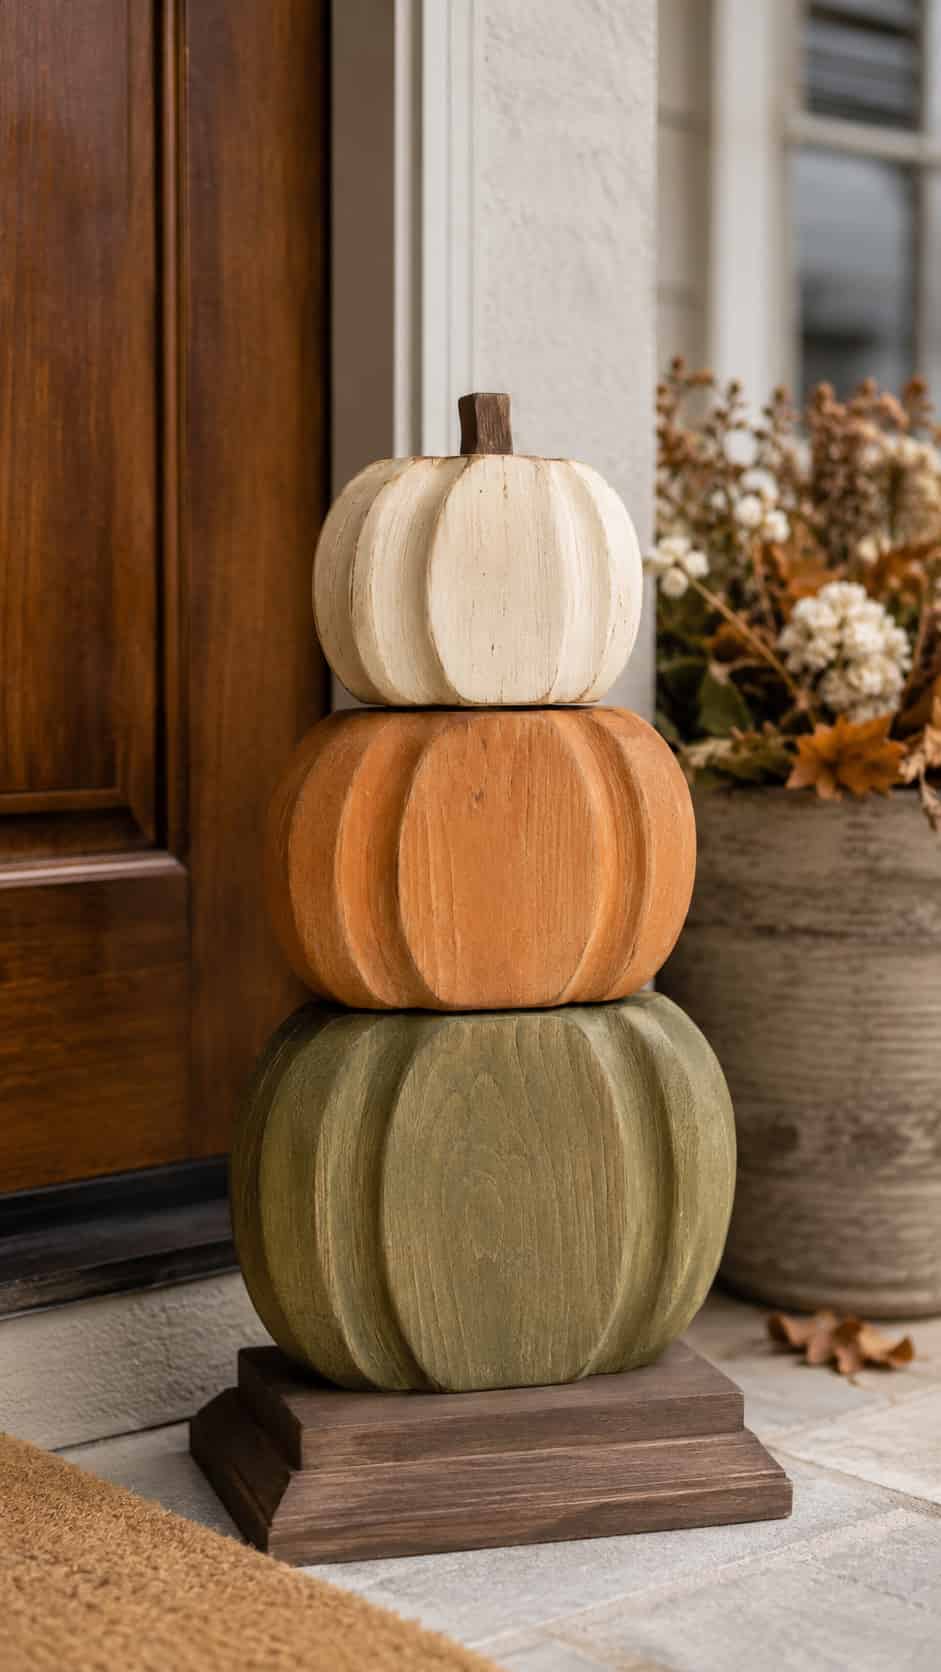
Difficulty: Medium
Estimated time: 3–5 hours
Suggested material: Exterior plywood or cedar
Finished size: Approximately 30–42 inches tall
Suitability: Covered porch
Stack three decreasing pumpkin silhouettes on a wide base to create a tall entryway accent. Overlap the shapes enough to form a visually strong arrangement rather than balancing three narrow points like a decorative game of Jenga.
Use different shades from one coordinated palette to separate the pumpkins. A dark base grounds the arrangement, while one or two restrained leaf details keep the silhouette readable from a distance.
Test the finished decoration for stability on a level floor. Move it indoors during strong wind rather than expecting a lightweight seasonal decoration to defeat the weather.
5. Reversible Fall and Halloween Pumpkin
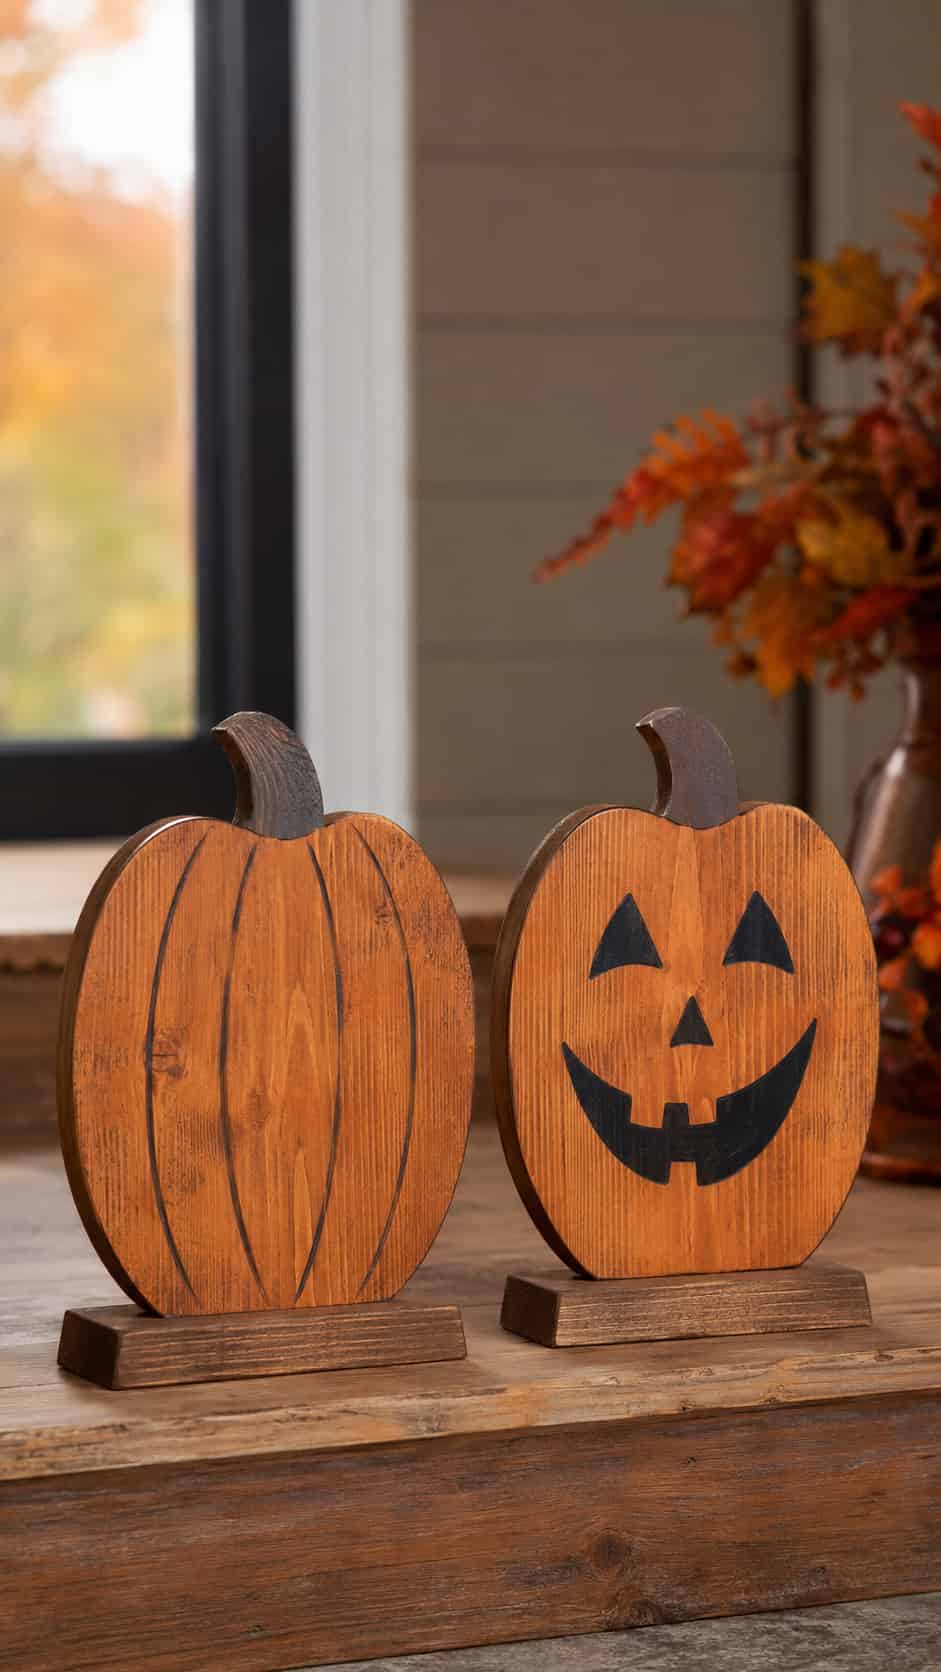
Difficulty: Easy–Medium
Estimated time: 3–4 hours
Suggested material: Pine boards and rear battens
Finished size: About 34 × 11 inches
Suitability: Covered porch
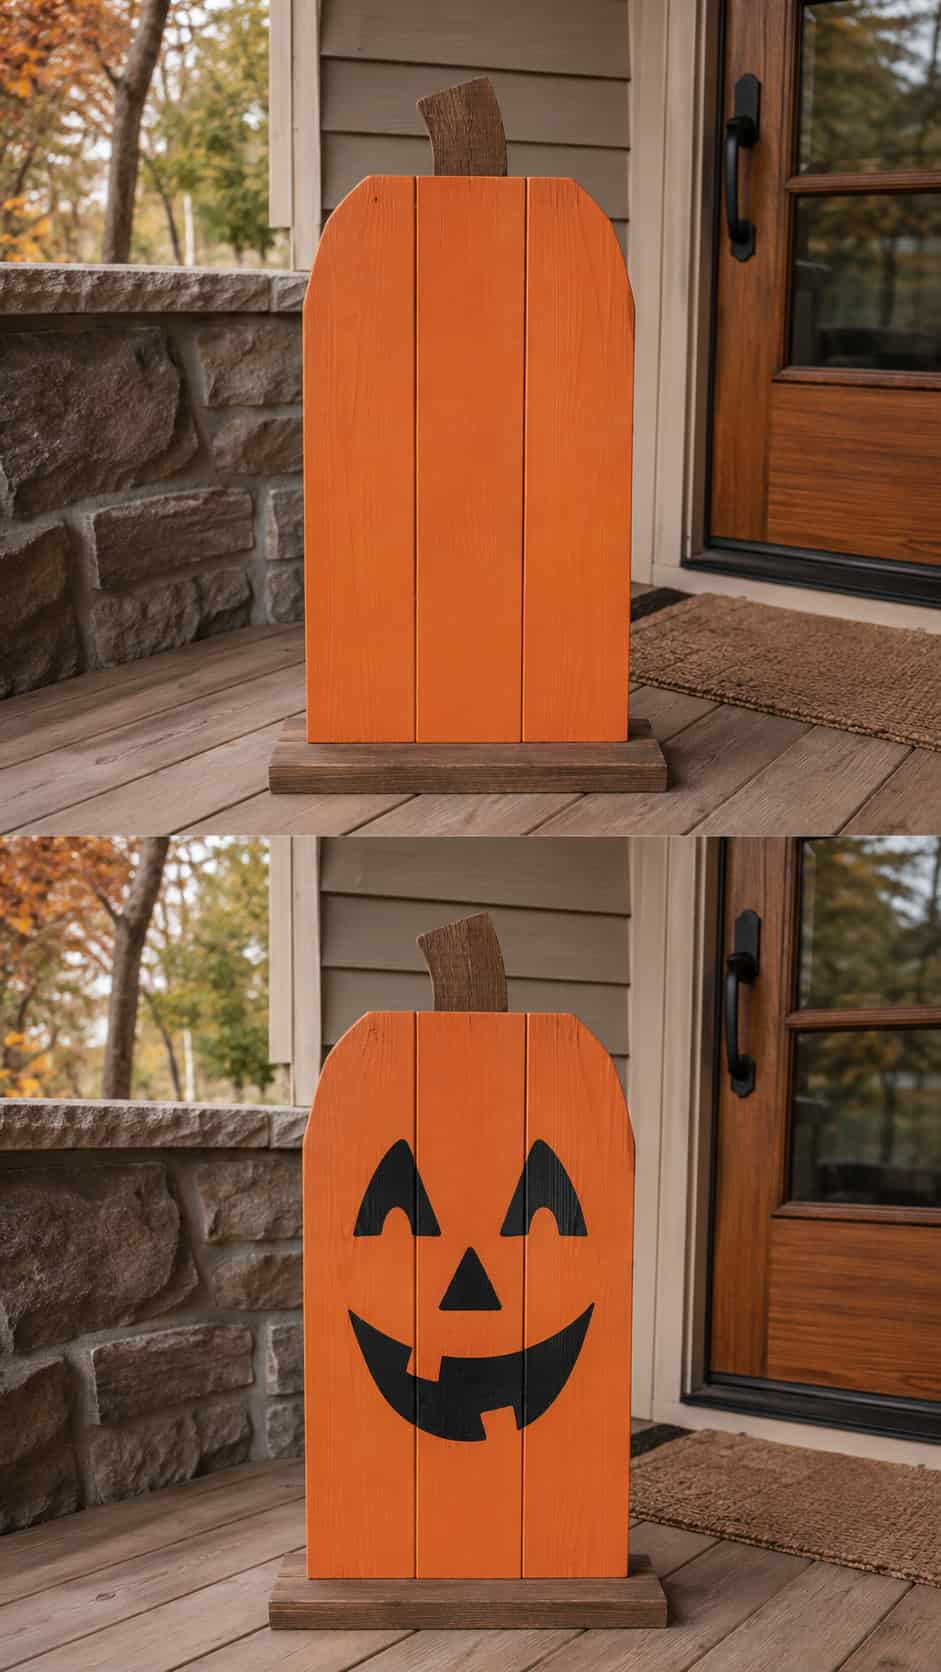
Build one tall wooden panel and decorate both faces. One side can display a plain autumn pumpkin, while the reverse carries a friendly painted jack-o’-lantern face.
This arrangement gives you two months of decorations from one storage footprint. That feels refreshingly efficient when seasonal projects start occupying every shelf in the garage.
Use paint instead of attached facial pieces so nothing loosens outdoors. Add a broad base and test the finished sign carefully for tipping before placing it near an entrance.
6. Interlocking Plywood Pumpkin
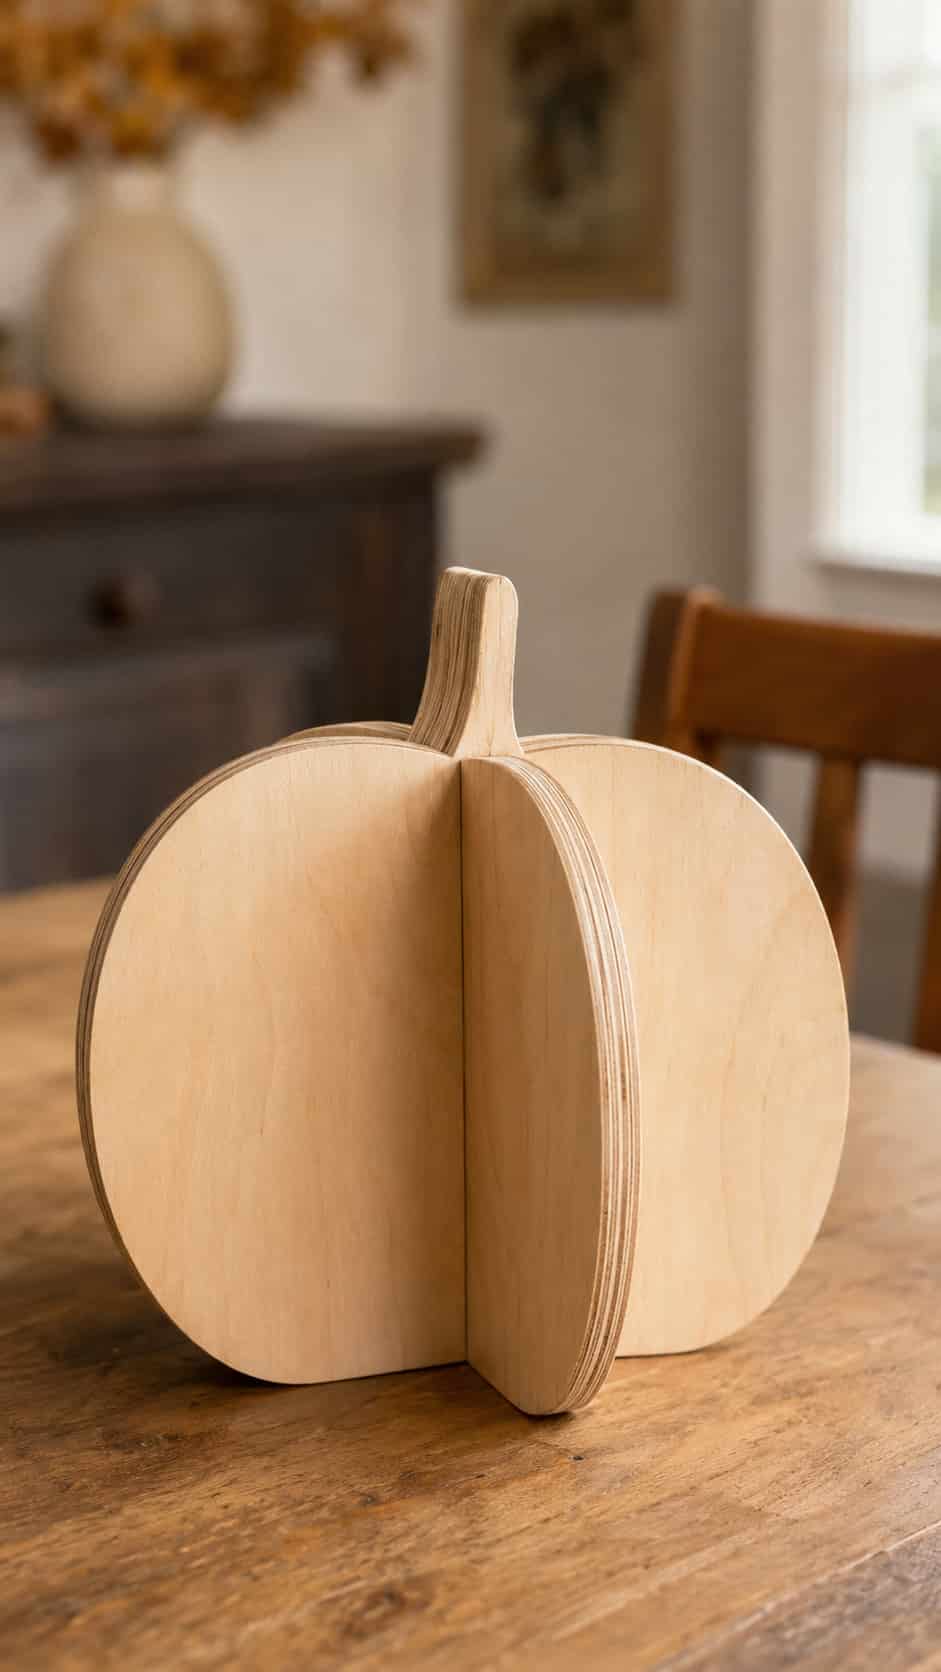
Difficulty: Medium
Estimated time: 2–4 hours
Suggested material: 1/2-inch furniture-grade plywood
Finished size: About 12 × 12 inches
Suitability: Indoors
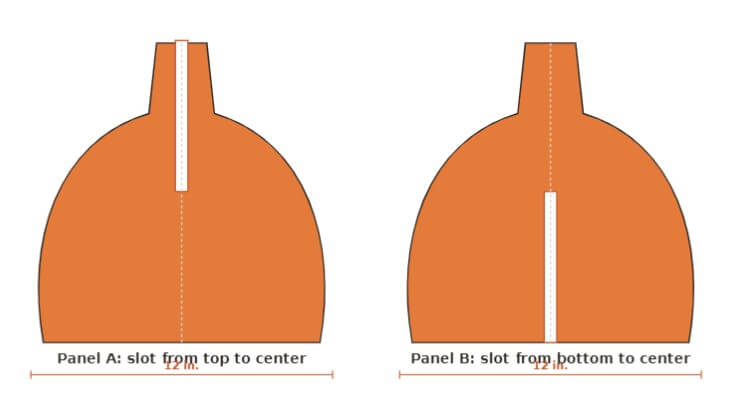
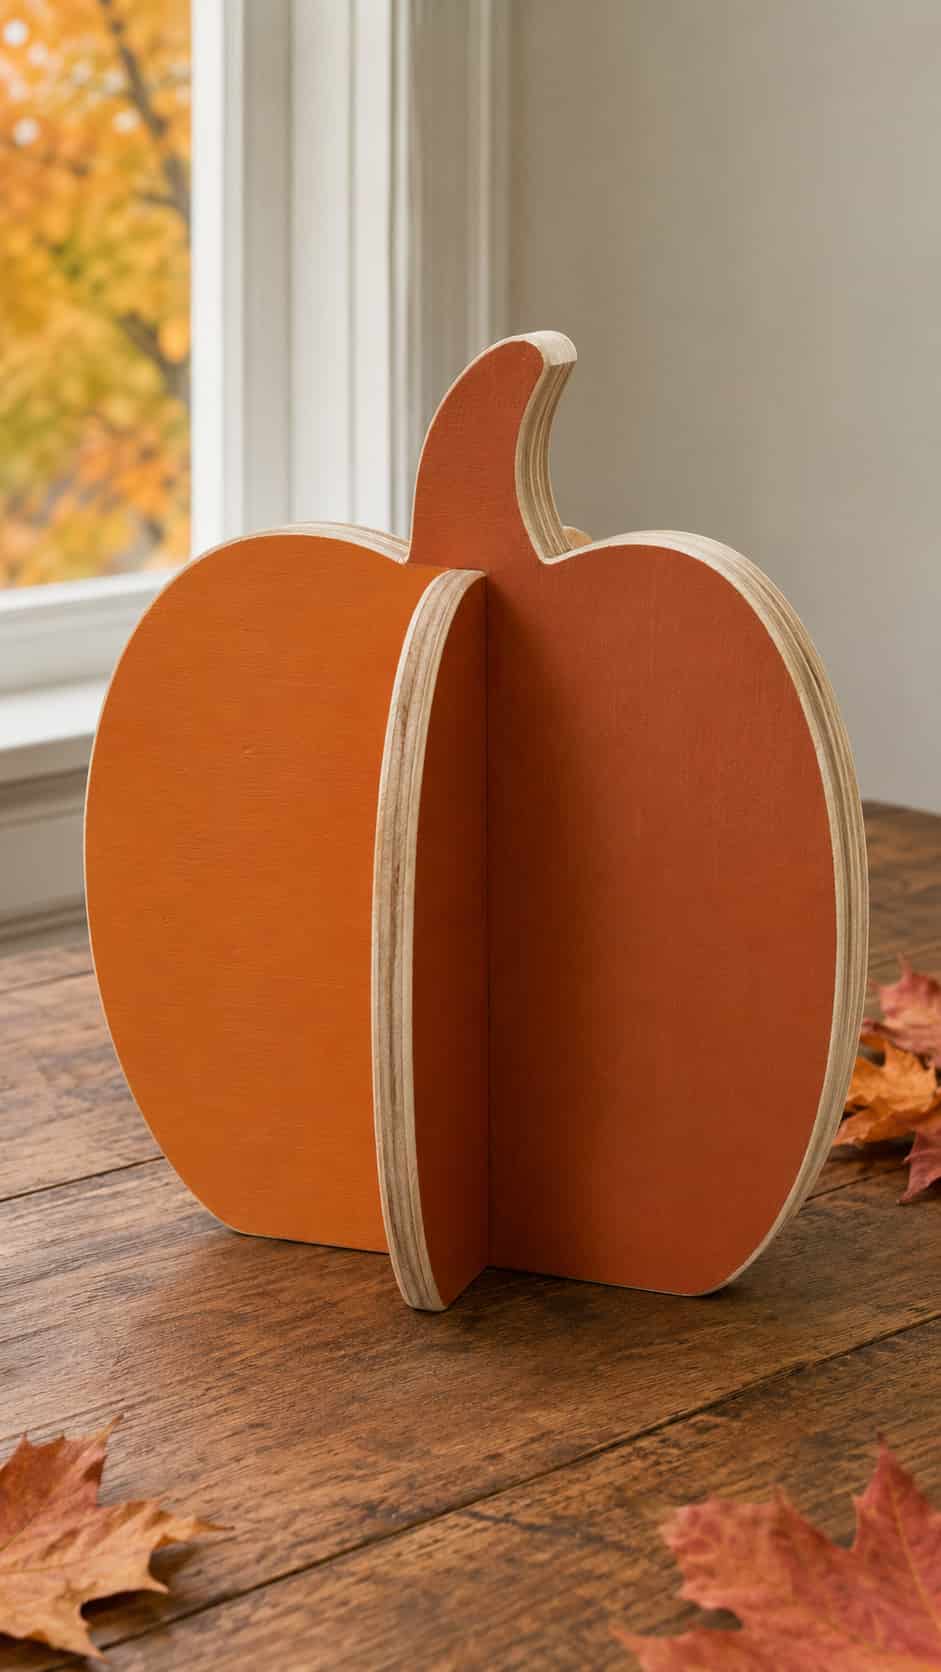
Two matching pumpkin silhouettes slide together through centered slots to form a three-dimensional tabletop decoration. The cross-shaped construction looks clever, requires no visible hardware, and separates into two flat pieces for storage.
Measure the actual plywood thickness before determining the slot width. Nominal lumber dimensions enjoy creating small and irritating surprises.
Paint the two panels in different shades for contrast, or leave the layered plywood edges visible. Apply only light finish inside the slots so the additional coating does not make the joint too tight.
7. Curved-Slat Pumpkin
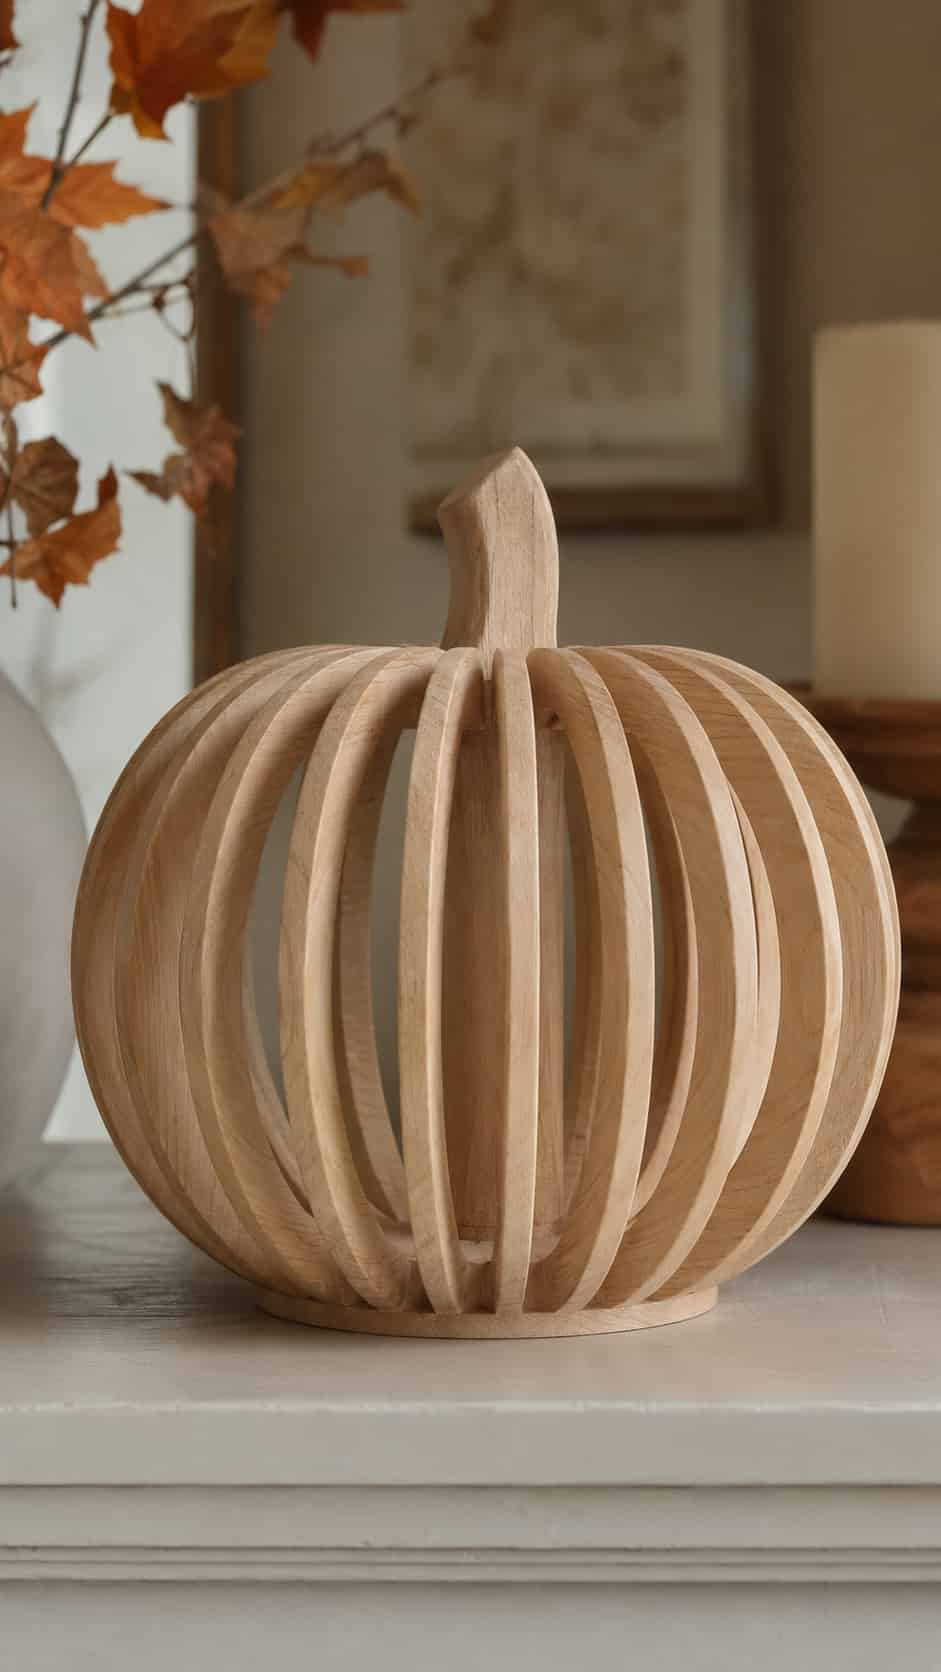
Difficulty: Medium
Estimated time: 3–5 hours
Suggested material: Thin cedar or poplar slats
Finished size: About 16 × 14 inches
Suitability: Indoors or a covered porch
Arrange gently curved wooden slats around a central back support to reproduce the appearance of pumpkin ribs. Small gaps between the slats give the project depth without making it look heavy.
Vary the slat widths slightly for an appealing handmade appearance. Use darker strips near the outside edges and lighter wood in the center to emphasize the rounded form.
Keep the base flat, conceal the fasteners when possible, and confirm that every slat remains securely attached.
8. LED Pumpkin Lantern Box
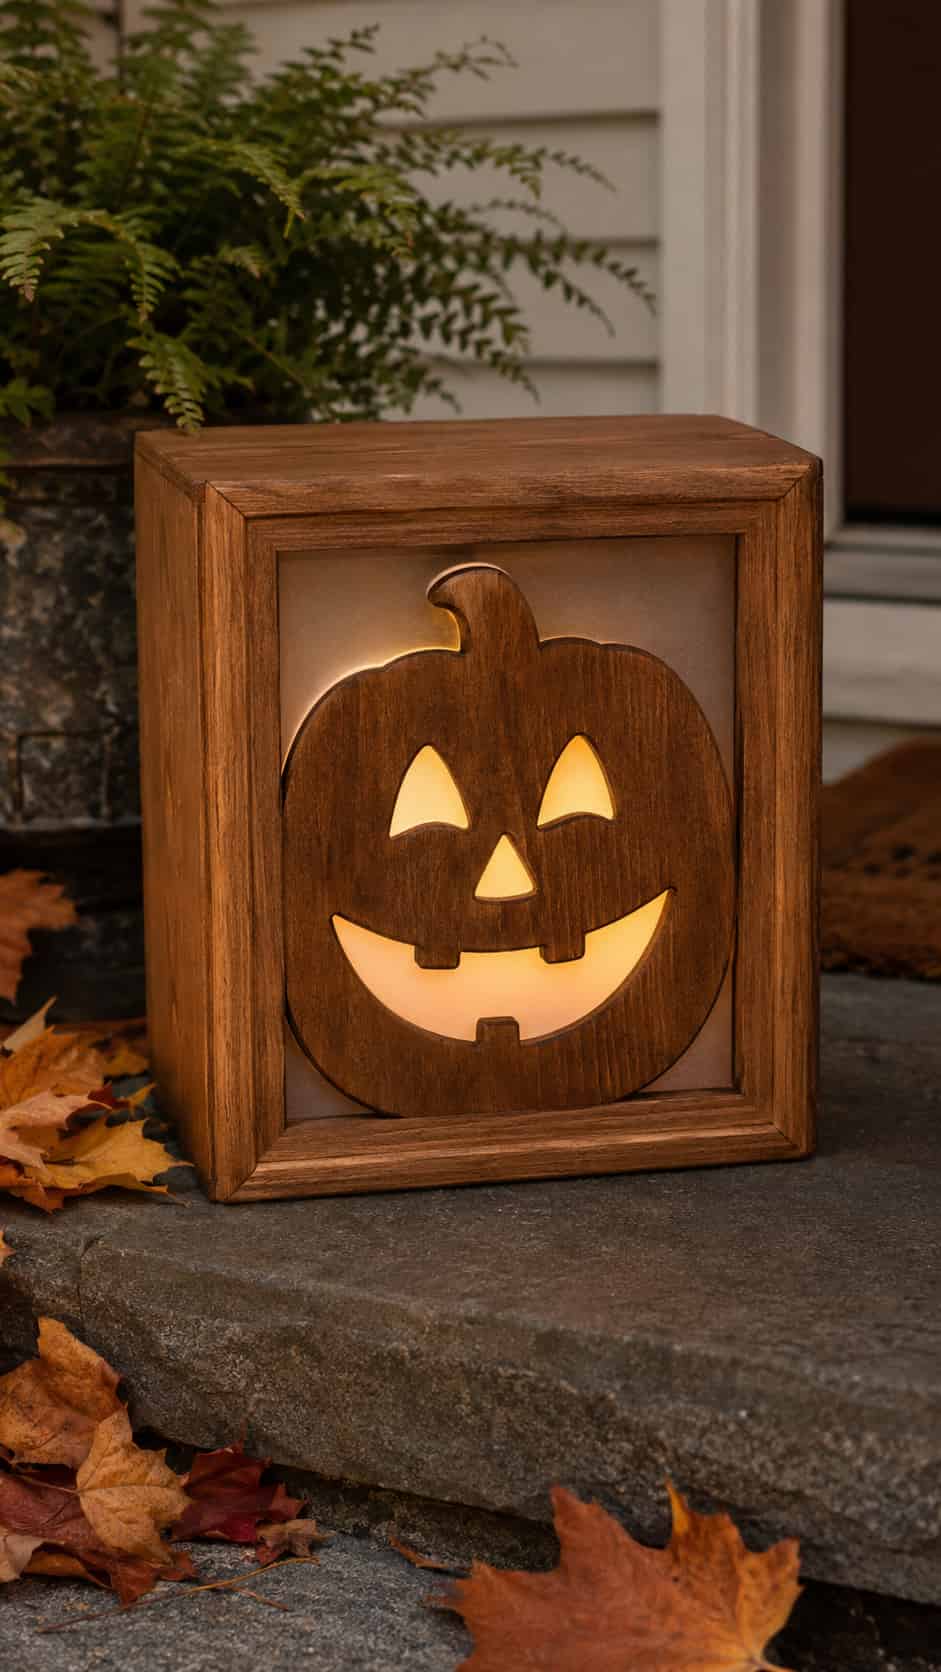
Difficulty: Medium
Estimated time: 3–4 hours
Suggested material: 1/2-inch plywood
Finished size: About 10 × 10 × 5 inches
Suitability: Indoors or a covered porch
A shallow wooden box with a pumpkin-shaped front opening becomes a warm seasonal lantern when you place a battery-powered LED light inside.
Use battery-powered LED lighting only. Never place an open flame inside or near a wooden lantern.
Keep the decorative opening bold and uncomplicated. Paint the inside a pale color to reflect more light, and design the back so an adult can reach the battery compartment easily.
9. Pumpkin Planter Box
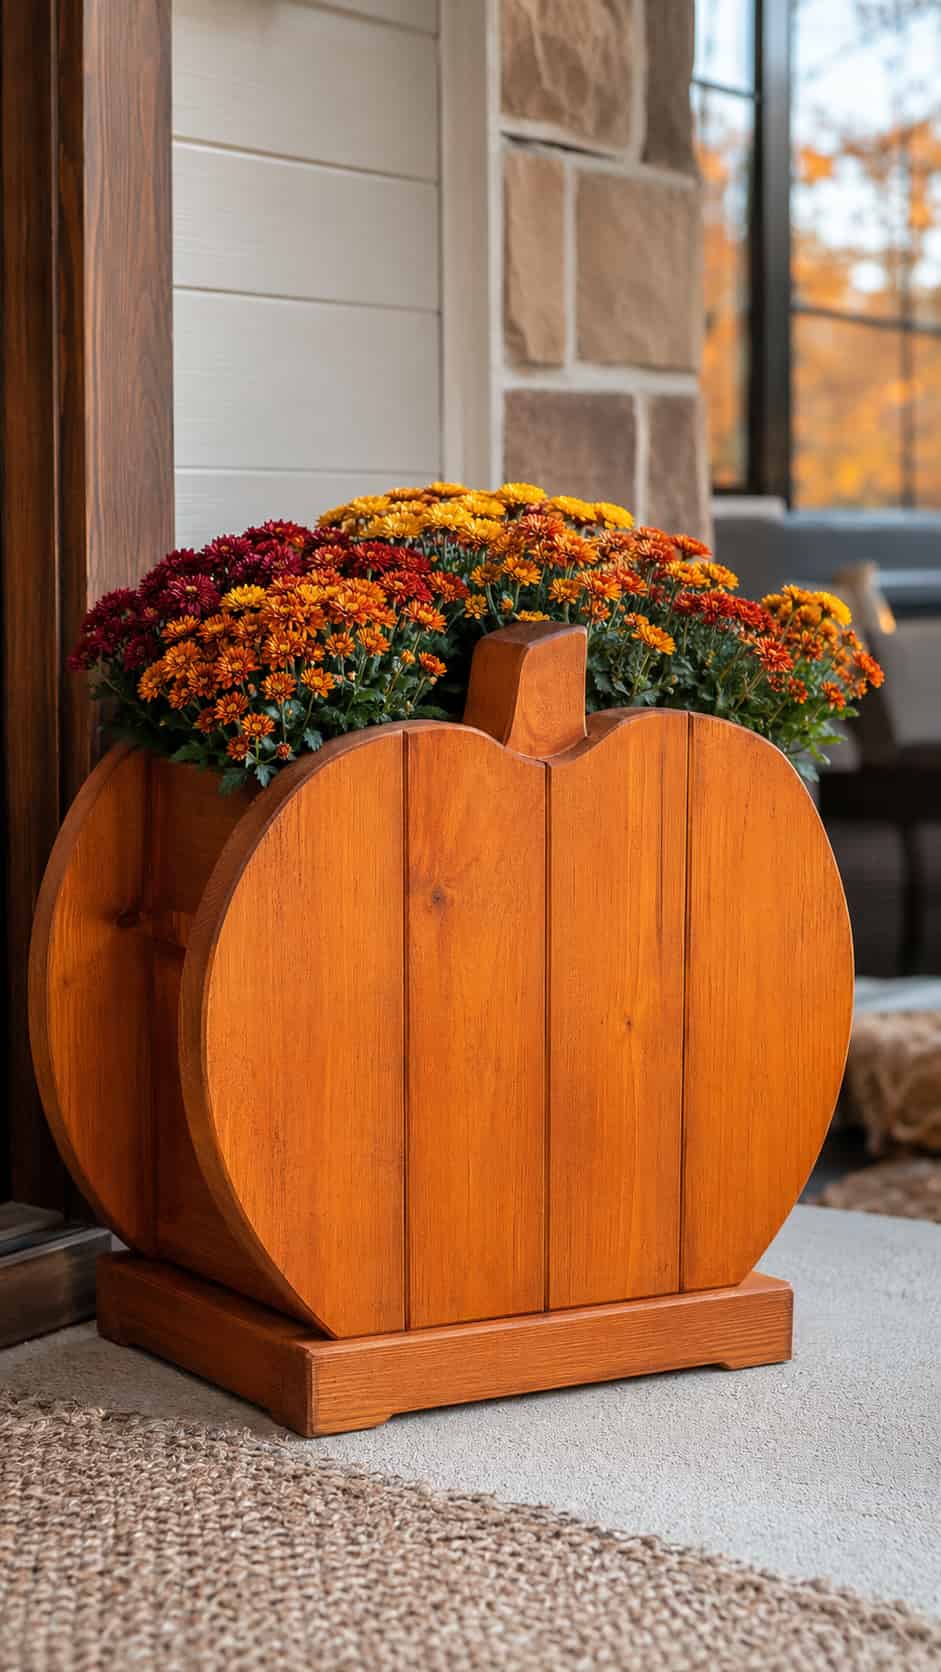
Difficulty: Medium
Estimated time: 3–5 hours
Suggested material: Cedar
Finished size: About 16 × 12 × 8 inches
Suitability: Covered outdoor area
Add a pumpkin-shaped front panel to a simple rectangular planter. The container supplies stability, while the silhouette transforms ordinary autumn flowers into a complete porch display.
Use a removable pot or waterproof liner to protect the wood from constantly wet soil. Provide drainage appropriate for the plant and location.
Paint the front panel orange or white while leaving the planter body natural. You could also use two pumpkin panels—one on each side—if the planter will remain visible from multiple directions.
10. Tall Porch Pumpkin
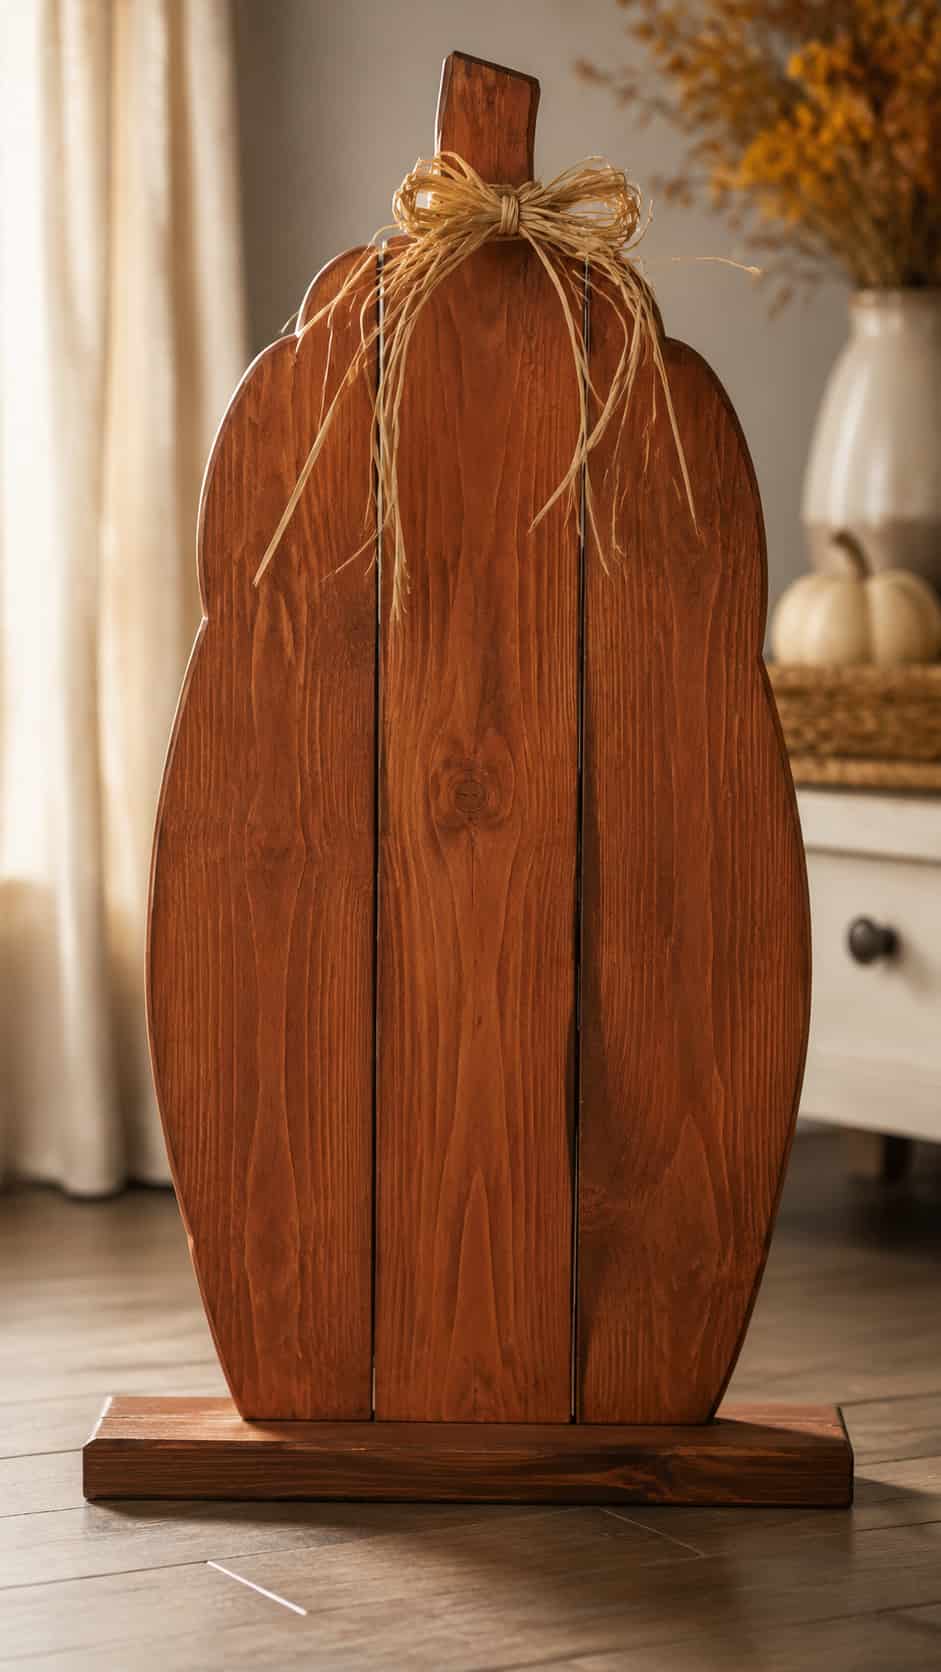
Difficulty: Easy–Medium
Estimated time: 2–4 hours
Suggested material: Cedar boards or exterior plywood
Finished size: About 36 × 14 inches
Suitability: Covered porch
A narrow oversized pumpkin fills an empty porch corner without consuming much floor space. Build the front as one solid silhouette or join several vertical boards to create a planked appearance.
An elongated stem makes the unusual proportions feel intentional. Shallow rib lines and a dark outer edge help the pumpkin remain recognizable from the street.
Add a sufficiently wide base and position the display where wind cannot catch it easily. Inspect the support regularly during the season.
11. Fence-Picket Pumpkin Set
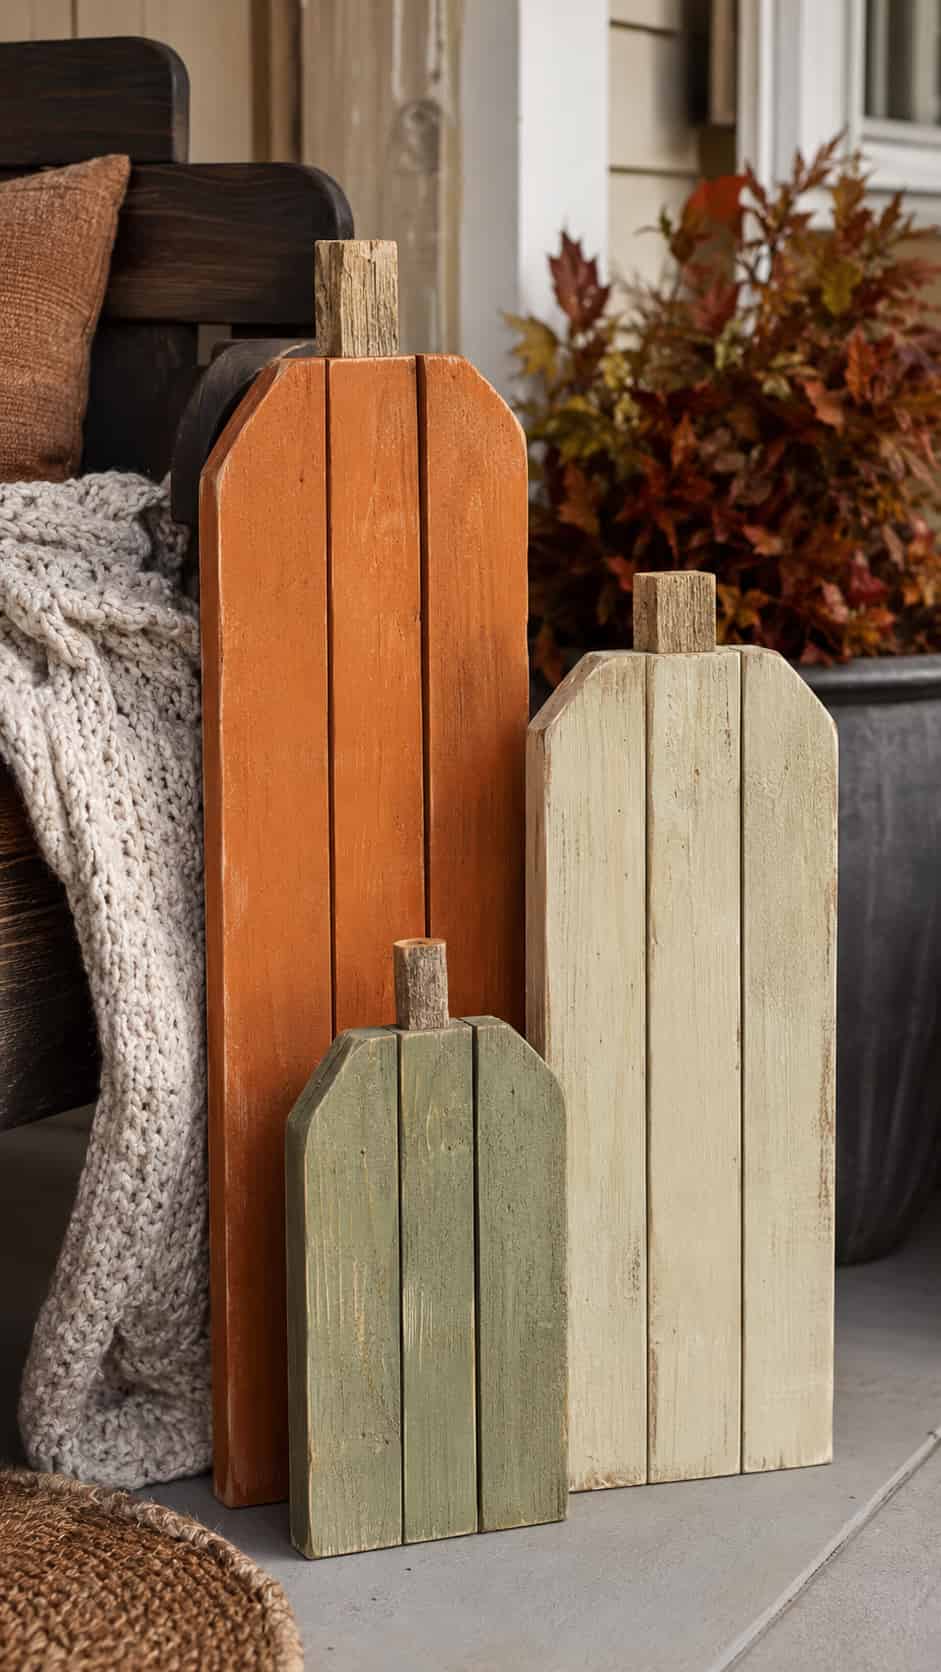
Difficulty: Easy
Estimated time: 2–3 hours
Suggested material: New cedar fence pickets
Finished size: 8–18 inches tall
Suitability: Indoors or a covered porch
The tapered top of a fence picket already suggests a quirky pumpkin shoulder. Group three different lengths, then use paint and short block stems to unify the collection.
Try dry-brushed white over orange, or use one dark pumpkin as the visual accent. A little variation will look intentional; making every board dramatically different may make the group feel disconnected.
Use new untreated pickets instead of reclaimed fencing with unknown coatings or embedded hardware.
12. Wood-Slice Pumpkin Ornaments
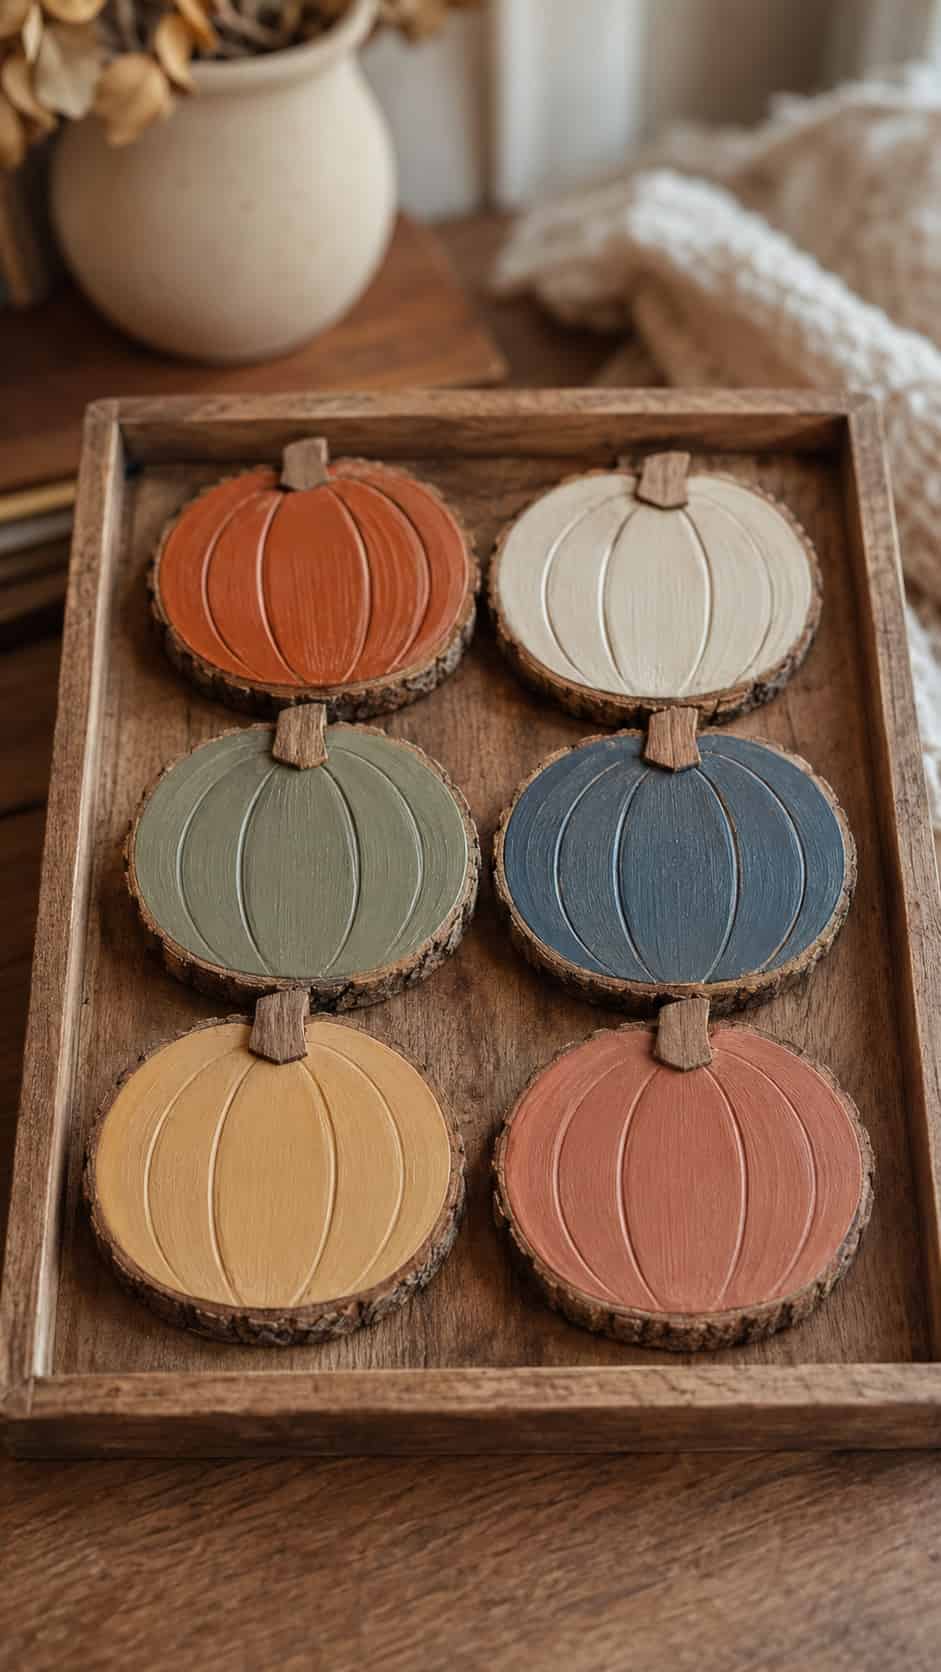
Difficulty: Easy
Estimated time: 1–2 hours
Suggested material: Dry, crack-free wood slices
Finished size: 3–5 inches
Suitability: Indoors
Paint a pumpkin across each round wood slice and use the bark edge as a natural frame. Display the pieces flat in a decorative bowl or add short loops for hanging them from a sturdy seasonal branch.
Keep the painted design simple. Three curved rib lines, a broad stem, and one small leaf usually provide enough detail.
Inspect the natural bark regularly and remove any loose material. Avoid displaying ornaments above fragile objects where falling bark could become annoying.
13. Pumpkin Coaster Set
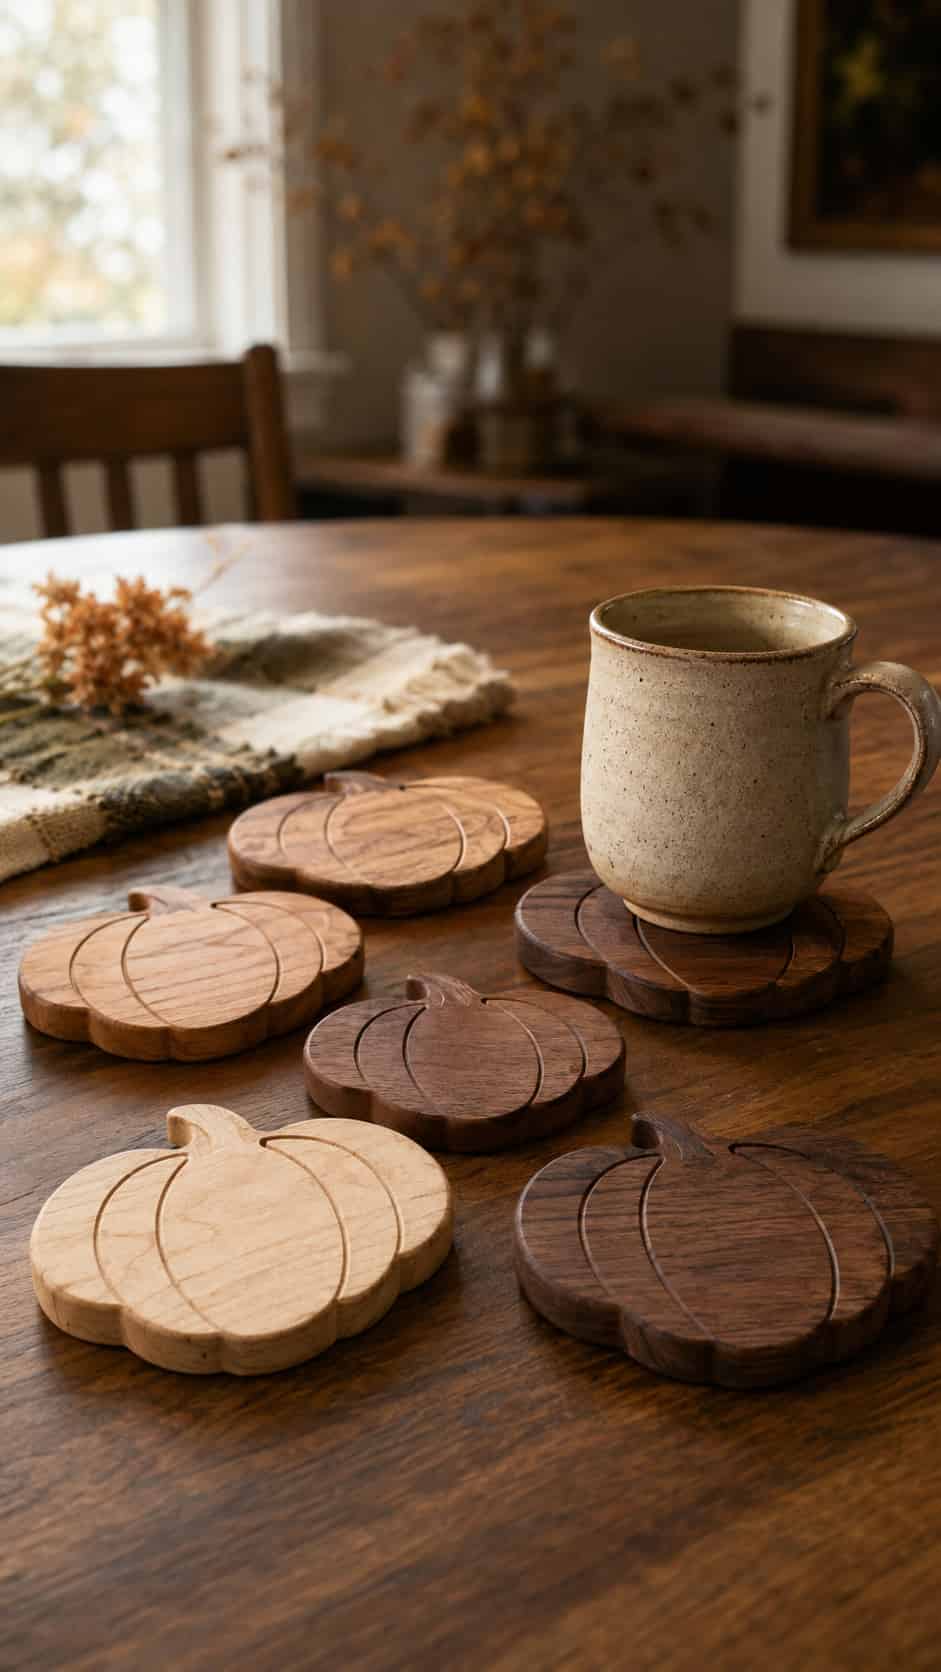
Difficulty: Easy
Estimated time: 1–2 hours
Suggested material: Maple, poplar, or furniture-grade plywood
Finished size: 4–5 inches wide
Suitability: Indoors
Create a coordinated set of broad pumpkin silhouettes or keep the coasters square and paint small pumpkins on their faces. Square versions stack more neatly, while silhouettes win the charm contest. Pick your battle.
Keep the upper surface level so glasses and mugs remain stable. Add cork or felt underneath to protect furniture.
Apply a moisture-resistant finish suitable for the coaster’s intended use. Allow the complete finish system to cure before placing hot or cold drinks on it.
14. Pumpkin Napkin Holder
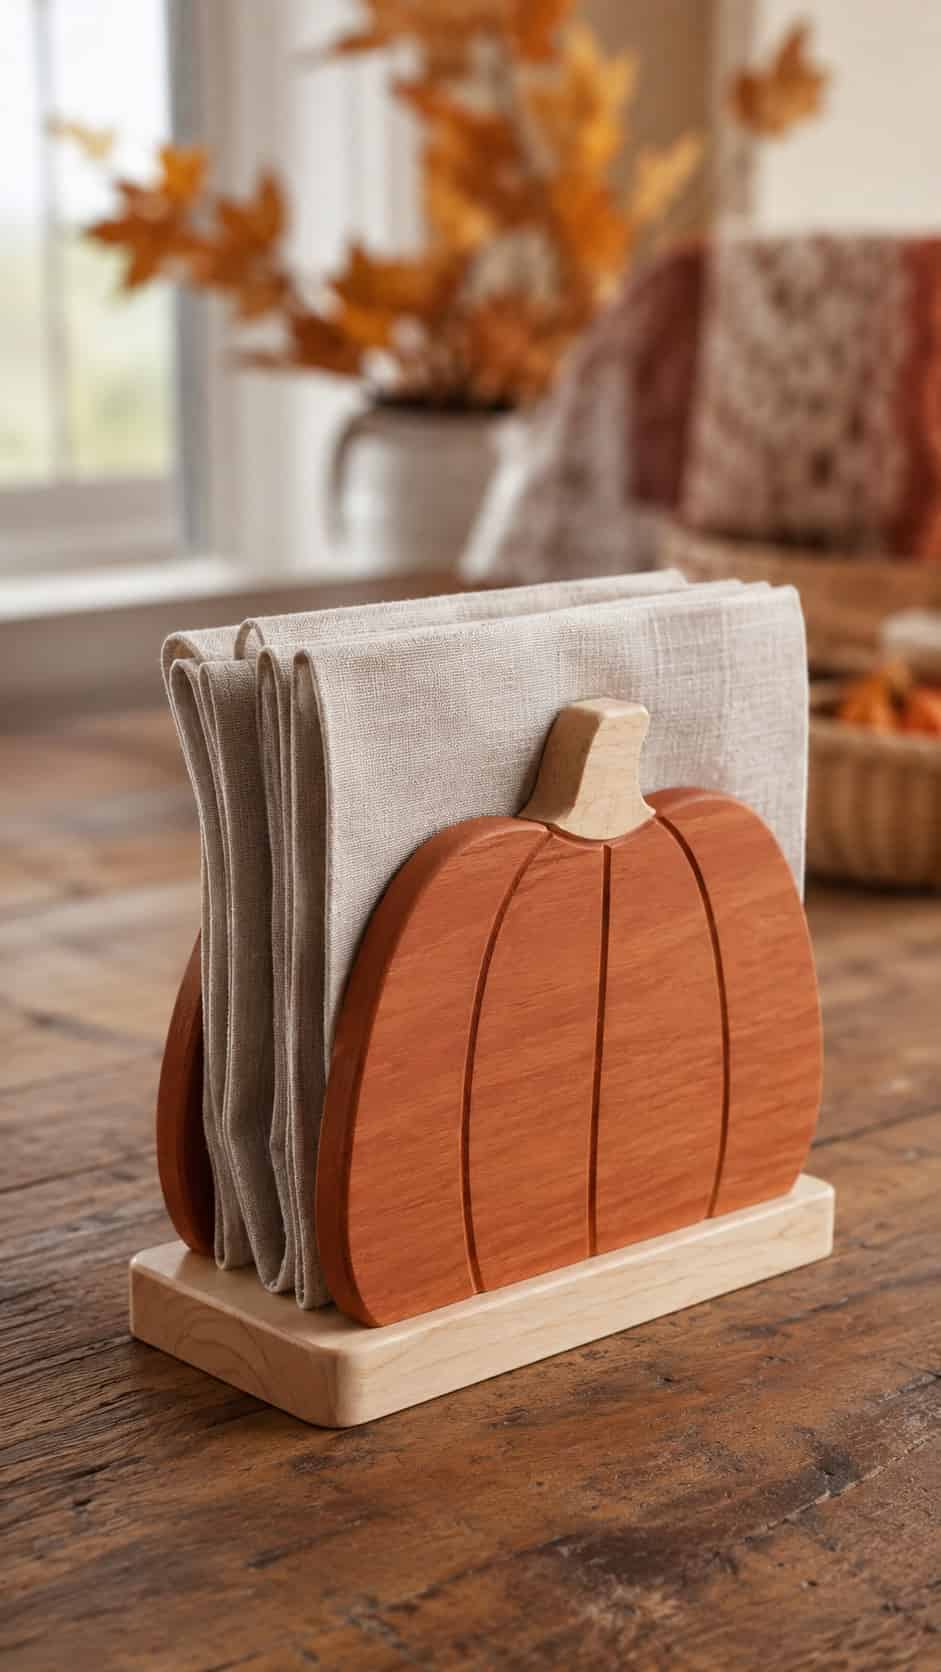
Difficulty: Medium
Estimated time: 2–3 hours
Suggested material: Poplar or 1/2-inch plywood
Finished size: About 7 × 6 × 3 inches
Suitability: Indoors
Two pumpkin-shaped side panels and a narrow base create a seasonal napkin holder. Match the two silhouettes carefully and leave enough room for a useful stack without making the holder unnecessarily wide.
Paint only the outside faces if you prefer a cleaner dining-table accessory. A darker base can visually anchor the two pumpkin panels.
Smooth every internal edge carefully. Paper napkins possess an impressive ability to find even the smallest rough spot.
15. Pumpkin Shelf Sitters
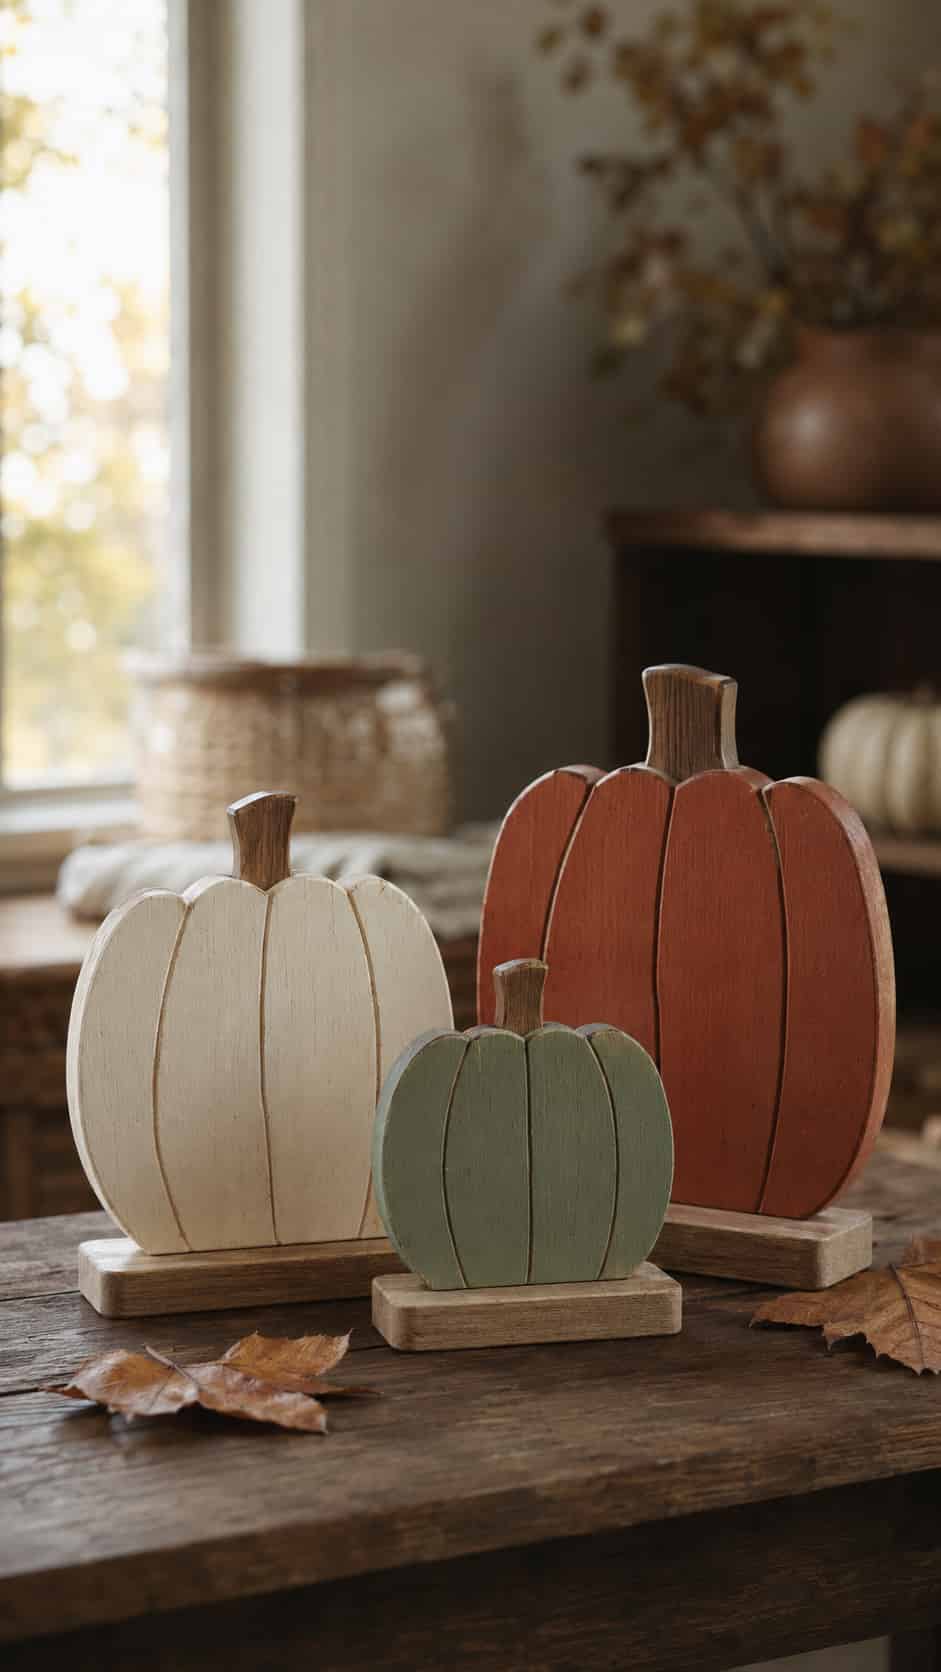
Difficulty: Easy
Estimated time: 1–2 hours
Suggested material: Poplar or maple scraps
Finished size: 4–8 inches tall
Suitability: Indoors
Freestanding pumpkin silhouettes make excellent bookshelf, windowsill, and mantel decorations. Create three related outlines, but vary the height, stem angle, and finish so the group feels collected rather than mass-produced.
Broad, flat bottoms matter more than perfectly symmetrical curves. Check each piece from the front and side before finishing it.
Mix natural wood with muted rust, cream, and sage paint for an easy modern-fall palette. Small painted leaves add detail without introducing fragile parts.
16. Mini Pumpkin House Village
Difficulty: Easy–Medium
Estimated time: 2–4 hours
Suggested material: Thick poplar or pine
Finished size: 4–7 inches tall
Suitability: Indoors
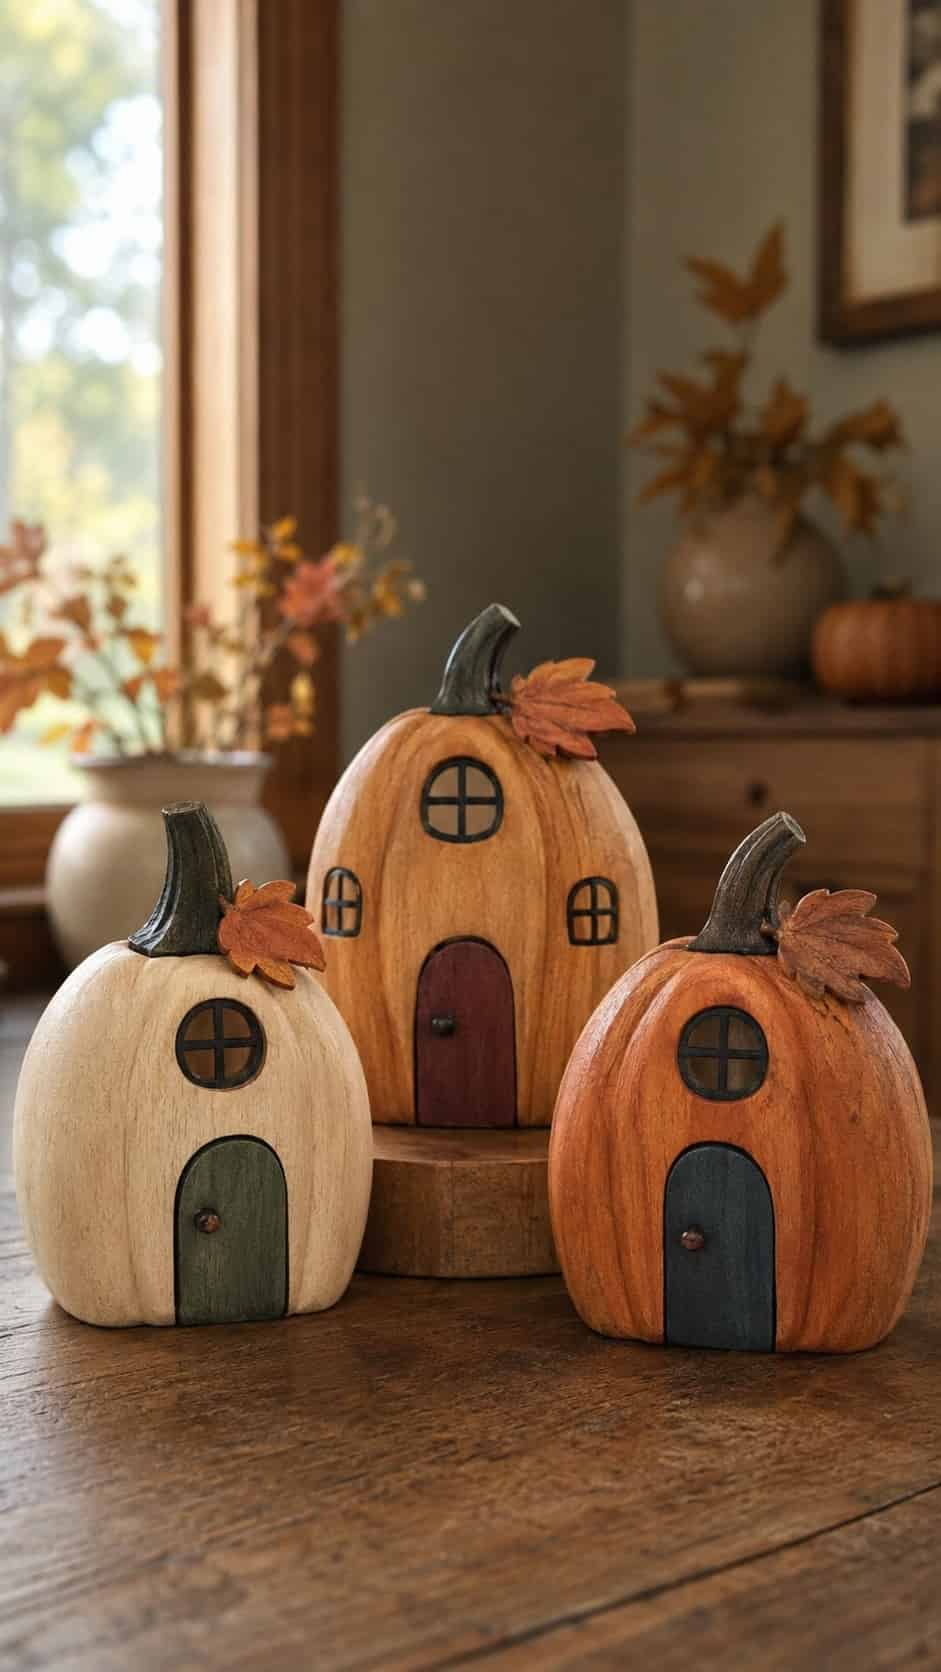
Combine pumpkin outlines with simple painted doors and windows to create a miniature autumn village. Keep every house as one solid, chunky piece and paint the details rather than attaching small parts.
Change the rooflines, stem shapes, and heights so each house has its own character. One tall pumpkin house can act as the center of the village.
Display the set on a mantel with dry leaves or small wooden trees. Use battery-powered lighting nearby instead of candles.
17. Pumpkin Bookends
Difficulty: Medium
Estimated time: 3–5 hours
Suggested material: Hardwood and wide wooden bases
Finished size: About 7 × 6 inches each
Suitability: Indoors
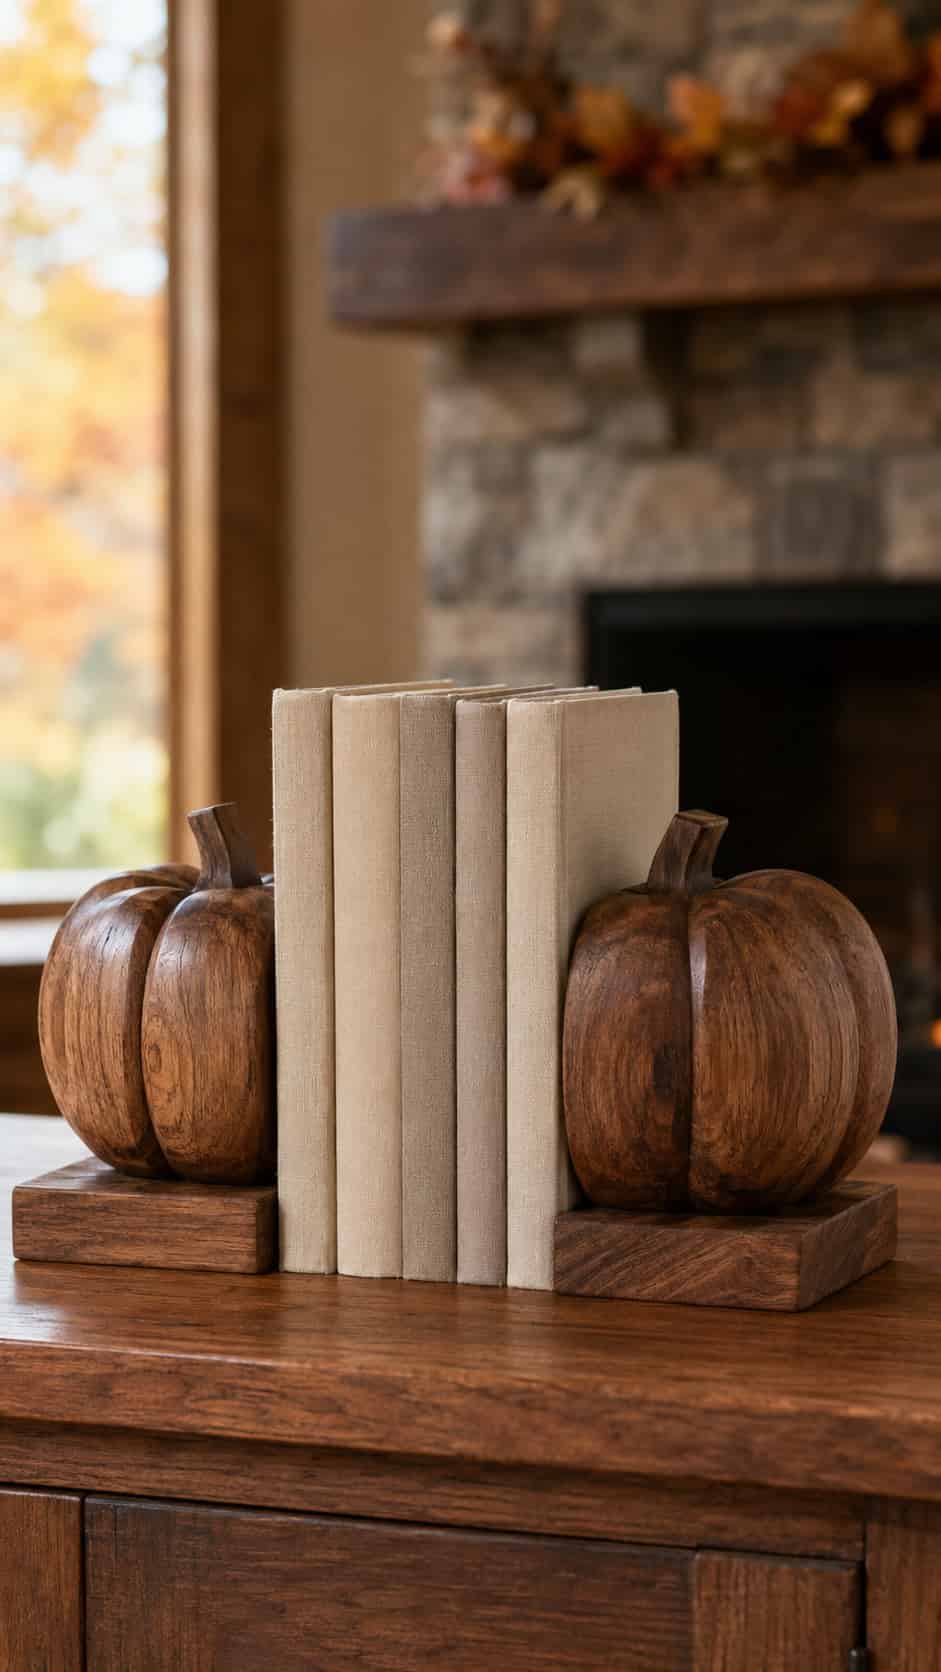
Mount two thick pumpkin silhouettes on wide rectangular bases to create useful seasonal bookends. The vertical panels require secure joints, while the bases need enough weight and depth to resist sliding.
Mirror the stem directions to create a balanced pair. You can keep the faces natural and stain only the stems for subtle contrast.
Place felt underneath the bases to protect the shelf and improve grip. Test the finished bookends with a modest stack before relying on them to support heavier books.
18. Wooden Pumpkin Wreath
Difficulty: Medium
Estimated time: 4–6 hours
Suggested material: Thin plywood shapes on a strong wooden ring
Finished size: 18–24 inches in diameter
Suitability: Indoors or a covered porch
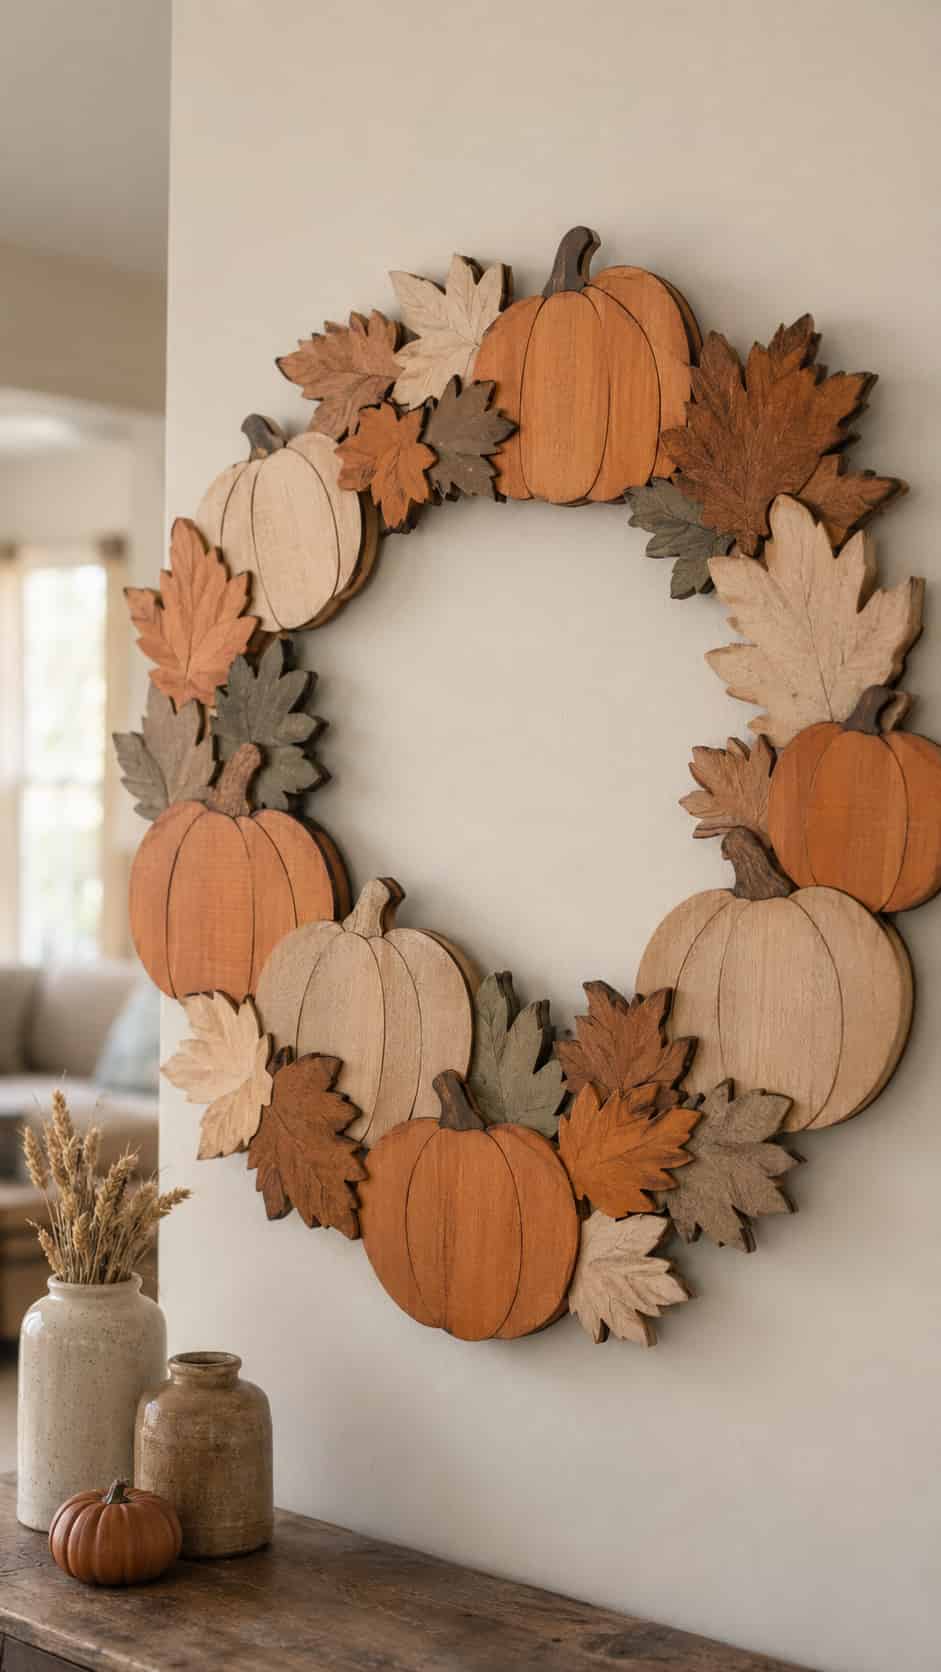
Layer broad pumpkin, leaf, and oval wood shapes around a sturdy circular backer. Alternate the grain direction and paint color to keep the arrangement interesting without adding fragile branches or dangling decorations.
Create the complete layout before attaching anything. Begin with the largest pumpkins, fill major spaces with leaves, and then decide whether the wreath genuinely needs smaller details.
Choose wall-rated hanging hardware suitable for the finished weight. Check every layered component before hanging the wreath and inspect it again after major humidity changes.
19. Engraved Pumpkin Plaque
Difficulty: Medium
Estimated time: 2–4 hours
Suggested material: Basswood, poplar, or clear pine
Finished size: About 14 × 12 inches
Suitability: Indoors
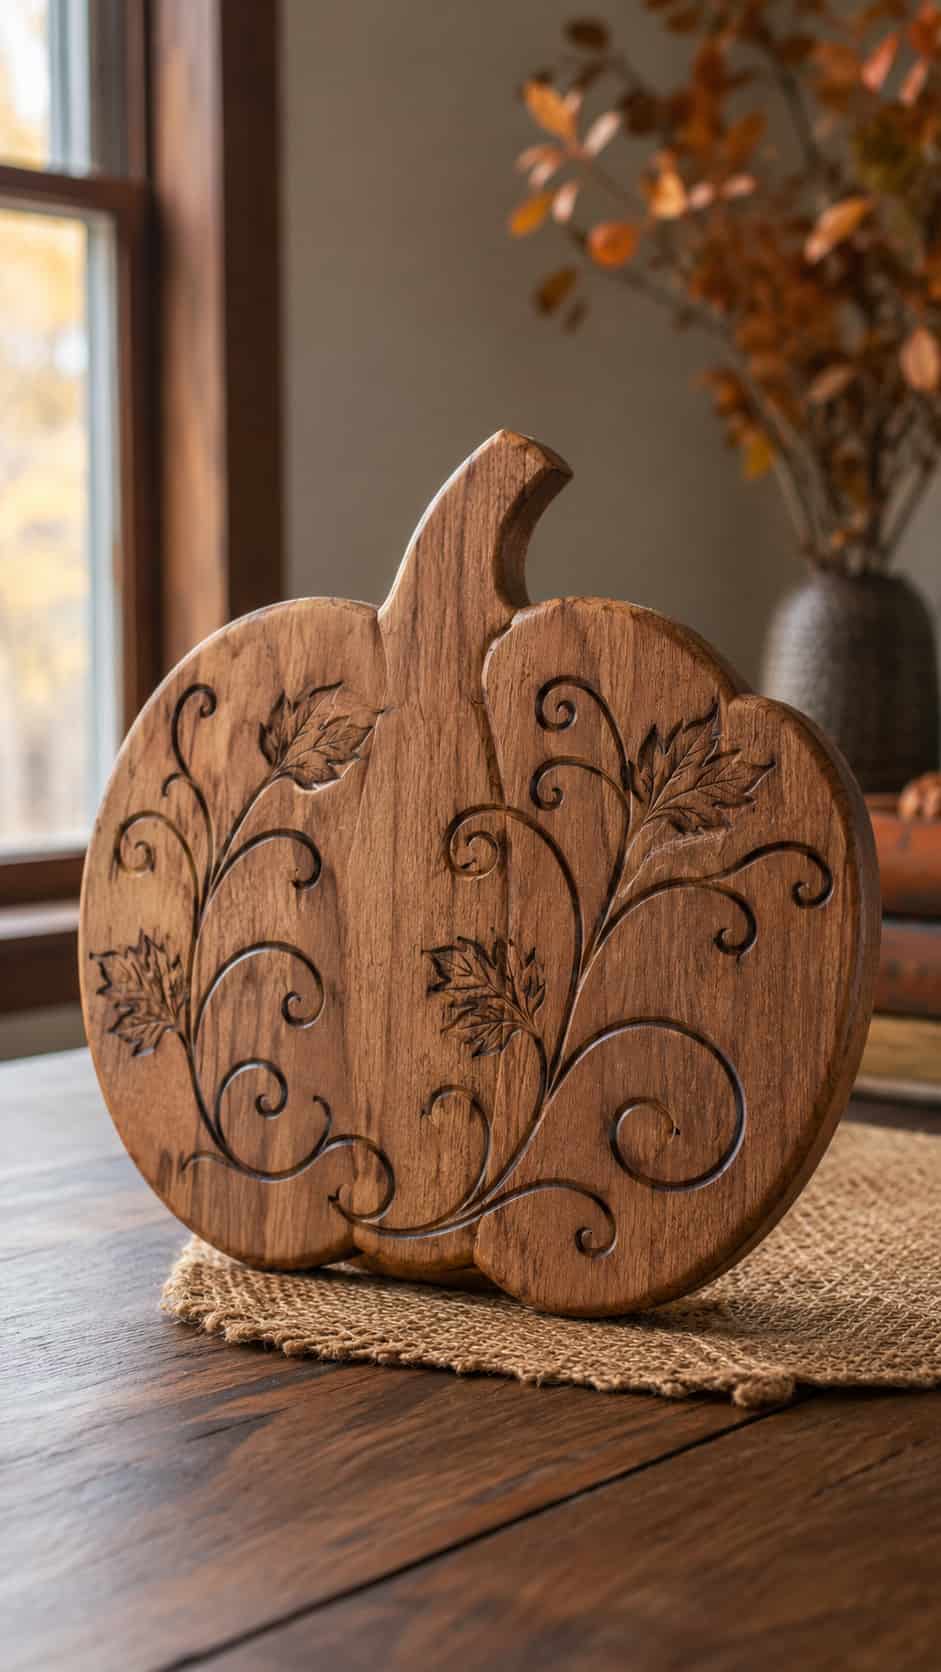
A solid pumpkin-shaped plaque provides enough room for shallow leaves, vines, ribs, and geometric patterns. Dark wax or paint inside the recessed lines creates contrast without requiring extremely deep carving.
Keep the main design bold and leave open space around the perimeter. Too many tiny lines can make a small plaque look visually cluttered.
A natural oil appearance suits botanical patterns, while painted recesses give geometric designs a sharper, more graphic look.
For more decorative inspiration, explore these fall wood crafts.
20. Scrap-Wood Mosaic Pumpkin
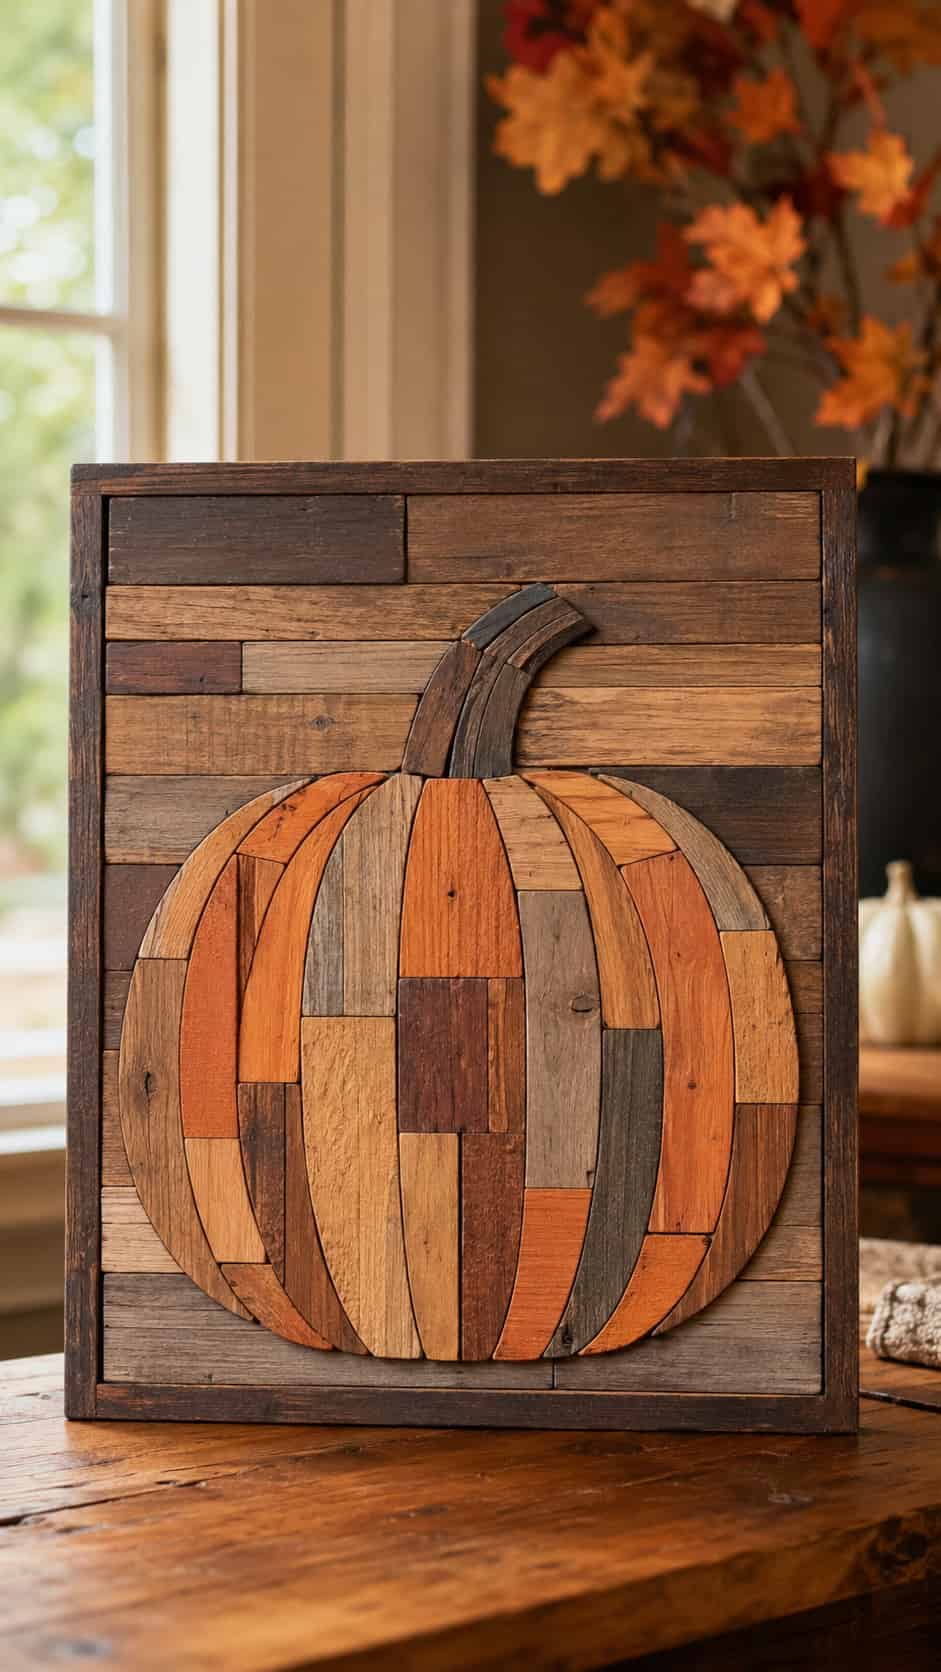
Difficulty: Medium
Estimated time: 4–6 hours
Suggested material: Clean thin offcuts and a plywood backer
Finished size: About 20 × 16 inches
Suitability: Indoors
Arrange short wooden strips within a pumpkin outline on a stable backing panel. Contrasting grain, width, and color turn the offcuts into the main design, so expensive lumber would almost miss the point.
Lay out the entire mosaic before gluing anything. Take a quick reference photograph so you can reconstruct the arrangement if pieces move during assembly.
A darker border sharpens the silhouette, while a simple stem prevents the upper section from becoming too visually busy. Place heavier pieces close to the center and ensure every offcut sits securely.
21. Pumpkin Tiered-Tray Decor
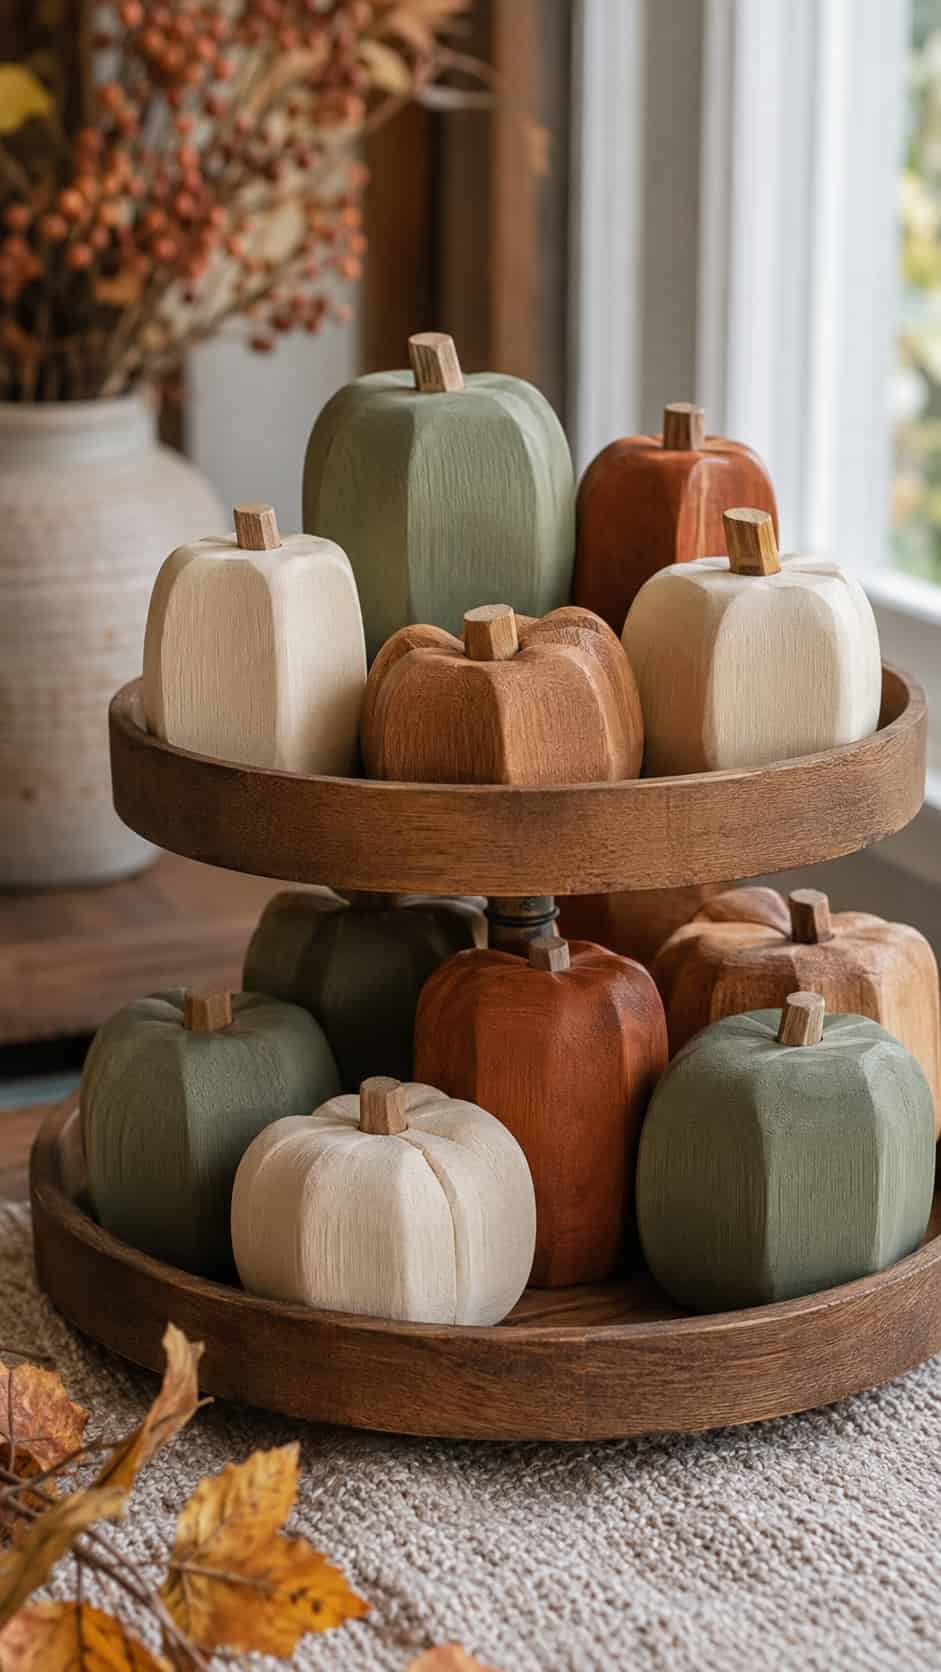
Difficulty: Easy
Estimated time: 1–3 hours
Suggested material: Assorted clean hardwood scraps
Finished size: 3–6 inches tall
Suitability: Indoors
Build several miniature block and silhouette pumpkins for a tiered tray or shallow centerpiece. Repeating the same three colors creates cohesion even when every individual shape differs.
Keep each piece broad enough to stand securely. Vary the stems and heights instead of relying on tiny attached decorations.
Mix one natural wooden pumpkin with several painted companions. Stop adding pieces before the tray turns into a tiny seasonal traffic jam.
Three Free Mini Plans With Measurements
These concepts provide adult builders with measurements, cut lists, and assembly guidance. They do not replace tool-manufacturer instructions, local requirements, or a complete safety review.
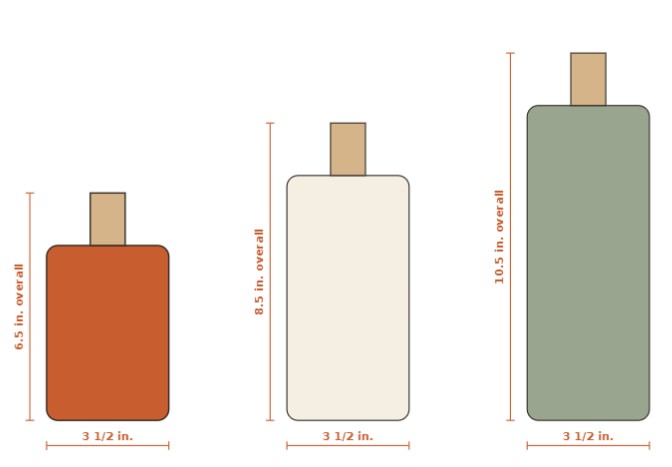
Mini Plan 1: 4×4 Pumpkin Trio
Finished heights: Approximately 6½, 8½, and 10½ inches, including the stems.
Cut list
- One 4×4 blank, 5 inches long
- One 4×4 blank, 7 inches long
- One 4×4 blank, 9 inches long
- Three wooden stem blocks, approximately 1 × 1 × 1½ inches
Assembly overview
A capable adult prepares the square blanks, rounds the exposed edges, and ensures that each base sits flat. Arrange the three blocks before attaching the stems so their heights and grain patterns look balanced.
Glue each stem centrally and clamp it according to the adhesive manufacturer’s directions. Allow the adhesive to cure before completing the final sanding and finish.
Finishing options
Use stain for a rustic trio or paint the three blocks in related fall colors. A covered-porch set needs an exterior-rated finishing system documented for that location.
Final checks
Confirm that every pumpkin stands without rocking. Inspect the blocks for splinters, loose stems, uncured finish, and sharp corners.
Mini Plan 2: Interlocking Plywood Pumpkin
Finished size: Approximately 12 inches wide and 12 inches tall.
Cut list
- Two matching 12 × 12-inch panels of 1/2-inch furniture-grade plywood
- Two optional stem overlays, approximately 1½ × 3 inches
Layout
Draw one broad pumpkin silhouette and transfer it to both plywood panels. Mark one centered slot on each panel.
The first slot extends from the top to the center. The second extends from the bottom to the center. Size both slots according to the measured thickness of your actual plywood.
Assembly overview
An adult prepares both silhouettes and slots, smooths every exposed edge, and tests the fit. The panels should meet at a right angle without excessive force or noticeable wobbling.
Complete the test fitting before painting. Thick paint inside the slots can tighten an otherwise accurate joint.
Finishing options
Paint both panels separately and apply only a light coating inside the slots. Allow the finish to cure completely before assembling the pumpkin.
Final checks
Look for plywood voids, splintered edges, a loose joint, or an uneven base. Separate the two panels and store them flat when the season ends.
Mini Plan 3: Reversible Tall Porch Pumpkin
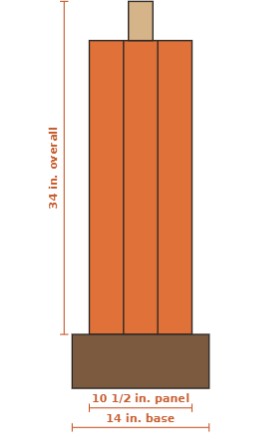
Finished size: Approximately 34 inches high and 10½ inches wide, plus a 14-inch-wide base.
Cut list
- Three 1×4 boards, each 30 inches long
- Two rear battens, approximately 9½ inches long
- One stem block, approximately 1×3 × 4 inches
- One 1×6 base, 14 inches long
Assembly overview
An adult aligns the three long boards face down with narrow, even seams. The builder then secures them across the rear battens using a suitable exterior assembly method.
Position the stem behind the upper edge. Attach the lower end to the wide base with a strong, square joint that resists tipping.
Finishing options
Paint a plain ribbed fall pumpkin on one face and a friendly Halloween face on the other. If you plan to use the sign on a covered porch, seal every face, end, edge, and fastener location with a compatible exterior system.
Final checks
Test the sign’s stability on a level surface and keep it away from strong wind. Inspect the joints, base, exposed hardware, and finish before every season.
Finishing Your Wooden Pumpkins
Remove sanding dust from grooves, seams, corners, and end grain before applying any finish. Dust trapped inside decorative lines can mix with the coating and create a rough, muddy appearance.
Apply compatible primer when the paint manufacturer recommends it. Coat every exposed side of an outdoor decoration to reduce uneven moisture movement.
Useful finishing styles include:
- Thin color wash: Adds color while preserving visible grain.
- Solid matte paint: Gives plywood and mixed scraps a unified surface.
- Layered dry brushing: Highlights planks, seams, and softened edges.
- Stain with a clear topcoat: Suits bookends, coasters, and plaques.
- Dark wax in recesses: Adds contrast to engraved ribs and patterns.
- Natural clear finish: Highlights attractive cedar, maple, or hardwood grain.
Follow the manufacturer’s ventilation, temperature, drying, recoating, and full-curing directions. Bring outdoor decorations inside during severe weather and repair damaged coatings before water reaches the bare wood.
Frequently Asked Questions
What is the easiest wooden pumpkin to make?
A 4×4 block pumpkin or small shelf sitter makes an excellent first project. Both designs use stable shapes, minimal assembly, and inexpensive offcuts.
Can I use scrap wood?
Yes, provided the scraps remain clean, untreated, dry, and structurally sound. Reject wood with unknown paint, chemical treatments, contamination, embedded metal, deep cracks, or loose knots.
Which wood works best outdoors?
Cedar suits covered porch projects well. Exterior-grade plywood can also work when the design and complete finishing system protect every exposed edge.
No wooden decoration lasts indefinitely outside. Inspect outdoor pieces regularly and maintain the protective coating.
For larger seasonal silhouettes, these DIY wood yard art ideas offer additional inspiration.
How do I keep a porch pumpkin from tipping?
Give the project a broad, flat base and keep heavier components close to the bottom. Display it on a level, protected surface and move it inside during strong wind.
Can children help decorate wooden pumpkins?
Children can join age-appropriate, non-powered activities under direct adult supervision. Suitable activities might include choosing colors or painting a completely prepared, smooth blank with an appropriate product.
A knowledgeable adult should control all cutting, drilling, carving, routing, and powered sanding.
Can I sell projects inspired by these ideas?
You can develop your own products from these original concepts, but you should create your own templates, verify the construction, and avoid copying protected artwork, branding, or another designer’s plans.
Remember to include your materials, finishing products, labor, packaging, platform fees, and selling costs when calculating a price.
How should I store wooden fall decorations?
Clean and dry every piece before storage. Wrap painted surfaces loosely and prevent heavy objects from pressing against stems or raised decorations.
Store the projects away from damp floors, direct sunlight, and extreme heat. Inspect them for loose joints or damaged finish before displaying them again.
Final Thoughts
The best DIY wooden pumpkin ideas do not require complicated shapes. Good proportions, stable construction, clean edges, and a finish suited to the display location will carry a project much further than a dozen fussy embellishments.
Start with the 4×4 trio if you want an approachable weekend project. Choose the reversible porch pumpkin when storage space matters, or use the mosaic design when your scrap bin has started making territorial claims.
Whichever project you select, let a knowledgeable adult handle the power-tool work and inspect the completed decoration carefully. You will end up with autumn décor that returns next year in exactly the same shape.