

A platform bed frame is one of those projects that looks complicated until you actually look at it. Then you realize it’s basically a big rectangle with legs. Seriously — if you can build a box and attach some supports, you can build this. I built mine on a long Saturday with a playlist, a cup of coffee that went cold twice, and zero regrets.
The bonus? A solid platform bed frame costs somewhere between $60–$120 in materials, depending on wood choice and size. Compare that to $400–$800 at a furniture store for something that wobbles after a year. The math writes itself.
Why Build a Platform Bed Instead of Buying One?

Beyond the obvious cost savings, there are real practical reasons to build your own:
- Custom dimensions. Standard bed sizes are not actually that standard once you start measuring rooms and mattresses. A DIY build fits your space exactly.
- No box spring needed. Platform beds support the mattress directly with slats. That’s one less thing to buy.
- It’s solid. Store-bought bed frames — especially in the mid-range price bracket — are mostly hollow metal or particleboard. A wood frame you build yourself is built to last decades.
- You can add storage. Design it with legs tall enough to slide bins underneath, or build it low to the ground for a minimalist look. Your call.
And honestly? Sleeping on something you built is just satisfying in a way that’s hard to explain until you’ve done it.
What Size Are We Building?
This guide covers a queen-size platform bed (60″ × 80″), which is the most requested size and a great middle ground for skill-building. The construction method is identical for king, full, or twin — you’ll just adjust the dimensions.
Free Plans: The cut list and diagram in this article give you everything you need to build without buying anything. Save this page, sketch out the dimensions, and you’re set.
Materials List
Here’s exactly what to buy. All dimensions are standard lumber sizes available at any hardware store.
Lumber

- 4 pieces of 2×10, 82 inches long — side rails (long sides)
- 4 pieces of 2×10, 62 inches long — end rails (head and foot)
- 2 pieces of 4×4, 14 inches long — corner legs (adjust height to preference)
- 1 piece of 4×4, 14 inches long — center leg
- 1 piece of 2×4, 57 inches long — center support beam
- 14 pieces of 1×4, 61 inches long — mattress slats
- 2 pieces of 2×2, 80 inches long — slat ledgers (inside the side rails)
Hardware
- Carriage bolts ½” × 3½”: 16 pieces (for corner joints)
- Lag screws 3/8″ × 3″: 12 pieces (for leg attachment)
- Wood screws 2½”: 1 box (~50 screws)
- Wood screws 1⅝”: 1 box (~30 screws, for slat attachment)
- Washers and nuts: matching set for carriage bolts
- Wood glue: 1 small bottle
Finishing Supplies
- Sandpaper (80-grit and 120-grit)
- Wood stain or paint (exterior-grade if you want durability; interior-grade is fine for bedroom use)
- Polyurethane or wax finish
Total estimated cost: $70–$110 depending on lumber prices in your area and whether you go with pine, poplar, or oak.
Advertisement
Tools You’ll Need

No, you don’t need a workshop. You need:
- Circular saw or miter saw
- Power drill + bits
- Countersink bit
- Speed square
- Tape measure
- Clamps (4 is ideal, 2 is workable)
- Level
- Sandpaper or orbital sander
- Safety glasses
If you’re still building out your tool kit, 16 Best Woodworking Tools for Beginners breaks down exactly what to buy first and why — without blowing your budget on tools you’ll use once.
Wood Selection — What Actually Works
Pine is the move for most first-time bed builders. It’s affordable, widely available, easy to work with, and takes stain beautifully. The main downside is it dents more easily than hardwoods — but for a bed frame that mostly sits still, that’s a non-issue.
Poplar is a step up in hardness and smoothness for not much more money. It paints extremely well if you want a clean, finished look.
Oak is gorgeous and rock-solid, but it’ll push your budget considerably higher and it fights back when you’re drilling. Worth it for a forever piece; overkill for a first build.
FYI — stay away from MDF and particleboard for structural pieces. They don’t hold screws well under load, and a bed frame carries real, repeated stress every single night. Use solid lumber.
Step-by-Step Instructions to Build a Platform Bed Frame
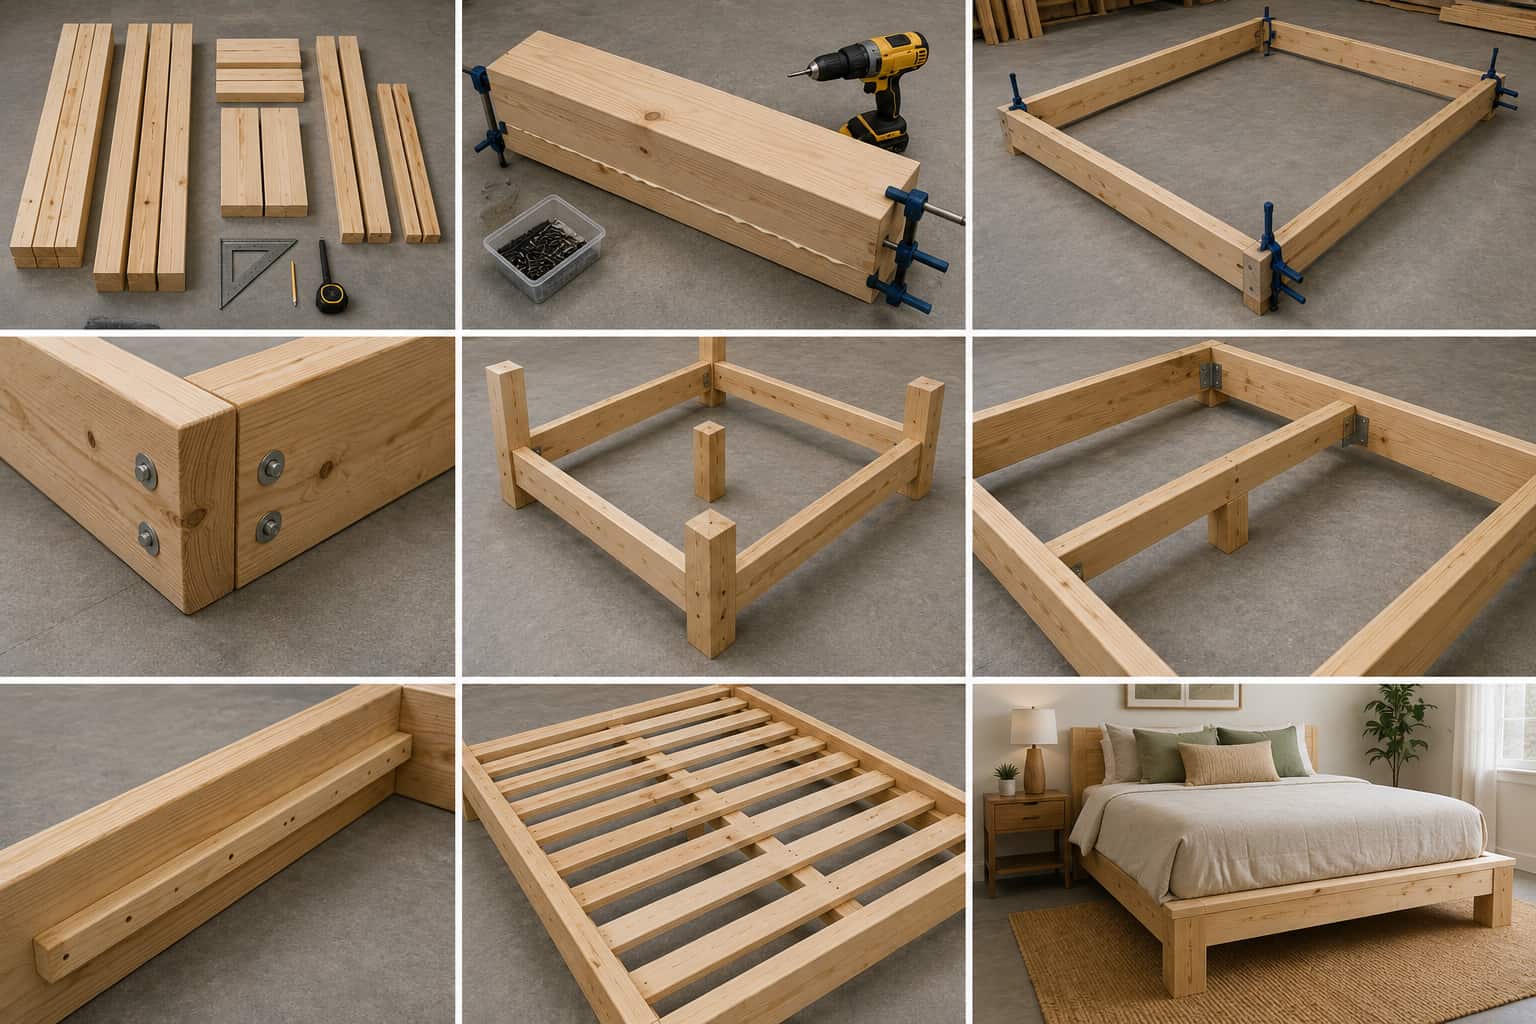
Alright, let’s build this thing.
Step 1 — Cut All Your Lumber
Before you touch the drill, get everything cut and labeled. Measure twice, cut once — that cliché exists because it’s true and everyone learns it the hard way.
Use your speed square to mark cut lines at 90 degrees on every piece. Label each board with painter’s tape as you cut it: “side rail,” “end rail,” “leg,” etc. Seems obvious. You will absolutely thank yourself later when you’re not standing there holding two boards trying to remember which is which.
Cut the legs last. If you want the bed higher or lower than the standard 14 inches, this is where you adjust. The 14-inch leg height puts the top of the rail at about 18–19 inches, which is a comfortable height for most people to sit on the edge of the mattress.
Step 2 — Build the Outer Frame
The outer frame is two long side rails and two shorter end rails, joined at four corners. This is the main structural rectangle everything else connects to.
Double up each rail side. You’re using two 2×10 boards per side, glued and screwed face-to-face. This doubles the thickness and gives you serious rigidity. Apply wood glue between the faces, clamp them, and drive 2½-inch screws every 12 inches along the length. Wipe any squeeze-out immediately — dried wood glue is annoying to sand off.
Let the glue cure for at least an hour before moving on. Use this time to lay out your hardware and pre-drill the corner bolt holes.
Step 3 — Join the Corners
Once your doubled rails are solid, it’s time to join them into a rectangle. Stand the side rails and end rails on edge and clamp them at the corners — this is where extra hands or a lot of clamps earn their keep.
Drill two ½-inch holes through each corner joint and drive carriage bolts through with washers and nuts. Tighten firmly but don’t overtighten — you want the joint snug, not split. Check your corners with a speed square as you go. A frame that’s out of square will cause headaches at every subsequent step.
Check the diagonal measurements corner to corner. Both diagonals should be equal. If they’re off by more than ¼ inch, nudge the frame gently before the joints fully set.
Step 4 — Attach the Legs
The four corner legs attach to the inside corners of the frame. Stand each leg flush with the outside corner, clamp it in place, and drive lag screws through the frame into the leg — two screws per rail face, so four screws per corner leg total.
Drill pilot holes for every lag screw. This isn’t optional with 4×4 stock. Skipping pilot holes risks splitting the leg or the rail, and lag screws in split wood are basically decorative at that point.
After all four corner legs are on, flip the frame over and set it on a flat surface. Check with your level. If one leg is slightly long, a quick pass with a hand plane or a piece of sandpaper on concrete levels it out. Rocking is annoying and fixable in about two minutes — don’t ignore it.
Step 5 — Install the Center Support
A queen mattress is 60 inches wide. Without center support, your slats will flex noticeably under weight — especially toward the middle. Nobody wants a bed that sags in the center after six months.
Cut your center support beam (2×4, 57 inches) to run lengthwise down the middle of the frame, parallel to the side rails. It sits on the center leg, which mounts to the floor of the frame at the midpoint. Attach the center leg the same way as the corner legs — pilot holes, lag screws, no shortcuts.
The center beam connects to the inside face of both end rails using metal joist hangers or simple angle brackets. Either works. The goal is a beam that carries load without moving.
Step 6 — Mount the Slat Ledgers
The slat ledgers are two 2×2 boards that run along the inside face of each side rail. They create a shelf for your slats to rest on, about 1½ inches down from the top of the rail.
Measure down 1½ inches from the top of each side rail, snap a pencil line, and screw the 2×2 ledgers in place along that line. Use 2½-inch screws every 8 inches. Make sure both ledgers sit at the same height — use your level and check both ends before driving every screw. Uneven ledgers mean tilted slats, which means a lumpy mattress surface.
Step 7 — Install the Slats
Space your 14 slats evenly across the frame — roughly 4-inch gaps between each one. Even spacing keeps the mattress supported without blocking airflow underneath.
Don’t skip the airflow. A mattress that sits on a solid surface with no gaps retains moisture, grows mold, and smells terrible within a year. The gaps between slats exist for a reason.
Drop each slat onto the ledgers and drive a single 1⅝-inch screw through the end of each slat into the ledger. You don’t need more than one screw per end — these boards carry vertical load, not lateral stress.
Step 8 — Sand and Finish
Sand every exposed surface, starting with 80-grit and finishing with 120-grit. Pay extra attention to the top edges of the side and end rails — those are where arms and legs brush every night, and rough edges are unpleasant.
For finishing:
- Stain + polyurethane is the classic combo. Apply stain first, let it dry fully, then apply 2–3 coats of poly, sanding lightly between coats with 220-grit.
- Paint + primer works beautifully on poplar and gives a furniture-grade look.
- Natural oil or wax (like Danish oil or beeswax) is a great low-sheen option that brings out wood grain and is easy to touch up later.
Let everything cure for at least 24 hours before loading the mattress. Finish fumes in an enclosed space are not pleasant, and polyurethane that hasn’t fully cured can stick to your mattress. Patience here pays off.
Headboard Options
You’ve got a few routes:
Simple Panel Headboard
Cut a piece of ¾-inch plywood to width (62 inches for a queen) and your preferred height (30–48 inches is typical). Sand the edges smooth, finish to match the frame, and attach it to the back legs with bolts. Done in an afternoon.
Slatted Headboard
Same concept, but instead of a solid panel, you run vertical 1×4 boards with gaps between them. Looks great in natural wood and adds a modern touch without much extra effort.
No Headboard
Genuinely fine. Push the bed against a wall, hang some art above it, and call it intentional design. Not every bed needs a headboard. 🙂
Common Mistakes That’ll Cost You Later
Been there, fixed these — so you don’t have to:
- Not checking square at every step. An out-of-square frame compounds. A small error at the frame stage becomes a big problem by the time you’re installing slats.
- Undersized legs. Wobbly legs are the number one reason platform beds creak and shift. Use 4×4 stock. Don’t substitute with 2×4 legs.
- Skipping the center support. This mistake shows up about three months after you finish the build. Don’t skip it.
- Rushing the finish. Applying a second coat of stain or poly before the first coat dries causes lifting, bubbling, and uneven color. Wait the full cure time.
- Not pre-drilling. Split wood is the enemy of structural integrity. Pre-drill every single hole, especially near board ends.
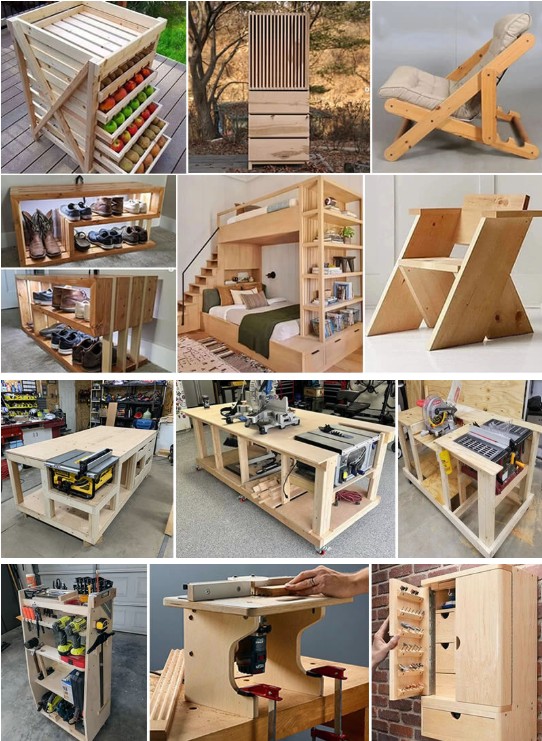
Take Your Builds Further
Once you finish this project, you’ll have a solid handle on frame joinery, rail construction, leg attachment, and finishing — skills that transfer directly to almost everything else you might want to build. 15 Woodworking Projects Using Basic Tools for Beginners has a great lineup of next projects that build on exactly what you learned here, without needing to add tools.
And if you found yourself wanting more detailed plans during this build — measured drawings, material lists with zero guesswork, multiple design variations — Ted’s Woodworking Plans is worth a serious look. It’s a library of over 16,000 plans covering furniture, outdoor structures, storage builds, and everything in between. The bed frame plans alone come in platform, storage, and canopy variations with full dimensions.
👉 Browse Ted’s Woodworking Plans here — once you finish this build, you’ll want a plan library for everything that comes next.
Frequently Asked Questions
How long does this build take? For a first-timer: about 6–8 hours of active work. Most people split it over two days — frame assembly on day one, finishing on day two.
Does a platform bed need a box spring? No — that’s the whole point. The slats replace the box spring. Just make sure your mattress manufacturer doesn’t specifically require a box spring (most modern foam and hybrid mattresses are designed for slats).
What’s the weight capacity? Built as described here with doubled 2×10 rails, 4×4 corner legs, and a center support, this frame handles 800–1,000 lbs comfortably. It’s not going anywhere.
Can I add under-bed storage? Yes. The 14-inch leg height leaves about 12 inches of clearance under the frame — enough for low-profile storage bins. If you want more clearance, extend the legs to 18 or 20 inches.
What if my floor isn’t level? Add adjustable furniture leveler feet to the bottom of each leg. They’re about $2 each and solve uneven floor problems in about five minutes.
Wrapping Up
A platform bed frame is one of those projects that makes you feel like you’ve leveled up as a builder. It’s bigger than a shelf, more structural than a side table, and you sleep on it every single night — which means every night is a quiet reminder that you built something real.
The plans in this article are everything you need. Grab your lumber, take your time on the corners, don’t skip the center support, and finish it properly. You’ll have a bed frame that outlasts anything you’d find in a furniture store, at a fraction of the price.
Now go build it. And then figure out what’s next.