
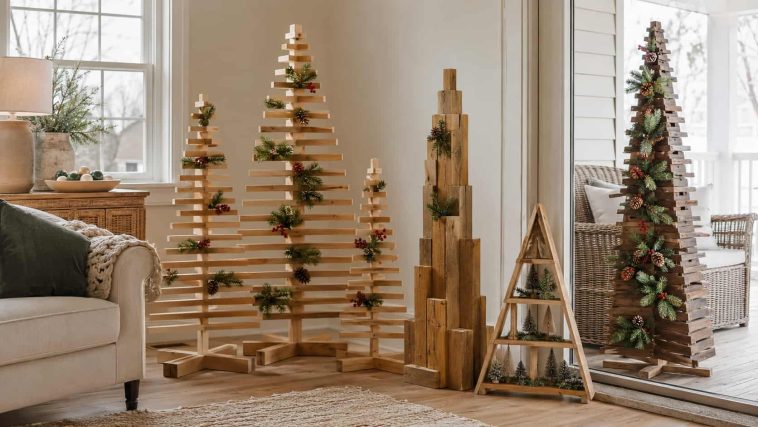
These DIY wooden Christmas tree ideas include tiny tabletop decorations, wall displays, porch accents and useful tree-shaped shelves. You will find quick scrap-wood projects alongside larger statement pieces, so you can choose a design that matches your space and experience instead of letting Pinterest choose chaos on your behalf.
Quick Comparison of Wooden Christmas Tree Projects
| Project | Difficulty | Estimated time | Best use | Suggested finished size |
| Tabletop slat-tree trio | Easy | 1–2 hours | Mantels and shelves | 8–16 in tall |
| Chunky 2×4 block trees | Easy | 1–2 hours | Rustic tabletop décor | 6–12 in tall |
| Scrap-wood triangle trees | Easy | Under 2 hours | Beginner crafts | 6–14 in tall |
| Pallet-style plank tree | Easy–Medium | 2–4 hours | Porch or wall décor | 24–48 in tall |
| Branch-and-dowel display tree | Medium | 2–4 hours | Hanging ornaments | 24–36 in tall |
| Ladder-style tree | Medium | 3–5 hours | Floor display | 36–60 in tall |
| Wooden Christmas tree shelf | Medium | 4–7 hours | Displaying small décor | 30–48 in tall |
| Stacked block tree | Easy | 1–2 hours | Scrap-wood décor | 10–20 in tall |
| Rustic plank tree | Easy | 2–3 hours | Farmhouse interiors | 18–36 in tall |
| Geometric flat-panel tree | Medium | 2–4 hours | Modern wall décor | 24–40 in tall |
| Tiered tabletop tree shelf | Medium | 3–5 hours | Miniature collections | 18–24 in tall |
| Flat wall-mounted tree | Medium | 3–5 hours | Small rooms | 30–48 in tall |
| LED glow tree lantern | Medium | 2–4 hours | Evening décor | 12–20 in tall |
| Outdoor porch tree | Medium | 4–6 hours | Covered entrances | 36–60 in tall |
| Garden-stake tree group | Medium | 3–5 hours | Winter yard accents | 24–48 in tall |
| Mini village and tree set | Easy | 2–4 hours | Mantels and consoles | 4–12 in tall |
| Christmas card display tree | Easy–Medium | 2–3 hours | Cards and photos | 24–36 in tall |
These dimensions help you compare scale. They do not replace a verified plan, cut list or stability check.
Plan Your Wooden Christmas Tree Before You Start
The prettiest design still needs to fit the place where you want to display it. Measure the mantel, tabletop, wall or porch first, then choose the tree. Revolutionary idea, right?
Match the Wood to the Design
Short clean offcuts suit chunky trees, triangles and miniature villages. Flat panels suit silhouettes and wall décor, while longer straight boards work better for ladder-style and porch trees.
Avoid badly split lumber and scraps with an unknown history. Choose clean material, smooth exposed edges and keep lightweight decorations stable on level surfaces.
Choose a Limited Holiday Palette
Traditional green and red can look cheerful, but they do not own Christmas. Natural wood, cream, charcoal, sage and muted red create a calmer display that stays useful for more than one decorating trend.
Repeat two or three colors across the complete group. IMO, a limited palette makes even random offcuts look like they attended the same design meeting.
Decide Between Freestanding and Wall-Mounted
Freestanding trees move easily and avoid wall holes, but they need broad stable bases. Flat wall trees save floor space, although the mounting method must suit the wall construction and project weight.
Ask an experienced adult or qualified professional to verify wall mounting, outdoor anchoring and large freestanding displays. Do not lean tall lightweight projects where pets, children, wind or foot traffic can knock them over.
Use Removable Battery Lights Only
Battery-powered LED strands or puck lights can add a warm glow without homemade wiring. Keep every light removable so you can replace batteries and inspect the wood.
Never use candles, burners or open flames with wooden Christmas décor. Keep battery packs accessible and follow the light manufacturer’s instructions.
Prepare Outdoor Trees for Weather
Choose exterior-rated materials, fasteners and finishes for porch or yard displays. Seal exposed end grain and position the decoration away from pooled water, steps and walking routes.
Outdoor displays need more than a heavy-looking photo. Confirm stability for the actual surface, wind exposure and location before you use them.
17 DIY Wooden Christmas Tree Ideas
1. Tabletop Slat-Tree Trio
Difficulty: Easy
Estimated time: 1–2 hours
Best use: Mantels, consoles and shelves
Suggested finished size: Approximately 8, 12 and 16 inches tall
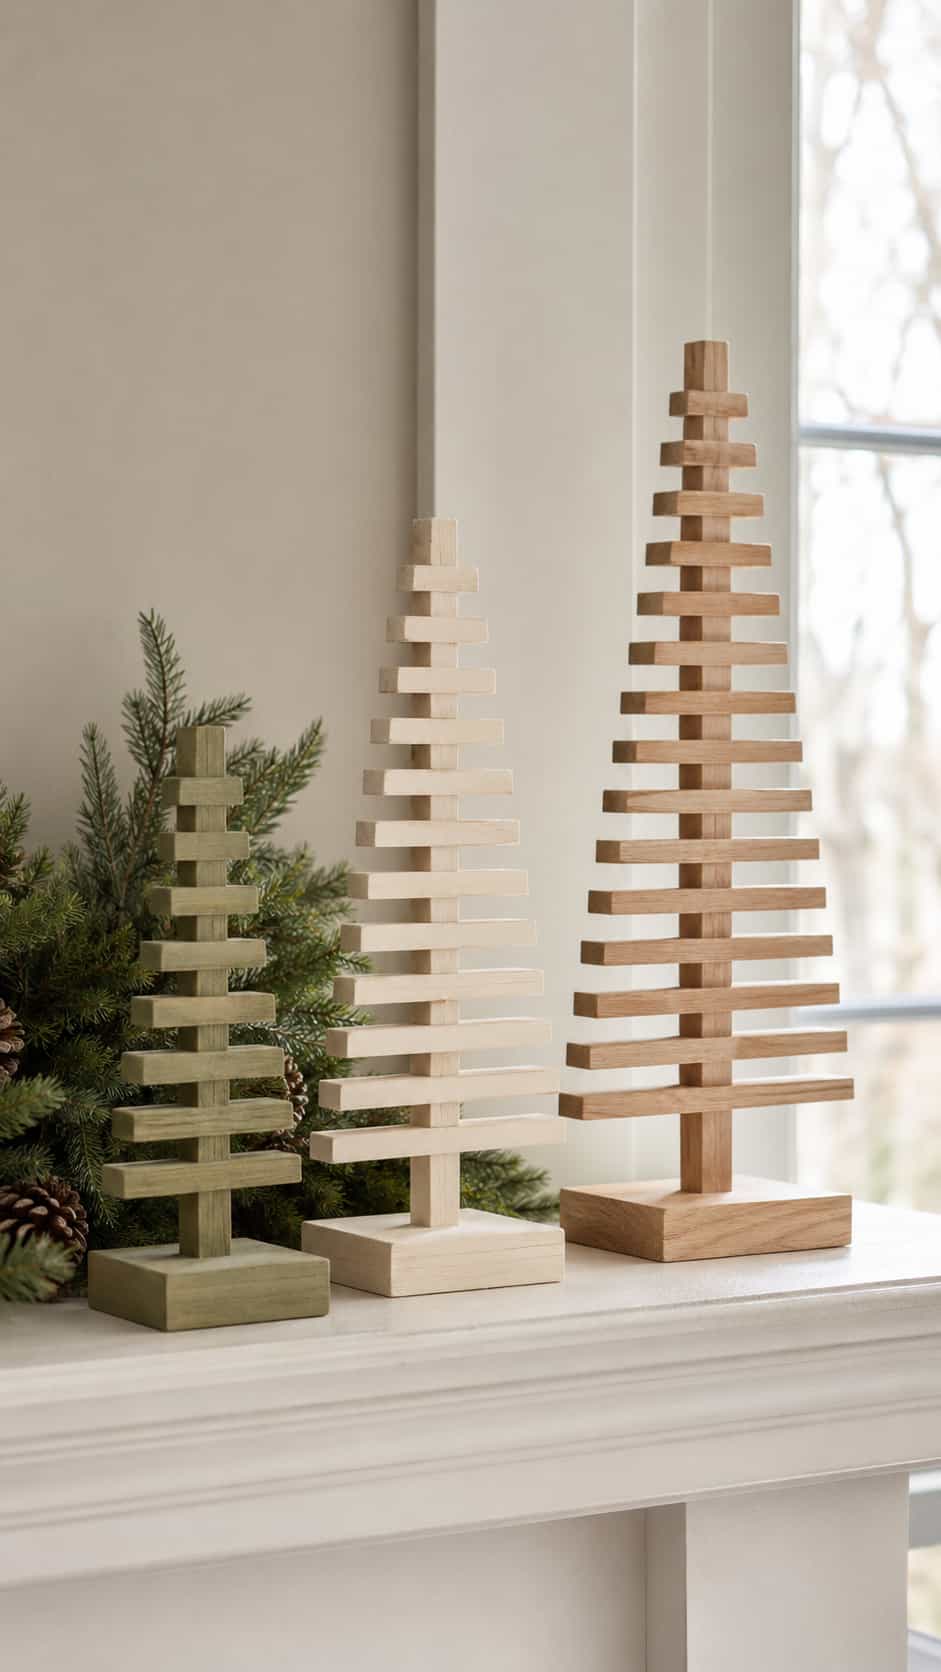
A group of three slim wooden trees creates more visual interest than one lonely triangle. Use simple layered slats or flat tree silhouettes, then vary the heights while keeping the base style consistent.
Natural wood looks warm and timeless. Cream, sage and charcoal also work beautifully when you want the trio to coordinate with modern holiday décor.
Customization idea: Give each tree a different finish while repeating one small gold or white accent.
2. Chunky 2×4 Block Trees
Difficulty: Easy
Estimated time: 1–2 hours
Best use: Rustic tabletop decorations
Suggested finished size: Approximately 6–12 inches tall
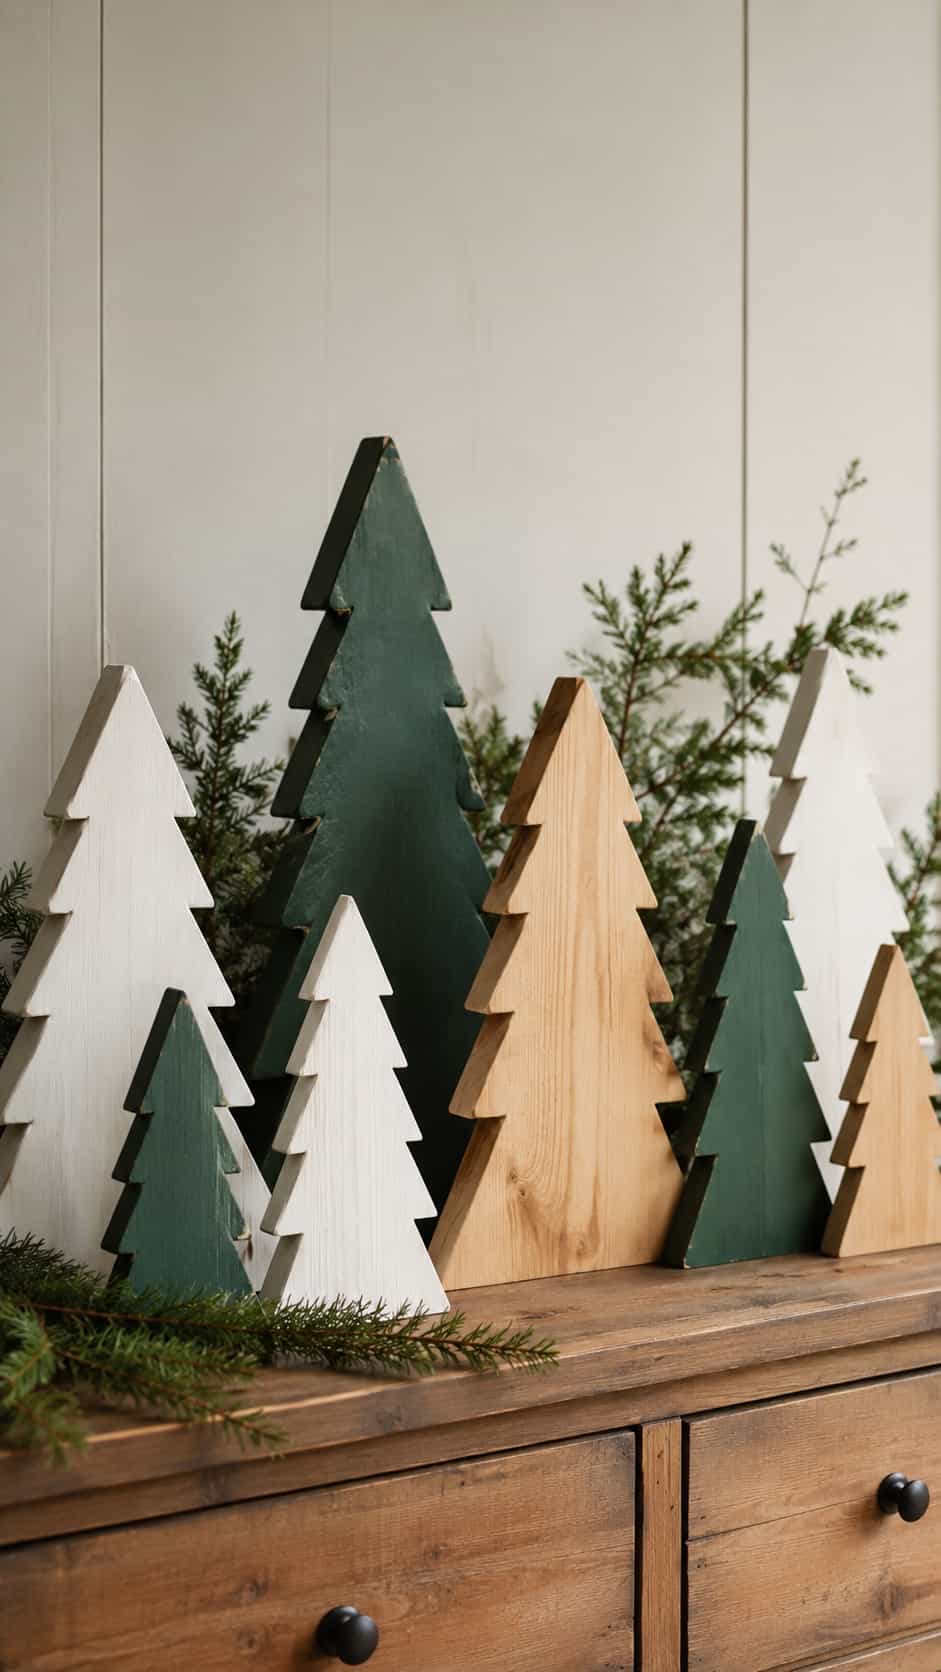
Chunky construction-lumber pieces create trees with plenty of visual weight. Their broad bases make them useful for shelves and entry tables where narrow decorations may wobble.
Keep the shapes bold and the finish simple. You can paint the faces while leaving the edges natural, which highlights the fact that the project started as ordinary lumber.
Customization idea: Add small painted dots, stripes or stars instead of attaching loose ornaments.
Explore more ways to use substantial scraps in 25 easy 4×4 wood projects.
3. Scrap-Wood Triangle Trees
Difficulty: Easy
Estimated time: Under 2 hours
Best use: Beginner Christmas crafts
Suggested finished size: Approximately 6–14 inches tall
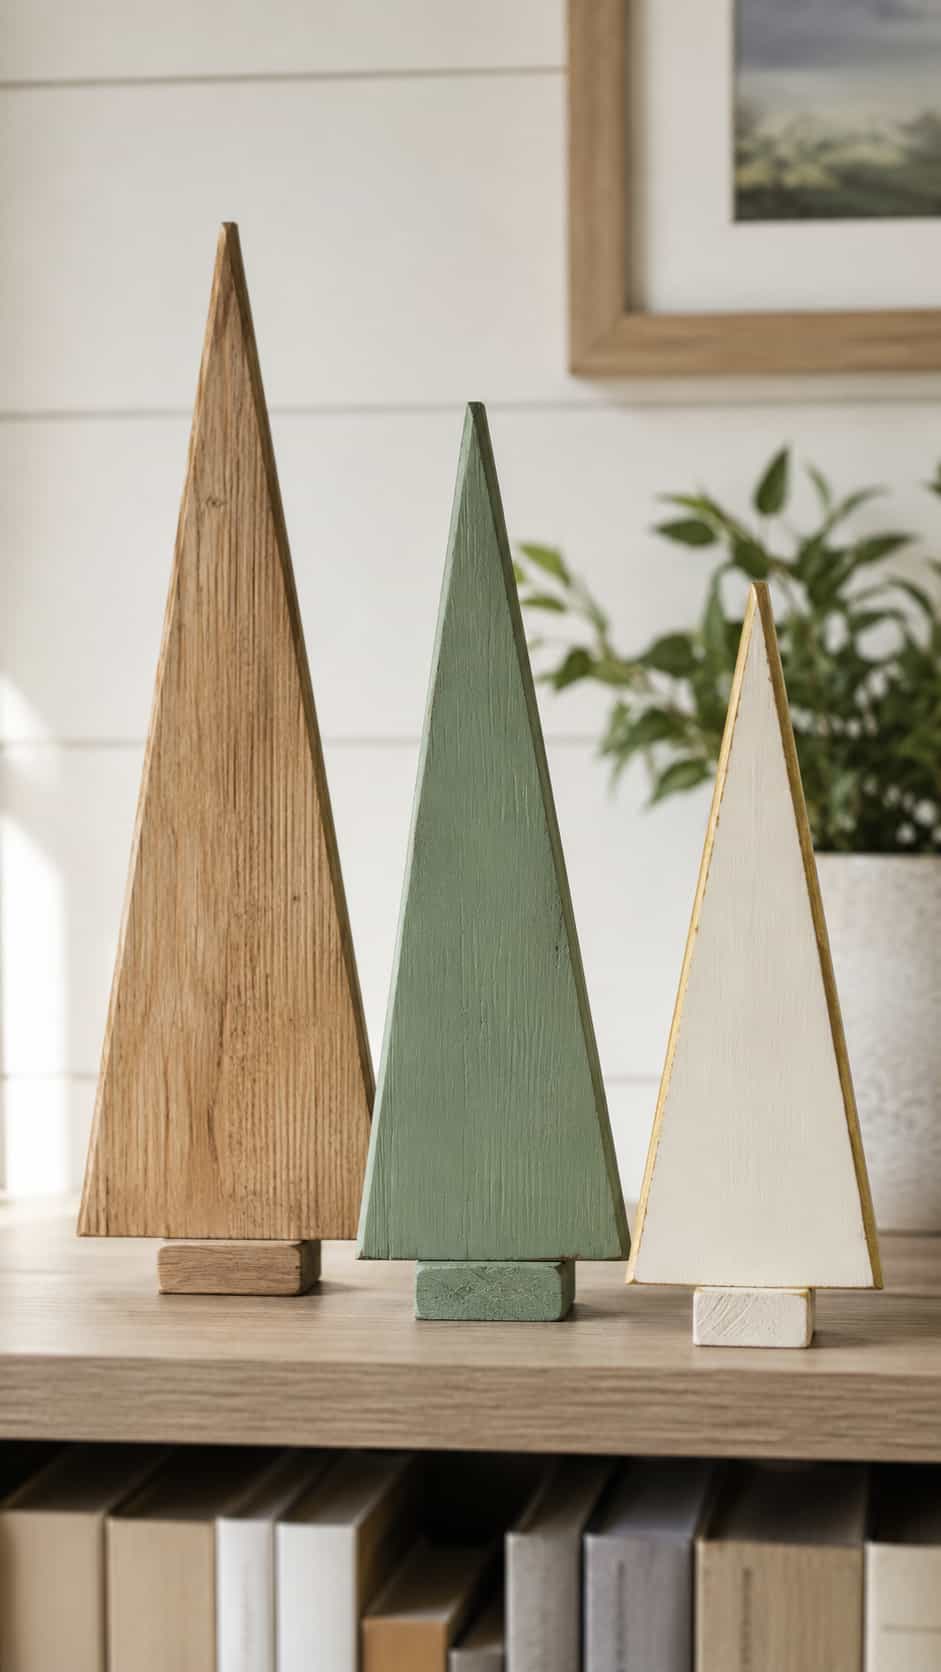
A triangle already does most of the visual work, so this project needs very little decoration. Group several sizes on a shared base or let broad pieces stand independently.
These trees work especially well with mismatched scraps because the repeated shape ties the set together. FYI, this may be the rare project where uneven leftovers look deliberately charming.
Customization idea: Paint only the lower half of each triangle for a modern color-blocked effect.
4. Pallet-Style Plank Christmas Tree
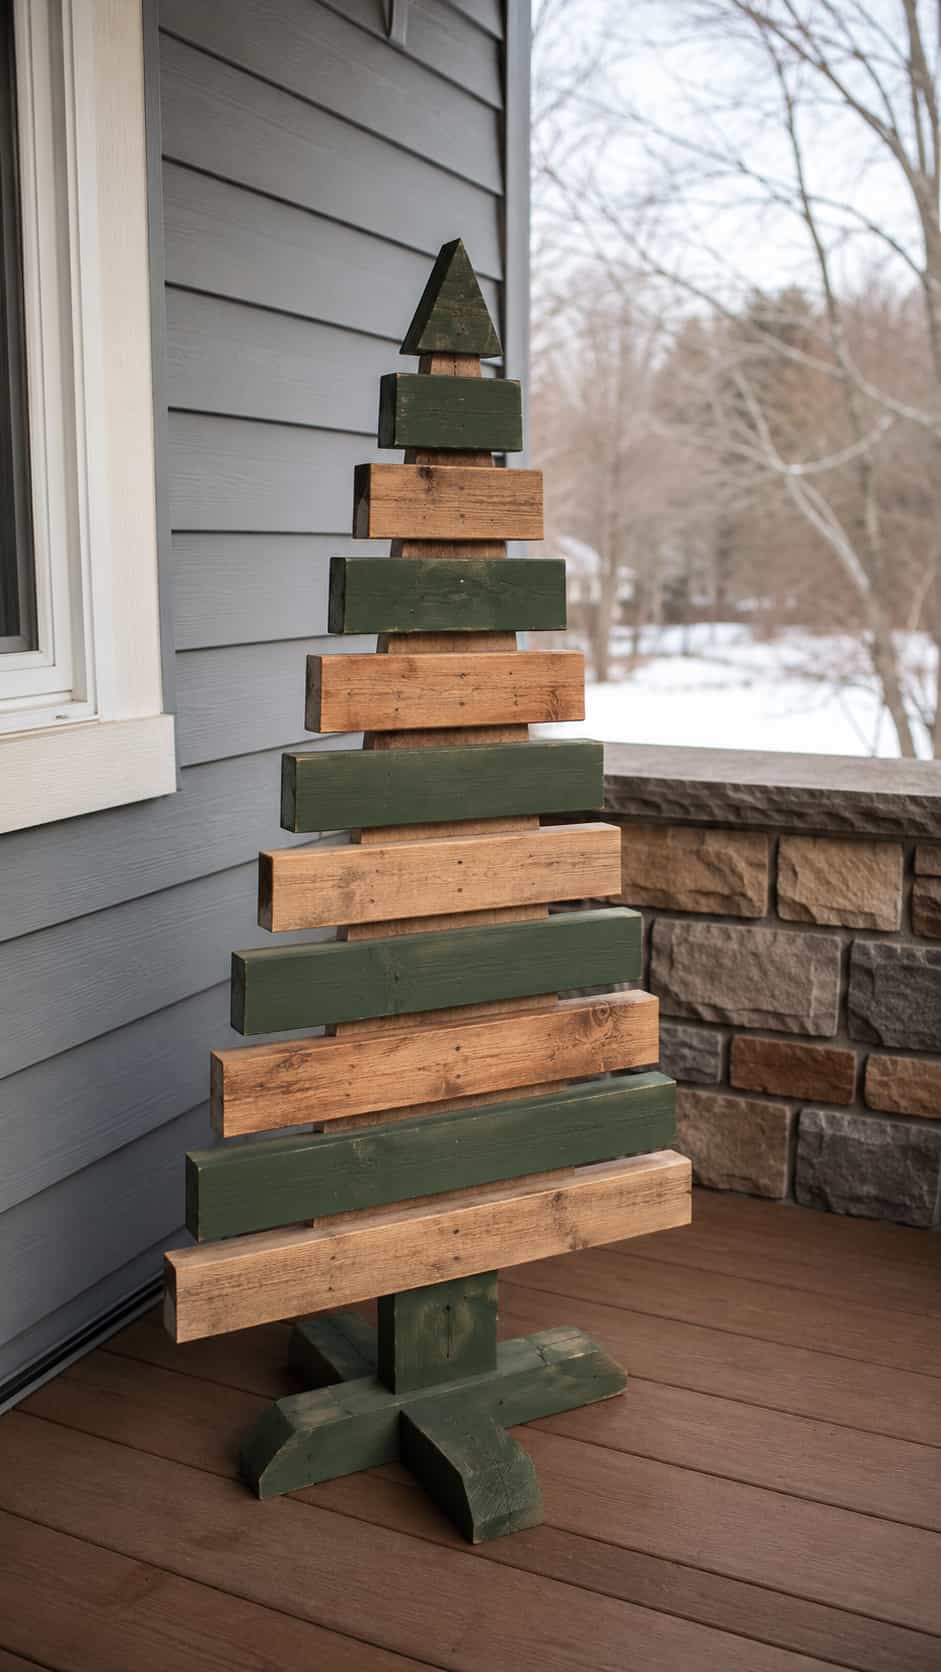
Difficulty: Easy–Medium
Estimated time: 2–4 hours
Best use: Porch corners or large wall décor
Suggested finished size: Approximately 24–48 inches tall
Horizontal planks arranged in gradually shorter lengths create a familiar tree outline. Use clean boards with a known history rather than unidentified pallet wood.
A central backing keeps the visual rhythm tidy, while a broad base or verified wall-mounting method supports the display. Keep outdoor versions away from doors, steps and strong wind.
Customization idea: Alternate stained, cream and muted-green planks instead of painting the whole tree one color.
5. Branch and Dowel Ornament Display Tree
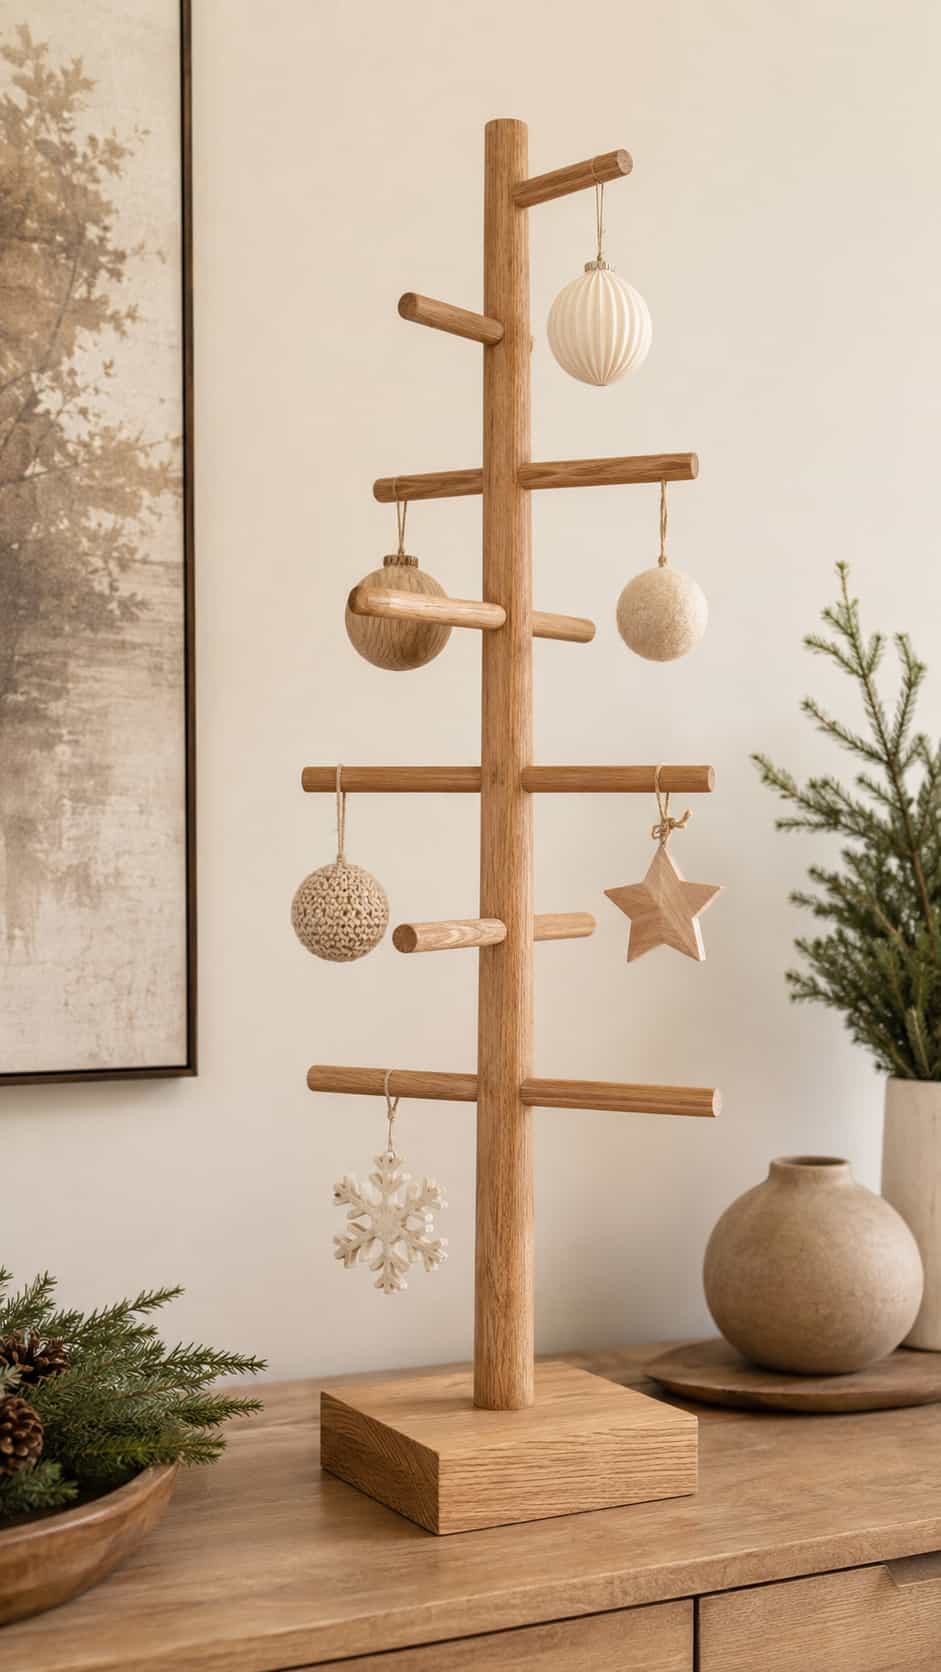
Difficulty: Medium
Estimated time: 2–4 hours
Best use: Lightweight ornaments
Suggested finished size: Approximately 24–36 inches tall
Graduated horizontal branches create an airy tree that shows every ornament clearly. A stable vertical support and broad base matter because hanging pieces can shift the balance.
Use only lightweight decorations and spread them evenly. Keep the display indoors unless a verified outdoor design addresses weather and anchoring.
Customization idea: Combine natural wood branches with a painted white base for a simple Scandinavian look.
6. Ladder Style Wooden Christmas Tree
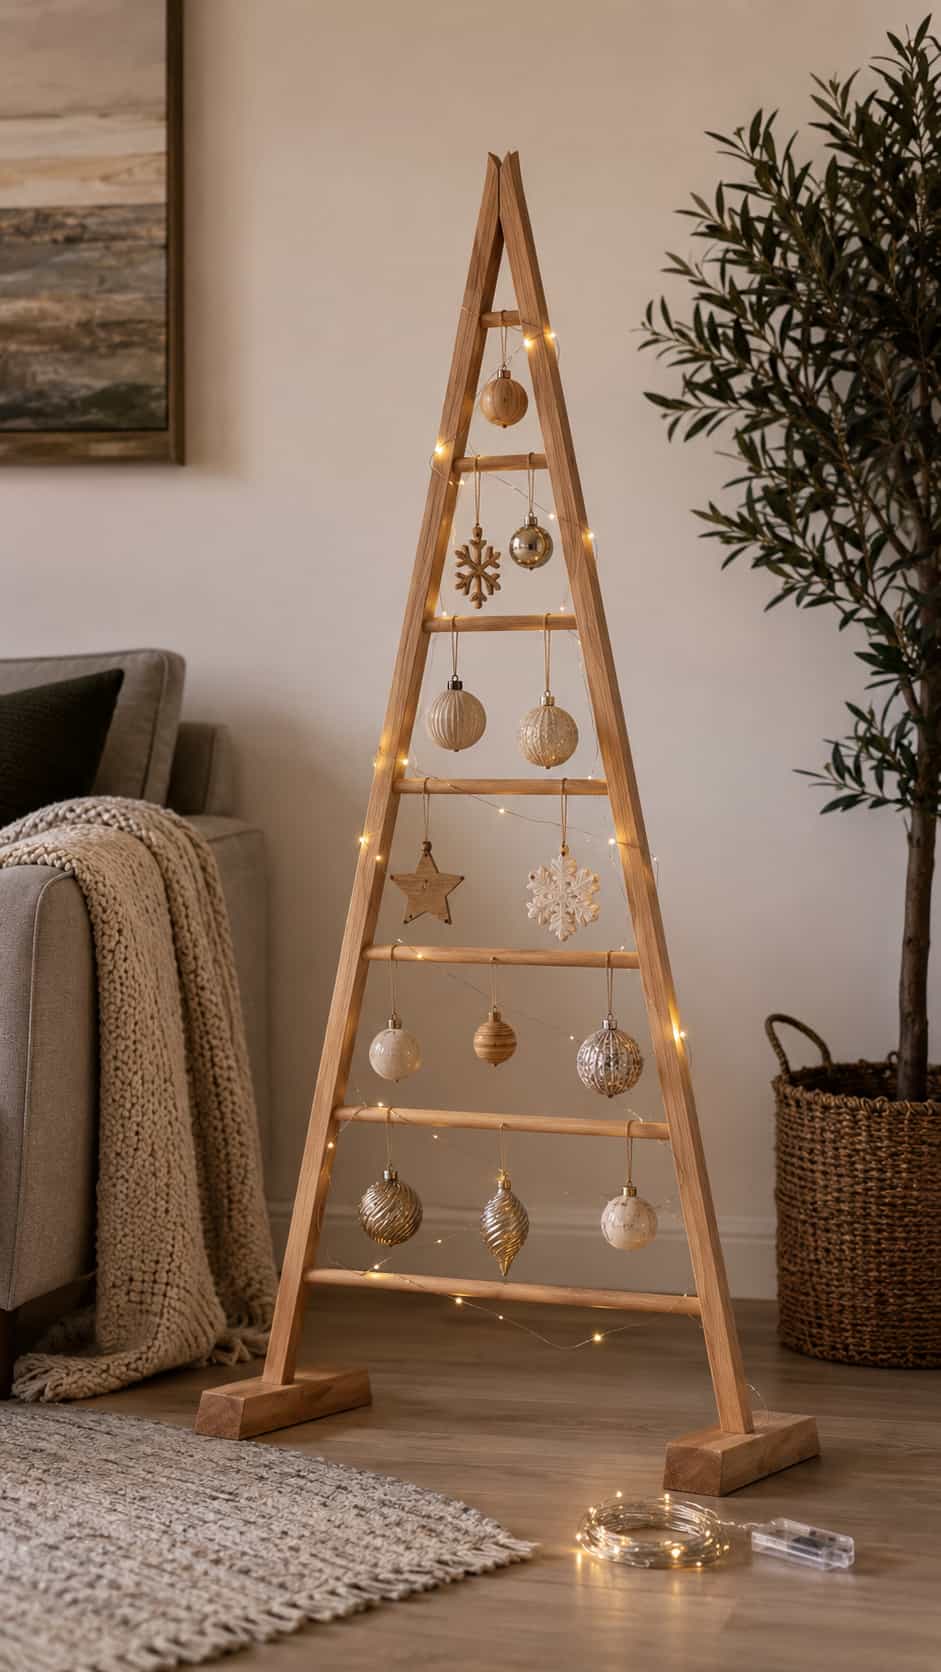
Difficulty: Medium
Estimated time: 3–5 hours
Best use: Floor displays and larger rooms
Suggested finished size: Approximately 36–60 inches tall
Two angled sides and several horizontal rails suggest a tree without creating a solid panel. The open shape works well for lightweight ornaments, folded garland and removable battery-powered LEDs.
Use a complete verified design for the frame and feet. Check the finished tree on a level surface before decorating it, and keep it outside busy walking routes.
Customization idea: Stain the frame dark walnut and use cream or natural ornaments.
7. Wooden Christmas Tree Shelf
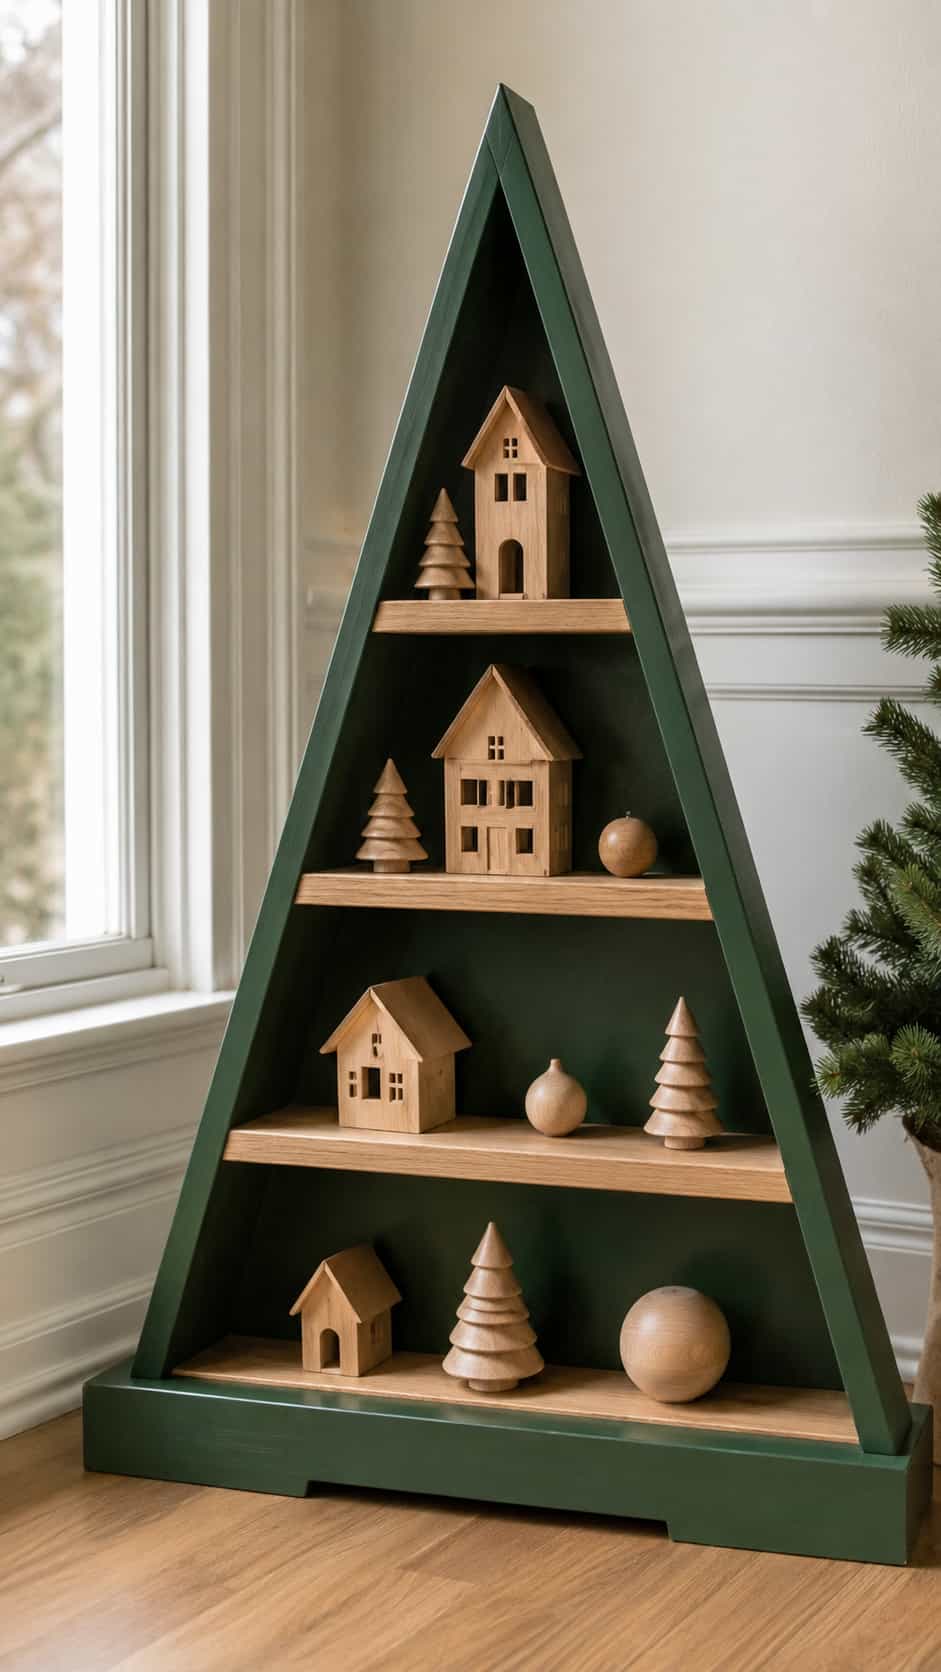
Difficulty: Medium
Estimated time: 4–7 hours
Best use: Displaying miniature houses and ornaments
Suggested finished size: Approximately 30–48 inches tall
A tree-shaped shelf combines seasonal décor with useful display space. Interior dividers can create triangular compartments for miniature houses, wrapped boxes and lightweight ornaments.
This project needs a verified design because the outer frame, shelves and mounting or base must work together. Keep the load light and distribute objects evenly.
Customization idea: Paint the inside compartments cream while leaving the outer tree frame natural.
8. Stacked Scrap-Wood Block Tree
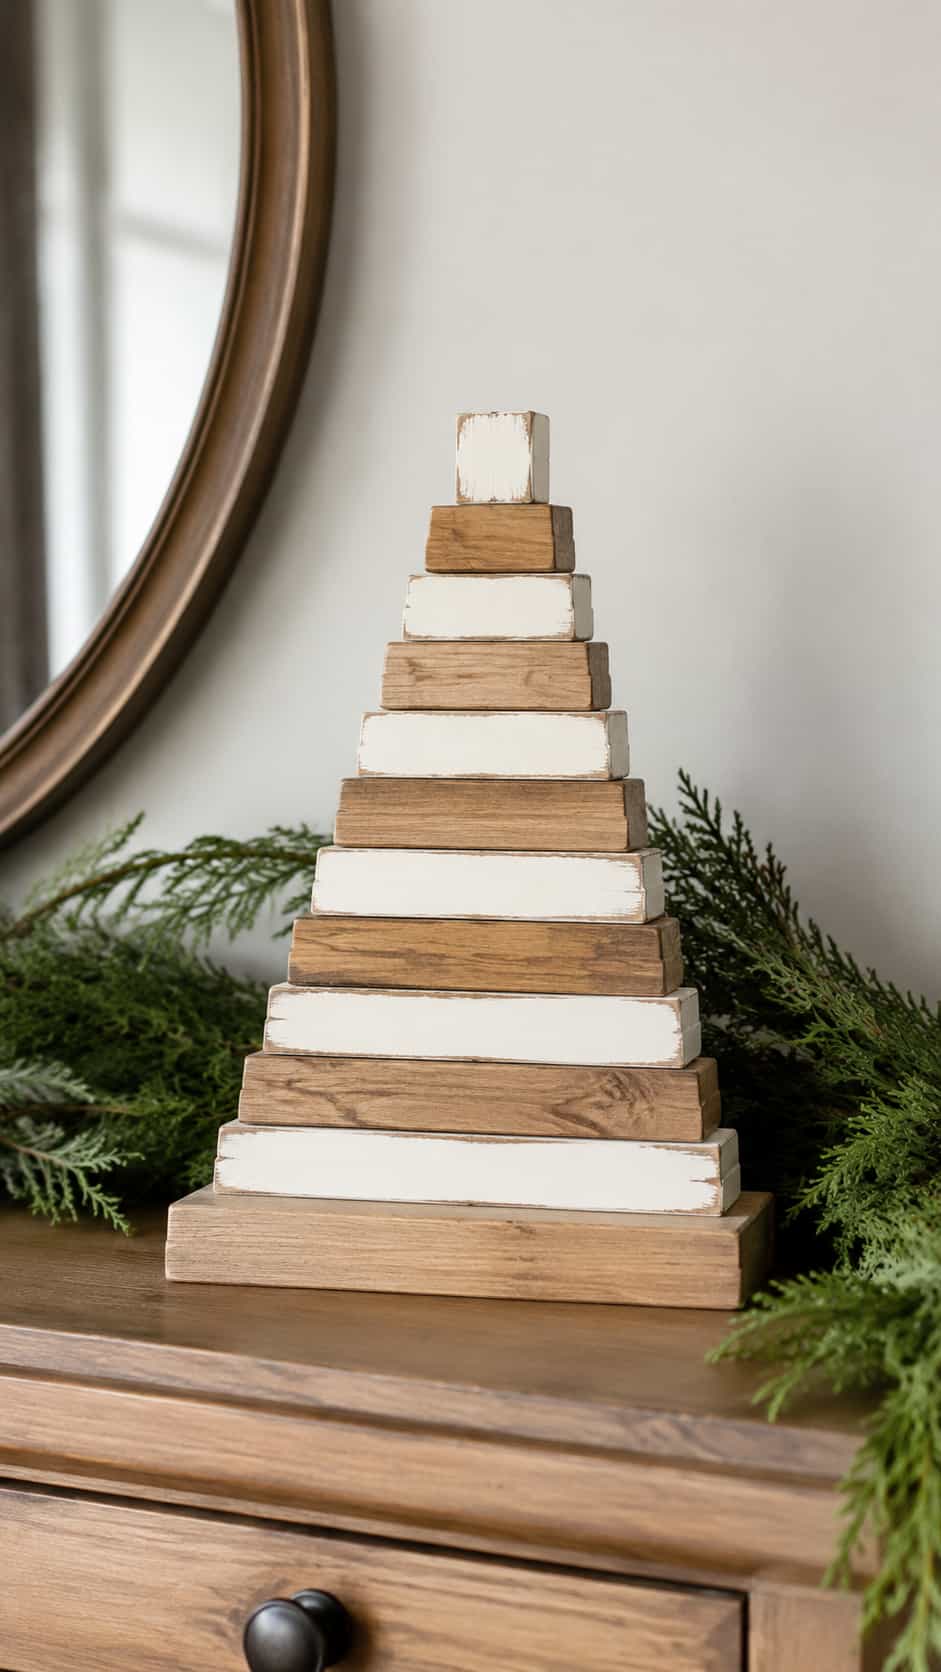
Difficulty: Easy
Estimated time: 1–2 hours
Best use: Using short uneven offcuts
Suggested finished size: Approximately 10–20 inches tall
Stack progressively shorter blocks to create a chunky stepped tree. The repeated horizontal layers make this design forgiving when your scraps do not match perfectly.
Use a stable shared backing or verified connection method rather than balancing loose blocks. Display the finished tree on a level shelf or tabletop.
Customization idea: Alternate natural, white and muted-green layers for a striped effect.
9. Rustic Plank Tree
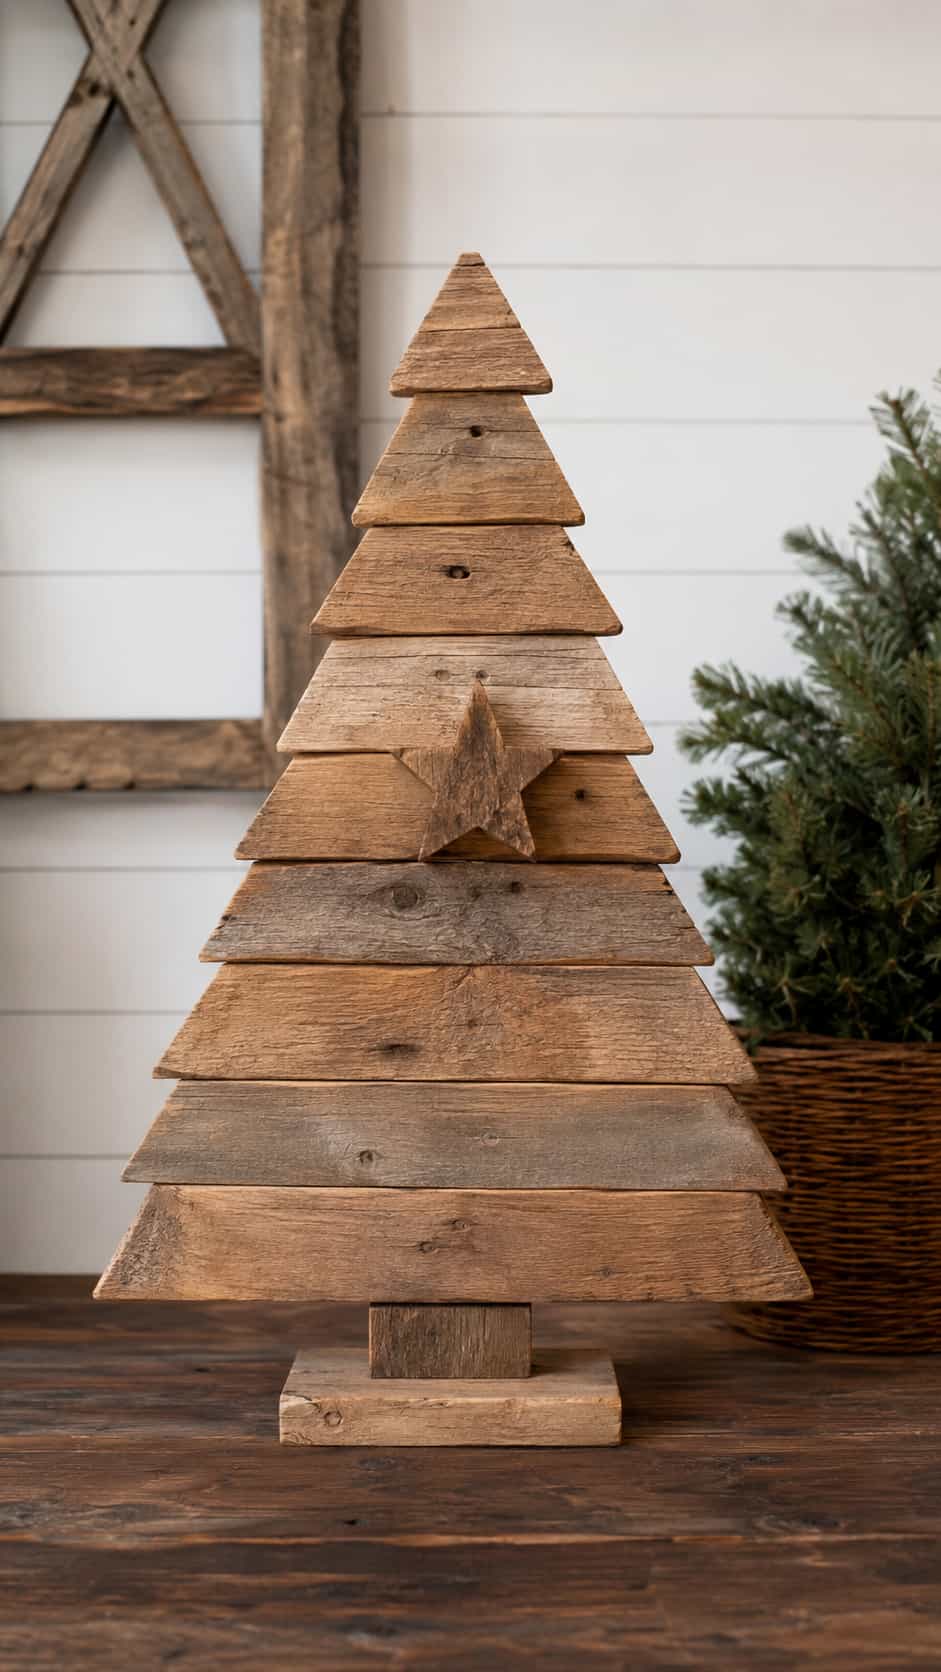
Difficulty: Easy
Estimated time: 2–3 hours
Best use: Farmhouse interiors
Suggested finished size: Approximately 18–36 inches tall
A few broad boards can form a simple tree silhouette with visible grain and slightly imperfect edges. The result feels rustic without requiring a pile of tiny decorations.
One painted star or a narrow contrasting trunk provides enough detail. Too many bows, bells and phrases can make the wood disappear under a festive identity crisis.
Customization idea: Use a dry-brushed cream finish that allows the grain to remain visible.
10. Geometric Flat-Panel Tree
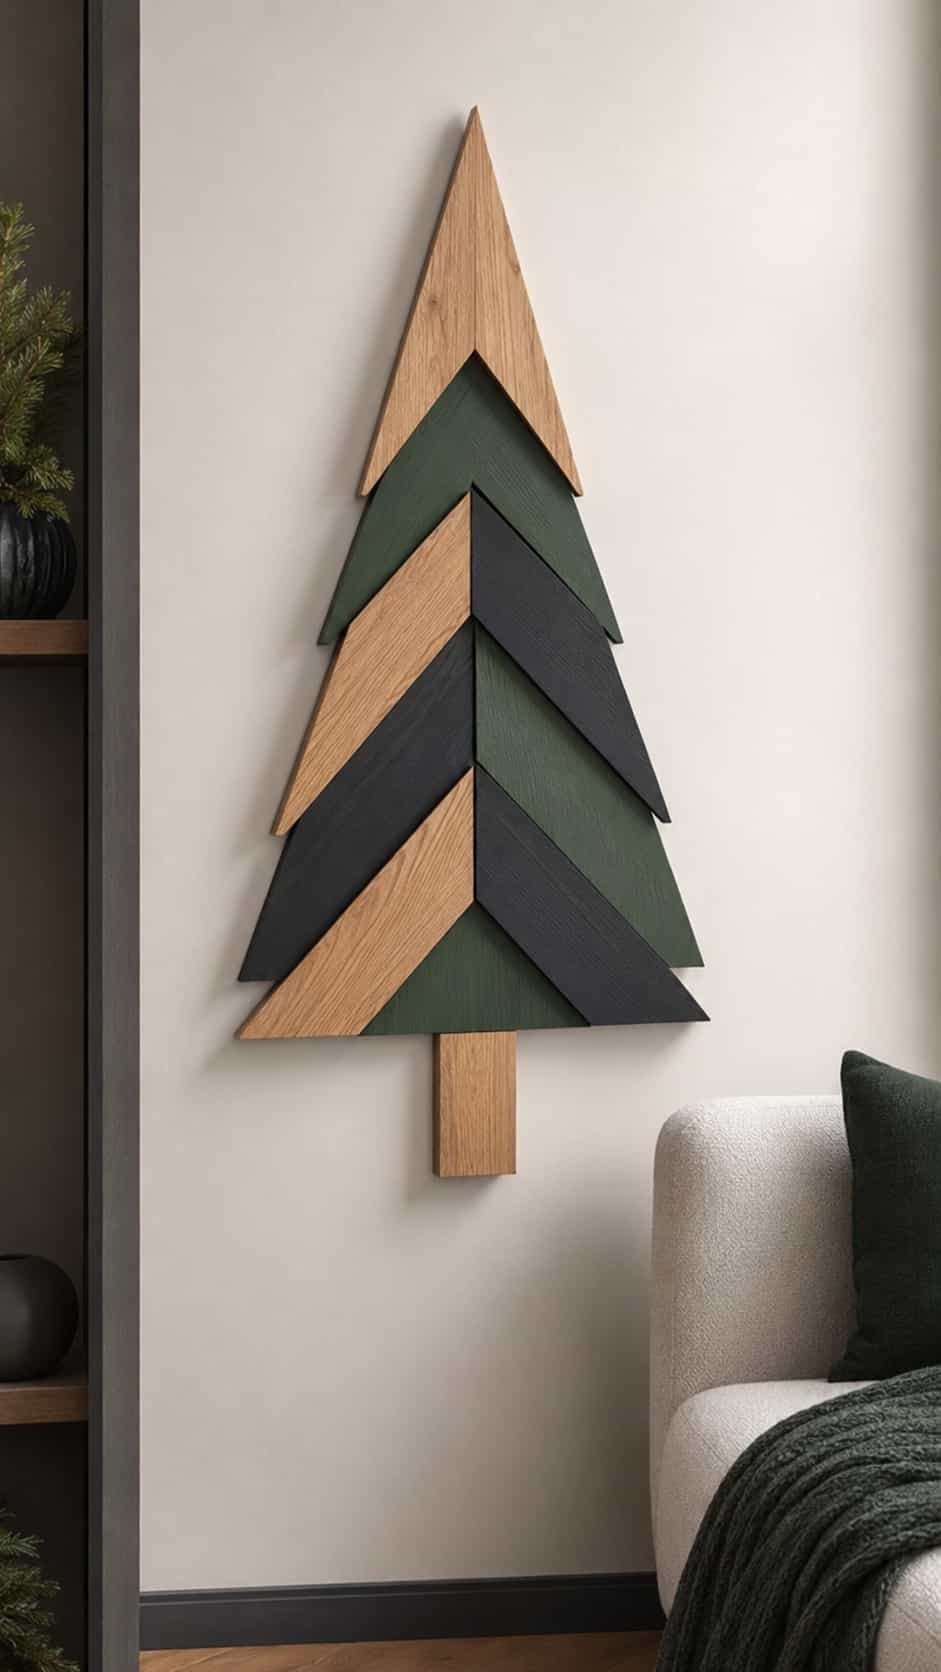
Difficulty: Medium
Estimated time: 2–4 hours
Best use: Modern walls and entryways
Suggested finished size: Approximately 24–40 inches tall
A flat tree made from layered geometric sections suits homes that prefer clean lines over rustic texture. Use simple triangles, repeated angles and one controlled color palette.
Keep the panel lightweight enough for the intended display method. Ask experienced help to confirm the mounting hardware and wall support.
Customization idea: Layer natural birch tones with charcoal and forest green.
11. Tiered Tabletop Tree Shelf
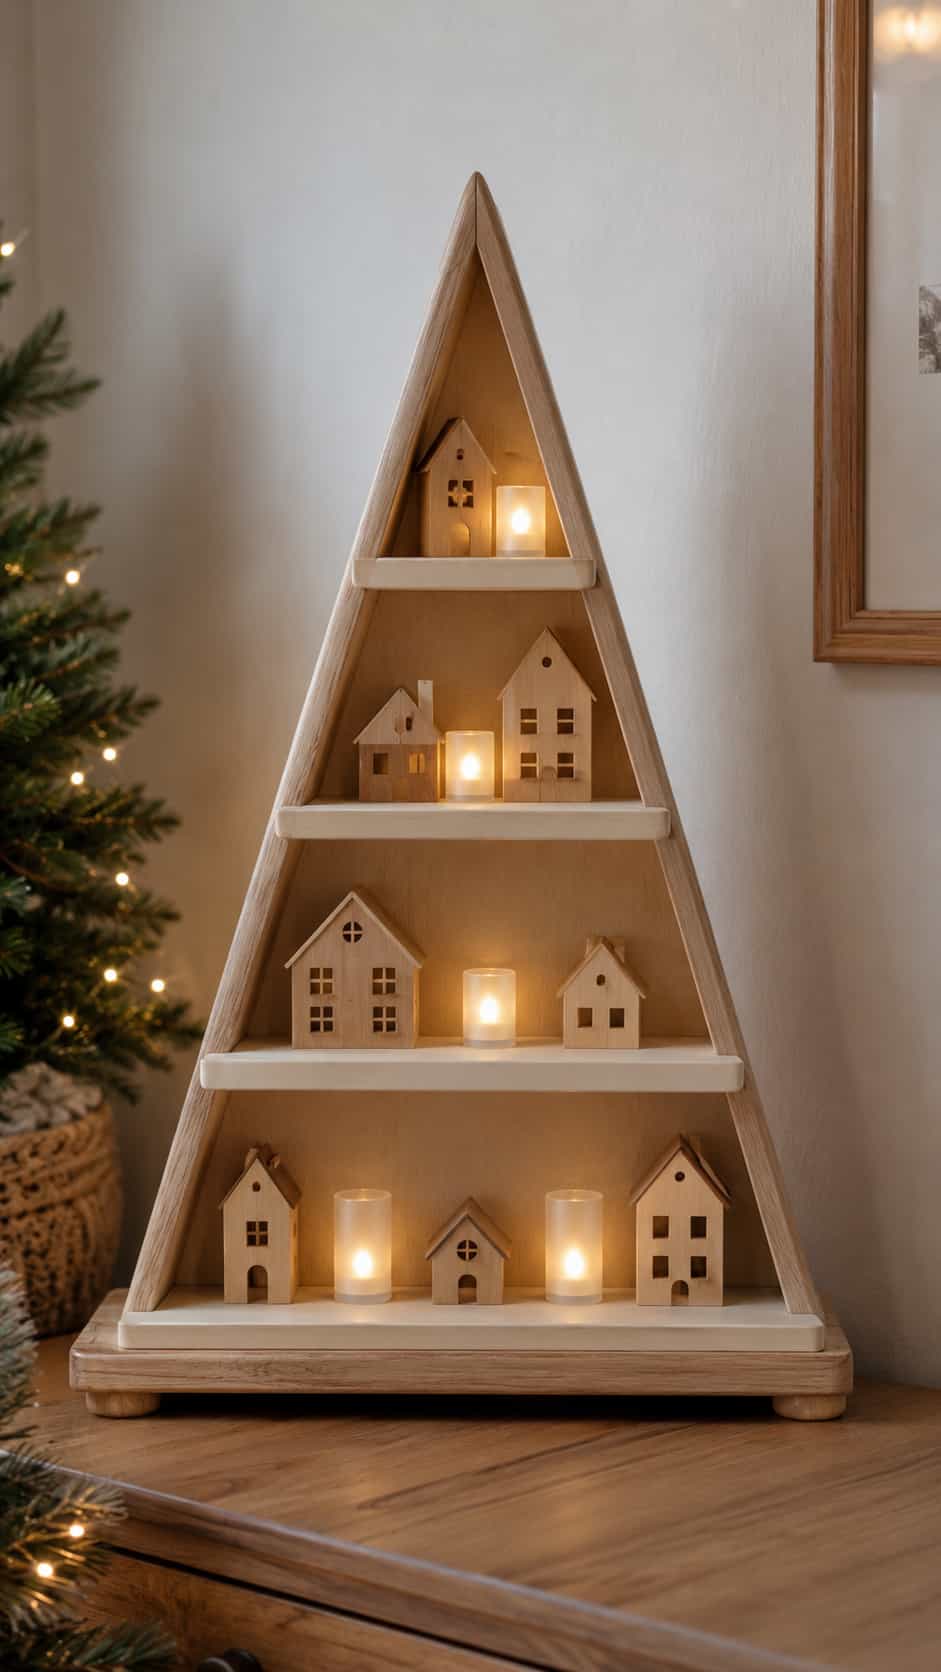
Difficulty: Medium
Estimated time: 3–5 hours
Best use: Miniature holiday collections
Suggested finished size: Approximately 18–24 inches tall
This compact shelf uses several graduated tiers to create the tree outline. It gives tiny houses, figurines and battery LED pieces a clear place instead of scattering them across the entire mantel.
Keep the base wide and the objects lightweight. A shallow lip on each tier can help items remain positioned, but the complete proportions should come from a verified design.
Customization idea: Paint the shelf cream and use natural wood accents on the tier edges.
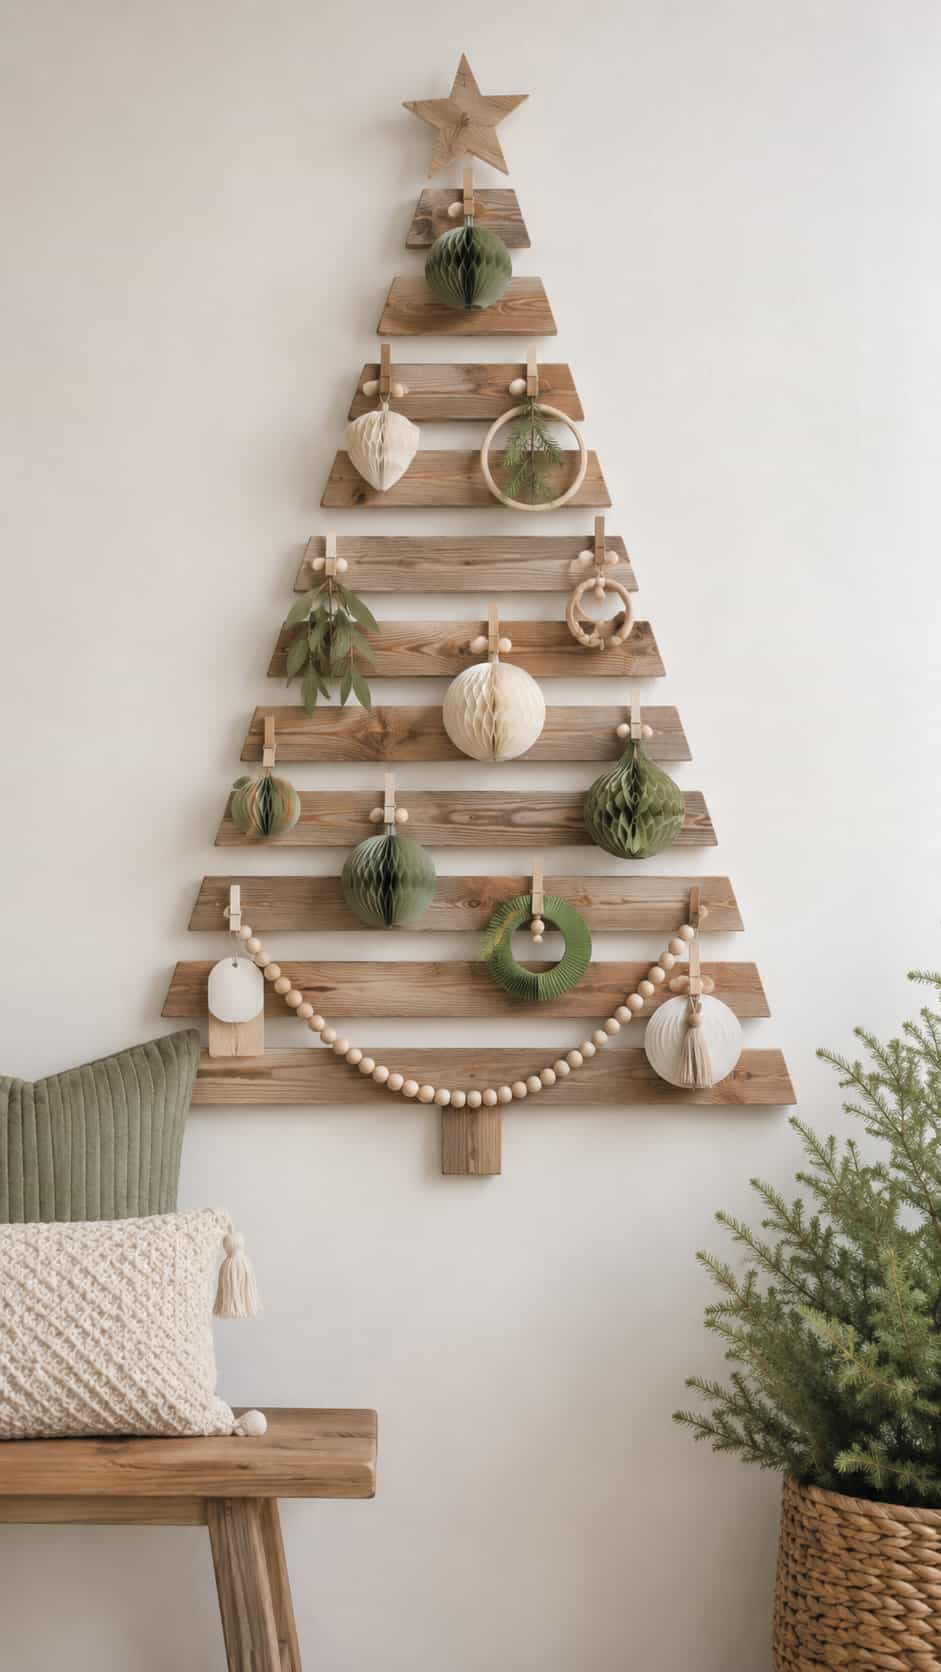
12. Flat Wall-Mounted Wooden Tree
Difficulty: Medium
Estimated time: 3–5 hours
Best use: Small rooms and apartments
Suggested finished size: Approximately 30–48 inches tall
A flat wall tree brings holiday shape to a room without using floor space. Horizontal slats, geometric panels or one solid silhouette can all create the effect.
Choose a mounting method that suits the wall construction and finished weight. Ask an experienced adult or qualified professional to verify the support before hanging decorations.
Customization idea: Add removable clips for lightweight cards rather than permanent ornament hooks.
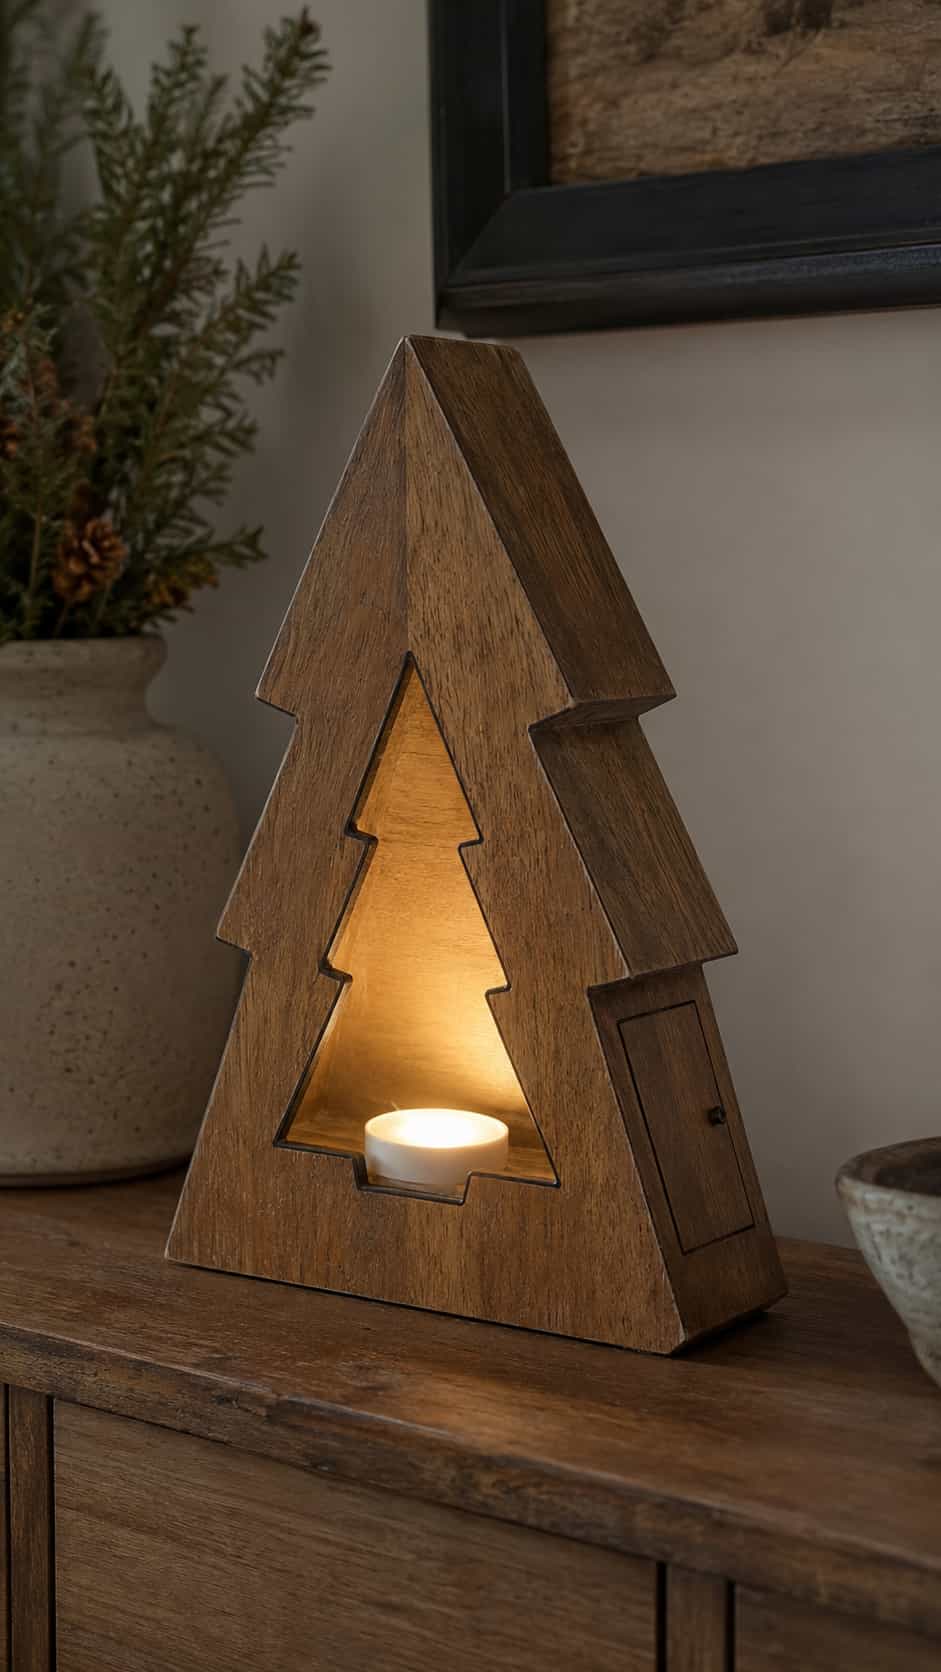
13. LED Glow Tree Lantern
Difficulty: Medium
Estimated time: 2–4 hours
Best use: Evening tabletop décor
Suggested finished size: Approximately 12–20 inches tall
A hollow tree-shaped lantern or pierced flat panel can glow when you place a removable battery-powered LED light behind it. Keep the openings simple so the light creates a clear pattern.
Provide easy access to the battery light and keep ventilation around the removable unit. Never use a candle or homemade electrical system inside wooden décor.
Customization idea: Create interchangeable front panels with stars, snowflakes and simple tree shapes.
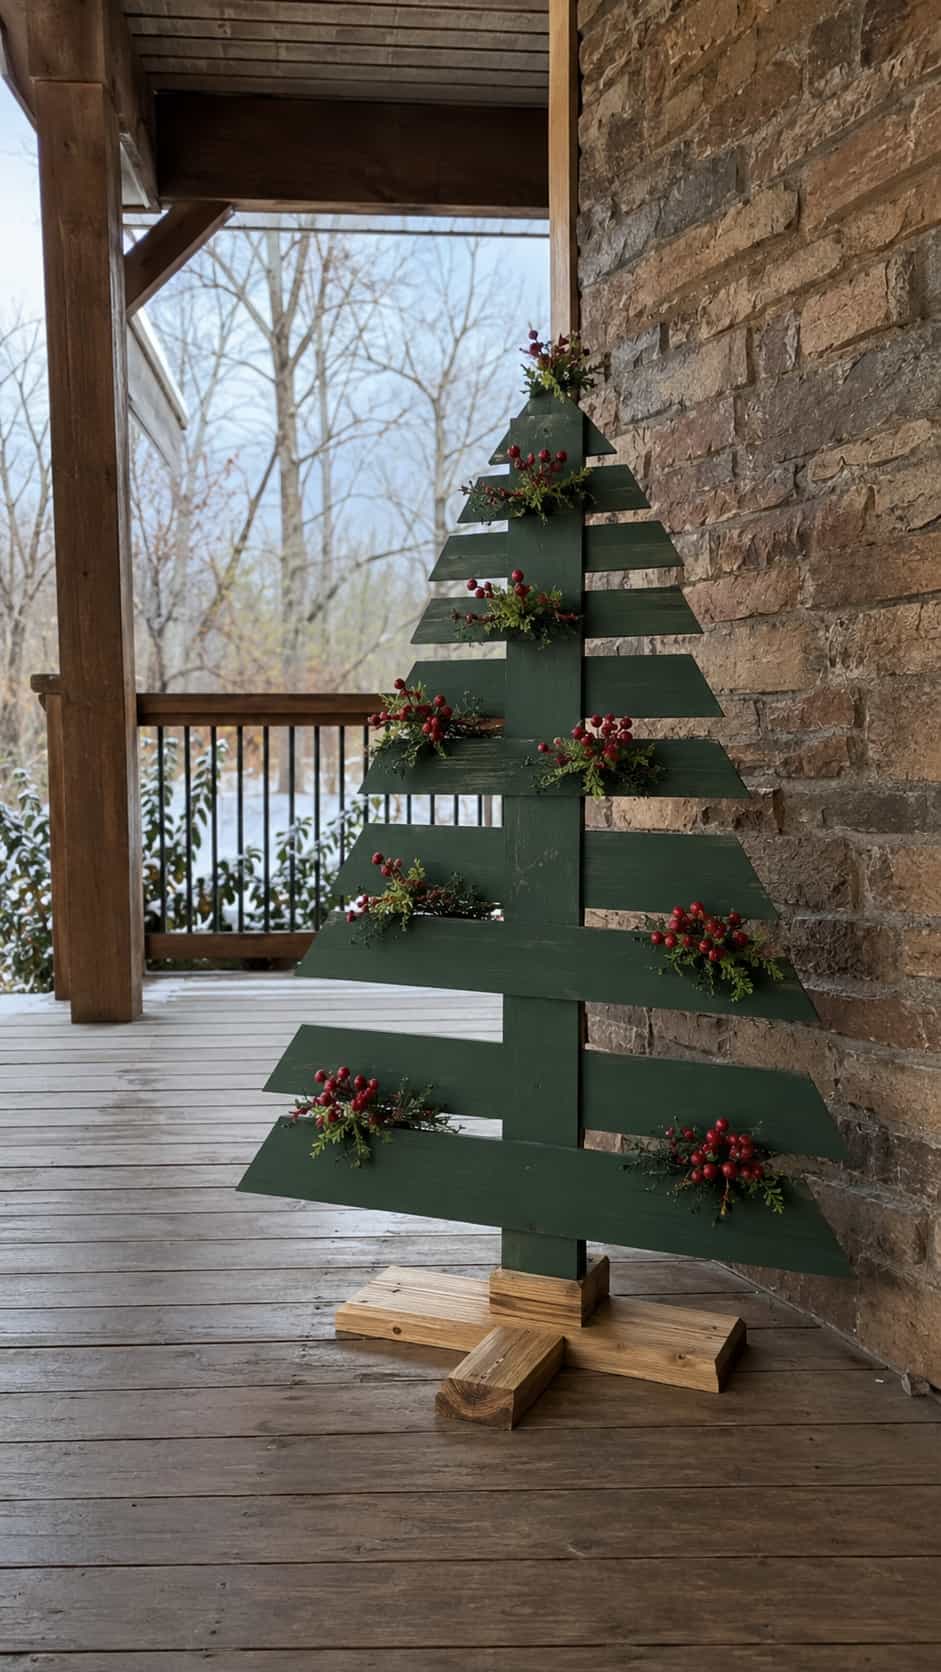
14. Outdoor Wooden Porch Tree
Difficulty: Medium
Estimated time: 4–6 hours
Best use: Covered entrances and porches
Suggested finished size: Approximately 36–60 inches tall
A substantial freestanding tree can fill an empty porch corner without requiring a living plant. Choose a broad stable base, exterior-rated materials and a finish suited to the actual exposure.
Keep the tree away from steps, doors and foot traffic. A tall display needs a verified design that addresses weight, wind and the porch surface.
Customization idea: Pair one natural wood tree with a smaller cream version for a coordinated two-piece display.
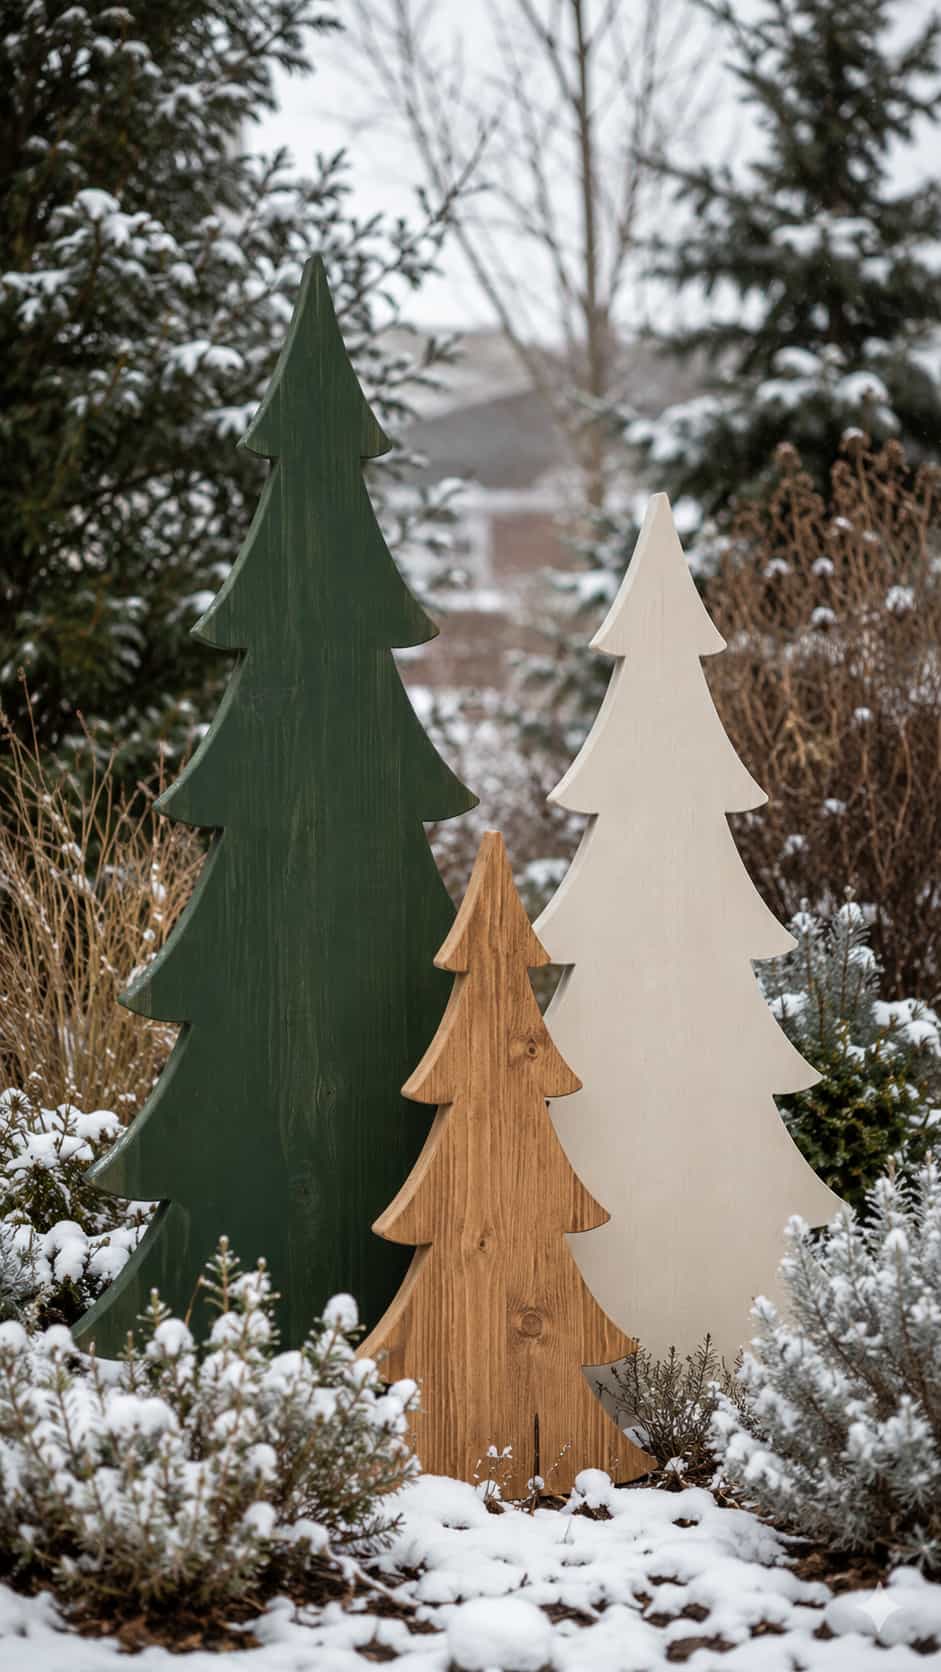
15. Wooden Garden-Stake Tree Group
Difficulty: Medium
Estimated time: 3–5 hours
Best use: Winter garden beds
Suggested finished size: Approximately 24–48 inches tall
Several flat tree silhouettes can turn an empty winter bed into a small wooden forest. Vary the heights and repeat the same two or three colors across the group.
Use suitable outdoor supports and confirm the placement before installation. Keep the trees away from paths, irrigation equipment, underground services and mowing routes.
Customization idea: Paint only the tips in cream to suggest snow without covering the wood completely.
16. Mini Christmas Village and Tree Set
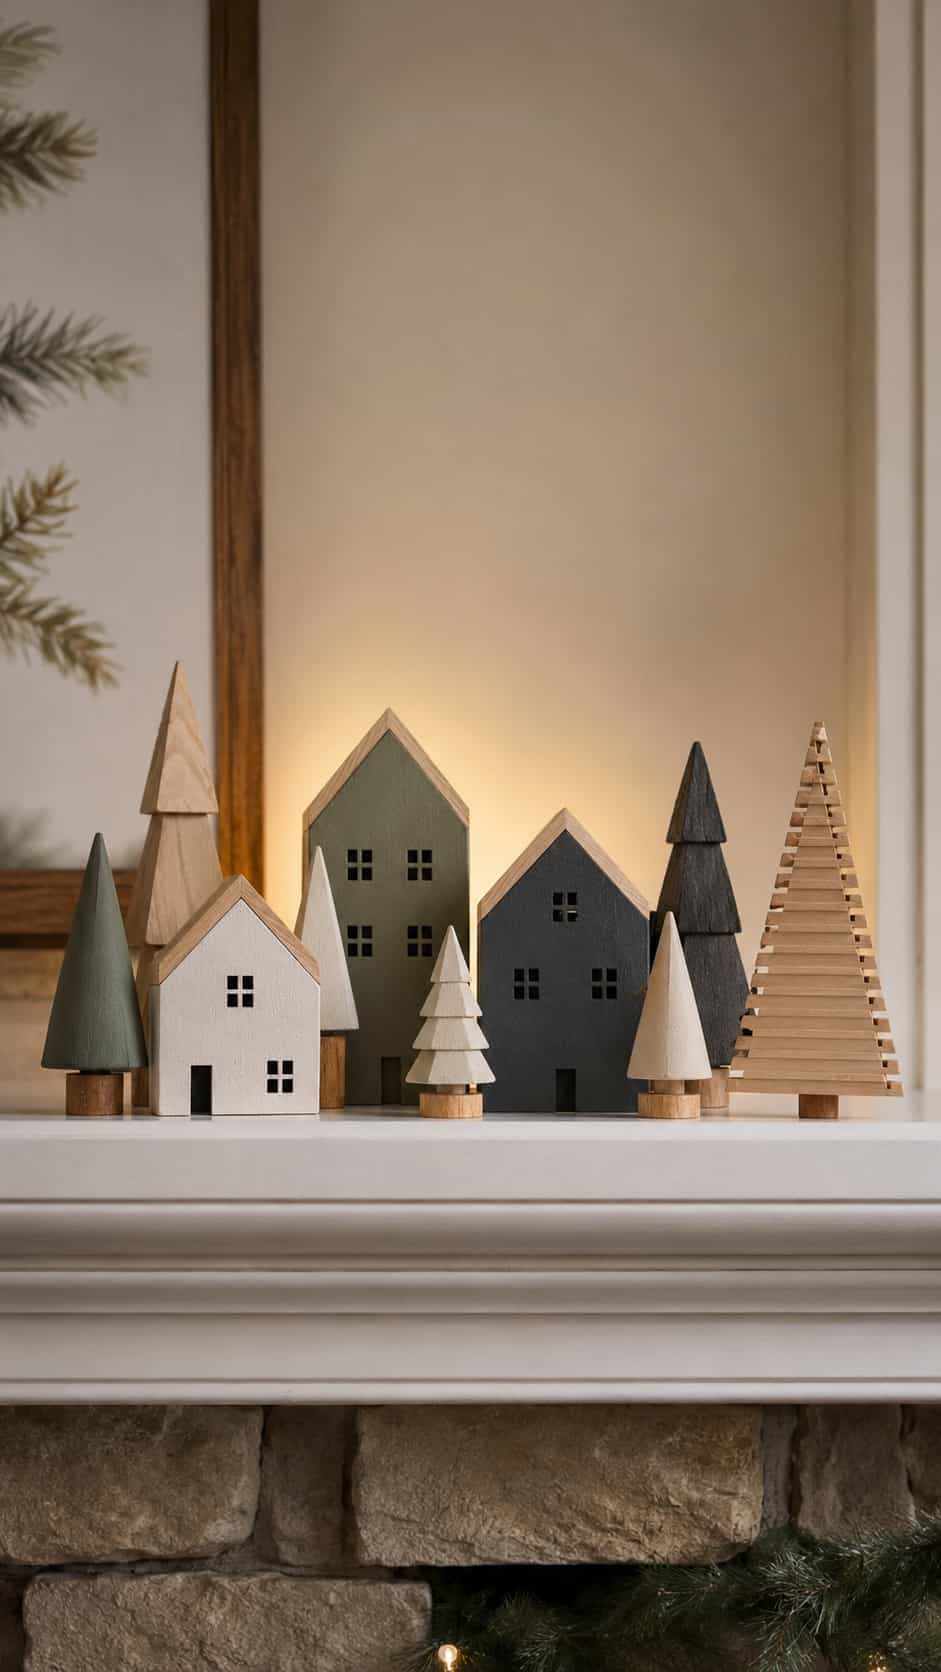
Difficulty: Easy
Estimated time: 2–4 hours
Best use: Mantels, shelves and consoles
Suggested finished size: Approximately 4–12 inches tall
Combine simple block houses with several triangular or slatted trees to create a coordinated miniature village. Different heights make the collection interesting even when every piece uses the same few colors.
Place a removable battery-powered LED light behind the group if you want a glow. Keep the light separate from the solid wood pieces.
Customization idea: Use cream, sage, charcoal and natural wood across the village.
17. Christmas Card Display Tree
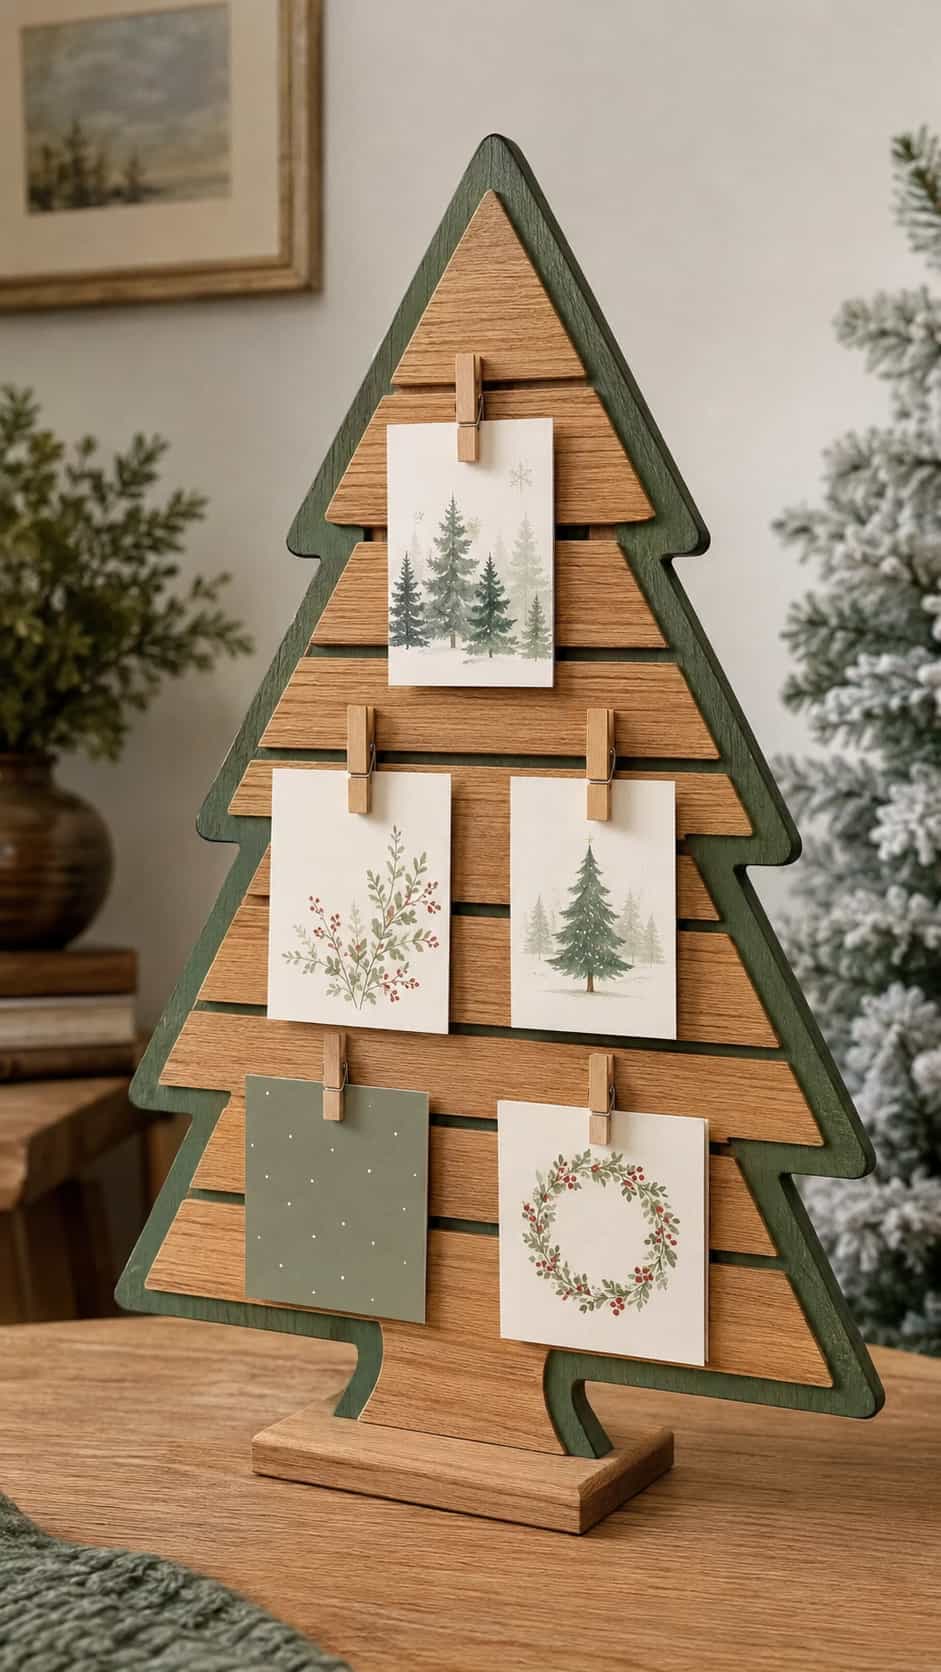
Difficulty: Easy–Medium
Estimated time: 2–3 hours
Best use: Cards, notes and small photos
Suggested finished size: Approximately 24–36 inches tall
A flat wooden tree with removable clips turns holiday mail into part of the décor. Space the cards so you can still see the tree shape behind them.
Keep the display lightweight and use a stable freestanding base or verified wall mounting. Remove the clips after Christmas and reuse the tree as a simple winter decoration.
Customization idea: Paint the clips to match one accent color from your holiday palette.
Three Featured Wooden Christmas Tree Design Guides
The following dimensions provide visual references only. They do not represent fully tested structural plans. Confirm every material, joint, support and mounting choice with a complete verified design, and get experienced help when stability or installation matters.
Tabletop Slat-Tree Trio
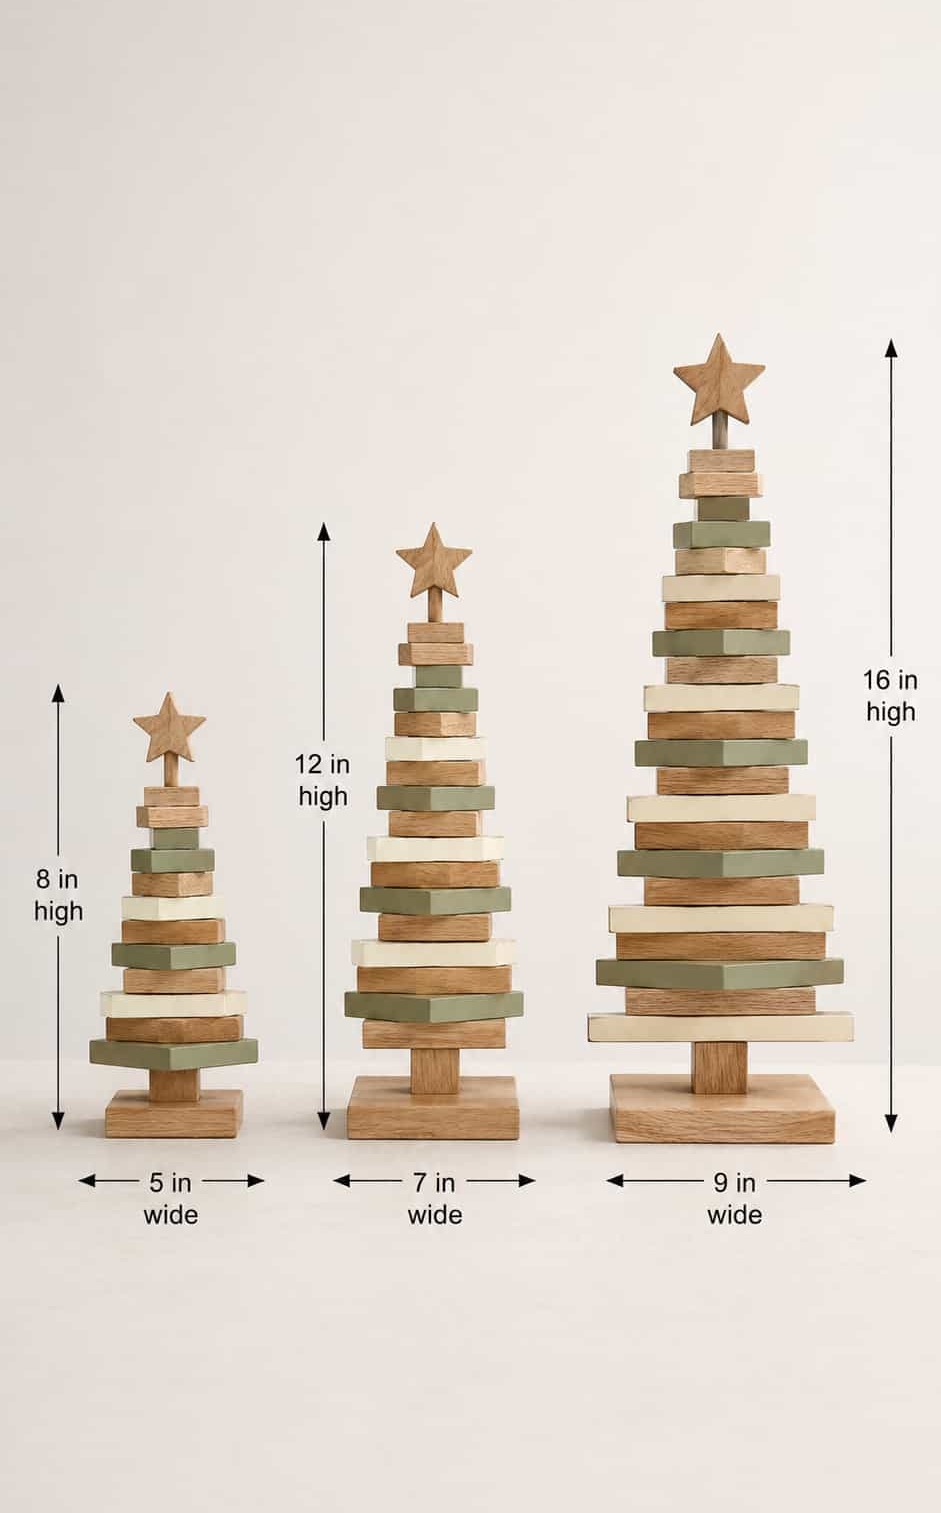
Use heights of approximately 8, 12 and 16 inches as a visual starting point. Pair those heights with bases around 5, 7 and 9 inches wide so the silhouettes feel balanced.
Keep each piece broad enough to stand securely. Repeat one trunk shape and one finish detail across the trio, even if you use three colors.
This group works best on a level indoor surface. Add felt pads underneath if you want to protect a mantel or console.
Freestanding Porch Tree
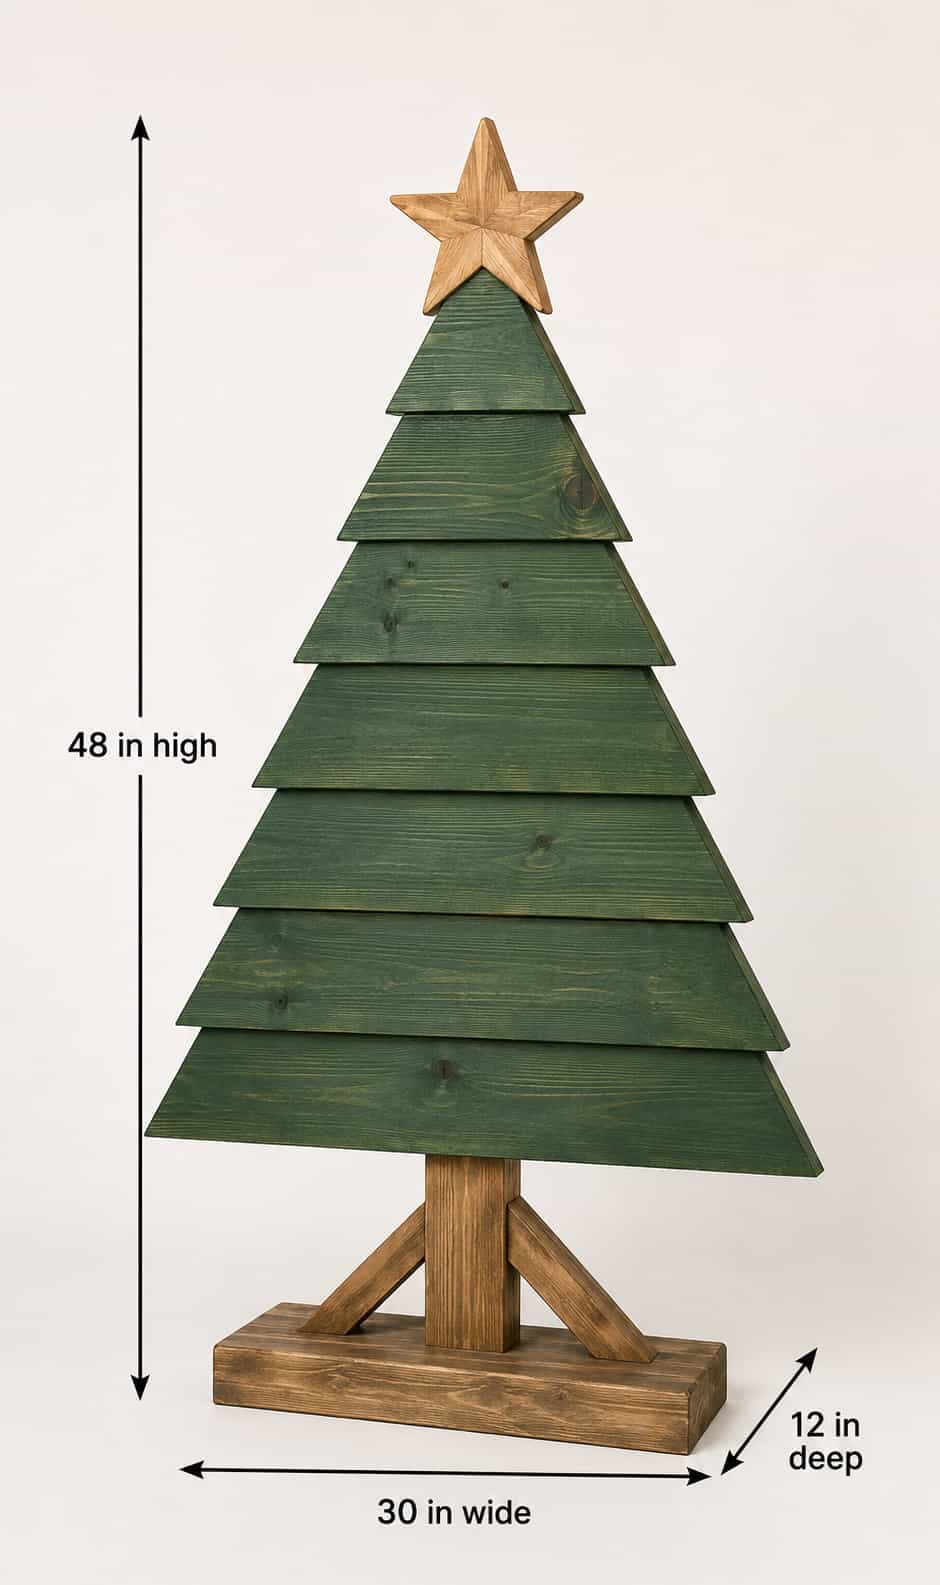
Picture a finished tree around 48 inches high, 30 inches wide and 12 inches deep at the base. The depth should come from a stable base or feet, not from simply leaning the tree against a wall.
Use exterior-rated materials and a verified plan that suits the porch surface and wind exposure. Keep the complete project clear of the door and walking route.
Choose painted details instead of loose ornaments for exposed locations. Removable battery LEDs may work on a protected porch when the product suits outdoor use.
Flat Wall Tree
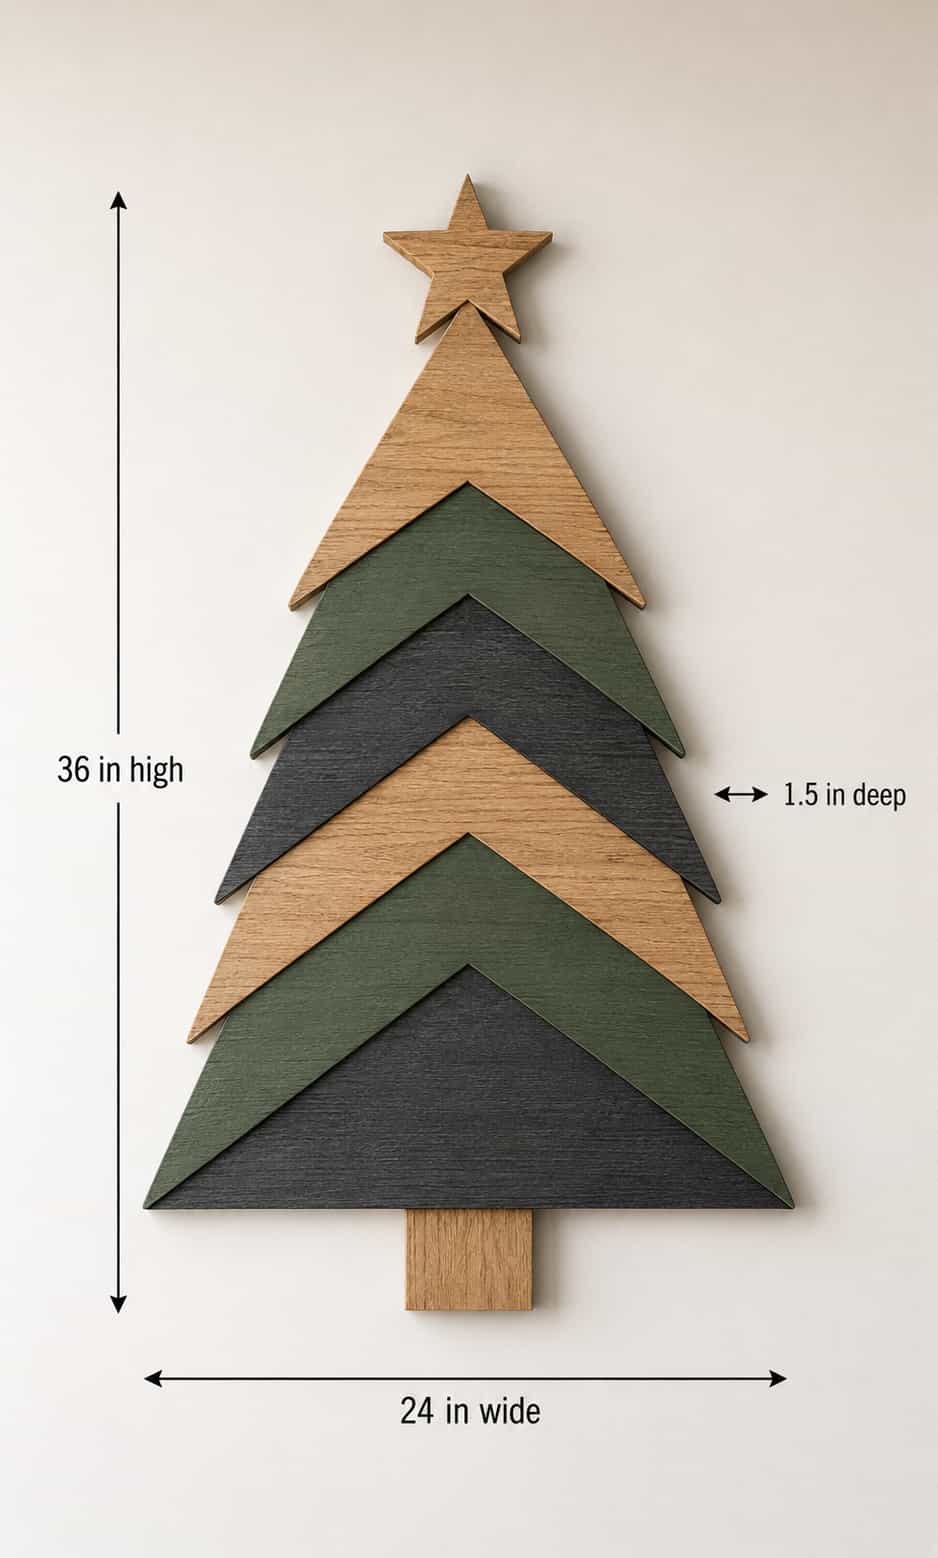
Use approximately 36 inches high, 24 inches wide and 1½ inches deep as a visual reference. Keep the panel light enough for the wall and mounting system.
A layered geometric design can create depth without projecting far into the room. Leave space around switches, vents and door frames.
Ask experienced help to verify the wall structure and mounting hardware. Do not rely on adhesive strips unless the manufacturer rates them for the complete project weight and surface.
Want Complete Plans for Larger Christmas Projects?
Disclosure: This section may contain affiliate links. If you purchase through one of these links, we may earn a commission at no additional cost to you.
Small tabletop trees make manageable seasonal projects when you use verified dimensions and suitable help. Larger shelves, wall displays and porch trees need more planning because the frame, base, mounting and expected load must work together.
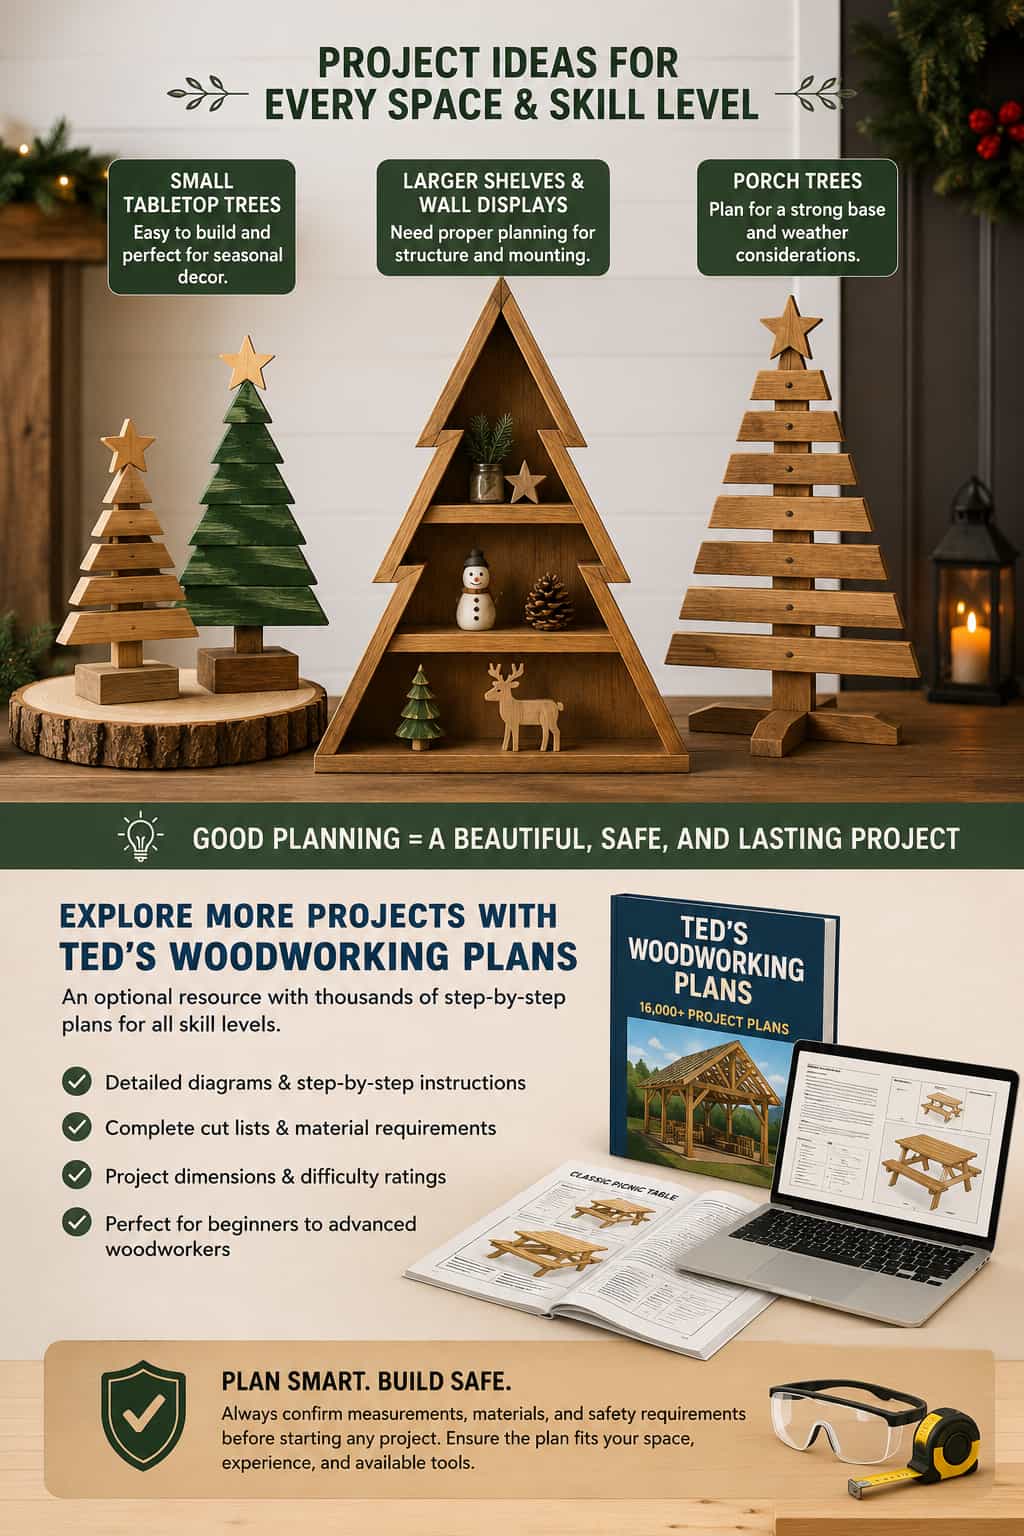
If you want a broader project library, Ted’s Woodworking Plans offers one optional resource to explore. Review the project dimensions, diagrams, cut list, difficulty and material requirements before starting. Confirm important measurements and safety requirements independently rather than assuming every third-party plan suits your materials, space or experience.
Final Thoughts
The best DIY wooden Christmas tree ideas match the room, the available scraps and the amount of time you actually have. Start with a tabletop trio, chunky block tree or miniature village if you want a quick seasonal project. Choose a verified plan and experienced help when you move into large shelves, wall mounting or outdoor displays.
Keep the colors consistent, the bases stable and the lighting removable. Then enjoy a Christmas tree that stores neatly, returns every year and never drops needles across the floor. That alone deserves a tiny celebration.