
There’s something timeless and cozy about farmhouse-style furniture — and the farmhouse bench is one of the most popular DIY projects right now. Whether you love the rustic charm, the clean lines of minimalism, or just need a stylish space-saver for your entryway, dining room, or porch — this bench checks all the boxes.
The best part? You can build it yourself — even if you’re a beginner — using basic tools and affordable materials. No fancy equipment. No expensive cuts. Just a straightforward, weekend-friendly project that actually looks store-bought when you’re done.
Want to follow along?
Grab the free printable bench plan at the end of this post and build your own today!
Materials & Tools You’ll Need
Before you dive in, here’s everything you’ll need to build your farmhouse bench. Don’t worry — you can find these materials at your local home improvement store or even repurpose scrap wood you already have on hand.
Lumber List
This build is designed to be simple and budget-friendly, using common lumber sizes.
| Quantity | Wood Type | Size | Use |
| 2 | Pine or Douglas Fir | 2×4 x 8 ft | Legs + Support Frame |
| 2 | Pine or Douglas Fir | 2×6 x 8 ft | Bench Top |
| 1 | Pine | 2×2 x 8 ft | Bottom stretcher (optional for style/stability) |
Tip: Pine is affordable and easy to work with. If you’re going for a more rustic look, don’t be afraid to pick boards with knots and grain character!
Tool List
You don’t need a full workshop to build this — just a few basic tools:
- Cordless Drill (for drilling + driving screws)
- Circular Saw or Miter Saw (for cutting boards to length)
- Measuring Tape
- Speed Square (to check your angles)
- Orbital Sander or Sanding Block
- Clamps (optional, but helpful for holding boards in place)
- Wood glue + 2½” wood screws or pocket hole screws
- Wood stain or paint (optional for finishing)
Cut List & Dimensions
Before you begin building, it’s a good idea to cut all your lumber and have it ready to go. This makes the assembly process smoother and faster.
Below is the full cut list based on the standard bench size:
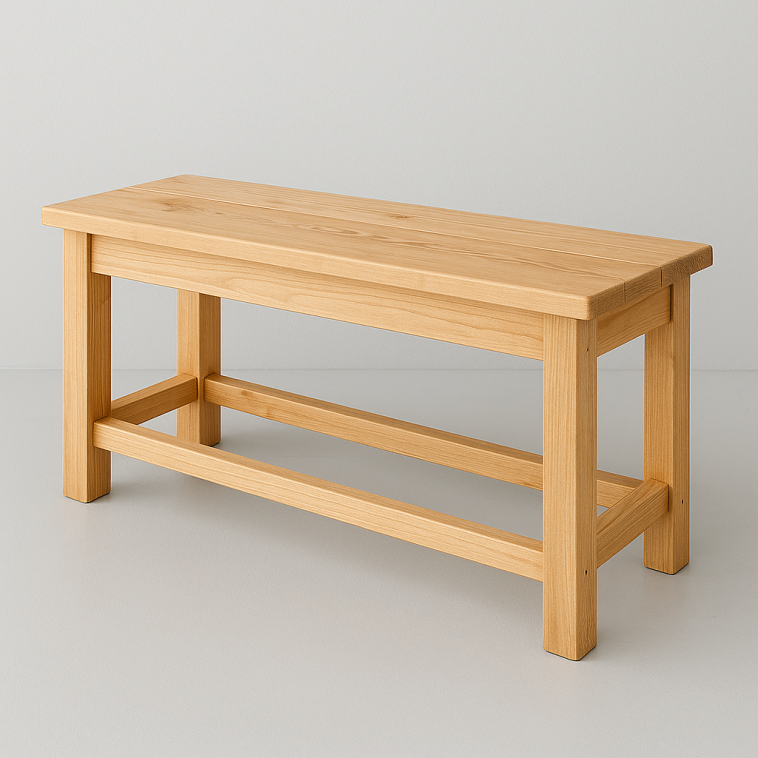
48″ long x 18″ tall x 14″ deep — perfect for an entryway, mudroom, or dining table seating.
Advertisement
Lumber Cut List
| Part | Quantity | Dimensions | Material |
| Bench Top (Seat) | 2 | 2×6 @ 48″ long | Pine or Douglas Fir |
| Legs | 4 | 2×4 @ 17.25″ long | 2×4 |
| Long Aprons (Front/Back Frame) | 2 | 2×4 @ 40″ long | 2×4 |
| Short Aprons (Side Frame) | 2 | 2×4 @ 9″ long | 2×4 |
| Bottom Stretcher (Optional) | 1 | 2×2 @ 40″ long | 2×2 |
Visual Dimensions Diagram
(Insert a clean sketch or image here showing front + side view with labeled dimensions. If you’d like, I can help you design this.)
Tips Before Cutting:
- Always measure twice, cut once
- For precise cuts, use a circle saw or miter saw with a straight edge.
- Label each piece after cutting with a pencil (e.g. “Leg 1,” “Apron Front”) to stay organized
Cut List & Final Bench Dimensions
To make things smooth and efficient, it’s best to cut all your boards before assembling. Below, you’ll find a complete cut list along with the finished dimensions of the bench.
Final Bench Dimensions
- Length: 48 inches
- Height: 18 inches (standard seating height)
- Depth: 14 inches
Perfect size for an entryway, mudroom, dining table, or even at the foot of your bed.
Cut List
Here’s exactly how to cut your lumber based on the design above:
From your 2x4s:
- (4) legs – 17¼” each
- (2) long aprons (side rails) – 42″ each
- (2) short aprons (end rails) – 9″ each
From your 2x6s (bench top):
- (3) top boards – 48″ each
Optional – From your 2x2s (bottom stretcher):
- (1) stretcher – 42″
Step-by-Step: How to Build Your DIY Farmhouse Bench
Now that your wood is cut and ready, let’s build this beauty from the ground up. Each step is beginner-friendly, and I’ll walk you through the process so you feel confident at every stage.
Step 1: Sand All Your Wood
Start by lightly sanding every piece. This removes rough edges and helps stain or paint absorb evenly.
- Use an orbital sander or sanding block with 120–150 grit
- Focus on the edges and corners (especially the bench top)
- Wipe off dust with a clean cloth
Tip: Pre-sanding now saves time later and gives your bench a polished, pro look.
Step 2: Build the Bench Base
This is the frame that supports the bench top. You’ll attach the legs to the aprons (side and end pieces).
- Lay out the 2 side aprons (42″) between two legs
- Use wood glue + 2½” screws or pocket hole screws to secure the side frames
- Repeat for the opposite side
- Connect the two sides using the 9″ end aprons, forming a full rectangle
Make sure everything is square. Use a speed square or clamp a straight board across corners for alignment.
Step 3: Add the Bottom Stretcher (Optional)
For extra strength and a nice farmhouse touch, add the 2×2 stretcher across the bottom.
- Place it between the long sides, about 4–5″ off the floor
- Secure with screws or pocket holes
Step 4: Attach the Bench Top
Now let’s secure the seat to the base:
- Lay the 3 bench top boards (2x6s) face down on your work surface
- Position the base on top, centering it so there’s about 1″ overhang on all sides
- Use wood glue + screws through the aprons into the underside of the top boards
- Clamp if needed for a tight fit
🪚 Want a more polished look? Sand the seat edges slightly to round them off.
Step 5: Finish Your Bench (Optional)
This is where you make the project truly yours.
- Stain: For a rustic, natural finish (try Dark Walnut, Weathered Oak, etc.)
- Paint: For a bright farmhouse look (white or sage green are popular choices)
- Use a polyurethane topcoat for protection, especially for dining use
Let it dry for at least 24 hours before using indoors.

Get Your Free Printable Farmhouse Bench Plan (PDF)
Want to make this project even easier?
I’ve put together a FREE printable PDF that includes:
✅ A complete material & cut list
✅ Clear bench dimensions
✅ Step-by-step instructions
✅ A labeled assembly diagram
✅ Bonus: Printable shopping checklist
This way, you can take it with you to the hardware store or keep it next to you in your workspace.
Click here to download your free bench plan (PDF)
(No signup needed — just click and build!)
Final Thoughts
And there you have it — your very own DIY farmhouse bench that looks like it came straight out of a designer catalog… but for less than $50!
Whether you’re adding charm to your entryway, creating extra seating at the dining table, or just love the satisfaction of building something with your own hands, this project is the perfect place to start.
Remember, woodworking doesn’t have to be complicated — just take it one step at a time, and don’t be afraid to make it your own with custom finishes or tweaks.
Don’t forget to download your free printable plan if you haven’t already — it’ll make your build even easier.
Got questions, need tips, or want to share your finished bench?
Drop a comment below — I’d love to see your build and help however I can!
Happy building!