
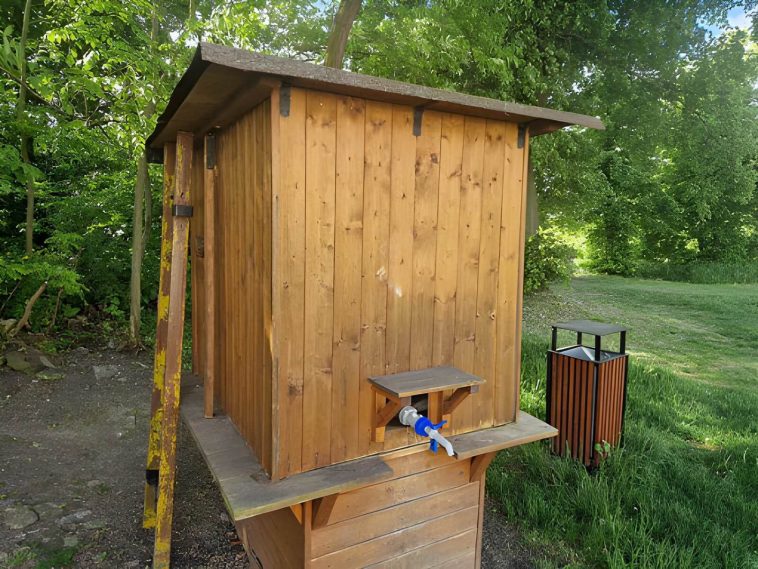
Four years ago, I needed a shed. I priced out the kit sheds at the big box stores, quietly had a small crisis at the $2,800 price tag, and then stood in my driveway staring at a stack of pallets I’d been meaning to deal with for six months. The math clicked almost immediately.
That pallet shed is still standing. It’s housed a lawnmower, a chest freezer, three bikes, and enough miscellaneous garage overflow to furnish a small apartment. Total material cost: just under $180. If you’ve got the time, a few basic tools, and access to free pallets, this might be the most useful thing you build all year.
But let’s be straight with each other from the start: building a pallet shed the right way is real work. Anyone who tells you it’s as simple as “just nail some pallets together” has either never done it or built something that won’t survive a rainstorm. Here’s how to actually do this properly.
The Truth About Pallet Wood (That Most Articles Skip)
Pallets are everywhere — behind grocery stores, at garden centers, outside furniture warehouses, stacked behind hardware stores. They’re often free for the taking, and that’s genuinely exciting. But not all pallets are created equal, and using the wrong ones is a mistake you don’t want to make.
The Stamp That Matters Most
Every pallet used in international shipping carries a stamp from the International Plant Protection Convention (IPPC). That stamp tells you exactly how the pallet was treated — and whether it’s safe to use for a structure you’re spending time inside.
Look for these two stamps:
- HT — Heat Treated: The pallet was kiln-dried or heat-treated to kill pests and pathogens. This is the one you want. Every single time.
- MB — Methyl Bromide: This pallet was fumigated with a toxic pesticide that penetrates the wood fibers. Hard pass. Don’t build with these, don’t burn them, don’t use them for anything.
Any pallet lacking a visible IPPC stamp is of uncertain origin; regard it as questionable and leave it behind.
What Good Pallets Look Like
Beyond the stamp, you want pallets that are:
- Structurally sound — no cracked or missing deck boards, no broken stringers (the thick pieces running lengthwise)
- Dry — waterlogged pallets are heavy, weak, and already compromised
- Consistently sized — standard GMA pallets measure 48″ × 40″. Mixing wildly different sizes makes your build a puzzle nobody wants to solve
- Not stained or discolored — dark stains can indicate chemical spills from whatever they were carrying
Collect more pallets than you think you need. Budget for about 20–25% waste from boards that split on disassembly or turn out to be more damaged than they looked.
Planning Your Shed Before You Touch a Single Pallet
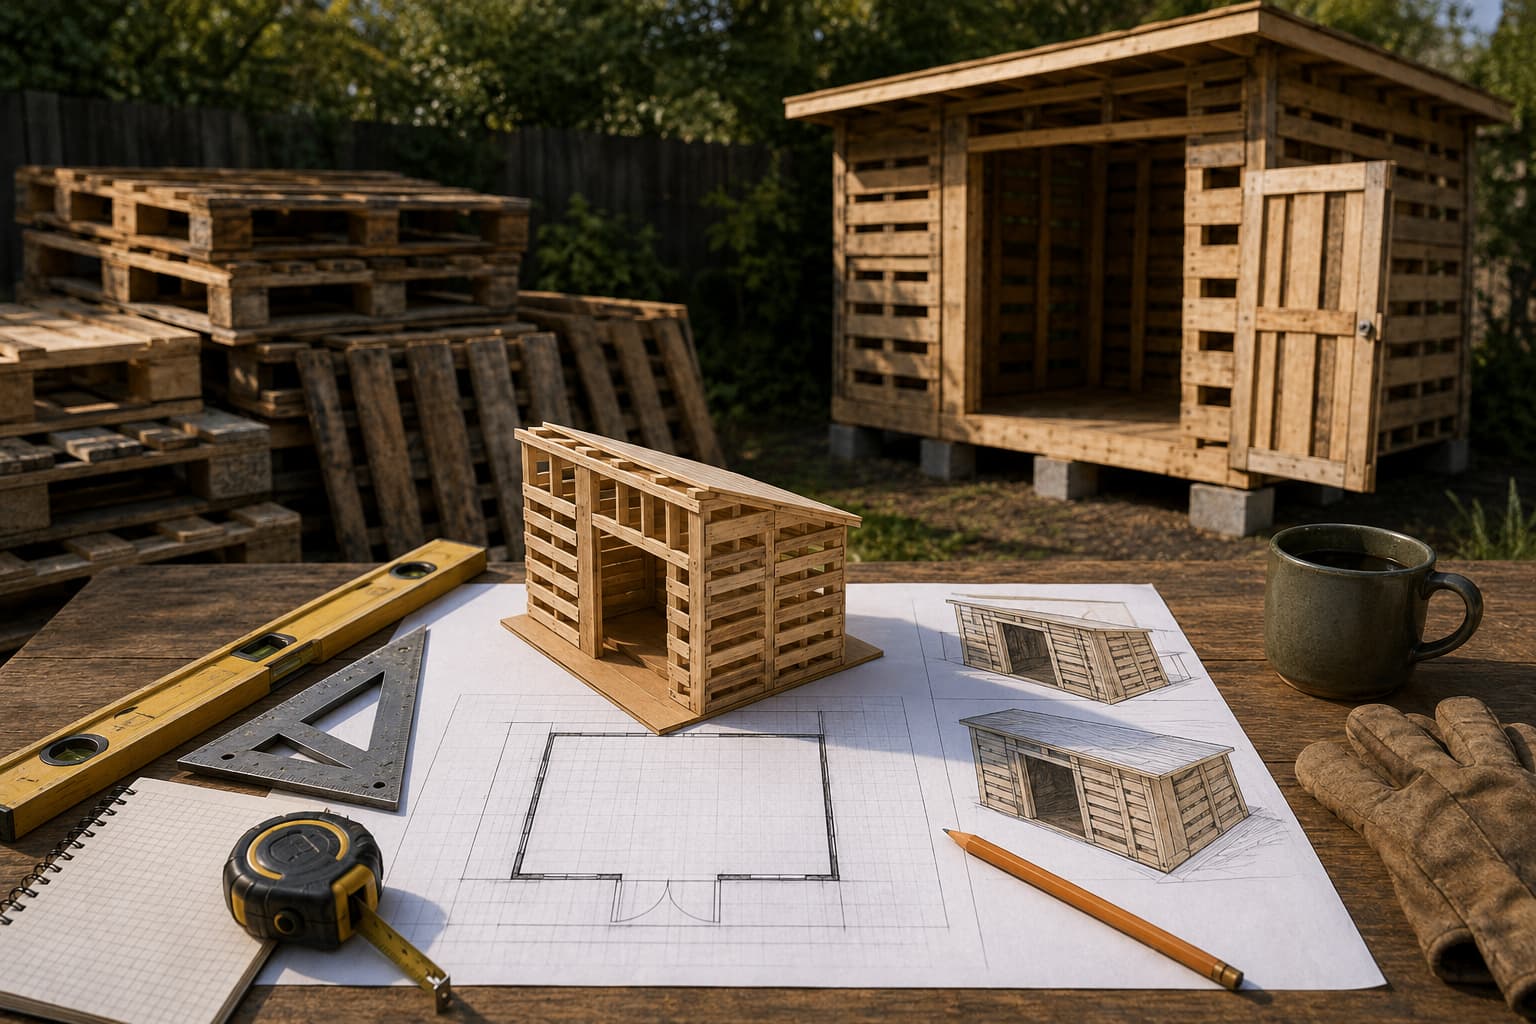
The biggest mistake pallet shed builders make is starting without a real plan. Pallets are free, so people assume the build can be equally casual. It can’t — at least not if you want something structurally sound and weatherproof.
Deciding on Size
Standard GMA pallets are 48″ × 40″. Your shed dimensions will naturally be built around multiples of these measurements, which simplifies the entire build considerably.
Common pallet shed sizes:
- Small (8′ × 6′): Storage for garden tools, bikes, small equipment. Requires roughly 20–25 pallets.
- Medium (10′ × 8′): Comfortable workshop space for one person plus storage. Roughly 35–40 pallets.
- Large (12′ × 10′): Full workshop or serious storage. 50+ pallets.
The best sizes for your first pallet shed are 8′ × 6′ or 10′ × 8′. Small enough to finish in a reasonable amount of time, yet large enough to be genuinely helpful. Engineering plans are available for reference in Step-by-Step: 14 Free 10×12 Shed Plans for Every Backyard, even if they are modified for pallet construction.
The Foundation Question
This is where most pallet shed tutorials let you down — they gloss over the foundation like it’s optional. It isn’t. A shed sitting directly on bare ground will rot, settle unevenly, and deteriorate fast regardless of how well you built the walls.
Your main foundation options:
- Concrete blocks on compacted gravel: The most practical DIY option. Level four to eight solid concrete blocks on compacted gravel, set your base frame on top. Keeps the wood off the ground and allows drainage.
- Poured concrete slab: More permanent, more work, and more cost. Worth it for a larger shed you intend to keep long-term.
- Treated timber skids: Two 4×6 pressure-treated beams laid on compacted gravel, with your base frame sitting on top. Works well for smaller sheds.
- Deck blocks: Pre-formed concrete blocks with a slot for a 4×4 post or beam. Dead simple to install and level.
Whatever you choose, level is non-negotiable. A shed that starts out-of-level gets worse over time, and it makes every wall, roof, and door installation a miserable experience. Take the time to get the foundation right.
Tools You’ll Actually Need
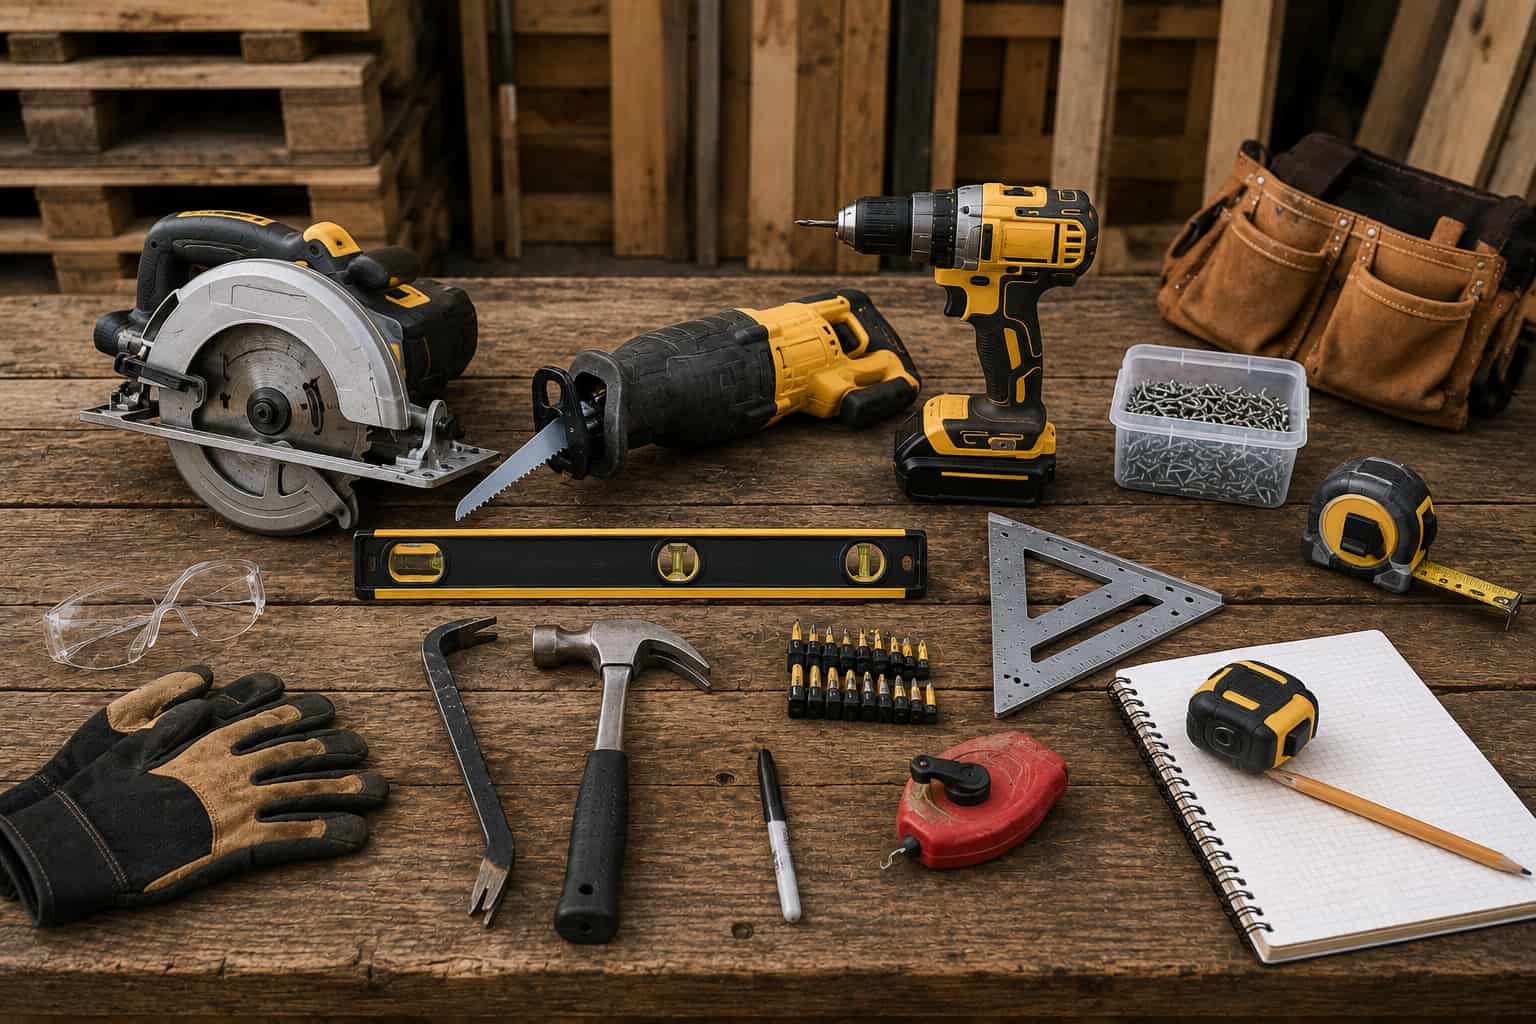
Let’s be realistic about what this project requires. You don’t need a fully equipped workshop, but you do need more than a hammer and determination.
Essential tools:
- Circular saw — For cutting pallets to size and trimming boards
- Reciprocating saw (sawzall) — Invaluable for disassembling pallets without destroying the boards
- Drill/driver — With a good supply of screws
- Speed square — For checking and marking right angles
- Level — A 4-foot level minimum; longer is better
- Tape measure and chalk line
- Pry bar — For pallet disassembly
Useful additions:
- Nail gun with compressor — Dramatically speeds up sheathing and trim work
- Table saw — For ripping boards to consistent width from disassembled pallets
- Jigsaw — For cutting around obstructions and making curved cuts
Our 16 Best Woodworking Tools for Beginners guide walks you through exactly which tools give you the most return for your investment when you’re building out your first shop — great reference if you’re deciding what to rent versus buy for this project.
Step by Step to Build a Pallet Shed
Step 1: Disassembling Pallets (For Boards) vs. Using Whole Pallets (For Walls)
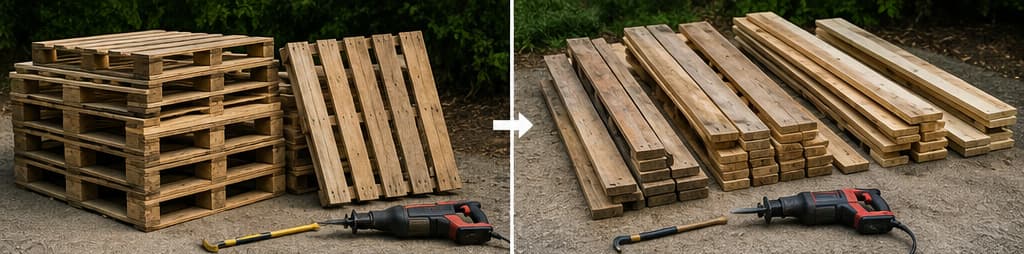
You have two techniques here, which you may mix in the same build.
Whole pallets used as wall panels: Stand the pallets upright and screw them together at the corners. Quick to construct, structurally sound, and requires few tools.The gaps between deck boards provide natural ventilation — great for a garden shed, less ideal if you need weatherproof storage.
Pallet boards that have been disassembled for sheathing: Disassemble pallets and sheathe a traditional stud frame using the individual boards. It requires more labor, but the result is a stronger, more resilient wall that allows you to insulate the space if necessary.
The smartest approach for most builds: Use whole pallets as the structural wall frame, then sheathe the exterior with disassembled pallet boards laid horizontally with a slight overlap — essentially creating a rough horizontal siding. This gives you structural integrity from the whole pallets and weather resistance from the sheathing layer.
Step 2: Build Your Base Frame
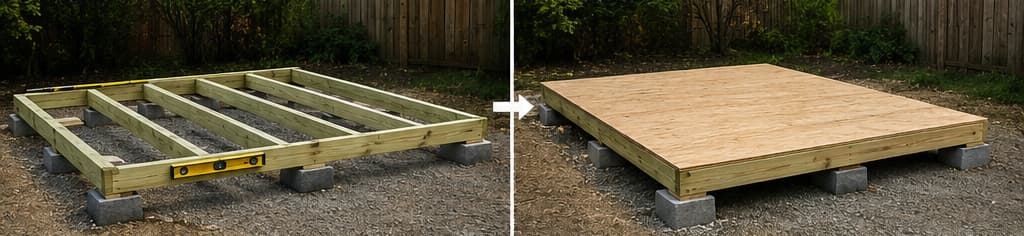
Cut pressure-treated 2×4s or 2×6s to form a rectangular base frame matching your shed’s footprint. This frame sits on your foundation and provides a flat, level surface to build up from.
Nail or screw the frame together at the corners, then check diagonal measurements — both diagonals must be equal for a square frame. Add cross members every 16 inches for floor support if you’re laying a plywood floor.
Step 3: Set and Secure the Wall Pallets
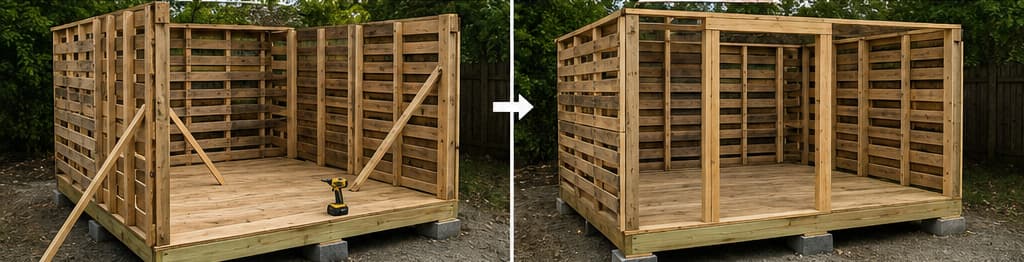
Stand your first wall pallet on the base frame and toe-screw it in place. Use 3-inch structural screws and don’t be shy with them — this is the skeleton of your shed.
Add corner pallets first, then fill in the wall runs. Screw adjacent pallets together at every point where their stringers meet — typically four to six screw points per joint. Use a level constantly. Plumb walls make every subsequent step easier. Out-of-plumb walls make every subsequent step a problem.
Add diagonal temporary bracing to hold walls plumb while you work. These come off later — they just keep things stable while the structure goes together.
Step 4: Build the Door Frame
Frame your door opening with doubled 2×4s on each side and a doubled header across the top. Standard shed door dimensions run 32–36 inches wide and 72–78 inches tall — wide enough to get equipment in and out without performing gymnastics.
You can build a simple door from disassembled pallet boards on a Z-frame brace — essentially a board-and-batten door — and hang it on heavy-duty strap hinges. It’s rustic, strong, and takes about two hours to build.
Step 5: Build the Roof Frame
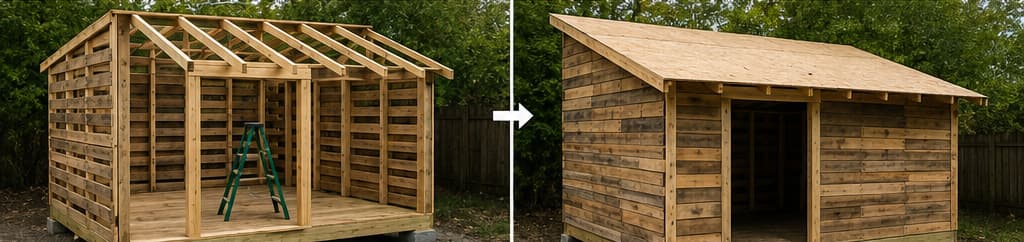
For a simple single-pitch (lean-to) roof, set one wall higher than the opposite wall to create the slope. A minimum 1-inch rise per foot of run keeps water shedding reliably — steeper is better in high-rainfall areas.
For a gable roof (the classic triangular peak), cut matching rafters from 2×4s and assemble them into roof trusses on the ground before lifting them into place. Space trusses every 24 inches across the shed width.
Sheathe the roof frame with ½-inch plywood, then cover with roofing felt and corrugated metal roofing or asphalt shingles. Corrugated metal is the practical choice for a pallet shed — it’s fast to install, extremely durable, and handles heavy rainfall without complaint.
Step 6: Sheathe and Weatherproof the Walls
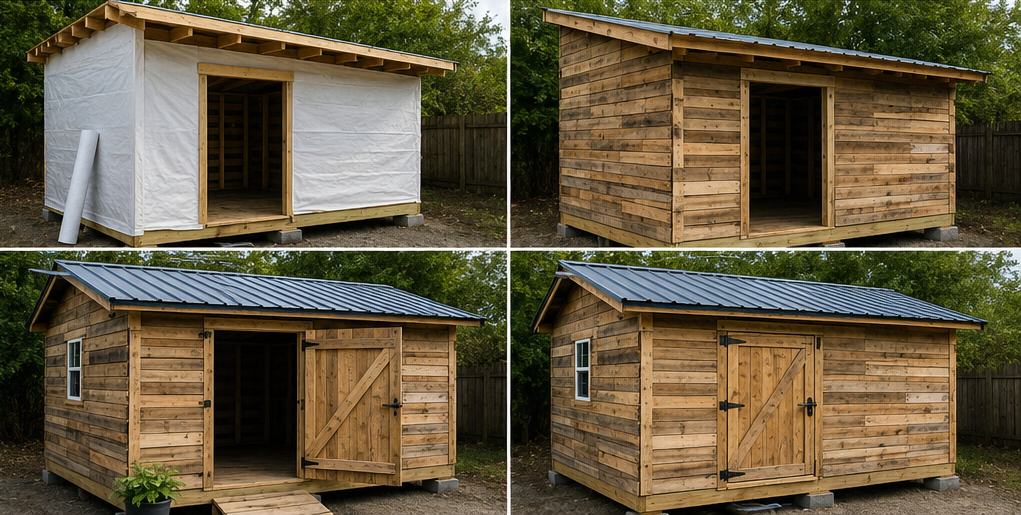
Nail or screw disassembled pallet boards horizontally across the exterior of your wall pallets, starting at the bottom and working up. Overlap each course by about ½ inch to shed water — the same principle as clapboard siding.
Before the sheathing goes on, staple house wrap (Tyvek or similar) over the wall surface. This breathable membrane blocks wind-driven rain while allowing moisture vapor to escape from inside. It’s a $40 investment that prevents a lot of rot and drafts.
Use external caulk to seal gaps around the doorframe, roof edges, and corners. Paint or stain the shed’s outside to preserve the wood and considerably increase its life.
What This Shed Actually Costs
Let’s be real about the numbers. “Free pallets” doesn’t mean “free shed.” Here’s a realistic budget breakdown:
| Item | Estimated Cost |
| Pallets (if not free) | $0–$60 |
|
Concrete foundation blocks + gravel |
$40–$80 |
| Pressure-treated base frame lumber | $30–$50 |
| Roofing felt + metal roofing | $60–$100 |
| House wrap | $35–$45 |
| Screws, nails, hardware | $30–$50 |
| Door hinges, latch | $15–$25 |
| Exterior paint or stain | $25–$40 |
| Total | $235–$450 |
Even at the high end, you’re building a functional, weatherproof shed for less than 20% of what a comparable kit shed costs. That’s a genuinely significant saving for a weekend (or two) of enjoyable work.
If you want to explore other storage shed options and compare approaches, 20 Free DIY Storage Shed Plans to Organize Your Backyard Like a Pro is worth browsing — particularly if your backyard dimensions or storage needs don’t align perfectly with a standard pallet build.
Already Thinking About Your Next Shed? Ryan Shed Plans Has You Covered
Here’s what nobody warns you about: once you finish your first shed, you immediately start planning the next one. Maybe you want a dedicated workshop with real insulation and windows. Maybe your partner has been eyeing a garden potting shed. Maybe you just want to go bigger now that you know what you’re doing.
That’s exactly the moment when having access to a serious plan library pays off — and Ryan Shed Plans is purpose-built for this audience. With over 12,000 shed plans covering every size, style, and complexity level — from lean-tos and pallet builds all the way to two-story barn workshops — it’s the most comprehensive shed-specific resource available.

👉 Click Here to Discover Ryan’s Shed Plans and Start Building Today
What makes it genuinely useful for someone coming off a pallet shed build is the sheer variety of properly engineered designs you get access to. Every plan includes detailed blueprints, a complete materials and cut list, foundation options, and step-by-step assembly instructions written for real people — not architects. You get rafter tables, roof pitch diagrams, and floor framing layouts that take all the structural guesswork out of the equation.
The pallet shed taught you the fundamentals: foundation, framing, weatherproofing, roof pitch. Ryan Shed Plans gives you the next hundred projects to put those fundamentals to work — each one better documented than anything you’d piece together from YouTube and forum posts. IMO, if sheds and outdoor structures are your thing, it’s the one resource worth having in your corner before you break ground on build number two.
The Bottom Line: Build the Shed
A pallet shed is honest work. It requires real planning, proper foundation work, and a full weekend of physical effort. But the result — a weatherproof, functional storage structure that cost you under $300 in materials — is genuinely hard to argue with.
Here’s what to remember:
- Only use HT-stamped pallets — the MB ones stay on the ground
- Foundation and level are non-negotiable — don’t rush these
- Layer your wall system — whole pallets for structure, sheathing boards for weather resistance
- Minimum 1-inch rise per foot on the roof — water management is everything
- House wrap before sheathing — a small cost that prevents major problems
Build the foundation right. Keep things plumb and square throughout. Weatherproof everything you can. The rest is just stacking wood in a logical order — and you’re more than capable of that.