
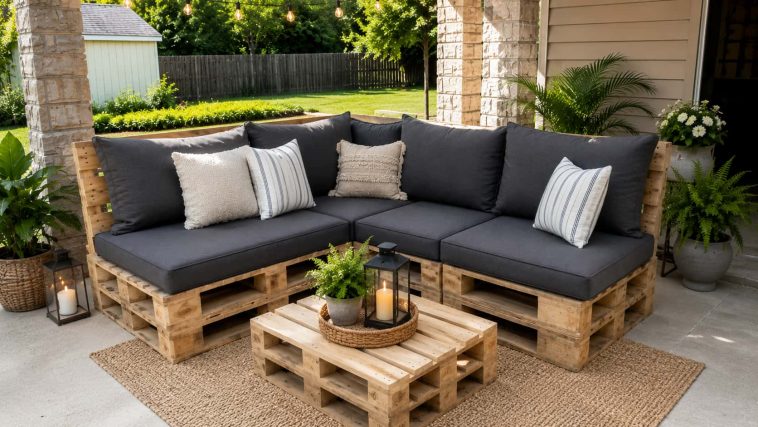
So you want a gorgeous outdoor sectional but you’ve seen the price tags — and yeah, $800 to $1,500 for a patio sofa is absolutely not it. Here’s the good news: you can build one yourself from pallets, spend a fraction of that, and honestly? It’ll look better because it’s yours.
I’m talking about a full DIY pallet outdoor sectional — the kind with cushions, throw pillows, and enough seating for the whole family. This is one of those weekend projects that sounds intimidating but really isn’t. If you can drill a screw, you can build this. Let’s get into it.
Quick Project Overview
Before we jump in, here’s what you’re signing up for:
- Project: DIY Pallet Outdoor Sectional Sofa
- Difficulty: Beginner to Intermediate
- Estimated Cost: $50–$150 (depending on cushions and finish)
- Build Time: 1 weekend
- Best For: Patios, decks, porches, gardens, fire pit areas
Not bad for something that would cost hundreds at a store, right?
Why Build a Pallet Outdoor Sectional? (Besides the Obvious Budget Win)
Look, you could just buy a cheap plastic patio chair and call it a day. But a sectional creates a lounge. It transforms a boring concrete slab into an outdoor living room where people actually want to hang out.
Here’s why this project makes sense:
- It costs a fraction of store-bought sectionals
- You customize it to fit your exact patio size
- Pallet wood has that rustic charm you can’t fake
- It’s a genuinely great beginner woodworking project
- You can go L-shape, straight sofa, or full U-shape depending on your space
IMO, this is one of the highest-value DIY projects you can do for your backyard. The transformation is dramatic and the skill level required is surprisingly low.
Step 0: The Pallet Safety Check (Don’t Skip This)
Before you get excited and start hauling pallets home, you need to do a safety check. Not all pallets are created equal, and some can be genuinely harmful.
How to Read the Pallet Stamp
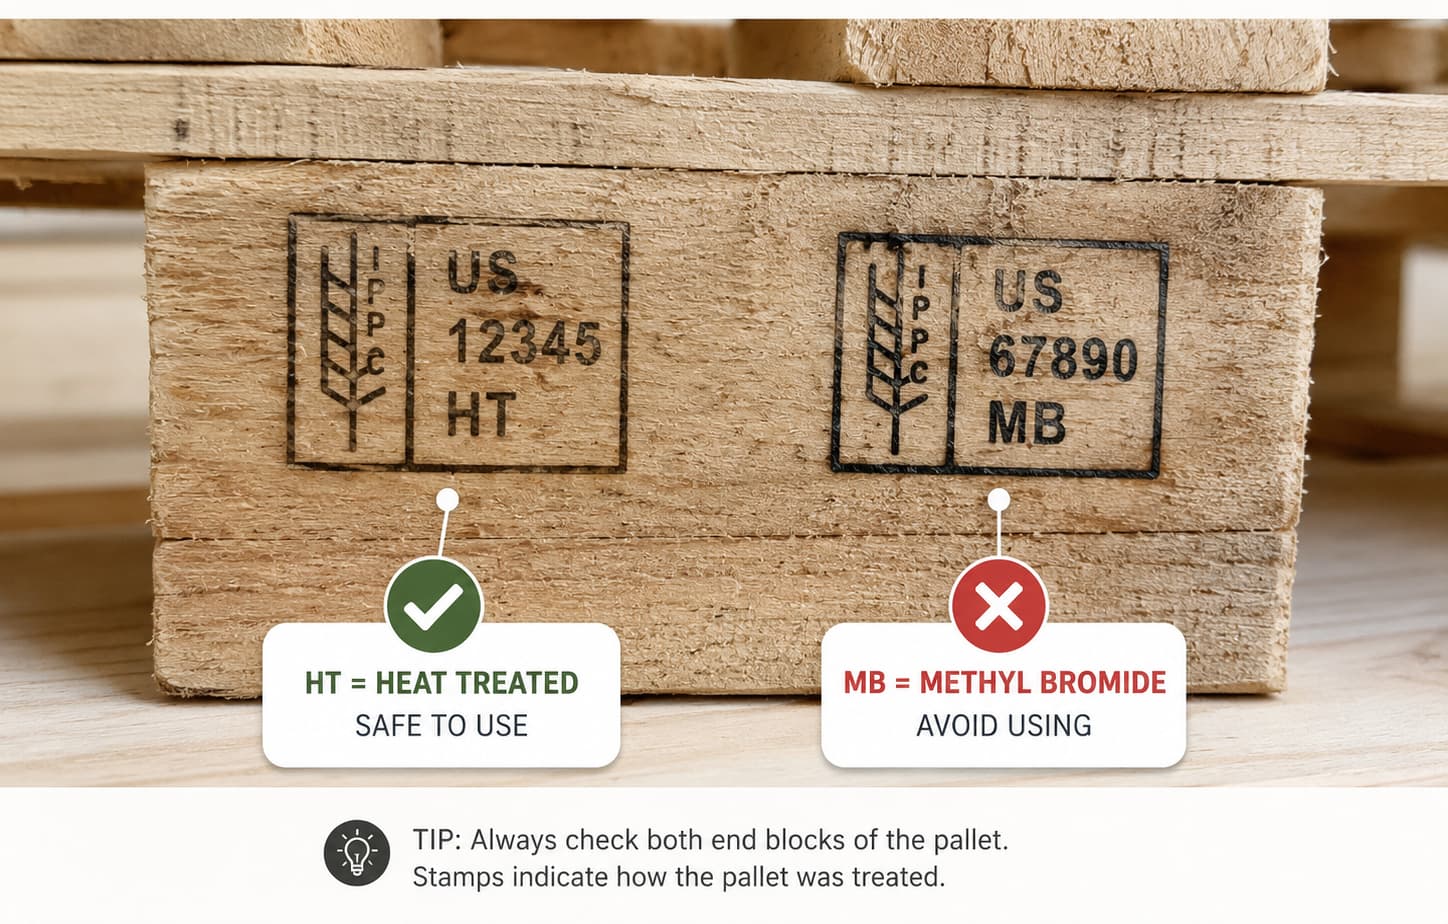
Many pallets have a stamp on the side. If you cannot find a stamp, use extra caution and avoid pallets with stains, chemical smells, mold, or unknown history.. Here’s what to look for:
- HT = Heat Treated ✅ — These are safe. The wood was treated with heat, not chemicals.
- MB = Methyl Bromide ❌ — Avoid these completely. They were treated with a pesticide that you do not want anywhere near your family.
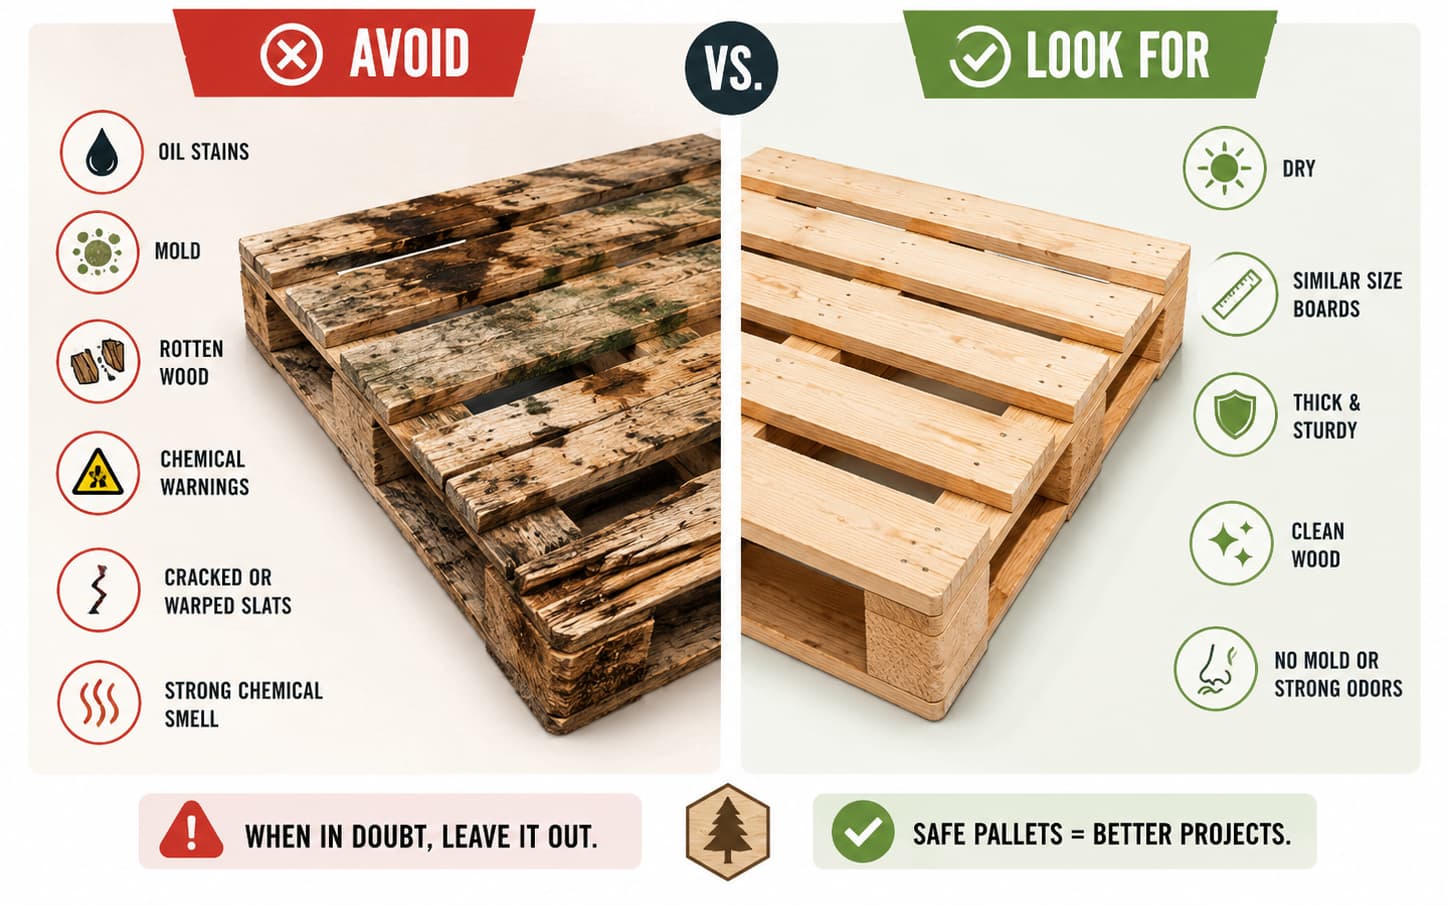
What Else to Avoid
Advertisement
- Pallets with a chemical smell
- Oil-stained pallets
- Moldy or rotten boards
- Pallets used for industrial chemicals or unknown liquids
- Warped or cracked slats that won’t sit flat
What to Look For
Choose pallets that are dry, solid, similar in size, and free from mold and strong odors. Thick boards are better than thin ones — they hold up to outdoor use much longer.
How Many Pallets Do You Need?
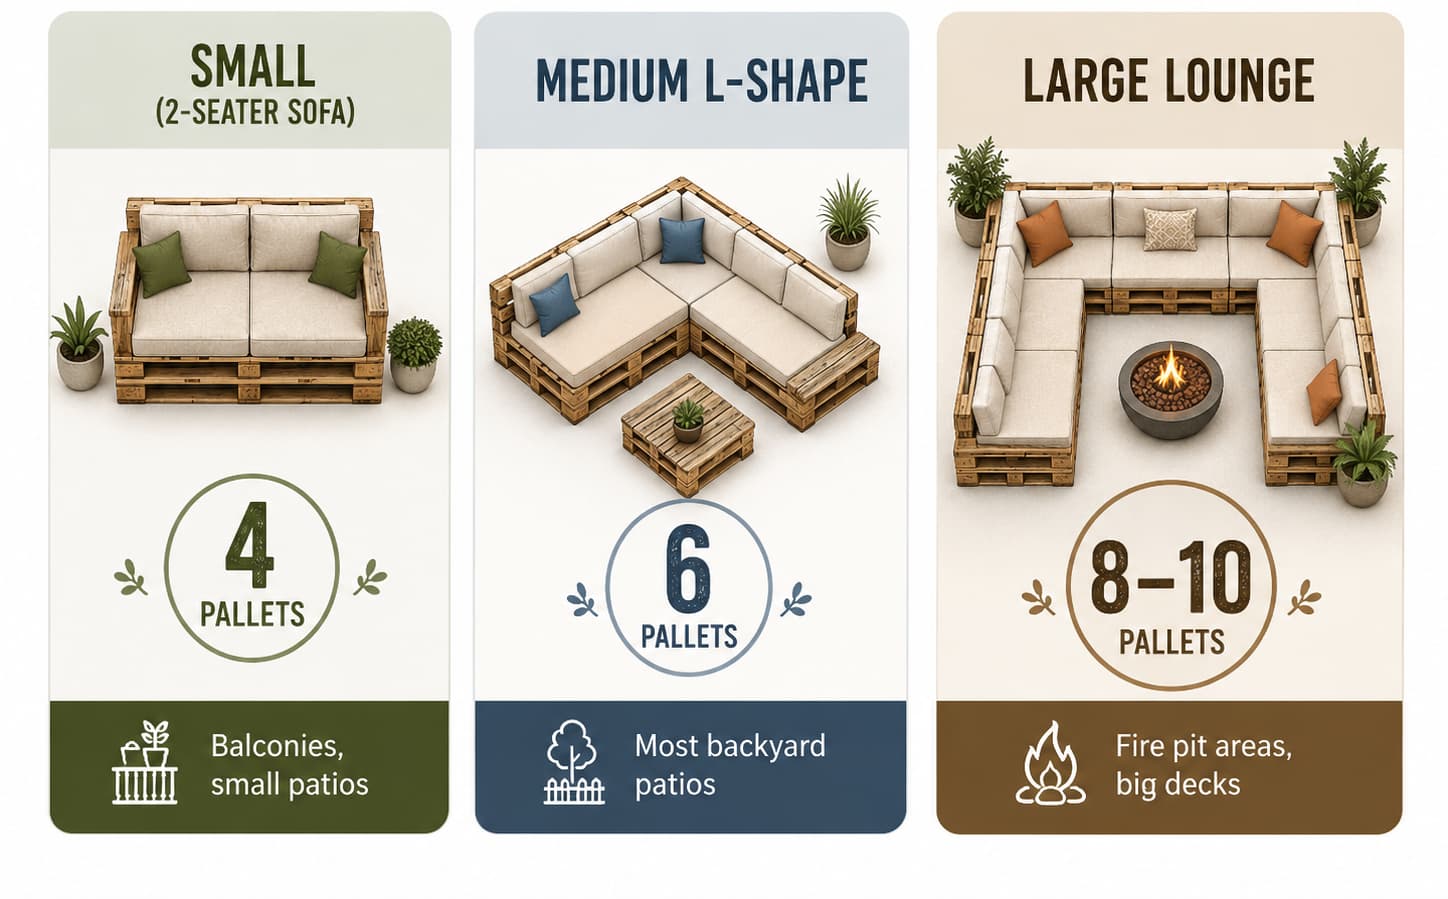
This depends on how big you want to go. Here’s a simple breakdown:
|
Sectional Size |
Pallets Needed |
Best For |
|
Small (2-seater sofa) |
4 pallets |
Balconies, small patios |
|
Medium L-shape |
6 pallets |
Most backyard patios |
|
Large lounge |
8–10 pallets |
Fire pit areas, big decks |
For a medium L-shaped sectional — the most popular layout — plan on:
- 2 pallets for the long base
- 2 pallets for the side base
- 2 pallets for the backrests
- Extra boards for armrests and reinforcement
Simple 6-Pallet Layout Plan

For this tutorial, we’ll use a basic 6-pallet L-shaped layout. This size works well for most patios, decks, and backyard seating areas without taking over the entire space.
Here’s the simple breakdown:
| Pallet Use | Number of Pallets | Purpose |
|---|---|---|
| Long seat base | 2 pallets | Creates the main sofa section |
| Side seat base | 2 pallets | Creates the shorter L-shape side |
| Backrests | 2 pallets | Adds support behind the seating area |
| Extra boards | As needed | Used for armrests, brackets, trim, and reinforcement |
Think of it like this: two pallets create the long side, two pallets create the shorter side, and two pallets stand behind them as backrests. If you want a higher sofa, you can stack extra pallets underneath the base, but for a simple beginner build, this 6-pallet layout is a great place to start.
Pro Tip: Lay the pallets on the ground first before attaching anything. This lets you test the shape, check the size, and make sure it fits your patio before you start drilling screws.
Materials and Tools You’ll Need
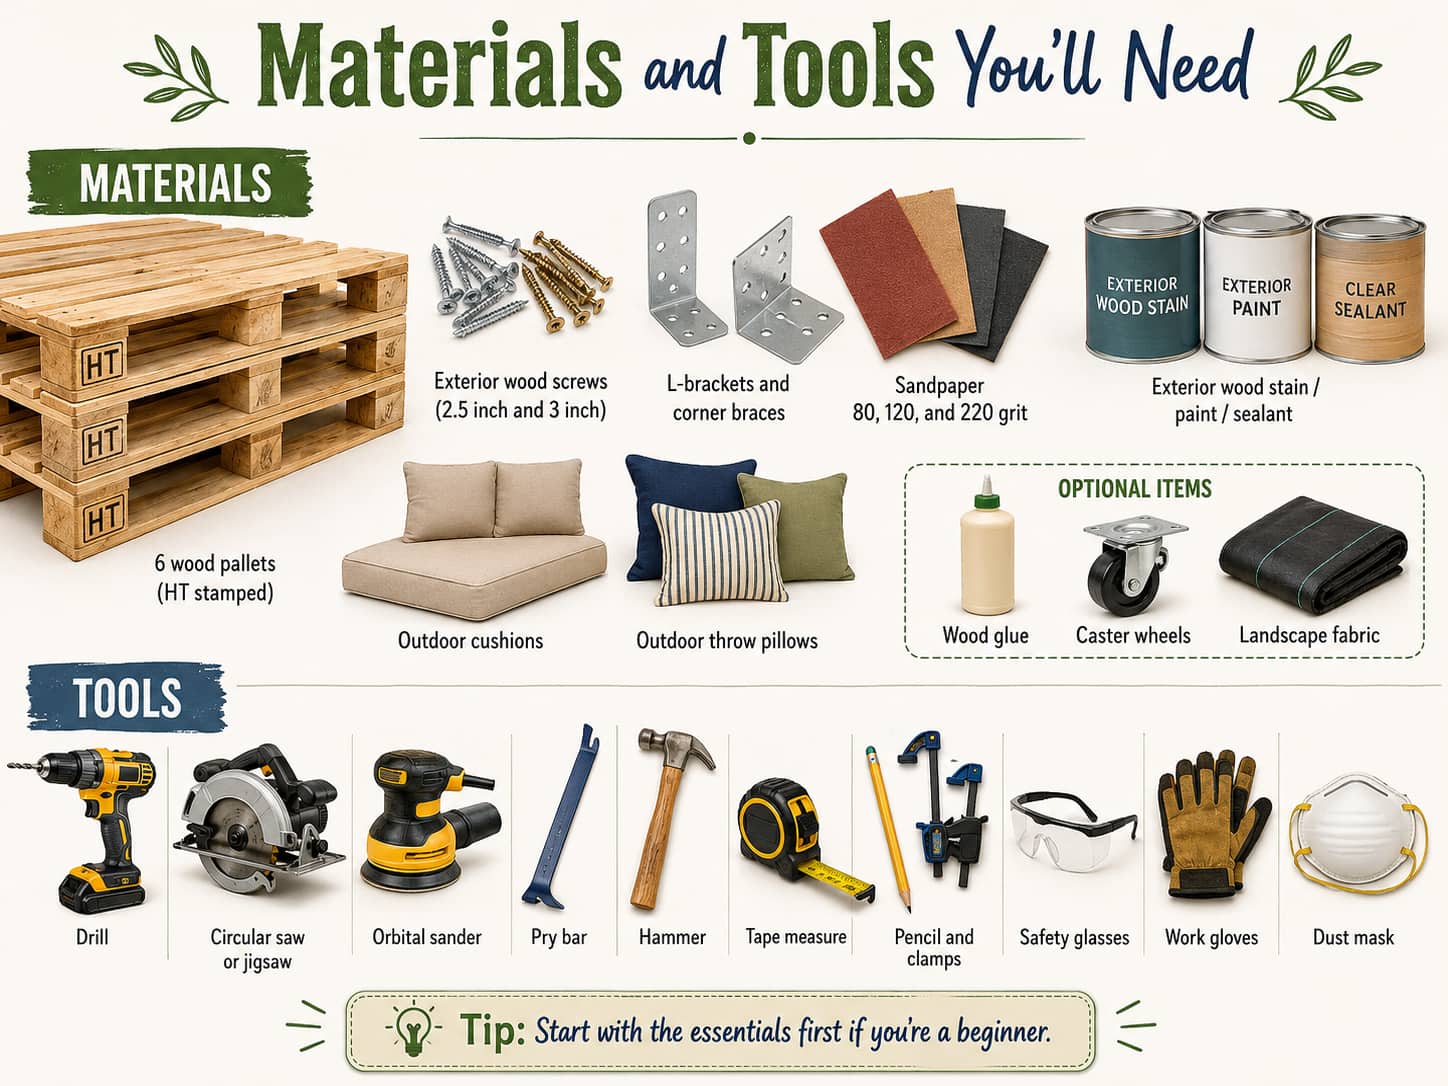
Materials
- 6 wood pallets (HT stamped)
- Exterior wood screws (2.5″ and 3″)
- L-brackets and corner braces
- Sandpaper: 80, 120, and 220 grit
- Exterior wood stain, paint, or sealant
- Outdoor cushions
- Outdoor throw pillows
- Optional: wood glue, caster wheels, landscape fabric
Tools
- Drill
- Circular saw or jigsaw
- Orbital sander
- Pry bar
- Hammer
- Tape measure
- Pencil and clamps
- Safety glasses, gloves, dust mask
Not sure what tools to prioritize if you’re just getting started? Check out our woodworking tool list for a beginner-friendly breakdown of what’s actually worth buying.
Step 1 — Plan Your Layout Before You Touch Anything
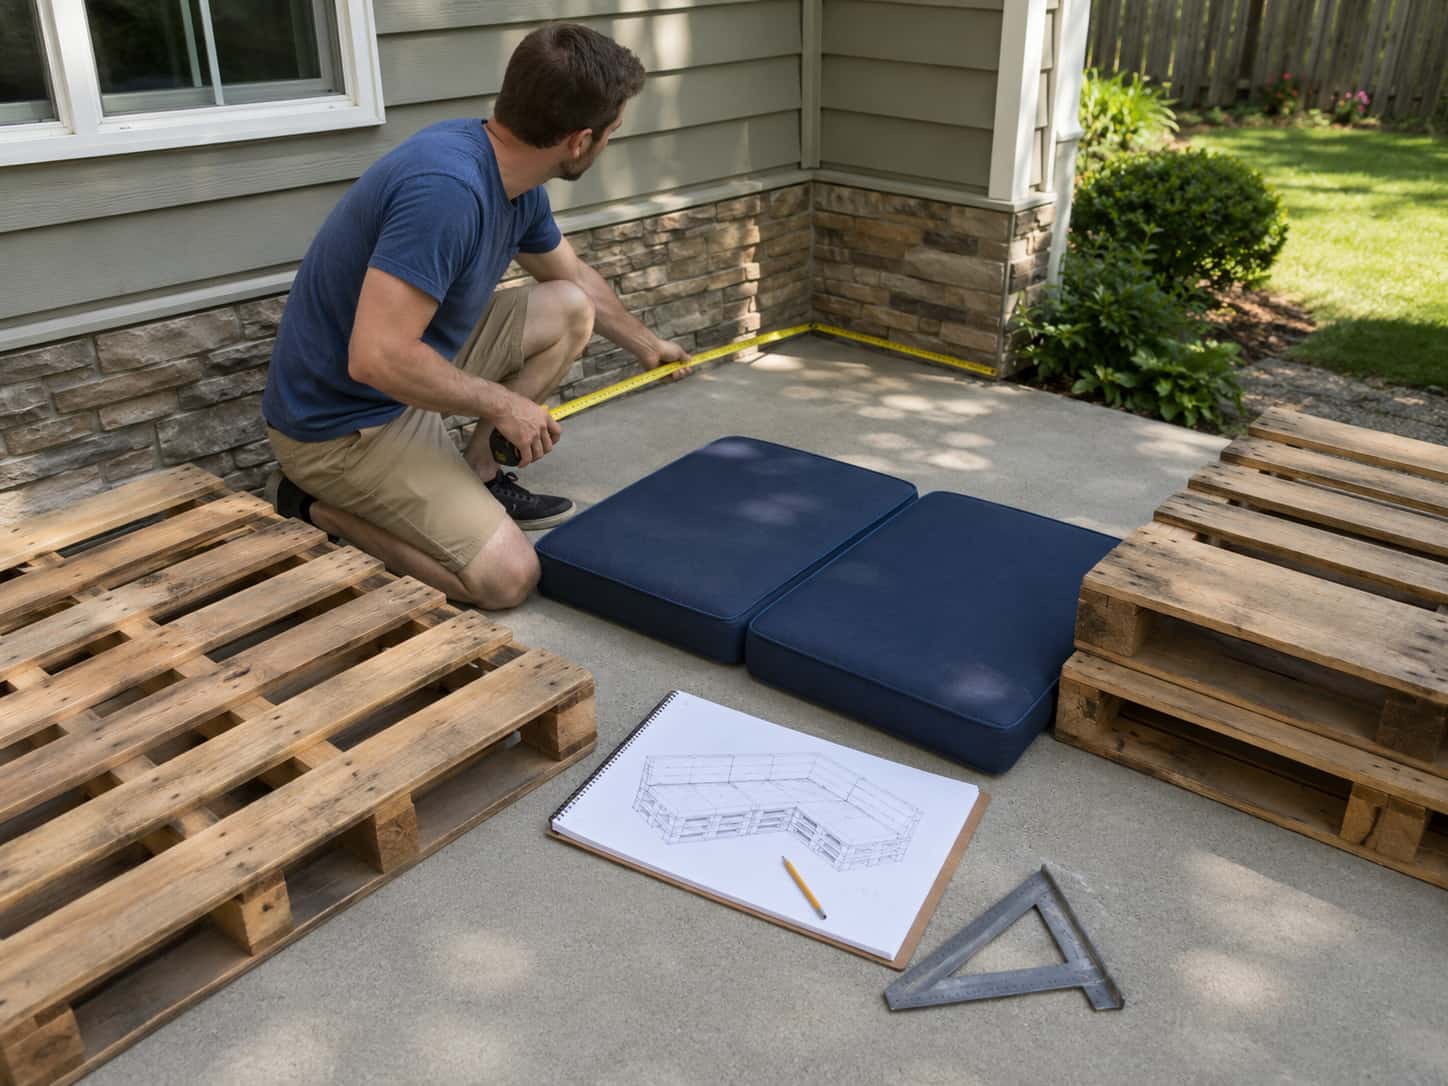
Seriously, measure first. A lot of people skip this and end up with a sectional that’s too big, too small, or awkwardly angled. Spend 10 minutes with a tape measure and a rough sketch before you start building.
Popular Layout Options
L-Shaped Sectional — The most popular option. Fits perfectly into a patio corner and creates that full lounge feel. This is what most people build.
Straight Pallet Sofa — Best for narrow spaces, porches, or balconies. Simple and clean.
U-Shaped Lounge — Great for fire pit areas. Creates a conversation circle naturally.
Corner Daybed — Wider layout with a large cushion. Perfect for outdoor napping (honestly, a strong life choice :)).
Pro Tip: Buy Cushions First
This is the move most people don’t make. Pick your outdoor cushions before you finalize your build dimensions. Standard outdoor cushions are usually 18″–20″ deep. Build your seat depth around that. Trying to find cushions to fit an oddly-sized frame afterward is a headache you don’t need.
Step 2 — Clean the Pallets
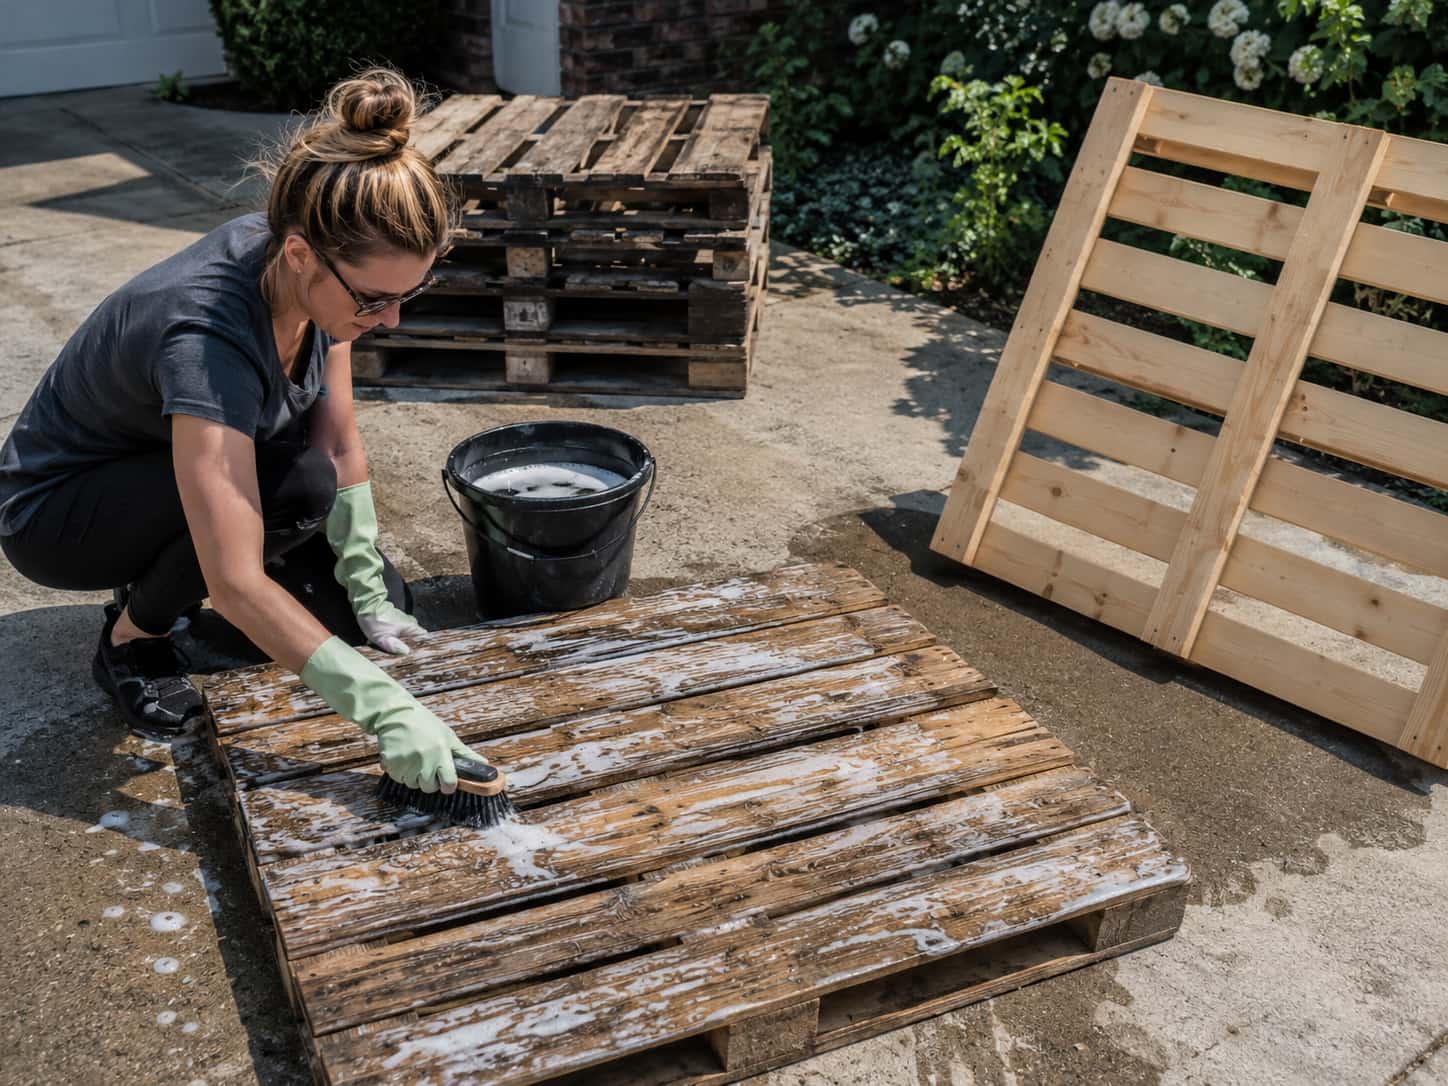
Pallets live outside, on loading docks, in warehouses. They’re dirty. Give them a good scrub with soapy water and a stiff brush, then let them dry for at least 24 hours before sanding.
Do not skip the drying time. Sanding wet wood clogs your sandpaper and leaves a rough, uneven finish.
Step 3 — Sand Everything (And I Mean Everything)
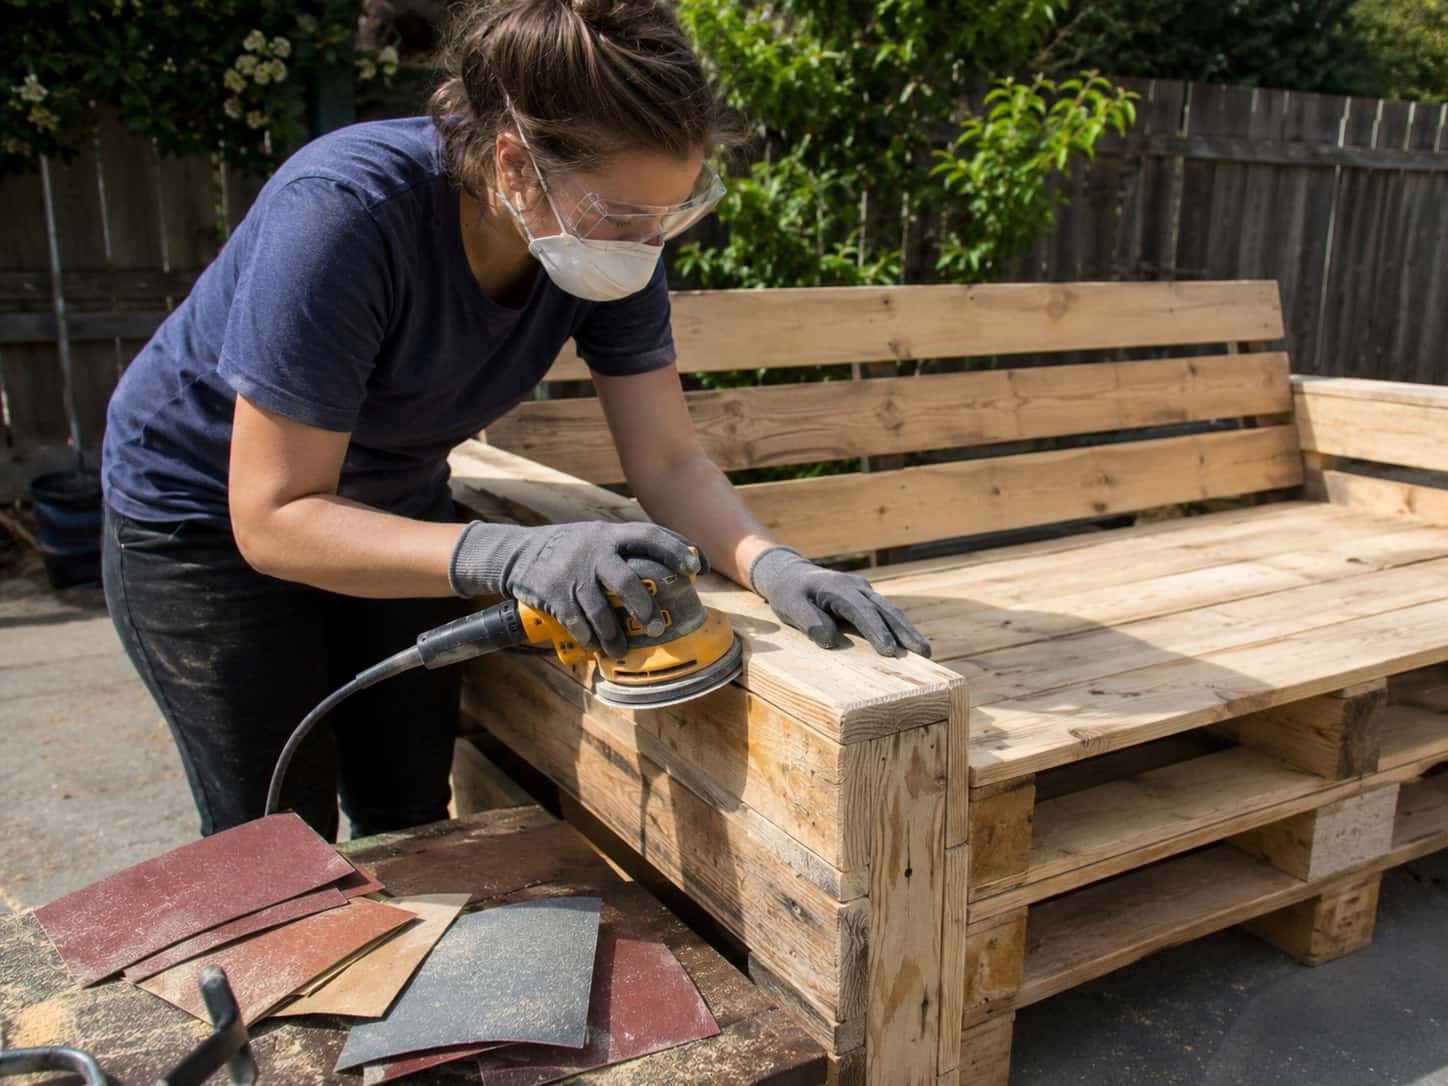
This step is where most beginners cut corners, and it shows. Pallet wood is rough, full of splinters, and not exactly couch-ready out of the box.
Sanding process:
- Start with 80 grit to knock down rough spots and sharp edges
- Move to 120 grit to smooth the surface
- Finish with 220 grit on any area people will touch — seat edges, armrests, backrest
Pay extra attention to:
- Seat edges (where legs rub)
- Backrest corners
- Armrest tops
- Any cracked or splintered boards
This takes time. But a well-sanded pallet sectional looks and feels like real furniture. A poorly sanded one gives splinters to your guests, which is a great way to never be invited to host again :/
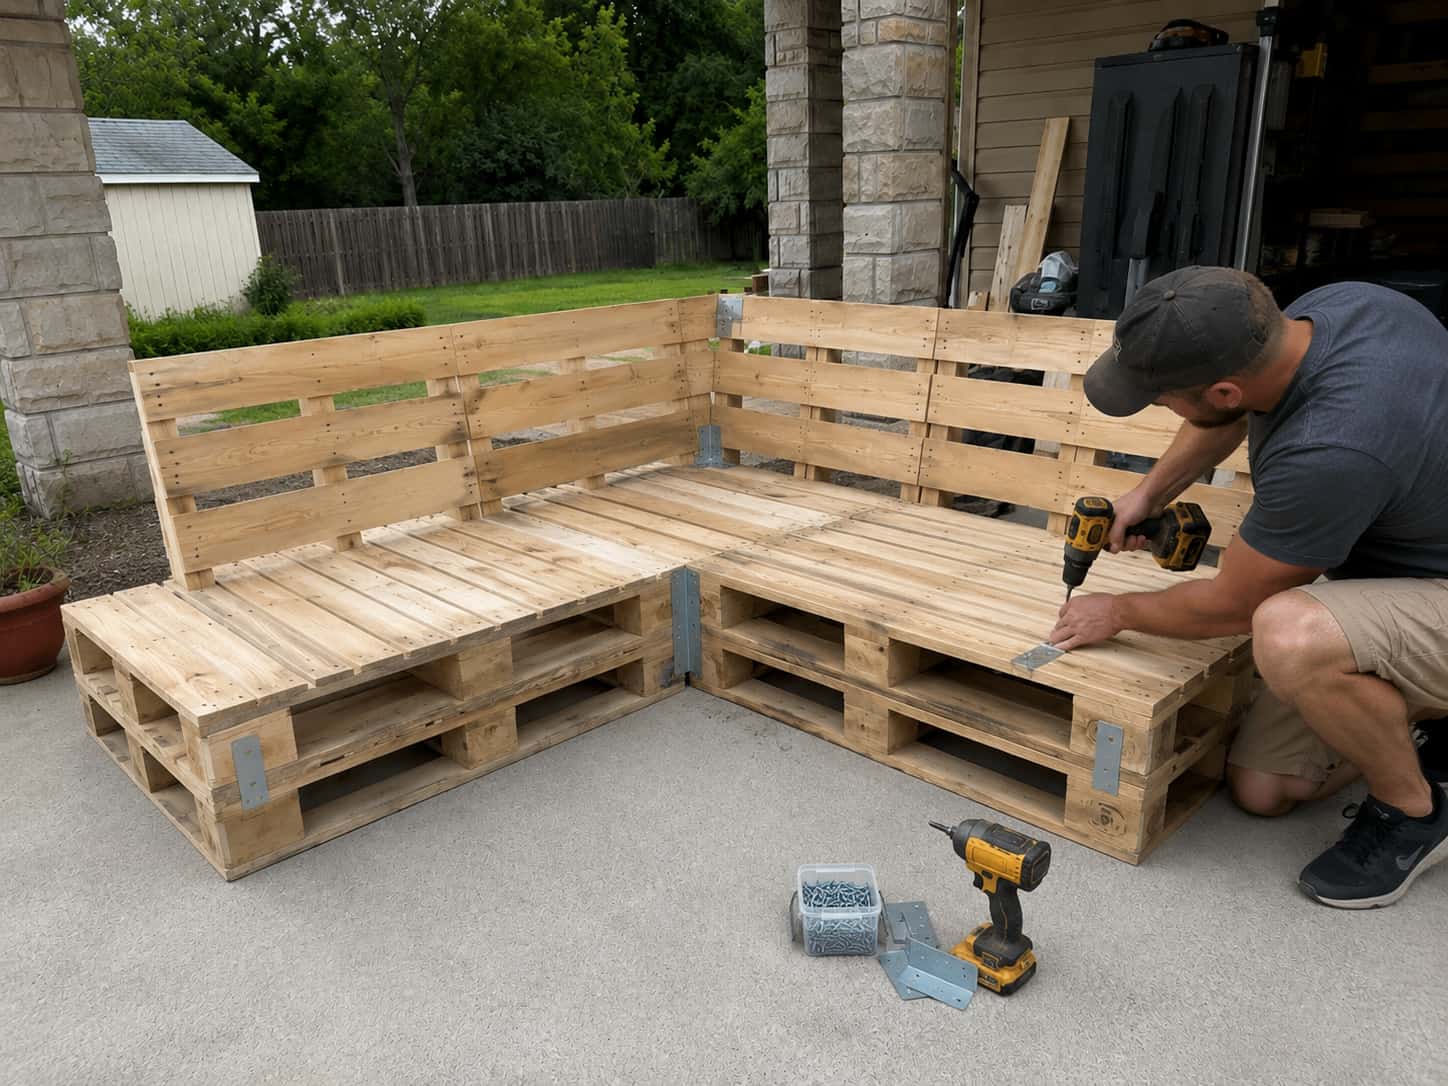
Step 4 — Build the Base
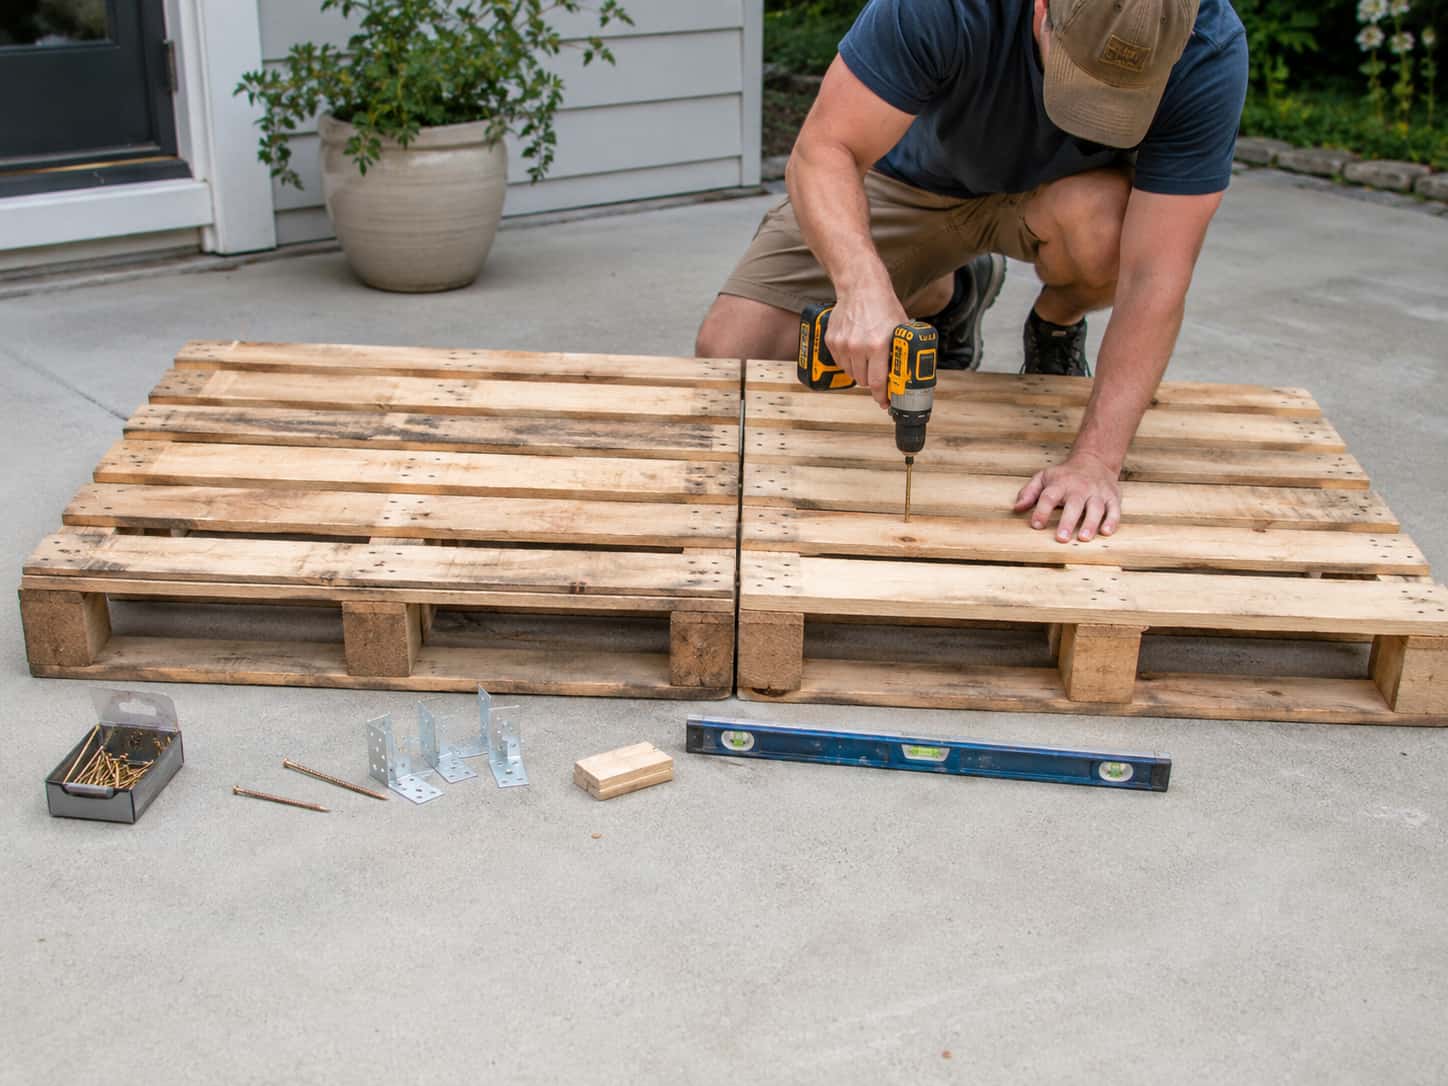
Start by placing two pallets side by side on a flat surface to form the long section of the sofa. Check that they’re even and aligned before screwing anything together.
One Layer vs. Two Layers
One pallet layer gives you a low lounge style — relaxed and casual, great for a boho or floor-level aesthetic.
Two pallet layers stacked gives you a standard sofa height — more comfortable for most people and easier to get in and out of. This is the recommended option for most builds.
Assembly Tips
- Pre-drill holes before adding screws to prevent the wood from splitting
- Use long exterior screws (3″) to connect pallets together
- Reinforce corners with L-brackets underneath
- Check that the base sits level — shim if needed
Step 5 — Create the L-Shape
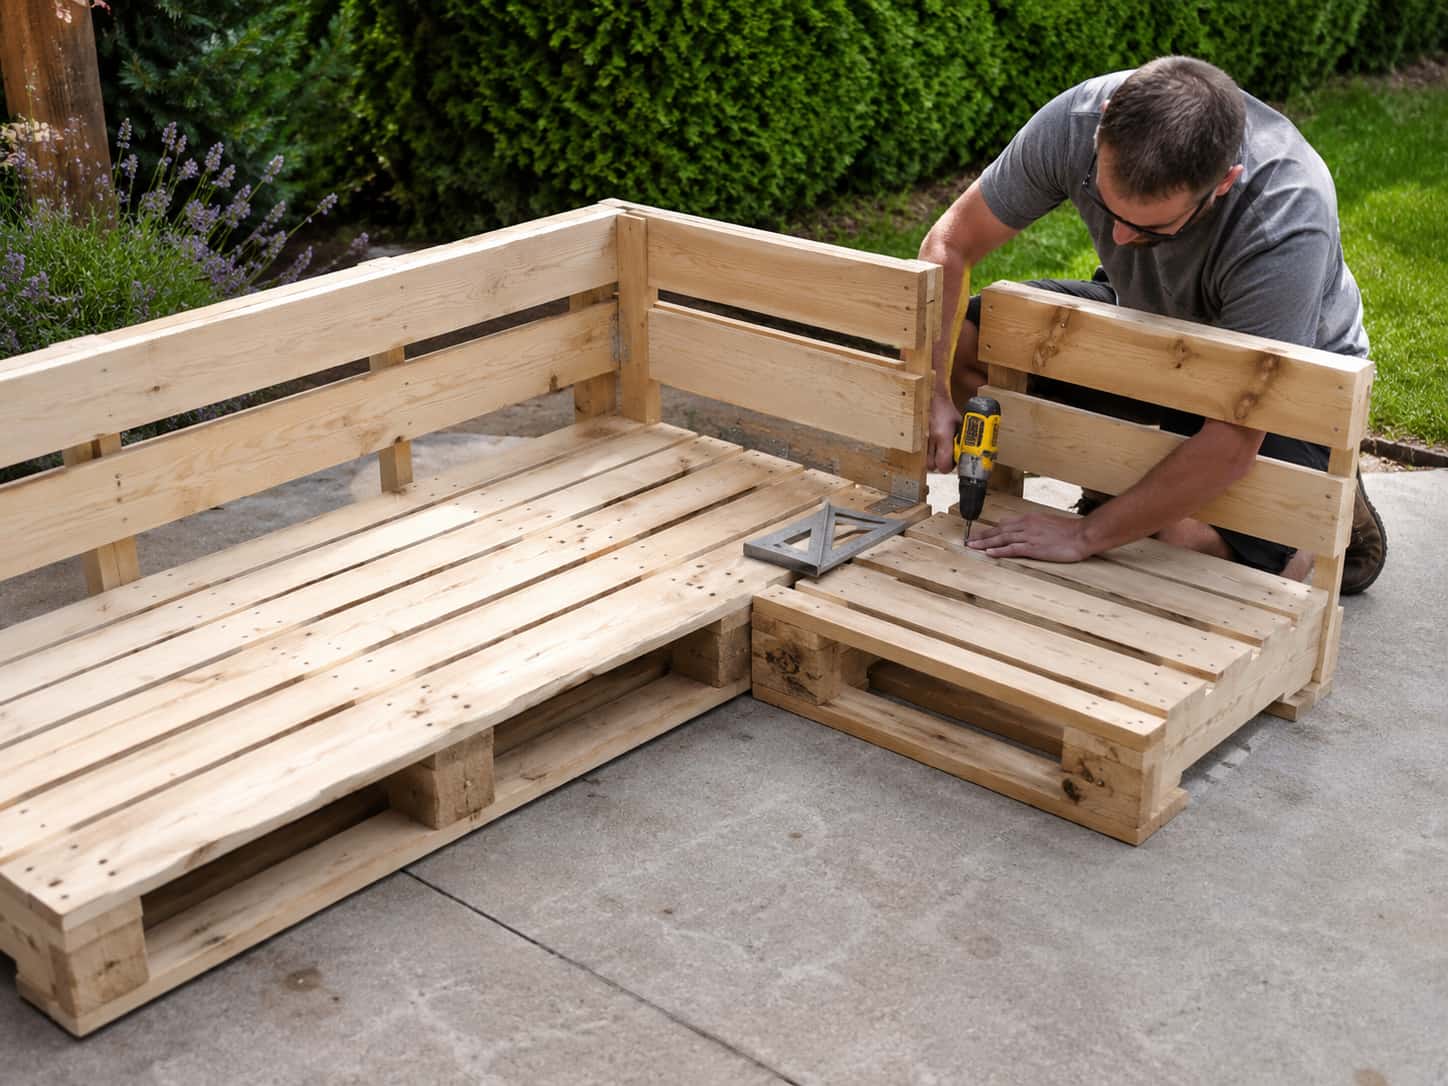
Once your long base is solid, add the shorter side section at a 90-degree angle to form the L.
Before you screw it in, grab a carpenter’s square and check that the corner is actually square. A slightly off angle looks fine now but becomes obvious once cushions are on.
Securing the Corner
Use exterior screws through the pallet frames, plus L-brackets on the inside of the corner. This joint takes the most pressure when people sit down, so don’t rely on two screws and hope for the best.
Step 6 — Add the Backrest
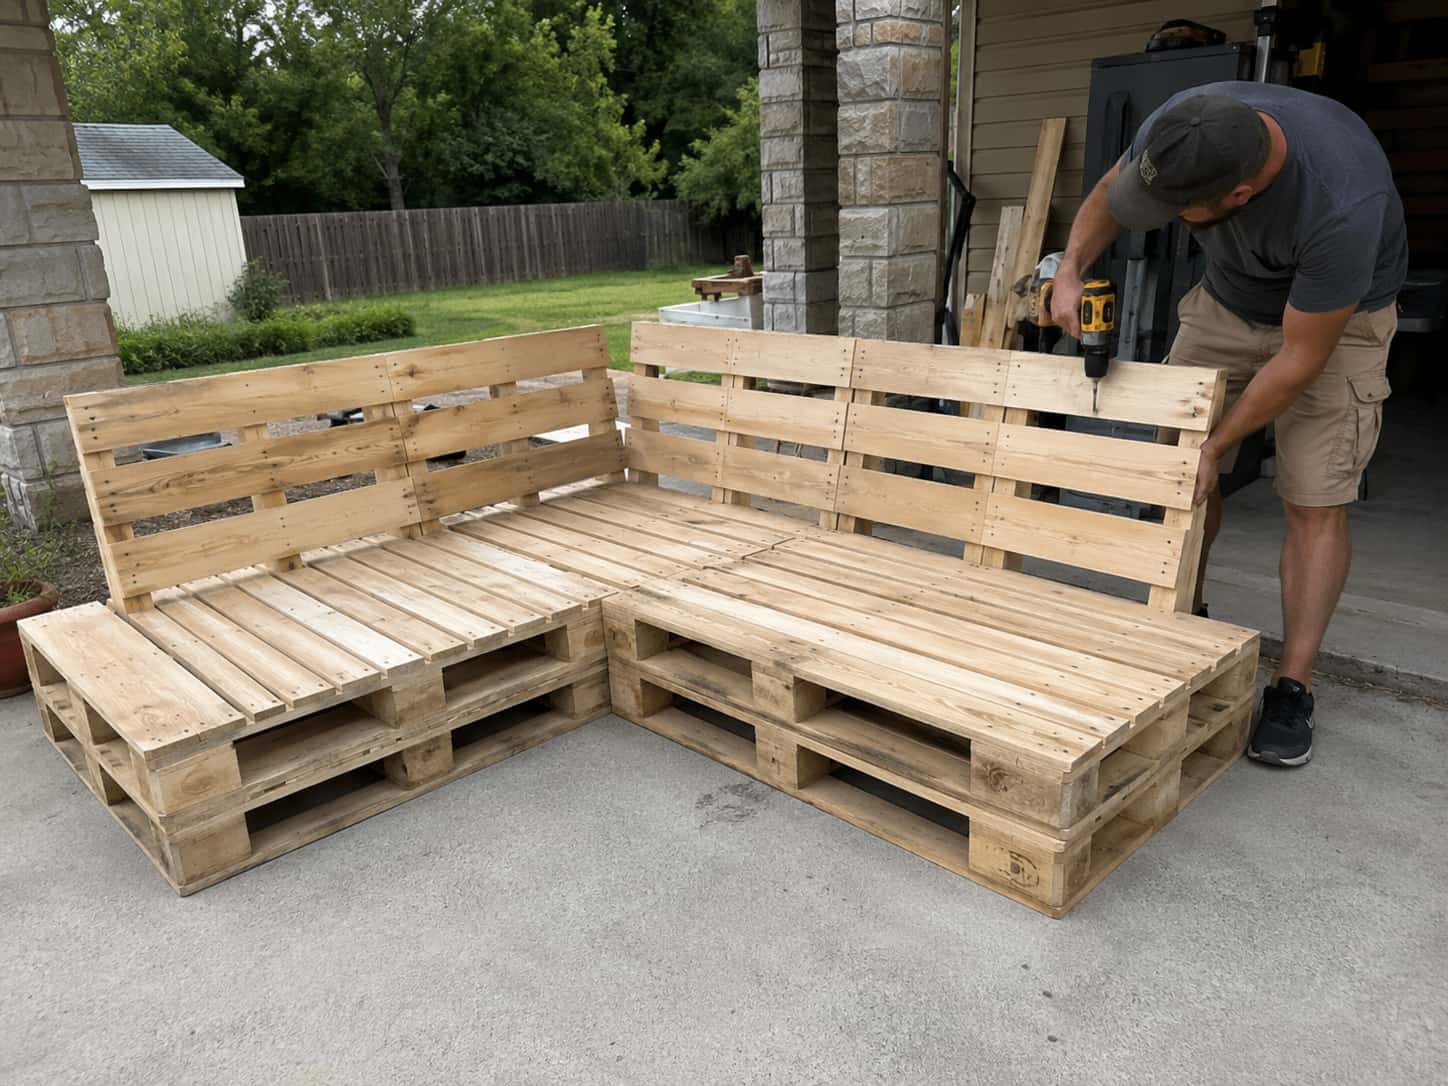
The backrest is what makes this look like furniture instead of a stack of pallets on your patio. You have a few options here:
Full Pallet Backrest
Stand a pallet upright behind the base and secure it. Fast, easy, and gives a chunky rustic look.
Angled Backrest
Tilt the backrest slightly backward (about 10–15 degrees) before securing. This makes the sofa dramatically more comfortable. It takes a little more work to angle and brace it, but it’s worth it.
Custom Slat Backrest
Dismantle a pallet and use the individual boards to create a cleaner, more spaced-out slatted back. This looks the most polished and works well with modern or farmhouse patio styles.
Step 7 — Add Armrests
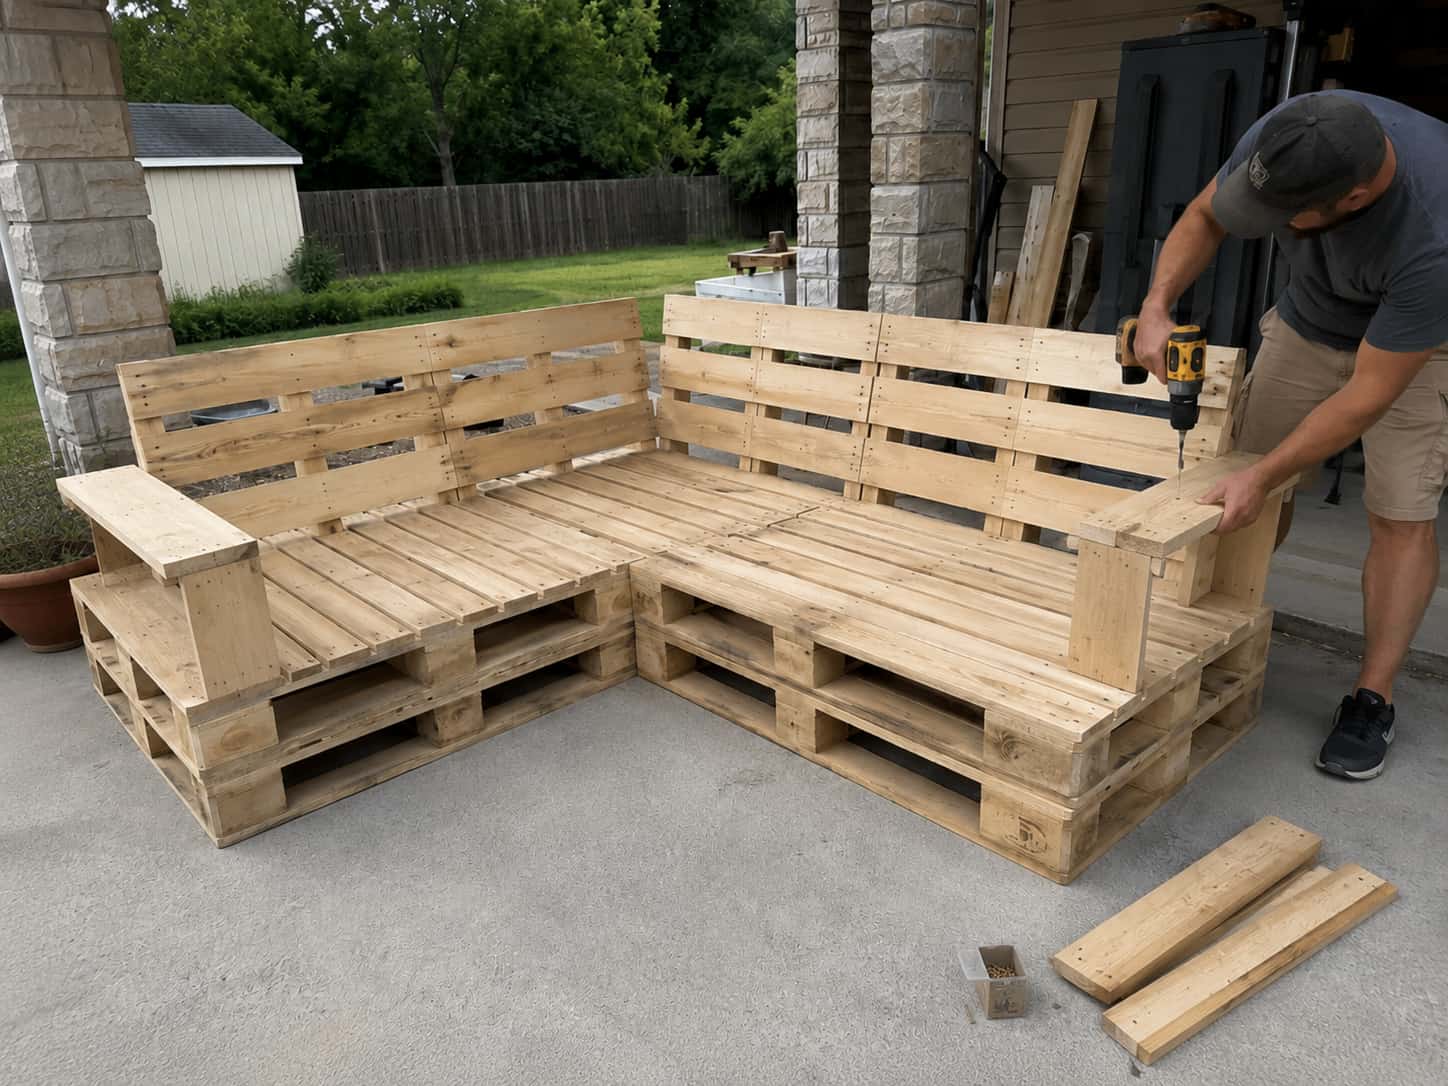
Armrests are optional, but they add a lot to the overall look and functionality. Here are some ideas:
- Simple board armrest — just a flat pallet board attached vertically to the side
- Wide flat armrest — wide enough to hold a drink, which is basically a requirement
- Box-style armrest — more effort, but you can hide storage inside
- No armrest on one side — keeps the sectional feeling open if your patio is tight
If you’re working with a smaller patio, skip the outer armrest and leave that side open. It makes the space feel larger.
Step 8 — Reinforce the Frame
Before you do anything else, sit on it. Push on the backrest. Wiggle the arms. Test every joint.
Any movement at this stage is fixable now and annoying later. Add screws, brackets, or extra boards wherever needed.
Reinforcement checklist:
- All pallet-to-pallet connections are tight
- Corner brackets are in place at the L-joint
- Backrest doesn’t wobble
- Base sits level on all four sides
- No cracked boards under load
Step 9 — Stain, Paint, or Seal the Wood

Because this sectional lives outside, you need to protect the wood. Untreated pallet wood will warp, crack, and absorb moisture within one season. Don’t let your weekend of work go to waste.
Use an exterior-grade product — not interior stain or paint. Those will peel and fail quickly outdoors.
Finish Options
Natural exterior stain — Keeps the rustic wood grain visible. Perfect for farmhouse and boho patios.
White paint — Classic and clean. Works with coastal, cottage, and farmhouse styles.
Black or charcoal paint — Looks modern and makes neutral cushions pop.
Clear exterior sealant — Best if you love the raw pallet wood look and want to preserve it.
Apply at least two coats, letting each dry completely before the next. Then let it cure fully before adding cushions.
Step 10 — Add Outdoor Cushions
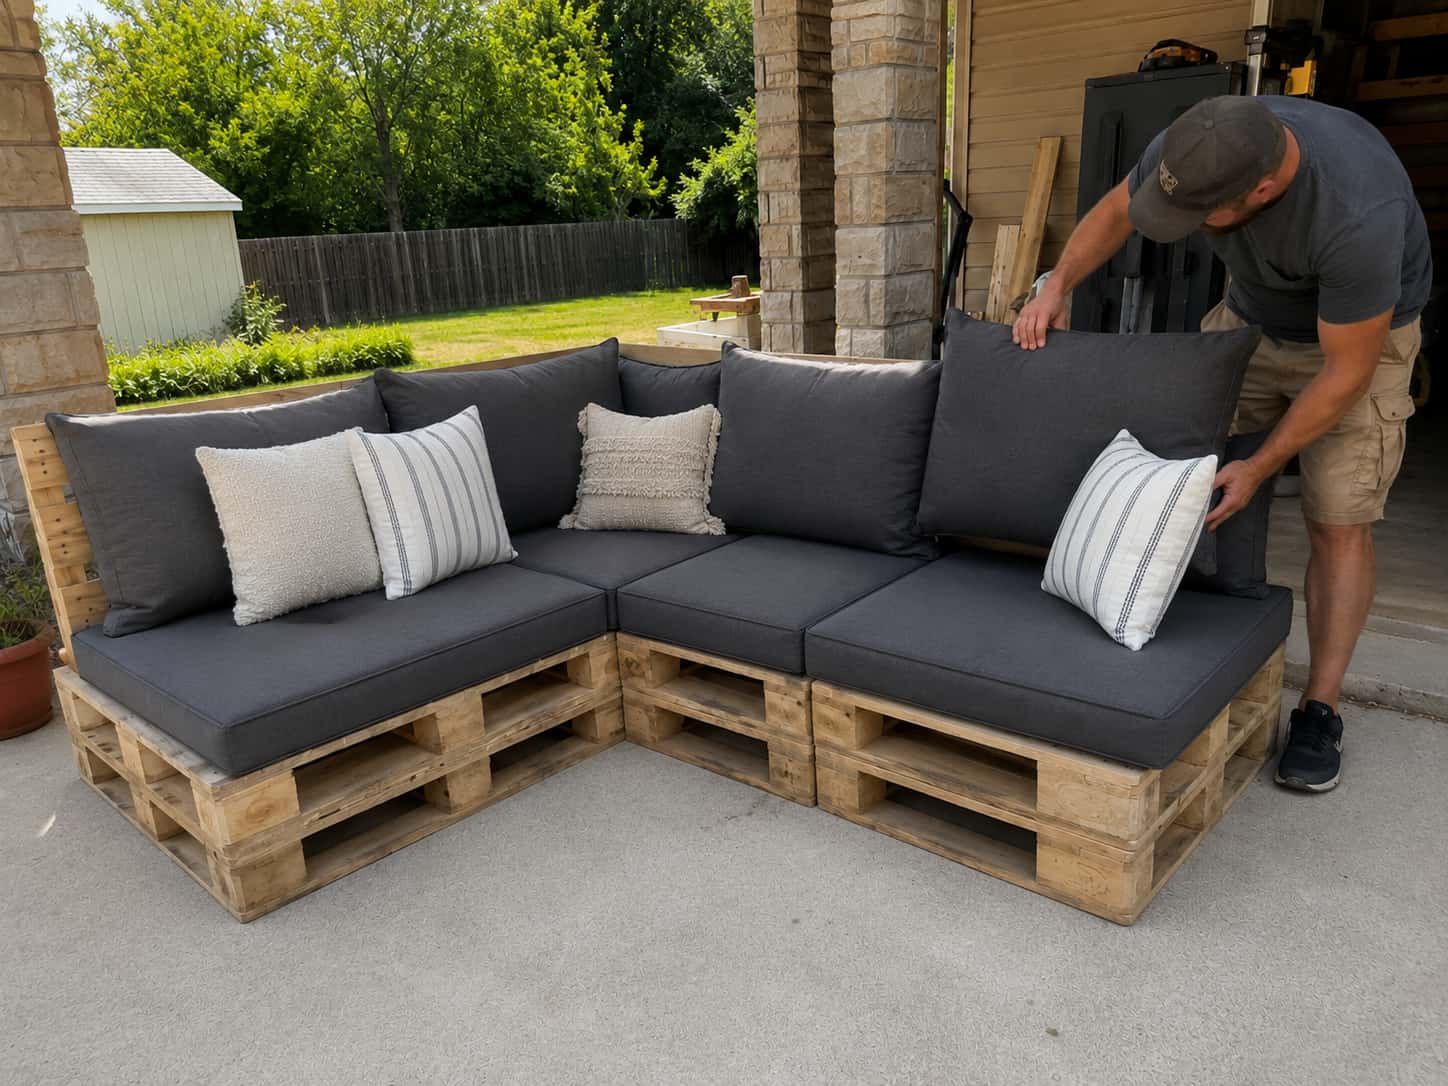
This is the step that takes your pallet sectional from “cute DIY project” to “did you buy that?” territory.
Go for weather-resistant cushions — outdoor bench cushions, patio cushions, or custom-cut foam with waterproof covers. If you’re on a tight budget, even basic outdoor chair cushions stacked together work fine.
What to avoid: Regular indoor cushions. They absorb moisture, grow mildew, and fall apart. Even one rainy night can ruin them. FYI — outdoor cushions are worth every penny here.
Step 11 — Style Your Pallet Sectional
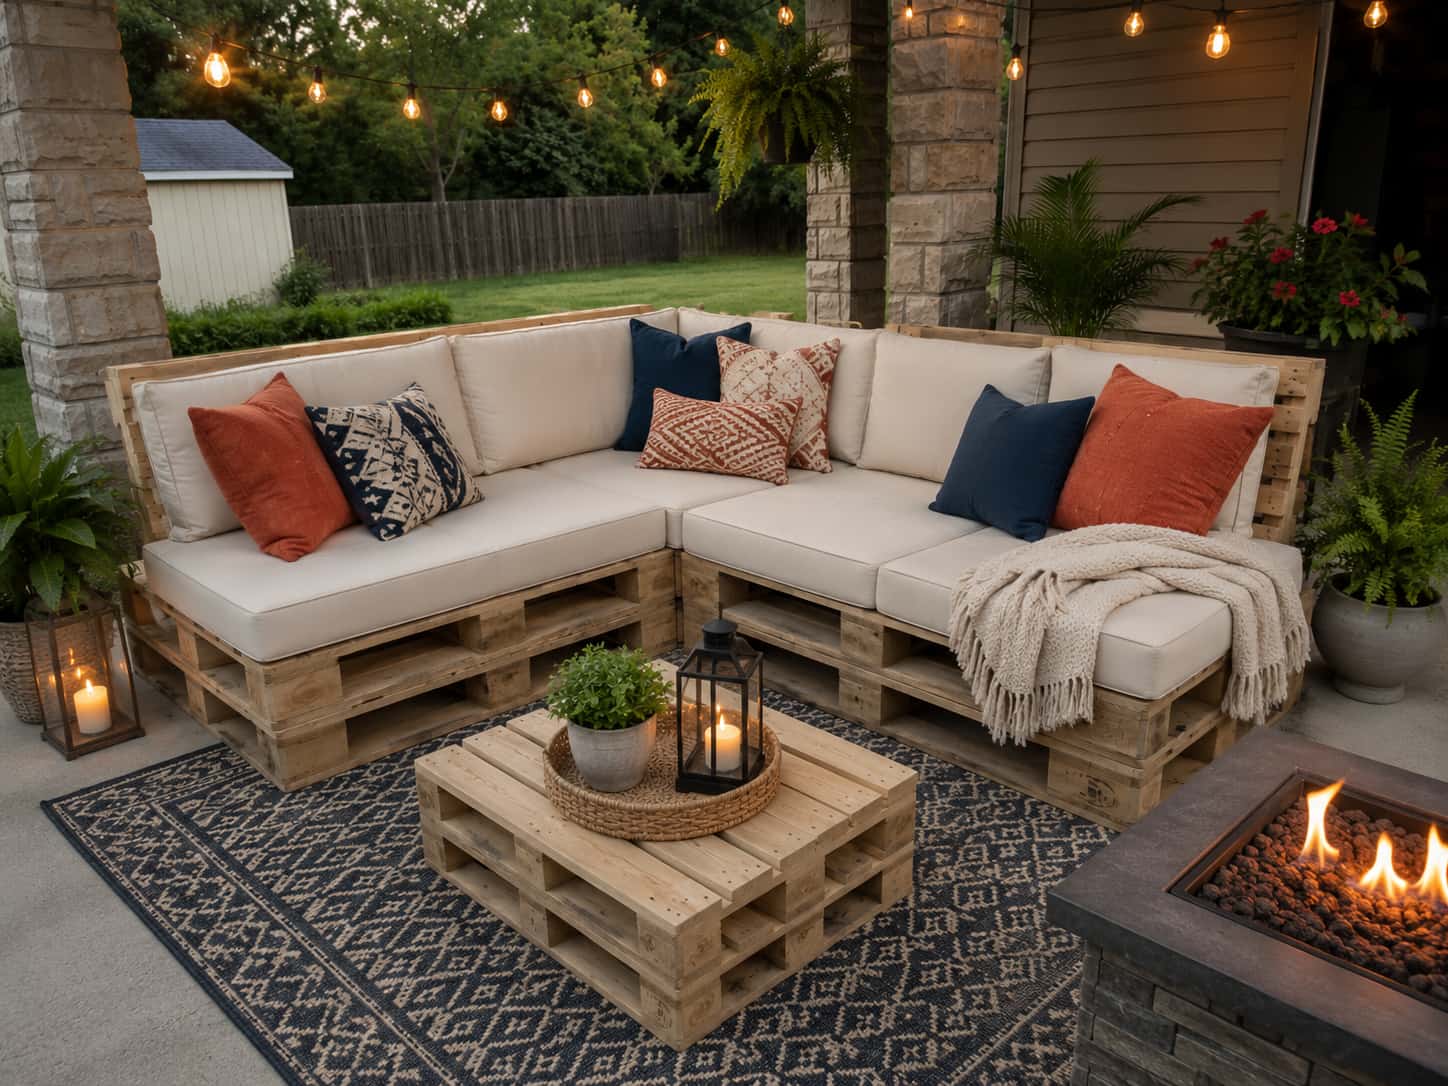
Now the fun part. Add some personality:
- Throw pillows in bold colors or patterns
- An outdoor rug underneath to anchor the space
- String lights or solar lanterns for evening ambiance
- Potted plants around the edges
- A matching pallet coffee table (takes maybe 2 hours with leftover wood)
- A fire pit table in front for evening hangouts
If you want to go all-in on the outdoor lounge look, check out our full guide on building a DIY Outdoor Couch for Under $30 for a matching companion piece.
Cost Breakdown
Here’s what you’re actually spending:
Item |
Estimated Cost |
Pallets |
Free (or $5–$10 each) |
Screws and brackets |
$15–$30 |
Sandpaper |
$10–$15 |
Exterior stain or sealant |
$20–$40 |
Basic outdoor cushions |
$40–$80 |
|
Total |
$85–$165 |
Compare that to a store-bought outdoor sectional at $400–$1,500+. You’re saving hundreds while getting something custom-built for your exact space. Hard to argue with that math.
Design Variations Worth Trying
Small Balcony Pallet Sofa
Two pallets, one layer, thin cushions. Perfect for apartment balconies where every inch counts.
Large L-Shaped Backyard Sectional
Six to eight pallets for a full patio lounge. Add a coffee table, a rug, and string lights, and your backyard becomes the place everyone wants to hang out.
Pallet Sectional with Storage
Leave the front pallet openings visible and slide in baskets. You get hidden outdoor storage for blankets, games, or garden tools.
Pallet Daybed
Wider layout, large floor cushion, maybe an umbrella or canopy overhead. The ultimate outdoor nap spot.
Pallet Sectional with Caster Wheels
Add locking caster wheels to the base so you can move the whole thing when you need to rearrange. Surprisingly easy to add and incredibly practical.
Common Mistakes to Avoid
Using unsafe pallets. Always check for the HT stamp. MB pallets are a hard no.
Skipping the sanding. Rough pallet wood splinters. It’s uncomfortable and it looks unfinished.
Not measuring cushions first. Build around your cushions, not the other way around.
Forgetting exterior sealant. One season without it and the wood starts warping. Two seasons and you’re rebuilding.
Building only one layer high. Single-layer pallets sit very low. Most people find double-stacked pallets more comfortable as a sofa height.
Under-reinforcing the backrest. People lean on backrests hard. Use multiple screws and brackets here.
What to Do With Leftover Pallet Wood
Don’t throw away the scraps. Leftover pallet boards are perfect for:
- A matching coffee table
- Planter boxes
- A garden sign
- Wall shelves
- A small outdoor tray
- A drink caddy to hang on the armrest
For more ideas on what to build with leftover wood, check out our roundup of 25 Easy Pallet Wood Project Ideas You Can Build This Weekend — there’s a lot more you can do with those scraps than you might think.
More Detailed Plans When You’re Ready to Level Up
Once you’ve built your first sectional, you’ll probably want to keep going. Matching coffee table, a storage bench, maybe a planter wall — the backyard transformation gets addictive fast.
This pallet sectional is a great beginner build, but if you want your next outdoor project to look more polished, using exact plans can save a lot of mistakes.
If you want ready-made plans with exact measurements, cut lists, and diagrams instead of figuring out dimensions yourself, a complete woodworking plan collection saves a huge amount of time and guesswork.
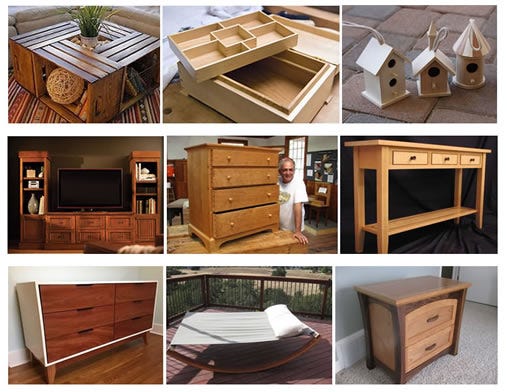
Ted’s Woodworking Plans includes thousands of outdoor furniture projects — sectionals, benches, tables, pergolas, and more — all with step-by-step instructions built for beginners. It’s a solid resource if you want to keep building without starting from scratch every time.
FAQ
Can pallet wood be used for outdoor furniture? Yes, absolutely — as long as you choose HT-stamped pallets and protect the wood with exterior stain, paint, or sealant. Unsealed pallet wood won’t last outdoors, but properly finished pieces hold up well for several years.
How many pallets do I need for a pallet outdoor sectional? Most builds need 4 to 8 pallets. A medium L-shaped sectional uses around 6. A small straight sofa needs as few as 4.
Do I need to dismantle the pallets? Not always. For a simple sectional, you can use whole pallets for the base and backrest. Dismantling gives you more flexibility for custom armrests and trim, but it’s not required.
What cushions work best for pallet furniture? Outdoor bench cushions and weather-resistant patio cushions are the best options. Look for cushions with waterproof or water-resistant covers. Pick your cushions before you build so you can size the frame around them.
How long does pallet outdoor furniture last? With proper sealing and basic care, several years easily. Covering the sectional during heavy rain or winter extends the life significantly. A furniture cover is a cheap and smart investment.
Should I paint or stain pallet outdoor furniture? Both work great — it comes down to the look you want. Stain keeps the rustic wood character, paint gives a cleaner more modern finish. Either way, use an exterior-grade product.
Final Thoughts
A DIY pallet outdoor sectional is one of the best backyard upgrades you can make without spending a lot of money. It’s beginner-friendly, endlessly customizable, and the finished result looks genuinely impressive for what it costs.
Start with a simple L-shaped layout, choose your cushions first, sand everything well, and protect the wood with an exterior finish. Once you add the cushions and a few accessories, your patio will feel like a completely different space.
Now stop reading and go find some pallets. Your backyard lounge is waiting.