
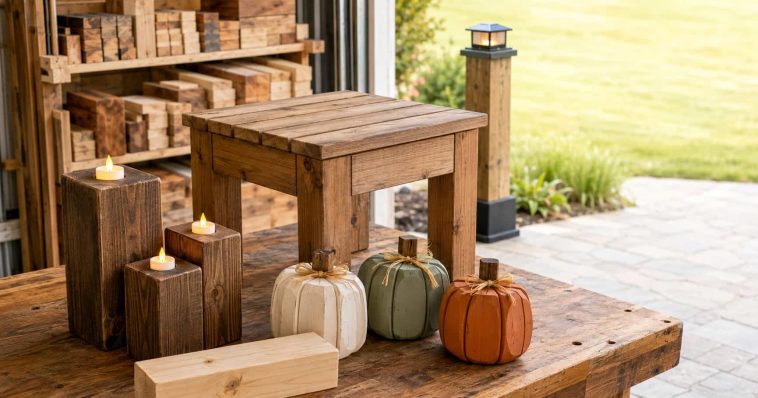
You do not need to make everything exclusively from 4×4 lumber. Several ideas use a 4×4 as the main block, post or leg and combine it with ordinary boards, plywood or small hardware.
A Quick Note About 4×4 Dimensions
Despite its name, a standard finished 4×4 post in North America normally measures approximately 3½ by 3½ inches. The 4×4 label refers to the lumber’s nominal size before drying and surfacing.
That difference matters when you calculate finished dimensions. For example, cutting a standard 4×4 post to a length of 3½ inches produces an approximately 3½-inch cube—not a true 4-inch cube.
Quick Project Comparison
| Project | Difficulty | Estimated time | Best for |
| LED candleholders | Easy | 30–60 minutes | Indoor décor |
| Chunky bookends | Easy | Under 1 hour | First project |
| Wooden pumpkins | Easy | 1–2 hours | Fall decorating |
| Ghost blocks | Easy | About 1 hour | Halloween décor |
| Jack-o’-lantern blocks | Easy | 1–2 hours | Reusable seasonal décor |
| Wooden snowmen | Easy | 1–2 hours | Christmas decorating |
| Gift-box blocks | Easy | About 1 hour | Porch or mantel décor |
| Wooden reindeer | Medium | 2–3 hours | Holiday display |
| Oversized wooden dice | Easy | 1–2 hours | Lawn games or décor |
| Perpetual block calendar | Medium | 2–3 hours | Gifts and desk décor |
| Photo holders | Easy | 30–60 minutes | Personalized gifts |
| House-number post | Medium | 2–3 hours | Curb appeal |
| Solar-light posts | Easy | 1–2 hours | Walkways and gardens |
| Garden-hose guides | Easy | About 1 hour | Flower-bed protection |
| Garden mushrooms | Medium | About 2 hours | Yard decorations |
| Bird-feeder post | Medium | 2–3 hours | Backyard projects |
| Planter pedestals | Easy | 1–2 hours | Container gardens |
| Tiered plant stand | Medium | 2–4 hours | Patio displays |
| Outdoor side table | Medium | 3–5 hours | Patio furniture |
| Chunky garden bench | Advanced | 4–6 hours | Outdoor seating |
| Patio plant stand | Medium | 2–3 hours | Small outdoor spaces |
| Entryway hook post | Easy | 1–2 hours | Home organization |
| Workshop tool stand | Easy | 1–2 hours | Workbench organization |
| Wooden house blocks | Easy | 1–2 hours | Indoor décor |
| Scrap-wood storage rack | Medium | 3–4 hours | Workshop storage |
Why 4×4 Lumber Works So Well for Small Projects
A 4×4 has several useful qualities that thinner boards do not:
- Its thick cross-section allows short blocks to stand without additional support.
- Its chunky shape suits rustic, farmhouse and seasonal decorations.
- It can serve as a strong post or furniture component when used in an appropriate, verified design.
- One leftover post can be divided into several small projects.
- Offcuts are often already available after fences, decks, sheds and other outdoor builds.
The visible grain and minor imperfections can become part of the design. Careful sanding and a thoughtful finish are often enough to make an ordinary construction offcut look intentional.
Before Using Leftover 4×4 Lumber
Inspect Every Piece
Look over the wood before planning a project. Avoid pieces with:
- Rot or soft, spongy areas
- Deep splits that compromise the block
- Severe twisting or warping
- Protruding nails, screws or staples
- Chemical spills or unidentified stains
- Signs of contamination or an unknown previous use
Old fasteners can be difficult to see. Inspect reclaimed posts carefully before any cutting or drilling takes place.
Know Whether the Wood Is Treated
Pressure-treated lumber is manufactured for applications where protection from decay and insects is needed. Reserve it for suitable outdoor projects and follow the product label and local guidance.
Untreated lumber is the simpler choice for indoor decorations, toys and objects that will be handled regularly. Never use treated or unidentified reclaimed lumber for cutting boards, countertops, serving pieces or anything intended to contact food or animal feed.
Never burn pressure-treated lumber. Reuse or dispose of it according to local waste regulations.
Basic Tools and Supplies
The exact requirements depend on the project, but common supplies include:
- Measuring tape and square
- A saw appropriate for the material and cut
- Drill and suitable bits
- Sander or sandpaper
- Wood glue
- Screws rated for the intended environment
- Paint, stain or clear finish
- Safety glasses, hearing protection and suitable dust protection
Work on a stable surface, secure the material appropriately and follow the instructions supplied with every tool and finishing product. Inexperienced or younger builders should work with a knowledgeable adult, particularly whenever powered cutting tools are involved.
1. Rustic 4×4 LED Candleholders
Difficulty: Easy
Estimated time: 30–60 minutes
Best for: Indoor décor
Suggested size: Approximately 4–10 inches tall
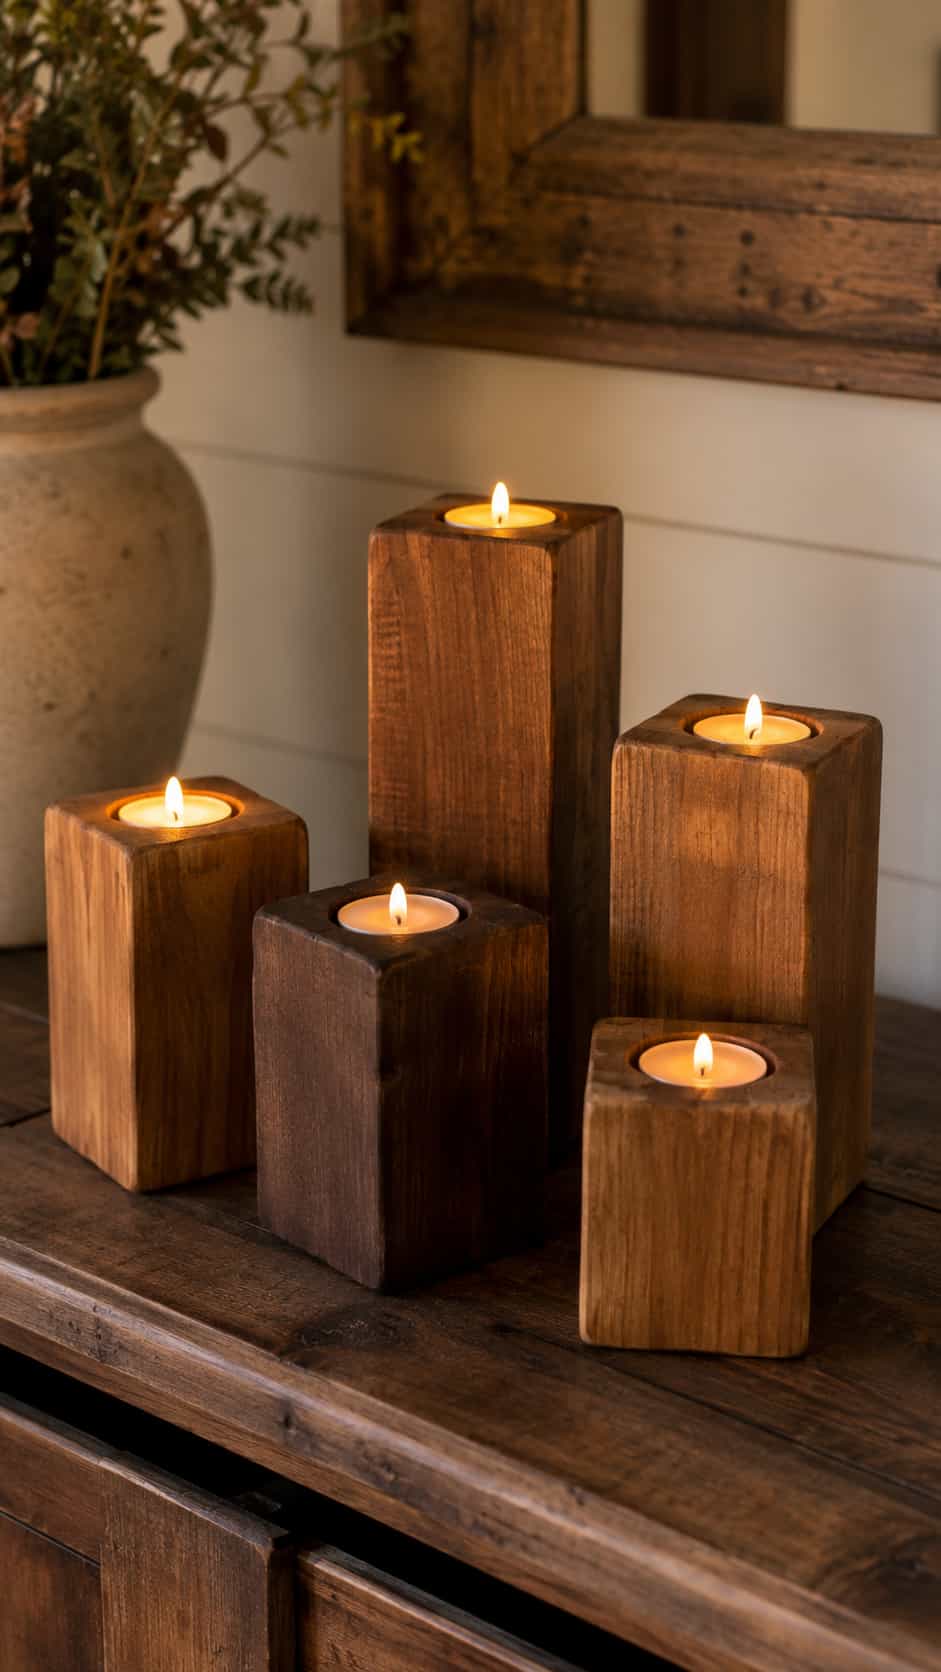
Turn several short blocks into a grouped display for a mantel, shelf or table. Varying the heights makes the collection more interesting than a row of identical pieces.
Sand the blocks, soften the sharp edges and add a shallow recess sized for a battery-operated LED tea light. Finish them with stain, paint or a clear coat. LED lights provide the warm appearance of candles without placing an open flame in a wooden holder.
Customization idea: Use three coordinating stain colors or paint the lower half of each block for a modern two-tone effect.
2. Chunky Wooden Bookends
Difficulty: Easy
Estimated time: Under 1 hour
Best for: Beginners
Suggested size: Approximately 5–6 inches long, with a 3½-by-3½-inch cross-section
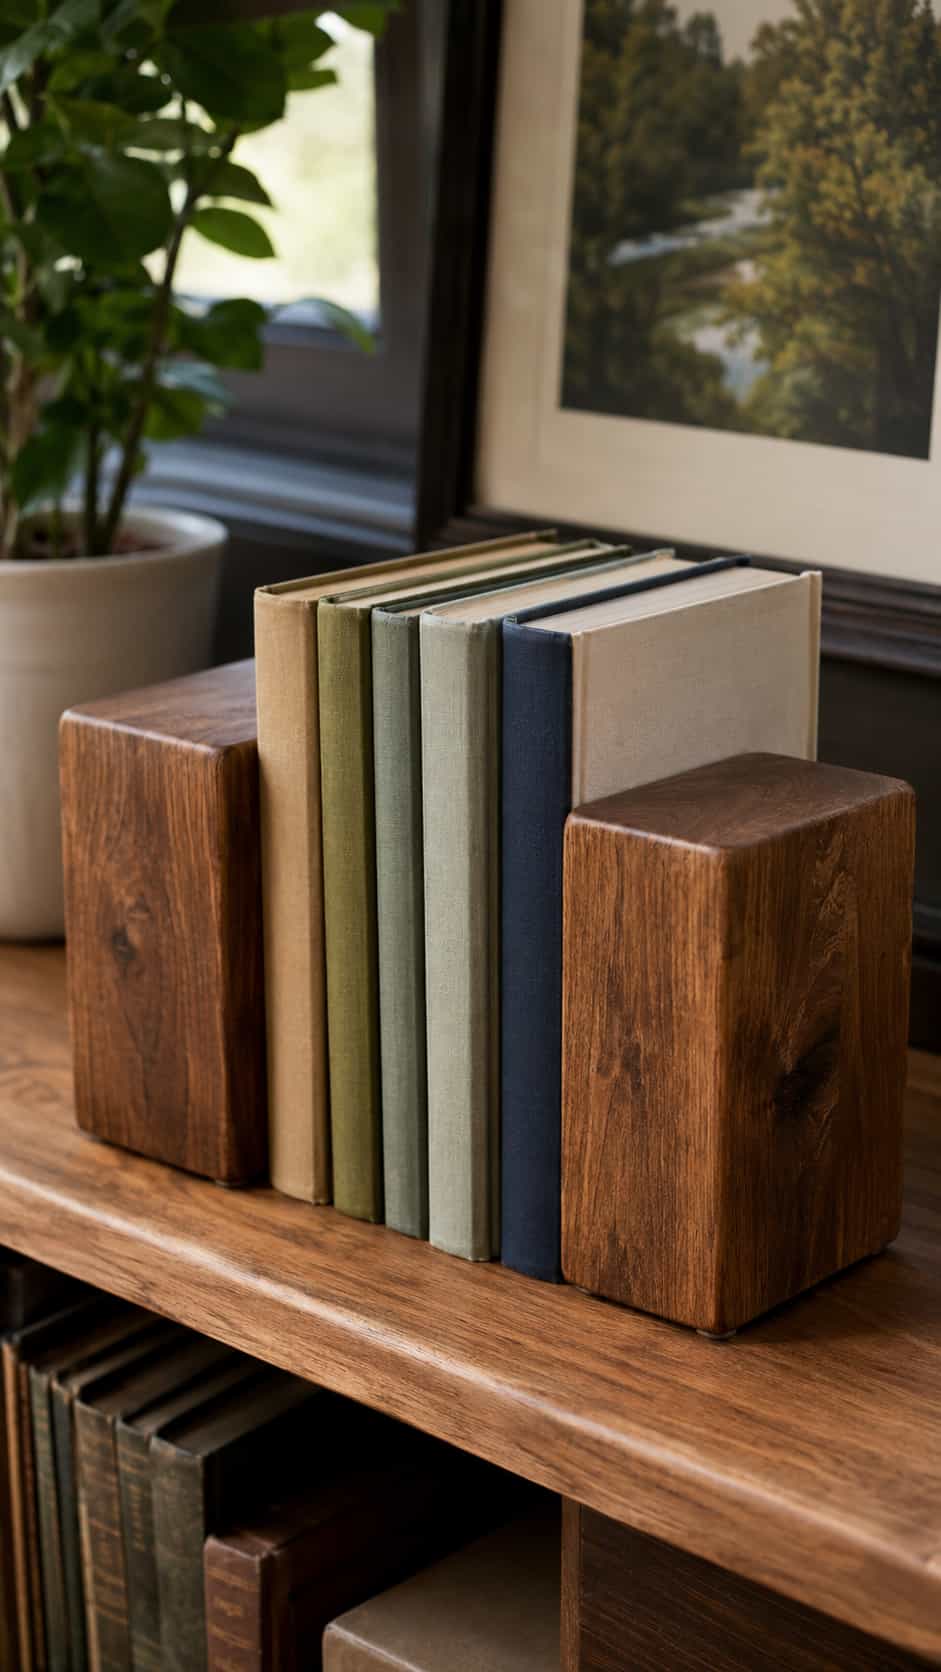
Two matching blocks make simple, substantial bookends. The project is forgiving because the basic form requires little more than matching lengths, smooth surfaces and a finish.
Leave the grain visible for a natural look, use a dark stain for a traditional office or paint each block to suit a child’s room. Felt pads underneath can protect the shelf and help prevent sliding.
Customization idea: Add initials, simple geometric patterns or one half of a short phrase to each bookend.
For a full step-by-step version of this project, check out our wooden book holder guide.
3. 4×4 Wooden Pumpkins
Difficulty: Easy
Estimated time: 1–2 hours
Best for: Fall decorating
Suggested size: Approximately 4–8 inches tall
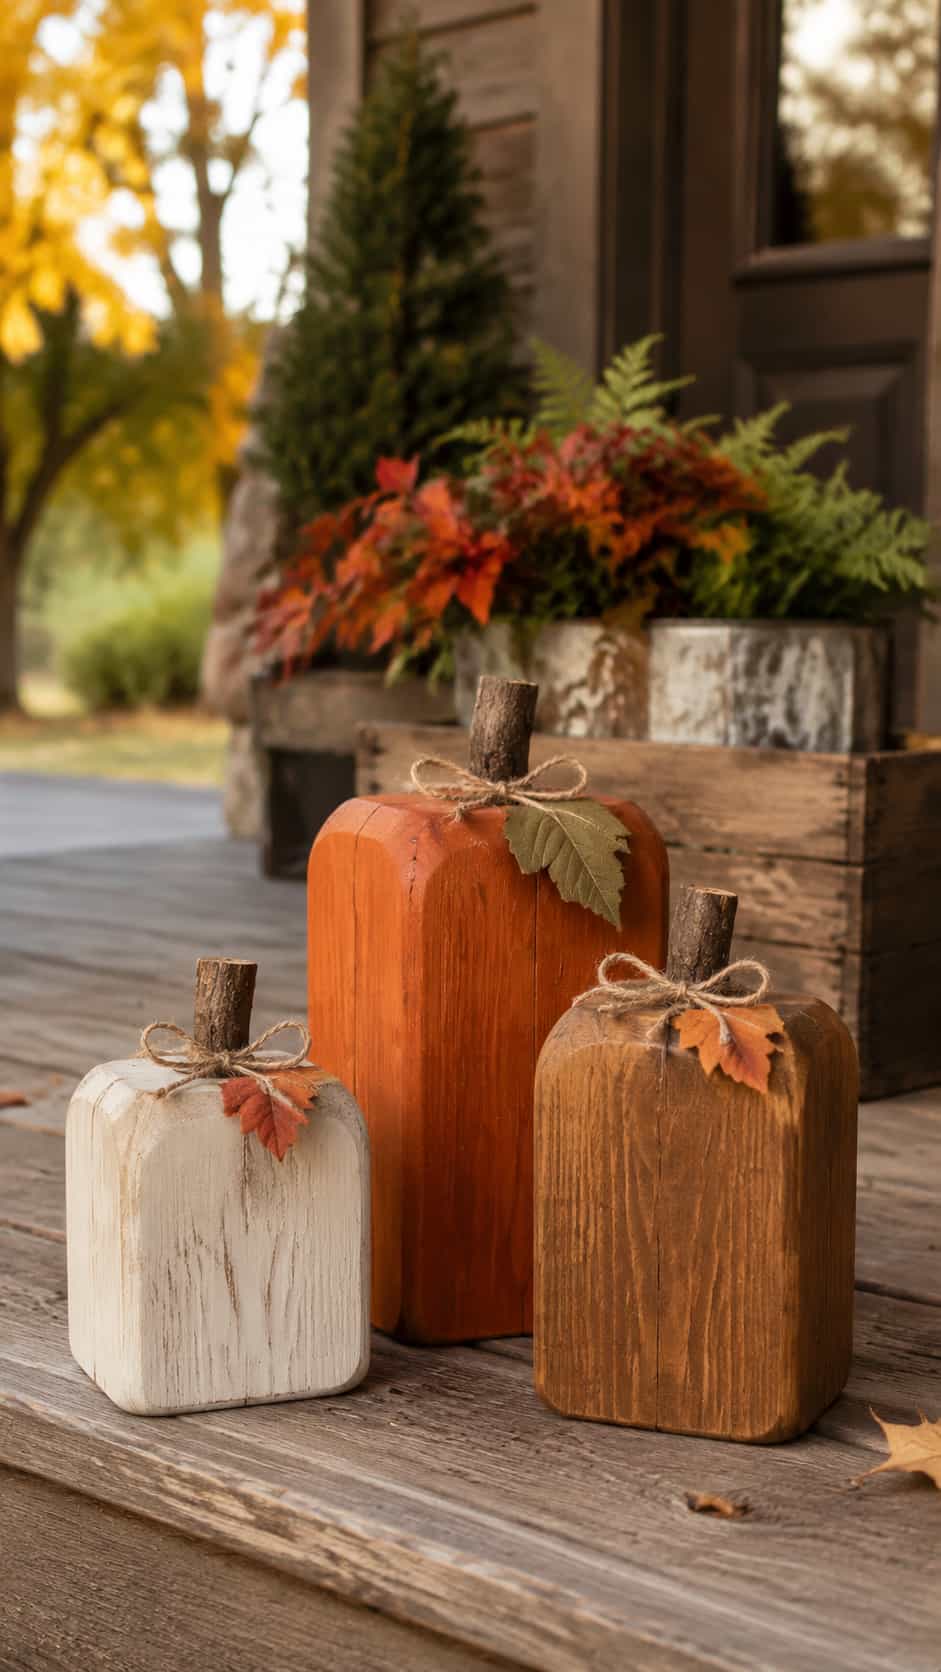
Wooden pumpkins are an excellent use for uneven offcuts because a group looks better when every piece has a slightly different height. Sand the blocks and soften the top edges before applying orange, cream or muted green paint.
A small untreated twig or dowel can serve as the stem. Twine, fabric leaves or a handwritten word such as “welcome” can complete the design.
Customization idea: Skip orange paint and combine a natural wood finish with a plaid fabric leaf for a more neutral farmhouse style.
4. Friendly Wooden Ghost Blocks
Difficulty: Easy
Estimated time: About 1 hour
Best for: Halloween décor
Suggested size: Approximately 6–12 inches tall
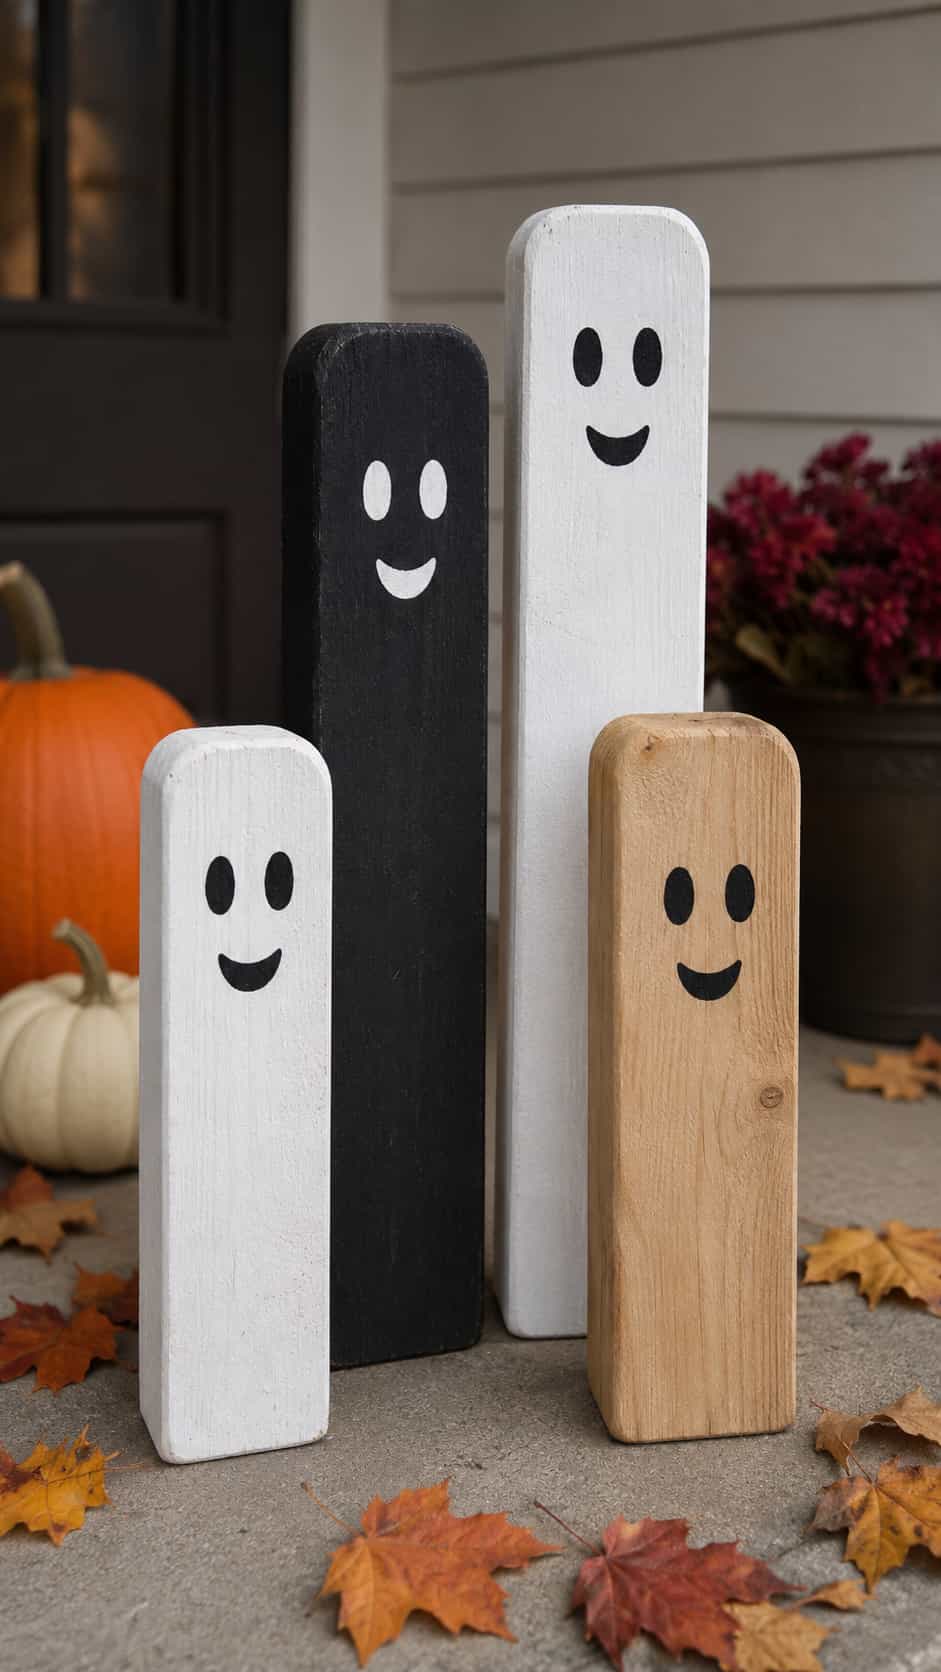
Paint several upright blocks white and add simple black faces to create a small group of friendly ghosts. Different heights make the display feel like a coordinated set.
Keep the shapes simple or soften the top corners before painting. For an outdoor display, use products rated for exterior exposure and place the finished blocks where they will remain stable.
Customization idea: Use black, white and natural wood across the group instead of painting every ghost identically.
5. Wooden Jack-o’-Lantern Blocks
Difficulty: Easy
Estimated time: 1–2 hours
Best for: Reusable Halloween decorations
Suggested size: Approximately 5–8 inches tall
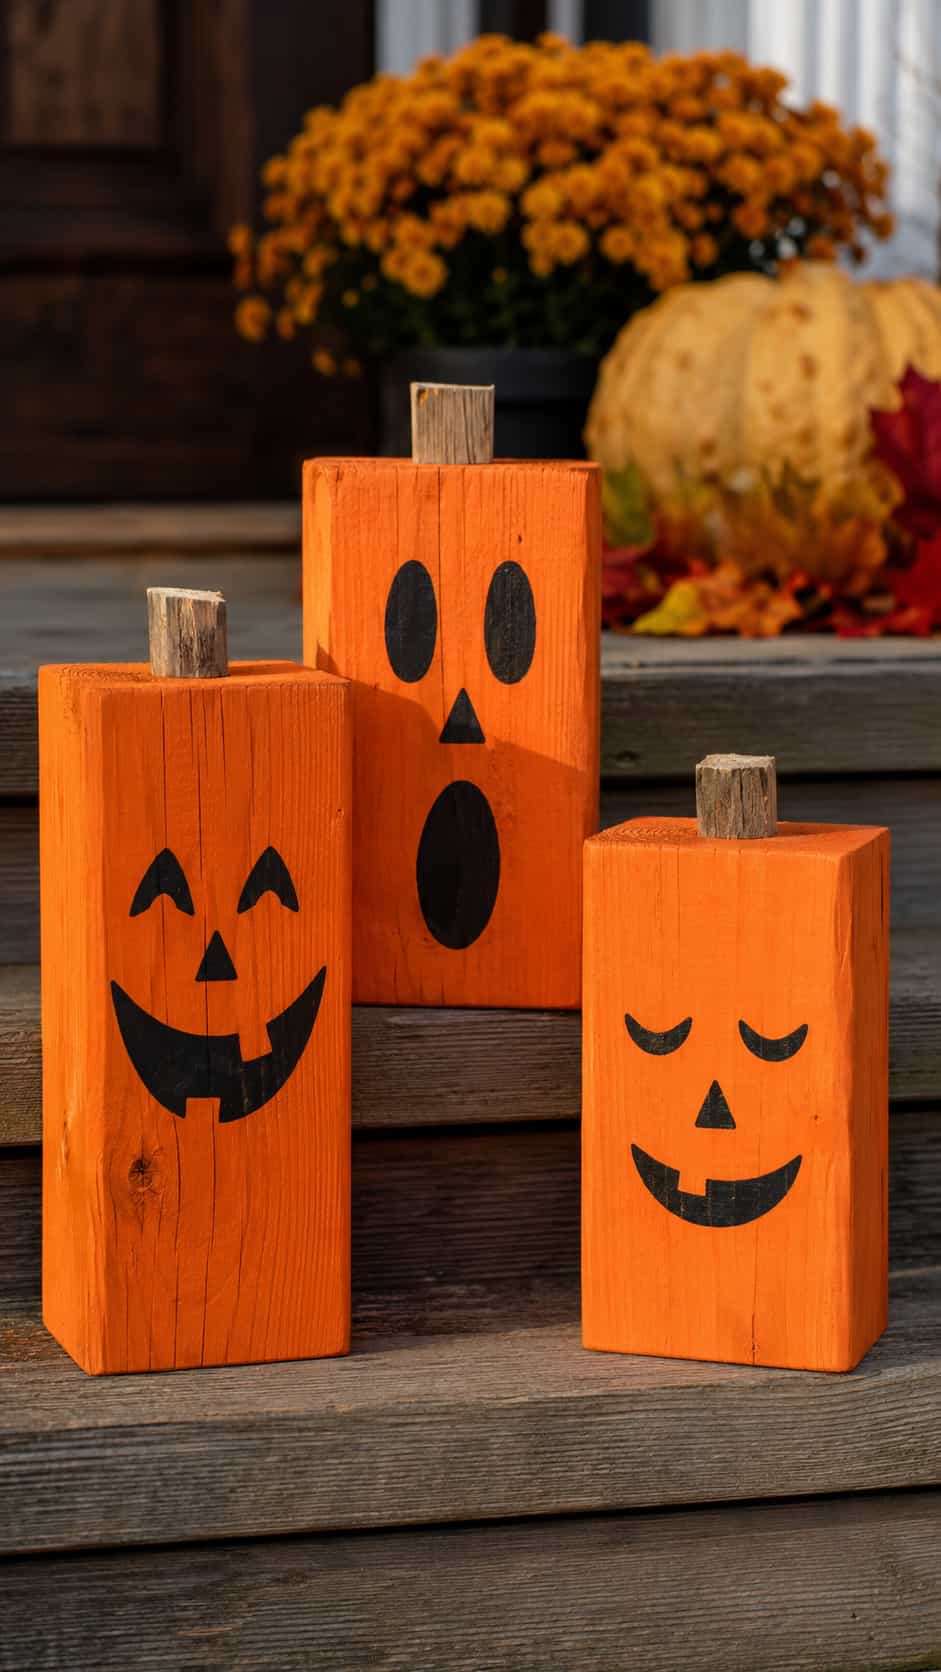
A painted wooden jack-o’-lantern can return every October without the mess of a real pumpkin. Apply orange paint, add a face with black paint and finish the top with a small wooden stem.
Make several expressions—happy, surprised and sleepy—to turn individual blocks into a complete display.
Customization idea: Paint one face on each side so the expression can be changed simply by rotating the block.
6. Rustic Wooden Snowmen
Difficulty: Easy
Estimated time: 1–2 hours
Best for: Winter and Christmas décor
Suggested size: Approximately 8–14 inches tall
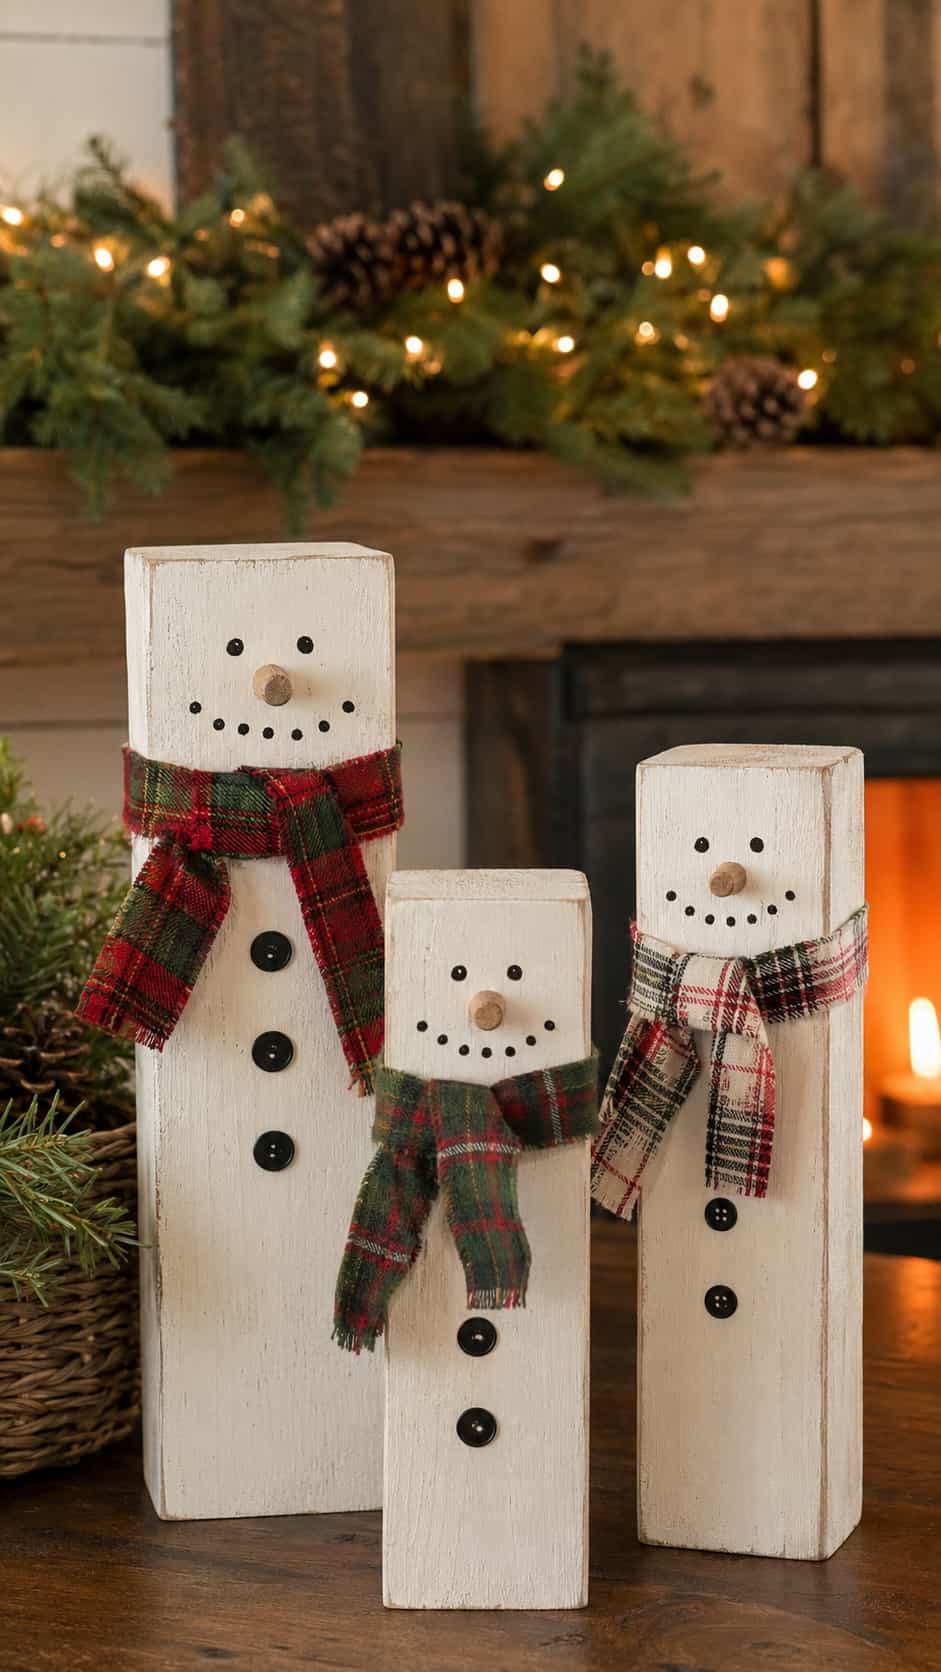
One tall block can become a simple snowman, or several securely joined blocks can create a more dimensional figure. White paint, a small face and a few button details are enough to establish the design.
Use fabric scraps for a scarf and a small wooden piece for the nose. Display lightweight seasonal decorations indoors or on a protected porch.
Customization idea: Make a snowman family using different block heights.
More seasonal ideas here: scrap wood Christmas projects.
7. 4×4 Christmas Gift-Box Decorations

Difficulty: Easy
Estimated time: About 1 hour
Best for: Mantel or covered-porch décor
Suggested size: Approximately 3½-inch cubes or taller rectangular blocks
Cut standard 4×4 lumber into approximately 3½-inch lengths to create near-cubes, then paint them to resemble wrapped presents. Painted ribbon lines are more durable outdoors than real fabric ribbon, while a removable bow works well for an indoor display.
Create a set using three coordinating colors and stack the pieces only where they cannot topple.
Customization idea: Add family initials or small gift-tag designs to the front faces.
8. Wooden Reindeer
Difficulty: Medium
Estimated time: 2–3 hours
Best for: Holiday displays
Suggested size: Body approximately 10–12 inches long
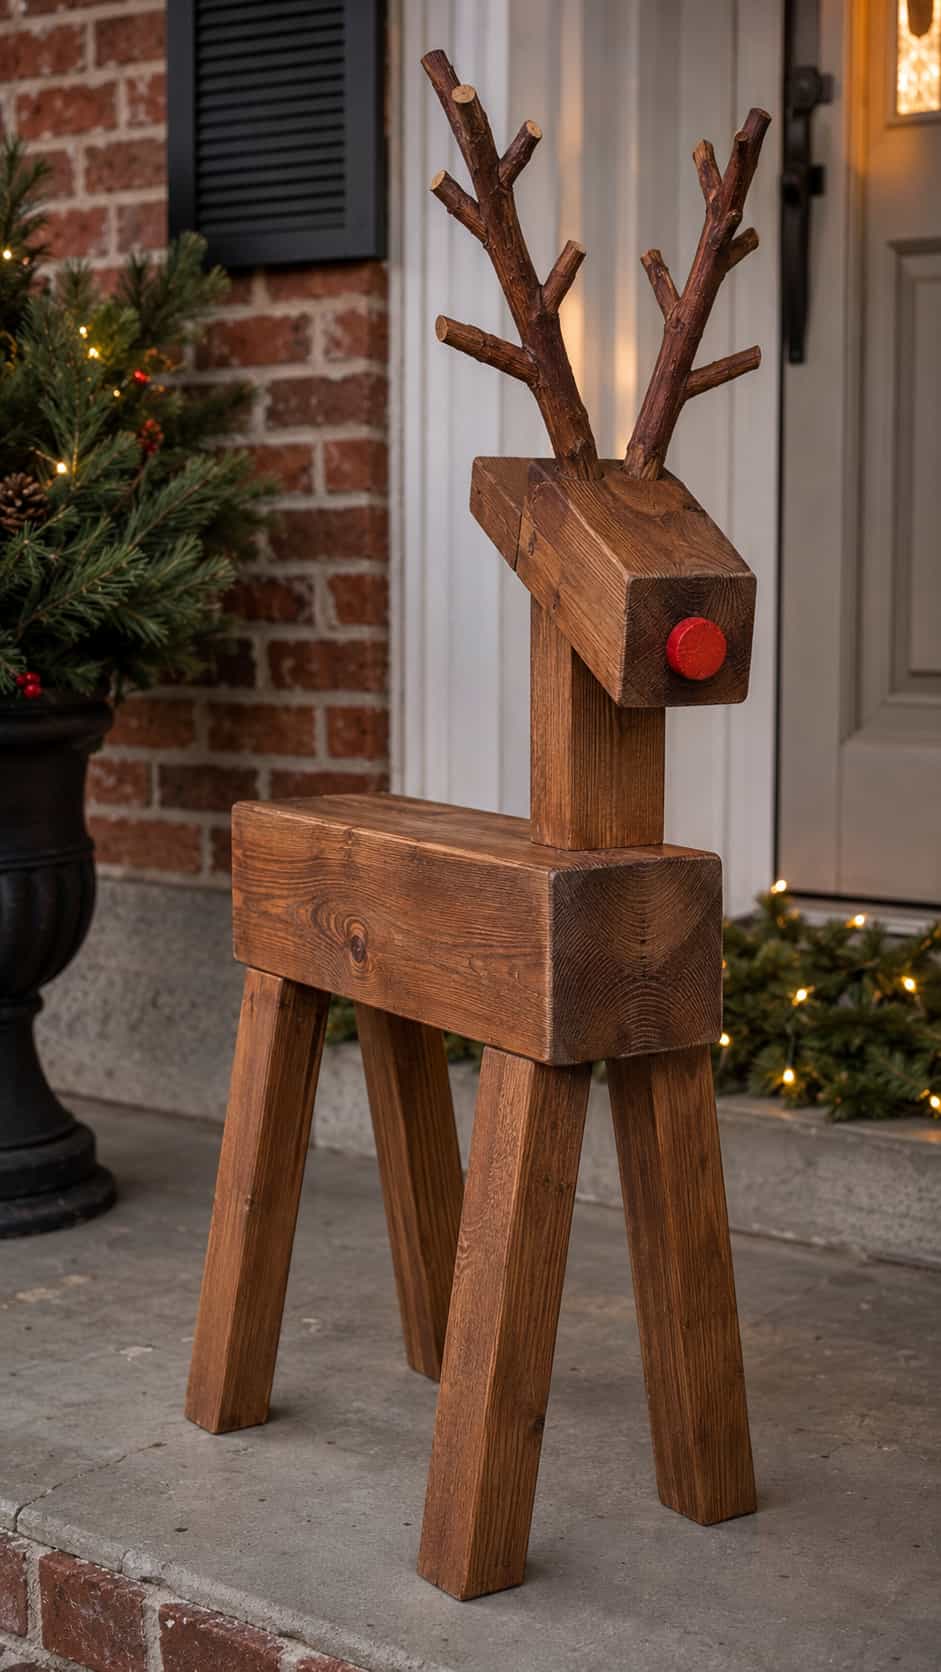
Use a 4×4 section as the reindeer’s body and combine it with smaller untreated scraps for the head, legs and antlers. A simple, stylized design will generally look more cohesive than trying to reproduce realistic anatomy.
Dry-fit the pieces before assembly so the figure stands steadily. Smooth every exposed edge and choose paint or stain based on where the decoration will be displayed.
Customization idea: Add a red painted nose to one figure and create a small group in varying sizes.
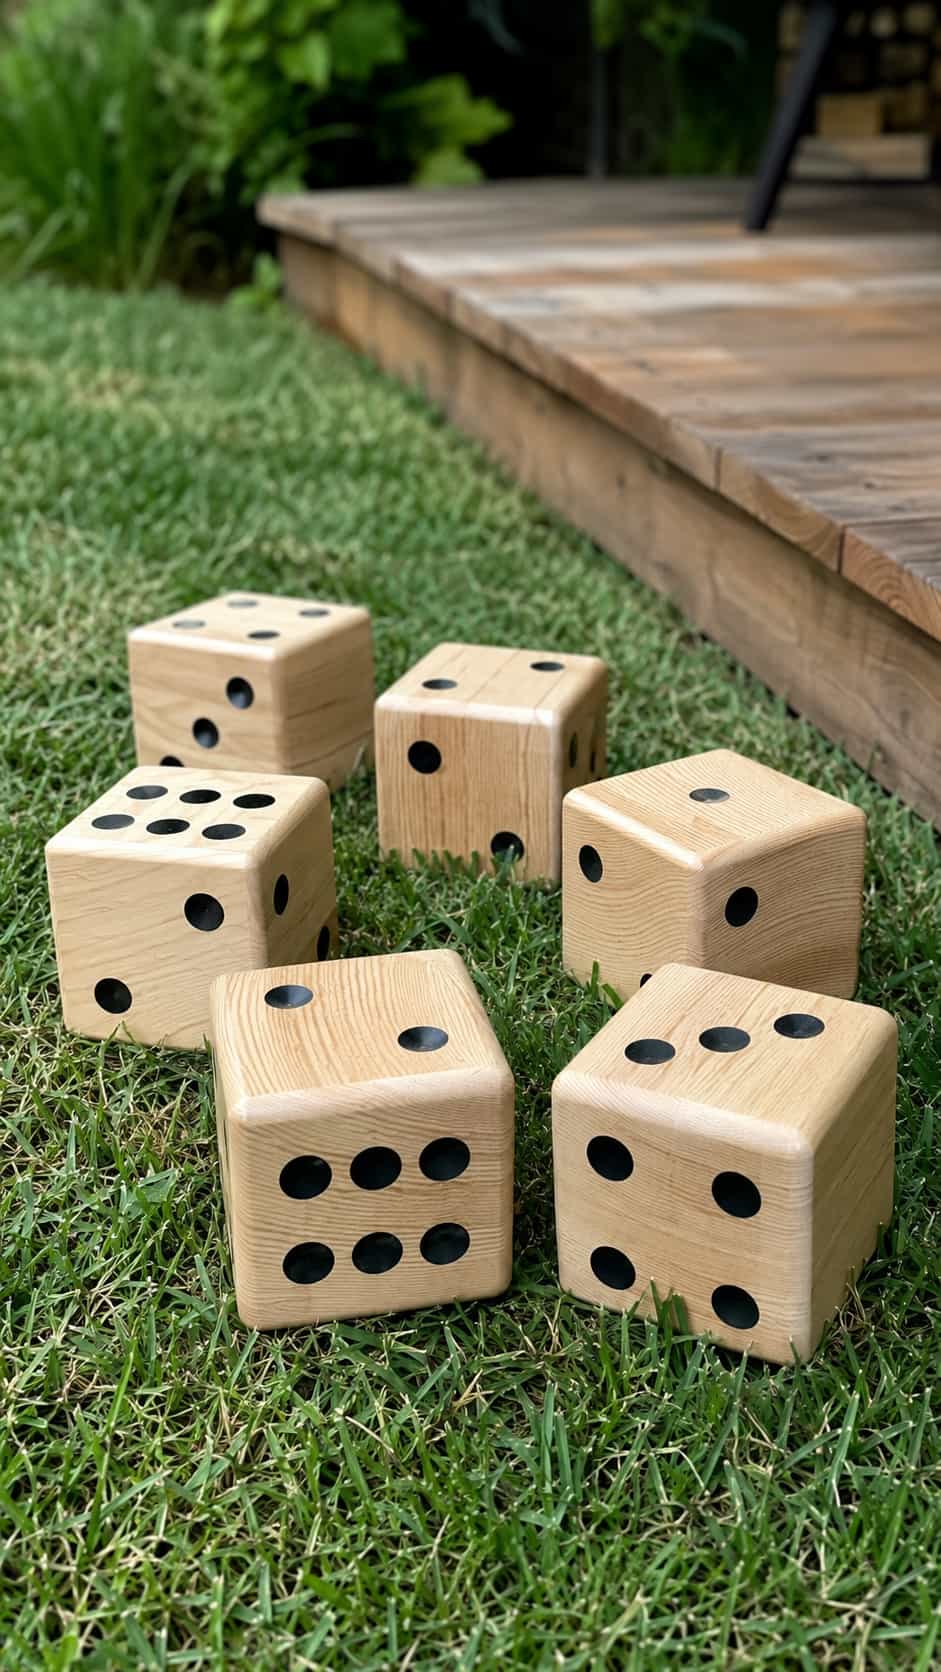
9. Oversized Wooden Dice
Difficulty: Easy
Estimated time: 1–2 hours
Best for: Lawn games or game-room décor
Suggested size: Approximately 3½-inch cubes
Because a finished 4×4 is approximately 3½ inches square, cutting it into 3½-inch lengths produces convenient oversized dice blanks. Make five or six matching cubes for yard games or create two as shelf decorations.
Smooth the faces and soften the edges before adding the dots with paint. A suitable clear exterior finish will help pieces intended for outdoor use, although they should still be stored out of prolonged rain.
Customization idea: Replace traditional dots with small painted symbols for a personalized family game.
10. Perpetual Block Calendar

Difficulty: Medium
Estimated time: 2–3 hours
Best for: Gifts and desk décor
Suggested size: Two approximately 3½-inch date blocks
Instead of trying to turn a 4×4 into tiny 2-inch cubes, keep the post’s natural dimensions and make a chunky calendar. Two approximately 3½-inch blocks can carry the date numbers, while a separate rectangular block displays the month.
Plan the number arrangement before painting or applying vinyl so the two cubes can display every date from 01 through 31. Place them on a small tray or shelf rather than cutting the 4×4 into narrower strips.
Customization idea: Use a dry-erase month plaque behind the two number blocks.
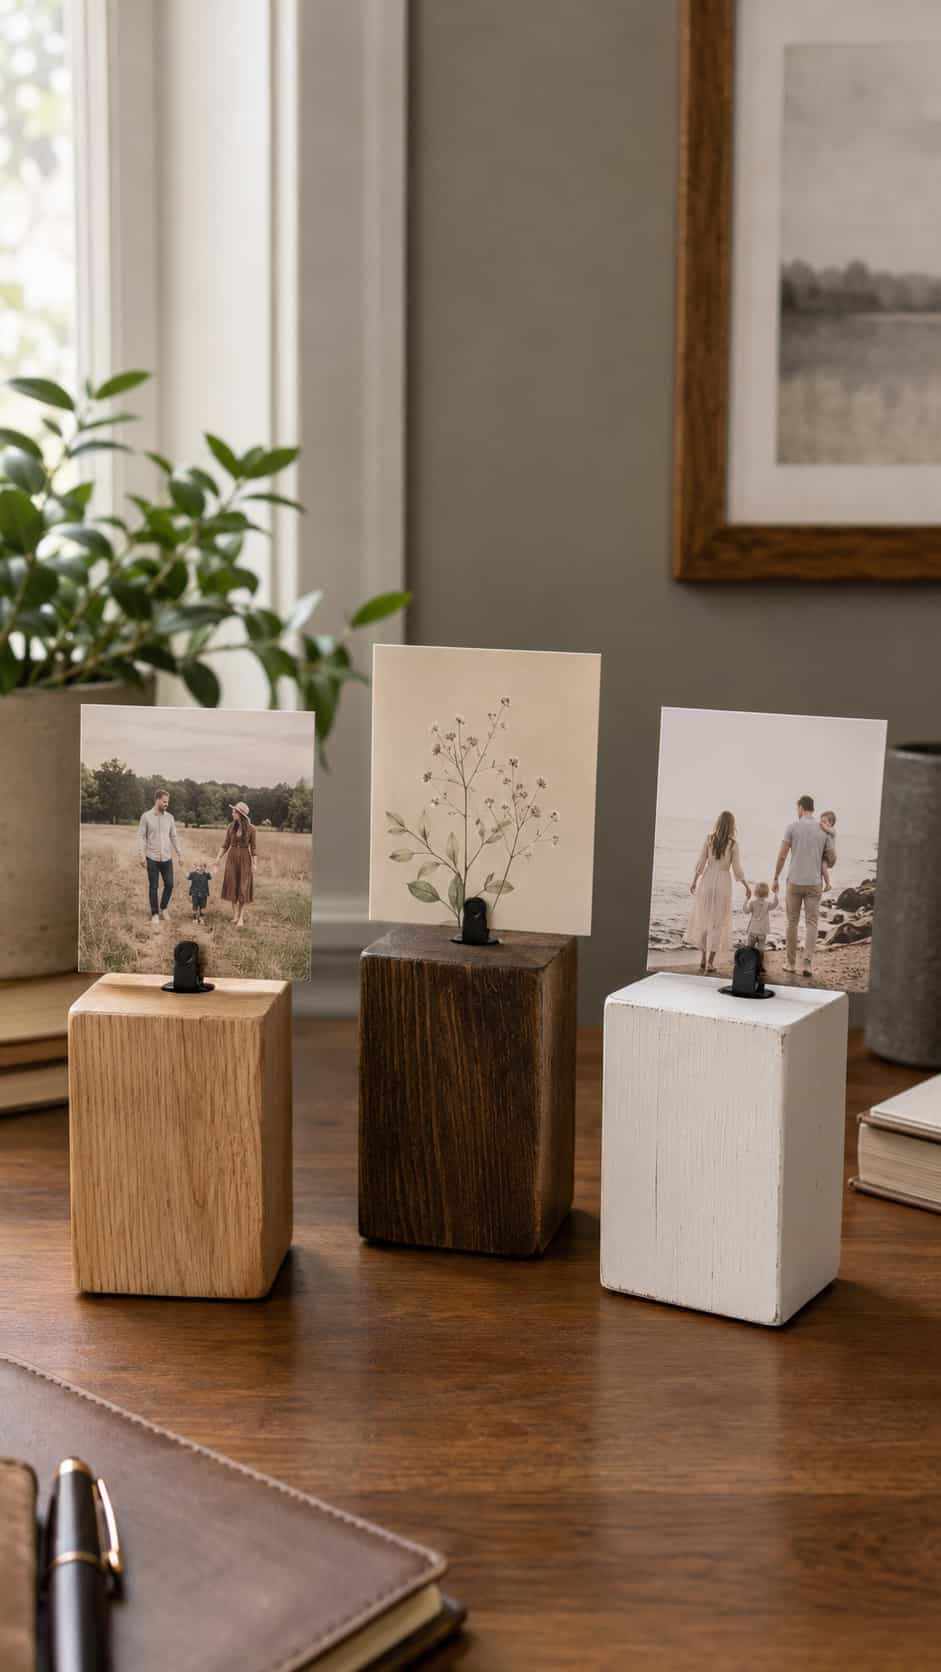
11. Rustic Photo Holders
Difficulty: Easy
Estimated time: 30–60 minutes
Best for: Personalized gifts
Suggested size: Approximately 4–6 inches tall
A small clip attached to a finished block creates a sturdy photo or note holder. These are easy to personalize for weddings, birthdays, teachers or family gifts.
Apply the decorative finish before installing the clip so the hardware remains clean. Felt pads underneath can protect desks and shelves.
Customization idea: Add a name, date or short message to the front face.
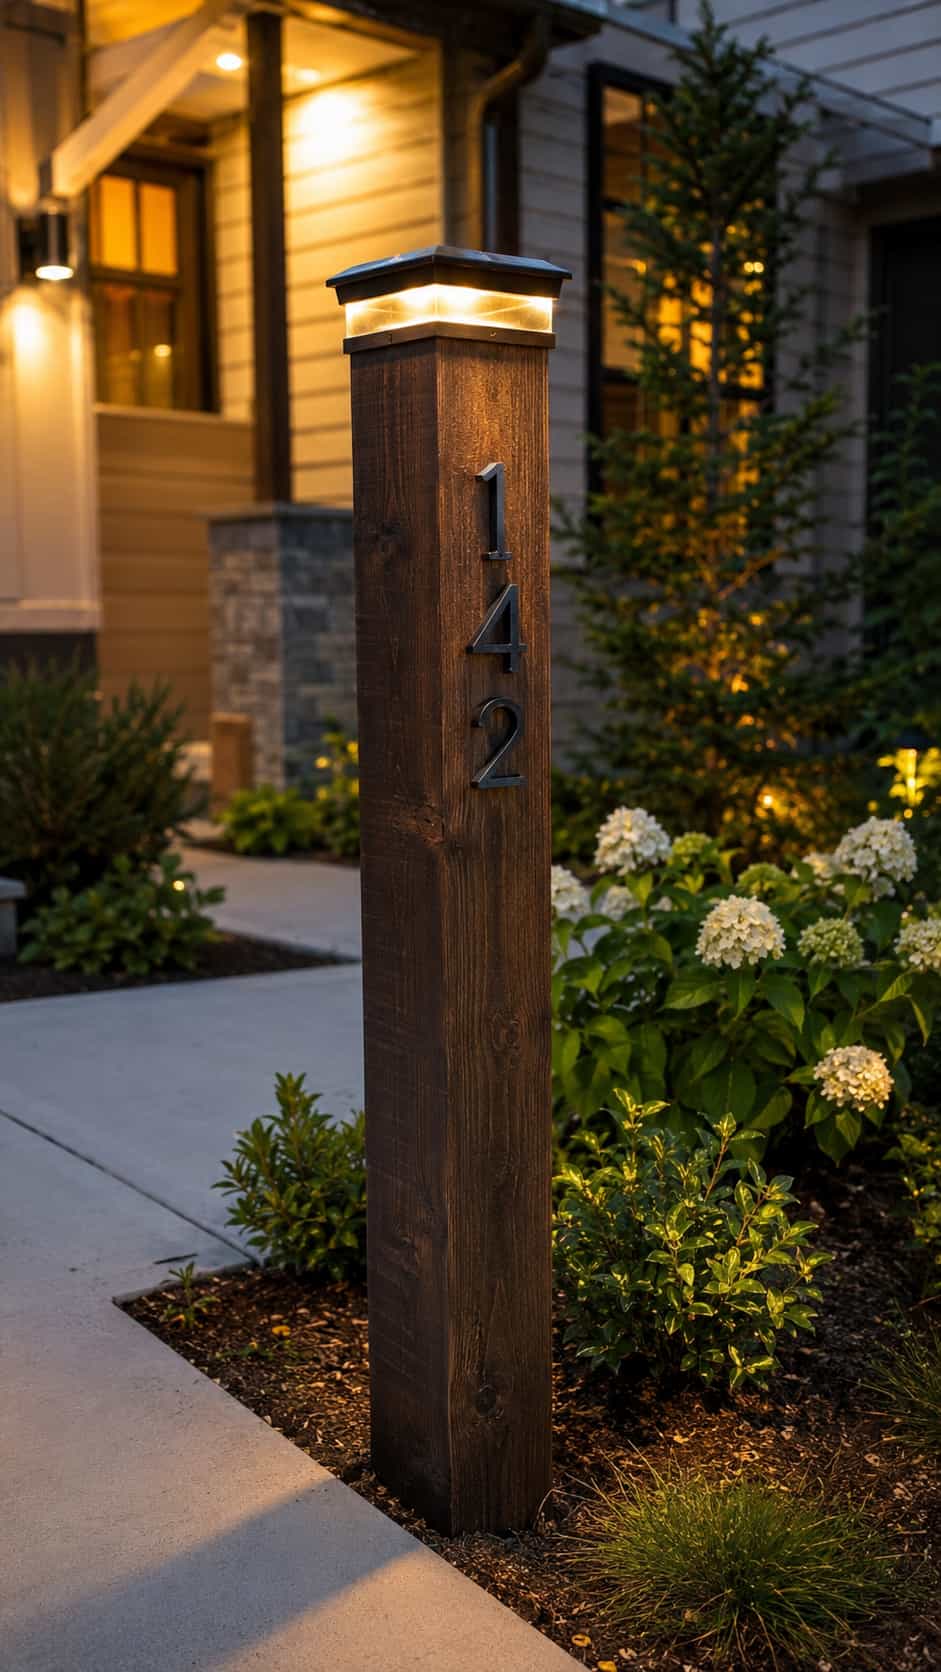
12. House-Number Post
Difficulty: Medium
Estimated time: 2–3 hours, excluding installation and curing
Best for: Curb appeal
Suggested size: Adapt to visibility and local requirements
A finished 4×4 can become a simple address marker near a driveway, walkway or front garden. Choose numbers that are easy to read from the appropriate viewing distance and use materials rated for outdoor exposure.
Before installation, confirm the location will not obstruct a sightline or interfere with underground services. Use an installation approach appropriate for the site and local conditions.
Customization idea: Add an outdoor-rated solar post cap for nighttime visibility.
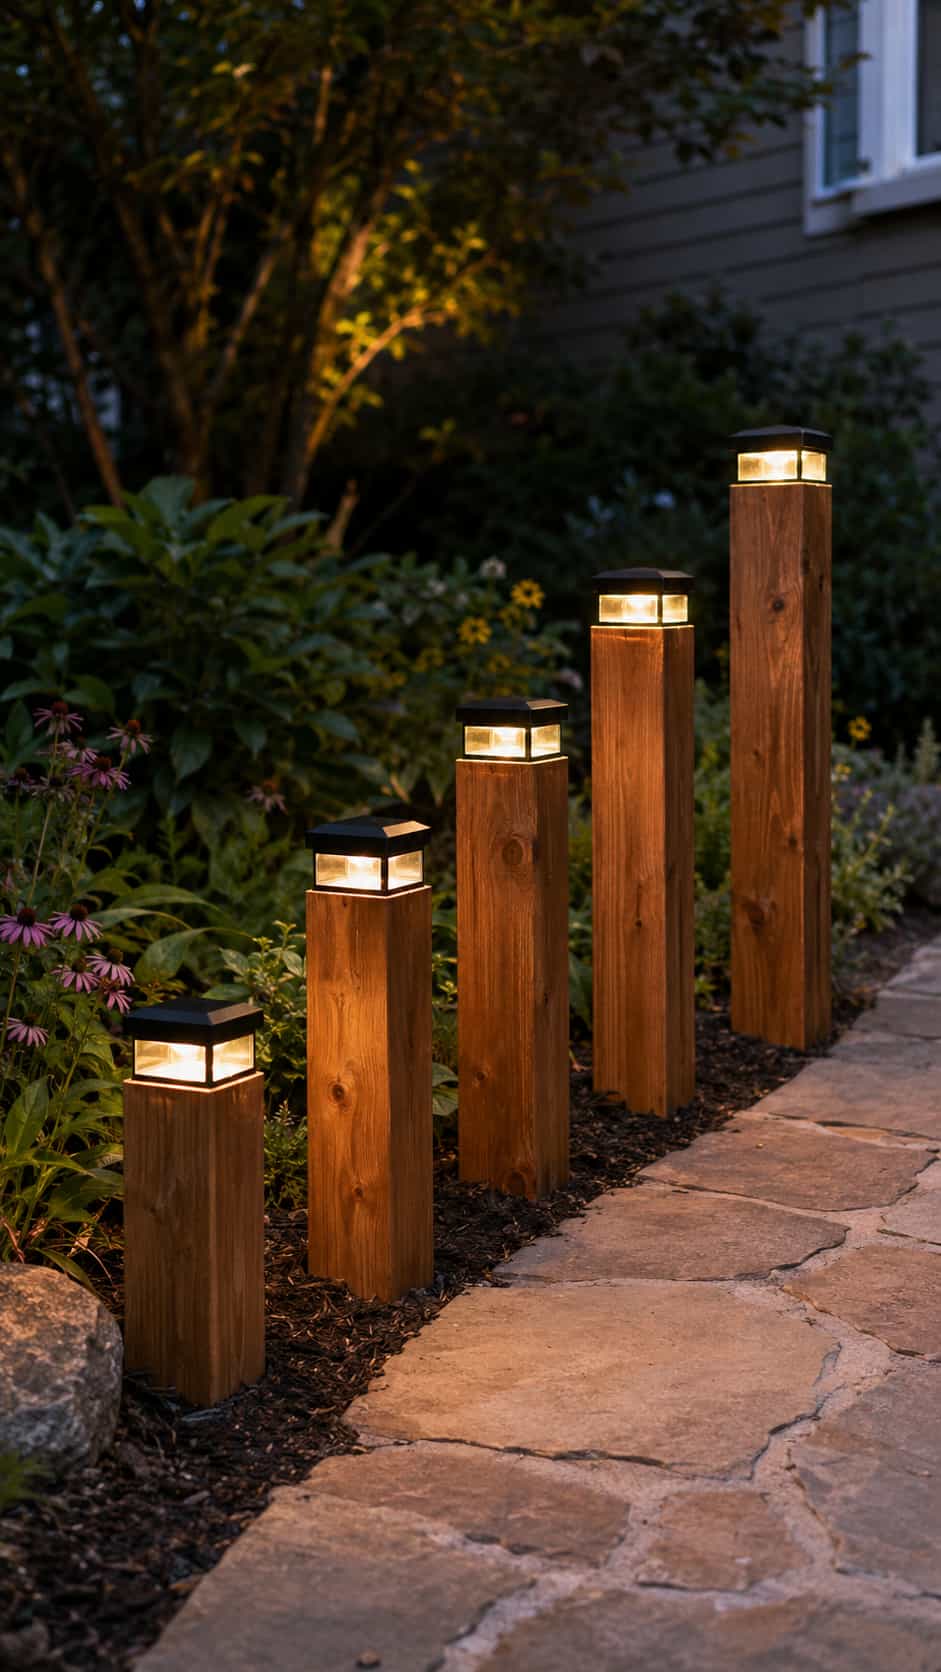
13. Solar-Light Garden Posts
Difficulty: Easy
Estimated time: 1–2 hours, excluding finish curing
Best for: Garden borders and walkways
Suggested size: Approximately 12–24 inches tall
Posts of different heights topped with outdoor-rated solar lights can define a walkway or garden bed without electrical wiring. Select the lights first so the post tops can be prepared for the actual mounting system.
Seal every face and exposed end grain, then place the finished posts where they are stable and do not create a trip hazard.
Customization idea: Use two or three coordinated post heights rather than making every light identical.
14. Garden-Hose Guide Posts
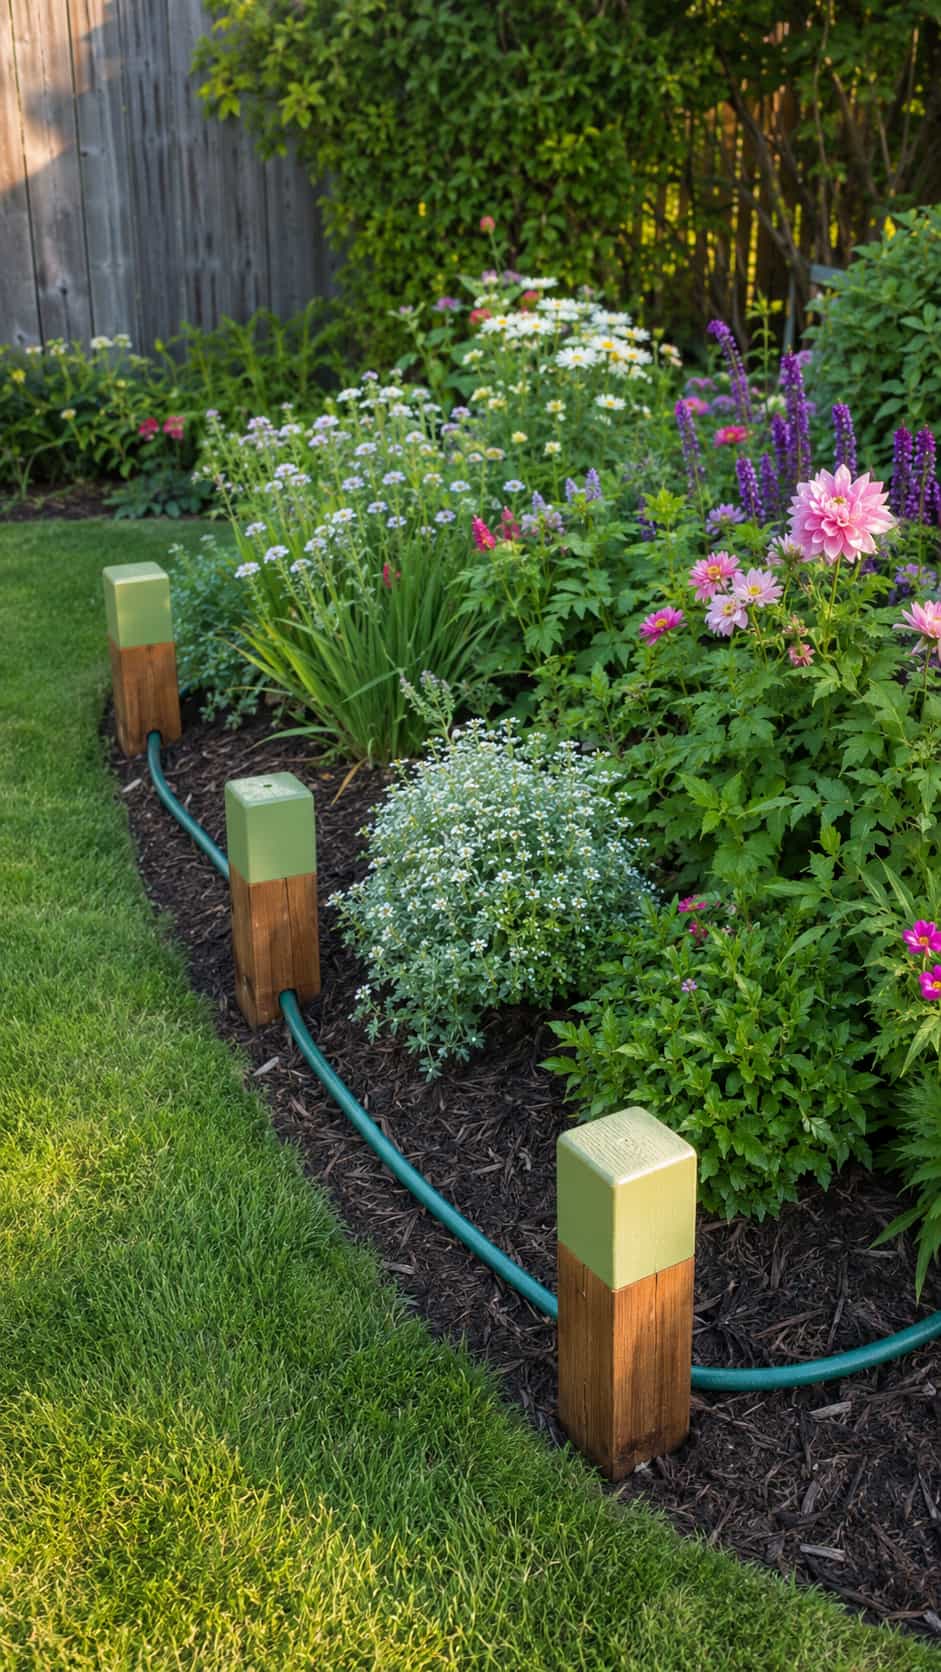
Difficulty: Easy
Estimated time: About 1 hour, excluding finish curing
Best for: Protecting flower beds
Suggested size: Approximately 8–12 inches above ground
Small posts placed at the corners of a garden bed can help guide a hose around plants instead of dragging it across them. Smooth, rounded tops prevent the hose from catching on sharp corners.
Make the posts visible enough to avoid becoming a mowing or walking hazard. Select lumber and finish suitable for outdoor or ground-contact conditions.
Customization idea: Paint the top section in a bright garden color for visibility.
15. Decorative Garden Mushrooms
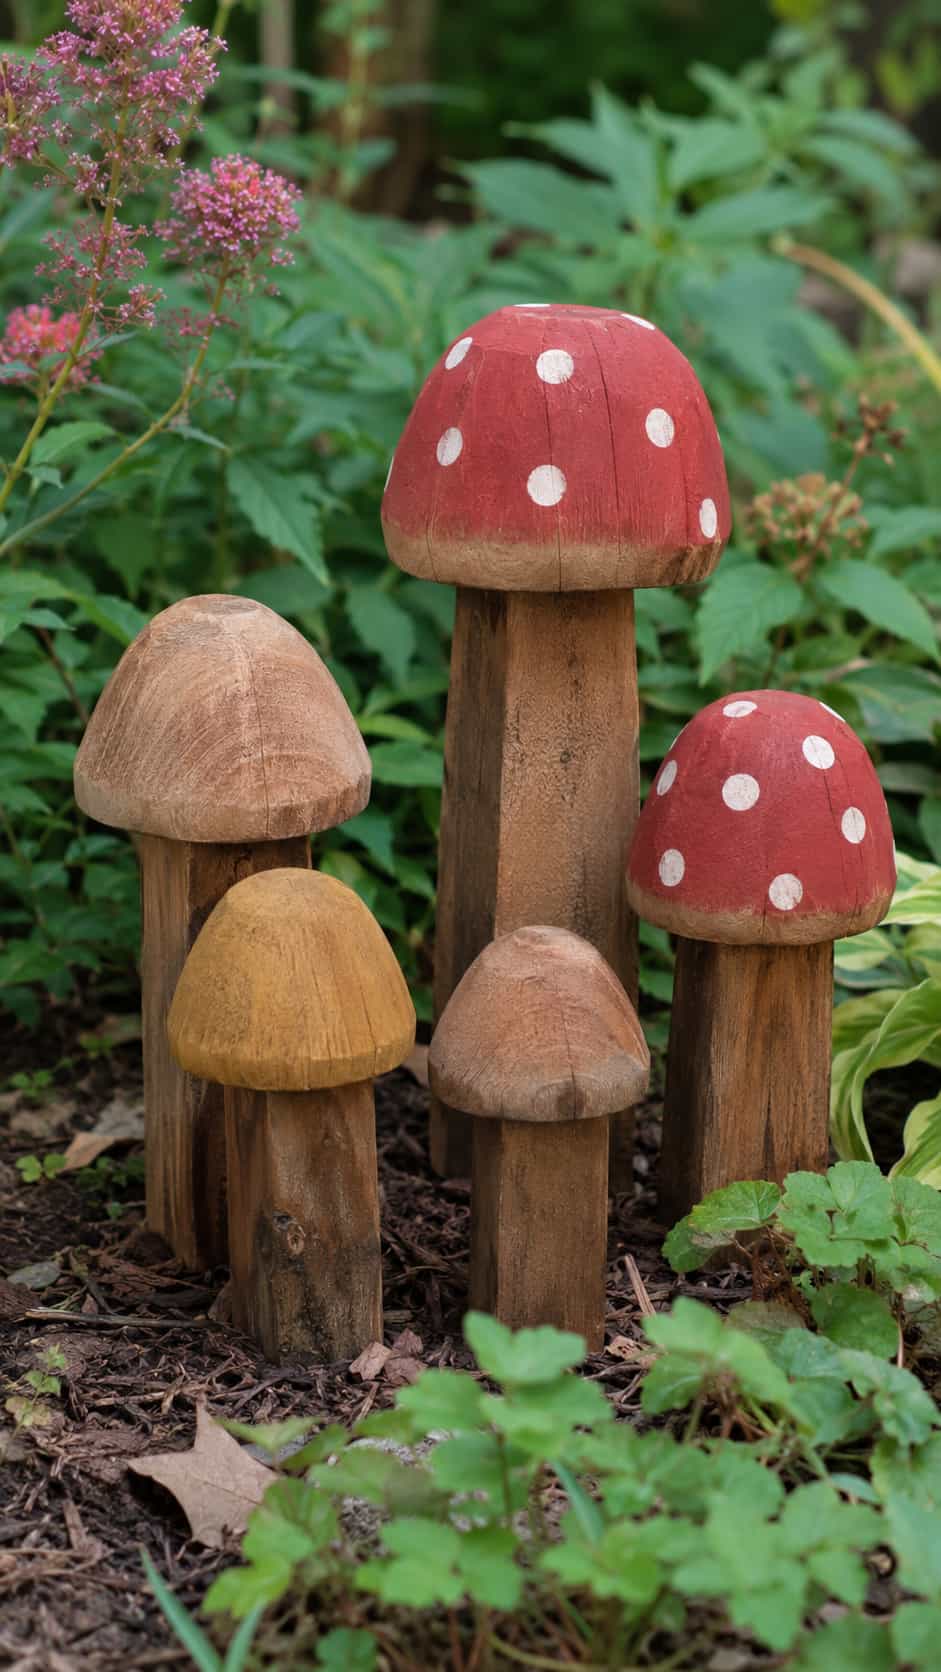
Difficulty: Medium
Estimated time: About 2 hours
Best for: Whimsical garden accents
Suggested size: Approximately 4–10 inches tall
Use a short block for the stem and pair it with a separate rounded wooden top. The finished shape can be painted in classic red and white or in earthy colors that blend into the garden.
Garden decorations should be stable and placed away from paths where someone could trip over them.
Customization idea: Create a group of three with different heights, cap shapes and colors.
16. 4×4 Bird-Feeder Post
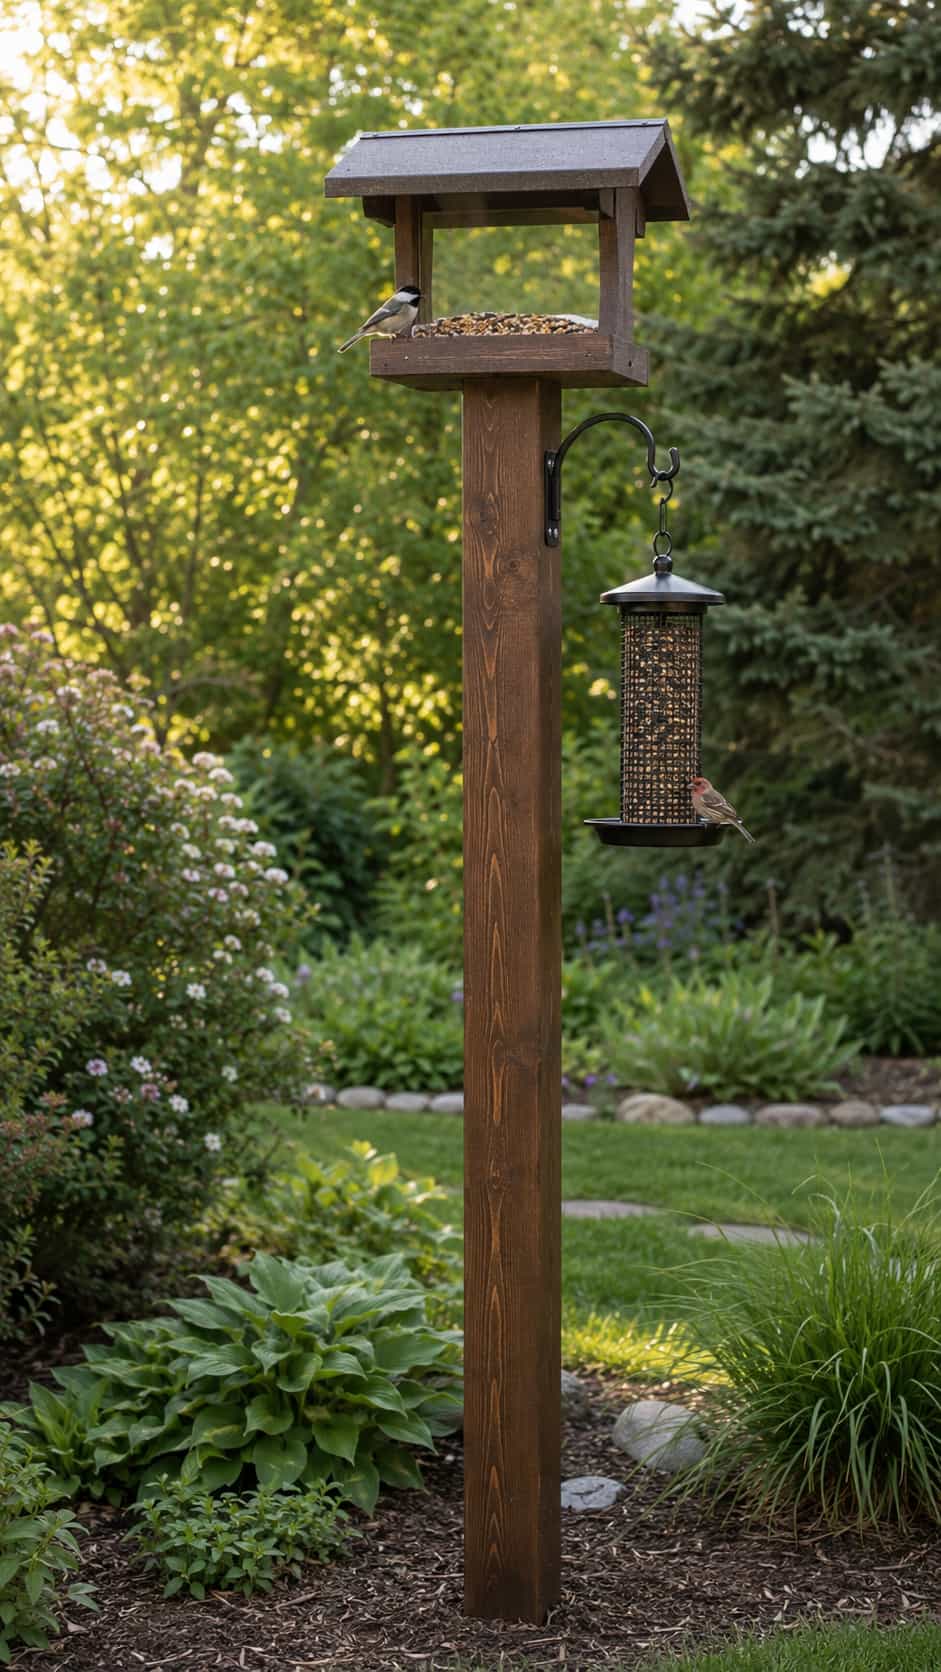
Difficulty: Medium
Estimated time: 2–3 hours, excluding installation
Best for: Backyard birdwatching
Suggested size: Based on the feeder and site
A properly installed 4×4 can serve as the main support for a purchased or separately built bird feeder. Finish the post for outdoor exposure and choose hanging or mounting hardware designed for the feeder’s weight.
Position the station where it can be maintained safely and cleaned regularly. Check local guidance about appropriate feeder placement and wildlife in your area.
Customization idea: Add a second approved hanger for another lightweight feeder.
Looking for a full build? Check out our birdhouse ideas article.
17. Rustic Planter Pedestals
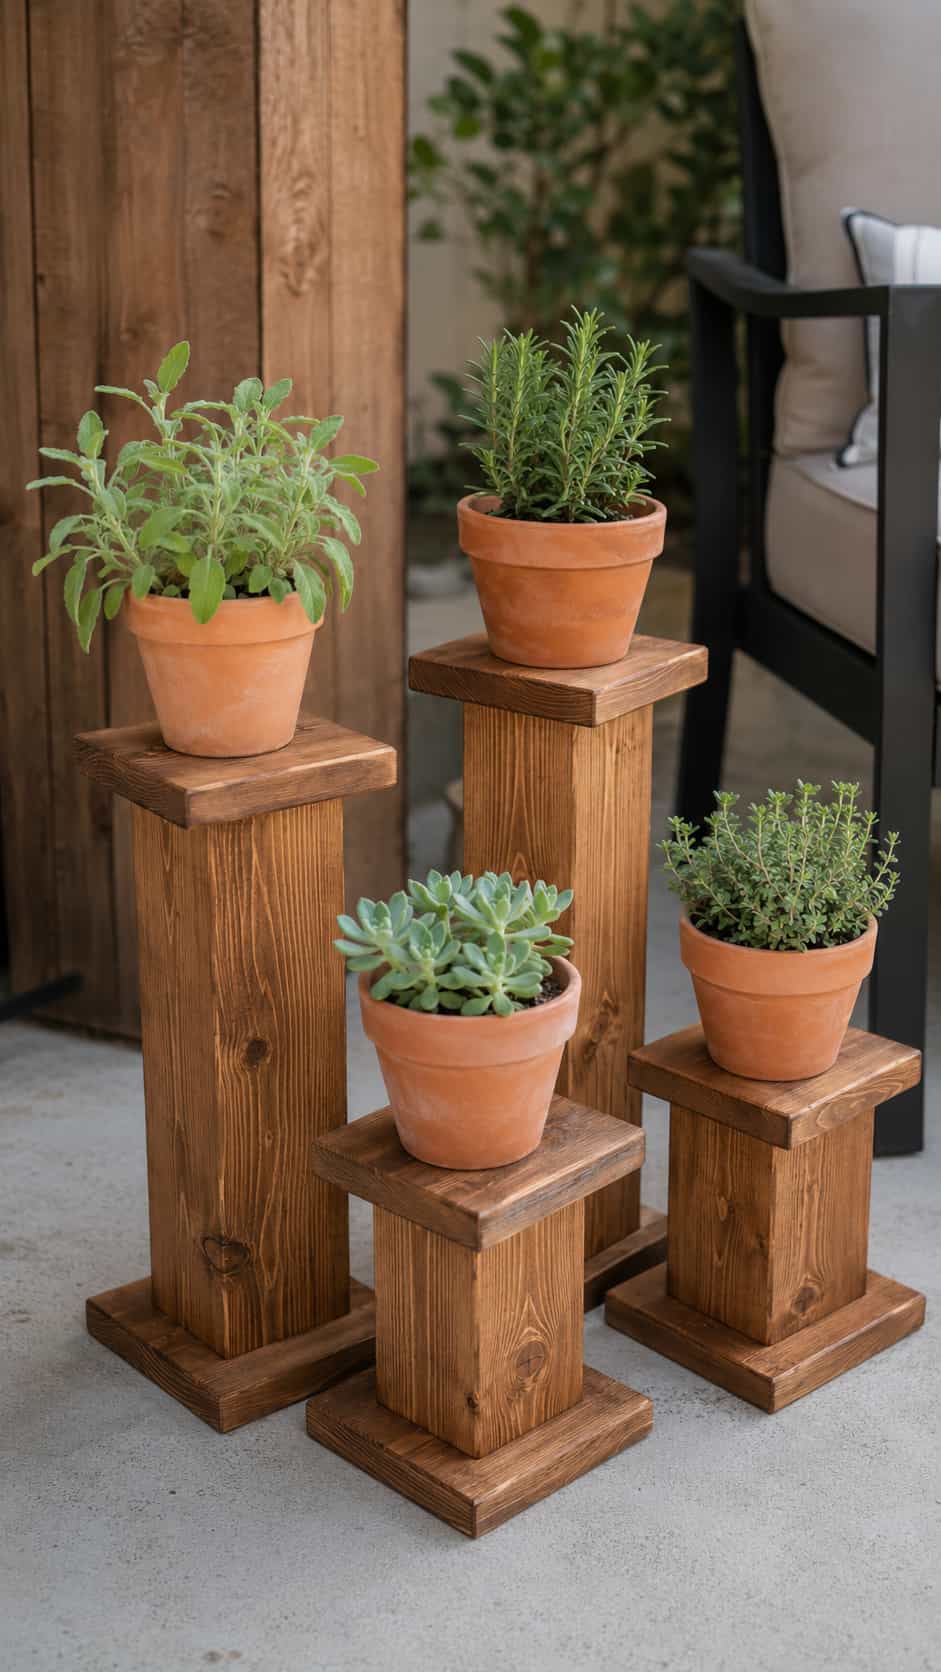
Difficulty: Easy
Estimated time: 1–2 hours
Best for: Elevating small plant pots
Suggested size: Approximately 8–14 inches tall
Short 4×4 sections can raise lightweight pots to different levels and add height to a container-garden arrangement. A 3½-inch-square top is narrow, so use only appropriately sized pots and add a broader base or top when needed for stability.
Test the arrangement on a level surface before adding a plant. Avoid placing a tall or heavy pot on a narrow pedestal.
Customization idea: Group several low pedestals in staggered heights instead of using one tall block.
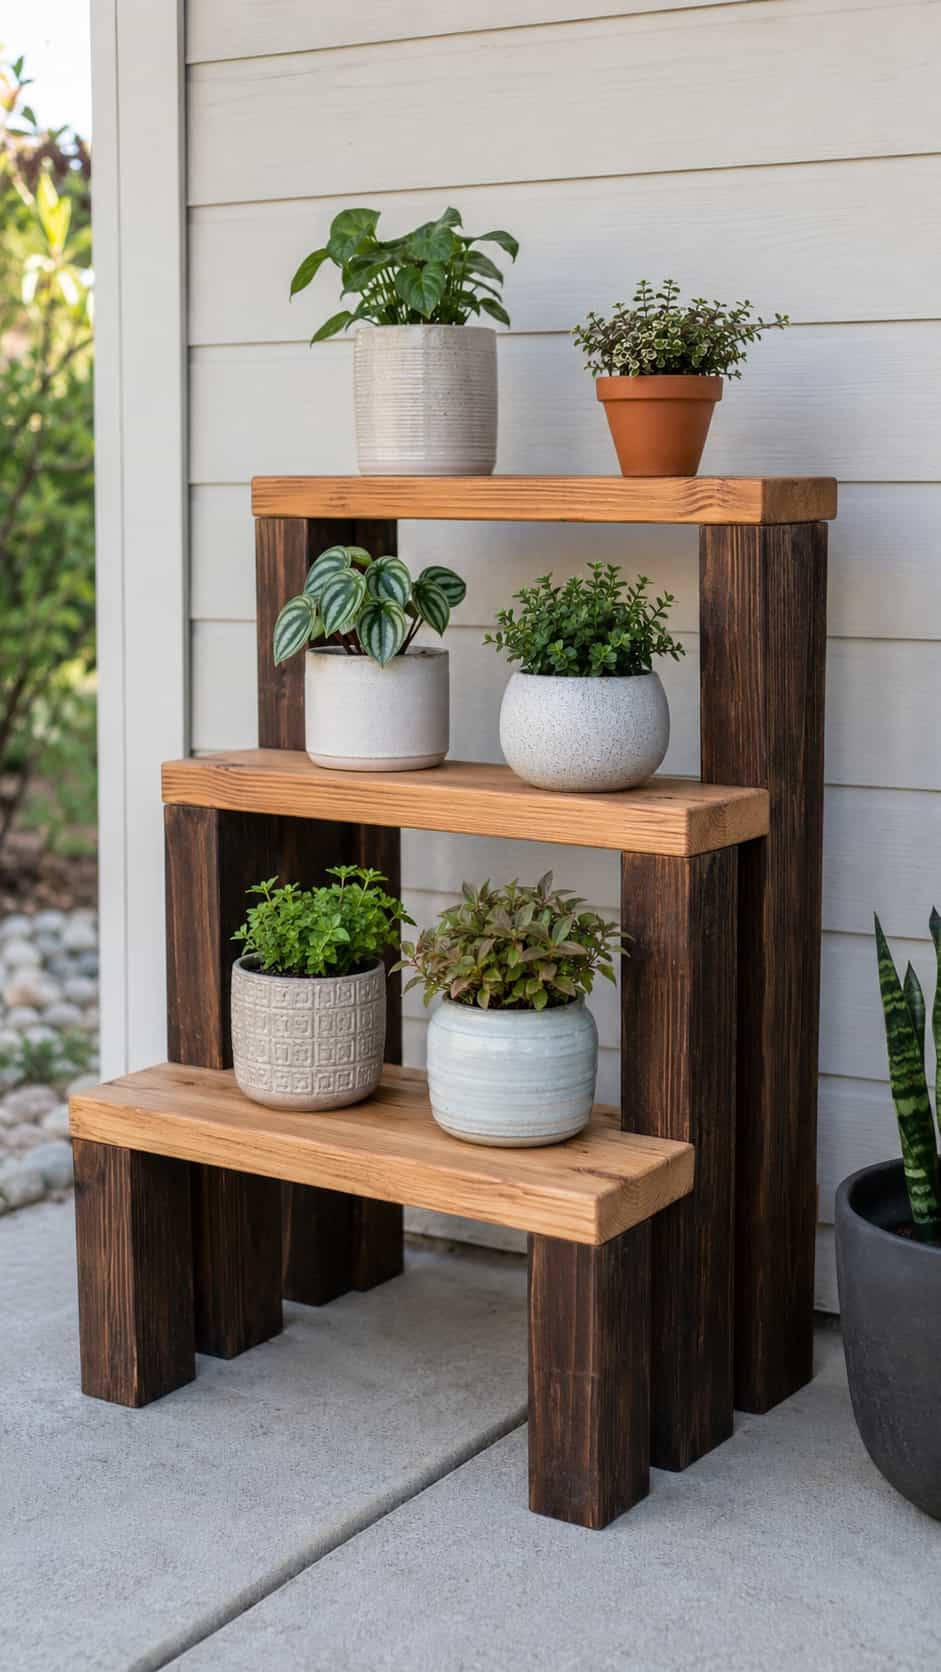
18. Tiered Plant Stand
Difficulty: Medium
Estimated time: 2–4 hours
Best for: Patios and gardens
Suggested size: Approximately 24–36 inches tall
Combine 4×4 legs or posts with wider shelf boards to create a stepped display for small plants. This project uses the 4×4 for strength and visual weight while the boards provide practical shelf space.
Because the stand will carry shifting loads and may be exposed to weather, work from a verified design appropriate for the number and weight of pots. Check stability on a level surface before use.
Customization idea: Finish the posts and shelves in contrasting colors.
Pairs nicely with our planter box plans or potting bench ideas.
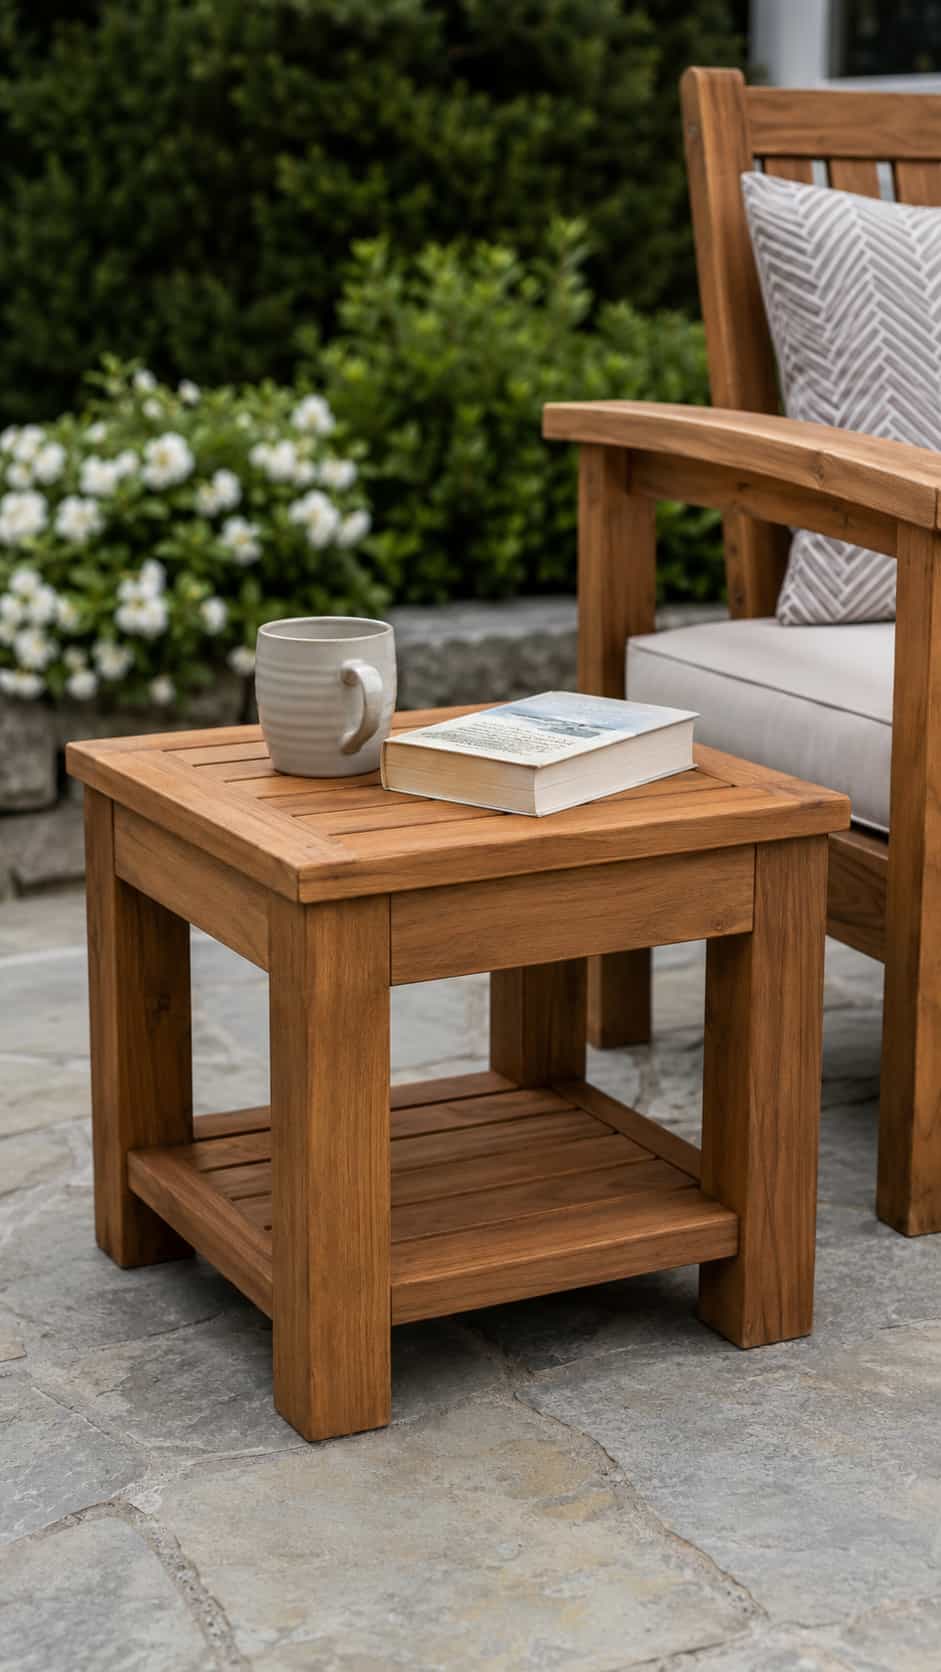
19. Small Outdoor Side Table
Difficulty: Medium
Estimated time: 3–5 hours
Best for: Patio furniture
Suggested size: Approximately 18 inches tall with a 16-inch-square top
Four short 4×4 legs can give a compact patio table a substantial appearance. Pair them with a complete apron frame and a slatted or solid top designed for exterior use.
This is a project where a verified plan matters. The apron dimensions, top width, fasteners and joinery must work together to prevent racking or wobbling. Rather than relying on a partial cut list, select or create a full design, confirm the actual dimensions of every board and test the finished table on a level surface.
Customization idea: Add a lower shelf only if it is included in the verified design and does not interfere with stability.
Full build details in the Mini-Plan section below. For more inspiration, see our 2×4 outdoor furniture article.
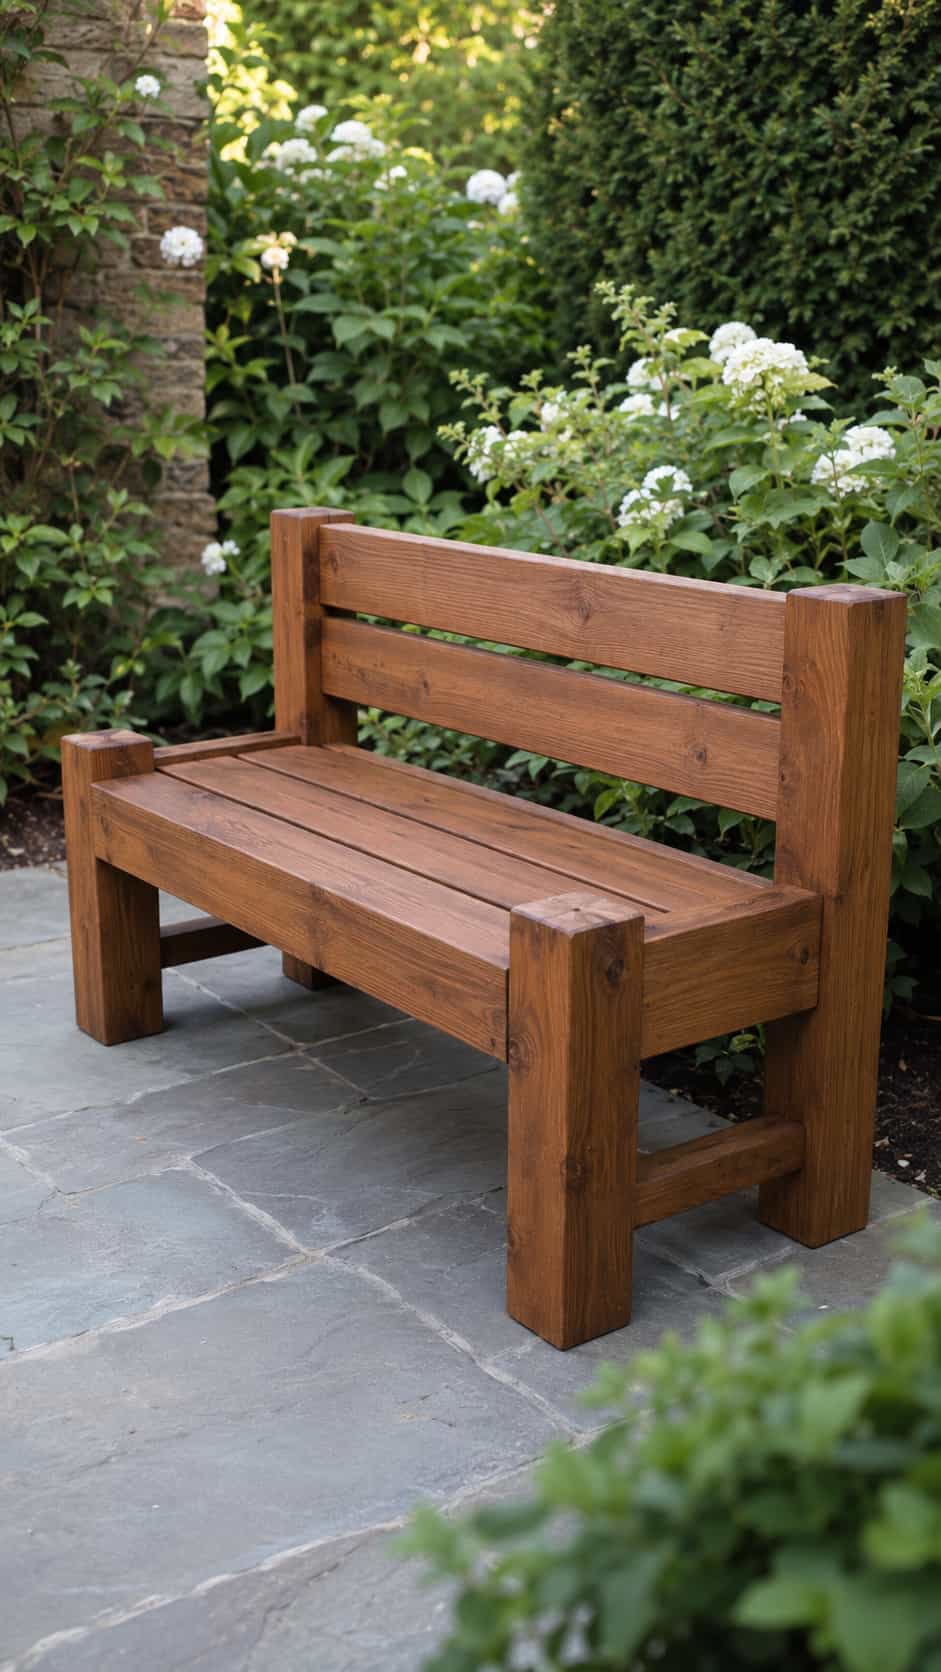
20. Chunky Garden Bench
Difficulty: Advanced
Estimated time: 4–6 hours
Best for: Experienced builders
Suggested size: Based on a tested seating plan
A 4×4 can provide strong-looking legs and supports for an outdoor bench, but seating is not the place for an improvised cut list. Use a complete, tested plan that specifies the joinery, hardware, span and intended load.
Inspect the lumber carefully, follow the plan exactly and verify that the finished bench is stable before use. Do not substitute deteriorated or badly checked offcuts for structural components.
Customization idea: Choose an exterior finish that coordinates with your other patio furniture.
See also: DIY outdoor storage bench.
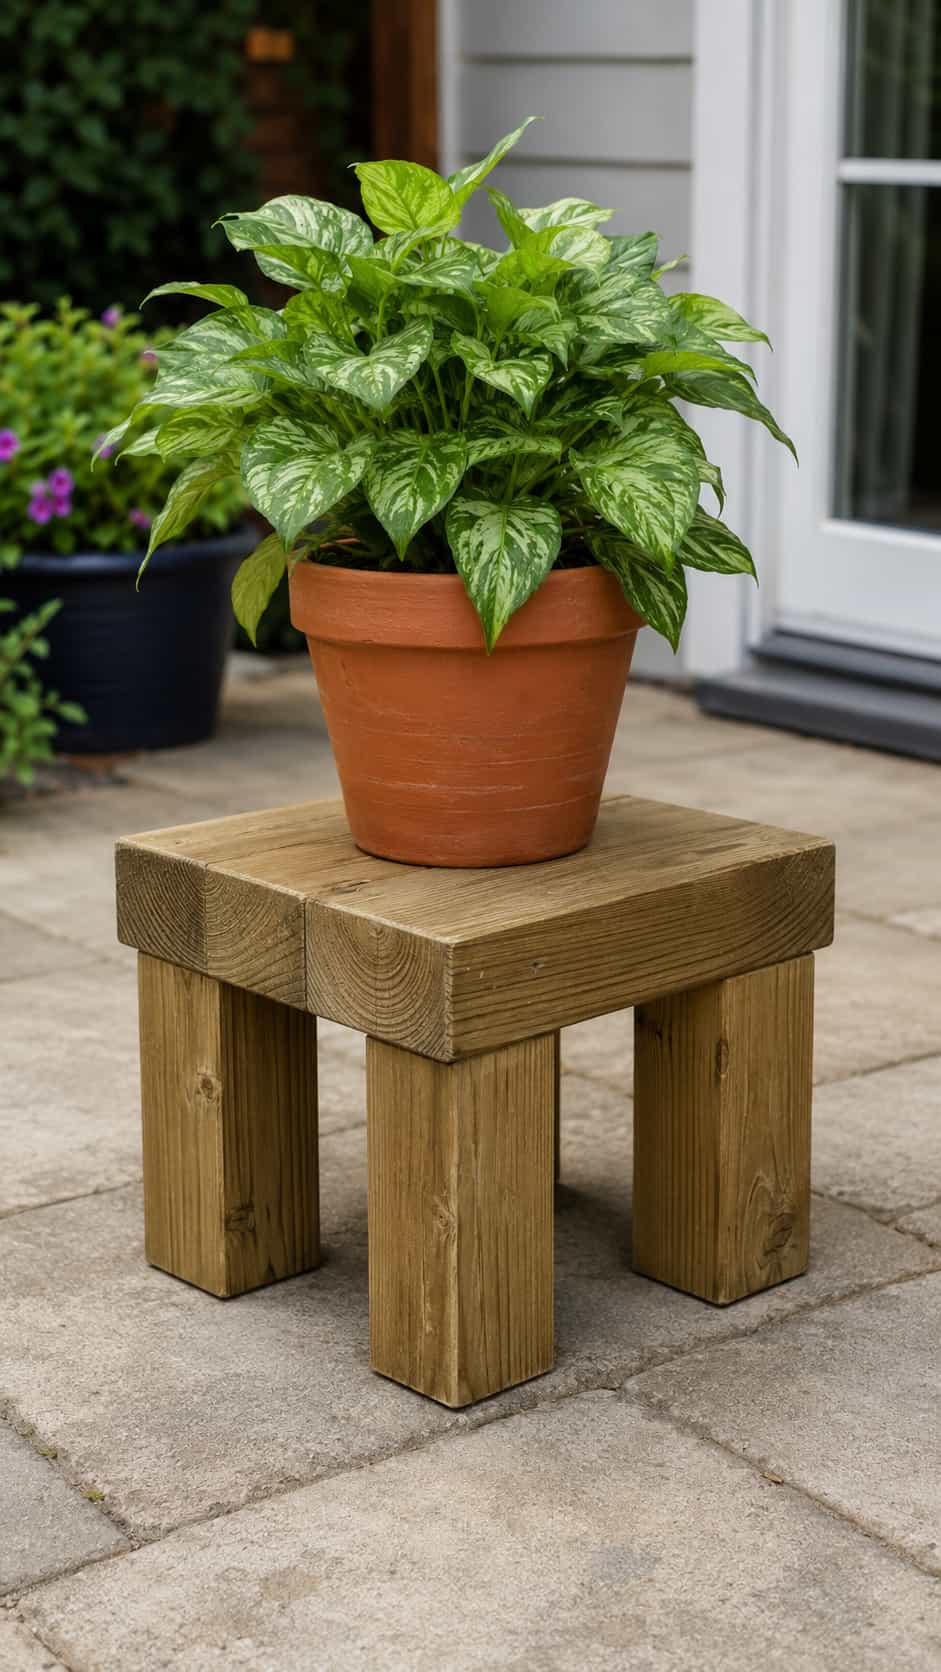
21. 4×4 Patio Plant Stand
Difficulty: Medium
Estimated time: 2–3 hours
Best for: Small outdoor spaces
Suggested size: Approximately 12–16 inches tall
Use short 4×4 legs with a suitably wide top to create a compact stand for a lightweight planter. Keeping this project dedicated to plants avoids presenting an unverified design as safe seating.
Make the top broad enough for the intended pot, check the stand on a level surface and keep the center of gravity low.
Customization idea: Paint the stand in a bold accent color to contrast with green foliage.
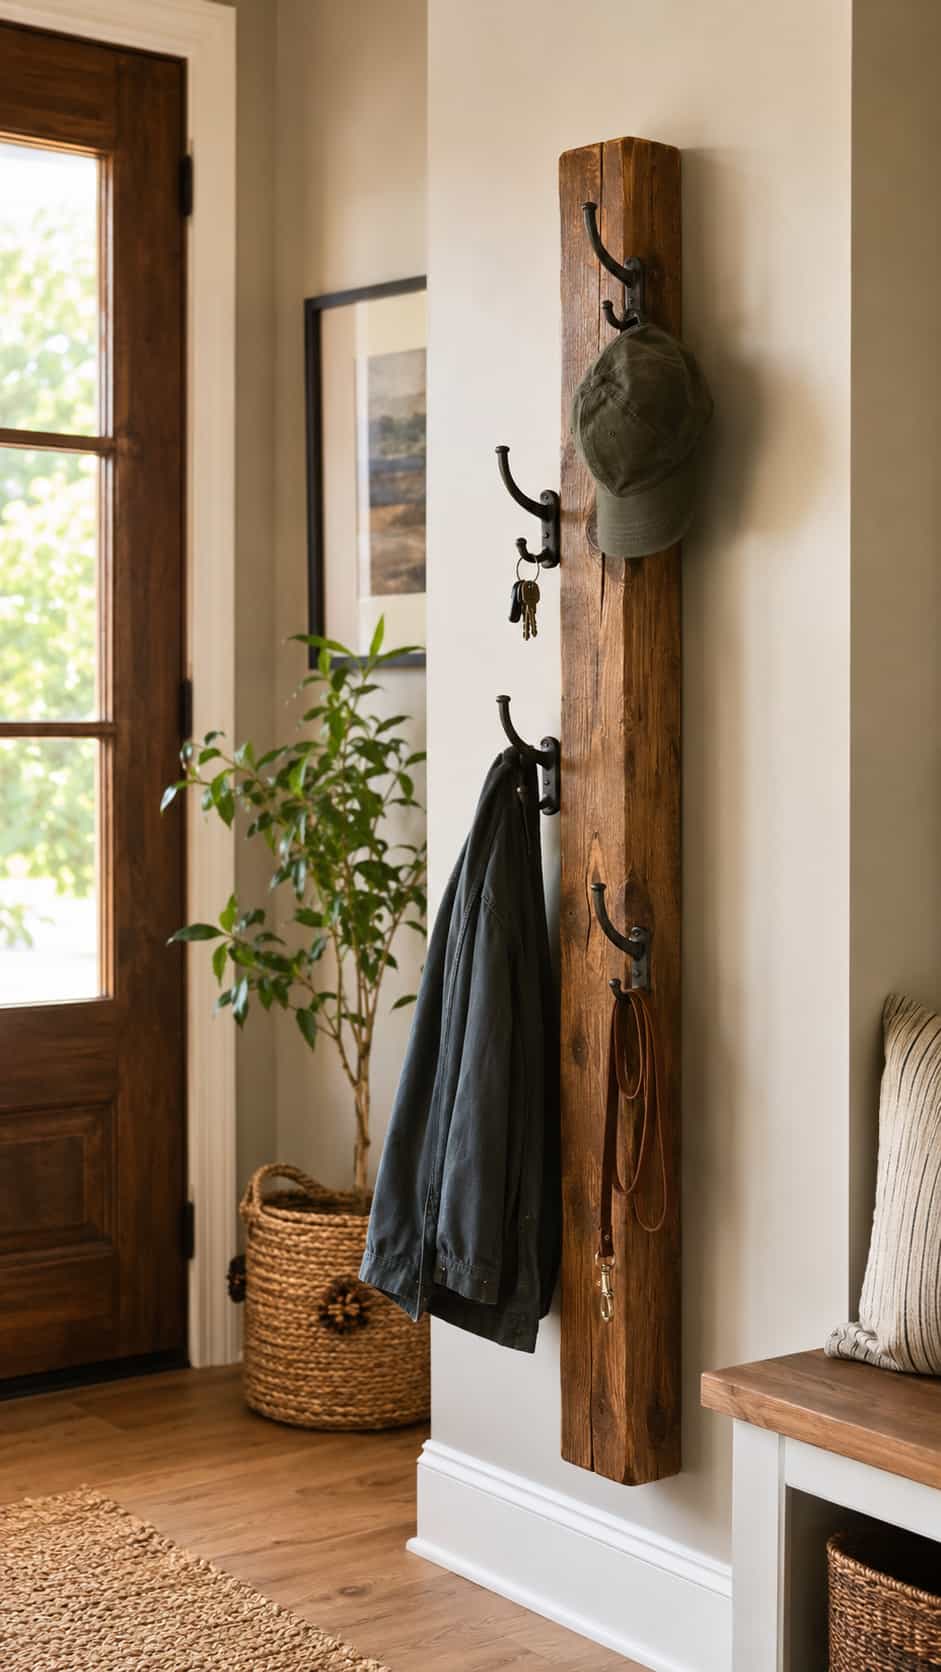
22. Rustic Entryway Hook Post
Difficulty: Easy
Estimated time: 1–2 hours
Best for: Home organization
Suggested size: Adapt to the mounting location
A 4×4 section can become a vertical organizer for lightweight coats, hats, keys or pet leashes. Finish the block first, then add hooks rated for their intended use.
The organizer must be secured to appropriate structural support rather than simply leaned against a wall. Select mounting hardware based on the wall construction and expected load.
Customization idea: Add small labels or stagger the hook heights for different household members.
23. Workshop Tool Stand
Difficulty: Easy
Estimated time: 1–2 hours
Best for: Workbench organization
Suggested size: Approximately 12–18 inches long
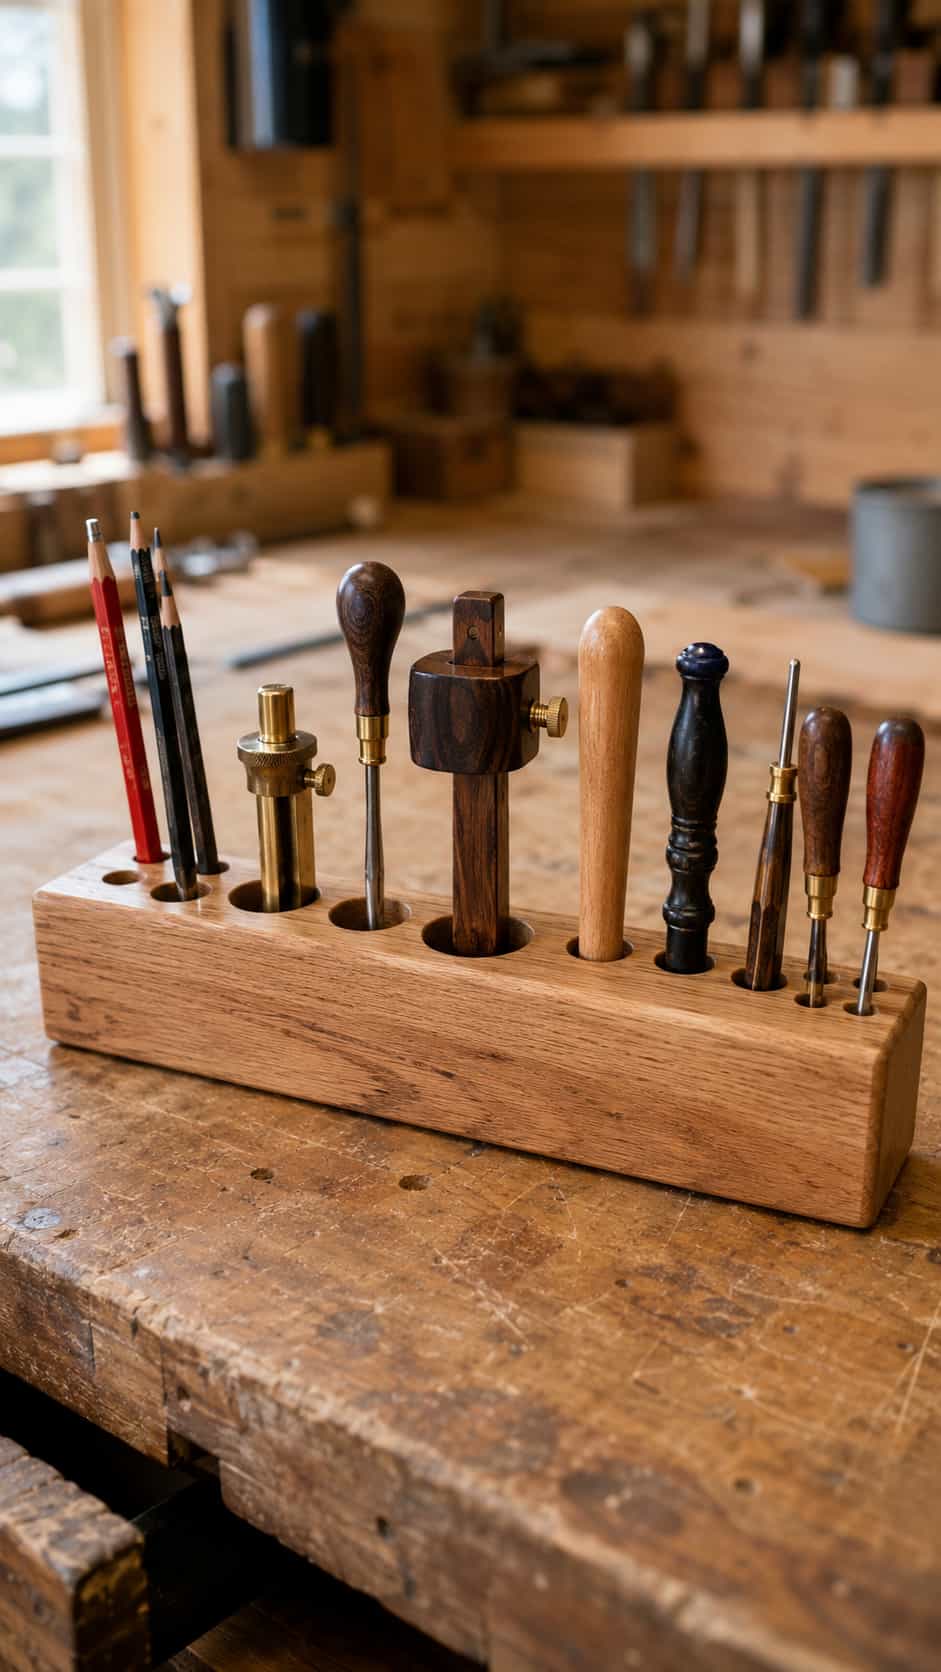
A horizontal 4×4 block can hold lightweight hand tools such as pencils, marking tools and small handled accessories. Plan the openings around the actual tools instead of drilling a random row of identical holes.
Keep the holder low and stable, smooth the edges and avoid storing powered or heavy tools in a block that could tip.
Customization idea: Label the positions so each tool has a consistent home.
Related reading: French cleat tool holders, and tool storage ideas.
24. Decorative Wooden House Blocks
Difficulty: Easy
Estimated time: 1–2 hours
Best for: Shelves and mantel décor
Suggested size: Approximately 4–10 inches tall
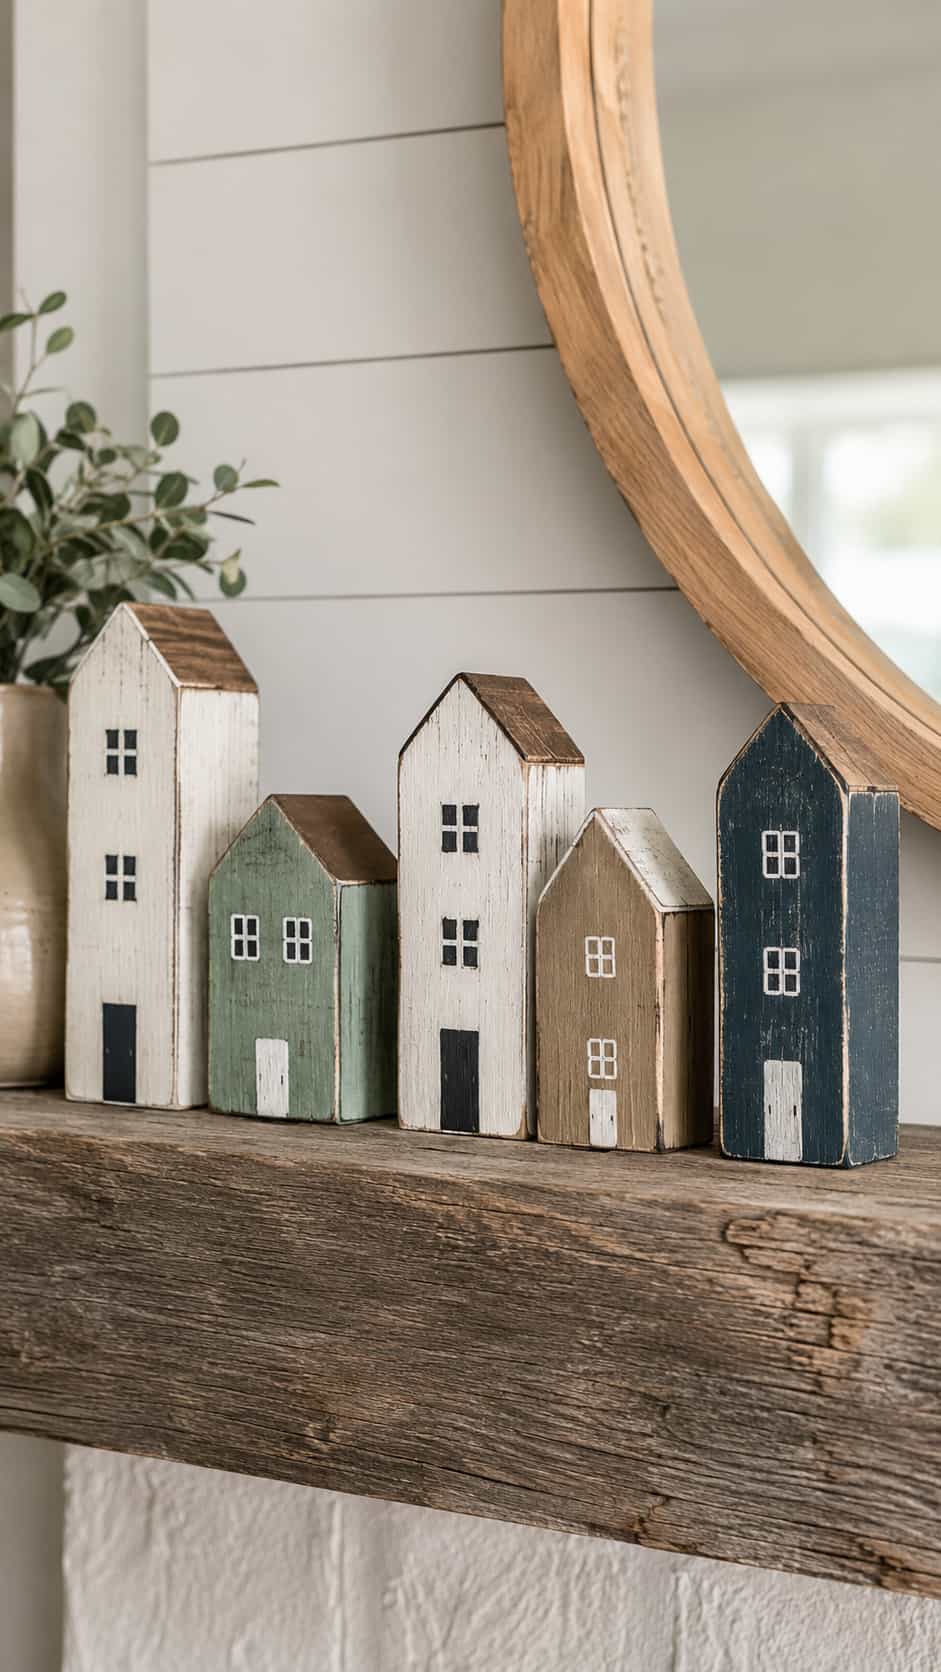
Turn upright 4×4 blocks into a small row of stylized houses. A simple painted roofline, windows and doors can create the effect without requiring a complicated structure.
Use different heights and coordinating colors so the pieces look like a tiny neighborhood when grouped together.
Customization idea: Paint the houses for a particular season—pastels for spring, warm colors for fall or snowy roofs for Christmas.
25. 4×4 Scrap-Wood Storage Rack
Difficulty: Medium
Estimated time: 3–4 hours
Best for: Workshop organization
Suggested size: Adapt to your available space and material lengths
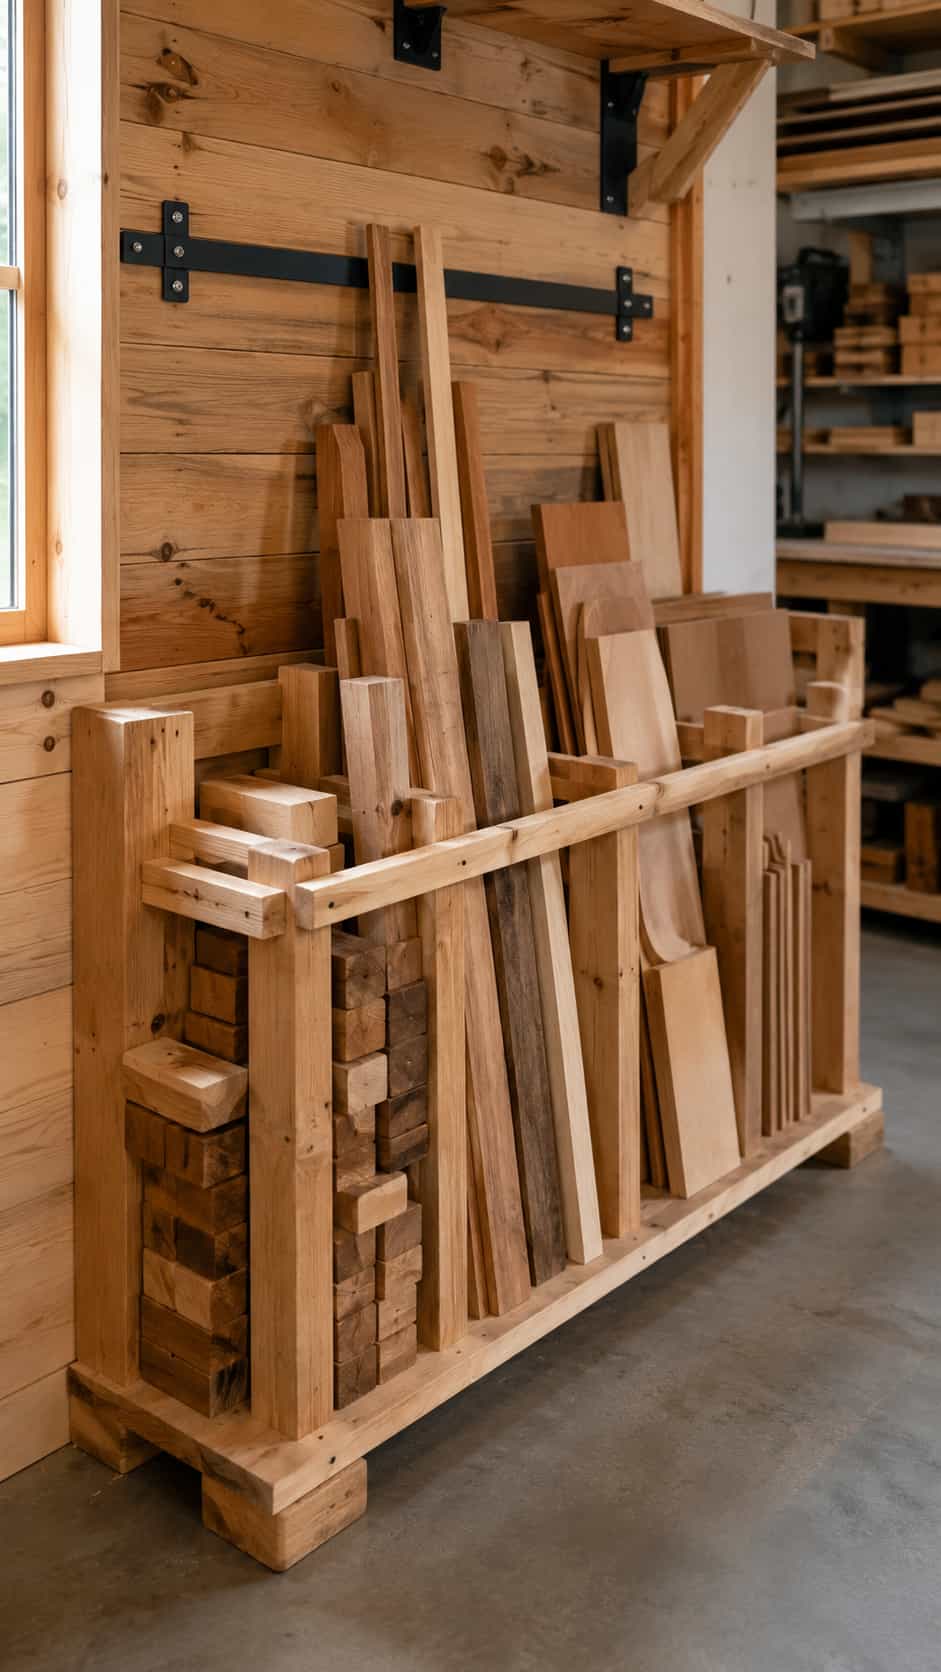
A compact rack can use 4×4 lumber in its base or dividers to keep offcuts sorted and off the floor. Start by measuring the material you actually store: short blocks, long narrow boards and sheet-goods scraps require different compartments.
Because long boards can shift or fall, use a complete rack design that includes a stable footprint, retaining components and appropriate wall anchoring when required. Place the rack where it does not narrow a walkway or obstruct access to tools.
Customization idea: Divide the storage into labeled sections for hardwood, construction lumber and small craft offcuts.
Three Featured 4×4 Wood Project Plans
If you’re ready to turn some of these ideas into actual projects, start with one of the three options below. The wooden pumpkin trio is the easiest, while the outdoor table and storage rack require more planning and experience.
Remember that a standard 4×4 usually measures approximately 3½ by 3½ inches. Measure your lumber before making any cuts, work from a stable surface and follow the instructions provided with your tools.
Mini-Plan 1: Wooden Pumpkin Trio
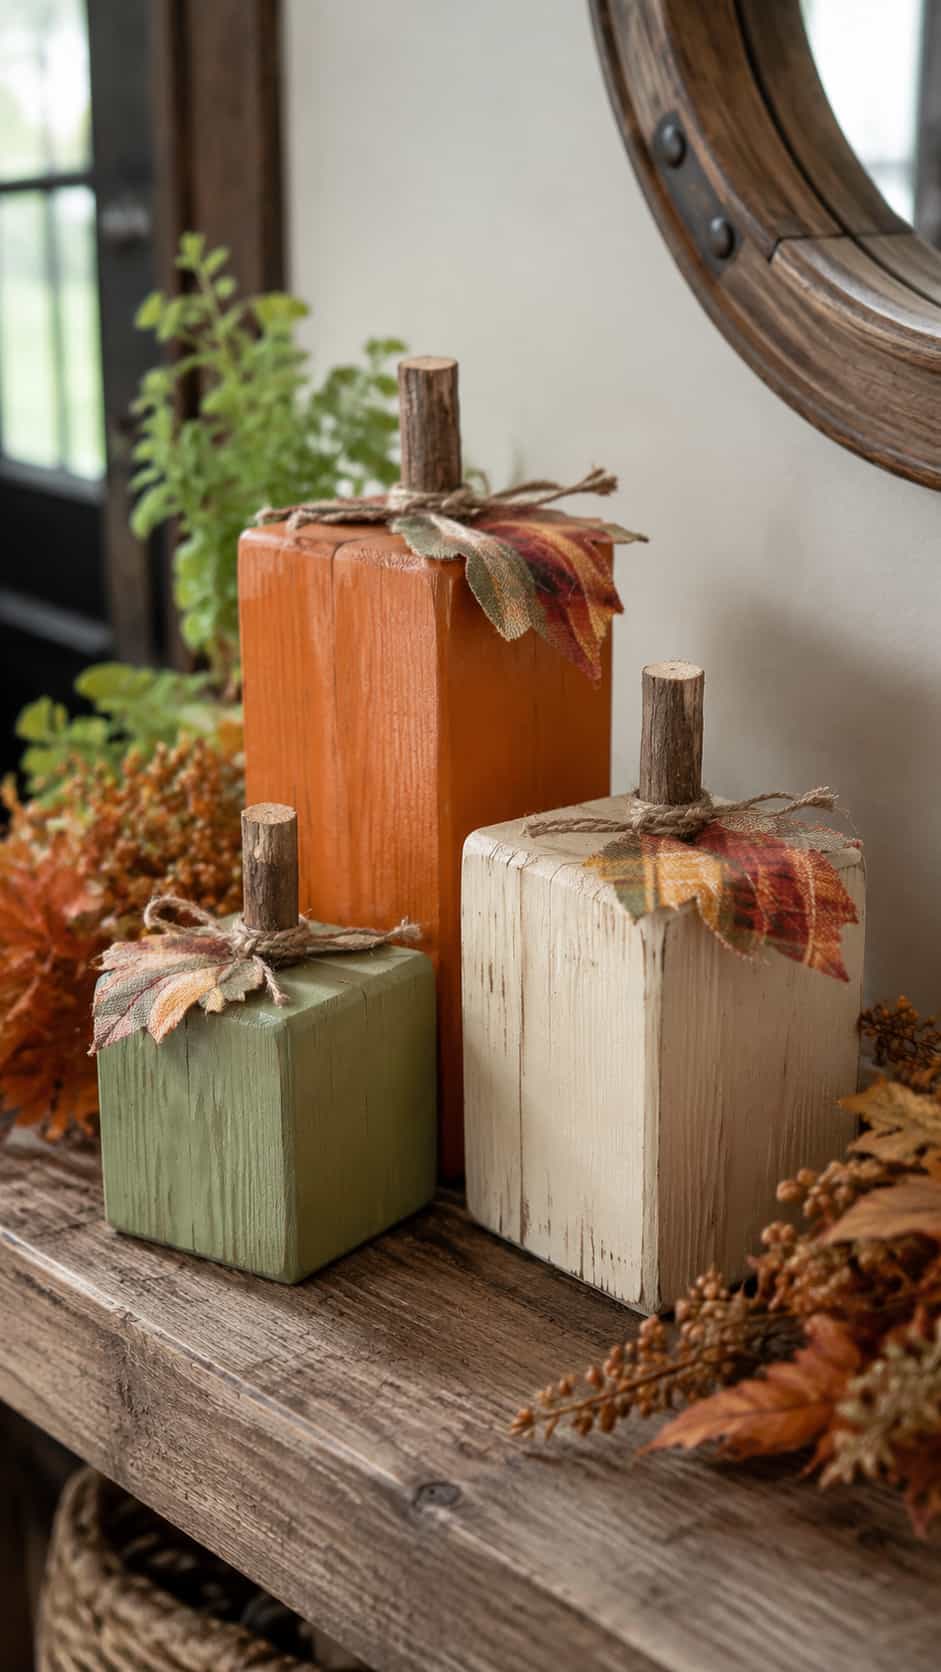
This wooden pumpkin trio is one of the easiest projects in the collection. The different heights create an attractive fall display for a mantel, table or covered porch.
Difficulty: Easy
Estimated time: 1–2 hours, excluding drying
Finished dimensions: Approximately 3½ inches wide, with heights of 4, 6 and 8 inches
Materials
- One untreated 4×4 post at least 20 inches long
- Orange, cream or muted green paint
- Three short untreated twigs or dowel pieces
- Wood glue
- Sandpaper
- Twine or fabric leaves
- Clear protective finish, optional
Project overview
- Measure and mark three blocks at 4, 6 and 8 inches tall.
- Prepare the blocks with the help of an experienced adult if powered cutting tools are required.
- Sand every face and soften the sharp corners.
- Paint the three blocks and allow them to dry completely.
- Attach a small twig or dowel to the top of each pumpkin.
- Add twine, ribbon or fabric leaves around the stems.
- Apply an appropriate clear finish if the pumpkins will be displayed on a covered porch.
You can paint all three pumpkins orange or use three coordinating colors. White, natural wood and muted green create a neutral farmhouse-style display.
Optional variation: Paint a different word on each pumpkin, such as “hello,” “fall” and “welcome.”
Mini-Plan 2: Small 4×4 Outdoor Side Table
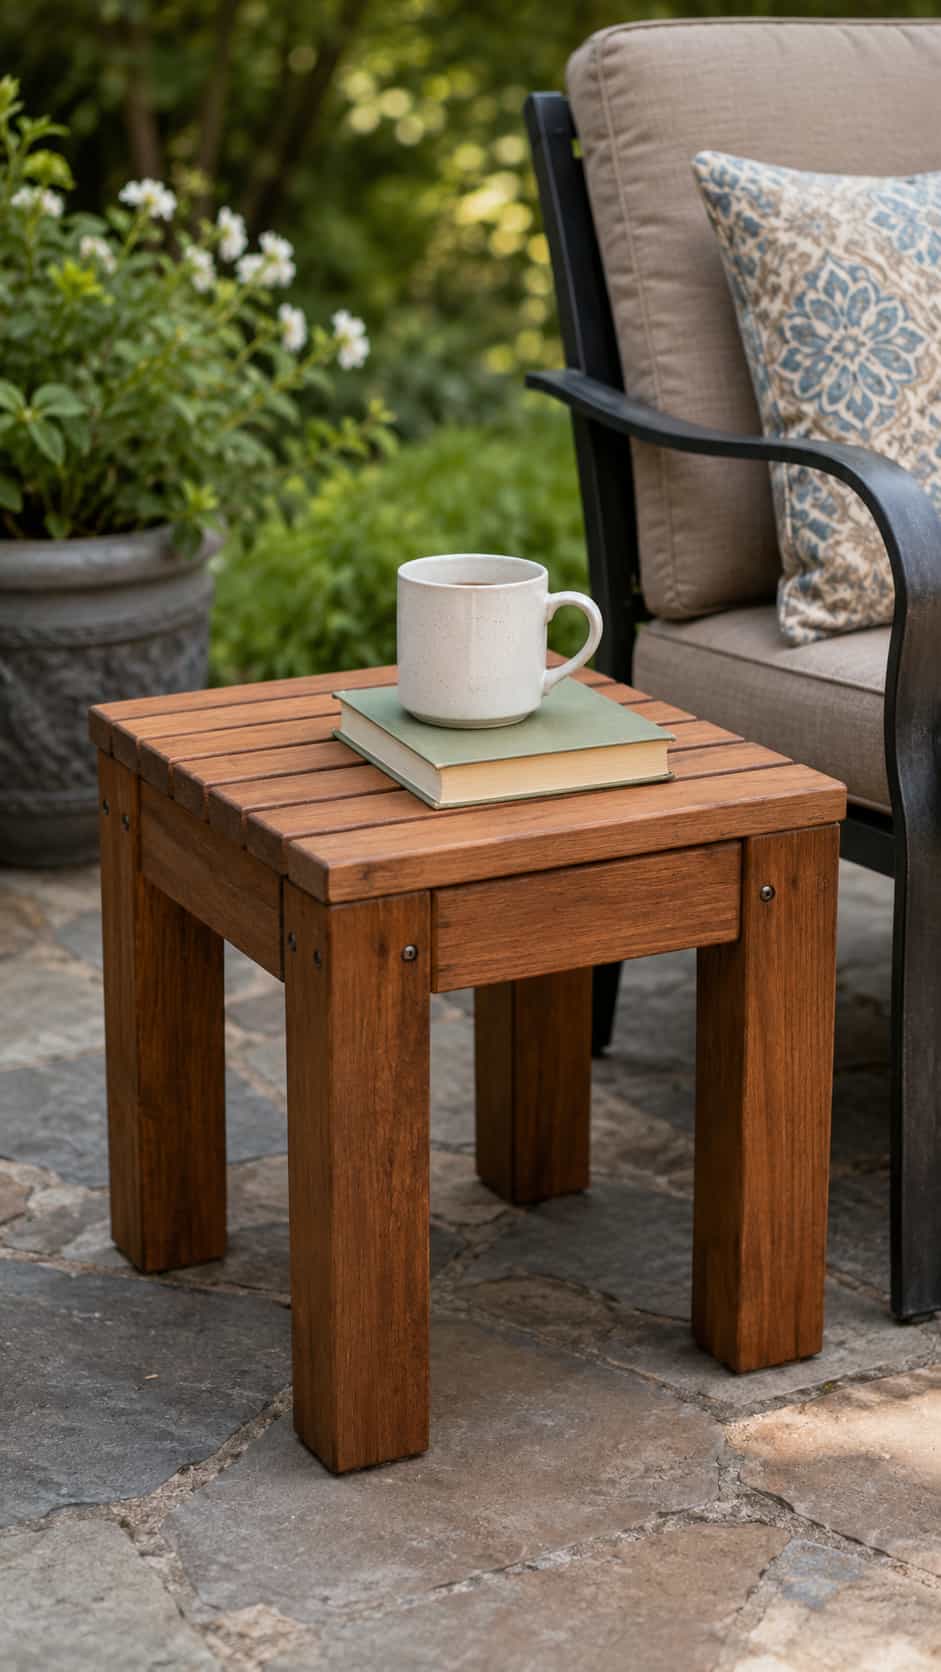
This compact table is useful beside an outdoor chair for holding a drink, small book or lightweight planter. The 4×4 legs give it a chunky appearance, while a complete apron frame helps keep the base stable.
Difficulty: Medium
Estimated time: 3–5 hours, excluding finish curing
Suggested finished size: Approximately 18 inches tall with a 16-by-16-inch top
Materials
- Four 4×4 pieces for the legs
- Four exterior-rated boards for the apron frame
- Exterior-rated boards for the tabletop
- Exterior-rated screws or suitable outdoor joinery
- Exterior wood glue, if required by your chosen joinery
- Sandpaper
- Exterior paint, stain or sealer
Before you begin
Measure the actual width and thickness of every board. Construction lumber is normally smaller than its nominal size, so measurements copied directly from a store label may not produce the intended finished dimensions.
The table should include:
- Four equal-length legs
- A complete four-sided apron frame
- A level tabletop
- Even spacing between slats if using a slatted top
- Exterior-rated fasteners
- A finish suitable for outdoor exposure
Assembly overview
- Prepare four matching legs based on your intended finished height.
- Arrange the legs on a flat surface and confirm that the base will fit underneath the tabletop.
- Join the legs with four apron boards, creating a complete rectangular frame.
- Check that the frame is square before tightening the connections.
- Add the tabletop boards with consistent spacing for drainage.
- Sand the complete table, paying particular attention to the top and exposed corners.
- Apply an exterior-rated finish and seal the exposed end grain.
- Allow the finish to cure completely before placing the table outdoors.
Because board dimensions and joining methods vary, confirm the tabletop layout and apron lengths using your actual lumber before preparing the pieces. Test the finished table on a level surface. It should not rock, twist or wobble.
Optional variation: Use a dark stain on the legs and a lighter finish on the tabletop for contrast.
Mini-Plan 3: Compact Scrap-Wood Storage Rack
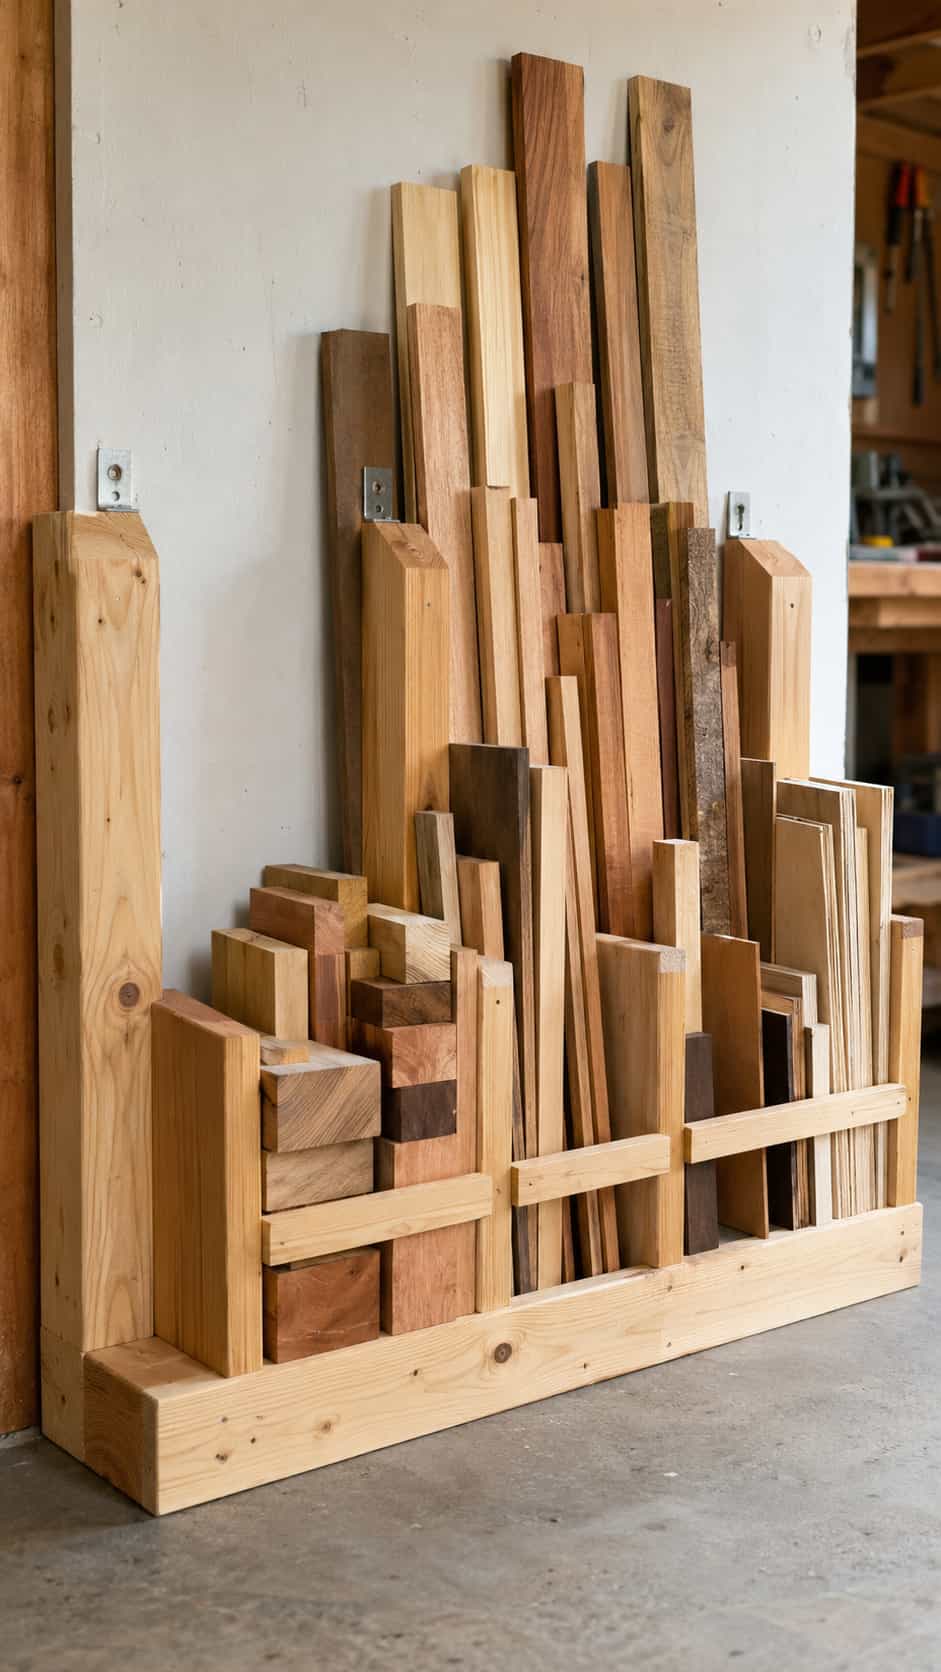
A compact storage rack keeps short boards and usable offcuts off the workshop floor. It is especially helpful in a small shop where lumber tends to collect beside the saw or underneath the workbench.
Difficulty: Medium
Estimated time: 3–4 hours
Suggested footprint: Approximately 24 inches wide by 18–24 inches deep
Suggested height: Approximately 30–36 inches
Materials
- 4×4 lumber for a stable base or dividers
- Plywood or boards for the bottom and sides
- Boards for retaining rails
- Suitable screws
- Sandpaper
- Optional labels
- Wall-anchoring hardware appropriate for the location
Plan the compartments first
Before preparing any lumber, sort the scraps you already own into groups:
- Short blocks
- Narrow boards
- Medium-length offcuts
- Hardwood scraps
- Plywood pieces
Measure the longest and widest pieces you plan to store. This will help you determine the rack’s height, depth and compartment widths.
Assembly overview
- Choose a location that does not block a doorway, walkway or frequently used tool.
- Build a broad, level base sized for the scraps you plan to store.
- Add vertical dividers to create separate compartments.
- Install retaining rails or a partial front panel to stop short pieces from sliding out.
- Check the rack for movement before loading it.
- Secure it appropriately if its height, location or stored material could allow it to tip.
- Add labels so different types of scraps remain organized.
Store the heaviest pieces near the bottom and avoid allowing long boards to lean into a walkway. Do not overload one compartment or use the rack to store sheet goods unless the design was created for their size and weight.
Optional variation: Add locking casters only when the complete rack design is engineered for mobile use and remains stable when loaded.
Which Project Should You Build First?
Start with the wooden pumpkin trio if you want a quick beginner project. Choose the outdoor side table if you are comfortable measuring and assembling furniture. Build the storage rack if workshop organization is your biggest priority.
Whichever project you choose, measure your actual lumber rather than relying exclusively on nominal dimensions. A few minutes spent checking the design can prevent wasted wood, uneven assemblies and frustrating adjustments later.
Frequently Asked Questions
What can I make from a short piece of 4×4?
Short pieces work well for bookends, LED candleholders, wooden pumpkins, dice, photo holders, calendar blocks and other freestanding decorations.
Is a 4×4 actually four inches square?
Usually not. In North America, a standard surfaced 4×4 commonly measures approximately 3½ by 3½ inches. Always measure your actual lumber before finalizing a cut list.
Can pressure-treated 4×4 lumber be used indoors?
Use untreated lumber for indoor crafts whenever possible. Treated wood products vary, so follow the product label and manufacturer guidance. Never use treated lumber where preservatives could become part of food or animal feed, and never burn treated-wood scraps.
Can I use old fence-post offcuts?
Only when you can identify the wood and confirm that it is clean and structurally appropriate for the project. Reject posts with rot, severe splitting, unidentified contamination or hidden fasteners.
How can I make construction lumber look more finished?
Careful sanding, softened edges, filled cosmetic holes and a consistent finish can dramatically change its appearance. The result will still have a rustic character, which is often part of the appeal.
Are these projects suitable for beginners?
The block-style decorations, bookends and photo holders are approachable beginner projects. Furniture, installed posts and storage racks require more experience and a complete, verified plan.
What is the easiest project to start with?
Chunky bookends, wooden pumpkins, photo holders and decorative house blocks are good starting points because they use the 4×4’s existing shape.
Want More Beginner-Friendly Woodworking Ideas?
If these projects have you looking at your scrap pile differently, continue with:
Want Complete Plans for Larger Projects?
Disclosure: This section may contain affiliate links. If you purchase through one of these links, we may earn a commission at no additional cost to you.
Small 4×4 projects are a practical way to use leftover lumber and build confidence. Larger furniture and workshop projects become easier to plan when you have complete measurements, diagrams and cut lists.
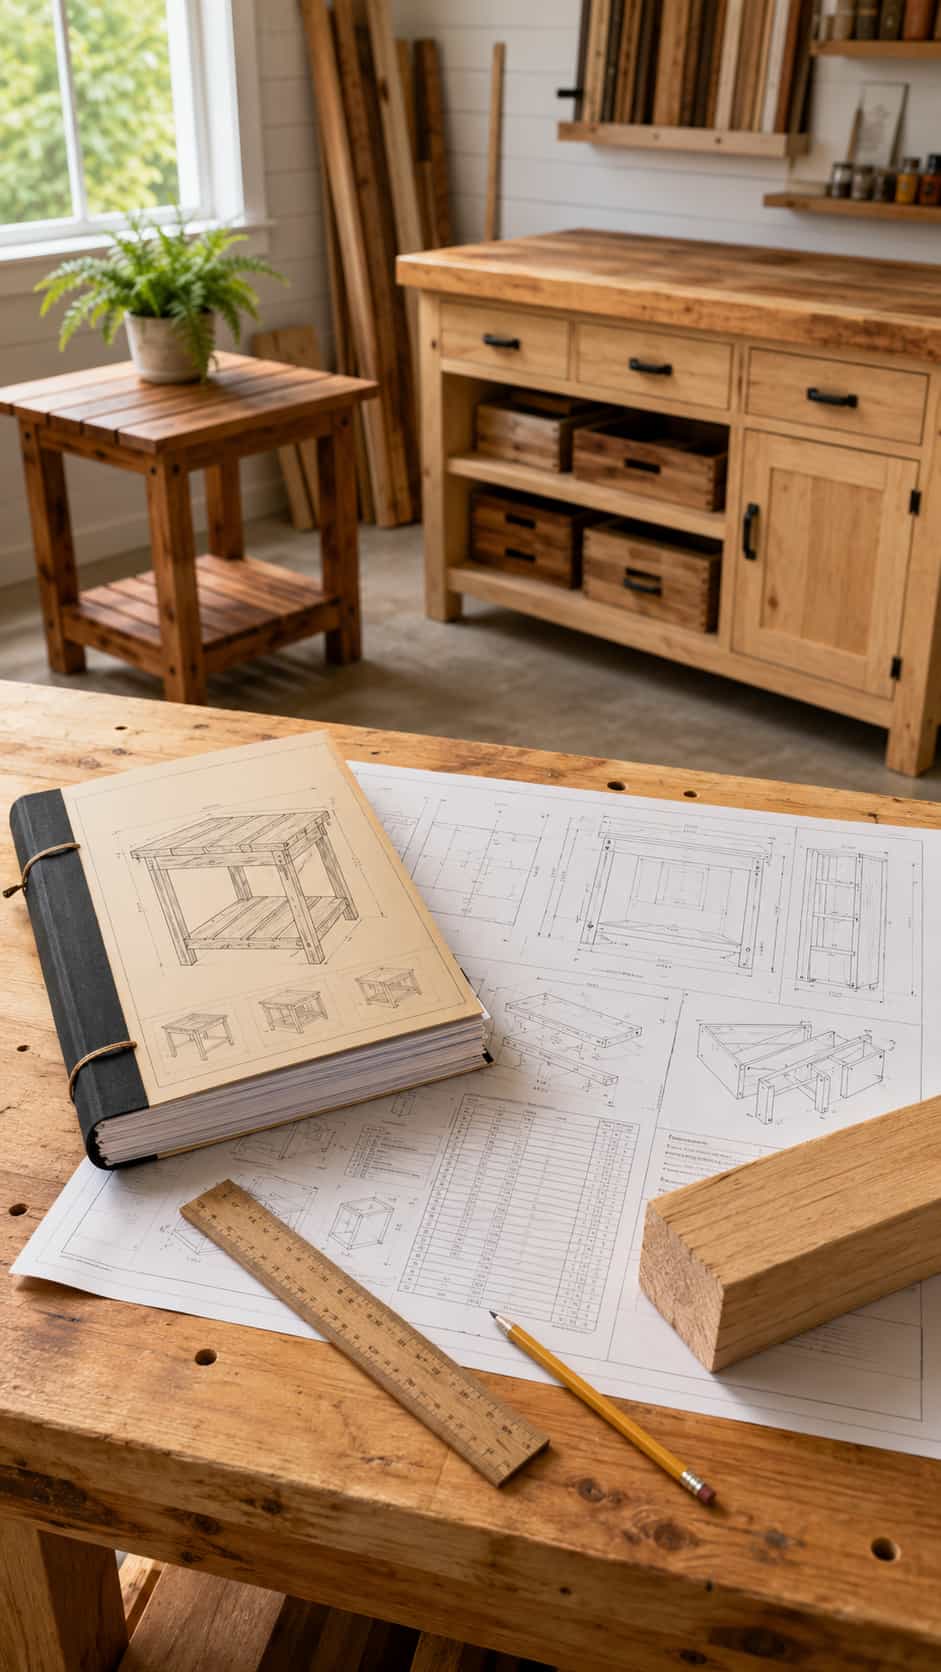
If you want a larger collection of project ideas, Ted’s Woodworking Plans is one optional resource to explore. Review the project details, dimensions and suitability for your tools and experience before starting any plan. As with any third-party plan collection, confirm important measurements and safety requirements for yourself rather than assuming every design will suit your exact materials or space.
Final Thoughts
A leftover 4×4 post can become much more than another piece of workshop clutter. Short offcuts are especially useful for wooden pumpkins, bookends, photo holders, seasonal blocks and other projects that take advantage of the lumber’s naturally chunky shape.
Start with one of the simple decorative ideas, measure the actual size of your lumber and save structural furniture projects for complete, verified plans. Most importantly, use wood appropriate for the project and never burn pressure-treated scraps.
Which of these 4×4 wood projects would you try first: the wooden pumpkins, decorative house blocks or a workshop storage project?