
Shoes everywhere. Bags dumped in the middle of the floor. A coat draped over a chair like it pays rent there. Sound familiar? Five minutes after you clean your entryway, it looks like a tornado touched down again, and honestly, it’s exhausting.
A DIY mudroom bench with shoe storage solves two problems in one shot. You get a place to actually sit down while you wrestle your shoes on, and you get built-in storage underneath so all that clutter has somewhere to go besides “the floor.”
This project isn’t picky about where it lives, either. It works great in:
- Mudrooms
- Entryways
- Hallways
- Laundry rooms
- Garage entrances
- Small apartments
- Farmhouse-style homes
If your entryway currently looks like everyone kicked their shoes off and ran for their lives, this project is for you.
I built my first version of this bench out of pure desperation. I was tired of playing “whose shoe is this” every morning and tired of stepping on stray sneakers in the dark. One weekend and a stack of plywood later, the chaos had an actual home. Ever wondered why something this simple took you so long to build? Same here.
Why Build a DIY Mudroom Bench with Shoe Storage?
Before you grab a saw, let’s talk about why this is worth a weekend of your life.
Benefits:
- Keeps shoes off the floor (and off your last nerve)
- Adds a place to sit while you put on shoes or boots
- Makes the entryway look more finished and intentional
- Can be customized to fit your exact space
- Costs less than most store-bought mudroom benches
- Beginner-friendly if you keep the design simple
- Matches farmhouse, rustic, modern, or minimal decor
Storage furniture doesn’t have to be boring or overpriced. If you’re already into small wood builds, this pairs nicely with other projects — like these 25 Genius DIY Organizers You Can Build From Scrap Wood, which is a great rabbit hole if you’re trying to get more organized without buying more stuff.
Here’s the thing about store-bought mudroom benches: they’re either flimsy particleboard that sags within a year, or they’re gorgeous and priced like a piece of art. Building your own means you control the quality, the size, and the finish. You end up with something that actually fits your space instead of a “close enough” compromise from a big box store.
Advertisement
Quick Project Overview Of a DIY Mudroom Bench with Shoe Storage
Here’s the gist before you commit:
| Project Detail | Recommendation |
|---|---|
| Skill Level | Beginner to intermediate |
| Estimated Time | 1 weekend |
| Estimated Cost | $60–$150 depending on wood and finish |
| Best Wood | Plywood, pine boards, or 2x4s |
| Best For | Entryway, mudroom, hallway, garage entrance |
| Main Feature | Bench seat with shoe storage underneath |
Best Size for a DIY Mudroom Bench
Size depends on your space, obviously, but you need a starting point. Here’s a beginner-friendly baseline that works for most homes.
Good Beginner Dimensions:
- Width: 36–48 inches
- Depth: 16–18 inches
- Bench height: 18 inches
- Shoe cubby height: 6–8 inches each
- Seat thickness: 3/4-inch plywood or solid boards
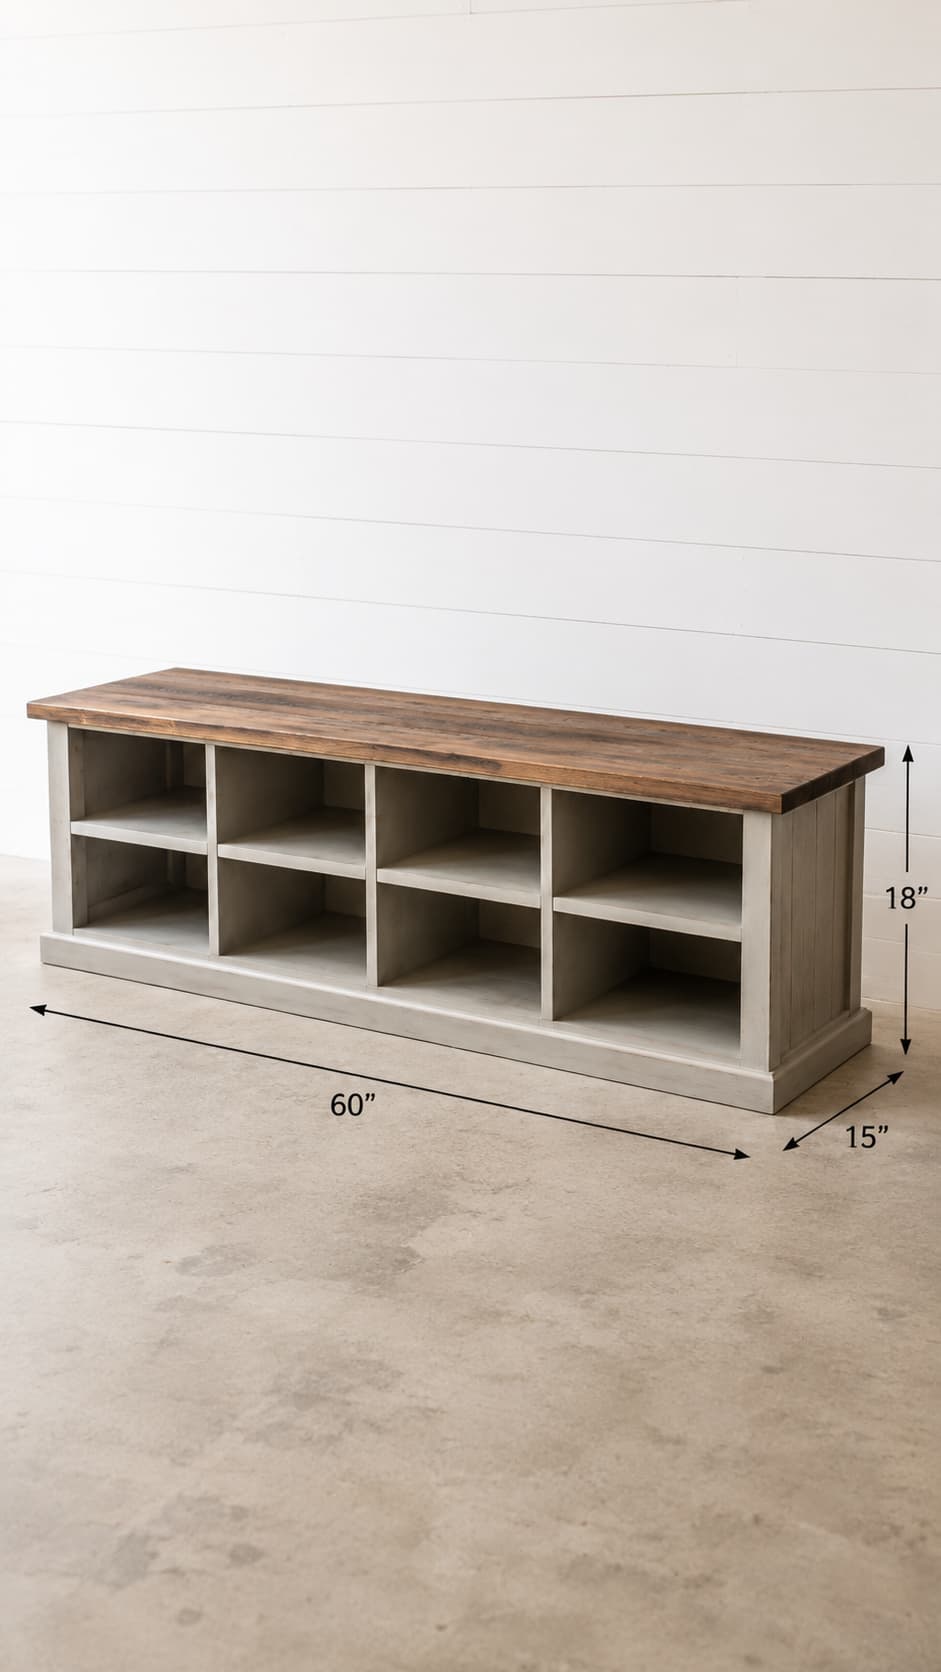
A 48-inch bench is a great size for most small entryways. It fits several pairs of shoes without swallowing the whole room, which is exactly what you want.
Measure your actual wall space before cutting anything. Entryways love to look bigger than they really are until the tape measure gets involved.
I learned this one the hard way. I eyeballed my hallway once, convinced myself I had room for a 60-inch bench, and ended up with something that blocked the closet door. Measure twice, dream small, cut once — that’s the real motto here.
Design Options Before You Build
You’ve got choices here, and the right one depends on your space and your patience level.
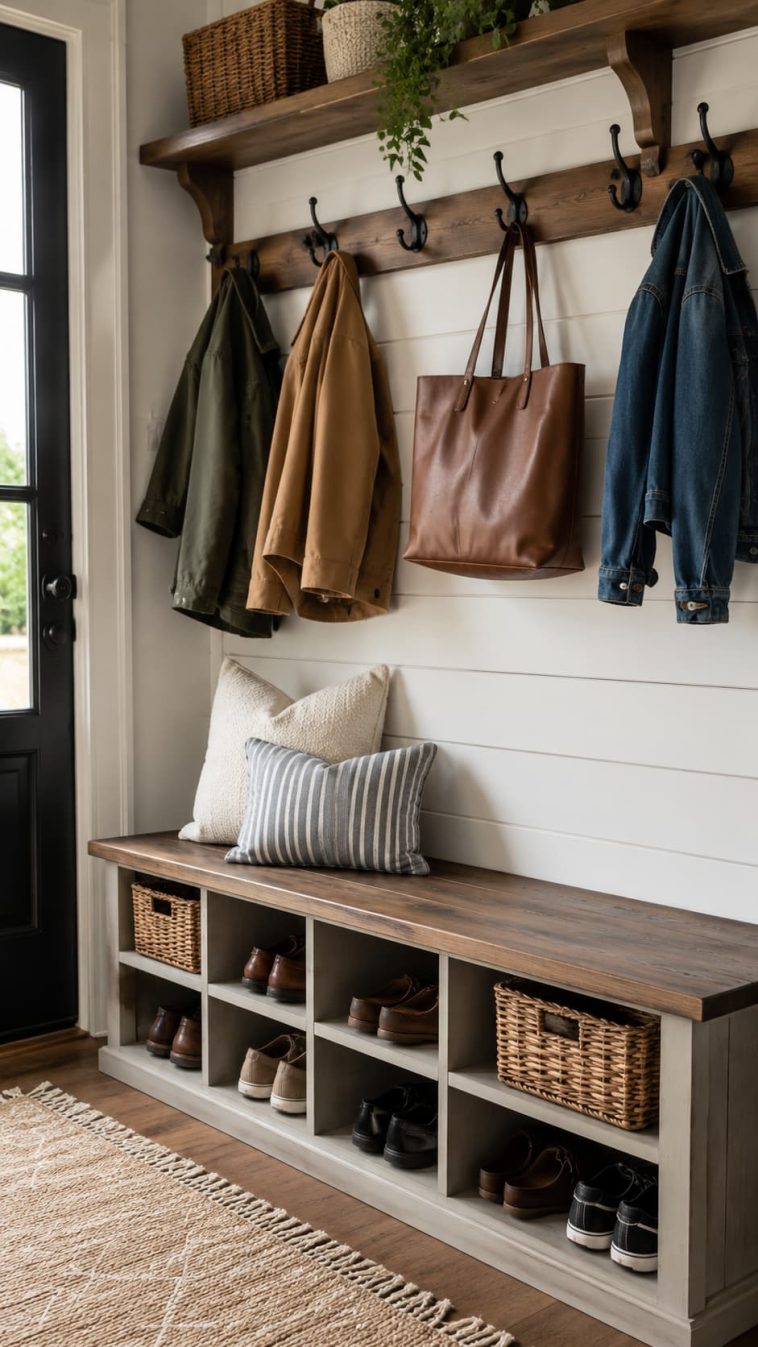
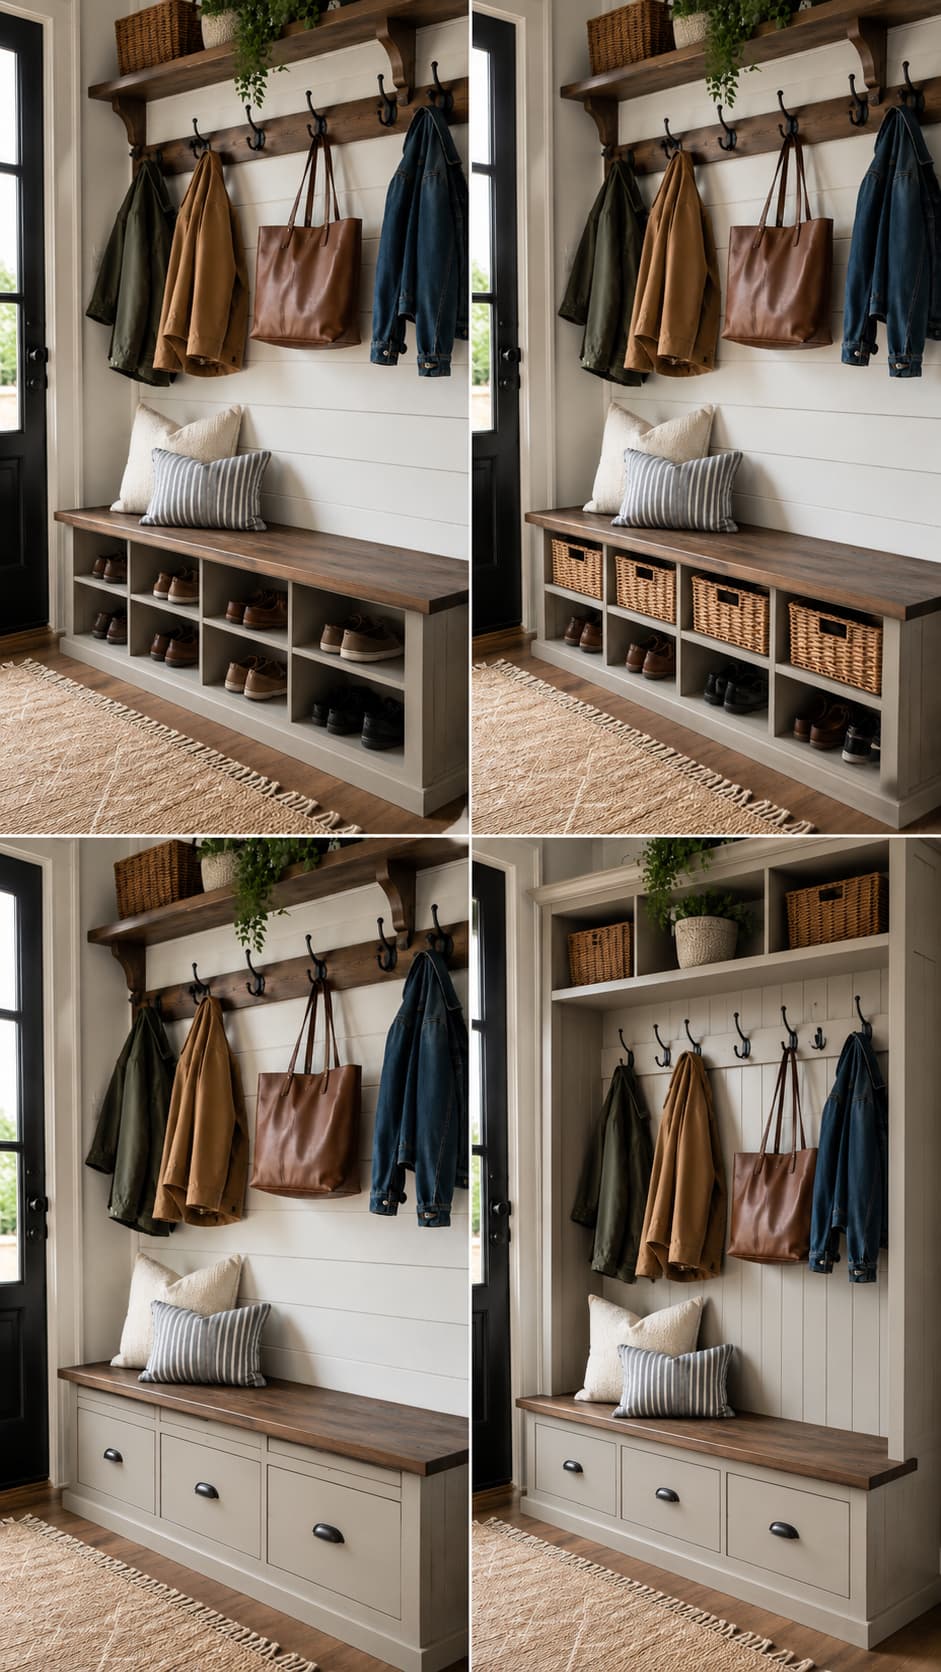
Option 1: Simple Open Shoe Cubbies
Best for beginners. Shoes stay visible and easy to grab on your way out the door.
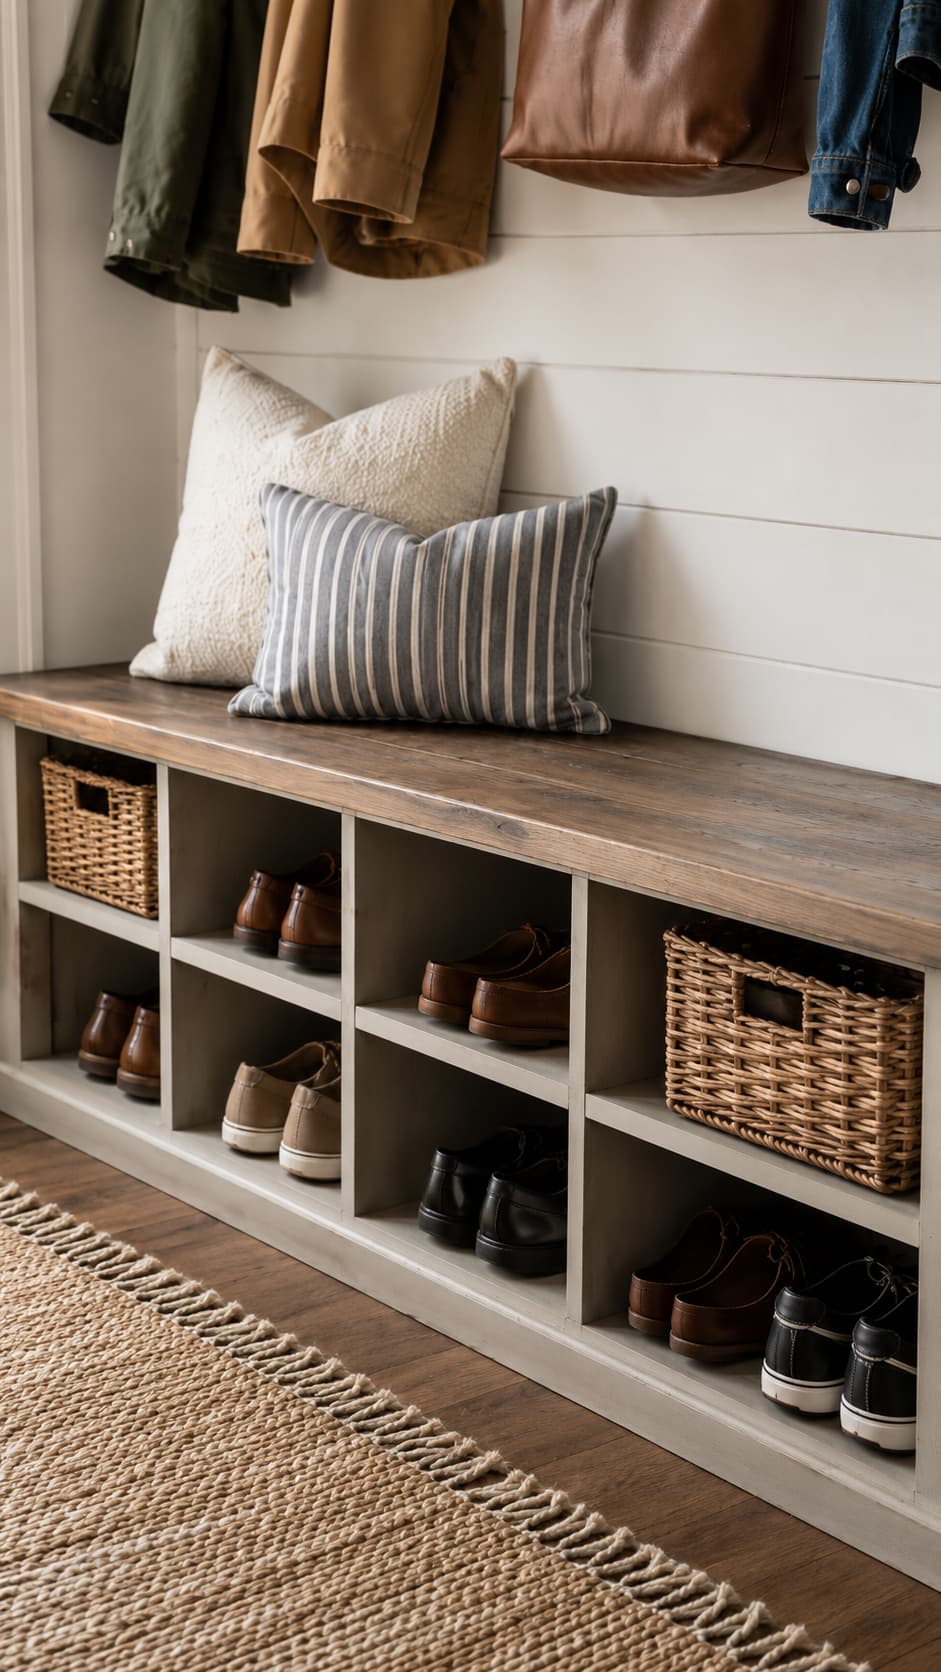
Option 2: Bench with Baskets
Best for a cleaner look. Build open cubbies, then slide baskets inside to hide the mess.
Option 3: Bench with Drawers
More advanced, but great if you want fully hidden storage.
Option 4: Bench with Hooks Above
Perfect for coats, bags, hats, and backpacks — basically your whole “leaving the house” arsenal.
Option 5: Full Mudroom Hall Tree Style
Includes a bench, cubbies, hooks, an upper shelf, and side panels. This is the “go big or go home” version.
If shoes are your main headache, it’s worth browsing 7 Simple Creative Wooden Shoe Rack Plans You Can Make at Home before you settle on a design — some of those layouts might change your mind about cubbies vs. baskets.
Tools and Materials You’ll Need for a DIY Mudroom Bench with Shoe Storage
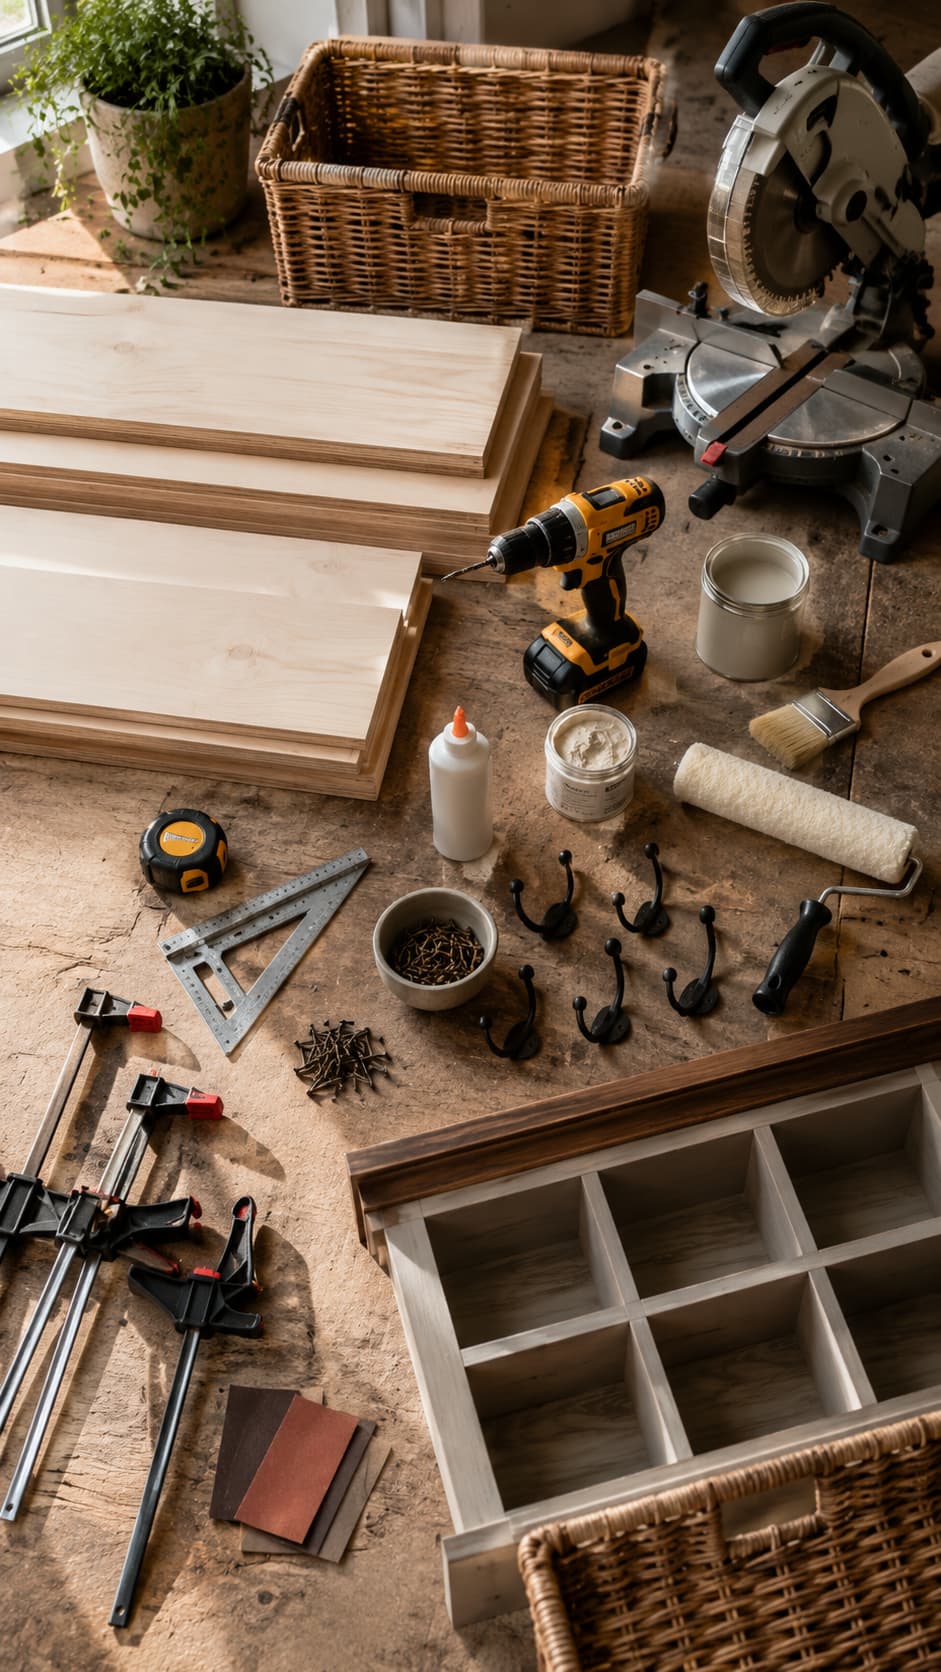
Basic Tools
- Circular saw or miter saw
- Drill/driver
- Measuring tape
- Speed square
- Sander or sanding block
- Clamps
- Level
- Safety glasses
- Paintbrush or roller
Materials
- 3/4-inch plywood or pine boards
- 1×2 or 1×3 trim boards
- Wood screws
- Wood glue
- Sandpaper
- Wood filler
- Primer
- Paint or stain
- Clear protective finish
- Optional baskets
- Optional coat hooks
- Optional wall anchors
New to some of these tools? Check out 16 Best Woodworking Tools for Beginners first. And if pocket holes come up while you’re building, How to Use a Pocket Hole Jig: The Complete Beginner’s Guide will save you some frustration.
Recommended Cut List
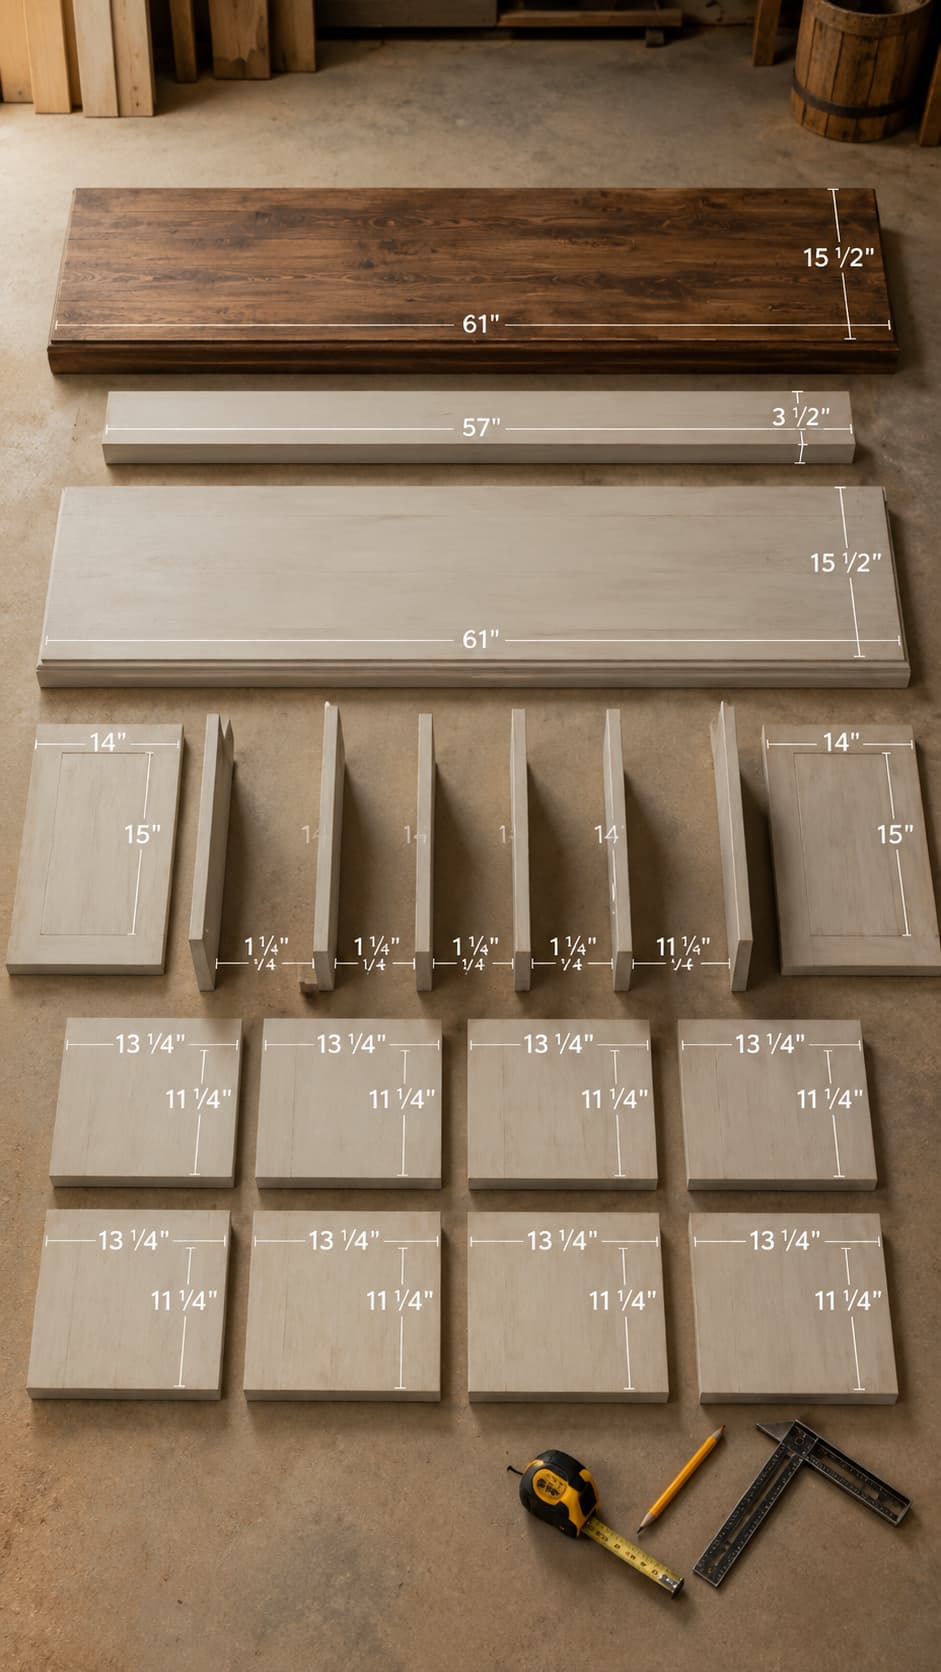
Here’s a simple example cut list for a 48-inch-wide DIY mudroom bench with shoe storage. This layout assumes you are using 3/4-inch plywood and building a basic open-cubby bench that finishes around 48 inches wide, 18 inches deep, and 18 inches tall.
Example Cut List for a 48-Inch Mudroom Bench:
- Top seat: 48″ x 18″
- Bottom panel: 48″ x 18″
- Two side panels: 16 1/2″ x 18″
- Two vertical dividers: 16 1/2″ x 18″
- Back support rail: 48″ x 3″
- Front trim board: 48″ x 2″
- Optional cubby shelf: 46 1/2″ x 16″
The side panels and dividers are listed at 16 1/2 inches tall because the 3/4-inch top and 3/4-inch bottom panels add the remaining 1 1/2 inches of height. That gives you an overall bench height of about 18 inches, which is comfortable for sitting.
Adjust these measurements based on your own entryway, plywood thickness, basket size, shoe height, and whether you want one row or two rows of cubbies.
Step-by-Step: How to Build a DIY Mudroom Bench with Shoe Storage
Step 1: Measure Your Entryway or Mudroom
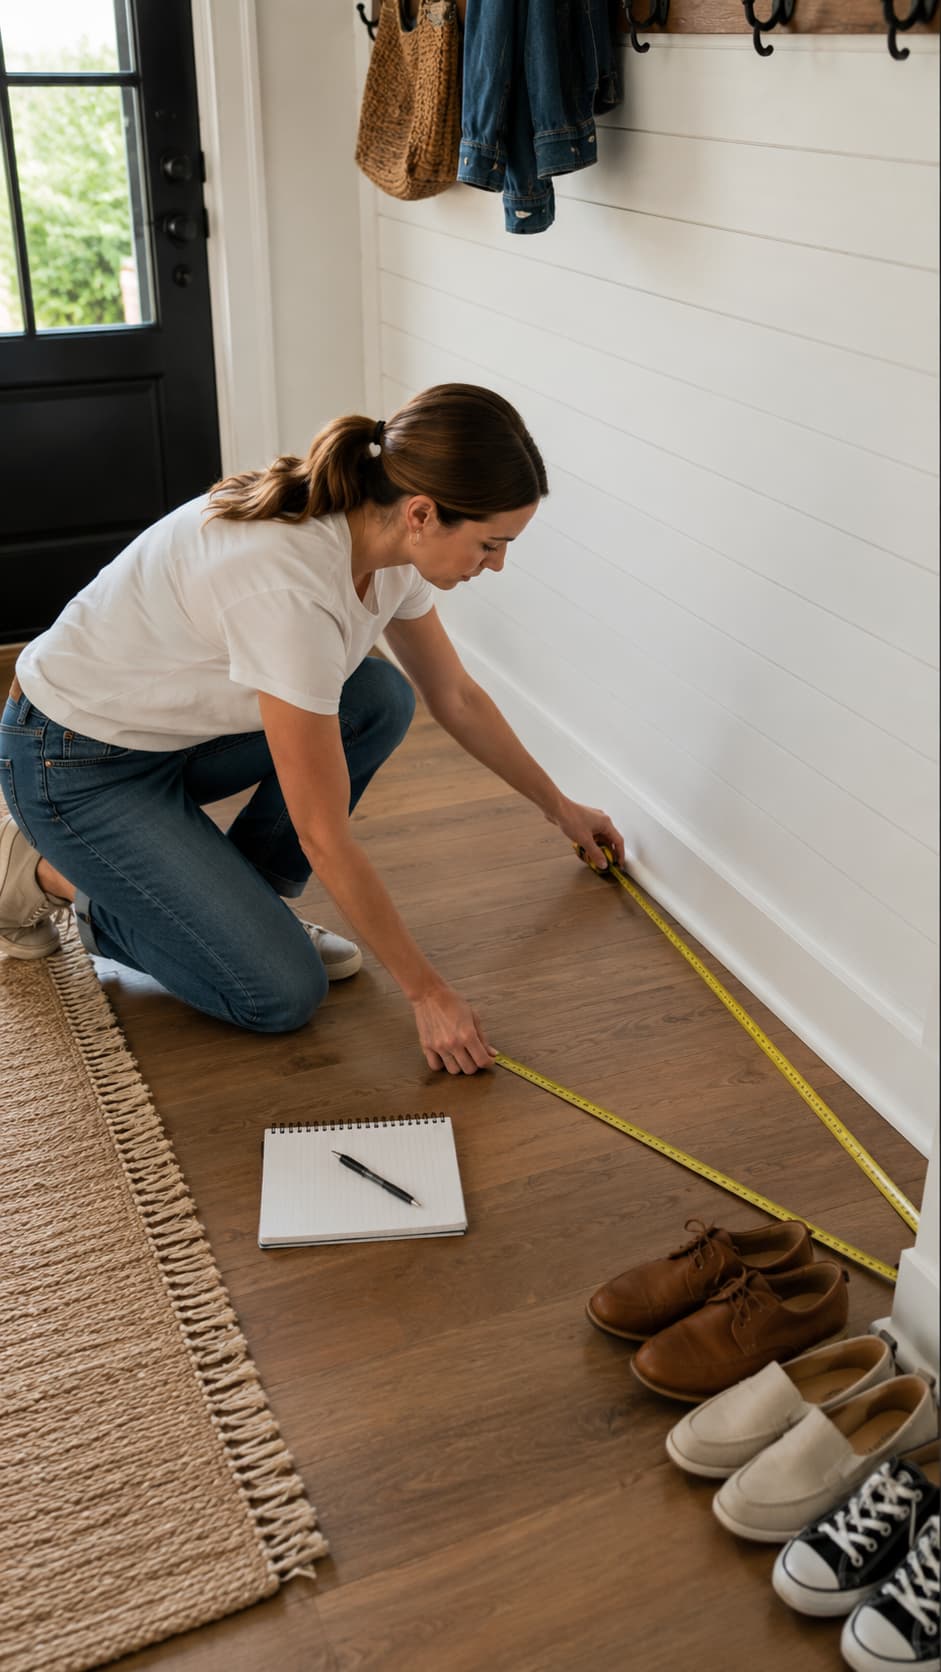
Grab your tape measure and get the full picture: wall width, available depth, baseboard height, nearby doors, and how people actually walk through the space. Nothing kills a project faster than building a beautiful bench that blocks the front door from opening all the way.
Leave enough clearance for doors to swing open and for people to pass by without doing a weird sideways shuffle. Walk through the space a few times mentally — where do people set bags down, where does the dog usually flop, where does the stroller need to fit? Real life dictates the layout more than any blueprint will.
Step 2: Choose Your Bench Style
Decide now whether you want open cubbies, baskets, drawers, or a bench with hooks above. This isn’t the place to overthink it — pick what fits your skill level and your storage needs, and move on.
Step 3: Cut the Wood Pieces
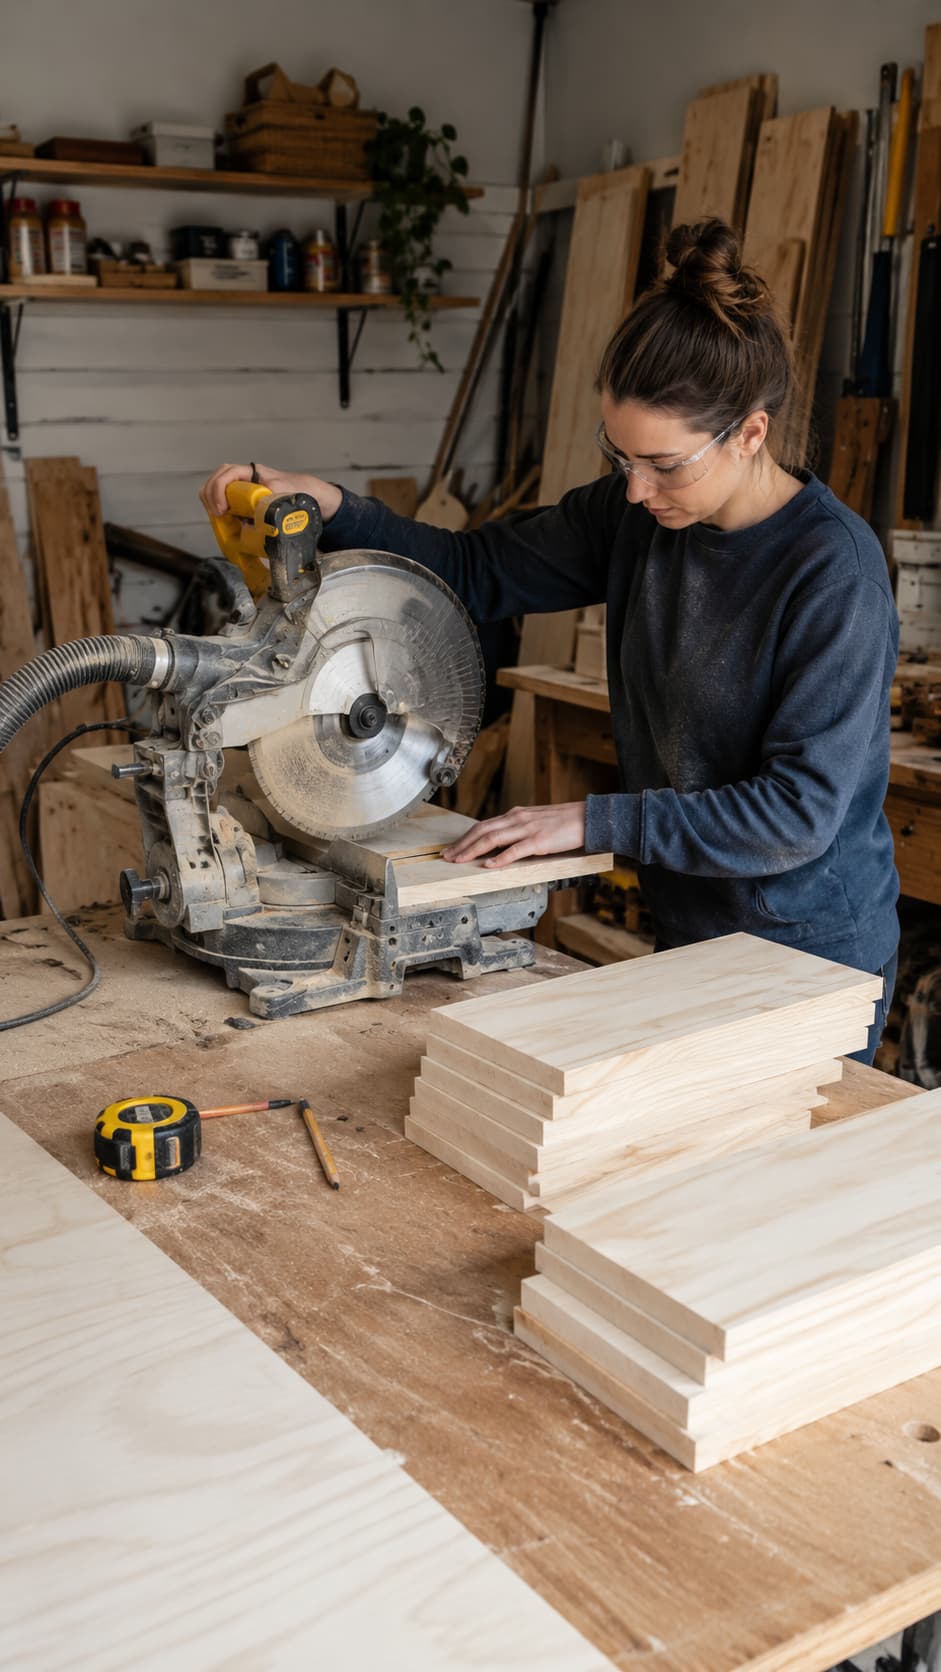
Cut your top, bottom, sides, dividers, and trim pieces according to your cut list. Measure twice, cut once, wear your safety glasses, and get a second set of hands when you’re wrestling large plywood panels through the saw.
Step 4: Sand the Pieces Before Assembly
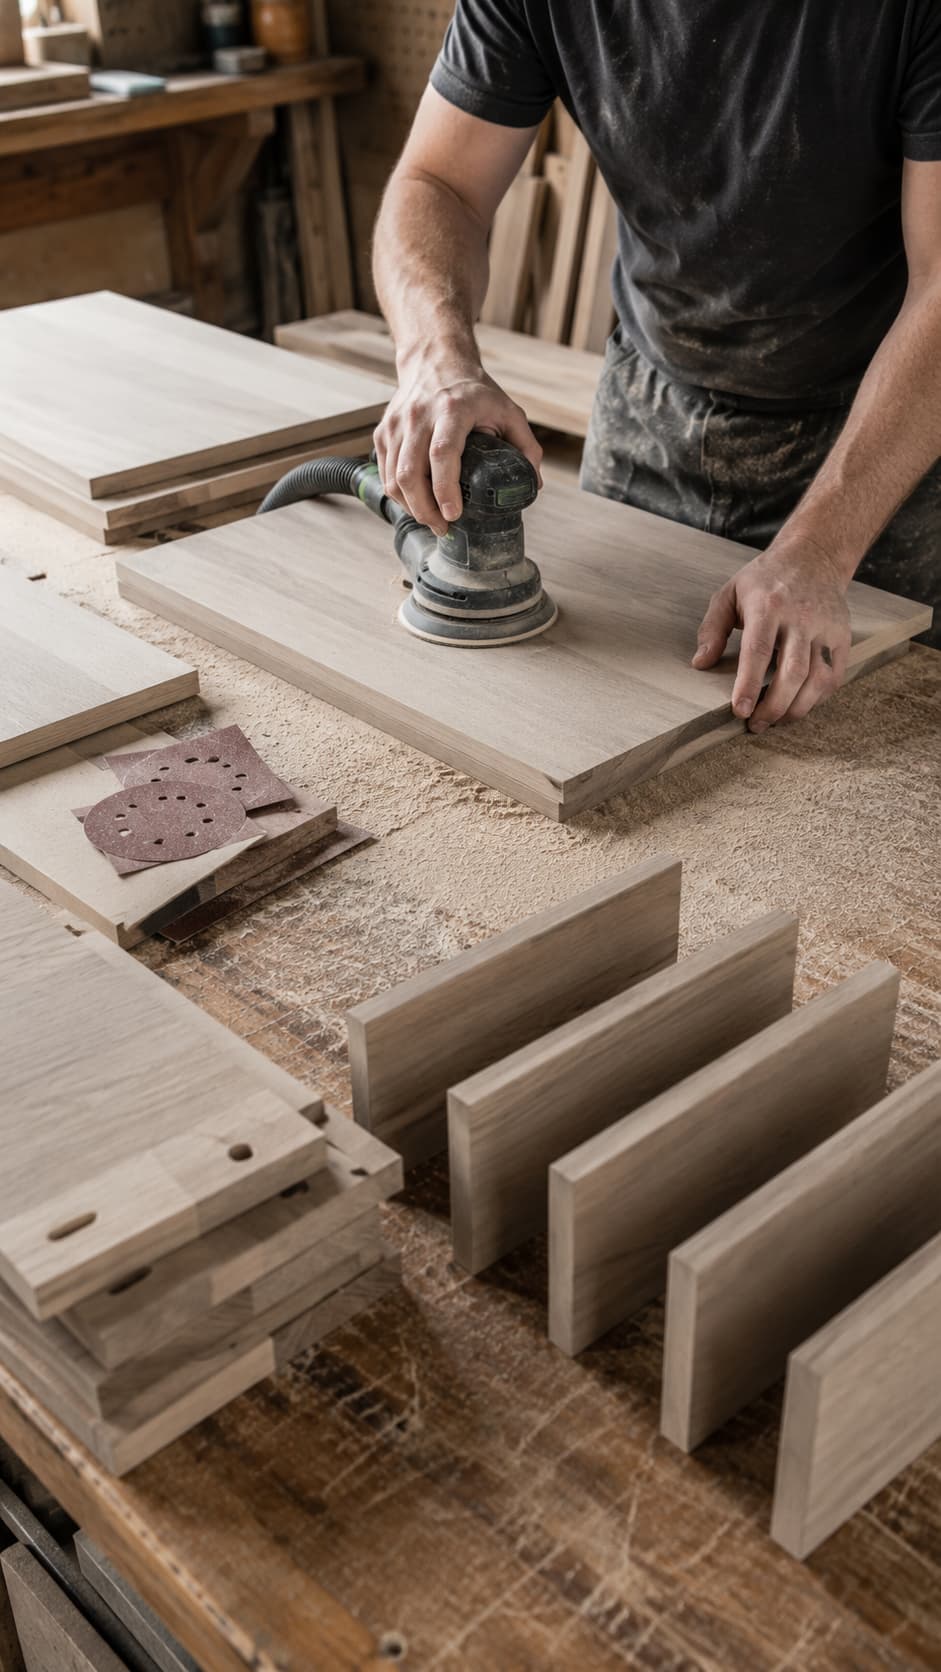
Sand every piece before you assemble anything. Trying to sand inside a finished cubby later is a special kind of annoying, and your knuckles will thank you for doing it now.
Recommended grits:
- 120 grit for smoothing
- 220 grit for final finish
Step 5: Build the Bench Box
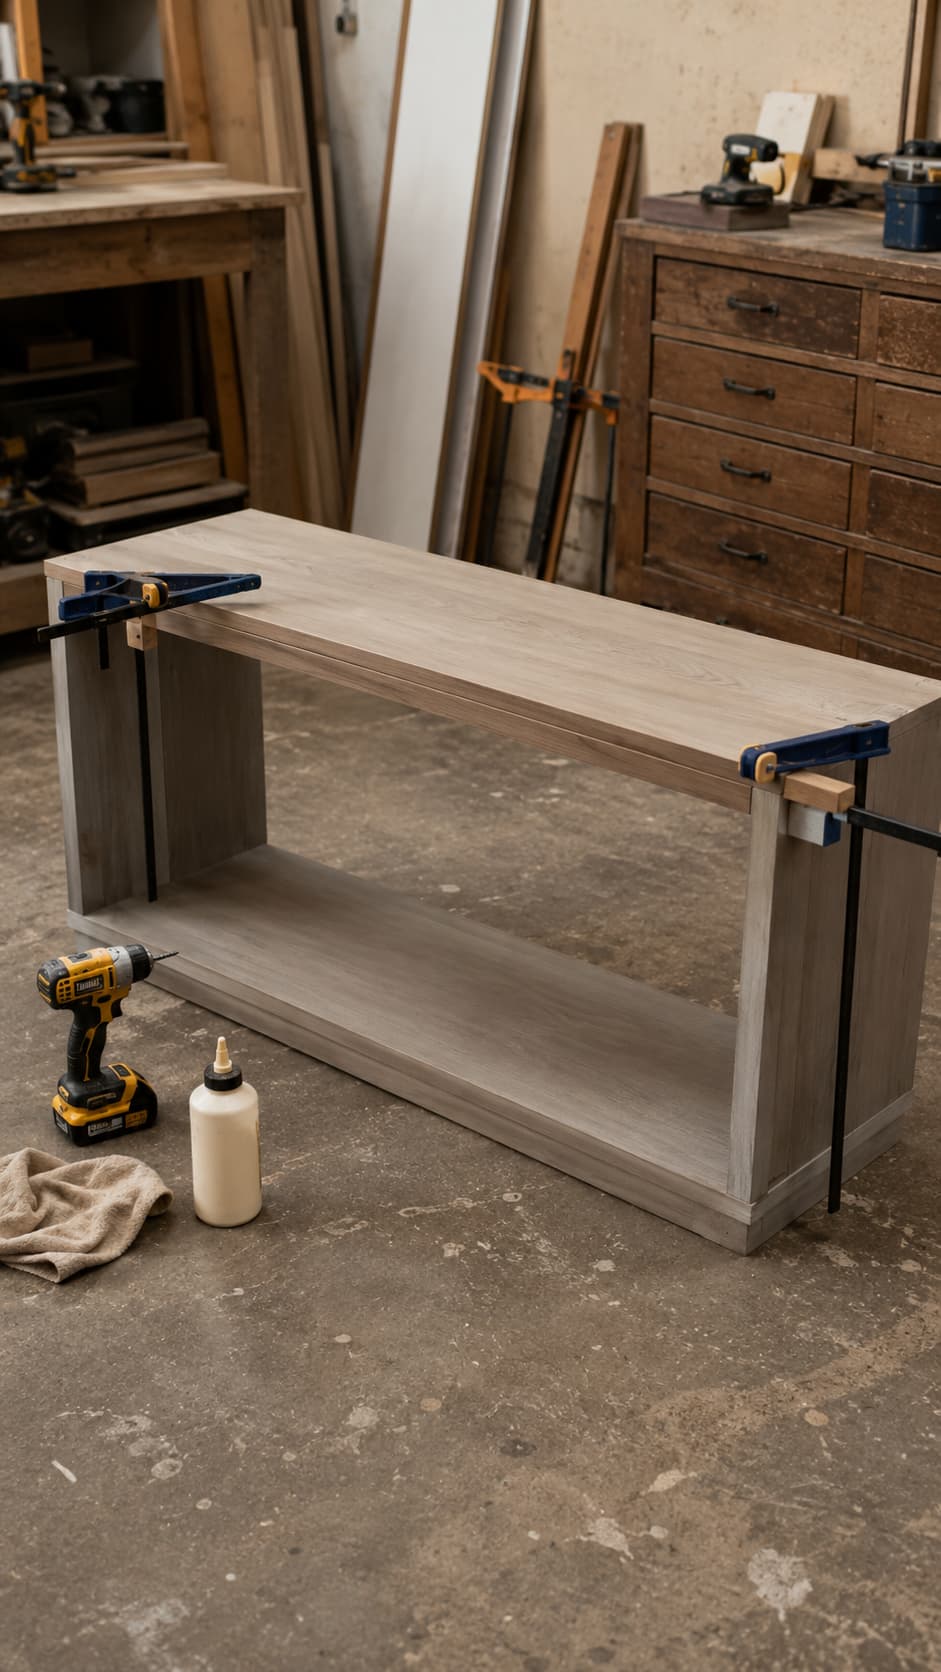
Assemble the two side panels, top, and bottom into a basic rectangular bench frame. Use wood glue plus screws for real strength — glue alone won’t hold up to years of people flopping down to tie their shoes.
Clamp everything before you drive a single screw. It feels like an extra step you don’t need, but a frame that shifts half an inch while you’re screwing it together will haunt you for the rest of the build. Trust the clamps.
Step 6: Add the Shoe Cubbies
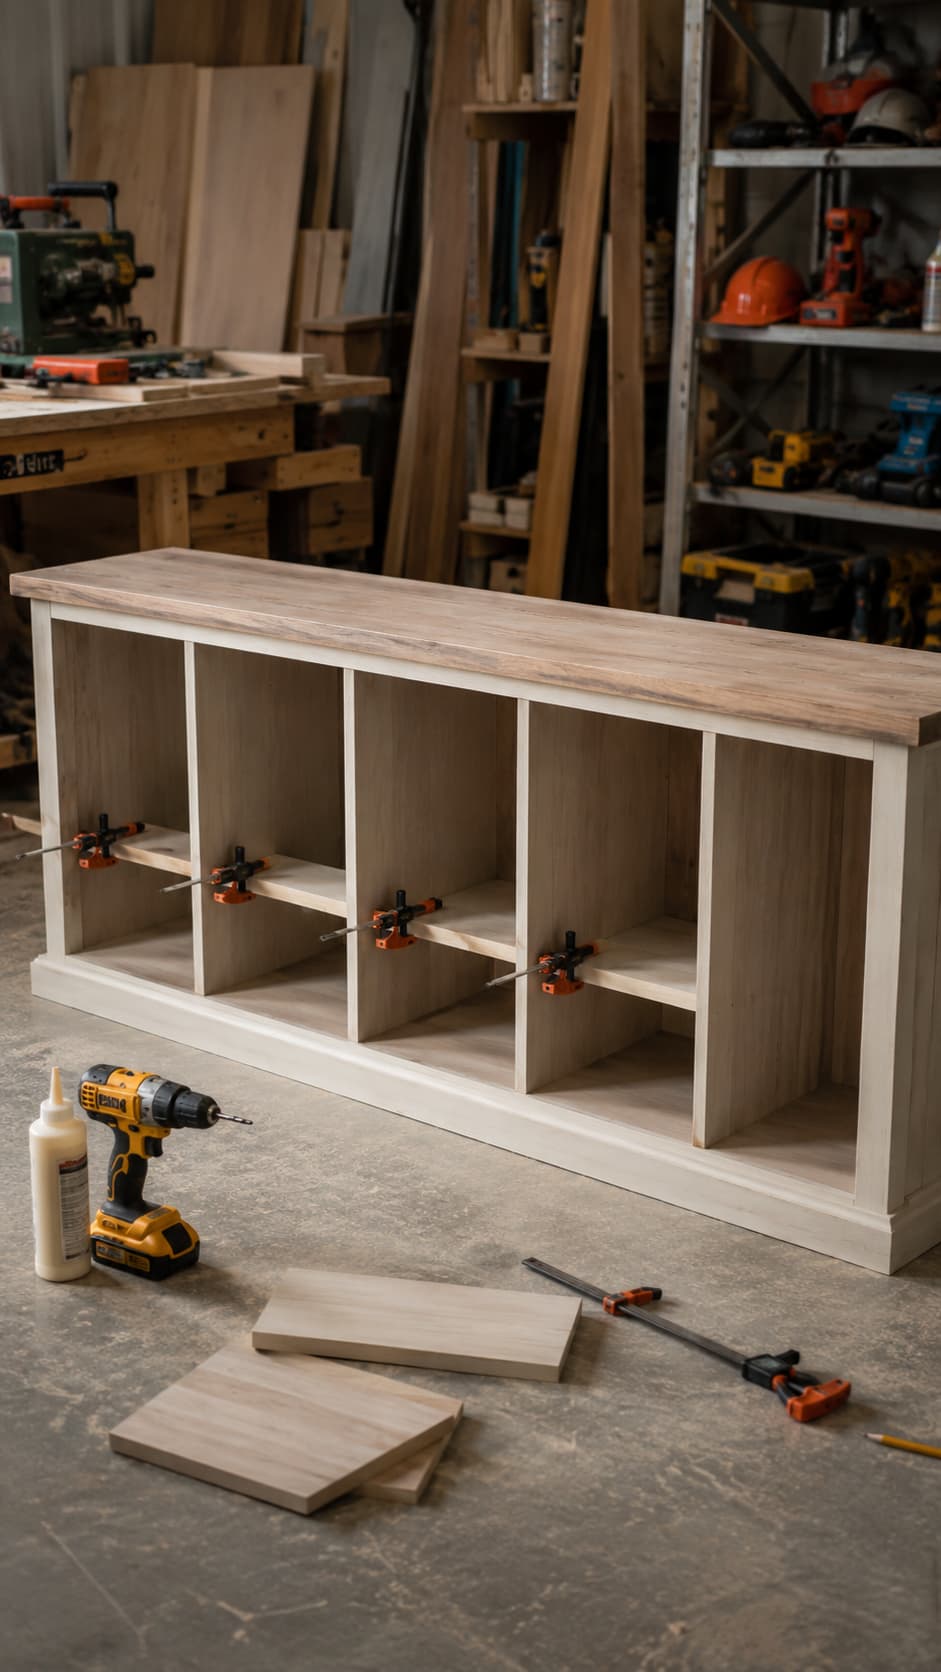
Install the vertical dividers inside the bench frame to create individual shoe compartments. Want double the storage? Add a middle shelf and create two rows instead of one.
Step 7: Add Trim for a Finished Look
Attach 1×2 or 1×3 boards to the front edges to hide the plywood layers underneath. This is the step where the project stops looking like a “garage project” and starts looking like a Pinterest entryway makeover.
Step 8: Fill Holes and Sand Again
Use wood filler on screw holes, seams, and any small gaps you find. Once it dries, sand everything smooth again before you move on to finishing.
Step 9: Paint, Stain, or Seal the Bench
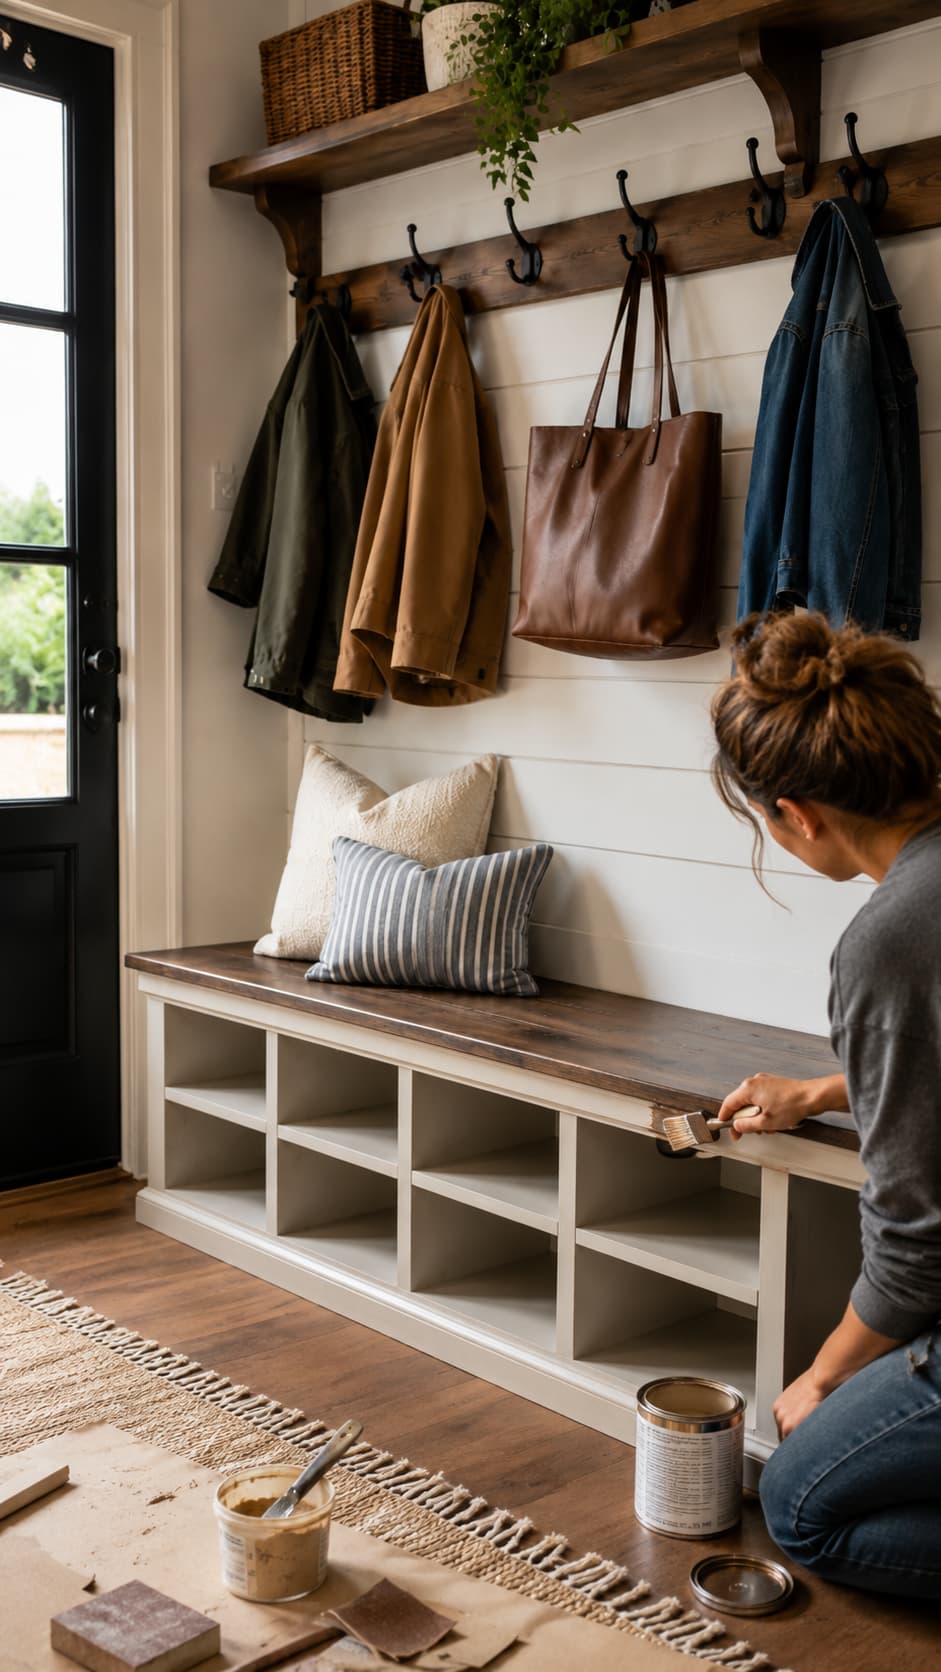
Time for the fun part. A few finish ideas to consider:
- White paint for farmhouse style
- Black paint for a modern entryway
- Natural stain for warm rustic decor
- Sage green or navy for a trendy mudroom look
Not sure what you need for this step? 12 Must-Have Wood Finishing Tools for Beginners breaks it all down.
Step 10: Add Baskets, Hooks, or a Wall Shelf
Finish the space with a few final touches:
- Add baskets inside the cubbies
- Install hooks above the bench
- Add a floating shelf over the hooks
- Use labels for kids’ shoes or daily-use items
If you want to go the extra mile, How to Build a Floating Shelf with a Hidden Bracket pairs really well with this build.
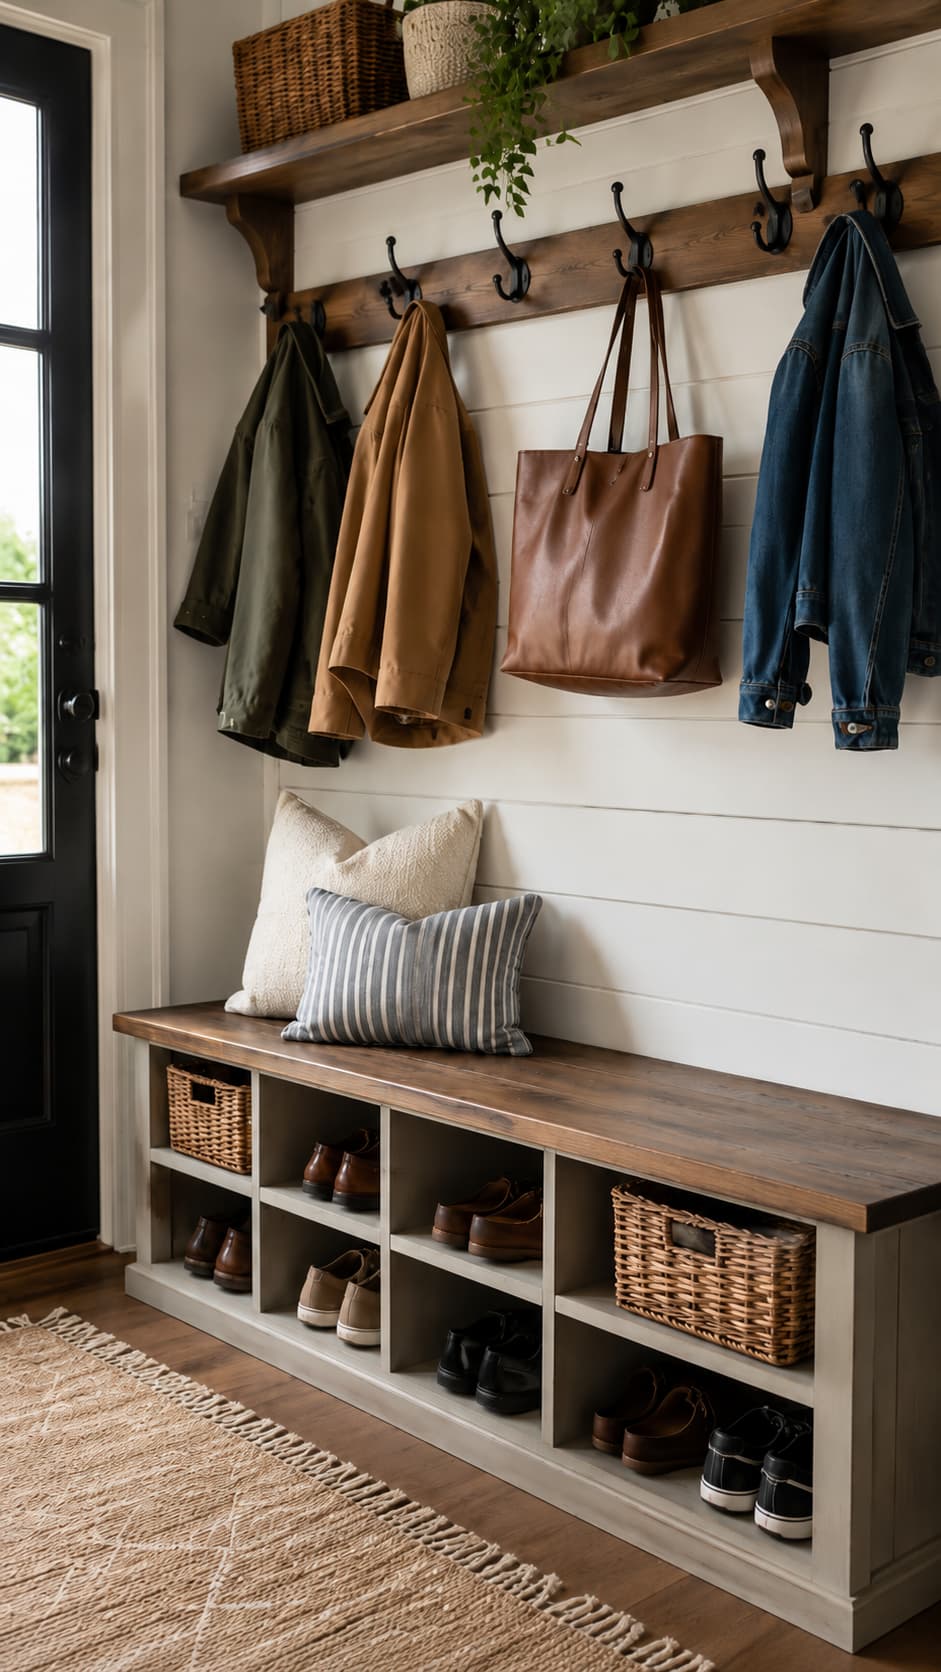
Mudroom Bench Ideas to Customize Your Build
Add Coat Hooks Above the Bench
Perfect for jackets, backpacks, hats, and bags — basically everything that used to end up on your dining chairs.
Add a Cushion
A cushion makes the bench more comfortable and softens the whole entryway look. IMO this is one of the most underrated upgrades on the list.
Use Baskets for Hidden Shoe Storage
Great if you’d rather not have twelve pairs of shoes on display every time someone walks through the door.
Add a Tall Side Cabinet
Useful for umbrellas, boots, cleaning supplies, or pet leashes. Ever notice how leashes multiply when you’re not looking? This fixes that.
Build It Into a Nook
Got an empty hallway nook or garage entrance? Building the bench into that space makes it look custom-built, even if it technically isn’t.
Best Wood for a DIY Mudroom Bench with Shoe Storage
Plywood
Best for a clean, strong, budget-friendly build. This is my go-to for most beginner projects.
Pine Boards
Easy to work with and great for painted benches. Forgiving if you’re still building up your confidence with a saw.
2x4s
Great for a chunky, farmhouse-style bench that can take a beating.
Hardwood
More expensive, but genuinely beautiful for stained benches where you want the wood grain to shine.
Still deciding what to build with? 7 Best Woods for Beginner Woodworking Projects covers the pros and cons in more detail.
My honest take, FYI: for a first mudroom bench, plywood wins almost every time. It’s more forgiving of small mistakes, it won’t warp on you the way solid pine sometimes will, and it takes paint beautifully. Save the hardwood splurge for a piece you plan to leave unpainted.
Common Mistakes to Avoid
Making the Bench Too Deep A bench that sticks too far into a hallway becomes annoying fast. Nobody wants to do the entryway limbo every day.
Forgetting Shoe Height Boots need taller cubbies than sneakers. Measure your tallest pair before finalizing your cubby heights.
Skipping Wall Anchoring If you’re adding hooks, a shelf, or a tall back panel, anchor it securely into wall studs. This isn’t optional — it’s a safety thing.
Not Sanding Inside the Cubbies Shoes, baskets, and hands will touch those edges constantly. Rough spots will bug you every single day if you skip this.
Choosing the Wrong Finish Mudroom benches take a beating from daily use, so go with a durable paint or protective topcoat. This isn’t the project to cut corners on finish quality :/
Want Exact Plans for More DIY Furniture Builds?
After building a DIY mudroom bench with shoe storage, you might catch the bug for more furniture projects — benches, shelves, cabinets, shoe racks, storage boxes, entryway organizers, you name it.
That’s where Ted’s Woodworking Plans can fit naturally into your next build. Instead of guessing measurements or piecing together random pictures from the internet, you get detailed plans with diagrams, cut lists, and step-by-step instructions already worked out for you.
If you enjoy building practical home projects but want clearer measurements and more project options without starting from scratch every time, Ted’s Woodworking Plans can help you keep the momentum going.
FAQ About DIY Mudroom Benches
How tall should a mudroom bench be? A comfortable mudroom bench is usually around 18 inches high, similar to a standard chair height.
How deep should a mudroom bench be? Most mudroom benches work well at 16 to 18 inches deep. That’s enough sitting space without taking over the entryway.
What is the best wood for a mudroom bench? Plywood and pine are both great beginner-friendly options. Plywood is strong and stable, while pine is affordable and easy to paint.
Can I build a mudroom bench without drawers? Yes. Open cubbies are easier for beginners and still work great for shoes, baskets, and everyday storage.
Should I paint or stain a mudroom bench? Paint works well for farmhouse, modern, or built-in styles. Stain is better if you want a warm, natural wood look.
Can I add hooks above the bench? Yes. Hooks are a great addition for coats, bags, hats, and backpacks. Just make sure they’re attached securely to wall studs or a strong back panel.
Final Thoughts
A DIY mudroom bench with shoe storage is one of those projects that makes your home feel more organized almost immediately. It gives shoes a place to go, creates a comfortable spot to sit, and makes the entryway look way more intentional than “shoe pile with a welcome mat.”
Start with a simple bench and open cubbies if you’re new to woodworking. Once you get comfortable, you can add hooks, baskets, shelves, cushions, or even build out a full mudroom wall setup.
The best part? Every time you walk through the door and don’t trip over a pile of shoes, you’ll be very glad you built it 🙂