
You want to build something. You’ve got the wood, the tools, and the motivation — but you’re staring at a blank workbench with absolutely no plan. That’s a special kind of paralysis, and honestly, it stops more beginners than a dull saw ever could.
Here’s the problem: most “free” woodworking plans online are either paywalled after the first step, so vague they’re basically useless, or designed for someone with a fully equipped shop and 15 years of experience. Not exactly helpful when you’re just getting started.
So I put together this list of 15 genuinely free, printable woodworking plans — real sources, real instructions, beginner-friendly builds. Every single one comes with a link to the actual plan, a difficulty rating, and an estimated cost so you know what you’re getting into before you buy a single board.
| Project | Difficulty | Cost | Time |
|---|---|---|---|
| Garden Bench | 🟢 | $30–40 | 1 Day |
| Storage Bench | 🟡 | $45–65 | Weekend |
| Planter Box | 🟢 | $20–30 | Half Day |
| Birdhouse | 🟡 | $15–25 | 3–4 Hours |
Quick Start: 5 Easiest Plans on This List
Pinterest skimmers, this one’s for you. If you want to grab a plan and start building today, these five are the most beginner-friendly on the entire list:
- Wooden Toolbox — straight cuts, screws, done in a day
- Floating Wall Shelf — minimal materials, massive visual impact
- Planter Box — outdoor-ready, zero complex joinery
- Birdhouse — classic starter build, forgiving proportions
- Raised Garden Bed — just straight cuts and screws, seriously
Now let’s get into all 15 with the full details.
What Makes a Good Beginner Woodworking Plan?
Not all free plans are created equal — and I say that from experience after downloading some truly terrible ones :/
A genuinely good beginner plan should have all of these:
- A complete cut list with exact dimensions, not “cut to fit”
- Step-by-step instructions with photos or diagrams — not just a finished photo and a wish
- Minimal tool requirements — ideally workable with a drill and circular saw
- Forgiving joinery — screws and pocket holes, not dovetails and mortise & tenon
- Printable format so you can take it to the workshop without your laptop
If a plan is missing any of these, it’s going to frustrate you. Stick to the sources in this list and you’ll be fine.
How We Chose These Plans
I didn’t just pull random links off the internet. Every plan on this list had to meet these criteria:
- ✅ Completely free — no credit card, no “free trial,” no games
- ✅ Printable instructions or downloadable PDF included
- ✅ Beginner-friendly — achievable without advanced skills or specialty tools
- ✅ From a trusted woodworking source — Ana White, Kreg Tool, Instructables, The Family Handyman
- ✅ Uses commonly available materials — standard lumber dimensions you can find at any home improvement store
That’s the bar. Everything on this list clears it.
Advertisement
Difficulty Level Guide
Each project below carries one of three ratings. Reference this as you browse:
- 🟢 Level 1 — Total Beginner: Straight cuts only, screws and glue, no special joinery. Build it on your first weekend.
- 🟡 Level 2 — Beginner+: A few more pieces to manage, basic pocket hole joinery, one or two new techniques. You’ll nail it by Sunday.
- 🟠 Level 3 — Confident Beginner: Introduces hinges, dados, or door fitting. Still very achievable — just take your time.
What You Need Before You Start
Before printing anything, let’s make sure you have the basics in place. The good news? You don’t need a full workshop to build any of these projects.
Essential tools for this list:
- Drill/driver (cordless is ideal)
- Circular saw or miter saw
- Measuring tape and combination square
- Clamps (4–6 is plenty to start)
- Sandpaper — 80, 120, and 220 grit
Wood to buy: For most of these builds, you’ll use pine, poplar, or construction-grade plywood. They’re affordable, widely available, and forgiving for beginners. Not sure which wood to pick for your first project? Our full guide to [7 Best Woods for Beginner Woodworking Projects](7 Best Woods for Beginner Woodworking Projects) breaks it all down.
Budget reality check: Most projects on this list land under $50 in materials if you shop smart and avoid buying more than you need.
Using printable plans in the workshop: Print at 100% scale — never “fit to page.” Draw a 1-inch reference line on your printout and measure it before cutting. If it’s off, adjust your printer scaling until it’s exact.
Section 1: Free Outdoor Woodworking Plans
These five projects are perfect for the backyard, patio, or garden — and they look fantastic when finished. Outdoor builds are especially forgiving because you don’t need perfectly flush joints or mirror finishes. A little rustic character just adds to the appeal.
1. Classic Garden Bench
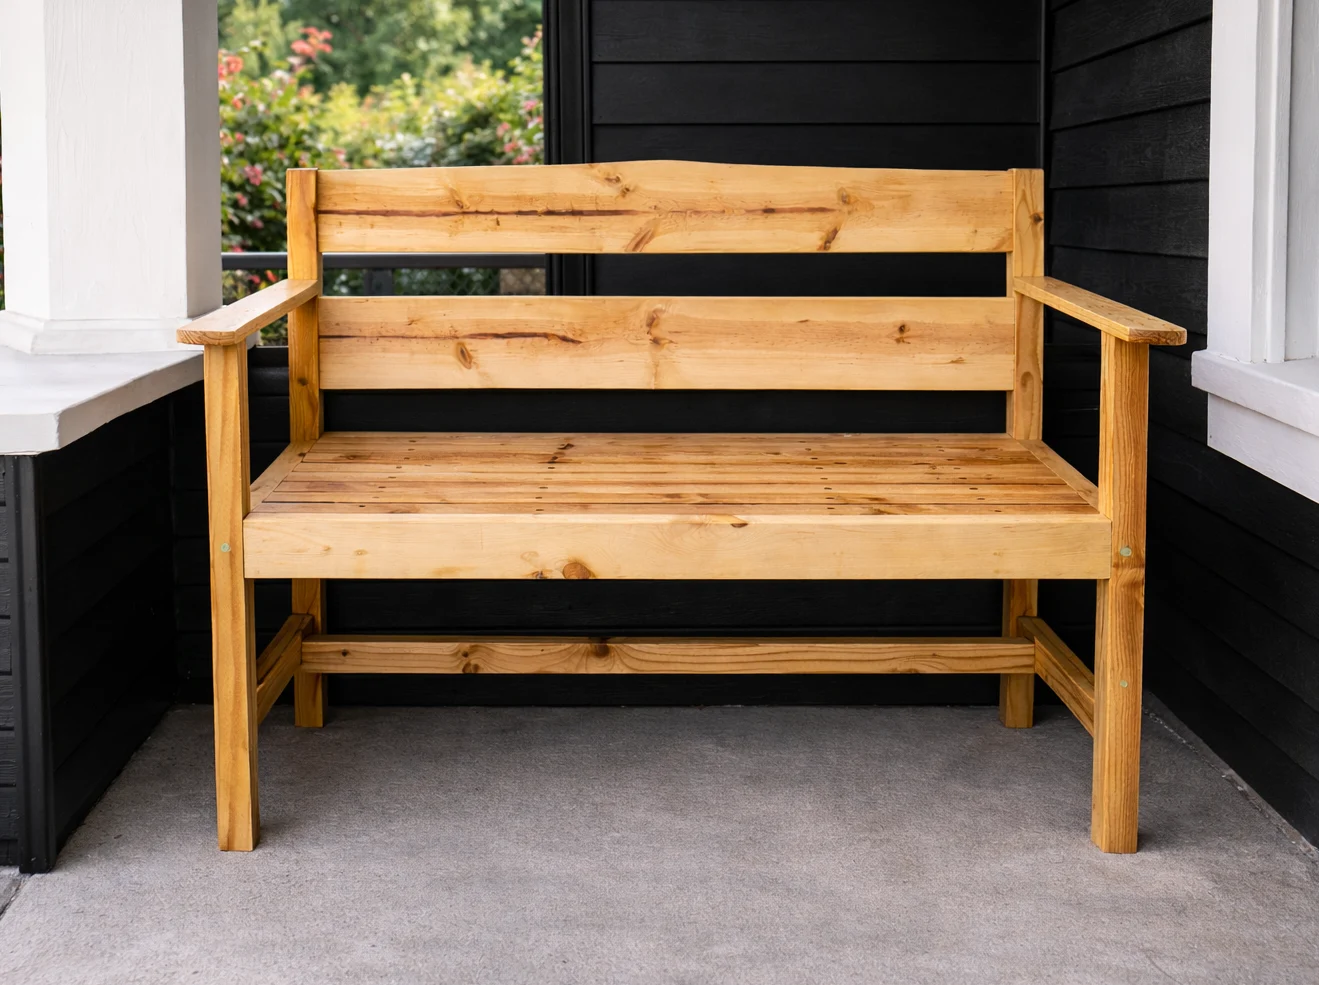
Difficulty: 🟢 Level 1 Estimated Cost: $30–$40 Source: Ana White — free PDF plan
A classic garden bench is one of those builds that looks way more impressive than the effort it actually takes. It’s straight cuts, a handful of screws, and a couple of hours — and you end up with something that genuinely elevates any outdoor space.
Ana White’s plan includes a full cut list, diagram, and step-by-step photos. This is the kind of plan that makes you feel like a woodworking genius on your first build. FYI — sand it smooth and hit it with an outdoor finish and it’ll last for years.
Why it’s great for beginners: No angled cuts, no complex joinery, no tricky assembly. Just measure, cut, and screw.
2. Outdoor Storage Bench
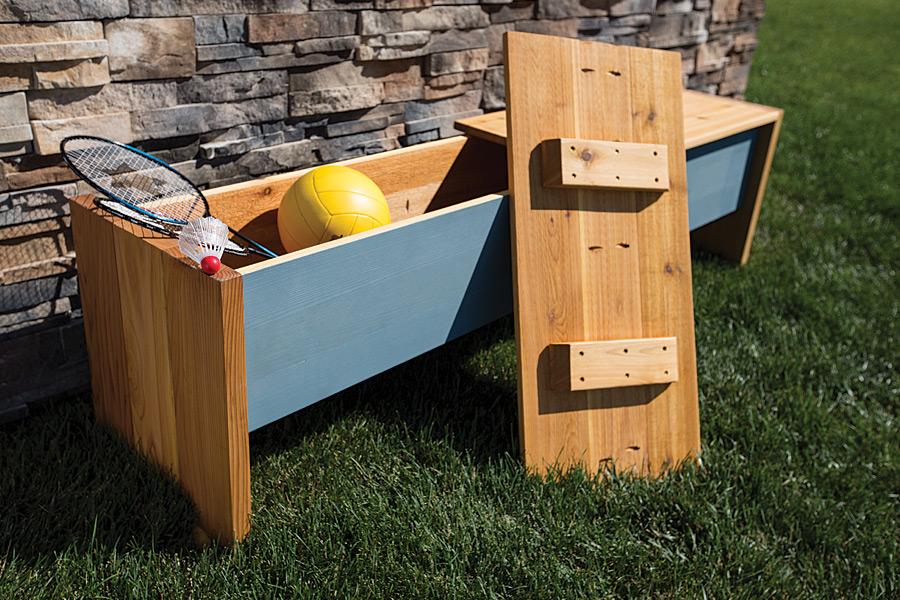
Difficulty: 🟡 Level 2 Estimated Cost: $45–$65 Source: Kreg Tool — free printable plan
This one does double duty — it’s a bench and hidden storage. Perfect for patios where you need somewhere to stash cushions, garden tools, or the kids’ outdoor toys.
The storage bench introduces you to building a basic box with a hinged lid — your first real experience with hardware fitting. It’s not hard, just a step up from the basic bench. We wrote a full deep-dive on this build over at our Outdoor Storage Bench post if you want more detail before starting.
Why it’s great for beginners: The box construction teaches you to build square — a fundamental skill you’ll use on every future project.
3. Simple Adirondack Chair
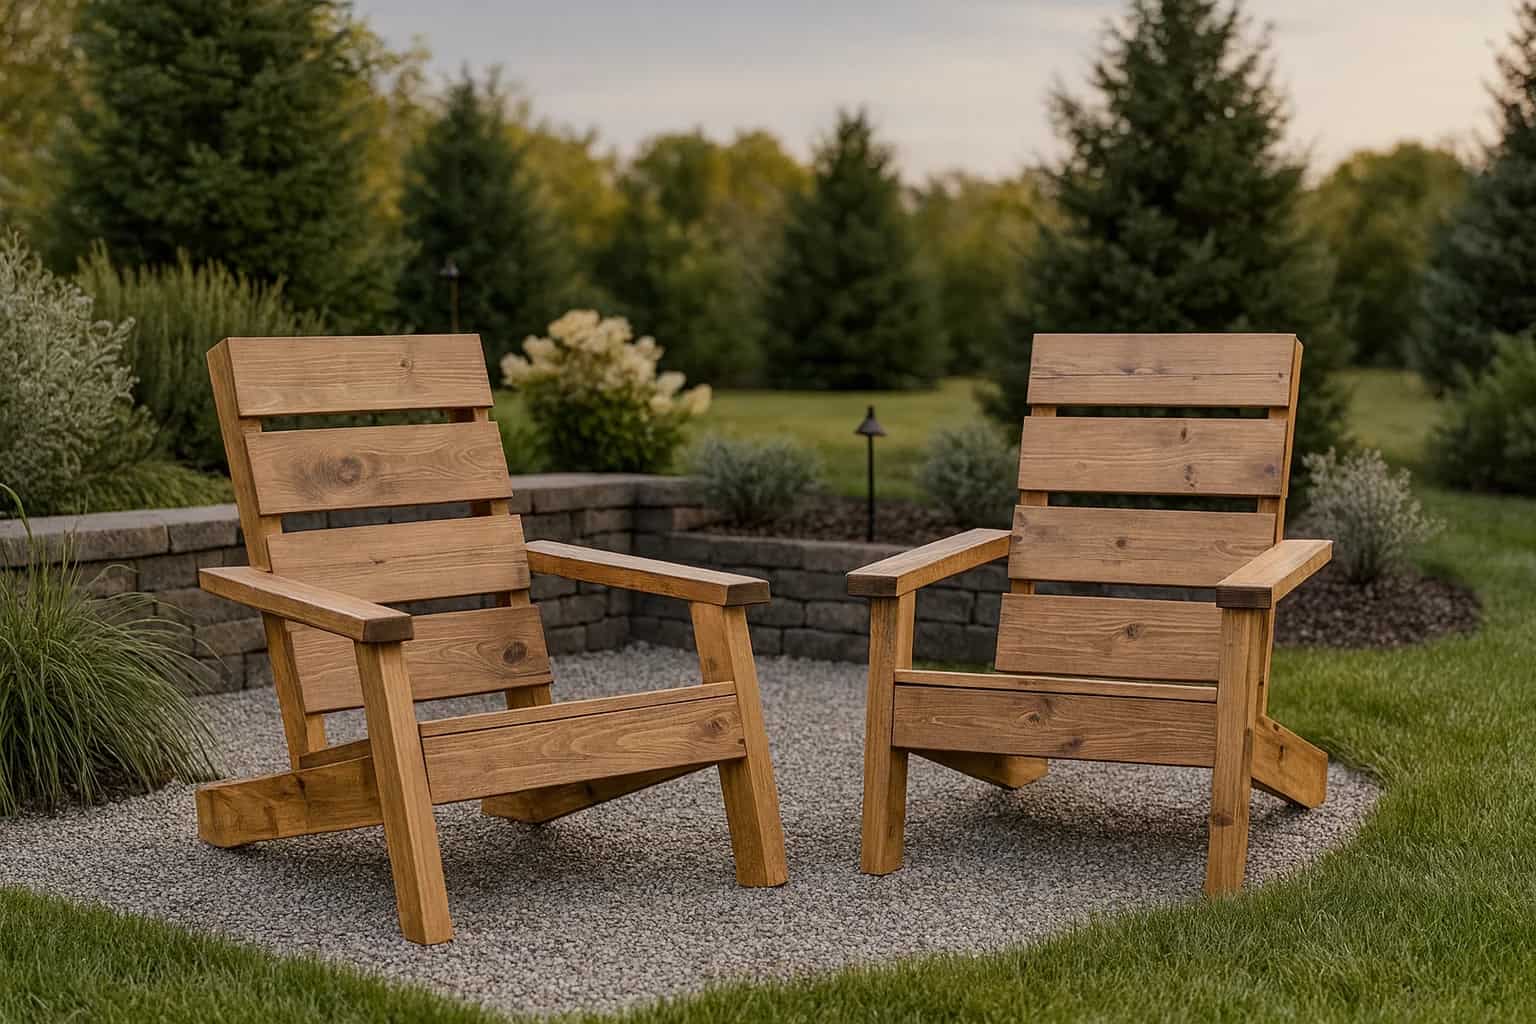
Difficulty: 🟡 Level 2 Estimated Cost: $40–$60 Source: Ana White — free plan
Adirondack chairs look complicated, but they’re really just a series of flat boards cut to shape and assembled with screws. The angled back and seat look impressive and feel amazing to sit in — and the whole thing is surprisingly quick to build once you get going.
The trickiest part is the seat angle and back slats. Take your time with the dry fit before driving any screws, and you’ll be fine. This is a solid weekend project that’ll impress everyone who sees it on your porch.
Why it’s great for beginners: Teaches you angled cuts and working with multiple identical pieces — great skill-builders without being overwhelming.
4. Raised Garden Bed
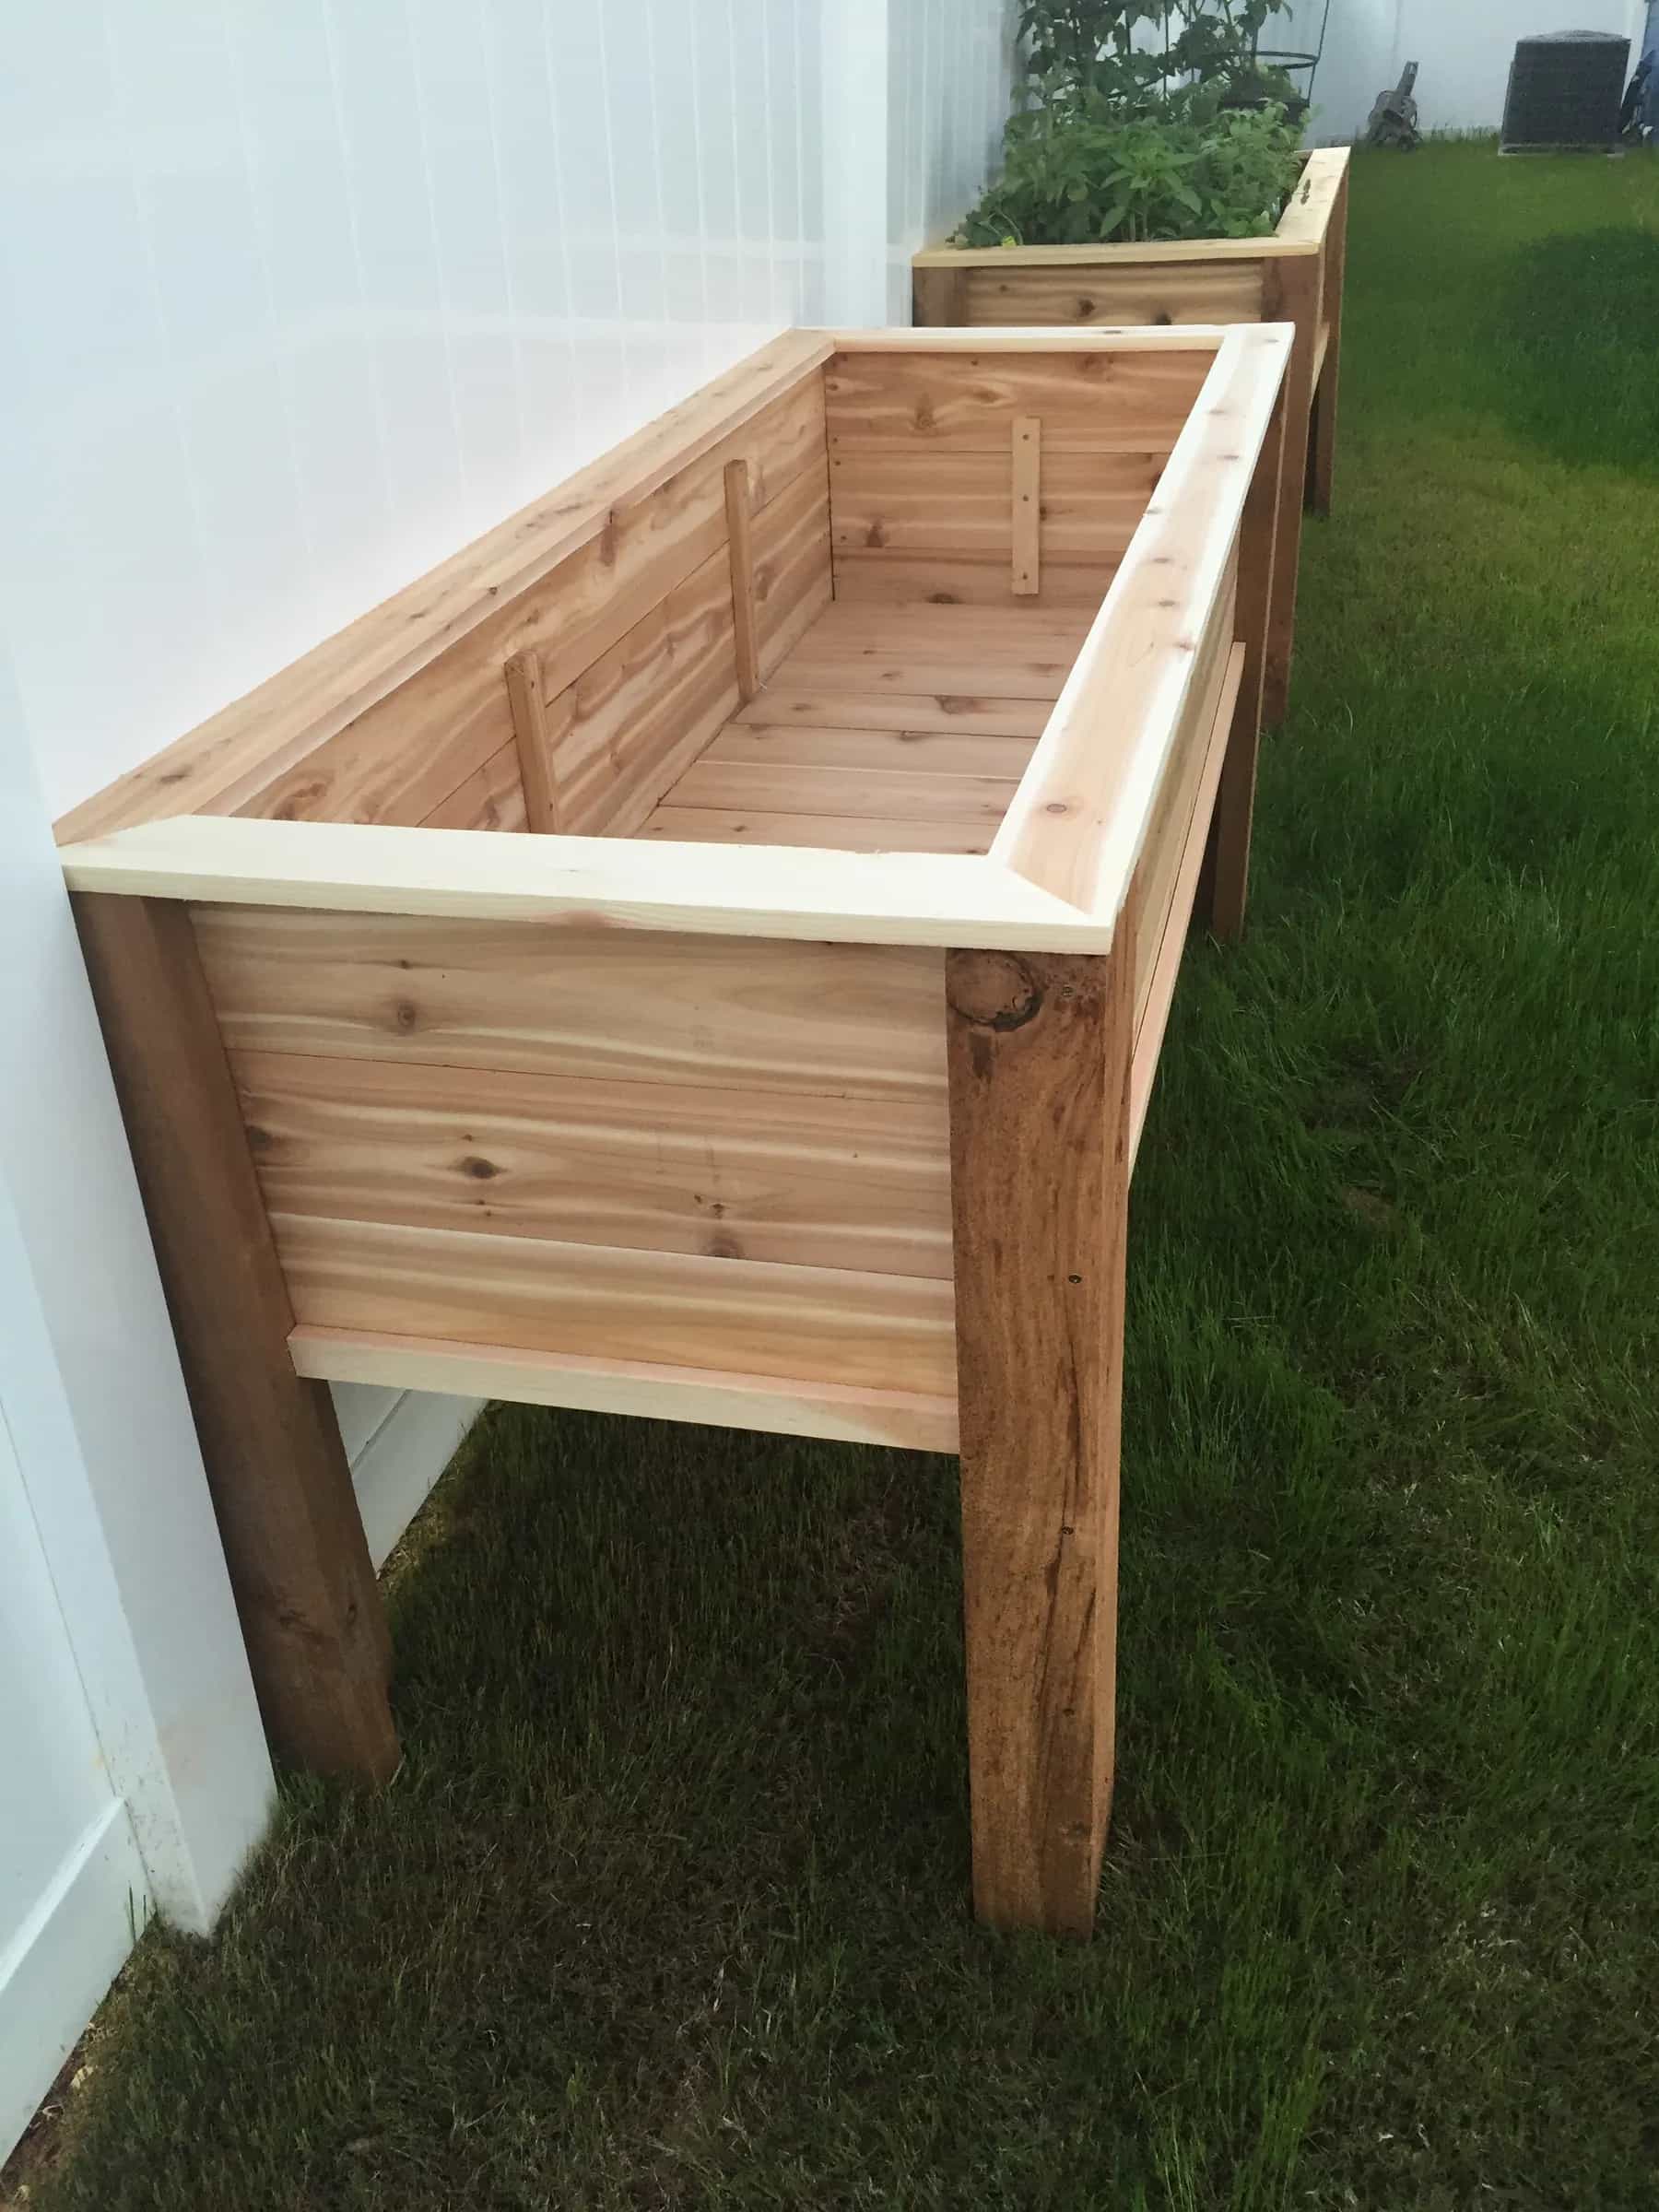
Difficulty: 🟢 Level 1 Estimated Cost: $25–$35 Source: instructables — free plan
This might be the most genuinely useful build on the entire list. A raised garden bed is just four boards screwed together — literally. No fancy joinery, no complicated cuts. Even if your first build is a little rough around the edges, it still works perfectly and looks great once you fill it with plants.
Use cedar if your budget allows — it’s naturally rot-resistant and smells incredible when you cut it. Pine works fine too, especially if you line the inside with landscape fabric.
Why it’s great for beginners: You can’t really mess this one up. It’s the perfect first outdoor build.
5. Classic Picnic Table
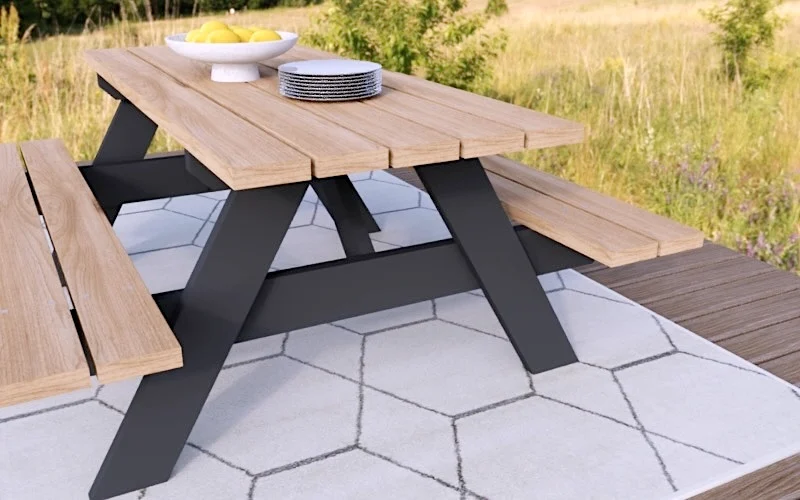
Difficulty: 🟡 Level 2 Estimated Cost: $50–$70 Source: ana white — free PDF plan
A picnic table is a project that feels ambitious but is completely within reach for a beginner. The angles on the legs are the main challenge — you’ll make your first angled cuts here — but Ana White’s plan walks you through it clearly. We also have a full build guide on our Picnic Table post worth checking out before you start.
Build this once and your family will use it for a decade. That’s a pretty good return on a Saturday morning.
Why it’s great for beginners: The repetitive cuts and symmetrical assembly teach you accuracy and consistency — skills that make every future build easier.
Section 2: Free Storage & Organization Plans
These projects make your home more functional and look great doing it. IMO, storage builds are the most satisfying category for beginners because you finish with something you actually use every single day.
6. Floating Wall Shelves
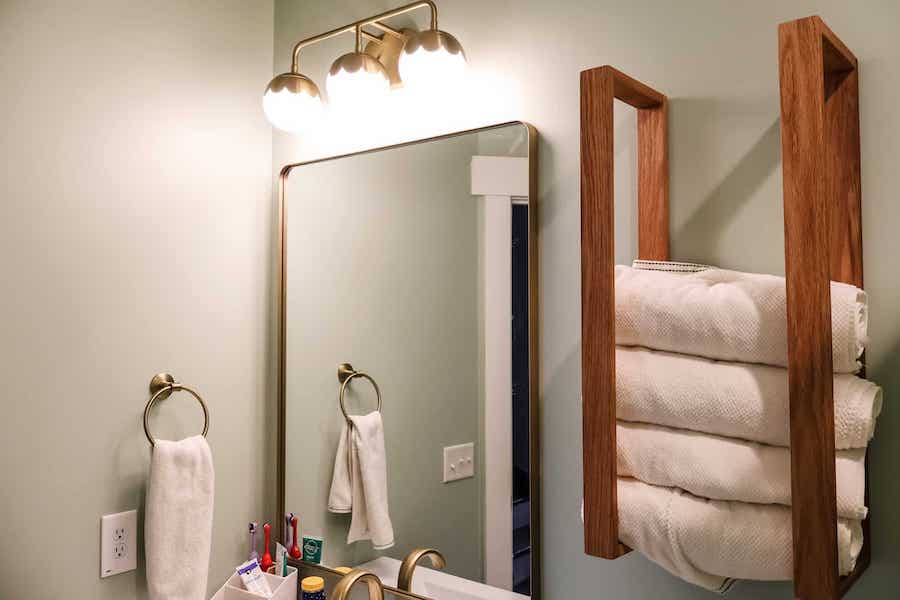
Difficulty: 🟢 Level 1 Estimated Cost: $15–$25 Source: Kreg Tool — free plan
Floating shelves are the gateway drug of woodworking. They’re quick, cheap, and transform a bare wall into something that looks designed. The basic version is literally just a board with a hidden mounting bracket — you can knock out a set of three in an afternoon.
The key skill here is finding studs and getting your mounting level. Nail those two things and the rest is trivial. Start with a short shelf in a low-stakes spot — a bathroom or laundry room — before mounting them somewhere prominent.
Why it’s great for beginners: Maximum visual impact for minimum effort. Perfect first indoor build.
7. Simple Bookcase
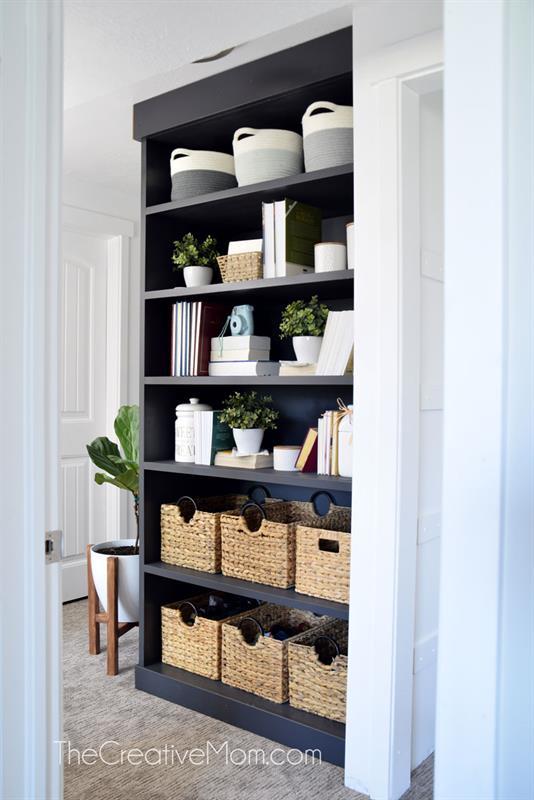
Difficulty: 🟡 Level 2 Estimated Cost: $40–$55 Source: Kreg tool — free printable plan
A basic bookcase is a box with shelves — which sounds simple, but teaches you the most important skill in all of woodworking: building square. If your box isn’t square when you assemble it, nothing sits right and doors won’t hang properly on future projects. A bookcase is where you learn to fix that.
Use pocket hole joinery (a Kreg jig is worth the investment) and plywood or pine boards.The kreg’s tool plan includes a cut list and clear photos for every step.
Why it’s great for beginners: Building a square box is the foundation of almost every future furniture project. Get this right and everything else gets easier.
8. Wooden Toolbox
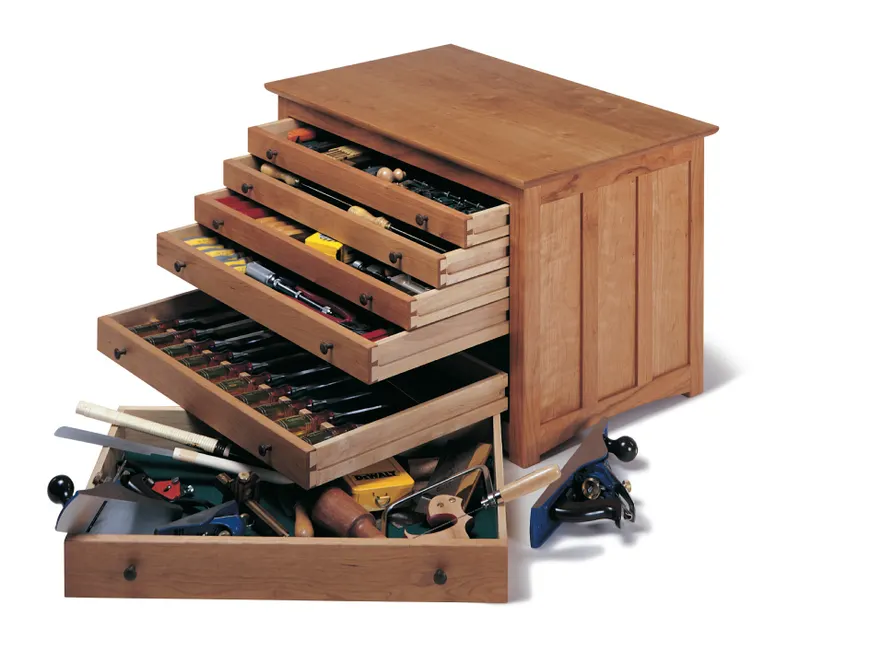
Difficulty: 🟢 Level 1 Estimated Cost: $20–$30 Source: Instructables — free plan
A wooden toolbox is the perfect beginner project for two reasons: it’s simple to build, and you immediately use it to hold your tools. Very satisfying. The classic design — a rectangular box with a central divider and a dowel handle — takes maybe three hours from start to finish.
We have a full step-by-step guide over at our Toolbox post if you want a detailed walkthrough before you start. Build this first, fill it with your tools, and take it to every future project.
Why it’s great for beginners: Introduces you to building a box with a handle — teaches glue joints, drilling, and basic assembly all at once.
9. Kitchen Drawer Organizer
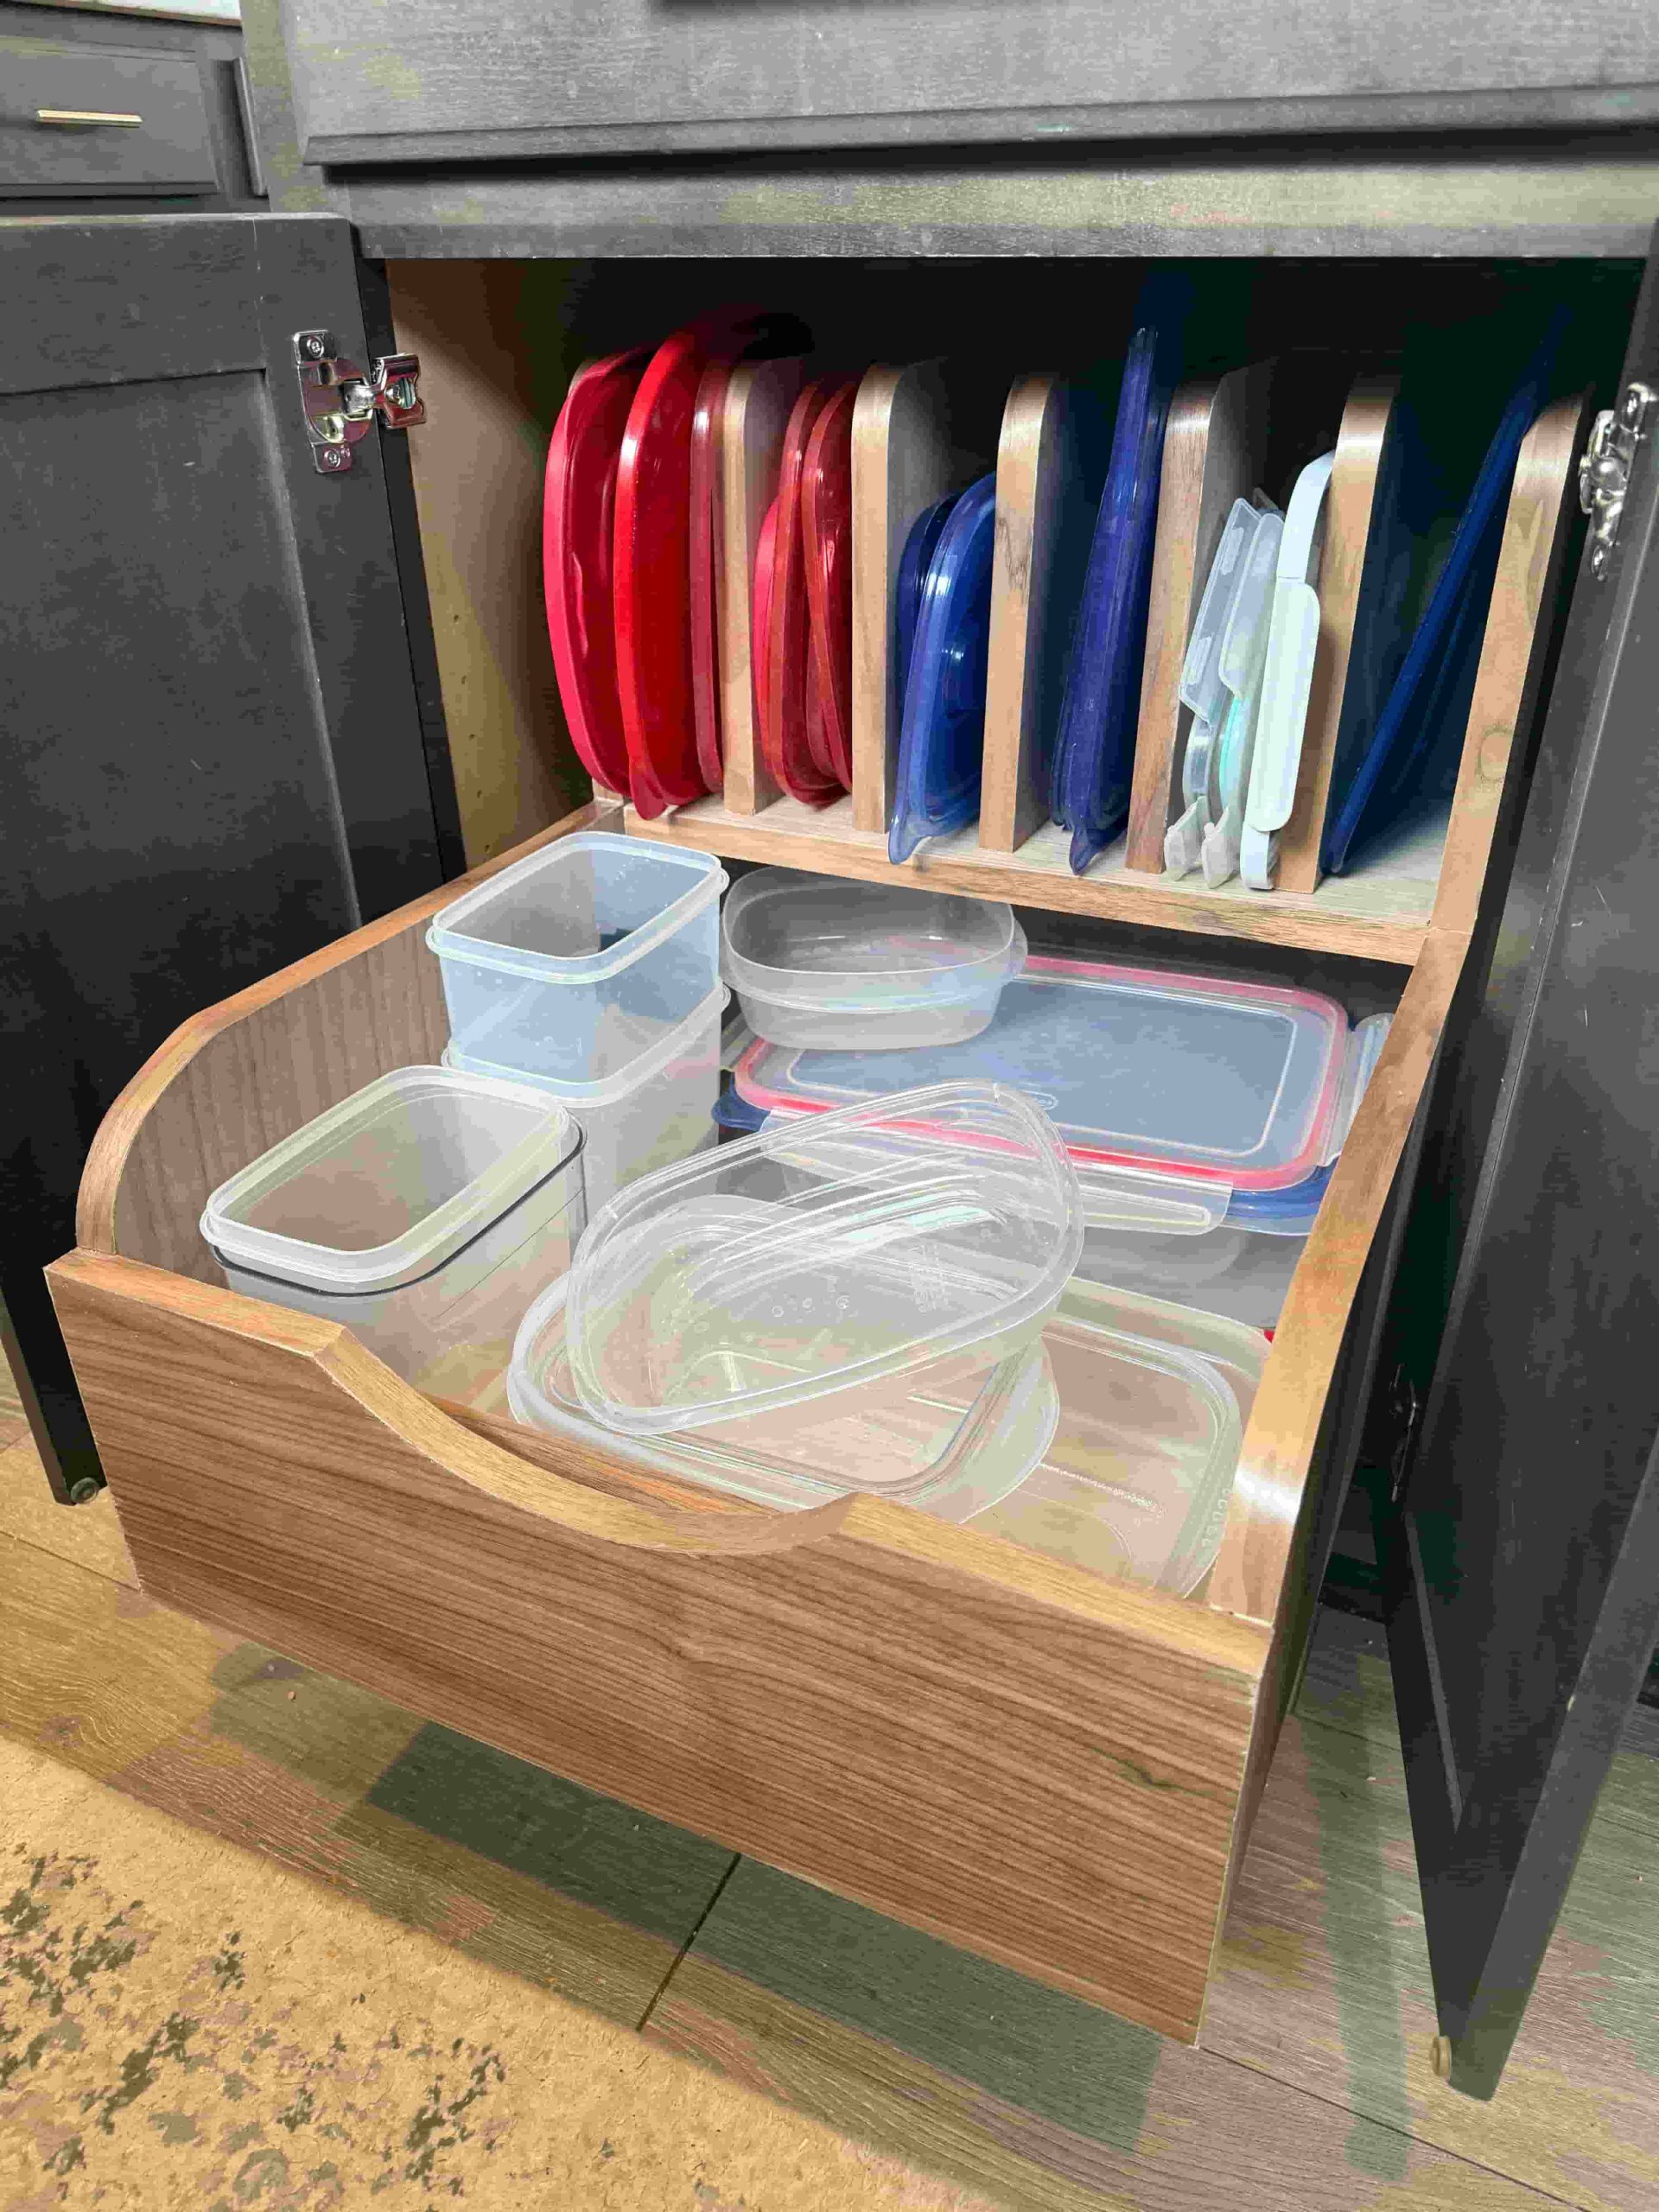
Difficulty: 🟢 Level 1 Estimated Cost: $15–$20 Source: Kreg Tool — free plan
Every kitchen has that one drawer of chaos. This project fixes it permanently. A custom drawer organizer fits your actual drawer dimensions — way better than anything you’ll buy at a store — and costs almost nothing in materials.
Thin plywood or hobby boards work perfectly here. You’re just making a grid of small compartments sized for whatever lives in your kitchen drawer. Check out our full guide on [Kitchen Drawer Organization](Kitchen Drawer Organization) for more ideas on making the most of your kitchen storage.
Why it’s great for beginners: Small scale, zero pressure, instant gratification. Great project to do with scraps from another build.
10. Storage Cabinet with Door
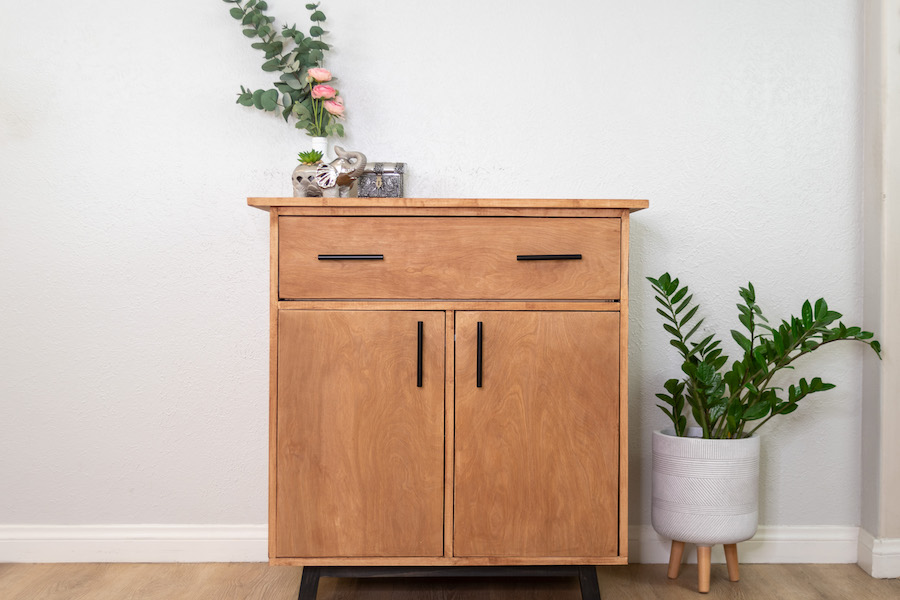
Difficulty: 🟠 Level 3 Estimated Cost: $50–$70 Source: kregtool — free plan
This is the most challenging project in Section 2 — and also the most rewarding. Building a cabinet with a door teaches you hinge installation, door fitting, and how to think about clearances and tolerances. These are skills that unlock a whole new level of woodworking.
Take your time on the door fitting. Leave yourself a little extra material and sneak up on the final fit with a hand plane or sandpaper. Rushing the door is where most beginners get frustrated.
Why it’s great for beginners: Once you can build a cabinet with a properly fitting door, you can build almost any furniture piece. This one’s worth the extra effort.
Section 3: Free Decorative Woodworking Plans
Not every project needs to be furniture. These five builds are quick, fun, and make excellent gifts. They’re also the category most likely to end up selling well on Etsy — just saying.
11. Rustic Wooden Sign

Difficulty: 🟢 Level 1 Estimated Cost: $10–$20 Source: Instructables — free plan
A rustic wooden sign is the quickest win on this entire list. You’re taking a board, roughing up the edges, and adding text either with a router, wood burning tool, or just stencils and paint. Done. It looks handmade because it is handmade — and people love that.
These signs also sell incredibly well at markets and on Etsy. Personalized family name signs, funny kitchen quotes, seasonal sayings — people pay good money for this stuff. If you ever want to start selling your work, this is where to begin.
Why it’s great for beginners: Zero structural complexity. You’re just decorating a board. Perfect low-pressure first project.
12. Window Planter Box
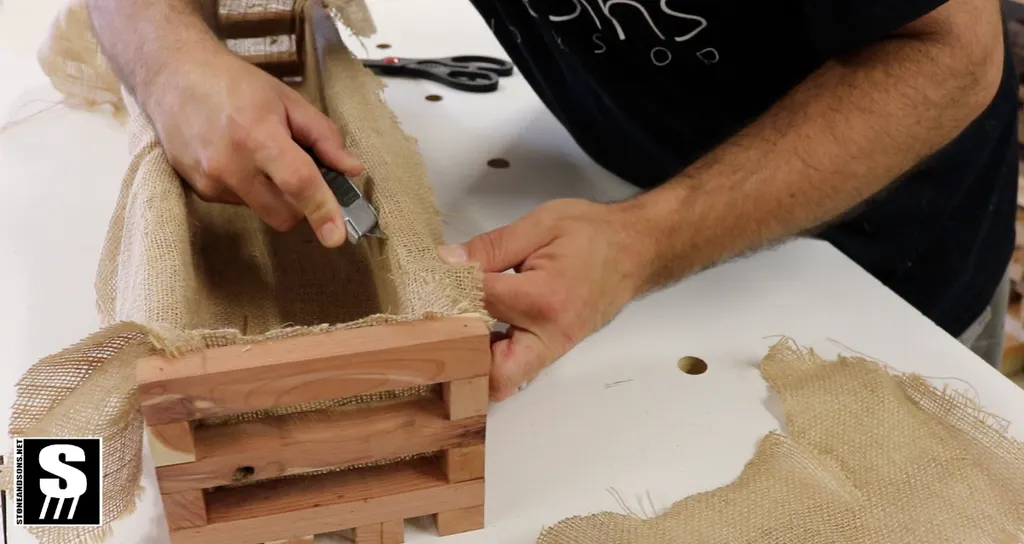
Difficulty: 🟢 Level 1 Estimated Cost: $20–$30 Source: Instructables — free PDF plan
A planter box is an outdoor build that uses the same skills as the raised garden bed but on a smaller, more decorative scale. These look great on porches, decks, and window ledges — and they’re endlessly customizable in size.
We have a full guide on our Planter Box post with ideas for finishing, drainage, and sizing. Use cedar or pressure-treated pine for outdoor longevity, or just seal regular pine well if that’s what you have.
Why it’s great for beginners: Small, fast, and forgiving. You can build two or three in an afternoon and give them as gifts.
13. Birdhouse

Difficulty: 🟡 Level 2 Estimated Cost: $15–$25 Source: 100things2do — free plan
A birdhouse is a woodworking rite of passage — and for good reason. It teaches you to cut precise angles (the roof), drill a specific-size entry hole, and assemble multiple small pieces accurately. All in a package that’s genuinely charming when finished.
Our Birdhouse post goes deep on species-specific sizing if you want to attract particular birds to your yard. Otherwise, the standard plan works great as a decorative piece too.
Why it’s great for beginners: Compact, fun, and teaches roof angles and precise hole drilling — skills that show up constantly in future builds.
14. Wooden Charcuterie Board
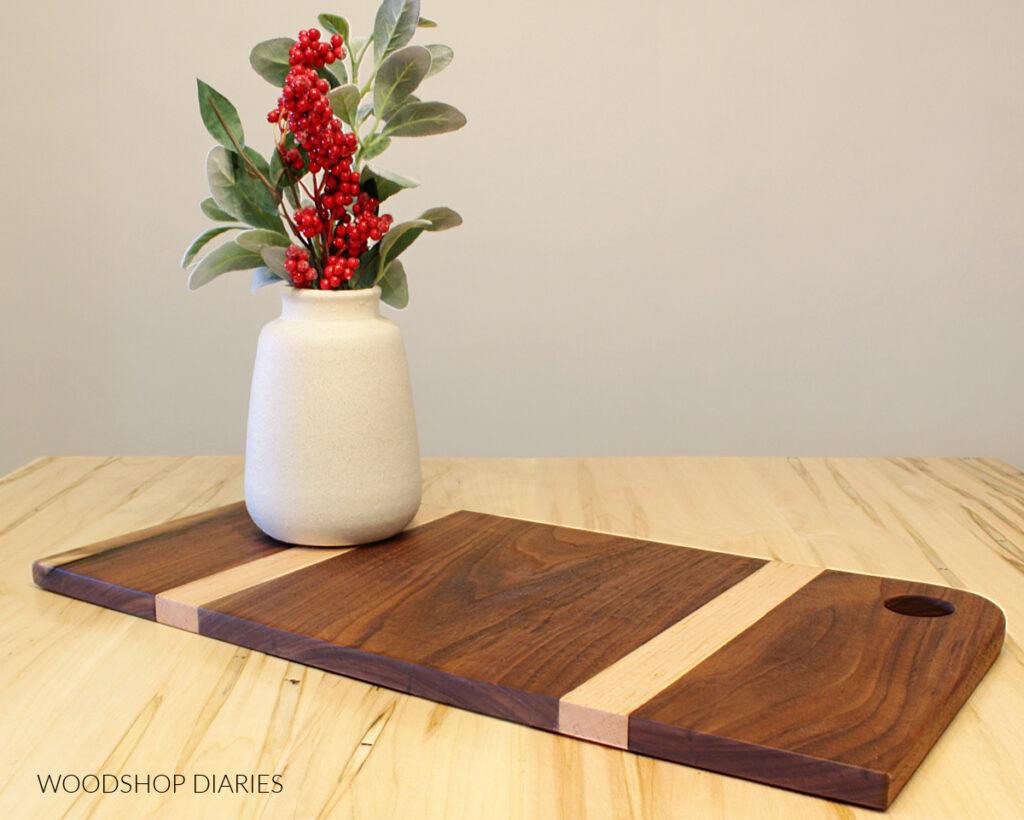
Difficulty: 🟢 Level 1 Estimated Cost: $10–$20 Source: woodshopdiaries
A charcuterie board is essentially a flat piece of wood with a handle — and it makes an incredible gift. Use a hardwood like walnut, maple, or cherry for a premium look and finish it with food-safe mineral oil. The end result looks like something from a boutique kitchen shop.
Our Charcuterie Board post has finishing tips and wood selection advice that’ll help you get a really polished result on this one. It’s a project where the finishing matters as much as the build.
Why it’s great for beginners: Almost no structural complexity — you’re learning design, shaping, and finishing. High perceived value for low build difficulty.
15. Kids’ Step Stool
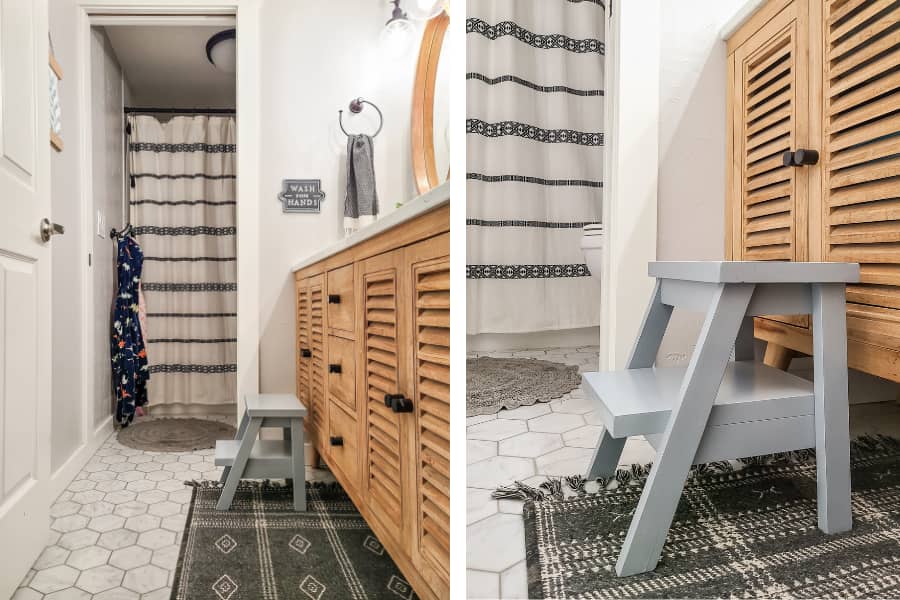
Difficulty: 🟡 Level 2 Estimated Cost: $20–$30 Source: kregtool — free PDF plan
A kids’ step stool is one of those projects that hits every mark: it’s genuinely useful, safe, durable, and makes an absolutely fantastic handmade gift. Parents go crazy for these. Ana White’s plan uses simple pocket hole joinery and standard pine boards.
The key on this one is sanding everything smooth — no splinters — and using a non-toxic finish. Kids will drag this stool across the floor, stand on it, and probably drop it. Build it solid and it’ll last until they’re in college.
Why it’s great for beginners: Teaches you to build something structurally sound enough to bear weight — a confidence-building milestone in any beginner’s woodworking journey.
Tips for Using Free Woodworking Plans Successfully
Even the best plan won’t save you if you skip these steps. I learned most of these the hard way 🙂
- Read the full plan before touching any wood. Seriously. The number of times people start cutting only to discover step 7 requires a tool they don’t have…
- Scale-check your printout. Print a test page and measure a known dimension — a 1-inch square or 12-inch line. If it’s off, fix your print settings before cutting anything.
- Build a cut list before buying wood. Group identical lengths together and figure out how many boards you actually need. You’ll save money and avoid mid-project hardware store runs.
- Label every piece as you cut it. Write dimensions directly on the wood with a pencil. It sounds obvious until you’re holding 12 similar-looking boards and can’t remember which is which.
- Dry fit first, fasten second. Assemble the whole project without glue or screws first. Catch problems before they’re permanent.
- Most projects work with just a drill and circular saw. If a plan calls for a tool you don’t have, check whether a simpler method achieves the same result before rushing to buy anything.
Where to Find Even More Free Plans
Once you finish a few projects from this list, you’ll want more. Here are the most reliable free plan sources on the internet:
- Ana White — massive library of furniture and home projects, beautifully organized, all free
- Kreg Tool — plans built around pocket hole joinery, excellent step-by-step format
- Instructables — community-built plans ranging from beginner to advanced, huge variety
- The Family Handyman — reliable, tested plans with professional photography
- Woodsmith Plans — some free, some paid, but the free ones are high quality
Bookmark these. You’ll use them constantly.
Frequently Asked Questions
Are free woodworking plans actually good quality?
Yes — if you know where to look. Ana White, Kreg Tool, and The Family Handyman all publish professional-grade free plans that have been tested by thousands of builders. The trick is avoiding random Pinterest repins with no original source attached. Always trace a plan back to its original site before trusting it.
What is the easiest woodworking project for a total beginner?
Floating wall shelves or a wooden toolbox — both are Level 1, require minimal tools, and finish in a single day. Either one is a perfect first build that gives you a real win quickly.
Can I build these projects with just a drill and circular saw?
Yes, the majority of projects on this list were designed with basic tool sets in mind. The Adirondack chair and picnic table benefit from a miter saw for cleaner angled cuts, but both are achievable with a circular saw and a steady hand.
How do I scale a printable woodworking plan correctly?
Always print at 100% scale — never use “fit to page” or “shrink to fit.” After printing, measure a known dimension on the plan (most include a 1-inch reference box). If it’s wrong, adjust your printer’s scale percentage until it’s accurate.
What wood should a beginner buy for their first project?
Pine and poplar are the most beginner-friendly and affordable options at any hardware store. They’re easy to cut, easy to sand, and hold screws well. For outdoor projects, cedar or pressure-treated pine is worth the extra cost. Our guide to [7 Best Woods for Beginner Woodworking Projects](7 Best Woods for Beginner Woodworking Projects) covers everything in detail.
Can I sell things I build from free woodworking plans?
Generally yes for small-scale selling. Ana White’s plans are explicitly free for personal use and small-scale selling. Always check the individual plan’s terms — most free plans from the sources on this list have no restrictions on selling what you build.
How long does a beginner woodworking project take?
Most Level 1 projects on this list take 4–8 hours including drying and finishing time. Level 2 projects typically run a full weekend. Level 3 (the storage cabinet) might stretch across two weekends if you’re working carefully. Set realistic expectations — rushing builds mistakes, and mistakes cost wood and money.
Do I need a workbench to build these projects?
Not necessarily. A pair of sawhorses with a sheet of plywood on top makes a perfectly functional temporary workbench. Many beginner woodworkers build their first projects this way — and some of those first projects become a proper workbench.
Ready for More Than Free Plans?
Free plans are a great starting point and you can keep yourself busy for months just with the sources above. But here’s the honest truth about free plans: they’re scattered, inconsistent in quality, and hard to search. You spend as much time hunting for the right plan as you do actually building.
That’s the problem Ted’s Woodworking Plans solves completely. It’s a library of 16,000+ woodworking plans organized by skill level, project type, and materials — all in one place, all with complete cut lists, step-by-step instructions, and detailed diagrams.
When you’re ready to build a bookshelf, a workbench, a dining table, a garden shed — whatever’s next — you search the library and find exactly what you need in seconds. No more digging through Google, no more half-finished plans with missing details.
The free plans on this list will get you started. Ted’s will keep you building for years.
👉 Check out Ted’s Woodworking Plans here
Final Thoughts
Fifteen free plans, real sources, printable PDFs, and a clear path from first project to confident builder. That’s what this list is here for.
Pick one Level 1 project this weekend — seriously, just one — and start. The toolbox, the floating shelf, the planter box. Any of them. The most important thing isn’t which project you choose. It’s that you actually start building instead of spending another weekend just researching.
Bookmark this page for when you’re ready for the next one. And when free plans start feeling limiting — you know where to find 16,000 more.