
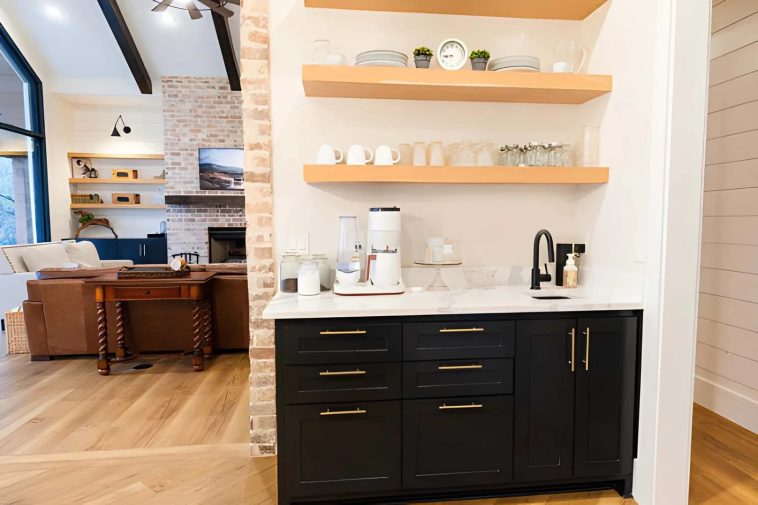
A dedicated coffee bar sounds luxurious until your coffee maker, grinder, mugs, filters, and syrup bottles take over half the kitchen. Then it stops feeling luxurious and starts looking like caffeine opened a hardware store on your countertop.
These DIY coffee bar cabinet plans solve that problem without demanding a huge kitchen. I picked 15 real woodworking plans that you can adapt into narrow cabinets, rolling carts, compact consoles, and appliance stations. Each option includes a link to the original plan, honest difficulty notes, and a few practical changes that make the design work in a small space.
Some plans create a complete cabinet from scratch. Others repurpose an island, console, or potting bench design into a compact coffee station. That flexibility matters because the best small-kitchen coffee bar fits your actual routine—not an imaginary kitchen where nobody owns a toaster.
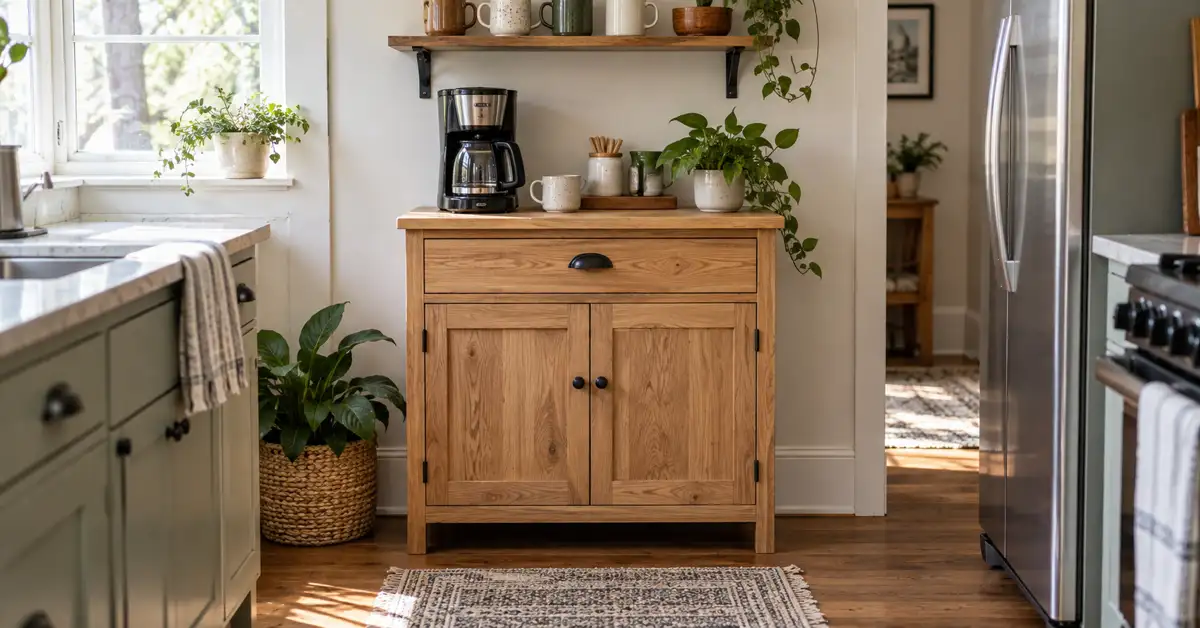
How to Choose a Coffee Bar Cabinet for a Small Kitchen
Measure the space before falling in love with a plan. Record the available width, depth, and height, then mark the proposed footprint with painter’s tape. Open nearby drawers, doors, and appliances to check for collisions. A beautiful cabinet loses its charm when it blocks the refrigerator every morning.
Most compact coffee stations work best at 30 to 36 inches high and 15 to 20 inches deep. Width varies more, but a 24- to 36-inch cabinet usually fits an unused wall or dining nook. Leave enough top space for the coffee maker lid or water reservoir to open fully.
- Choose drawers for pods, filters, spoons, and small tools.
- Choose doors when you want to hide bulk coffee, syrups, or cleaning supplies.
- Choose open shelves for baskets and mugs you use every day.
- Choose casters if one station must serve several areas.
- Choose a hutch when you have more wall height than floor space.
- Choose a mini-fridge opening only after buying or measuring the appliance.
Locate an outlet before you build. Avoid permanent extension-cord arrangements, keep electrical connections away from water, and follow the appliance manufacturer’s ventilation requirements. Coffee tastes better when the setup does not double as a creative fire hazard.
Tools and Materials You Will Probably Need
Every linked plan provides its own list, but most projects rely on the same core tools. A circular saw with a straightedge can replace a table saw for many plywood cuts. A pocket-hole jig simplifies cabinet assembly, although traditional screws, dowels, or dados can also work when the plan allows them.
- Circular saw, track saw, or table saw
- Miter saw or reliable crosscut guide
- Drill and driver
- Pocket-hole jig and clamps
- Brad nailer or hammer
- Random-orbit sander
- Tape measure, square, level, and pencil
- Three-quarter-inch plywood or straight 1-by lumber
- Quarter-inch plywood for backs and drawer bottoms
- Wood glue, screws, nails, hinges, slides, and pulls
Build on a flat surface and check the cabinet for square after every major step. Measure both diagonals across the box; matching measurements confirm a square assembly. That two-minute check saves an hour of trying to convince a crooked door that it should close.
15 DIY Coffee Bar Cabinet Plans for Small Kitchens
1. Compact Snack Cabinet With a Coffee Drawer
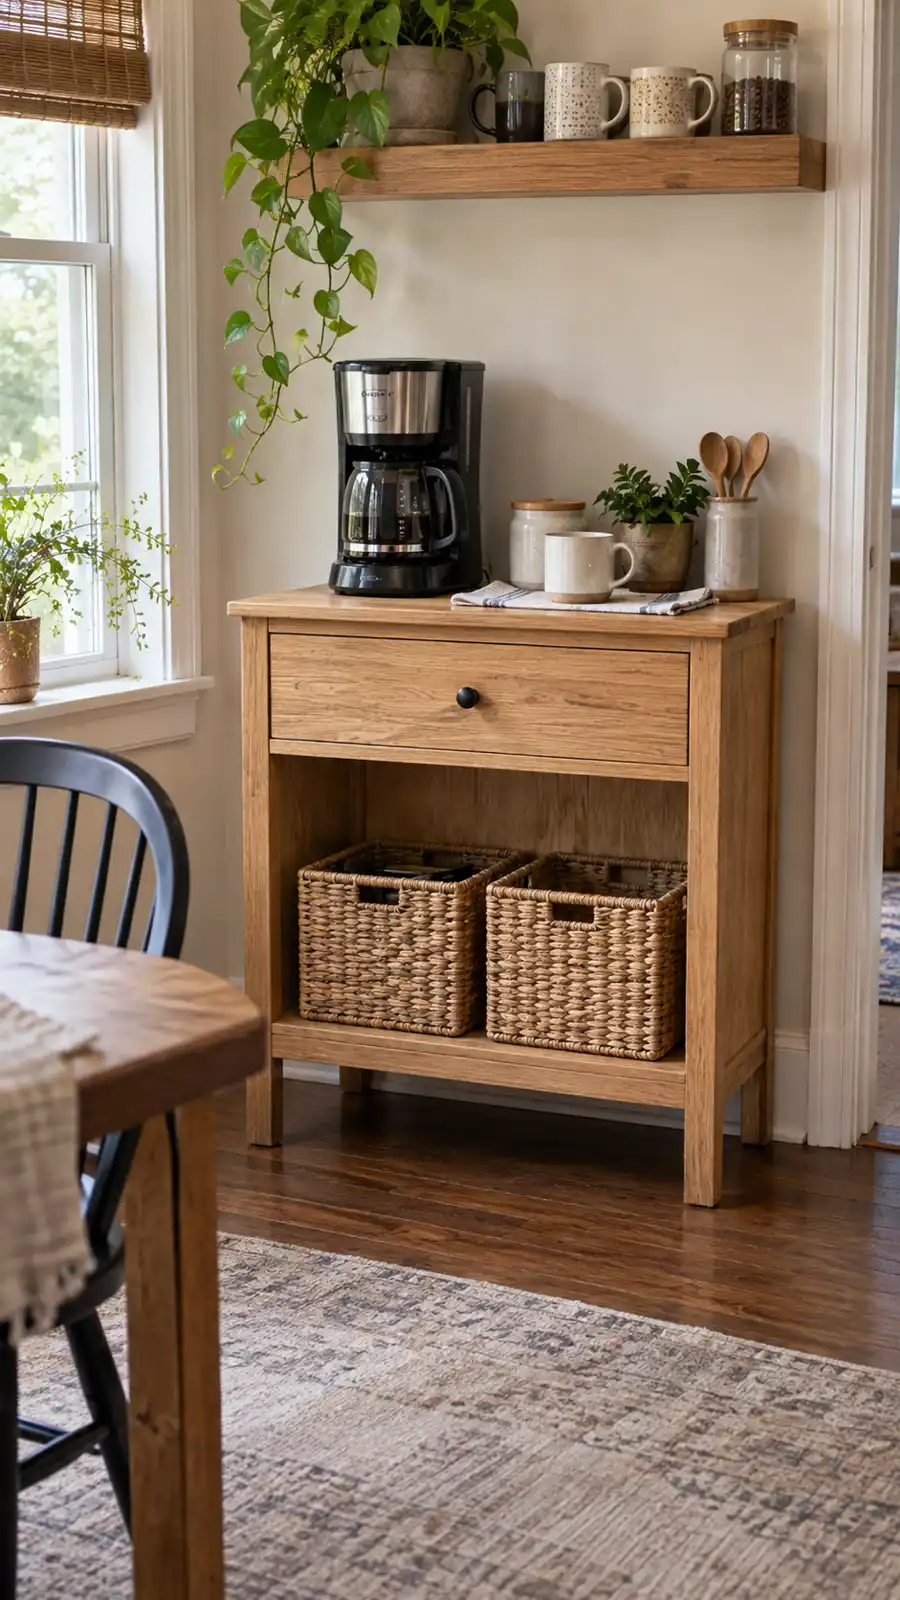
Ana White’s Channing Snack Cabinet plan gives you a narrow cabinet with a drawer and a removable lower shelf. The top measures about 29 inches wide, so it fits spaces where a full buffet would swallow the walkway.
The drawer handles pods, tea bags, filters, and spoons. Keep the optional shelf for baskets, or remove it to accommodate a compact beverage fridge after you verify ventilation clearances. The plan uses common plywood, 1-by trim, and pocket-hole construction.
Best for: intermediate beginners who want concealed small-item storage. I would add a waterproof topcoat and drill a neat cord hole through the back rather than letting the plug perform parkour around the cabinet.
2. Open-Shelf Coffee Bar Island
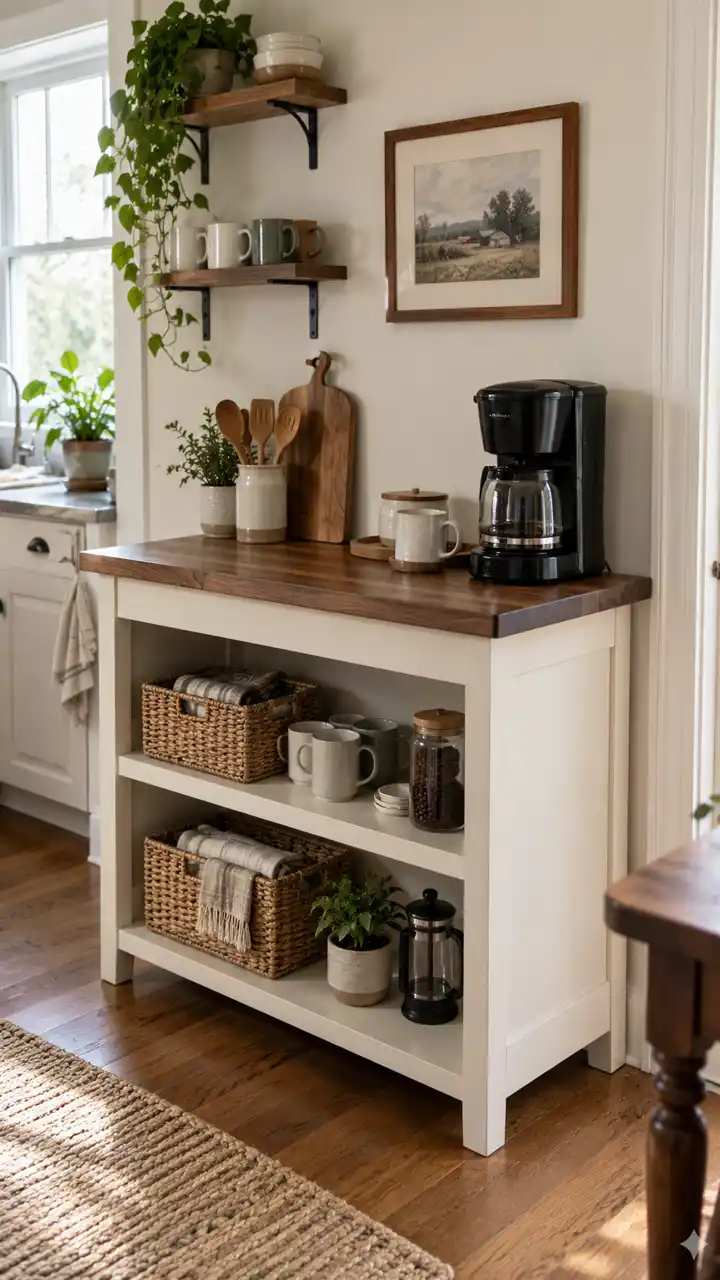
The Michaela’s Kitchen Island plan adapts easily into a simple coffee bar. Its open shelves reduce visual weight, which helps a small kitchen feel less crowded than a solid cabinet would.
Shorten the plan to suit your wall and keep the finished depth close to the coffee maker’s actual footprint. Use the upper shelf for cups and the lower shelf for matching baskets. A raised edge or tray beneath the machine catches small spills before they reach the wood finish.
Best for: beginners who want straightforward construction and flexible storage. Open shelves demand a little organization, of course. They display your mugs beautifully, but they also display the emergency bag of marshmallows with equal enthusiasm.
3. Small Rolling Coffee Island
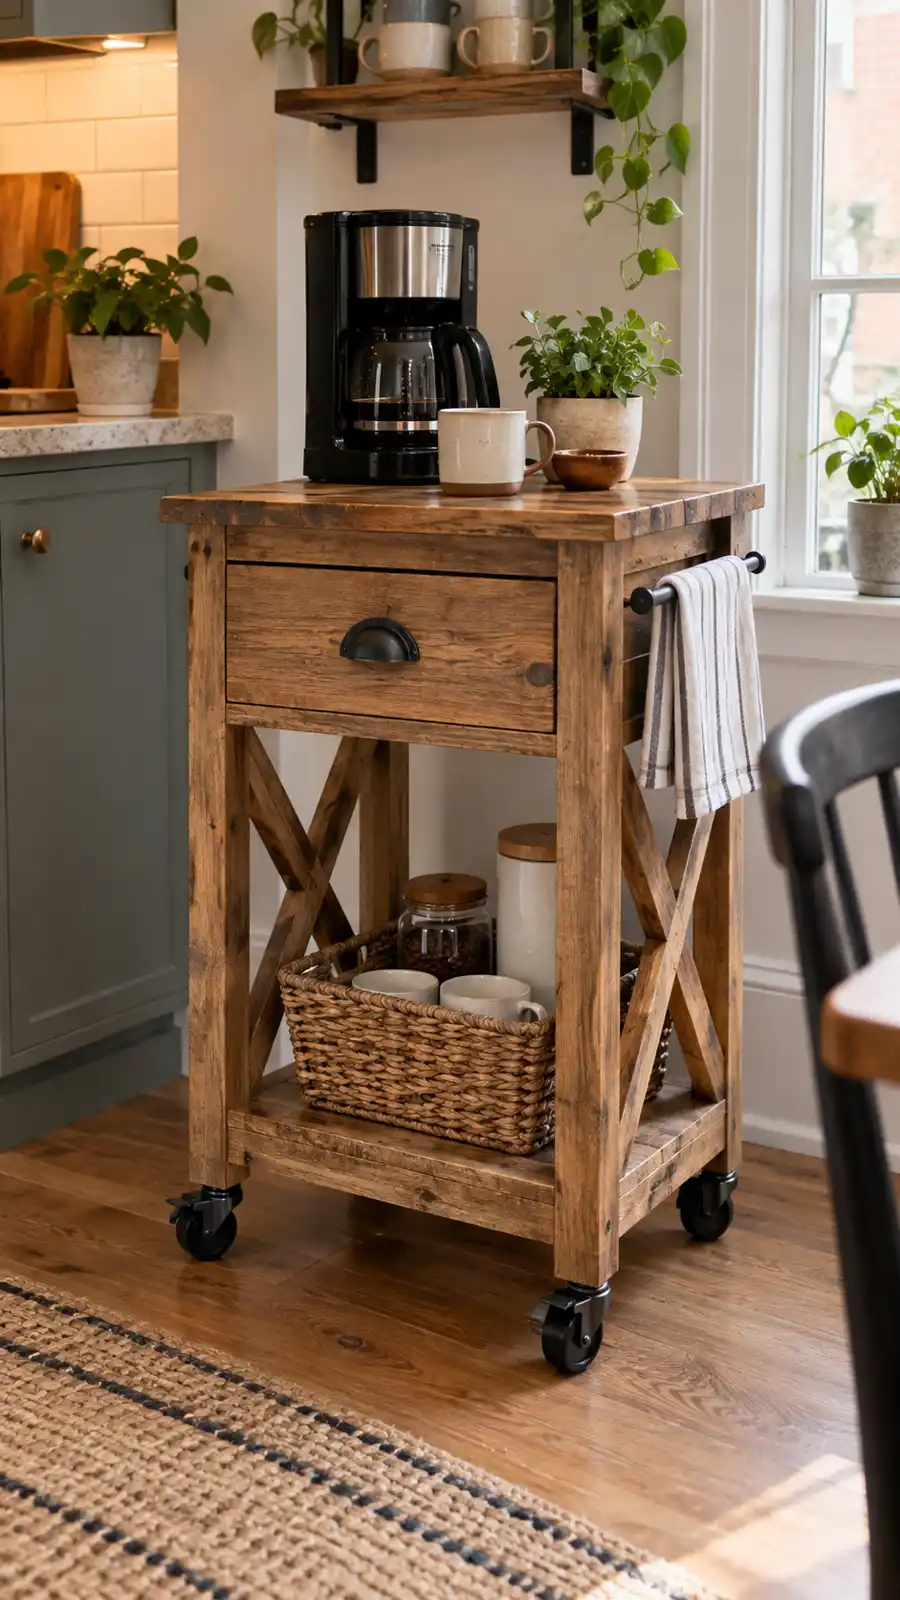
Ana White’s Rustic X Small Rolling Island combines a drawer, open storage, and casters. Roll it against the wall during normal use, then move it beside the dining table when guests arrive.
Use four quality locking casters and select wheels rated for the cabinet, appliances, and stored supplies. Place heavy items low to improve stability. If your coffee maker contains water, lock the cart before brewing and avoid rolling it while the reservoir remains full.
Best for: rental kitchens and multipurpose rooms. This design offers more flexibility than a fixed cabinet, although it needs a few extra inches around the sides for safe movement.
4. Rustic X Console Coffee Station
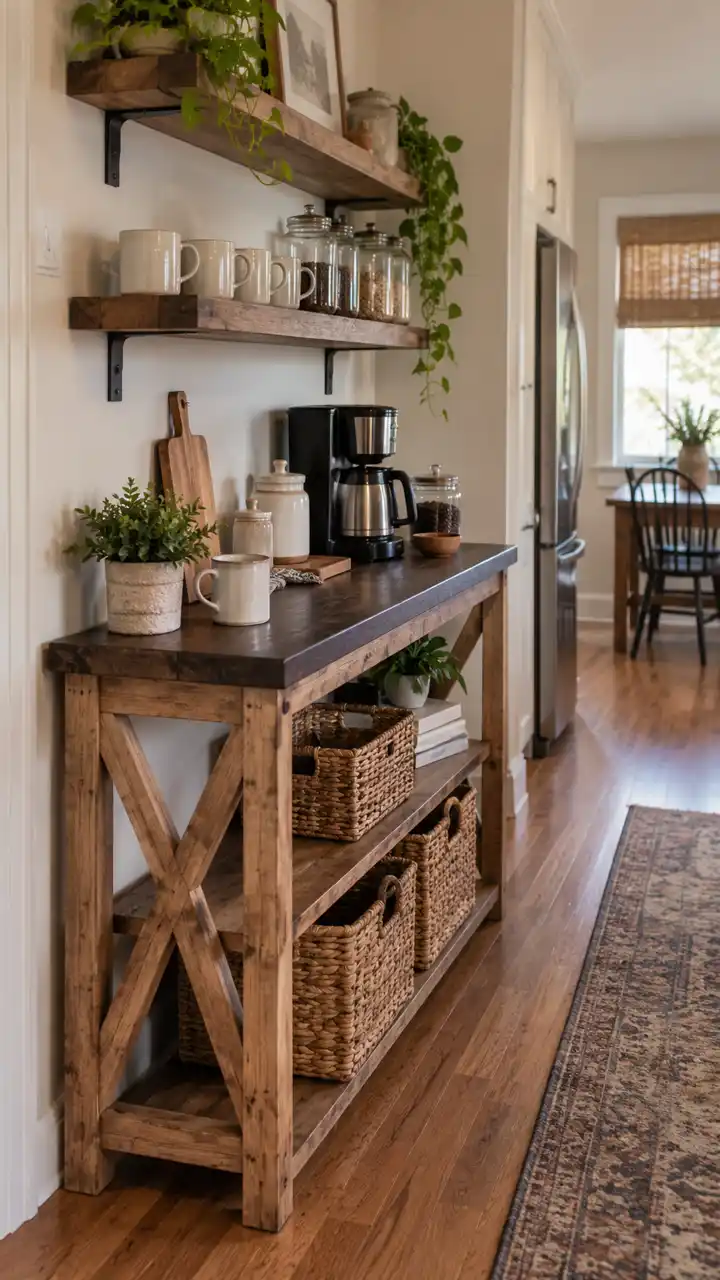
The Rustic X Console Table plan suits long, shallow spaces. Console proportions usually protect the walkway better than deep base cabinets, and the two shelves accept baskets, mugs, or small appliances.
Adjust the length without changing the leg and side-frame construction. Add a narrow backsplash strip so the machine cannot vibrate against the wall, and secure the console to a stud if children might climb or pull on it.
Best for: farmhouse interiors and open dining areas. The X braces add style and lateral strength, but they reduce side access to the shelves. Use front-loading baskets rather than containers that need room on both sides.
5. Tall Open-Shelf Coffee Cabinet
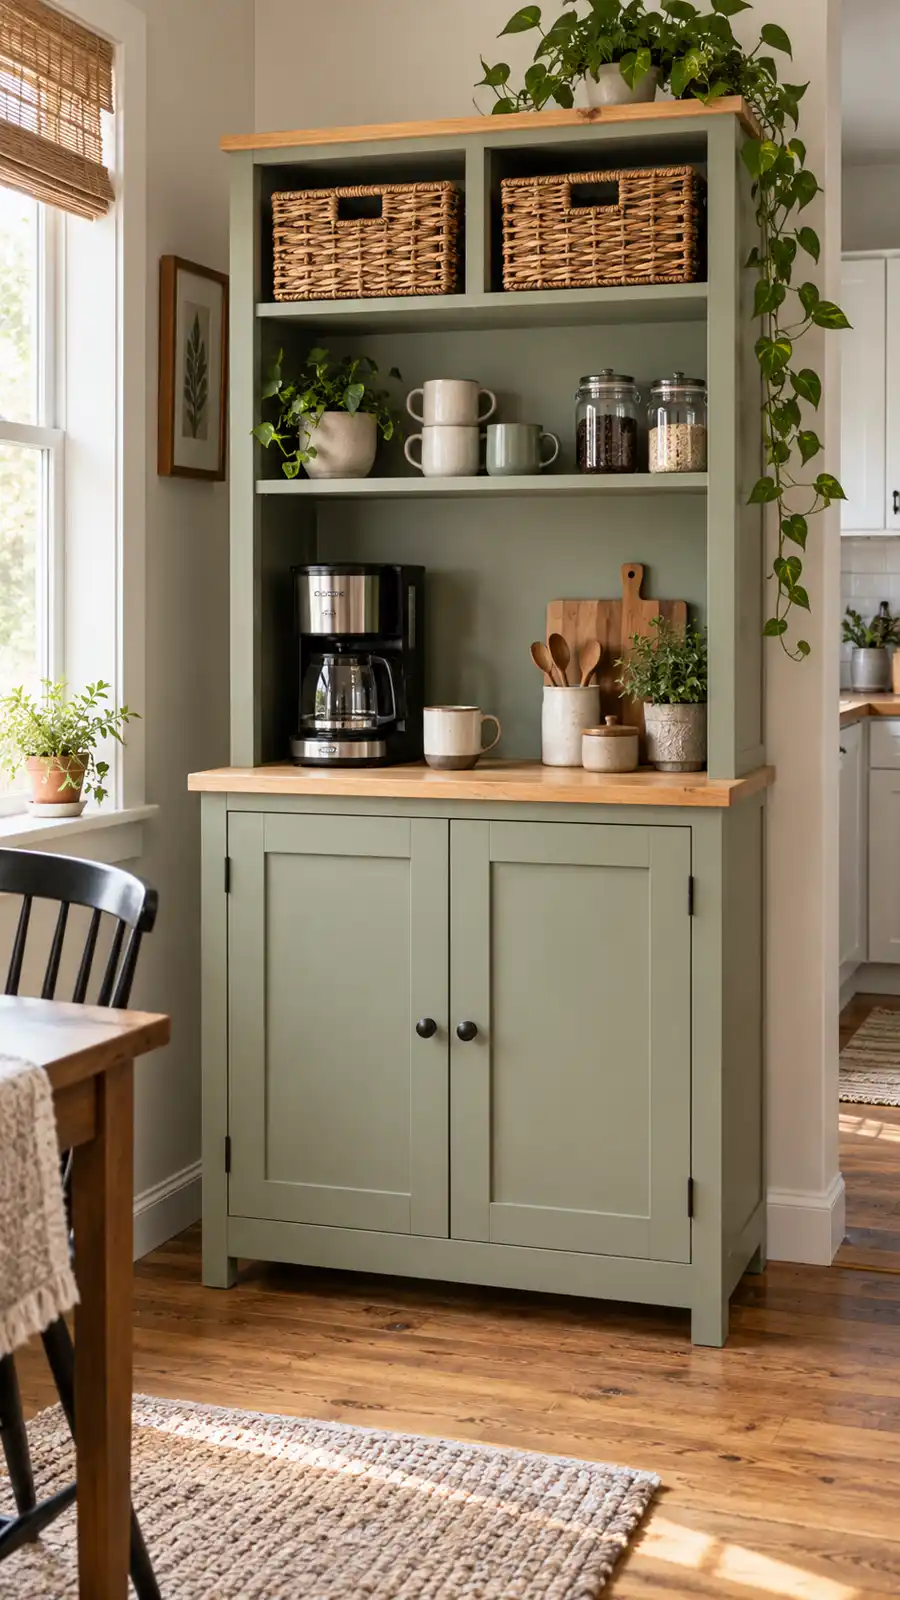
Ana White’s Shanty Open Shelf Console uses two open cubbies above concealed lower storage. It measures roughly 39 inches wide in the original plan, but you can reduce the width by narrowing both cubbies equally.
Place the coffee machine on top, everyday supplies in the open spaces, and unattractive bulk packages behind the doors. The design needs accurate door gaps, so build the cabinet box first and measure each opening before cutting door parts.
Best for: builders ready to try face frames and doors. If you like the mix of open and closed storage, the same principle appears in our DIY nightstand with drawer plan, which explains squaring plywood cases and controlling reveals.
6. Sliding Barn Door Coffee Console
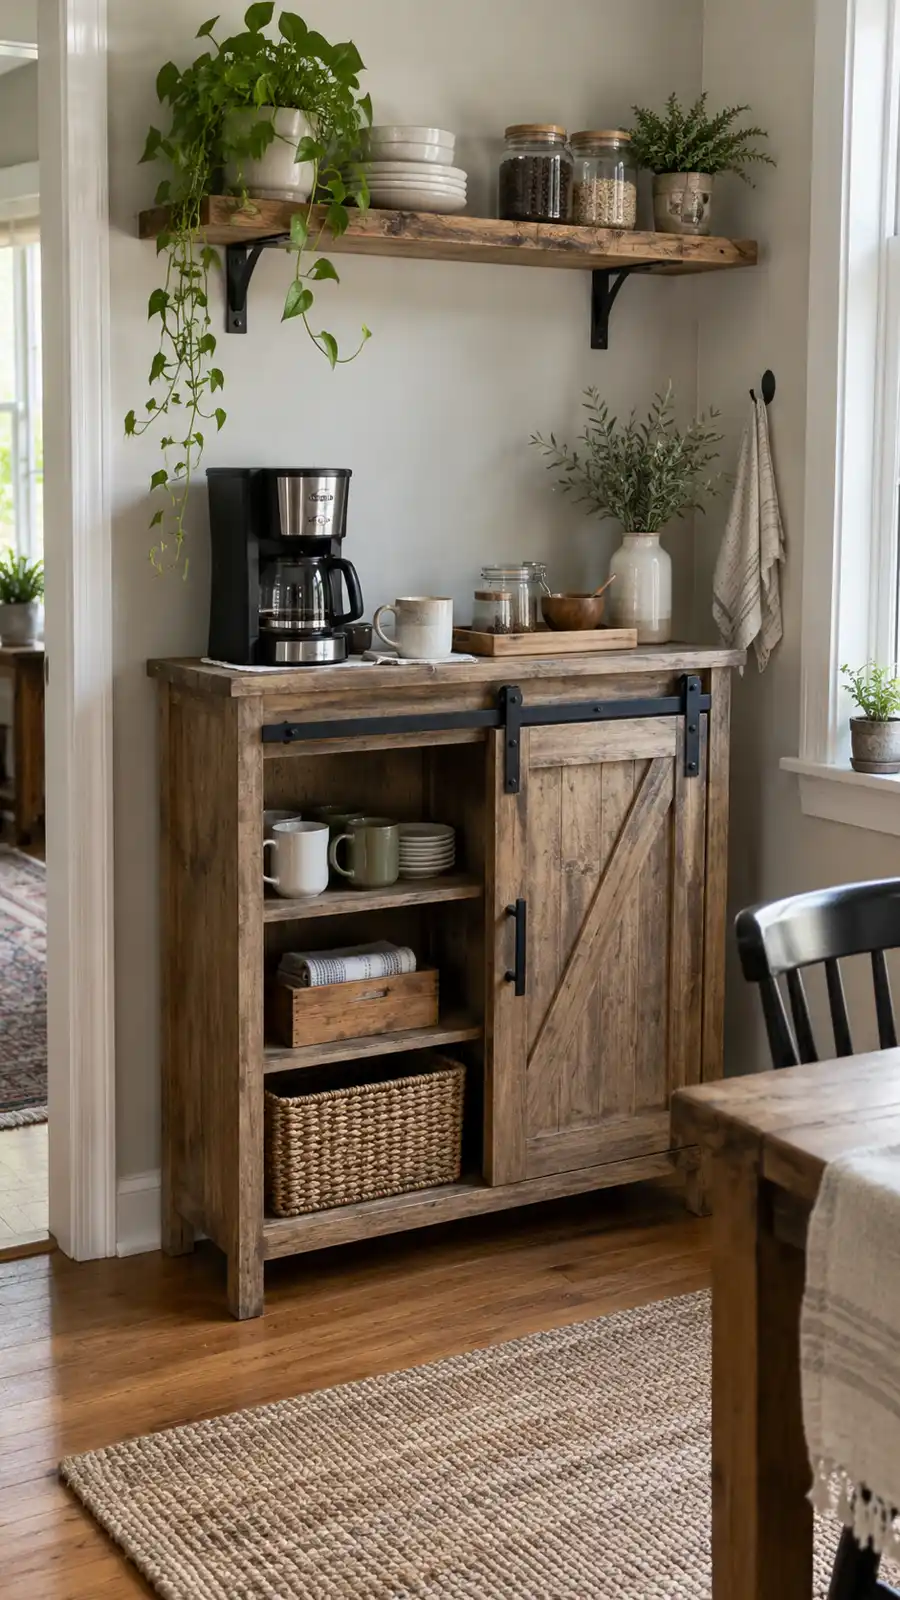
The Grandy Barn Door Console plan gives you adjustable-looking storage with one sliding focal door. Move the door to hide pods and syrups on one side while keeping mugs accessible on the other.
A sliding door saves swing space, but the rail extends across the cabinet face. Install the hardware perfectly level and leave finger clearance around the stops. Shortening the console requires recalculating both shelf openings and the door travel.
Best for: narrow kitchens that still need concealed storage. The style looks bold, so use a quiet paint color if the room already includes several competing finishes.
7. Farmhouse Coffee Stand With Mug Hooks
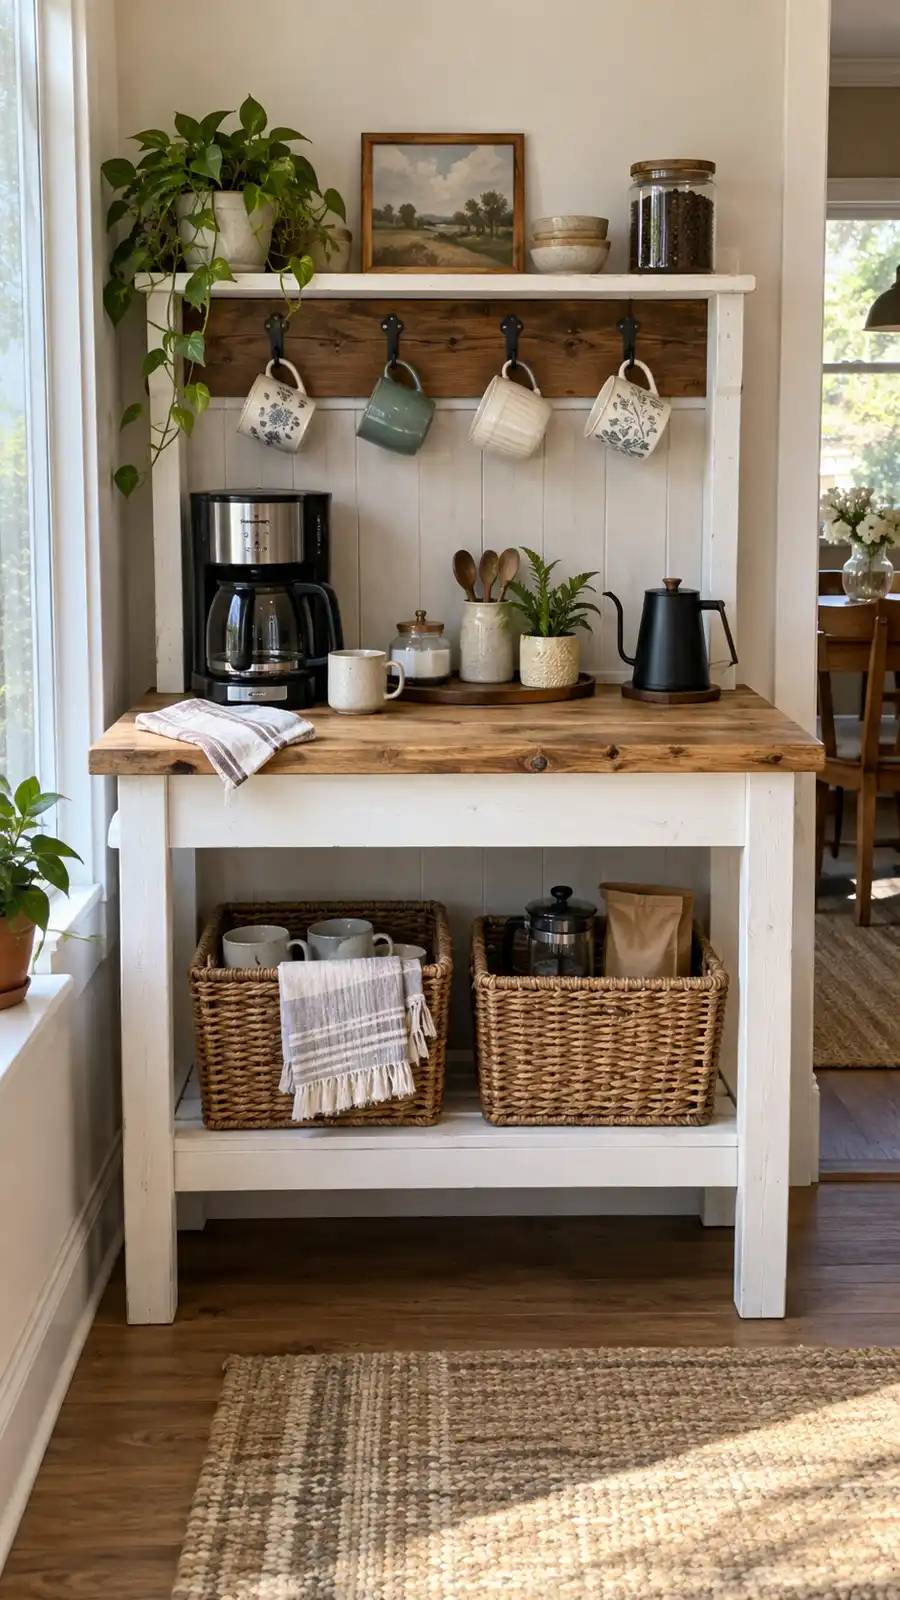
Ana White’s Farmhouse Potting Bench plan adapts surprisingly well into an indoor coffee stand. Builders commonly shorten the depth, finish the surfaces for indoor use, and add cup hooks beneath the upper rail.
The back structure creates vertical storage without requiring wall-mounted cabinets. Keep frequently used mugs above the worktop and place baskets on the lower shelf. Confirm that each hook can support the intended mug and space the hooks far enough apart to prevent ceramic collisions.
Best for: beginners who want a decorative station with open storage. Skip distressed paint around food-contact areas; smooth cabinet enamel wipes clean more easily.
8. Barn Door Cabinet for a Mini Fridge
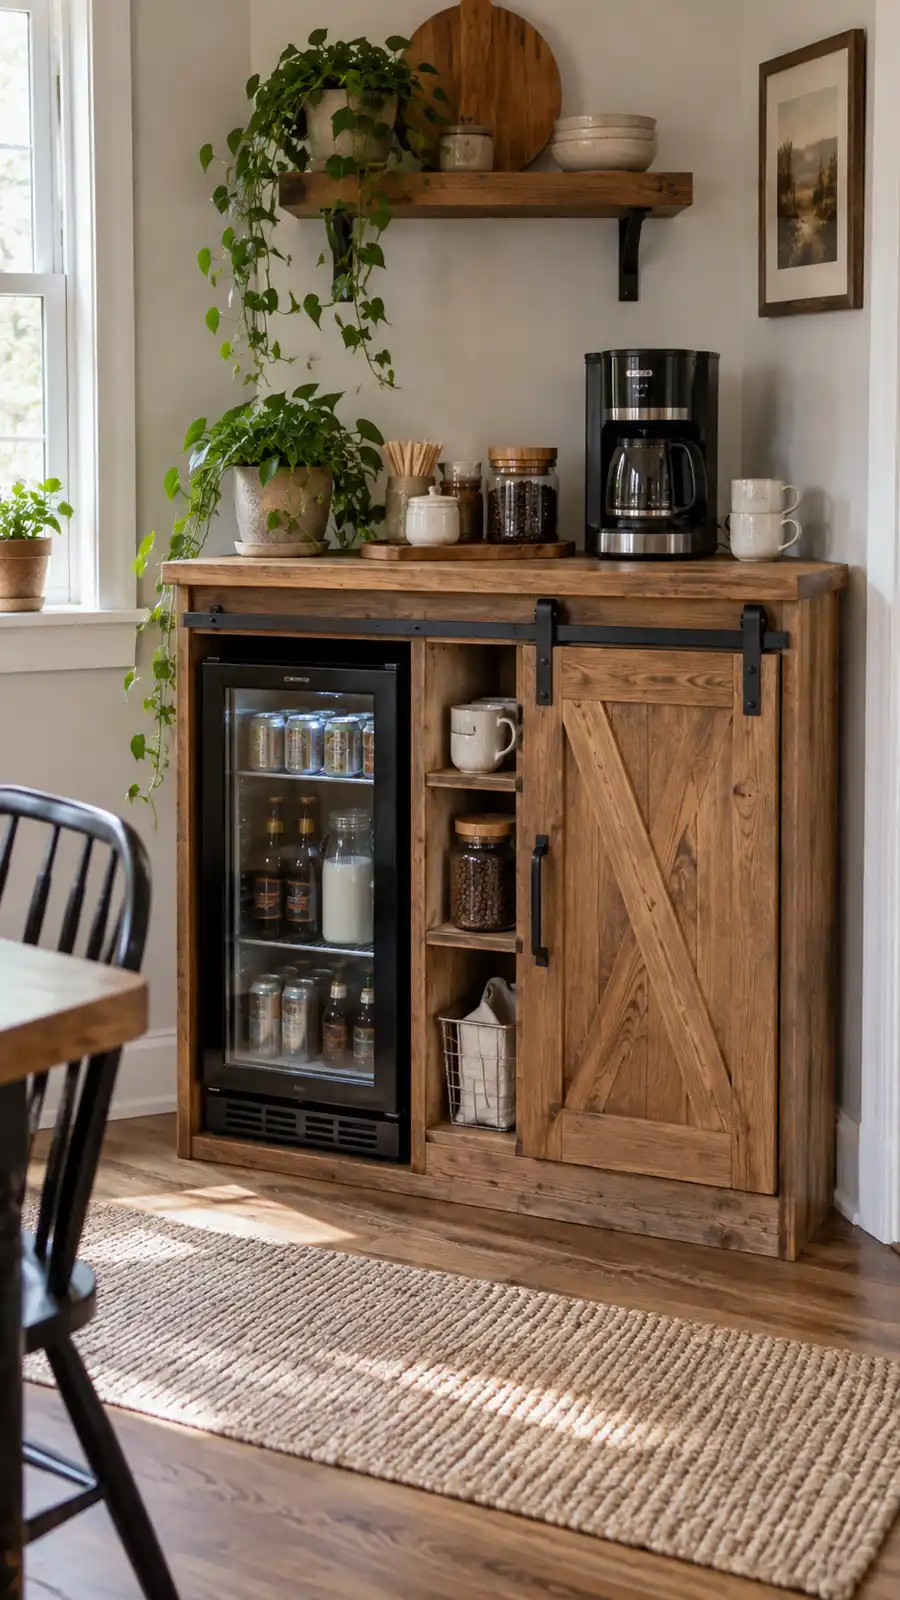
The Barn Door Mini Fridge and Microwave Cabinet can hold chilled milk below and a coffee maker above. For a small kitchen, omit unnecessary appliance openings or narrow the side storage.
Buy the fridge before finalizing the cabinet. Follow its manual for side, rear, and top ventilation. Never trap a freestanding refrigerator inside a tight plywood box simply because the photograph looks tidy.
Best for: espresso drinkers who use fresh milk and people creating a coffee station outside the main kitchen. This project requires more material and planning than a console, but it can replace several scattered storage zones.
9. Wide Cabinet With Two Drawers
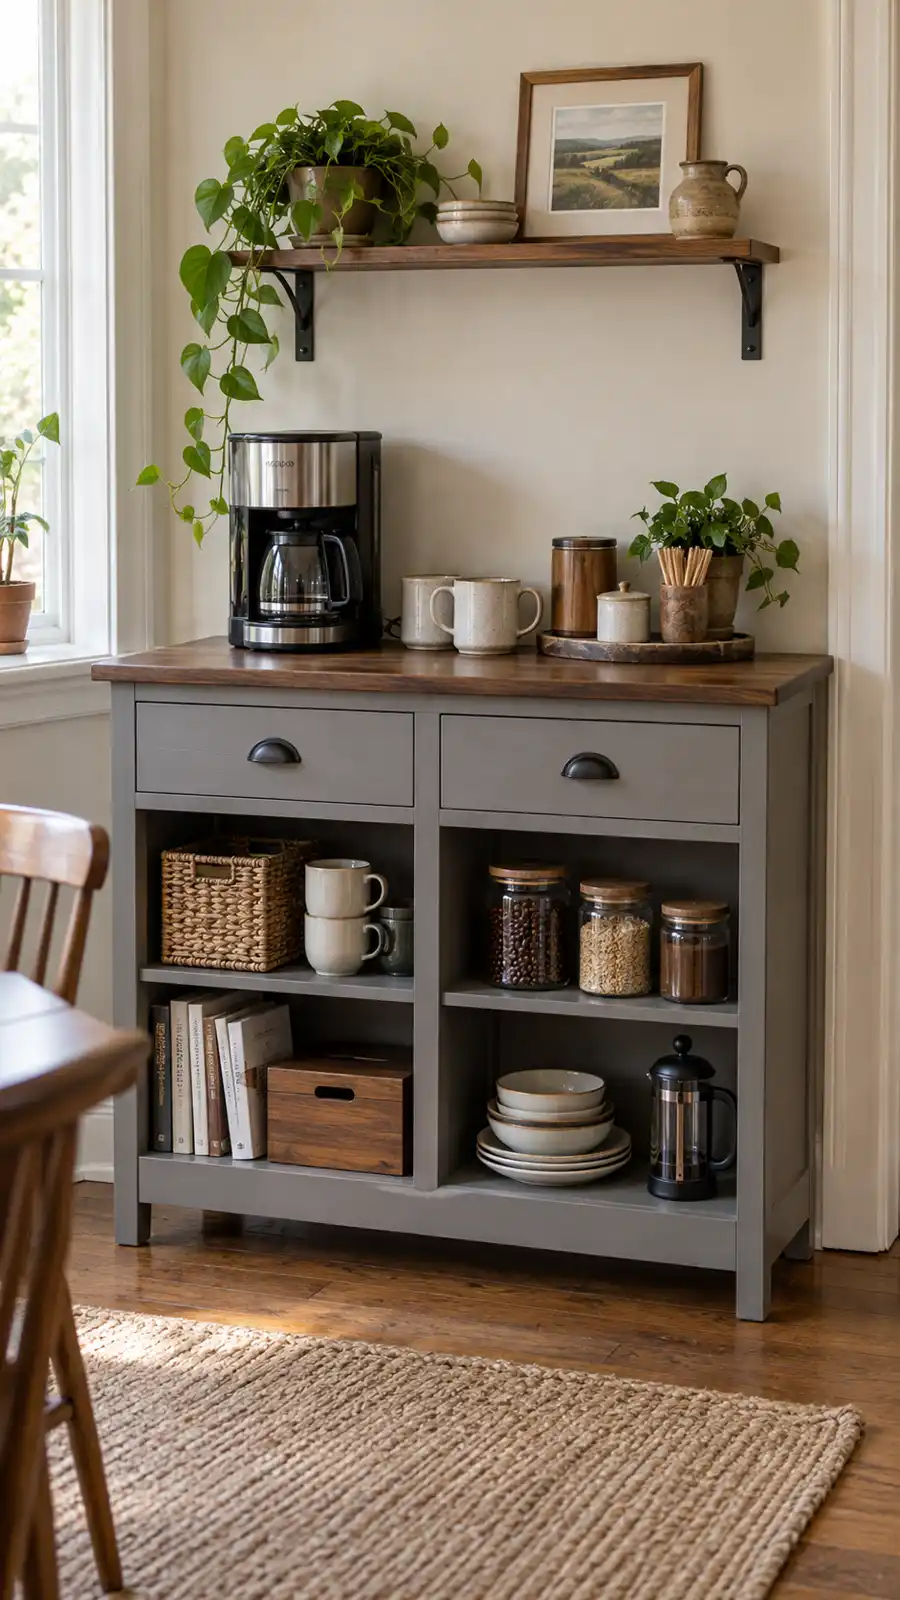
The Inspired Workshop provides a detailed DIY Coffee Bar Cabinet plan with two drawers, divided storage, a face frame, and baseboard trim. The original spans about 56 inches, so it suits a dining wall more than a tiny kitchen corner.
You can create a narrower version by keeping one drawer bay and one shelf bay. Preserve adequate support beneath the countertop and recalculate every horizontal part together. Randomly chopping twelve inches from one board rarely inspires the others to cooperate.
Best for: intermediate builders who want a furniture-quality built-in appearance. Match the baseboard and trim to nearby cabinetry so the new piece looks intentional.
10. Farmhouse Cabinet With a Pull-Out Coffee Shelf
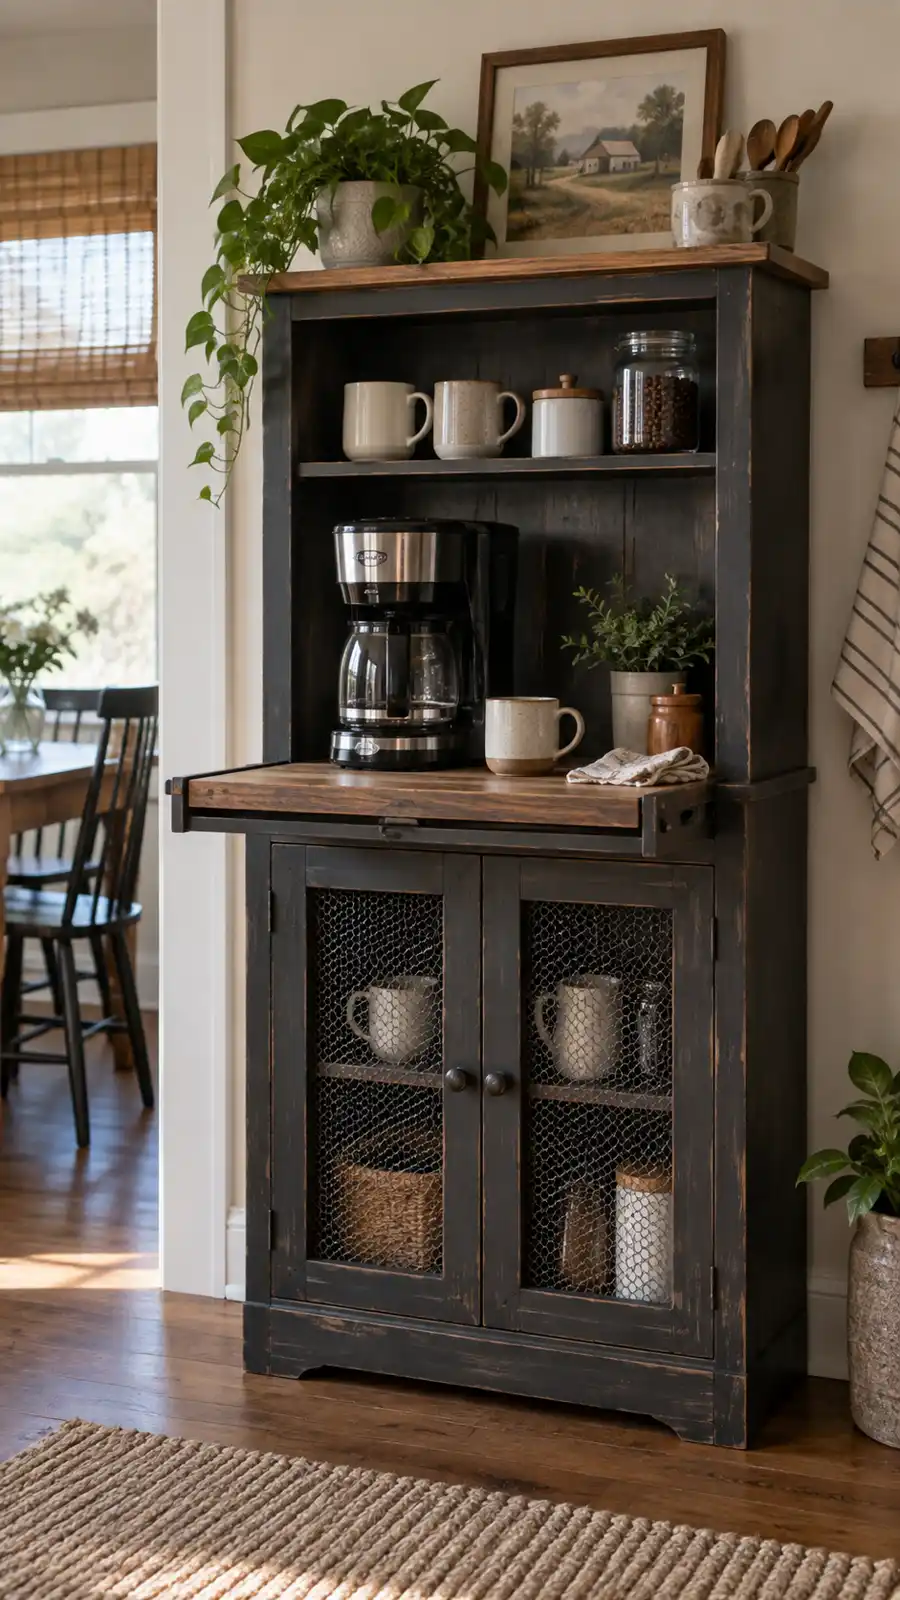
The Shanty 2 Chic Farmhouse Coffee Cabinet includes doors, adjustable storage, and a pull-out platform for the coffee maker. That sliding shelf makes refilling a rear reservoir much easier.
Use drawer slides rated above the combined weight of the platform, machine, and full water tank. Install the slides parallel and test the movement before finishing. Keep the cabinet open while the machine operates unless its manufacturer explicitly approves enclosed use.
Best for: households that want appliances hidden after breakfast. The plan involves doors, shelves, and slides, so it offers a useful next step after a basic cabinet build.
11. Slim Barn Door Coffee Cabinet
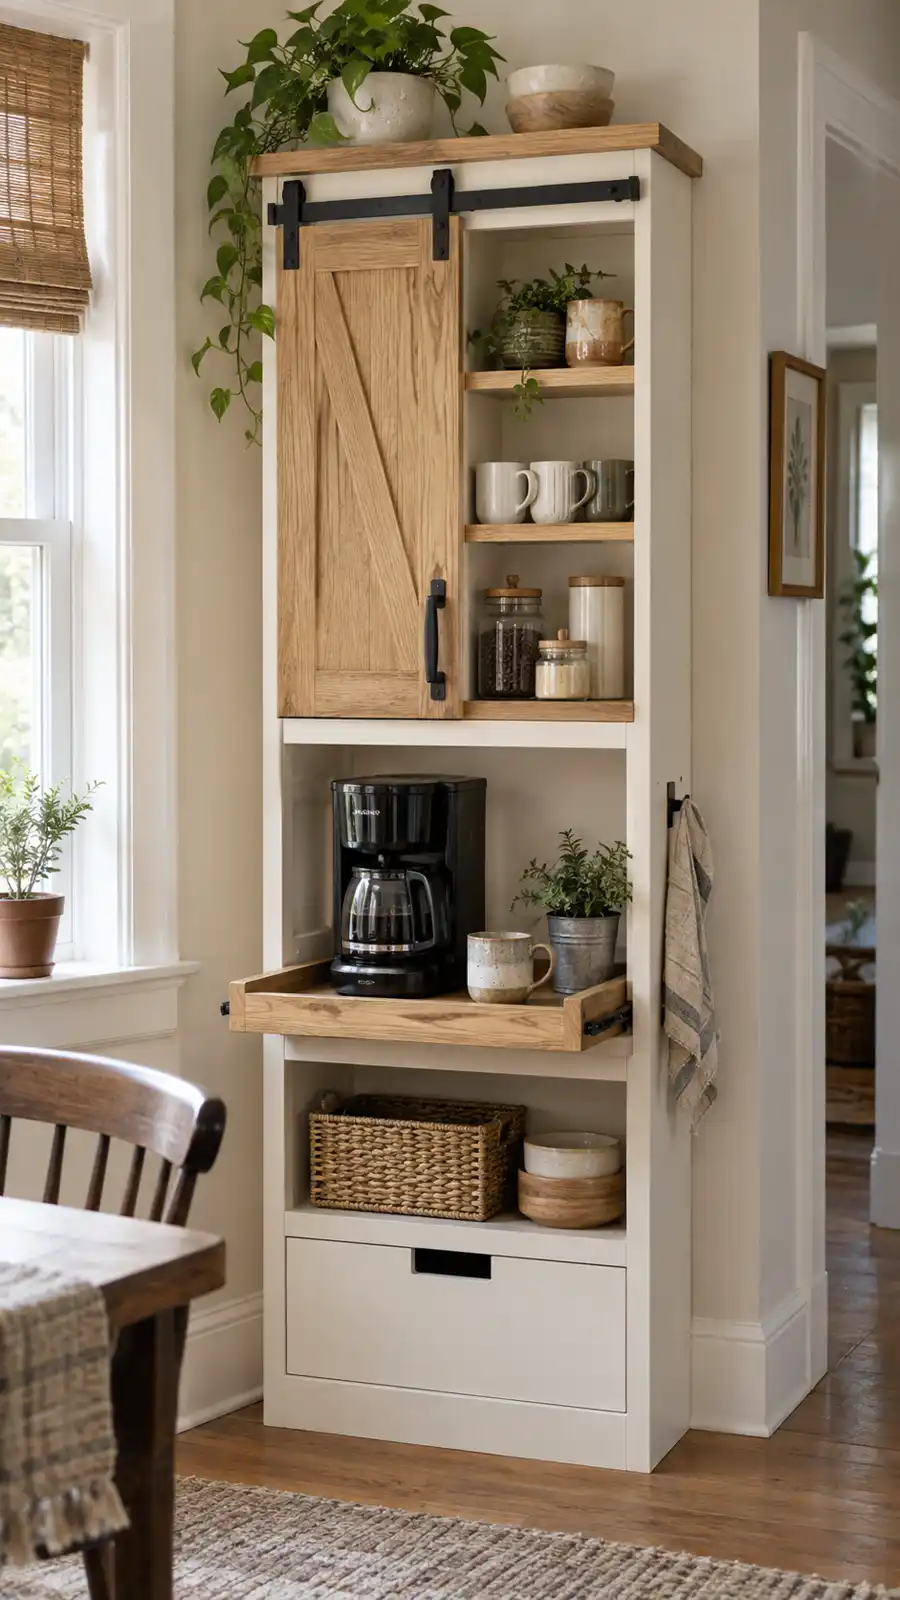
Shanty 2 Chic’s DIY Barn Door Coffee Cabinet targets limited space. It includes shelves, a pull-out tray, and a small sliding door that conceals supplies without swinging outward.
This design works especially well with a compact single-serve brewer. Measure your own machine, including the open lid and removable reservoir, before choosing shelf heights. Add a cord opening just above the work shelf and smooth the hole so it cannot damage the cable.
Best for: very narrow walls and anyone who wants maximum function from a small footprint. Anchor the tall cabinet to a wall stud, particularly when the pull-out tray shifts weight forward.
12. Modern Farmhouse Sideboard Coffee Bar
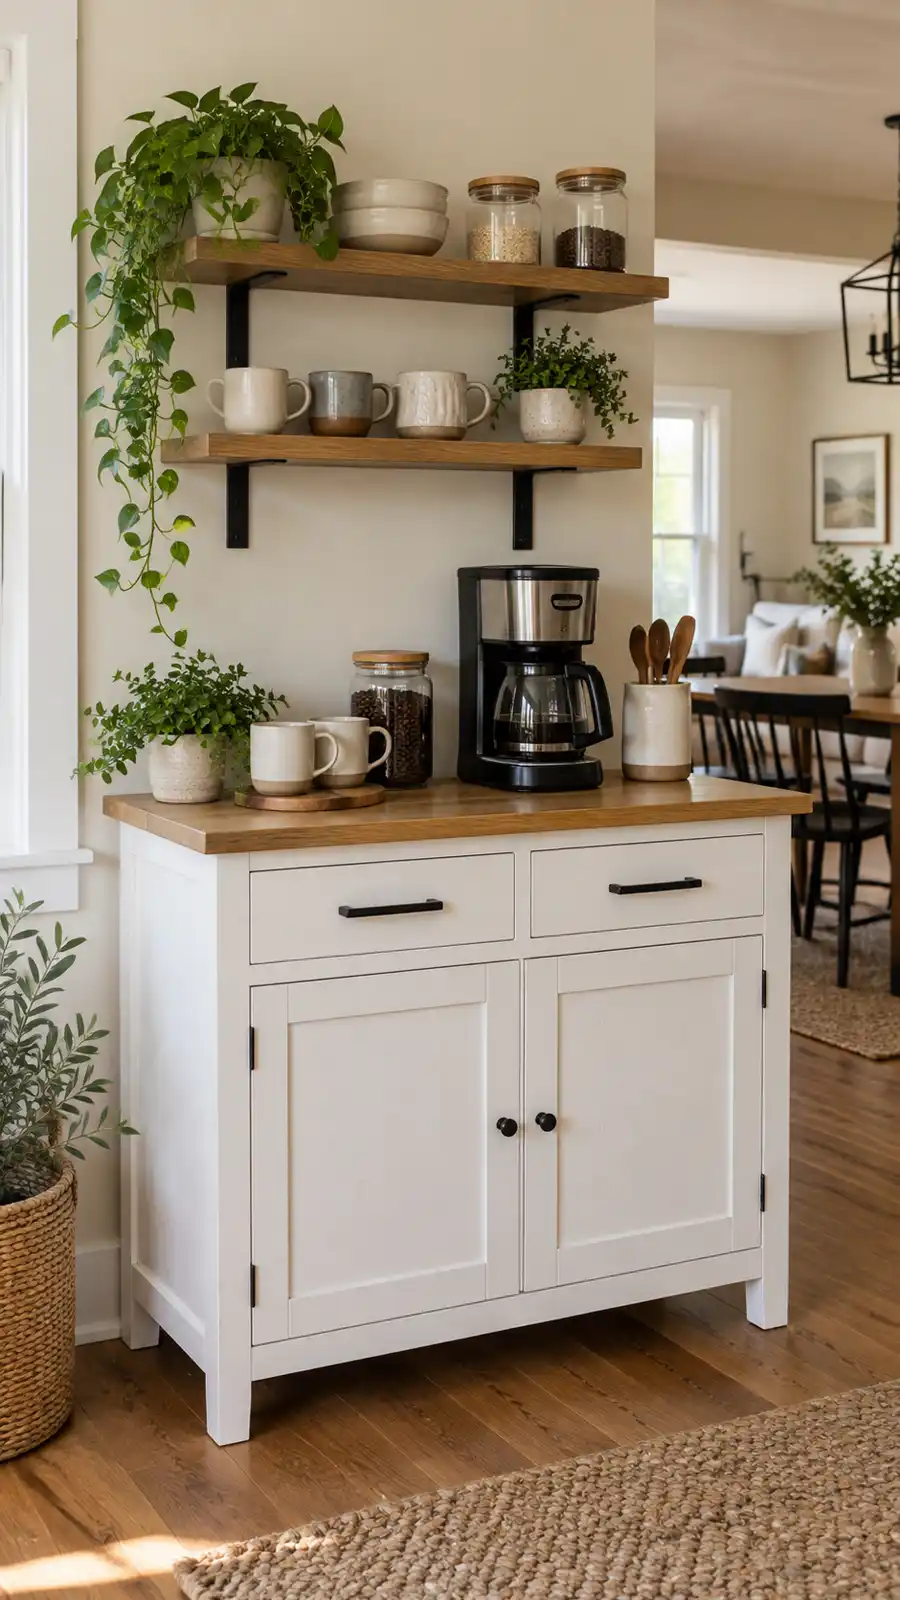
The Modern Farmhouse Coffee Cabinet combines closed compartments, drawers, and a broad top. It behaves like a small sideboard, so it can serve coffee while storing dishes or linens.
For a smaller version, retain the center divider and reduce the width of matching door bays equally. Keep drawer-slide clearances unchanged unless you choose different hardware. A durable satin enamel on the base and polyurethane on the wood top provide an easy-clean two-tone finish.
Best for: intermediate woodworkers and open-plan rooms where the cabinet must look good from across the living area. Pairing it with a warm feature wall can create a complete nook; our wood panel wall ideas offer several restrained backdrops.
13. Beginner Coffee Console With Two Drawers
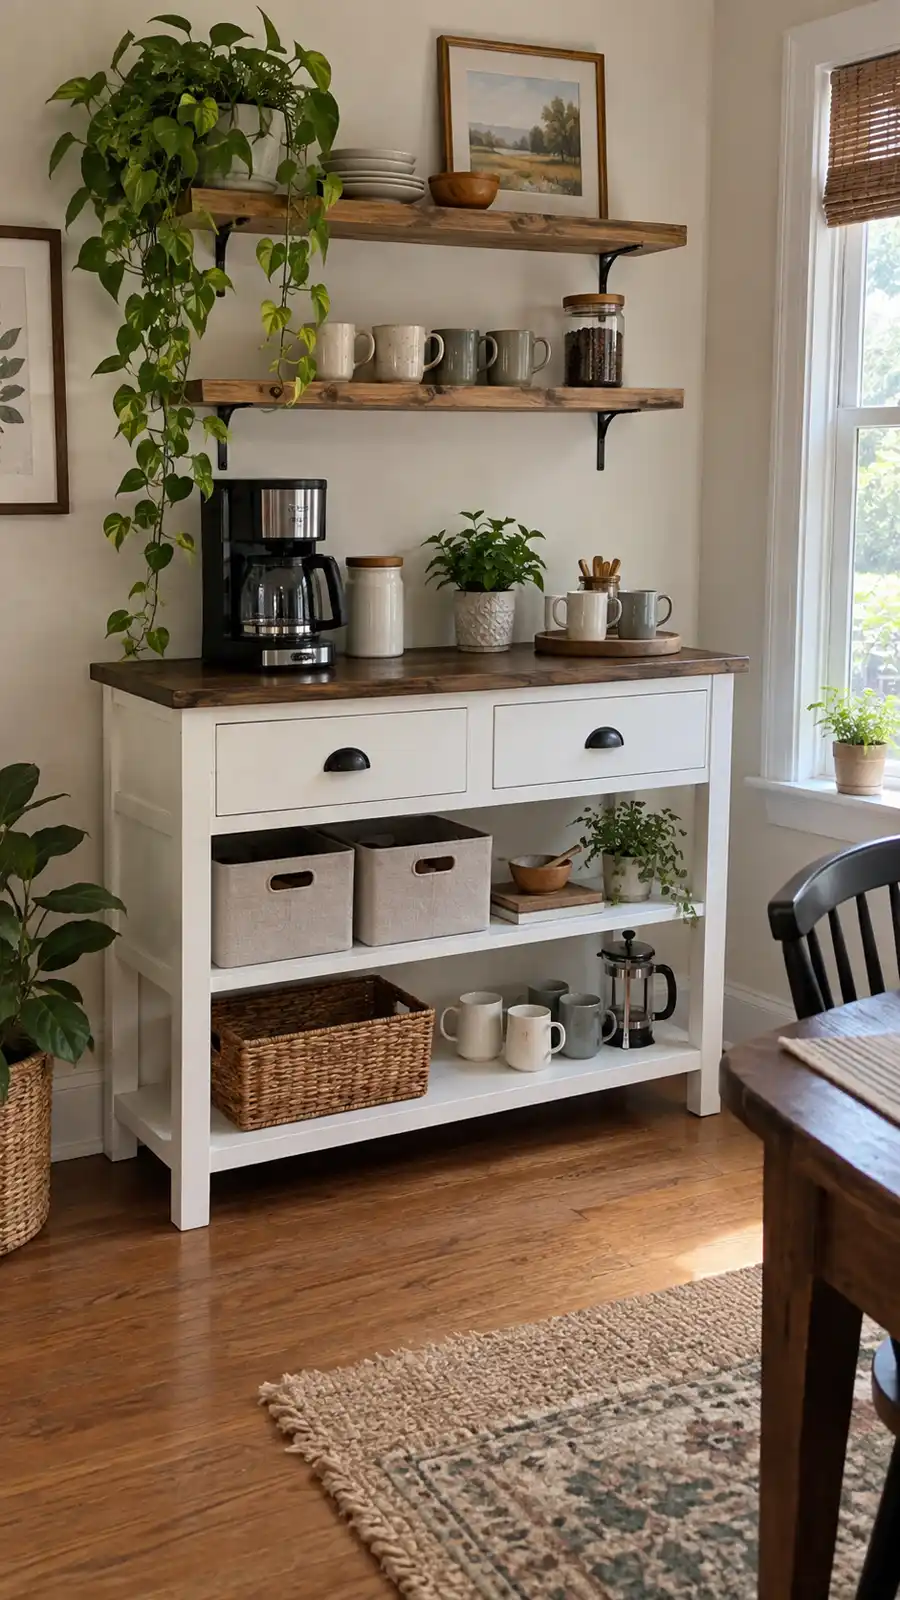
Houseful of Handmade’s Easy Coffee Bar Table includes two drawers and two open shelves. The author presents it as an approachable larger beginner project and provides practical drawer-building guidance.
Fabric bins or wooden crates hide refill bags on the upper shelf, while the bottom shelf displays larger serving pieces. Protect the top with several compatible clear coats because coffee, steam, and hurried mornings test finishes more aggressively than decorative console tables do.
Best for: confident beginners who want to learn drawers. Build and install the drawer boxes before attaching decorative fronts so you can center the final gaps precisely.
14. Full Coffee Bar Hutch
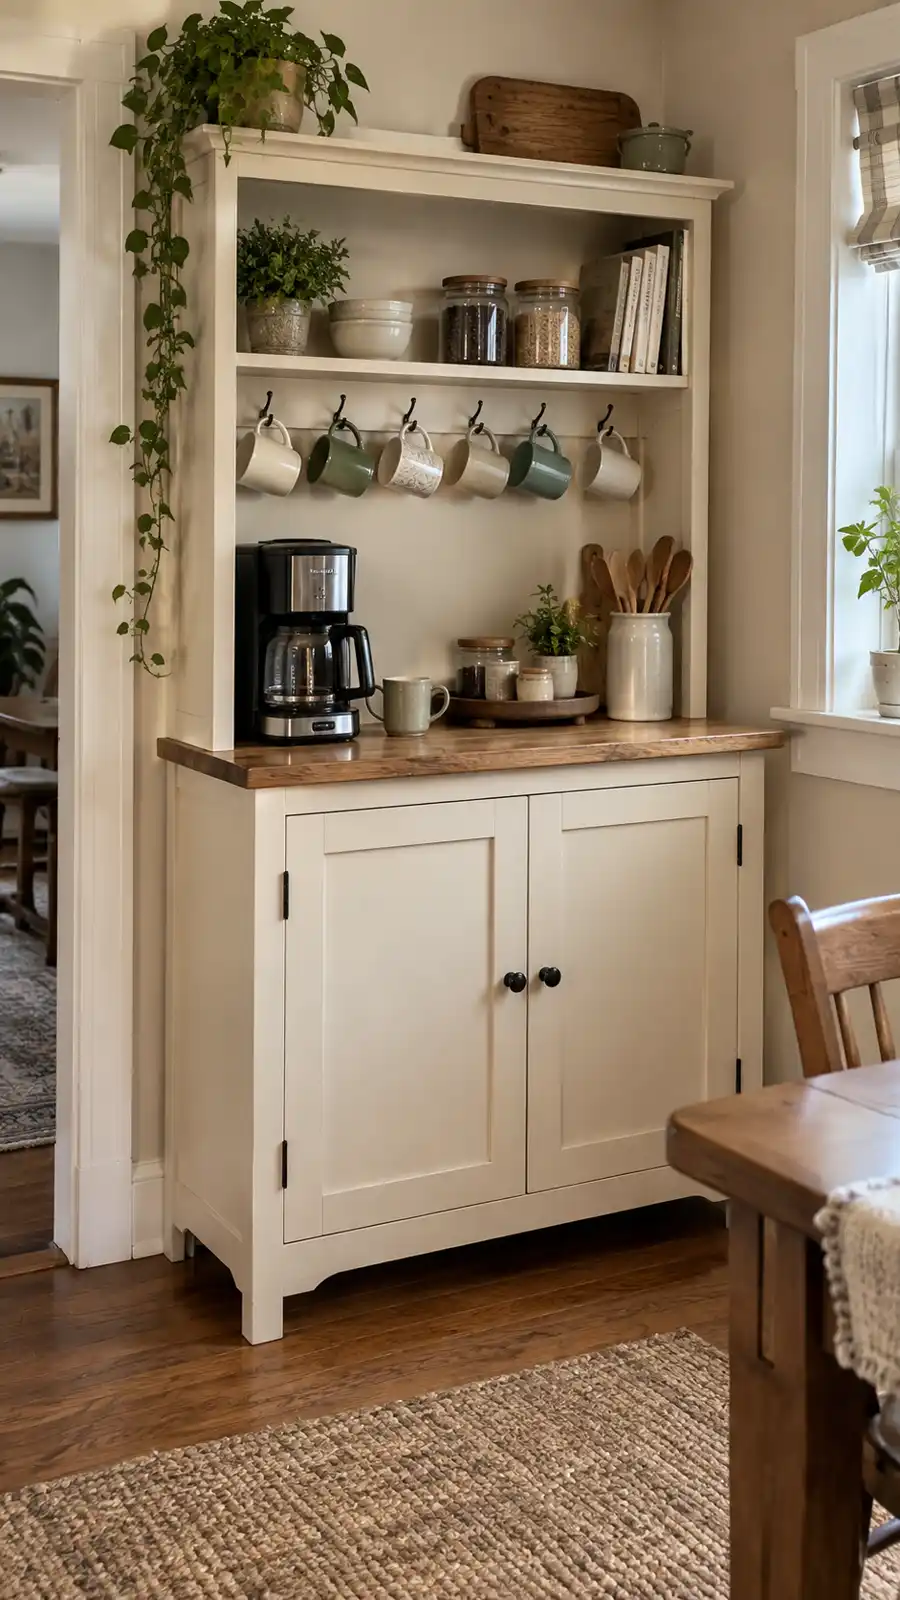
Kreg’s Coffee Bar Hutch plan adds upper shelving above a base cabinet. This layout uses wall height efficiently and keeps mugs close to the machine without consuming more floor space.
Secure the hutch to wall framing with appropriate anti-tip hardware. Confirm the open work area provides enough height for your coffee maker and enough ventilation for heat and steam. Seal the wall-facing surfaces before final assembly because reaching them later becomes a yoga exercise nobody requested.
Best for: kitchens with one available wall but limited cabinet storage. Paint the hutch close to the wall color if you want the tall piece to feel less visually heavy.
15. Coffee Bar With a Fridge Cabinet
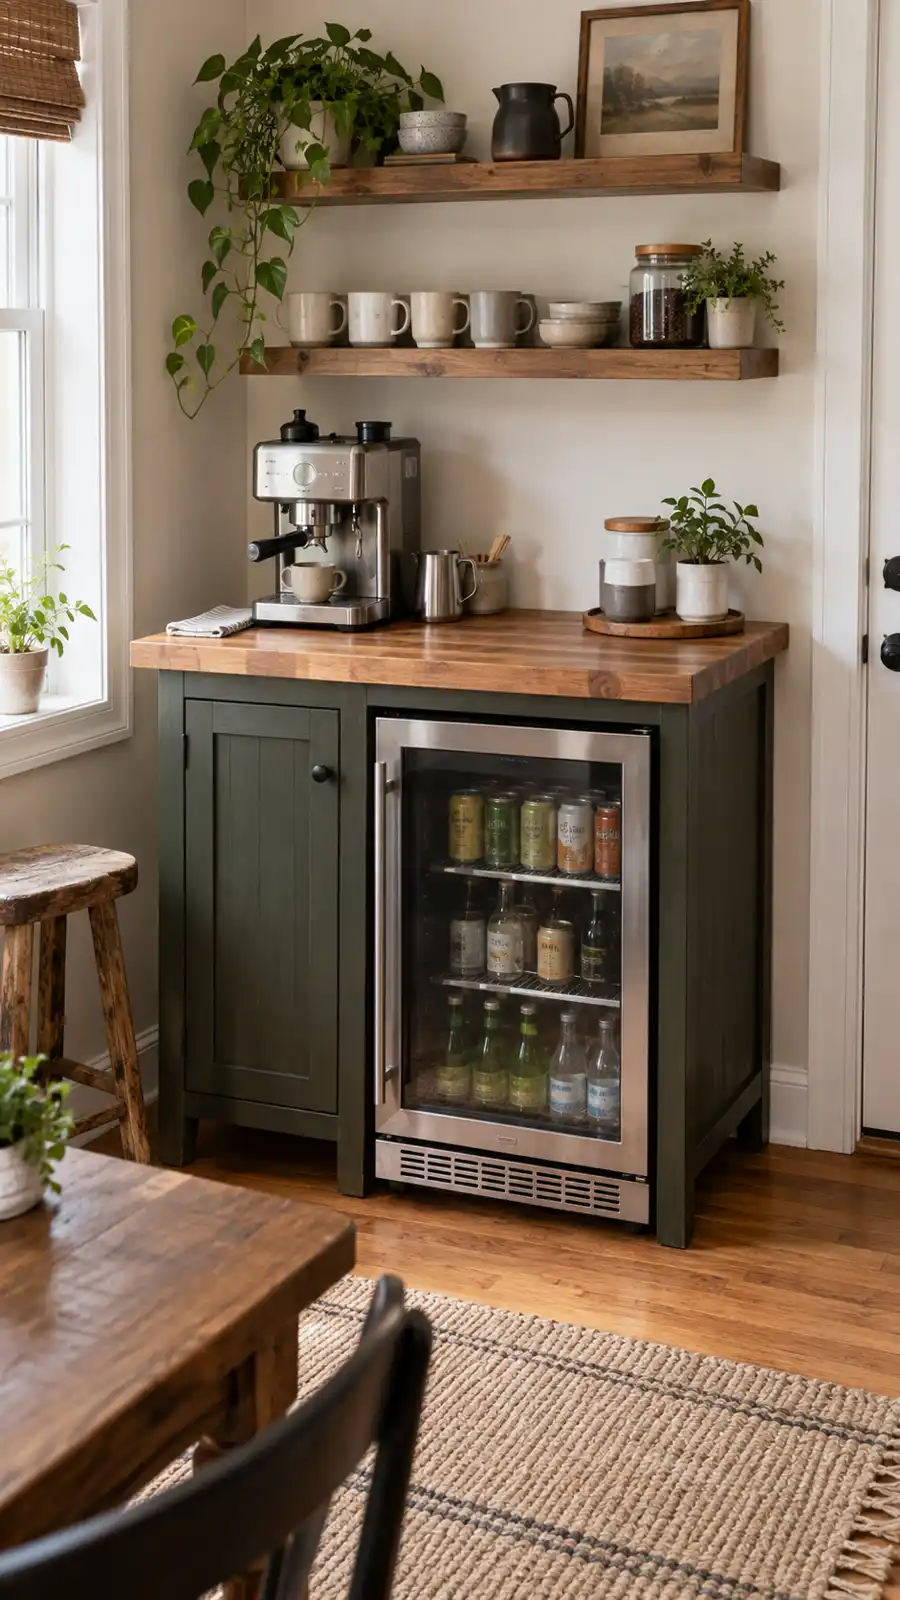
The Kreg Fridge Cabinet Wine or Coffee Bar plan turns a freestanding beverage refrigerator into part of a coordinated cabinet. It works well in a dining room, finished basement, or kitchen overflow area.
The original project has moderate difficulty because appliance clearances, face-frame proportions, and countertop support must align. Build around the actual refrigerator specification and leave access for cleaning, maintenance, and replacement.
Best for: serious espresso setups and combined coffee-and-drink stations. This plan costs more than an open console, but it can eliminate a separate fridge stand and several storage pieces.
Which Coffee Bar Plan Should You Build?
If you want the simplest build, choose the open-shelf island, Rustic X console, or adapted farmhouse stand. They rely on basic frames and shelves, and small measurement changes rarely disturb complicated hardware.
Choose the snack cabinet or two-drawer console when organization matters most. Drawers keep tiny supplies from forming a countertop colony. Choose the pull-out farmhouse cabinet when reservoir access causes daily frustration.
The slim barn-door cabinet offers the best use of a narrow wall. The hutch offers the most vertical storage. The rolling island wins when flexibility matters, while the fridge cabinets make sense for milk-heavy espresso drinks or an out-of-kitchen station.
Smart Small-Kitchen Modifications
- Reduce depth carefully: Leave enough room for the appliance feet, cord bend, and door or drawer hardware.
- Use full-extension slides: They expose the entire drawer and prevent supplies from disappearing at the back.
- Add adjustable shelves: Shelf-pin holes let the cabinet adapt when you replace the coffee maker.
- Use the door interiors: Shallow racks can hold filters or measuring spoons without stealing shelf width.
- Install mug hooks: Position them where handles cannot strike the appliance or your forehead.
- Add a removable tray: A waterproof tray simplifies spill cleanup and protects the finish.
- Anchor tall furniture: Pull-out trays and open doors change the center of gravity.
If a narrow room also struggles with entryway clutter, these DIY shoe rack plans for small entryways use many of the same space-saving ideas. For rotating vertical storage inspiration, see our DIY rotating bookshelf plan.
Finishes That Survive Coffee, Steam, and Spills
Sand cabinet parts through 180 grit before assembly where possible. Remove every trace of dust, then apply paint or stain in thin coats. Sand lightly between clear coats with 220 grit when the manufacturer recommends it.
Cabinet enamel works well on painted bases because it cures harder than ordinary wall paint. Use a water-resistant clear finish on stained tops and follow its full cure schedule before placing appliances. “Dry to the touch” does not mean “ready for a hot coffee machine and a puddle of water.”
Seal exposed plywood edges with edge banding, solid trim, or suitable filler. Add small felt pads beneath baskets and appliances so grit cannot scratch the top. Wipe spills promptly, especially around seams and end grain.
Want More Detailed Woodworking Plans?
Each project above starts with a useful plan, but one cabinet rarely ends the woodworking wish list. You may want matching shelves, a breakfast bench, a pantry organizer, or an entirely different layout after the coffee station proves how much custom furniture can improve a room.
If you want a much larger plan library, read our honest Ted’s Woodworking Plans review. It explains what the collection includes, where it helps, and what you should understand before buying. That makes more sense than promising that several thousand plans will magically organize themselves while you drink coffee.
Frequently Asked Questions
How deep should a small coffee bar cabinet be?
Most compact stations work between 15 and 20 inches deep. Measure the machine from its front edge to the cord connection, then add working clearance. Larger espresso machines may need a deeper top.
How high should I build the coffee bar?
A finished height of 30 to 36 inches suits many people. Standard kitchen-counter height sits near 36 inches, while a lower console may feel comfortable for shorter users. Test the height with boxes before cutting legs.
Can I place a coffee maker inside a cabinet?
Only if the appliance manufacturer permits the arrangement and the open cabinet provides the required heat, steam, and ventilation clearance. Pull the machine forward during use when the plan includes a suitable rated sliding shelf.
What wood works best for a DIY coffee cabinet?
Furniture-grade plywood creates stable cabinet boxes, while poplar or pine works for face frames and trim. Use straight, dry material and seal the finished surfaces against moisture.
Do I need a table saw?
No. A circular saw with a rigid straightedge or track can cut accurate plywood panels. Support the sheet fully, use a sharp blade, and make practice cuts before cutting final cabinet parts.
Should I add a sink to my coffee bar?
A sink adds plumbing, waterproofing, permits, and leak risk. Most small kitchens work better with a removable water reservoir and a durable tray. Consult qualified local professionals if you plan permanent plumbing or electrical changes.
Final Thoughts
The best DIY coffee bar cabinet for a small kitchen does not need to look enormous or complicated. It needs a stable worktop, sensible storage, safe appliance clearances, and dimensions that protect the walkway.
Start with the plan that solves your biggest daily annoyance. Build the rolling island if flexibility matters, the slim barn-door cabinet if floor space feels precious, or the drawer console if filters and pods currently roam free. Measure twice, build square, seal the top—and then reward the finished cabinet with the first cup of coffee it actually earned.