
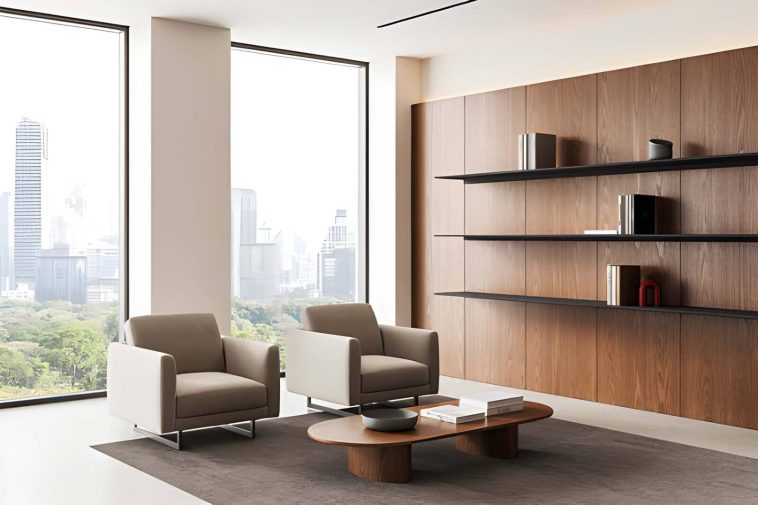
There is something about a beautifully paneled wall that makes a room feel finished. Even when the furniture is simple and the color palette is quiet, wood brings depth, warmth and architecture to a space that plain drywall rarely delivers on its own.
The good news? You do not need a luxury renovation budget to get the look.
Some of the most striking wood panel walls are made from affordable plywood, pine boards, MDF strips or reclaimed lumber. The secret is not necessarily choosing the most expensive material. It is selecting the right scale, spacing, color and finish—and installing every visible line with care.
This collection includes everything from modern oak slats and dramatic walnut panels to painted half walls, rustic planks and renter-friendly treatments. You will find ideas for living rooms, bedrooms, dining rooms, entryways, home offices and even moisture-prone spaces.
Whether you want to cover an entire room or transform one blank wall, these 25 wood panel wall ideas will help you create a space that looks warmer, more intentional and far more expensive than it really was.
Planning note: Decorative wall paneling does not replace required drywall, fire-resistant assemblies or structural sheathing. Before drilling or nailing, locate studs and check for hidden plumbing and electrical wiring. Follow local building rules, especially around fireplaces, electrical equipment and wet areas.
Wood panel wall ideas at a glance
| Look | Best room | Beginner-friendly? | Typical material |
|---|---|---|---|
| Natural vertical slats | Living room or office | Yes | Pine, oak or veneered slats |
| Dark media wall | Living room | Intermediate | Painted slats or acoustic panels |
| Walnut headboard wall | Bedroom | Intermediate | Walnut veneer panels |
| Painted half-wall paneling | Dining room or hallway | Yes | MDF or pine trim |
| Geometric accent wall | Bedroom or office | Yes | Thin wood or MDF strips |
| Reclaimed plank wall | Living room or entryway | Intermediate | Clean reclaimed boards |
| Herringbone feature wall | Dining room or bedroom | Intermediate | Thin, consistent boards |
| Renter-friendly panels | Any room | Yes | Removable framed panels |
What makes wood wall paneling look expensive?
Before choosing a design, it helps to understand why some paneled walls look custom while others feel unfinished.
High-end results usually share five details:
- The proportions suit the room. Narrow slats can visually raise a low ceiling, while wider panels calm a large wall.
- The spacing is consistent. A simple spacer block is often more valuable than a costly tool.
- Edges and transitions look intentional. Panels should finish cleanly at ceilings, baseboards, outlets and adjoining walls.
- The finish is controlled. Sanding scratches, glue marks and uneven stain become more obvious once a wall is complete.
- The design has a clear purpose. The paneling might frame a bed, soften a television wall, define a dining area or add storage to an entryway.
If this is your first decorative woodworking project, review these essential woodworking tools for beginners before you start. You can create several of the simpler designs below with a saw, level, drill, tape measure and brad nailer.
1. Warm oak slat wall for the living room
Design note: Use evenly spaced warm oak slats against a darker backing to make a standard-height room feel taller and more layered.
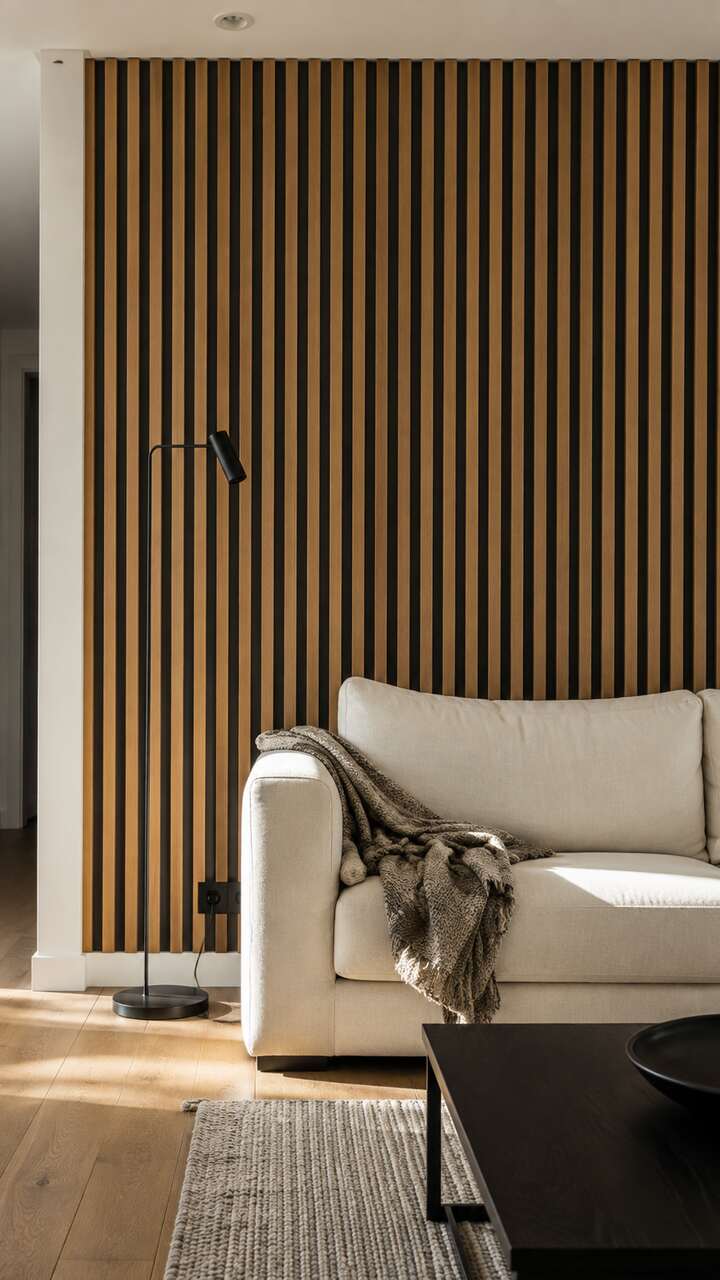
For a refined effect, place narrow oak or oak-veneered slats over a black or charcoal backing. The dark gaps give each piece a crisp outline and make even modestly priced wood look richer. Continue the slats from baseboard to ceiling, or stop them behind a sofa to create a clearly defined sitting zone.
Keep the furniture simple. Cream upholstery, matte black lighting and one or two textured fabrics allow the wall to remain the main feature.
Make it look expensive: Use a spacer block so every gap is identical. Finish the slats before installation to prevent stain or clear coat from marking the dark background.
2. Matte-black wood slat media wall
Design note: Black slats work best when cables, outlets and media components are planned before installation, preserving the wall’s clean lines.
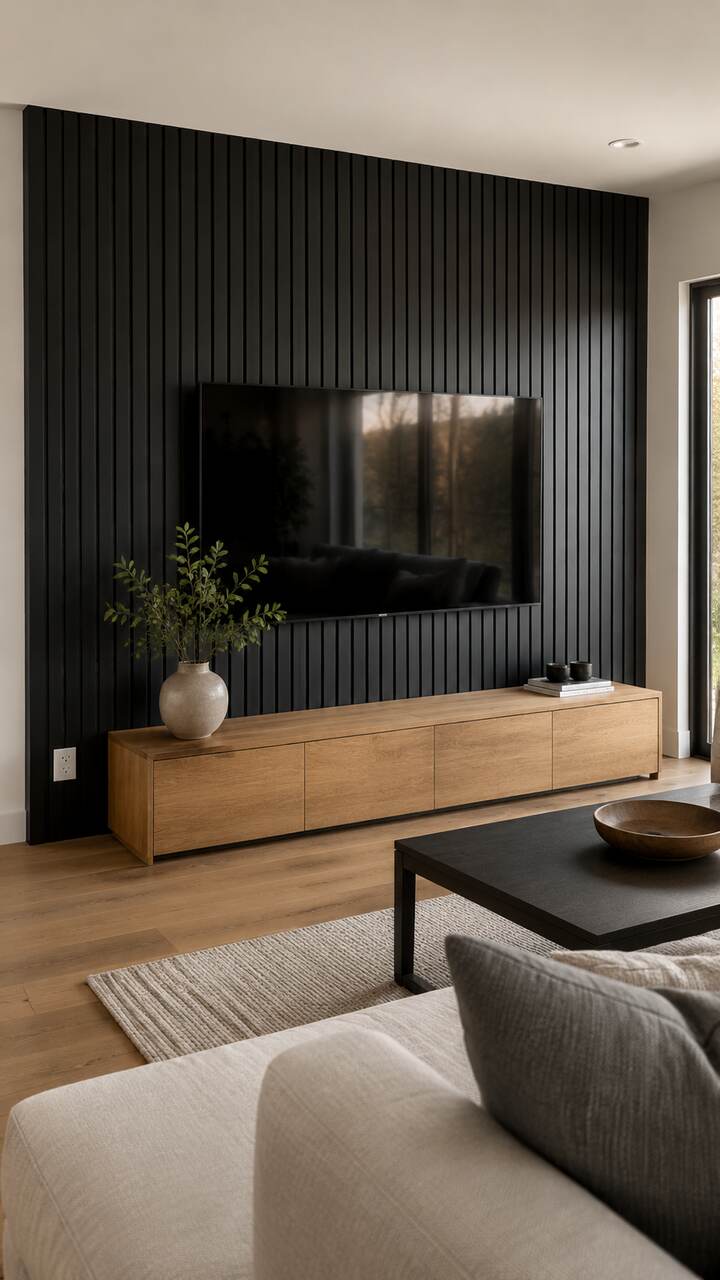
Paint inexpensive pine or MDF strips the same deep black as the backing wall, then install them vertically with narrow, consistent gaps. Add a low wood console to introduce warmth and prevent the finished space from looking flat. If you plan to mount a television, locate the studs and install the mount before covering the wall. Map the mounting points and cable route carefully so they remain accessible.
This treatment works particularly well in small rooms because the dark surface visually reduces the television’s size, while the vertical texture keeps the wall interesting.
Make it look expensive: Conceal visible cords in a code-compliant cable route. A beautiful paneled wall loses its polished appearance the moment power cables hang across it.
3. Walnut-paneled bedroom headboard wall
Design note: For a high-end bedroom effect, align full-height walnut panels symmetrically with the bed and keep surrounding furniture visually quiet.
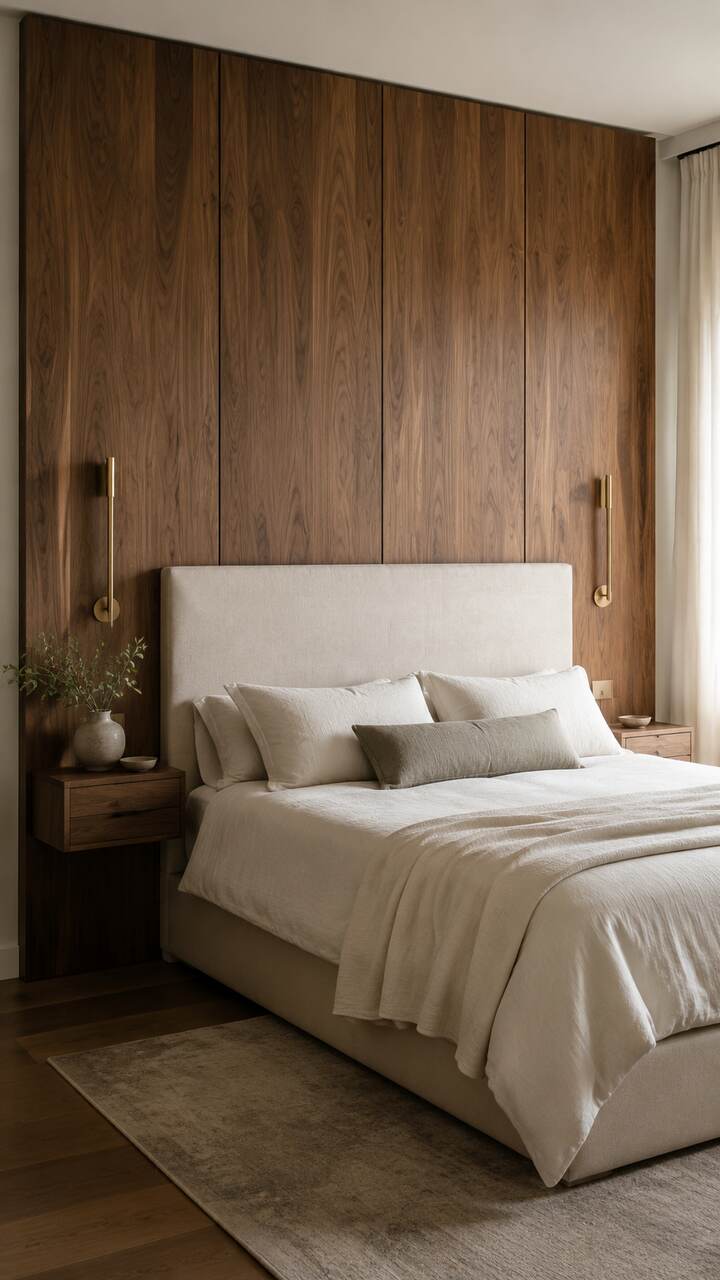
You do not need solid walnut boards to achieve this effect. High-quality walnut-veneered plywood or ready-made veneer panels can create a similar appearance with less weight and cost. Arrange the panels on the floor first so the grain flows naturally from one section to the next.
Complete the wall with slim sconces and understated bedding in cream, stone or soft gray. A pair of simple floating nightstands keeps more of the wood visible and makes the installation feel deliberately integrated.
Make it look expensive: Use narrow shadow gaps or dark trim between panels. Precise reveals make sheet material resemble custom architectural millwork.
4. Floor-to-ceiling fluted wood panels
Design note: Choose pale fluted panels when you want strong texture without sacrificing brightness; grazing daylight will emphasize every ridge.
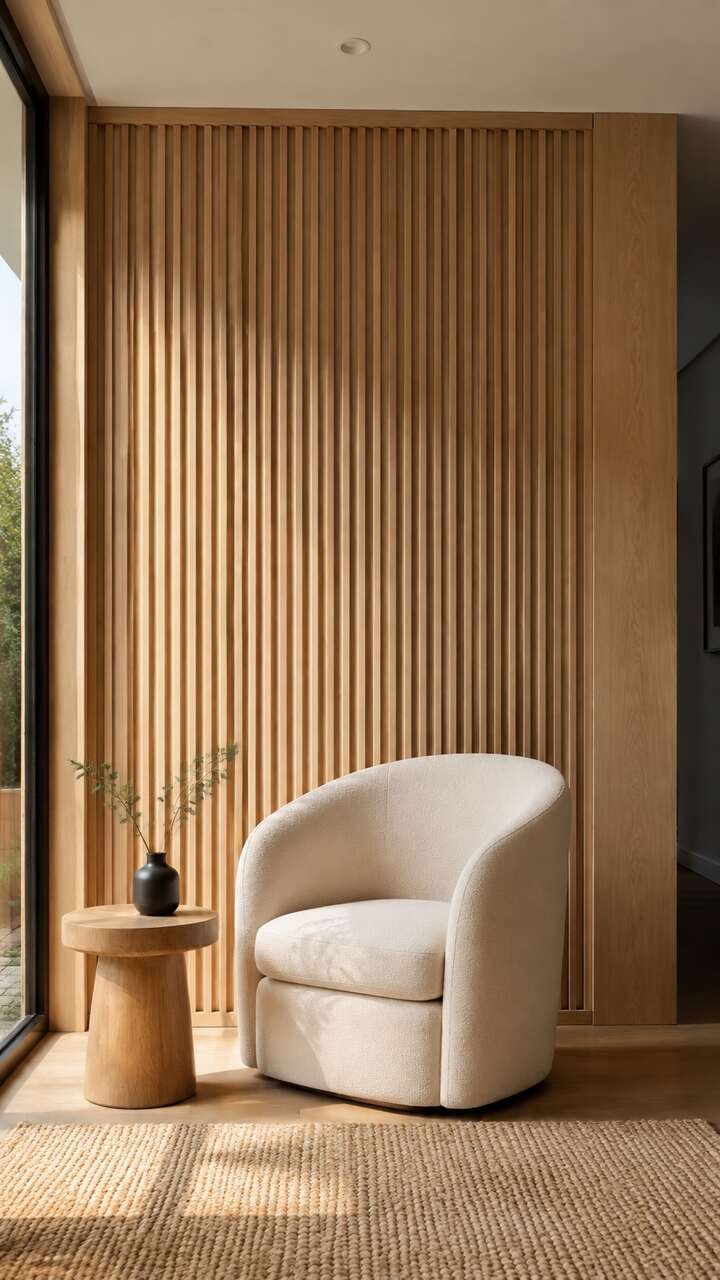
Use pale oak for a calm Scandinavian look, walnut for a sophisticated library feeling or painted MDF when you want texture without visible grain. Fluting is especially effective on narrow walls, around doorways or behind a sculptural chair where it can be appreciated up close.
Prefabricated fluted panels make installation faster, but check the width of the final wall before beginning. If the last panel would leave a thin, awkward strip, rip the first and final panels equally so the composition remains balanced.
Make it look expensive: Plan symmetrical edge pieces. Balanced margins at both ends are one of those subtle details people notice even when they cannot explain why the wall looks professionally made.
5. Classic painted half-wall paneling
Design note: Half-wall paneling looks most intentional when the top rail aligns with nearby windowsills, chair backs or other architectural lines.
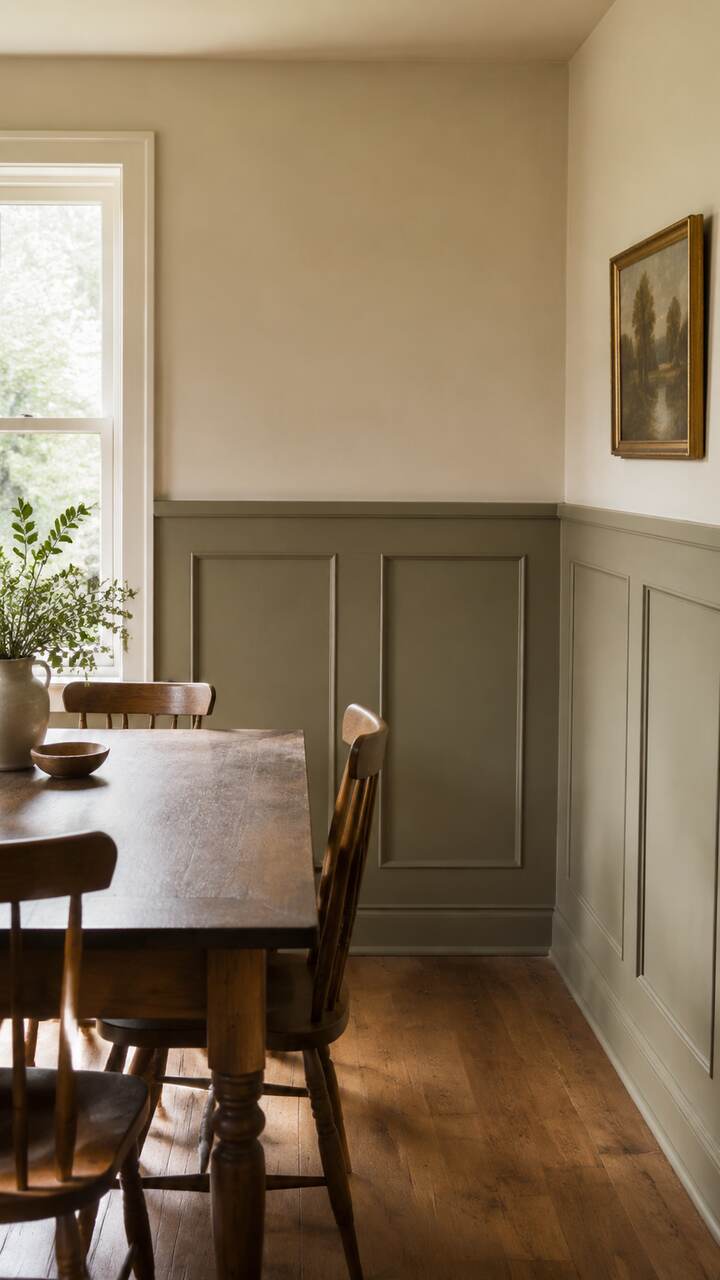
Use a level top rail and divide the lower section into evenly proportioned rectangles. Paint the trim, wall and baseboard one color so the individual pieces read as a single paneled surface. Warm white feels timeless; olive, dusty blue or deep taupe creates more drama.
This idea is especially effective in dining rooms, hallways and stair landings, where furniture is limited and the walls need a little more presence.
Make it look expensive: Calculate the panel widths before cutting. Avoid tiny leftover boxes at the corners—slightly adjusting all the panels will produce a far better result.
6. Geometric wood-strip accent wall
Design note: Lay the full geometric pattern out with painter’s tape first so the angles feel balanced from the main doorway and from the bed.
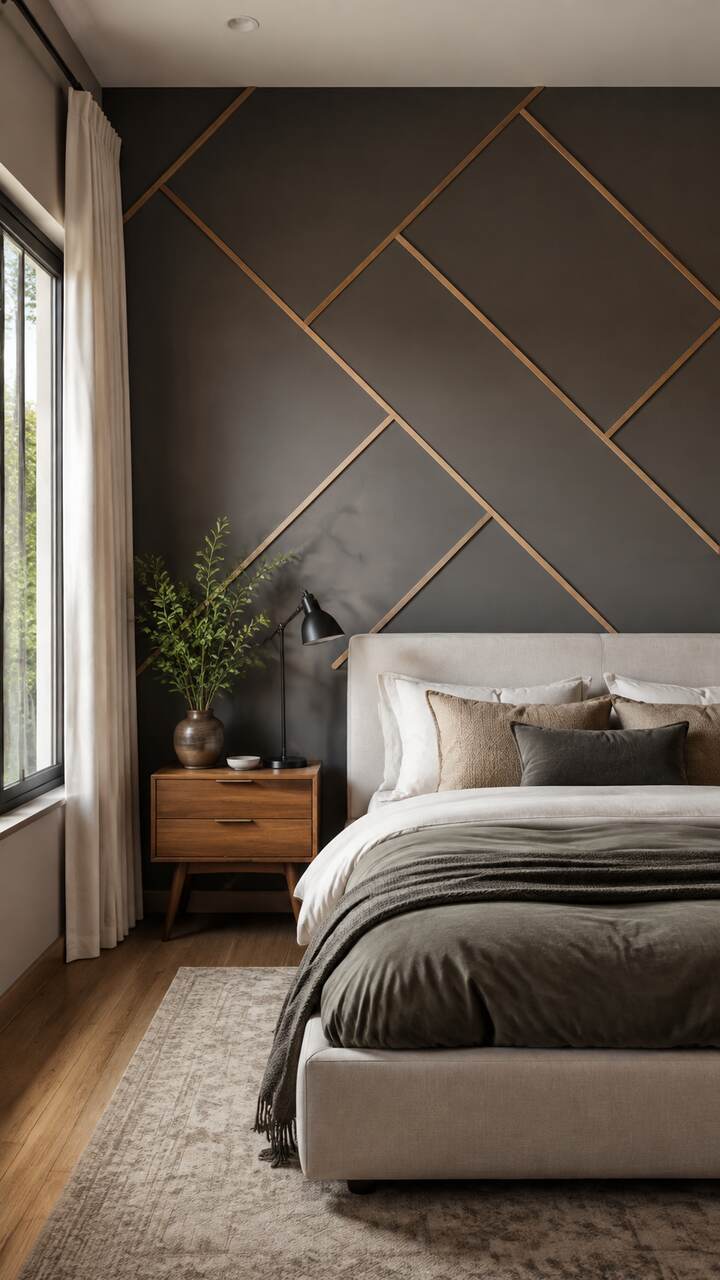
Start with a full-size sketch and transfer the key points to the wall with a pencil and level. Cut each strip carefully, dry-fit the design and label the back of every piece. A monochrome painted finish makes complicated cuts more forgiving, while natural wood strips over a dark painted wall create stronger contrast.
This is a manageable weekend project for beginners who are comfortable making repeated miter cuts.
Make it look expensive: Keep the pattern asymmetrical but balanced. Random angles can look busy; a limited set of repeated angles feels intentional and sophisticated.
7. Reclaimed barn-wood feature wall
Design note: Limit reclaimed boards to one feature wall and repeat one or two wood tones elsewhere so the variation feels curated rather than chaotic.
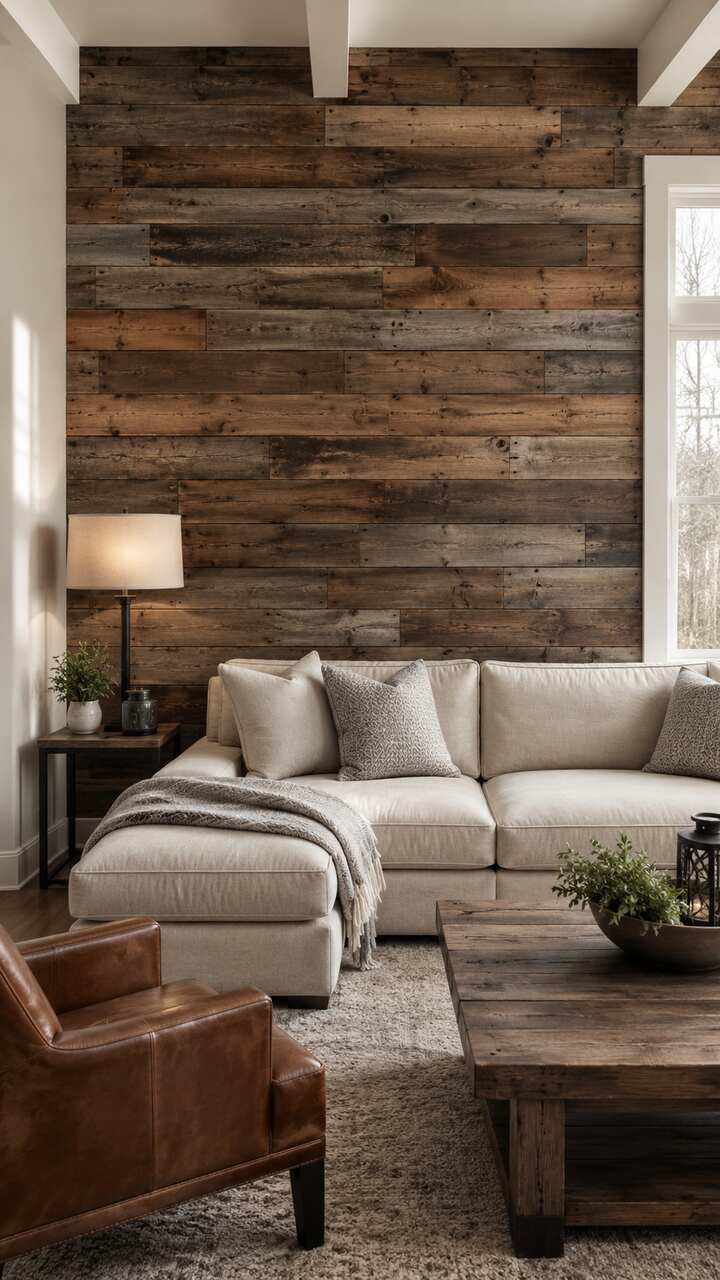
Before bringing salvaged lumber indoors, identify its source. Avoid boards with unknown chemical treatment, oil contamination, pests, mold or lead-based paint. Remove loose debris, pull or cut back hidden metal and clean the wood appropriately before installation.
Arrange the boards on the floor and distribute the darkest pieces across the layout. Mixing board lengths will help hide end joints and create a natural rhythm.
Make it look expensive: Limit the palette. Reclaimed wood already has plenty of character, so skip busy accessories and allow one wall to carry the visual weight.
8. White vertical plank wall
Design note: Painting narrow vertical planks the same white as the trim creates subtle shadow lines while maintaining a light cottage-inspired palette.
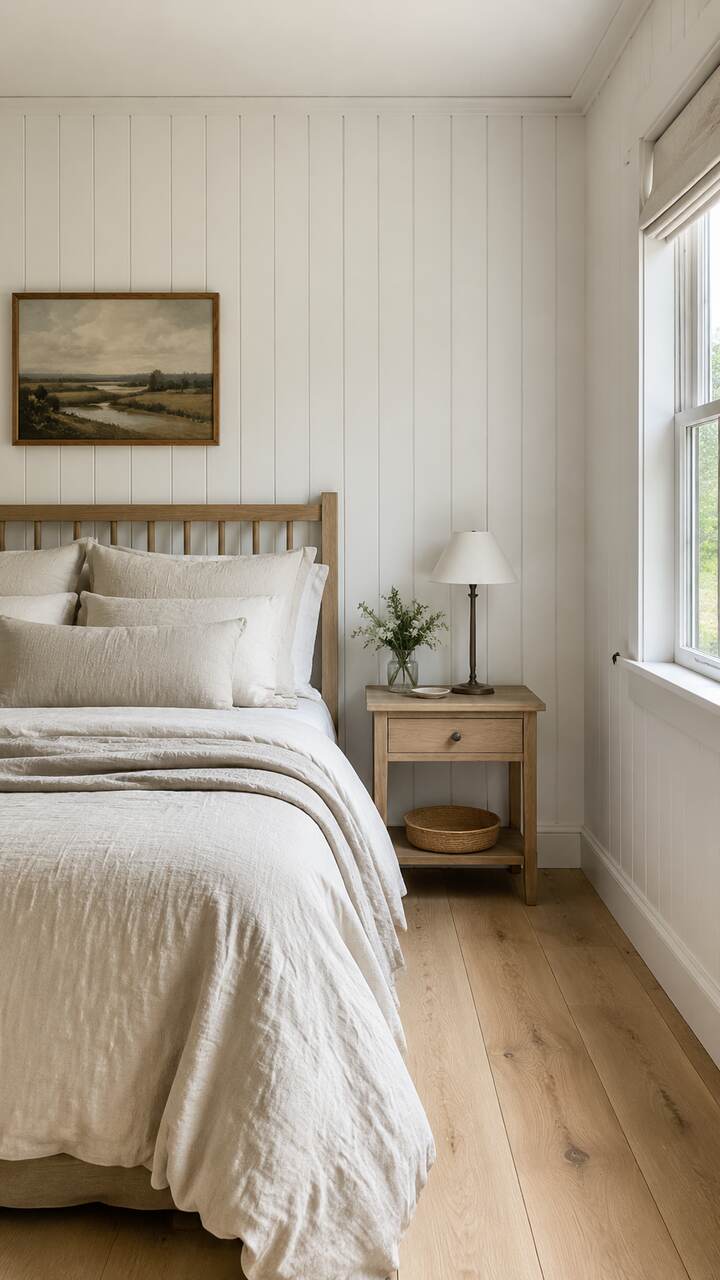
The best whites for this treatment have a slightly warm undertone. A stark blue-white can make the grooves look harsh, while cream, ivory or warm off-white softens the shadows. Use tongue-and-groove boards for authentic join lines, or create a similar visual rhythm with evenly spaced strips over a painted wall.
Running the boards vertically makes a low ceiling feel taller. Keep the baseboard simple and finish the top with either a clean ceiling transition or a narrow trim board.
Make it look expensive: Fill visible fastener holes and caulk only the edges that should disappear. Do not fill deliberate grooves between boards—the shadow lines are what give the wall its character.
9. Moody green paneled wall
Design note: Deep green paneling gains richness from a low-sheen finish and warm accents such as aged brass, tan leather and natural wood.
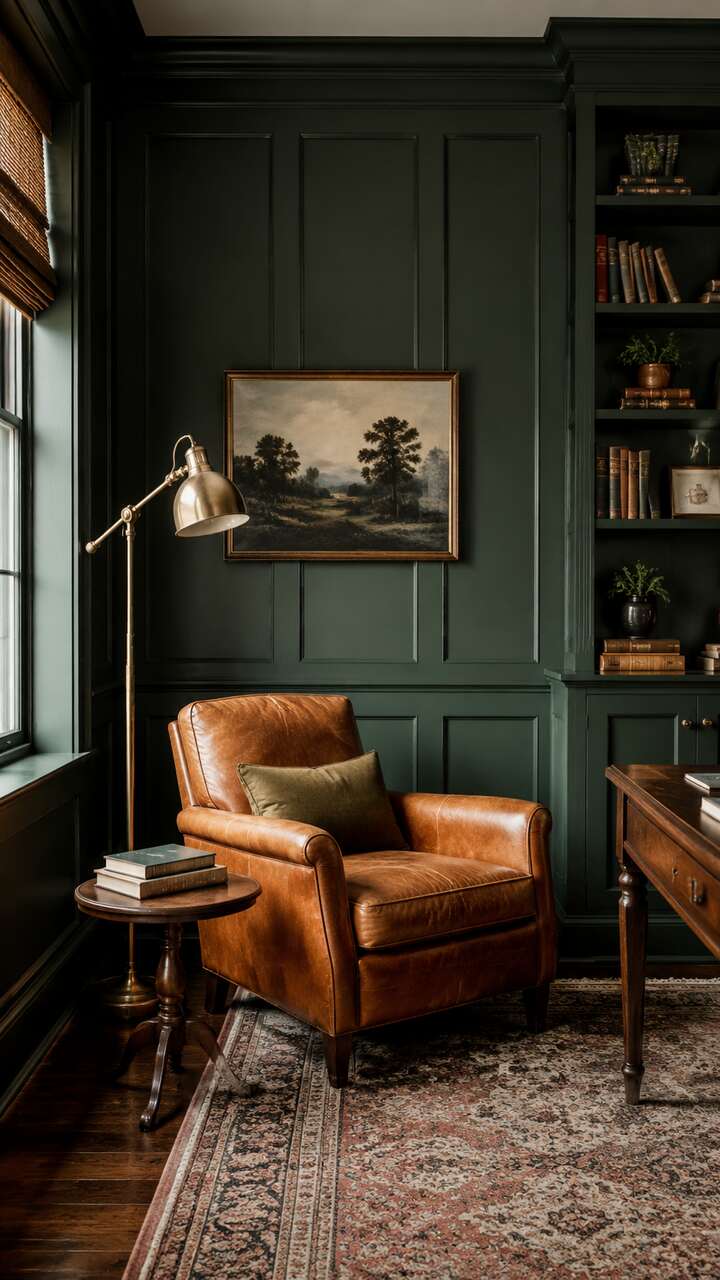
Create the panel design with MDF strips, simple rectangular frames or tongue-and-groove boards. Then paint the entire wall—including trim and baseboard—in the same satin or matte color. Keeping the finish monochromatic makes inexpensive materials feel like built-in millwork.
Add warm contrast through tan leather, aged brass, natural linen or medium-toned wood furniture. Avoid introducing too many competing colors; the green wall should anchor the room.
Make it look expensive: Paint a large sample first and observe it throughout the day. Dark colors can shift dramatically as the light changes, and the right green is worth choosing slowly.
10. Natural plywood grid wall
Design note: Consistent panel sizes and narrow shadow gaps are essential—the precise grid is what makes economical plywood read as custom millwork.
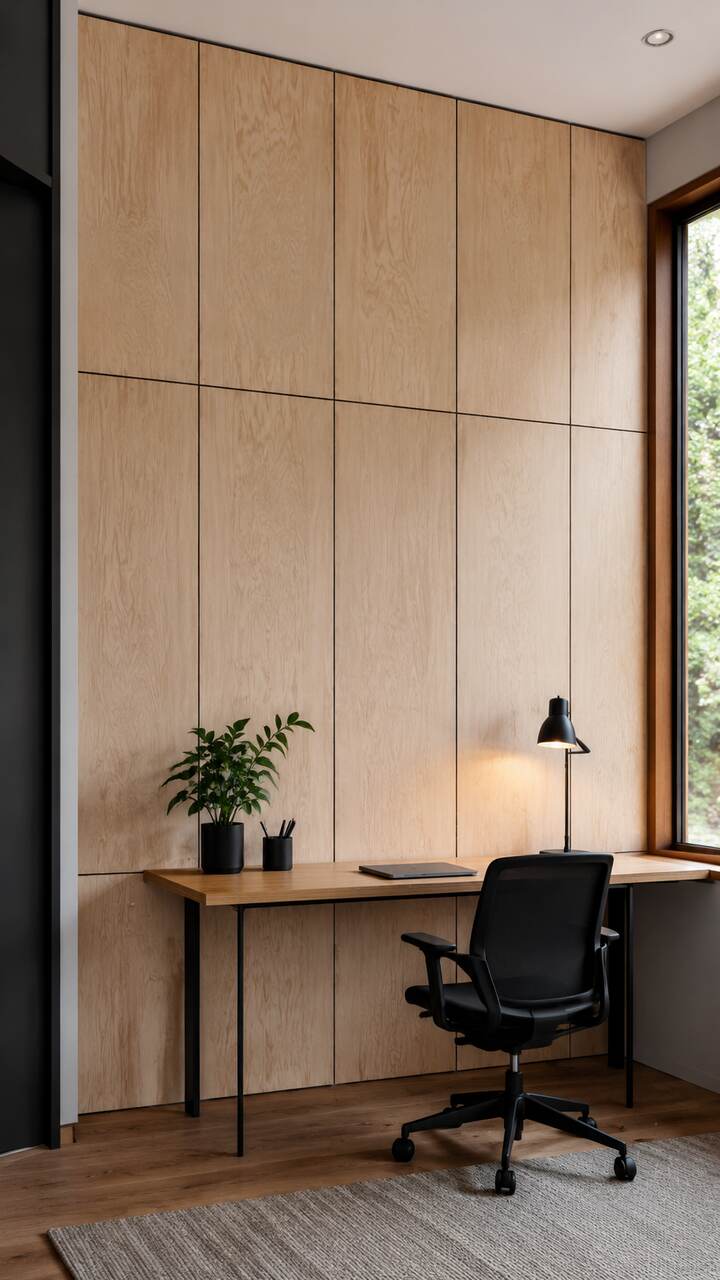
The success of this look depends on selection and sequencing. Choose flat sheets with attractive face veneer, cut them with a sharp blade and arrange them so the grain direction remains consistent. Narrow black reveals—or slim painted battens—separate the panels and make the grid feel purposeful.
This treatment suits a modern office, studio or media room. It can also provide a practical background for floating shelves, artwork or a long desk.
If you are uncertain which material will machine cleanly, this guide to the best woods for beginner woodworking projects is a useful starting point.
Make it look expensive: Finish the plywood with a clear matte topcoat rather than a glossy film. A low sheen lets the grain remain the focus.
11. Slim vertical panels in a narrow hallway
Design note: In a narrow hallway, slim vertical battens create upward movement without consuming the visual width needed for comfortable circulation.
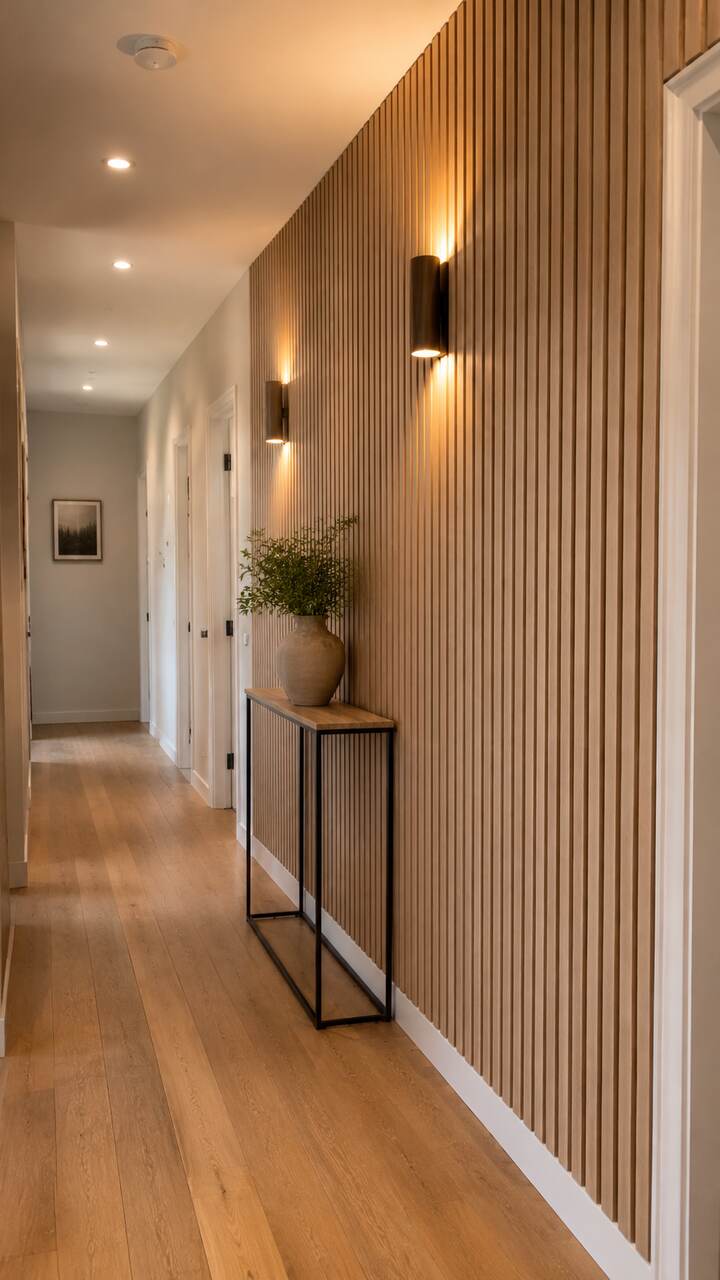
Use thin vertical battens or shallow fluted panels on one side only. Pale wood keeps the passage bright, while the vertical direction visually lifts the ceiling. A few small wall lights can skim across the texture and make the repeated shadows more noticeable.
Keep projecting features to a minimum. A narrow console, small picture ledge or wall-mounted hook rail is usually enough. Make sure the finished installation does not obstruct doors, switches or the required path through the hallway.
Make it look expensive: Finish the paneling neatly around every doorway. Continuous, carefully cut vertical lines will make the hallway appear custom-built rather than decorated as an afterthought.
12. Wood-paneled fireplace wall
Design note: Check the fireplace manufacturer’s clearance requirements and local code before allowing any combustible wood paneling near the firebox.
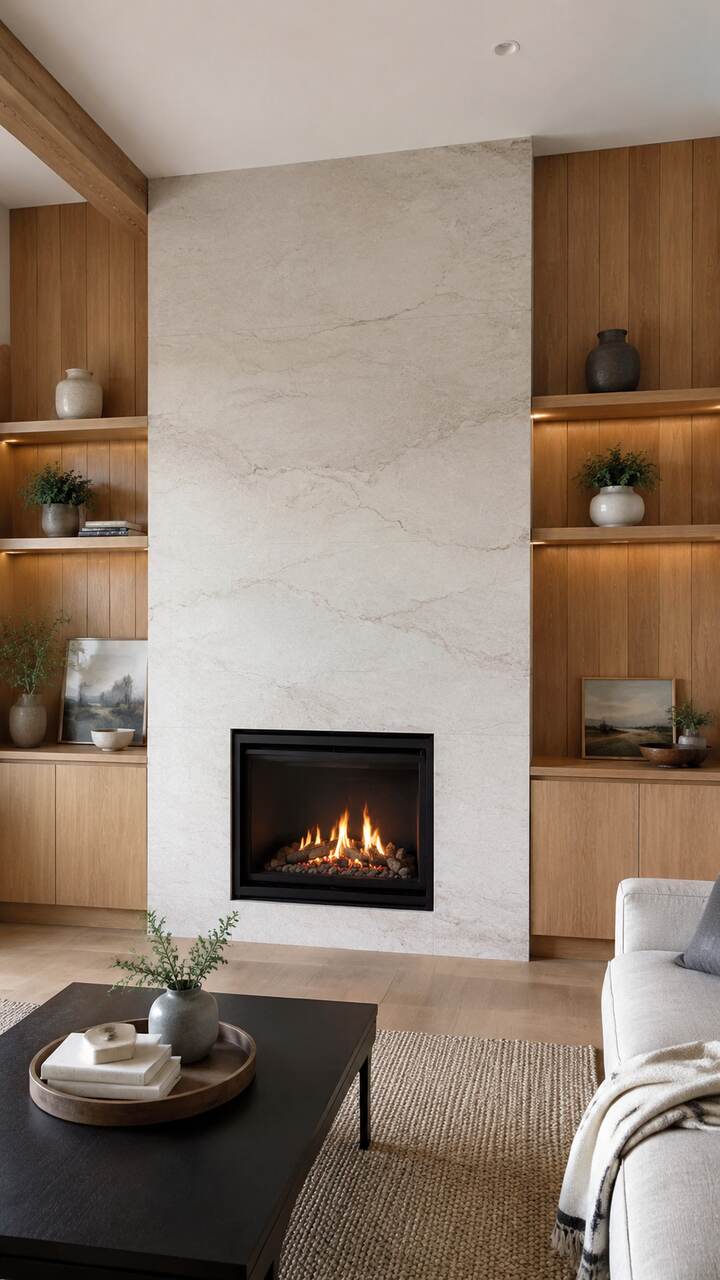
A strong design might combine a stone or tile surround with vertical oak panels on each side. Matching built-in shelves or low cabinets can make the entire wall feel like one custom installation. Dark wood feels dramatic, while pale oak keeps the fireplace wall light and contemporary.
Clearances vary by fireplace type and manufacturer. Follow the appliance instructions and local code, and consult a qualified professional when the required separation is unclear.
Make it look expensive: Align panel joints with shelves, cabinets or the edges of the noncombustible surround. Shared lines make multiple materials feel unified.
13. Wood slat backdrop for a home office
Design note: Behind a desk, restrained walnut slats provide a polished video-call background while the darker gaps add useful visual depth.
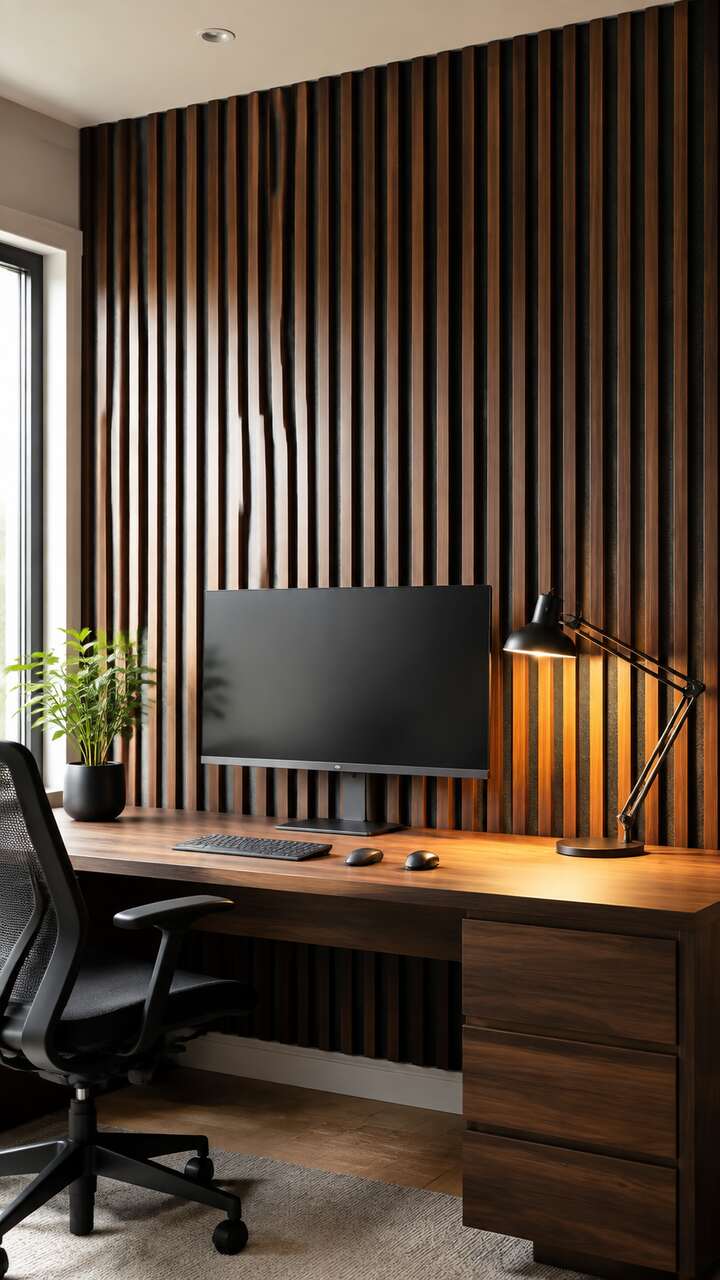
Medium walnut tones flatter warm lighting and contrast nicely with black desks, monitors and task lamps. Pale oak creates a calmer, more Scandinavian result. If sound control matters, consider an acoustic slat system with a felt backing; the surface adds visual warmth and may help reduce some reflected sound, though it will not soundproof the room.
Run cables before closing the wall and preserve access to outlets. A beautifully organized background is most convincing when the working side of the desk is equally tidy.
Make it look expensive: Add one carefully positioned picture light or wall washer. Grazing light reveals the texture and gives the wall far more depth after dark.
14. Box molding in a dining room
Design note: Large molding rectangles generally look calmer and more expensive than many small boxes, especially when centered on furniture and artwork.
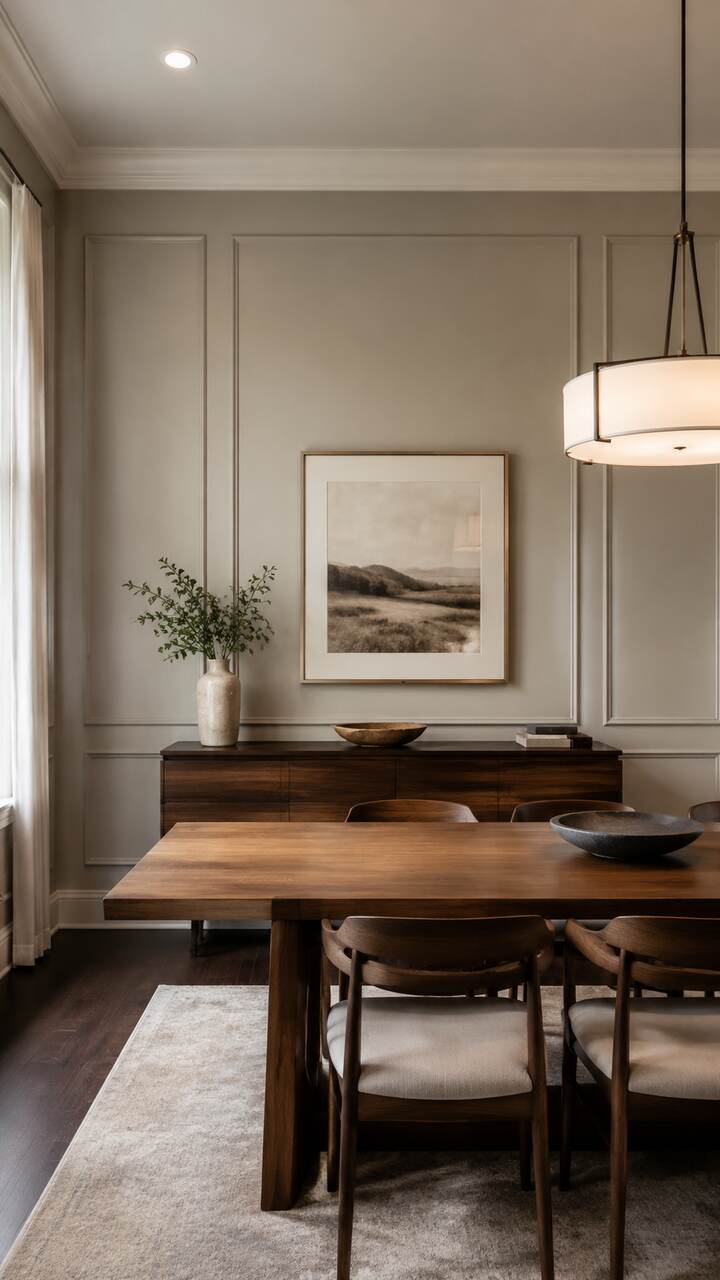
Create tall rectangular frames from slim molding and space them evenly around the room. Paint the frames and wall one color, then center artwork or sconces within selected panels. For a contemporary look, use fewer, larger boxes. Many small rectangles can feel traditional and visually busy.
Dining rooms are ideal for this treatment because the furniture arrangement is usually symmetrical. Let the panel layout respond to the table, buffet and light fixture instead of dividing the wall arbitrarily.
Make it look expensive: Design around the room’s focal points. A panel centered precisely behind a buffet or major artwork instantly makes the installation feel planned.
15. Herringbone wood accent wall
Design note: Build a level centerline first, then work outward with equal-width boards so the herringbone pattern remains symmetrical at both edges.
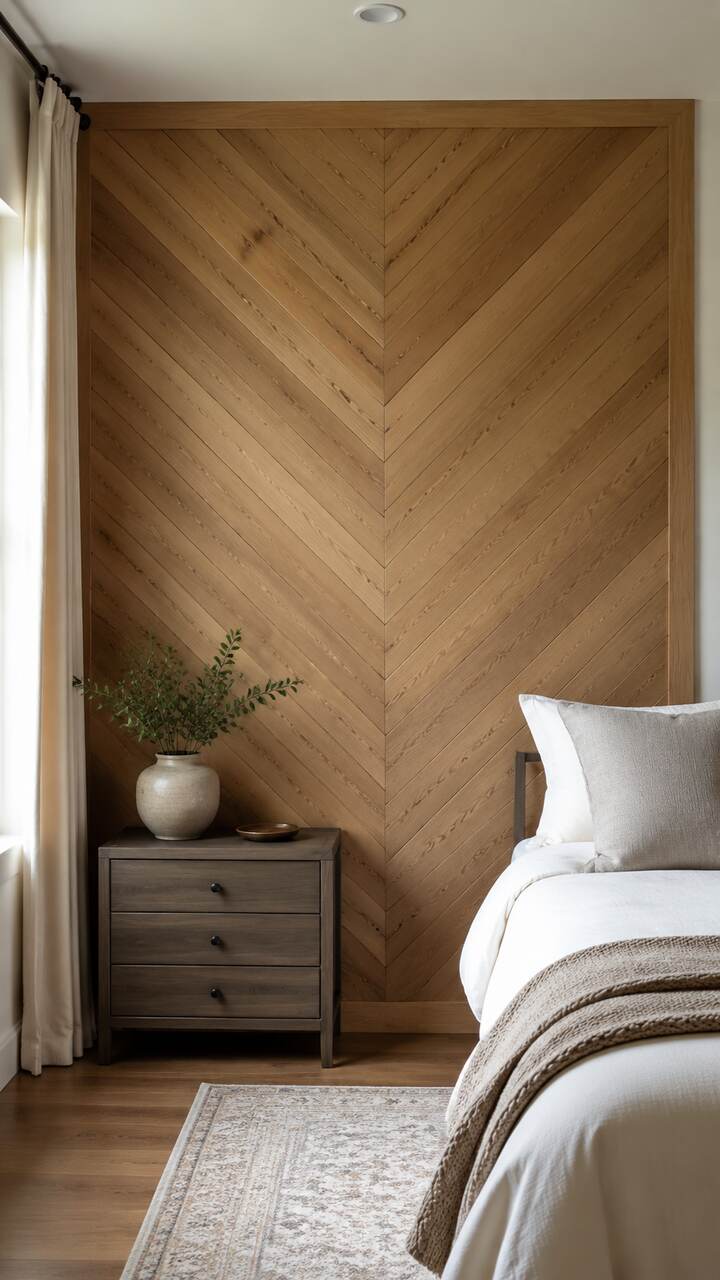
Begin with accurate centerlines and establish the first V perfectly. Every later piece depends on that starting point. Boards of consistent width and thickness are essential; even small variations accumulate as the pattern expands. A plywood backer can make layout and fastening easier while reducing damage to the finished wall behind it.
Herringbone already introduces a lot of movement, so choose wood with moderate rather than extreme color variation. Use it on one contained wall behind a bed, dining table or console.
Make it look expensive: Frame the pattern with a simple perimeter border. The border hides small cut variations at the edges and gives the design a crisp stopping point.
16. Acoustic felt-backed slat panels
Design note: Felt-backed slat panels can help reduce reflections and echo, but they should be described as acoustic treatment rather than soundproofing.
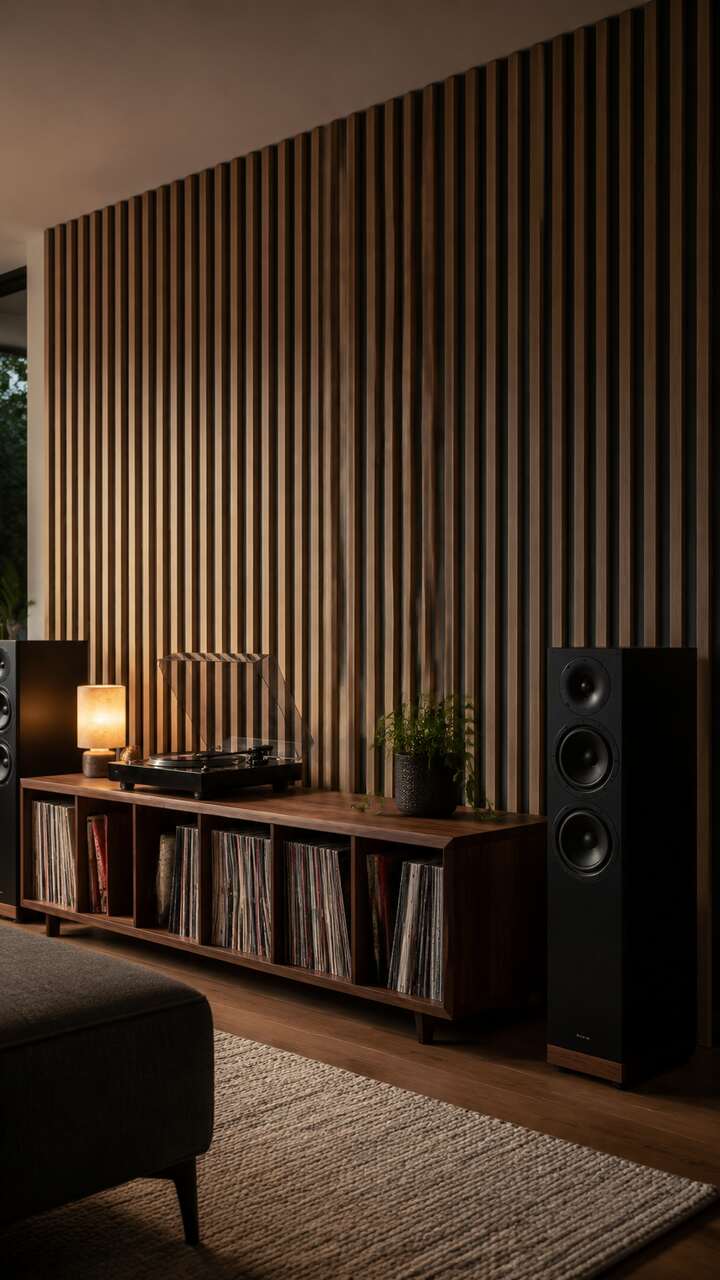
Premade panels can cover a wall quickly, but measure carefully before ordering and inspect how the seams will align. Depending on the product, a joint can disappear behind a slat or become very noticeable in the open felt area. Cut panels with the blade and method recommended by their manufacturer to avoid torn veneer and fuzzy felt edges.
Remember that acoustic treatment and soundproofing are different goals. These panels may reduce echo within a room, but they do not automatically stop sound moving through the wall.
Make it look expensive: Wrap the treatment around one outside corner or continue it onto a short adjacent wall. That small gesture makes the paneling feel architectural rather than applied.
17. Rustic horizontal plank wall
Design note: Stagger horizontal plank joints and control color variation to achieve modern-cabin warmth without creating a patchwork appearance.
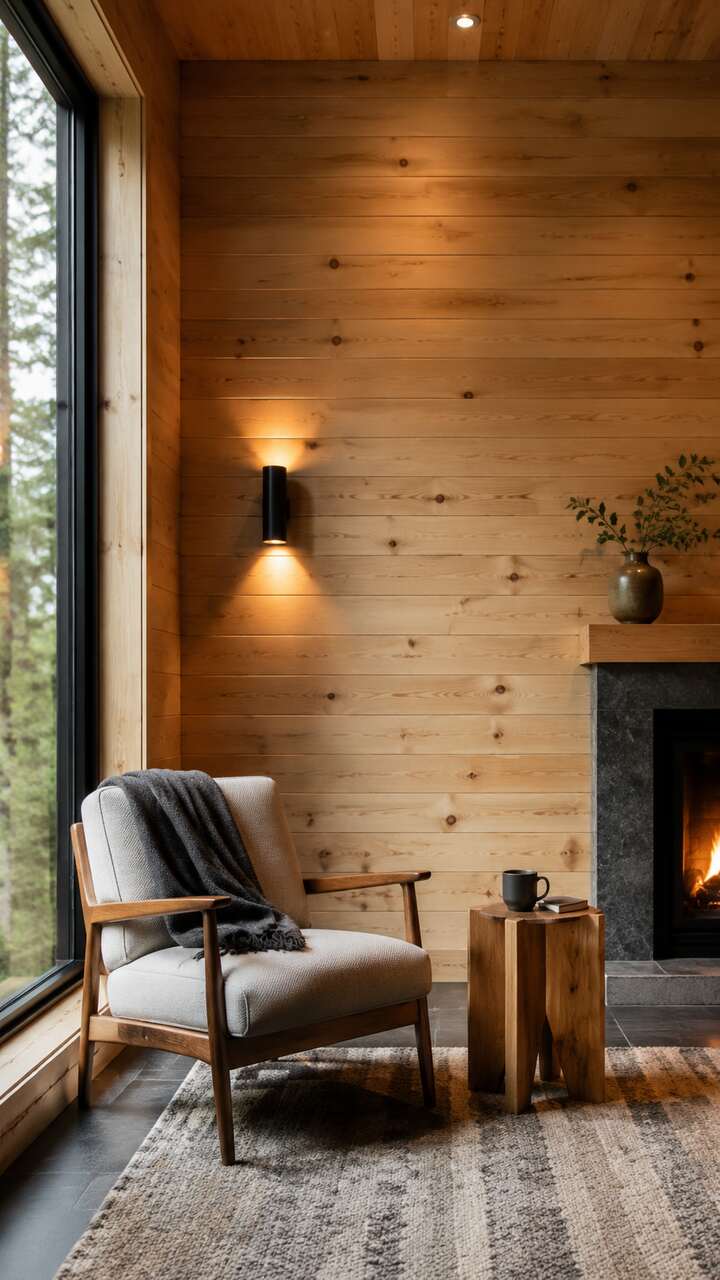
Use consistent gaps for a modern interpretation, or fit the boards more closely for a traditional plank wall. Pine can be stained, whitewashed or left light beneath a protective clear finish. If using boards of different lengths, stagger the joints and avoid creating an obvious stair-step pattern.
Because solid boards naturally expand and contract, allow for the movement required by the material and installation method. Acclimate the wood indoors and follow the product guidance rather than forcing every joint together.
Make it look expensive: Mix texture, not chaos. Choose boards with compatible tones and distribute knots evenly so one part of the wall does not look noticeably heavier than another.
18. Curved ribbed feature wall
Design note: Use flexible backing or narrow ribs only on a gentle, consistent radius; concealed grazing light makes the curve easier to appreciate.
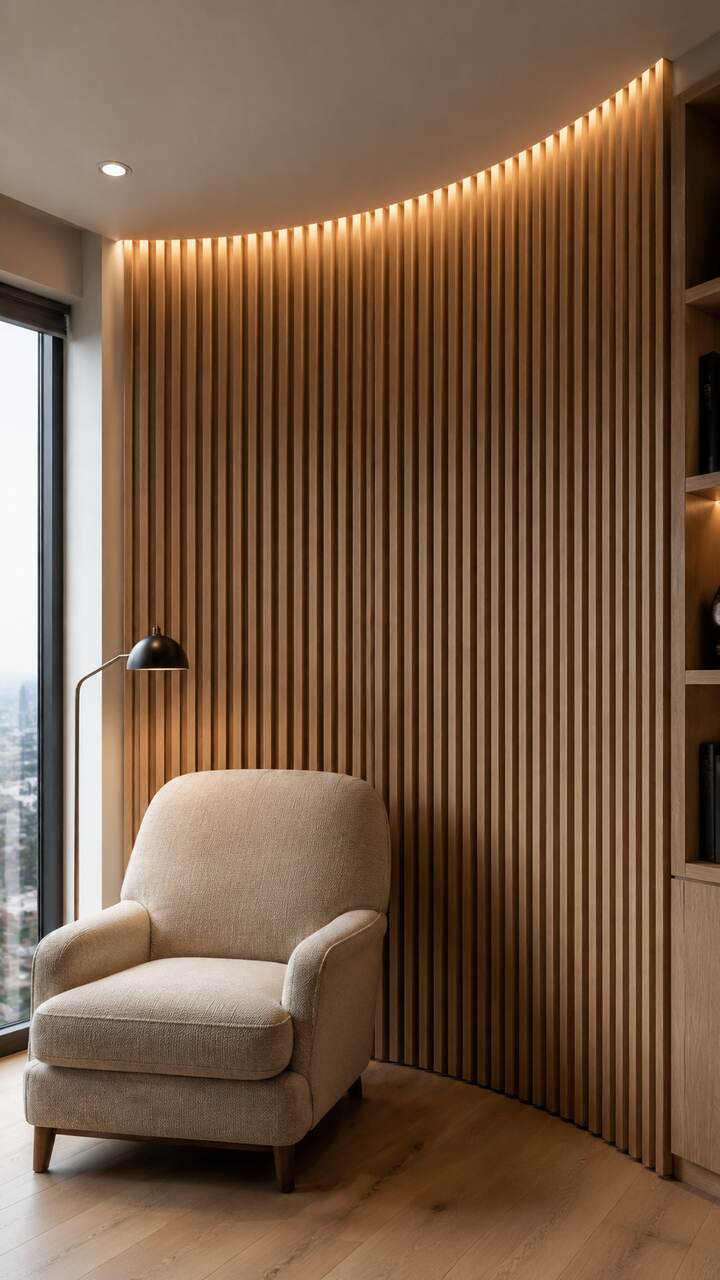
This is an advanced project. The substrate must be stable, the bend must suit the chosen panel system and every slat needs to remain visually parallel as it travels around the curve. Flexible premade panels are usually more predictable than trying to bend ordinary solid boards.
Concealed warm lighting can emphasize the curved form, but electrical work should be planned before the panels are installed.
Make it look expensive: Use the curve sparingly. One beautifully finished transition has more impact than covering several unrelated walls with the same dramatic texture.
19. Paneled entryway with integrated hooks
Design note: Fasten hooks through the decorative paneling into studs or solid blocking so the entryway remains practical as well as attractive.
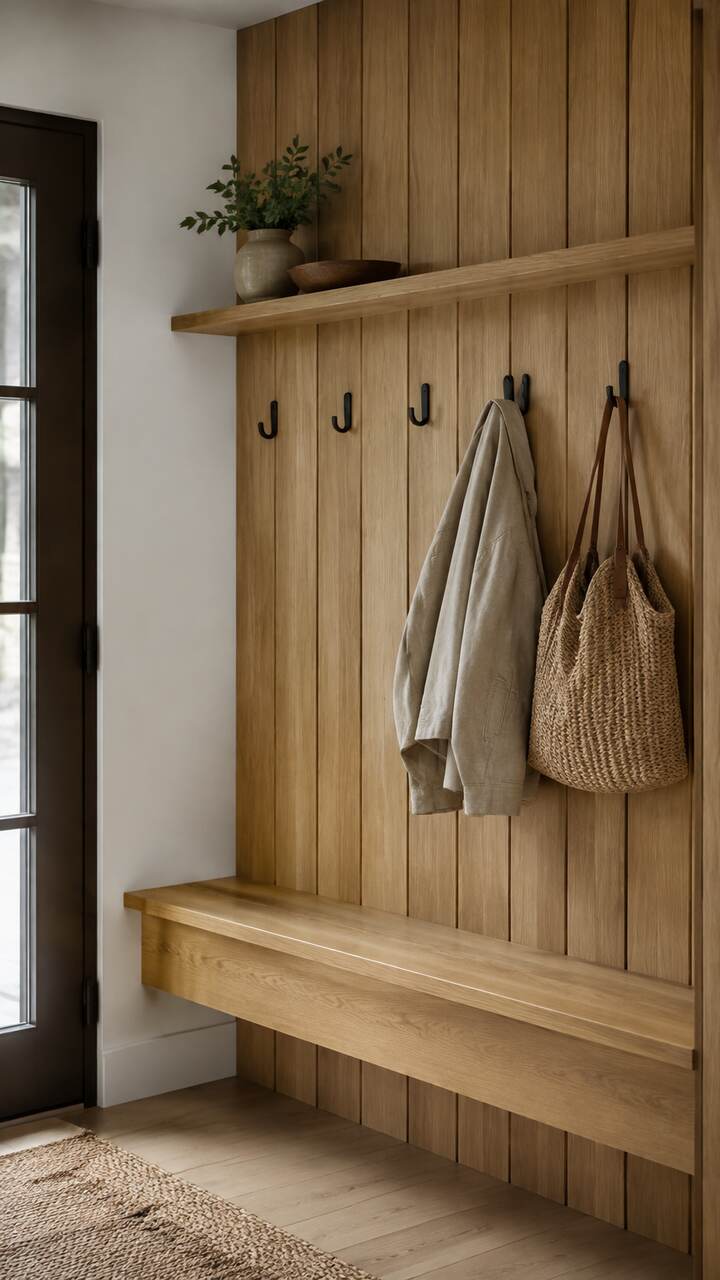
Use tongue-and-groove boards or painted strips on the lower two-thirds of the wall, then finish the top with a substantial rail or shelf. Anchor hooks through the paneling into studs or solid blocking; decorative boards alone may not support loaded bags and coats.
Dark paint hides scuffs in a busy family entrance, while natural oak gives a smaller entry a lighter, calmer feeling. Include enough open space that the wall still looks attractive when the hooks are not full.
Make it look expensive: Align every functional element. Hooks set on one clean line and a shelf that finishes flush with the panel edges create the appearance of custom millwork.
20. Light-oak Scandinavian panel wall
Design note: Broad light-oak panels need few accessories; matte finishes, pale upholstery and soft daylight let the natural grain provide the decoration.
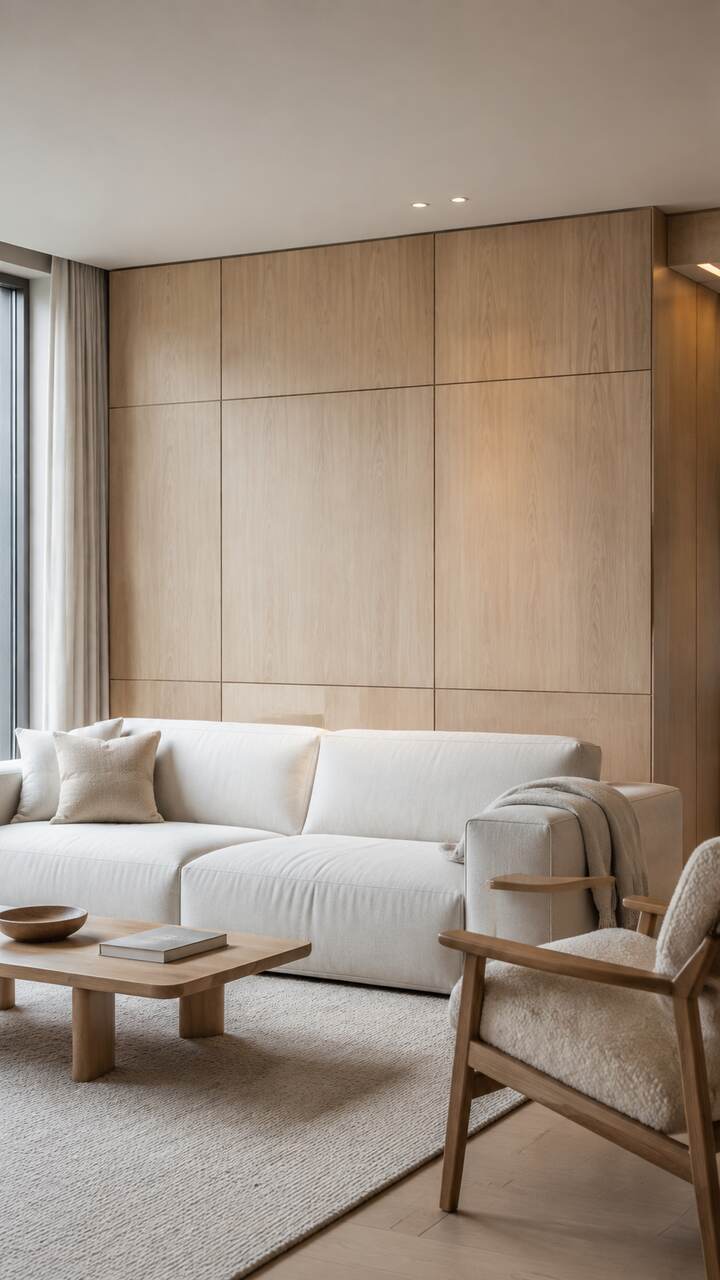
Choose a matte finish that preserves the natural appearance of the wood. Broad panels create a calmer surface than many narrow slats, which makes them well suited to a bedroom or living room intended for relaxation. A small amount of black—in a lamp, frame or chair leg—adds definition without disrupting the gentle palette.
Keep the installation precise because simple rooms reveal imperfections quickly. Uneven panel gaps and poorly finished corners have nowhere to hide.
Make it look expensive: Repeat the oak tone elsewhere only once or twice, such as on a side table or picture frame. Exact matching is unnecessary; a coordinated family of warm tones feels more natural.
21. Mixed-width wood slats
Design note: Establish a repeatable narrow-narrow-wide sequence on a spacer jig before installation so the mixed-width rhythm stays deliberate.
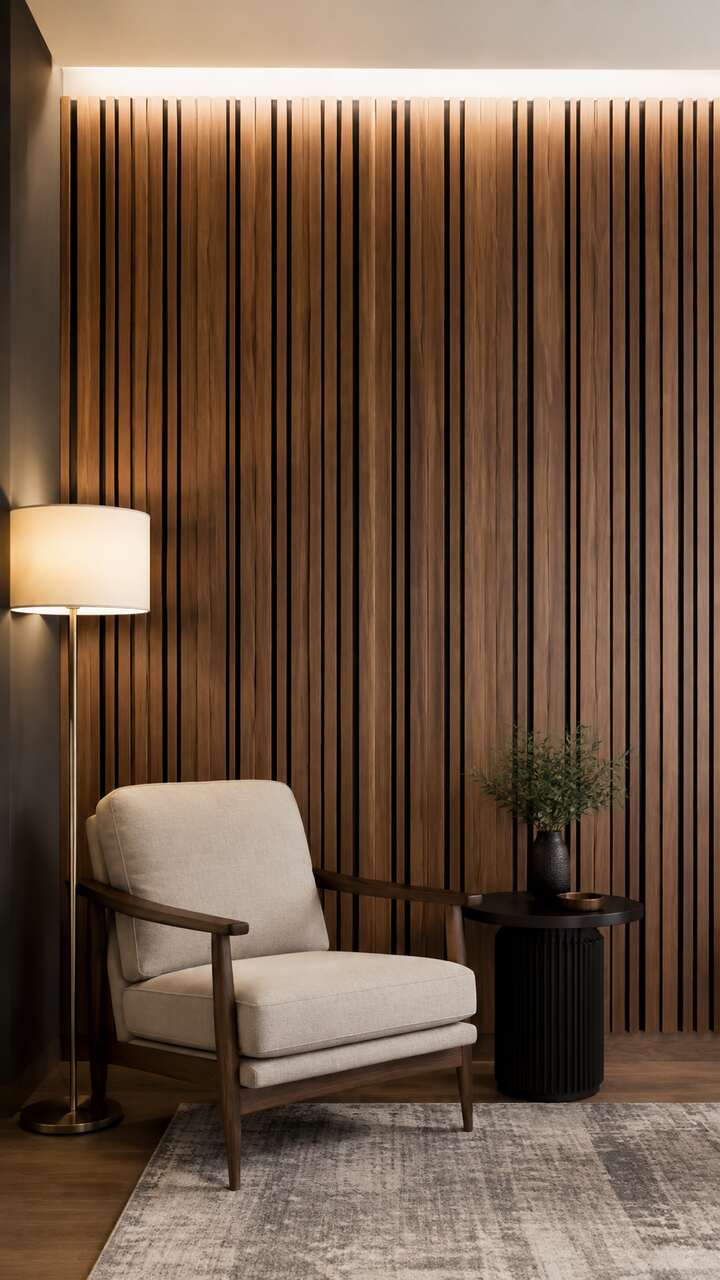
Plan the pattern on paper and calculate how many complete repeats fit across the wall. Adjust the outside margins or the gap size before cutting; do not simply stop halfway through the sequence at the far corner. Use one wood species and finish so the varying widths remain the only strong variable.
This treatment works well behind a lounge chair, home bar or dining bench. It feels contemporary but warmer than a painted geometric wall.
Make it look expensive: Repeat a deliberate pattern such as narrow-narrow-wide. Consistency turns assorted strips into design; uncontrolled variation can look like leftover material.
22. Wood panel wall with a picture ledge
Design note: Keep a picture ledge shallow and add a small retaining lip so layered frames remain secure without overwhelming the panel pattern.
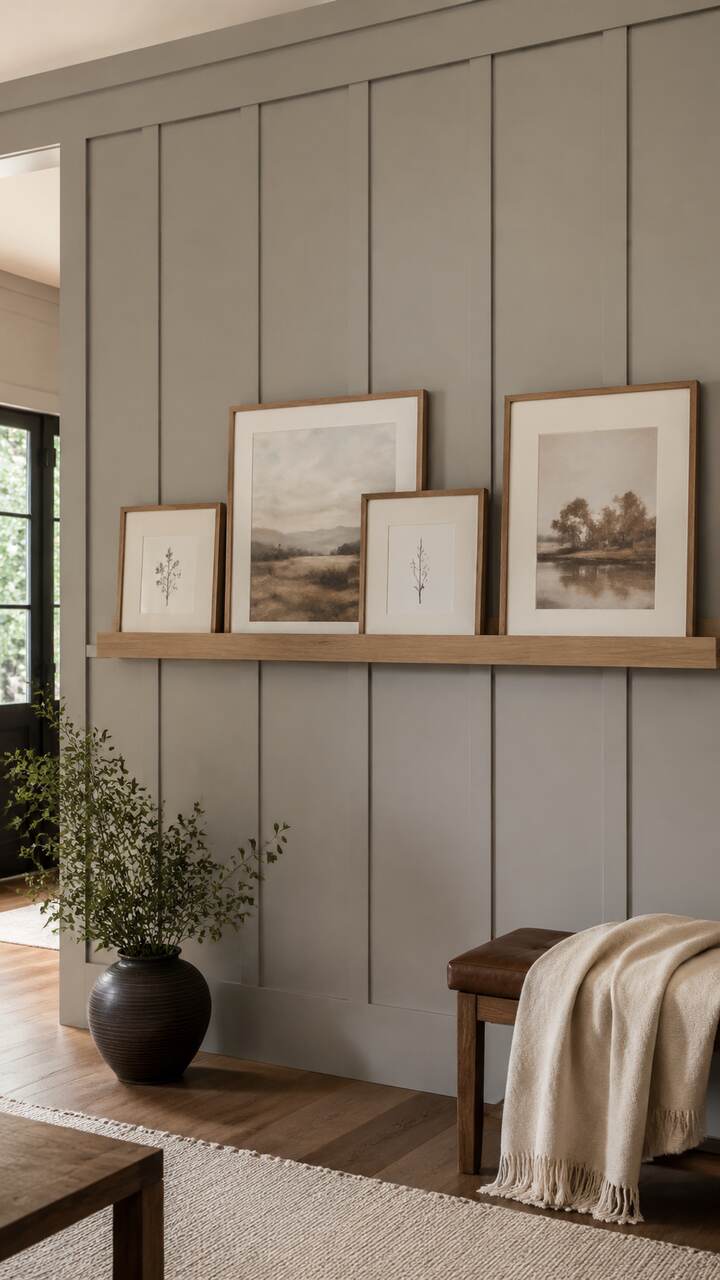
Run vertical paneling or painted board-and-batten up to the ledge, then continue the same finish above it—or switch to a plain painted upper wall. Keep the shelf shallow enough that it does not become a clutter collector, and add a small front lip to prevent frames from sliding.
Secure the ledge to studs or blocking, particularly if you plan to display heavy frames. For a separate floating design, use appropriately rated hardware and follow the same careful wall-mounting principles used in a hidden-bracket shelf.
Make it look expensive: Paint or finish the ledge as part of the wall rather than as unrelated furniture. Integration is what creates the custom-built effect.
23. Paneling that continues onto the ceiling
Design note: Continue only a defined band of slats onto the ceiling and align each piece through the corner to avoid making the whole room feel enclosed.
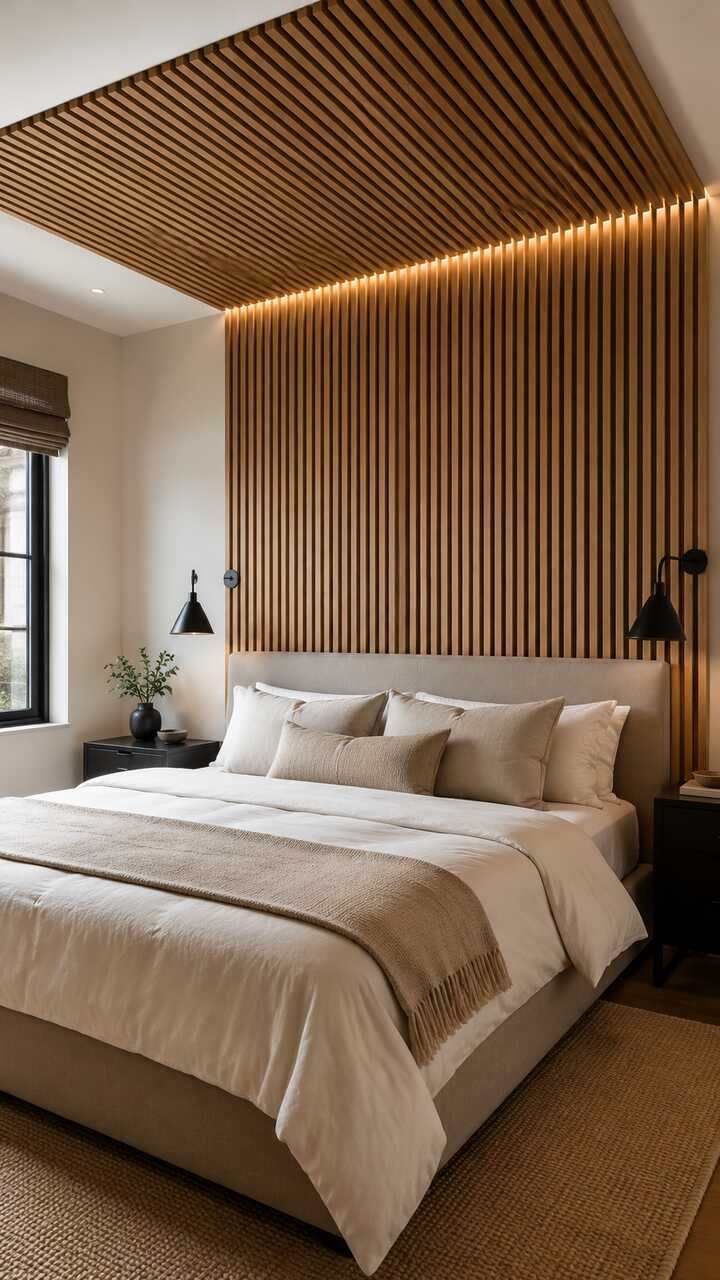
Use this idea on a contained portion of the room rather than every surface. Straight slats are easier to align through the wall-to-ceiling transition than large sheet panels. Ceiling pieces require secure fastening into appropriate framing or a properly designed support system; adhesive alone should not be assumed sufficient overhead.
Plan lighting, smoke detectors, vents and other ceiling fixtures before beginning. Do not cover or obstruct required devices.
Make it look expensive: Keep every line continuous across the corner. Even a small sideways shift between the wall slats and ceiling slats will be immediately visible.
24. Moisture-resistant paneling for a small bathroom
Design note: Use moisture-resistant materials, seal every cut edge and reserve decorative paneling for powder rooms or dry zones away from direct spray.
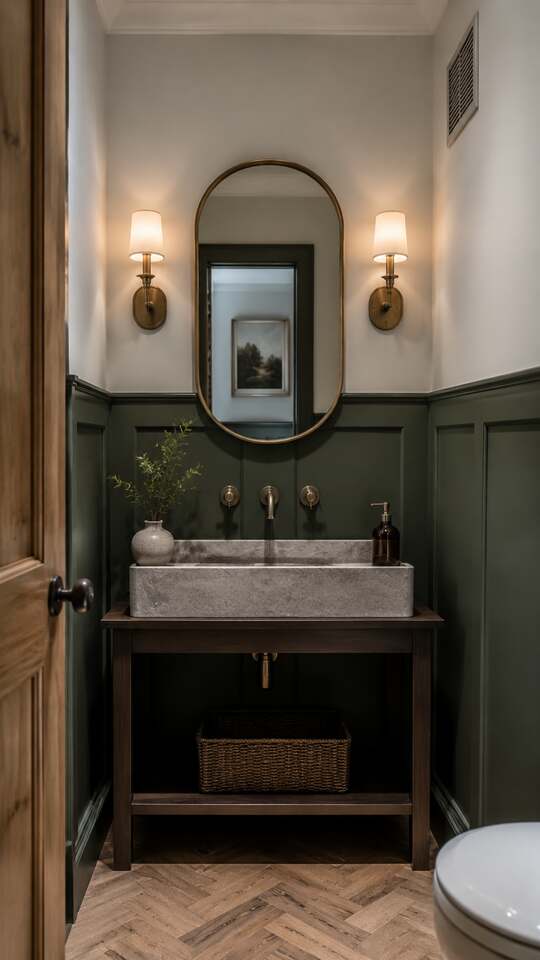
Seal cut edges, maintain ventilation and follow the coating manufacturer’s instructions. Keep ordinary wood out of direct splash zones unless the complete wall assembly is designed for that exposure. In a powder room with no shower, rich navy, deep green or warm taupe paneling beneath patterned wallpaper can create impressive depth in very little space.
For tools that help achieve a smooth protective finish, see these must-have wood-finishing tools for beginners.
Make it look expensive: Coordinate the panel color with one metal finish. Repeating brass, polished nickel or matte black in the mirror, faucet and light produces a cohesive room.
25. Renter-friendly removable wood panels
Design note: For rentals, build lightweight framed modules with visible equal seams so the installation appears intentional and can be removed cleanly.
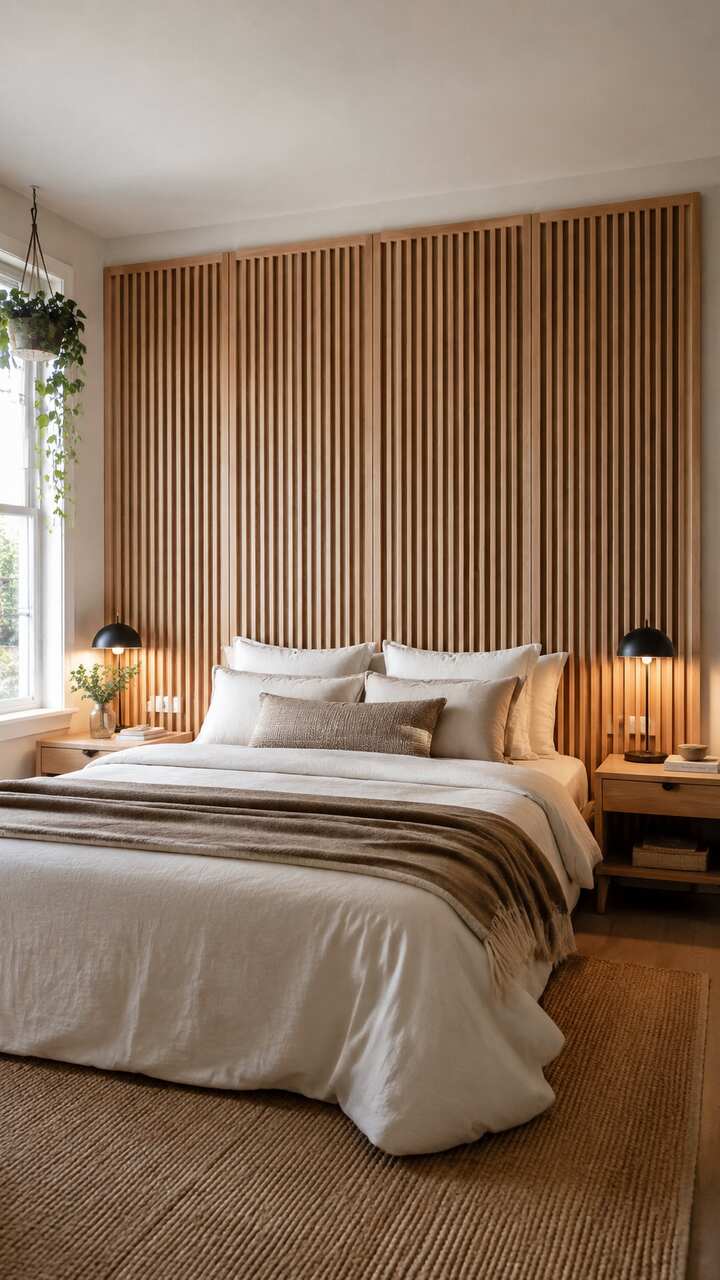
For example, narrow wood strips can be fastened to thin backer panels in the workshop, finished flat and then installed as larger sections. A freestanding slatted headboard or floor-supported panel is another option when wall alterations are restricted.
Always confirm the lease rules before installing anything. So-called removable tapes can still lift paint or drywall paper, and their capacity varies with the wall surface and conditions.
Make it look expensive: Make the modular seams part of the design. Equal-width sections and consistent edge gaps look intentional and make the panels easier to move later.
How to choose the right wood panel wall for your room
With 25 possibilities, the hardest part may be deciding which idea belongs in your space. Use the room itself as your guide.
Consider the amount of natural light
Pale oak, birch and warm white paneling help a dark room feel brighter. Walnut, charcoal and forest green create beautiful depth, but they are most successful when balanced with adequate daylight or layered artificial lighting.
Match the scale to the wall
A large wall can handle broad panels, mixed widths or a strong herringbone pattern. In a narrow hallway or compact bedroom, slim vertical lines often feel lighter. Print or sketch the elevation before buying material; proportions that look correct on a small sample may feel very different across twelve feet of wall.
Decide whether you want grain or geometry
Natural wood makes its grain the main feature. Painted paneling emphasizes shadow lines and proportion instead. If the room already contains several wood tones, painted molding might create a calmer result than introducing another prominent species.
Think about permanence
Applied molding is relatively simple to repaint. Glued boards and full sheet paneling are harder to remove without wall repair. If you enjoy changing your decor frequently, consider a framed panel, headboard-sized treatment or half wall instead of a permanent floor-to-ceiling installation.
A simple installation plan for most decorative panel walls
Every product and wall is different, but this planning sequence prevents many common mistakes:
- Measure the entire wall. Check the width and height in several places because floors, corners and ceilings are not always perfectly square.
- Locate studs and hidden services. Use suitable detection methods and avoid fastening where electrical wiring or plumbing may be present.
- Remove or plan around trim and cover plates.
Electrical boxes must remain safely accessible and correctly positioned relative to the finished surface. - Sketch the complete layout. Include outside margins, outlets, corners, doors and the final panel width.
- Bring the material into the room. Follow the manufacturer’s acclimation and storage instructions.
- Cut and dry-fit. Label pieces and check the full pattern before applying adhesive or driving nails.
- Finish visible surfaces. Depending on the design, painting or sealing before installation may be easier than coating narrow gaps afterward.
- Install from a reliable reference line. Do not assume the nearest wall or floor is level.
- Complete the edges. Add planned trim, balanced margins or clean shadow gaps.
- Touch up carefully. Fill appropriate fastener holes, sand repairs and apply the final coat without clogging intentional joints.
If you want a smaller project before committing to an entire wall, browse these free woodworking plans for beginners and practice accurate measuring, cutting and finishing first.
Common wood paneling mistakes to avoid
Starting without a full layout
A wall may look rectangular, but outlets, windows and corners quickly complicate the pattern. Draw everything first and calculate the first and last panel widths together.
Following an uneven corner
Use a level reference line. If the first slat leans with the corner, every later slat will repeat the error and the final edge may be dramatically out of alignment.
Using too many competing wood tones
Wood does not need to match perfectly, but it should feel related. If the floor, cabinets and furniture already contain strong grain, a painted panel treatment may give the room welcome visual rest.
Ignoring outlet depth and access
Do not bury boxes, splice cords inside a decorative wall or improvise around electrical devices. Have a qualified electrician address required extensions or relocations.
Rushing the finish
Glue residue, sanding swirls and blotchy stain are especially noticeable across a large wall. Test the full finishing schedule on offcuts and inspect the samples under the room’s actual lighting.
Frequently asked questions
Are wood panel walls still in style?
Yes, but today’s most versatile versions focus on clean proportions, natural finishes and deliberate placement. Vertical slats, broad veneer panels, painted box molding and half-wall treatments feel more current than covering every wall with identical dark sheets.
What is the cheapest way to create a wood panel wall?
Painted MDF or pine strips applied over an existing smooth wall are often among the least expensive options. You use the wall surface as the center of each “panel” and purchase only the narrow trim pieces. Cost depends on wall size, local material prices, finish and tool access.
Can beginners install wood wall paneling?
Several styles are beginner-friendly, including painted box molding, simple vertical battens and white plank walls. Herringbone patterns, curved panels, fireplace walls and ceiling installations require more planning and may warrant professional help.
Should wood panels run vertically or horizontally?
Vertical lines tend to make ceilings appear taller. Horizontal boards can make a short wall feel wider. Neither direction is automatically better; choose the effect that improves the room’s proportions.
Can I install wood paneling directly over drywall?
Many decorative systems can be installed over sound drywall, but the correct fasteners and adhesive depend on the product, wall condition and panel weight. Locate studs where structural attachment is required and follow the panel manufacturer’s instructions. Do not cover damaged, damp or mold-affected walls until the underlying problem is resolved.
What finish is best for a natural wood panel wall?
A clear matte or satin finish is a popular choice because it protects the surface while allowing the grain to remain visible. Always test the finish on an offcut: clear coats can deepen the color more than expected. Follow the product instructions for sanding, ventilation, application and curing.
How do you make old wood paneling look modern?
Clean and prepare the surface, then consider a high-quality painted finish, simplified trim, updated lighting and lighter furnishings. If the paneling is damaged or the substrate is unknown, inspect it before deciding whether to paint, cover or remove it.
Can wood paneling be used in a bathroom?
It can work in appropriate areas when the material, coating, wall assembly and ventilation suit the moisture level. Avoid untreated wood and ordinary MDF in direct wet zones. Use products approved for the intended environment and resolve any existing moisture problem first.
Final thoughts
The best wood panel wall ideas do more than decorate a blank surface. They correct proportions, establish a focal point, introduce warmth and help a room feel complete.
You can achieve that transformation with rich walnut veneer, but you can also do it with carefully spaced pine slats or a few lengths of painted molding. Material cost matters less than thoughtful layout, clean transitions and a finish that suits the room.
Start by choosing one wall with a clear purpose. Decide whether it should frame a bed, soften a television, define a dining area or organize an entryway. Then test your spacing, color and finish before committing to the full installation.
Which treatment would work best in your home: warm natural slats, dramatic painted panels or a character-filled reclaimed wall? Save your favorite idea, measure the space and turn that plain wall into the feature the whole room has been missing.