
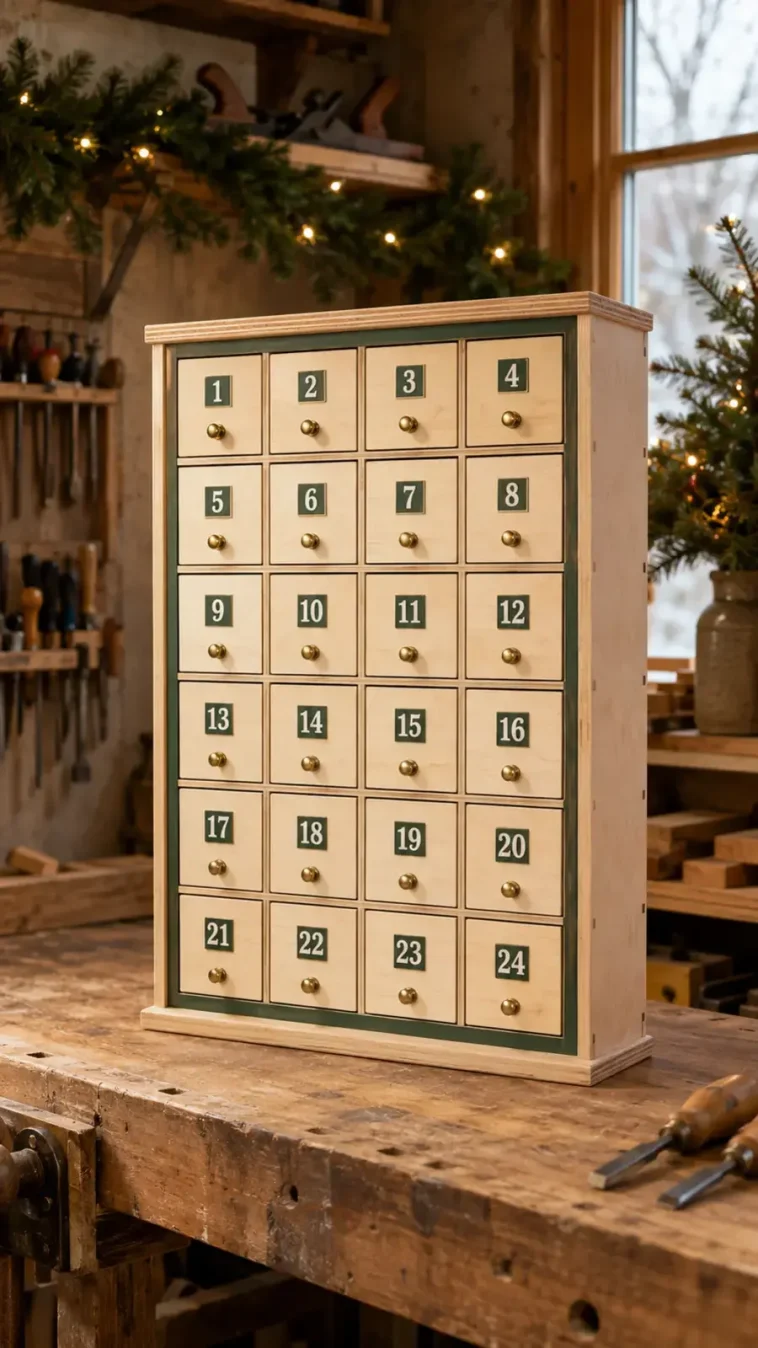
Building a DIY wooden Advent calendar turns the Christmas countdown into a tradition you can reuse every December. This freestanding cabinet has 24 individual drawers—one for every day from December 1 through Christmas Eve—and each drawer is large enough for chocolates, small toys, handwritten notes, ornaments or gift cards.
The finished calendar measures 24 inches wide, 30 inches high and 6 inches deep. The outer cabinet is a simple 3/4-inch plywood box. Inside, a 1/4-inch plywood grid creates four columns and six rows, while 24 lightweight drawer boxes slide into the openings.
The basic joinery is beginner-friendly, but accuracy matters because a small spacing error becomes obvious across 24 drawers. The best approach is to build the cabinet square, use spacer blocks for the grid, and make one test drawer before batch-cutting the other 23.
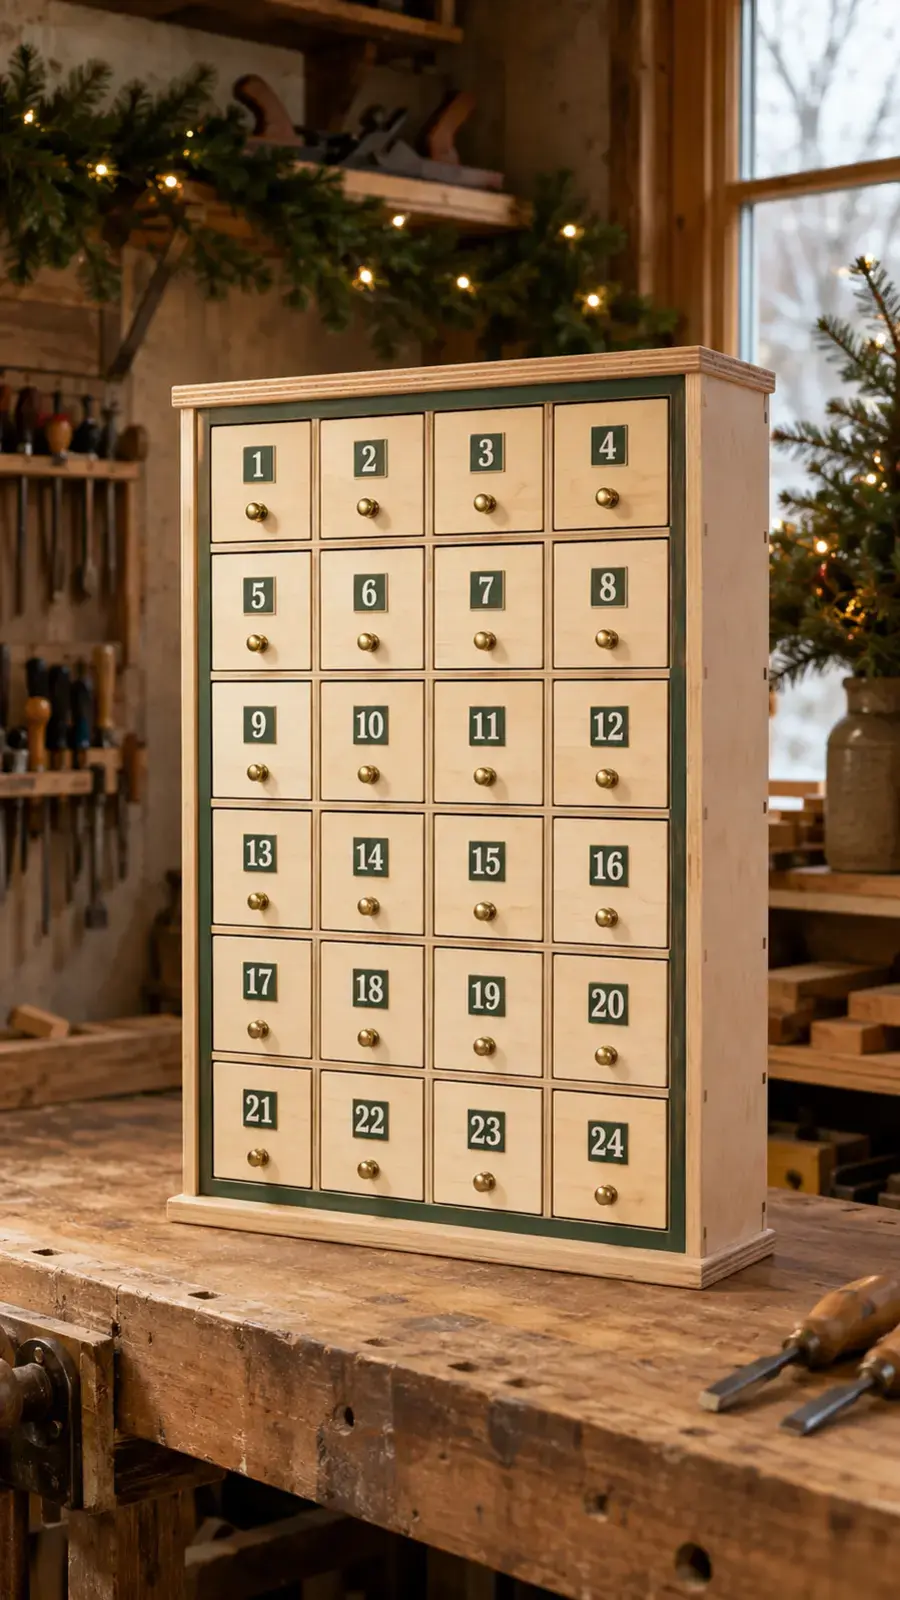
DIY Wooden Advent Calendar Plan at a Glance
| Finished size | 24″ W × 30″ H × 6″ D |
|---|---|
| Drawer layout | 4 columns × 6 rows |
| Number of drawers | 24 |
| Cabinet material | 3/4″ plywood |
| Grid, back and drawer boxes | 1/4″ plywood |
| Difficulty | Confident beginner to intermediate |
| Build time | One weekend, plus finish-curing time |
| Estimated material cost | About $90–$180, depending on plywood, knobs and finish |
If you enjoy approachable plans with clear cut lists, save this project alongside these free woodworking plans for beginners. For quick decorations made from offcuts, browse the scrap wood Christmas projects collection too.
Measurements and Drawer Spacing
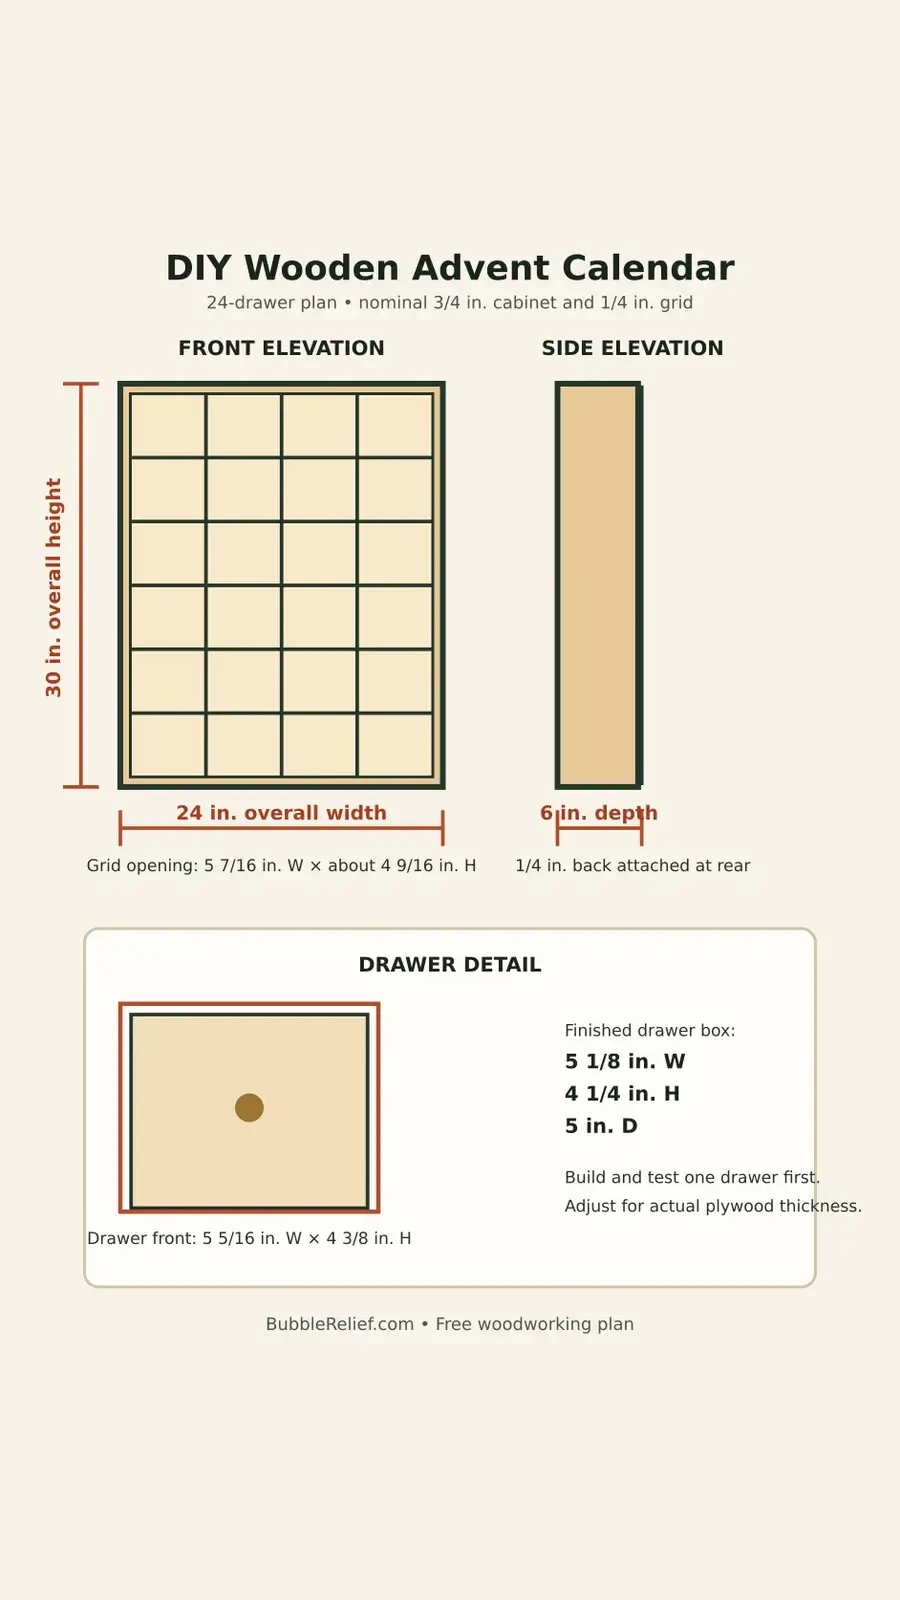
The two 30-inch side panels remain full height. The 22 1/2-inch top and bottom fit between them, producing an exact nominal width of 24 inches. After subtracting the two 3/4-inch side panels, the clear interior width is 22 1/2 inches.
Three 1/4-inch vertical dividers consume 3/4 inch of that interior width. Divide the remaining 21 3/4 inches by four, and each nominal cubby opening is 5 7/16 inches wide.
Vertically, the top and bottom leave 28 1/2 inches of interior height. Five 1/4-inch horizontal dividers consume 1 1/4 inches. The remaining space divided by six produces openings approximately 4 9/16 inches high.
Those figures assume the sheet goods are their stated thickness. Plywood frequently measures slightly thinner, which can alter the openings across a repeated grid. Measure the material in your shop, use spacers, and treat the test drawer as the final authority.
Materials
- One half-sheet or larger piece of 3/4″ cabinet-grade plywood
- One 4′ × 8′ sheet of 1/4″ plywood for the back, grid and drawer boxes
- Wood glue
- 1 1/4″ pocket-hole screws or suitable cabinet screws
- 3/4″ brad nails or pin nails
- 24 small knobs with suitable screws
- 80-, 120-, 180- and 220-grit sandpaper
- Wood filler
- Paint, stain, hard-wax oil or clear protective finish
- Number stencils, vinyl numbers, stamps or a wood-burning tool
- Optional iron-on plywood edge banding
- Optional felt, cardstock or thin cork for drawer liners
Tools
- Table saw or circular saw with a straightedge guide
- Miter saw for small repetitive parts, optional
- Drill/driver and bits
- Pocket-hole jig, optional
- Brad nailer or pin nailer
- Tape measure and sharp pencil
- Combination square and framing square
- Clamps
- Random-orbit sander
- Small brush or clean finishing cloths
Complete Cut List
3/4-Inch Plywood
| Part | Qty. | Cut size | Notes |
|---|---|---|---|
| Cabinet sides | 2 | 30″ × 6″ | Full-height outer sides |
| Cabinet top and bottom | 2 | 22 1/2″ × 6″ | Fit between the sides |
| Drawer fronts | 24 | 5 5/16″ × 4 3/8″ | Leaves a small reveal around each front |
1/4-Inch Plywood: Cabinet and Grid
| Part | Qty. | Cut size | Notes |
|---|---|---|---|
| Back panel | 1 | 24″ × 30″ | Trim flush after assembly if needed |
| Horizontal dividers | 5 | 22 1/2″ × 5 1/4″ | Run full width |
| Vertical divider segments | 18 | About 4 9/16″ × 5 1/4″ | Verify against the actual row opening |
1/4-Inch Plywood: 24 Drawer Boxes
| Part | Qty. | Cut size |
|---|---|---|
| Drawer sides | 48 | 5″ × 4″ |
| Drawer fronts and backs | 48 | 4 5/8″ × 4″ |
| Drawer bottoms | 24 | 5 1/8″ × 5″ |
When the four wall pieces sit on top of the 1/4-inch bottom, the target exterior drawer-box size is approximately 5 1/8″ W × 4 1/4″ H × 5″ D. This provides practical clearance inside the nominal cubby. Do not batch-cut every drawer until a test drawer slides freely in several openings.
How to Build a DIY Wooden Advent Calendar
Step 1: Cut and Label the Main Cabinet Parts
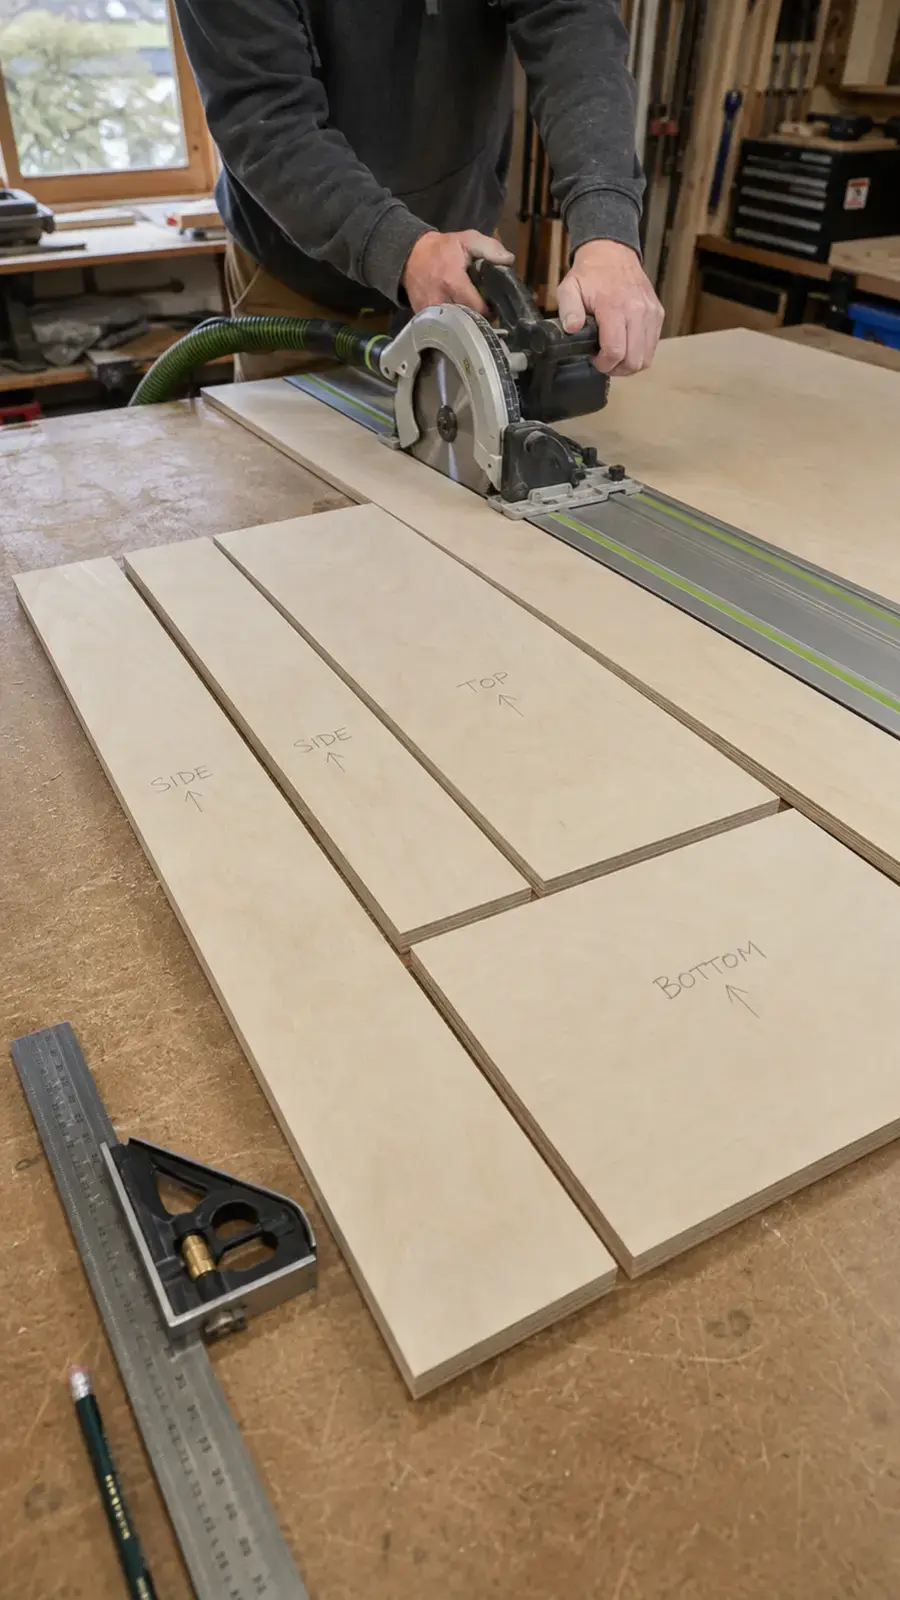
Cut two side panels at 30″ × 6″ and two top-and-bottom panels at 22 1/2″ × 6″. A track saw, table saw or circular saw guided by a straightedge will produce the most consistent cuts.
Check each panel with a square. Pair the two sides and confirm that their lengths match exactly; do the same with the top and bottom. Label the inside face and front edge of every piece before assembly. Lightly sand splinters with 120-grit paper, but save final sanding for later.
If you plan to use edge banding, applying it to the front edges before assembly is usually easier. Trim and sand the banding carefully so it cannot interfere with the drawer fronts.
Step 2: Assemble the Outer Cabinet
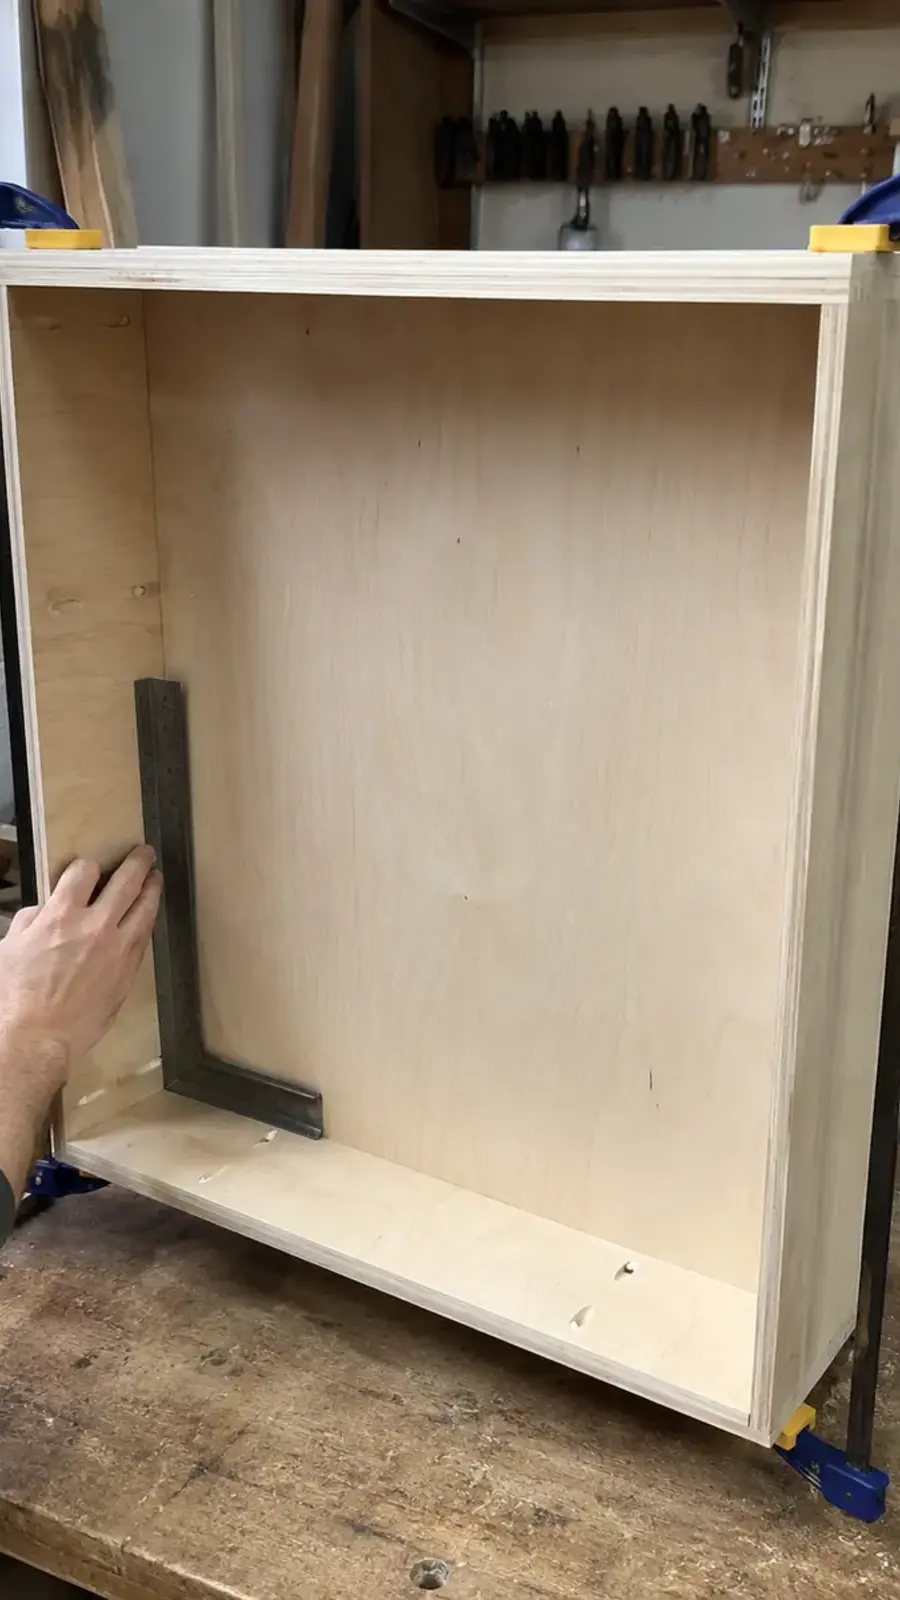
Place the top and bottom between the side panels. Apply a thin, continuous bead of glue to each joint and secure the box with pocket screws, countersunk cabinet screws or brads plus glue. Keep visible fasteners away from the front edges.
Clamp the cabinet and measure both diagonals. When the diagonal measurements match, the box is square. Also verify that the outside width is 24 inches and the height is 30 inches. Allow the glue to set before adding the thin divider grid.
Step 3: Install the 24-Cubby Grid
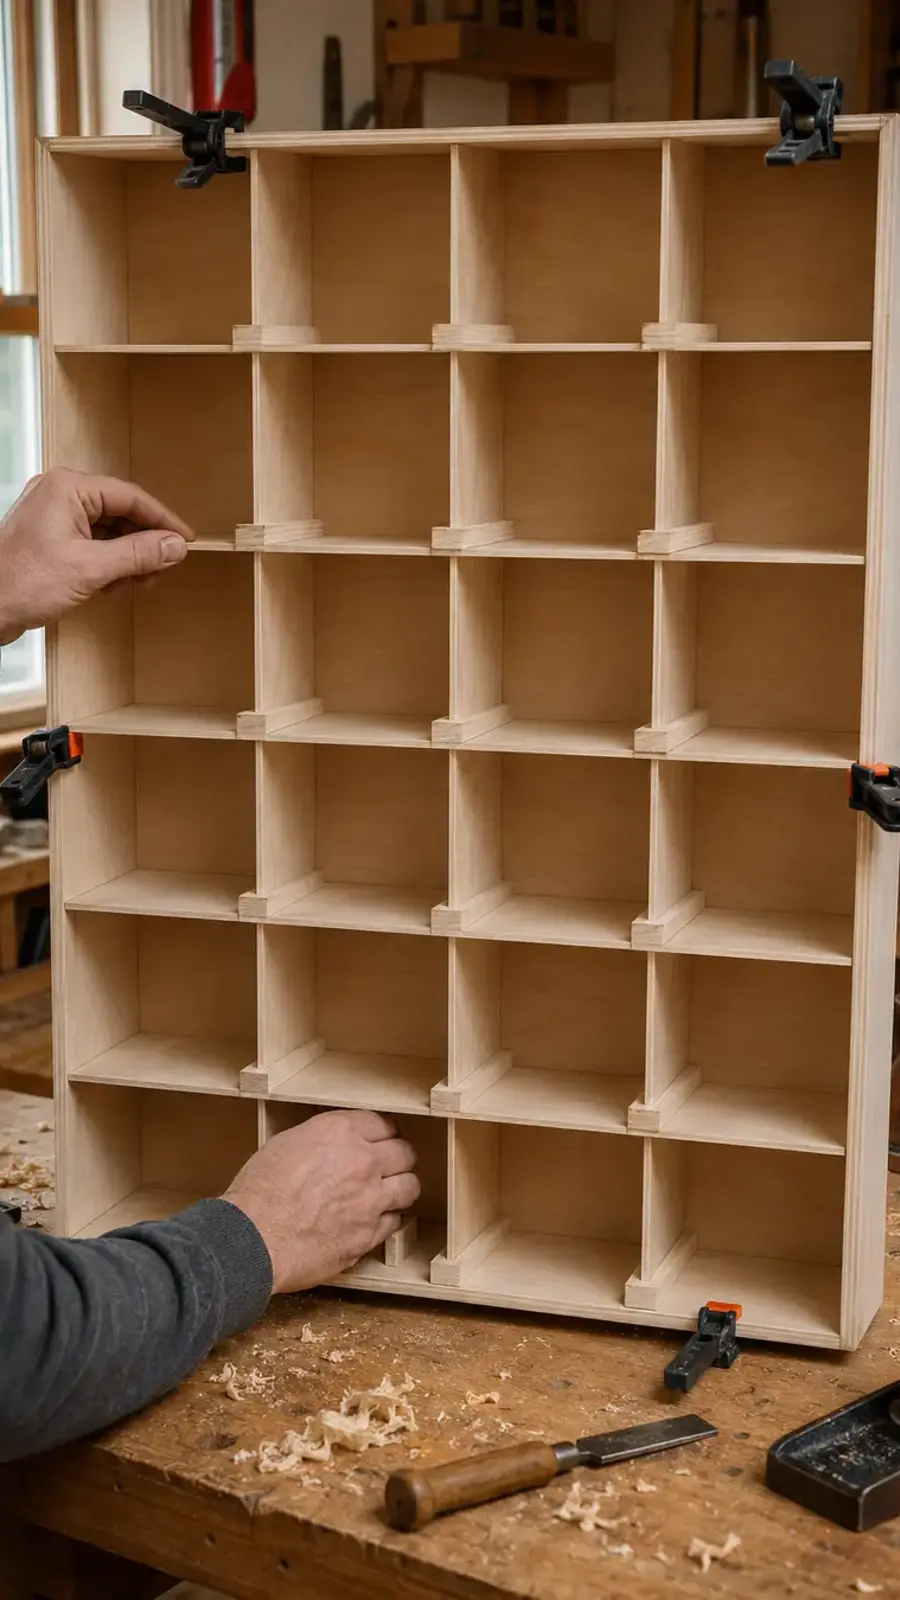
Rip the 1/4-inch plywood dividers to 5 1/4 inches deep. Cut five horizontal pieces to span the full 22 1/2-inch interior width. Dry-fit them before applying glue.
Create one spacer that matches the intended row opening—approximately 4 9/16 inches with nominal material. Starting at the bottom, position the spacer, install a horizontal divider, then repeat upward. Check each divider with a square and use a second matching spacer on the opposite side to keep it level.
Next, divide each row into four columns with three vertical segments. Use a 5 7/16-inch spacer at both the front and rear of the grid. Glue the segments and hold them with pins or small brads while the adhesive cures. Avoid excessive glue because dried squeeze-out can make the drawers bind.
Before permanently fastening the final row, measure several openings. Small adjustments are much easier now than after the back is attached.
Step 4: Attach the Back Panel
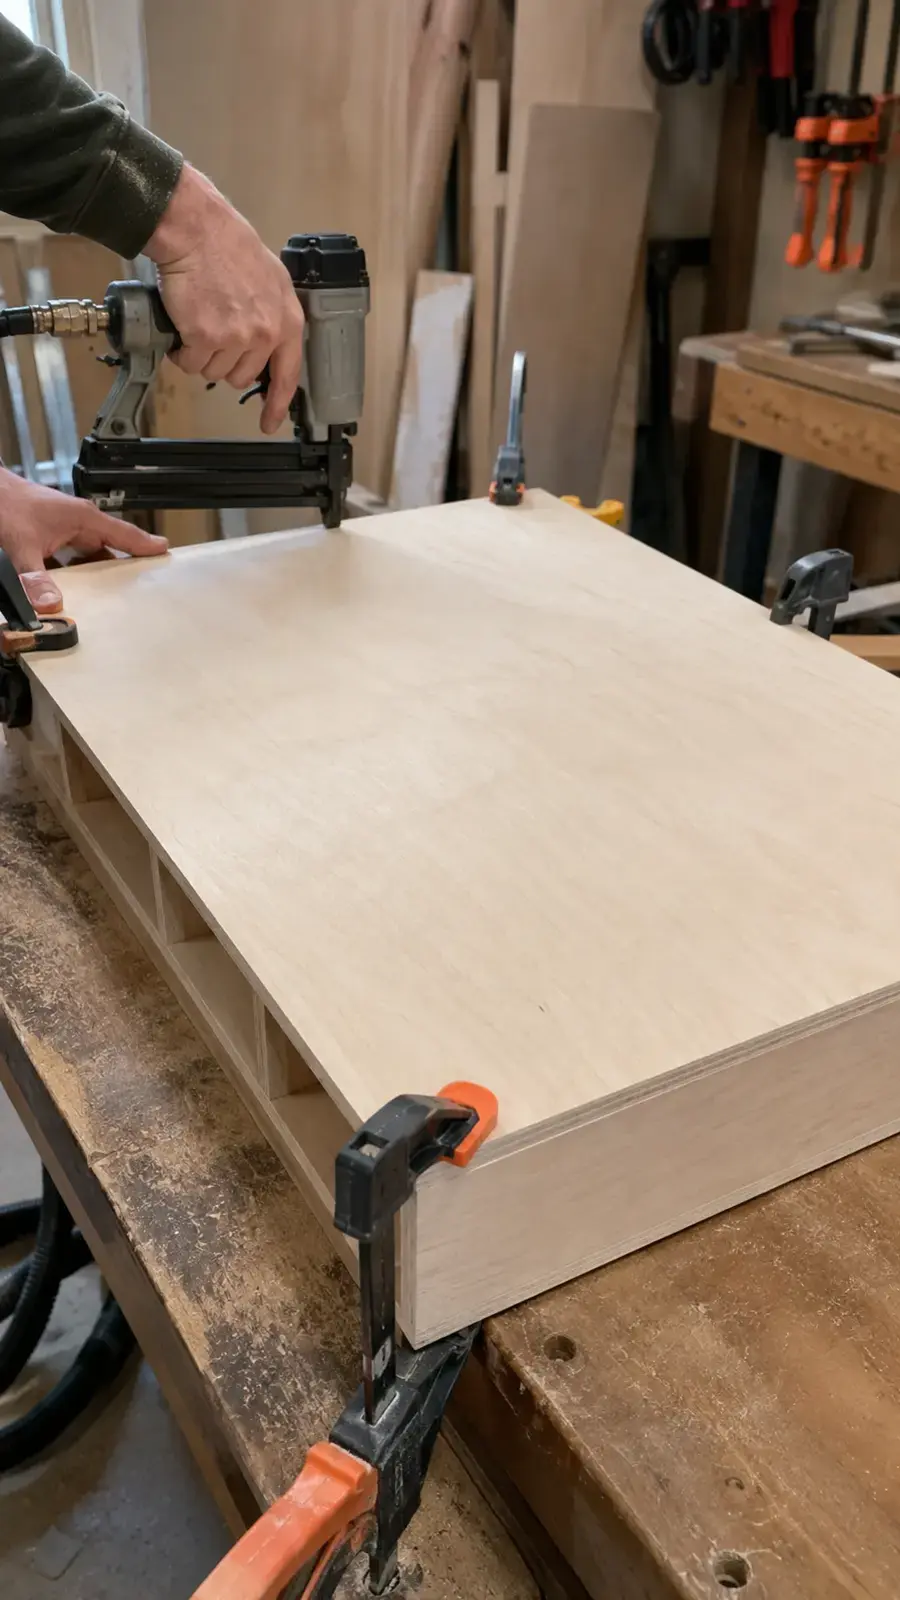
Place the cabinet face-down on a clean, flat surface. Set the 24″ × 30″ back panel on top and align its edges with the cabinet. Recheck the diagonals before fastening because the back will lock the box into shape.
Apply a modest bead of glue around the cabinet perimeter. Add small dots or very thin lines of glue where the back meets the divider grid. Secure the back with 3/4-inch brads or pins every 5–6 inches around the perimeter and at selected grid intersections. Keep fasteners centered so they do not break through the thin dividers.
Trim or sand any slight overhang flush after the glue dries.
Step 5: Build One Test Drawer
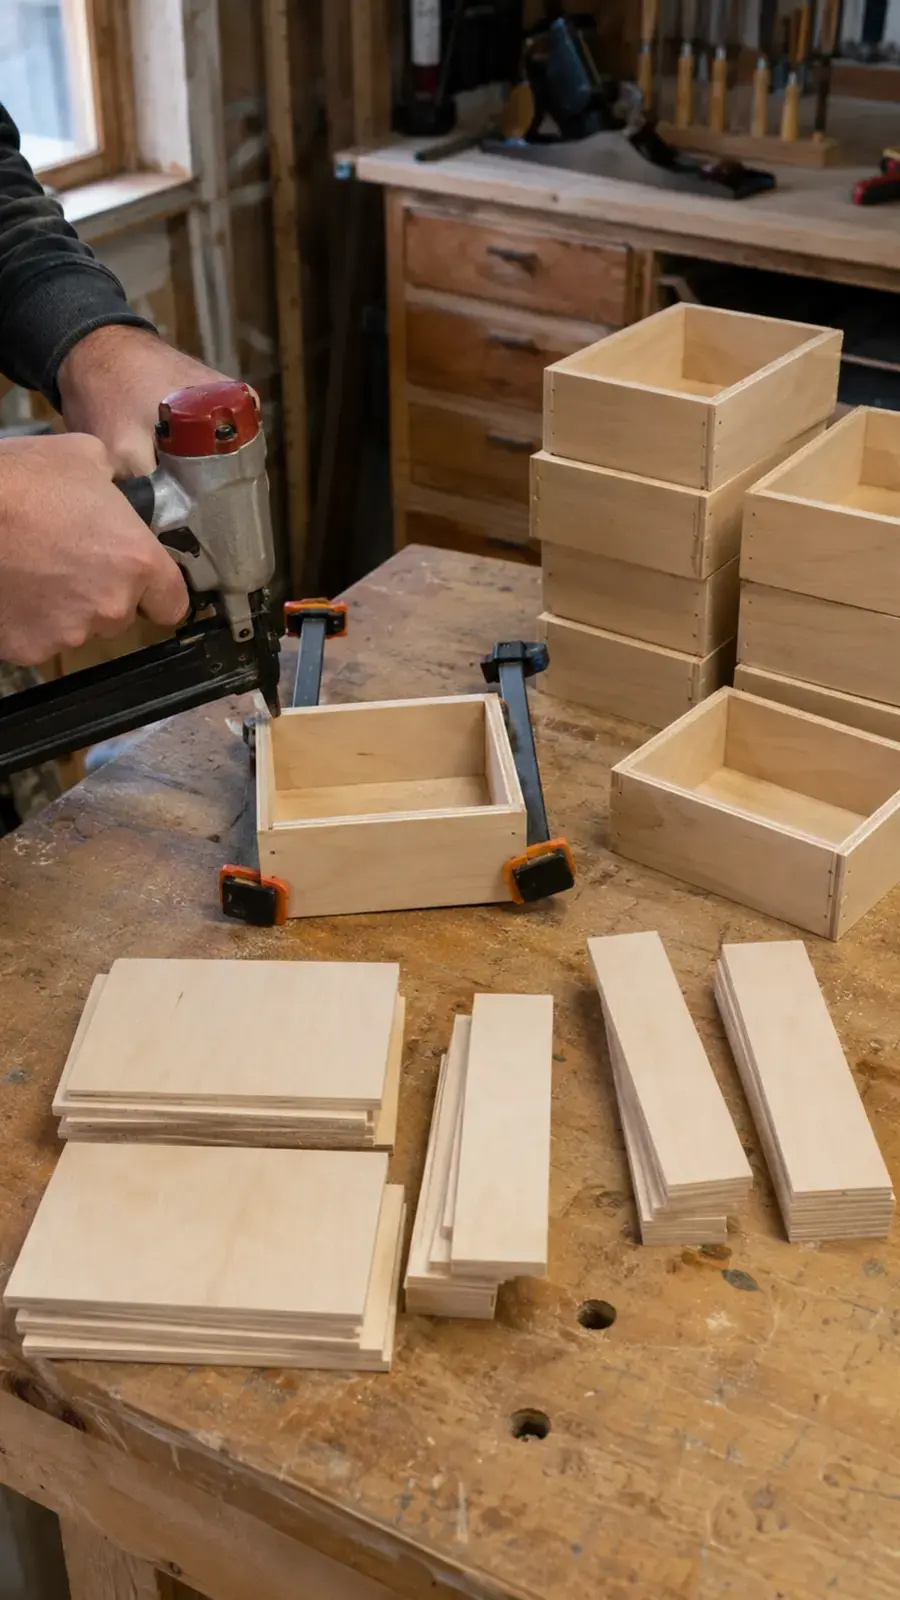
For the test drawer, cut two 5″ × 4″ sides, one 4 5/8″ × 4″ front, one matching back and one 5 1/8″ × 5″ bottom. Place the four walls on top of the bottom. The side pieces cover the ends of the front and back pieces, producing a nominal outside width of 5 1/8 inches.
Apply glue sparingly, clamp the box square and secure it with pins or very small brads. After it dries, slide the drawer into cubbies at the top, center and bottom. It should move without scraping but should not look noticeably loose.
If the test drawer binds, identify whether width, height or an uneven grid opening is responsible. Adjust the production dimensions by 1/16 inch at a time. Once the test drawer fits consistently, use it as the master pattern.
Step 6: Batch-Build the Other 23 Drawers
Set up a stop block wherever practical so repeated parts remain identical. Cut all remaining sides first, then the fronts and backs, followed by the bottoms. Label the stacks and keep the best-looking faces outward.
Assemble the drawers in small batches rather than all at once. Check square frequently, wipe off glue immediately and test random boxes in different cubbies. If one opening is slightly tighter, mark the matching drawer discreetly on the bottom instead of forcing it into another location.
Step 7: Fit the Decorative Drawer Fronts
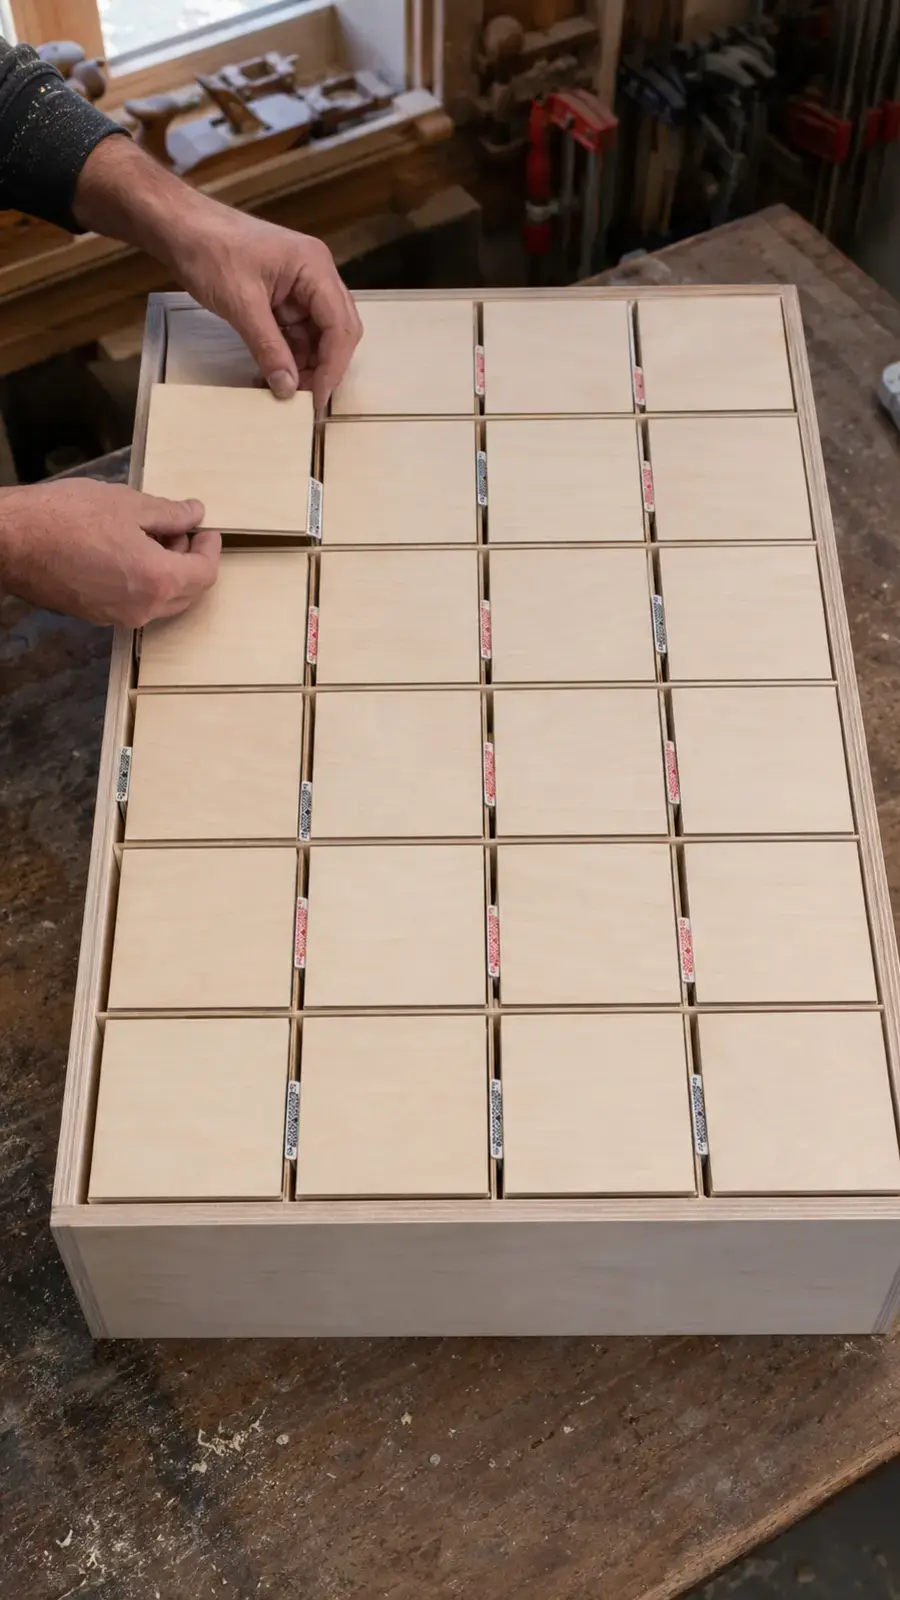
Cut 24 decorative fronts at 5 5/16″ × 4 3/8″ from 3/4-inch plywood or solid wood. Sand the edges and arrange the pieces until the grain and color distribution look balanced.
Lay the cabinet on its back and insert all drawer boxes. Use playing cards, thin plastic shims or equal-thickness washers to center each front with consistent gaps. A small amount of double-sided tape can hold a front temporarily while you remove the drawer.
Fasten each front from inside the drawer box with short screws. Measure the combined drawer-wall and front thickness first so the screws cannot break through the finished face.
Step 8: Install Knobs and Add Numbers 1–24
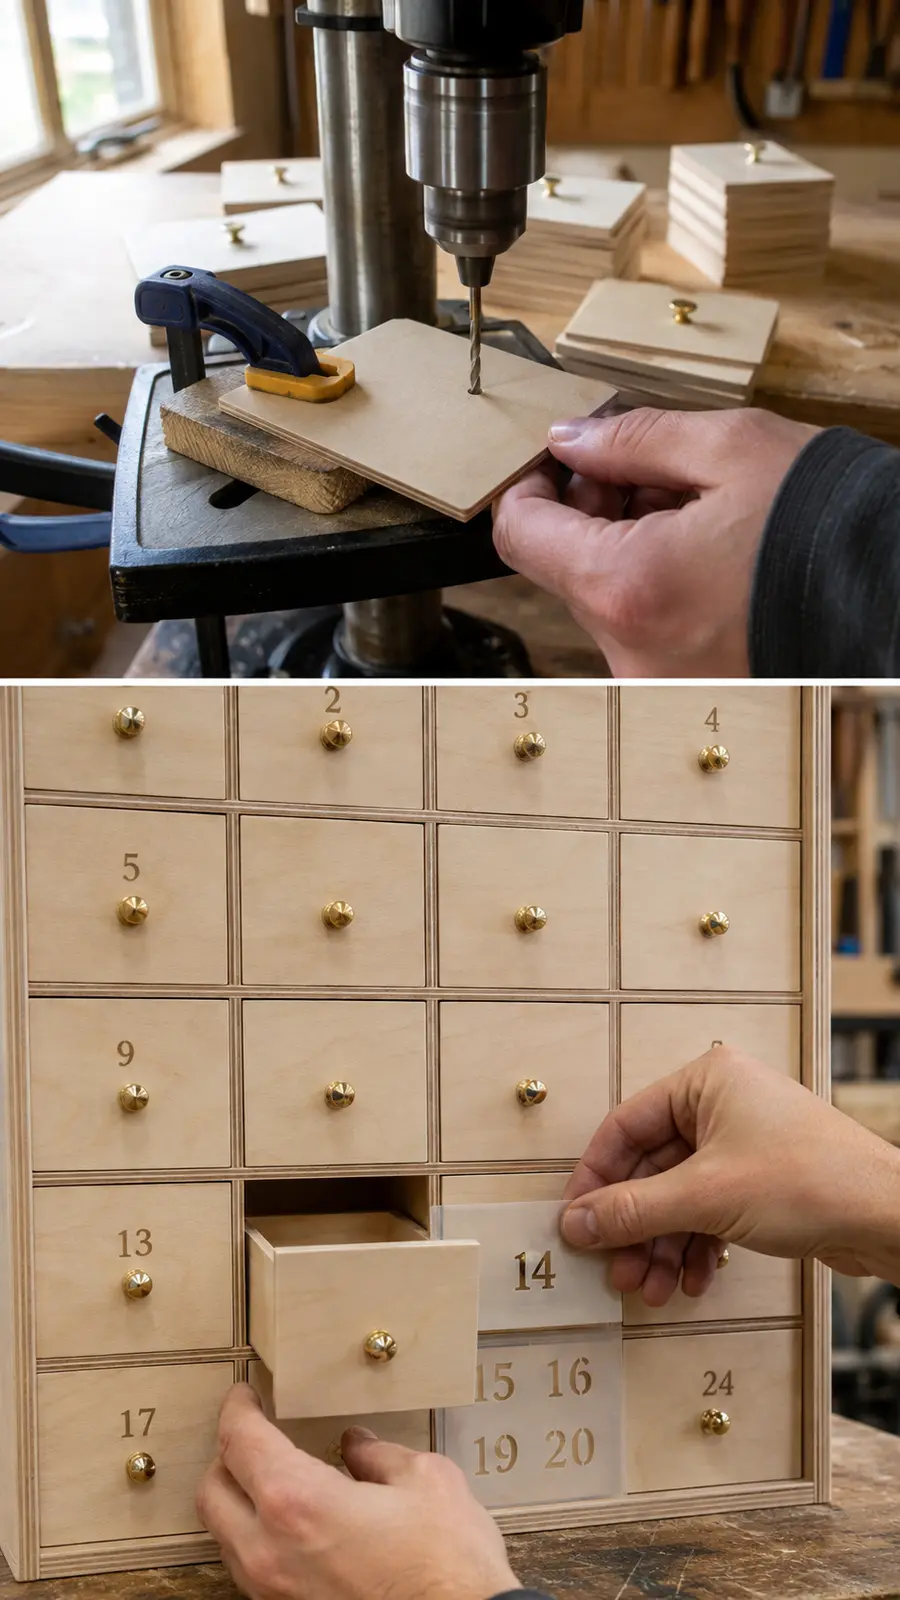
Make a cardboard or scrap-plywood template that marks the knob hole and number position. Use it on every front rather than measuring 24 times. Drill clean pilot holes with a backing board to reduce tear-out, then install the knobs with correctly sized screws.
Number the drawers from 1 to 24. You can use stencils and acrylic paint, vinyl, stamps, small brass tags or a wood-burning tool. If children will use the calendar, placing the numbers out of sequence adds a simple daily search game. A straight numerical arrangement creates a cleaner furniture-style appearance.
Step 9: Sand the Cabinet and Drawers
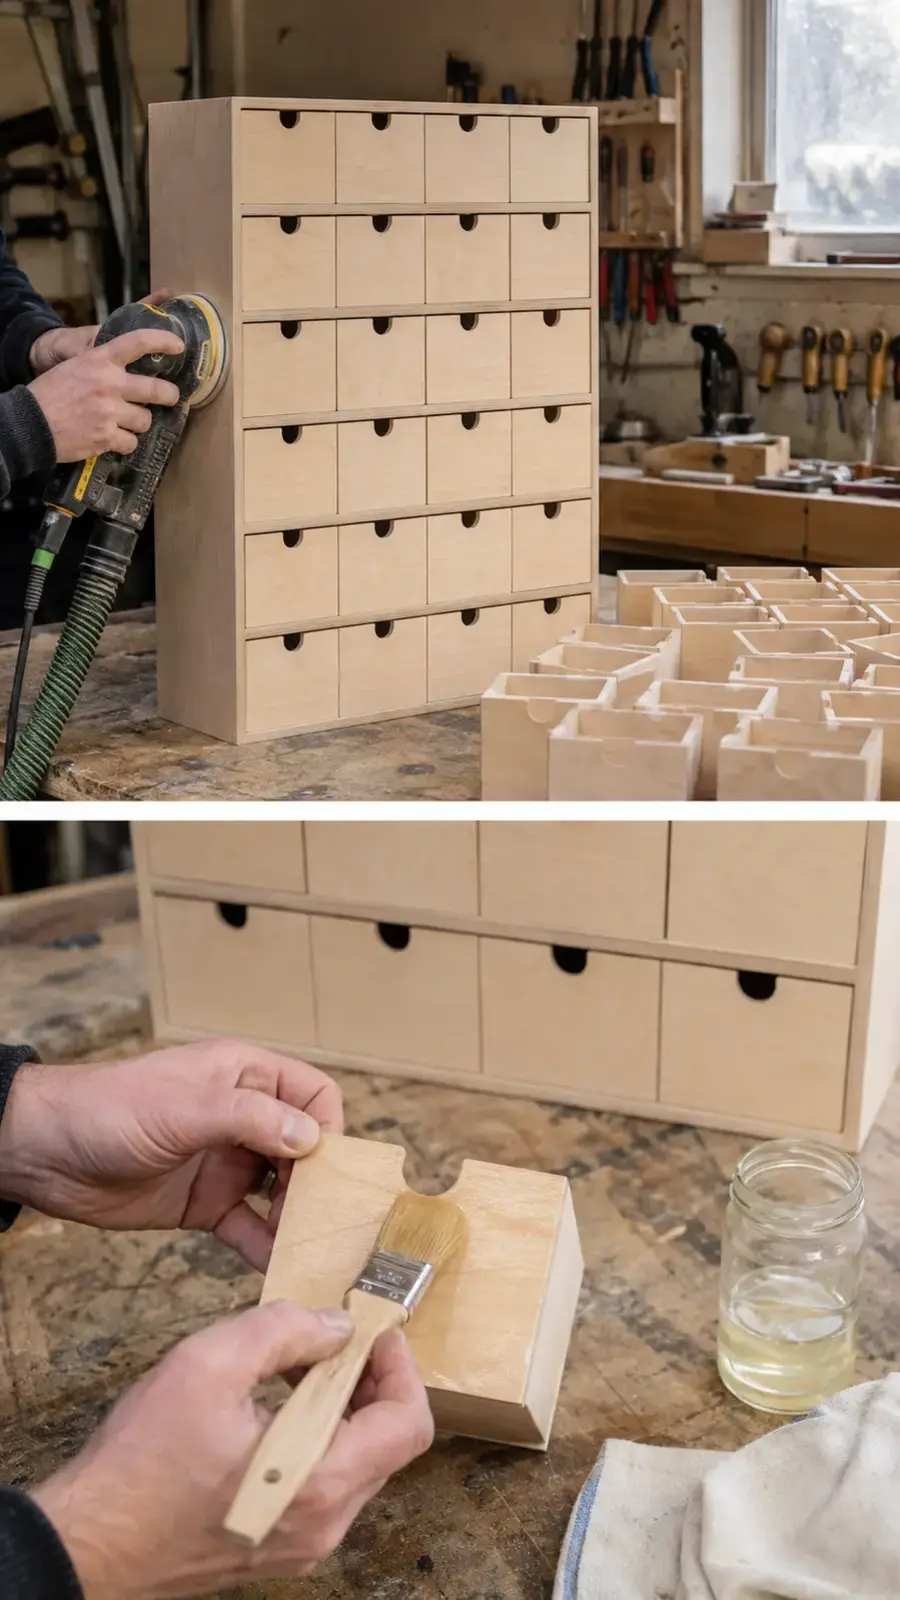
Remove every drawer and keep its location label on the bottom. Sand rough areas with 80 grit only when necessary, then progress through 120, 180 and 220 grit. Ease sharp front edges lightly without changing the carefully fitted dimensions.
Pay particular attention to the drawer sides, bottoms and cubby edges. A tiny glue bead or raised plywood fiber can make a drawer feel tight. Vacuum thoroughly and wipe away dust before finishing.
Step 10: Paint, Stain or Seal the Calendar
For a Scandinavian look, leave the birch natural and apply a clear water-based finish. For a classic Christmas palette, use a white or natural cabinet with red and forest-green fronts. Warm walnut stain with brass knobs suits farmhouse decor, while cream, sage and muted burgundy create a vintage style.
Apply thin coats and follow the finish manufacturer’s drying and recoating instructions. Avoid heavy buildup on drawer sides or inside the cubbies. Finish can reduce clearance, so keep fitted sliding surfaces lightly coated or unfinished where appropriate.
Step 11: Reassemble and Test Every Drawer
When the finish is fully cured, reinstall the drawers in their marked locations. Open and close every one. If a drawer rubs, find the exact contact point and sand only that area. A small amount of paste wax on unfinished sliding surfaces can improve movement.
Fill the drawers with chocolates, small ornaments, jokes, activity cards, LEGO pieces, coins, tea bags, coffee pods, date-night ideas or handwritten family memories. Mix treats with activities so the countdown feels different every day.
Ways to Customize the Calendar
- Add a family name or short Christmas message above the drawers.
- Use contrasting hardwood offcuts for the drawer fronts.
- Arrange the numbers randomly for children to find.
- Line drawers with felt, cork or decorative paper.
- Add small rubber feet beneath the cabinet.
- Use wooden knobs, black pulls or antique brass hardware.
- Paint a continuous winter scene across all 24 fronts.
Drawer fronts are ideal for using attractive offcuts. If your scrap pile is growing, these scrap wood Christmas ideas can turn the leftovers into ornaments, signs and small gifts.
Can You Make and Sell Wooden Advent Calendars?
Yes, but price the calendar for the real labor involved. This is not a 30-minute scrap-wood craft: you are building one cabinet, a 24-section grid, 24 drawer boxes, 24 fitted fronts and 24 numbered hardware assemblies.
Personalization can increase perceived value. Popular upgrades include a family name, custom colors, engraved numbers, decorative trim and a matching set of reusable activity cards. Photograph the finished calendar clearly and state the drawer interior dimensions so buyers know what will fit.
For more seasonal product inspiration, see these Christmas wood crafts to make and sell.
Want More Ready-to-Build Projects?
Finishing a project like this often starts a much longer build list: a storage bench, a bookshelf, a coffee table or perhaps a backyard shed. When you would rather begin with an existing plan than design every project from a blank page, a larger plan library can save research time.
Explore Ted’s Woodworking Plans
Ted’s Woodworking Plans includes a broad collection of woodworking project ideas covering furniture, small crafts, storage, workshop projects and outdoor builds. Review the dimensions, materials and instructions for any plan carefully, and adapt them to your tools and local requirements.
Get Access to Ted’s Woodworking Plans
Affiliate disclosure: This page contains affiliate links. If you purchase through one of these links, we may earn a commission at no additional cost to you.
If you prefer to begin with free projects, return to the collection of beginner woodworking plans and choose a smaller build for your next weekend.
Frequently Asked Questions
How big is this DIY wooden Advent calendar?
The finished cabinet is 24 inches wide, 30 inches high and 6 inches deep. It is designed as a freestanding piece for a console, sideboard, sturdy shelf or low table.
How large are the drawer boxes?
The target exterior drawer-box size is approximately 5 1/8″ wide, 4 1/4″ high and 5″ deep. The decorative fronts measure 5 5/16″ × 4 3/8″. Actual plywood thickness can affect the fit, so build and test one drawer before producing the full batch.
What wood works best?
Birch, maple or sanded pine plywood are practical choices. Plywood keeps the cabinet stable and makes repeated drawer parts easier to produce. Solid wood can be used for the drawer fronts if you allow for seasonal movement and keep the pieces flat.
Can a beginner build it?
A patient beginner who can make square cuts and assemble basic boxes can complete the project. The techniques are simple; the challenge is accuracy and repetition. Spacer blocks, stop blocks and one carefully tested drawer make the work far more manageable.
Can the calendar hang on a wall?
This version is intended to stand on a stable surface. A wall-mounted variation would require construction and hanging hardware rated for the fully loaded cabinet, securely fastened into appropriate wall framing. Do not assume the thin back panel alone can carry the weight.
Can I change the overall size?
Yes. Keep the four-column by six-row layout, subtract the cabinet sides and divider thicknesses, then divide the remaining space evenly. Recalculate the drawer boxes and fronts from the finished openings rather than scaling the cut list blindly.
Final Thoughts
A reusable wooden Advent calendar takes longer to build than a disposable cardboard one, but it becomes part of the family’s holiday routine instead of disappearing on December 25. The project is a sequence of straightforward tasks: assemble a square cabinet, divide it accurately, perfect one drawer, repeat the drawer, fit the fronts and add the finish.
Take your time with the grid and test drawer. Those two stages determine how polished the finished calendar feels. Once the 24 drawers glide smoothly, all that remains is choosing what surprise goes into drawer number one.