
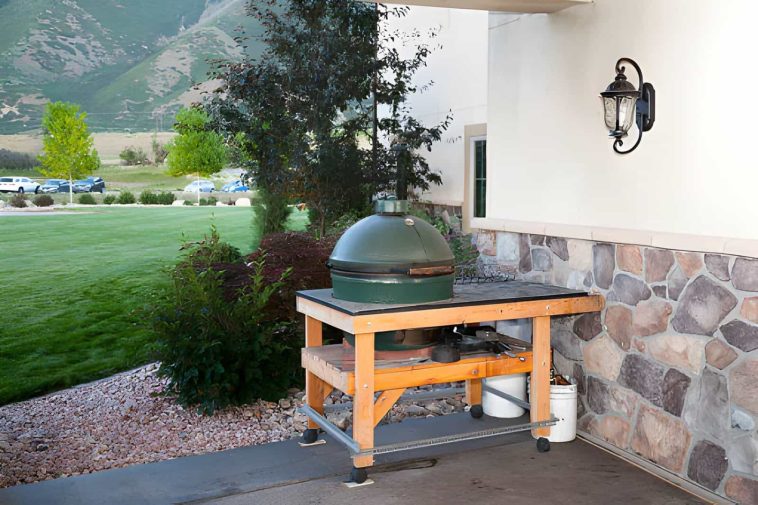
The 15 ideas below range from movable carts to permanent outdoor cooking stations. Treat them as inspiration rather than universal construction plans. Always follow the instructions for your exact appliance, and ask an experienced adult or qualified professional to handle cutting, drilling, gas, electrical, plumbing or structural work when needed.
Before You Choose a DIY Grill Station
The best-looking station will still frustrate you if the grill lid hits the counter or the cart blocks a control panel. A few planning checks will help you avoid a very expensive version of “almost right.”
Measure the Whole Grill
Measure more than the grill body. Account for the lid in both positions, handles, knobs, shelves, grease trays, vents and any area that needs regular cleaning. Also check how you move or remove the fuel source according to the manufacturer’s directions.
Sketch the appliance and its moving parts before you consider a built-in design. This simple check often reveals that a freestanding BBQ prep table will work better than a tight wooden surround.
Follow the Manufacturer’s Clearances
Every grill, griddle and ceramic cooker has its own clearance, ventilation and installation requirements. Use the manual for the exact model rather than copying a measurement from a photo online.
Never treat wood, tile or a decorative backsplash as an automatic heat barrier. A safe installation may require approved noncombustible materials and a tested design. If the manual does not approve built-in use, keep the appliance separate from the station.
Choose Materials for Outdoor Exposure
Rain, sunlight and temperature changes punish indoor materials. For an outdoor prep station, look for exterior-rated lumber, naturally durable wood, suitable sheet materials and corrosion-resistant hardware.
Use an exterior finish that suits the material and local climate. Avoid unidentified pallet wood near food-preparation or cooking areas because you may not know its treatment, storage history or contamination exposure.
Keep Heat, Fuel and Utilities Independent
A homemade cabinet should never interfere with a fuel container, regulator, gas line, electrical connection, burner, grease system or air vent. Do not modify those components to make an appliance fit.
When a project involves gas, fixed electricity, plumbing, a roof or a permanent foundation, involve a qualified professional and follow local requirements. The easiest beginner-friendly option places a separate prep table near the grill while respecting every required clearance.
DIY Grill Station Ideas at a Glance
| Project | Difficulty | Best feature | Movable? |
| Rolling BBQ prep cart | Easy | Flexible workspace | Yes |
| Simple outdoor prep table | Easy | Beginner-friendly layout | Optional |
| Compact patio station | Easy–Medium | Small footprint | Optional |
| Farmhouse BBQ table | Medium | Decorative style | No |
| Open-shelf grill station | Medium | Accessible storage | No |
| Fold-down prep table | Medium | Saves floor space | No |
| Cooler and serving station | Medium | Entertaining space | Optional |
| Kettle-grill prep station | Medium | Dedicated side workspace | Optional |
| Flat-top griddle station | Medium | Generous prep area | Optional |
| Kamado-style grill table | Advanced | Built-in appearance | No |
| Masonry grill station | Medium–Advanced | Permanent structure | No |
| Backsplash prep station | Medium | Easy-clean work zone | No |
| Outdoor sink station | Advanced | Convenient cleanup | No |
| Covered cooking station | Advanced | Weather protection | No |
| Modular outdoor kitchen | Advanced | Expandable layout | No |
1. Rolling BBQ Prep Cart
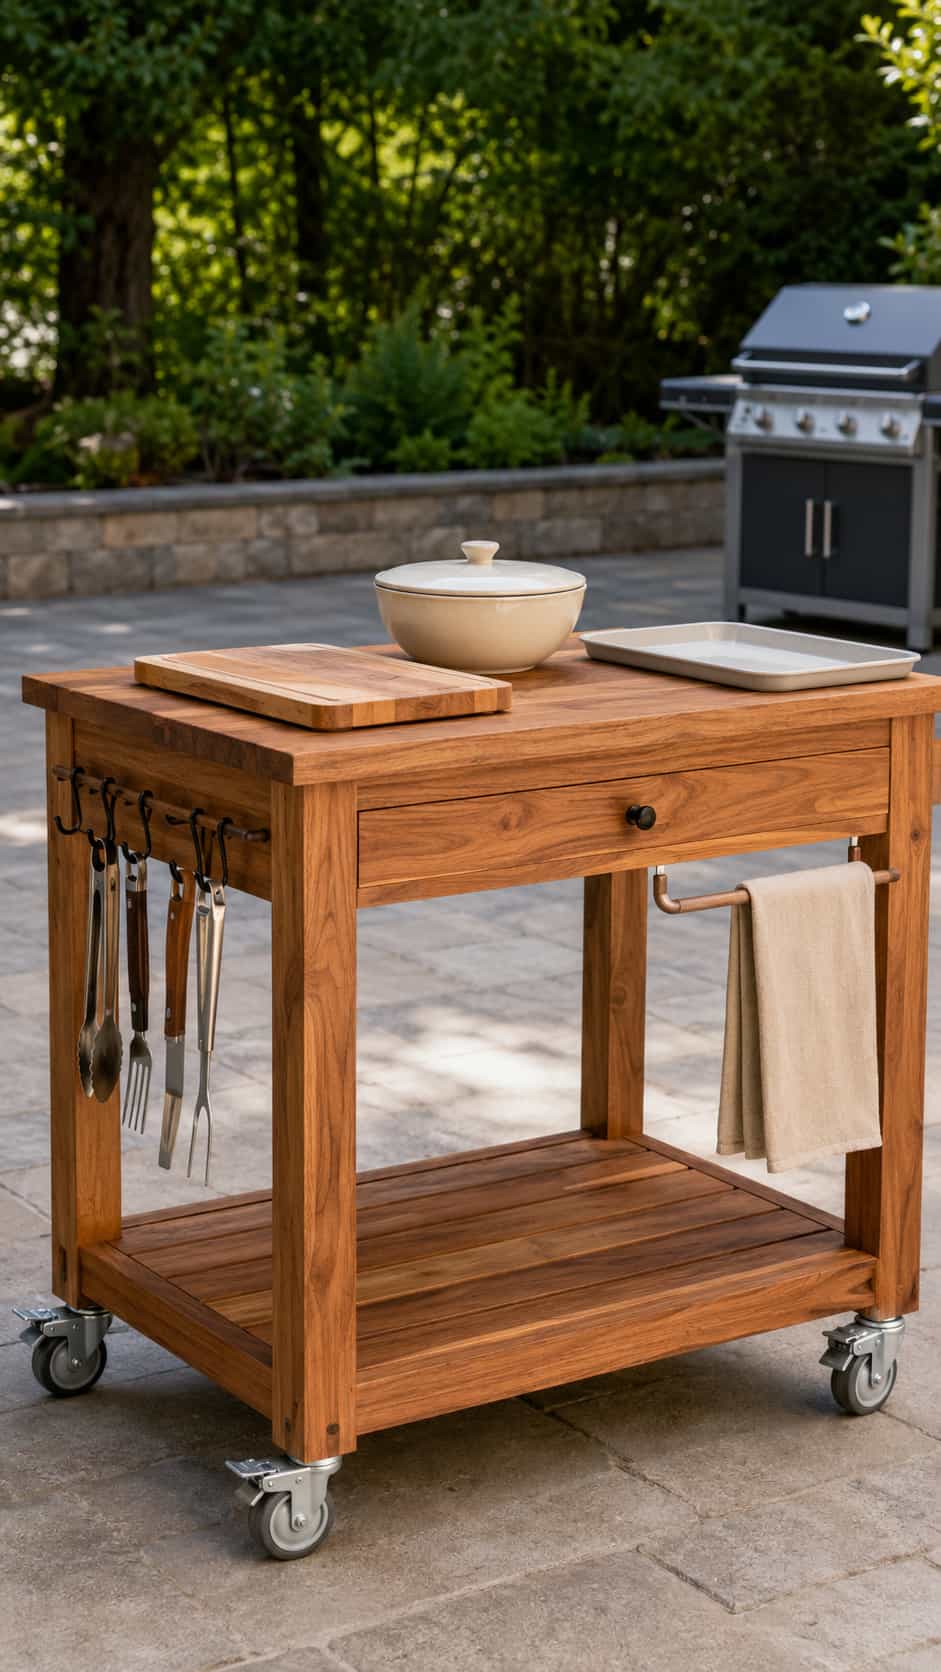
A rolling cart gives you workspace exactly where you need it, then moves out of the way when dinner ends. A practical version includes a solid top, an open lower shelf and exterior-rated locking casters.
Keep this cart separate from the grill and use it for ingredients, serving pieces and lightweight accessories. Check that the base feels stable before loading the top, and lock every caster during use.
Customization idea: Add removable utensil hooks and a towel bar on the side farthest from the heat.
2. Simple Outdoor Prep Table
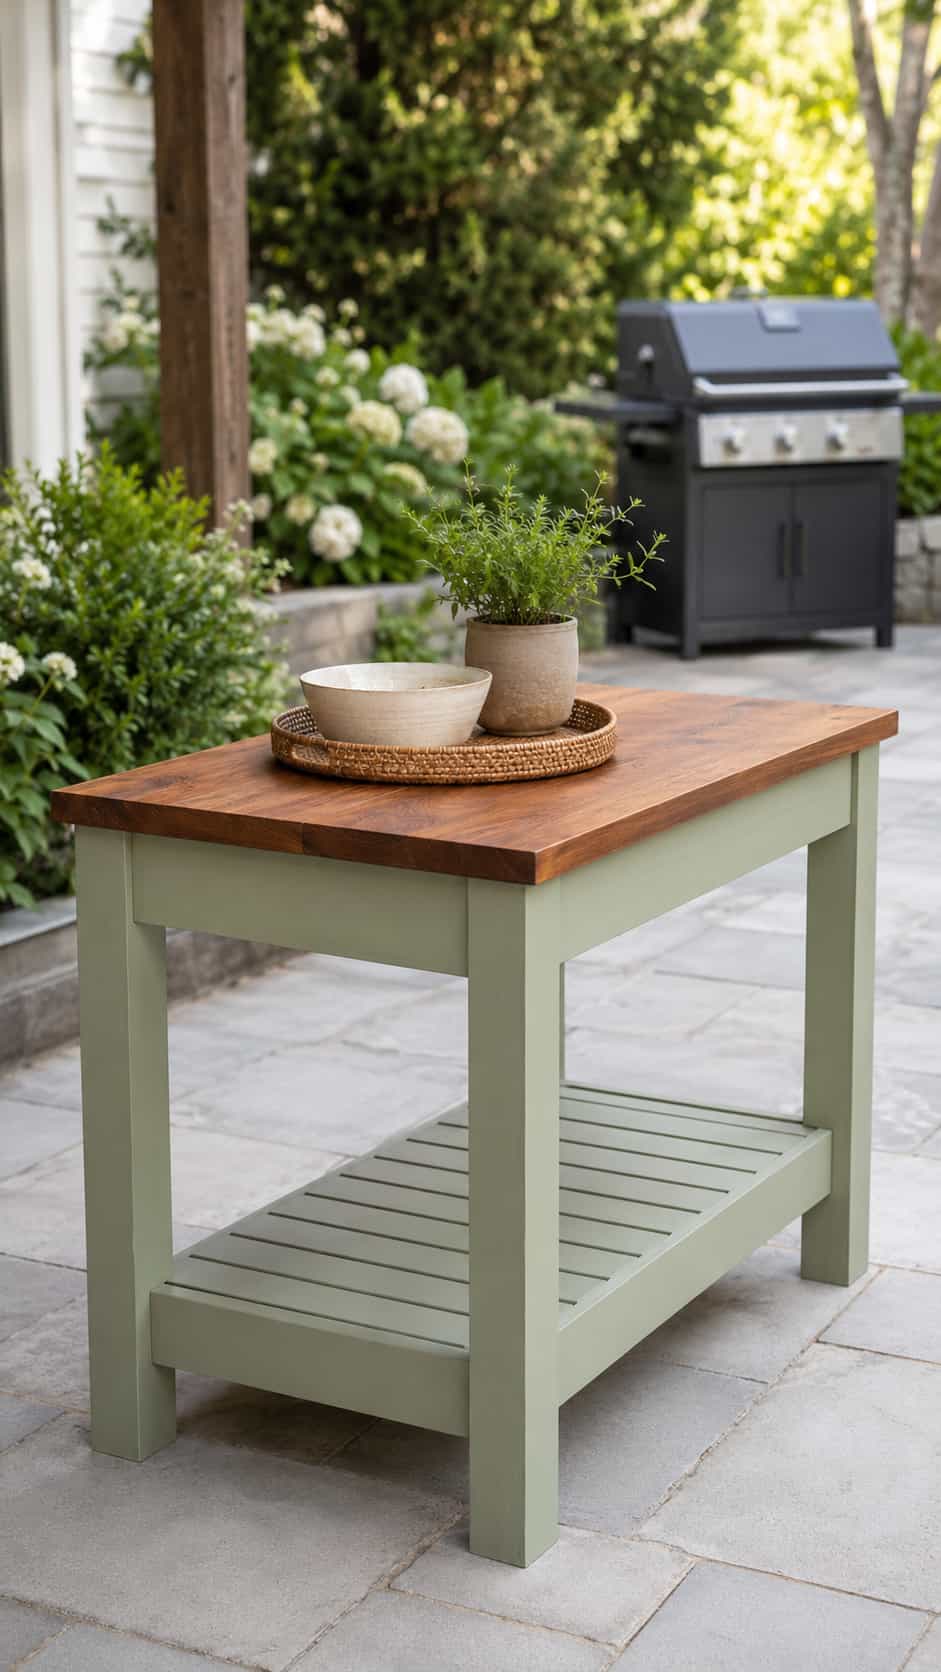
This design keeps everything refreshingly simple: a stable table frame, a generous work surface and an optional lower shelf. It works beside many different grills because it does not try to wrap around the appliance.
IMO, this idea suits most backyards better than a complicated grill enclosure. You gain useful space, preserve access around the grill and can replace either item without redesigning the entire patio.
Customization idea: Paint the base and stain the top for a clean two-tone finish. For more sturdy backyard ideas, explore our 21 DIY 2×4 Outdoor Furniture Projects.
3. Compact Patio Grill Station
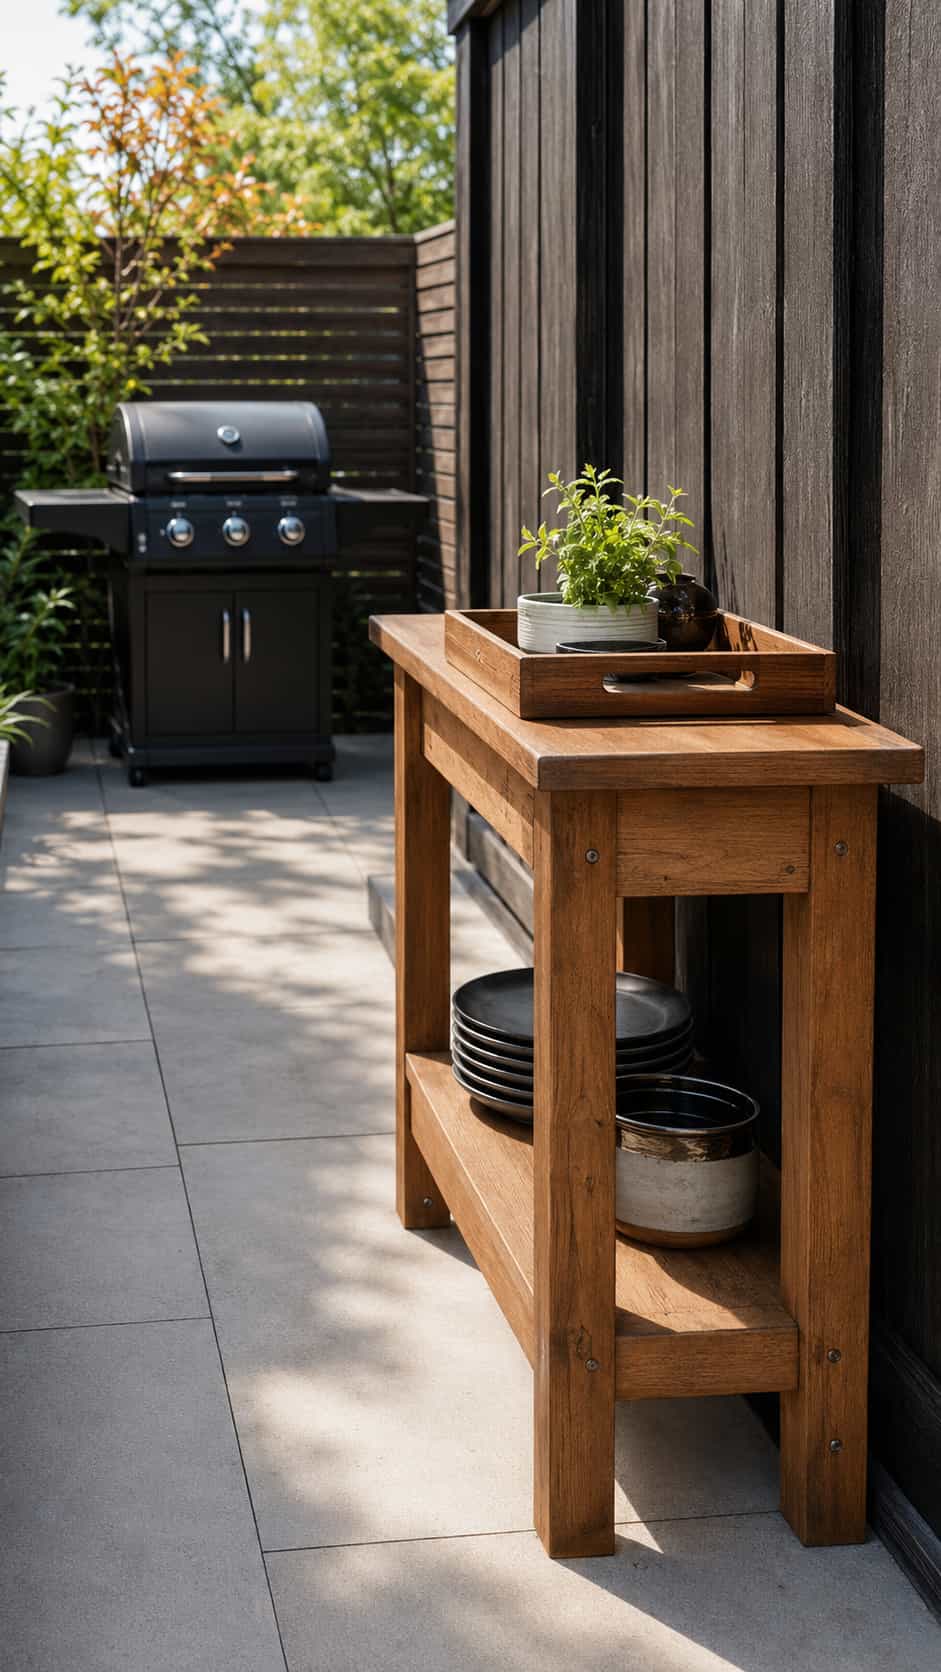
A compact station uses a narrow footprint while still providing a useful landing area for a tray. Open storage underneath can hold weather-safe serving supplies without making the piece feel bulky.
Do not shrink the base so far that the station becomes top-heavy. Leave comfortable walking space and keep the complete unit outside the appliance’s required clearance area.
Customization idea: Add a removable serving tray that sits securely on the top.
4. Farmhouse-Style BBQ Prep Table
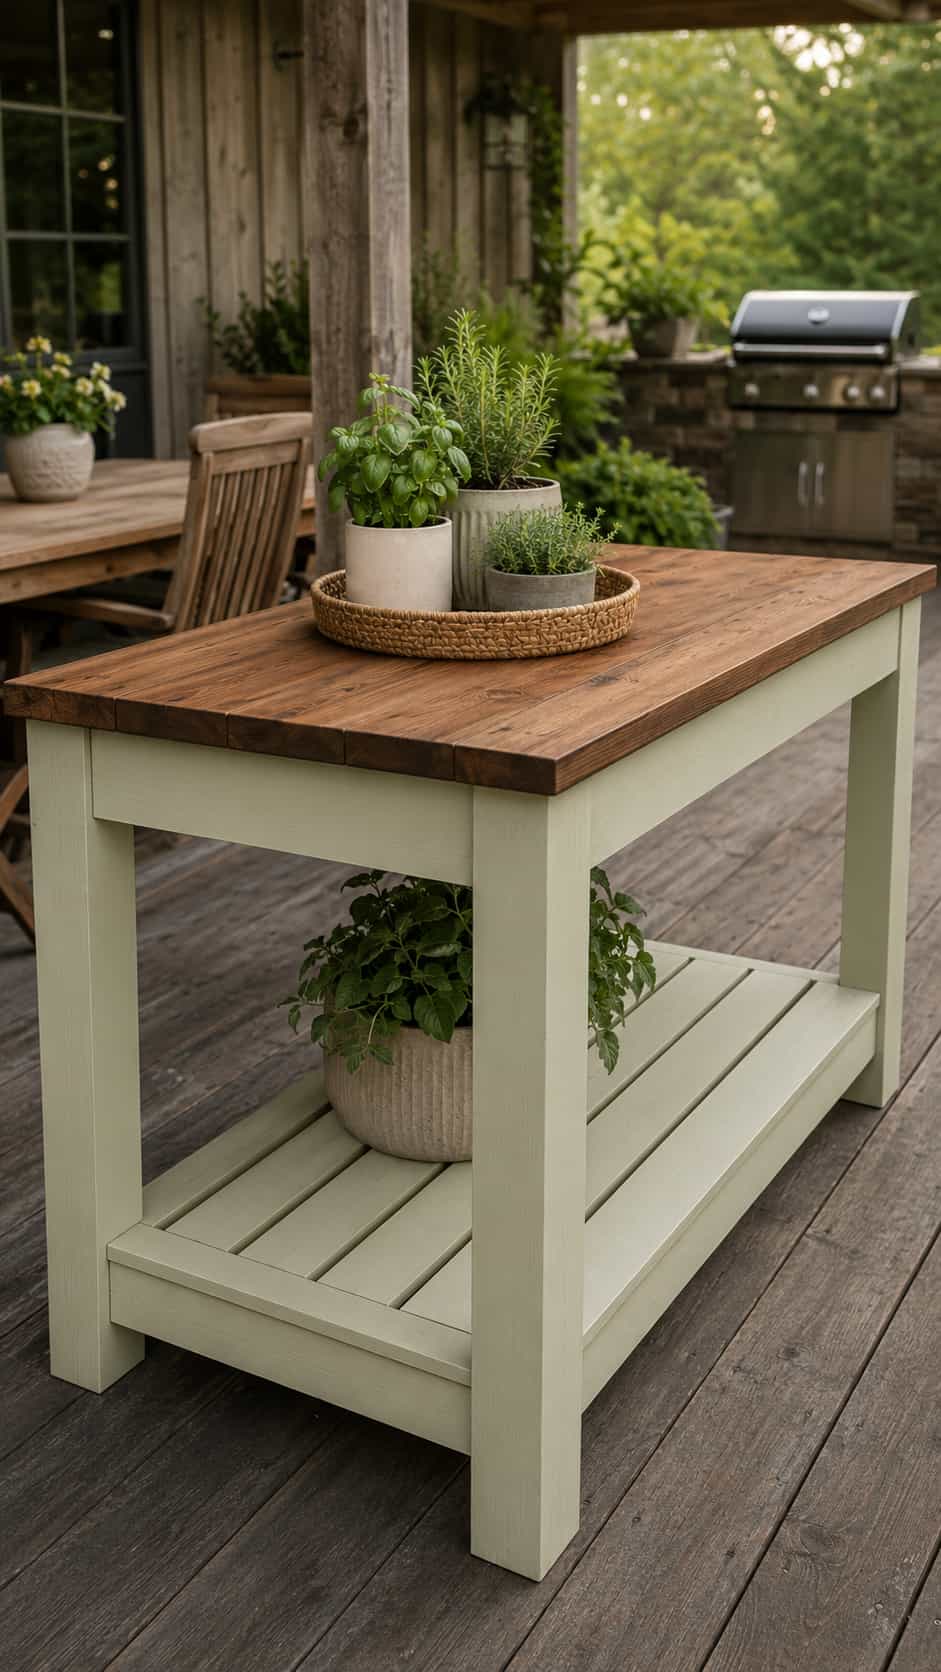
Chunky legs, a complete apron frame and a slatted lower shelf give this BBQ prep table a relaxed farmhouse look. A stained top paired with a painted base can make the project feel like real outdoor furniture rather than workshop storage.
Use the table as a separate preparation and serving surface. That simple role makes the design more flexible and avoids the risks that come with forcing an appliance into an unverified opening.
Customization idea: Match the base color to your planters, fence or outdoor dining chairs.
5. Grill Station With Open Shelves
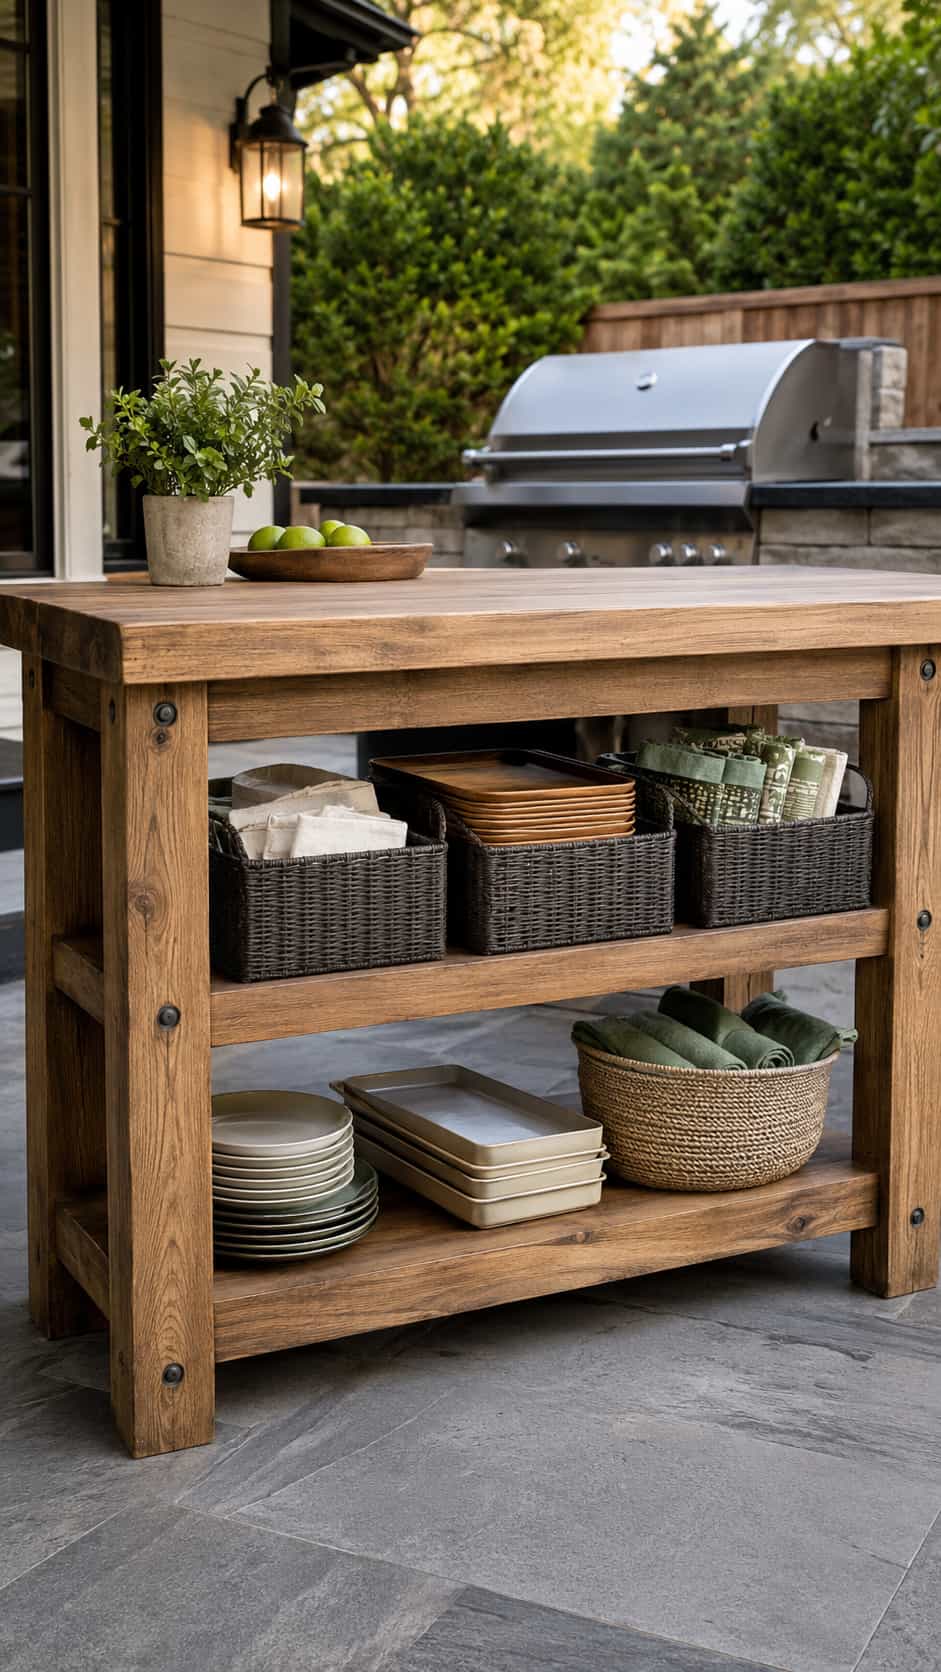
Open shelves let you see what you have and grab it quickly. They also allow rainwater and air to move more freely than a poorly designed closed cabinet.
Store only suitable weather-safe items in the station. Keep fuel, ignition products and anything restricted by the appliance manufacturer in an approved location. Yes, an empty shelf can survive without immediately becoming mystery-storage central.
Customization idea: Use removable outdoor bins for napkins, trays and other items that you bring indoors after cooking.
6. Fold-Down Outdoor Prep Table
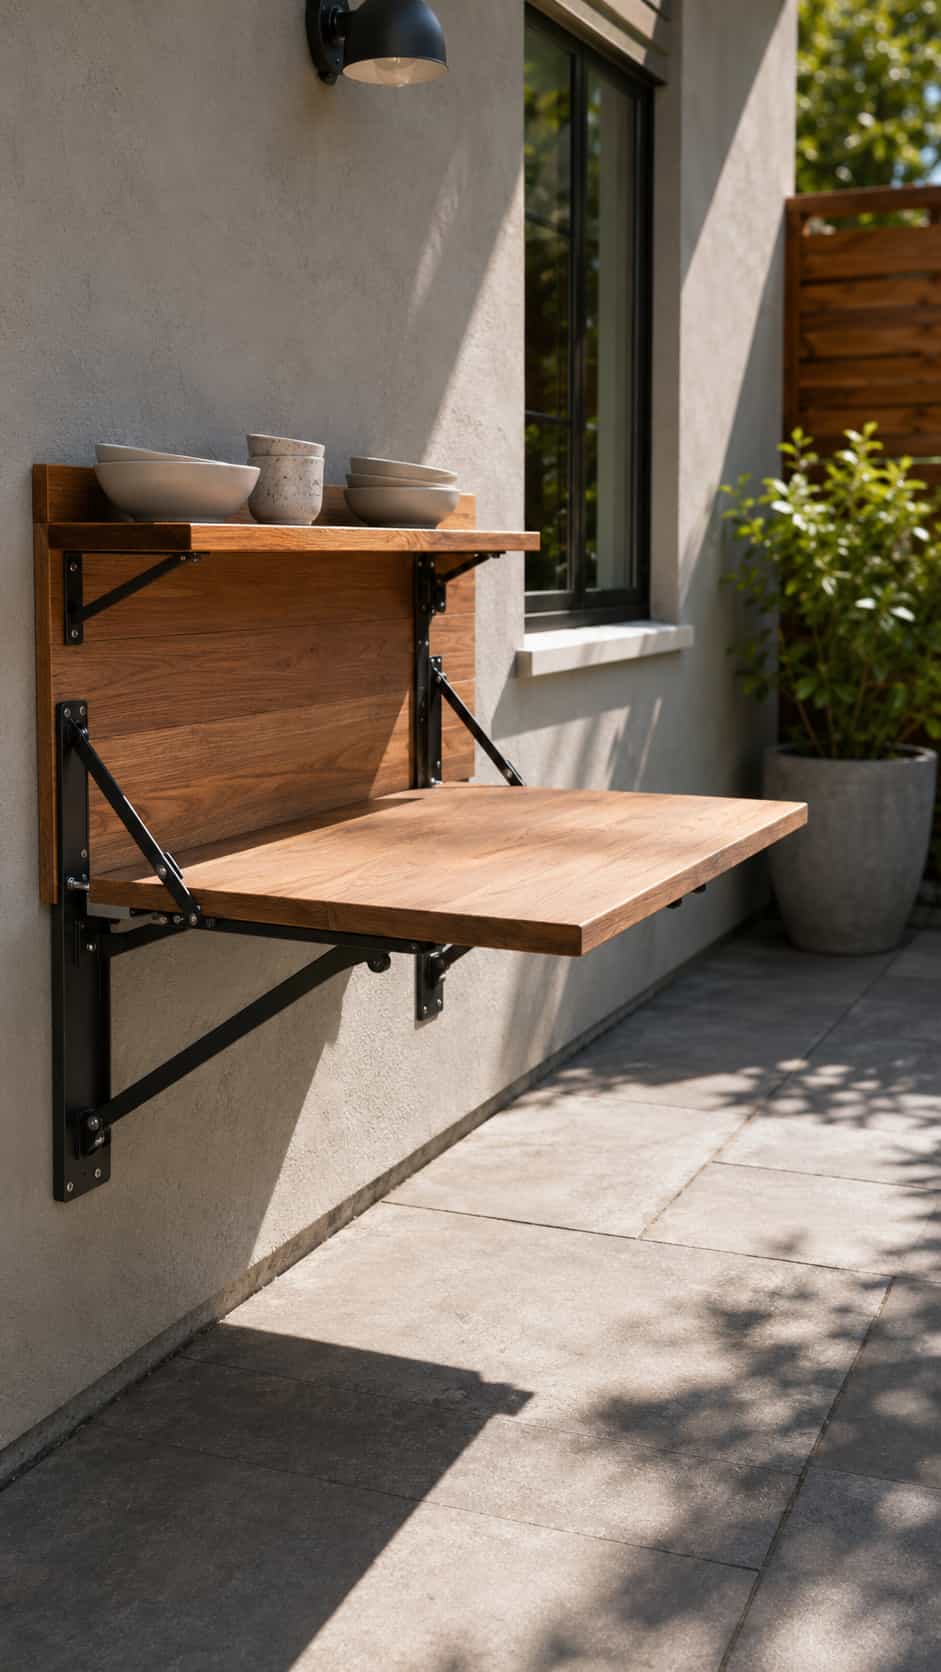
A fold-down table creates temporary workspace without permanently occupying the walkway. Mount it to appropriate structural support in a location that remains outside every grill clearance and heat zone.
This idea works best as a serving or preparation surface, not as a grill shelf. Ask an experienced adult or qualified professional to verify the mounting method and expected load before use.
Customization idea: Add a shallow upper shelf for lightweight, nonflammable serving pieces.
7. Cooler and Serving Station
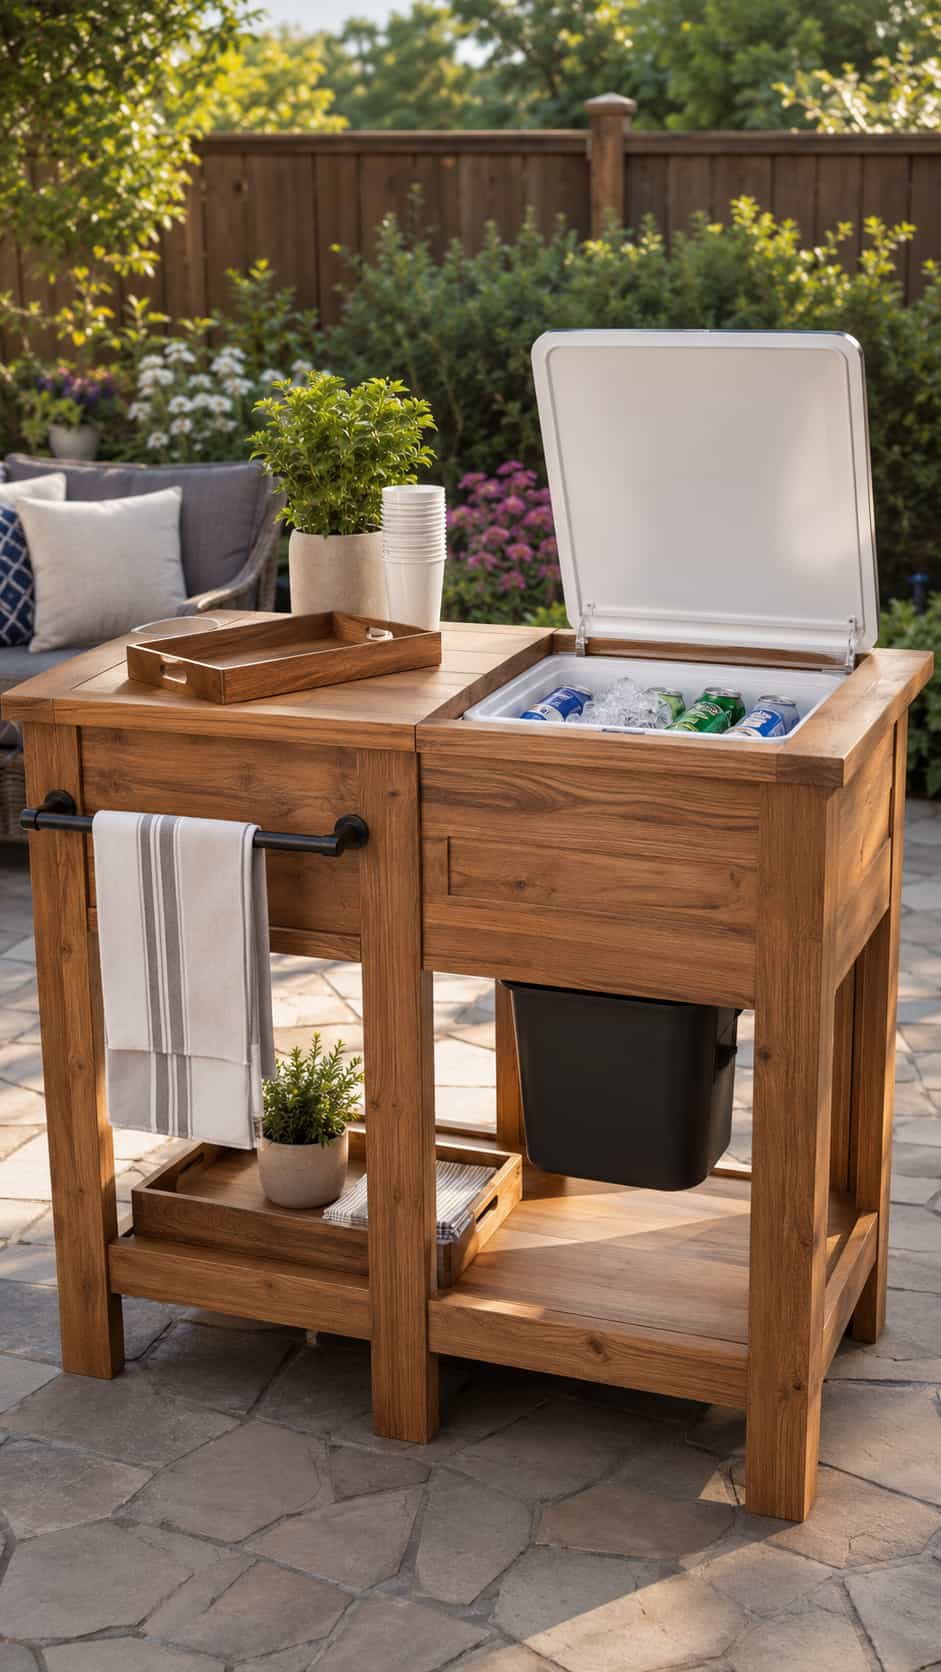
A removable cooler turns an ordinary patio table into a useful serving station. Keep the insulated container separate from the work surface so you can lift it out for draining and cleaning.
Place this station away from the grill’s heat and traffic zone. A broader top provides room for cups and serving trays without encouraging guests to crowd the cooking area.
Customization idea: Add a towel bar, a tray shelf or a removable waste bin that you can sanitize easily.
8. Kettle-Grill Prep Station
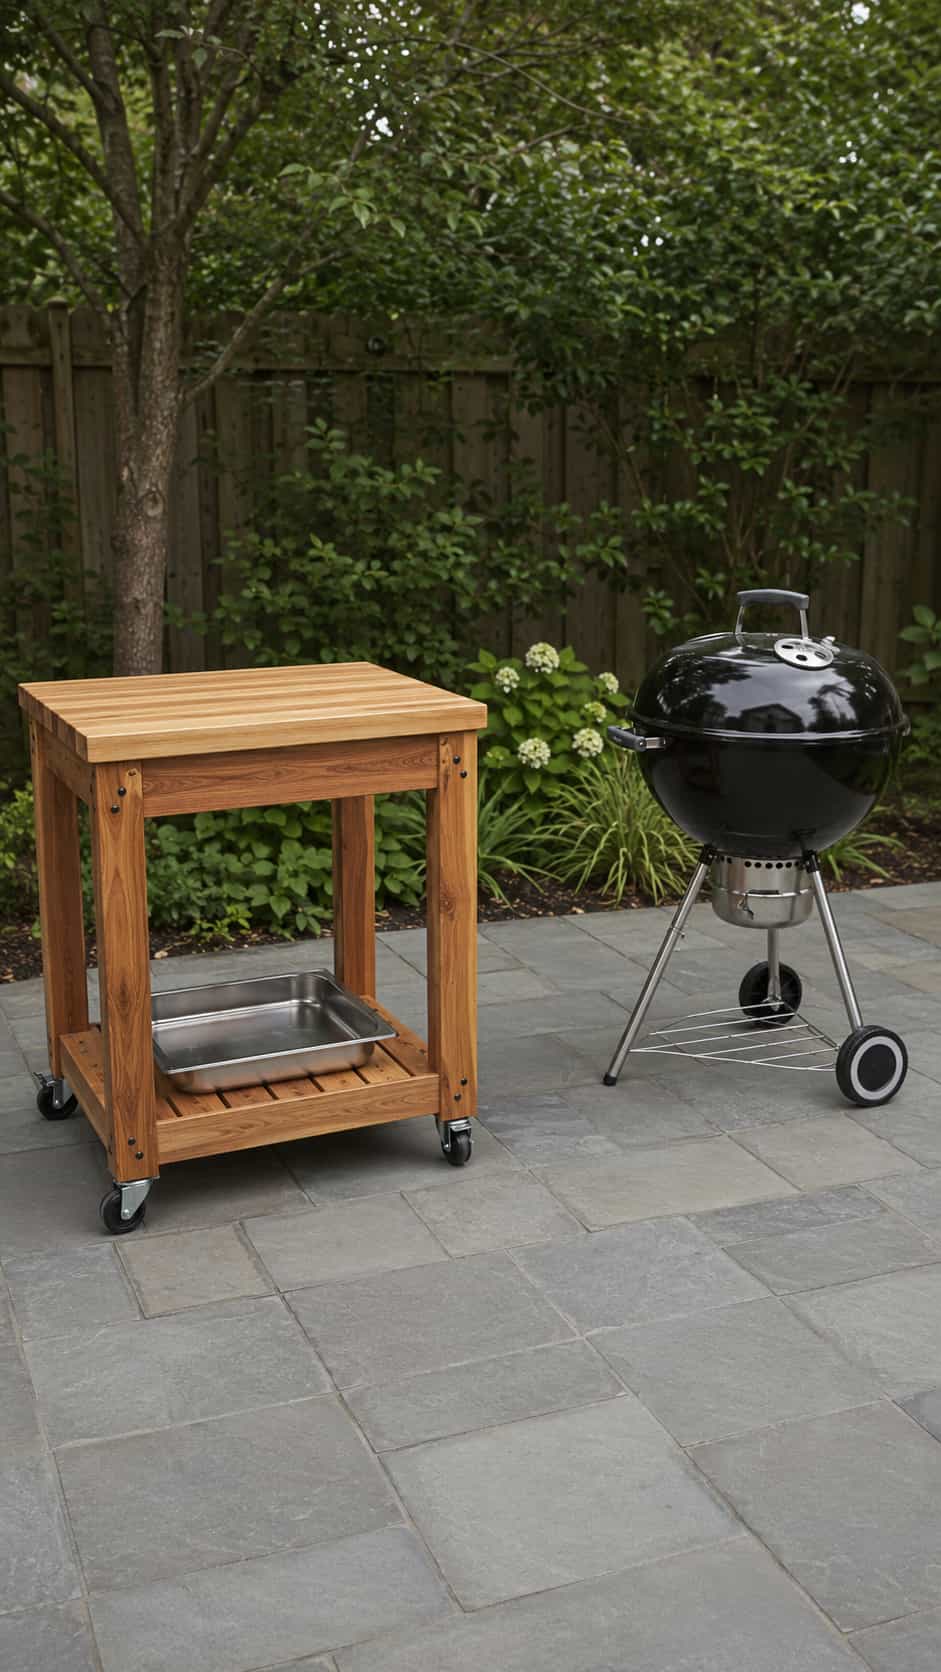
The safest straightforward version places a prep cart beside the kettle grill while keeping the grill fully independent. You gain room for ingredients without changing the appliance or restricting access to its vents and ash-management components.
Some online plans show a kettle grill dropped into a wooden opening. Only consider that arrangement when a tested plan matches the exact model and follows every manufacturer requirement for support, ventilation and approved heat barriers.
Customization idea: Use a removable stainless-steel tray on the preparation side for easier cleanup.
9. Flat-Top Griddle Prep Station
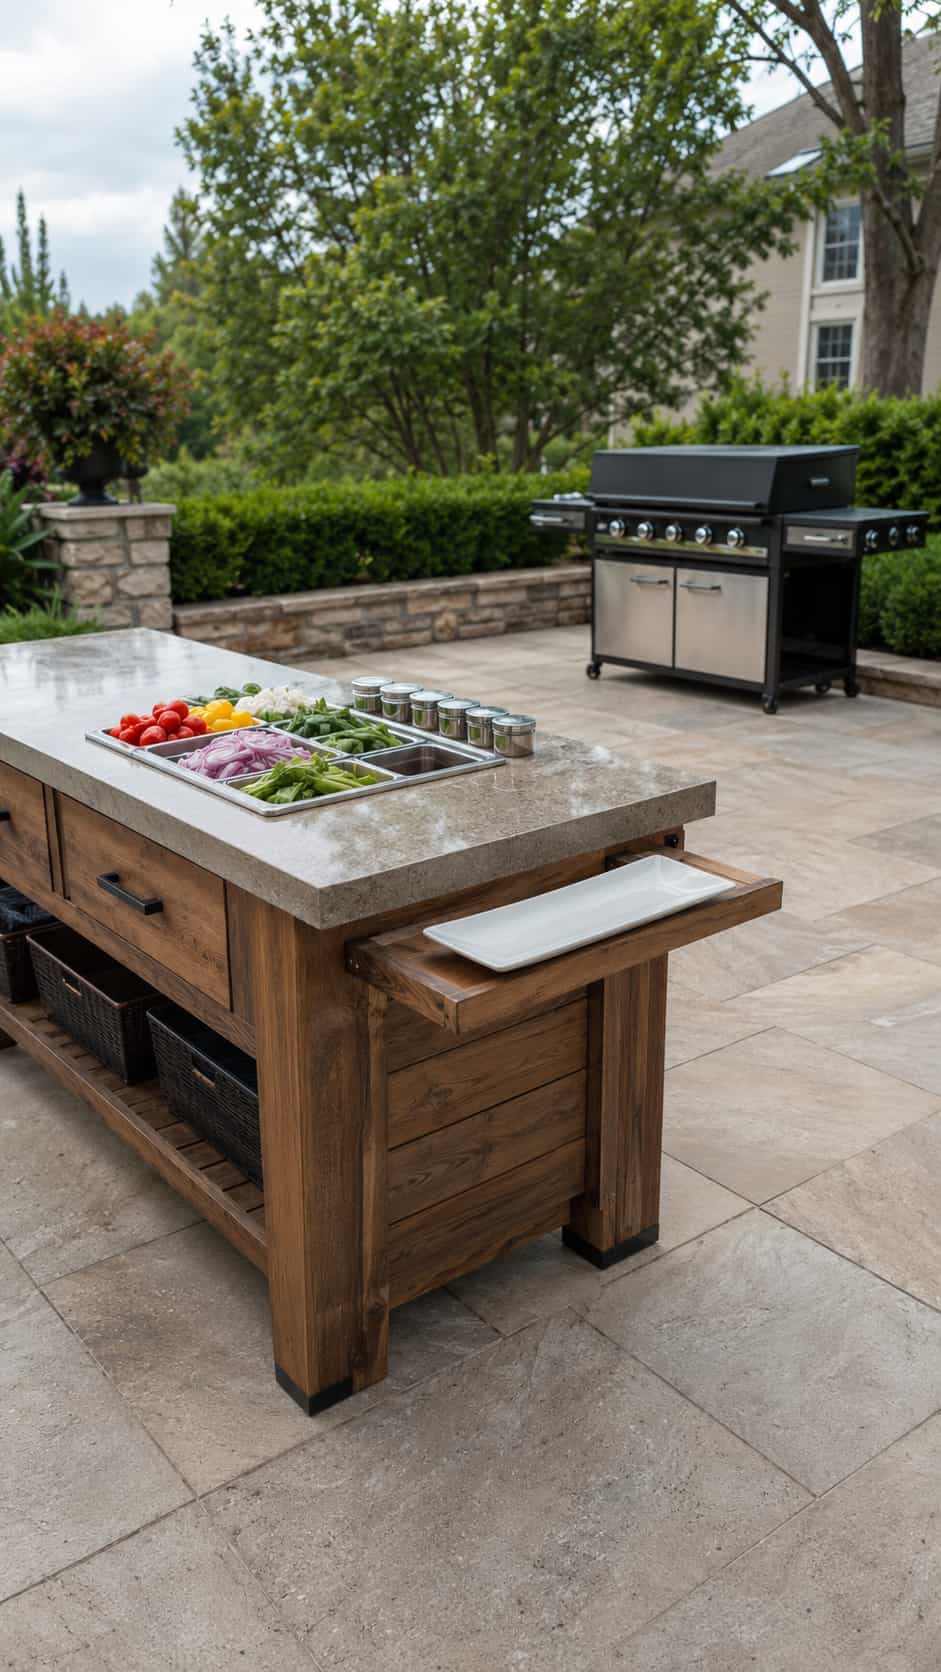
A flat-top griddle often needs more ingredient space than a basic grill. A separate side station can organize trays, seasonings and finished food without blocking the griddle’s controls, grease management or ventilation.
Select a worktop that cleans easily and fits your food-preparation routine. Keep paper goods, towels and other combustible items well away from hot surfaces.
Customization idea: Add a removable side shelf that carries finished food directly to the dining table.
10. Kamado-Style Grill Table
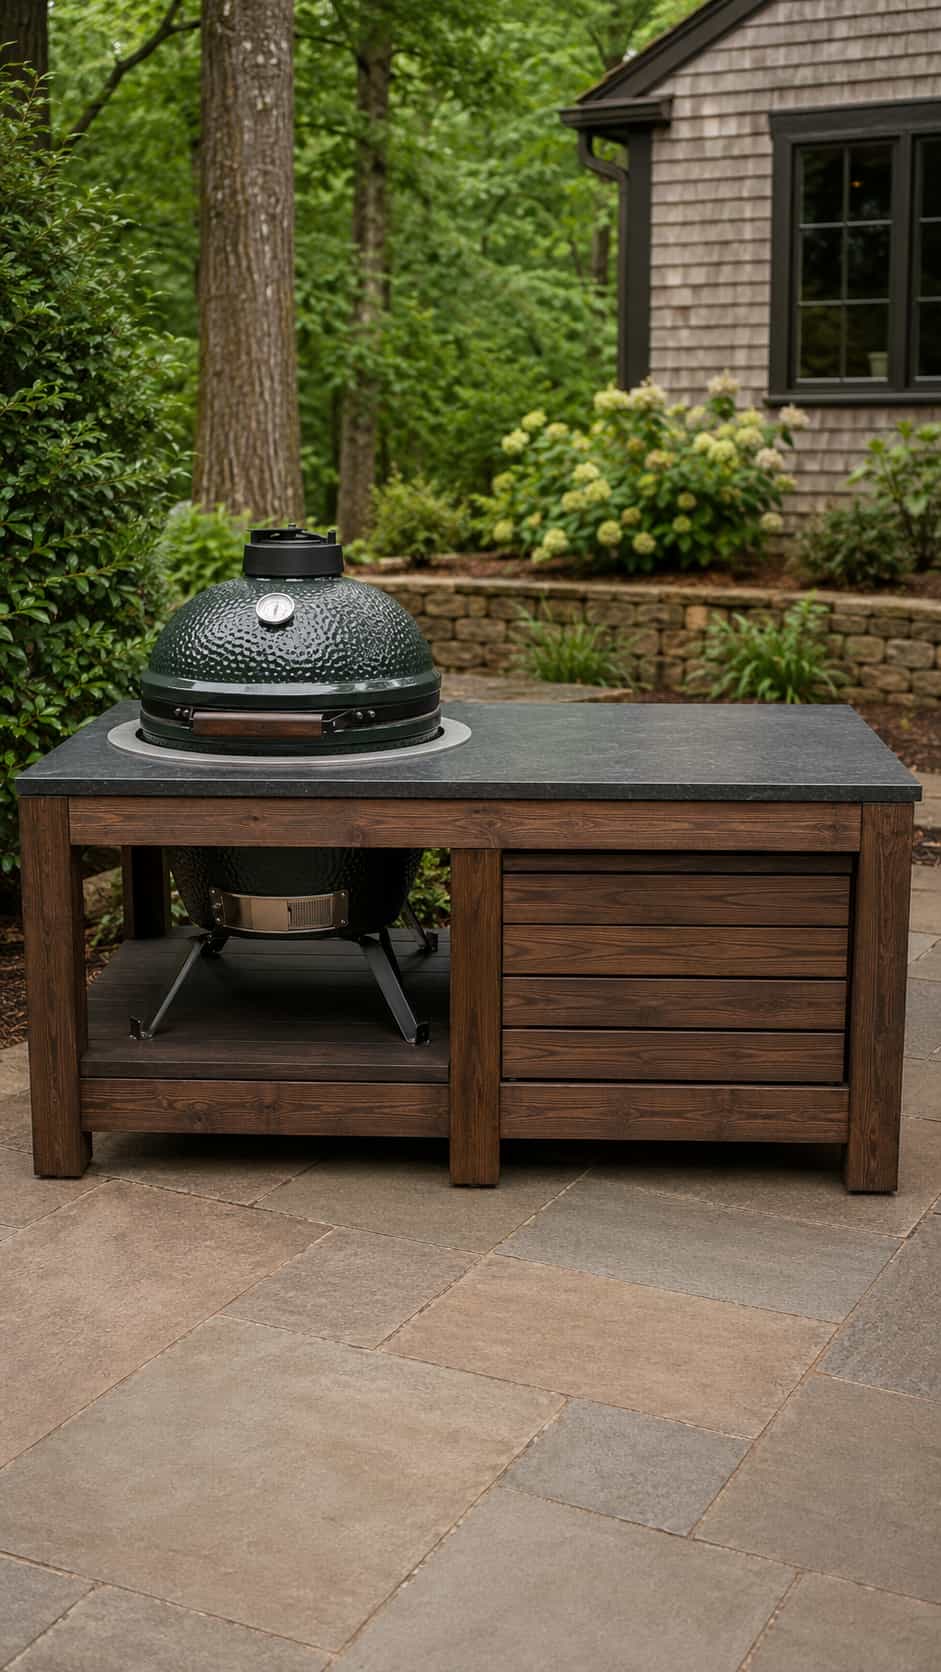
Ceramic cookers combine considerable weight with high operating temperatures, so this project needs more than a stylish photo and hopeful thinking. The supporting structure, opening, ventilation and approved heat-resistant components must suit the exact appliance.
Use a complete, tested plan and confirm it against the current manufacturer instructions. Ask qualified help to review the design if any requirement remains unclear.
Customization idea: Add preparation space on one side without reducing the appliance’s required clearance.
11. Masonry Grill Station
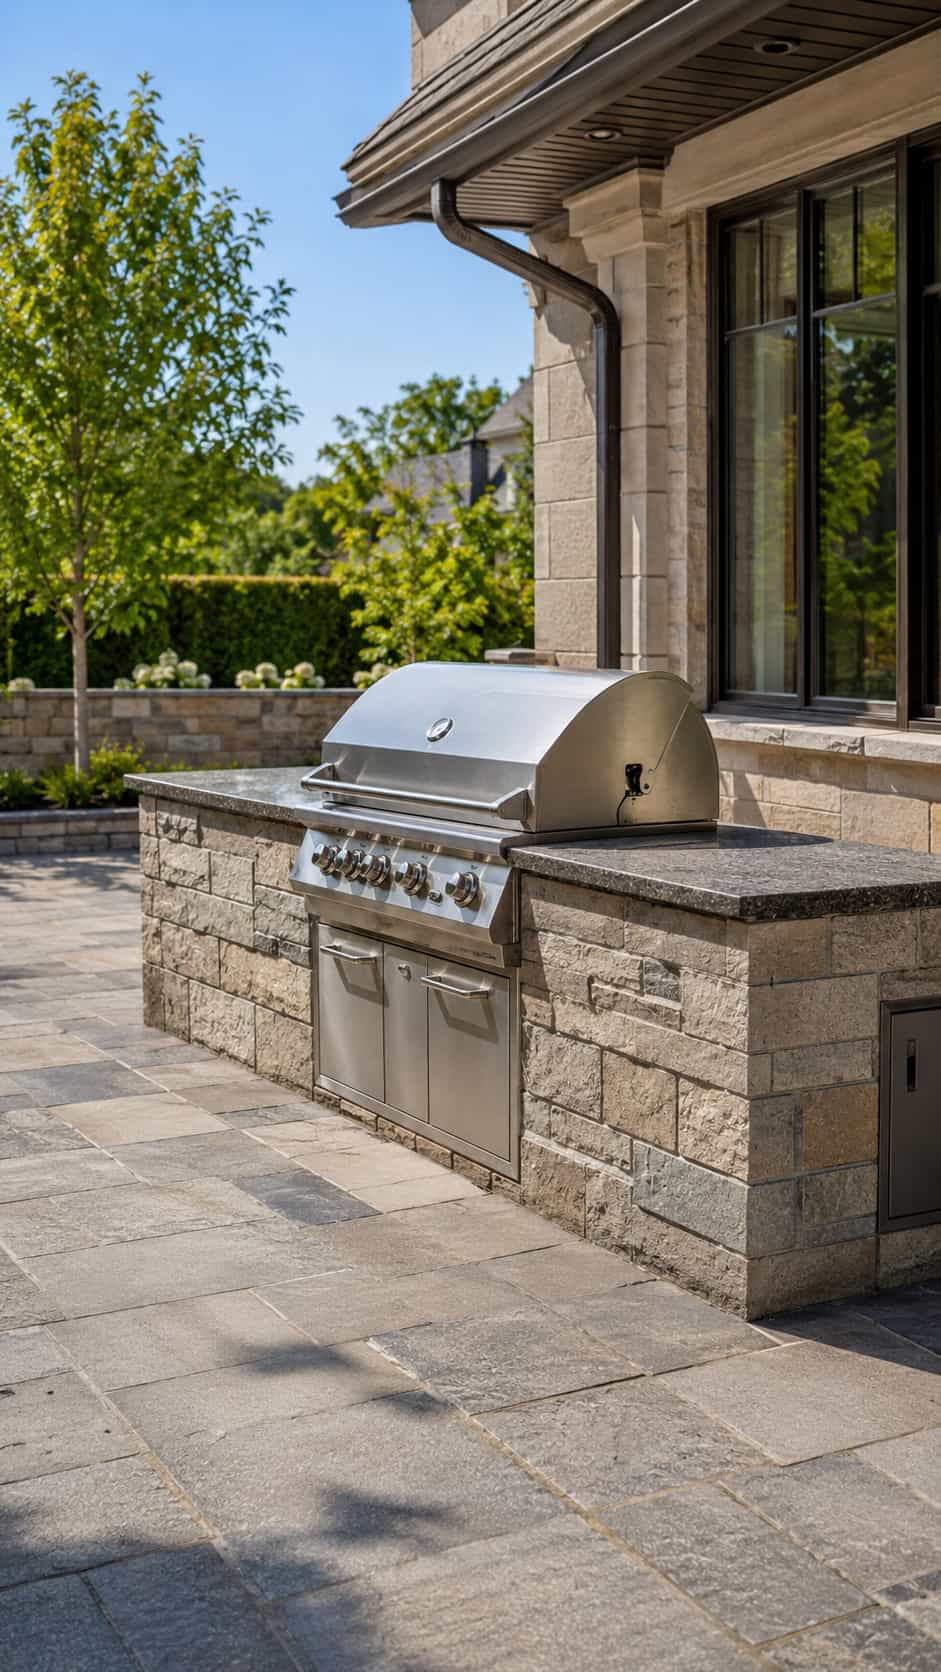
Concrete blocks or other approved masonry materials can create a durable base for an outdoor station. A suitable countertop gives the structure a polished finish and an easy-to-clean preparation area.
Permanent structures require a level, appropriate base and may trigger local rules. Plan drainage, access and appliance clearances before any construction begins, and use professional guidance for structural or code questions.
Customization idea: Choose an exterior finish that repeats colors from the patio or house.
12. Grill Station With a Protective Backsplash
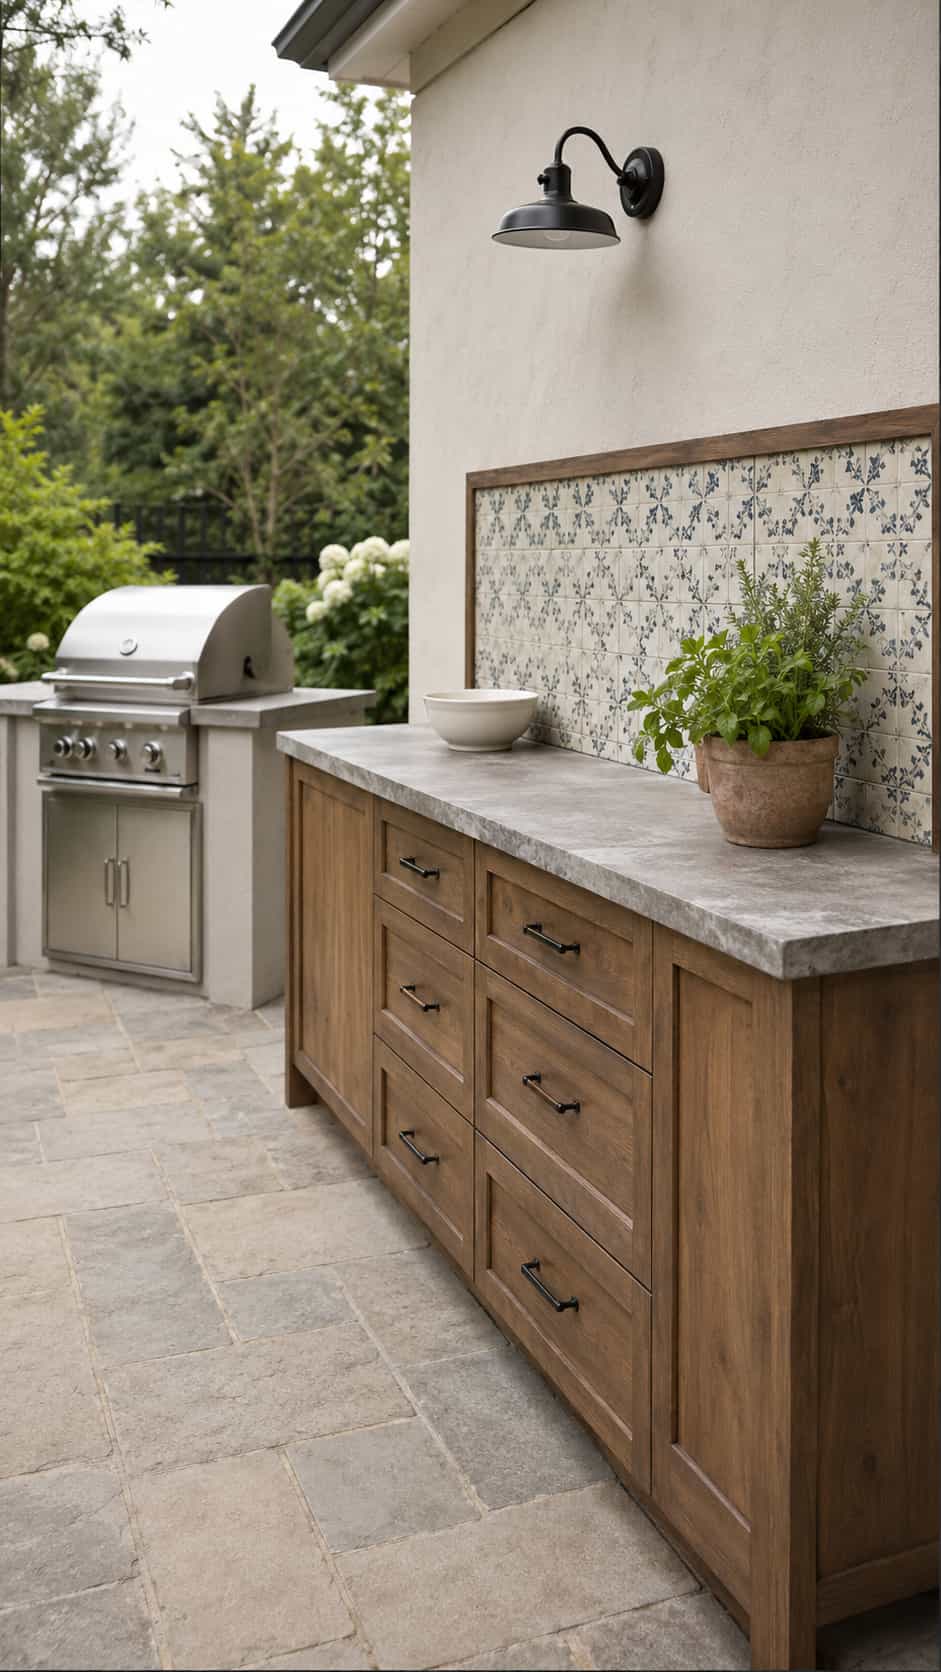
A washable backsplash can protect the preparation zone from splashes and make cleanup easier. Outdoor-rated tile also adds color without taking up extra floor space.
Keep one fact clear: a decorative backsplash does not replace an approved heat shield or required clearance. Position the station and grill according to the appliance manual, not according to how heat-resistant the tile looks.
Customization idea: Use a restrained tile pattern that coordinates with the countertop.
13. Outdoor Sink and Prep Station
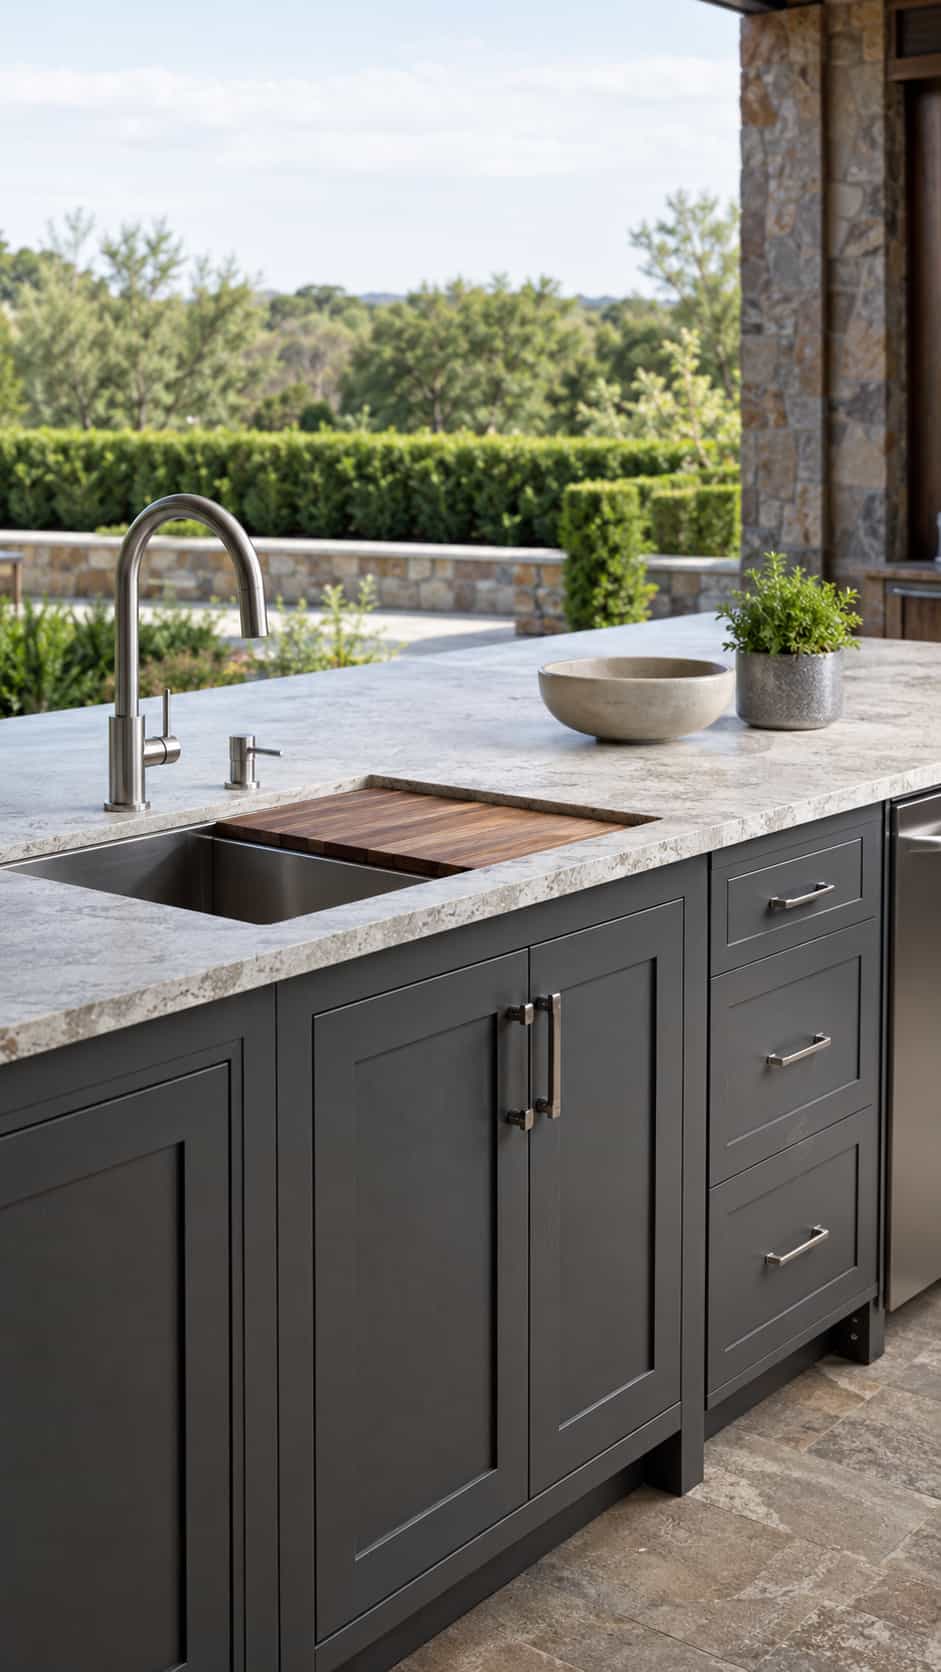
A sink makes handwashing and cleanup more convenient, especially when the indoor kitchen sits far from the patio. It also adds plumbing, drainage, winterization and sanitation questions that a simple table avoids.
Use a qualified professional where local rules require one, and never improvise connections. Keep electrical equipment and outlets compliant with outdoor requirements.
Customization idea: Add a removable cutting-board insert beside the sink to expand the work surface.
14. Covered Backyard Cooking Station
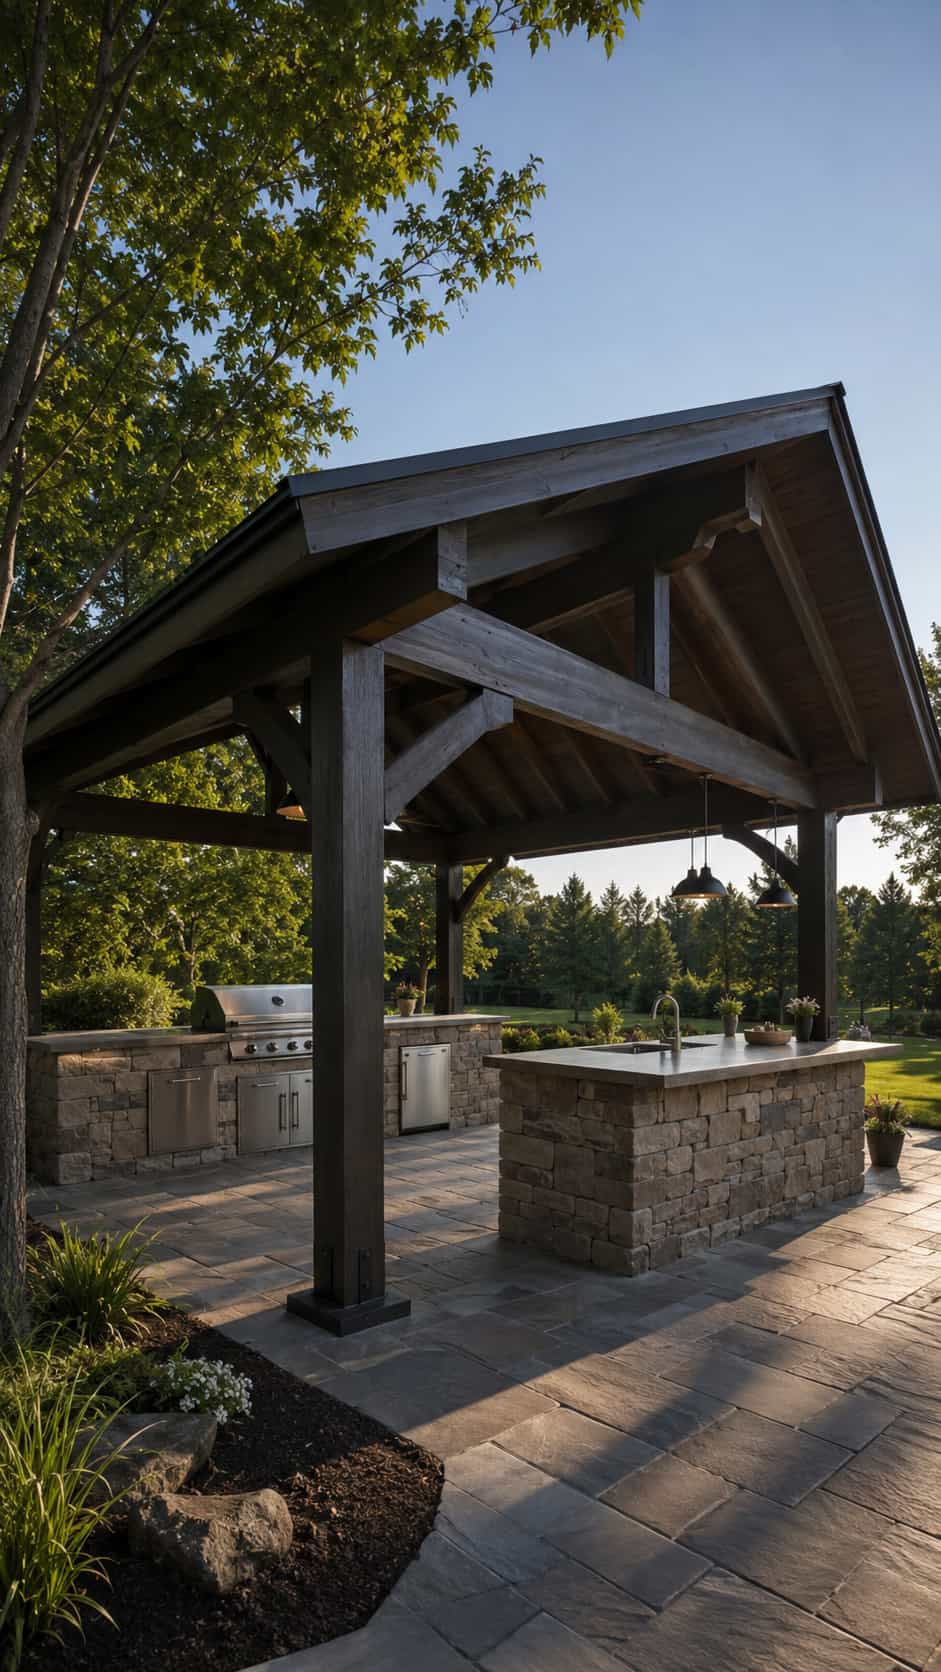
A roof can provide shade and weather protection, but it also changes ventilation, heat and fire-safety conditions. Only place a grill beneath a structure when the manufacturer and local requirements allow that exact arrangement.
Ask qualified professionals to review the roof clearance, ventilation, anchoring, wind exposure and any electrical work. FYI, an attractive pergola photo cannot answer those site-specific questions.
Customization idea: Add professionally installed outdoor lighting over the preparation zone rather than directly above a heat source.
15. Modular Outdoor Kitchen Station
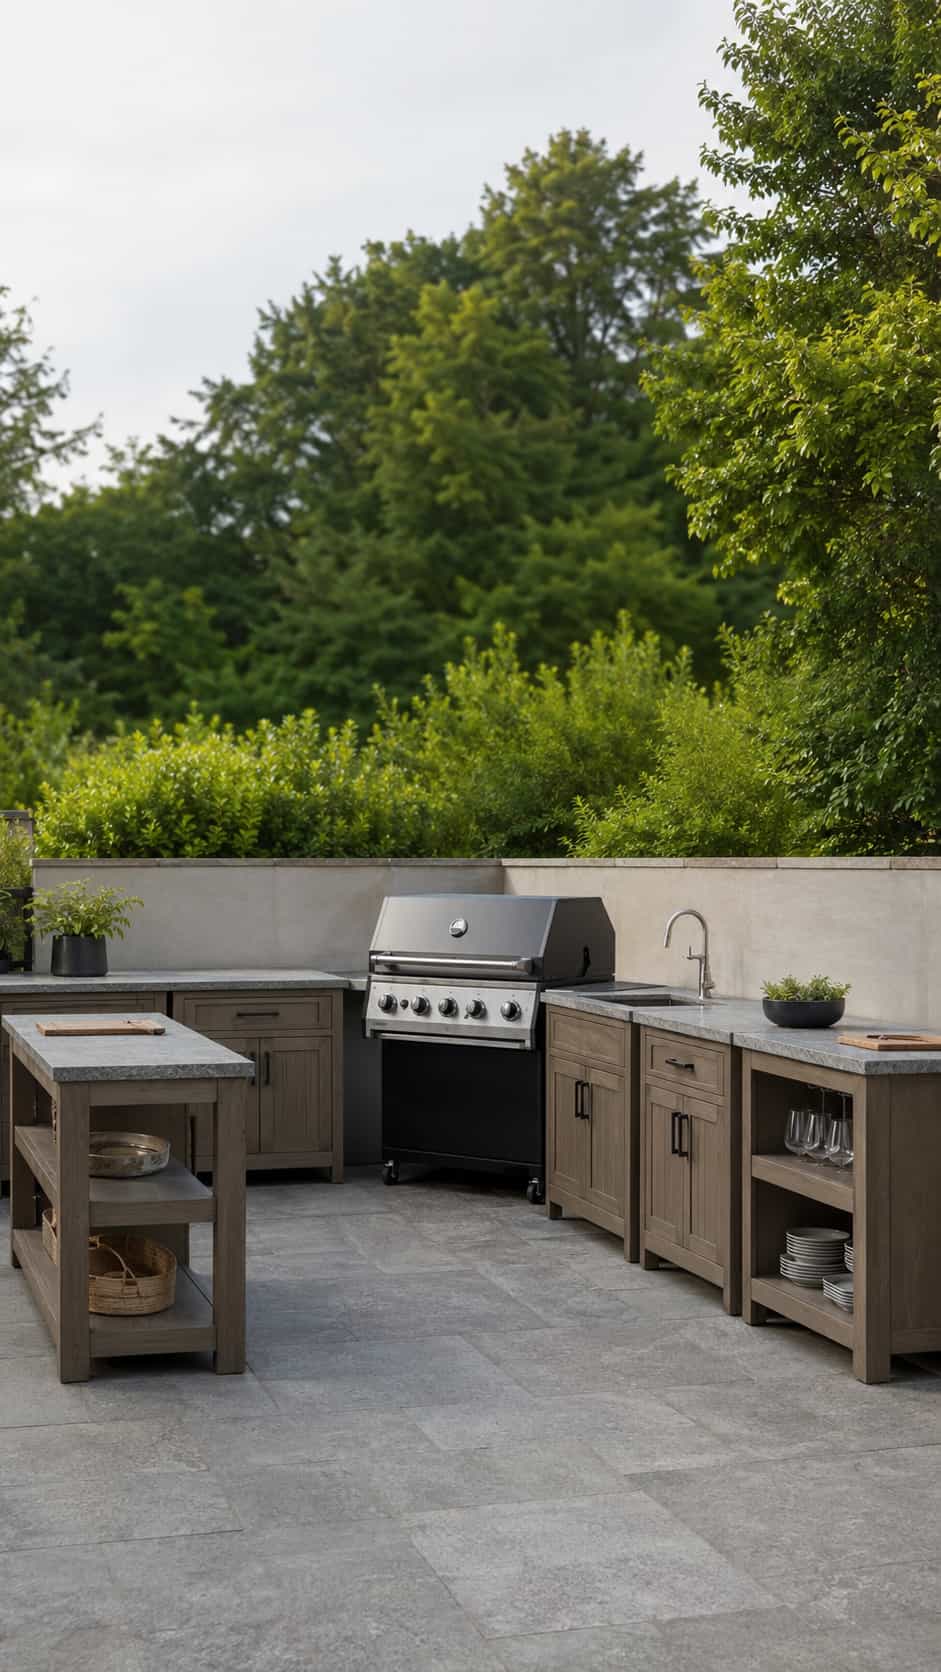
A modular layout separates the outdoor kitchen into individual units. You might start with a prep table, then add a storage module, serving station or professionally planned sink area later.
This approach gives each component a clear job and makes future changes easier. It also lets the grill remain independent unless a verified appliance-specific design supports built-in installation.
Customization idea: Use matching countertop materials and finishes to connect the modules visually.
Which BBQ Prep Table Should You Choose?
Choose a rolling cart when your patio layout changes often or when you store outdoor furniture between uses. Check the caster ratings, lock the wheels and keep the cart on a level surface.
Choose a freestanding prep table when you want the simplest and most versatile option. This design works especially well for a first outdoor furniture project because it does not depend on one grill model.
Choose a built-in station only after you select the exact appliance and verify every clearance, ventilation and support requirement. A built-in arrangement demands more planning because the station and appliance must work as one approved system.
Three Featured BBQ Prep Table Design Guides
The following three designs give you a clearer starting point than the inspiration projects above. Each mini plan explains the recommended size, main components and practical layout.
These stations should remain separate from the grill and outside every clearance listed in your appliance manual. Ask an experienced adult or qualified professional to handle cutting, drilling and structural assembly when needed.
1. Beginner Rolling BBQ Prep Cart
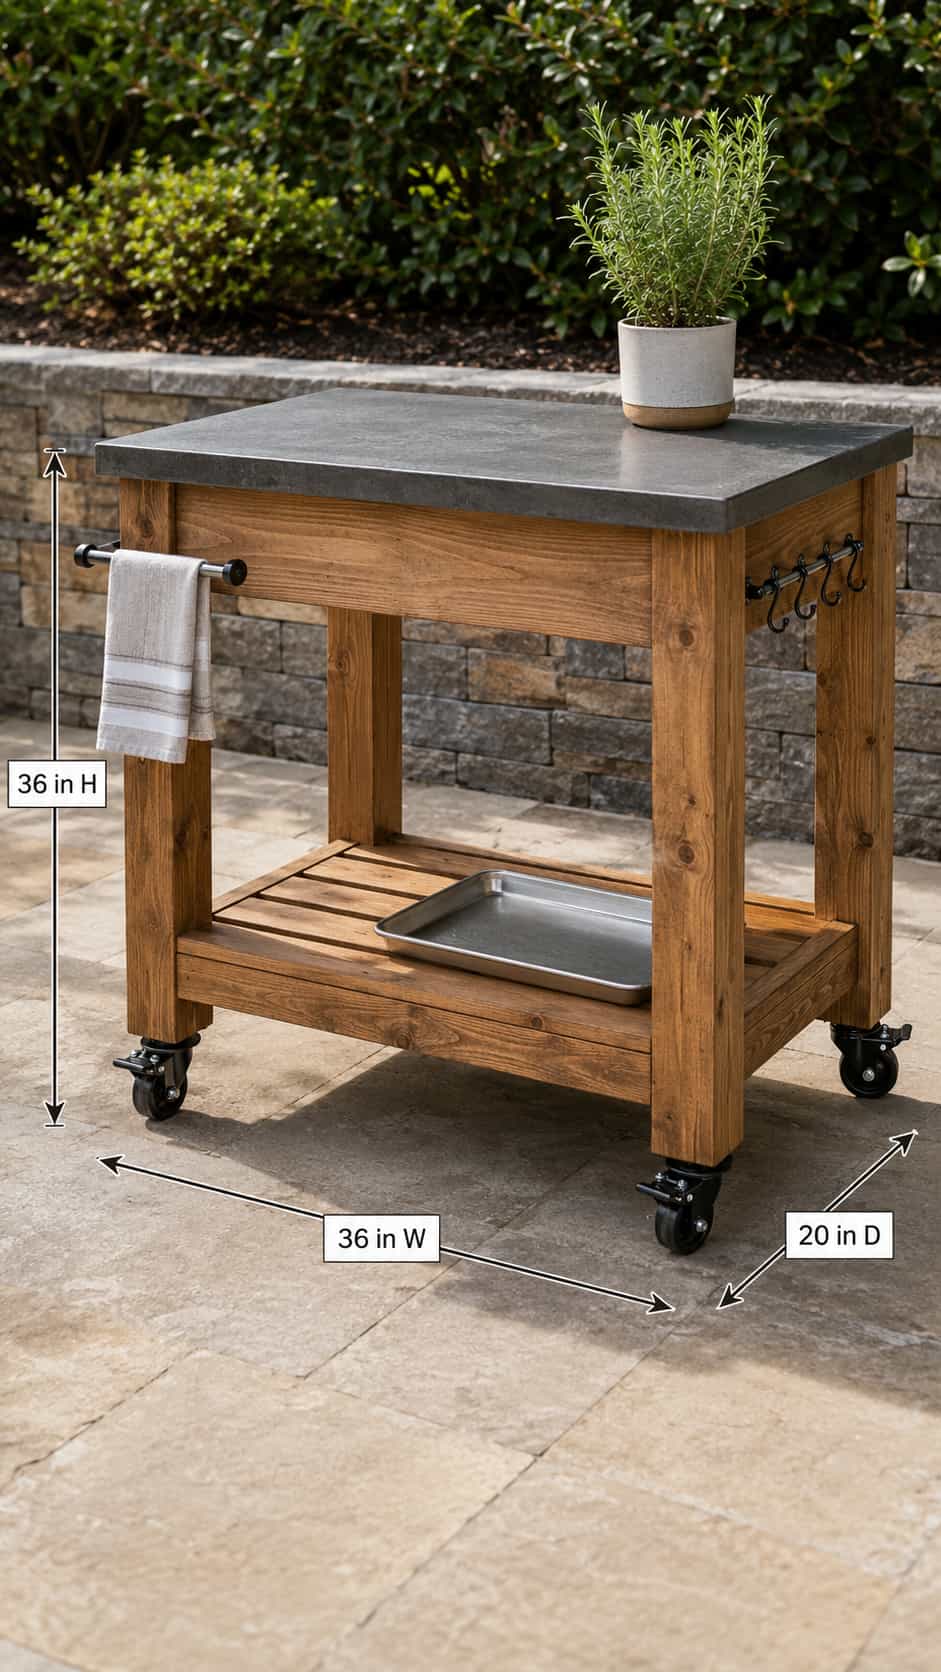
Suggested finished dimensions: Approximately 36 inches high, 36 inches wide and 20 inches deep
Difficulty: Easy
Best for: Small patios and flexible cooking areas
This compact rolling cart gives you a convenient surface for preparing ingredients, arranging serving dishes and carrying lightweight supplies. Its narrow depth provides useful workspace without occupying too much patio space.
Plan the cart around five main components:
- Four sturdy legs
- A complete upper support frame
- A weather-resistant worktop
- A lower slatted shelf
- Four exterior-rated locking casters
Use a rectangular upper frame to support the worktop on all sides. Position the lower shelf several inches above the wheels so it remains away from wet ground while still leaving room for trays, baskets or weather-safe accessories.
Choose casters rated for more than the expected total weight of the cart and its contents. All four wheels should lock so the cart cannot move while you prepare food.
Before loading it, place the empty cart on a level surface, lock the casters and gently check it from every side. If the frame shifts or rocks, correct the problem before use.
Customization idea: Add a removable towel bar and lightweight utensil hooks to the side farthest from the grill.
2. Farmhouse Outdoor Prep Table
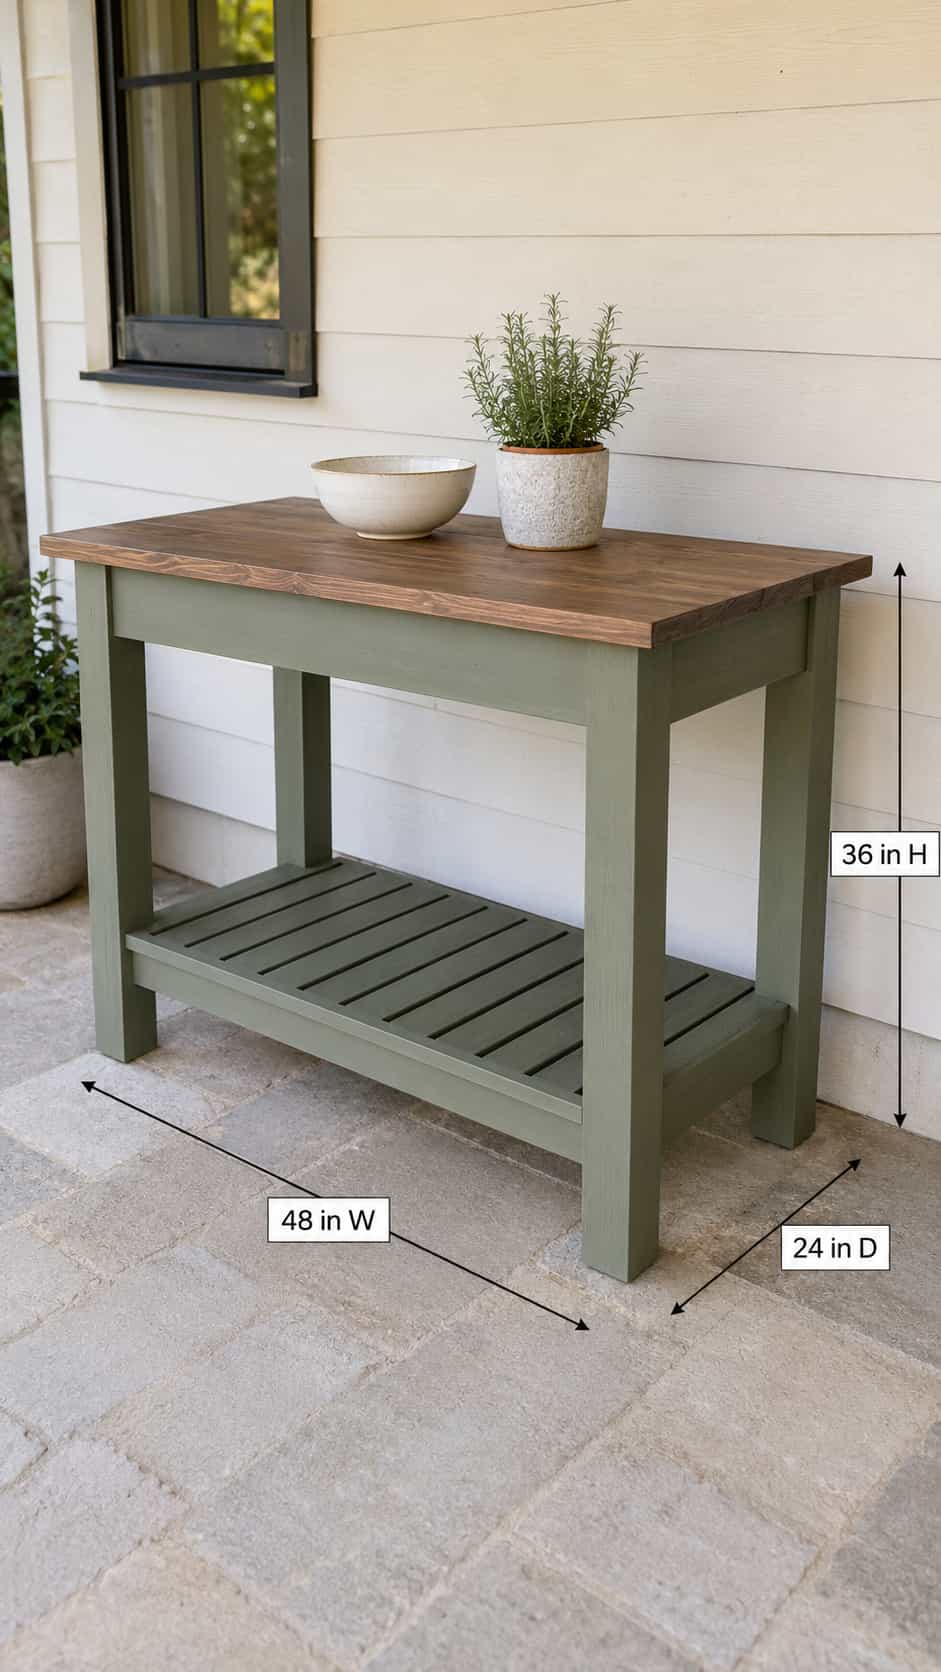
Suggested finished dimensions: Approximately 36 inches high, 48 inches wide and 24 inches deep
Difficulty: Medium
Best for: Patios that need generous preparation and serving space
This freestanding table combines a broad worktop with chunky legs and an open lower shelf. It gives you more room than a rolling cart while maintaining a simple design that works with different grills.
The basic layout includes:
- Four substantial exterior-rated legs
- A complete apron frame connecting all four sides
- A broad weather-resistant top
- A slatted lower shelf
- Exterior-rated fasteners and finish
The full apron frame matters because it supports the top and helps prevent the table from shifting sideways. The lower shelf should connect securely to the base while leaving enough clearance underneath for cleaning and airflow.
A slatted shelf works particularly well outdoors because the gaps allow rainwater to drain. Keep the openings narrow enough to support baskets and serving supplies securely.
Use the table only as a separate preparation and serving surface. Do not cut an opening for a grill unless you have a tested, appliance-specific design that satisfies every manufacturer requirement.
Customization idea: Paint the base in white, charcoal or sage green, then stain the top for a farmhouse-style two-tone finish.
3. Modular Outdoor Kitchen Prep Unit
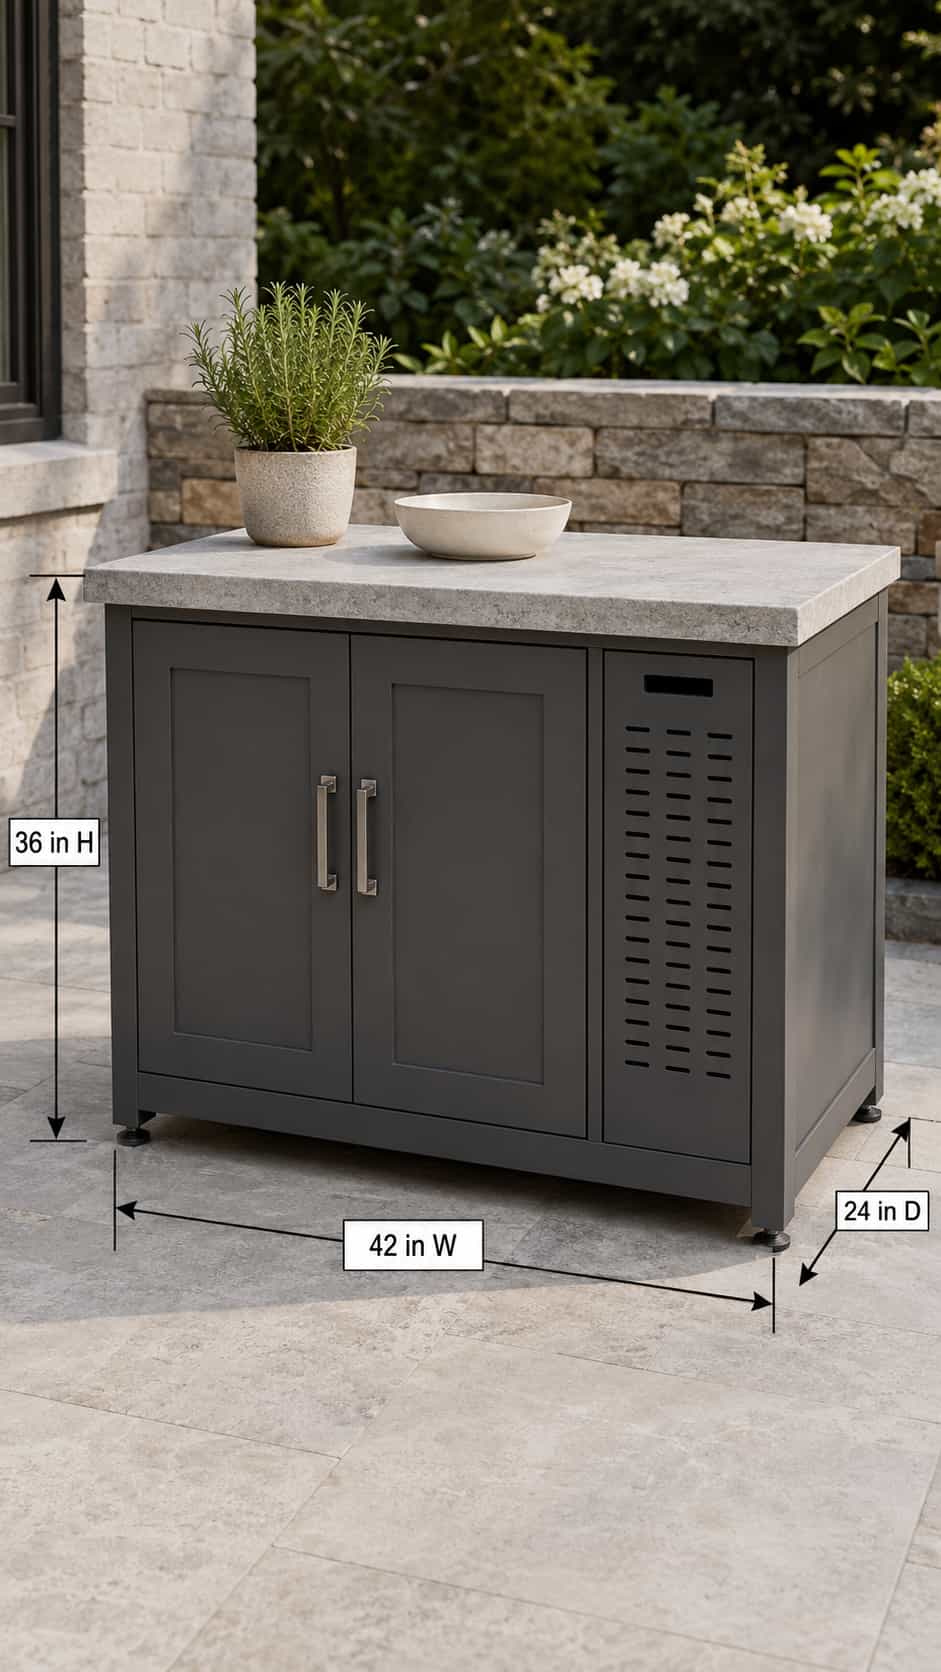
Suggested finished dimensions: Approximately 36 inches high, 36–48 inches wide and 24 inches deep
Difficulty: Advanced
Best for: Creating an outdoor kitchen gradually
A modular preparation unit lets you begin with one practical cabinet and add compatible sections later. Your first module can provide a countertop, enclosed weather-resistant storage and adjustable support on uneven patio surfaces.
Plan the unit around these main sections:
- A stable exterior-rated cabinet frame
- A weather-resistant countertop
- One enclosed storage compartment
- Adjustable feet or another reliable leveling system
- Ventilated or removable storage components where appropriate
Keep the first module dedicated to preparation and ordinary storage. This approach allows you to use it immediately without modifying the grill or adding complicated utility connections.
Before choosing the countertop, consider weight, weather exposure and maintenance. Outdoor-rated wood creates a warm appearance, while suitable tile, stone or stainless steel may offer easier cleaning. The supporting cabinet must suit the selected countertop’s weight.
If you expand the kitchen later, build separate modules for serving, storage or professionally planned utilities. Plumbing, fixed electrical connections and appliance integration require qualified professional guidance and must follow local requirements.
Customization idea: Use the same countertop and cabinet finish across future modules so the complete outdoor kitchen looks coordinated.
Frequently Asked Questions
What height should a BBQ prep table be?
Many people prefer a surface near standard kitchen-counter height, but comfort depends on the user and the task. Compare the proposed height with a counter you already use comfortably before choosing a verified plan.
Can I put a wooden table beside a grill?
You can place a table nearby only when it remains outside every clearance required by the grill manufacturer. The table must not block ventilation, controls, cleaning access or safe movement around the appliance.
Which wood works best for an outdoor grill station?
Naturally durable species and properly rated exterior lumber can work well for a freestanding prep table. Choose suitable hardware and finish as part of the same system. No wood species acts as a substitute for an approved heat barrier.
Should a grill station have wheels?
Wheels help when you need flexible workspace or seasonal storage. Use exterior-rated locking casters that support the complete expected load, and keep the cart on a level surface.
Can I build a grill directly into a wooden cabinet?
Only consider built-in installation when the appliance manufacturer approves it and a complete design satisfies every structural, ventilation and clearance requirement. Do not modify the appliance or fuel system to fit a homemade cabinet.
How do I protect a BBQ prep table from rain?
Choose exterior materials, apply a suitable finish, prevent standing water and use a fitted cover. Inspect the table periodically so you can repair finish damage or loose hardware early.
Want Complete Plans for Larger Outdoor Projects?
Disclosure: This section may contain affiliate links. If you purchase through one of these links, we may earn a commission at no additional cost to you.
A simple freestanding DIY BBQ prep table can make a manageable project when you use verified dimensions and appropriate help. Larger grill stations and modular outdoor kitchens require more careful planning because the structure, weather exposure and appliance requirements must work together.
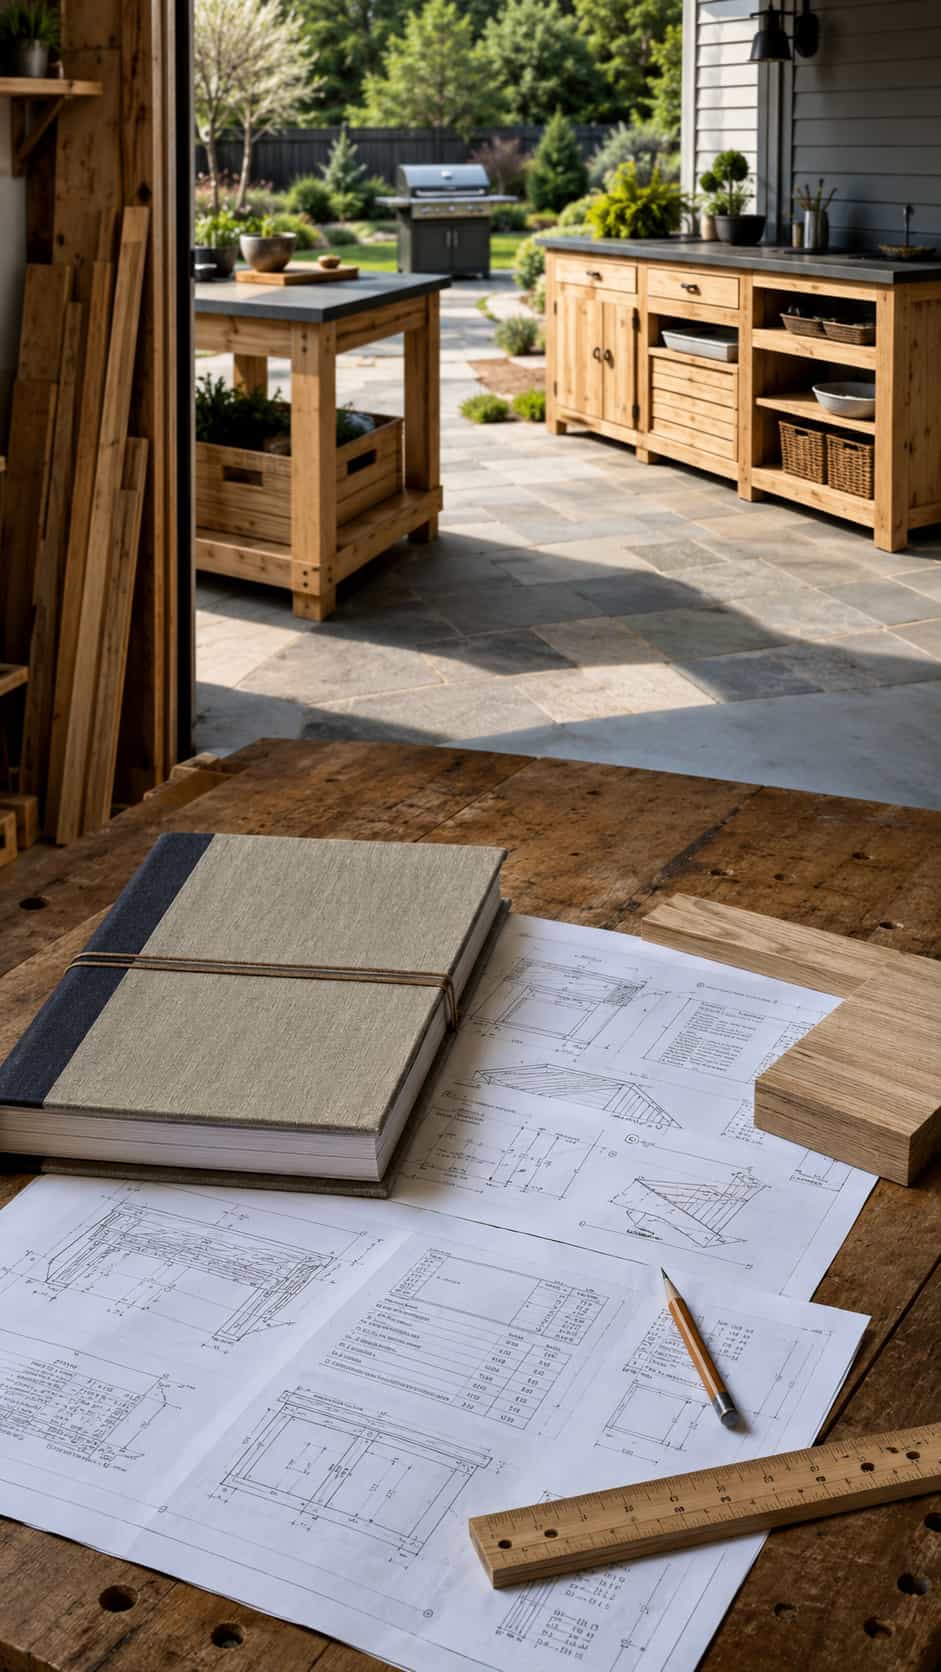
If you want a broader project library, Ted’s Woodworking Plans offers one optional collection to explore. Review each project’s dimensions, diagrams, cut list, difficulty and material requirements before starting. Also compare any outdoor cooking design with the instructions for your exact appliance and local requirements; never assume a third-party plan automatically fits your grill, patio or experience.
Final Thoughts
A useful grill station does not need to resemble a luxury outdoor kitchen. For most patios, a stable freestanding table or rolling cart provides the preparation space that actually makes cooking easier.
Measure the area, read the appliance manual and choose the simplest design that meets your needs. Your patio gains useful workspace, and the clean chair can finally retire from its unpaid career as a tray stand.