
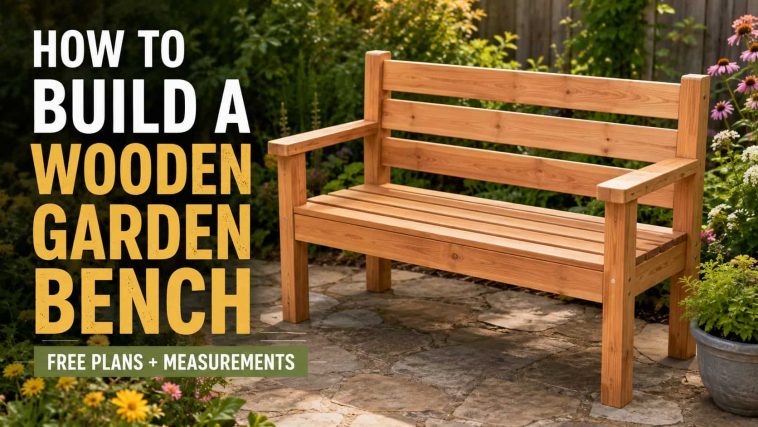
Wooden Garden Bench Plan at a Glance
| Detail | Plan specification |
|---|---|
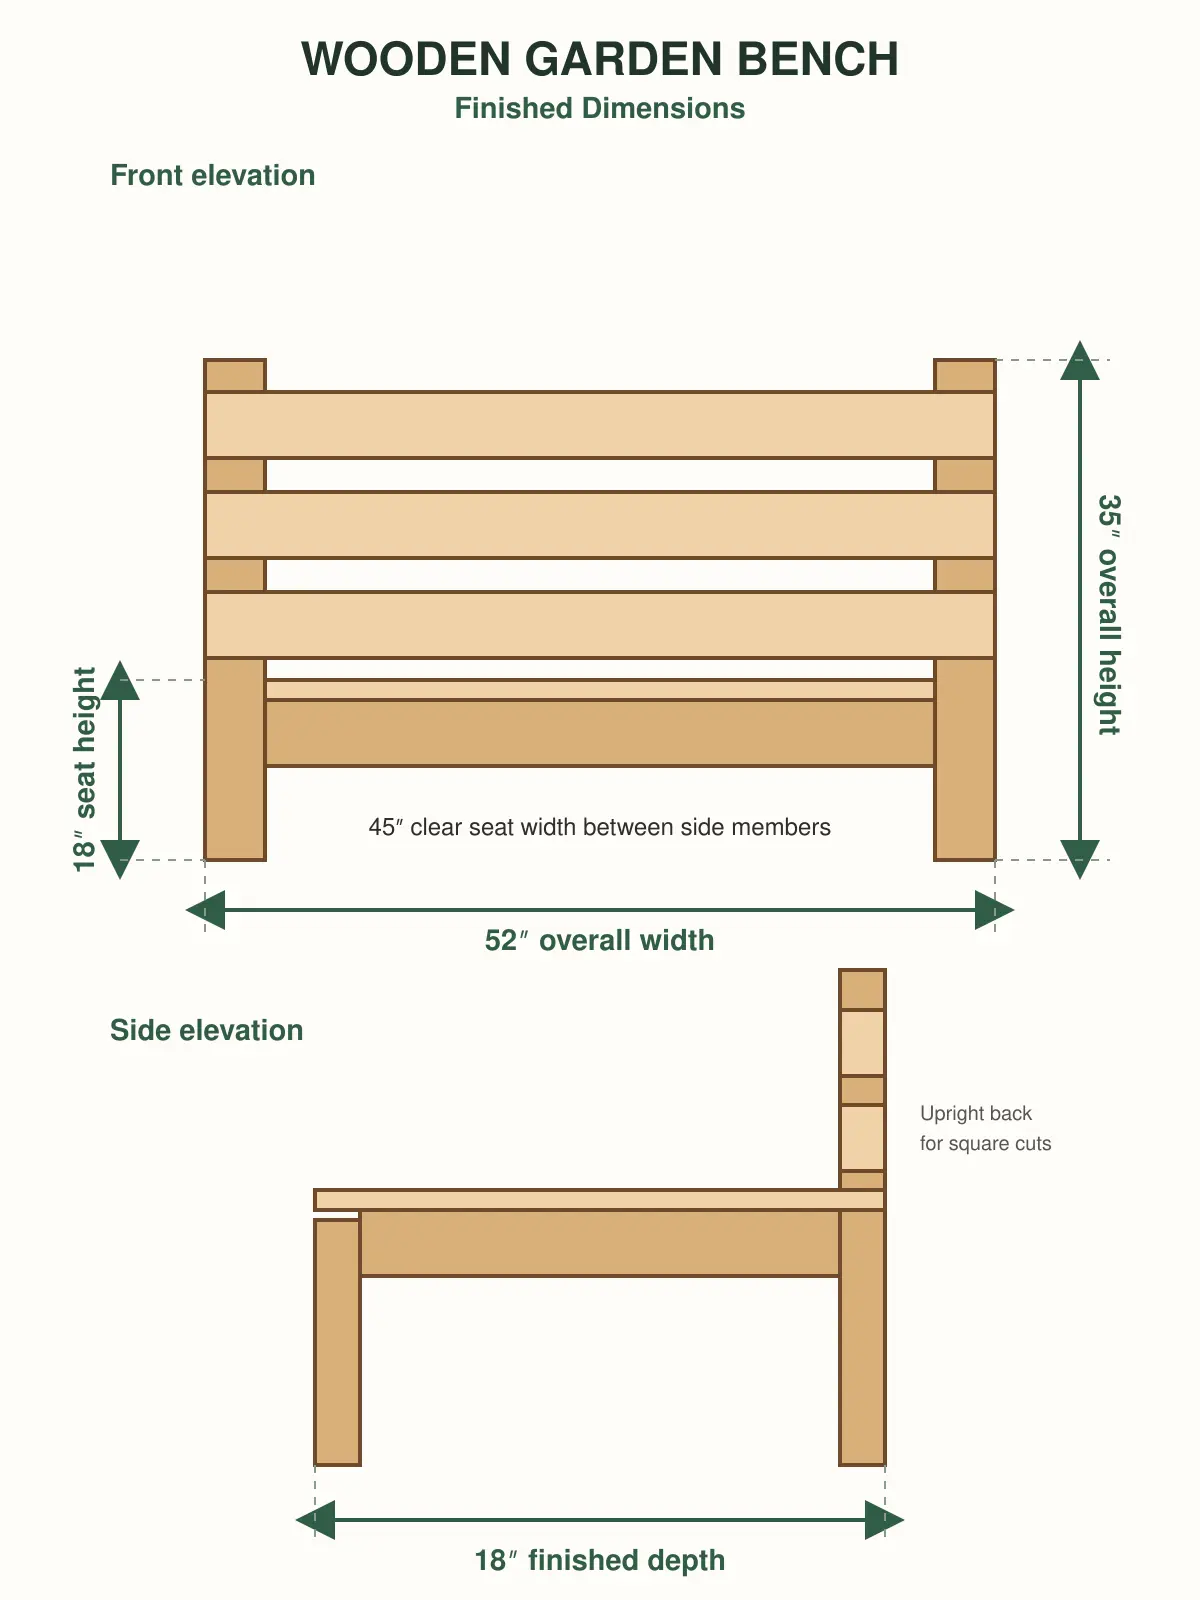
| Finished size | 52″ W × 18″ D × 35″ H |
| Clear seat width | 45″ between the side legs and rear posts |
| Seat height | 18″ |
| Seat depth | 18″ using five 1×4 slats and four ⅛″ drainage gaps |
| Back style | Three horizontal slats on upright rear posts |
| Main lumber | Three 2×4×8 boards and four 1×4×10 boards |
| Difficulty | Beginner to confident beginner |
| Build time | One weekend, plus finish drying and curing time |
Why This Garden Bench Design Works
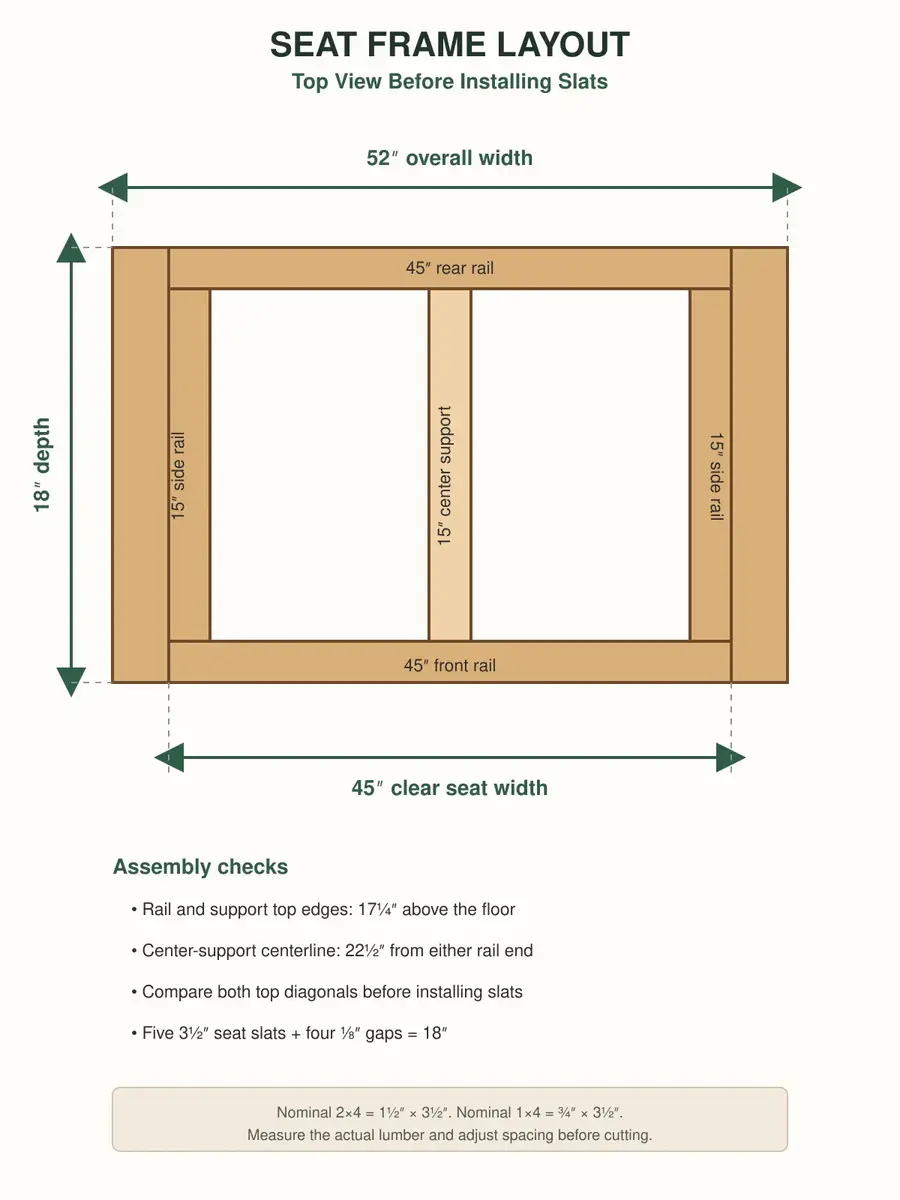
The bench is built as two leg assemblies joined by three front-to-back members. A 45-inch rail connects the two front legs. A second 45-inch rail connects the two rear posts. Two 15-inch side rails and one 15-inch center support then lock those assemblies together.
Five 1×4 seat slats fit between the legs and posts. Their combined actual width is 17½ inches. Four ⅛-inch gaps add another ½ inch, producing the exact 18-inch seat depth:
5 × 3½″ slats + 4 × ⅛″ gaps = 18″ seat depth
The 45-inch seat width plus two 3½-inch-wide side members produces the 52-inch finished width. The 17¼-inch front legs plus ¾-inch seat slats produce the 18-inch seat height. Those relationships are simple enough to verify before any assembly begins.
This plan intentionally uses a vertical back. It removes angled post joints, templates and compound cuts from the main build. Readers wanting a deeper recline may prefer the separate DIY Adirondack chair plan or the broader collection of DIY outdoor chair plans.
Best Wood for an Outdoor Garden Bench
Cedar
Cedar is the easiest premium choice for this project. It is comparatively light, pleasant to machine and naturally suited to outdoor use. Select straight boards with tight knots, especially for the long seat and back slats.
Exterior-Rated or Pressure-Treated Pine
Pine can reduce the initial material cost. Use stock approved for your intended outdoor application, let damp treated lumber stabilize before final finishing and follow the treatment supplier’s handling instructions. Wear gloves where appropriate and control sawdust carefully.
Douglas Fir, Redwood or Other Local Outdoor Species
A straight, dry, locally available species can work when protected with an appropriate exterior finish. Avoid MDF, particleboard and interior plywood because repeated moisture exposure can cause swelling and joint failure.
Whatever species you choose, buy the straightest material you can find. Sight down every board from both ends. Reject badly twisted slats because screws will not permanently turn a corkscrew-shaped board into a flat seat.
Materials and Hardware
Lumber
- Three 2×4×8 boards for the legs, rear posts, rails and center support
- Four 1×4×10 boards for the five seat slats and three back slats
- Exterior-rated scrap for test drilling and finish samples
Fasteners and Supplies
- Approximately 32 corrosion-resistant 2½″ pocket-hole screws approved for exterior use
- Approximately 30 corrosion-resistant #8 × 2″ exterior wood screws for the slats
- Exterior-rated wood glue
- Exterior wood filler, optional
- 80-, 120- and 180-grit sandpaper
- Exterior paint, stain or clear finish compatible with your wood
- Four temporary ⅛″ spacers for the seat-slat gaps
Do not use ordinary interior drywall screws outdoors. Their coatings and shanks are not intended for exposed furniture. If you choose pressure-treated lumber, confirm that the fastener coating is compatible with the treatment used in your boards.
Complete Wooden Garden Bench Cut List
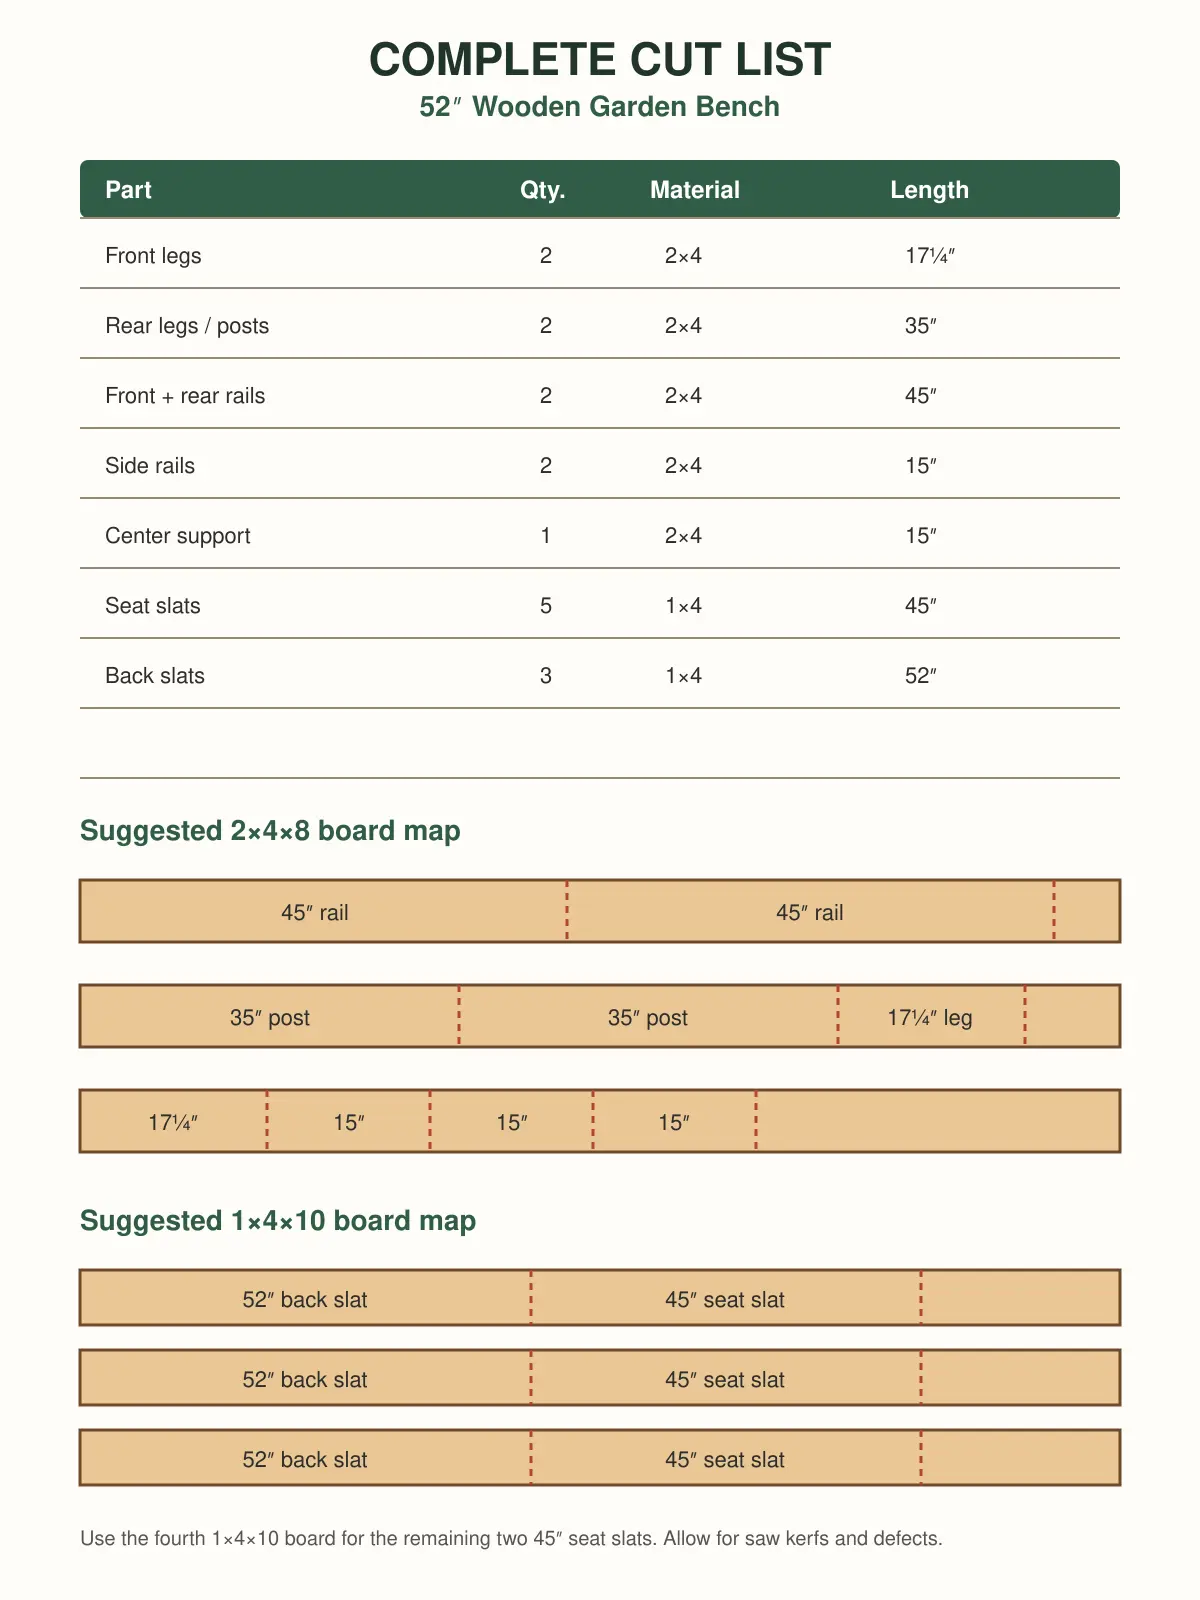
| Part | Qty. | Material | Finished size |
|---|---|---|---|
| Front legs | 2 | 2×4 | 17¼″ long |
| Rear legs/back posts | 2 | 2×4 | 35″ long |
| Front and rear rails | 2 | 2×4 | 45″ long |
| Side rails | 2 | 2×4 | 15″ long |
| Center seat support | 1 | 2×4 | 15″ long |
| Seat slats | 5 | 1×4 | 45″ long |
| Back slats | 3 | 1×4 | 52″ long |
Efficient Board-Yield Map
- 2×4 board 1: 45″ rail + 45″ rail = 90″, leaving approximately 6″ before kerf allowances
- 2×4 board 2: 35″ rear post + 35″ rear post + 17¼″ front leg = 87¼″
- 2×4 board 3: 17¼″ front leg + 15″ side rail + 15″ side rail + 15″ center support = 62¼″
- 1×4 boards 1–3: one 52″ back slat + one 45″ seat slat from each 10-foot board
- 1×4 board 4: two 45″ seat slats
Board lengths vary by retailer, and knots may force a different layout. Confirm every board’s usable length before cutting. The map includes reasonable room for kerfs on 10-foot slat boards, but it does not reserve damaged areas.
Tools Needed
- Miter saw or circular saw with a square cutting guide
- Pocket-hole jig rated for 1½″ material
- Drill/driver and bits
- Random-orbit sander or sanding block
- Tape measure, combination square and pencil
- Four or more clamps
- Countersink bit
- Small round-over router bit, optional
A well-organized cutting and assembly area matters more than owning every machine. If your tools currently compete for floor space, use this guide to setting up a small woodworking shop.
Critical Measurements Before Building
Finished Width
Each front leg and rear post presents a 3½-inch face across the bench. The 45-inch front and rear rails fit between them. Therefore, 3½ + 45 + 3½ equals the 52-inch finished width.
Finished Depth
The legs and rear posts are oriented with their 1½-inch thickness running front to back. A 15-inch side rail fits between them. Therefore, 1½ + 15 + 1½ equals the 18-inch frame depth.
Seat Height
The front legs end at 17¼ inches. The front, rear and side rails have their top edges flush with those leg tops. Adding a ¾-inch seat slat produces an 18-inch finished seat height.
Rear Slat Locations
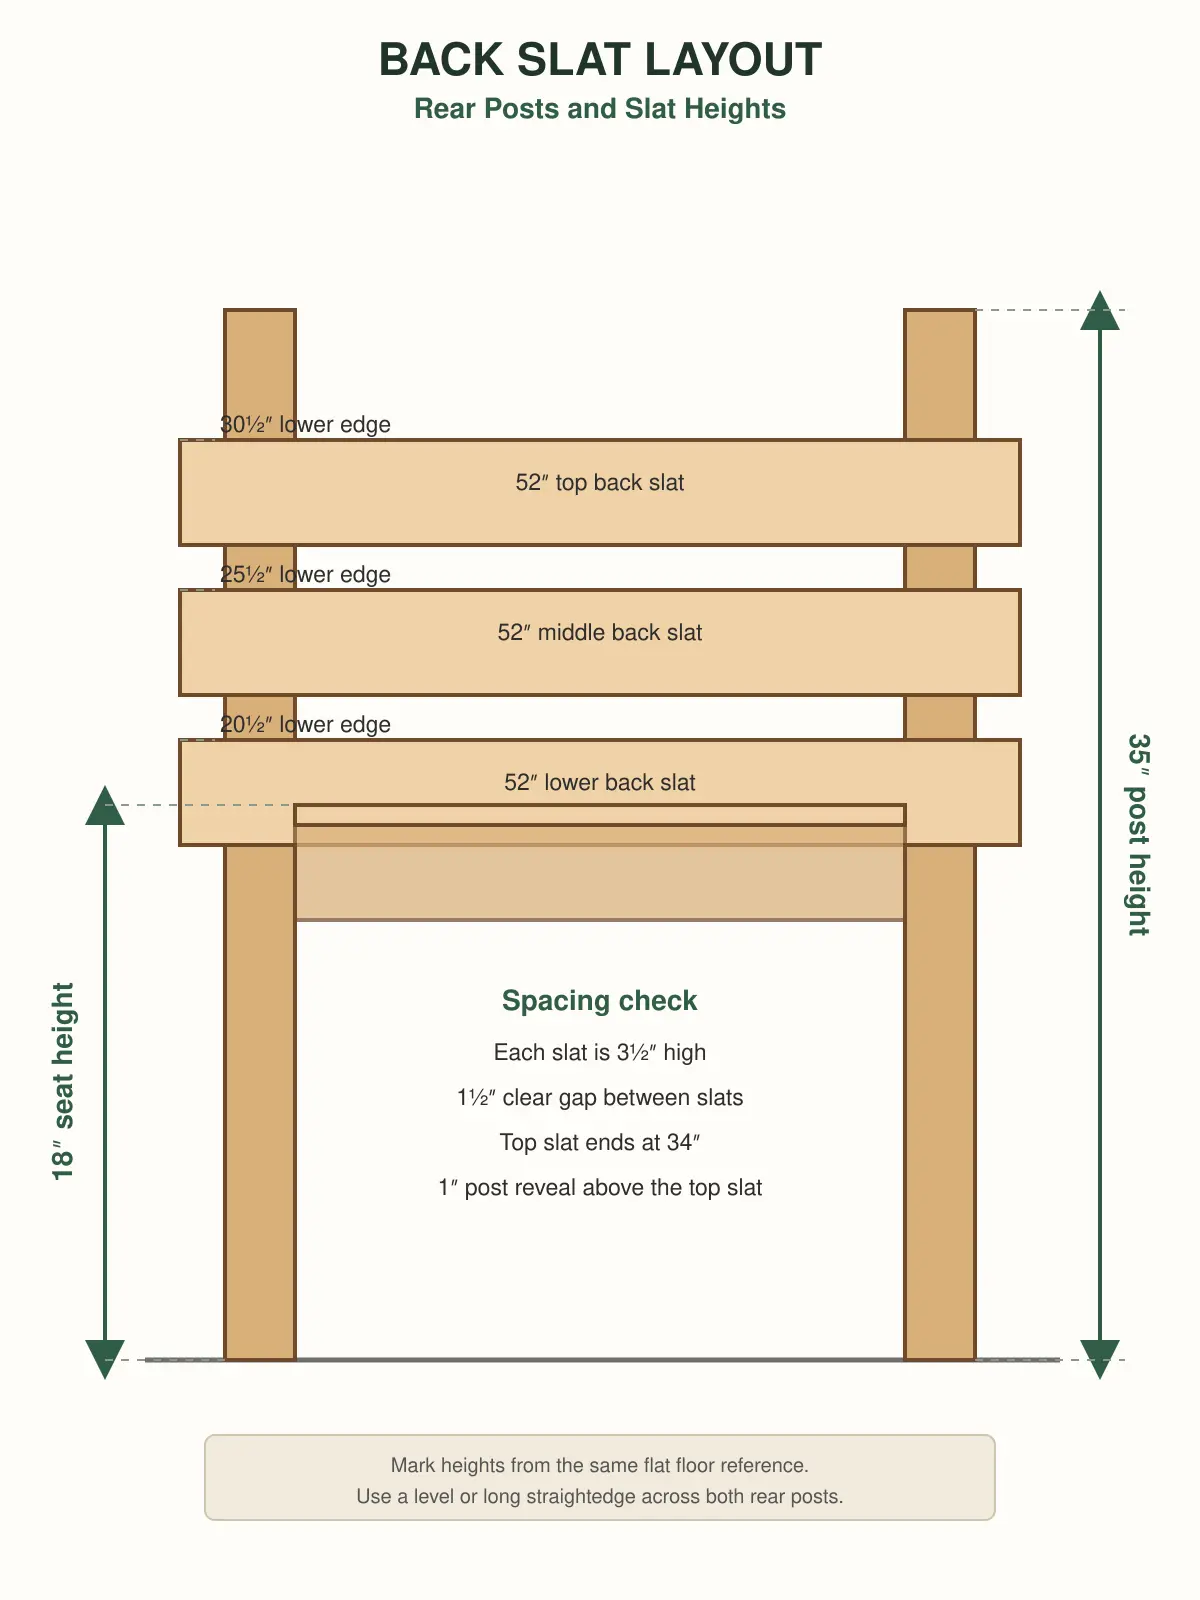
Measure from the ground and mark the lower edges of the three back slats at 20½, 25½ and 30½ inches. Each slat is 3½ inches high, so the top slat ends at 34 inches. That leaves a 1-inch reveal beneath the 35-inch rear-post tops.
How to Build the Wooden Garden Bench
Step 1: Inspect and Mark the Lumber
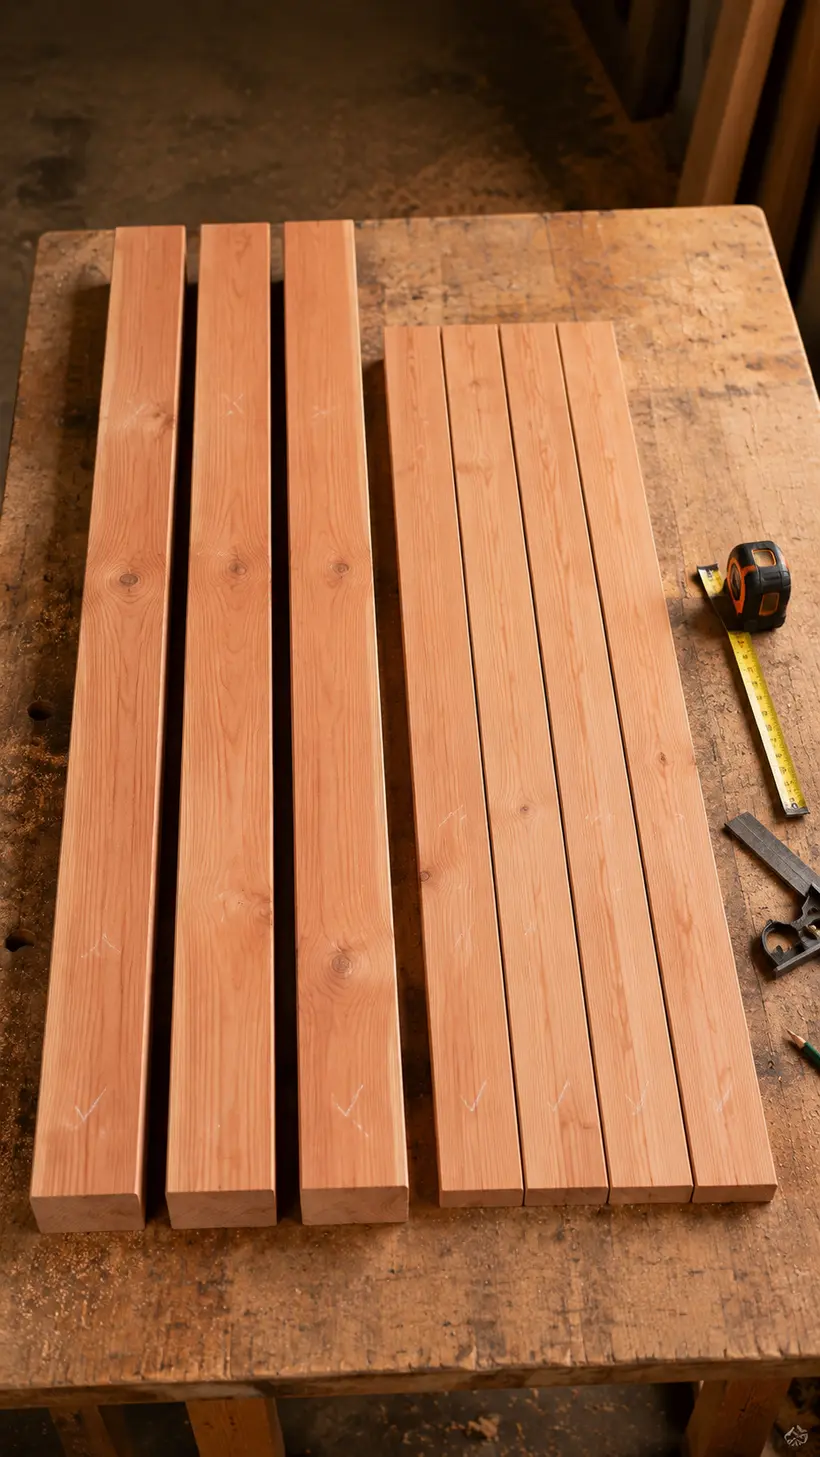
Lay all the lumber on a flat surface. Sight along the edges and faces, then place the straightest 1×4 boards aside for the seat. Mark an “X” on damaged areas that must not become a structural joint or a hand-contact edge.
Measure the actual width and thickness of every lumber group. The arithmetic in this plan assumes modern nominal 2×4 stock measures 1½ × 3½ inches and nominal 1×4 stock measures ¾ × 3½ inches. If your boards differ, recalculate the finished dimensions before cutting.
Step 2: Cut and Label Every Part
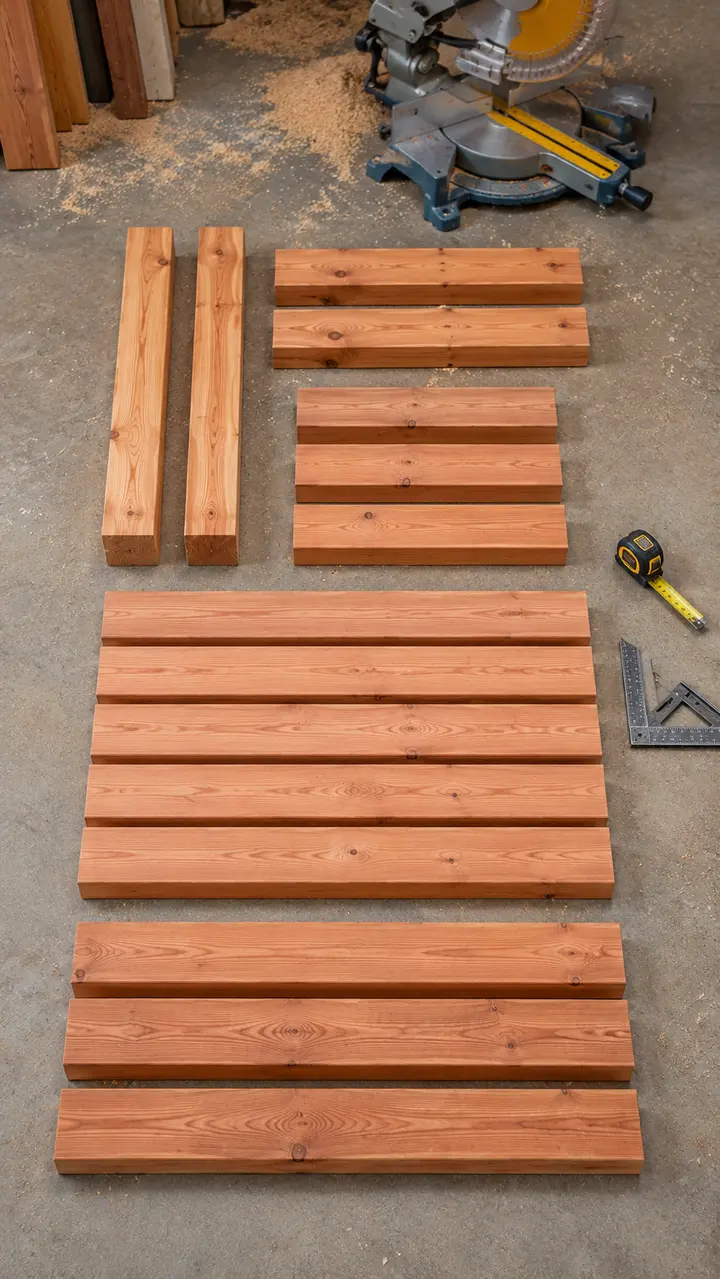
Set a stop block whenever possible and cut each group of identical pieces without moving it. Cut the two front legs together, the two rear posts together, both 45-inch rails together and all three 15-inch members together.
Label each part on a concealed face. Stand the two front legs together and compare their ends. Repeat with the rear posts. Unequal legs create rocking that no amount of tightening can permanently correct.
Step 3: Ease the Slat Edges and Sand
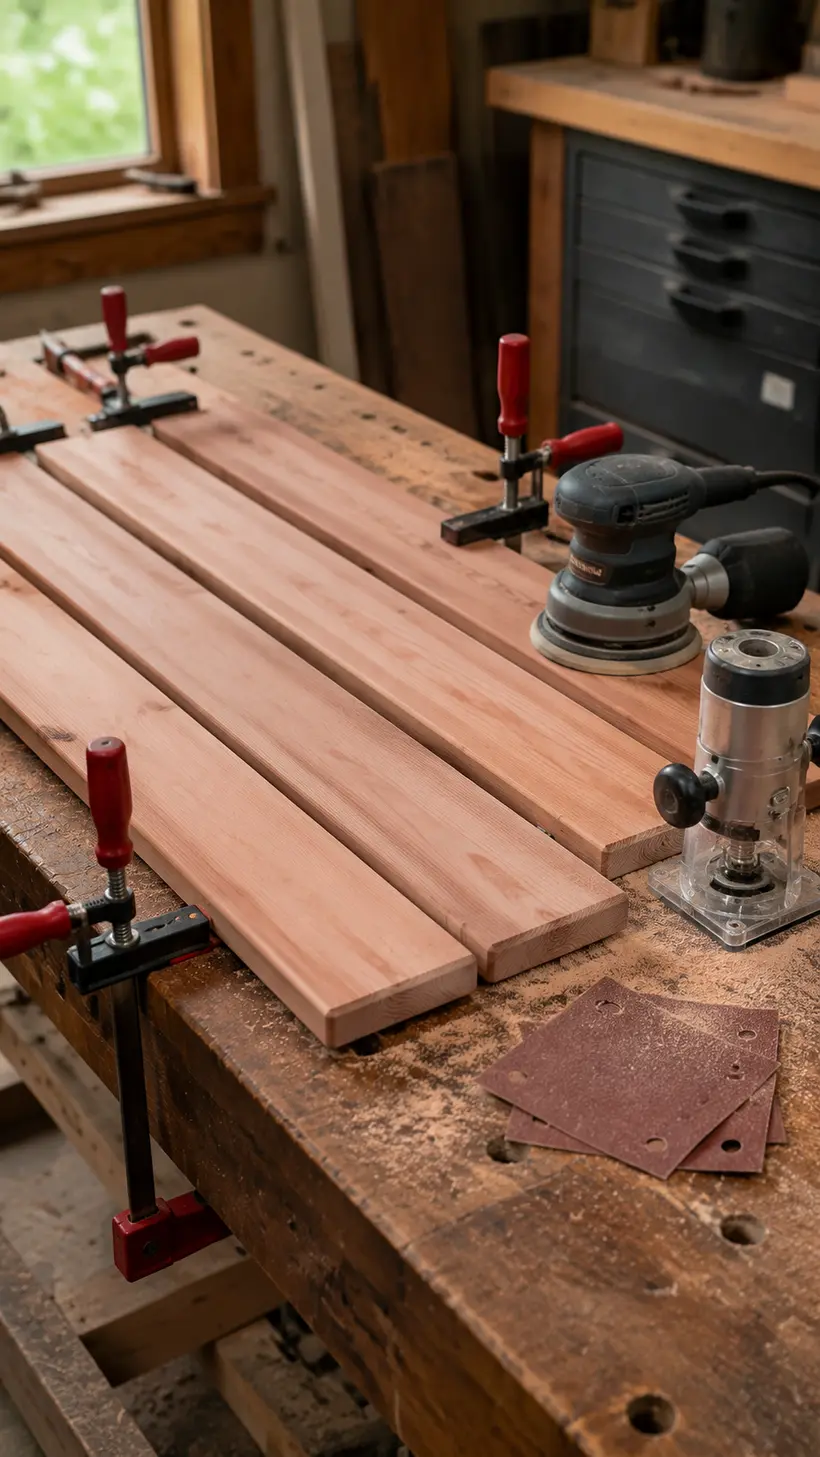
Round the exposed edges of the seat and back slats with a small router bit or a sanding block. A modest ⅛-inch round-over is enough to remove the sharp factory edge without changing the part dimensions.
Sand rough areas with 80 grit only where needed, then move through 120 and 180 grit. Do not aggressively round the ends that must align with the frame. Remove splinters from the legs and rails, but keep joint surfaces flat.
Step 4: Drill the Pocket Holes
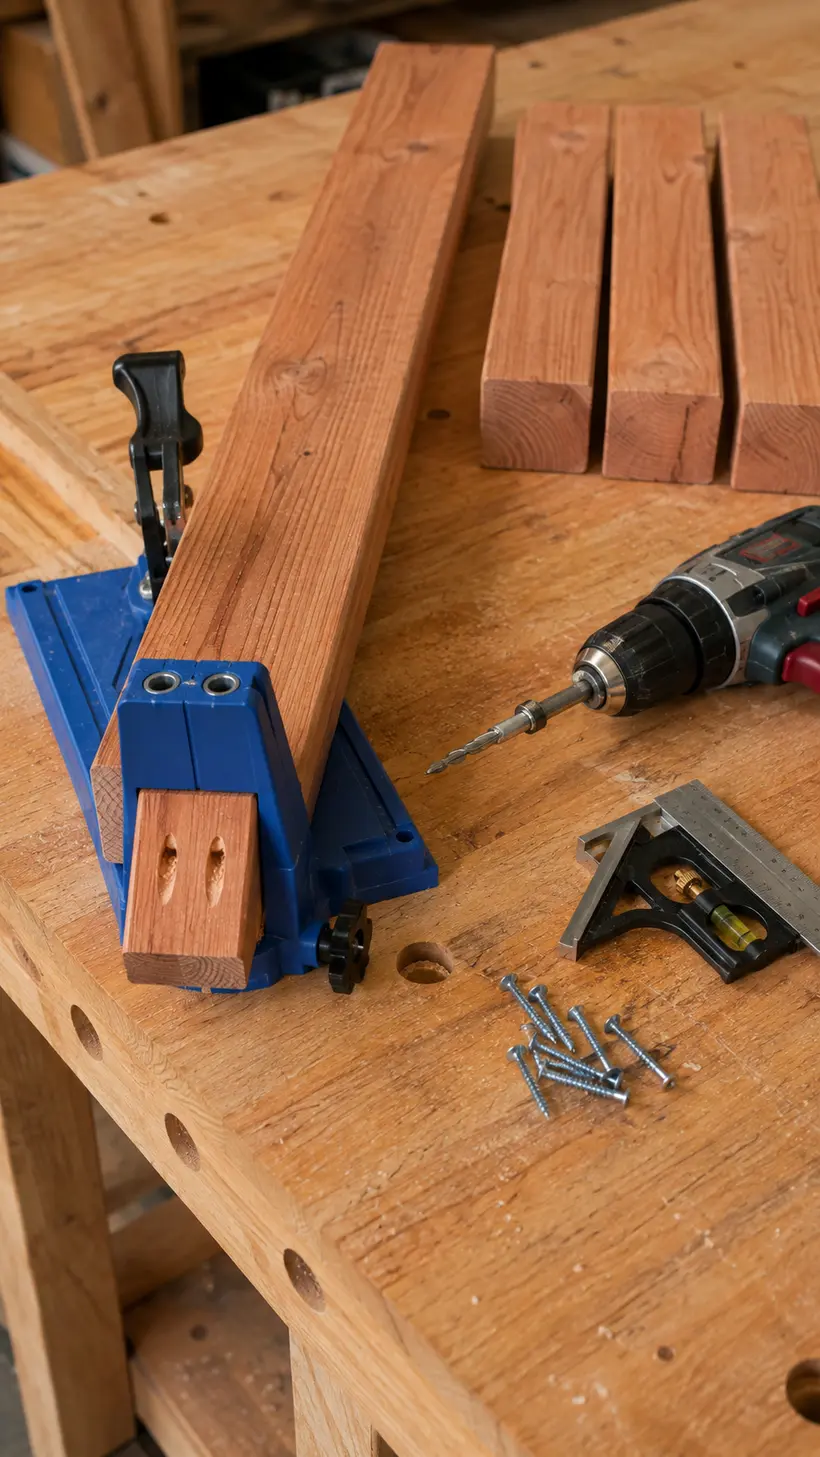
Drill two pocket holes at both ends of the front rail, rear rail and two side rails. Drill two at both ends of the center support. Set the jig and drill-bit collar for the actual 1½-inch stock thickness.
Use exterior-rated pocket screws recommended for the wood species. Coarse threads are commonly used in softwoods, but follow the fastener and jig manufacturer’s current instructions. Make one complete test joint in offcut material before drilling the project parts.
Step 5: Assemble the Front Leg Frame
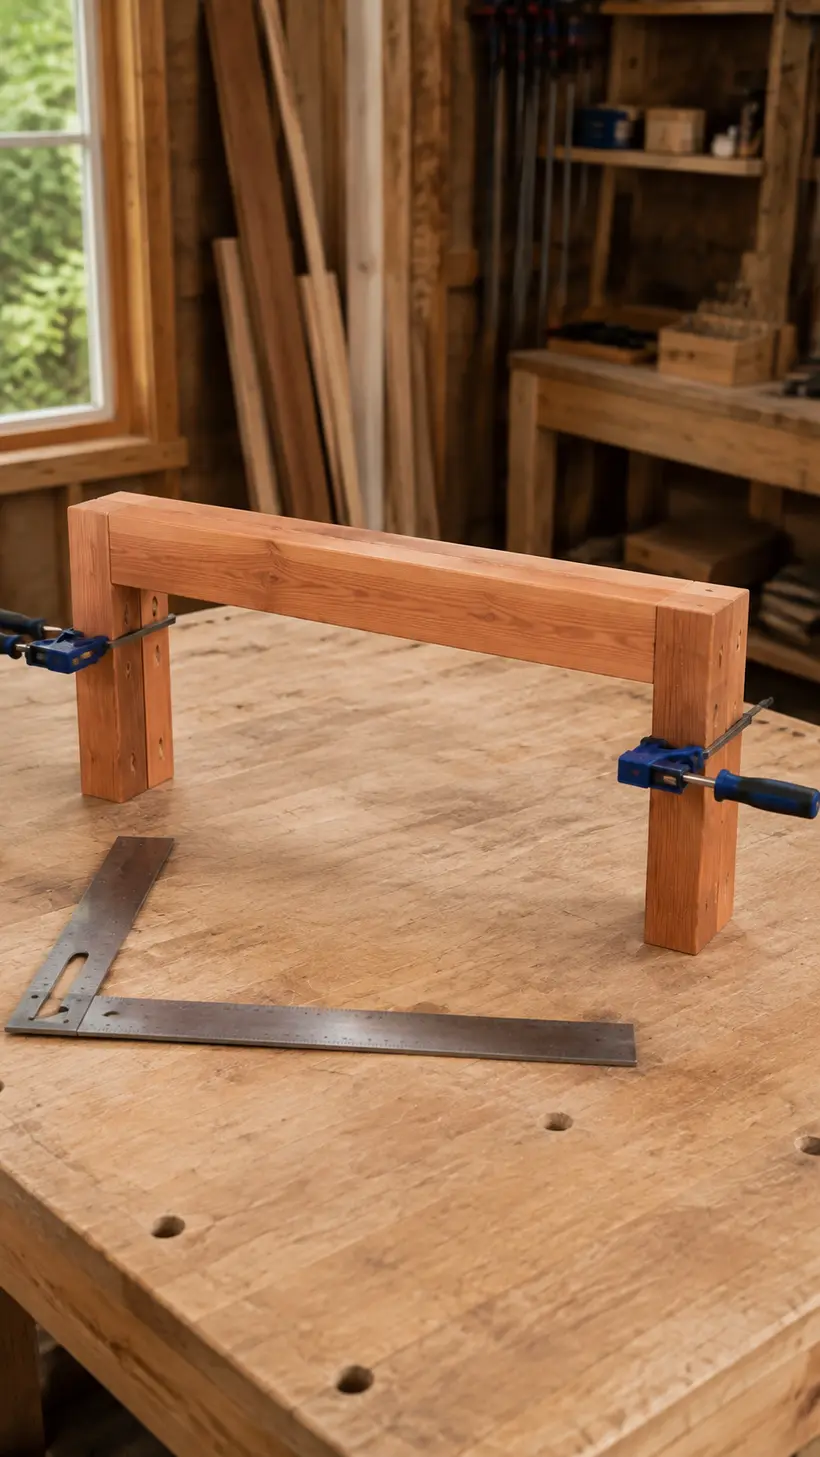
Lay the two front legs on a flat bench with their 3½-inch faces down. Position the 45-inch front rail between them. Its top edge must be flush with both leg tops, and its pocket holes must face toward the bench interior.
Apply exterior glue, clamp the pieces and drive the screws without stripping them. Measure across the assembly: 3½ + 45 + 3½ should equal exactly 52 inches. Check both leg-to-rail corners with a square.
Step 6: Assemble the Rear Post Frame
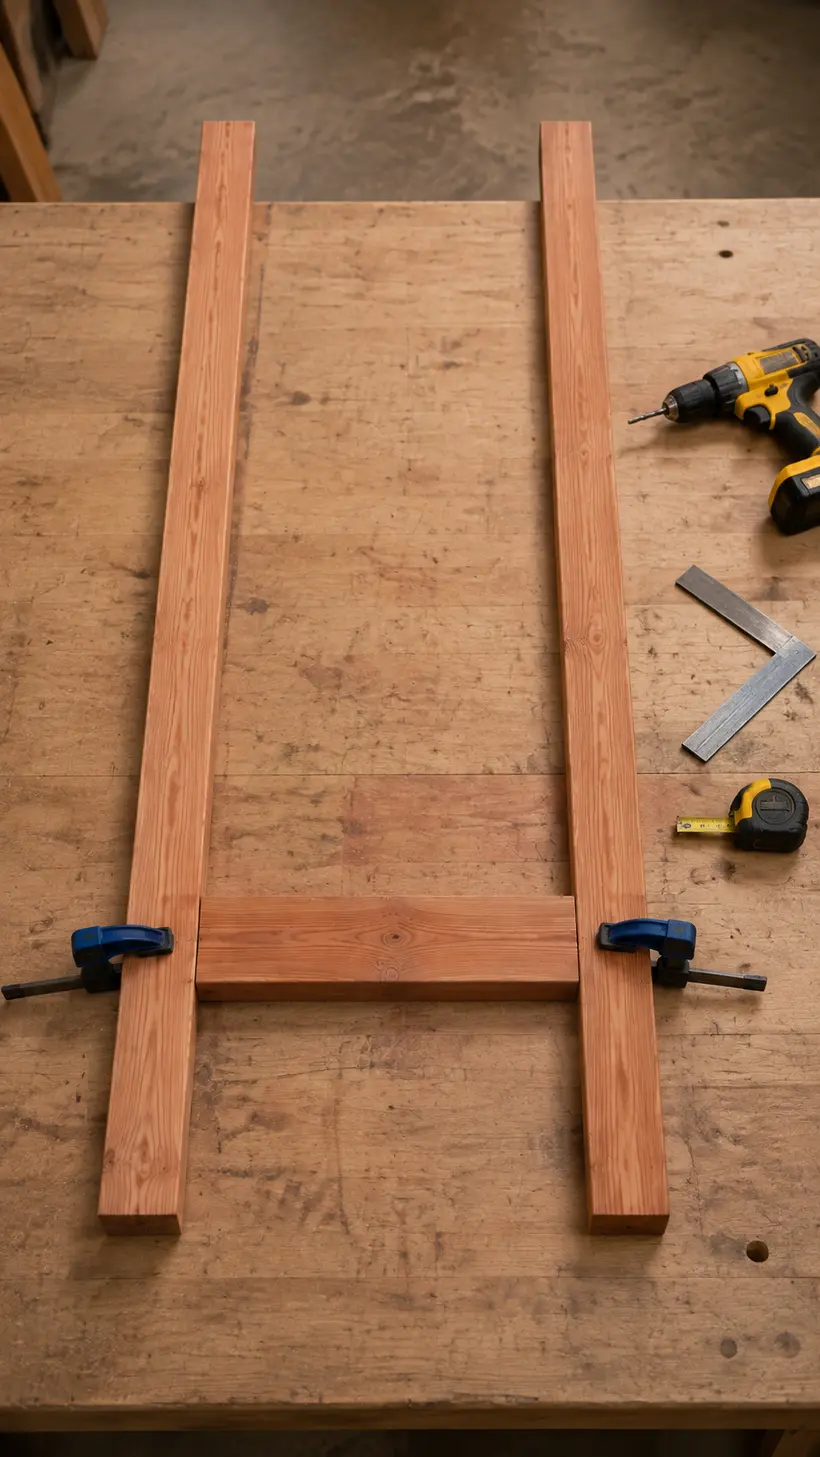
Place the two 35-inch rear posts on the flat surface. Mark a line 17¼ inches above both bottom ends. Position the 45-inch rear rail between the posts with its top edge touching those lines.
Glue, clamp and screw the rail in place. Confirm the lower post ends are aligned and the outside width is 52 inches. Measure diagonally between matching reference points; if the assembly is skewed, correct it before the glue sets.
Step 7: Join the Front and Rear Assemblies
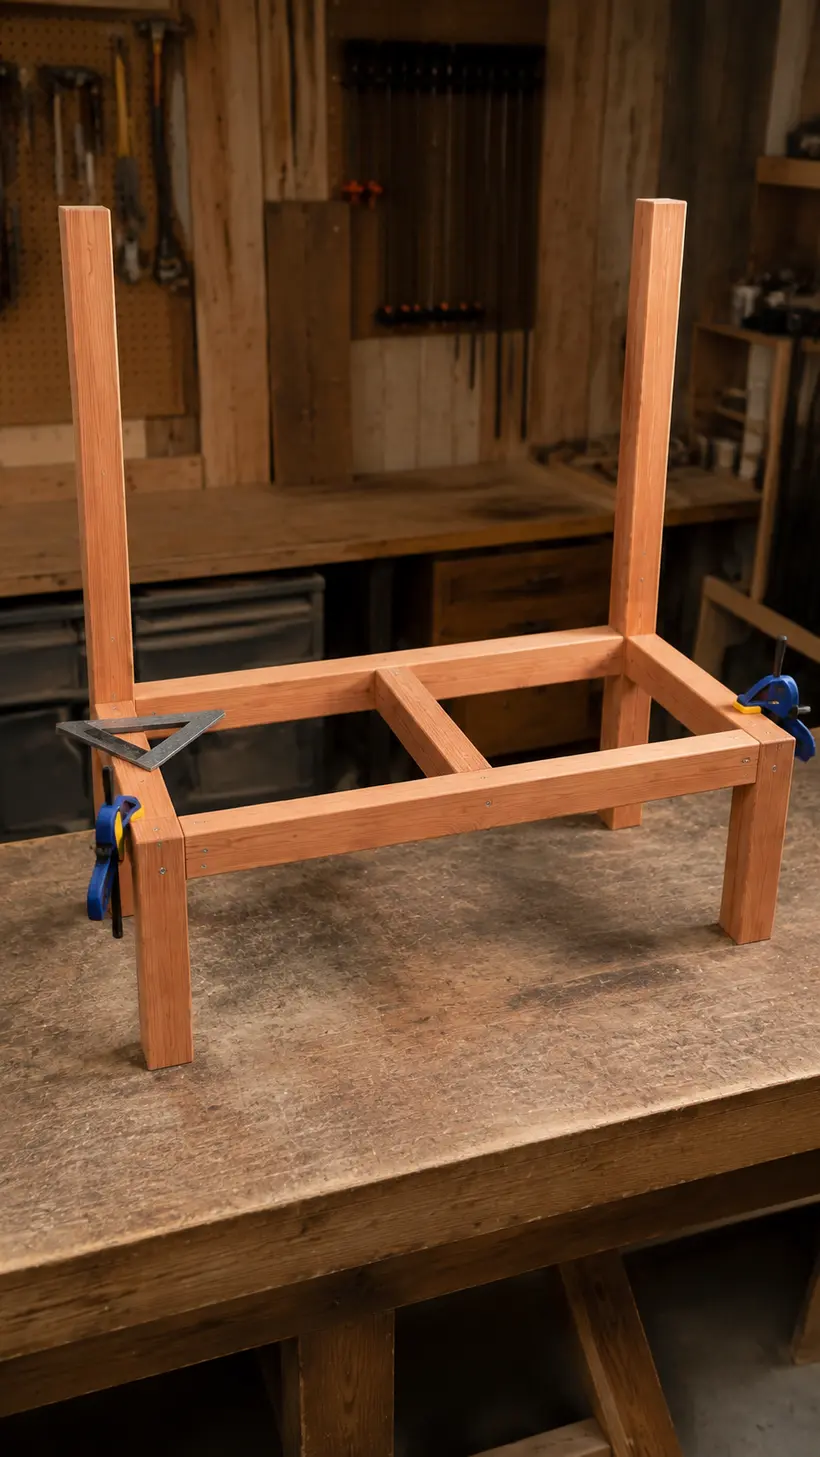
Stand the front and rear assemblies upright. Fit one 15-inch side rail between the left legs and one between the right legs, keeping all rail tops flush at 17¼ inches. Clamp the joints before driving screws.
Install the 15-inch center support halfway along the 45-inch rails. Its centerline is 22½ inches from either rail end. Keep its top edge flush with the other rails. Measure both top diagonals of the frame; adjust until they match, then recheck that all four feet sit flat.
Step 8: Install the Five Seat Slats
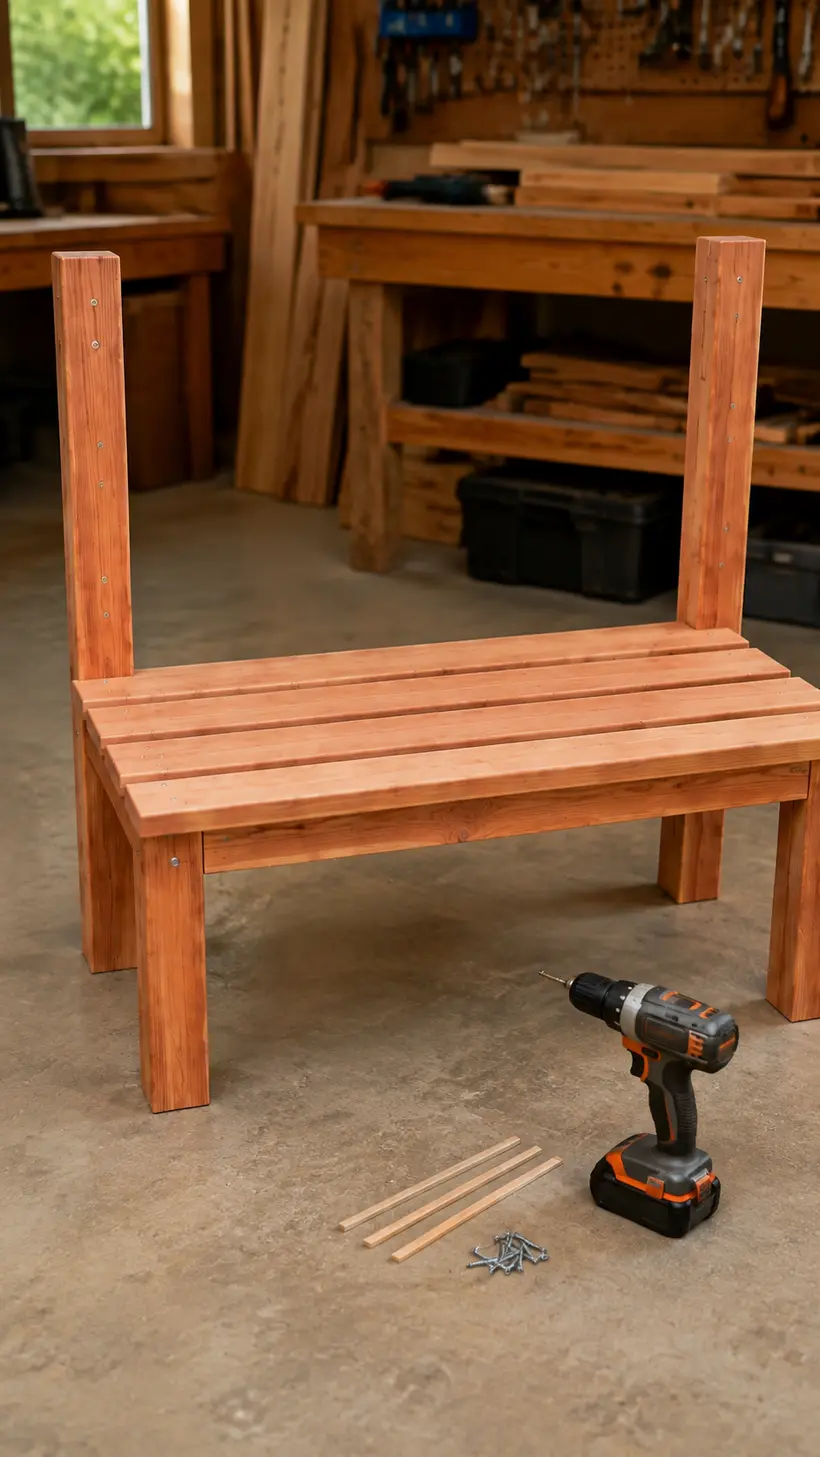
Dry-place all five 45-inch slats between the side members. Insert four ⅛-inch spacers and confirm the group fills the full 18-inch depth. If your slats are slightly narrower or wider than 3½ inches, divide the remaining space into four equal gaps instead of forcing the plan’s spacer size.
Predrill and countersink each slat over the left side rail, center support and right side rail. Use two screws at every support point, keeping the screw lines straight. Start with the front and rear slats, check the total spacing, then install the middle three.
Step 9: Attach the Three Back Slats
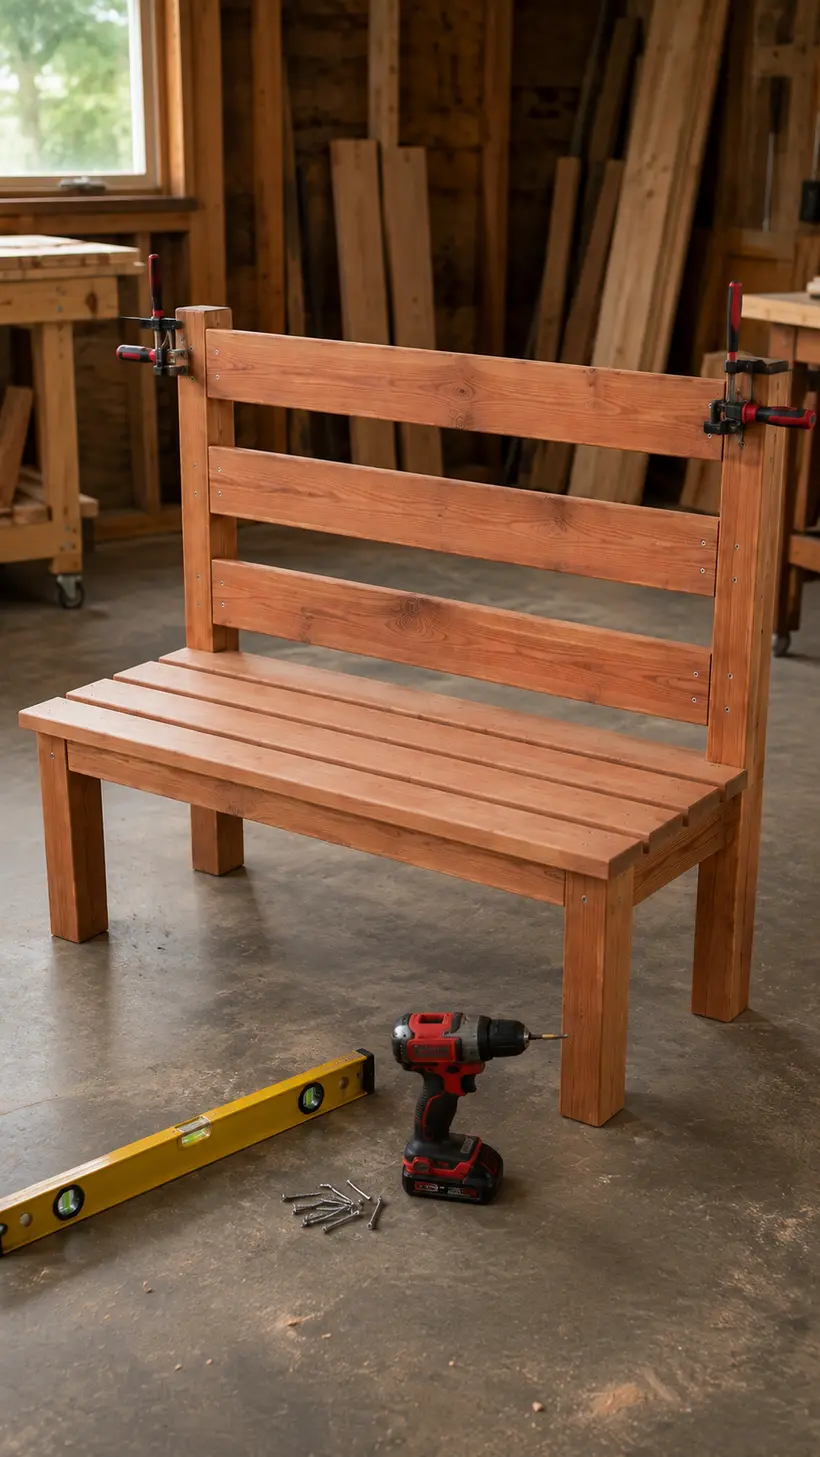
Stand the bench on a flat floor. Transfer the 20½-, 25½- and 30½-inch marks across the front faces of both rear posts with a level or long straightedge. Clamp the lower 52-inch slat with its bottom edge on the first line and its ends flush with the post exteriors.
Predrill and secure it with two 2-inch exterior screws into each post. Repeat for the middle and top slats. Compare the end overhangs, confirm the slats are level and ease any edge that feels sharp against a user’s back.
Step 10: Fill, Resand and Inspect the Joints
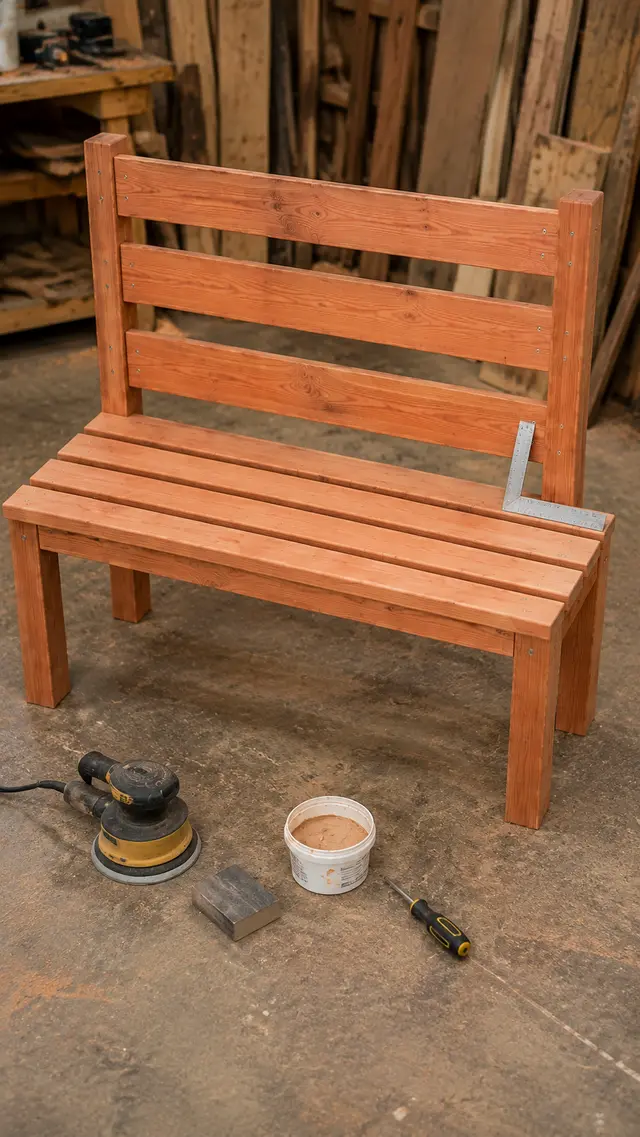
Fill visible countersinks only if your finishing system allows it. Sand the filler flush, break any newly discovered sharp edge and remove pencil lines. Do not thin structural parts by trying to sand a severe twist out of the frame.
Place the bench on a verified flat surface. Check for rocking, confirm the rear posts remain parallel and tighten every screw. If a joint opens under gentle hand pressure, correct the joint before finishing rather than asking paint or filler to hold it together.
Step 11: Apply Exterior Finish and Test the Bench
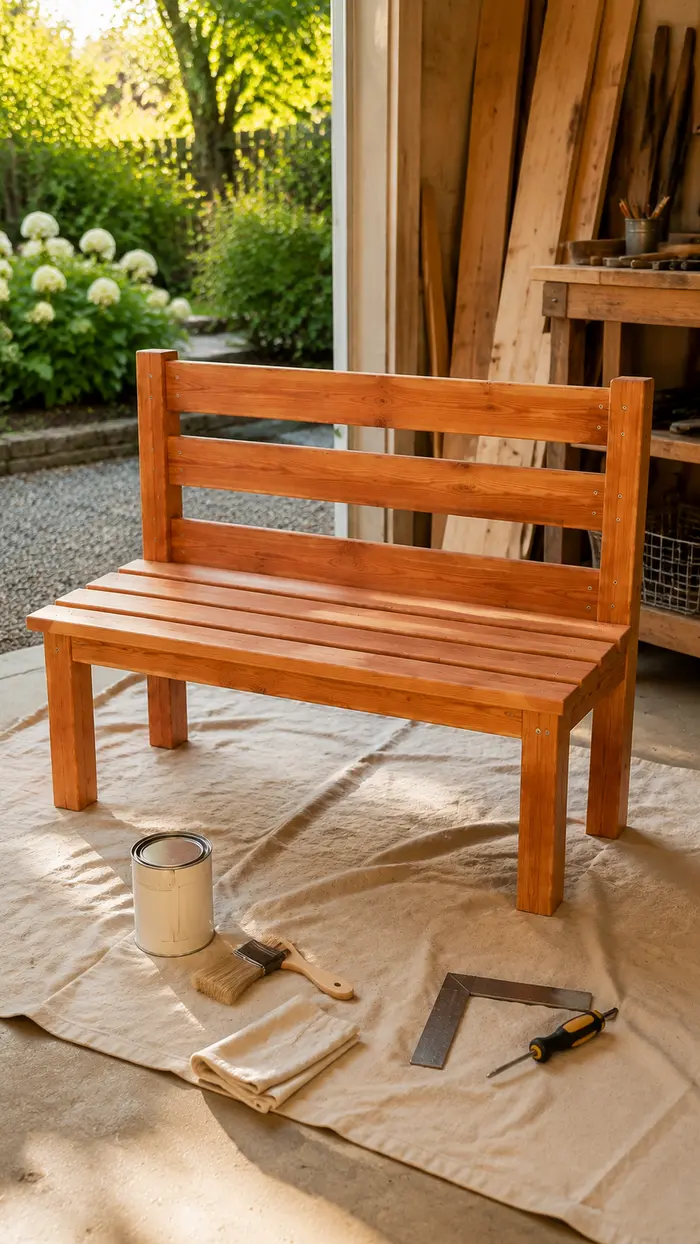
Remove all sanding dust and apply an exterior finish compatible with the wood and previous products. Coat the feet, end grain, screw recesses and underside edges carefully. Thin, even coats normally behave better than one heavy coat, but the product label controls application, drying, recoating and curing.
After the finish has fully cured, place the bench on level ground and press each corner to check stability. Inspect the slats and frame before the first seated test. Increase loading gradually during prototype testing and stop immediately if you hear cracking, see a joint opening or notice abnormal movement.
Want More Measured Woodworking Projects?
How to Protect a Wooden Bench Outdoors
Keep Water Moving Away
The ⅛-inch seat gaps allow rain to drain and help debris fall through instead of trapping moisture. Place the bench on pavers, gravel or another firm surface rather than burying the feet in damp soil or grass.
Coat End Grain Carefully
Board ends absorb moisture more readily than broad faces. Give the foot bottoms, slat ends and post tops the attention specified by your finish manufacturer. A small chamfer or round-over on post tops can also prevent water from sitting on a razor-sharp edge.
Inspect It Every Season
Clean the bench, check for loose fasteners, look for cracks around knots and renew the finish when it no longer sheds water as intended. Outdoor furniture lasts longer when maintenance happens before bare wood is exposed.
If you are building a coordinated garden area, pair the bench with these potting bench ideas or build the site’s outdoor storage bench for seating plus weather-conscious storage. For better sanding and coating results, review these wood-finishing tools for beginners.
Optional Garden Bench Variations
Build a 60-Inch Version
Do not simply lengthen the slats and leave the support layout unchanged. Increase the two long rails and all eight slats by 8 inches, then consider adding a second center support so no wide span is left unsupported. Recalculate board quantities and prototype-test the wider version.
Add Armrests
Arms require taller front posts, level supports and new lateral-load checks. They are not included in this cut list. Draw the side view first and keep the arm height comfortable without creating a pinch point near the back slats.
Paint It a Garden Color
An opaque exterior paint can create a cottage-style white, deep green or charcoal bench. Prime compatible bare wood, coat all faces and allow full curing before setting planters or cushions on the seat.
Build a Matching Pair to Sell
A simple garden bench photographs well and can be offered in several finishes, but selling seating creates responsibility. Build and test a prototype, use repeatable jigs, document materials and disclose care requirements. For broader product research, compare these profitable woodworking projects and woodworking projects that sell on Etsy.
Common Garden Bench Building Mistakes
Using Twisted Seat Slats
A screw may pull one point down temporarily, but a twisted slat continues stressing the fastener and frame. Use straight stock for long seating surfaces.
Forgetting Actual Lumber Sizes
This plan depends on 3½-inch-wide slats. If your boards are only 3⅜ inches wide, five slats and four ⅛-inch gaps will not fill an 18-inch depth. Measure first and adjust the four gaps evenly.
Skipping the Center Support
The middle 15-inch support reduces the unsupported span of each seat slat. Omitting it increases flex and concentrates more load at the side fasteners.
Driving Slat Screws Without Predrilling
Screws installed near board ends can split dry cedar or pine. Predrill and countersink, especially at the back slat ends.
Finishing Only the Visible Faces
Moisture reaches the underside, feet and end grain even when visitors cannot see them. Coat every surface required by the finish system.
Publishing an Untested Load Rating
Capacity depends on species, defects, moisture, fasteners, joinery, workmanship and exposure. Do not claim a number based only on this drawing. Prototype and test the exact finished product.
Frequently Asked Questions
What are the finished wooden garden bench measurements?
The plan finishes at 52 inches wide, 18 inches deep and 35 inches high. The seat is 45 inches wide between the side members and 18 inches above the ground.
Can a beginner build this bench?
Yes. The main version uses only square crosscuts, pocket-hole joints and surface-mounted slats. A beginner should still practice on scrap and ask an experienced adult for help with unfamiliar power tools.
Why are the seat slats 45 inches but the back slats 52 inches?
The seat slats fit between the 3½-inch-wide side members. The back slats cross the front faces of the rear posts and finish flush with their outside edges.
How wide should the gaps be between bench slats?
The measured plan uses four ⅛-inch gaps across five 3½-inch seat slats. If your actual slats differ, divide the remaining depth into four equal gaps.
Can I build the bench from ordinary construction pine?
You can use straight, dry pine if you protect it with a suitable exterior system and maintain it. Cedar or another locally appropriate outdoor species may require less ongoing protection, but availability and cost vary.
Should the garden bench be anchored?
Ordinary freestanding placement may be suitable on a firm, level surface, but exposed or high-wind locations need site-specific judgment. Do not improvise anchors into pavers, decks or soil without confirming the substrate and local conditions.
Can I place the bench directly on grass?
It is better to set it on pavers, gravel or another drained surface. Continual contact with damp soil or grass keeps the feet wet and makes the bench less stable.
Final Thoughts
This wooden garden bench plan keeps the important arithmetic visible: a 52-inch overall width, 45-inch clear seat, 18-inch depth, 18-inch seat height and 35-inch back. Because the base and slat spacing can be checked before assembly, the project is approachable without relying on guesswork.
Start with straight lumber, keep the two leg assemblies square and do not rush the finish. Once the prototype has been inspected and tested, the same plan can become a matching pair for a patio, garden path or quiet reading corner.