
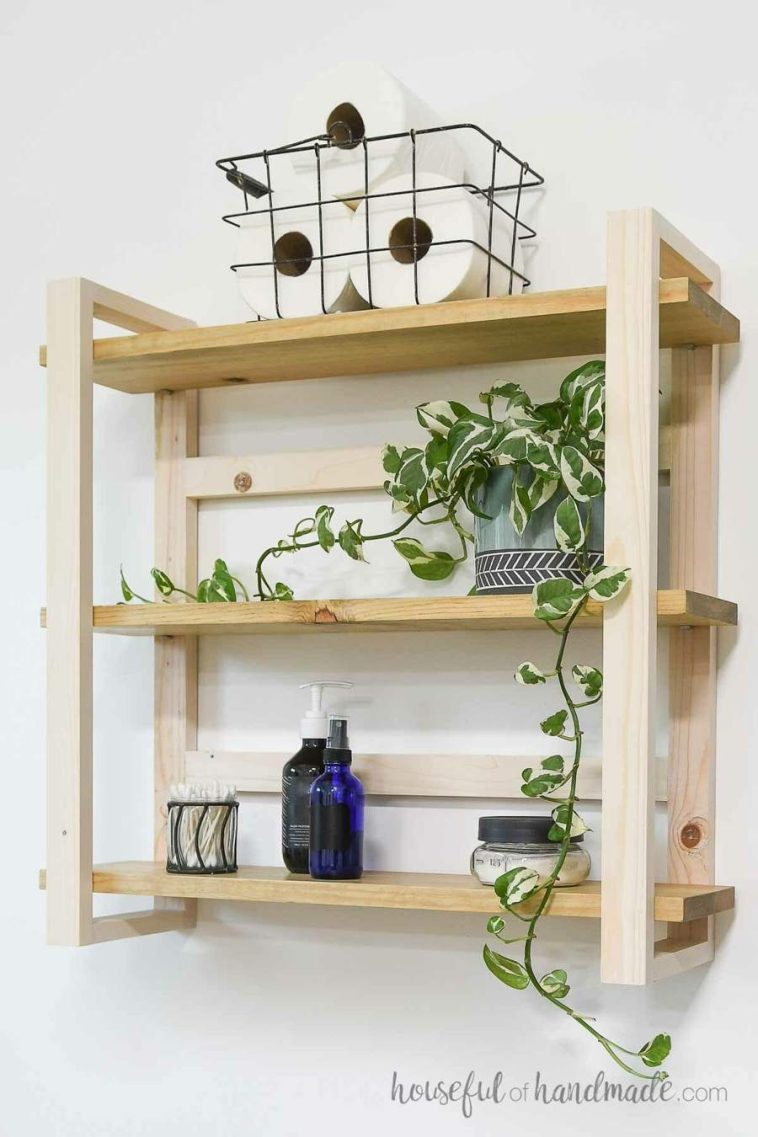
These DIY wooden bathroom shelf ideas for small bathrooms give towels, bottles, and spare supplies a home without crowding the sink. There are projects for the wall above the toilet, an empty corner, the back of a door, and even a narrow gap beside the vanity.
Every idea below links to a real creator’s plan or tutorial and includes a project photo. Start with the spot you need to organize, then compare the dimensions and materials before choosing a build.
Disclosure: This article contains an affiliate link. BubbleRelief may earn a commission if you buy through it, at no additional cost to you.
Find the Right Shelf for Your Space
| Your storage problem | Start here |
|---|---|
| Bottles need different shelf heights | 1. Modern open shelves |
| Blank wall above the toilet | 2. Floating shelves or 8. Farmhouse shelves |
| Unused space around the door | 3. Behind-door shelves or 7. Over-door shelves |
| A three-sided recess | 4. Built-in nook shelves |
| Little items look messy | 6. Shelves with drawers |
| No room for more wall storage | 15. Compact storage tower |
Before choosing: Check the door swing, toilet-tank access, and wall support. Sizes below describe the original projects or explicitly labelled parts, not a cut list for a resized version. Printable PDFs may be sold separately even where the online tutorial is free.
1. Modern Wooden Shelves with Adjustable Storage
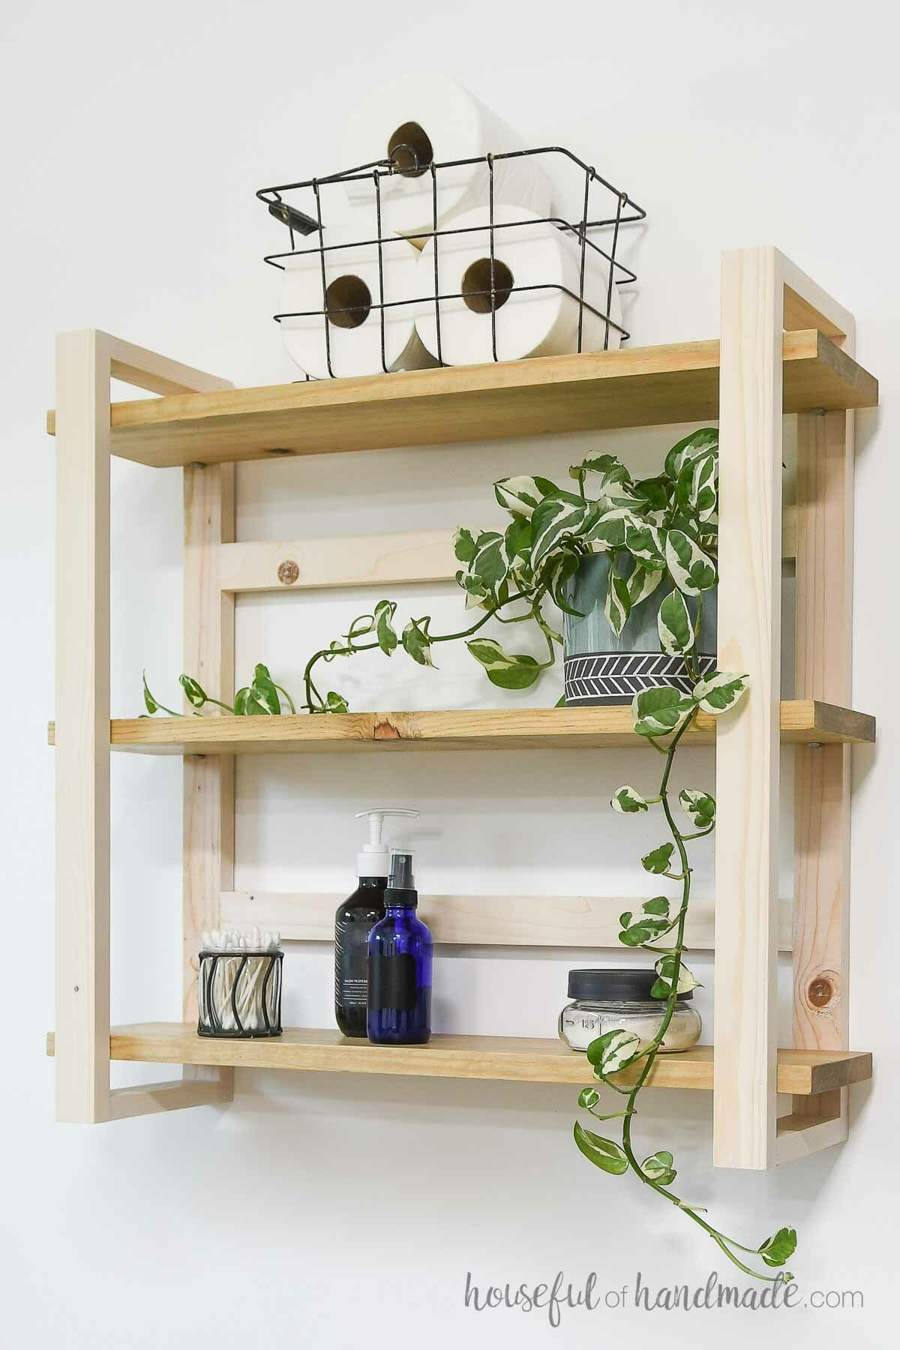
Best for: A small wall that needs flexible bottle storage. Skill: Confident beginner.
Size reference: Frame: 23″ wide × 24″ high × 7″ deep; shelf boards: 25″ long × 5½″ deep.
Main materials: 1×2 boards, 1×6 shelf boards, shelf pins, pocket-hole screws.
Tall lotion bottles on one shelf, little jars on another: this open-frame design gives you room to organize both. Its slim sides keep it visually light, which helps when the bathroom already feels busy.
Houseful of Handmade explains how to support the boards on shelf pins. Add additional pin positions if you want adjustable spacing; the photographed build uses three fixed shelf positions. That small choice is worth deciding before assembly.
The shelf boards extend beyond the frame, so allow for their full 25-inch width when measuring your wall. A two-tone finish can highlight the wood without making the whole unit look heavy.
Plan access: Free online tutorial; optional premium printable plans.
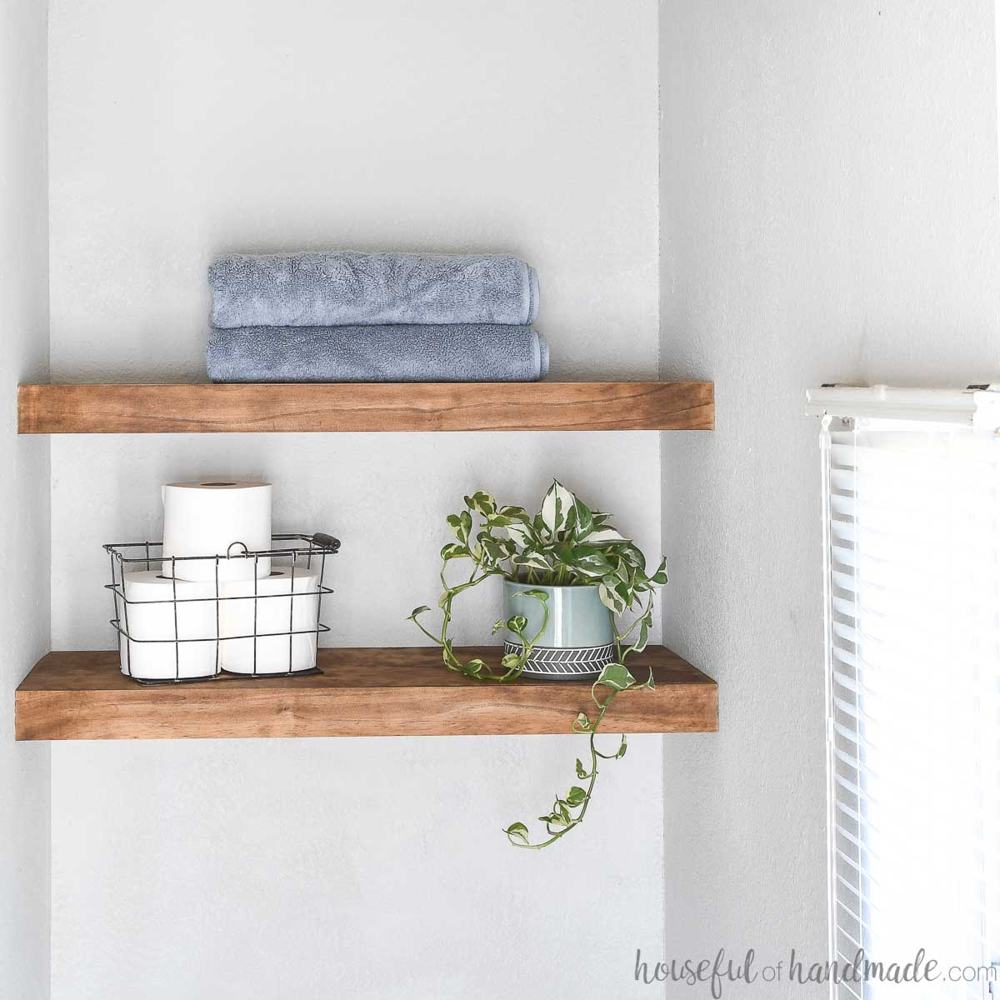
2. Chunky Floating Shelves Above the Toilet
Best for: Towels and baskets without a floor-standing cabinet. Skill: Beginner-friendly.
Size reference: Original shelf top boards: 32″ long × 9¼″ deep before the surrounding trim.
Main materials: Pine boards, 2×3 support lumber, ¼″ plywood, screws, and trim.
A basket for spare tissue, a stack of hand towels, and one small plant can make the wall above the toilet genuinely useful. These substantial-looking shelves are built around hidden frames rather than thick hardwood slabs.
The appeal is the clean silhouette: you see wood, not metal brackets. Keep the lower shelf focused on everyday supplies and use the upper one for lighter spare items.
The dimensions above describe the top boards, not the complete trimmed shelf. Check the original cut list for the finished envelope. For another concealed-support option, see our floating shelf with a hidden bracket tutorial.
Plan access: Free tutorial, video, and printable plans.
3. Shallow Storage Shelves Behind the Bathroom Door
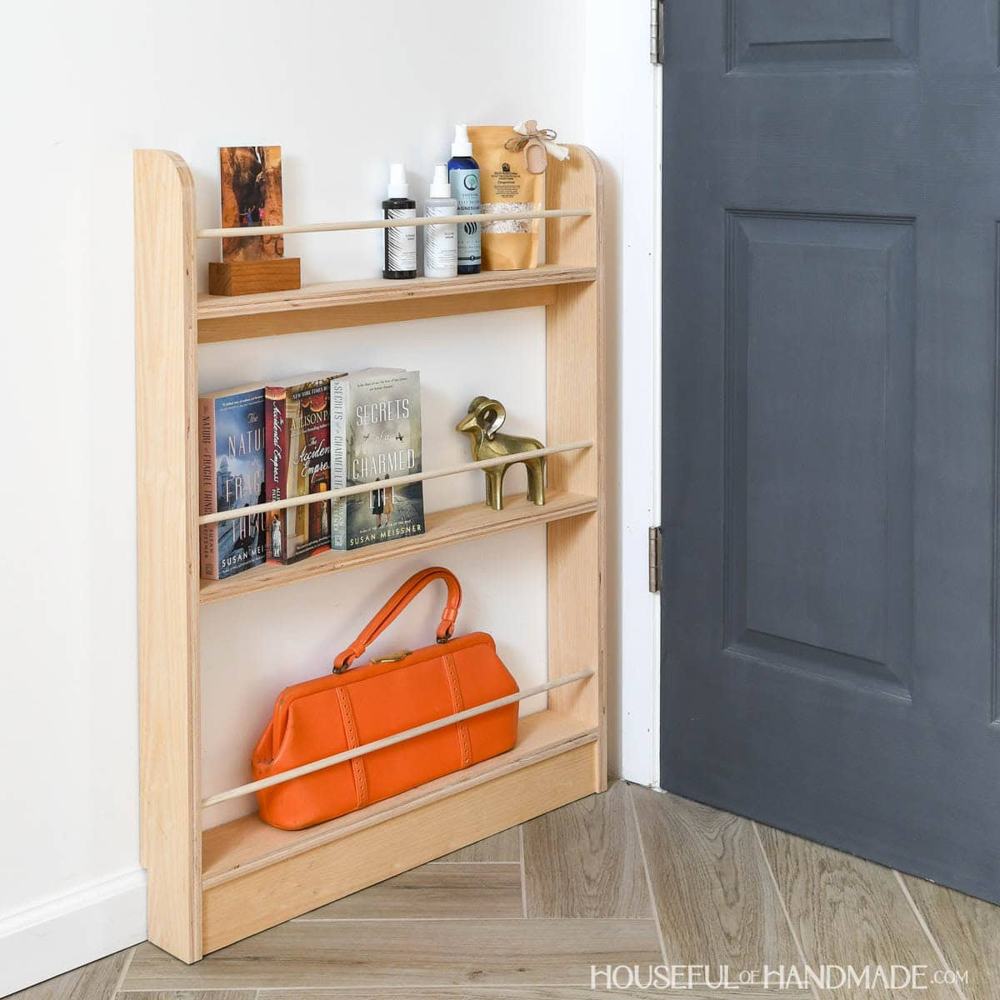
Best for: Hair products and accessories in an overlooked gap. Skill: Confident beginner.
Size reference: 28″ wide × 36″ high × 3¾″ deep.
Main materials: ¾″ plywood, ⅜″ dowels, pocket-hole screws; optional edge banding.
This is one of the most useful options if every obvious wall is already occupied. The organizer stands against the wall behind the door and is secured through a back support; it does not hang from the door.
Its shallow shelves keep smaller bottles in sight, while dowel rails help contain the contents. The original build uses a 2-by-3-foot plywood offcut, so check your leftovers first.
A 3¾-inch depth sounds modest, but it still needs clearance for your actual door, handle, and stop. Make a cardboard mock-up before cutting. Our scrap wood organizer ideas offer more ways to use small leftover panels.
Plan access: Free online tutorial; premium printable plans available.
4. Built-In Floating Shelves for a Bathroom Nook
Best for: A recess with walls on three sides. Skill: Confident beginner.
Size reference: Custom-fit: measure the width separately at every shelf height.
Main materials: 2×2 framing, ½″ plywood, and wood facing or trim.
An awkward recess can become the most organized part of the room. These shelves fit from wall to wall, giving baskets and folded towels a home without adding another freestanding piece.
The most valuable part of the tutorial is its approach to uneven walls. Measure at each shelf line and make a template for the panels instead of assuming every corner is square.
Choose baskets before settling on the depth. You want enough room to slide them in comfortably, without creating a deep cupboard that is difficult to reach. Matching the front trim across the shelves gives the niche a coherent built-in appearance.
Plan access: Free online tutorial; optional premium PDF plans.
5. One-Board Wooden Towel Shelf
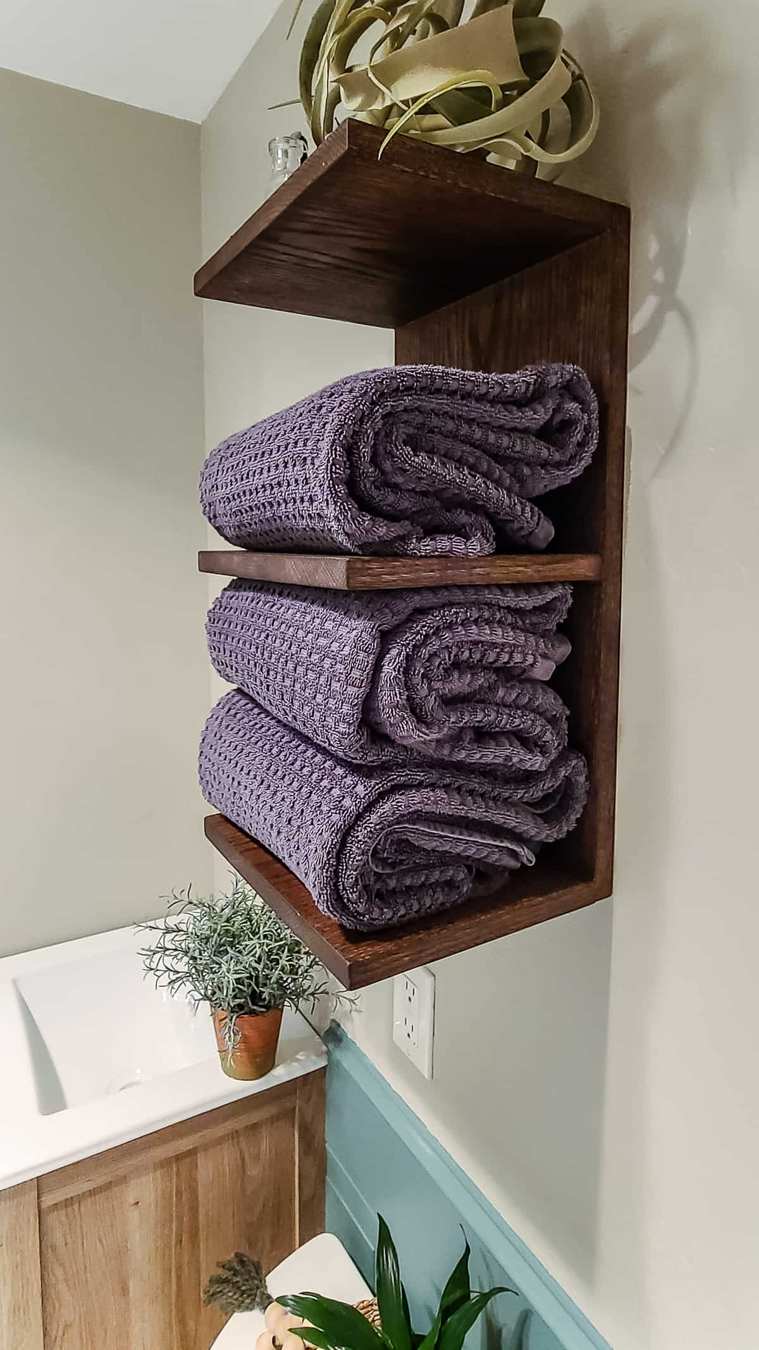
Best for: Keeping clean guest towels within reach. Skill: Beginner-friendly.
Size reference: Original shelf pieces: 11″ wide × 8″ deep; back panel: 11″ wide × 19¼″ high.
Main materials: One 4-foot nominal 1×12 red-oak board, pocket-hole screws, and plugs.
If folded towels fill the vanity cabinet, give them a place on the wall. Making Manzanita’s design uses a back panel and three projecting shelves, all cut from one board.
The original dark-stained oak looks particularly good against a pale wall. A few carefully folded towels supply the color, so the unit does not need extra decoration.
Check your towel stack against the shelf dimensions before building; guest towels and large bath sheets are very different sizes. Keep this shelf for clean, dry towels and provide a separate bar for damp ones. New to the joinery? Start with our pocket hole jig guide.
Plan access: Free illustrated tutorial and linked free Kreg plans.
6. Wooden Wall Shelves with Small Drawers
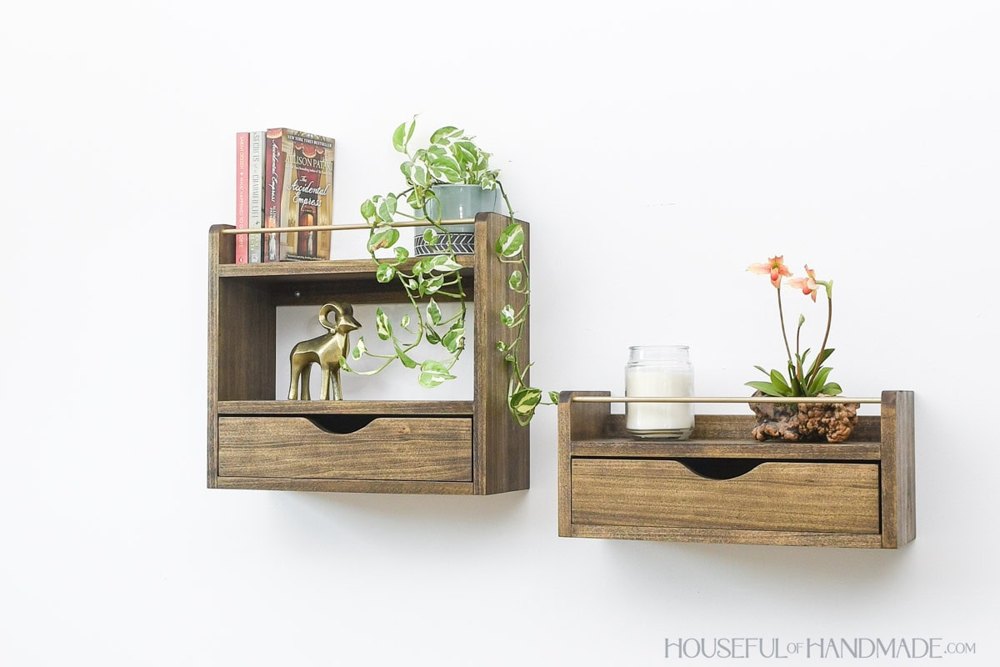
Best for: Hiding hair ties, packets, and other small clutter. Skill: Confident beginner.
Size reference: Both versions: 18″ wide × 7¼″ deep; heights: 16″ and 8″.
Main materials: 1×8 boards, smaller trim boards, ½″ plywood drawer bottoms, screws, and brad nails.
Sometimes the best thing an open shelf can do is hide a few things. These compact wall units combine display space with a small drawer underneath.
The drawer fits directly into its opening without metal slides. That makes it an approachable introduction to drawer construction and avoids buying hardware for a very small compartment.
Choose the taller version if you want two open levels above the drawer, or the shorter one for a tight wall. The source photographs show other-room styling; for a bathroom, use a suitable finish and keep the contents dry. Leave enough space in front to withdraw the drawer fully.
Plan access: Free online tutorial; premium printable plans available.
7. Over-the-Door Wooden Bottle Shelves
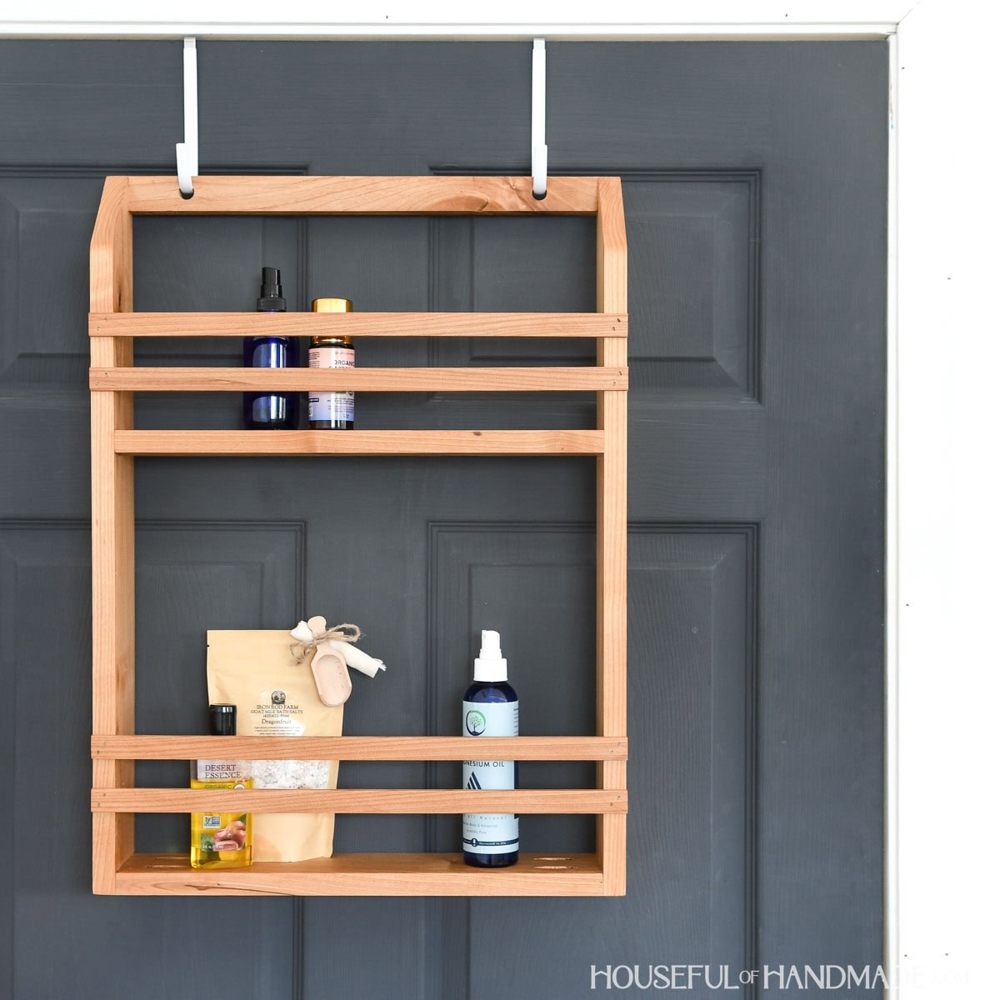
Best for: Storage when the walls are already full. Skill: Confident beginner.
Size reference: 17½″ wide × 24″ high × 3½″ deep.
Main materials: 1×4 boards, 1×2 support, thin wood rails, and two over-door hooks.
This organizer uses the back of the door itself, rather than the wall behind it. Two shelf levels give bottles and small supplies a clear home, with front rails to help keep them contained.
It is worth comparing with the behind-door unit in idea 3: choose the design around how your door actually opens and how much clearance you have.
Check hook thickness, door thickness, and the top closing gap before building. Keep the contents light and choose hardware appropriate for the door and total load. The low material requirement also makes this a sensible project for sound leftover boards.
Plan access: Free online tutorial; optional printable plan purchase.
8. Farmhouse Over-Toilet Shelves with Front Rails
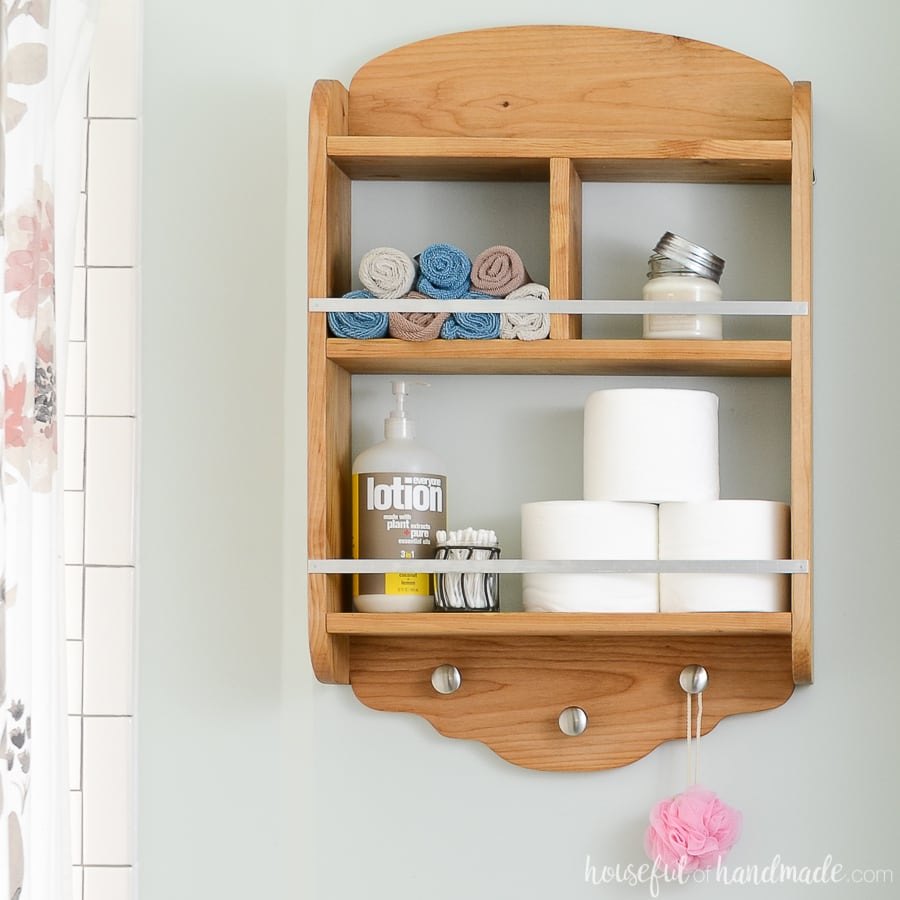
Best for: Several storage levels in one wall unit. Skill: Confident beginner.
Size reference: Check the linked Kreg plan against your wall width and chosen baskets.
Main materials: Solid wood; the original uses knotty alder, aluminum front rails, and lower knobs.
Curved sides and slim metal rails give this unit more character than a stack of plain boards. The lower knobs add a place for small hanging accessories, while the shelves hold tissue, washcloths, and bottles.
Use the rails as a helpful boundary, not an excuse to overfill every level. Two coordinated containers will usually look calmer than a collection of unrelated jars.
The warm alder finish is part of the appeal, though the silhouette can also suit a painted bathroom. Choose your baskets before starting so the openings work for real storage, not just the photograph.
Plan access: Project overview plus free detailed Kreg building plans.
9. Bathroom Cubby Shelf with Towel Hooks
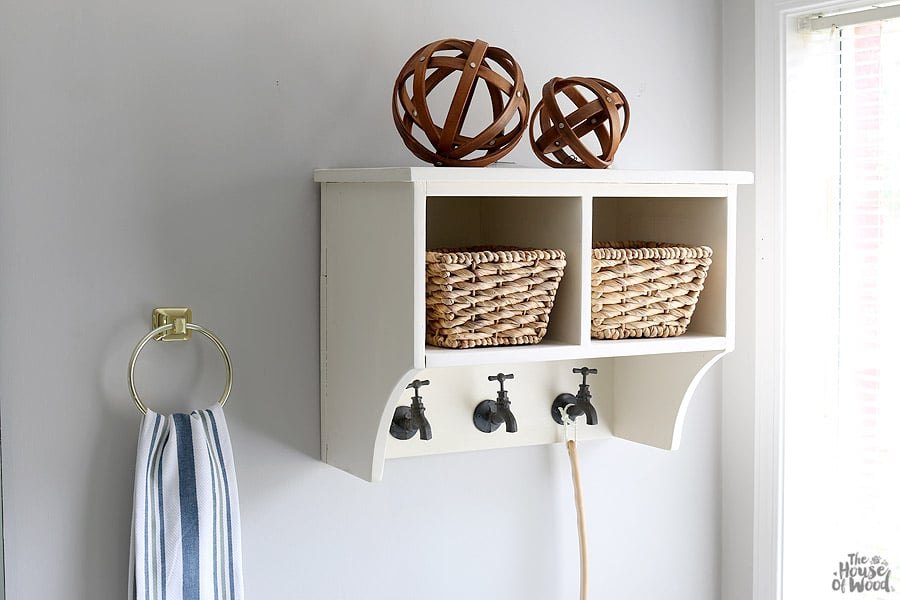
Best for: Baskets and hand towels on the same wall. Skill: Beginner-friendly.
Size reference: Original top board: 22½″ long; main shelf boards: 11¼″ deep.
Main materials: Solid pine boards, pocket-hole screws, and three robe hooks.
Two cubbies above, towel hooks below: Jen Woodhouse’s shelf puts several useful functions into one piece. Baskets hide the small supplies that tend to make open shelving look untidy.
The original faucet-shaped hooks give it a cottage feel. Standard robe hooks would make it simpler, especially in a modern bathroom.
This is a deeper design than the shallow door organizers. Check how far it projects before placing it beside a doorway or narrow passage. Keep the top lightly styled and the cubbies practical; one correctly sized basket in each opening makes the layout easy to maintain.
Plan access: Creator’s project overview and free detailed Kreg plans.
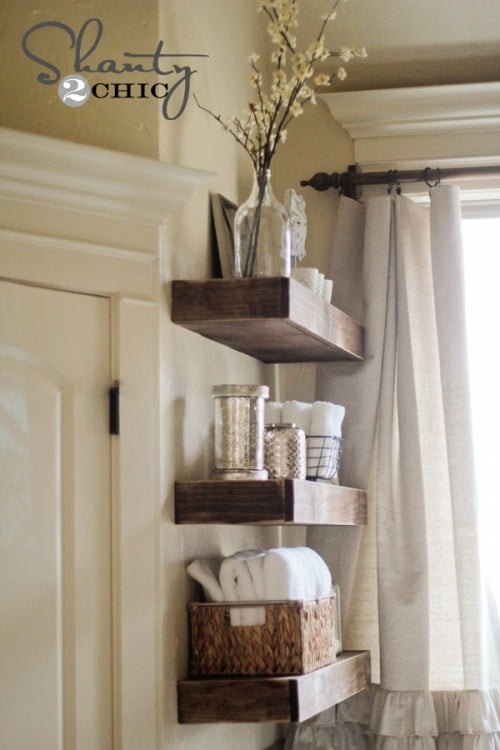
10. Floating Corner Shelves
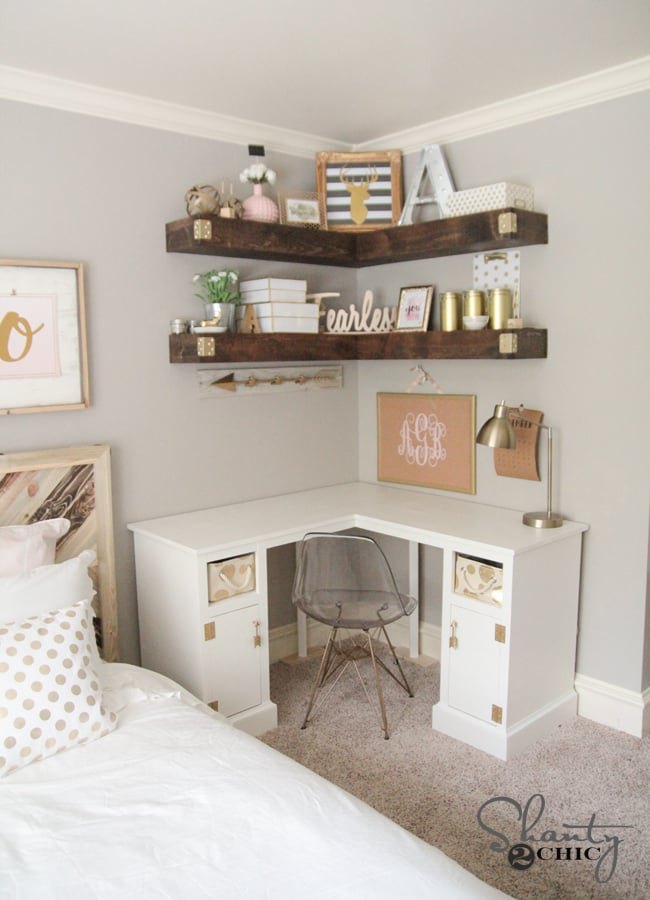
Best for: Turning an unused inside corner into storage. Skill: Confident beginner.
Size reference: Size each shelf run to your corner; use the source cut list for the support and trim layout.
Main materials: Framing lumber, plywood, shelf boards, and wood trim.
A short shelf on one wall may not hold much. Turning the shelf around the corner adds usable length without requiring one long blank wall.
Shanty 2 Chic demonstrates the project in a bedroom. The same construction approach can suit a dry bathroom corner when you choose an appropriate size and finish.
Before buying lumber, tape both shelf runs onto the walls. Stand at the sink and open the door to check the fit. Keep the layout simple: a basket at one end and daily supplies at the other make the corner easier to use than a crowded display.
Plan access: Free illustrated tutorial and printable plans.
11. Floating Mirror Shelf for a Small Vanity
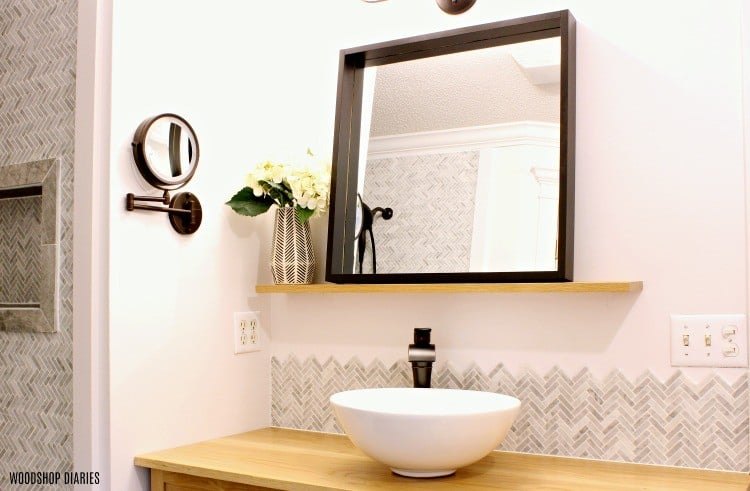
Best for: A landing spot when the counter is crowded. Skill: Intermediate.
Size reference: Original mirror: 24″ square; adapt the frame and shelf to your measured mirror.
Main materials: Plywood strips or 1×3 frame boards, a 1×6 shelf, mirror, and mounting hardware.
When there is barely room for soap beside the tap, a slim ledge at the mirror can make the vanity more usable. Woodshop Diaries pairs a framed mirror with a simple wooden shelf for a clean, modern result.
This project includes making the mirror frame, so allow more care and setup than you would for a plain shelf. The grooved frame pieces need to fit the actual mirror thickness.
Use the ledge selectively. A small tray or toothbrush cup is enough; leaving part of it empty makes cleaning easier. Check the tap height and follow the original mirror-retention and mounting instructions.
Plan access: Free illustrated tutorial and video.
12. Narrow Ladder Shelves Beside the Vanity
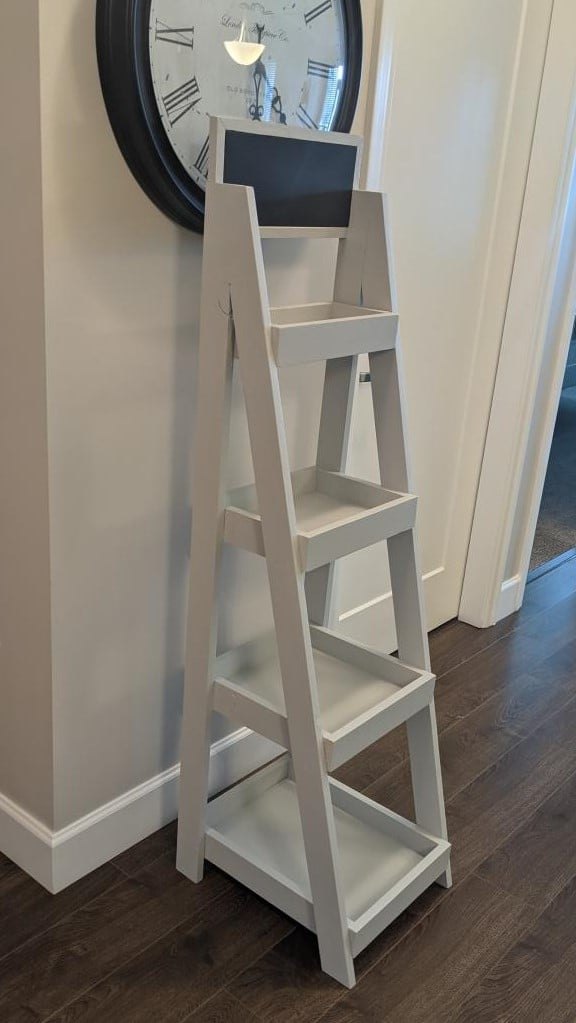
Best for: A small floor gap with room above it. Skill: Confident beginner.
Size reference: The original plan uses shelf-bottom pieces cut to 4¾″, 8½″, 12¼″, and 16″; check the full frame dimensions in the plan.
Main materials: Pine boards, screws or nails, wood glue, and suitable anti-tip hardware.
A ladder shelf adds several storage levels while keeping the top of the piece visually light. Deeper lower shelves suit baskets; smaller upper levels can hold washcloths and a few lightweight essentials.
It needs a little floor space, so measure the footprint rather than choosing it on height alone. Keep the route between the door, sink, and toilet comfortable.
The photograph is a reader’s modification shown on Ana White’s plan page, so use the original plan rather than the photo as your construction reference. Store heavier items low and secure the finished unit against tipping.
Plan access: Free plan with shopping list and cut list.
13. Rustic Hanging Bathroom Shelves
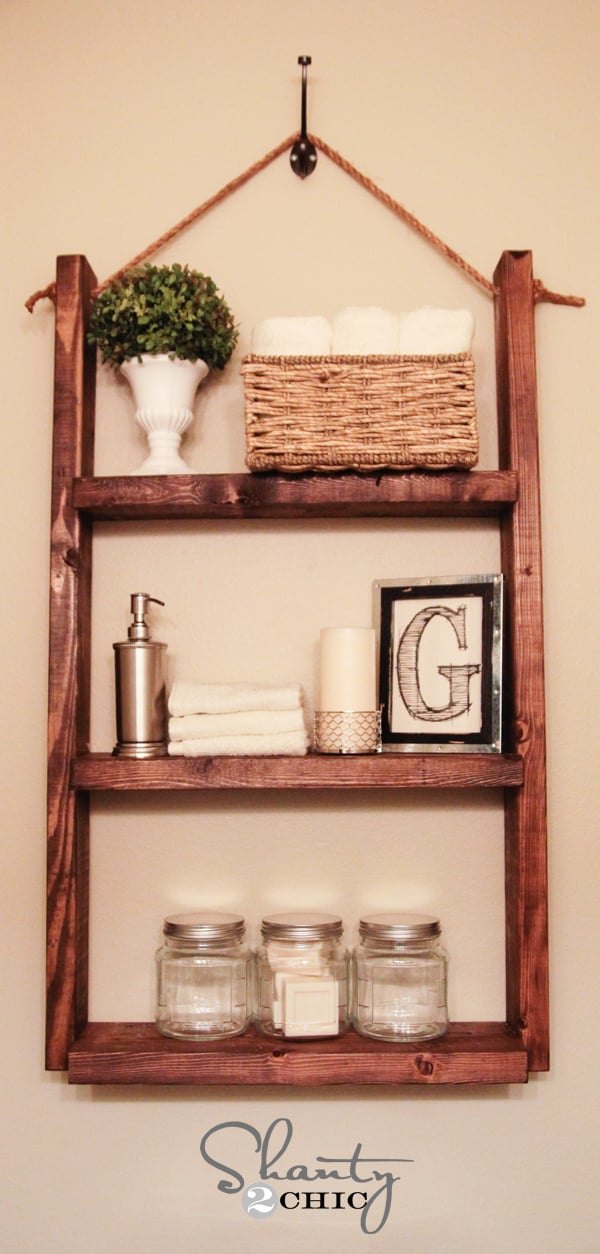
Best for: A visible-wood accent with lightweight storage. Skill: Confident beginner.
Size reference: Original shelf boards: three pieces cut to 21″ long; upright pieces: 40″ long.
Main materials: 2×4 and 2×6 lumber, wood screws, rope, and a suitable wall hook.
The rope detail makes this shelf feel more like a piece of furniture than a wall cabinet. Three levels provide room for spare tissue, small baskets, and a few everyday containers.
Read both parts of the Shanty 2 Chic tutorial before cutting. The first page covers the materials and cuts; the continuation explains the assembly.
Keep the display light. This unit depends on its hook, rope, joints, and wall fixing working together, so follow the complete hanging arrangement. It is best chosen for a spot where nobody will be tempted to pull on it for support.
Plan access: Free cut list, assembly continuation, and linked video.
14. Wood Shelves with DIY Corbel Brackets
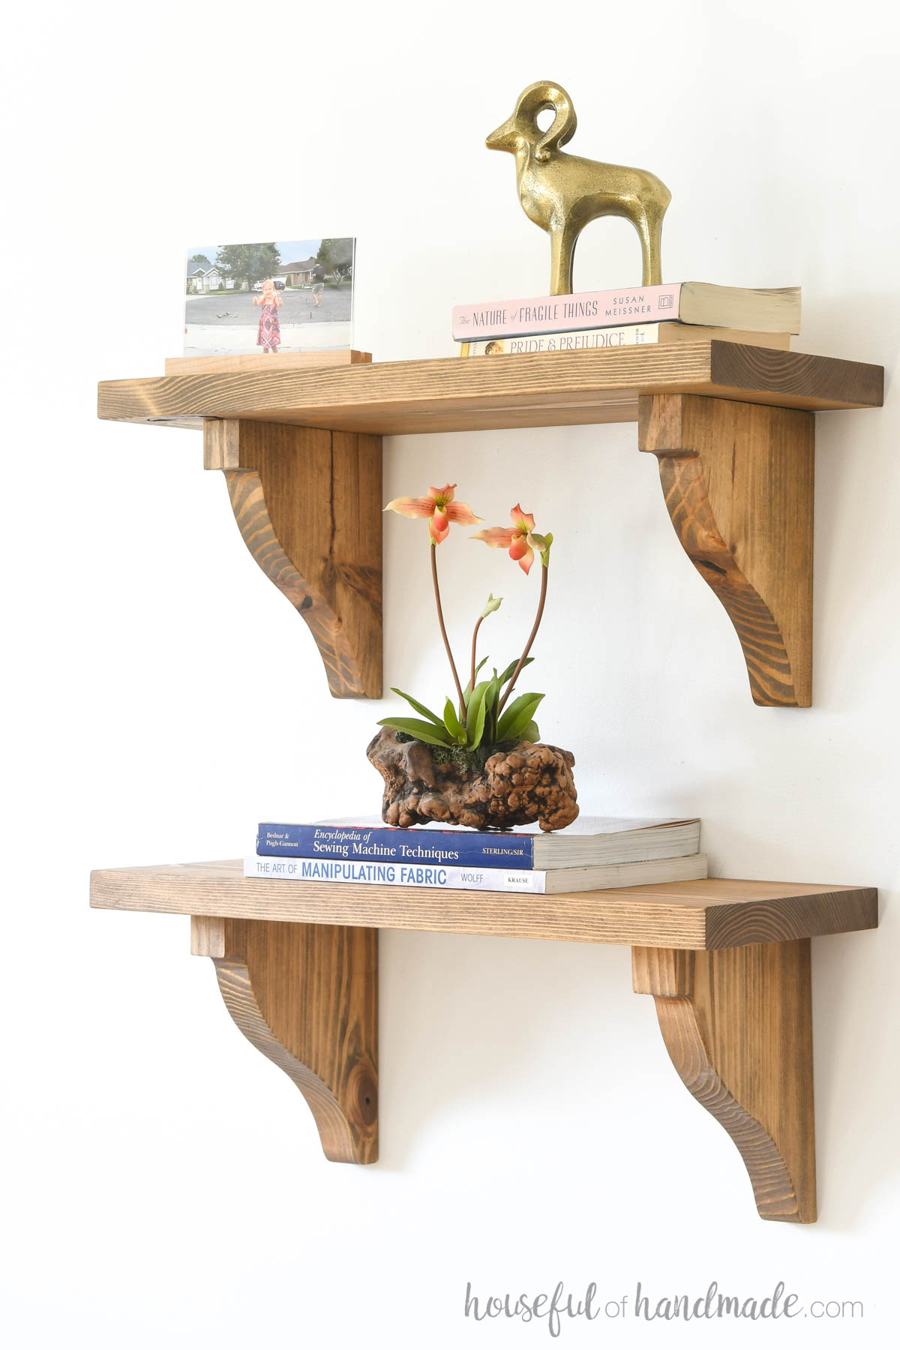
Best for: Traditional detail from a small amount of wood. Skill: Confident beginner.
Size reference: Original shelf boards: 22″ long × 9¼″ deep; brackets: 7¼″ deep.
Main materials: A short piece of 2×8 for each bracket pair, shelf boards, and suitable mounting hardware.
Shaped wooden brackets can make a modest shelf look considered and finished. Houseful of Handmade shows how to cut a matching pair of corbels and mount a shelf above them.
The source photos are styled outside a bathroom, but the design can suit a dry wall with the right finish. A short version works well for a tray of toiletries or a small folded-towel stack.
This is a good choice if you enjoy a little jigsaw work. Finish the curved supports before installation so you can reach every edge. Our wood finishing tools guide can help with preparation.
Plan access: Free online bracket and shelf tutorial.
15. Compact Bathroom Storage Tower for Baskets
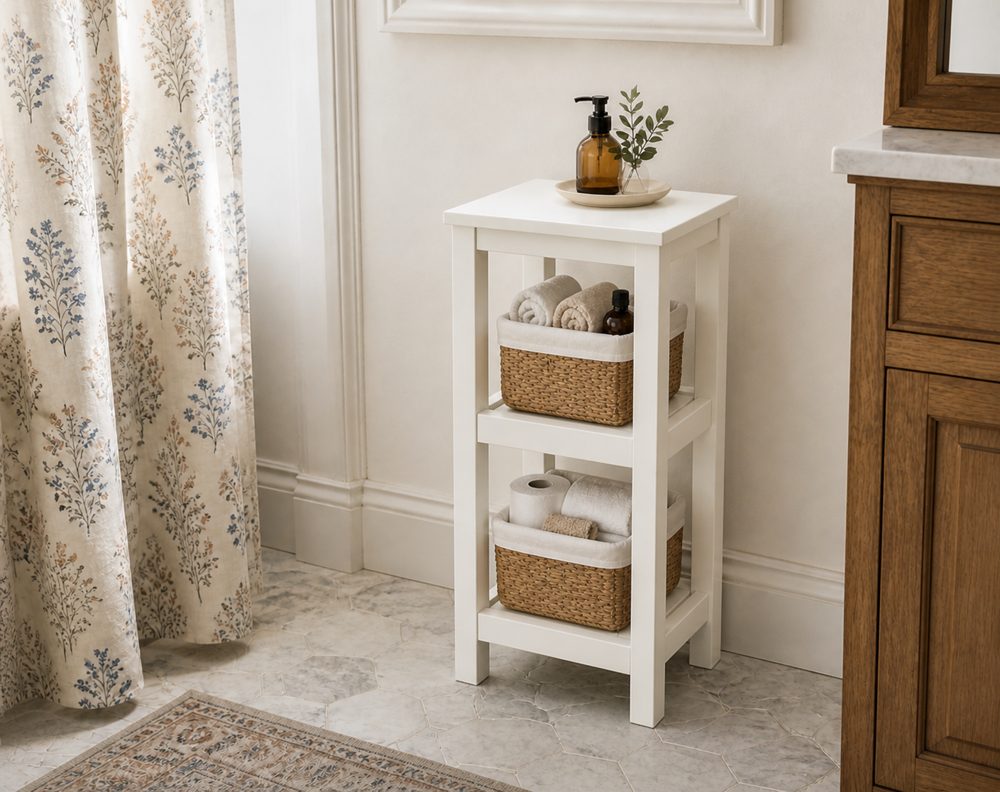
Best for: A narrow gap beside the vanity. Skill: Beginner-friendly.
Size reference: Original top shelf: 16″ long; leg pieces: 29¼″ long. Check the dimension diagram for the assembled footprint.
Main materials: 2×2 legs and supports, 1×12 shelves, 1×3 and 1×2 trim, screws, and glue.
This compact tower is a more versatile option than a decorative wall shelf when you have a little floor space to spare. Two lower storage levels can hold baskets, leaving the top available for a small tray.
Ana White’s plan uses straightforward boards and a simple frame. It is a useful beginner build for storing folded towels and spare toilet rolls close to the vanity.
Measure the baskets and the gap before shopping. The top and trim may project beyond the legs, so check the complete footprint rather than the shelf boards alone. Keep the base out of standing water and secure the unit against tipping.
Plan access: Free online plan with shopping list, cut list, and diagrams.
Measure These Things Before You Build
Start with the items you want to store. Measure your tallest bottle, folded towels, and preferred baskets. Then check the available wall width and the depth you can use without crowding the room.
- Door movement: Include the handle and the full opening arc.
- Toilet access: Leave room to remove the tank lid and reach service parts.
- Sink clearance: Keep shelves clear of the tap, mirror access, and where your head moves when washing.
- Mounting: Identify suitable structural support and check for hidden pipes and wiring before drilling.
A cardboard shelf mock-up is useful here. Tape it in position and use the room normally before committing to a depth. If you are gathering basic equipment, our woodworking tools for beginners guide can help you plan the build.
Choosing Wood and a Finish for Bathroom Shelves
Wood can work beautifully in a bathroom when you manage moisture. Keep these projects outside the shower and away from repeated direct splashing. A protective finish does not turn an ordinary wooden shelf into waterproof shower storage.
Pine is easy to work with for painted projects. Hardwoods can give a small shelf a more distinctive grain, while good-quality plywood is useful for panels and shallow organizers. Choose flat, sound material and avoid damaged edges that are difficult to seal.
Apply a coating whose manufacturer recommends it for the intended interior use. Follow its preparation, coverage, and curing instructions; coat exposed edges and end grain as well as the main faces. Let the finish cure before placing bottles or baskets on it. Wipe up splashes promptly and ventilate the bathroom after bathing.
How to Make Small Bathroom Shelves Look Tidy
Give each shelf a job: daily essentials within reach, spare supplies above, and a little empty space so the room still feels open.
- Use one or two baskets sized to the shelf instead of several containers that overhang.
- Group small bottles on a washable tray so cleaning stays simple.
- Leave some empty space rather than filling every inch.
- Keep clean towels separate from damp towels that need to dry.
- Store medicines and hazardous products securely where children cannot access them; an open shelf is not secure storage.
If you enjoy making practical storage for awkward spaces, our wooden spice rack ideas for small kitchens use a similar approach: match the depth and layout to the items you need to organize.
What Will You Build After Your Bathroom Shelves?
A small shelf is a useful way to practise measuring, joining boards, and applying a neat finish. Once you have made one, you can put those same skills into an entryway organizer, a bedside table, or another piece of storage furniture.
Want more project choices in one place? Explore Ted’s Woodworking Plans here → It is a paid offer to consider for future builds. Look through the current sample plans and package details to see whether they fit your tools and experience; the independent projects featured above are separate.
Prefer another small build first? Browse our free woodworking plans for beginners.
Frequently Asked Questions
What is the easiest wooden bathroom shelf to build?
A short shelf on suitable brackets is a simple starting point. Among these projects, the one-board towel shelf is also approachable because it uses a small number of parts. The installation still needs careful attention, even when the woodworking is straightforward.
How deep should shelves be in a small bathroom?
Use the shallowest depth that comfortably fits what you want to store. Bottles need less space than folded bath towels. Measure the contents and test a cardboard mock-up against the door swing, toilet, and sink before choosing your final dimensions.
Can I put wooden shelves above a toilet?
Yes, when the shelf is securely mounted and leaves comfortable headroom and access for maintenance. Keep the tank lid removable, avoid overcrowding the area, and choose storage that is easy to clean.
Can I build bathroom shelves from scrap wood?
Yes, if the pieces are sound, flat, clean, and suitable for indoor use. Shallow organizers and small shelves can be good uses for leftovers. Match the plan’s required thicknesses and do not use unidentified treated or contaminated wood indoors.
Are all the plans in this article free?
The article links to a mixture of free plans and free online tutorials. Some creators sell optional printable PDF versions. Check each project’s plan-access note and the source page before downloading or buying anything.
How much weight can a DIY bathroom shelf hold?
There is no universal load limit. Capacity depends on the wood, shelf span, joinery, supports, fasteners, wall construction, and installation. Follow the original plan and hardware specifications rather than assuming a shelf can carry a particular weight from its appearance.
Start with the Spot That Needs Storage Most
Choose one problem to solve: towels filling the vanity, bottles crowding the sink, or an empty wall above the toilet. Measure that space, pick the project that fits, and read its full tutorial before buying materials. One thoughtfully placed shelf is often enough to make a small bathroom easier to use.