
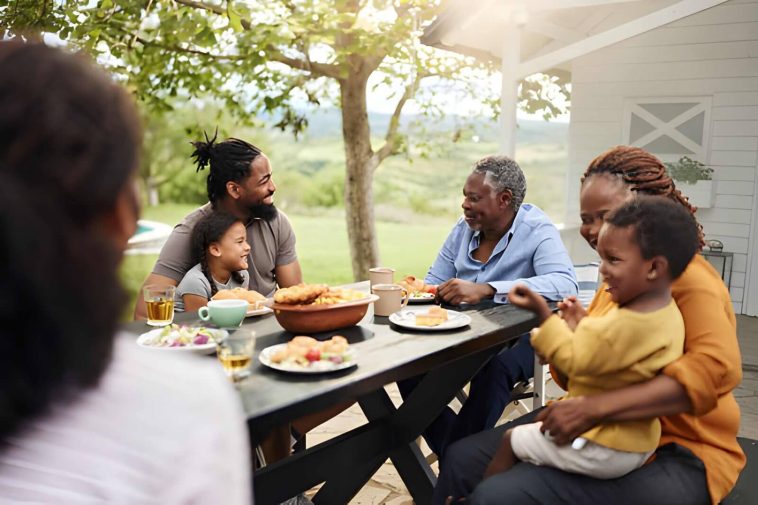
Summer is here, the backyard is calling, and honestly — what’s the point of having an outdoor space if you’re eating off a fold-up camping table? A picnic table you built yourself hits different. It’s sturdy, it’s personal, and every time someone sits down at it, you get to casually say “yeah, I made that.” 🙂
Whether you’ve never picked up a saw in your life or you’ve been building furniture for years, this list has something for you. We’re covering 12 plans across all skill levels — classic, farmhouse, folding, kids’ size, round, and a few that’ll genuinely make your neighbors jealous. If you’re just warming up to outdoor builds, check out our full list of 10 Backyard Wood Projects to Build This Summer (No Experience Needed) before you start.
Ready? Let’s build something.
Before You Build — What You Actually Need to Know
Before you grab your saw and start eyeballing a pile of 2x4s, let’s cover a few basics. This section is quick — promise.
Best Wood for Outdoor Picnic Tables
Not all wood handles the outdoors equally. Here’s what actually works:
- Cedar — naturally rot-resistant, lightweight, smells amazing. The premium option.
- Pressure-treated pine — affordable, strong, widely available. The practical choice for most builds.
- Redwood — beautiful and durable but pricier and harder to find.
- Douglas fir — solid and budget-friendly, works well when properly sealed.
FYI — skip untreated pine for anything that’ll sit outside year-round. You’ll be rebuilding in two seasons.
Tools You’ll Need
Most of these plans don’t require a full workshop. At minimum, grab:
- Circular saw or miter saw
- Power drill + bits
- Measuring tape
- Speed square
- Orbital sander
- Exterior wood screws (3″ for most builds)
Budget Range
Depending on the plan and your wood choice, expect to spend anywhere from $30 to $150. Pallet builds can cost almost nothing; cedar statement pieces will hit the higher end.
One Safety Note
Always pre-drill your holes before driving screws into the ends of boards. End-grain splits easily, and nothing kills momentum like a cracked 2×6 halfway through your build.
The 12 Picnic Table Plans
Beginner Picnic Table Plans
These four plans use basic cuts, minimal hardware, and tools most people already own. If this is your first outdoor build — start here.
Advertisement
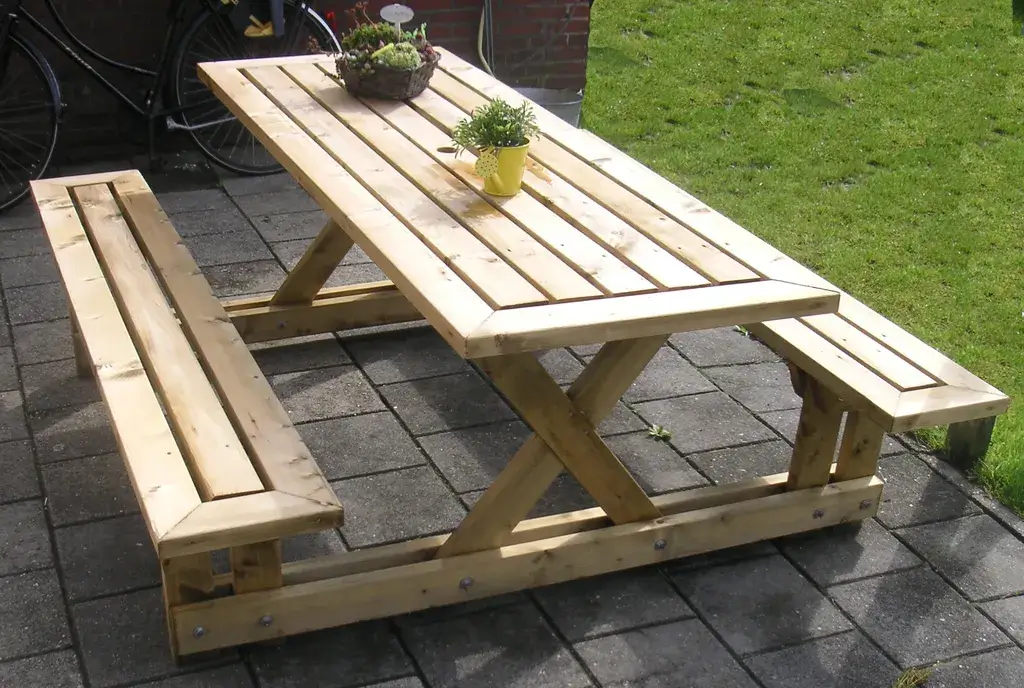
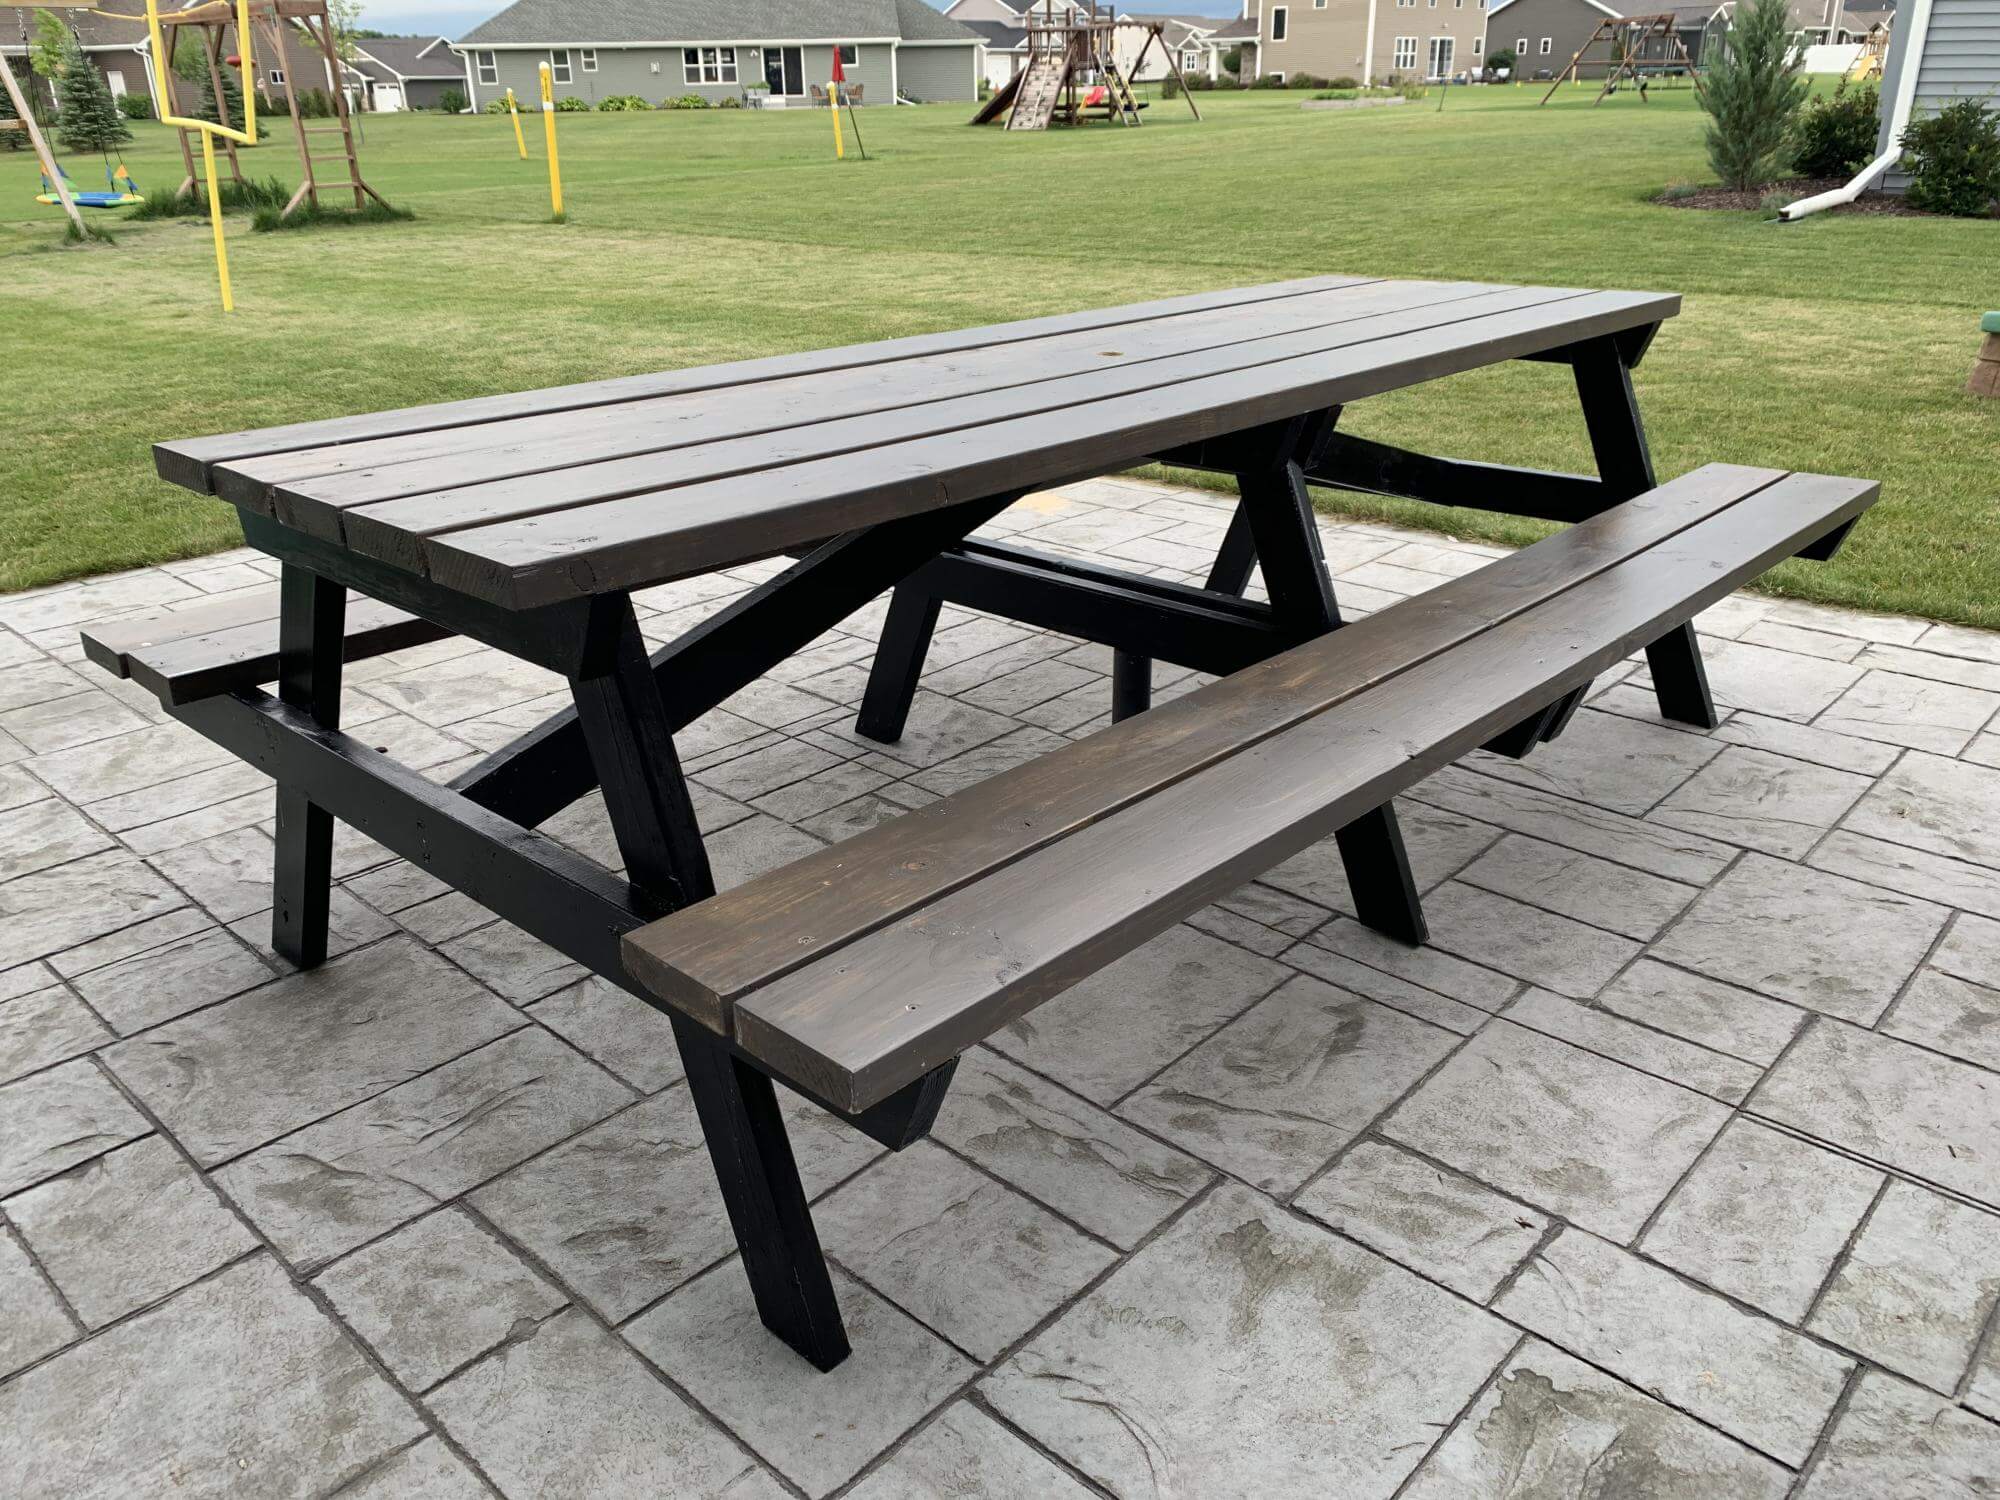
Plan 1: The Classic 2×4 Picnic Table
Credit : Instructables
Skill Level: Beginner | Cost: ~$40 | Time: 1 afternoon
The original. The one your dad probably built in the ’90s. And honestly? It still holds up — literally and figuratively.
This design uses standard 2×4 and 2×6 lumber, straight cuts only, and a handful of carriage bolts. No fancy joinery, no templates, no headaches. The attached benches are built as part of the same frame, so there’s no fussing with separate pieces.
Build notes:
- Standard tabletop width: 28–30 inches
- Bench height: 17–18 inches from ground
- Use 3″ exterior screws throughout
- Sand the tabletop to 120 grit before sealing — splinters are nobody’s friend
This is the plan to start with if you want a confidence-builder that actually ends up useful.
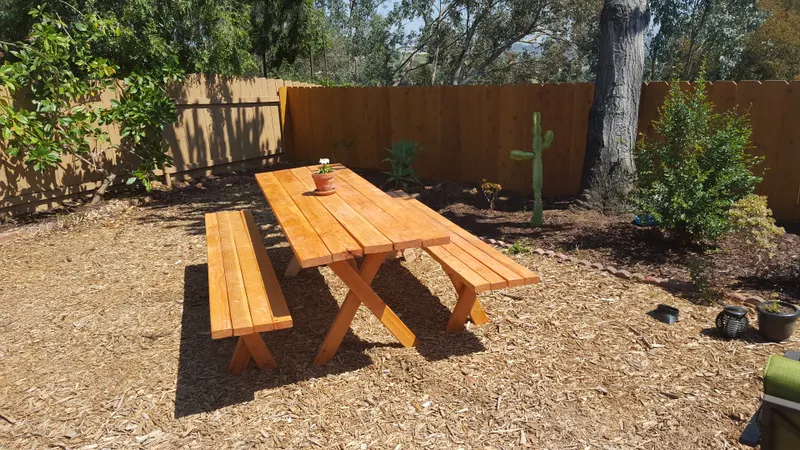
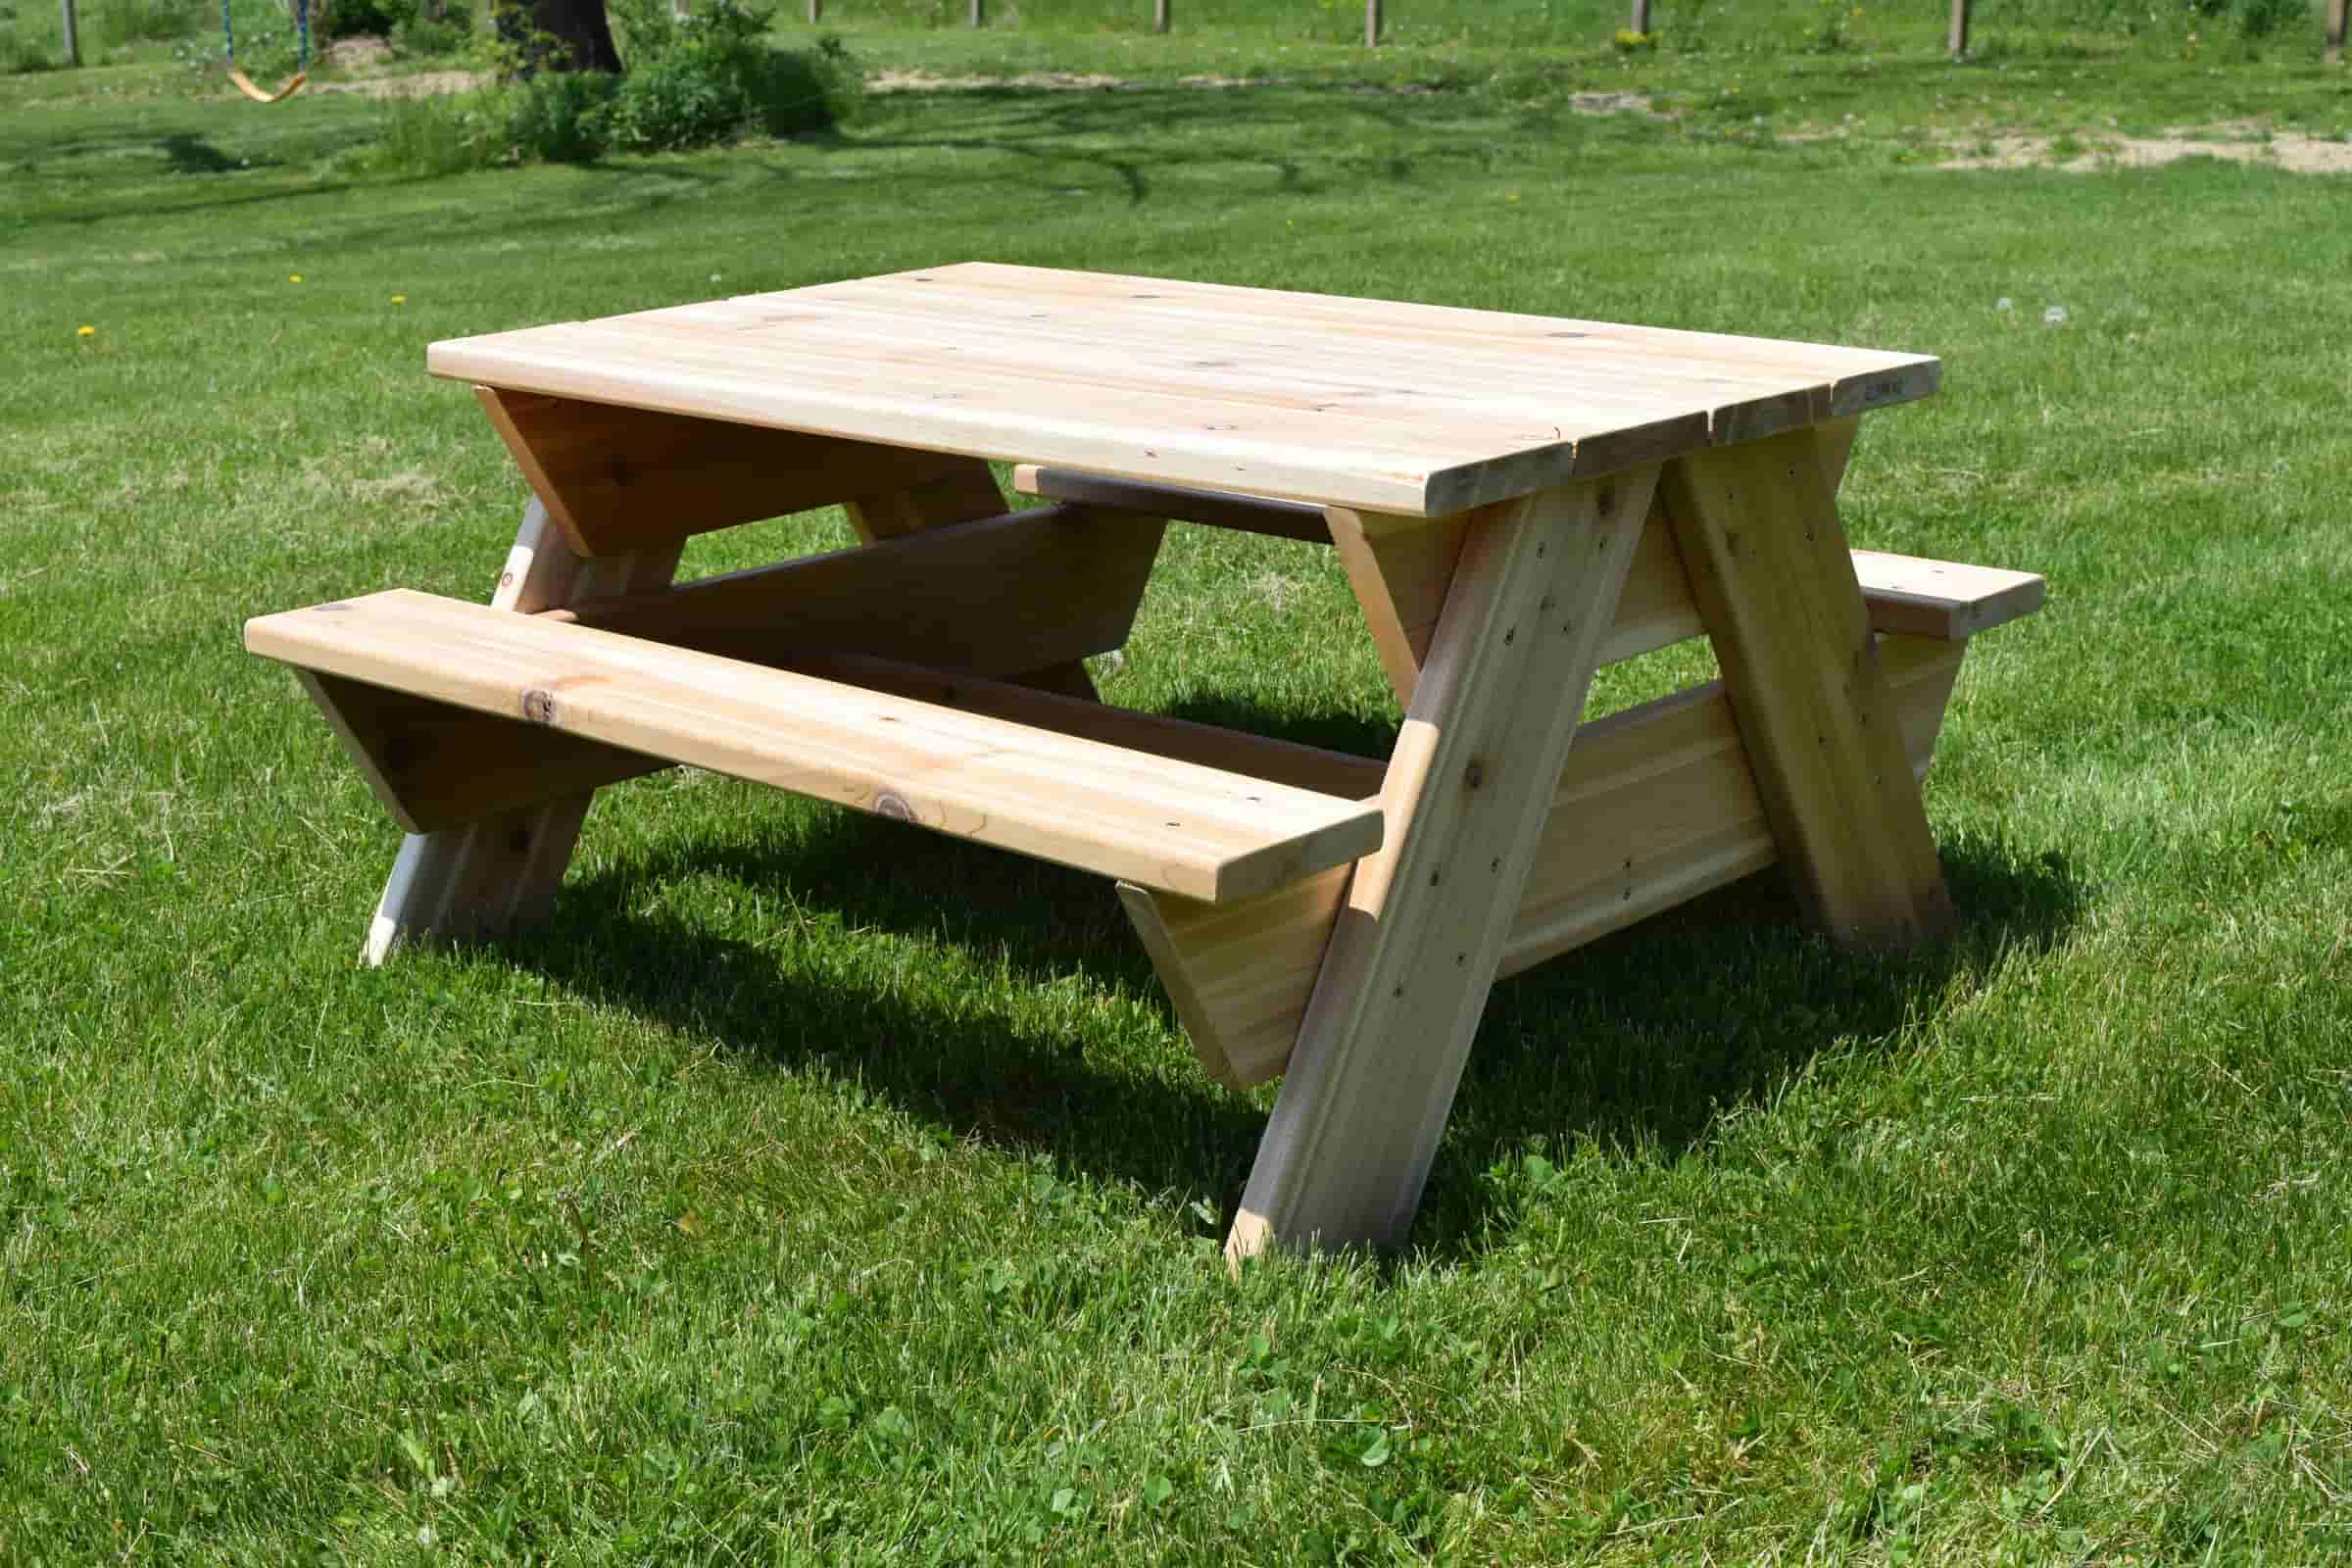
Plan 2: The Attached-Bench Picnic Table
Credit : Instructables
Skill Level: Beginner | Cost: ~$50 | Time: 1 day
This is the most recognizable picnic table style on the planet — the kind you see at every park, campsite, and backyard BBQ since approximately forever. The design uses diagonal leg braces that give it that classic A-frame look and solid stability.
Why we love it: It’s bombproof once assembled. Kids can climb on it, adults can crowd around it, and it doesn’t wobble.
Build notes:
- Cut your legs at a 35-degree angle for the classic splay
- Pre-drill every connection point — this one has a lot of hardware
- Pressure-treated 2x6s for the top and benches; 2x4s for the frame work great here
Get The Full Instructions Here
Plan 3: The Pallet Wood Picnic Table
Credit : Ana-White
Skill Level: Beginner | Cost: ~$10–$20 | Time: Weekend
Look — I know “pallet wood project” sounds like something from a 2014 DIY blog, but hear me out. When pallets are properly prepared and sealed, they make surprisingly good outdoor furniture. And spending $15 total on a usable picnic table is genuinely hard to argue with.
The key is prep. You need to disassemble carefully (a pallet buster tool makes this way easier), sand thoroughly, and seal with exterior finish before this thing sees rain.
Build notes:
- Source heat-treated pallets only (stamped HT) — avoid chemically treated ones
- Use pallet wood for the tabletop; build a proper lumber frame underneath for strength
- Two coats of exterior deck stain minimum
Get The Full Instructions Here
Plan 4: The Kids’ Picnic Table
Credit: Instructables
Skill Level: Beginner | Cost: ~$25 | Time: Half day
Half the size, twice the cuteness. This scaled-down version is perfect for kids 3–8, fits on a deck or patio without taking over the whole space, and makes an excellent weekend project you can actually knock out in a morning.
Build notes:
- Table height: 20–22 inches; bench height: 12–13 inches
- 2×4 lumber throughout — no need for 2×6 at this scale
- Round all the corners with a sander before finishing — small humans and sharp edges don’t mix
- Paint it a fun color and you’ve got a backyard hero project IMO
Get The Full Instructions Here
Intermediate Picnic Table Plans
These plans involve angled cuts, slightly more complex joinery, or additional features. Totally manageable if you’ve done a couple of beginner builds — just don’t rush them.
Plan 5: The Farmhouse Picnic Table
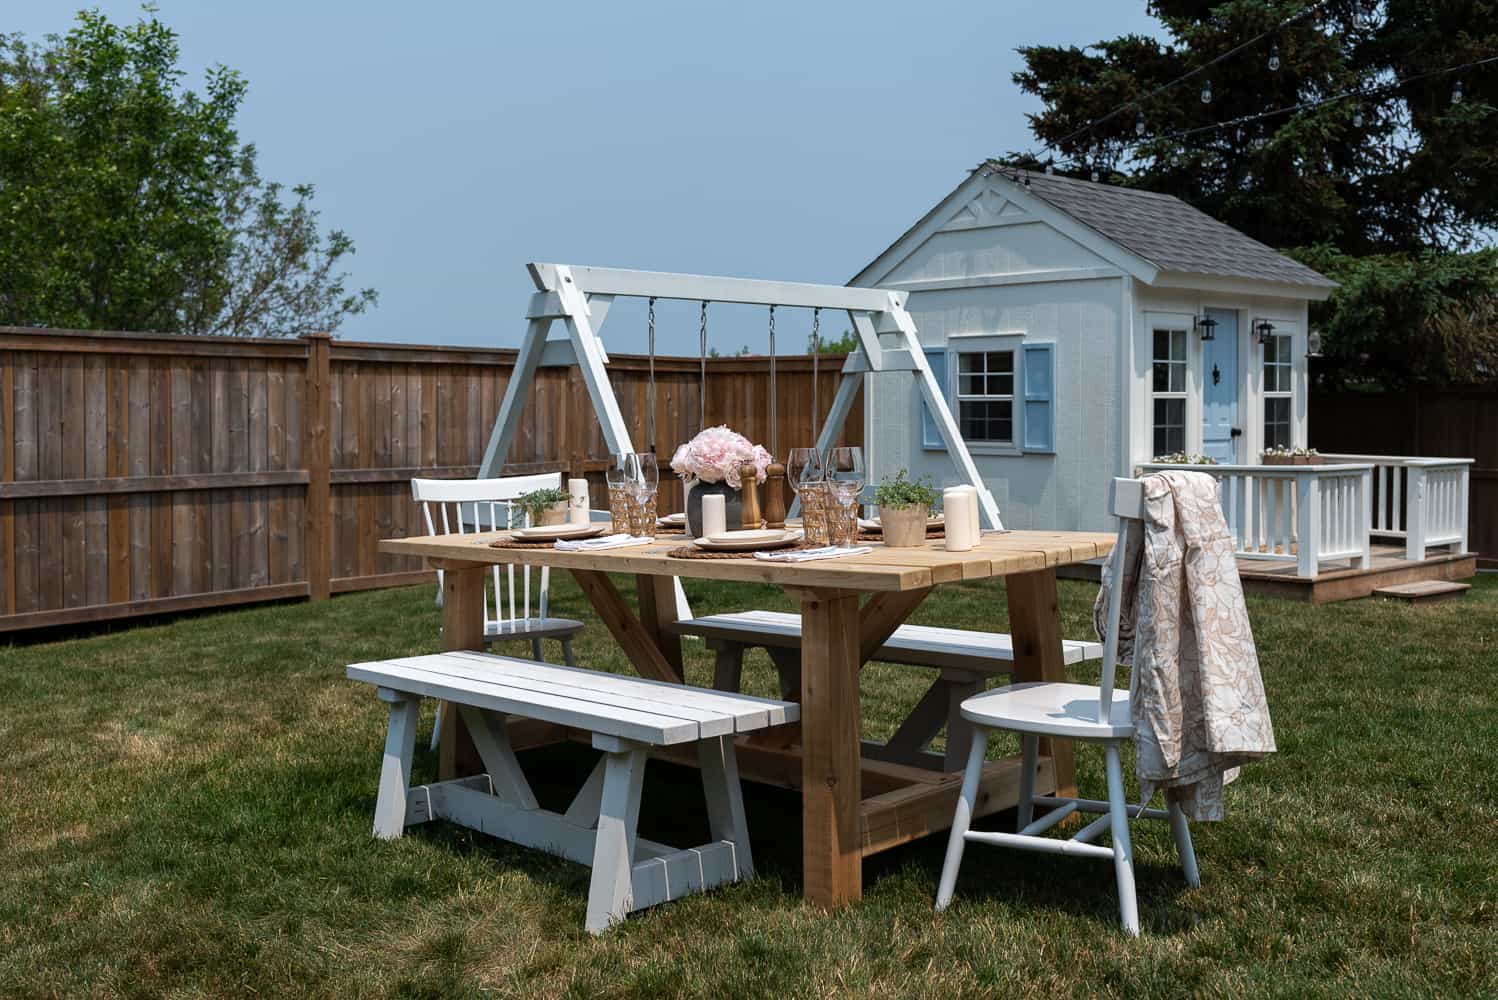
Credit: Kregtool
Skill Level: Intermediate | Cost: ~$80 | Time: Weekend
The farmhouse picnic table takes the classic silhouette and refines it — tighter construction, cleaner lines, separate benches instead of attached ones, and often a mix of 2×6 and 4×4 lumber for a chunkier, more intentional look.
What makes it different: The separate benches allow you to tuck them under the table when not in use, which is surprisingly practical. And the overall aesthetic is less “park furniture” and more “outdoor dining room.”
Build notes:
- 4×4 legs give it the farmhouse heft — don’t substitute 2×4s here
- Pocket hole joinery on the apron makes assembly much cleaner
- Finish with a grey-wash stain for maximum farmhouse points
Get the Full Instructions Here
Plan 6: The Folding Picnic Table
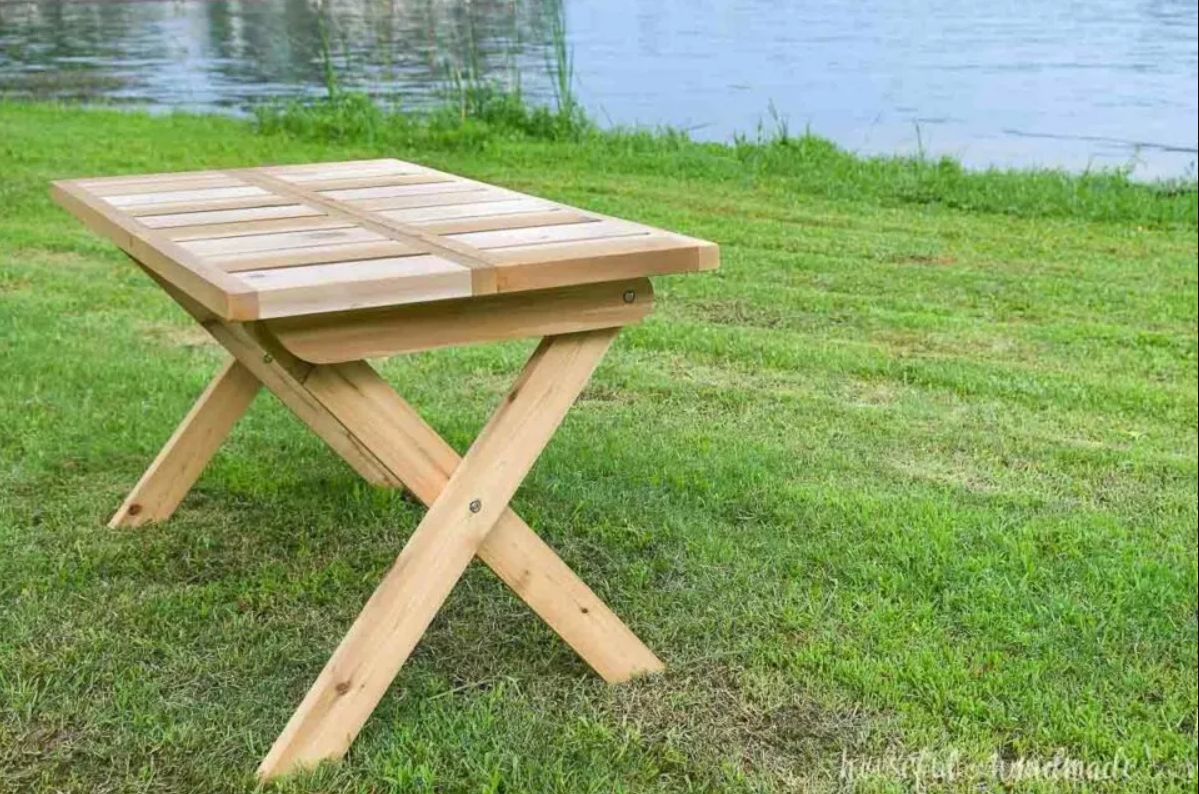
Credit : Housefulofhandmade
Skill Level: Intermediate | Cost: ~$60 | Time: 1 day
This one gets underrated. A folding picnic table folds completely flat, leans against the wall of your shed, and takes up almost no storage space. For anyone with a smaller yard or a garage that’s already doing too much, this is the practical pick.
The folding mechanism is the only tricky part — it uses a central pivot point with a specific hinge placement that needs to be precise. Get the measurement right and it works beautifully; get it wrong and you have a table that folds at an inopportune moment. So measure twice. Or three times.
Build notes:
- The pivot bolt placement is critical — mark carefully before drilling
- Use locking hardware so it doesn’t accidentally fold while in use
- Keep the tabletop boards tight with minimal gaps for stability
Get the Full Instructions Here
Plan 7: The Octagon Picnic Table
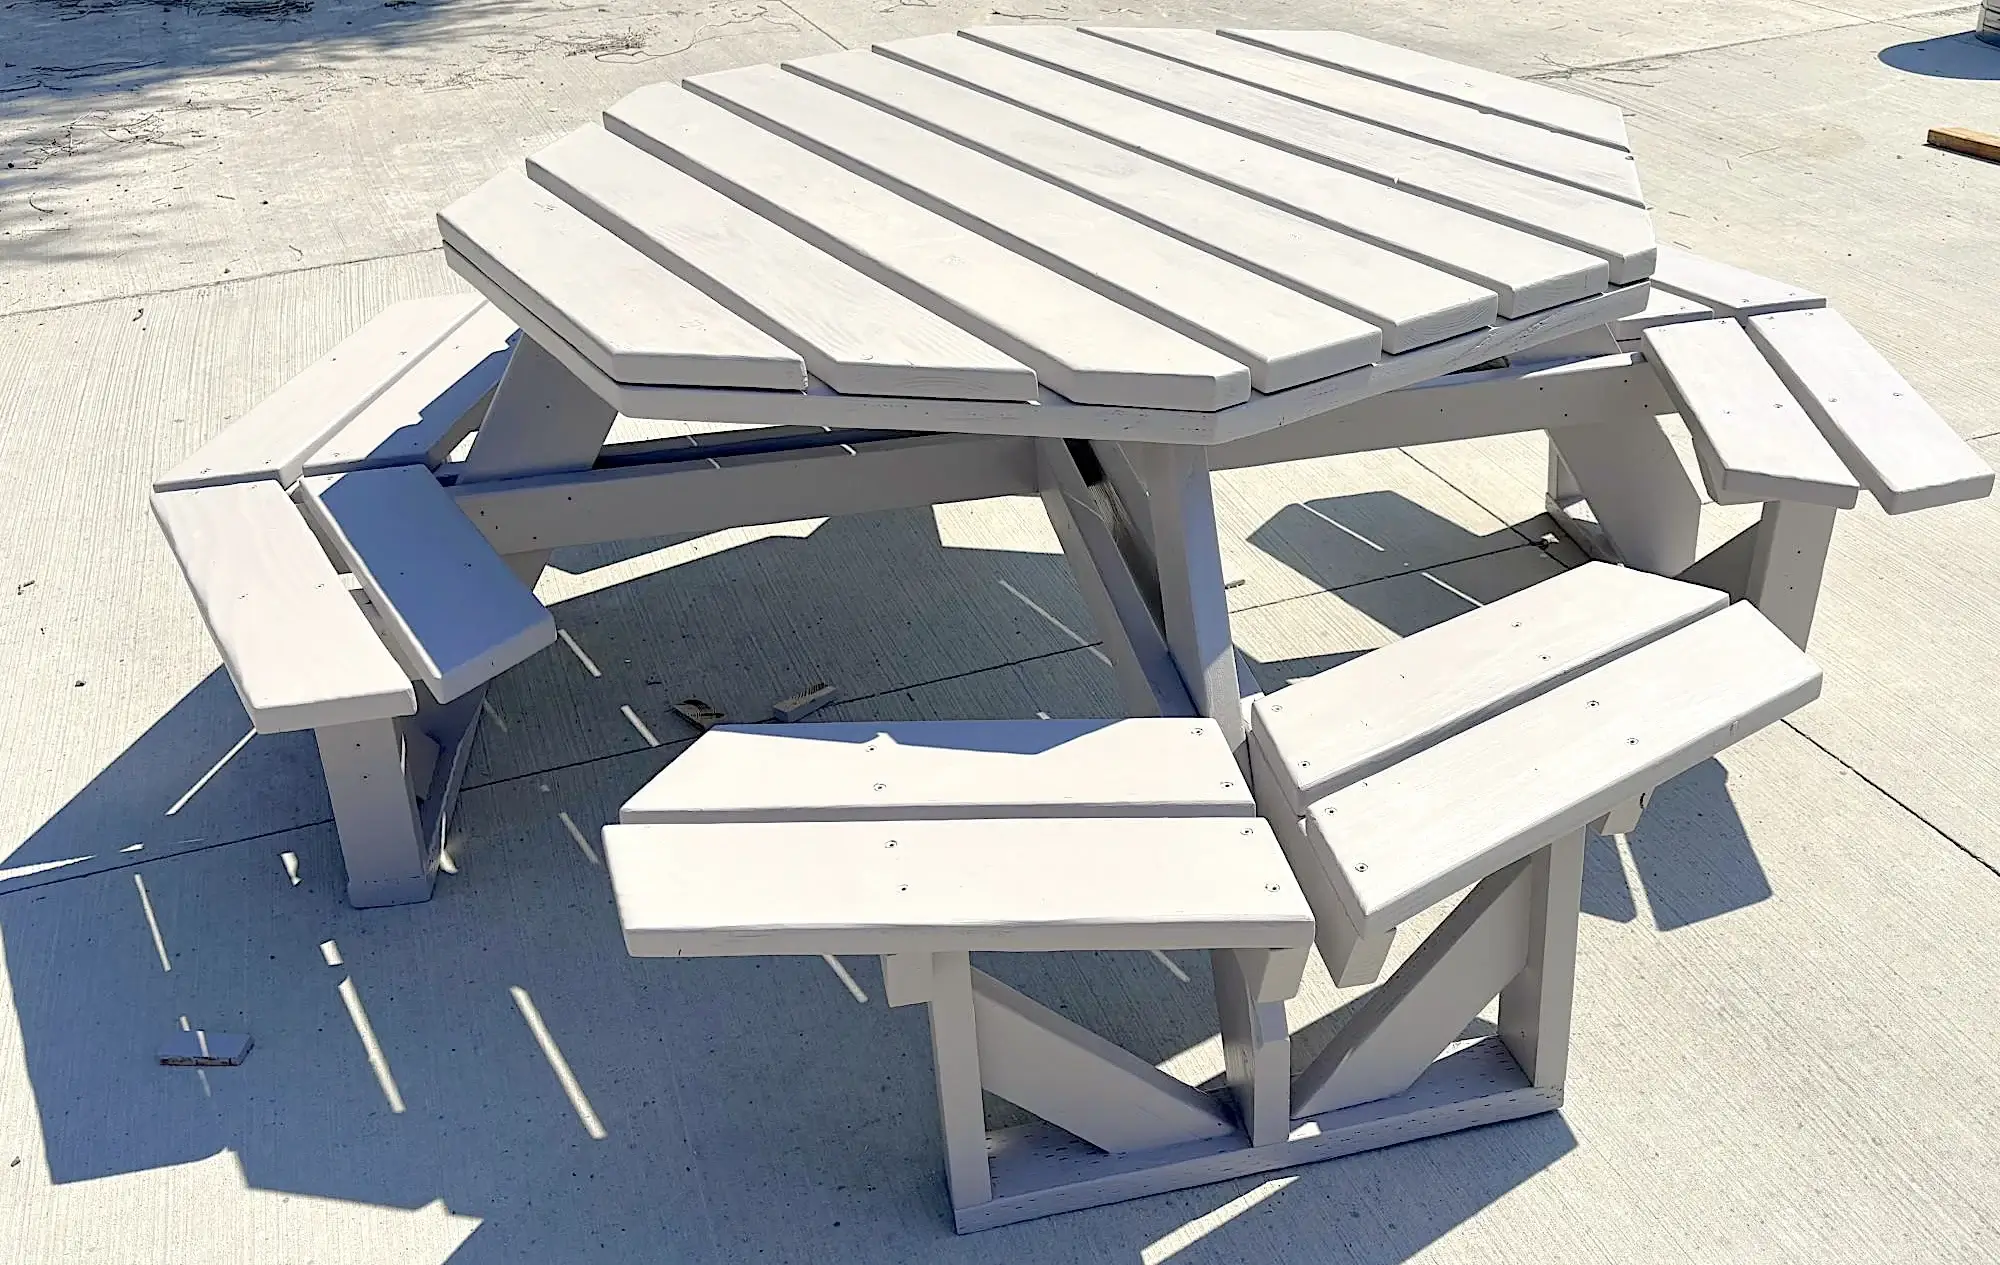
Credit: Ana-White
Skill Level: Intermediate | Cost: ~$90 | Time: Weekend
Octagon picnic tables look significantly more impressive than they are to build. The geometry intimidates people, but once you understand that you’re just making angled cuts on a radial pattern, it clicks.
Why it’s worth the extra effort: Everyone can make eye contact at a round table. No awkward “end of the table” seating. Plus it looks like something from a high-end outdoor furniture catalog.
Build notes:
- Cut all top boards at 22.5 degrees for an octagon; 15 degrees for a 12-sided round effect
- Build the base first and dry-fit the top before final assembly
- A central post base is the most stable option for this shape
Get the Full Instructions Here
Plan 8: The 8-Foot Picnic Table (Seats the Whole Crew)
Credit : Ana-White
Skill Level: Intermediate | Cost: ~$70 | Time: 1 day
Got a big family or love hosting? Then a standard 6-foot table just isn’t cutting it, and you know it. This 8-foot picnic table plan from Ana White is the answer — more seating, more surface space, and a bonus umbrella hole built right into the design so you don’t have to sacrifice shade for a full table.
What makes this build clever is how the center base support is modified — an extra tabletop support board is added to the opposite side of the center legs, giving the table symmetry while creating the perfect gap to fit a standard umbrella pole. No awkward retrofitting, no weak spots around the hole. It all works together from the start.
The builder used a 1¾” hole saw for the umbrella opening — just the right size for a snug fit without being too tight. And the whole thing, including staining, came in at around 5 hours of actual work. That’s a full-size entertaining table in less than a day. Not bad at all.
Build notes:
- Use a 1¾” hole saw for the umbrella hole — sized for a standard pole fit
- Modify the center base support with an extra board on each side for symmetry and umbrella clearance
- Shorten both cross supports by an inch so the base doesn’t extend past the tabletop boards
- The builder used untreated pine to keep weight manageable — seal thoroughly with exterior spar urethane if you go this route
- Finish recommendation: Varathane Briarsmoke for the top, Rustoleum Canyon Black Satin for the base, sealed with 2 coats of Helmsman Spar Urethane — this combo looks sharp
Love outdoor builds? See our full roundup of 15 Outdoor Wood Projects for Your Backyard for even more inspiration once you’re done here.
Advanced Picnic Table Plans
These plans take two days, more materials, and more planning. But the results look like something you’d pay $800 for at a furniture store — except you built it for a fraction of that.
Plan 6: The Convertible Picnic Table and Bench (2-in-1 Build)
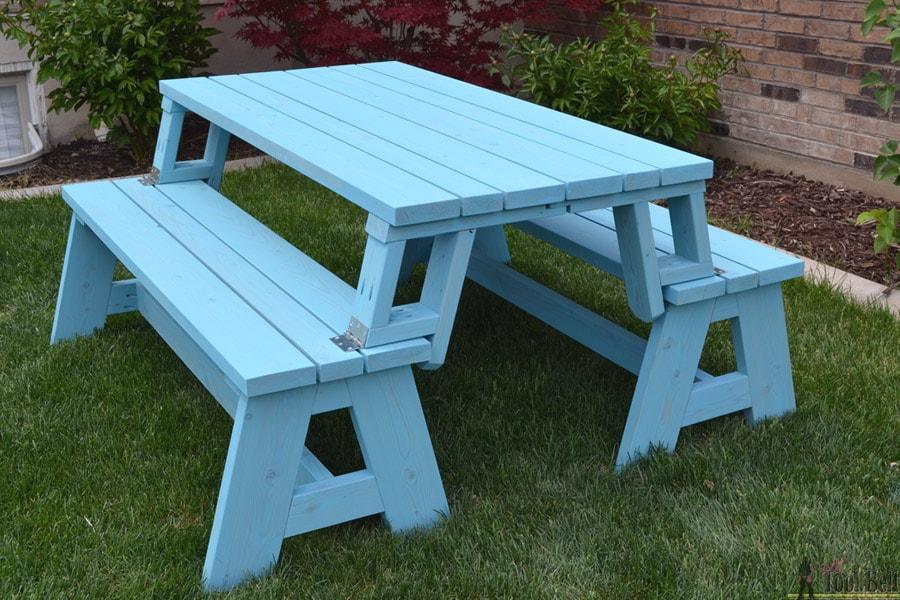
Credit : Kregtool
Skill Level: Intermediate | Cost: ~$60 | Time: 1 day
What if your picnic table could pull double duty? This Kreg Tool convertible plan is genuinely one of the smartest outdoor builds on this list. It functions as a full picnic table for meals and gatherings — then the tabletop folds down to become the backrest of two separate garden benches. One build, two pieces of furniture. That’s a win.
The whole thing is built using pocket hole joinery throughout, which means cleaner connections, less visible hardware, and a finished look that’s a step above your average backyard table. If you already own a Kreg pocket hole jig, this project is practically made for you. And if you don’t — well, this might be the project that finally convinces you to get one.
Why we love it: It’s the most versatile plan on this list. When you’re not hosting a full cookout, the two benches live separately as proper garden seating — not just tucked-away accessories. That’s actually useful.
Build notes:
- All pocket holes are drilled for 1½” material — set your jig accordingly before you start
- Drill pocket holes in leg supports A and B; mark 4⅛” up from the bottom of each leg for leg support A placement
- Use wood glue + 2½” screws at every joint — don’t skip the glue, it’s what keeps this build tight over time
- The bench top attaches to the legs with the leg assembly flipped upside down — follow the sequence carefully here
- Arm supports use pocket holes on one end; attach the riser pieces before mounting to the frame
- Optional lap joints on the table top supports keep the top from separating — worth doing if you have the tools
- Finish with exterior stain or paint, then seal with outdoor polyurethane — don’t skip the topcoat on a piece that’ll see this much use
Plan 10: The L-Shaped Corner Picnic Table
Credit : Instructables
Skill Level: Advanced | Cost: ~$100 | Time: Weekend
Got a tree in the corner of your yard or a fence line you want to use creatively? The L-shaped corner picnic table wraps around a corner or central feature and creates a cozy, semi-enclosed seating area that no standard rectangular table can replicate.
Build notes:
- Plan the corner angle before cutting anything — most corners are 90 degrees but verify yours
- The inside corner has no leg; it’s supported by the two connecting frame sections, which need to be extra solid
- Built-in storage under the benches is easy to add at this size and worth the extra effort
Get the Full Instructions Here
Plan 11: The Compact Picnic Table and Stools (Kreg Tool)
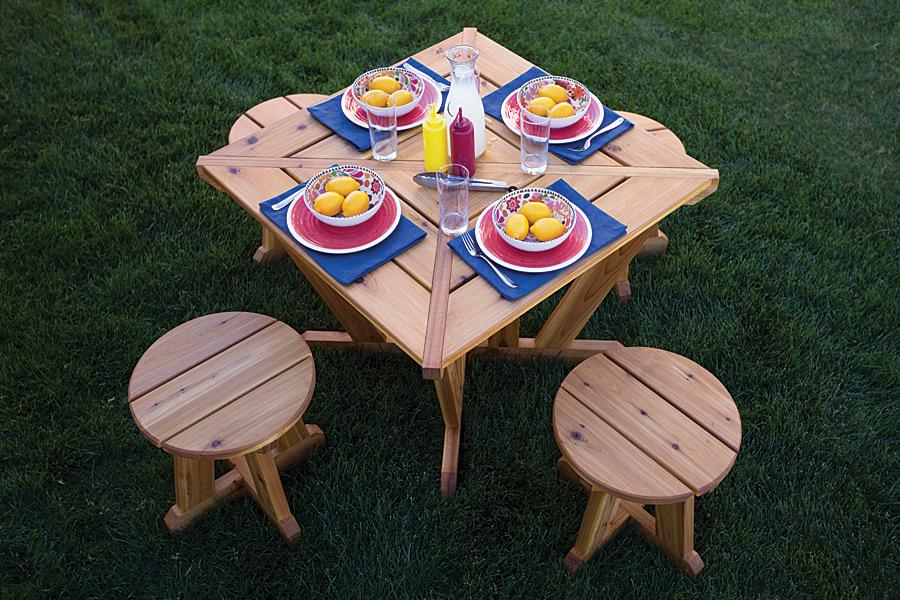
Credit : Kregtool
Skill Level: Advanced | Cost: ~$100 | Time: Weekend
Most picnic table plans assume you’ve got a sprawling backyard and a crowd to fill it. This Kreg Tool compact picnic table and stools plan thinks differently — and honestly, that’s what makes it stand out. It seats four comfortably, works perfectly for smaller patios and decks, and comes with four matching round cedar stools that look like they belong in a boutique outdoor furniture shop. You genuinely won’t find this design at any store.
The whole build uses all-cedar construction throughout — both the table and the stools — so durability outdoors isn’t a concern. The geometric frame design with chamfered rails and angled uprights gives it a look that’s distinctly more refined than your average backyard table. And the stools? Each seat gets cut into a 17-inch diameter circle using a jigsaw, which is the kind of detail that makes people ask “wait, did you actually build that?”
The joinery is pocket hole throughout, using the Kreg jig set for 1½”-thick stock for the frame parts and 1″-thick stock for the slats. It’s a lot of parts — Kreg themselves note to keep everything sorted and chalk-marked as you go — but the step-by-step sequence is very well documented with diagrams for every stage.
Tips to Make Any Picnic Table Last Longer
You put the work in — now protect it. These five habits will extend the life of any outdoor table significantly:
- Always sand before finishing. Bare wood that’s been sanded absorbs sealant properly; unsanded wood sheds it. At minimum, run through 120 grit on all surfaces.
- Use exterior wood glue at all joints in addition to screws. The glue fills gaps and dramatically reduces the chance of joints working loose over time.
- Apply a waterproof stain or sealant rated for outdoor use. Reapply every 1–2 years depending on your climate and how much direct sun the table gets.
- Elevate the legs slightly off the ground using rubber feet or a concrete pad. Direct ground contact is where rot starts, even with treated lumber.
- Cover it or store it in winter. A $20 waterproof furniture cover extends the life of an outdoor table by years. Don’t have storage space? That’s a separate problem — and we’ve got 20 Free DIY Storage Shed Plans to Organize Your Backyard Like a Pro that will solve it.
Frequently Asked Questions
How long does it take to build a picnic table? Most beginner plans (Plans 1–4) can be completed in a single afternoon to one full day. Intermediate plans typically take a full day. Advanced builds generally require a weekend or two separate work sessions.
What’s the cheapest wood for an outdoor picnic table? Pressure-treated pine is the most budget-friendly option that’s actually appropriate for outdoor use. You can build a solid, functional table for around $40–$50 using PT pine from any home improvement store.
How much does it cost to build a picnic table? Anywhere from $10–$20 for a pallet build up to $150 for a premium cedar or all-weather treated build. The average for a solid beginner-to-intermediate table lands around $50–$80.
Can a total beginner build a picnic table? 100% yes. Plans 1–4 on this list require only a circular saw, a drill, and basic measuring skills. If you can cut a straight line and drive a screw, you can build a picnic table. The classic 2×4 table (Plan 1) is genuinely one of the best first woodworking projects you can tackle.
You’ve Got 12 Plans — Now Go Build Something
Here’s the thing about picnic tables: they’re one of those rare projects where the effort-to-payoff ratio is massively in your favor. A weekend of work produces something your whole family uses for years. That’s a pretty good deal.
Start with the plan that matches your skill level and your budget. Don’t overthink the wood species or the finish on your first build — just get the reps in. Your second table will be better than your first, and your third better than your second.
And if you caught the building bug and want to keep going beyond picnic tables — which, fair warning, tends to happen — one resource a lot of our readers have found genuinely useful is Ted’s Woodworking. It’s a collection of over 16,000 step-by-step plans covering everything from outdoor furniture and garden structures to full indoor furniture builds, shop jigs, and storage solutions. Every plan includes cut lists, material guides, and measurements, so you’re never starting from scratch on a new project. If you want a ready-made roadmap for the next ten things you want to build instead of hunting for plans one by one, it’s worth checking out.
See Ted’s Woodworking Plans here →
Now go build that table. Summer’s not waiting.