Have you ever had trouble making that flawless wood piece for a do-it-yourself project? Learn how to easily and effectively join two boards lengthwise!
Joining two boards lengthwise is a foundational skill in woodworking, allowing you to create larger pieces of wood from smaller ones. Whether you’re crafting furniture, building a tabletop, or working on a DIY project, knowing how to seamlessly and securely connect boards is essential.
In this guide, we’ll explore several popular methods, their advantages and disadvantages, and step-by-step instructions to achieve professional results. Let’s dive into the world of edge joints and make woodworking accessible and enjoyable for everyone.
Key Takeaways
- Glue It Together: The simplest and most accessible method for joining boards lengthwise. Requires minimal tools but may lack strength for heavy-duty applications.
- Reinforce with Dowels: Ideal for added stability and precision. Involves drilling holes for wooden dowels to align and strengthen the joint.
- Use Pocket-Hole Screws: This technique, using a Kreg Jig, provides robust joints, commonly used in furniture-making.
- Advanced Joinery: Techniques like biscuit joints, half-lap joints, and bevel scarf joints offer a balance of strength and aesthetics for experienced woodworkers.
What Does It Mean to Join Two Boards Lengthwise?

To join two boards lengthwise, also called edge joining, involves connecting the long edges of two wooden boards to create a wider or longer surface. This is often necessary for projects like tabletops, countertops, or larger panels. With the right method, you can create a smooth and sturdy joint that looks like a single, continuous piece of wood.
1. The Basics of Joining Boards
Prior to delving into particular methods, it’s critical to comprehend several basic ideas:
- Alignment: A smooth and robust joint is guaranteed by proper alignment. For a smooth and organic appearance, always align the wood grain.
Preparation: To increase adherence and avoid flaws, sand and polish the boards’ edges.
Clamping: To provide a strong binding, clamps are necessary to hold boards firmly while glue or screws set.
2. Methods for Joining Boards Lengthwise
a) Gluing the Boards
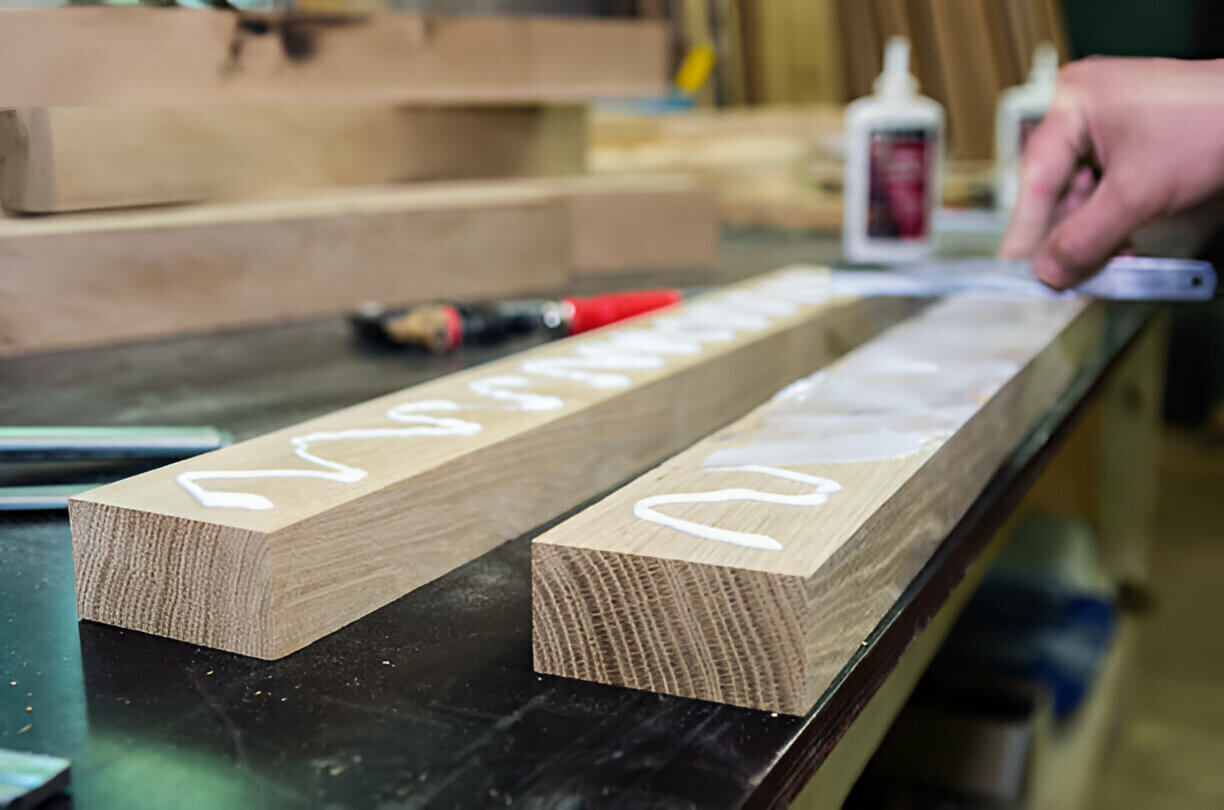
Gluing boards together is the easiest method, perfect for beginners. If done carefully, it can create an invisible joint.
What You’ll Need:
- Wood glue
- Clamps
- Chalk or pencil
- Wood chisel
Steps:
- Prepare the Boards: Lay the boards flat and align their edges. Match the grain for a cohesive look.
- Mark Alignment: Draw a U-shape across the joint to ensure proper alignment during clamping.
- Apply Glue: Spread an even line of wood glue along one edge. Avoid overapplying to reduce excess spillage.
- Join and Clamp: Press the boards together and clamp them firmly. Let the glue set for at least 20 minutes.
- Clean Excess Glue: Use a chisel to scrape off glue once it starts to dry but is still soft.
Pros:
Advertisement
- Simple and beginner-friendly.
- No need for specialized tools.
Cons:
- Not the strongest joint.
- May bow if not clamped properly.
b) Adding Dowels for Strength
Using dowels is a popular technique for reinforcing joints. It’s precise and creates a durable connection.
What You’ll Need:
- Wooden dowels
- Drill with matching bit
- Ruler, depth gauge, and pencil
- Wood glue
- Mallet
Steps:
- Mark Dowel Holes: Measure and mark evenly spaced points along the edge of the boards. Use a ruler to ensure accuracy.
- Drill Holes: Drill holes at the marked points to the depth of your dowels. Use masking tape on the drill bit as a depth guide.
- Install Dowels: Verify that the dowels fit into the holes. Insert the dowels after applying wood glue on them.
- Join Boards: Align the dowels with the corresponding holes on the second board. Push the boards together and clamp them.
- Let It Dry: Allow the glue to set for a strong bond.
Pros:
• Stronger than glue alone.
• Precise alignment of boards.
Cons:
• Requires drilling skills.
• Time-consuming compared to gluing.
c) Pocket-Hole Screws with a Kreg Jig
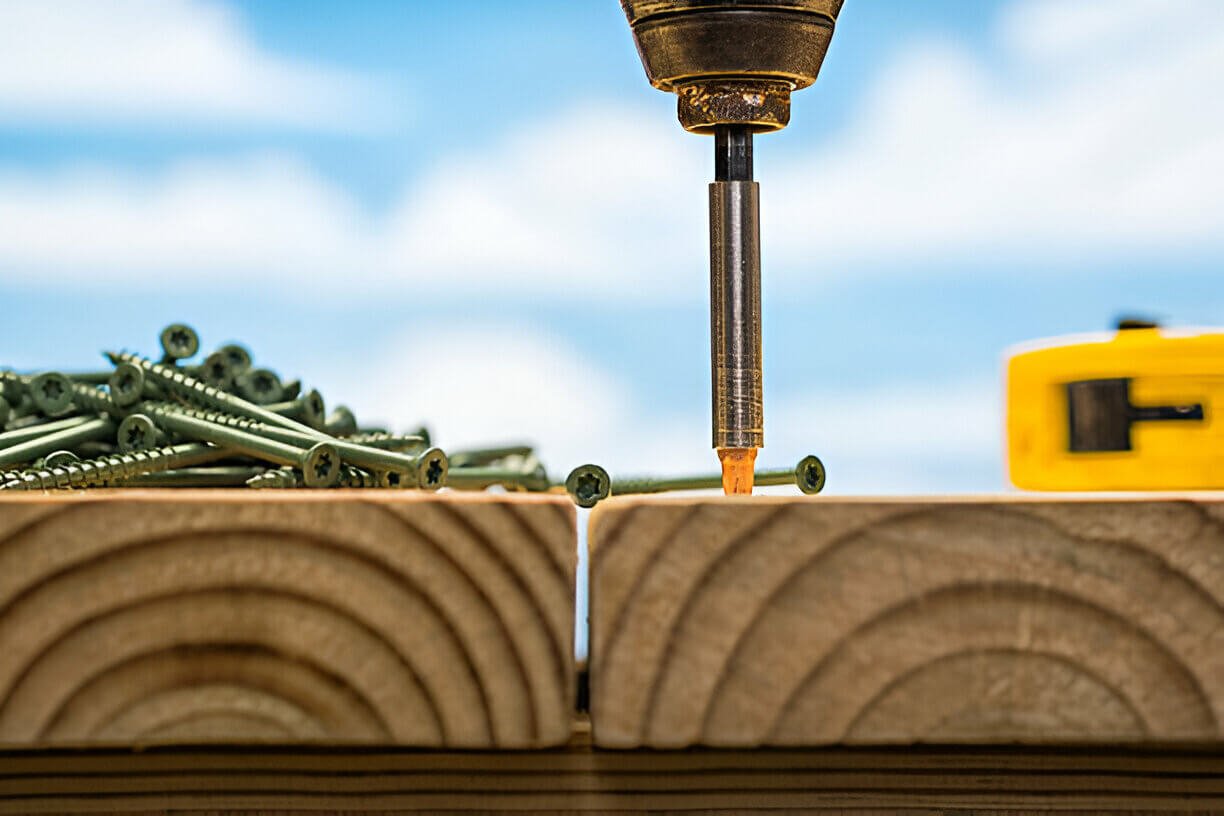
Pocket-hole screws are a favorite among furniture makers for their strength and neat appearance.
What You’ll Need:
- Kreg Jig
- Drill and driver bits
- Pocket-hole screws
- Clamps
Steps:
- Set Up the Jig: Adjust the Kreg Jig based on the thickness of your wood.
- Drill Pocket Holes: Clamp the board into the jig and drill angled holes into the edge.
- Align the Boards: Position the second board against the first. Use clamps to hold them steady.
- Screw Them Together: Insert screws into the pocket holes and tighten until the boards are flush.
- Finish Up: Sand the joint to smooth out any imperfections.
Pros:
• Strong and secure joint.
• Hidden screws for a clean look.
Cons:
• Requires a specialized tool.
• Slight learning curve.
d) Biscuit Joints
Biscuit joinery involves inserting thin, oval-shaped wooden pieces into slots to align and strengthen the joint.
What You’ll Need:
- Biscuit joiner
- Biscuits
- Wood glue
- Clamps
Steps :
- Mark Dowel Holes: Measure and mark locations along the boards’ edge that are uniformly spaced. To guarantee precision, use a ruler.
- Drill Holes: To determine the depth of your dowels, drill holes at the designated spots. As a depth guide, apply masking tape on the drill bit.
- Install Dowels: Make sure the dowels are inserted into the appropriate holes. Apply wood glue to the dowels and insert them.
- Join Boards: Line up the dowels with the second board’s matching holes. Clamp the boards together after pushing them together.
- Let It Dry: To ensure a solid bond, let the glue cure.
Pros:
• Creates a seamless joint.
• Improves alignment.
Cons:
• Requires a biscuit joiner.
• Less robust than dowels or screws.
e) Half-Lap Joints
Half-lap joints involve removing half the thickness of each board at the joint, creating a flush and sturdy connection.
What You’ll Need:
- Table saw with dado blade
- Square and pencil
- Clamps
- Wood glue
Steps:
- Mark the Joint: Use a square to mark the overlap on both boards.
- Cut the Lap: Set the dado blade to half the board’s thickness and cut along the marked area.
- Test Fit: Check that the two boards fit flush.
- Apply Glue and Clamp: Glue the joint and clamp it tightly. Let it set for a few hours.
Pros:
- Extremely strong joint.
- Provides a large bonding surface.
Cons:
- Requires a table saw.
- Time-intensive.
f) Bevel Scarf Joints
This advanced technique increases the bonding surface by cutting edges at an angle.
What You’ll Need:
- Table saw or miter saw
- Clamps
- Wood glue
Steps:
- Cut the Bevel: Set the saw blade to 45 degrees and cut the edges of both boards.
- Apply Glue: Spread glue on the angled surfaces.
- Clamp the Boards: Join the boards and clamp them until the glue sets.
Pros:
- Strong and clean joint.
- Ideal for longer boards.
Cons:
- Requires precise cutting.
- Limited to straight edges.
3. Tips for a Seamless Joint
- Use Sandpaper: Smooth edges ensure better adhesion and a clean look.
- Check for Flatness: Use a straightedge to ensure the boards lie flush.
- Don’t Skimp on Clamps: Apply consistent pressure along the joint to avoid gaps.
- Practice Makes Perfect: Experiment with scrap wood to master each technique.
4. When to Use Each Method
- Gluing: Ideal for lightweight projects or decorative pieces.
- Dowels: Best for medium-strength applications like shelves.
- Pocket-Hole Screws: Perfect for furniture and heavy-duty projects.
- Biscuit Joints: Suitable for tabletops and panels.
- Half-Lap or Scarf Joints: Excellent for structural integrity and longer boards.
5. FAQs
Q: Can I join boards without glue?
Yes, using screws, dowels, or brackets can eliminate the need for glue, but the joint may not be as seamless.
Q: How do I prevent bowing?
Ensure the boards are flat and clamped tightly during the drying process.
Q: What’s the strongest joint?
Half-lap joints and pocket-hole screws are among the strongest methods for joining boards lengthwise.
With these methods and tips, you can confidently join two boards lengthwise for any woodworking project. Whether you’re a beginner or a seasoned pro, there’s a technique suited to your skill level and project needs. Happy woodworking!