
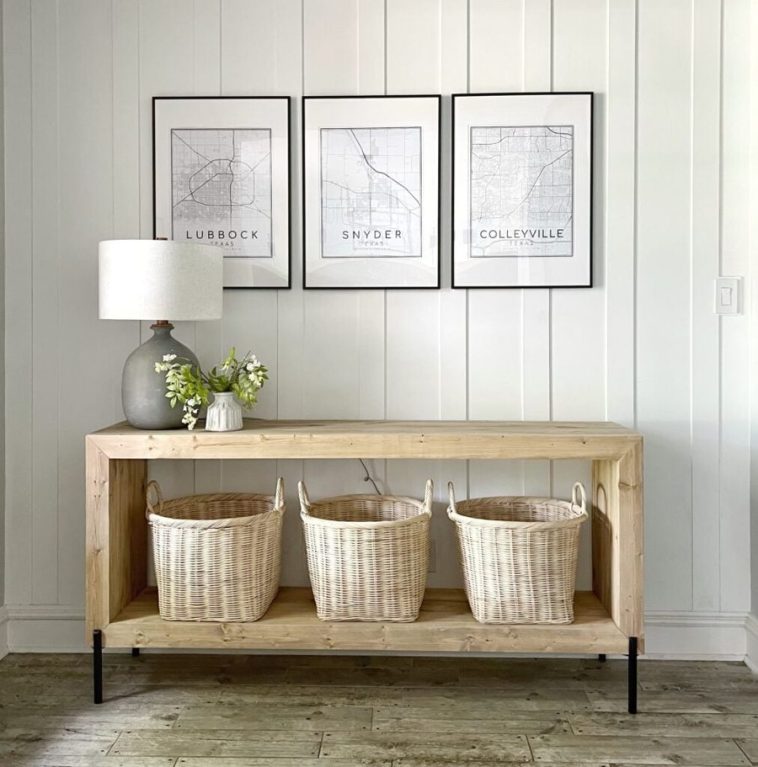
You walk in the door with keys in one hand and a pile of mail in the other, and there’s nowhere to put either. A console table would solve it, but your entryway can’t handle a deep one. In a tight space, depth, overall footprint, and door swing matter far more than how pretty the finished photo looks.
This guide rounds up 15 DIY narrow console table plans and tutorials, each linking directly to the original creator’s resource. Most are free online plans and tutorials. Two offer free walkthroughs with paid complete PDFs, and I’ve labeled those clearly. If you’re starting your first furniture project, our free woodworking plans for beginners are a good warm-up.
Quick Comparison: Which Narrow Console Table Fits Your Entryway?
Measurements below are only those stated by the creator or confirmed in the source. “Confirm in plan” means check the original diagram before you commit. Difficulty is my editorial judgment unless I’ve attributed it to a creator.
| # | Creator | Size (as stated) | Storage | Difficulty (editorial) | Access |
|---|---|---|---|---|---|
| 1 | Pine and Poplar | 7¼” deep | None (decor only) | Beginner | Free tutorial |
| 2 | Ana White | 11¼” deep, ~71¾” long | Three shelves | Beginner | Free plans, video, emailed printable |
| 3 | Ana White | Confirm in plan | Shelf | Intermediate | Free plan, cut list |
| 4 | Ana White | 36″ top length | Bottom shelf | Beginner | Free plan, cut list |
| 5 | Ana White | 48″ top | Storage shelf | Beginner | Free plan, cut list |
| 6 | Ana White | 48″ top length | Lower shelf | Intermediate | Free plan, cut list, video |
| 7 | Addicted 2 DIY | Confirm in plan | Bottom shelf | Intermediate | Free tutorial; printable via Gumroad (check access) |
| 8 | Her Tool Belt / Kreg | 11¼” top; feet to 14½” | None | Advanced (per Kreg) | Free plan, templates |
| 9 | Shanty 2 Chic | Confirm in plan | No dedicated storage | Intermediate | Free tutorial, video, printable |
| 10 | Shanty 2 Chic | 80″ × 16″ top | None | Intermediate | Free tutorial, video, printable |
| 11 | Shanty 2 Chic | Confirm in PDF | Open lower shelf | Intermediate | Free tutorial, PDF |
| 12 | Jenna Sue Design | ~9′ long, 2×12 top | No dedicated storage | Beginner | Free tutorial, sketch |
| 13 | Jenna Sue Design | 72″ × 12″ × 30″ | None | Advanced | Free photo tutorial |
| 14 | Woodshop Diaries | 60″ × 11¼” × 25¾” | Open compartments | Intermediate | Free tutorial, video; paid PDF |
| 15 | Houseful of Handmade | 36″ × 12½” × 34″ | Two drawers, shelves | Advanced | Free walkthrough; paid PDF |
Standouts: #1 is the shallowest and best for light decorative use. #2 offers open shelving if you have a longer wall. #4 and #15 both suit shorter wall spaces, with 36-inch tops. #13 is the pick for traditional joinery. #15 is the one with drawers.
One thing the table can’t show: tabletop depth isn’t the same as floor footprint. Feet, leg splay, trim, and handles can all stick out past the top.
Measure Your Entryway Before Choosing a Plan
Measure the complete footprint
Measure the widest point of the whole piece, not just the tabletop. Include baseboards (which hold a table away from the wall), feet, leg splay, tabletop overhang, and any drawer pulls. A table with an 11-inch top can sit much deeper at its feet.
Check door swing and walking space
Cut out a rough footprint from cardboard or mark it on the floor with painter’s tape. Then open the front door, any nearby doors, and walk through the way you normally do, with a bag or a coat in hand. Keep the walking route and door opening unobstructed, and check the arrangement with everyone who uses the entryway.
Decide what you need to store
Keys and mail need very little surface. Baskets and shoes need real shelf measurements, and drawers need room to open fully. If shoes are the main clutter, our DIY shoe rack plans for small entryways may pair well with a slim console.
Tools and Materials to Check in the Original Plan
Most of these builds use a saw, a drill/driver, clamps, a square, a tape measure, and sandpaper or a sander. Some call for a pocket-hole jig, so check the plan before you start.
A few builds have special requirements. #7 uses purchased tapered legs, #8 involves cutting curves, #10 requires ripping boards to width, and #13 uses mortise-and-tenon joinery.
Also remember that nominal lumber sizes aren’t actual sizes. A “1×12” is thinner and narrower than the name suggests. Match the thickness the plan specifies, and measure your boards before cutting.
15 DIY Narrow Console Table Plans and Tutorials
1. Super-Slim Modern Entryway Table
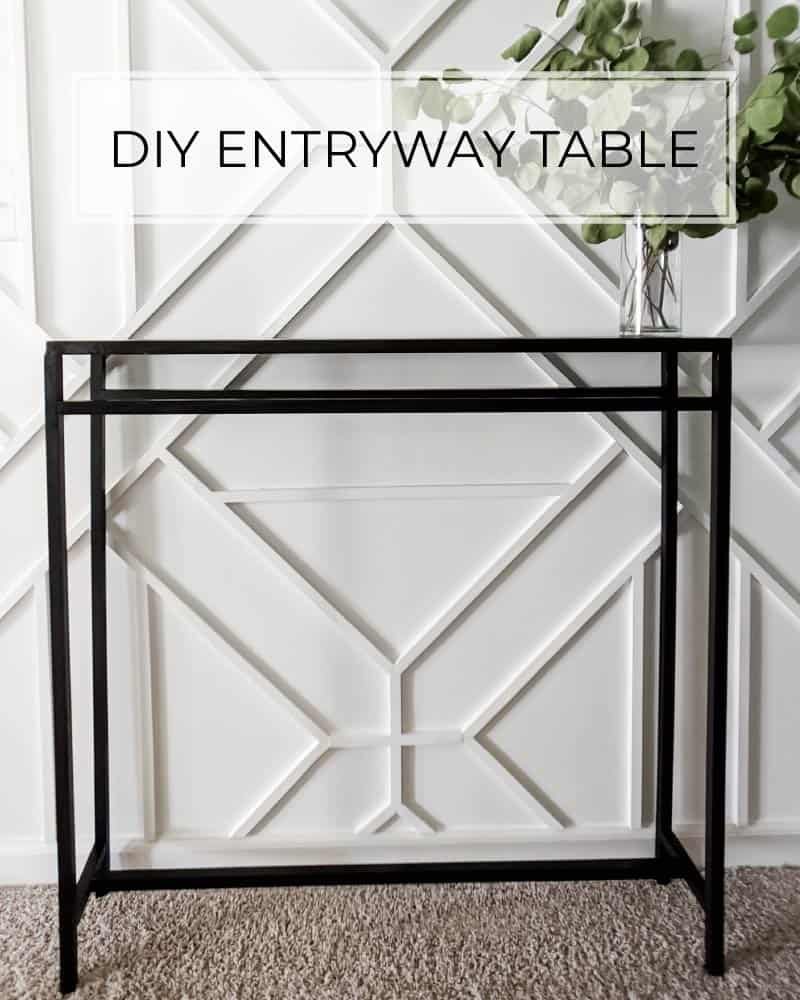
Project image: Pine and Poplar
At 7¼ inches deep (as stated by the builder), this is the slimmest table on the list. A square-dowel base gives it clean, modern lines without much visual weight. It’s a good fit for a narrow hallway where you only need a spot for a small lamp, a bowl, or some decor.
Treat it as a light decorative piece, not heavy storage. The builder also warns about children tugging on furniture, so keep that in mind if little ones are around.
Creator: Pine and Poplar | Access: Free illustrated tutorial | View the original plan or tutorial →
2. Three-Shelf Narrow Console Table
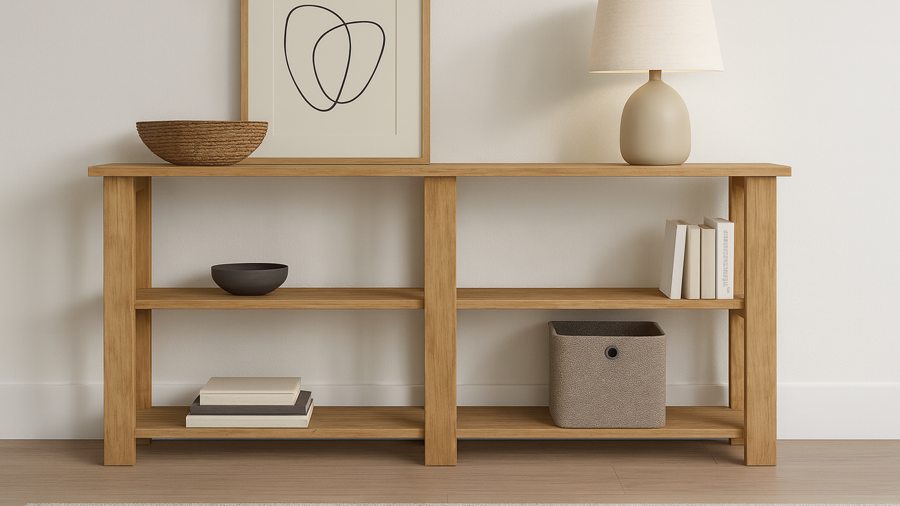
Project image: Ana White
From Ana White’s Super Simple Collection, this one is 11¼ inches deep and about 71¾ inches long. The three shelves hold baskets or shoes, so it works as real storage, not just a landing spot.
Shallow doesn’t mean short, though. Check your wall length before you commit, because this table needs room to stretch.
Creator: Ana White | Access: Free online plans, cut list, and build video; emailed printable option | View the original plan or tutorial →
3. Modern Farmhouse Console With Decorative Supports
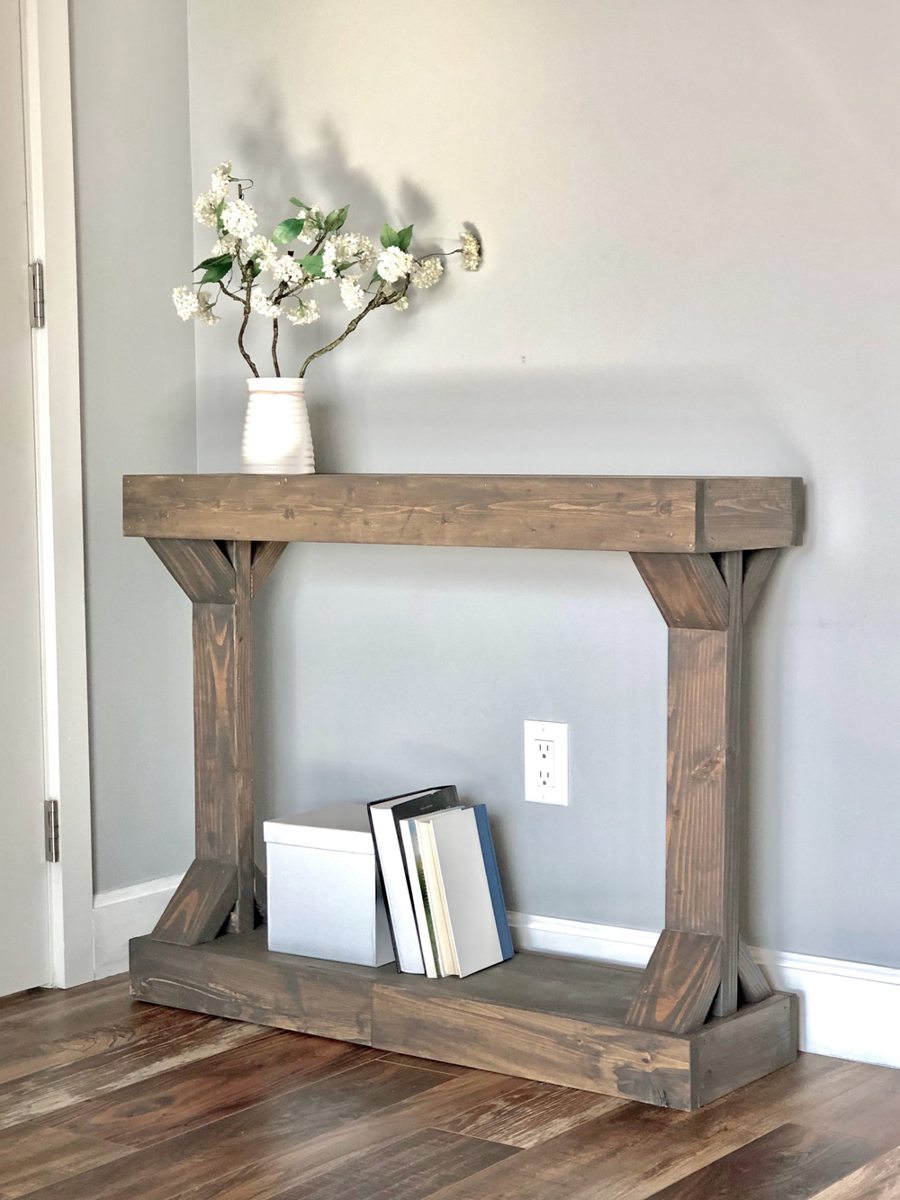
Project image: Ana White
This Modern Farmhouse Collection design has decorative angled supports and a layered top-and-shelf look. It reads more like a furniture piece than a basic frame.
Those repeated angled cuts make it more involved than a plain rectangular console, so give yourself time. Confirm the overall footprint, including trim, from the diagram in the source before you plan your space.
Creator: Ana White | Access: Free illustrated online plan and cut list | View the original plan or tutorial →
4. Small Whitewood Console With a Bottom Shelf
Project image: Ana White
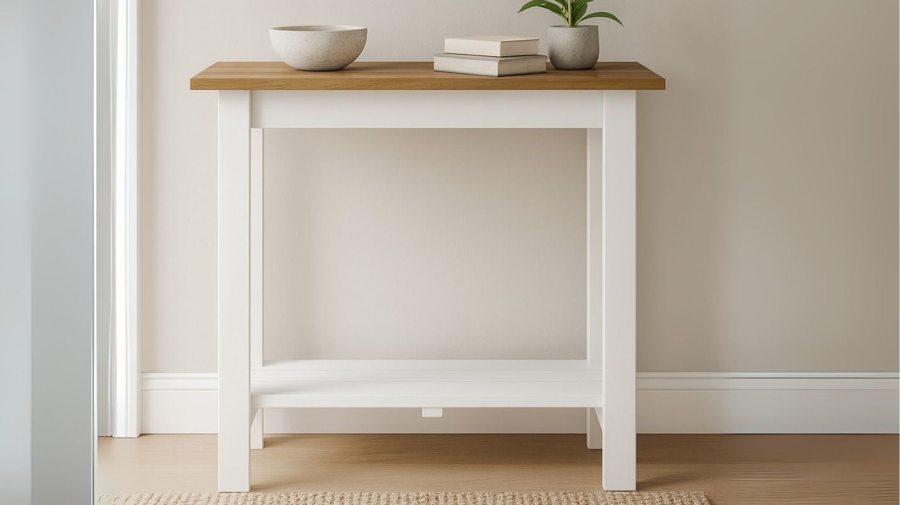
If your entryway is short on wall space, this is one compact option. The cut list shows a 36-inch tabletop, built-up legs, and a practical bottom shelf for baskets or a few pairs of shoes. It’s made from affordable board-based construction.
Check the dimensioned diagram for the complete depth and height before choosing your lumber.
Creator: Ana White | Access: Free online plan, material list, cut list, and diagrams | View the original plan or tutorial →
5. Simple Rustic Modern Console Table
Project image: Ana White
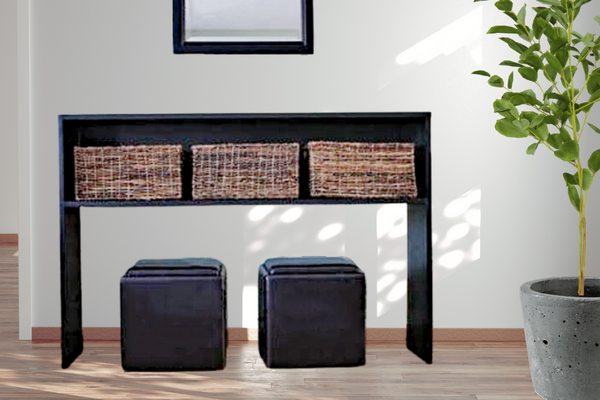
This one has slab-style sides, a clean rectangular shape, an inset back, and a storage shelf beneath the top. The top is a 48-inch piece cut from a 1×12 board.
Don’t skip the back. It keeps the whole structure square, which matters in a table this simple. Measure the actual width of your 1×12 before you plan around the footprint, since real lumber is narrower than the nominal size.
Creator: Ana White | Access: Free online plan with cut list and assembly steps | View the original plan or tutorial →
6. Homestead Console With Angled Legs
Project image: Ana White
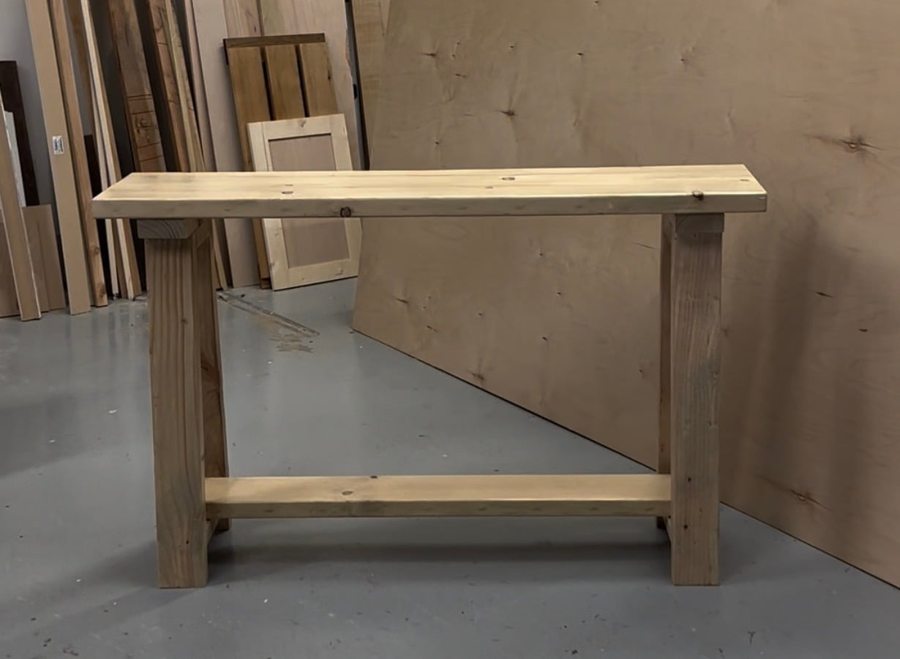
The two-board top, modest lower shelf, and angled leg sets give this table a sturdier, more rustic look than the straight-sided modern designs. The cut list shows a 48-inch top length.
Angled legs change your footprint. Confirm the maximum width at the feet from the diagrams before you decide it fits.
Creator: Ana White | Access: Free online plan, cut list, diagrams, and linked video | View the original plan or tutorial →
7. Narrow Hallway Table With Tapered Legs
Project image: Addicted 2 DIY
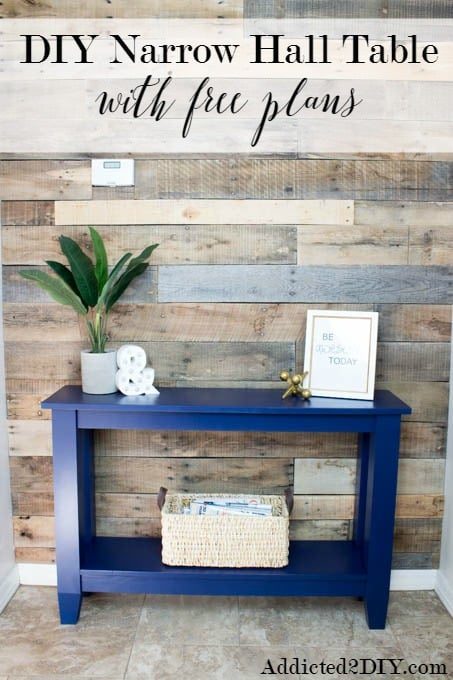
Purchased tapered legs, pocket-hole rails, and a bottom shelf give this table a polished, store-bought look. Check the original dimensioned plan for the footprint.
Add the cost of the bought legs to your budget, because they’re an extra expense beyond the lumber. The builder links to free printable plans through Gumroad, so check the checkout and access conditions before you rely on the download.
Creator: Addicted 2 DIY | Access: Free online tutorial; free printable plans via Gumroad (check access) | View the original plan or tutorial →
8. Arched Narrow Console Table
Project image: Her Tool Belt / Kreg
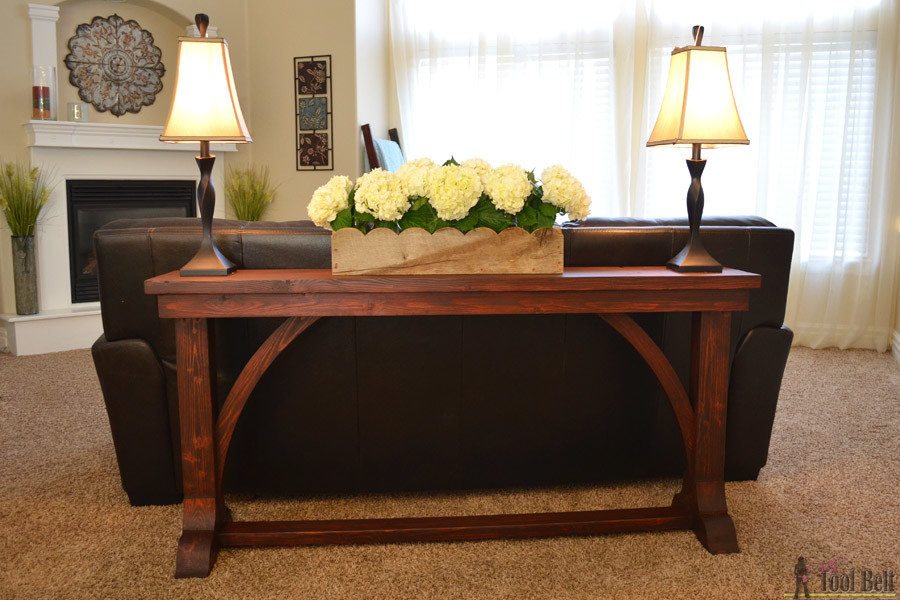
Decorative arches and shaped feet make this one a standout. The top is 11¼ inches deep, but the original feet extend to 14½ inches, so the floor footprint is bigger than the tabletop suggests. The source includes a shorter-foot option for wall placement.
Kreg labels this build advanced, and it uses curve templates, so it’s best for people comfortable cutting curves.
Creator: Her Tool Belt / Kreg | Access: Free online plan with cut list, diagrams, download, and curve templates | View the original plan or tutorial →
9. Narrow Truss Console Table
Project image: Shanty 2 Chic
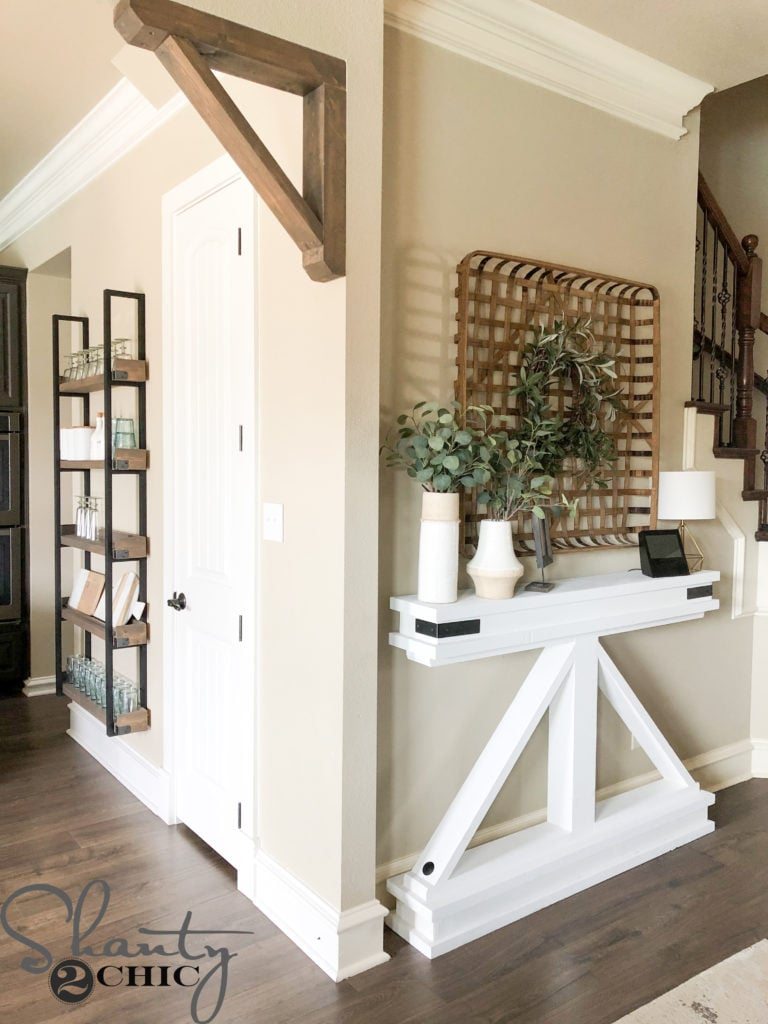
Truss-style detailing and layered construction give this table a rustic, architectural look. It’s a good match for farmhouse or industrial entryways.
The truss pieces require angled cuts, and the layered base needs careful alignment. Choose it for its decorative frame; it does not offer the open shelf storage found in several other designs here.
Creator: Shanty 2 Chic | Access: Free written tutorial, build video, and linked printable plans | View the original plan or tutorial →
10. Chunky Farmhouse Console Built From 2×6 Boards
Project image: Shanty 2 Chic
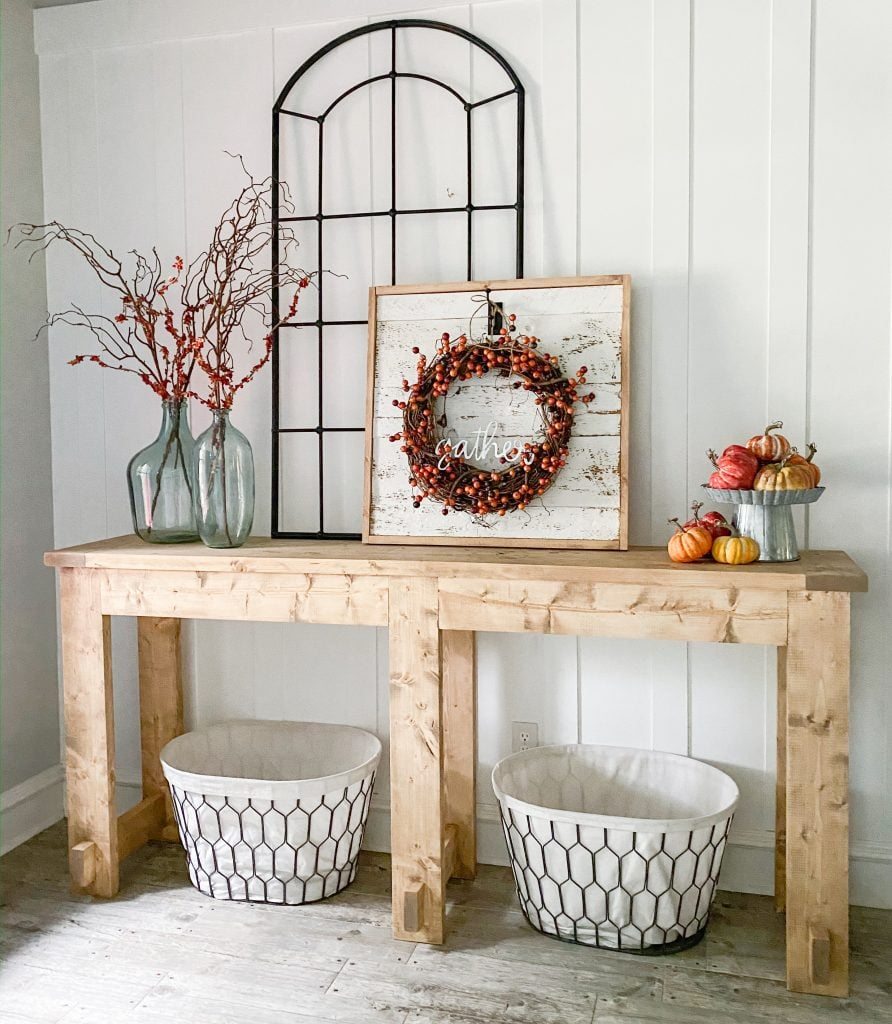
The builder describes an 80-by-16-inch top, which is shallow but long. A planked top and chunky base give it real presence. This is a better fit for a longer entryway wall than a tiny alcove.
The boards need to be ripped to width, so you’ll want a saw setup that can handle it safely.
Creator: Shanty 2 Chic | Access: Free written tutorial, build video, and linked printable plans | View the original plan or tutorial →
11. Modern Waterfall Console Table
Project image: Shanty 2 Chic
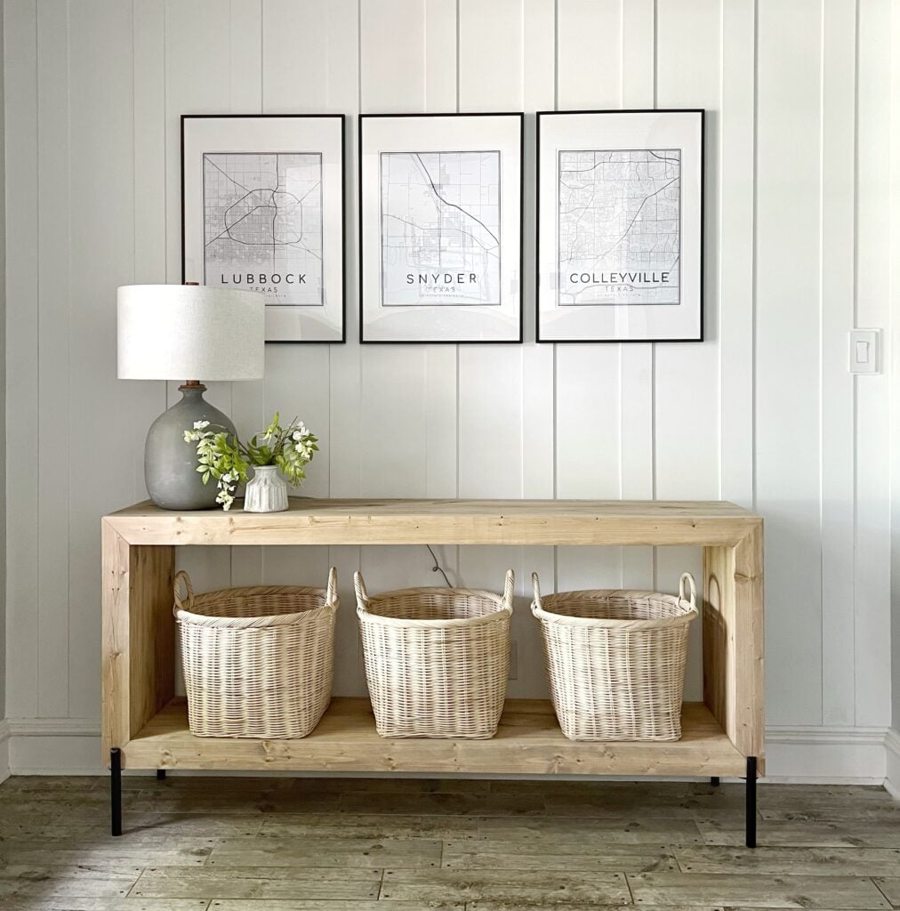
Waterfall corners, a framed structure, and laminated pine panels give this table a sleek, modern profile. An open lower shelf provides room for baskets. It includes 12-inch project panels plus framing, so confirm the finished depth in the PDF.
Accurate angled cuts and square assembly matter here. Small errors show up quickly in a design with clean, continuous lines.
Creator: Shanty 2 Chic | Access: Free written tutorial and linked PDF plans | View the original plan or tutorial →
12. Simple Long Console With a 2×2 Frame
Project image: Jenna Sue Design
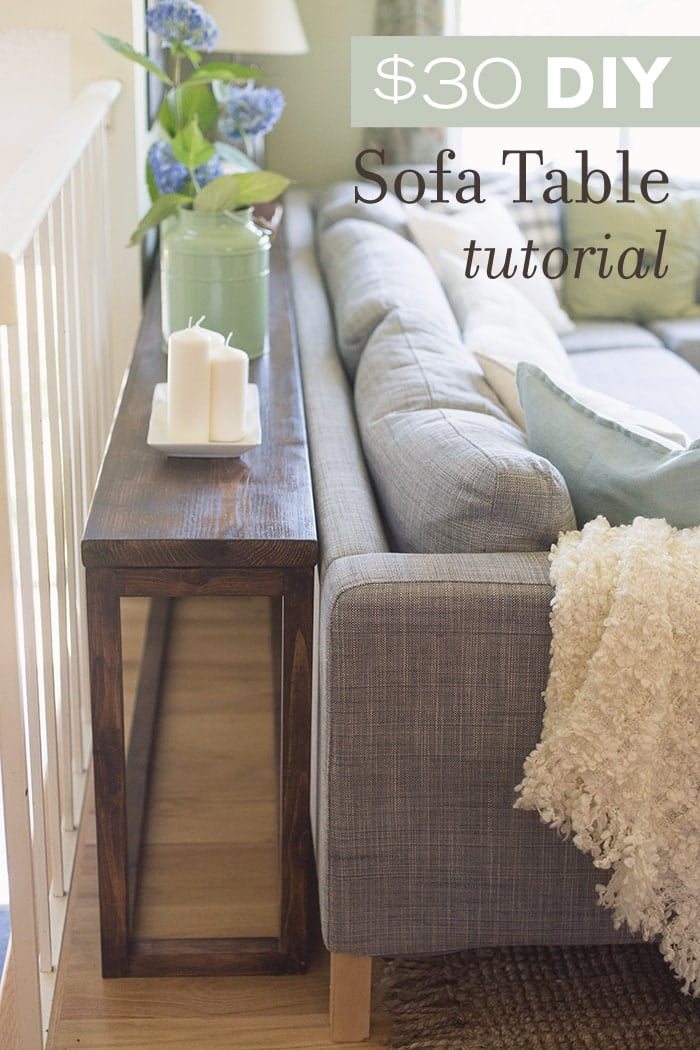
This is a long-wall option. The original build is about 9 feet long, with a 2×12 top over a 2×2 frame and a center support.
If you shorten the design, review every affected cut, support, and connection. Price the lumber and hardware locally before starting. The free resource is an illustrated tutorial and construction sketch.
Creator: Jenna Sue Design | Access: Free illustrated tutorial and construction sketch | View the original plan or tutorial →
13. Rustic Console With Mortise-and-Tenon Joinery
Project image: Jenna Sue Design
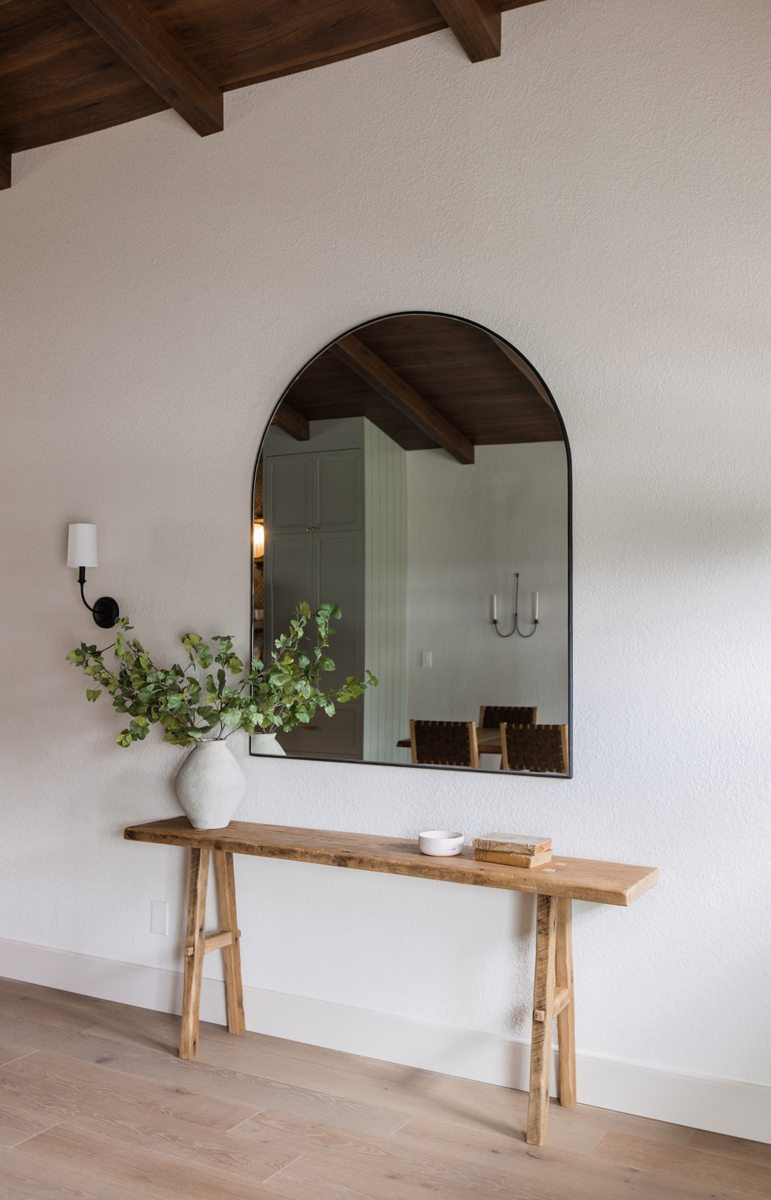
The main tutorial gives 72 inches long, 12 inches deep, and 30 inches high. Reclaimed wood, angled legs, and traditional joinery give it a real heirloom feel. For sourcing ideas, see our reclaimed wood projects.
This is a more demanding choice than the beginner board builds. Mortise-and-tenon joints take patience and the right tools, but the detailed photo tutorial walks you through it.
Creator: Jenna Sue Design | Access: Free detailed photo tutorial | View the original plan or tutorial →
14. Narrow Console Shelf With Open Storage
Project image: Woodshop Diaries
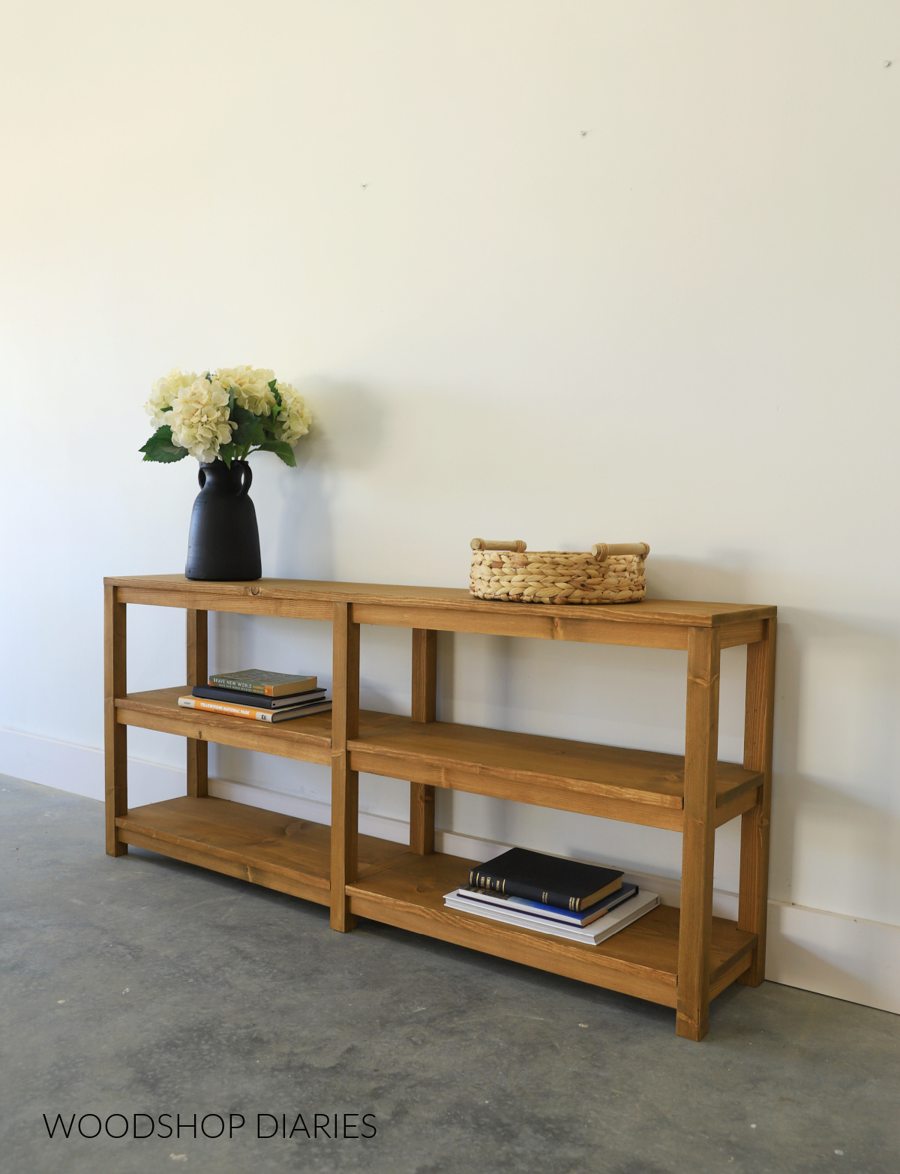
At 60 inches wide, 11¼ inches deep, and 25¾ inches high, this is really a low console or shelf. Multiple open compartments hold baskets, books, or shoes.
Its lower height makes it useful beneath a window or as a hallway shelf. If you prefer a taller version, review the leg connections and stability before adapting it. The tutorial and video are free; the complete printable plans and cut list are sold separately.
Creator: Woodshop Diaries | Access: Free online tutorial and build video; paid printable plans | View the original plan or tutorial →
15. Small Console Table With Two Drawers
Project image: Houseful of Handmade
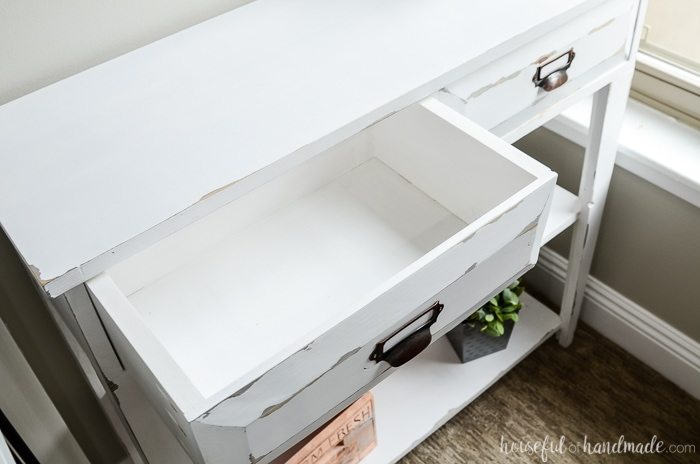
This is the only build on the list with drawers. It measures 36 inches wide, 12½ inches deep, and 34 inches high, with tapered legs and shelves for a compact footprint.
Drawer fit takes extra precision, since small errors can make drawers stick. The online walkthrough is free, but the complete dimensioned PDF and cut list are premium.
Creator: Houseful of Handmade | Access: Free illustrated walkthrough; paid full plan set | View the original plan or tutorial →
How to Customize a Console Without Losing Its Stability
It’s tempting to tweak a plan to fit your space. A few rules keep that safe.
Changing length affects spans and supports. A longer top may need extra support in the middle, and a shorter one changes where shelves and supports sit.
Changing depth affects leg placement and stability. Review the full relationship between tabletop depth, base width, height, and load before altering the footprint.
Drawer dimensions can’t be changed independently. The opening, drawer box, and running clearance must work together. Follow the hardware or slide-free method in the original plan.
Tabletop fastening should follow the source’s method. It’s part of how the table stays solid.
Where the original plan and your home call for it, secure the table to the wall with suitable restraint hardware. Keep any warnings from the source, especially for the lightweight #1.
Finish Your Console for Everyday Use
Entryway furniture takes a beating from bags, keys, and wet umbrellas. Paint hides imperfections and suits a painted-farmhouse look, while stain highlights the grain. Sand before assembly where practical, since it’s easier to reach every surface. Smooth exposed edges so nothing snags a sleeve.
Follow the finish label’s drying and curing instructions. Dry to the touch isn’t the same as fully cured. For help choosing supplies, see our guide to wood finishing tools for beginners.
Ready to Plan Your Next Furniture Build?
Once you’ve chosen a console table, you may already have another project in mind: a matching side table, a bookcase, or more storage for a small room. If you’d like to explore a broader woodworking plan collection, take a look at Ted’s Woodworking Plans and review the current offer to see whether it suits the builds you want to tackle next.
Affiliate disclosure: If you purchase through the link below, I may earn a commission at no extra cost to you.
The free resources above can help you choose your console project. If you want to browse a larger paid collection for future builds, review the current offer below.
Explore Ted’s Woodworking Plans →
Frequently Asked Questions
How deep should a console table be for a narrow entryway?
Some designs here are around 7–12 inches deep, while others are deeper. What matters is the full footprint, including feet, trim, and handles, and the actual space you have. Tape the footprint on your floor before you decide.
What is the easiest narrow console table to build?
A basic frame or straight-board design, like #4 or #5, is usually simpler than curved, angled, or drawer builds. Lightweight doesn’t mean stable in every household, so follow the source’s guidance, especially for #1.
Can I build one without a pocket-hole jig?
Check each plan’s joinery. Some use pocket holes and others use different methods, such as mortise-and-tenon in #13. Choose a plan whose specified joinery you can do, instead of improvising a substitute.
Can I shorten a console table plan?
Yes, but every affected cut, shelf, support, and fastener position needs review. Use the dimensions specified in the creator’s plan as your starting point.
Should a narrow console be secured to the wall?
It’s worth considering, especially with children or pets. A narrow, tall piece can be less stable. Follow appropriate restraint hardware guidance and the original plan’s advice.
Are all 15 printable plans free?
No. The list combines free online plans and tutorials. #14 and #15 offer premium full PDFs and cut lists, and some other sources offer emailed printables. Check each source for current access.
Pick a Table That Fits Before You Buy the Wood
A good narrow console starts with the right measurements. Tape out the full footprint, test your door swing, and decide what you need to store. Then choose a design that suits your space and skills, and read the original instructions closely. Check the materials and tools list before you buy anything, so there are no surprises mid-build.
With a design that matches your available footprint, you can create a useful landing spot for keys and mail while keeping the entryway easy to move through.