
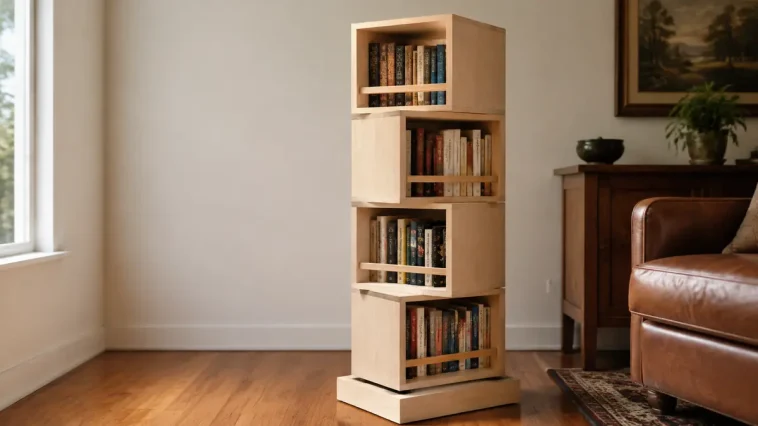
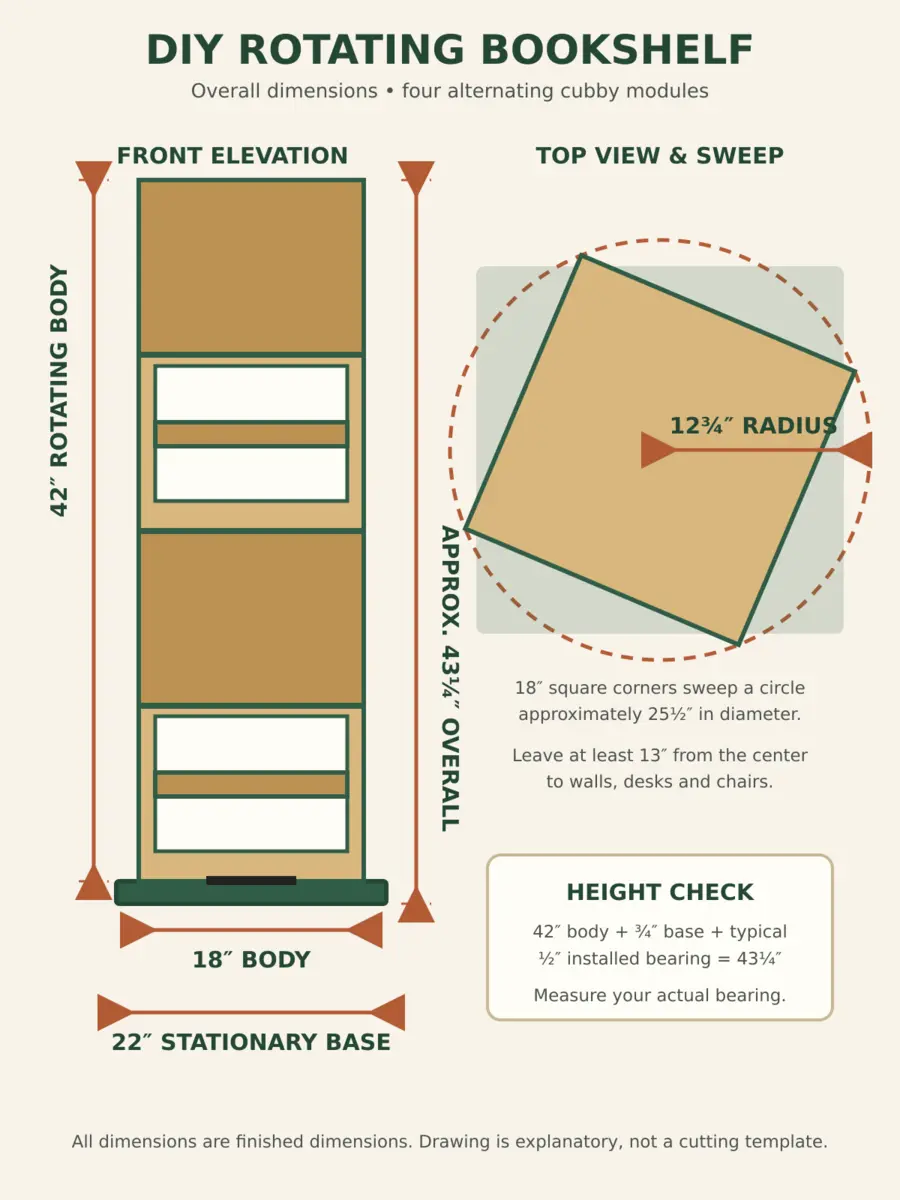
The rotating body measures 18 inches square and 42 inches high. It sits on a 22-inch-square stationary base with a centered heavy-duty Lazy Susan bearing. With a typical ½-inch-tall bearing, the finished project is approximately 22 inches wide, 22 inches deep and 43¼ inches high. Because bearing heights vary, measure your actual hardware before promising an exact finished height.
This is a confident-beginner plywood project. Every structural part is a straight cut, and the four modules are identical. The work that requires the most care is keeping every box square, aligning the stacked modules and installing the rotating bearing exactly in the center.
If this is your first full furniture build, review these free woodworking plans for beginners and practice on one of these beginner weekend woodworking projects before cutting the full plywood sheet.
DIY Rotating Bookshelf Plan at a Glance
| Finished footprint | 22″ W × 22″ D |
| Rotating body | 18″ W × 18″ D × 42″ H |
| Approximate overall height | 43¼″ with a ½″ installed bearing height |
| Modules | Four identical open-front/open-back cubbies, each 18″ × 18″ × 10½″ |
| Each opening | 16½″ W × 9″ H × approximately 8¼″ usable depth |
| Rotation hardware | 12″ heavy-duty Lazy Susan bearing rated for at least 250 lb |
| Difficulty | Confident beginner to intermediate |
| Build time | One weekend, plus finish curing time |
How the Rotating Cubby Design Works
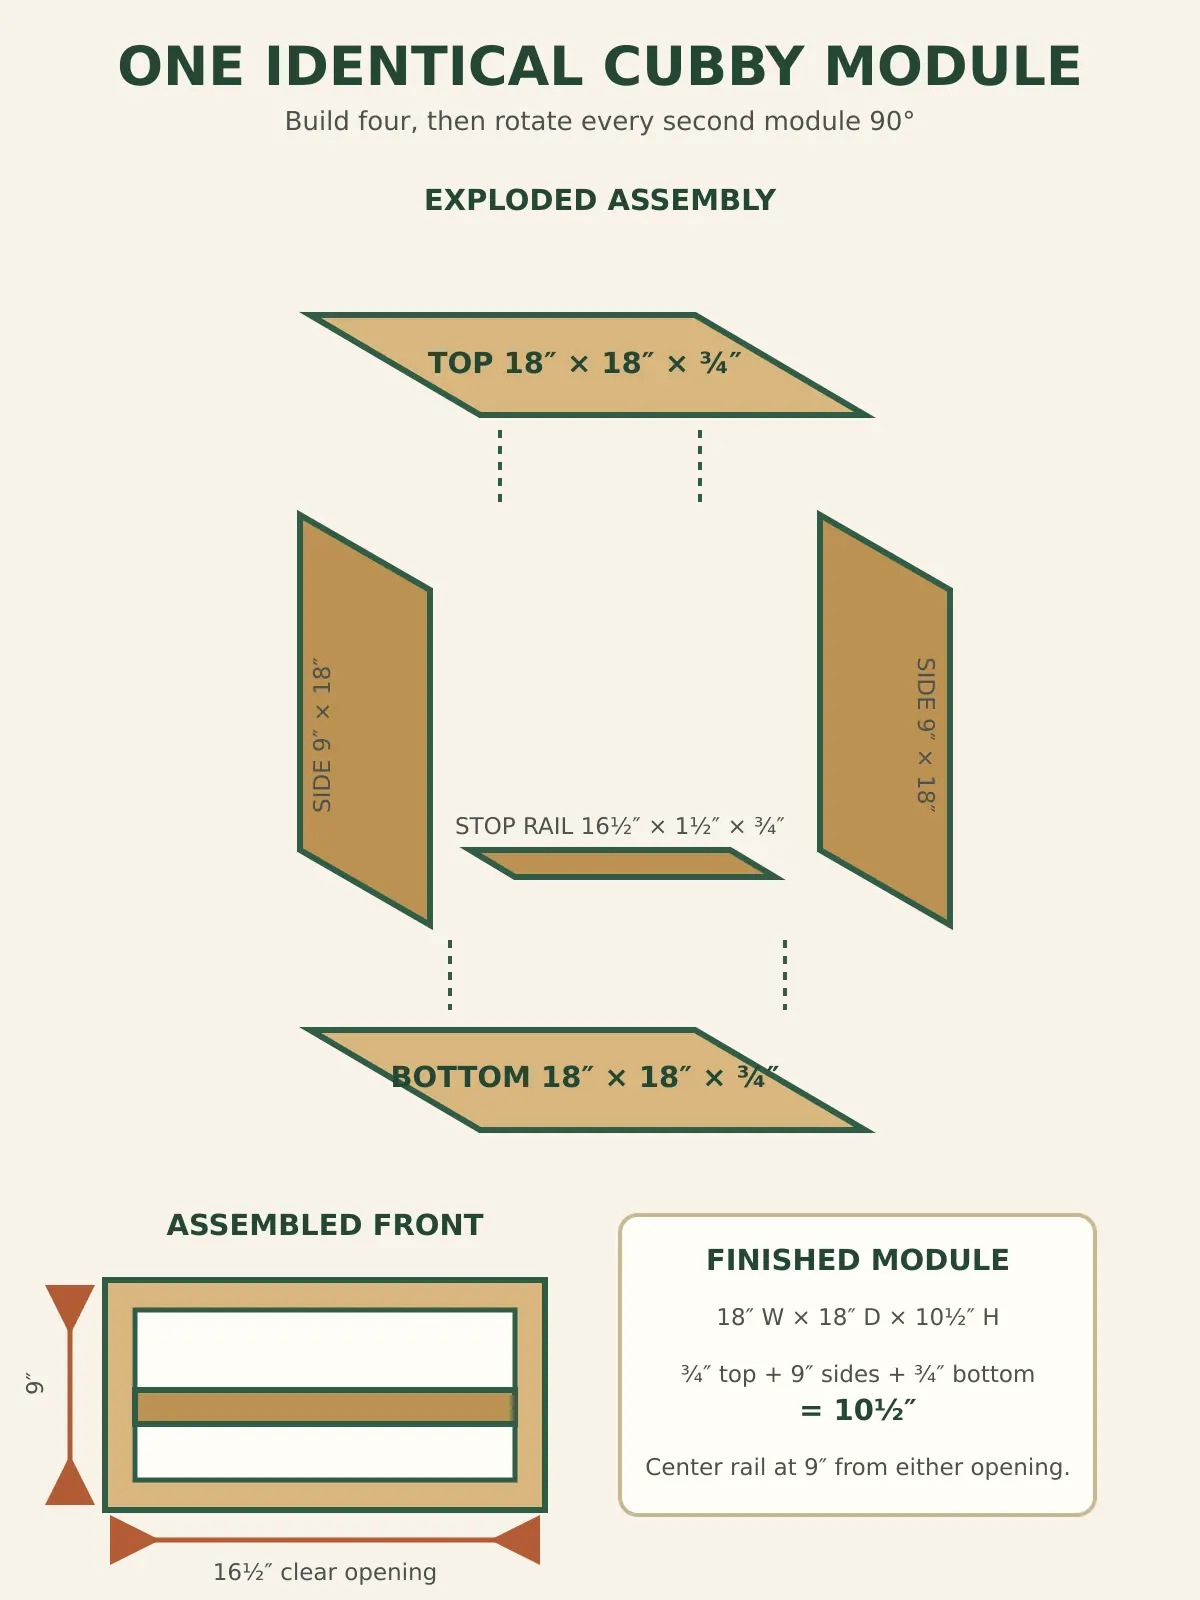
Each cubby is a shallow open box made from two 18-inch-square horizontal panels and two 9 × 18-inch side panels. The side panels fit between the top and bottom, which makes the outside height exactly 10½ inches:
¾″ top + 9″ side + ¾″ bottom = 10½″ module height
The space between the side panels is 16½ inches wide. A 1×2 stop rail runs across the center of each bottom panel, dividing the 18-inch depth into two book-storage zones. The rail keeps books from sliding through to the opposite opening without requiring a plywood back.
Modules one and three open toward the front and back. Modules two and four are rotated 90 degrees, so they open toward the left and right. Gluing and screwing the four boxes together creates a 42-inch-high tower with storage visible from every direction.
The four corners of an 18-inch-square body sweep through a circle approximately 25½ inches in diameter. Leave at least 13 inches between the center of the bookcase and any wall, desk or chair. Test a complete rotation before adding books.
Materials and Hardware
- One full 4′ × 8′ sheet of ¾″ cabinet-grade plywood
- One half sheet, approximately 4′ × 4′, of matching ¾″ plywood
- One 1×2×8 board for the four center stop rails
- One 12″ heavy-duty Lazy Susan bearing rated for at least 250 lb
- Four low-profile non-slip rubber feet
- 1¼″ coarse-thread pocket-hole screws
- 1¼″ wood screws compatible with the bearing and plywood thickness
- 1″ bearing-mounting screws if specified by the hardware manufacturer
- Wood glue
- Wood filler
- Optional iron-on edge banding for exposed plywood edges
- Primer and paint, or stain plus a clear protective finish
Birch plywood gives the cleanest furniture-grade result, but maple, oak or sanded pine plywood can also work. Avoid low-grade sheathing plywood because voids and splintered faces make exposed edges difficult to finish. This guide to the best woods for beginner woodworking projects can help you compare cost, appearance and workability.
Tools You Will Need
- Track saw or circular saw with a straightedge guide
- Table saw, optional but helpful for repeatable strips
- Drill/driver and bits
- Pocket-hole jig set for ¾″ material
- Jigsaw or hole saw for bearing-access holes
- Random-orbit sander
- Clamps
- Tape measure, combination square and framing square
- Brad nailer, optional for temporary alignment
- Eye protection, hearing protection and appropriate dust protection
If your workspace is tight, organize the cutting and assembly area first using this small woodworking shop setup guide. A flat assembly surface matters more than owning every possible tool.
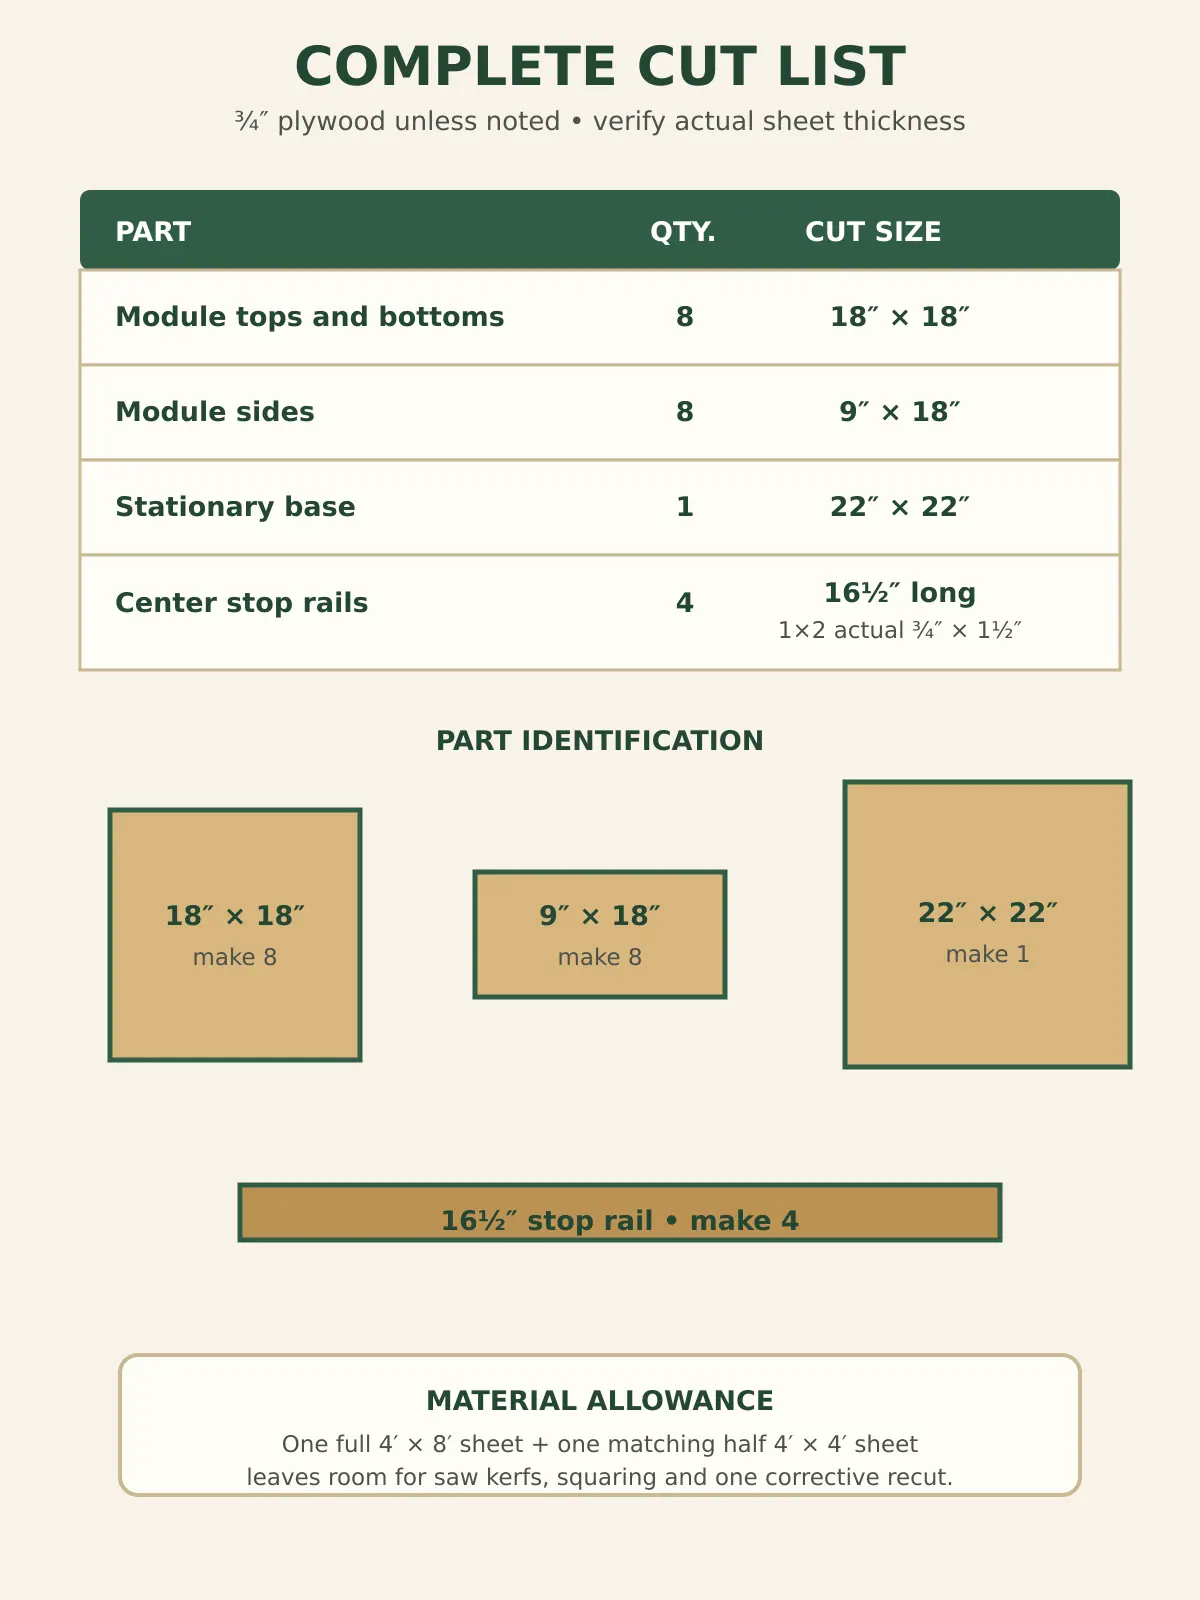
Complete Cut List
| Part | Qty. | Material | Cut size |
|---|---|---|---|
| Module top and bottom panels | 8 | ¾″ plywood | 18″ × 18″ |
| Module side panels | 8 | ¾″ plywood | 9″ × 18″ |
| Stationary base | 1 | ¾″ plywood | 22″ × 22″ |
| Center stop rails | 4 | 1×2 actual ¾″ × 1½″ | 16½″ long |
Suggested Plywood Breakdown
Use the full sheet for the eight 18-inch-square panels and as many 9 × 18-inch sides as your saw kerf allows. Cut the remaining side panels and the 22-inch base from the half sheet. This is intentionally conservative: it leaves enough material to square damaged factory edges and recut a part if a sheet contains a void.
Do not assume a nominal 4 × 8 sheet is perfectly square or exactly 48 × 96 inches. Trim one long edge and one short edge first, then make every repeated rip from those reference edges. A rough sheet breakdown should leave at least ⅛ inch for each saw kerf.
Bearing Position and Rotation Measurements
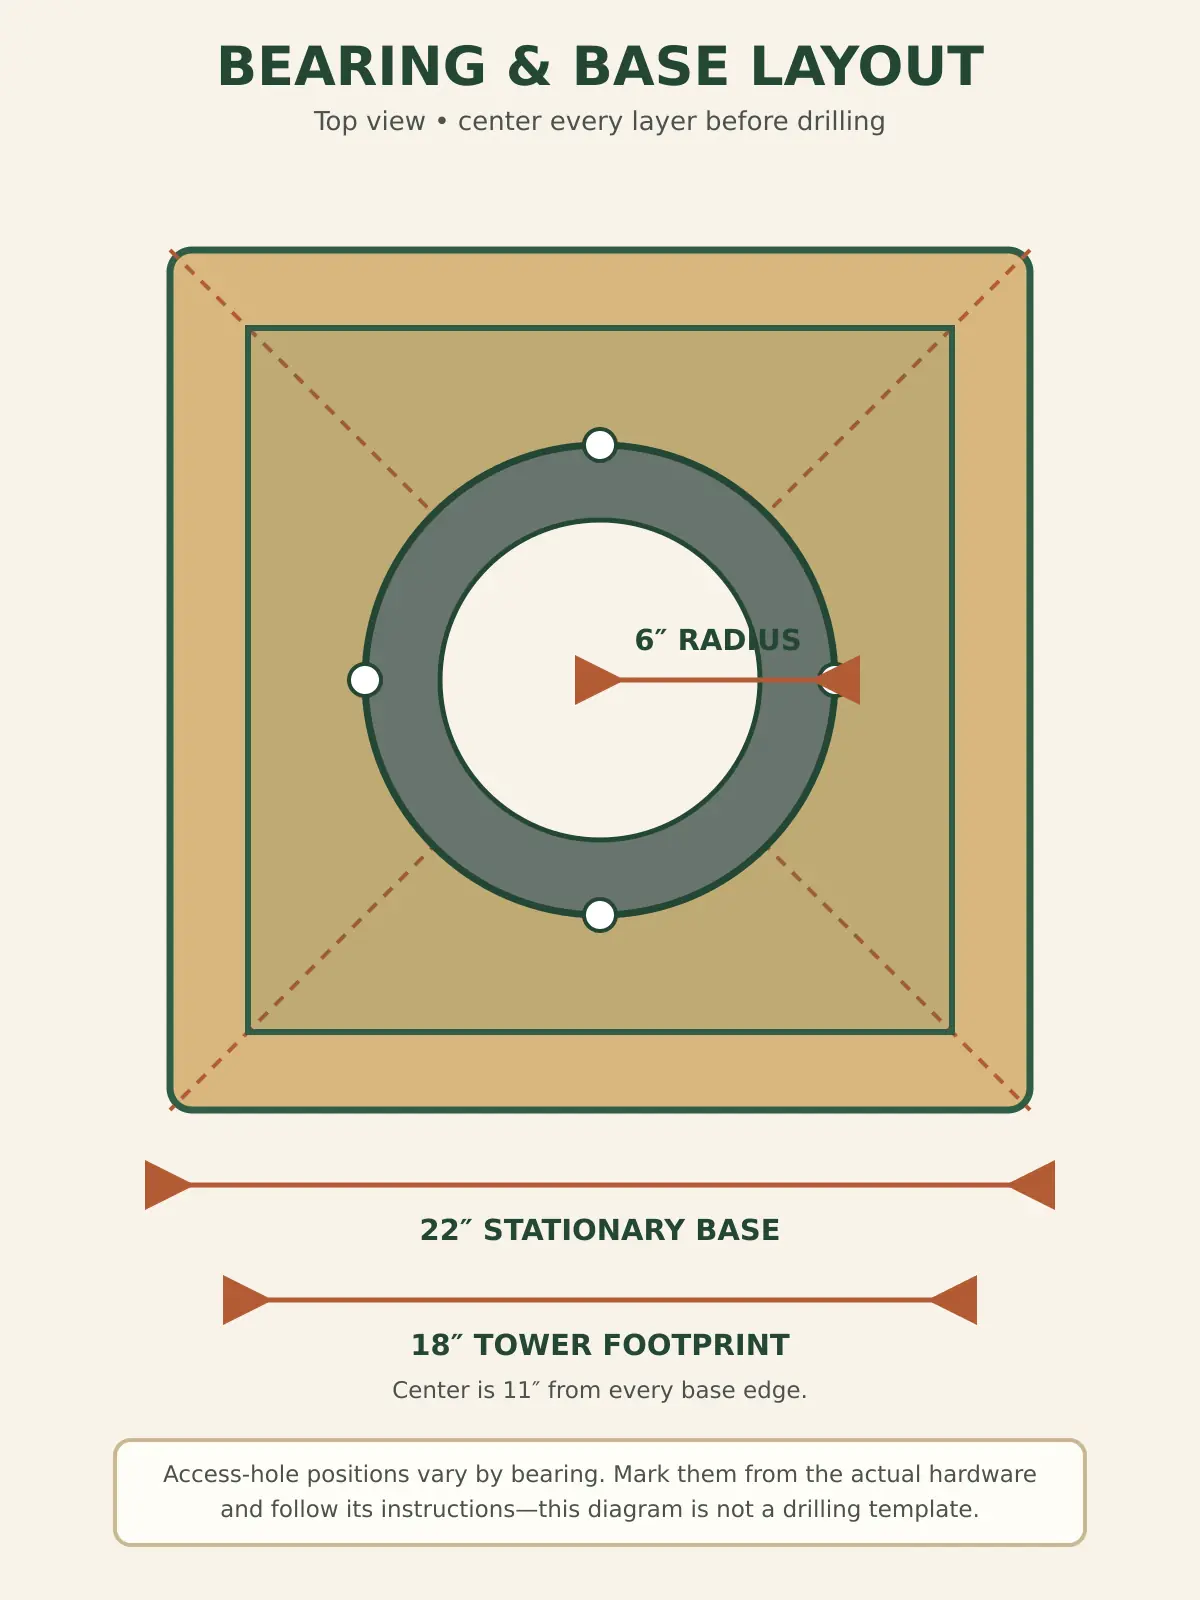
Draw diagonals across the 22-inch base to locate its exact center, 11 inches from every edge. Draw the same diagonals on the underside of the lowest 18-inch panel. Center the bearing on both marks.
The bearing-access-hole pattern depends on the hardware. Position the bearing, rotate its moving race and mark the mounting holes exactly as the manufacturer shows. Many square bearings require one or more ¾- to 1-inch access holes through the stationary base so you can reach screws in the opposite race. Do not copy access-hole locations from a generic diagram when your bearing has a different pattern.
How to Build the DIY Rotating Bookshelf
Step 1: Inspect and Square the Plywood
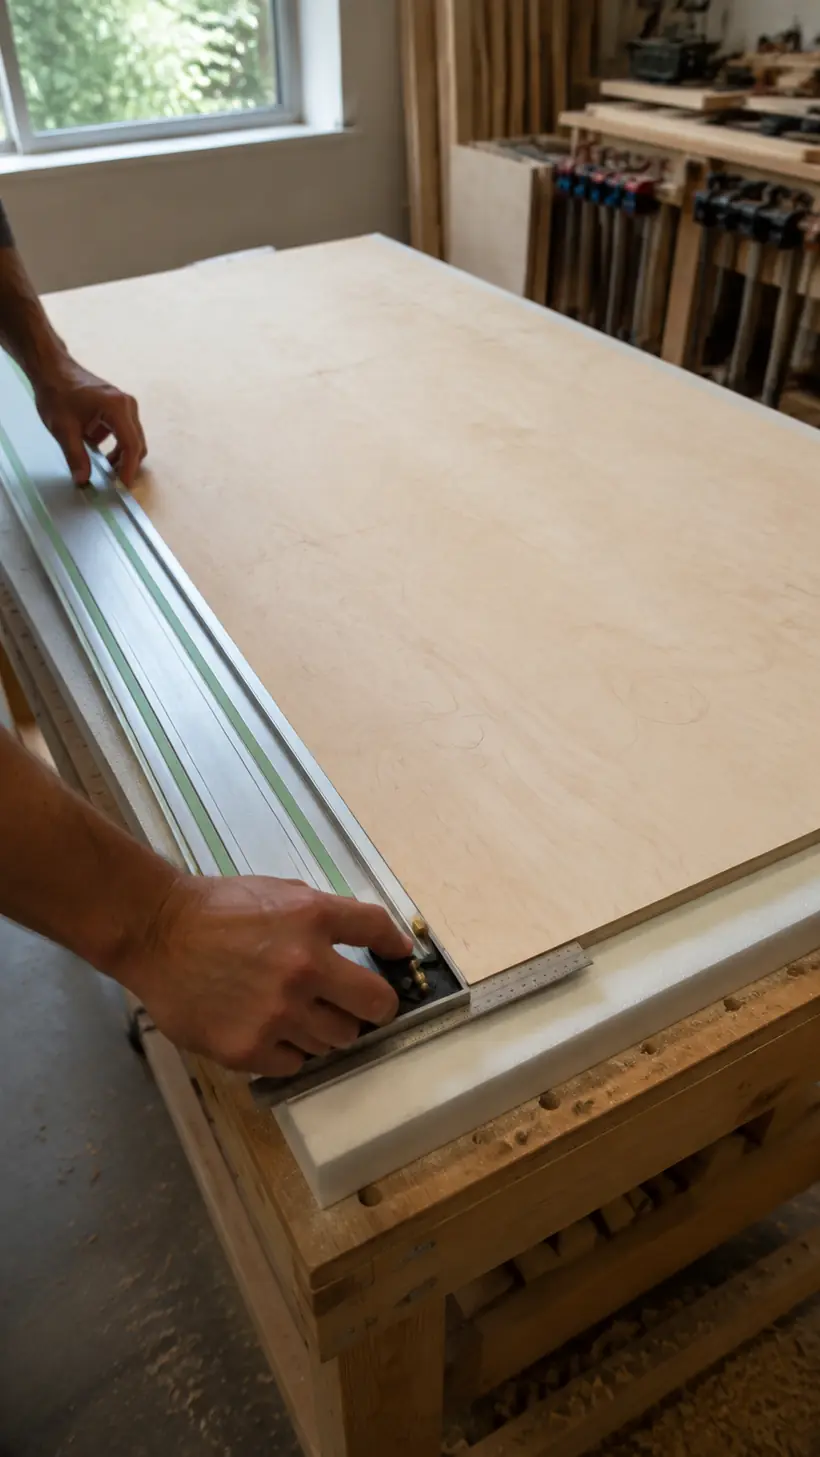
Lay both plywood sheets on foam insulation or a supported cutting table. Mark the best face of every sheet and circle defects you want to avoid. Trim a narrow strip from one long edge with a track saw or guided circular saw, then square one short edge to it.
Use the straightest, cleanest areas for the 18-inch top and bottom panels. Keep the 22-inch base flat; a warped base will make the finished tower rock even if every cubby is square.
Step 2: Cut and Label Every Plywood Part
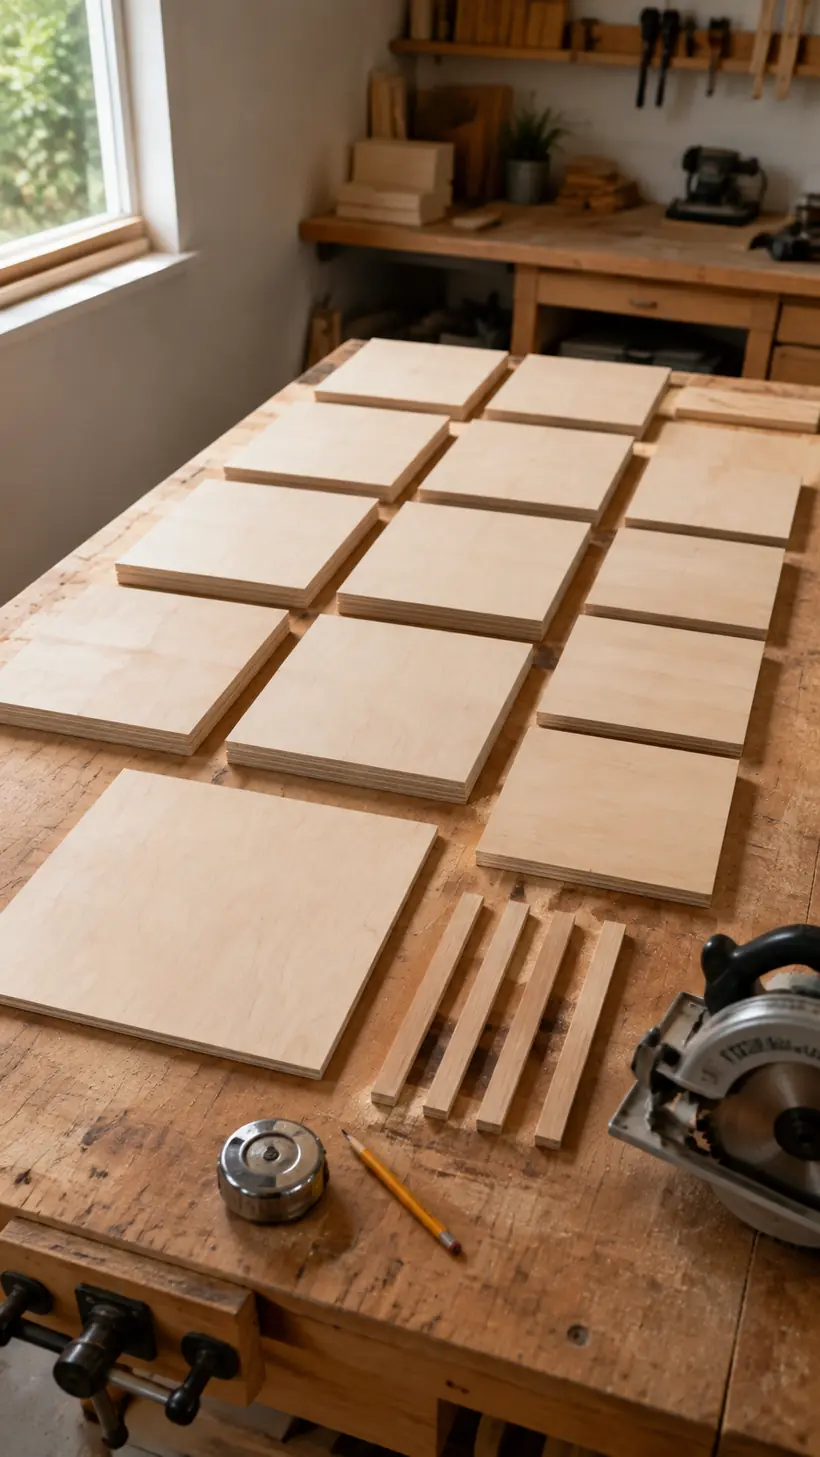
Rip the plywood into manageable strips, then crosscut the repeated parts using a stop or a carefully clamped guide. Check the first part with a reliable square before using it as the reference for the other seven.
Label the square panels A1 through A8 and the side panels B1 through B8. Also mark the factory face and the intended inside face. Consistent labeling prevents the common mistake of drilling pocket holes on the visible side.
Step 3: Drill the Pocket Holes
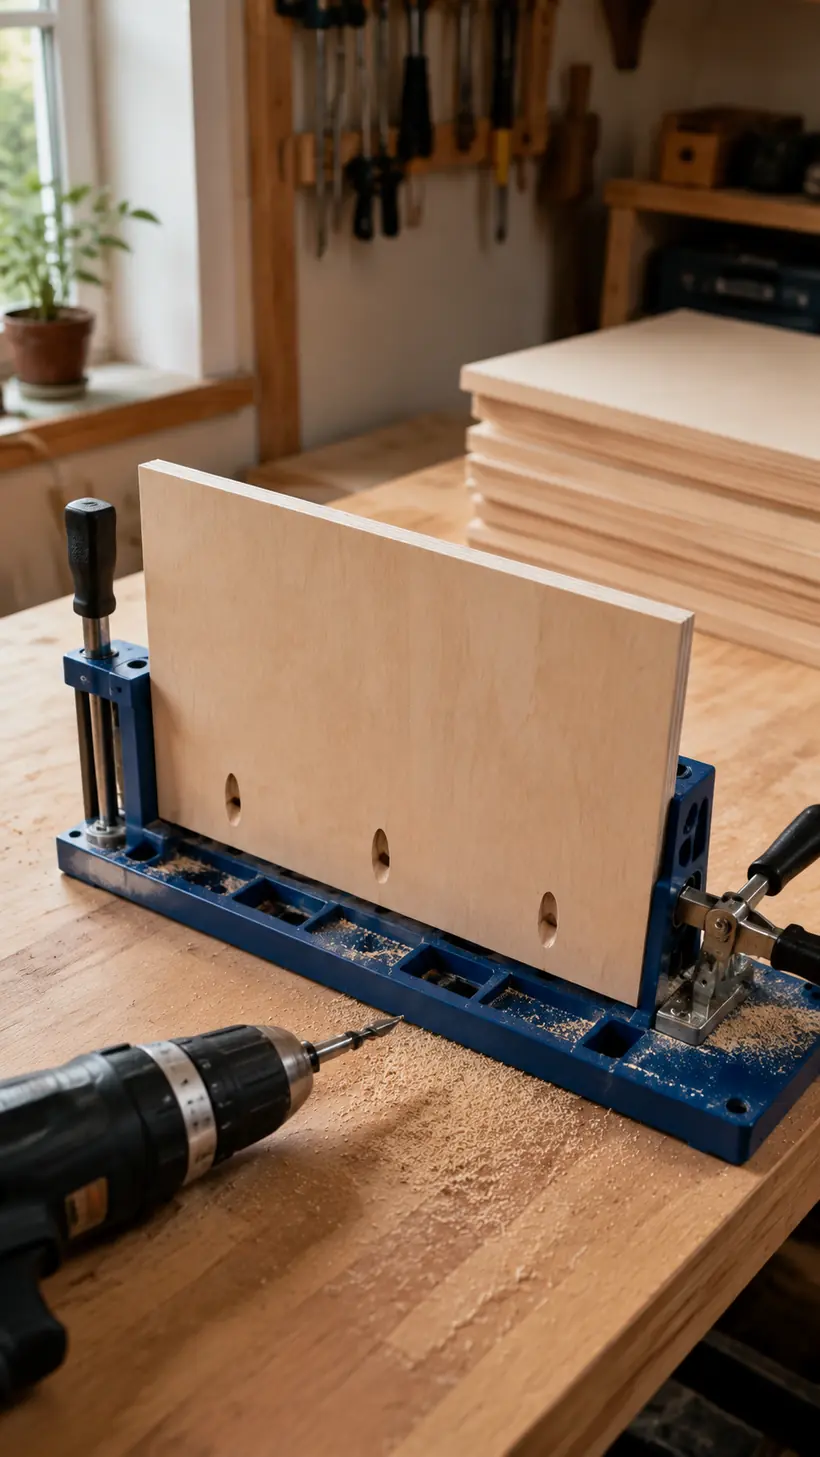
Set the pocket-hole jig and bit collar for ¾-inch material. On the inside face of every side panel, drill three evenly spaced pocket holes along both 9-inch edges. Keep the nearest hole at least 1½ inches from each corner.
Use coarse-thread screws for softwood plywood cores and the screw type recommended by your jig manufacturer for hardwood plywood. Test the setting on an offcut; the screw tip must not break through the outside face.
Step 4: Assemble the First Cubby Module
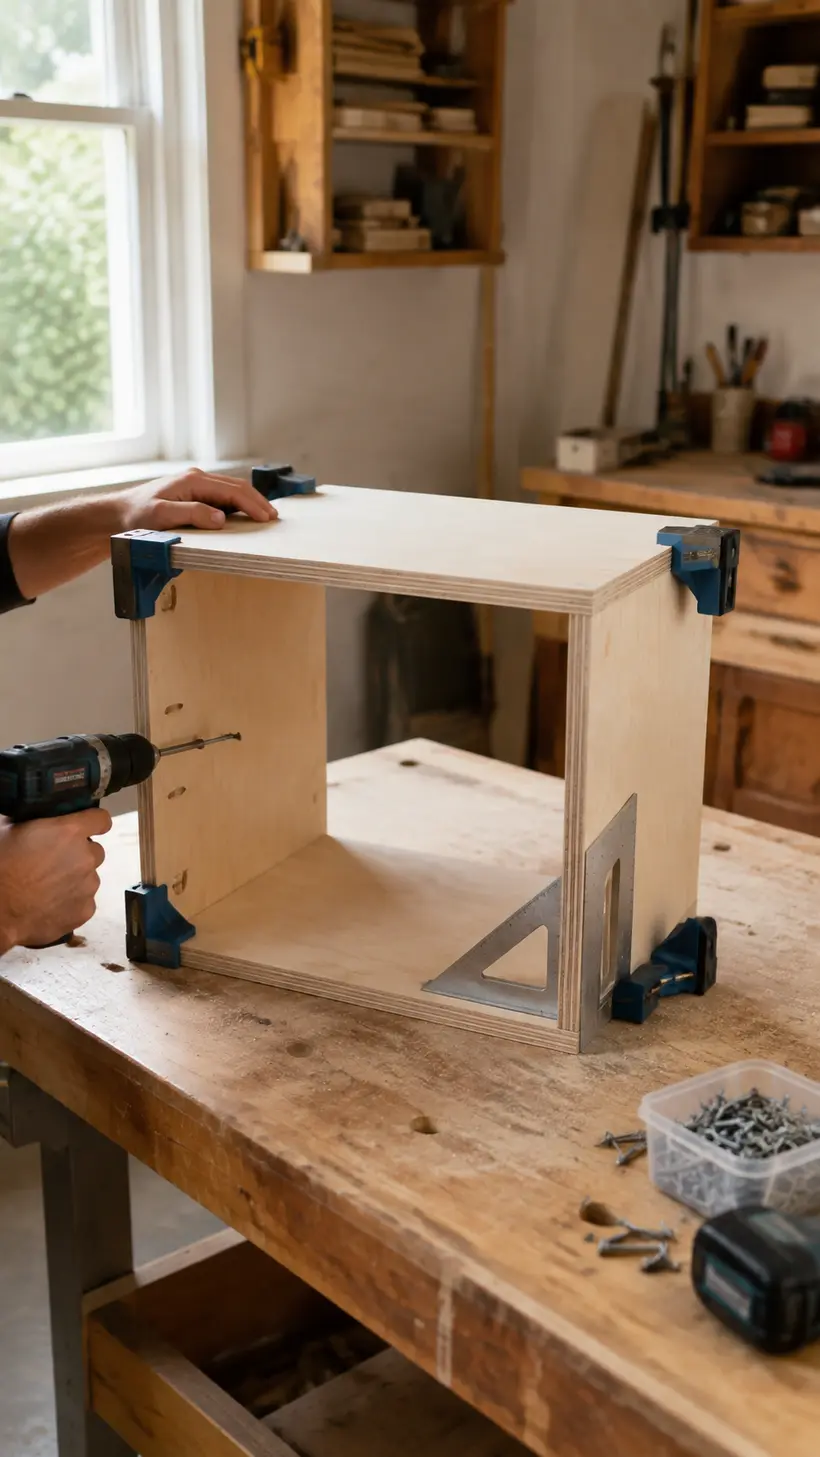
Place one 18-inch panel face-down as the bottom. Apply glue to the lower edge of two side panels and stand them along opposite edges. Their outside faces must be flush with the bottom-panel edges, leaving a 16½-inch opening between them.
Drive the lower pocket screws, add glue to the upper edges and clamp a second 18-inch panel on top. Fasten it through the remaining pocket holes. Measure both corner-to-corner diagonals. Adjust the clamps until the measurements match before the glue begins to set.
Step 5: Install the Center Stop Rail
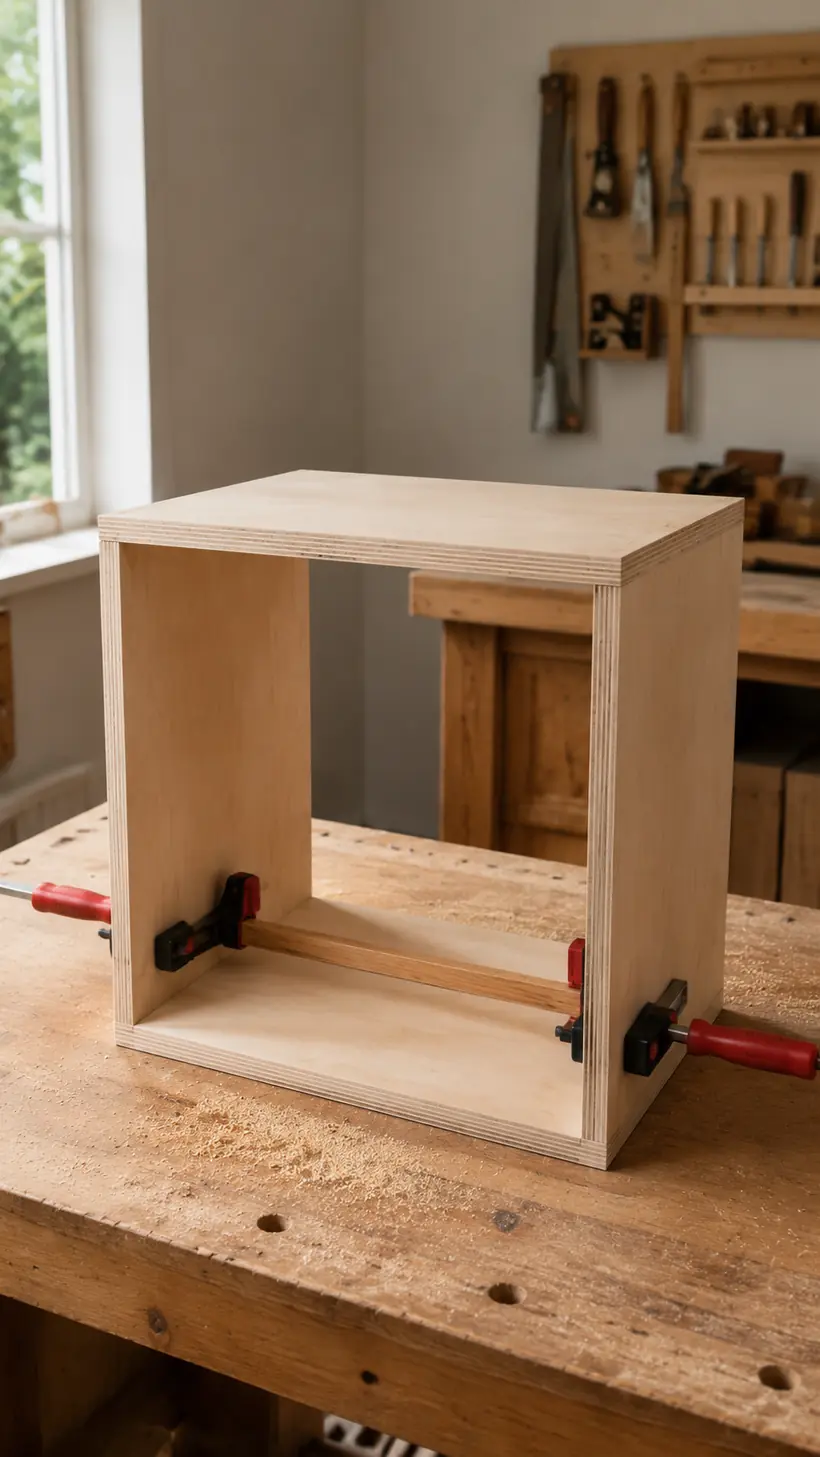
Cut one 1×2 rail to 16½ inches and mark the centerline of the module bottom at 9 inches from either open edge. Stand the rail on its ¾-inch edge so it creates a 1½-inch-high book stop.
Glue and clamp the rail between the side panels. Secure it from underneath with countersunk 1¼-inch screws or use two pocket holes on the hidden side. Make sure the screw heads sit below the surface that will contact the next module.
Step 6: Build the Other Three Modules
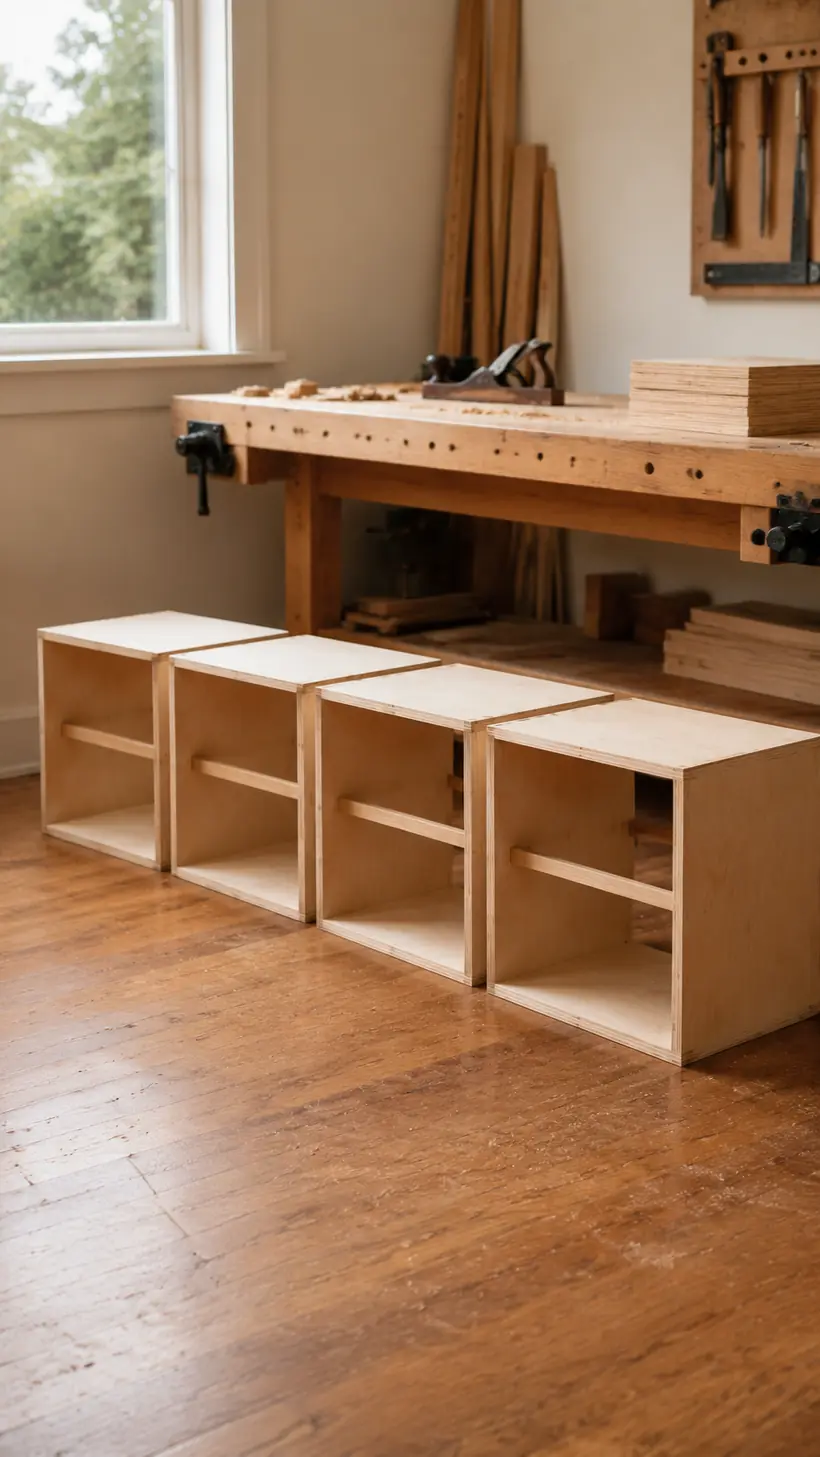
Repeat Steps 4 and 5 until you have four matching modules. Place them side by side and check that their heights match. Sand or recut a badly mismatched part rather than forcing the stack together.
Each finished module should measure 18 inches wide, 18 inches deep and 10½ inches high. The two openings should each be 16½ inches wide by 9 inches high.
Step 7: Sand and Finish the Hard-to-Reach Areas
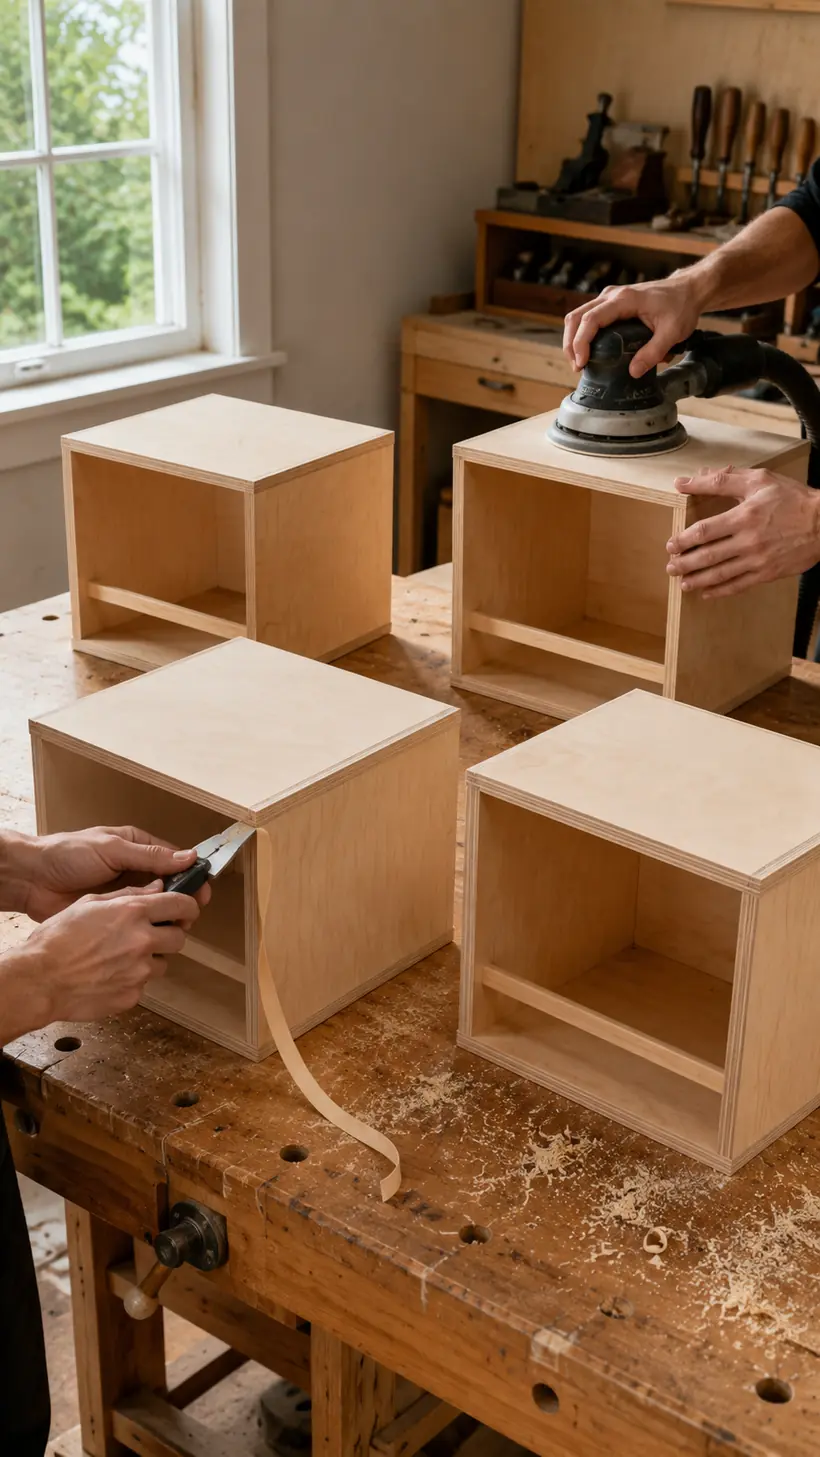
Fill visible pocket holes, then sand with 120- and 180-grit abrasive. Break every exposed corner lightly so the edges feel comfortable in the hand. Apply edge banding now if you want the plywood to resemble solid wood.
It is much easier to prime, paint or apply the first clear coat inside each module while it is separate. Keep glue areas bare so the stacked joints bond to wood rather than finish. For more help, see these wood-finishing tools for beginners.
Step 8: Stack and Secure the Four Modules
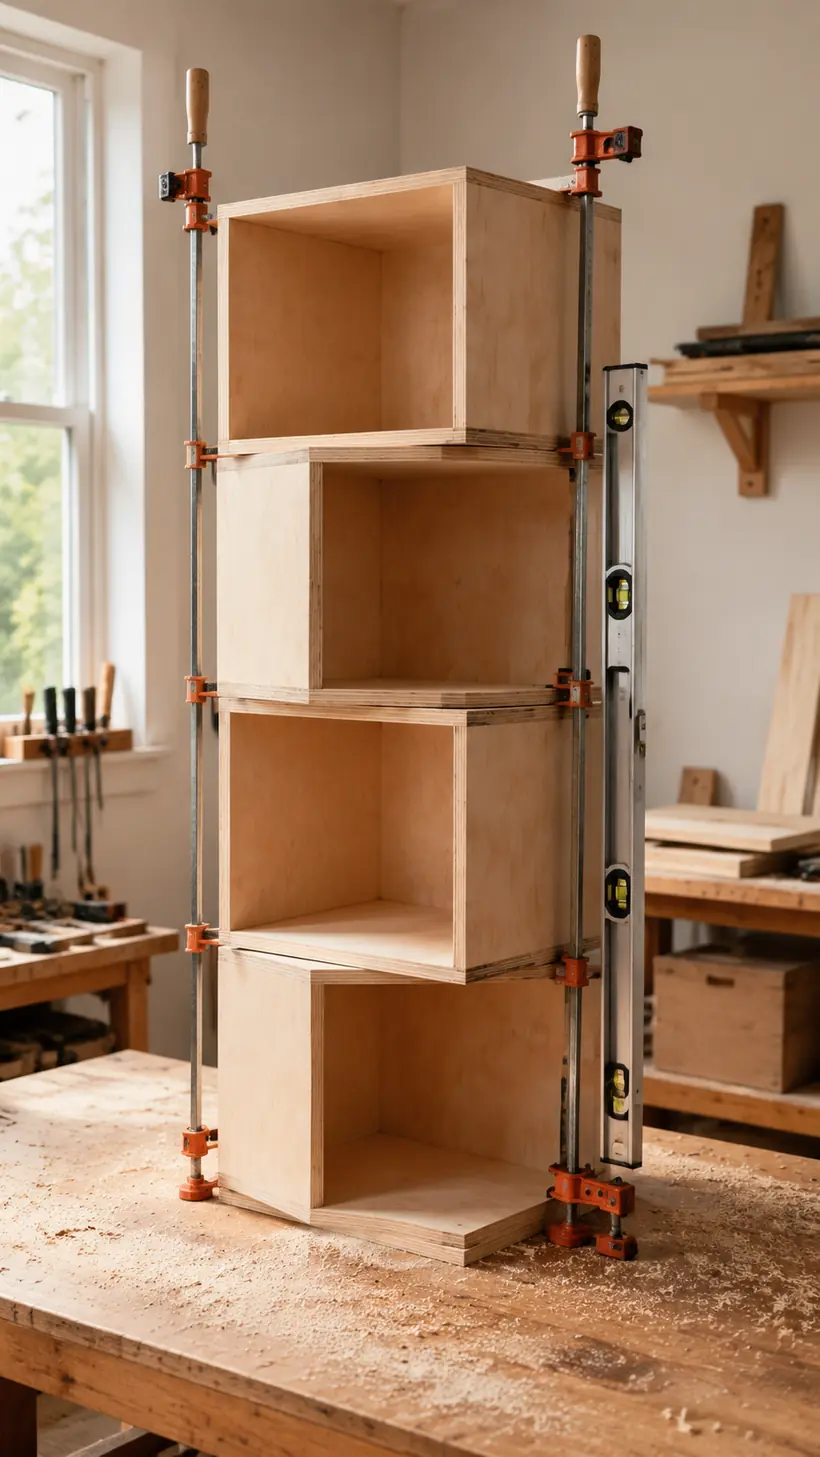
Place the first module with its openings facing front and back. Spread glue across its top, then place the second module with its openings facing left and right. Align all four outside edges and clamp the stack.
Drive 1¼-inch countersunk screws through the floor of the upper module into the top of the lower module. Position the screws at least 1 inch from every edge and away from the center stop rail. Repeat with module three facing front/back and module four facing left/right.
Check the complete tower with a long level and framing square. The body should measure 18 inches square and 42 inches high. Do not mount a leaning or twisted tower to the rotating base.
Step 9: Prepare the Stationary Base
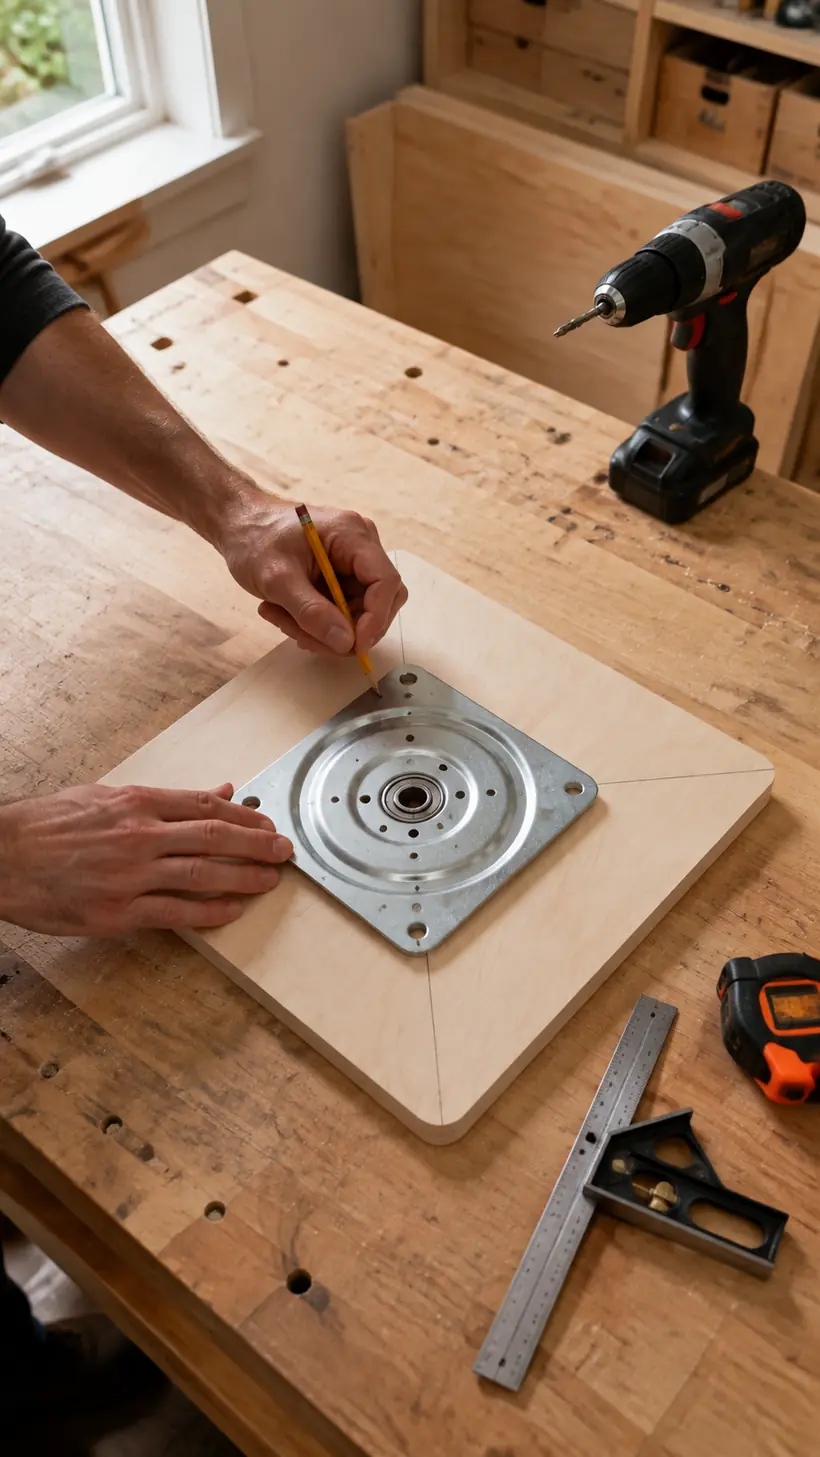
Cut the base to 22 inches square. Round the four corners with a 1-inch radius or soften them with a sander. Draw both diagonals and mark the center point.
Center the bearing and copy its mounting pattern. Drill only the access holes required by the manufacturer. Sand the base, finish its visible surfaces and attach four low-profile rubber feet near the corners, keeping them outside the bearing footprint.
Step 10: Attach the Lazy Susan Bearing
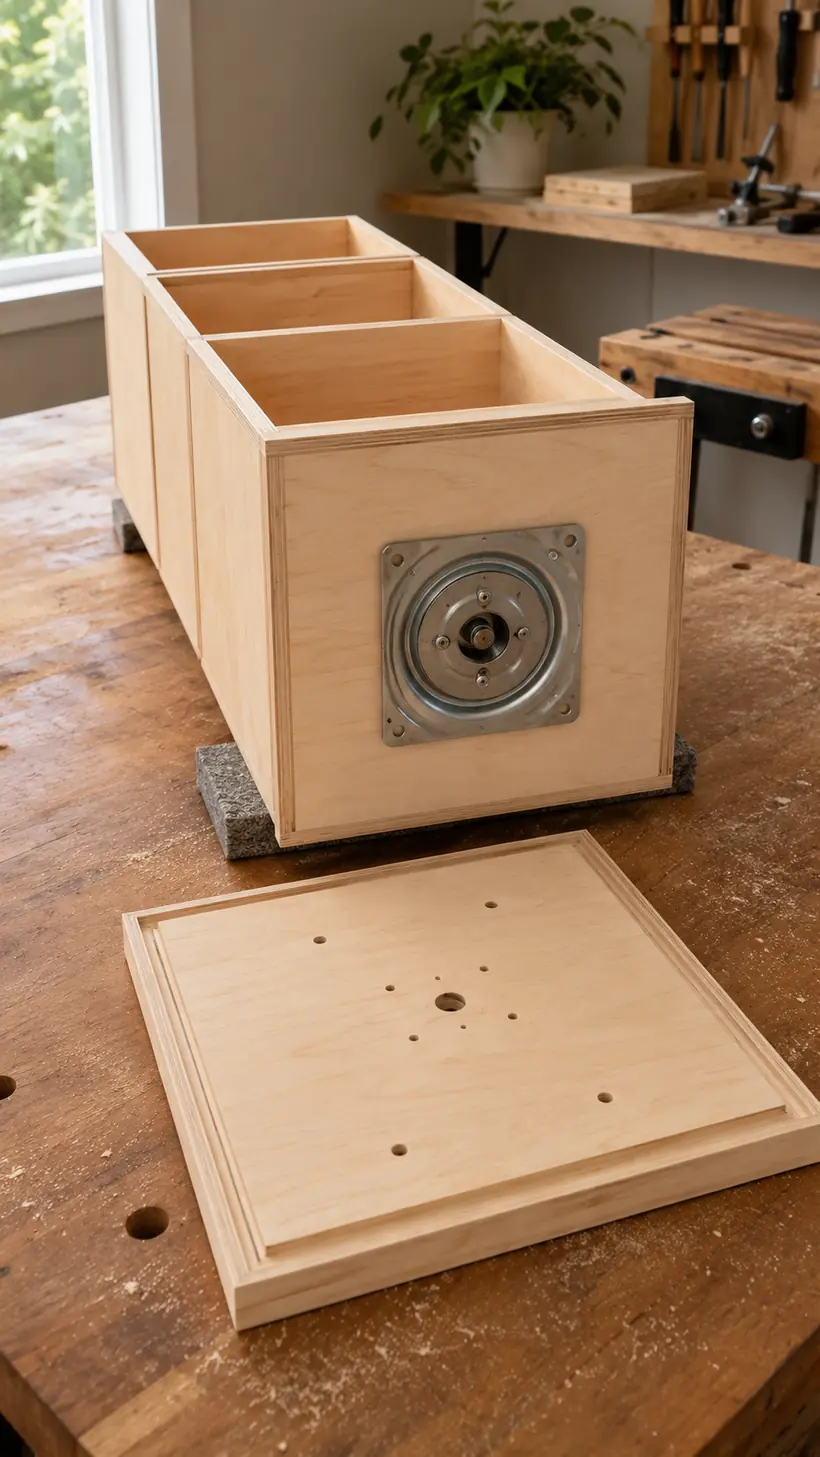
Attach one bearing race to the underside of the tower. Place the tower on the base, align the two center marks and rotate the bearing until the remaining holes are visible through the access openings. Install the base screws without overtightening them.
Turn the empty tower slowly through 360 degrees. Listen for rubbing and check that no screw head catches. If the tower wobbles, stop and correct the bearing alignment or base flatness before proceeding.
Step 11: Apply the Final Finish
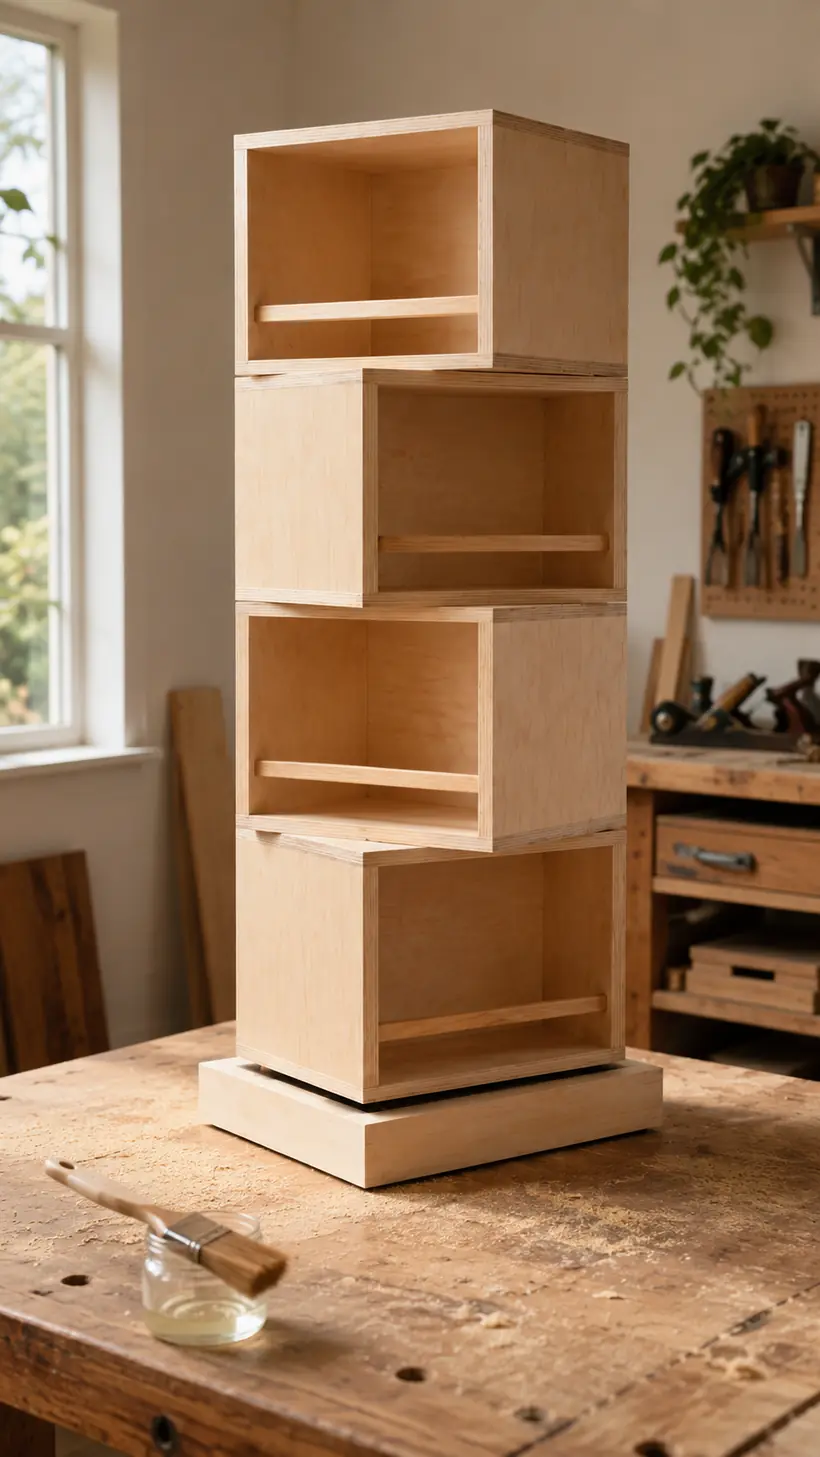
Remove dust and apply the final paint or clear coats according to the product directions. Avoid flooding finish into the bearing. Let the surface cure fully before placing books on it; dry-to-touch is not the same as ready for service.
A painted cabinet hides filled pocket holes and lower-cost plywood cores. A clear finish works best on birch, maple or oak veneer when the grain is worth showing.
Step 12: Balance the Load and Test Rotation
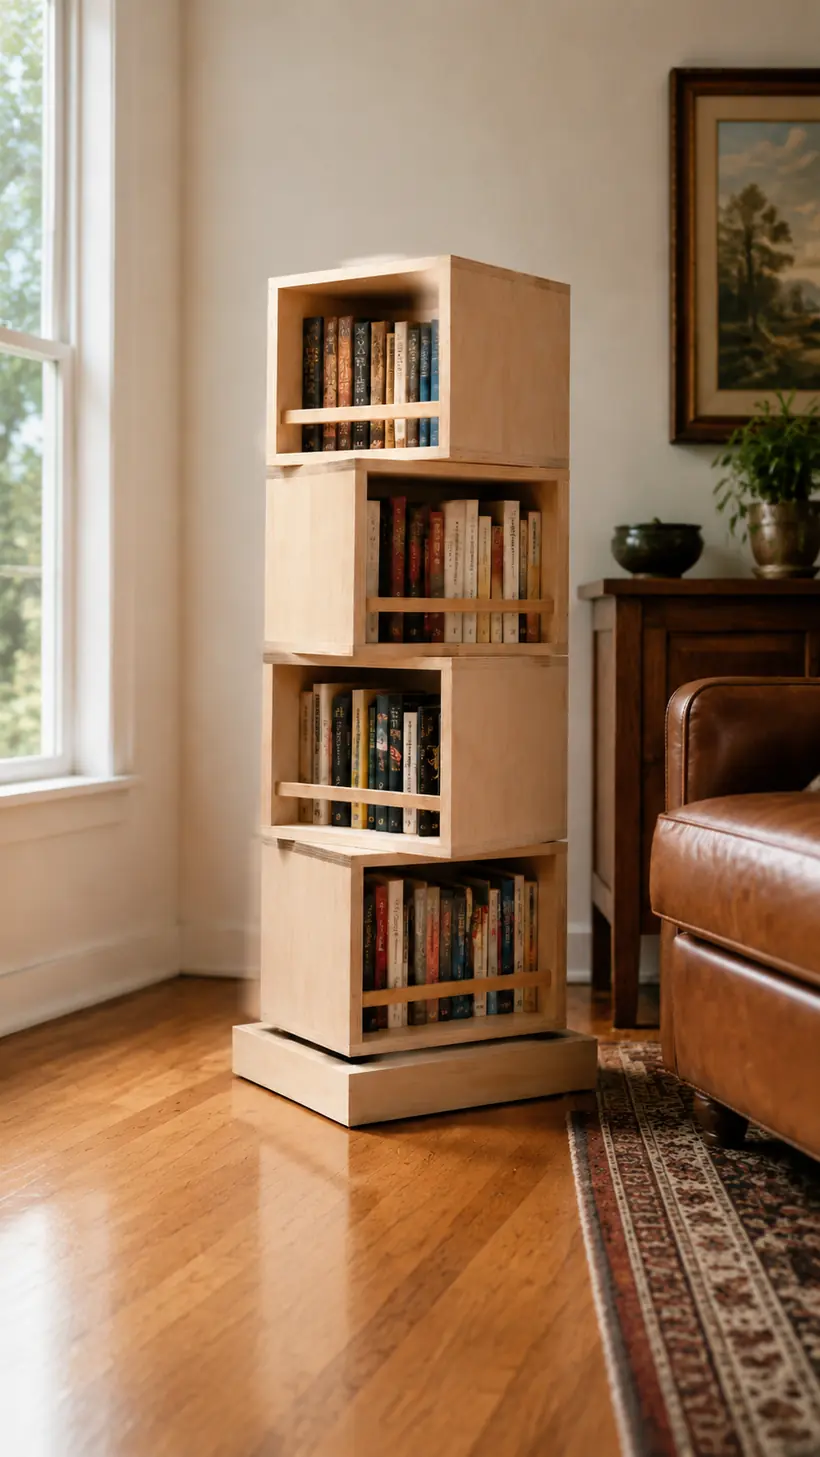
Set the finished bookcase on a clean, level hard floor. Add a small number of books to opposite sides of the lowest module, then rotate the tower. Continue upward in balanced pairs. Heavy books belong on the bottom two levels.
Stop using the unit if the base lifts, the bearing binds, screws loosen or the tower leans. Never use spinning speed as a test; the bookcase is meant to turn slowly by hand.
Want More Furniture Plans Ready for Your Workshop?
Optional Rotating Bookshelf Upgrades
Add Removable Shelf Dividers
Short vertical dividers can keep paperbacks upright, but install them only after deciding which book sizes you store. Removable dowel-mounted dividers offer more flexibility than permanent plywood partitions.
Use Contrasting Stop Rails
Walnut stop rails against birch plywood create a deliberate furniture detail. You can also reuse straight hardwood offcuts from these scrap-wood organizer projects.
Build a Shorter Three-Tier Version
A three-tier version uses six square panels, six side panels and three stop rails. Its rotating body is 31½ inches high. It will expose only two opening directions twice and the other direction once, but the lower center of gravity can suit smaller rooms.
Add Felt-Lined Display Bays
Thin removable felt protects collectibles and keeps small objects from sliding. Do not cover the center stop rail or place fabric where it can contact the bearing.
Common Rotating Bookcase Mistakes
- Building boxes that are not square: Unequal diagonals create a leaning stack and uneven rotation.
- Drilling through the visible face: Test pocket-screw and bearing-screw lengths on scraps first.
- Guessing the bearing holes: Use the template supplied with your exact hardware.
- Skipping the stop rails: Books can slide through or shift to one side during rotation.
- Loading the top first: This raises the center of gravity before the base has stabilizing weight.
- Placing it too close to a wall: The 18-inch-square body needs an approximately 25½-inch circular clearance envelope.
- Using it on a thick rug: A soft, uneven surface can let the fixed base rock.
- Treating it like a toy: Slow hand rotation is appropriate; climbing and fast spinning are not.
If you want a smaller furniture project before committing to a full tower, build this DIY nightstand with a drawer or this DIY end table with cabinet storage. Both teach square casework and careful plywood assembly.
Frequently Asked Questions
What size Lazy Susan bearing should I use?
A 12-inch heavy-duty bearing is a practical size for the 18-inch-square rotating body. Choose a reputable unit rated for at least 250 pounds and follow its mounting instructions. The rating is not the safe capacity of the finished bookcase; that can be determined only through physical testing.
Can I build the rotating bookshelf from MDF?
MDF is flat and paints smoothly, but it is much heavier than plywood and holds edge screws less reliably. Furniture-grade plywood is the better beginner choice for a tall rotating structure.
Why does the plan use double-thick shelves between modules?
Building four independent boxes makes squaring and assembly easier. The stacked top-and-bottom panels produce 1½-inch-thick intermediate shelves, adding stiffness and lowering the risk of sagging.
How many books will it hold?
Capacity depends on book size, weight distribution, plywood quality, joinery and the bearing. Do not publish or rely on a numerical capacity until a finished prototype has been gradually and safely load-tested.
Can I make the tower taller?
Do not add another tier to this base without redesigning and physically testing the stability system. Greater height raises the center of gravity and increases the leverage created when a user pulls on an upper shelf.
Is this rotating bookshelf suitable for a child’s room?
Not automatically. Rotating furniture creates pinch, climbing and tip hazards. A qualified adult should assess the finished unit, room, floor, hardware and intended use. Never market it as child-safe without appropriate physical testing and safety review.
Can I use ordinary wood screws instead of pocket holes?
Yes, but exposed screw heads will need countersinking and filling. Predrill near plywood edges and choose a screw length that cannot break through the opposite face.
Final Thoughts
This DIY rotating bookshelf is built from one repeatable idea: four square cubbies, alternating 90 degrees, on one centered bearing. The simple geometry makes it approachable, while the changing openings give the finished piece a distinctive shape that looks far more complicated than it is.
Accuracy matters most in three places: identical panel sizes, square module assembly and centered bearing installation. Take time with those steps, balance the books from the bottom upward and the project should rotate smoothly while providing useful storage from every direction.
After you finish this build, continue the furniture cluster with more beginner woodworking plans or explore woodworking projects that can become profitable products.