
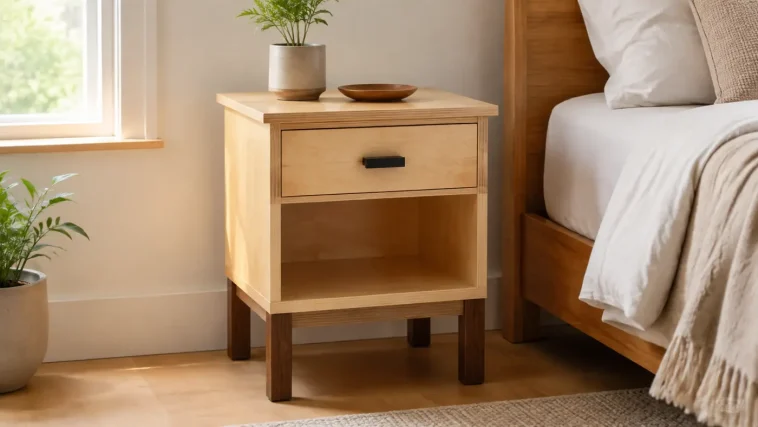
If this is one of your first furniture builds, browse these free woodworking plans for beginners or start with one of these simple weekend woodworking projects. You may also want to review the existing DIY end table with cabinet storage if a door would suit your room better than a drawer.
DIY Nightstand Plan at a Glance
| Detail | Plan specification |
|---|---|
| Finished size | 20″ W × 16″ D × 24″ H |
| Cabinet size | 18½″ W × 15″ D × 15″ H, plus ¼″ applied back |
| Drawer box | 16″ W × 14″ D × 4″ H |
| Drawer front | 17½″ W × 5½″ H |
| Main materials | ¾″, ½″ and ¼″ plywood; 2×2 legs; 1×3 aprons |
| Drawer hardware | One pair of 14″ side-mount full-extension slides |
| Difficulty | Beginner to confident beginner |
| Build time | One weekend, plus finish-curing time |
| Estimated materials | Approximately $70–$130, depending on plywood and hardware |
Why This Nightstand Design Works
The project separates into three simple assemblies: a pocket-hole base, a plywood case and a drawer box. That keeps each glue-up manageable and lets you correct small alignment issues before they affect the whole piece.
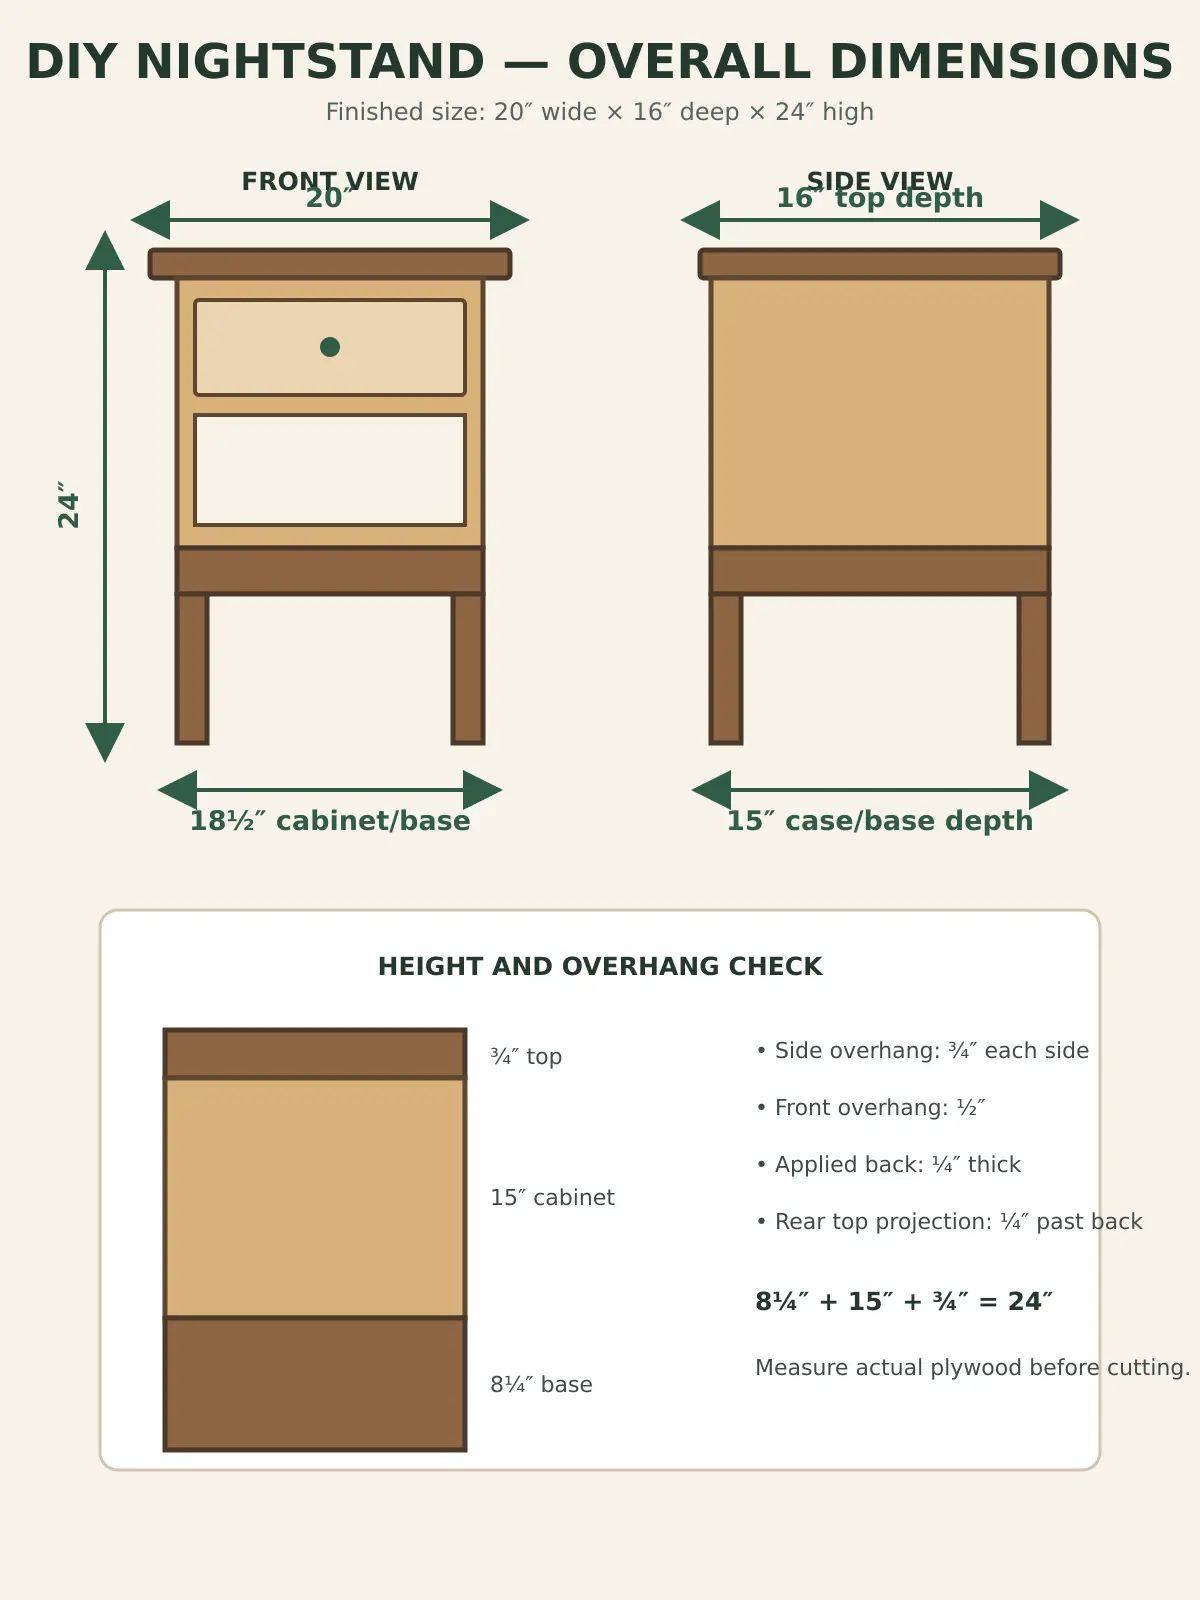
The 20-inch top gives you room for a lamp, phone and book without making the table bulky. The cabinet is 18½ inches wide, so the top projects ¾ inch on each side. At the front it projects ½ inch beyond the side panels; at the back it finishes ¼ inch beyond the applied back panel.
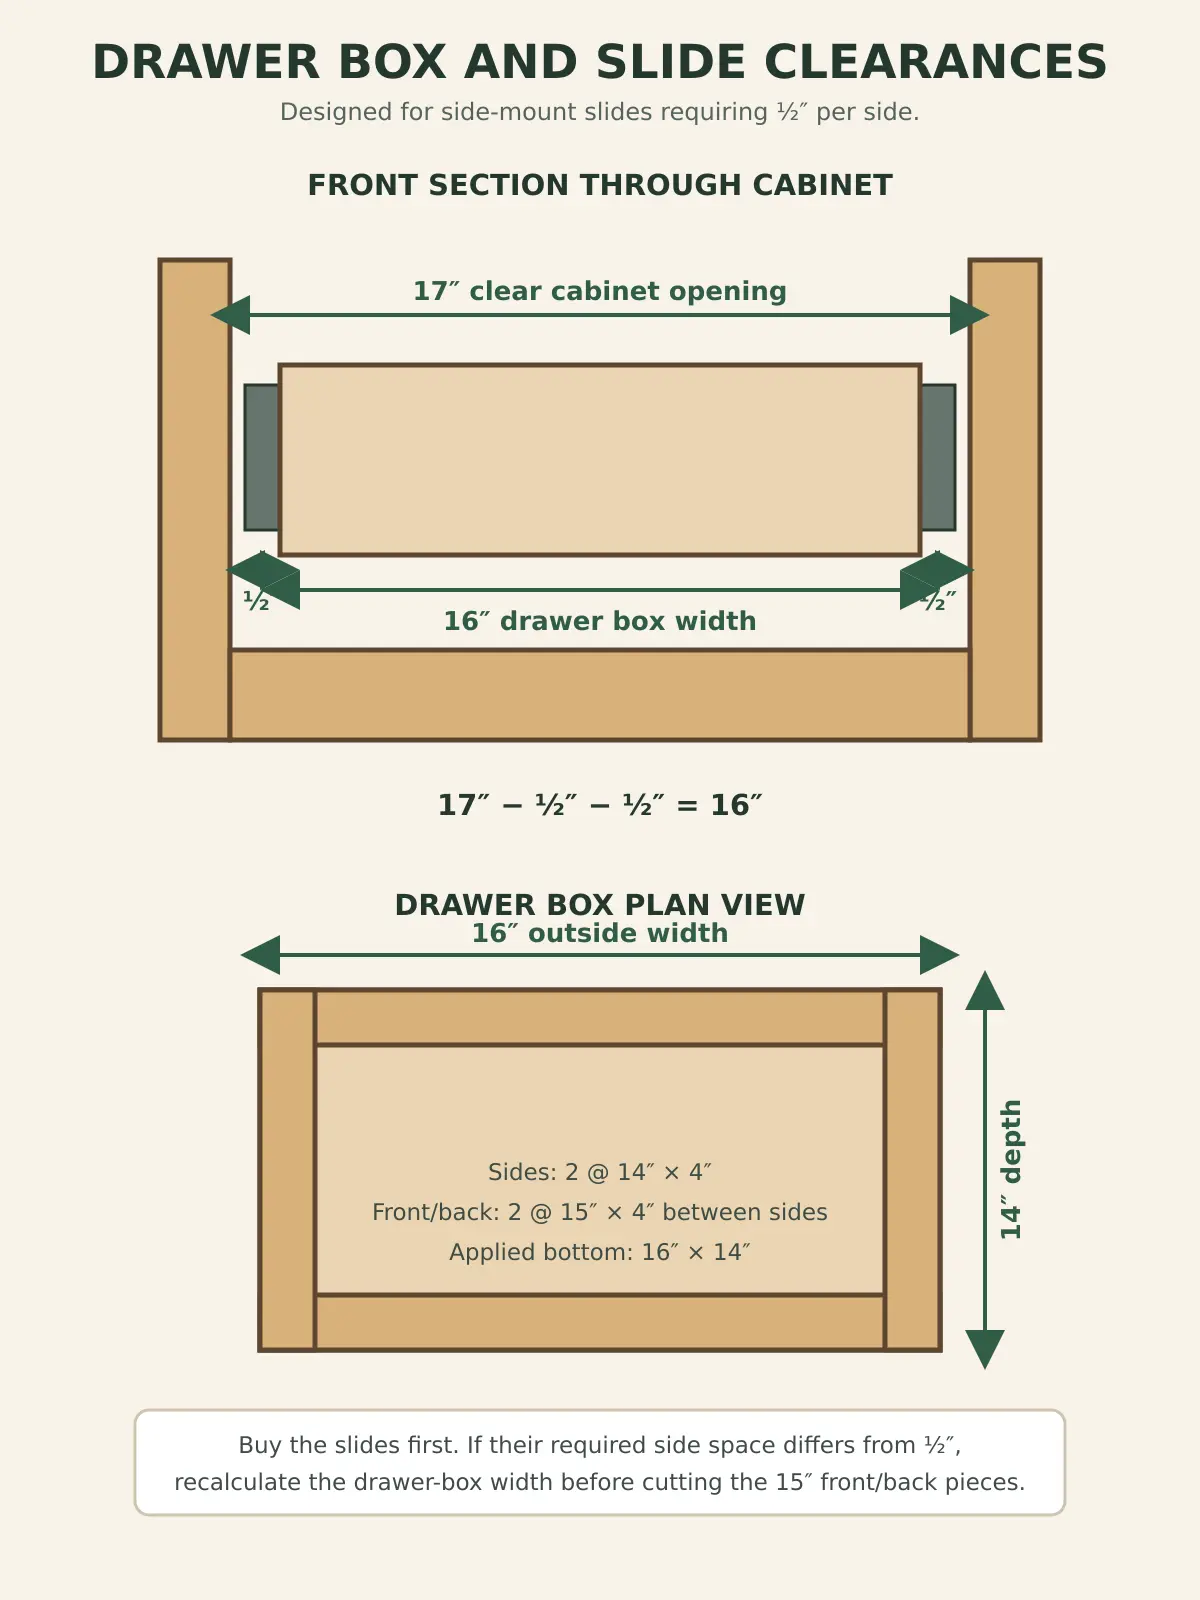
The clear opening between the two ¾-inch sides is 17 inches. A conventional pair of side-mount drawer slides commonly needs ½ inch of clearance on each side, which makes the planned drawer box 16 inches wide. That relationship is the most important arithmetic in the project:
17″ cabinet opening − 1″ total slide clearance = 16″ drawer box
Do not treat that equation as universal. Buy the slides first and follow their installation sheet. If your hardware requires a different clearance, change the drawer-box width before cutting its front and back pieces.
Materials and Hardware
Sheet Goods and Lumber
- One half sheet of ¾″ furniture-grade plywood for the cabinet, top, stretchers and drawer front
- One 2′ × 4′ panel of ½″ plywood for the drawer box
- One 2′ × 4′ panel of ¼″ plywood for the back and drawer bottom
- One 2×2 board at least 4 feet long for the four legs
- One 1×3 board at least 6 feet long for the base aprons
- Iron-on edge banding that matches the ¾″ plywood, optional but recommended
Hardware and Supplies
- One pair of 14″ full-extension side-mount drawer slides
- One drawer pull or knob with matching screws
- Approximately 30 indoor 1¼″ pocket-hole screws appropriate for your material
- Approximately 16 #8 × 1¼″ wood screws for securing the case, top and back where noted
- ¼″ or ⅝″ brad nails for the back and drawer bottom, if compatible with your nailer and joint
- Wood glue
- Wood filler
- 80-, 120-, 180- and 220-grit sandpaper
- Paint, stain and a compatible protective finish
Kreg lists 1¼-inch pocket-hole screws among its indoor joinery options. Match thread type to your material, set the jig for the actual stock thickness and make a test joint before assembling the furniture. For additional small-shop planning, see this guide to setting up a small woodworking shop.
Complete DIY Nightstand Cut List
| Part | Qty. | Material | Finished size |
|---|---|---|---|
| Top | 1 | ¾″ plywood | 20″ × 16″ |
| Case sides | 2 | ¾″ plywood | 15″ × 15″ |
| Case bottom | 1 | ¾″ plywood | 17″ × 15″ |
| Top stretchers | 2 | ¾″ plywood | 17″ × 3″ |
| Drawer front | 1 | ¾″ plywood | 17½″ × 5½″ |
| Drawer sides | 2 | ½″ plywood | 14″ × 4″ |
| Drawer front/back | 2 | ½″ plywood | 15″ × 4″ |
| Drawer bottom | 1 | ¼″ plywood | 16″ × 14″ |
| Case back | 1 | ¼″ plywood | 18½″ × 15″ |
| Legs | 4 | 2×2 | 8¼″ long |
| Front/back aprons | 2 | 1×3 | 15½″ long |
| Side aprons | 2 | 1×3 | 12″ long |
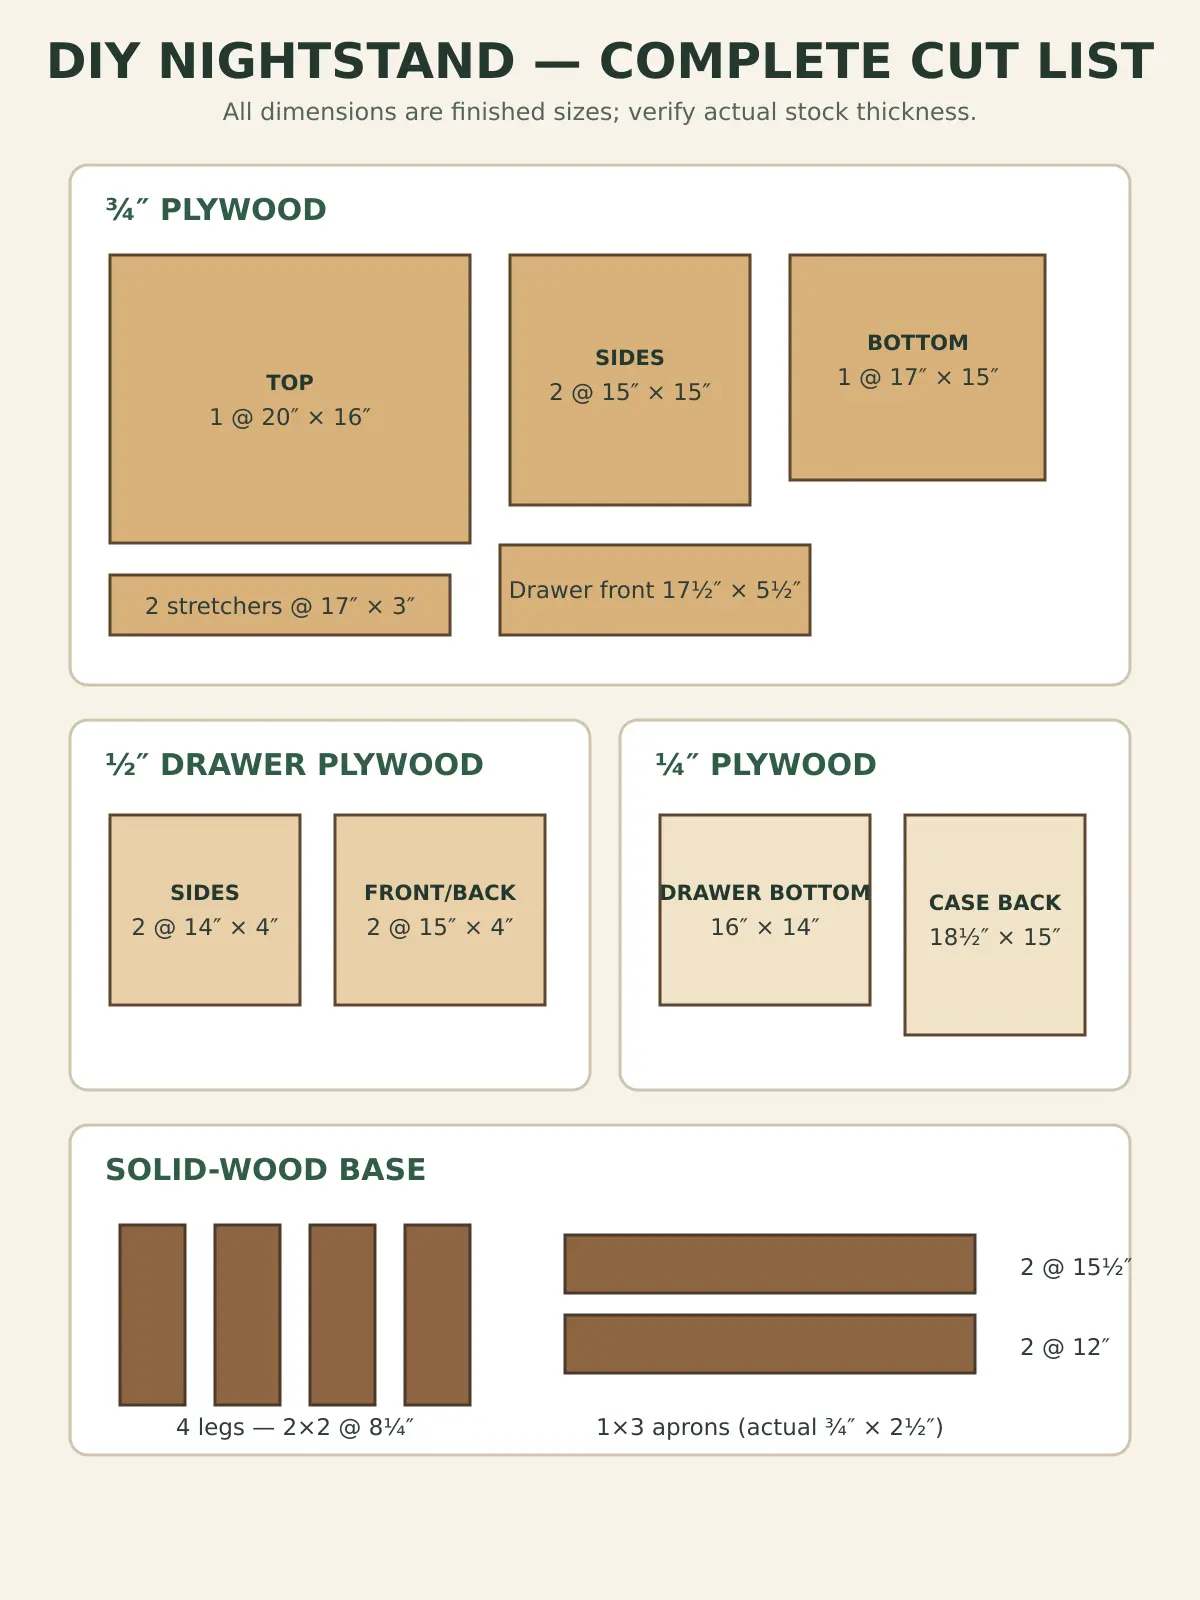
The planned ¾-inch parts use approximately 8½ square feet of plywood, so a clean half sheet provides enough area with a sensible margin for saw kerfs and defects. The drawer requires less than 2 square feet of ½-inch plywood, and the back plus bottom use about 3½ square feet of ¼-inch plywood.
Tools Needed
- Table saw, track saw or circular saw with a straightedge guide
- Miter saw or a square crosscut guide for the solid-wood legs and aprons
- Pocket-hole jig
- Drill/driver and drill bits
- Orbital sander
- Clamps, including two long enough to span the cabinet
- Tape measure, combination square and marking pencil
- Brad nailer or hammer, optional
- Drawer-slide jig or accurately cut spacer blocks, optional
A precise circular-saw setup can complete every panel cut; a large table saw is not required. If your tools are currently competing for bench space, this power-tool organizer with charging station can help separate storage from assembly space.
Critical Measurements Before You Start
Cabinet Width
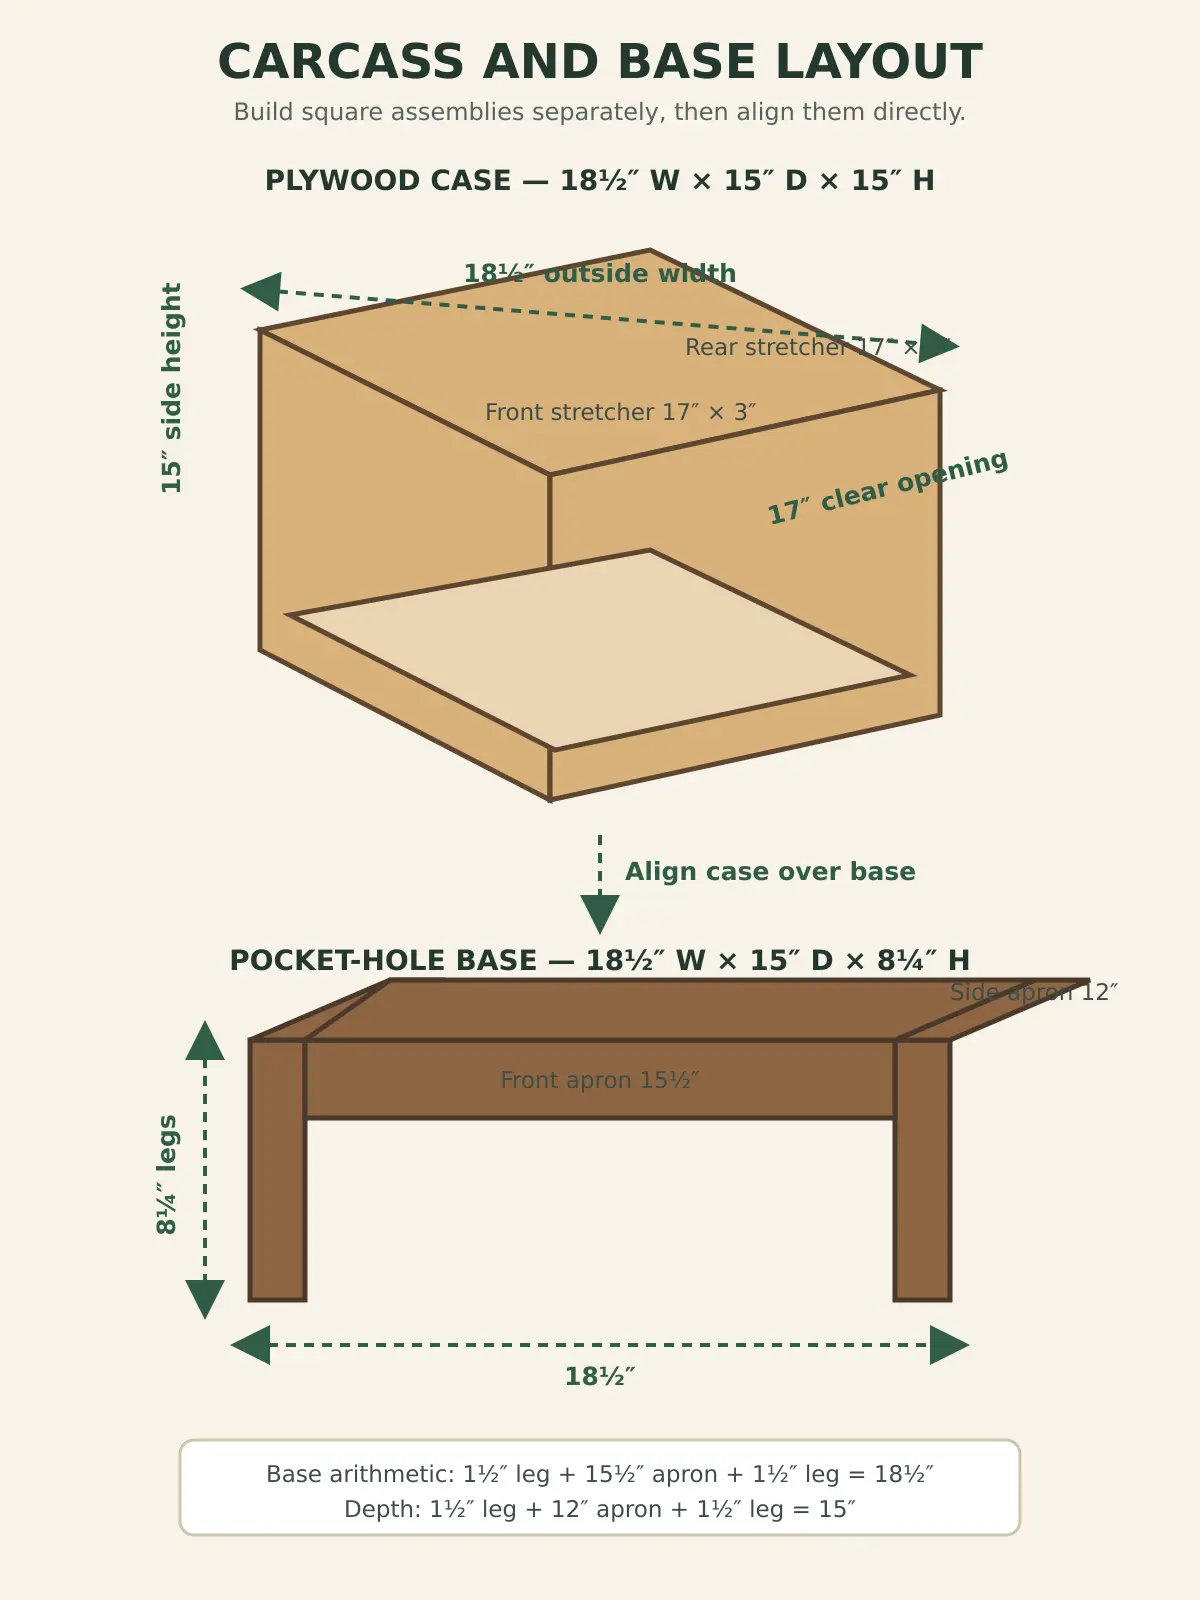
The bottom and both stretchers are 17 inches wide. Adding two ¾-inch sides produces an outside cabinet width of 18½ inches. Centering the 20-inch top leaves a ¾-inch overhang at both sides.
Base Width and Depth
The front and back aprons fit between the legs. Two 1½-inch legs plus one 15½-inch apron produce 18½ inches. At each side, two 1½-inch legs plus one 12-inch apron produce 15 inches. The completed base therefore matches the plywood case exactly.
Finished Height
The 8¼-inch base, 15-inch cabinet and ¾-inch top total 24 inches. If you change the height for a tall or low bed, change only the four leg lengths. Keep all four legs identical and recalculate the finished height before cutting.
Drawer Clearance
The 16-inch drawer box assumes slides requiring ½ inch of side space each. The 14-inch drawer depth matches a 14-inch slide and leaves approximately 1 inch behind the box inside the 15-inch-deep cabinet. Never force the back of a drawer against the applied back panel.
How to Build the DIY Nightstand With Drawer
Step 1: Cut and Label Every Part
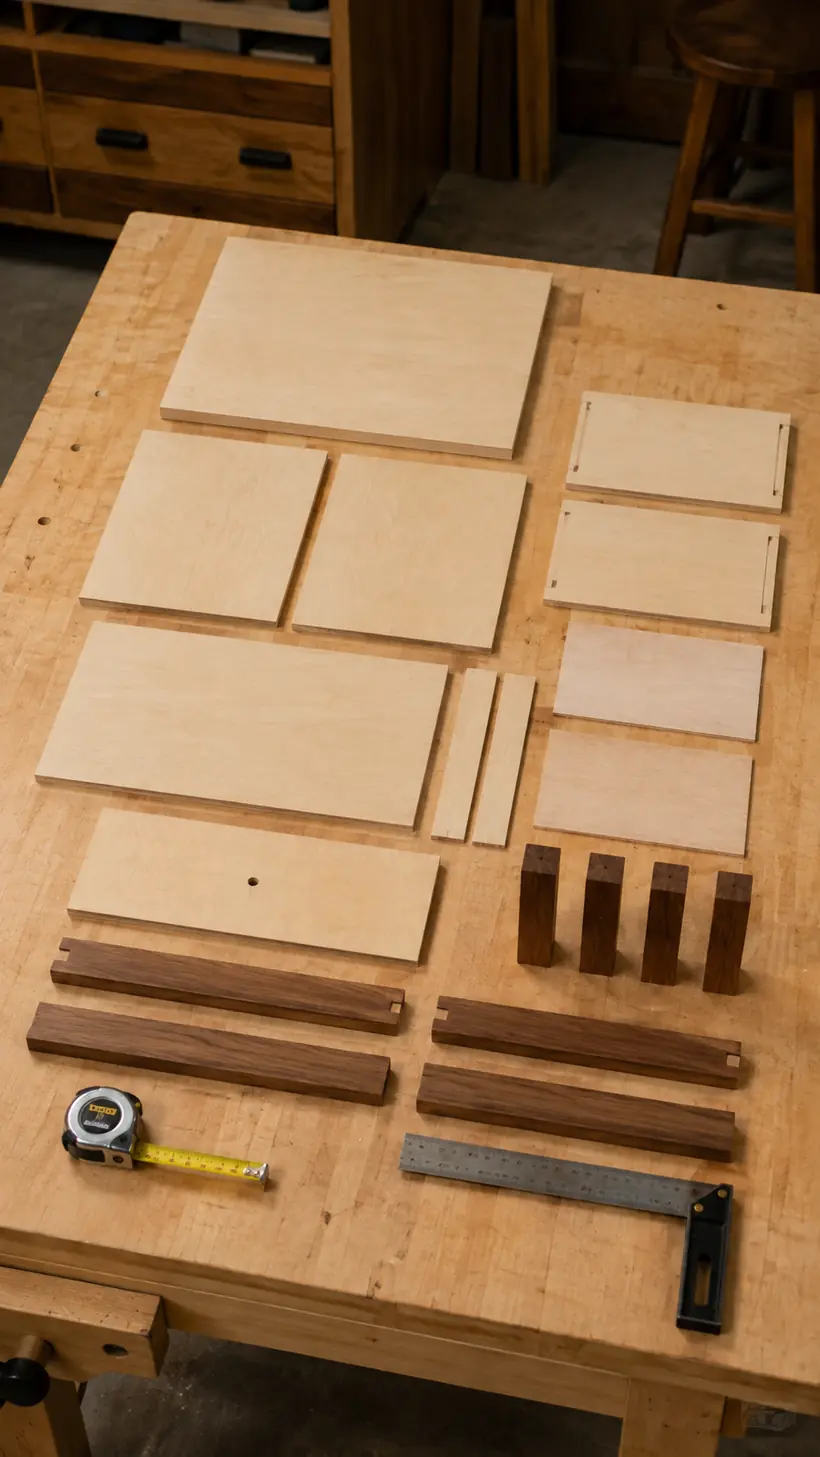
Break down the plywood on rigid foam or a supported work surface. Cut slightly oversized panels first if that helps you manage a large sheet, then make the final dimensioned cuts with a square guide. Use the same fence setting for identical parts so both side panels and both drawer sides finish exactly alike.
Cut all four legs in one setup. Stand them together on a flat surface and check that their tops align. A difference of even 1⁄16 inch can make a small table rock.
Step 2: Prepare the Panels and Pocket Holes
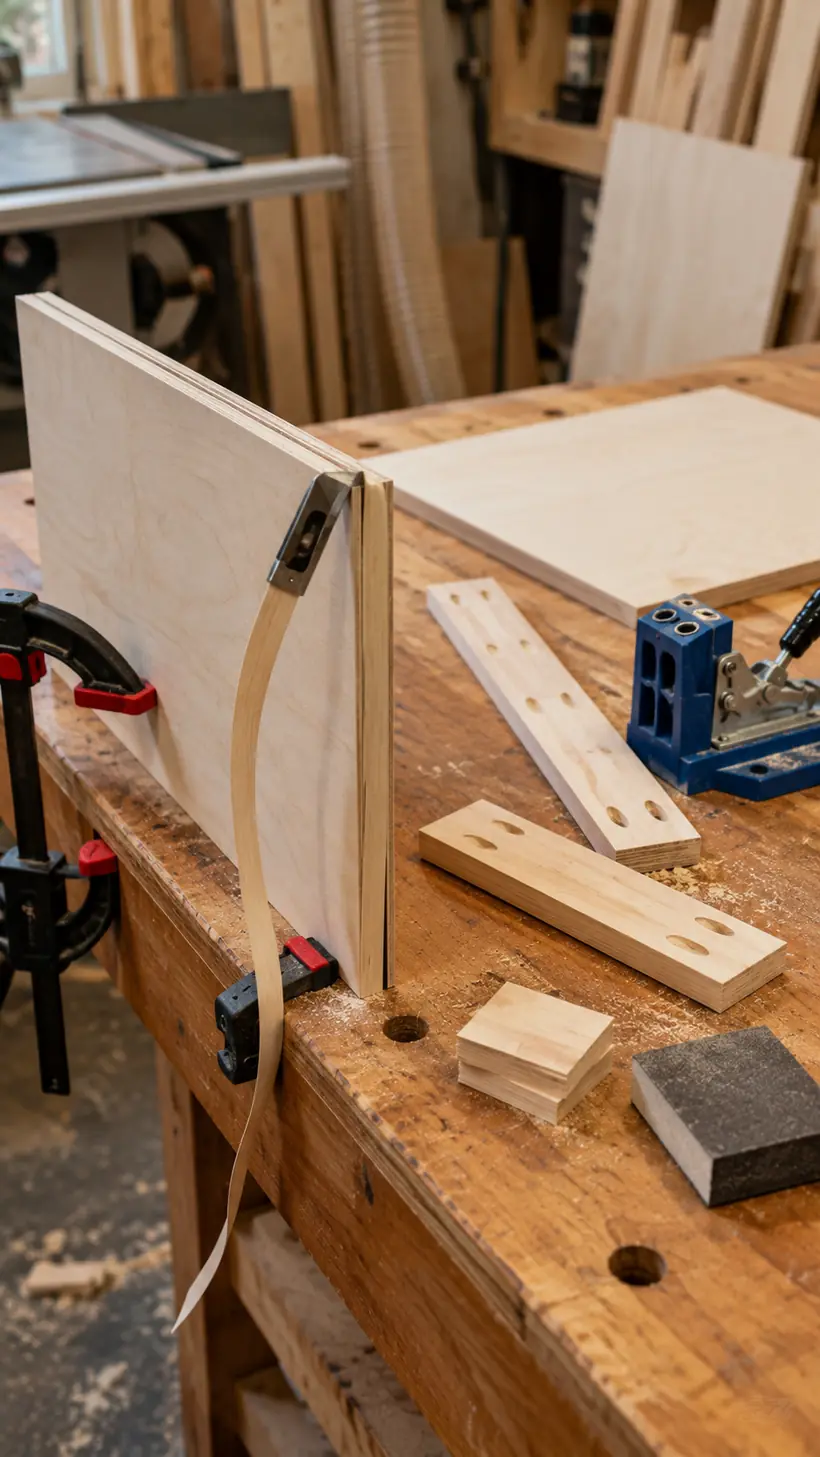
Apply edge banding to the front edges of both side panels, the drawer front and all four edges of the top. You can also band the front edge of the case bottom if you want the open shelf to look more finished. Trim and sand the banding without rounding over the plywood faces.
Drill pocket holes on the underside of the bottom panel, at both ends of the two top stretchers and at both ends of every apron. Place the apron holes on inward-facing surfaces. Set the jig and stop collar for the actual material thickness, and test a screw in scrap before drilling the project parts.
Step 3: Assemble the Plywood Case
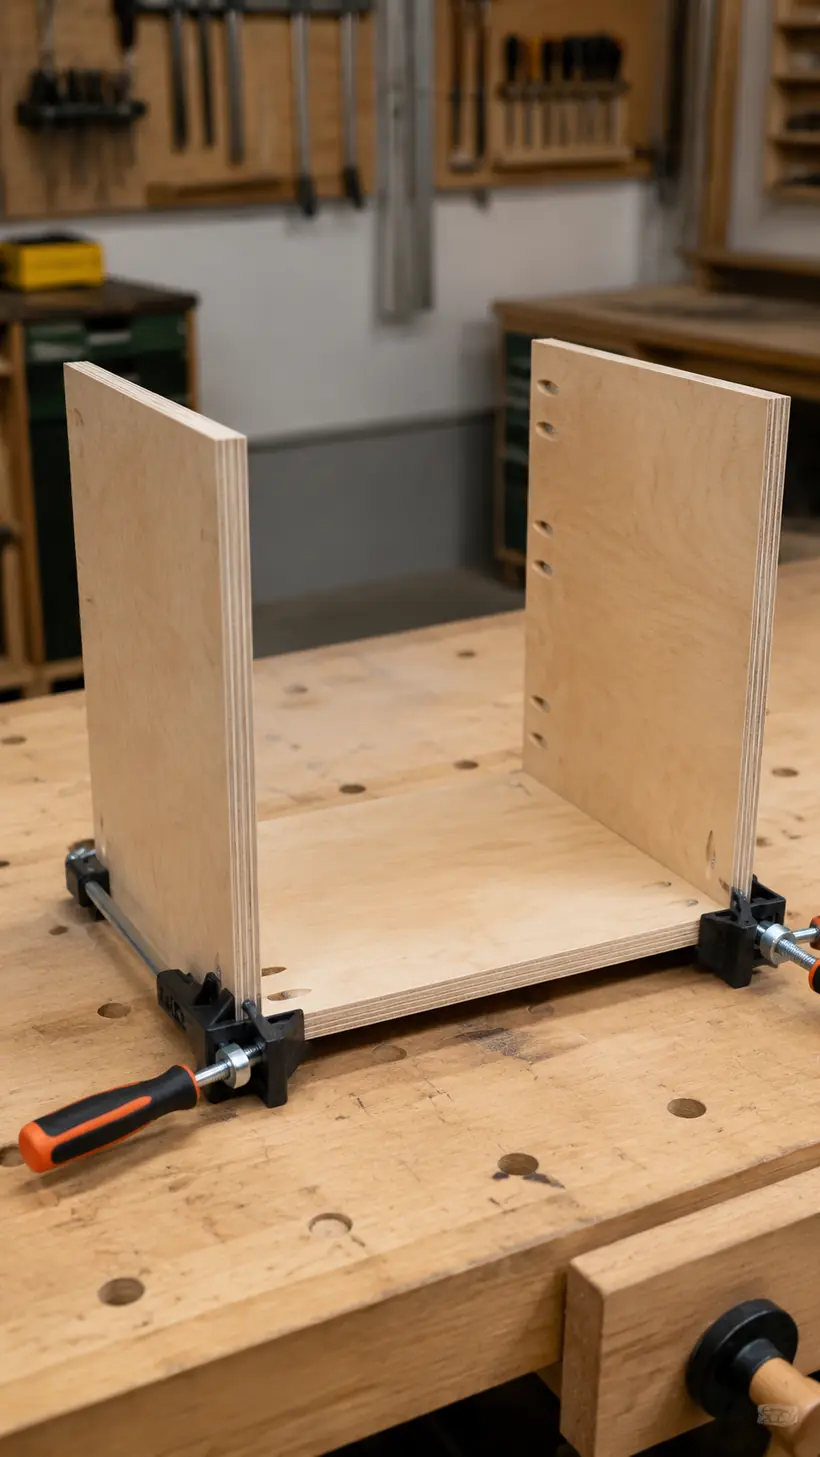
Lay one side panel flat with its best face down. Position the bottom panel flush with the lower edge and front edge. Apply glue, clamp the joint square and drive 1¼-inch pocket-hole screws from the underside of the bottom into the side.
Add the second side the same way. Measure the inside opening at the front and back; both should be 17 inches. Then compare the two diagonal measurements. Adjust the assembly until the diagonals match before the glue begins to set.
Step 4: Install the Top Stretchers
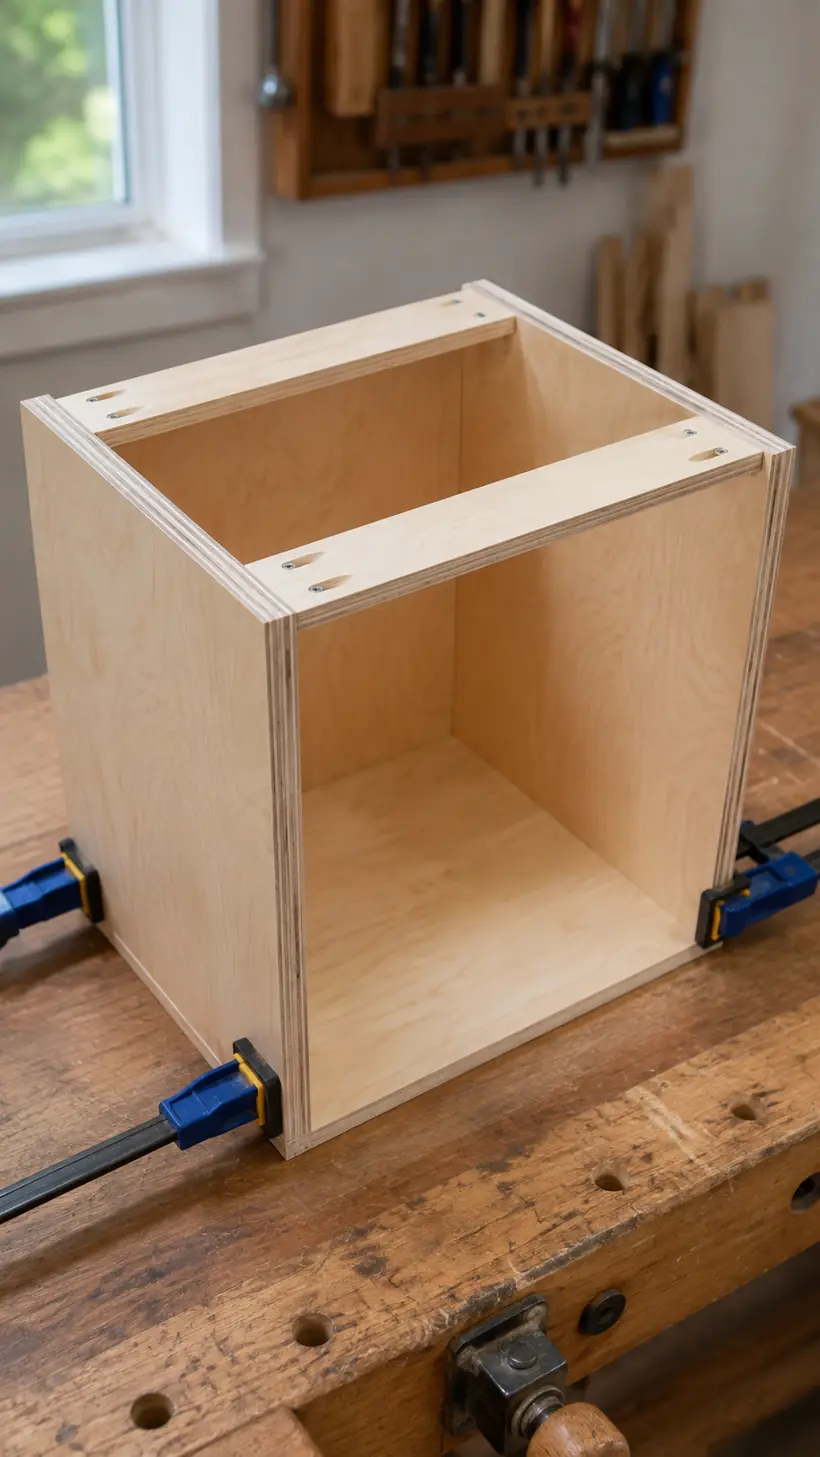
Fit the two 17-inch stretchers between the sides. The front stretcher is flush with the cabinet front; the rear stretcher is flush with the rear edges of the side panels. Their upper edges are level with the side-panel tops.
Clamp each stretcher before driving its pocket screws. Recheck the 17-inch opening and both diagonals. The stretchers hold the cabinet square and give you broad surfaces for attaching the top from below.
Step 5: Build and Attach the Base
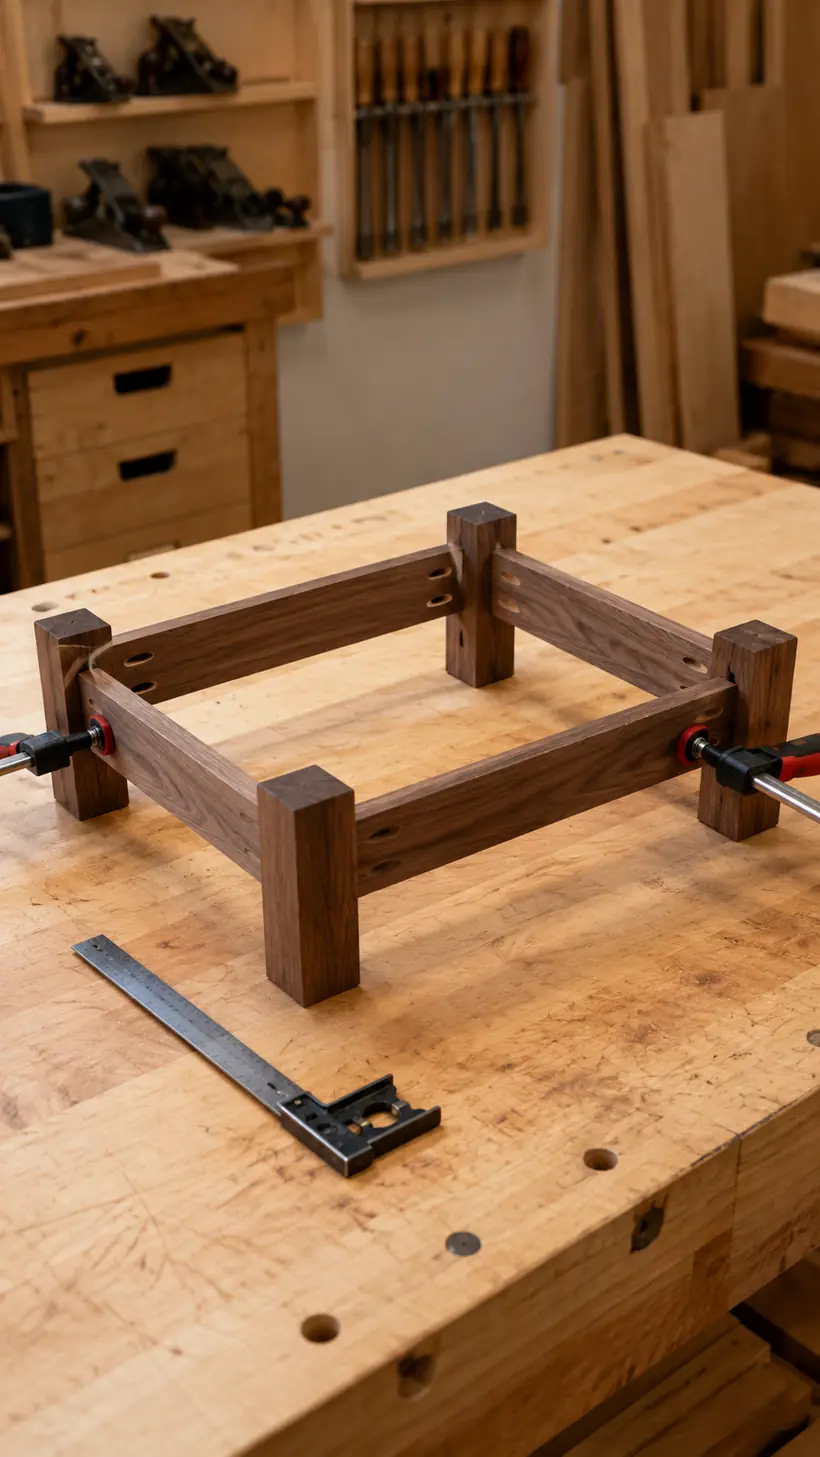
Place two legs on a flat bench with a 15½-inch apron between them. Keep the apron top flush with the leg tops and its face inset consistently. Apply glue, clamp and drive the pocket screws. Build the opposite assembly, then connect them with the two 12-inch side aprons.
The completed base should measure 18½ inches wide by 15 inches deep. Check its diagonals, stand it on a flat surface and correct any twist. Center the plywood case directly over the base, apply glue and drive appropriate 1¼-inch screws down through the case bottom into the aprons and leg tops. Predrill and avoid overtightening.
Step 6: Add the Back Panel
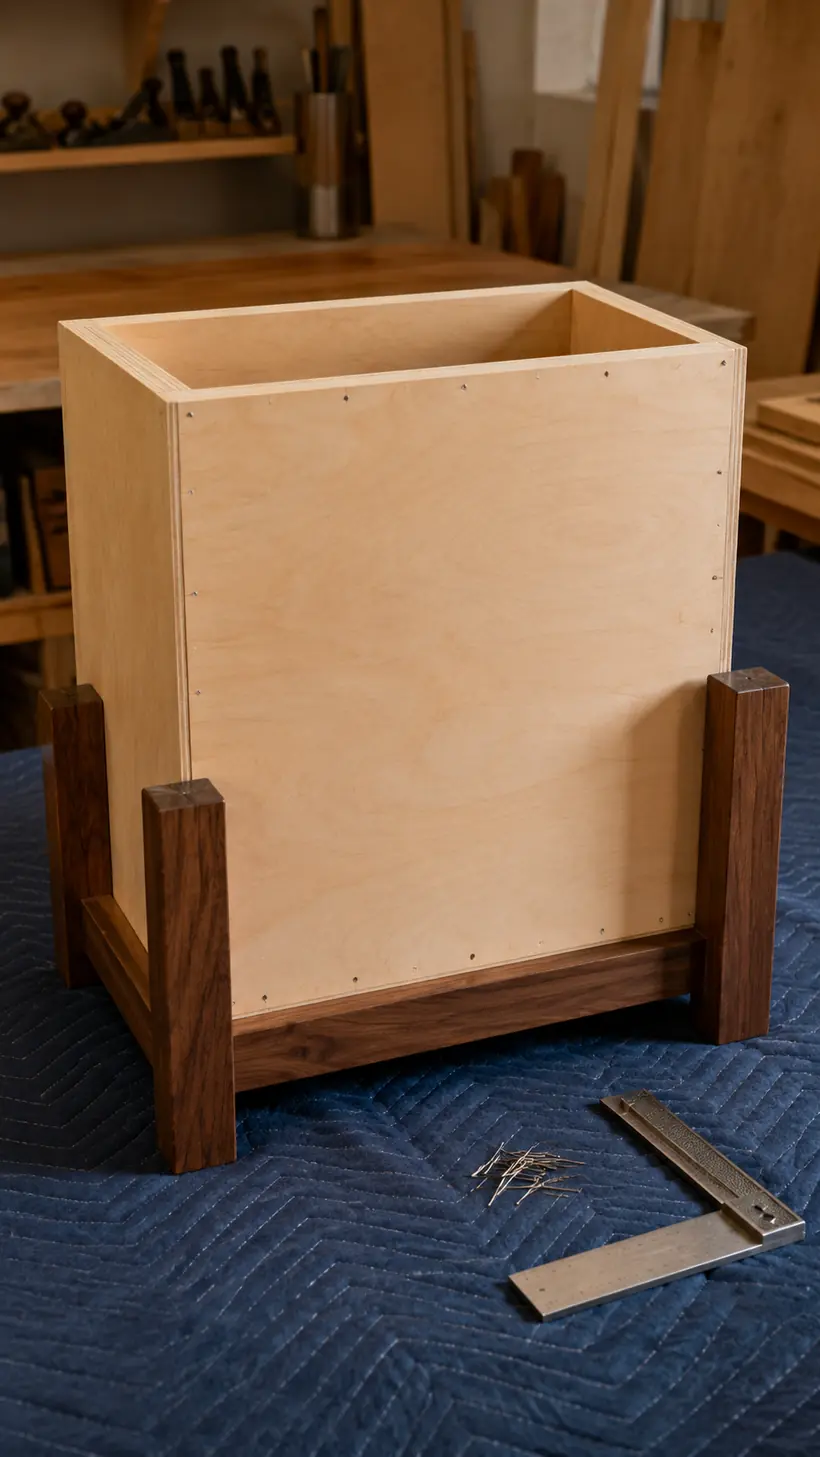
Place the nightstand face down on a padded surface. Confirm the cabinet diagonals match, then lay the ¼-inch back over the rear edges. The panel should align with both sides, the bottom and the upper stretchers.
Attach it with glue and short brads or screws spaced approximately 4 to 6 inches apart. Keep every fastener safely inside the ¾-inch panel edges. The back is not decorative filler; it is what prevents the case from racking out of square.
Step 7: Assemble the Drawer Box
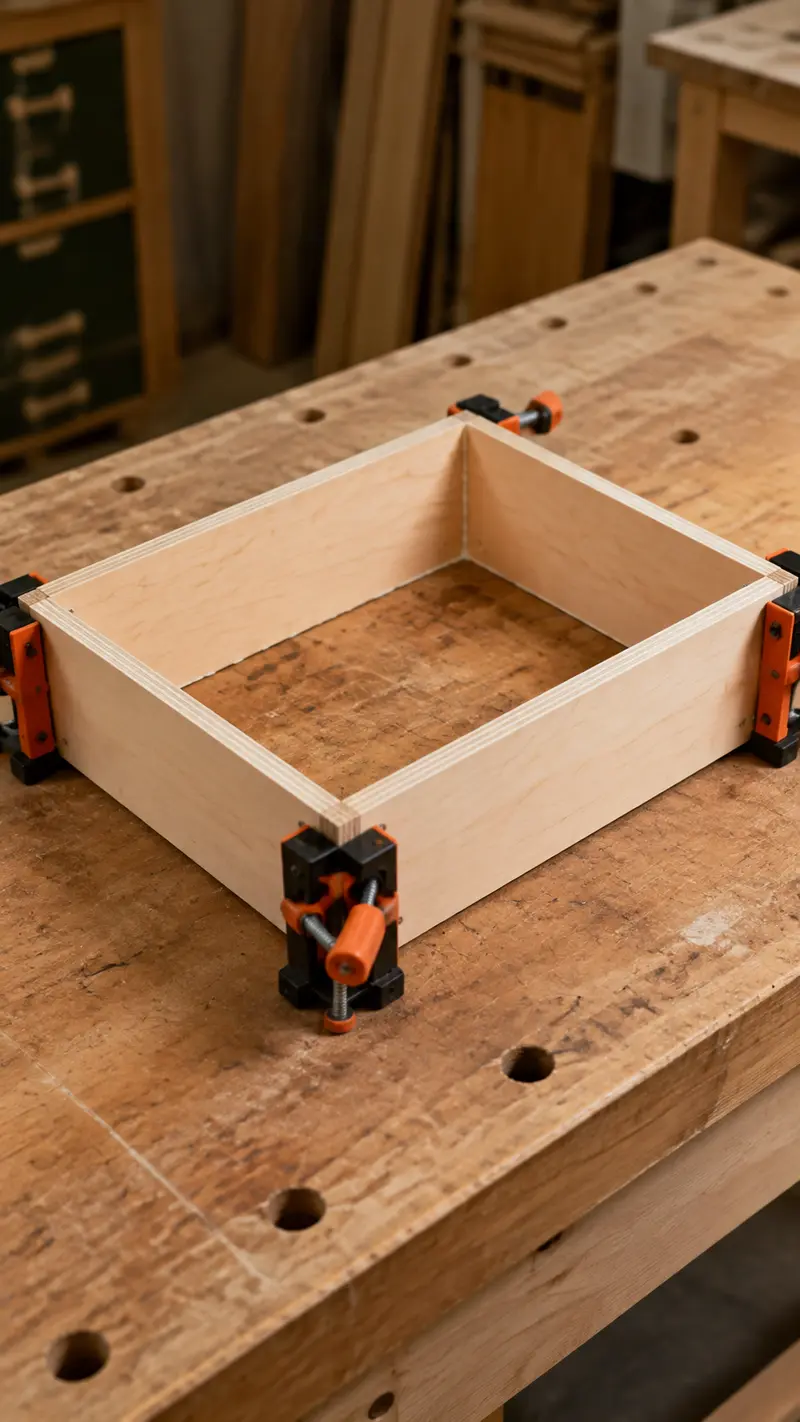
Dry-fit the two 14-inch sides around the two 15-inch front and back pieces. The outside measurement should be exactly 16 inches wide by 14 inches deep. Assemble with glue and joinery appropriate for ½-inch plywood—carefully placed pocket screws, small confirmat screws or brads can work when used correctly.
Measure both diagonals before the glue sets. A drawer box that is parallelogram-shaped will bind even when the cabinet slides are installed perfectly.
Step 8: Install the Drawer Bottom
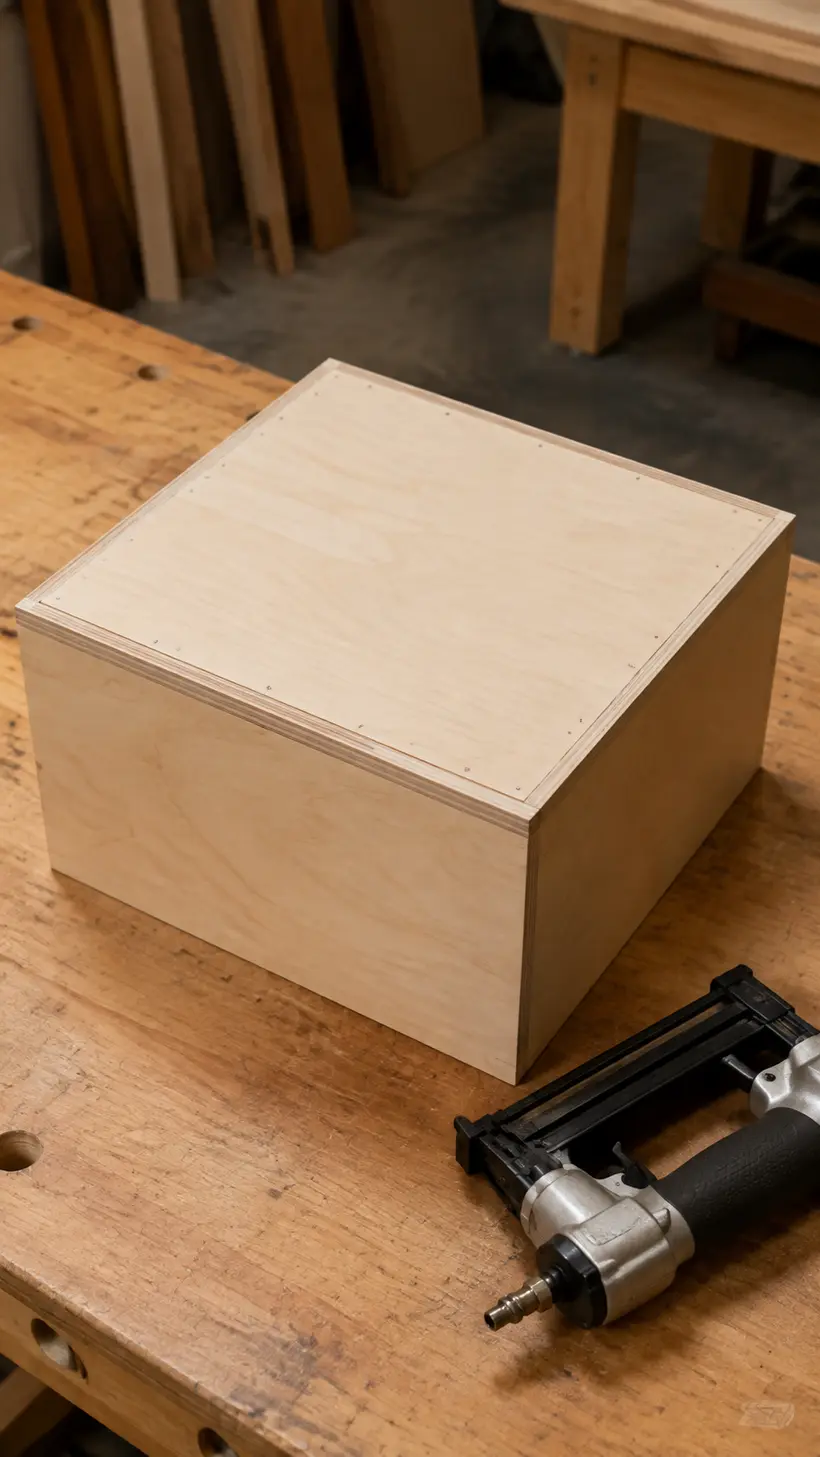
Turn the squared drawer box upside down. Apply a narrow, even bead of glue along all four lower edges and position the 16-inch by 14-inch bottom flush around the perimeter. Attach it with short brads or small screws that cannot penetrate the drawer interior.
For heavier storage, use a captured bottom in grooves instead of the applied panel and recalculate the cut sizes. This plan is intended for ordinary bedside items, not heavy tools, books stacked to the top or climbing children.
Step 9: Mount the Drawer Slides
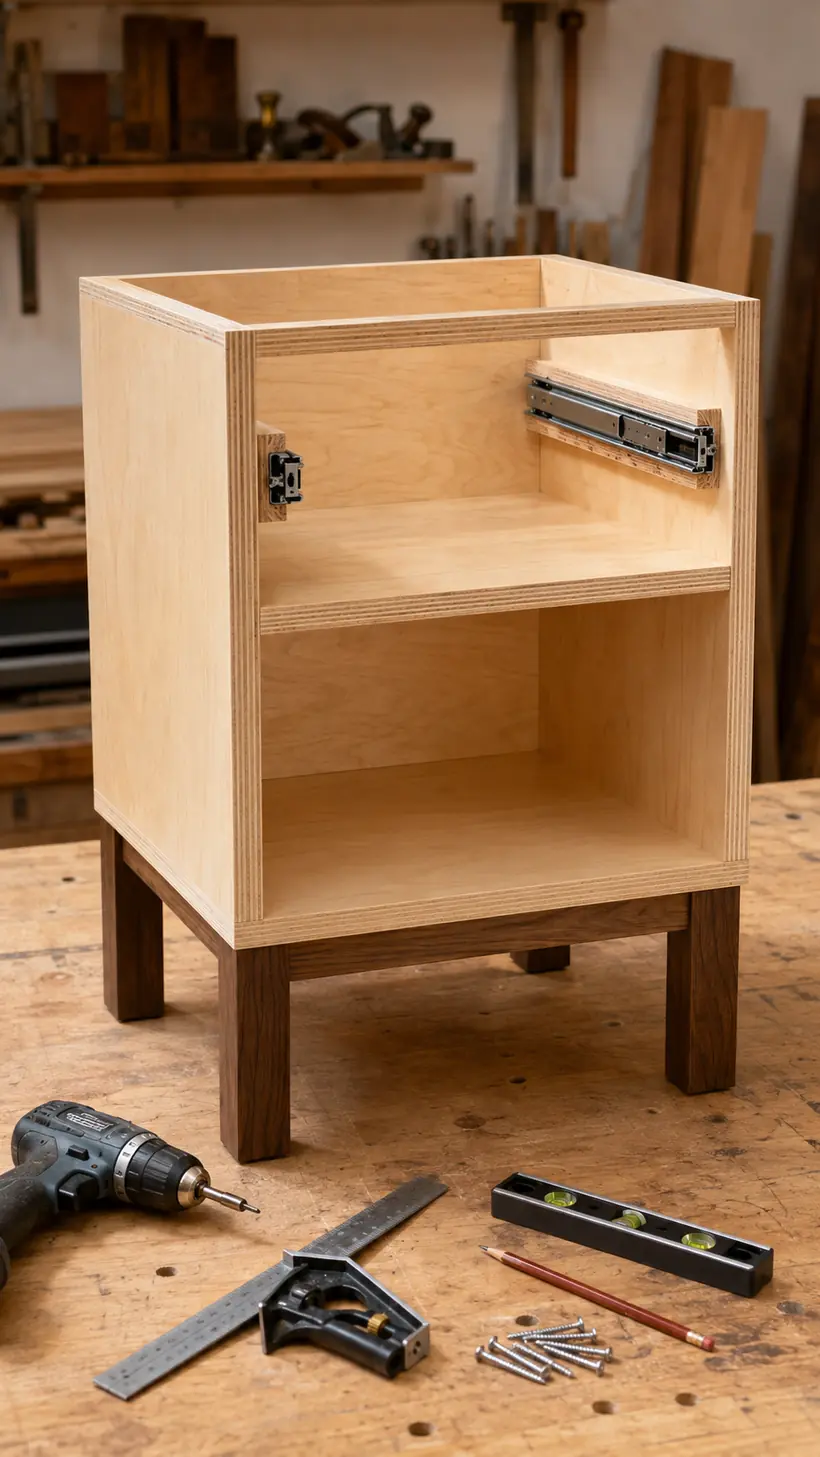
Separate the drawer members from the cabinet members according to the slide instructions. Use identical spacer blocks to support the cabinet members level on both sides. Keep their front ends positioned as required for an overlay drawer front; hardware brands differ, so do not copy a random setback.
Attach the drawer members parallel to the lower edges of the drawer box. Begin with screws in the elongated adjustment holes, test the movement and only then install the remaining screws. The box should move without rubbing and sit approximately 1 inch below the underside of the top.
Step 10: Attach the Drawer Front and Pull
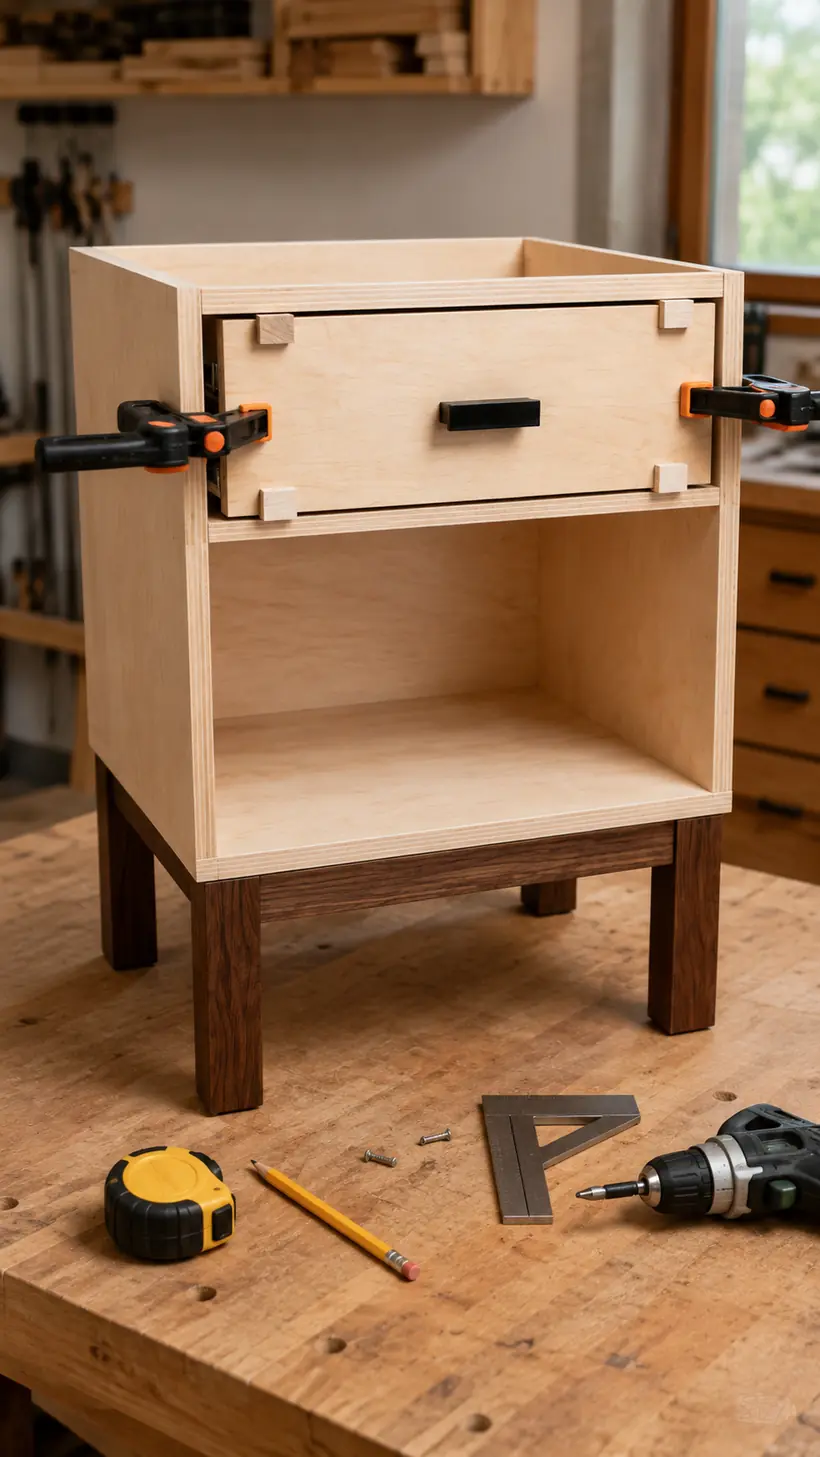
Close the drawer box and use ½-inch spacers to center the false front between the side edges and beneath the future top. Secure it temporarily with strong double-sided tape or two carefully placed brads. Open the drawer and drive screws from inside the box into the front, choosing a length that cannot pierce the ¾-inch face.
Mark the pull location from a true centerline, not by eye. Predrill with a backing block to reduce tear-out. If the screws supplied with the pull are too long or short for the combined 1¼-inch thickness, obtain compatible machine screws rather than stacking loose washers carelessly.
Step 11: Attach the Top, Finish and Test
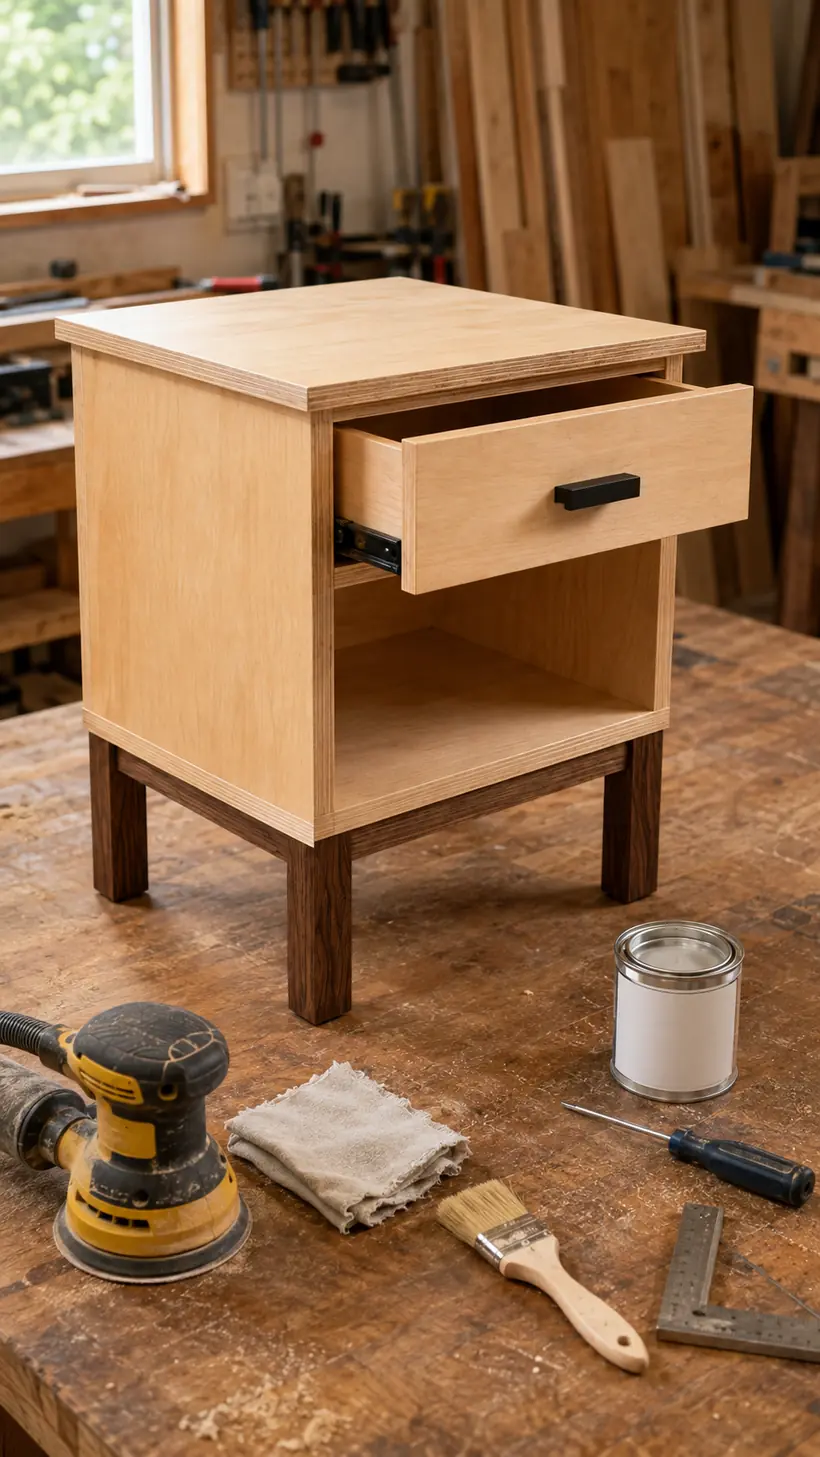
Center the 20-inch by 16-inch top over the cabinet. Confirm the ¾-inch side overhangs, ½-inch front overhang and ¼-inch projection beyond the applied back. Clamp it gently, then drive screws upward through the two stretchers. Predrill and use screws that engage the top without breaking through its face.
Remove the drawer and hardware before final finishing. Sand flat surfaces progressively, ease sharp edges lightly and remove all dust. Apply a finish suitable for indoor furniture and follow its label for ventilation, coat thickness, drying and cure times. Reinstall the hardware only after the finish has hardened enough not to imprint.
Set the nightstand on a flat floor, check for rocking, test the drawer repeatedly and confirm every screw is secure. Do not state or assume a load rating without physically testing a prototype and considering the exact materials and fasteners used.
How to Get a Professional-Looking Finish
For a Painted Nightstand
Fill exposed plywood voids and fastener holes, sand them flush, then apply a primer compatible with both the plywood and paint. A satin or low-sheen furniture paint hides minor surface variation better than a glossy finish. Paint the drawer separately so the slide mechanisms stay clean.
For a Natural Wood Look
Choose birch, maple or oak-faced plywood and match the edge banding. Test stain on offcuts from the same sheet because plywood faces can absorb color differently from solid-wood legs. A clear water-based topcoat preserves a lighter color, while many oil-based finishes add warmth or ambering. Always follow the finish manufacturer’s current instructions.
For a Two-Tone Style
Paint the cabinet and leave the top, base and drawer front natural. This makes economical plywood look intentional and lets the solid-wood base provide visual contrast. Finish the separate assemblies before final installation when that will keep paint lines cleaner.
Want More Furniture Plans Ready for Your Workshop?
Optional Nightstand Upgrades
Add a Second Drawer
A second drawer is not a simple add-on to this exact cut list. You would need a second pair of slides, a second box, two resized fronts and a reliable vertical-divider or rail system. Draw the opening and recalculate every clearance before cutting.
Add a Charging Pass-Through
A smooth grommeted hole in the back can route an existing low-voltage device cable. Do not build homemade mains wiring, outlets or chargers into the wood cabinet. Keep power adapters ventilated and follow their manufacturers’ directions.
Build a Matching Pair
Cut both nightstands at the same time so the tops, sides, legs and drawer fronts match. Batch work saves setup time, and symmetrical hardware placement makes the pair look professionally built. This is also good practice before attempting the larger drawer system in the site’s wooden dresser plan.
Turn It Into a Sellable Project
A compact side table with one drawer has strong perceived value, especially when offered in two or three finishes. If you are exploring small-batch furniture, read these profitable woodworking projects to build and sell and the broader guide to woodworking projects that sell on Etsy. Price the materials, hardware, finishing time and labor honestly.
Common Nightstand Building Mistakes
Buying Drawer Slides After Building the Drawer
The slide clearance controls the box width. Buy the slides first, read their sheet and confirm the 16-inch planned box matches the selected hardware.
Ignoring Plywood Thickness
“¾-inch” plywood can measure slightly under ¾ inch. If your bottom panel is cut to 17 inches but the sides are thinner than expected, the cabinet’s outside width will not be exactly 18½ inches. Decide whether the clear opening or outside dimension is more important, then adjust deliberately.
Skipping the Diagonal Check
A case can look square while being noticeably racked. Measure both diagonals at the case, base and drawer stages. Equal diagonals are the fastest reliable check for a rectangular assembly.
Mounting Slides at Different Heights
Use equal spacer blocks instead of measuring repeatedly from different surfaces. A slide tilted by a small amount can make the drawer creep, bind or sit crooked behind the front.
Attaching the Drawer Front Too Early
Get the drawer box moving smoothly before adding the decorative front. Otherwise, you may align the front perfectly to a box that still needs vertical adjustment.
Using the Wrong Screw Length
Check every joint as a stack of actual thicknesses. Screws used from inside the drawer or below the top can easily break through a visible face if selected casually.
Frequently Asked Questions
Is 24 inches a good nightstand height?
Twenty-four inches suits many standard beds, but the most comfortable height is usually close to the top of your mattress. Measure the assembled bed before cutting the legs. Change all four leg lengths equally to alter the finished height.
Can I use solid wood instead of plywood?
Yes, but wide solid-wood panels move across the grain as humidity changes. Joinery and top attachment must allow that movement. Plywood is more predictable for a first cabinet build.
Can I use bottom-mount or undermount drawer slides?
Not without recalculating the drawer. Those slides use different box dimensions, bottom details and clearances. This plan is specifically dimensioned around conventional ½-inch-per-side side-mount hardware.
Do I need a pocket-hole jig?
No, but it simplifies the base and stretcher joinery. Dowels, loose tenons or traditional mortise-and-tenon joints can produce excellent results when sized and executed correctly.
Can I build the drawer without slides?
You can use wooden runners, but the box and opening need different clearances and wear surfaces. Waxed hardwood runners are a legitimate traditional option; they are not a direct substitution for this 16-inch box without test fitting.
How much weight can the nightstand hold?
This article does not assign a weight rating. Capacity depends on the plywood grade, joinery, fasteners, glue, hardware, finish and build quality. Build and physically test a prototype before making any load claim.
Final Thoughts
This DIY nightstand is a useful step between small beginner projects and full-size furniture. You will practice breaking down plywood, building two square boxes, using pocket holes, installing drawer slides, aligning a false front and applying a furniture finish—all in a compact project that does not consume an entire shop.
Start by buying the drawer slides and measuring your actual material. Cut carefully, label every piece and stop to check square at each assembly. Once you have built one smooth-working drawer, larger storage furniture becomes far less intimidating.
For another measured project after this one, try the DIY birdhouse plan. If you would rather continue with furniture, the end table with cabinet storage introduces door fitting without requiring another drawer.