
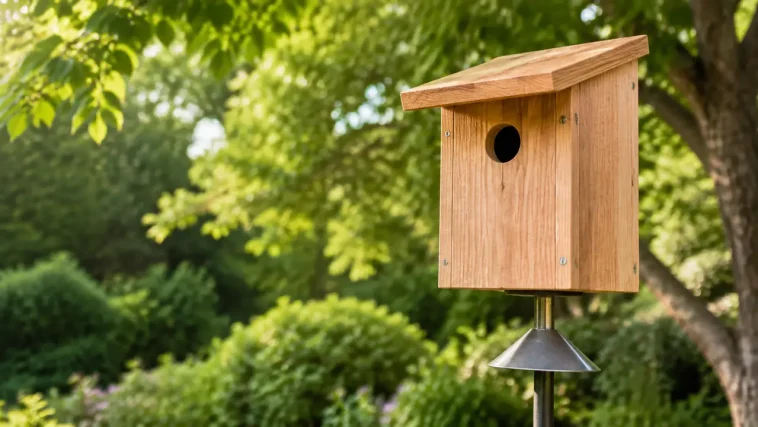
If you have been searching for DIY birdhouse plans that include real measurements—not just an attractive picture—this beginner project gives you everything needed to build one dependable wooden nest box. The design uses six straightforward cedar parts, common workshop tools and beginner-friendly joinery.
The finished birdhouse has a 5½-inch by 5½-inch interior floor, an 8-inch minimum interior depth and a 1⅛-inch round entrance. Those dimensions are intended for chickadees, including black-capped and Carolina chickadees where their ranges and habitats are appropriate. Because every cavity-nesting species has different needs, check which birds live in your area before cutting the entrance hole.
This plan also includes the features that matter to birds but are often left out of decorative birdhouses: thick untreated walls, drainage, ventilation, a sloped roof, a clean-out side, a rough interior surface, no perch and advice for predator-resistant mounting.
DIY Birdhouse Plan at a Glance
- Difficulty: Beginner
- Build time: Approximately 3–5 hours, plus finish-curing time if used
- Estimated material cost: Approximately $25–$45, depending on cedar prices and hardware
- Primary material: ¾-inch untreated cedar, pine or fir
- Exterior box size: 7″ wide × 7″ deep × 10¼″ high at the front
- Roof size: 11″ wide × 10½″ deep
- Interior floor: 5½″ × 5½″
- Entrance: 1⅛″ diameter, centered 7″ above the finished floor
- Best suited to: Chickadees where local range and habitat are suitable
If this is your first workshop project, review these essential woodworking tools for beginners before buying anything. You can also browse the site’s collection of free woodworking plans for beginners when you are ready for a second measured build.
Important: Choose the Bird Before You Build the House
“Birdhouse” is a broad word, but birds are surprisingly particular tenants. A box sized for a chickadee is not automatically right for a bluebird, wren, nuthatch or owl. Entrance diameter, floor area, interior depth, mounting height and habitat all affect which species can safely use it.
This plan follows the chickadee dimensions published by Cornell Lab of Ornithology’s NestWatch program: a 1⅛-inch entrance, a 5½-inch by 5½-inch floor and an 8-inch interior depth. NestWatch lists a mounting range of 5–15 feet for black-capped chickadees and recommends facing the hole away from prevailing wind. Use NestWatch’s Right Bird, Right House resources to confirm the correct plan for your region and habitat.
The 1⅛-inch opening is intentionally small. Do not enlarge it simply because a larger opening looks more welcoming. A properly sized hole helps limit which animals can enter. This plan also has no perch. Small cavity-nesting birds do not need an exterior perch, and a perch can provide extra leverage to predators.
Finished Birdhouse Measurements
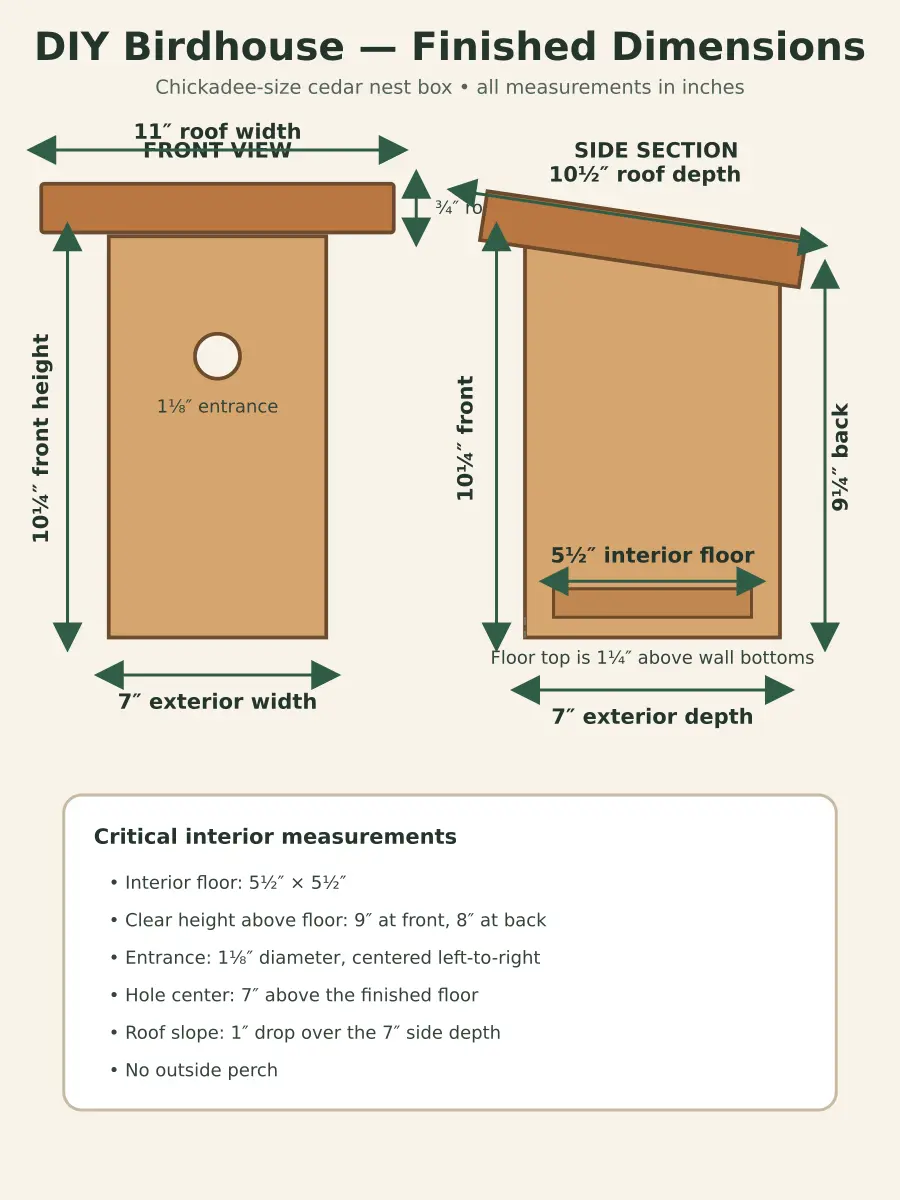
The box body is 7 inches wide and 7 inches deep on the outside because the 5½-inch front and back panels fit between two ¾-inch side panels. The floor fits inside the four walls and is recessed ½ inch above their bottom edges. Once the ¾-inch floor thickness is included, the floor surface sits 1¼ inches above the wall bottoms.
The side walls measure 10¼ inches high at the front and 9¼ inches at the back. That one-inch difference creates the roof slope. Above the finished floor, the clear interior height is 9 inches at the front and 8 inches at the back.
The oversized roof measures 11 inches wide by 10½ inches deep. Centering it across the 7-inch-wide body creates a 2-inch overhang on each side. Position approximately 2½ inches of the roof beyond the front face; the remaining rear overhang will be close to one inch.
Materials List
Use untreated lumber. Cedar is my first choice because it handles outdoor exposure well and is easy to work with. Untreated pine or fir can also work, although it may weather faster. Avoid pressure-treated lumber, interior MDF, particleboard and wood with flaking paint or unknown chemical treatments.
- ¾″ untreated cedar, pine or fir for all six panels
- Approximately 18 galvanized or stainless 1⅝″ exterior screws
- Two additional 1⅝″ exterior screws for the clean-out-side pivots
- One small exterior-grade hook-and-eye latch or rotating wooden latch
- Optional exterior-rated, low-VOC water-based finish for exterior surfaces only
- Optional 1″ layer of coarse untreated wood shavings if recommended for your target species
- Metal mounting pole and an appropriate predator baffle
Do not use staples. Galvanized or stainless screws resist outdoor corrosion, make repairs easier and hold more reliably than small finish nails.
Tools Needed
- Tape measure and sharp pencil
- Speed square or combination square
- Circular saw, miter saw or handsaw
- Jigsaw or handsaw for the side slopes if preferred
- Drill/driver
- 1⅛″ Forstner bit or hole saw
- ⅝″ drill bit for ventilation
- ⅜″ drill bit for drainage
- ⅛″ pilot bit
- Two clamps
- 80-, 120- and 180-grit sandpaper
- Eye protection and hearing protection
You do not need a table saw to complete this project if your lumber supplier can provide the 5½-inch and 7-inch widths. For more practical beginner projects that use similar tools, see these easy wooden projects with step-by-step instructions.
Complete DIY Birdhouse Cut List
| Part | Quantity | Thickness | Cut size | Notes |
|---|---|---|---|---|
| Front | 1 | ¾″ | 5½″ × 10¼″ | Drill 1⅛″ entrance |
| Back | 1 | ¾″ | 5½″ × 9¼″ | Predrill mounting points before assembly if required |
| Left fixed side | 1 | ¾″ | 7″ deep | 10¼″ front; 9¼″ back |
| Right clean-out side | 1 | ¾″ | 7″ deep | Match left side; pivoting panel |
| Floor | 1 | ¾″ | 5½″ × 5½″ | Four ⅜″ drainage holes |
| Roof | 1 | ¾″ | 11″ × 10½″ | 2″ side overhangs; approximately 2½″ front overhang |
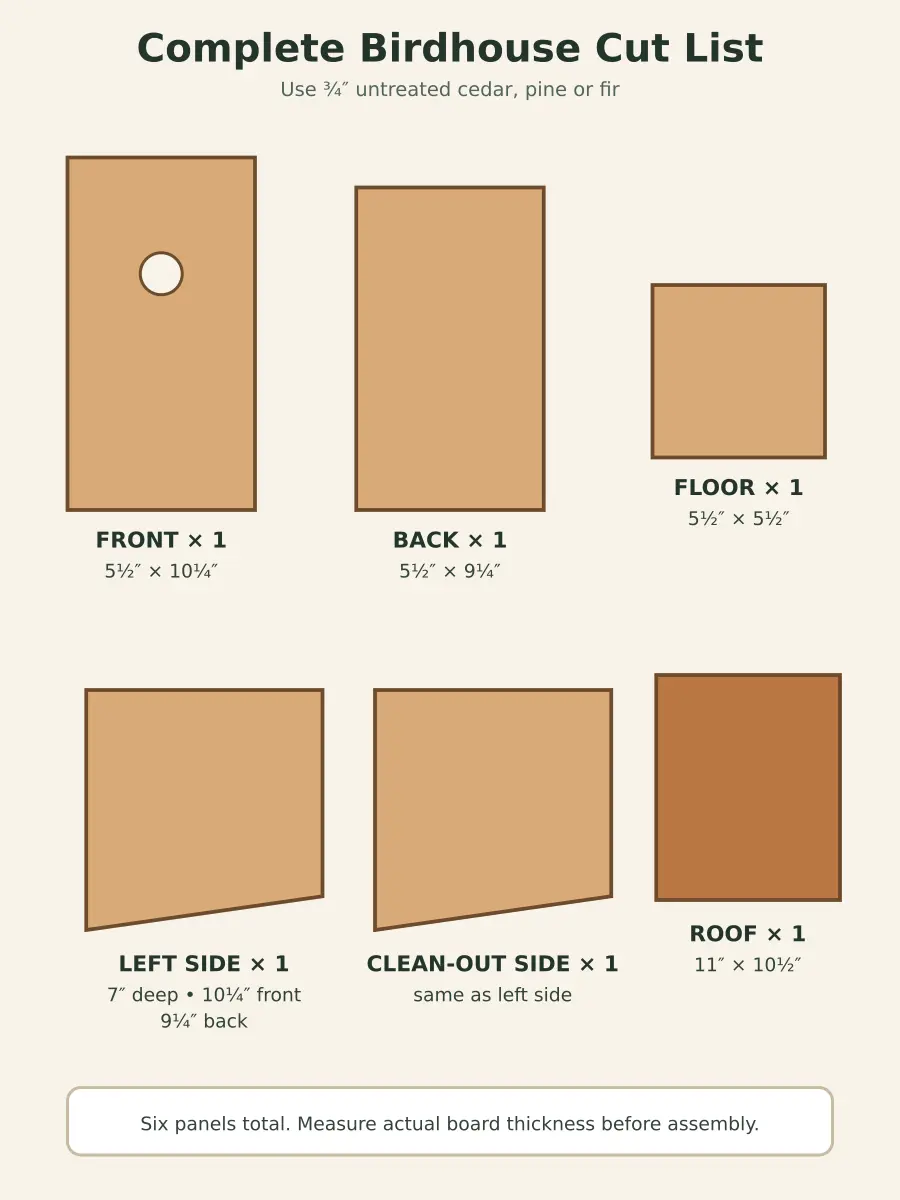
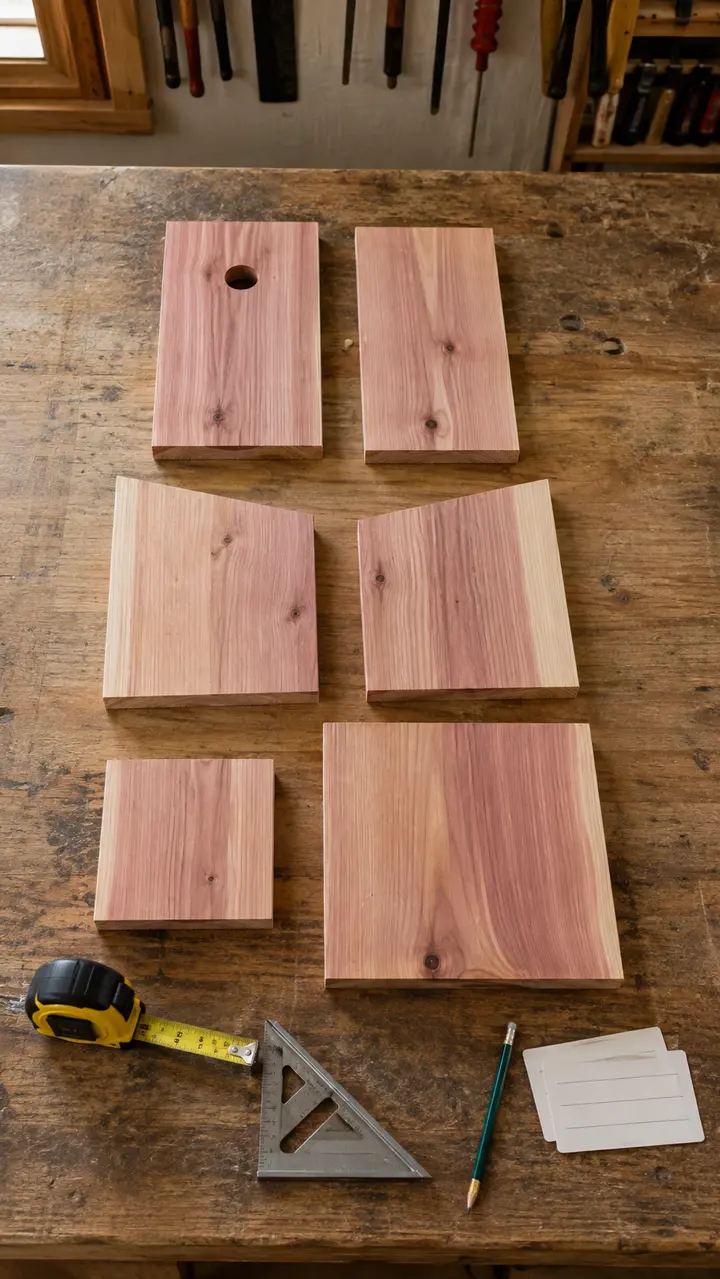
Measure your lumber before cutting. Boards sold as one inch thick are commonly about ¾ inch thick after surfacing, but actual dimensions can vary. This plan’s 5½-inch floor assumes ¾-inch side walls and 5½-inch-wide front and back panels.
Hole Placement Diagram
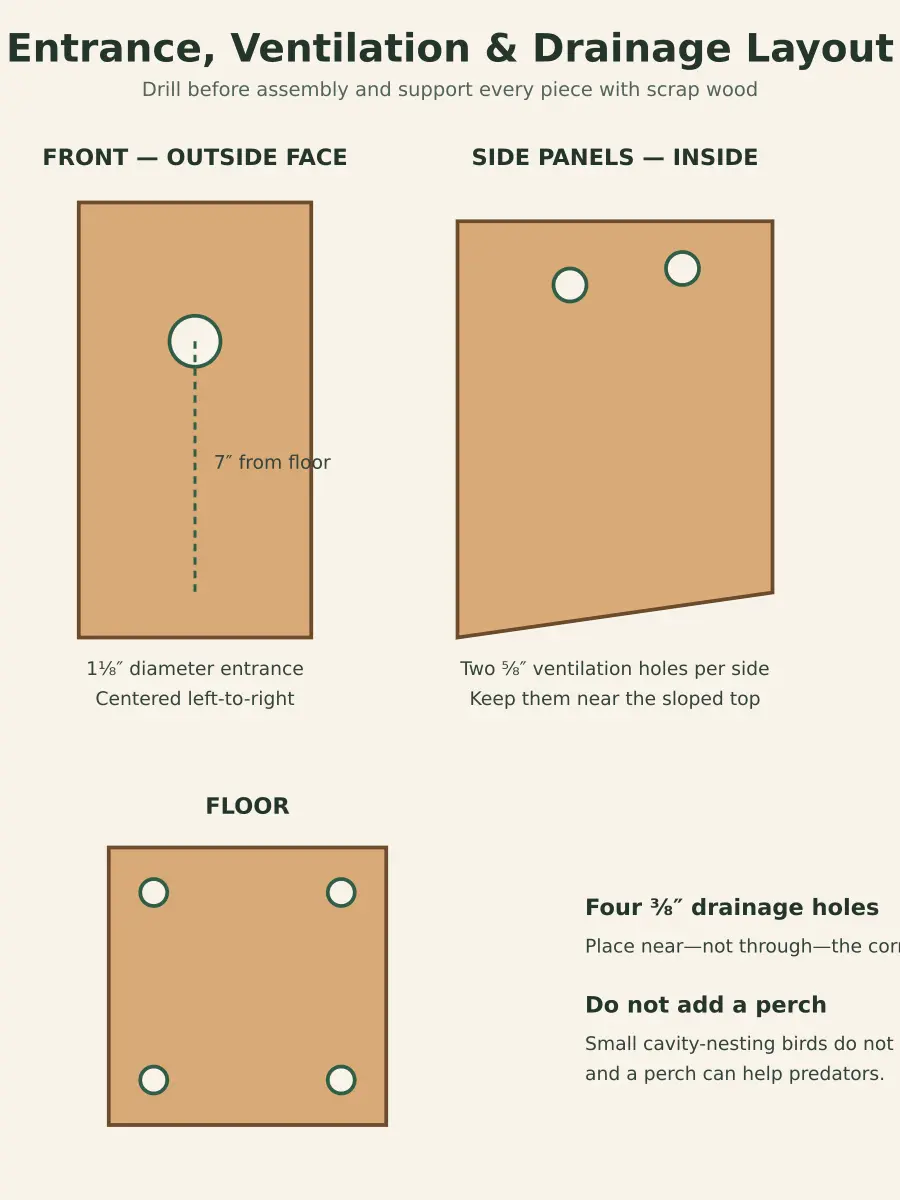
Mark the entrance center 8¼ inches above the bottom of the front panel. Because the finished floor surface will sit 1¼ inches above the wall bottoms, this places the hole center exactly 7 inches above the floor.
Each side receives two ⅝-inch ventilation holes near the sloped top. Place them approximately 2½ inches and 4½ inches back from the front edge, with their centers about one inch below the roofline. The floor receives four ⅜-inch drainage holes near—but not through—the corners.
Adult Workshop Safety Comes First
Wear eye protection whenever you cut or drill. Secure small parts with clamps instead of holding them close to a blade or bit. Support the front panel with scrap wood while drilling the entrance so the bit cannot grab as it exits. Disconnect corded tools or remove cordless-tool batteries before changing blades and bits.
If a young person helps with measuring, labeling or sanding, an experienced adult should handle or directly supervise all saws, drills, exterior mounting work and ladders. Check lumber for nails, screws and hidden metal before cutting reclaimed material.
How to Build the DIY Birdhouse
Step 1: Cut the Side Roof Slopes
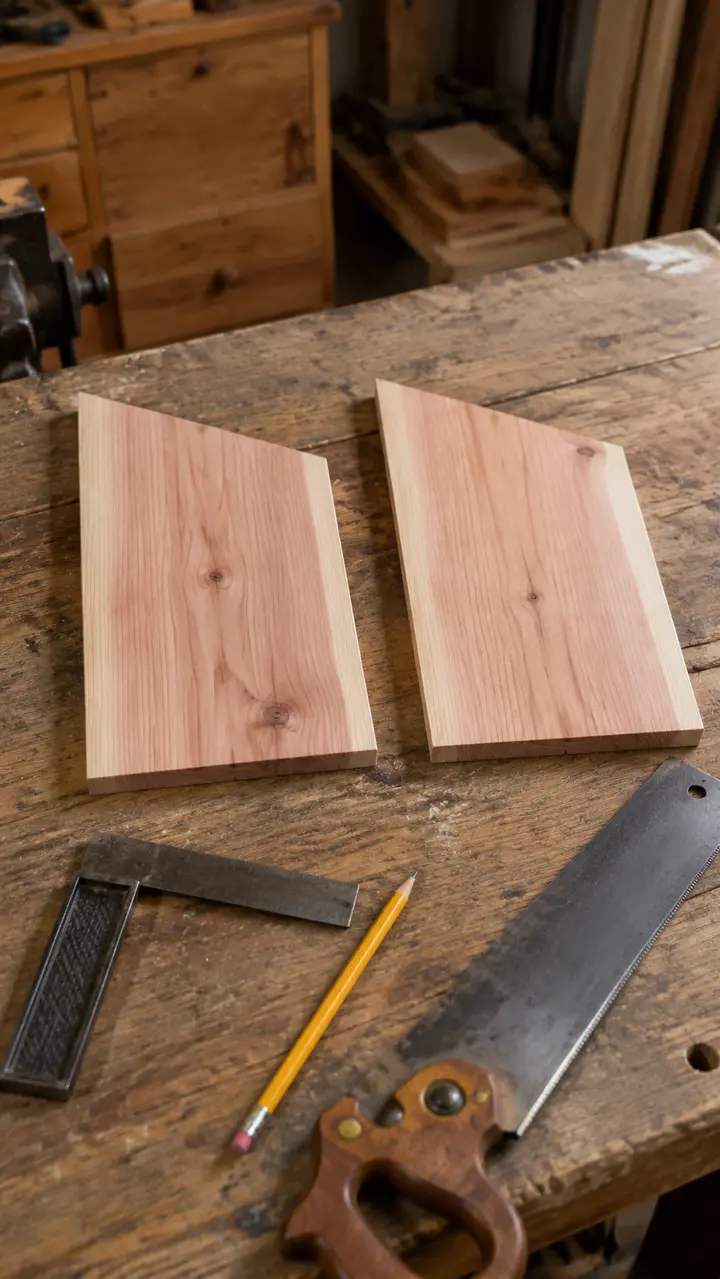
Cut the front, back, floor and roof to the dimensions in the table. For each side panel, begin with a 7-inch-deep blank. Mark one long edge at 10¼ inches and the opposite edge at 9¼ inches. Connect the marks with a straight line and cut along it.
Use the first completed side as the pattern for the second. Align their bottom edges, trace the slope and cut the matching panel. Clamp the two sides together and lightly sand their upper edges at the same time. Matching slopes prevent the roof from rocking later.
Step 2: Drill the 1⅛-Inch Entrance
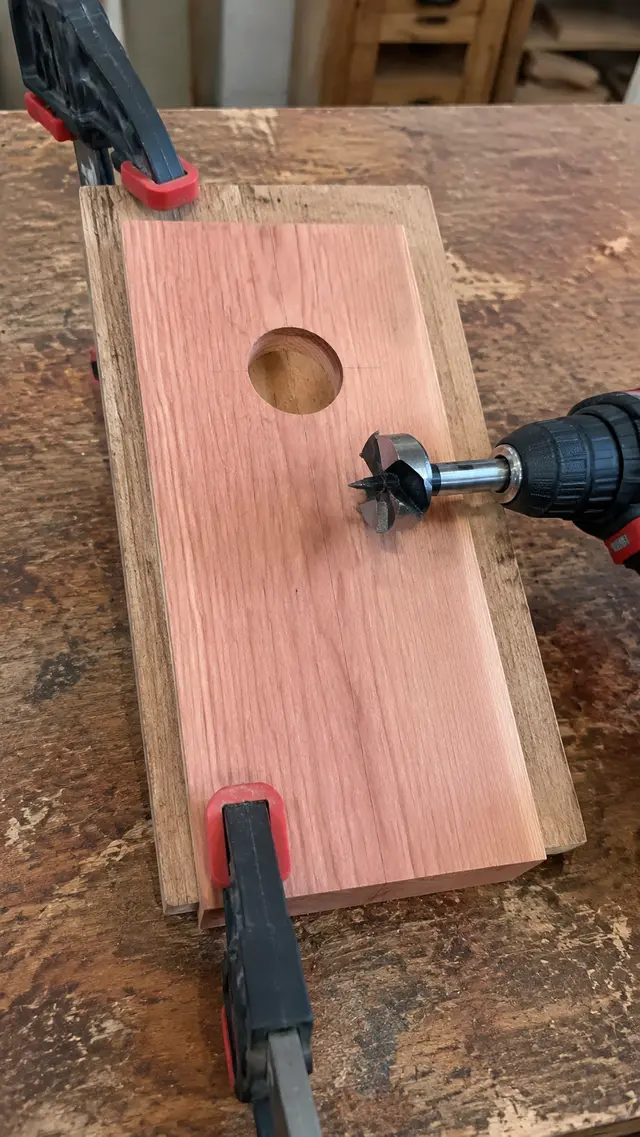
On the 5½-inch-wide front panel, draw a centerline at 2¾ inches from either side. Measure 8¼ inches up from the bottom and mark the intersection. Clamp the panel firmly to a flat scrap backer.
Drill a 1⅛-inch hole with a sharp Forstner bit or hole saw. Keep the drill perpendicular to the board. The scrap backer reduces tear-out when the bit breaks through. Sand the rim enough to remove loose fibers without enlarging the opening.
If you decide to target another bird species, stop and consult a species-specific plan before changing this measurement. Do not treat entrance diameter as a decorative choice.
Step 3: Add Ventilation and Drainage
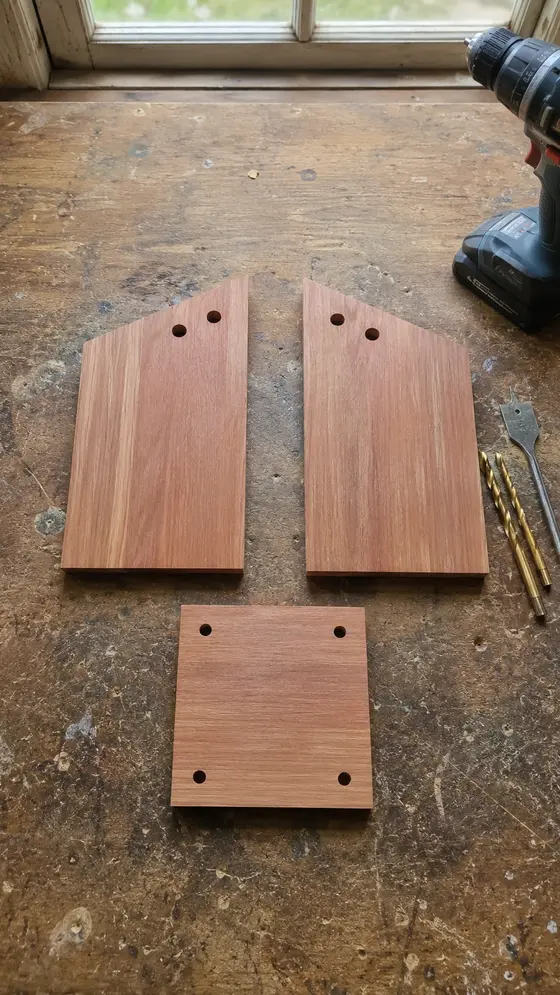
Drill two ⅝-inch ventilation holes in each side near the top, for four ventilation holes total. Keep the centers about one inch below the sloped roofline. Sand away splinters on both faces.
Drill four ⅜-inch drainage holes through the floor, one near each corner. Keep each hole at least ½ inch from both adjacent edges so the screws and end grain remain strong.
Step 4: Roughen the Interior Below the Entrance
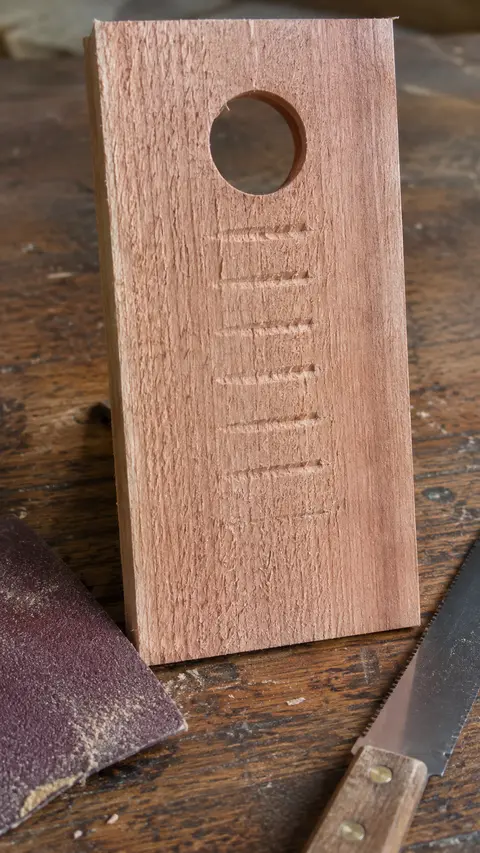
The inside face below the entrance should not be polished smooth. Use coarse sandpaper to roughen that area. You can also make five or six shallow horizontal saw kerfs, spaced roughly ½ inch apart, to create a simple climbing ladder.
Keep the cuts shallow—about 1⁄16 inch is enough. Remove sharp splinters but preserve texture. Do not install loose mesh or fabric that could snag feet.
Step 5: Sand the Parts Without Making the Interior Slick
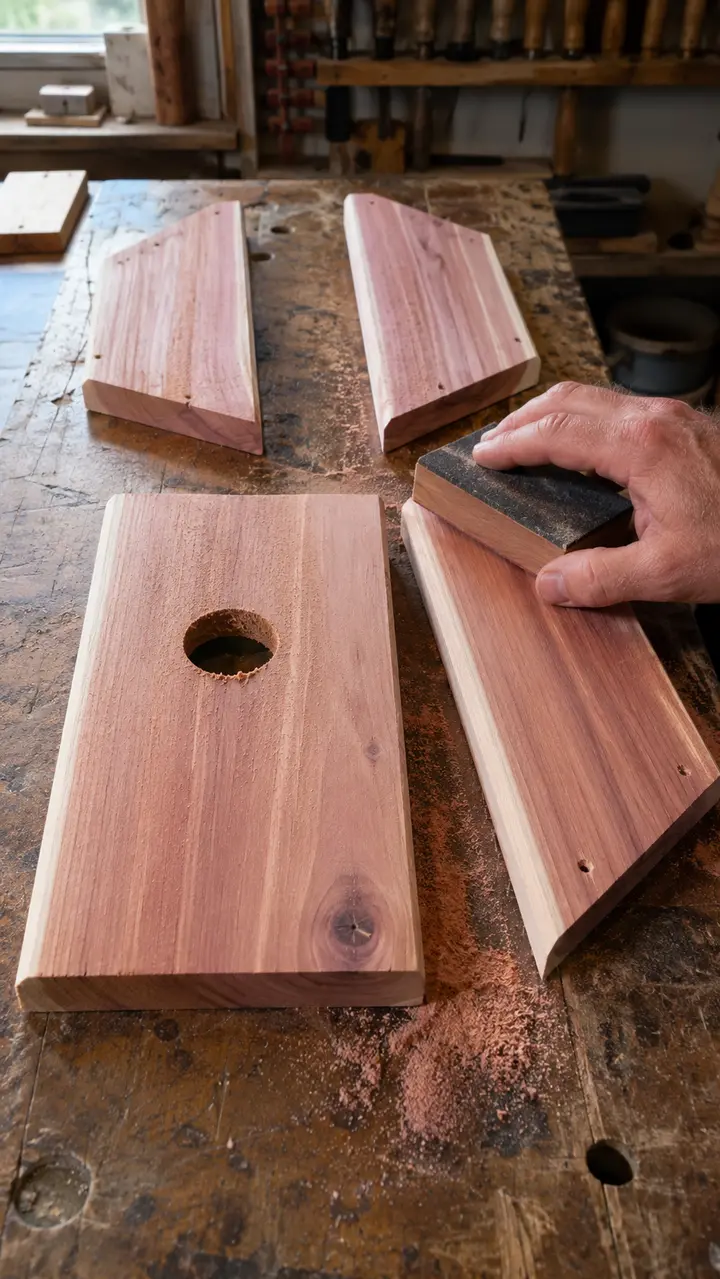
Sand cut edges with 80 grit, followed by 120 grit. Smooth the roof edges and outer corners so they are comfortable to handle. The exterior faces can receive a light 180-grit pass if you want a neater appearance.
Do not over-sand the interior walls. A natural, slightly rough cedar surface gives young birds more purchase than a polished one. Remove all loose dust before assembly.
Step 6: Assemble the Fixed Shell and Recessed Floor
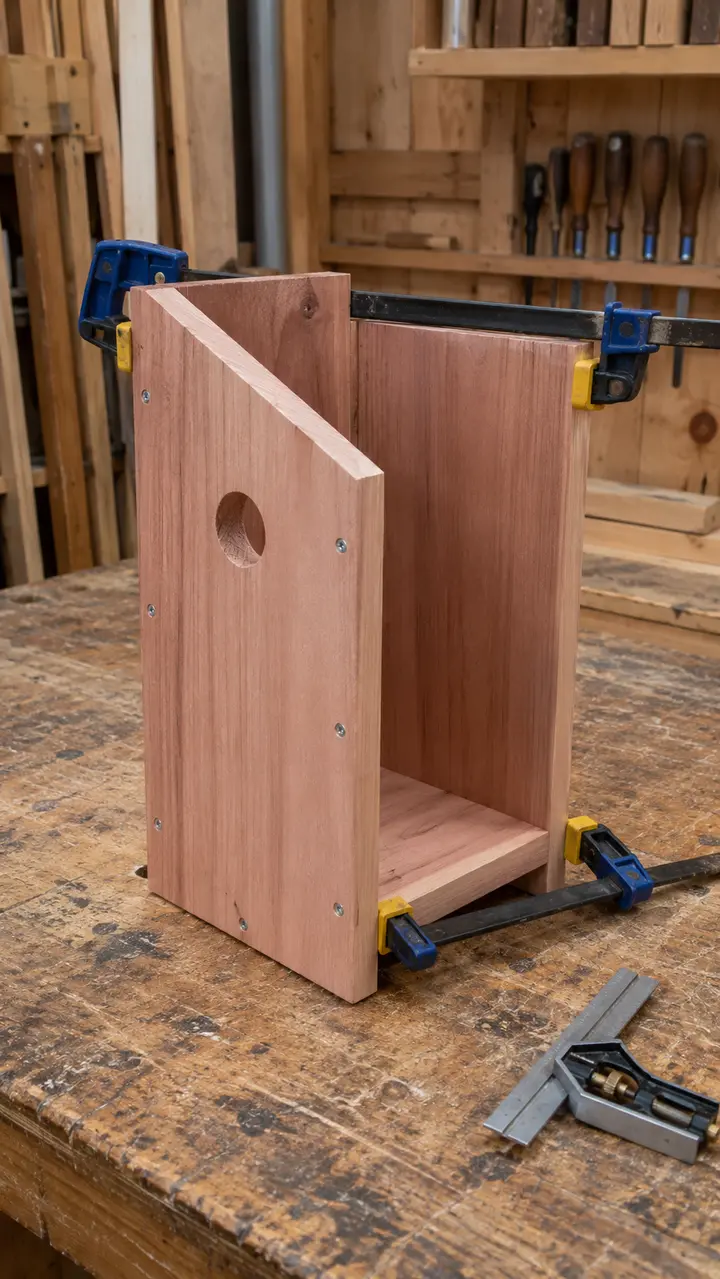
Place the front and back panels between the two side positions. Fasten the left side permanently, using two screws into the front edge and two into the back edge. Predrill and countersink lightly to reduce splitting. Check the bottom edges with a square before tightening.
Position the floor between the front, back and fixed side with its bottom face ½ inch above the wall bottoms. This recess helps protect the floor from water. Fasten through the front, back and fixed side into the floor with one screw from each direction. Keep the drainage holes unobstructed.
A small bead of exterior wood glue can strengthen the permanent seams, but keep glue away from drainage and ventilation openings. Do not glue the clean-out side.
Step 7: Install the Pivoting Clean-Out Side
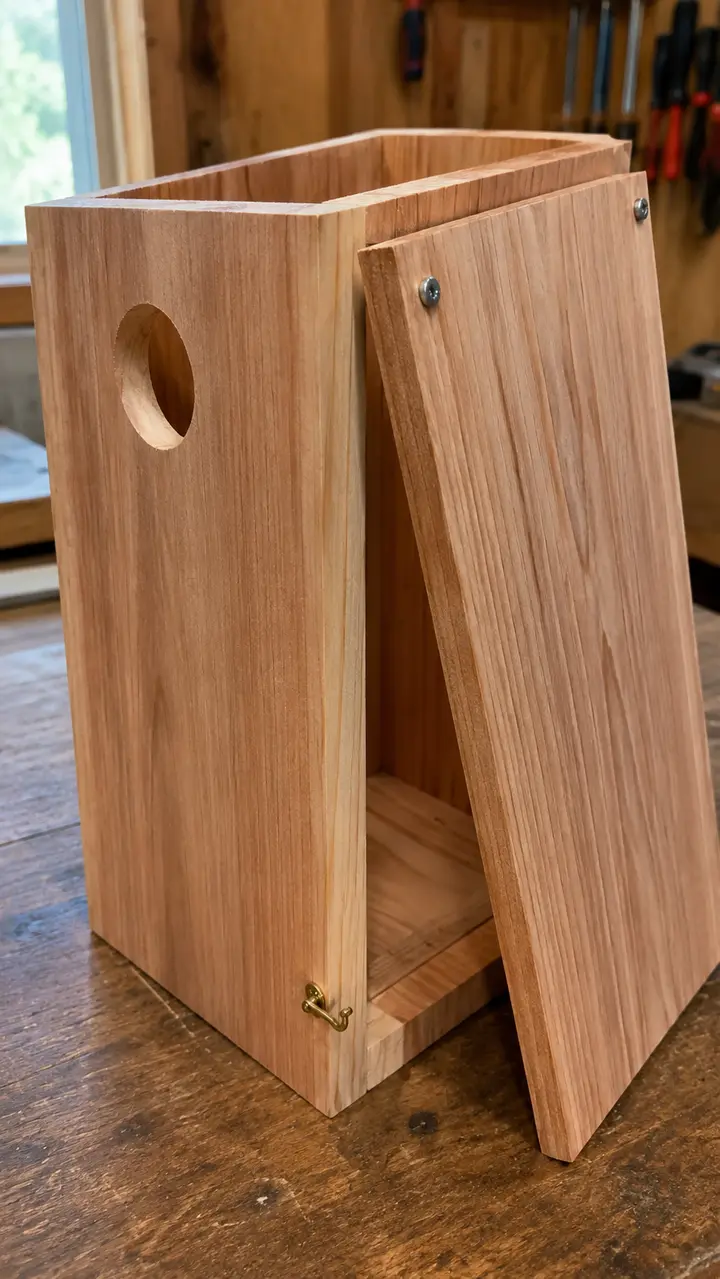
Fit the right side into the opening and check that it can move without binding. If necessary, sand the top edge lightly to create about 1⁄16 to ⅛ inch of roof clearance.
Make a small mark near the upper front and upper rear corners of the side panel, approximately ¾ inch from each vertical edge and one inch below the sloped top. Drive one pivot screw through the front and one through the back into the side panel. Keep the two screws aligned and do not overtighten; the side must pivot outward at the bottom.
Add a small hook-and-eye latch or rotating wooden catch at the lower front corner. Confirm that wind, raccoons and curious hands cannot pull the side open accidentally.
Step 8: Attach the Sloped Roof
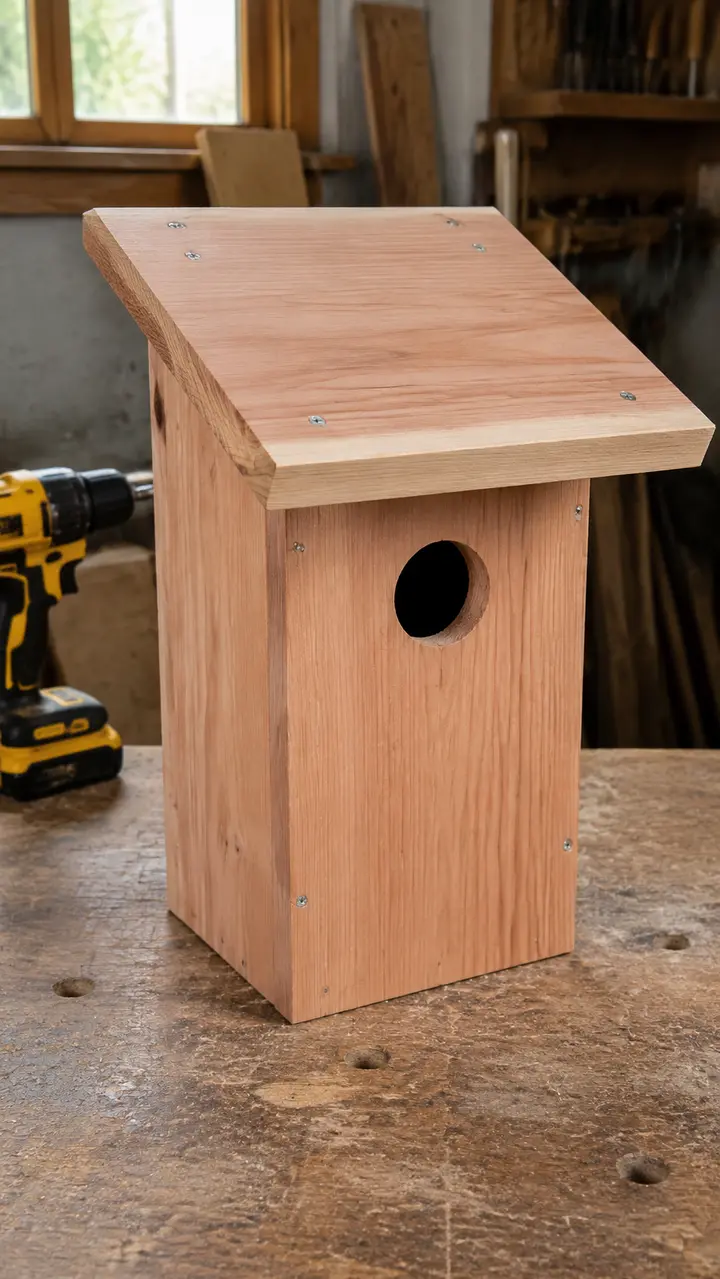
Center the 11-inch roof across the 7-inch-wide body to create 2-inch side overhangs. Slide it forward until approximately 2½ inches extend beyond the front face.
Predrill and secure the roof into the front, back and fixed left side. Do not drive a screw into the pivoting clean-out side. Four well-placed exterior screws are enough: one near the front, one near the back and two along the fixed side.
For better rain control, cut shallow ¼-inch-deep kerfs into the roof’s underside near the front and side edges. These drip grooves interrupt water before it can run underneath toward the box walls.
Step 9: Leave Cedar Natural or Finish the Exterior Only
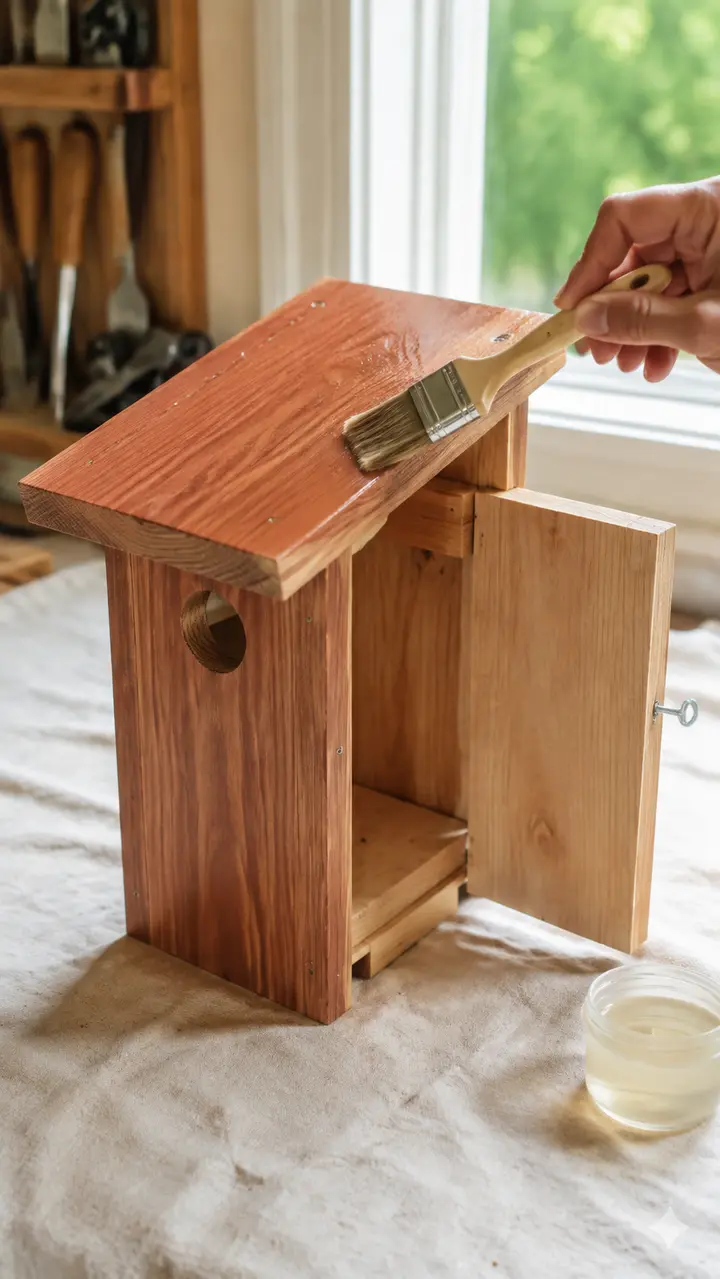
Untreated cedar can be installed without paint or sealer and will gradually weather to gray. That is the simplest option. If you decide to protect the exterior appearance, use a low-odor, water-based exterior coating and apply it only to the outside faces.
Never coat the interior, entrance rim, drainage holes or ventilation holes. Allow the product to cure completely outdoors according to its label before the box is mounted. Avoid dark exterior colors in hot, sunny areas because they can absorb extra heat.
If finishing wood is new to you, the guide to wood finishing tools for beginners explains brushes, sanding supplies and surface preparation in more detail.
Step 10: Mount the Birdhouse Safely
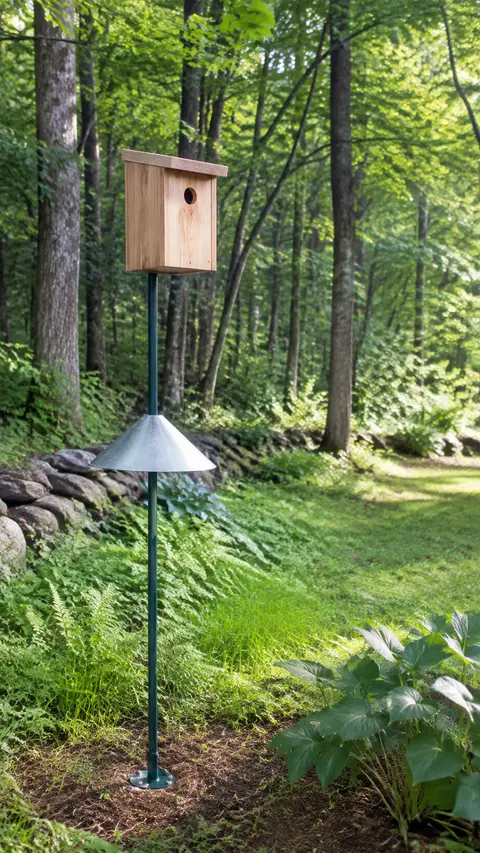
Mount the box on a freestanding smooth metal pole equipped with an appropriate predator baffle. For black-capped chickadees, NestWatch recommends approximately 5–15 feet above the ground, in forest edges, woodlots or yards with mature hardwoods, with the entrance facing away from prevailing wind.
Choose a location without a branch directly beside the entrance or roof. Secure the pole and box firmly enough to resist strong wind. Do not mount from an unstable ladder or work alone at height; use a helper and suitable fall precautions.
Different chickadee species have different ranges, spacing recommendations and placement heights. Confirm local requirements before installation instead of assuming that one backyard position fits every bird.
Why This Birdhouse Design Works
- ¾-inch walls: Provide more insulation and durability than thin craft wood.
- Recessed floor: Reduces the chance of standing water reaching the nest.
- Four drainage holes: Let incidental moisture escape.
- Four ventilation holes: Encourage airflow near the warmest part of the box.
- Sloped, oversized roof: Directs rain away from the entrance and seams.
- Small entrance: Matches the target chickadee dimensions.
- Rough interior: Gives fledglings traction below the exit.
- Clean-out side: Makes off-season maintenance possible.
- No perch: Removes an unnecessary foothold that can help predators.
Where and When to Install the Birdhouse
Install the box before the local nesting season so birds have time to find it. NestWatch recommends placing boxes by February in southern regions and by mid-to-late March in northern regions. A new box may remain empty during its first season; location, surrounding habitat, competition and simple chance all affect occupancy.
Avoid lawns and gardens that receive heavy pesticide or herbicide use. Cavity-nesting songbirds depend on insects, especially while feeding young. Place the box where you can monitor it without creating constant traffic directly in front of the entrance.
Cleaning and Annual Maintenance
Before opening a nest box, learn the legal and ethical monitoring practices for your area. Never disturb active nests casually. Once nesting is over and local guidance allows cleaning, unlatch the side, remove old nesting material, inspect the screws and clear the drainage holes.
Do not use bleach, scented household cleaners, insecticides or indoor disinfectant inside the box. A stiff brush and warm water are normally enough for routine off-season cleaning. Allow every surface to dry before closing the side.
Check the roof, latch, pole and predator baffle at least once a year. Replace loose or rusty hardware before the next breeding season.
Common DIY Birdhouse Mistakes
Making the Entrance Too Large
A larger hole does not make the house more comfortable. It changes which animals can enter and may expose the nest to larger competitors. Select the target species first and drill the specified diameter.
Adding a Decorative Perch
Perches look traditional, but chickadees do not need one. Skip it.
Using Thin Craft Plywood
Thin panels provide poor insulation and can warp quickly outdoors. Use solid, untreated boards at least ¾ inch thick.
Sealing or Painting the Interior
The interior should remain untreated and naturally textured. Keep every coating outside and allow it to cure fully before installation.
Forgetting Clean-Out Access
A permanently sealed box cannot be inspected or maintained properly. Test the pivot side before the roof goes on and make sure the latch is secure.
Mounting on the Nearest Tree
A tree is convenient, but climbing predators can also use it. A smooth metal pole with a suitable baffle is the more defensible mounting system.
DIY Birdhouse Plan FAQs
What wood is best for a DIY birdhouse?
Untreated cedar is an excellent choice because it is durable outdoors and easy to cut. Untreated pine, cypress or fir can also work. Avoid pressure-treated lumber, MDF and unknown reclaimed wood.
How big should a birdhouse entrance be?
It depends entirely on the target species. This chickadee-size plan uses a 1⅛-inch entrance. Do not apply that measurement to bluebirds, wrens, nuthatches or other species without checking a dedicated plan.
Does a birdhouse need ventilation?
Yes. This design uses two ⅝-inch ventilation holes on each side near the roof, for four holes total.
Should I add a perch?
No. Chickadees and many other cavity-nesting birds can enter without one, while a perch may help predators or competitors.
Should I paint the inside?
No. Leave the inside untreated and slightly rough. If you coat the outside, keep the product away from the interior and openings and allow it to cure completely before mounting.
Can I make this birdhouse from scraps?
Yes, if the scraps are untreated, sound, at least ¾ inch thick and wide enough for the specified parts. If you enjoy useful offcut projects, explore these small and scrap wood projects.
Can I sell completed birdhouses made from this plan?
A well-built nest box can be a practical craft product, but advertise the intended species accurately and include mounting and maintenance guidance. For more product ideas, see these woodworking projects that sell on Etsy.
Final Thoughts
A good birdhouse is not defined by tiny shingles, a porch or a cute painted sign. It is defined by the right interior space, a species-appropriate entrance, thick untreated walls, drainage, ventilation, safe access for cleaning and responsible placement.
Build the box carefully, confirm the intended bird for your region and resist adding decorative features that reduce safety. Once this simple plan is complete, compare it with these birdhouse plan ideas for design inspiration—but keep the nesting dimensions tied to the species you hope to attract.