
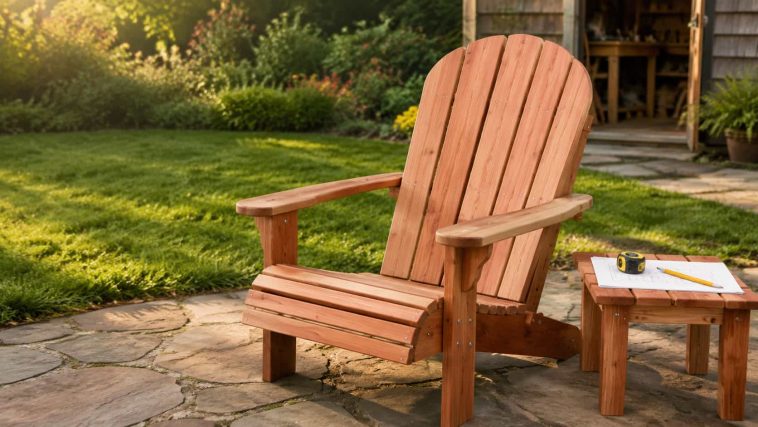
The price of a ready-made chair can ruin that peaceful feeling rather quickly. Fortunately, this DIY Adirondack chair plan uses common dimensional lumber, mostly straight cuts, and one repeatable side-frame layout. You do not need a bandsaw, a CNC machine, or a mysterious chair-making secret passed down through seven generations.
This is a complete, original plan—not another collection of pretty chair photos. Below you will find the finished dimensions, lumber list, exact cut list, seat and back angles, fastener locations, slat spacing, assembly order, finishing advice, and dimensioned diagrams. If you are still comparing styles, browse these 15 DIY outdoor chair plans before buying lumber.
DIY Adirondack Chair Plan at a Glance
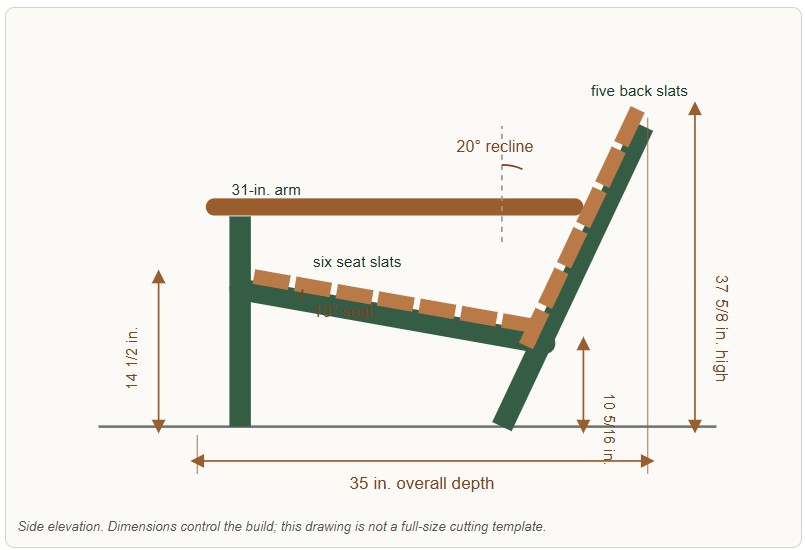
- Finished size: approximately 31 in. wide × 35 in. deep × 37 5/8 in. high
- Clear seat width: 20 in.
- Seat height: 14 1/2 in. at the front and 10 5/16 in. at the rear
- Seat slope: 10° down toward the back
- Back recline: 20° back from vertical
- Included seat-to-back angle: approximately 100°
- Arm height: approximately 22 1/4 in.
- Difficulty: confident beginner to intermediate
- Build time: 6–8 hours, plus drying time for finish
- Estimated lumber cost: roughly $55–$110, depending on species and local prices
Understanding the Adirondack Chair Dimensions
The comfortable feel comes from three measurements working together. The seat begins at 14 1/2 inches high, drops a little more than 4 inches across the 24-inch side rails, and meets a back that reclines 20 degrees from vertical. That creates an included angle of about 100 degrees between the seat and back—relaxed, but not so flat that standing up becomes a full-body negotiation.
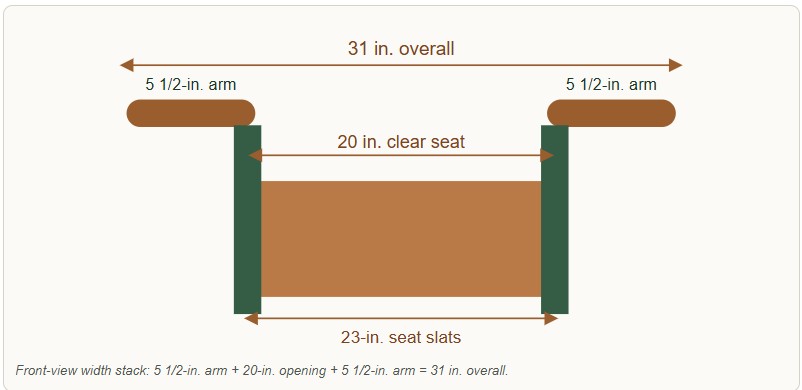
The 20-inch clear seat provides comfortable room for most adults without making the chair unnecessarily wide. Two 5 1/2-inch armrests bring the total width to 31 inches. If space is tight around a fire pit, remember to allow at least a few extra inches on both sides so no one has to climb over an armrest.
Choose the Right Wood
Cedar is the best all-around choice for this chair. It is light enough to move, naturally resistant to decay, pleasant to shape, and unlikely to turn this weekend project into a wrestling match. Redwood is another excellent option where it is affordable. Douglas fir or untreated pine can work when every surface receives a durable exterior finish, although they generally need more maintenance.
Pressure-treated lumber is economical and durable, but freshly treated boards may be heavy and wet. Let them dry before sanding or finishing, wear suitable protection when cutting, clean up sawdust carefully, and follow the treatment manufacturer’s instructions. If you want a broader comparison, see this guide to the best woods for beginner woodworking projects.
Materials and Shopping List
Lumber
- Three 2×4 boards, 8 ft. long
- Four 1×4 boards, 8 ft. long
- One 1×6 board, 8 ft. long
Hardware and finish
- Eight 3/8 × 4-in. hot-dipped galvanized or stainless carriage bolts
- Eight matching washers and locknuts
- Approximately twenty-four 3 1/2-in. exterior structural screws
- Approximately fifty 2-in. exterior trim-head or deck screws
- Exterior-rated wood glue (optional at fixed frame joints; do not rely on glue alone)
- 80-, 120- and 180-grit sandpaper
- Exterior stain, paint, or penetrating outdoor wood finish
- Exterior end-grain sealer, if recommended by your finish manufacturer
Use stainless fasteners with cedar if the budget allows. Some ordinary fasteners react with cedar and create dark streaks. Whatever wood you choose, do not substitute indoor drywall screws; they are brittle and not intended for weather-exposed furniture.
Complete Adirondack Chair Cut List
| Label | Part | Material | Qty. | Cut length | Cut or shaping note |
|---|---|---|---|---|---|
| A | Seat side rails | 2×4 | 2 | 24 in. | Square ends; install at 10° |
| B | Front legs | 2×4 | 2 | 21 1/2 in. | Square ends |
| C | Rear leg/back posts | 2×4 | 2 | 40 in. | 20° floor cut at bottom; cut both pieces together |
| D | Seat cross rails | 2×4 | 2 | 20 in. | Square ends |
| E | Rear arm support | 2×4 | 1 | 31 in. | Square ends; center across chair |
| F | Lower back rail | 2×4 | 1 | 26 in. | Mount across front faces of back posts |
| G | Seat slats | 1×4 | 6 | 23 in. | Ease all exposed edges |
| H | Upper back rail | 1×4 | 1 | 26 in. | Mount across front faces of back posts |
| I | Outer back slats | 1×4 | 2 | 29 in. | Round top corners |
| J | Intermediate back slats | 1×4 | 2 | 30 in. | Round top corners |
| K | Center back slat | 1×4 | 1 | 31 in. | Round top into a gentle arch |
| L | Armrests | 1×6 | 2 | 31 in. | Round front ends; mirror the pair |
Efficient 8-foot board layout
This cutting map leaves practical room for saw kerfs, but still inspect every board and move a cut when it helps you avoid a knot at a bolt hole.
| Board | Suggested cuts | Used length before kerfs |
|---|---|---|
| 2×4 #1 | 40 + 31 + 24 in. | 95 in. |
| 2×4 #2 | 40 + 24 + 21 1/2 in. | 85 1/2 in. |
| 2×4 #3 | 26 + 21 1/2 + 20 + 20 in. | 87 1/2 in. |
| 1×4 #1 | 31 + 30 + 29 in. | 90 in. |
| 1×4 #2 | 30 + 29 + 26 in. | 85 in. |
| 1×4 #3 | 23 + 23 + 23 + 23 in. | 92 in. |
| 1×4 #4 | 23 + 23 in. | 46 in. |
| 1×6 #1 | 31 + 31 in. | 62 in. |
Tools You Will Need
- Miter saw or circular saw with a reliable angle guide
- Jigsaw for rounding the arm and back-slat tops
- Drill/driver and bits
- 3/8-in. drill bit for carriage bolts
- Countersink bit for the slat screws
- Speed square or digital angle gauge
- Tape measure and sharp pencil
- Four clamps at minimum
- Random-orbit sander or sanding block
- Eye and hearing protection, plus appropriate dust protection
This build is manageable with basic tools, but accuracy matters more than the size of your workshop. If you are assembling your first tool kit, the broader beginner woodworking plans collection is a useful place to practice square cuts and predrilling before starting a full-size chair.
Before You Cut: Make One Full-Size Side Layout
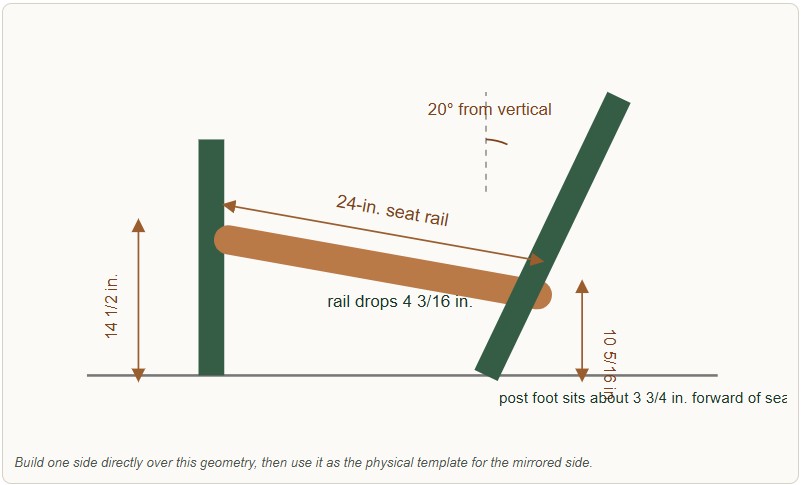
Draw the side assembly on a scrap sheet of plywood, cardboard, or the workbench itself. Mark a level floor line first. At the front of the chair, draw the top of the seat 14 1/2 inches above that line. Twenty-four inches along the rail, the rear top corner will land at 10 5/16 inches high when the rail is set to 10 degrees.
The rear post leans 20 degrees away from vertical. Its bottom sits on the floor approximately 3 3/4 inches forward of the point where the top of the seat rail meets it. Those numbers come from the actual geometry of a 24-inch rail at 10 degrees and a back post reclined 20 degrees; they are not decorative approximations.
How to Build the DIY Adirondack Chair
Step 1: Cut and label every part
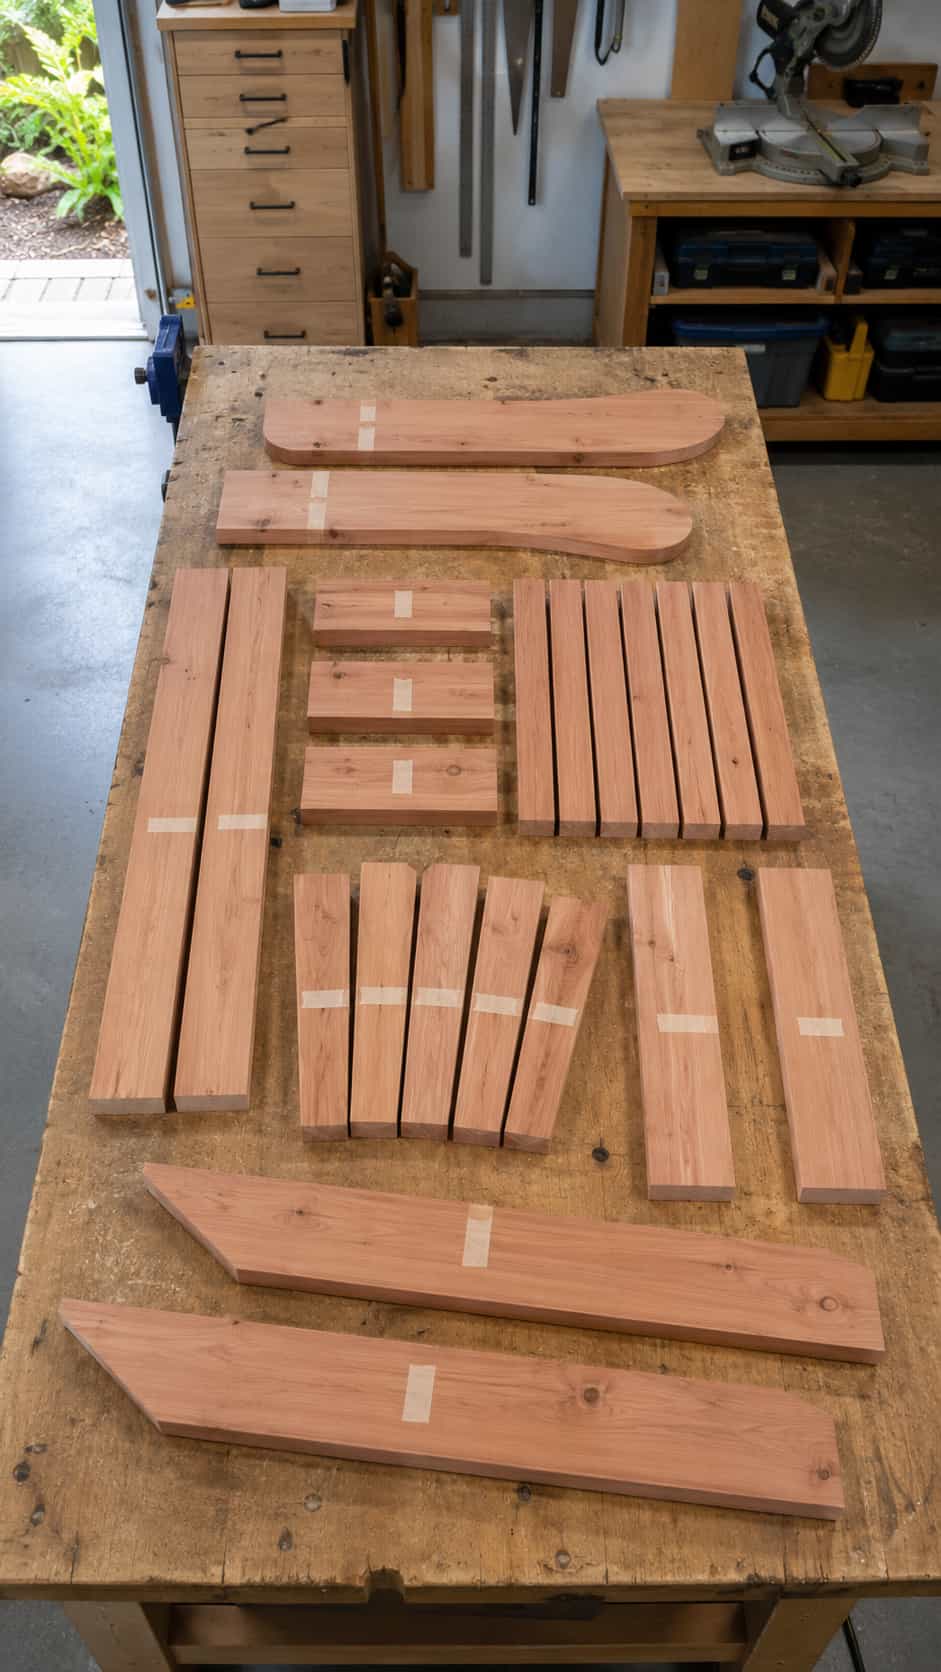
Cut the square-ended pieces first and label them A through L with painter’s tape. Keep the two seat rails stacked while cutting so they finish at exactly the same length. Do the same with the front legs and paired back slats.
Set the saw to 20 degrees off square for the bottom of each 40-inch rear post. The cut creates a flat foot when the post leans back. Make both posts from the same setup and verify that they are mirror-compatible before moving the saw. A pair of posts that disagree by even a degree will make the finished chair rock or twist.
Step 2: Shape the armrests and back-slat tops
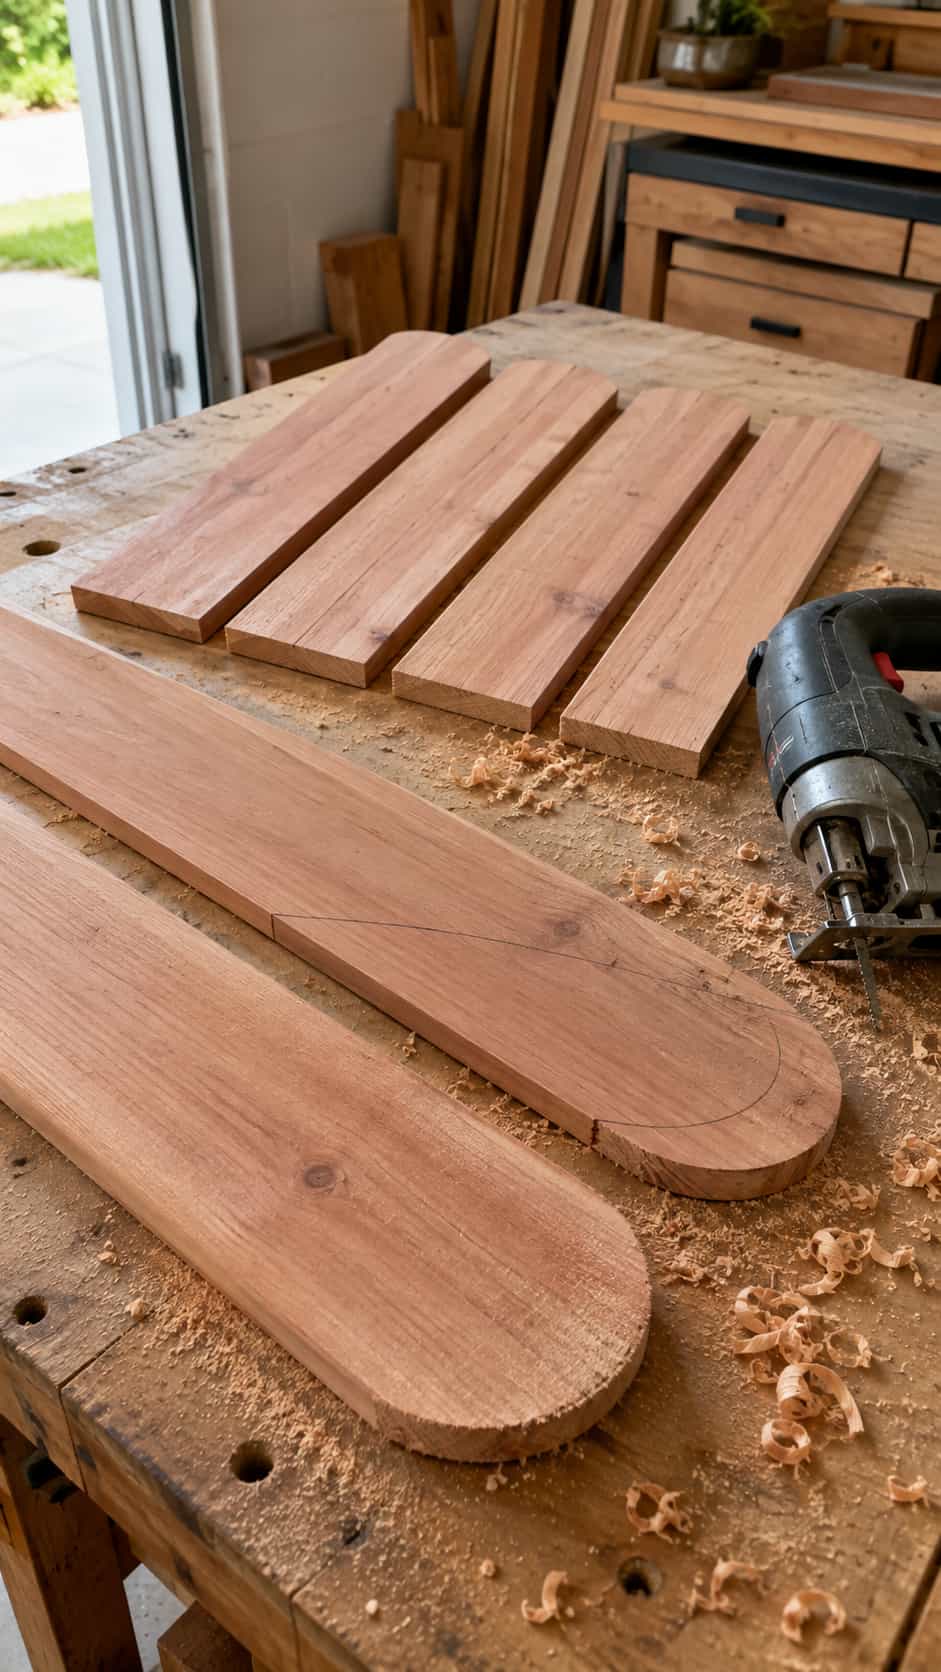
On one end of each 31-inch armrest, mark the center of the 5 1/2-inch width. Use a compass set to 2 3/4 inches to draw a half-round end. Cut just outside the line with a jigsaw, sand to the line, and use the first arm as the template for the second.
Round the two upper corners of each back slat with a 1 1/2- to 2-inch radius. Keep the center slat at 31 inches, the intermediate pair at 30 inches, and the outside pair at 29 inches. When their lower ends align, those graduated lengths create the familiar arched Adirondack back without needing to bend a rail.
Step 3: Sand now, while every surface is easy to reach
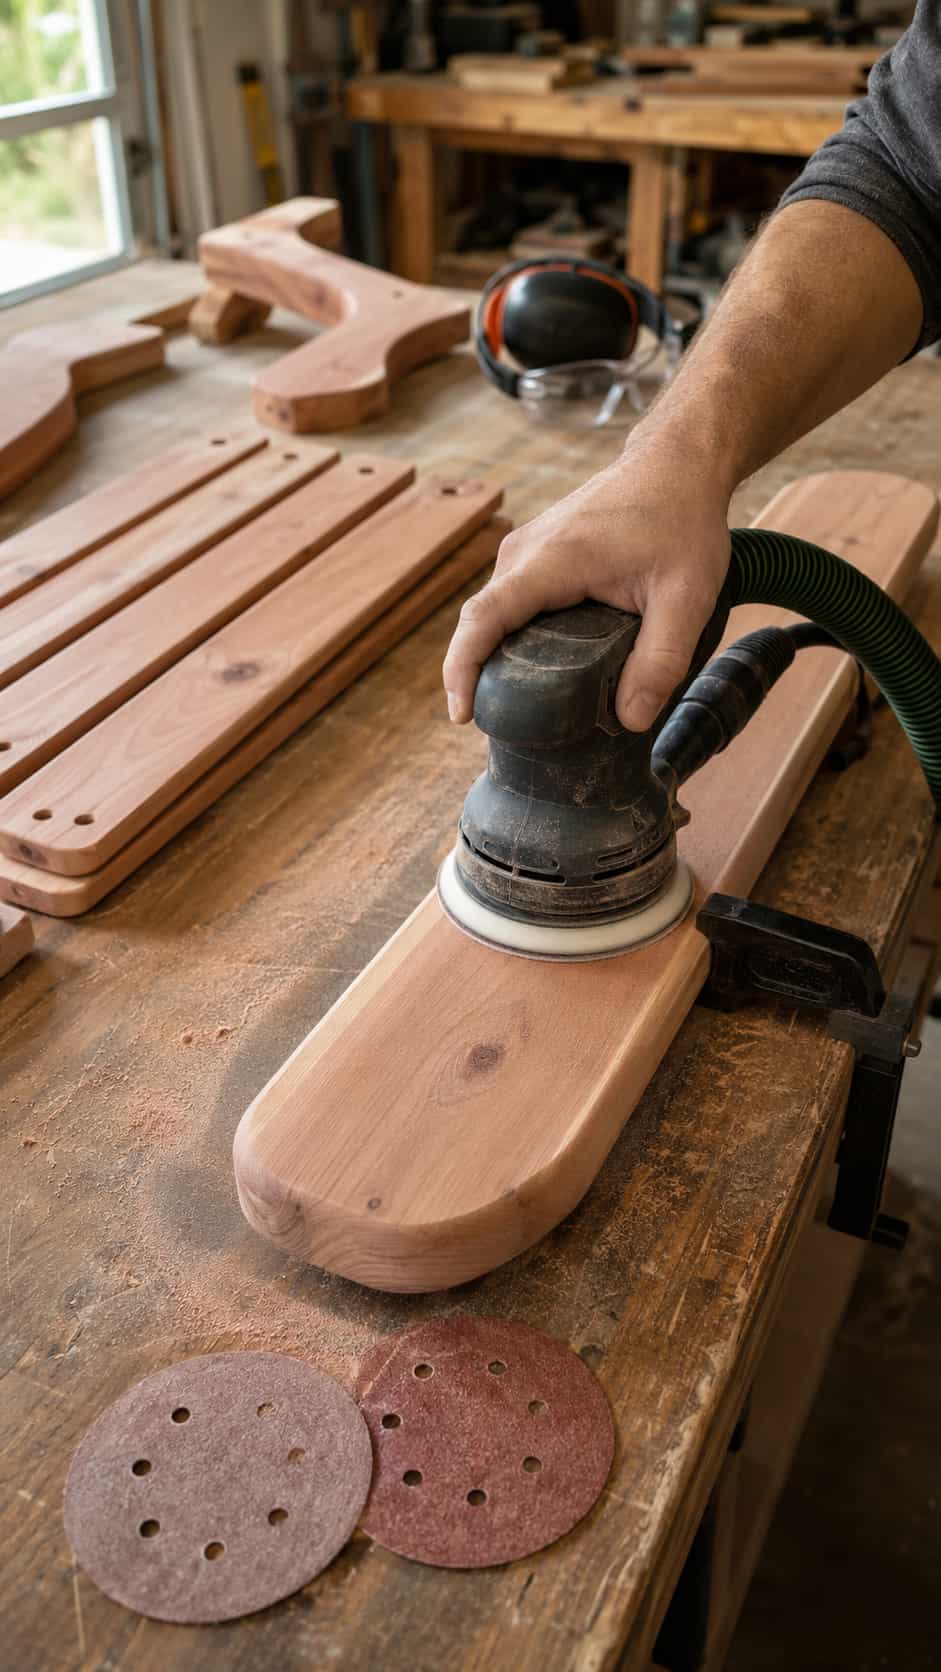
Sand all faces with 80 grit only where necessary, then move through 120 grit. Finish hand-contact areas—the arms, front seat slat, and front edges of the back slats—with 180 grit. Ease sharp edges with a small round-over bit or a sanding block. Do not round the faces that must sit tightly against another frame part.
Seal freshly cut end grain according to the finish manufacturer’s directions. End grain absorbs water like a straw, and the bottoms of outdoor legs are especially vulnerable.
Step 4: Assemble the first side frame
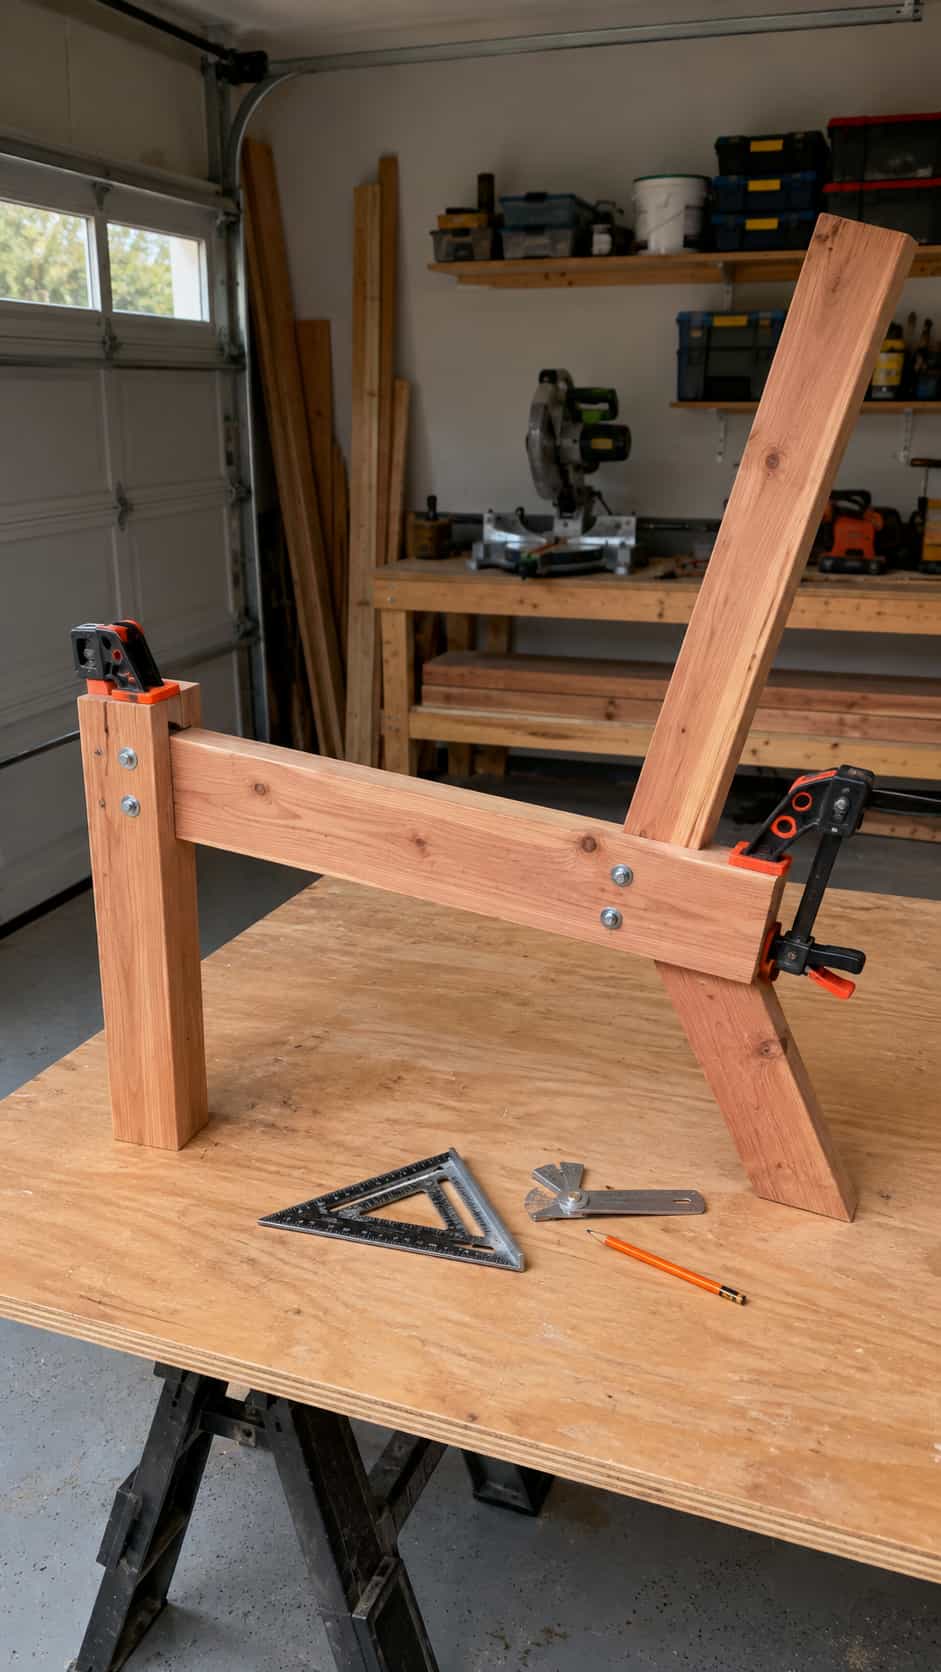
Work on a flat surface over the full-size layout. Place one 21 1/2-inch front leg vertically. Clamp one 24-inch seat rail to its inside face so the rail’s top front corner is exactly 14 1/2 inches above the floor line. Set the rail at 10 degrees, sloping down toward the rear.
Place a rear post on the layout at 20 degrees from vertical. The top edge of the seat rail should meet the post approximately 11 inches along the post from its floor end. Clamp everything firmly and verify all four control measurements:
- Front seat height: 14 1/2 in.
- Rear seat height: 10 5/16 in.
- Seat rail angle: 10°
- Rear post angle: 20° from vertical
At each overlapping joint, mark two bolt centers along the seat rail, roughly 3/4 inch and 2 3/4 inches from the end, centered across the rail’s 3 1/2-inch width. Keep every hole at least 3/4 inch from an edge. Drill through the clamped parts with a 3/8-inch bit, insert two 3/8 × 4-inch carriage bolts, and add washers and locknuts. Snug the nuts; do not crush soft cedar fibers.
Step 5: Build the mirrored side
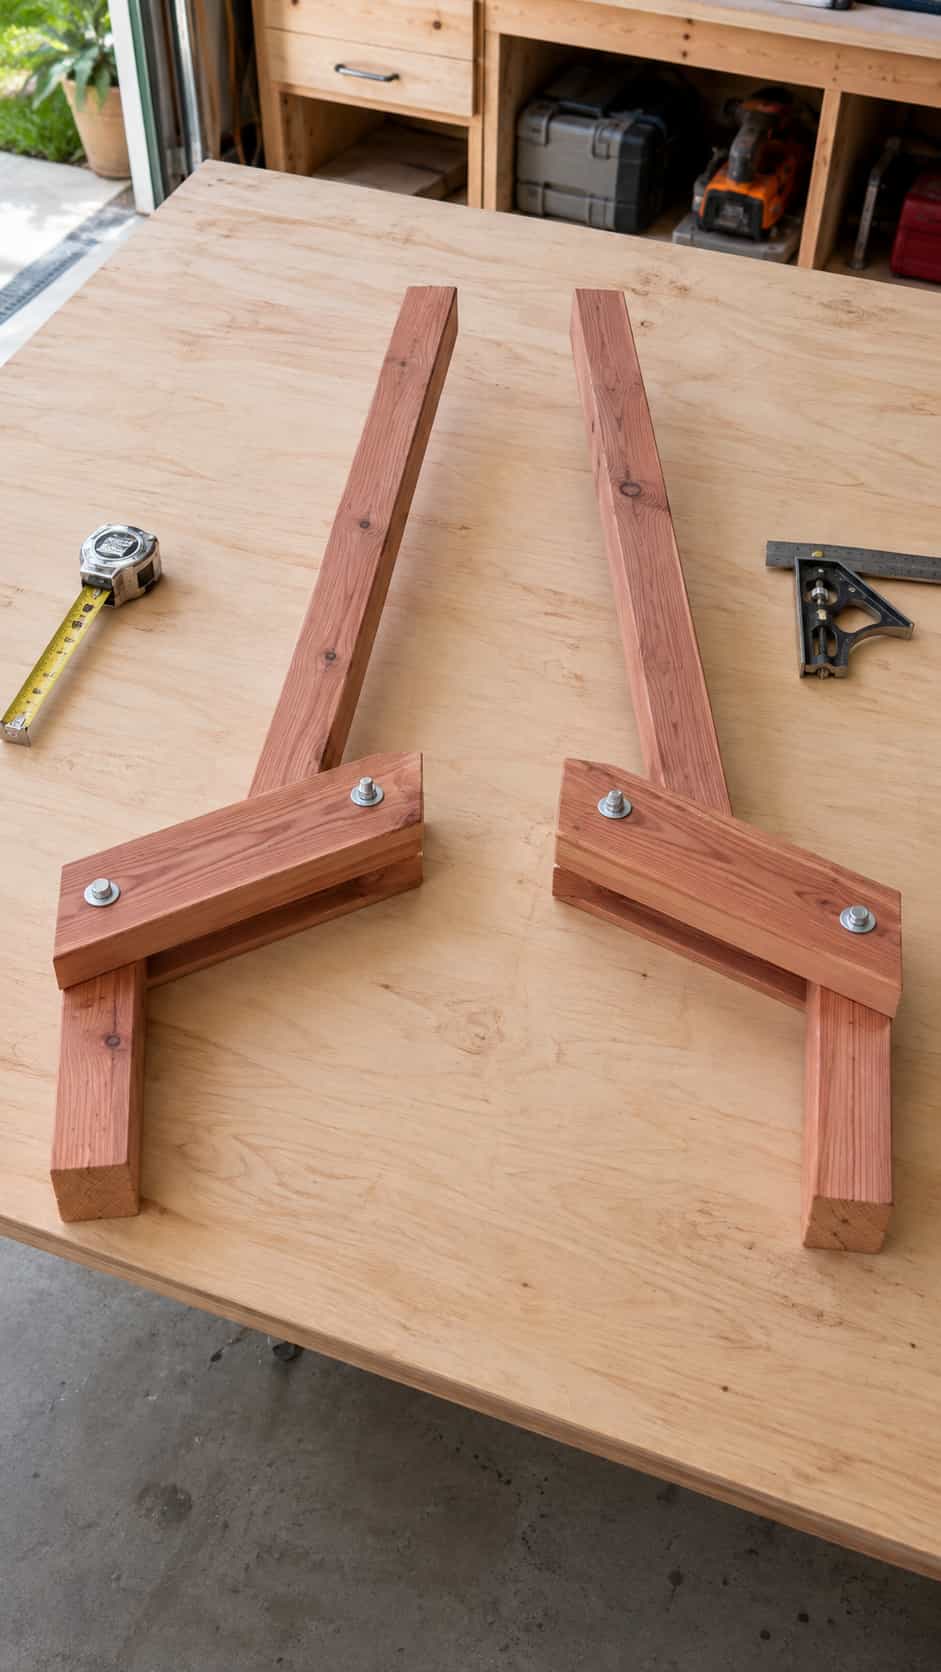
Lay the completed side on top of the remaining leg, rail, and rear post. Transfer the angles and hole locations directly, then flip the parts to create a true mirror image. This is more reliable than measuring the entire layout twice. Assemble the second side, place both on the floor, and confirm that the rail tops match.
Step 6: Join the sides with the seat cross rails
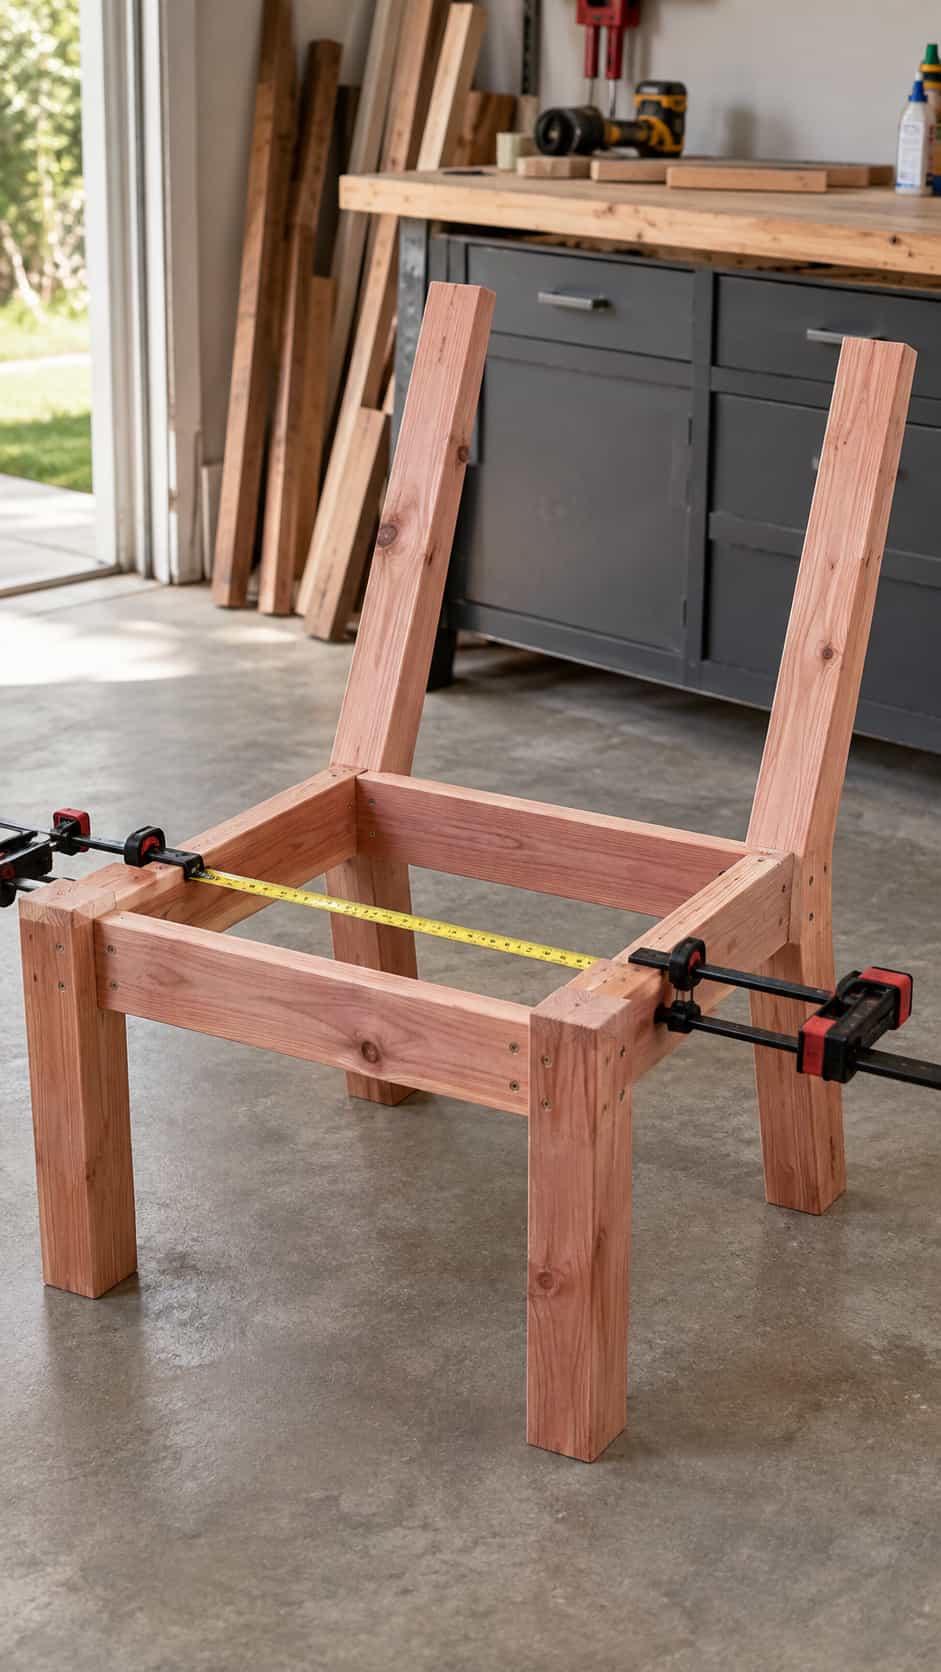
Stand the side assemblies upright. Fit one 20-inch seat cross rail between the side rails at the front and the second at the rear. Their top edges should sit flush with the side-rail tops. This creates a 20-inch clear seat width and a 23-inch outside frame width.
Clamp across the chair, check the frame for square by comparing diagonal measurements, then predrill. Drive two 3 1/2-inch exterior structural screws through each side rail into each cross-rail end. Stagger the screws slightly to reduce splitting. If your cedar is especially soft, add small exterior-rated corner blocks below these joints.
Step 7: Install the six seat slats
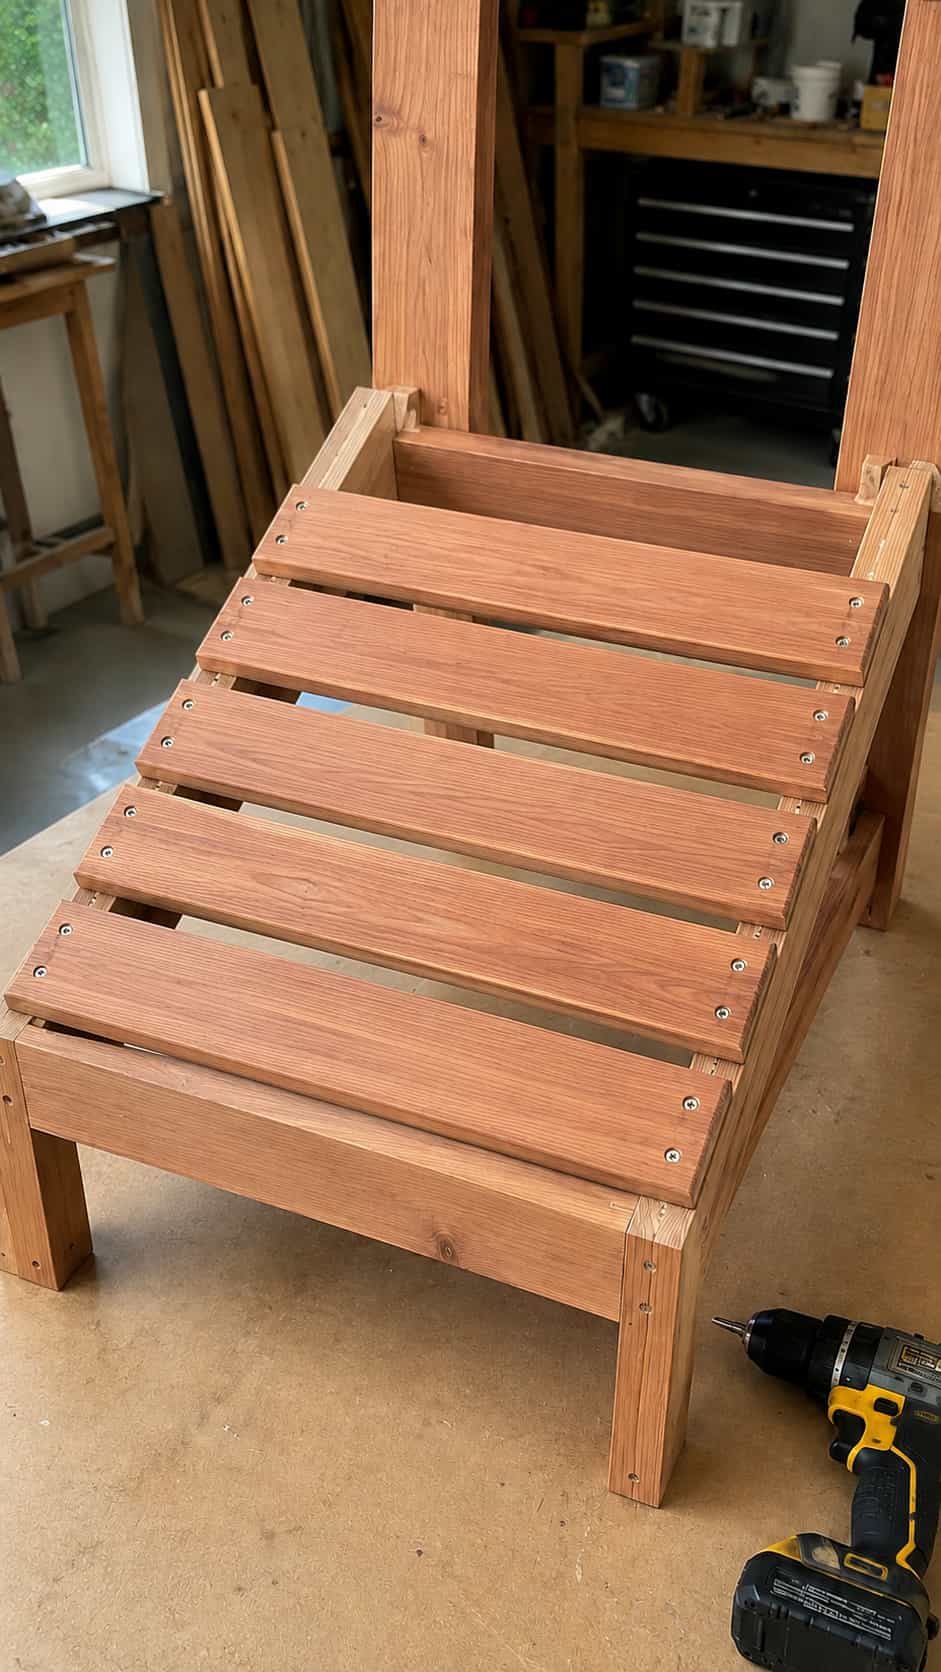
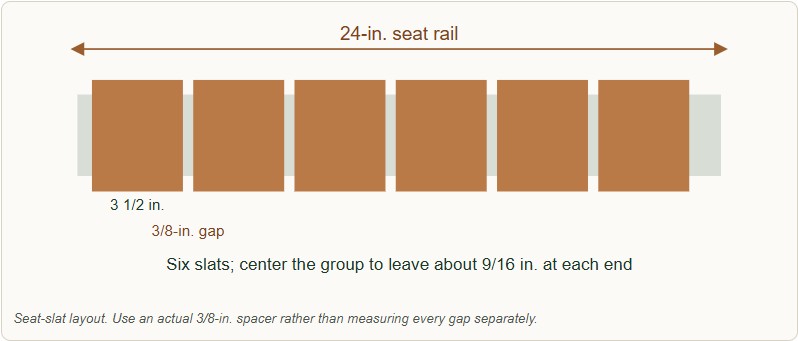
Arrange the six 23-inch seat slats across the side rails. Center the entire group along the 24-inch rails. With 3/8-inch gaps between slats, the slat group occupies 22 7/8 inches, leaving approximately 9/16 inch at the front and rear.
Use a 3/8-inch plywood offcut as a spacer. Start at the front, where visual alignment matters most. Predrill and countersink each end, then fasten every slat with one 2-inch exterior screw into each side rail. Keep screw centers approximately 3/4 inch from the slat ends.
Do not close the gaps to make the seat look more “solid.” Outdoor furniture needs drainage, and swelling boards can buckle or split when they are packed tightly together.
Step 8: Add the rear arm support
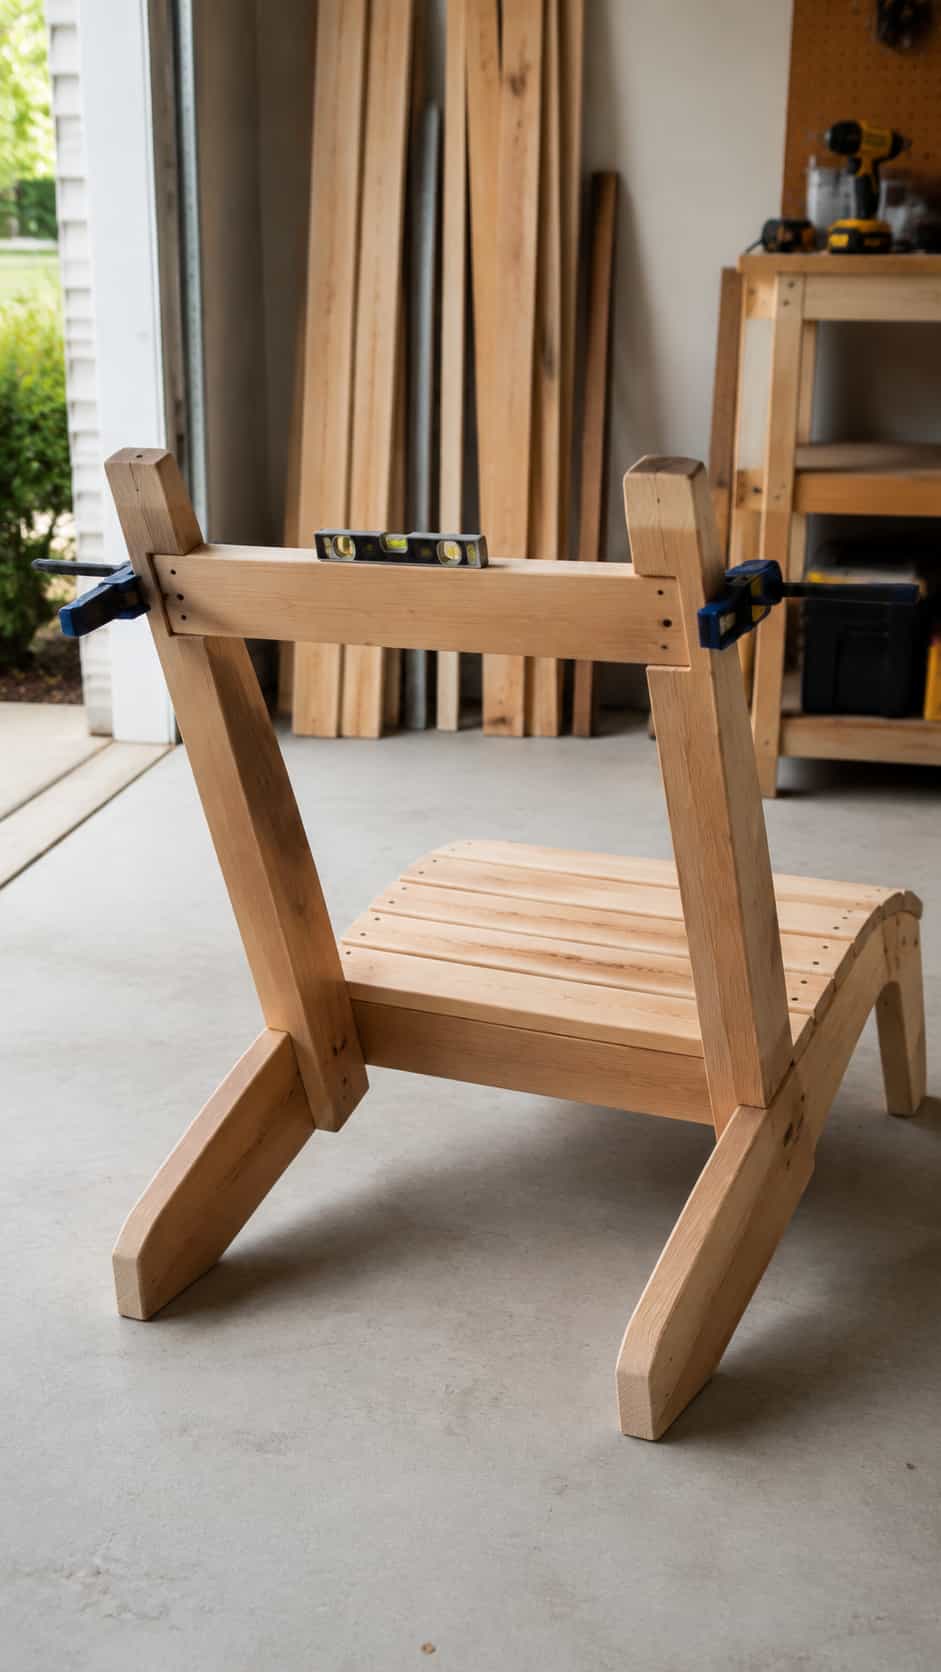
With the chair standing on a flat floor, draw a level line across both rear posts at 21 1/2 inches above the floor. Center the 31-inch rear arm support across the chair, position it against the front faces of the posts with its top edge on that line, and clamp it. The projecting ends support the armrests, while the middle also becomes a third brace behind the back slats.
Check level from side to side. Predrill and fasten the support to each post with two 3 1/2-inch structural screws. For a chair that will receive heavy public use, substitute through-bolts at this connection after confirming that their locations do not collide with the back-rail screws.
Step 9: Fit the armrests
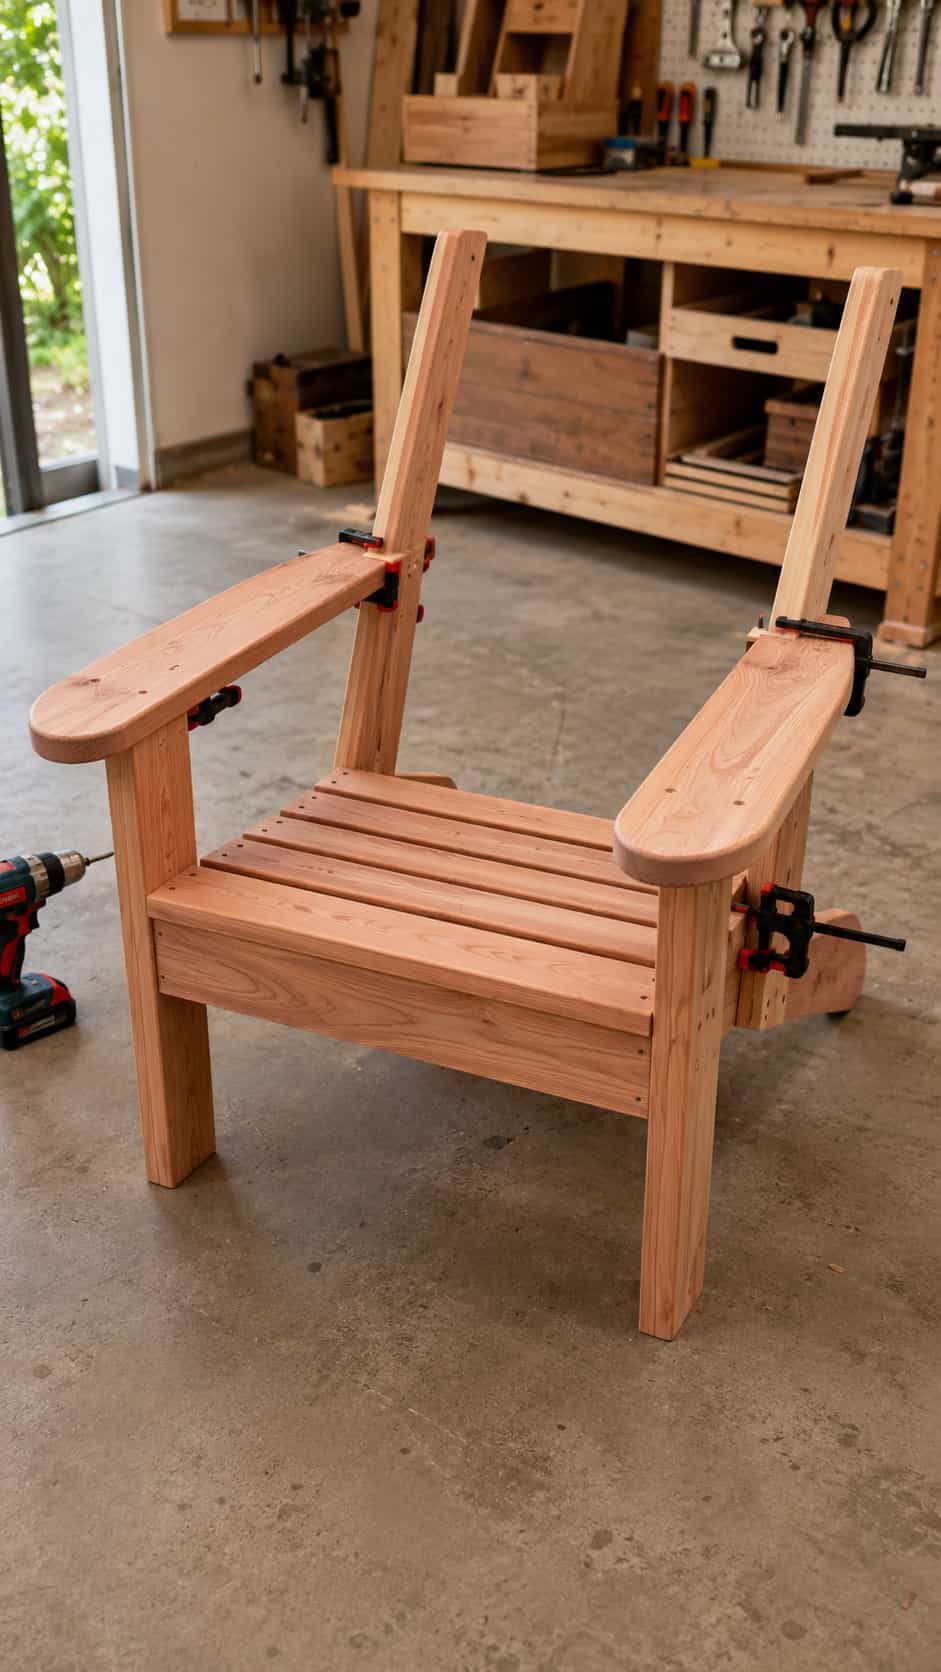
Set one armrest on the front leg and rear support. The rounded end projects 1 1/2 inches beyond the front leg. Align the arm’s outside edge with the end of the 31-inch rear support. Repeat on the other side. This produces a 20-inch opening between the two inside arm edges.
Check that both arms are level and parallel. Predrill, countersink, and drive two 2-inch screws down into each front leg and two more into the rear support. Keep fasteners at least 3/4 inch from edges. The screws should sit just below the surface without crushing the arm.
Step 10: Attach the lower and upper back rails
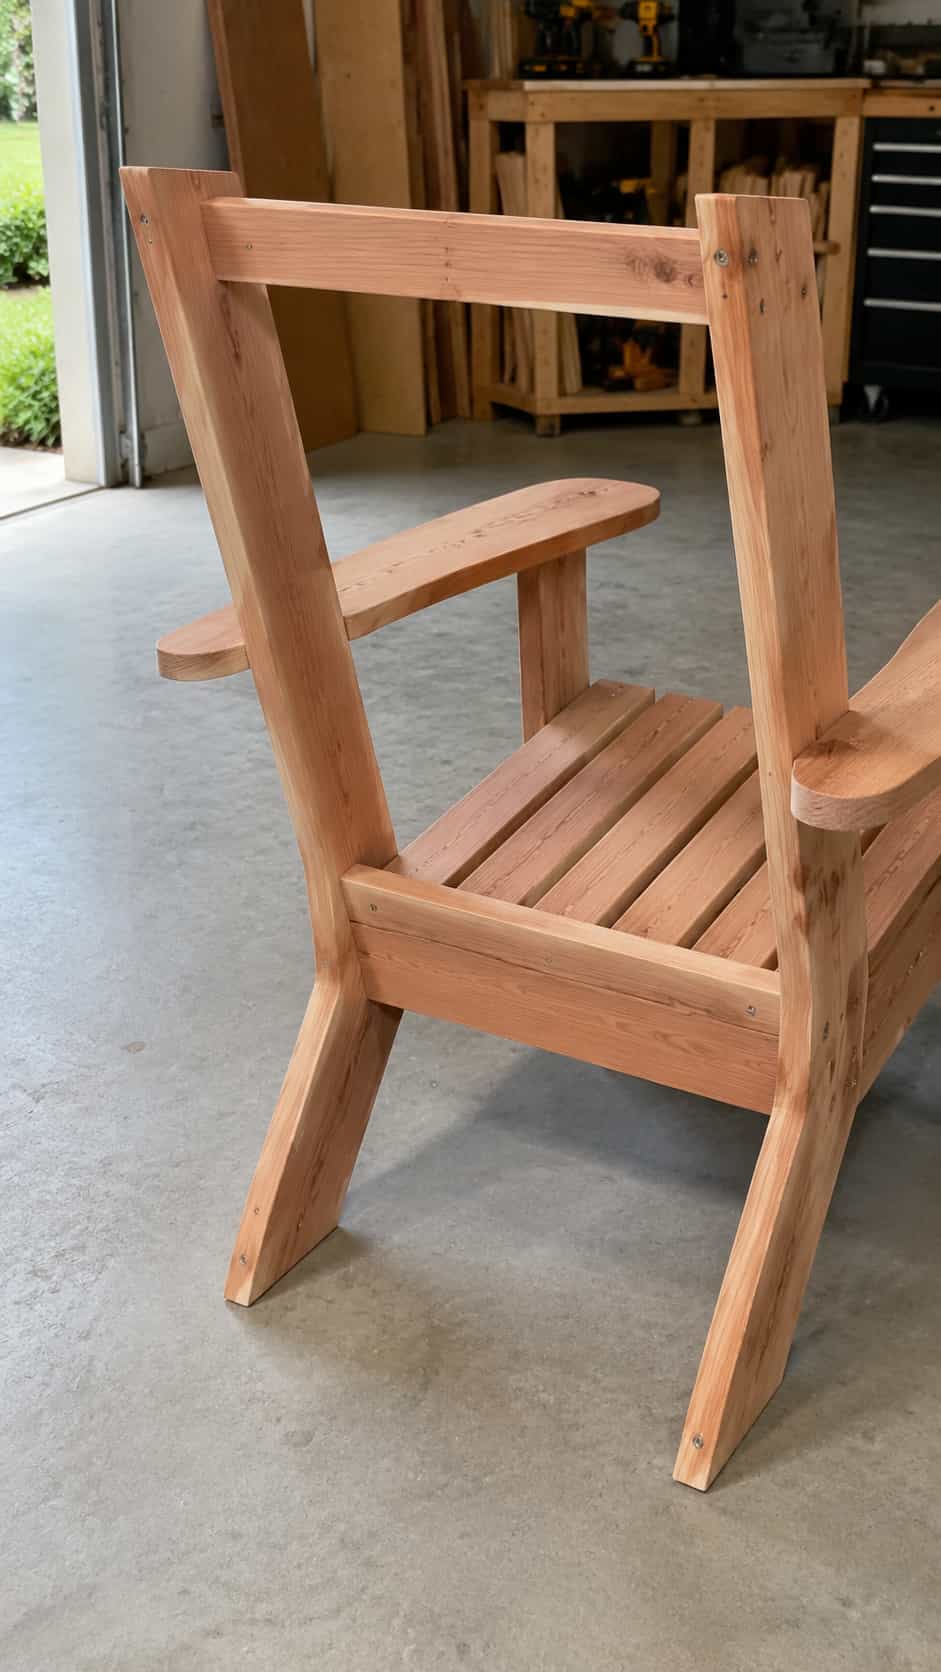
Measure along the sloping rear posts—not vertically from the floor. Position the 26-inch lower back rail across the front faces of the posts with its lower edge 10 inches from the post feet. Place the 26-inch upper back rail with its lower edge 25 inches from the post feet. Center both rails so their ends finish flush with the outside faces of the posts.
Confirm that the rails are square across the chair, then fasten each rail to each post with two exterior screws. Use 3 1/2-inch structural screws for the 2×4 lower rail and 2-inch exterior screws for the 1×4 upper rail. Predrilling is essential near the ends.
Step 11: Install the five back slats
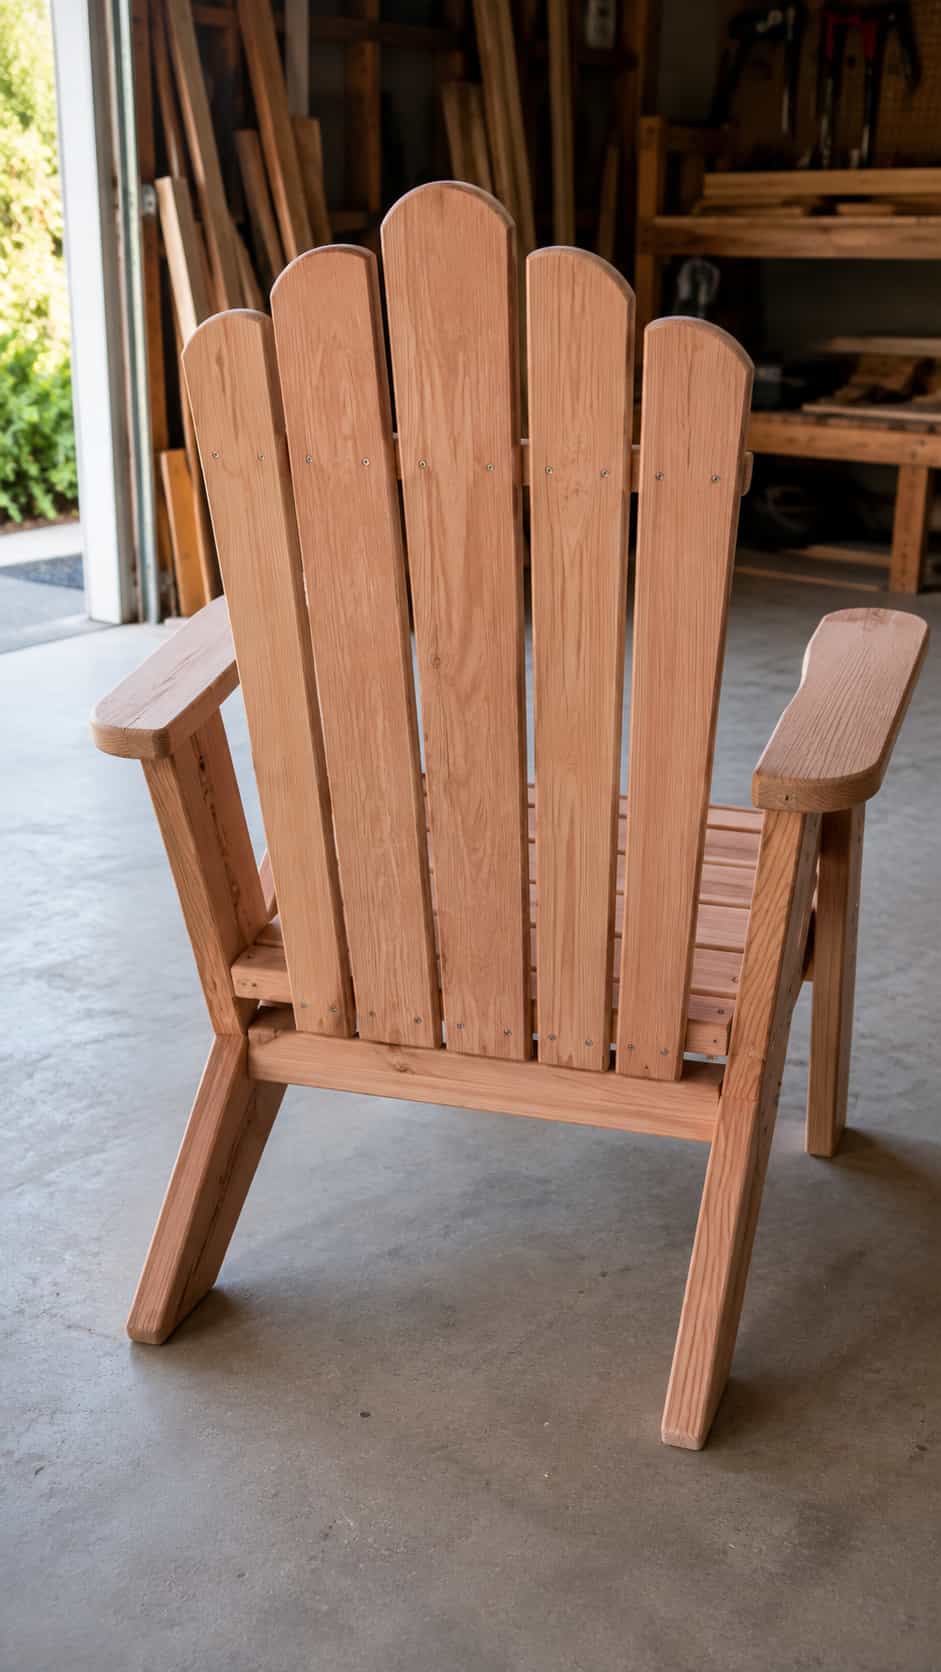
Arrange the slats from left to right as 29, 30, 31, 30 and 29 inches. Align their lower ends 9 inches along the post from the floor end—approximately 1 inch below the lower rail. Use 1/2-inch spacers between slats.
The five slats and four gaps occupy 19 1/2 inches. Center that group across the 26-inch rails, leaving 3 1/4 inches of rail exposed on each side. Step back and check the arch before fastening anything; one upside-down slat is much funnier before the screws go in.
Predrill and attach every slat to both back rails with two 2-inch exterior screws at each rail. Add one centered screw through each slat into the rear arm support where it crosses behind the back. Keep the lower screw row clear of the seat fasteners. The back should meet the rear seat slat cleanly without trapping water; maintain roughly a 1/2-inch drainage gap where necessary.
Step 12: Square, tighten and test the chair
Place the chair on a known-flat surface. Confirm that all four contact points sit solidly. Measure the frame diagonals, inspect every bolt and screw, and tighten the carriage-bolt locknuts until the washers are seated—never until the wood caves in.
Before anyone sits in the chair, test the prototype with gradually increasing static weight such as secured sandbags while people stand clear. Watch the rail-to-leg joints, the rear post connections, and the cross rails. Stop immediately if a joint moves, a board cracks, or the chair rocks. This practical test checks workmanship; it does not establish a published load rating.
How to Finish an Adirondack Chair for Outdoor Use
Remove dust, soften any last sharp corners, and follow the finish maker’s surface-preparation instructions. Coat the underside, end grain, bolt holes, and feet—not only the photogenic surfaces. Water will happily find the one patch you skipped.
Good finish options
- Penetrating exterior oil: easy to refresh and keeps a natural appearance, but usually needs regular maintenance.
- Exterior stain: adds color while showing grain; choose a product specifically rated for horizontal outdoor surfaces.
- Exterior paint: provides strong UV protection and a traditional Adirondack look when applied over the correct primer.
- Clear exterior film finish: can look beautiful, but damaged film must be maintained before moisture creeps underneath.
Allow every coat to cure fully before use. Place the chair on pavers, a deck, or another draining surface rather than leaving the leg ends in damp soil. Clean it periodically, inspect the hardware each season, and refresh the finish before the wood becomes rough and gray.
Optional Modifications
Make the seat 22 inches wide
Add 2 inches to both seat cross rails, all six seat slats, both back rails, and the rear arm support. Keep the side-frame angles unchanged. Move each arm outward by 1 inch, leaving the same relationship between the arm, front leg, and rear support.
Add a cup-holder recess
A 3- to 3 1/4-inch recess can fit many cups, but measure the intended drinkware first. Keep the hole centered in the arm width and at least 4 inches away from the nearest supporting fastener. Use a hole saw or router template, soften the edge, and seal the exposed end grain thoroughly.
Build a matching pair
Cut matching parts for both chairs in one setup. This improves consistency and saves time. A small side table between the chairs turns the result into a complete seating area; the 2×4 outdoor furniture ideas article has several pieces that suit the same style.
Common Adirondack Chair Building Mistakes
- Changing one dimension in isolation: widening the seat also changes the cross rails, slats, back rails, and rear arm support.
- Building two side frames separately: use the first assembly as the physical template for the mirrored second side.
- Guessing the angles: a small error at the rear post becomes a large mismatch at the top of the back.
- Using wet or badly twisted boards: furniture cannot become square when the lumber refuses to be straight.
- Skipping pilot holes: cedar and narrow slats split easily near their ends.
- Using indoor hardware: corrosion stains the wood and weakens joints.
- Eliminating drainage gaps: tight slats trap water and leave no room for seasonal movement.
- Claiming an untested weight capacity: a calculation alone cannot account for defects, moisture, fastener installation, or repeated outdoor use.
Want More Measured Woodworking Plans?
DIY Adirondack Chair FAQ
What are standard Adirondack chair dimensions?
Adult Adirondack chairs commonly finish around 29–32 inches wide, 34–38 inches deep, and 35–40 inches high. This plan finishes approximately 31 inches wide, 35 inches deep, and 37 5/8 inches high, with a 20-inch clear seat.
What angle should an Adirondack chair seat be?
This plan uses a 10-degree downward seat slope. Across the 24-inch rails, that lowers the rear of the seat by approximately 4 3/16 inches. The back reclines 20 degrees from vertical, creating an included seat-to-back angle of about 100 degrees.
Can a beginner build this chair?
Yes, if the beginner can make repeatable square and angled cuts, drill straight bolt holes, and work from a full-size side layout. The build is less forgiving than a basic bench, so read every step and make both side frames from the same template.
Can I build it with only a circular saw?
Yes. Use a clamped straightedge or angle guide for the 20-degree post-foot cuts and a jigsaw for the rounded arms. A miter saw makes repeatability easier but is not required.
What is the best wood for a DIY Adirondack chair?
Cedar is the most beginner-friendly balance of weather resistance, weight, and workability. Redwood is excellent where affordable. Fir or pine can work with careful exterior finishing and maintenance. Pressure-treated lumber is durable but should be dry enough to machine and finish according to its manufacturer’s guidance.
How much weight will this chair hold?
Do not assign a number without testing a finished prototype. Capacity depends on wood species and grade, knots, moisture, fastener type, hole placement, assembly quality, weather exposure, and repeated use. Inspect and load-test the actual chair before use, and never market an unverified rating.
Should I glue outdoor chair joints?
Exterior-rated glue can supplement fixed joints, but bolts and rated exterior screws provide the mechanical connection in this plan. Glue does not replace correct fasteners, and it performs poorly when applied to wet, dirty, or poorly fitted surfaces.
How do I stop the chair from rocking?
Build both sides from one template, cut the rear-post feet together, assemble on a flat surface, and compare diagonal measurements before installing all slats. If a completed chair rocks, first identify whether the floor or the chair is responsible; do not shorten a leg until you have checked both.
Final Thoughts
A successful Adirondack chair is not complicated because it has dozens of parts. It is demanding because a handful of important parts must agree with one another. Keep the 10-degree seat slope, the 20-degree back recline, the 20-inch clear width, and the mirrored side assemblies under control, and the rest of the build becomes pleasantly repetitive.
Cut carefully, predrill near every edge, leave room for drainage, protect all six sides of the wood, and test the finished prototype before regular use. The reward is a sturdy backyard chair with wide arms, a comfortable recline, and a very convincing excuse to sit down after the tools are put away.