
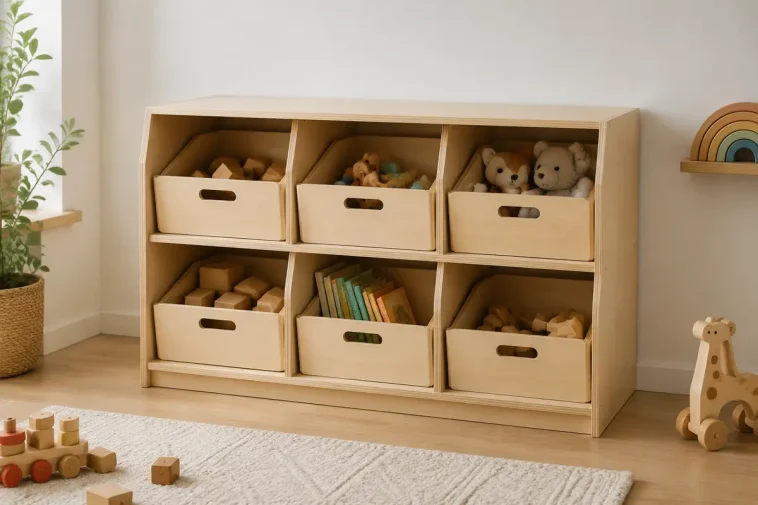
Toy storage works best when children can see what they own, reach it without climbing and put it away without opening a heavy lid. This DIY toy storage organizer with bins uses six open cubbies and six removable plywood bins, giving blocks, puzzles, vehicles, art supplies and stuffed animals a clear home.
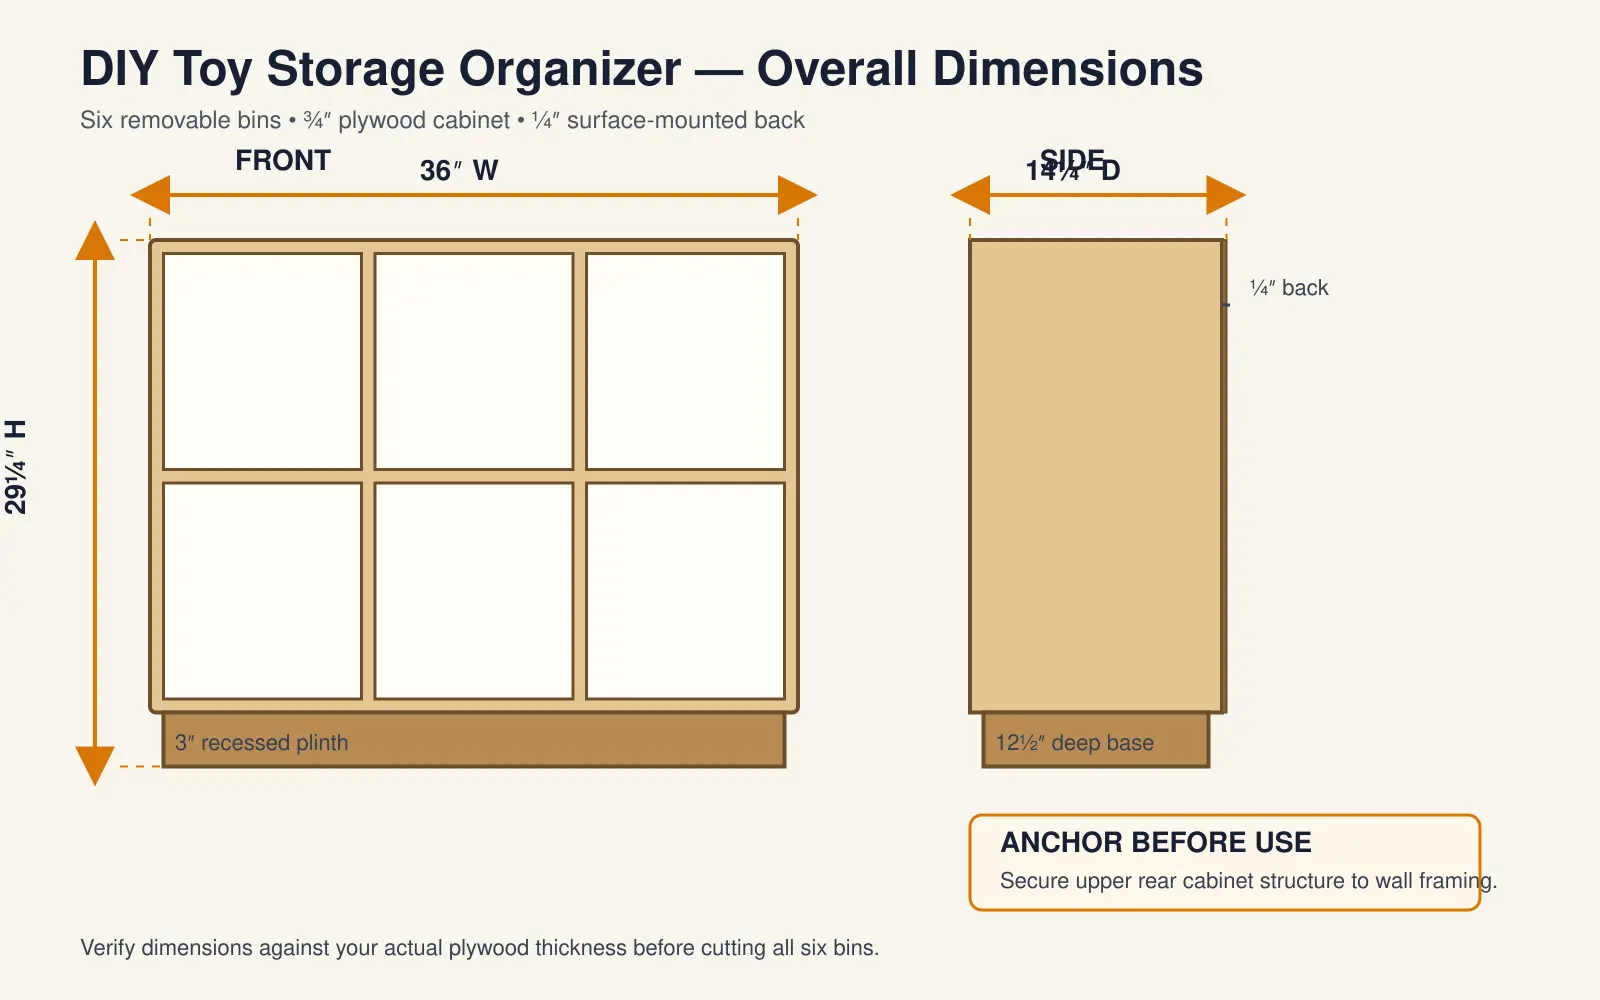
The finished organizer is 36 inches wide, 14¼ inches deep and 29¼ inches high. The cabinet is built from ¾-inch plywood, the removable bins use lighter ½-inch plywood, and a ¼-inch back keeps the case square. Every cut is straight except the sloped top edges of the bin sides and the rounded handholds.
This is a confident-beginner project. If you have already built a basic box, shelf or small cabinet, the repeated parts make the organizer manageable over one weekend. If this is your first plywood build, start with these free woodworking plans for beginners to practice measuring, guided cutting and square assembly.
Important safety note: This plan is general DIY information, not a tested children’s-product certification. Build and inspect a physical prototype before use. Round every exposed edge, fully cure the finish, keep hardware inaccessible, and secure the organizer to wall framing or a suitable structural wall anchor with a rated anti-tip restraint. Never allow a child to climb, sit or stand on the bins or cabinet. The U.S. Consumer Product Safety Commission recommends anchoring furniture with drawers, doors and shelves to help prevent tip-over injuries; see the official Anchor It guidance.
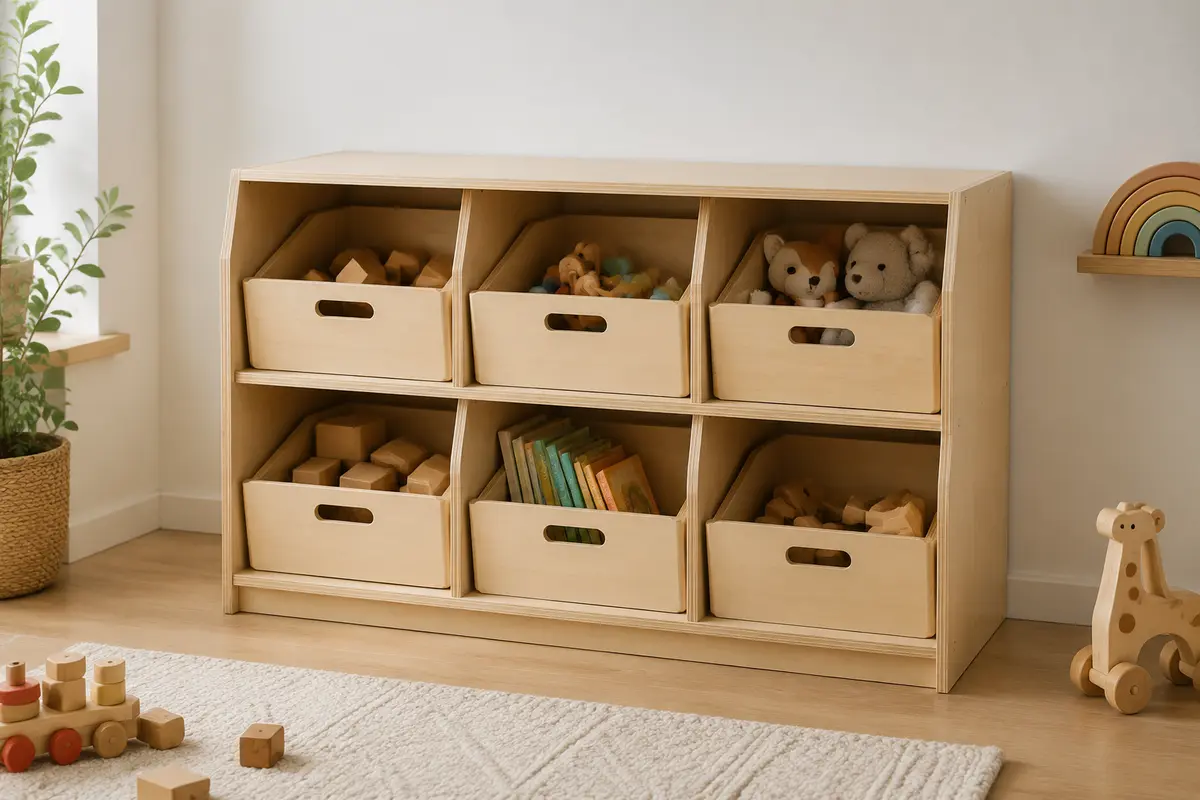
DIY Toy Storage Organizer Plan at a Glance
| Finished size | 36″ W × 14¼″ D × 29¼″ H |
|---|---|
| Cabinet body | 36″ W × 14¼″ D × 26¼″ H, including the surface-mounted back |
| Base | 34½″ W × 12½″ D × 3″ H |
| Cubby openings | Six openings, each 11″ W × 12″ H × 14″ D |
| Bin outside size | 10¾″ W × 13″ D; 7″ front and 10½″ back |
| Difficulty | Confident beginner |
| Build time | One weekend, plus finish-curing time |
| Estimated material cost | Approximately $120–$220 USD, depending on plywood and finish |
How the Six-Cubby Layout Works
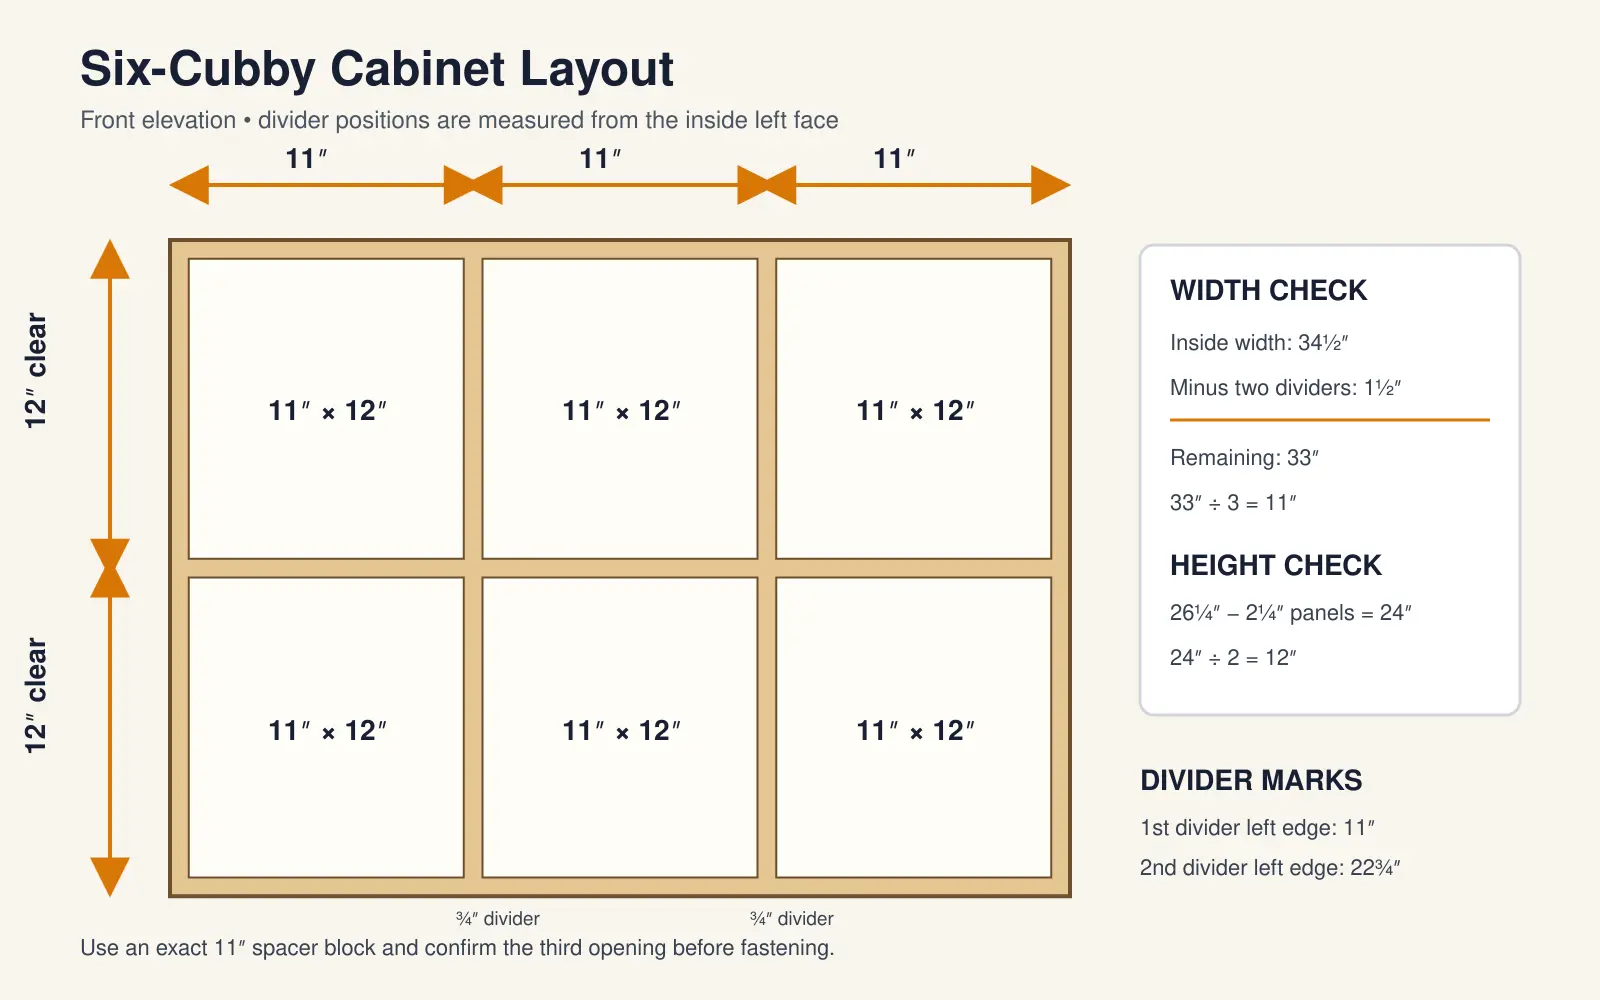
The main case is a simple plywood grid. Two 26¼-inch side panels hold three 34½-inch horizontal panels: the bottom, center shelf and top. Four 12-inch dividers split the two rows into three equal columns.
The arithmetic is deliberate. Between the ¾-inch sides, the inside cabinet width is 34½ inches. Subtract the two ¾-inch dividers and 33 inches remain. Divide that by three, and every opening is exactly 11 inches wide:
34½″ − ¾″ − ¾″ = 33″; 33″ ÷ 3 = 11″
The 26¼-inch side height also divides cleanly. The top, middle and bottom use 2¼ inches in total, leaving 24 inches for two 12-inch rows:
26¼″ − ¾″ − ¾″ − ¾″ = 24″; 24″ ÷ 2 = 12″
Each removable bin is 10¾ inches wide, leaving ⅛ inch of clearance on each side of an 11-inch cubby. The 13-inch depth leaves room behind the bin for the ¼-inch back and prevents the front from protruding excessively. Do not enlarge the bin until you have assembled and measured the actual cabinet; plywood thickness and finish buildup can reduce the final clearance.
Materials and Hardware
- One 4′ × 8′ sheet of ¾″ cabinet-grade plywood for the case and plinth
- One 4′ × 8′ sheet of ½″ cabinet-grade plywood for six bins
- One ¼-sheet or larger piece of ¼″ plywood for the 36″ × 26¼″ back
- 1¼″ coarse-thread pocket-hole screws for ¾″ plywood
- 1″ brad nails or narrow-crown staples for the ½″ bins
- ¾″ brads or short screws for the back panel
- Wood glue
- Wood filler
- Optional iron-on edge banding
- A rated anti-tip furniture restraint with fasteners appropriate for the wall structure
- Primer and furniture paint, or stain plus a durable clear finish
- Optional removable picture labels for the bin fronts
Birch plywood gives clean exposed edges and a durable furniture surface. Sanded pine plywood is usually less expensive but may contain more voids. Compare the practical options in this guide to the best woods for beginner woodworking projects. Avoid pressure-treated lumber indoors, badly warped panels and material with loose veneer or splintered edges.
Tools You Will Need
- Track saw or circular saw with a straightedge guide
- Table saw, optional but useful for repeatable strips
- Miter saw or circular saw for the plinth strips
- Drill/driver and drill bits
- Pocket-hole jig set for ¾″ material
- Jigsaw and 1¼″ Forstner or hole-saw bit for the bin handholds
- Brad nailer, narrow-crown stapler or clamps for the bin assemblies
- Random-orbit sander and sanding block
- Tape measure, combination square and framing square
- Four-foot level
- Clamps
- Eye protection, hearing protection and appropriate dust protection
A flat cutting and assembly area matters more than owning every possible machine. If your garage is crowded, this small woodworking shop setup guide can help you prepare a safer workflow before breaking down full sheets.
Complete Cut List
¾-Inch Plywood: Cabinet and Base
| Part | Qty. | Cut size | Notes |
|---|---|---|---|
| Side panels | 2 | 26¼″ × 14″ | Best face outward |
| Top, middle and bottom panels | 3 | 34½″ × 14″ | Fit between sides |
| Vertical dividers | 4 | 12″ × 14″ | Two per row |
| Plinth front and back | 2 | 34½″ × 3″ | ¾″ inset from cabinet sides |
| Plinth sides | 2 | 11″ × 3″ | Fit between front and back |
¼-Inch Plywood: Cabinet Back
| Part | Qty. | Cut size |
|---|---|---|
| Surface-mounted back | 1 | 36″ × 26¼″ |
½-Inch Plywood: Six Removable Bins
| Part | Qty. | Cut size | Notes |
|---|---|---|---|
| Bin sides | 12 | 13″ deep; 10½″ rear height tapering to 7″ front height | Cut as six mirrored pairs |
| Bin fronts | 6 | 9¾″ × 7″ | Fit between side panels |
| Bin backs | 6 | 9¾″ × 10½″ | Fit between side panels |
| Bin bottoms | 6 | 9¾″ × 12″ | Inset ½″ above lower edges |
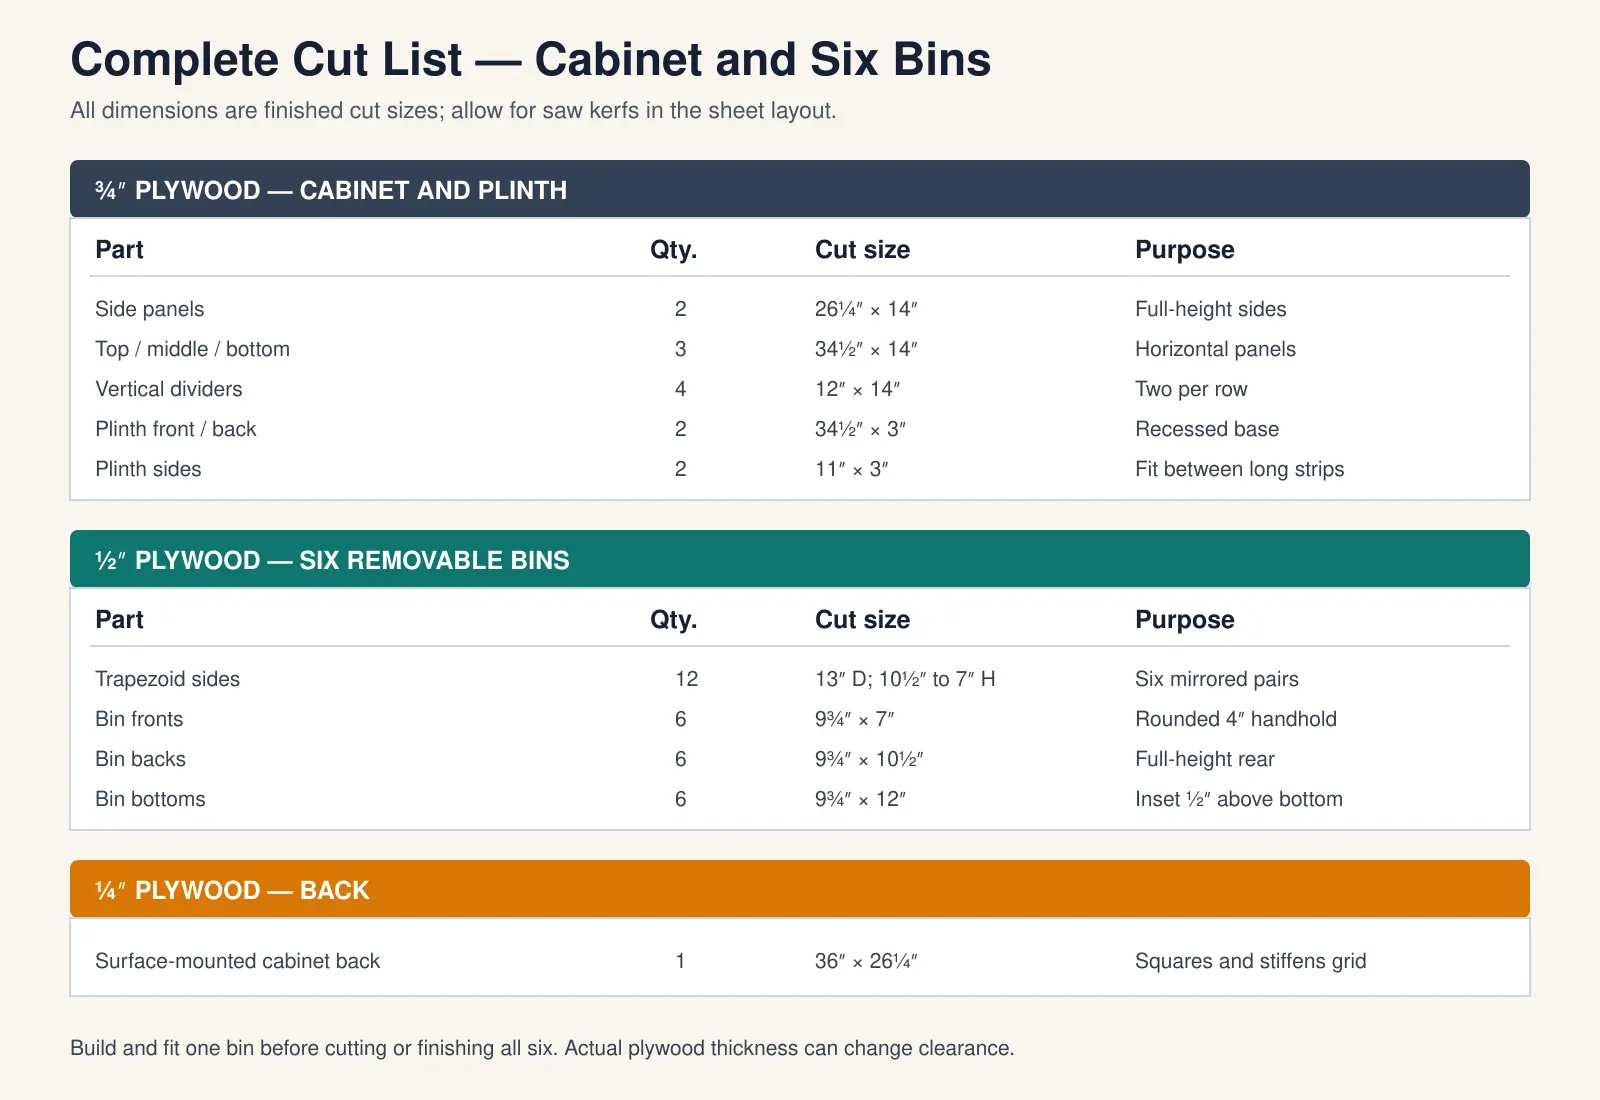
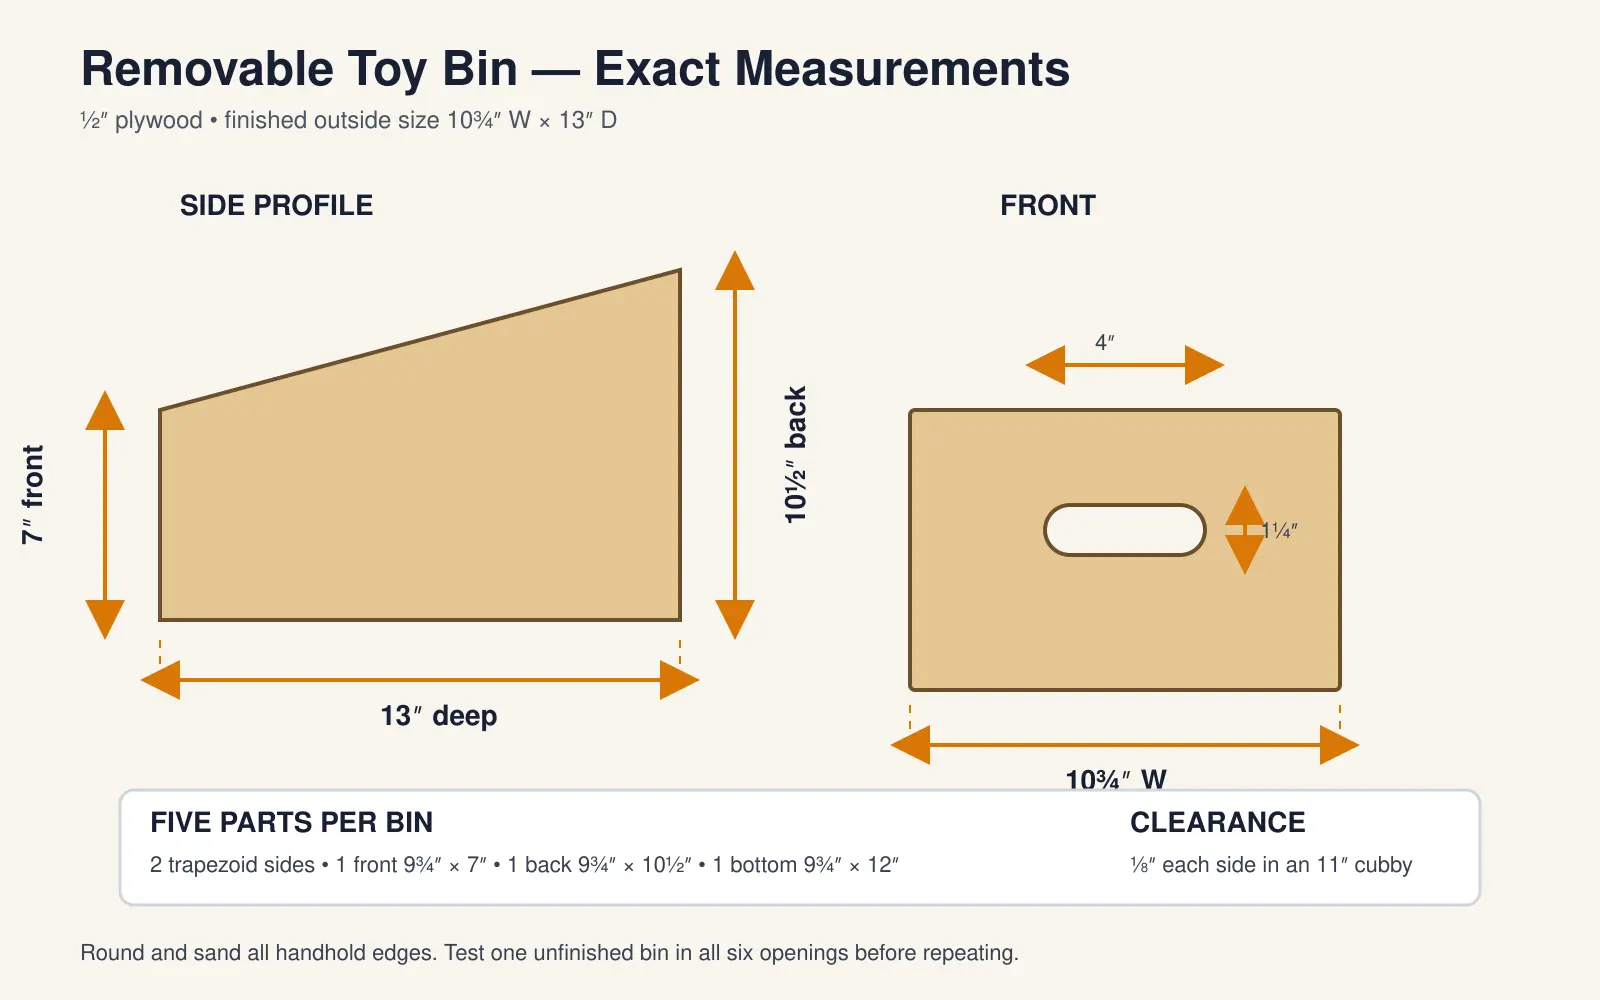
Exact Bin Measurements
Each bin uses two trapezoid-shaped sides. Start with a 13″ × 10½″ rectangle. On the front edge, measure 7 inches up from the bottom. Draw a straight line from that point to the 10½-inch-high rear corner, then cut along the line. Stack and sand each mirrored pair together so the slopes match.
The 9¾-inch front, back and bottom fit between the ½-inch side panels, producing a finished outside width of 10¾ inches. The front and back close the 13-inch depth, leaving a 12-inch-long bottom between them. Set the bottom ½ inch above the lower edges to conceal it and provide a clean fastening line.
For the handhold, mark a 4″ × 1¼″ rounded slot centered horizontally in each front. Keep the upper edge of the slot at least 1½ inches below the top edge. Drill the rounded ends first, connect them with a jigsaw and sand the opening until every surface feels smooth.
Before You Cut: Check Your Actual Material
Nominal ¾-inch and ½-inch plywood can measure slightly thinner. That does not change the outside case dimensions, but it can change the openings and bin clearance. Measure the sheets with calipers or a reliable tape before committing to all six bins.
Cut and assemble the cabinet first. Then measure all six openings. If the narrowest opening is less than 11 inches, reduce every bin width so you maintain approximately ⅛ inch of clearance per side after finishing. A test bin is faster and cheaper than sanding six oversized boxes.
Break the full sheets down on rigid foam or a supported cutting table. Trim damaged factory edges before making repeated rips. Account for the saw kerf between parts; do not assume a 48″ × 96″ sheet is perfectly square.
How to Build a DIY Toy Storage Organizer With Bins
Step 1: Inspect, Square and Mark the Plywood
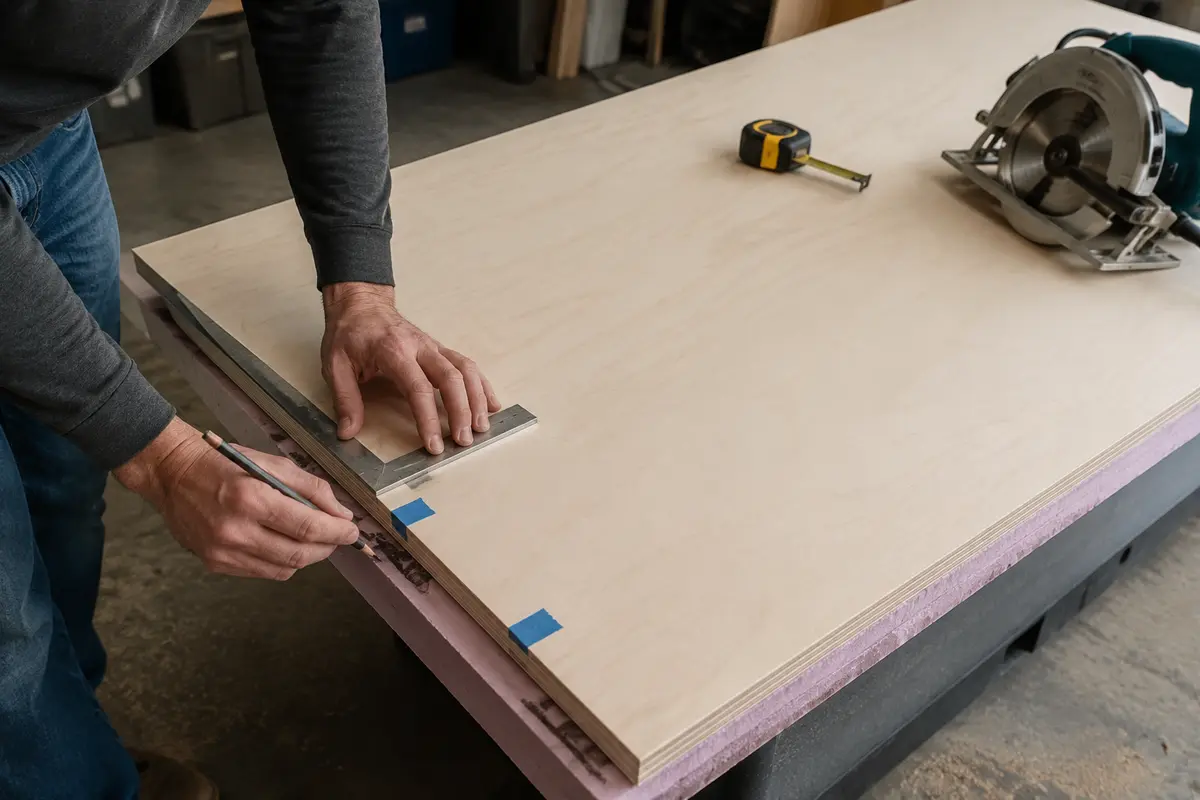
Lay out the ¾-inch and ½-inch sheets on a flat surface. Mark the best face of every sheet with painter’s tape and circle knots, veneer patches or voids you want to avoid. Check the factory corners with a framing square.
Trim one long edge and one short edge to establish a straight reference corner. Make every repeated measurement from those two edges. This small preparation step keeps the final grid square and prevents cumulative errors across six openings.
Step 2: Cut and Label the Cabinet Parts
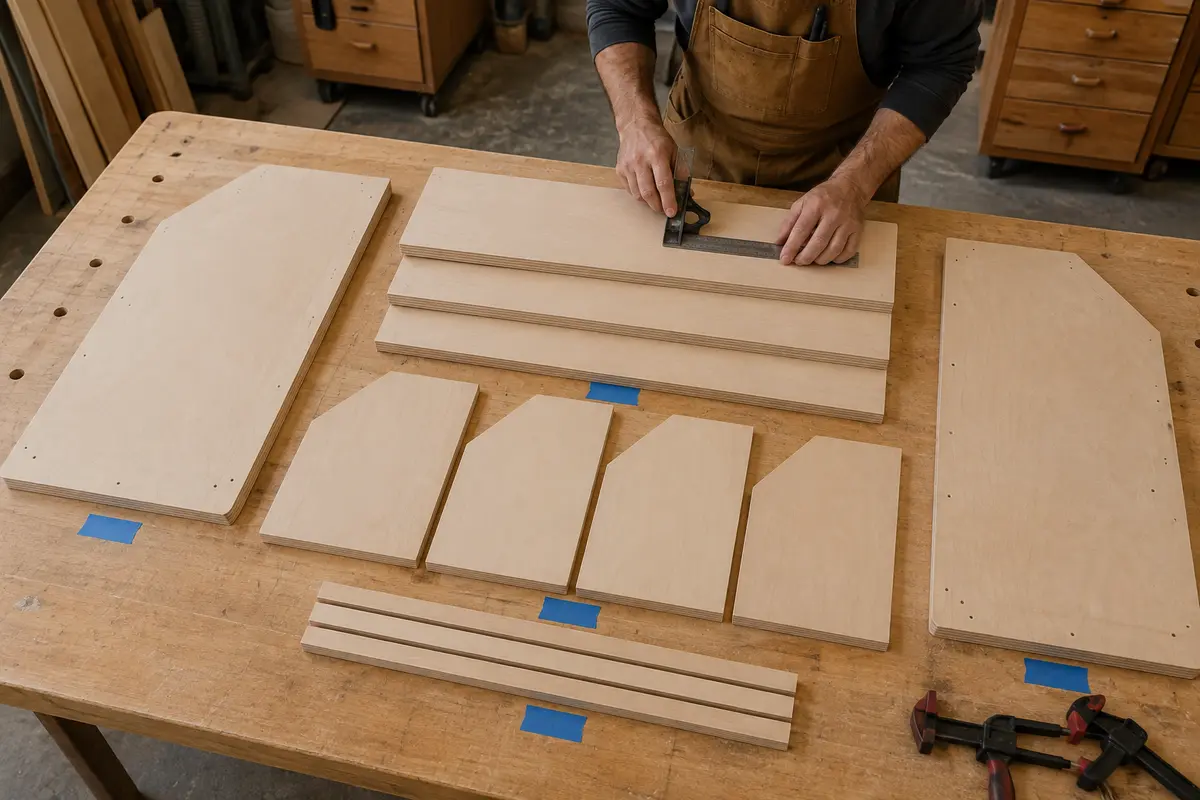
Cut the two 26¼″ × 14″ sides first, then the three 34½″ × 14″ horizontal panels. Rip a 12-inch-wide strip for the four dividers, and use the remaining ¾-inch plywood for the 3-inch plinth parts.
Label the panels Left Side, Right Side, Top, Middle, Bottom and Divider 1–4. Mark the cabinet interior faces. If you plan to use pocket holes, these labels prevent you from drilling into the visible side.
Step 3: Cut the Bin Components
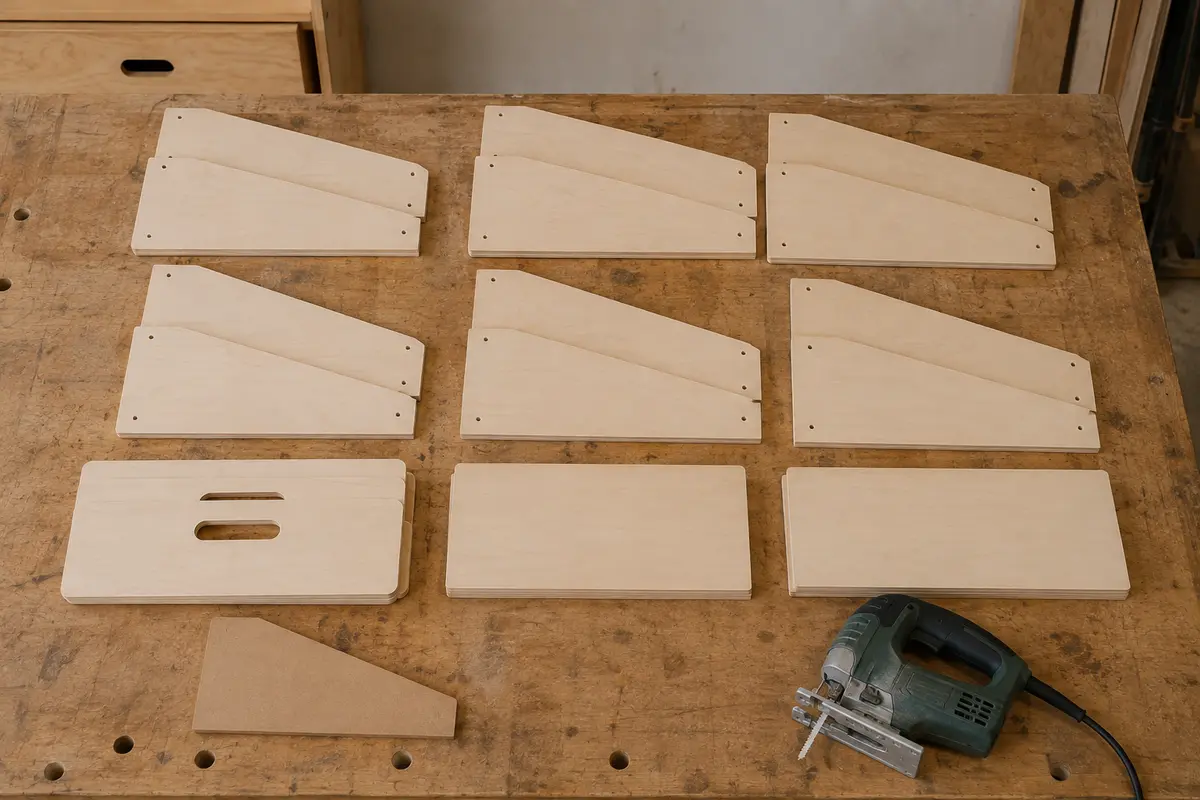
From the ½-inch plywood, cut six bottoms at 9¾″ × 12″, six fronts at 9¾″ × 7″ and six backs at 9¾″ × 10½″. Cut twelve 13″ × 10½″ side blanks.
Make one accurate side template with the 7-inch front and 10½-inch back. Trace it onto the other blanks, flipping the template to create mirrored pairs. Cut slightly outside the line with a jigsaw, stack each pair and sand to the line.
Step 4: Cut and Smooth the Bin Handholds
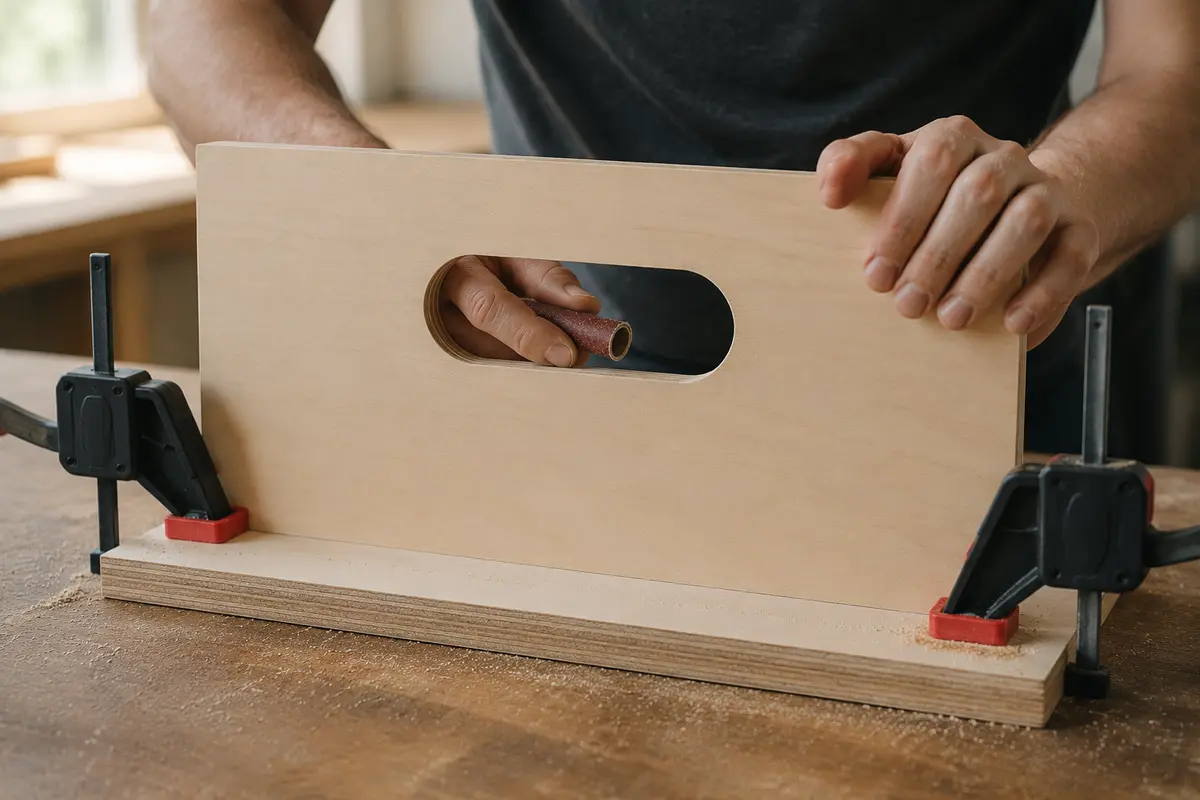
Create a simple centering jig for the 4″ × 1¼″ opening, then mark every bin front. Drill both rounded ends on a sacrificial backer board to reduce breakout. Connect the openings with a jigsaw.
Sand the slot with rolled abrasive or a spindle sander. Round the top corners of each bin side with at least a ½-inch radius, then break all exposed plywood edges. Run your hand across every edge; if it catches a cloth or feels sharp, keep sanding.
Step 5: Assemble the Outer Cabinet
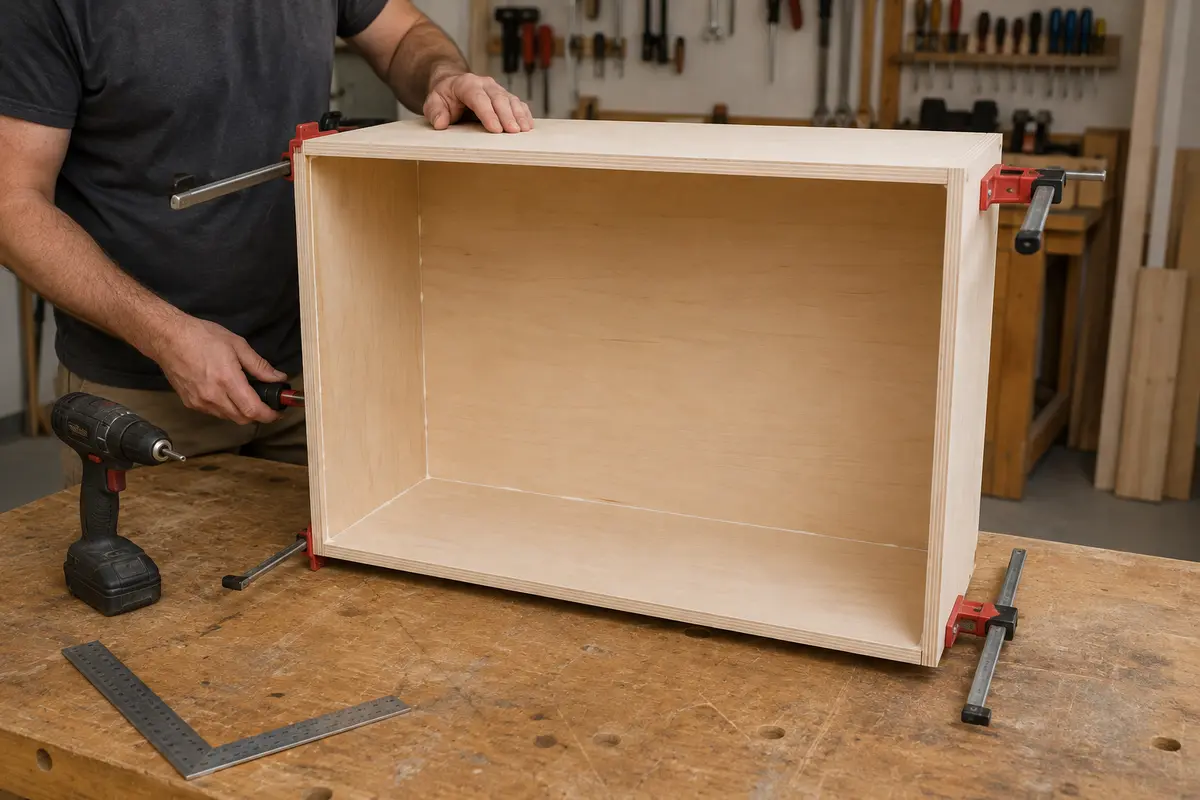
Drill pocket holes on the hidden underside of the top and bottom panels, or prepare countersunk screw locations through the sides. Apply glue, clamp the bottom between the sides with its lower face flush to the side-panel bottoms, and secure it. Repeat with the top panel flush to the upper edges.
Measure both cabinet diagonals. Adjust the clamps until the measurements match. Do not continue with a racked shell; the error will appear in every cubby and make the bins bind.
Step 6: Install the Middle Shelf
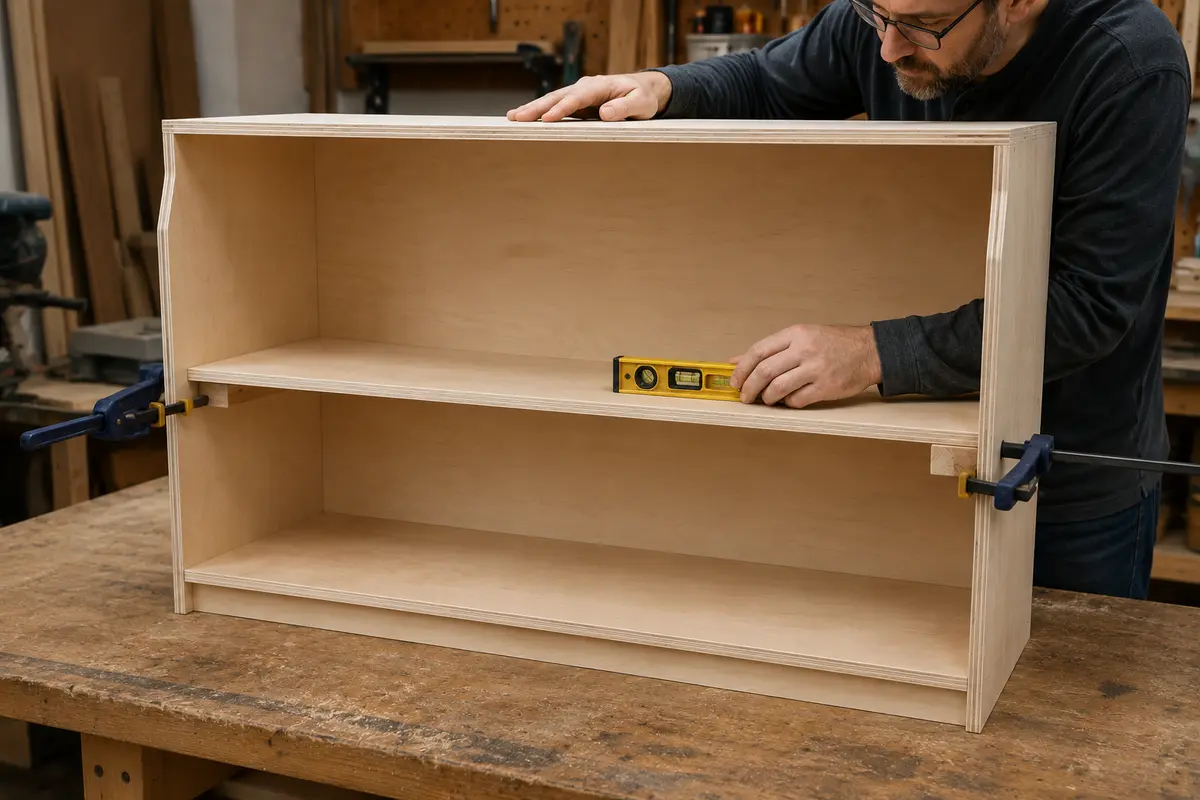
Cut two temporary spacer blocks exactly 12 inches long. Stand them on the bottom panel near the sides, set the middle shelf on top and clamp it in place. Its upper surface should be 12¾ inches above the upper surface of the bottom panel, leaving a clear 12-inch lower opening.
Check the shelf with a level and measure from both ends. Attach it with hidden pocket screws, confirm the upper opening is also 12 inches and remove the spacer blocks.
Step 7: Position the Four Vertical Dividers
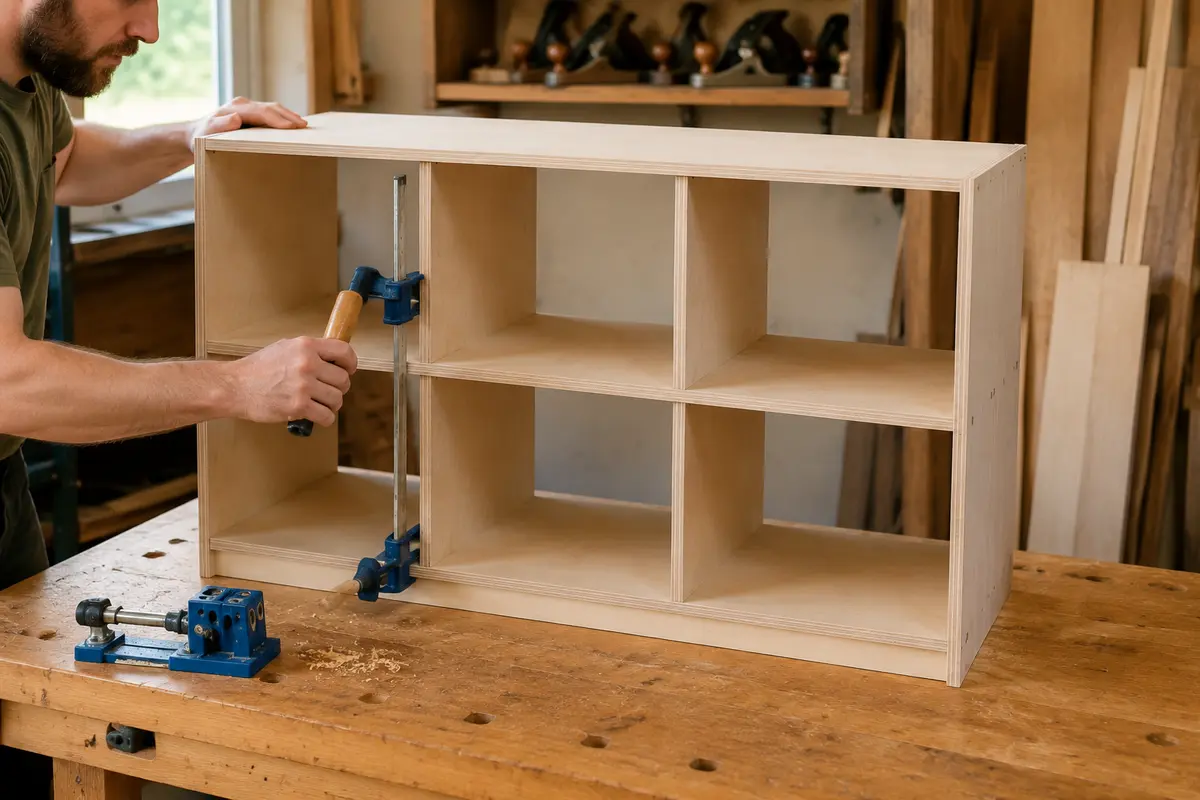
In the lower row, mark the first divider 11 inches from the inside of the left side. The divider occupies the next ¾ inch. Measure another 11-inch opening, then install the second divider. The final opening should also measure 11 inches.
Repeat the layout in the upper row. Use a square to align the upper dividers directly over the lower pair. Glue and fasten the dividers through pocket holes on their hidden faces. Recheck all six openings before the glue sets.
The square grid construction is similar to the casework in this DIY nightstand with drawer and this DIY end table with cabinet storage, so those projects make useful follow-up practice.
Step 8: Attach the Back and Build the Recessed Base
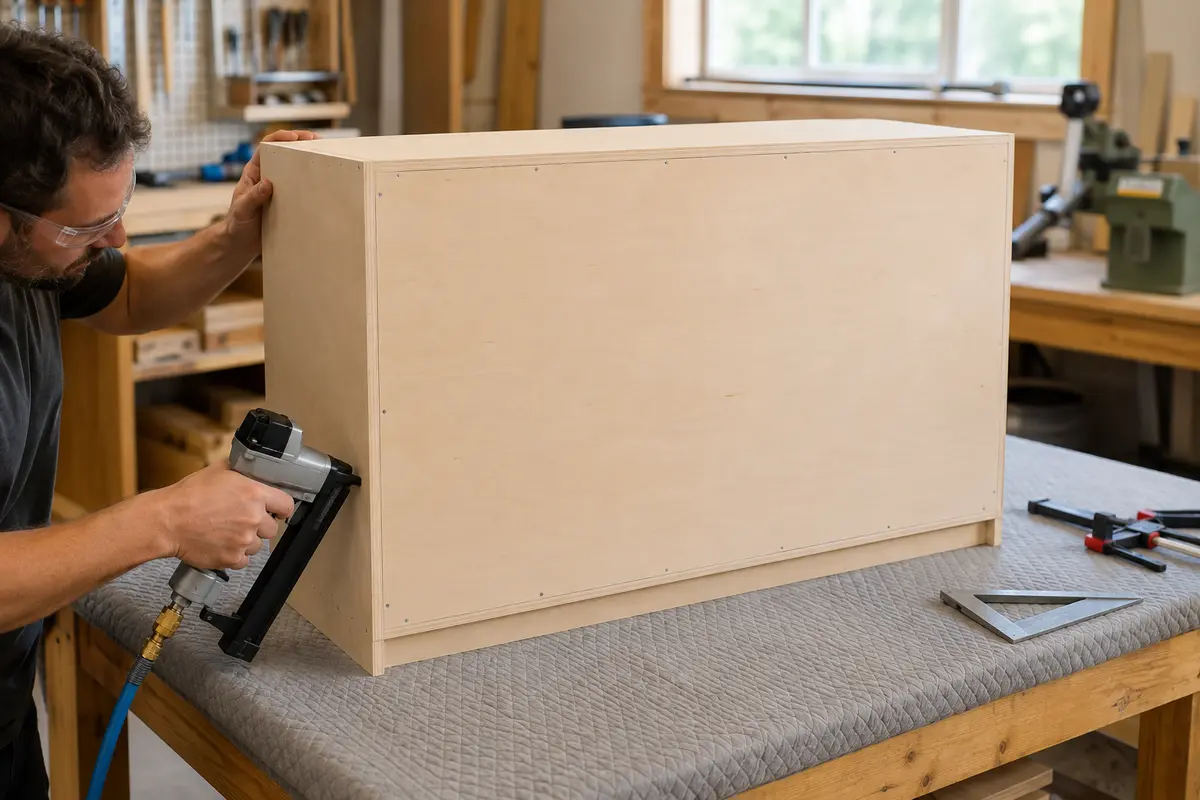
Place the cabinet face-down on a protected flat surface. Square it again, spread a thin glue bead around the back edges and position the 36″ × 26¼″ back panel. Fasten it every 5–6 inches around the perimeter and into the middle shelf and dividers. Keep every fastener short enough that it cannot penetrate a visible face.
Assemble the plinth from two 34½″ × 3″ front/back strips and two 11″ × 3″ side strips. The side strips fit between the long pieces, producing a 34½″ × 12½″ frame. Glue and screw it square, then center it beneath the cabinet with a ¾-inch inset at the left and right. Fasten through the bottom panel into the base.
Step 9: Assemble One Test Bin
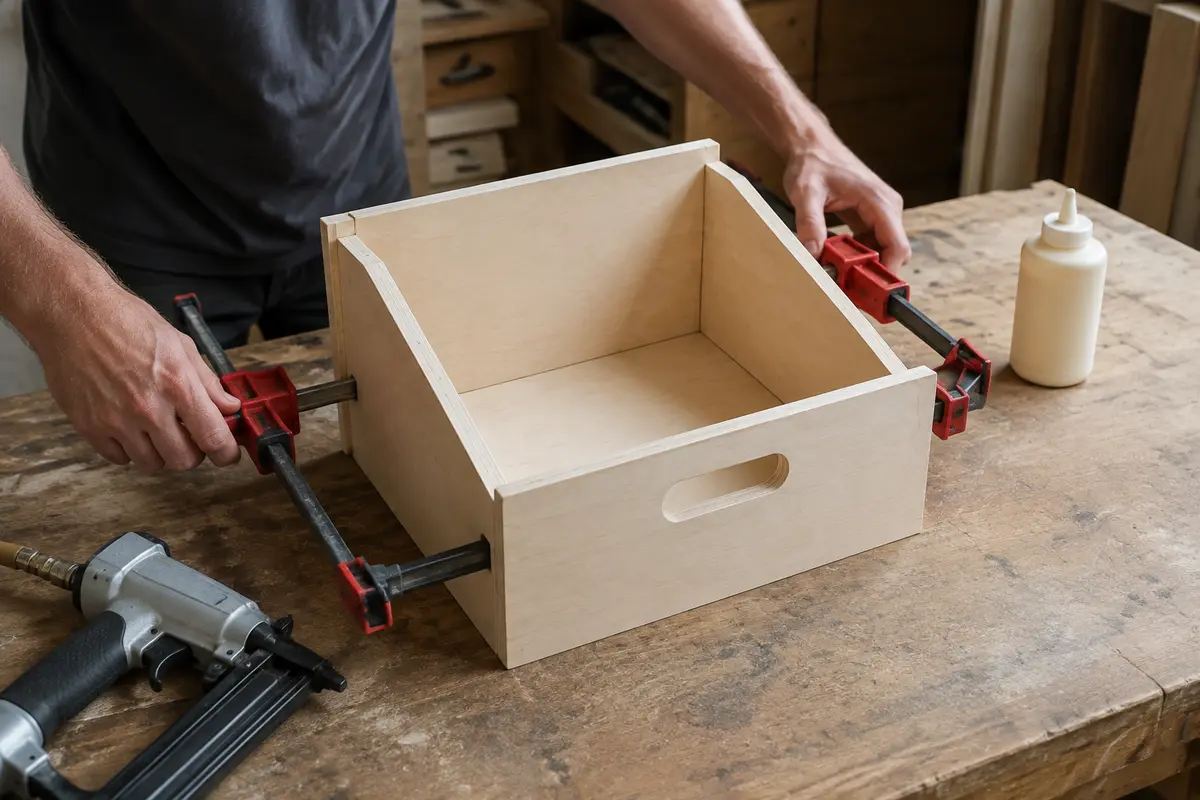
Place the bottom ½ inch above the lower edges of the two side panels. Glue and clamp it, then attach it through the sides with 1-inch brads or narrow-crown staples. Fit the 7-inch front and 10½-inch back between the sides, closing the ends of the bottom panel.
Check the box for square, secure the front and back, and let the glue set. Slide the unfinished bin into every cubby. It should move without force and sit flat. If the fit is tight, correct the test bin or cabinet now—do not assume finish will improve the clearance.
Step 10: Assemble the Remaining Five Bins
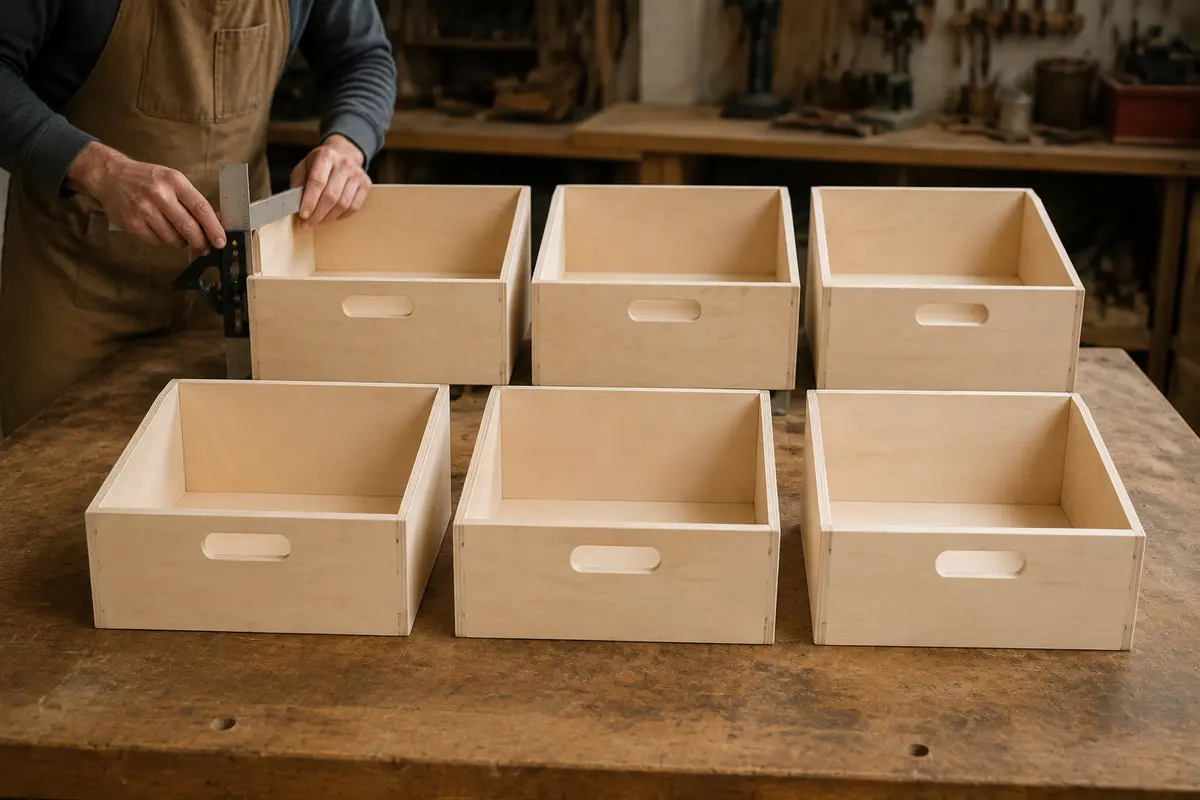
Assemble the other five bins in the same sequence. A simple 90-degree clamping jig speeds up the repeated work. Keep the best veneer faces outward and orient mirrored side pairs correctly.
After the glue cures, remove squeeze-out and fill visible nail holes. Test every bin in more than one opening. Small differences between openings are easier to correct before paint or clear finish adds thickness.
Step 11: Sand, Edge-Band and Apply the Finish
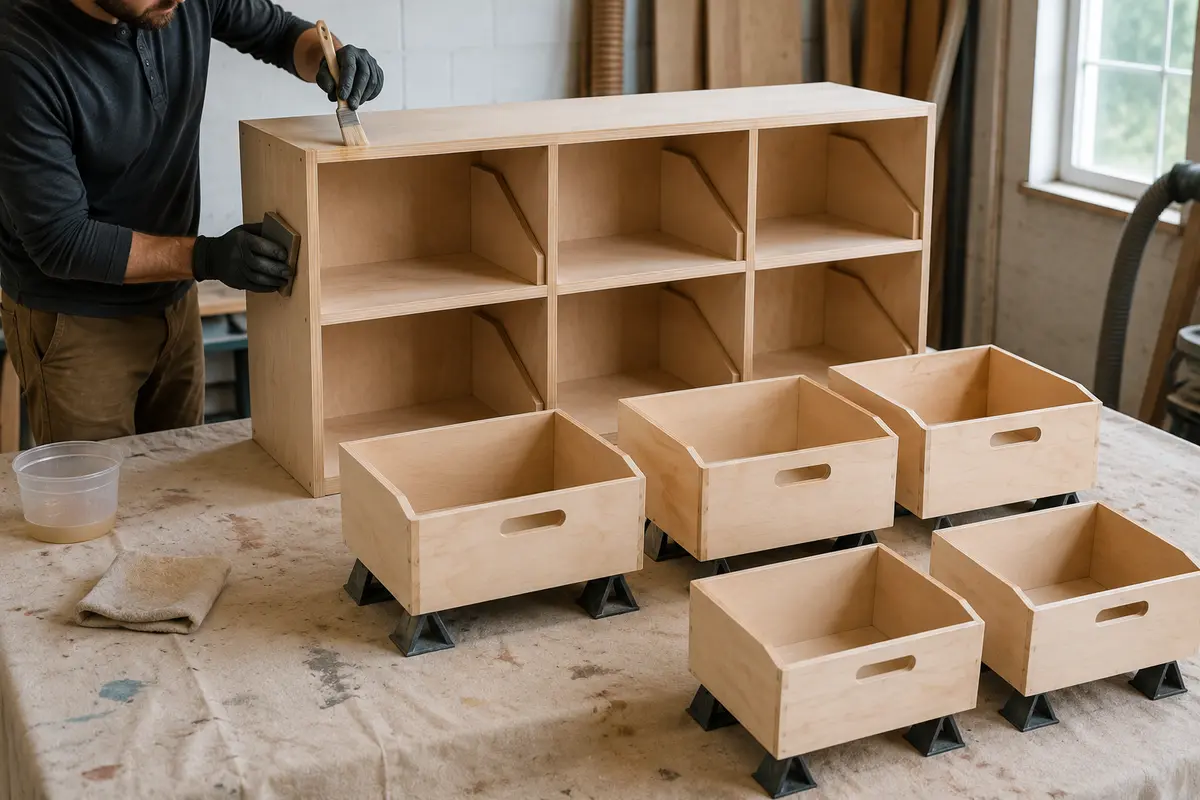
Sand the cabinet and bins with 120-grit, then 180-grit abrasive. Ease every exposed edge and corner. Apply optional edge banding before the final sanding if you want the plywood layers concealed.
Vacuum thoroughly and follow the finish manufacturer’s instructions for preparation, coat thickness, drying, ventilation and full cure time. “Dry to the touch” does not mean ready for toys or repeated hand contact. Do not return the bins until the finish is completely cured and odor-free according to the product documentation. These wood finishing tools for beginners will help you prepare a smoother surface.
Step 12: Anchor, Inspect and Load the Organizer
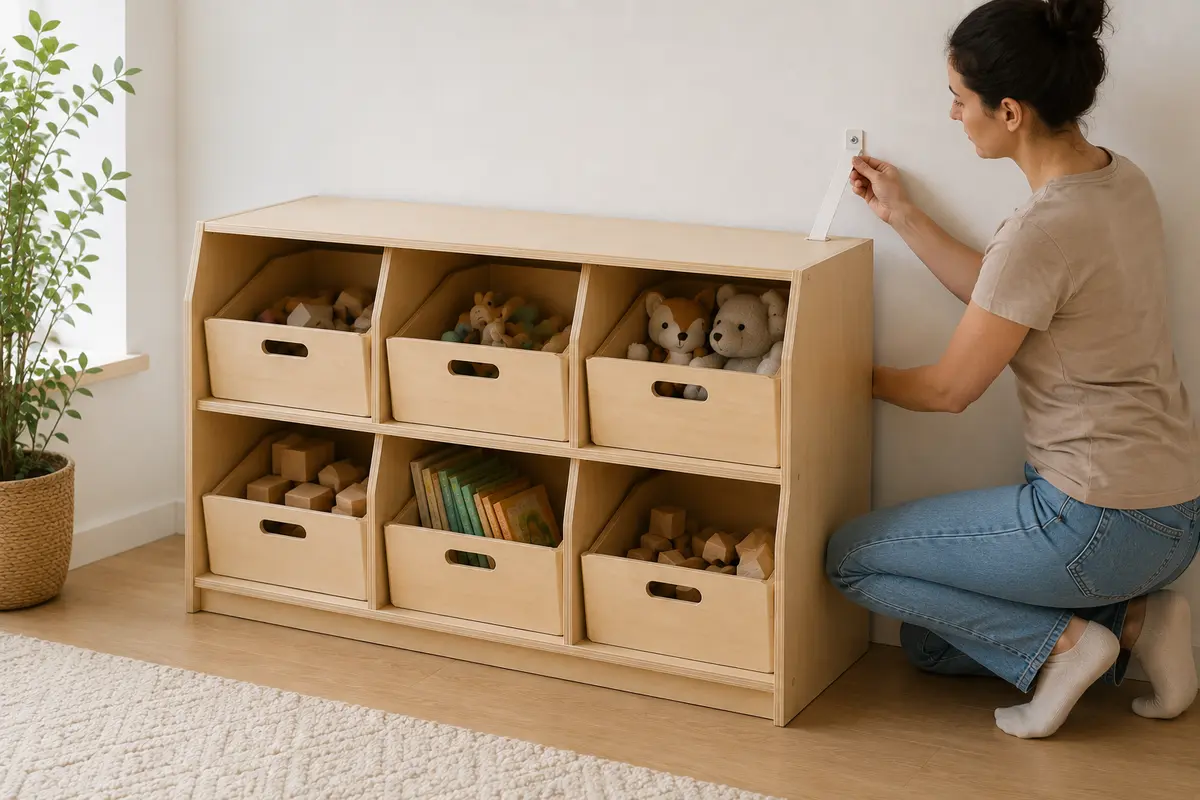
Set the organizer on a hard, level floor against the intended wall. Shim only with a durable furniture shim if the floor is uneven; the cabinet must not rock. Connect a rated anti-tip restraint from the upper rear structure to a wall stud or another anchor approved for that specific wall type. Follow the restraint manufacturer’s instructions.
Pull forward gently at the top to confirm that the restraint engages and no fastener loosens. Load heavier blocks and books into the bottom row and lighter toys into the top. Keep the top surface clear so it does not invite climbing. Inspect the anchor, bin handles, fasteners and finish regularly.
Want More Measured Woodworking Projects?
Disclosure: This section contains an affiliate link. If you purchase through it, Bubblerelief may earn a commission at no additional cost to you.
This free plan walks through one six-bin organizer from the first plywood cut to the final wall anchor. If you want a larger project library covering storage furniture, shelves, tables, outdoor builds and beginner workshop projects, Ted’s Woodworking Plans is an optional collection to review.
A large library can save idea-searching time, but it does not replace checking every plan against your actual lumber, hardware, tools and intended use. Review the examples and current terms carefully before purchasing. For a balanced look at the strengths and limitations, read this Ted’s Woodworking Plans review.
See the current Ted’s Woodworking Plans offer →
Optional Design Upgrades
Add Removable Picture Labels
Young children may sort more easily with pictures than words. Use removable adhesive label holders on the bin fronts, but keep labels below the handholds and check that corners cannot peel into small pieces.
Use Color to Create Categories
Paint the bin fronts in two or three muted colors while leaving the cabinet natural. Color can make sorting intuitive without adding text to the furniture. Apply the same number of finish coats to every bin so their dimensions remain consistent.
Build Only Three Bins for the Lower Row
Leave the top row open for front-facing books, larger puzzles or display baskets. If you want a dedicated book solution, pair the organizer with the DIY rotating bookshelf plans. Keep climbing safety in mind and anchor every stationary shelf unit.
Make a Wider Version Carefully
Adding a fourth column is not a simple matter of stretching the shelves. A longer span may sag and the larger unit needs a new back, base and anchoring plan. Treat it as a redesigned project rather than changing one number in this cut list.
Common Toy Organizer Mistakes
- Building all six bins before testing one: Finish buildup and plywood variation can turn a theoretical clearance into a tight fit.
- Skipping the full back: The ¼-inch panel keeps the grid square and resists side-to-side racking.
- Attaching dividers by measurement alone: Use an 11-inch spacer and confirm the final opening before the glue cures.
- Leaving sharp plywood edges: Round and sand the corners, handholds and exposed veneer layers carefully.
- Using screws that are too long: Test every screw and brad length on offcuts so no point breaks through a finished face.
- Applying finish inside an assembled cabinet only: Pull the bins out and coat every side independently for even curing.
- Loading the top first: Put heavier toys in the bottom row to keep the center of gravity lower.
- Treating anchoring as optional: Children can climb unexpectedly. Anchor the finished unit before use.
Frequently Asked Questions
Can I use store-bought plastic bins?
Yes, but buy the bins before cutting the cabinet. Measure the maximum outside width, depth and height—including handles and rims—and redesign the openings around those real dimensions. Product dimensions can change, so do not rely only on an online listing.
Can I use MDF instead of plywood?
MDF is flat and paints smoothly, but it is heavy, produces fine dust and holds edge fasteners less reliably. Furniture-grade plywood is a more practical choice for the cabinet and removable bins. If you use MDF, redesign the joinery and support rather than substituting it piece for piece.
Why are the bin fronts lower than the backs?
The 7-inch front gives a child a clearer view of the contents and makes small toys easier to reach. The 10½-inch back helps contain larger items. The sloped sides connect those heights without adding a hinged lid.
How much weight can each bin hold?
This plan does not publish an untested load rating. Capacity depends on plywood quality, glue coverage, fasteners and workmanship. Build and test the physical bins with a gradual, controlled load before normal use. The bins are for toys, not seating, standing or climbing.
Should I add casters?
No casters are recommended for this child-room version. A mobile cabinet can move when pulled or climbed. Keep the plinth flat on the floor and secure the cabinet to the wall. For mobile storage intended for an adult workshop, use a separately engineered plan.
Can I make the organizer from one sheet of plywood?
The cabinet and plinth fit comfortably on one sheet of ¾-inch plywood, but the six bins require a separate sheet of ½-inch plywood and the back uses ¼-inch material. Mixing thicknesses keeps the cabinet rigid without making every removable bin unnecessarily heavy.
Is this a good beginner project?
It is a good confident-beginner build because most cuts are straight and the joinery repeats. The challenge is maintaining accuracy across six openings and six bins. For smaller practice builds first, browse these small wood projects or these DIY wooden toy plans.
Final Thoughts
A useful toy organizer does not need complicated hardware. This plan combines a rigid ¾-inch plywood grid, six lightweight removable bins and a recessed base in a compact footprint. The repeated 11-inch openings make the case easy to verify, while the fitted bins can move between cubbies as storage needs change.
Take the accuracy checkpoints seriously: square the shell, use spacer blocks for the shelf and dividers, build one test bin, allow the finish to cure fully and anchor the completed cabinet. Those steps matter more than rushing to fill it with toys.
If you enjoy functional storage builds, try the DIY outdoor storage bench next, or browse more DIY plywood projects for ways to use the remaining offcuts.